W↓
All docs
🔑
Sign Up/Sign In
bun.sh/docs/runtime/
Public Link
Apr 8, 2025, 12:49:52 PM - complete - 109.3 kB
Created by:
****ad@vlad.studio
Starting URLs:
https://bun.sh/docs/runtime/
## Page: https://bun.sh/docs/runtime/ ## TypeScript Bun natively supports TypeScript out of the box. All files are transpiled on the fly by Bun's fast native transpiler before being executed. Similar to other build tools, Bun does not perform typechecking; it simply removes type annotations from the file. bun index.js bun index.jsx bun index.ts bun index.tsx Some aspects of Bun's runtime behavior are affected by the contents of your `tsconfig.json` file. Refer to Runtime > TypeScript page for details. ## JSX Bun supports `.jsx` and `.tsx` files out of the box. Bun's internal transpiler converts JSX syntax into vanilla JavaScript before execution. react.tsx function Component(props: {message: string}) { return ( <body> <h1 style={{color: 'red'}}>{props.message}</h1> </body> ); } console.log(<Component message="Hello world!" />); Bun implements special logging for JSX to make debugging easier. bun run react.tsx <Component message="Hello world!" /> ## Text files Text files can be imported as strings. index.ts import text from "./text.txt"; console.log(text); // => "Hello world!" text.txt Hello world! ## JSON and TOML JSON and TOML files can be directly imported from a source file. The contents will be loaded and returned as a JavaScript object. import pkg from "./package.json"; import data from "./data.toml"; ## WASI 🚧 **Experimental** Bun has experimental support for WASI, the WebAssembly System Interface. To run a `.wasm` binary with Bun: bun ./my-wasm-app.wasm # if the filename doesn't end with ".wasm" bun run ./my-wasm-app.whatever **Note** — WASI support is based on wasi-js. Currently, it only supports WASI binaries that use the `wasi_snapshot_preview1` or `wasi_unstable` APIs. Bun's implementation is not fully optimized for performance; this will become more of a priority as WASM grows in popularity. ## SQLite You can import sqlite databases directly into your code. Bun will automatically load the database and return a `Database` object. import db from "./my.db" with { type: "sqlite" }; console.log(db.query("select * from users LIMIT 1").get()); This uses `bun:sqlite`. ## Custom loaders Support for additional file types can be implemented with plugins. Refer to Runtime > Plugins for full documentation. --- ## Page: https://bun.sh/docs/runtime/loaders ## TypeScript Bun natively supports TypeScript out of the box. All files are transpiled on the fly by Bun's fast native transpiler before being executed. Similar to other build tools, Bun does not perform typechecking; it simply removes type annotations from the file. bun index.js bun index.jsx bun index.ts bun index.tsx Some aspects of Bun's runtime behavior are affected by the contents of your `tsconfig.json` file. Refer to Runtime > TypeScript page for details. ## JSX Bun supports `.jsx` and `.tsx` files out of the box. Bun's internal transpiler converts JSX syntax into vanilla JavaScript before execution. react.tsx function Component(props: {message: string}) { return ( <body> <h1 style={{color: 'red'}}>{props.message}</h1> </body> ); } console.log(<Component message="Hello world!" />); Bun implements special logging for JSX to make debugging easier. bun run react.tsx <Component message="Hello world!" /> ## Text files Text files can be imported as strings. index.ts import text from "./text.txt"; console.log(text); // => "Hello world!" text.txt Hello world! ## JSON and TOML JSON and TOML files can be directly imported from a source file. The contents will be loaded and returned as a JavaScript object. import pkg from "./package.json"; import data from "./data.toml"; ## WASI 🚧 **Experimental** Bun has experimental support for WASI, the WebAssembly System Interface. To run a `.wasm` binary with Bun: bun ./my-wasm-app.wasm # if the filename doesn't end with ".wasm" bun run ./my-wasm-app.whatever **Note** — WASI support is based on wasi-js. Currently, it only supports WASI binaries that use the `wasi_snapshot_preview1` or `wasi_unstable` APIs. Bun's implementation is not fully optimized for performance; this will become more of a priority as WASM grows in popularity. ## SQLite You can import sqlite databases directly into your code. Bun will automatically load the database and return a `Database` object. import db from "./my.db" with { type: "sqlite" }; console.log(db.query("select * from users LIMIT 1").get()); This uses `bun:sqlite`. ## Custom loaders Support for additional file types can be implemented with plugins. Refer to Runtime > Plugins for full documentation. --- ## Page: https://bun.sh/docs/runtime/typescript Bun treats TypeScript as a first-class citizen. **Note** — To add type declarations for Bun APIs like the `Bun` global, follow the instructions at Intro > TypeScript. This page describes how the Bun runtime runs TypeScript code. ## Running `.ts` files Bun can directly execute `.ts` and `.tsx` files just like vanilla JavaScript, with no extra configuration. If you import a `.ts` or `.tsx` file (or an `npm` module that exports these files), Bun internally transpiles it into JavaScript then executes the file. **Note** — Similar to other build tools, Bun does not typecheck the files. Use `tsc` (the official TypeScript CLI) if you're looking to catch static type errors. **Is transpiling still necessary?** — Because Bun can directly execute TypeScript, you may not need to transpile your TypeScript to run in production. Bun internally transpiles every file it executes (both `.js` and `.ts`), so the additional overhead of directly executing your `.ts/.tsx` source files is negligible. That said, if you are using Bun as a development tool but still targeting Node.js or browsers in production, you'll still need to transpile. ## Path mapping When resolving modules, Bun's runtime respects path mappings defined in `compilerOptions.paths` in your `tsconfig.json`. No other runtime does this. Consider the following `tsconfig.json`. { "compilerOptions": { "baseUrl": "./src", "paths": { "data": ["./data.ts"] } } } Bun will use `baseUrl` to resolve module paths. // resolves to ./src/components/Button.tsx import { Button } from "components/Button.tsx"; Bun will also correctly resolve imports from `"data"`. index.ts import { foo } from "data"; console.log(foo); // => "Hello world!" data.ts export const foo = "Hello world!" ## Experimental Decorators Bun supports the pre-TypeScript 5.0 experimental decorators syntax. hello.ts // Simple logging decorator function log(target: any, propertyKey: string, descriptor: PropertyDescriptor) { const originalMethod = descriptor.value; descriptor.value = function(...args: any[]) { console.log(`Calling ${propertyKey} with:`, args); return originalMethod.apply(this, args); }; } class Example { @log greet(name: string) { return `Hello ${name}!`; } } // Usage const example = new Example(); example.greet("world"); // Logs: "Calling greet with: ['world']" To enable it, add `"experimentalDecorators": true` to your `tsconfig.json`: tsconfig.json { "compilerOptions": { // ... rest of your config "experimentalDecorators": true, }, } We generally don't recommend using this in new codebases, but plenty of existing codebases have come to rely on it. ### emitDecoratorMetadata Bun supports `emitDecoratorMetadata` in your `tsconfig.json`. This enables emitting design-time type metadata for decorated declarations in source files. emit-decorator-metadata.ts import "reflect-metadata"; class User { id: number; name: string; } function Injectable(target: Function) { // Get metadata about constructor parameters const params = Reflect.getMetadata("design:paramtypes", target); console.log("Dependencies:", params); // [User] } @Injectable class UserService { constructor(private user: User) {} } // Creates new UserService instance with dependencies const container = new UserService(new User()); To enable it, add `"emitDecoratorMetadata": true` to your `tsconfig.json`: tsconfig.json { "compilerOptions": { // ... rest of your config "experimentalDecorators": true, "emitDecoratorMetadata": true, }, } --- ## Page: https://bun.sh/docs/runtime/jsx Bun supports `.jsx` and `.tsx` files out of the box. Bun's internal transpiler converts JSX syntax into vanilla JavaScript before execution. react.tsx function Component(props: {message: string}) { return ( <body> <h1 style={{color: 'red'}}>{props.message}</h1> </body> ); } console.log(<Component message="Hello world!" />); ## Configuration Bun reads your `tsconfig.json` or `jsconfig.json` configuration files to determines how to perform the JSX transform internally. To avoid using either of these, the following options can also be defined in `bunfig.toml`. The following compiler options are respected. ### `jsx` How JSX constructs are transformed into vanilla JavaScript internally. The table below lists the possible values of `jsx`, along with their transpilation of the following simple JSX component: <Box width={5}>Hello</Box> | Compiler options | Transpiled output | | --- | --- | | { "jsx": "react" } | import { createElement } from "react"; createElement("Box", { width: 5 }, "Hello"); | | { "jsx": "react-jsx" } | import { jsx } from "react/jsx-runtime"; jsx("Box", { width: 5 }, "Hello"); | | { "jsx": "react-jsxdev" } | import { jsxDEV } from "react/jsx-dev-runtime"; jsxDEV( "Box", { width: 5, children: "Hello" }, undefined, false, undefined, this, ); The `jsxDEV` variable name is a convention used by React. The `DEV` suffix is a visible way to indicate that the code is intended for use in development. The development version of React is slower and includes additional validity checks & debugging tools. | | { "jsx": "preserve" } | // JSX is not transpiled // "preserve" is not supported by Bun currently <Box width={5}>Hello</Box> | ### `jsxFactory` **Note** — Only applicable when `jsx` is `react`. The function name used to represent JSX constructs. Default value is `"createElement"`. This is useful for libraries like Preact that use a different function name (`"h"`). | Compiler options | Transpiled output | | --- | --- | | { "jsx": "react", "jsxFactory": "h" } | import { h } from "react"; h("Box", { width: 5 }, "Hello"); | ### `jsxFragmentFactory` **Note** — Only applicable when `jsx` is `react`. The function name used to represent JSX fragments such as `<>Hello</>`; only applicable when `jsx` is `react`. Default value is `"Fragment"`. | Compiler options | Transpiled output | | --- | --- | | { "jsx": "react", "jsxFactory": "myjsx", "jsxFragmentFactory": "MyFragment" } | // input <>Hello</>; // output import { myjsx, MyFragment } from "react"; myjsx(MyFragment, null, "Hello"); | ### `jsxImportSource` **Note** — Only applicable when `jsx` is `react-jsx` or `react-jsxdev`. The module from which the component factory function (`createElement`, `jsx`, `jsxDEV`, etc) will be imported. Default value is `"react"`. This will typically be necessary when using a component library like Preact. | Compiler options | Transpiled output | | --- | --- | | { "jsx": "react", // jsxImportSource is not defined // default to "react" } | import { jsx } from "react/jsx-runtime"; jsx("Box", { width: 5, children: "Hello" }); | | { "jsx": "react-jsx", "jsxImportSource": "preact", } | import { jsx } from "preact/jsx-runtime"; jsx("Box", { width: 5, children: "Hello" }); | | { "jsx": "react-jsxdev", "jsxImportSource": "preact", } | // /jsx-runtime is automatically appended import { jsxDEV } from "preact/jsx-dev-runtime"; jsxDEV( "Box", { width: 5, children: "Hello" }, undefined, false, undefined, this, ); | ### JSX pragma All of these values can be set on a per-file basis using _pragmas_. A pragma is a special comment that sets a compiler option in a particular file. | Pragma | Equivalent config | | --- | --- | | // @jsx h | { "jsxFactory": "h", } | | // @jsxFrag MyFragment | { "jsxFragmentFactory": "MyFragment", } | | // @jsxImportSource preact | { "jsxImportSource": "preact", } | ## Logging Bun implements special logging for JSX to make debugging easier. Given the following file: index.tsx import { Stack, UserCard } from "./components"; console.log( <Stack> <UserCard name="Dom" bio="Street racer and Corona lover" /> <UserCard name="Jakob" bio="Super spy and Dom's secret brother" /> </Stack> ); Bun will pretty-print the component tree when logged: 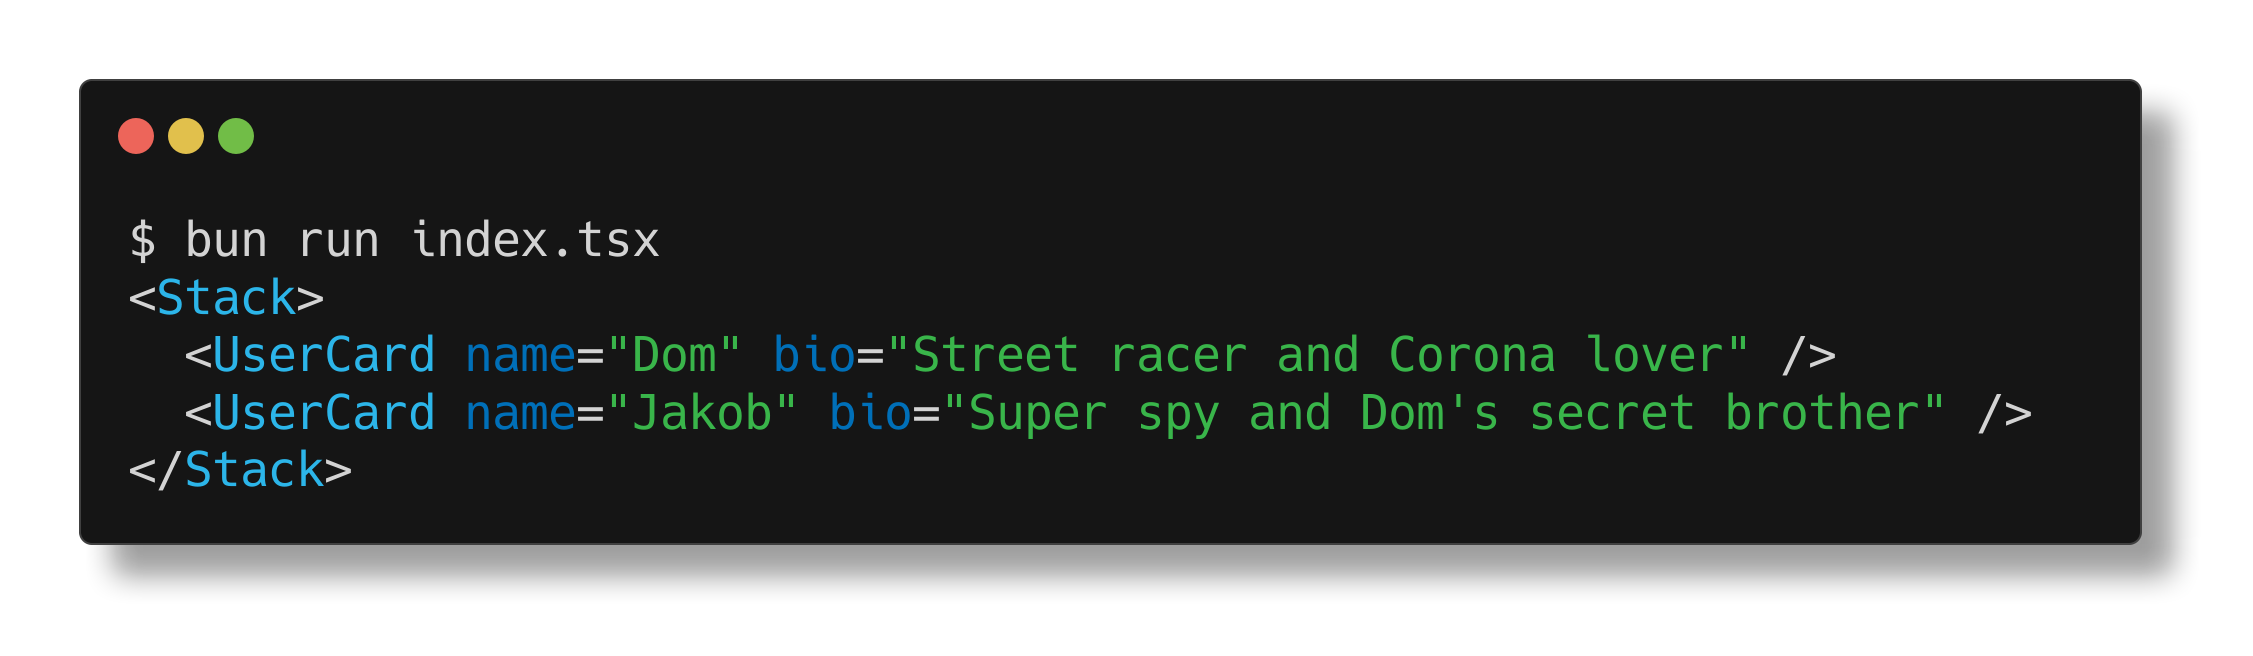 ## Prop punning The Bun runtime also supports "prop punning" for JSX. This is a shorthand syntax useful for assigning a variable to a prop with the same name. function Div(props: {className: string;}) { const {className} = props; // without punning return <div className={className} />; // with punning return <div {className} />; } --- ## Page: https://bun.sh/docs/runtime/env Bun reads your `.env` files automatically and provides idiomatic ways to read and write your environment variables programmatically. Plus, some aspects of Bun's runtime behavior can be configured with Bun-specific environment variables. ## Setting environment variables Bun reads the following files automatically (listed in order of increasing precedence). * `.env` * `.env.production`, `.env.development`, `.env.test` (depending on value of `NODE_ENV`) * `.env.local` .env FOO=hello BAR=world Variables can also be set via the command line. Linux/macOS FOO=helloworld bun run dev Windows # Using CMD set FOO=helloworld && bun run dev # Using PowerShell $env:FOO="helloworld"; bun run dev Cross-platform solution with Windows Or programmatically by assigning a property to `process.env`. process.env.FOO = "hello"; ### Manually specifying `.env` files Bun supports `--env-file` to override which specific `.env` file to load. You can use `--env-file` when running scripts in bun's runtime, or when running package.json scripts. bun --env-file=.env.1 src/index.ts bun --env-file=.env.abc --env-file=.env.def run build ### Quotation marks Bun supports double quotes, single quotes, and template literal backticks: .env FOO='hello' FOO="hello" FOO=`hello` ### Expansion Environment variables are automatically _expanded_. This means you can reference previously-defined variables in your environment variables. .env FOO=world BAR=hello$FOO process.env.BAR; // => "helloworld" This is useful for constructing connection strings or other compound values. .env DB_USER=postgres DB_PASSWORD=secret DB_HOST=localhost DB_PORT=5432 DB_URL=postgres://$DB_USER:$DB_PASSWORD@$DB_HOST:$DB_PORT/$DB_NAME This can be disabled by escaping the `$` with a backslash. .env FOO=world BAR=hello\$FOO process.env.BAR; // => "hello$FOO" ### `dotenv` Generally speaking, you won't need `dotenv` or `dotenv-expand` anymore, because Bun reads `.env` files automatically. ## Reading environment variables The current environment variables can be accessed via `process.env`. process.env.API_TOKEN; // => "secret" Bun also exposes these variables via `Bun.env` and `import.meta.env`, which is a simple alias of `process.env`. Bun.env.API_TOKEN; // => "secret" import.meta.env.API_TOKEN; // => "secret" To print all currently-set environment variables to the command line, run `bun --print process.env`. This is useful for debugging. bun --print process.env BAZ=stuff FOOBAR=aaaaaa <lots more lines> ## TypeScript In TypeScript, all properties of `process.env` are typed as `string | undefined`. Bun.env.whatever; // string | undefined To get autocompletion and tell TypeScript to treat a variable as a non-optional string, we'll use interface merging. declare module "bun" { interface Env { AWESOME: string; } } Add this line to any file in your project. It will globally add the `AWESOME` property to `process.env` and `Bun.env`. process.env.AWESOME; // => string ## Configuring Bun These environment variables are read by Bun and configure aspects of its behavior. | Name | Description | | --- | --- | | `NODE_TLS_REJECT_UNAUTHORIZED` | `NODE_TLS_REJECT_UNAUTHORIZED=0` disables SSL certificate validation. This is useful for testing and debugging, but you should be very hesitant to use this in production. Note: This environment variable was originally introduced by Node.js and we kept the name for compatibility. | | `BUN_CONFIG_VERBOSE_FETCH` | If `BUN_CONFIG_VERBOSE_FETCH=curl`, then fetch requests will log the url, method, request headers and response headers to the console. This is useful for debugging network requests. This also works with `node:http`. `BUN_CONFIG_VERBOSE_FETCH=1` is equivalent to `BUN_CONFIG_VERBOSE_FETCH=curl` except without the `curl` output. | | `BUN_RUNTIME_TRANSPILER_CACHE_PATH` | The runtime transpiler caches the transpiled output of source files larger than 50 kb. This makes CLIs using Bun load faster. If `BUN_RUNTIME_TRANSPILER_CACHE_PATH` is set, then the runtime transpiler will cache transpiled output to the specified directory. If `BUN_RUNTIME_TRANSPILER_CACHE_PATH` is set to an empty string or the string `"0"`, then the runtime transpiler will not cache transpiled output. If `BUN_RUNTIME_TRANSPILER_CACHE_PATH` is unset, then the runtime transpiler will cache transpiled output to the platform-specific cache directory. | | `TMPDIR` | Bun occasionally requires a directory to store intermediate assets during bundling or other operations. If unset, defaults to the platform-specific temporary directory: `/tmp` on Linux, `/private/tmp` on macOS. | | `NO_COLOR` | If `NO_COLOR=1`, then ANSI color output is disabled. | | `FORCE_COLOR` | If `FORCE_COLOR=1`, then ANSI color output is force enabled, even if `NO_COLOR` is set. | | `BUN_CONFIG_MAX_HTTP_REQUESTS` | Control the maximum number of concurrent HTTP requests sent by fetch and `bun install`. Defaults to `256`. If you are running into rate limits or connection issues, you can reduce this number. | | `BUN_CONFIG_NO_CLEAR_TERMINAL_ON_RELOAD` | If `BUN_CONFIG_NO_CLEAR_TERMINAL_ON_RELOAD=true`, then `bun --watch` will not clear the console on reload | | `DO_NOT_TRACK` | Disable uploading crash reports to `bun.report` on crash. On macOS & Windows, crash report uploads are enabled by default. Otherwise, telemetry is not sent yet as of May 21st, 2024, but we are planning to add telemetry in the coming weeks. If `DO_NOT_TRACK=1`, then auto-uploading crash reports and telemetry are both disabled. | ## Runtime transpiler caching For files larger than 50 KB, Bun caches transpiled output into `$BUN_RUNTIME_TRANSPILER_CACHE_PATH` or the platform-specific cache directory. This makes CLIs using Bun load faster. This transpiler cache is global and shared across all projects. It is safe to delete the cache at any time. It is a content-addressable cache, so it will never contain duplicate entries. It is also safe to delete the cache while a Bun process is running. It is recommended to disable this cache when using ephemeral filesystems like Docker. Bun's Docker images automatically disable this cache. ### Disable the runtime transpiler cache To disable the runtime transpiler cache, set `BUN_RUNTIME_TRANSPILER_CACHE_PATH` to an empty string or the string `"0"`. BUN_RUNTIME_TRANSPILER_CACHE_PATH=0 bun run dev ### What does it cache? It caches: * The transpiled output of source files larger than 50 KB. * The sourcemap for the transpiled output of the file The file extension `.pile` is used for these cached files. --- ## Page: https://bun.sh/docs/runtime/bun-apis Bun implements a set of native APIs on the `Bun` global object and through a number of built-in modules. These APIs are heavily optimized and represent the canonical "Bun-native" way to implement some common functionality. Bun strives to implement standard Web APIs wherever possible. Bun introduces new APIs primarily for server-side tasks where no standard exists, such as file I/O and starting an HTTP server. In these cases, Bun's approach still builds atop standard APIs like `Blob`, `URL`, and `Request`. Bun.serve({ fetch(req: Request) { return new Response("Success!"); }, }); Click the link in the right column to jump to the associated documentation. | Topic | APIs | | --- | --- | | HTTP server | `Bun.serve` | | Bundler | `Bun.build` | | File I/O | `Bun.file` `Bun.write` | | Child processes | `Bun.spawn` `Bun.spawnSync` | | TCP | `Bun.listen` `Bun.connect` | | Transpiler | `Bun.Transpiler` | | Routing | `Bun.FileSystemRouter` | | Streaming HTML Transformations | `HTMLRewriter` | | Hashing | `Bun.hash` `Bun.CryptoHasher` | | import.meta | `import.meta` | | SQLite | `bun:sqlite` | | FFI | `bun:ffi` | | Testing | `bun:test` | | Node-API | `Node-API` | | Glob | `Bun.Glob` | | Utilities | `Bun.version` `Bun.revision` `Bun.env` `Bun.main` `Bun.sleep()` `Bun.sleepSync()` `Bun.which()` `Bun.peek()` `Bun.openInEditor()` `Bun.deepEquals()` `Bun.escapeHTML()` `Bun.fileURLToPath()` `Bun.pathToFileURL()` `Bun.gzipSync()` `Bun.gunzipSync()` `Bun.deflateSync()` `Bun.inflateSync()` `Bun.inspect()` `Bun.nanoseconds()` `Bun.readableStreamTo*()` `Bun.resolveSync()` | --- ## Page: https://bun.sh/docs/runtime/web-apis Some Web APIs aren't relevant in the context of a server-first runtime like Bun, such as the DOM API or History API. Many others, though, are broadly useful outside of the browser context; when possible, Bun implements these Web-standard APIs instead of introducing new APIs. The following Web APIs are partially or completely supported. <table><thead></thead><tbody><tr><td>HTTP</td><td><a href="https://developer.mozilla.org/en-US/docs/Web/API/fetch"><code>fetch</code></a> <a href="https://developer.mozilla.org/en-US/docs/Web/API/Response"><code>Response</code></a> <a href="https://developer.mozilla.org/en-US/docs/Web/API/Request"><code>Request</code></a> <a href="https://developer.mozilla.org/en-US/docs/Web/API/Headers"><code>Headers</code></a> <a href="https://developer.mozilla.org/en-US/docs/Web/API/AbortController"><code>AbortController</code></a> <a href="https://developer.mozilla.org/en-US/docs/Web/API/AbortSignal"><code>AbortSignal</code></a></td></tr><tr><td>URLs</td><td><a href="https://developer.mozilla.org/en-US/docs/Web/API/URL"><code>URL</code></a> <a href="https://developer.mozilla.org/en-US/docs/Web/API/URLSearchParams"><code>URLSearchParams</code></a></td></tr><tr><td>Web Workers</td><td><a href="https://developer.mozilla.org/en-US/docs/Web/API/Worker"><code>Worker</code></a> <a href="https://developer.mozilla.org/en-US/docs/Web/API/DedicatedWorkerGlobalScope/postMessage"><code>self.postMessage</code></a> <a href="https://developer.mozilla.org/en-US/docs/Web/API/structuredClone"><code>structuredClone</code></a> <a href="https://developer.mozilla.org/en-US/docs/Web/API/MessagePort"><code>MessagePort</code></a> <a href="https://developer.mozilla.org/en-US/docs/Web/API/MessageChannel"><code>MessageChannel</code></a> <a href="https://developer.mozilla.org/en-US/docs/Web/API/BroadcastChannel"><code>BroadcastChannel</code></a>.</td></tr><tr><td>Streams</td><td><a href="https://developer.mozilla.org/en-US/docs/Web/API/ReadableStream"><code>ReadableStream</code></a> <a href="https://developer.mozilla.org/en-US/docs/Web/API/WritableStream"><code>WritableStream</code></a> <a href="https://developer.mozilla.org/en-US/docs/Web/API/TransformStream"><code>TransformStream</code></a> <a href="https://developer.mozilla.org/en-US/docs/Web/API/ByteLengthQueuingStrategy"><code>ByteLengthQueuingStrategy</code></a> <a href="https://developer.mozilla.org/en-US/docs/Web/API/CountQueuingStrategy"><code>CountQueuingStrategy</code></a> and associated classes</td></tr><tr><td>Blob</td><td><a href="https://developer.mozilla.org/en-US/docs/Web/API/Blob"><code>Blob</code></a></td></tr><tr><td>WebSockets</td><td><a href="https://developer.mozilla.org/en-US/docs/Web/API/WebSocket"><code>WebSocket</code></a></td></tr><tr><td>Encoding and decoding</td><td><a href="https://developer.mozilla.org/en-US/docs/Web/API/atob"><code>atob</code></a> <a href="https://developer.mozilla.org/en-US/docs/Web/API/btoa"><code>btoa</code></a> <a href="https://developer.mozilla.org/en-US/docs/Web/API/TextEncoder"><code>TextEncoder</code></a> <a href="https://developer.mozilla.org/en-US/docs/Web/API/TextDecoder"><code>TextDecoder</code></a></td></tr><tr><td>JSON</td><td><a href="https://developer.mozilla.org/en-US/docs/Web/JavaScript/Reference/Global_Objects/JSON"><code>JSON</code></a></td></tr><tr><td>Timeouts</td><td><a href="https://developer.mozilla.org/en-US/docs/Web/API/setTimeout"><code>setTimeout</code></a> <a href="https://developer.mozilla.org/en-US/docs/Web/API/clearTimeout"><code>clearTimeout</code></a></td></tr><tr><td>Intervals</td><td><a href="https://developer.mozilla.org/en-US/docs/Web/API/setInterval"><code>setInterval</code></a> <a href="https://developer.mozilla.org/en-US/docs/Web/API/clearInterval"><code>clearInterval</code></a></td></tr><tr><td>Crypto</td><td><a href="https://developer.mozilla.org/en-US/docs/Web/API/Crypto"><code>crypto</code></a> <a href="https://developer.mozilla.org/en-US/docs/Web/API/SubtleCrypto"><code>SubtleCrypto</code></a> <a href="https://developer.mozilla.org/en-US/docs/Web/API/CryptoKey"><code>CryptoKey</code></a></td></tr><tr><td><p>Debugging</p></td><td><p><a href="https://developer.mozilla.org/en-US/docs/Web/API/console"><code>console</code></a> <a href="https://developer.mozilla.org/en-US/docs/Web/API/Performance"><code>performance</code></a></p></td></tr><tr><td>Microtasks</td><td><a href="https://developer.mozilla.org/en-US/docs/Web/API/queueMicrotask"><code>queueMicrotask</code></a></td></tr><tr><td>Errors</td><td><a href="https://developer.mozilla.org/en-US/docs/Web/API/reportError"><code>reportError</code></a></td></tr><tr><td>User interaction</td><td><a href="https://developer.mozilla.org/en-US/docs/Web/API/Window/alert"><code>alert</code></a> <a href="https://developer.mozilla.org/en-US/docs/Web/API/Window/confirm"><code>confirm</code></a> <a href="https://developer.mozilla.org/en-US/docs/Web/API/Window/prompt"><code>prompt</code></a> (intended for interactive CLIs)</td></tr><tr><td>Realms</td><td><a href="https://github.com/tc39/proposal-shadowrealm"><code>ShadowRealm</code></a></td></tr><tr><td>Events</td><td><a href="https://developer.mozilla.org/en-US/docs/Web/API/EventTarget"><code>EventTarget</code></a> <a href="https://developer.mozilla.org/en-US/docs/Web/API/Event"><code>Event</code></a> <a href="https://developer.mozilla.org/en-US/docs/Web/API/ErrorEvent"><code>ErrorEvent</code></a> <a href="https://developer.mozilla.org/en-US/docs/Web/API/CloseEvent"><code>CloseEvent</code></a> <a href="https://developer.mozilla.org/en-US/docs/Web/API/MessageEvent"><code>MessageEvent</code></a></td></tr></tbody></table> --- ## Page: https://bun.sh/docs/runtime/nodejs-apis Every day, Bun gets closer to 100% Node.js API compatibility. Today, popular frameworks like Next.js, Express, and millions of `npm` packages intended for Node just work with Bun. To ensure compatibility, we run thousands of tests from Node.js' test suite before every release of Bun. **If a package works in Node.js but doesn't work in Bun, we consider it a bug in Bun.** Please open an issue and we'll fix it. This page is updated regularly to reflect compatibility status of the latest version of Bun. The information below reflects Bun's compatibility with _Node.js v23_. ## Built-in Node.js modules ### `node:assert` 🟢 Fully implemented. ### `node:buffer` 🟢 Fully implemented. ### `node:console` 🟢 Fully implemented. ### `node:dgram` 🟢 Fully implemented. > 90% of Node.js's test suite passes. ### `node:diagnostics_channel` 🟢 Fully implemented. ### `node:dns` 🟢 Fully implemented. > 90% of Node.js's test suite passes. ### `node:events` 🟢 Fully implemented. `EventEmitterAsyncResource` uses `AsyncResource` underneath. 100% of Node.js's test suite for EventEmitter passes. ### `node:fs` 🟢 Fully implemented. 92% of Node.js's test suite passes. ### `node:http` 🟢 Fully implemented. Outgoing client request body is currently buffered instead of streamed. ### `node:https` 🟢 APIs are implemented, but `Agent` is not always used yet. ### `node:os` 🟢 Fully implemented. 100% of Node.js's test suite passes. ### `node:path` 🟢 Fully implemented. 100% of Node.js's test suite passes. ### `node:punycode` 🟢 Fully implemented. 100% of Node.js's test suite passes, _deprecated by Node.js_. ### `node:querystring` 🟢 Fully implemented. 100% of Node.js's test suite passes. ### `node:readline` 🟢 Fully implemented. ### `node:stream` 🟢 Fully implemented. ### `node:string_decoder` 🟢 Fully implemented. 100% of Node.js's test suite passes. ### `node:timers` 🟢 Recommended to use global `setTimeout`, et. al. instead. ### `node:tty` 🟢 Fully implemented. ### `node:url` 🟢 Fully implemented. ### `node:zlib` 🟢 Fully implemented. 98% of Node.js's test suite passes. ### `node:async_hooks` 🟡 `AsyncLocalStorage`, and `AsyncResource` are implemented. v8 promise hooks are not called, and its usage is strongly discouraged. ### `node:child_process` 🟡 Missing `proc.gid` `proc.uid`. `Stream` class not exported. IPC cannot send socket handles. Node.js <> Bun IPC can be used with JSON serialization. ### `node:cluster` 🟡 Handles and file descriptors cannot be passed between workers, which means load-balancing HTTP requests across processes is only supported on Linux at this time (via `SO_REUSEPORT`). Otherwise, implemented but not battle-tested. ### `node:crypto` 🟡 Missing `secureHeapUsed` `setEngine` `setFips` Some methods are not optimized yet. ### `node:domain` 🟡 Missing `Domain` `active` ### `node:http2` 🟡 Client & server are implemented (95.25% of gRPC's test suite passes). Missing `options.allowHTTP1`, `options.enableConnectProtocol`, ALTSVC extension, and `http2stream.pushStream`. ### `node:module` 🟡 Missing `syncBuiltinESMExports`, `Module#load()`. Overriding `require.cache` is supported for ESM & CJS modules. `module._extensions`, `module._pathCache`, `module._cache` are no-ops. `module.register` is not implemented and we recommend using a `Bun.plugin` in the meantime. ### `node:net` 🟡 `SocketAddress` class not exposed (but implemented). `BlockList` exists but is a no-op. ### `node:perf_hooks` 🟡 Missing `createHistogram` `monitorEventLoopDelay`. It's recommended to use `performance` global instead of `perf_hooks.performance`. ### `node:process` 🟡 See `process` Global. ### `node:sys` 🟡 See `node:util`. ### `node:tls` 🟡 Missing `tls.createSecurePair`. ### `node:util` 🟡 Missing `getCallSite` `getCallSites` `getSystemErrorMap` `getSystemErrorMessage` `transferableAbortSignal` `transferableAbortController` `MIMEType` `MIMEParams` ### `node:v8` 🟡 `writeHeapSnapshot` and `getHeapSnapshot` are implemented. `serialize` and `deserialize` use JavaScriptCore's wire format instead of V8's. Other methods are not implemented. For profiling, use `bun:jsc` instead. ### `node:vm` 🟡 Core functionality works, but experimental VM ES modules are not implemented, including `vm.Module`, `vm.SourceTextModule`, `vm.SyntheticModule`,`importModuleDynamically`, and `vm.measureMemory`. Options like `timeout`, `breakOnSigint`, `cachedData` are not implemented yet. ### `node:wasi` 🟡 Partially implemented. ### `node:worker_threads` 🟡 `Worker` doesn't support the following options: `stdin` `stdout` `stderr` `trackedUnmanagedFds` `resourceLimits`. Missing `markAsUntransferable` `moveMessagePortToContext` `getHeapSnapshot`. ### `node:inspector` 🔴 Not implemented. ### `node:repl` 🔴 Not implemented. ### `node:sqlite` 🔴 Not implemented. ### `node:test` 🟡 Partly implemented. Missing mocks, snapshots, timers. Use `bun:test` instead. ### `node:trace_events` 🔴 Not implemented. ## Node.js globals The table below lists all globals implemented by Node.js and Bun's current compatibility status. ### `AbortController` 🟢 Fully implemented. ### `AbortSignal` 🟢 Fully implemented. ### `Blob` 🟢 Fully implemented. ### `Buffer` 🟢 Fully implemented. ### `ByteLengthQueuingStrategy` 🟢 Fully implemented. ### `__dirname` 🟢 Fully implemented. ### `__filename` 🟢 Fully implemented. ### `atob()` 🟢 Fully implemented. ### `BroadcastChannel` 🟢 Fully implemented. ### `btoa()` 🟢 Fully implemented. ### `clearImmediate()` 🟢 Fully implemented. ### `clearInterval()` 🟢 Fully implemented. ### `clearTimeout()` 🟢 Fully implemented. ### `CompressionStream` 🔴 Not implemented. ### `console` 🟢 Fully implemented. ### `CountQueuingStrategy` 🟢 Fully implemented. ### `Crypto` 🟢 Fully implemented. ### `SubtleCrypto (crypto)` 🟢 Fully implemented. ### `CryptoKey` 🟢 Fully implemented. ### `CustomEvent` 🟢 Fully implemented. ### `DecompressionStream` 🔴 Not implemented. ### `Event` 🟢 Fully implemented. ### `EventTarget` 🟢 Fully implemented. ### `exports` 🟢 Fully implemented. ### `fetch` 🟢 Fully implemented. ### `FormData` 🟢 Fully implemented. ### `global` 🟢 Implemented. This is an object containing all objects in the global namespace. It's rarely referenced directly, as its contents are available without an additional prefix, e.g. `__dirname` instead of `global.__dirname`. ### `globalThis` 🟢 Aliases to `global`. 🟢 Fully implemented. ### `MessageChannel` 🟢 Fully implemented. ### `MessageEvent` 🟢 Fully implemented. ### `MessagePort` 🟢 Fully implemented. ### `module` 🟢 Fully implemented. ### `PerformanceEntry` 🟢 Fully implemented. ### `PerformanceMark` 🟢 Fully implemented. ### `PerformanceMeasure` 🟢 Fully implemented. ### `PerformanceObserver` 🟢 Fully implemented. ### `PerformanceObserverEntryList` 🟢 Fully implemented. ### `PerformanceResourceTiming` 🟢 Fully implemented. ### `performance` 🟢 Fully implemented. ### `process` 🟡 Mostly implemented. `process.binding` (internal Node.js bindings some packages rely on) is partially implemented. `process.title` is currently a no-op on macOS & Linux. `getActiveResourcesInfo` `setActiveResourcesInfo`, `getActiveResources` and `setSourceMapsEnabled` are stubs. Newer APIs like `process.loadEnvFile` and `process.getBuiltinModule` are not implemented yet. ### `queueMicrotask()` 🟢 Fully implemented. ### `ReadableByteStreamController` 🟢 Fully implemented. ### `ReadableStream` 🟢 Fully implemented. ### `ReadableStreamBYOBReader` 🟢 Fully implemented. ### `ReadableStreamBYOBRequest` 🟢 Fully implemented. ### `ReadableStreamDefaultController` 🟢 Fully implemented. ### `ReadableStreamDefaultReader` 🟢 Fully implemented. ### `require()` 🟢 Fully implemented, including `require.main`, `require.cache`, `require.resolve`. ### `Response` 🟢 Fully implemented. ### `Request` 🟢 Fully implemented. ### `setImmediate()` 🟢 Fully implemented. ### `setInterval()` 🟢 Fully implemented. ### `setTimeout()` 🟢 Fully implemented. ### `structuredClone()` 🟢 Fully implemented. ### `SubtleCrypto` 🟢 Fully implemented. ### `DOMException` 🟢 Fully implemented. ### `TextDecoder` 🟢 Fully implemented. ### `TextDecoderStream` 🟢 Fully implemented. ### `TextEncoder` 🟢 Fully implemented. ### `TextEncoderStream` 🟢 Fully implemented. ### `TransformStream` 🟢 Fully implemented. ### `TransformStreamDefaultController` 🟢 Fully implemented. ### `URL` 🟢 Fully implemented. ### `URLSearchParams` 🟢 Fully implemented. ### `WebAssembly` 🟢 Fully implemented. ### `WritableStream` 🟢 Fully implemented. ### `WritableStreamDefaultController` 🟢 Fully implemented. ### `WritableStreamDefaultWriter` 🟢 Fully implemented. --- ## Page: https://bun.sh/docs/runtime/plugins Bun provides a universal plugin API that can be used to extend both the _runtime_ and _bundler_. Plugins intercept imports and perform custom loading logic: reading files, transpiling code, etc. They can be used to add support for additional file types, like `.scss` or `.yaml`. In the context of Bun's bundler, plugins can be used to implement framework-level features like CSS extraction, macros, and client-server code co-location. ## Usage A plugin is defined as simple JavaScript object containing a `name` property and a `setup` function. Register a plugin with Bun using the `plugin` function. myPlugin.ts import { plugin, type BunPlugin } from "bun"; const myPlugin: BunPlugin = { name: "Custom loader", setup(build) { // implementation }, }; plugin(myPlugin); Plugins have to be loaded before any other code runs! To achieve this, use the `preload` option in your `bunfig.toml`. Bun automatically loads the files/modules specified in `preload` before running a file. preload = ["./myPlugin.ts"] To preload files before `bun test`: [test] preload = ["./myPlugin.ts"] ## Third-party plugins By convention, third-party plugins intended for consumption should export a factory function that accepts some configuration and returns a plugin object. import { plugin } from "bun"; import fooPlugin from "bun-plugin-foo"; plugin( fooPlugin({ // configuration }), ); Bun's plugin API is loosely based on esbuild. Only a subset of the esbuild API is implemented, but some esbuild plugins "just work" in Bun, like the official MDX loader: import { plugin } from "bun"; import mdx from "@mdx-js/esbuild"; plugin(mdx()); ## Loaders Plugins are primarily used to extend Bun with loaders for additional file types. Let's look at a simple plugin that implements a loader for `.yaml` files. yamlPlugin.ts import { plugin } from "bun"; await plugin({ name: "YAML", async setup(build) { const { load } = await import("js-yaml"); // when a .yaml file is imported... build.onLoad({ filter: /\.(yaml|yml)$/ }, async (args) => { // read and parse the file const text = await Bun.file(args.path).text(); const exports = load(text) as Record<string, any>; // and returns it as a module return { exports, loader: "object", // special loader for JS objects }; }); }, }); Register this file in `preload`: bunfig.toml preload = ["./yamlPlugin.ts"] Once the plugin is registered, `.yaml` and `.yml` files can be directly imported. index.ts import data from "./data.yml" console.log(data); data.yml name: Fast X releaseYear: 2023 Note that the returned object has a `loader` property. This tells Bun which of its internal loaders should be used to handle the result. Even though we're implementing a loader for `.yaml`, the result must still be understandable by one of Bun's built-in loaders. It's loaders all the way down. In this case we're using `"object"`—a built-in loader (intended for use by plugins) that converts a plain JavaScript object to an equivalent ES module. Any of Bun's built-in loaders are supported; these same loaders are used by Bun internally for handling files of various kinds. The table below is a quick reference; refer to Bundler > Loaders for complete documentation. | Loader | Extensions | Output | | --- | --- | --- | | `js` | `.mjs` `.cjs` | Transpile to JavaScript files | | `jsx` | `.js` `.jsx` | Transform JSX then transpile | | `ts` | `.ts` `.mts` `.cts` | Transform TypeScript then transpile | | `tsx` | `.tsx` | Transform TypeScript, JSX, then transpile | | `toml` | `.toml` | Parse using Bun's built-in TOML parser | | `json` | `.json` | Parse using Bun's built-in JSON parser | | `napi` | `.node` | Import a native Node.js addon | | `wasm` | `.wasm` | Import a native Node.js addon | | `object` | _none_ | A special loader intended for plugins that converts a plain JavaScript object to an equivalent ES module. Each key in the object corresponds to a named export. | Loading a YAML file is useful, but plugins support more than just data loading. Let's look at a plugin that lets Bun import `*.svelte` files. sveltePlugin.ts import { plugin } from "bun"; await plugin({ name: "svelte loader", async setup(build) { const { compile } = await import("svelte/compiler"); // when a .svelte file is imported... build.onLoad({ filter: /\.svelte$/ }, async ({ path }) => { // read and compile it with the Svelte compiler const file = await Bun.file(path).text(); const contents = compile(file, { filename: path, generate: "ssr", }).js.code; // and return the compiled source code as "js" return { contents, loader: "js", }; }); }, }); Note: in a production implementation, you'd want to cache the compiled output and include additional error handling. The object returned from `build.onLoad` contains the compiled source code in `contents` and specifies `"js"` as its loader. That tells Bun to consider the returned `contents` to be a JavaScript module and transpile it using Bun's built-in `js` loader. With this plugin, Svelte components can now be directly imported and consumed. import "./sveltePlugin.ts"; import MySvelteComponent from "./component.svelte"; console.log(MySvelteComponent.render()); ## Virtual Modules This feature is currently only available at runtime with `Bun.plugin` and not yet supported in the bundler, but you can mimic the behavior using `onResolve` and `onLoad`. To create virtual modules at runtime, use `builder.module(specifier, callback)` in the `setup` function of a `Bun.plugin`. For example: import { plugin } from "bun"; plugin({ name: "my-virtual-module", setup(build) { build.module( // The specifier, which can be any string - except a built-in, such as "buffer" "my-transpiled-virtual-module", // The callback to run when the module is imported or required for the first time () => { return { contents: "console.log('hello world!')", loader: "js", }; }, ); build.module("my-object-virtual-module", () => { return { exports: { foo: "bar", }, loader: "object", }; }); }, }); // Sometime later // All of these work import "my-transpiled-virtual-module"; require("my-transpiled-virtual-module"); await import("my-transpiled-virtual-module"); require.resolve("my-transpiled-virtual-module"); import { foo } from "my-object-virtual-module"; const object = require("my-object-virtual-module"); await import("my-object-virtual-module"); require.resolve("my-object-virtual-module"); ### Overriding existing modules You can also override existing modules with `build.module`. import { plugin } from "bun"; build.module("my-object-virtual-module", () => { return { exports: { foo: "bar", }, loader: "object", }; }); require("my-object-virtual-module"); // { foo: "bar" } await import("my-object-virtual-module"); // { foo: "bar" } build.module("my-object-virtual-module", () => { return { exports: { baz: "quix", }, loader: "object", }; }); require("my-object-virtual-module"); // { baz: "quix" } await import("my-object-virtual-module"); // { baz: "quix" } ## Reading or modifying the config Plugins can read and write to the build config with `build.config`. await Bun.build({ entrypoints: ["./app.ts"], outdir: "./dist", sourcemap: "external", plugins: [ { name: "demo", setup(build) { console.log(build.config.sourcemap); // "external" build.config.minify = true; // enable minification // `plugins` is readonly console.log(`Number of plugins: ${build.config.plugins.length}`); }, }, ], }); **NOTE**: Plugin lifecycle callbacks (`onStart()`, `onResolve()`, etc.) do not have the ability to modify the `build.config` object in the `setup()` function. If you want to mutate `build.config`, you must do so directly in the `setup()` function: await Bun.build({ entrypoints: ["./app.ts"], outdir: "./dist", sourcemap: "external", plugins: [ { name: "demo", setup(build) { // ✅ good! modifying it directly in the setup() function build.config.minify = true; build.onStart(() => { // 🚫 uh-oh! this won't work! build.config.minify = false; }); }, }, ], }); ## Lifecycle hooks Plugins can register callbacks to be run at various points in the lifecycle of a bundle: * `onStart()`: Run once the bundler has started a bundle * `onResolve()`: Run before a module is resolved * `onLoad()`: Run before a module is loaded. ### Reference A rough overview of the types (please refer to Bun's `bun.d.ts` for the full type definitions): namespace Bun { function plugin(plugin: { name: string; setup: (build: PluginBuilder) => void; }): void; } type PluginBuilder = { onStart(callback: () => void): void; onResolve: ( args: { filter: RegExp; namespace?: string }, callback: (args: { path: string; importer: string }) => { path: string; namespace?: string; } | void, ) => void; onLoad: ( args: { filter: RegExp; namespace?: string }, callback: (args: { path: string }) => { loader?: Loader; contents?: string; exports?: Record<string, any>; }, ) => void; config: BuildConfig; }; type Loader = "js" | "jsx" | "ts" | "tsx" | "css" | "json" | "toml" | "object"; ### Namespaces `onLoad` and `onResolve` accept an optional `namespace` string. What is a namespace? Every module has a namespace. Namespaces are used to prefix the import in transpiled code; for instance, a loader with a `filter: /\.yaml$/` and `namespace: "yaml:"` will transform an import from `./myfile.yaml` into `yaml:./myfile.yaml`. The default namespace is `"file"` and it is not necessary to specify it, for instance: `import myModule from "./my-module.ts"` is the same as `import myModule from "file:./my-module.ts"`. Other common namespaces are: * `"bun"`: for Bun-specific modules (e.g. `"bun:test"`, `"bun:sqlite"`) * `"node"`: for Node.js modules (e.g. `"node:fs"`, `"node:path"`) ### `onStart` onStart(callback: () => void): Promise<void> | void; Registers a callback to be run when the bundler starts a new bundle. import { plugin } from "bun"; plugin({ name: "onStart example", setup(build) { build.onStart(() => { console.log("Bundle started!"); }); }, }); The callback can return a `Promise`. After the bundle process has initialized, the bundler waits until all `onStart()` callbacks have completed before continuing. For example: const result = await Bun.build({ entrypoints: ["./app.ts"], outdir: "./dist", sourcemap: "external", plugins: [ { name: "Sleep for 10 seconds", setup(build) { build.onStart(async () => { await Bunlog.sleep(10_000); }); }, }, { name: "Log bundle time to a file", setup(build) { build.onStart(async () => { const now = Date.now(); await Bun.$`echo ${now} > bundle-time.txt`; }); }, }, ], }); In the above example, Bun will wait until the first `onStart()` (sleeping for 10 seconds) has completed, _as well as_ the second `onStart()` (writing the bundle time to a file). Note that `onStart()` callbacks (like every other lifecycle callback) do not have the ability to modify the `build.config` object. If you want to mutate `build.config`, you must do so directly in the `setup()` function. ### `onResolve` onResolve( args: { filter: RegExp; namespace?: string }, callback: (args: { path: string; importer: string }) => { path: string; namespace?: string; } | void, ): void; To bundle your project, Bun walks down the dependency tree of all modules in your project. For each imported module, Bun actually has to find and read that module. The "finding" part is known as "resolving" a module. The `onResolve()` plugin lifecycle callback allows you to configure how a module is resolved. The first argument to `onResolve()` is an object with a `filter` and `namespace` property. The filter is a regular expression which is run on the import string. Effectively, these allow you to filter which modules your custom resolution logic will apply to. The second argument to `onResolve()` is a callback which is run for each module import Bun finds that matches the `filter` and `namespace` defined in the first argument. The callback receives as input the _path_ to the matching module. The callback can return a _new path_ for the module. Bun will read the contents of the _new path_ and parse it as a module. For example, redirecting all imports to `images/` to `./public/images/`: import { plugin } from "bun"; plugin({ name: "onResolve example", setup(build) { build.onResolve({ filter: /.*/, namespace: "file" }, args => { if (args.path.startsWith("images/")) { return { path: args.path.replace("images/", "./public/images/"), }; } }); }, }); ### `onLoad` onLoad( args: { filter: RegExp; namespace?: string }, callback: (args: { path: string, importer: string, namespace: string, kind: ImportKind }) => { loader?: Loader; contents?: string; exports?: Record<string, any>; }, ): void; After Bun's bundler has resolved a module, it needs to read the contents of the module and parse it. The `onLoad()` plugin lifecycle callback allows you to modify the _contents_ of a module before it is read and parsed by Bun. Like `onResolve()`, the first argument to `onLoad()` allows you to filter which modules this invocation of `onLoad()` will apply to. The second argument to `onLoad()` is a callback which is run for each matching module _before_ Bun loads the contents of the module into memory. This callback receives as input the _path_ to the matching module, the _importer_ of the module (the module that imported the module), the _namespace_ of the module, and the _kind_ of the module. The callback can return a new `contents` string for the module as well as a new `loader`. For example: import { plugin } from "bun"; plugin({ name: "env plugin", setup(build) { build.onLoad({ filter: /env/, namespace: "file" }, args => { return { contents: `export default ${JSON.stringify(process.env)}`, loader: "js", }; }); }, }); This plugin will transform all imports of the form `import env from "env"` into a JavaScript module that exports the current environment variables. --- ## Page: https://bun.sh/docs/runtime/hot Bun supports two kinds of automatic reloading via CLI flags: * `--watch` mode, which hard restarts Bun's process when imported files change. * `--hot` mode, which soft reloads the code (without restarting the process) when imported files change. ## `--watch` mode Watch mode can be used with `bun test` or when running TypeScript, JSX, and JavaScript files. To run a file in `--watch` mode: bun --watch index.tsx To run your tests in `--watch` mode: bun --watch test In `--watch` mode, Bun keeps track of all imported files and watches them for changes. When a change is detected, Bun restarts the process, preserving the same set of CLI arguments and environment variables used in the initial run. If Bun crashes, `--watch` will attempt to automatically restart the process. **⚡️ Reloads are fast.** The filesystem watchers you're probably used to have several layers of libraries wrapping the native APIs or worse, rely on polling. Instead, Bun uses operating system native filesystem watcher APIs like kqueue or inotify to detect changes to files. Bun also does a number of optimizations to enable it scale to larger projects (such as setting a high rlimit for file descriptors, statically allocated file path buffers, reuse file descriptors when possible, etc). The following examples show Bun live-reloading a file as it is edited, with VSCode configured to save the file on each keystroke. bun run --watch watchy.tsx watchy.tsx import { serve } from "bun"; console.log("I restarted at:", Date.now()); serve({ port: 4003, fetch(request) { return new Response("Sup"); }, }); In this example, Bun is 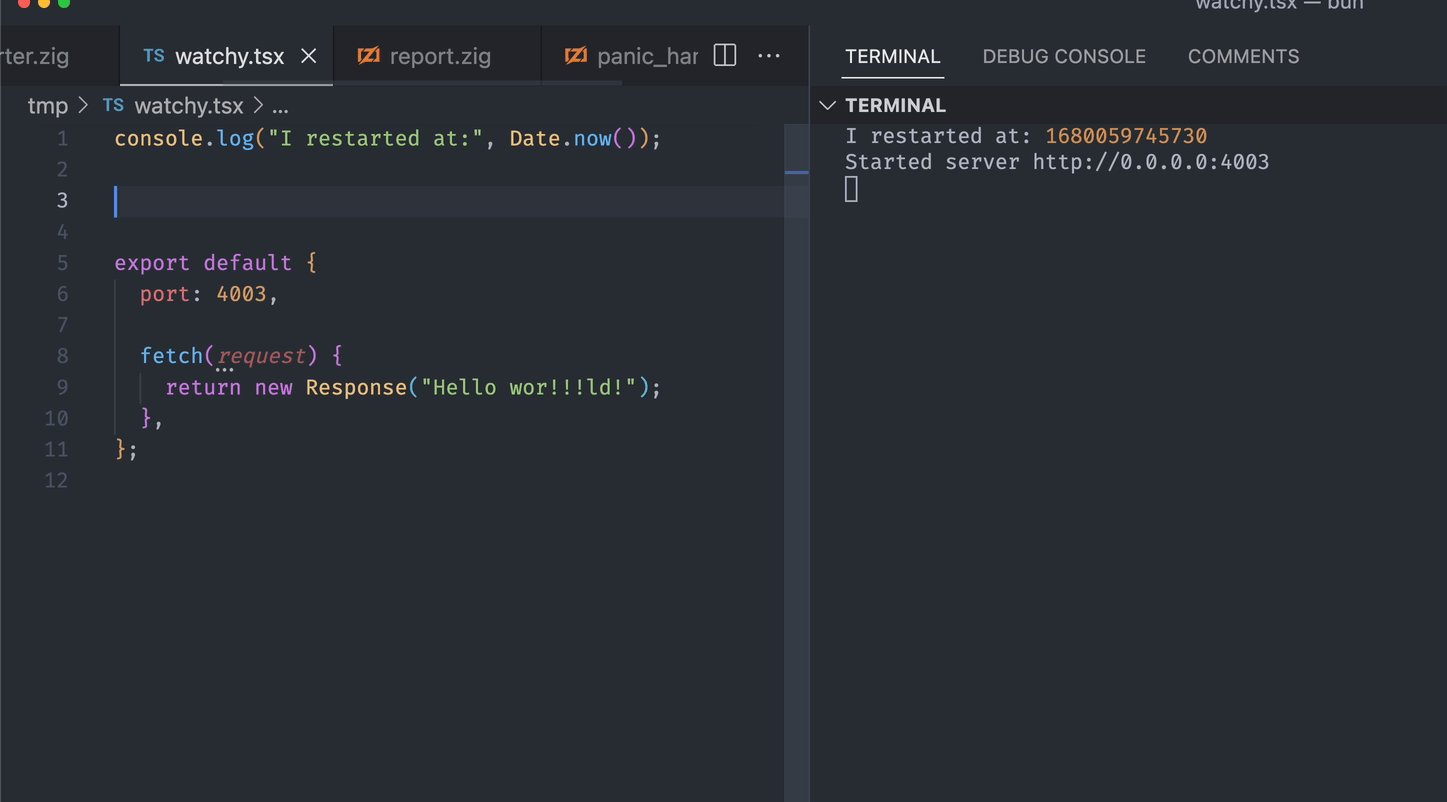 Running `bun test` in watch mode and `save-on-keypress` enabled: bun --watch test 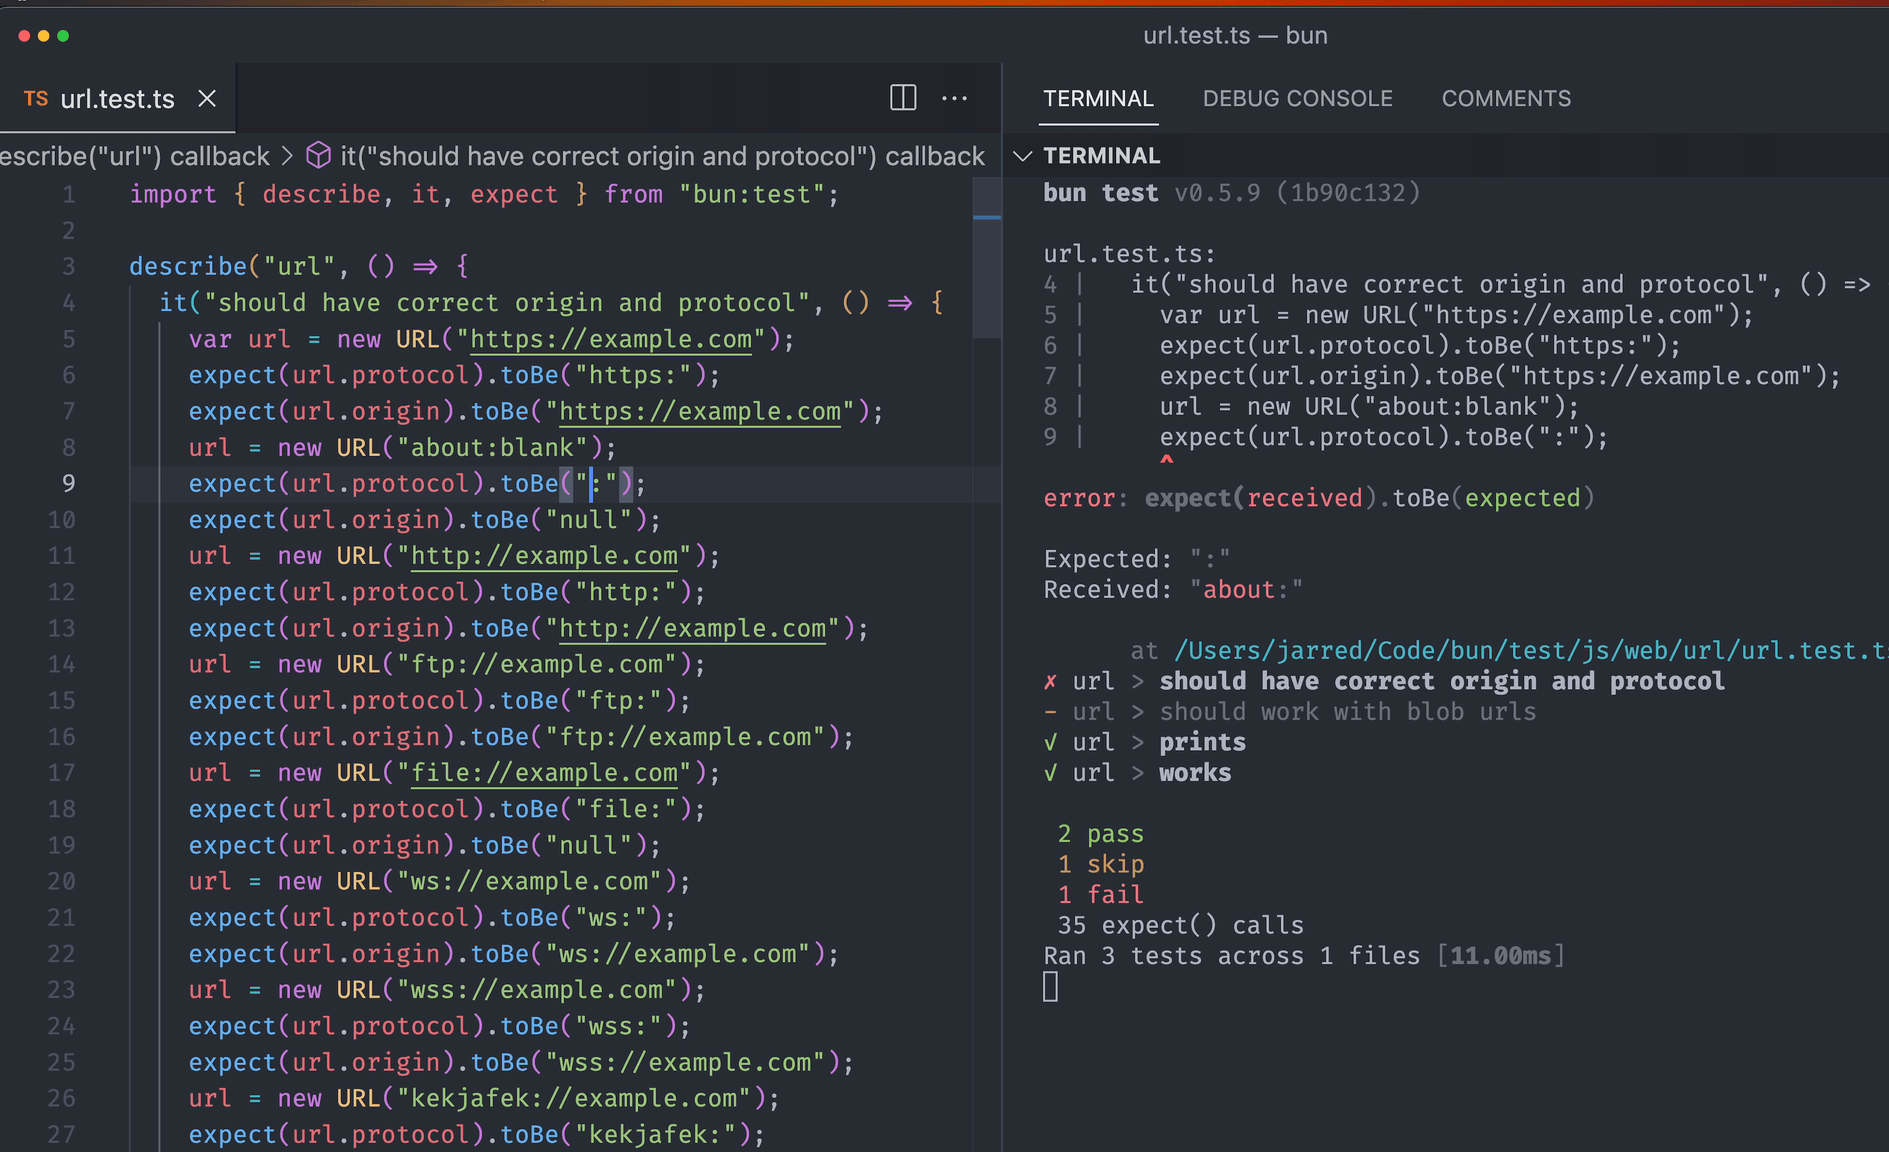 The **`--no-clear-screen`** flag is useful in scenarios where you don’t want the terminal to clear, such as when running multiple `bun build --watch` commands simultaneously using tools like `concurrently`. Without this flag, the output of one instance could clear the output of others, potentially hiding errors from one instance beneath the output of another. The `--no-clear-screen` flag, similar to TypeScript’s `--preserveWatchOutput`, prevents this issue. It can be used in combination with `--watch`, for example: `bun build --watch --no-clear-screen`. ## `--hot` mode Use `bun --hot` to enable hot reloading when executing code with Bun. This is distinct from `--watch` mode in that Bun does not hard-restart the entire process. Instead, it detects code changes and updates its internal module cache with the new code. **Note** — This is not the same as hot reloading in the browser! Many frameworks provide a "hot reloading" experience, where you can edit & save your frontend code (say, a React component) and see the changes reflected in the browser without refreshing the page. Bun's `--hot` is the server-side equivalent of this experience. To get hot reloading in the browser, use a framework like Vite. bun --hot server.ts Starting from the entrypoint (`server.ts` in the example above), Bun builds a registry of all imported source files (excluding those in `node_modules`) and watches them for changes. When a change is detected, Bun performs a "soft reload". All files are re-evaluated, but all global state (notably, the `globalThis` object) is persisted. server.ts // make TypeScript happy declare global { var count: number; } globalThis.count ??= 0; console.log(`Reloaded ${globalThis.count} times`); globalThis.count++; // prevent `bun run` from exiting setInterval(function () {}, 1000000); If you run this file with `bun --hot server.ts`, you'll see the reload count increment every time you save the file. bun --hot index.ts Reloaded 1 times Reloaded 2 times Reloaded 3 times Traditional file watchers like `nodemon` restart the entire process, so HTTP servers and other stateful objects are lost. By contrast, `bun --hot` is able to reflect the updated code without restarting the process. ### HTTP servers This makes it possible, for instance, to update your HTTP request handler without shutting down the server itself. When you save the file, your HTTP server will be reloaded with the updated code without the process being restarted. This results in seriously fast refresh speeds. server.ts globalThis.count ??= 0; globalThis.count++; Bun.serve({ fetch(req: Request) { return new Response(`Reloaded ${globalThis.count} times`); }, port: 3000, }); **Note** — In a future version of Bun, support for Vite's `import.meta.hot` is planned to enable better lifecycle management for hot reloading and to align with the ecosystem. Implementation details --- ## Page: https://bun.sh/docs/runtime/modules Module resolution in JavaScript is a complex topic. The ecosystem is currently in the midst of a years-long transition from CommonJS modules to native ES modules. TypeScript enforces its own set of rules around import extensions that aren't compatible with ESM. Different build tools support path re-mapping via disparate non-compatible mechanisms. Bun aims to provide a consistent and predictable module resolution system that just works. Unfortunately it's still quite complex. ## Syntax Consider the following files. index.ts import { hello } from "./hello"; hello(); hello.ts export function hello() { console.log("Hello world!"); } When we run `index.ts`, it prints "Hello world!". bun index.ts Hello world! In this case, we are importing from `./hello`, a relative path with no extension. **Extensioned imports are optional but supported.** To resolve this import, Bun will check for the following files in order: * `./hello.tsx` * `./hello.jsx` * `./hello.ts` * `./hello.mjs` * `./hello.js` * `./hello.cjs` * `./hello.json` * `./hello/index.tsx` * `./hello/index.jsx` * `./hello/index.ts` * `./hello/index.mjs` * `./hello/index.js` * `./hello/index.cjs` * `./hello/index.json` Import paths can optionally include extensions. If an extension is present, Bun will only check for a file with that exact extension. index.ts import { hello } from "./hello"; import { hello } from "./hello.ts"; // this works If you import `from "*.js{x}"`, Bun will additionally check for a matching `*.ts{x}` file, to be compatible with TypeScript's ES module support. index.ts import { hello } from "./hello"; import { hello } from "./hello.ts"; // this works import { hello } from "./hello.js"; // this also works Bun supports both ES modules (`import`/`export` syntax) and CommonJS modules (`require()`/`module.exports`). The following CommonJS version would also work in Bun. index.js const { hello } = require("./hello"); hello(); hello.js function hello() { console.log("Hello world!"); } exports.hello = hello; That said, using CommonJS is discouraged in new projects. ## Module systems Bun has native support for CommonJS and ES modules. ES Modules are the recommended module format for new projects, but CommonJS modules are still widely used in the Node.js ecosystem. In Bun's JavaScript runtime, `require` can be used by both ES Modules and CommonJS modules. If the target module is an ES Module, `require` returns the module namespace object (equivalent to `import * as`). If the target module is a CommonJS module, `require` returns the `module.exports` object (as in Node.js). | Module Type | `require()` | `import * as` | | --- | --- | --- | | ES Module | Module Namespace | Module Namespace | | CommonJS | module.exports | `default` is `module.exports`, keys of module.exports are named exports | ### Using `require()` You can `require()` any file or package, even `.ts` or `.mjs` files. const { foo } = require("./foo"); // extensions are optional const { bar } = require("./bar.mjs"); const { baz } = require("./baz.tsx"); What is a CommonJS module? ### Using `import` You can `import` any file or package, even `.cjs` files. import { foo } from "./foo"; // extensions are optional import bar from "./bar.ts"; import { stuff } from "./my-commonjs.cjs"; ### Using `import` and `require()` together In Bun, you can use `import` or `require` in the same file—they both work, all the time. import { stuff } from "./my-commonjs.cjs"; import Stuff from "./my-commonjs.cjs"; const myStuff = require("./my-commonjs.cjs"); ### Top level await The only exception to this rule is top-level await. You can't `require()` a file that uses top-level await, since the `require()` function is inherently synchronous. Fortunately, very few libraries use top-level await, so this is rarely a problem. But if you're using top-level await in your application code, make sure that file isn't being `require()` from elsewhere in your application. Instead, you should use `import` or dynamic `import()`. ## Importing packages Bun implements the Node.js module resolution algorithm, so you can import packages from `node_modules` with a bare specifier. import { stuff } from "foo"; The full specification of this algorithm are officially documented in the Node.js documentation; we won't rehash it here. Briefly: if you import `from "foo"`, Bun scans up the file system for a `node_modules` directory containing the package `foo`. Once it finds the `foo` package, Bun reads the `package.json` to determine how the package should be imported. To determine the package's entrypoint, Bun first reads the `exports` field and checks for the following conditions. package.json { "name": "foo", "exports": { "bun": "./index.js", "node": "./index.js", "require": "./index.js", // if importer is CommonJS "import": "./index.mjs", // if importer is ES module "default": "./index.js", } } Whichever one of these conditions occurs _first_ in the `package.json` is used to determine the package's entrypoint. Bun respects subpath `"exports"` and `"imports"`. package.json { "name": "foo", "exports": { ".": "./index.js" } } Subpath imports and conditional imports work in conjunction with each other. { "name": "foo", "exports": { ".": { "import": "./index.mjs", "require": "./index.js" } } } As in Node.js, Specifying any subpath in the `"exports"` map will prevent other subpaths from being importable; you can only import files that are explicitly exported. Given the `package.json` above: import stuff from "foo"; // this works import stuff from "foo/index.mjs"; // this doesn't **Shipping TypeScript** — Note that Bun supports the special `"bun"` export condition. If your library is written in TypeScript, you can publish your (un-transpiled!) TypeScript files to `npm` directly. If you specify your package's `*.ts` entrypoint in the `"bun"` condition, Bun will directly import and execute your TypeScript source files. If `exports` is not defined, Bun falls back to `"module"` (ESM imports only) then `"main"`. package.json { "name": "foo", "module": "./index.js", "main": "./index.js" } ### Custom conditions The `--conditions` flag allows you to specify a list of conditions to use when resolving packages from package.json `"exports"`. This flag is supported in both `bun build` and Bun's runtime. # Use it with bun build: bun build --conditions="react-server" --target=bun ./app/foo/route.js # Use it with bun's runtime: bun --conditions="react-server" ./app/foo/route.js You can also use `conditions` programmatically with `Bun.build`: await Bun.build({ conditions: ["react-server"], target: "bun", entryPoints: ["./app/foo/route.js"], }); ## Path re-mapping In the spirit of treating TypeScript as a first-class citizen, the Bun runtime will re-map import paths according to the `compilerOptions.paths` field in `tsconfig.json`. This is a major divergence from Node.js, which doesn't support any form of import path re-mapping. tsconfig.json { "compilerOptions": { "paths": { "config": ["./config.ts"], // map specifier to file "components/*": ["components/*"], // wildcard matching } } } If you aren't a TypeScript user, you can create a `jsconfig.json` in your project root to achieve the same behavior. Low-level details of CommonJS interop in Bun --- ## Page: https://bun.sh/docs/runtime/autoimport If no `node_modules` directory is found in the working directory or higher, Bun will abandon Node.js-style module resolution in favor of the **Bun module resolution algorithm**. Under Bun-style module resolution, all imported packages are auto-installed on the fly into a global module cache during execution (the same cache used by `bun install`). import { foo } from "foo"; // install `latest` version foo(); The first time you run this script, Bun will auto-install `"foo"` and cache it. The next time you run the script, it will use the cached version. ## Version resolution To determine which version to install, Bun follows the following algorithm: 1. Check for a `bun.lock` file in the project root. If it exists, use the version specified in the lockfile. 2. Otherwise, scan up the tree for a `package.json` that includes `"foo"` as a dependency. If found, use the specified semver version or version range. 3. Otherwise, use `latest`. ## Cache behavior Once a version or version range has been determined, Bun will: 1. Check the module cache for a compatible version. If one exists, use it. 2. When resolving `latest`, Bun will check if `package@latest` has been downloaded and cached in the last _24 hours_. If so, use it. 3. Otherwise, download and install the appropriate version from the `npm` registry. ## Installation Packages are installed and cached into `<cache>/<pkg>@<version>`, so multiple versions of the same package can be cached at once. Additionally, a symlink is created under `<cache>/<pkg>/<version>` to make it faster to look up all versions of a package that exist in the cache. ## Version specifiers This entire resolution algorithm can be short-circuited by specifying a version or version range directly in your import statement. import { z } from "zod@3.0.0"; // specific version import { z } from "zod@next"; // npm tag import { z } from "zod@^3.20.0"; // semver range ## Benefits This auto-installation approach is useful for a few reasons: * **Space efficiency** — Each version of a dependency only exists in one place on disk. This is a huge space and time savings compared to redundant per-project installations. * **Portability** — To share simple scripts and gists, your source file is _self-contained_. No need to `zip` together a directory containing your code and config files. With version specifiers in `import` statements, even a `package.json` isn't necessary. * **Convenience** — There's no need to run `npm install` or `bun install` before running a file or script. Just `bun run` it. * **Backwards compatibility** — Because Bun still respects the versions specified in `package.json` if one exists, you can switch to Bun-style resolution with a single command: `rm -rf node_modules`. ## Limitations * No Intellisense. TypeScript auto-completion in IDEs relies on the existence of type declaration files inside `node_modules`. We are investigating various solutions to this. * No patch-package support ## FAQ How is this different from what pnpm does? How is this different from Yarn Plug'N'Play does? How is this different from what Deno does? --- ## Page: https://bun.sh/docs/runtime/bunfig Bun's behavior can be configured using its configuration file, `bunfig.toml`. In general, Bun relies on pre-existing configuration files like `package.json` and `tsconfig.json` to configure its behavior. `bunfig.toml` is only necessary for configuring Bun-specific things. This file is optional, and Bun will work out of the box without it. ## Global vs. local In general, it's recommended to add a `bunfig.toml` file to your project root, alongside your `package.json`. To configure Bun globally, you can also create a `.bunfig.toml` file at one of the following paths: * `$HOME/.bunfig.toml` * `$XDG_CONFIG_HOME/.bunfig.toml` If both a global and local `bunfig` are detected, the results are shallow-merged, with local overriding global. CLI flags will override `bunfig` setting where applicable. ## Runtime Bun's runtime behavior is configured using top-level fields in the `bunfig.toml` file. ### `preload` An array of scripts/plugins to execute before running a file or script. # scripts to run before `bun run`-ing a file or script # register plugins by adding them to this list preload = ["./preload.ts"] ### `jsx` Configure how Bun handles JSX. You can also set these fields in the `compilerOptions` of your `tsconfig.json`, but they are supported here as well for non-TypeScript projects. jsx = "react" jsxFactory = "h" jsxFragment = "Fragment" jsxImportSource = "react" Refer to the tsconfig docs for more information on these fields. * jsx * jsxFactory * jsxFragment * jsxImportSource ### `smol` Enable `smol` mode. This reduces memory usage at the cost of performance. # Reduce memory usage at the cost of performance smol = true ### `logLevel` Set the log level. This can be one of `"debug"`, `"warn"`, or `"error"`. logLevel = "debug" # "debug" | "warn" | "error" ### `define` The `define` field allows you to replace certain global identifiers with constant expressions. Bun will replace any usage of the identifier with the expression. The expression should be a JSON string. [define] # Replace any usage of "process.env.bagel" with the string `lox`. # The values are parsed as JSON, except single-quoted strings are supported and `'undefined'` becomes `undefined` in JS. # This will probably change in a future release to be just regular TOML instead. It is a holdover from the CLI argument parsing. "process.env.bagel" = "'lox'" ### `loader` Configure how Bun maps file extensions to loaders. This is useful for loading files that aren't natively supported by Bun. If [loader] # when a .bagel file is imported, treat it like a tsx file ".bagel" = "tsx" Bun supports the following loaders: * `jsx` * `js` * `ts` * `tsx` * `css` * `file` * `json` * `toml` * `wasm` * `napi` * `base64` * `dataurl` * `text` ### `telemetry` The `telemetry` field permit to enable/disable the analytics records. Bun records bundle timings (so we can answer with data, "is Bun getting faster?") and feature usage (e.g., "are people actually using macros?"). The request body size is about 60 bytes, so it's not a lot of data. By default the telemetry is enabled. Equivalent of `DO_NOT_TRACK` env variable. telemetry = false ## Test runner The test runner is configured under the `[test]` section of your bunfig.toml. [test] # configuration goes here ### `test.root` The root directory to run tests from. Default `.`. [test] root = "./__tests__" ### `test.preload` Same as the top-level `preload` field, but only applies to `bun test`. [test] preload = ["./setup.ts"] ### `test.smol` Same as the top-level `smol` field, but only applies to `bun test`. [test] smol = true ### `test.coverage` Enables coverage reporting. Default `false`. Use `--coverage` to override. [test] coverage = false ### `test.coverageThreshold` To specify a coverage threshold. By default, no threshold is set. If your test suite does not meet or exceed this threshold, `bun test` will exit with a non-zero exit code to indicate the failure. [test] # to require 90% line-level and function-level coverage coverageThreshold = 0.9 Different thresholds can be specified for line-wise, function-wise, and statement-wise coverage. [test] coverageThreshold = { line = 0.7, function = 0.8, statement = 0.9 } ### `test.coverageSkipTestFiles` Whether to skip test files when computing coverage statistics. Default `false`. [test] coverageSkipTestFiles = false ### `test.coverageReporter` By default, coverage reports will be printed to the console. For persistent code coverage reports in CI environments and for other tools use `lcov`. [test] coverageReporter = ["text", "lcov"] # default ["text"] ### `test.coverageDir` Set path where coverage reports will be saved. Please notice, that it works only for persistent `coverageReporter` like `lcov`. [test] coverageDir = "path/to/somewhere" # default "coverage" ## Package manager Package management is a complex issue; to support a range of use cases, the behavior of `bun install` can be configured under the `[install]` section. [install] # configuration here ### `install.optional` Whether to install optional dependencies. Default `true`. [install] optional = true ### `install.dev` Whether to install development dependencies. Default `true`. [install] dev = true ### `install.peer` Whether to install peer dependencies. Default `true`. [install] peer = true ### `install.production` Whether `bun install` will run in "production mode". Default `false`. In production mode, `"devDependencies"` are not installed. You can use `--production` in the CLI to override this setting. [install] production = false ### `install.exact` Whether to set an exact version in `package.json`. Default `false`. By default Bun uses caret ranges; if the `latest` version of a package is `2.4.1`, the version range in your `package.json` will be `^2.4.1`. This indicates that any version from `2.4.1` up to (but not including) `3.0.0` is acceptable. [install] exact = false ### `install.saveTextLockfile` If false, generate a binary `bun.lockb` instead of a text-based `bun.lock` file when running `bun install` and no lockfile is present. Default `true` (since Bun v1.2). [install] saveTextLockfile = false ### `install.auto` To configure Bun's package auto-install behavior. Default `"auto"` — when no `node_modules` folder is found, Bun will automatically install dependencies on the fly during execution. [install] auto = "auto" Valid values are: | Value | Description | | --- | --- | | `"auto"` | Resolve modules from local `node_modules` if it exists. Otherwise, auto-install dependencies on the fly. | | `"force"` | Always auto-install dependencies, even if `node_modules` exists. | | `"disable"` | Never auto-install dependencies. | | `"fallback"` | Check local `node_modules` first, then auto-install any packages that aren't found. You can enable this from the CLI with `bun -i`. | ### `install.frozenLockfile` When true, `bun install` will not update `bun.lock`. Default `false`. If `package.json` and the existing `bun.lock` are not in agreement, this will error. [install] frozenLockfile = false ### `install.dryRun` Whether `bun install` will actually install dependencies. Default `false`. When true, it's equivalent to setting `--dry-run` on all `bun install` commands. [install] dryRun = false ### `install.globalDir` To configure the directory where Bun puts globally installed packages. [install] # where `bun install --global` installs packages globalDir = "~/.bun/install/global" ### `install.globalBinDir` To configure the directory where Bun installs globally installed binaries and CLIs. # where globally-installed package bins are linked globalBinDir = "~/.bun/bin" ### `install.registry` The default registry is `https://registry.npmjs.org/`. This can be globally configured in `bunfig.toml`: [install] # set default registry as a string registry = "https://registry.npmjs.org" # set a token registry = { url = "https://registry.npmjs.org", token = "123456" } # set a username/password registry = "https://username:password@registry.npmjs.org" ### `install.scopes` To configure a registry for a particular scope (e.g. `@myorg/<package>`) use `install.scopes`. You can reference environment variables with `$variable` notation. [install.scopes] # registry as string myorg = "https://username:password@registry.myorg.com/" # registry with username/password # you can reference environment variables myorg = { username = "myusername", password = "$npm_password", url = "https://registry.myorg.com/" } # registry with token myorg = { token = "$npm_token", url = "https://registry.myorg.com/" } ### `install.ca` and `install.cafile` To configure a CA certificate, use `install.ca` or `install.cafile` to specify a path to a CA certificate file. [install] # The CA certificate as a string ca = "-----BEGIN CERTIFICATE-----\n...\n-----END CERTIFICATE-----" # A path to a CA certificate file. The file can contain multiple certificates. cafile = "path/to/cafile" ### `install.cache` To configure the cache behavior: [install.cache] # the directory to use for the cache dir = "~/.bun/install/cache" # when true, don't load from the global cache. # Bun may still write to node_modules/.cache disable = false # when true, always resolve the latest versions from the registry disableManifest = false ### `install.lockfile` To configure lockfile behavior, use the `install.lockfile` section. Whether to generate a lockfile on `bun install`. Default `true`. [install.lockfile] save = true Whether to generate a non-Bun lockfile alongside `bun.lock`. (A `bun.lock` will always be created.) Currently `"yarn"` is the only supported value. [install.lockfile] print = "yarn" ## `bun run` The `bun run` command can be configured under the `[run]` section. These apply to the `bun run` command and the `bun` command when running a file or executable or script. Currently, `bunfig.toml` isn't always automatically loaded for `bun run` in a local project (it does check for a global `bunfig.toml`), so you might still need to pass `-c` or `-c=bunfig.toml` to use these settings. ### `run.shell` - use the system shell or Bun's shell The shell to use when running package.json scripts via `bun run` or `bun`. On Windows, this defaults to `"bun"` and on other platforms it defaults to `"system"`. To always use the system shell instead of Bun's shell (default behavior unless Windows): [run] # default outside of Windows shell = "system" To always use Bun's shell instead of the system shell: [run] # default on Windows shell = "bun" ### `run.bun` - auto alias `node` to `bun` When `true`, this prepends `$PATH` with a `node` symlink that points to the `bun` binary for all scripts or executables invoked by `bun run` or `bun`. This means that if you have a script that runs `node`, it will actually run `bun` instead, without needing to change your script. This works recursively, so if your script runs another script that runs `node`, it will also run `bun` instead. This applies to shebangs as well, so if you have a script with a shebang that points to `node`, it will actually run `bun` instead. By default, this is enabled if `node` is not already in your `$PATH`. [run] # equivalent to `bun --bun` for all `bun run` commands bun = true You can test this by running: bun --bun which node # /path/to/bun bun which node # /path/to/node This option is equivalent to prefixing all `bun run` commands with `--bun`: bun --bun run dev bun --bun dev bun run --bun dev If set to `false`, this will disable the `node` symlink. ### `run.silent` - suppress reporting the command being run When `true`, suppresses the output of the command being run by `bun run` or `bun`. [run] silent = true Without this option, the command being run will be printed to the console: bun run dev $ echo "Running \"dev\"..." Running "dev"... With this option, the command being run will not be printed to the console: bun run dev Running "dev"... This is equivalent to passing `--silent` to all `bun run` commands: bun --silent run dev bun --silent dev bun run --silent dev --- ## Page: https://bun.sh/docs/runtime/debugger Bun speaks the WebKit Inspector Protocol, so you can debug your code with an interactive debugger. For demonstration purposes, consider the following simple web server. ## Debugging JavaScript and TypeScript server.ts Bun.serve({ fetch(req){ console.log(req.url); return new Response("Hello, world!"); } }) ### `--inspect` To enable debugging when running code with Bun, use the `--inspect` flag. This automatically starts a WebSocket server on an available port that can be used to introspect the running Bun process. bun --inspect server.ts ------------------ Bun Inspector ------------------ Listening at: ws://localhost:6499/0tqxs9exrgrm Inspect in browser: https://debug.bun.sh/#localhost:6499/0tqxs9exrgrm ------------------ Bun Inspector ------------------ ### `--inspect-brk` The `--inspect-brk` flag behaves identically to `--inspect`, except it automatically injects a breakpoint at the first line of the executed script. This is useful for debugging scripts that run quickly and exit immediately. ### `--inspect-wait` The `--inspect-wait` flag behaves identically to `--inspect`, except the code will not execute until a debugger has attached to the running process. ### Setting a port or URL for the debugger Regardless of which flag you use, you can optionally specify a port number, URL prefix, or both. bun --inspect=4000 server.ts bun --inspect=localhost:4000 server.ts bun --inspect=localhost:4000/prefix server.ts ## Debuggers Various debugging tools can connect to this server to provide an interactive debugging experience. ### `debug.bun.sh` Bun hosts a web-based debugger at debug.bun.sh. It is a modified version of WebKit's Web Inspector Interface, which will look familiar to Safari users. Open the provided `debug.bun.sh` URL in your browser to start a debugging session. From this interface, you'll be able to view the source code of the running file, view and set breakpoints, and execute code with the built-in console.  Let's set a breakpoint. Navigate to the Sources tab; you should see the code from earlier. Click on the line number `3` to set a breakpoint on our `console.log(req.url)` statement.  Then visit `http://localhost:3000` in your web browser. This will send an HTTP request to our `localhost` web server. It will seem like the page isn't loading. Why? Because the program has paused execution at the breakpoint we set earlier. Note how the UI has changed. 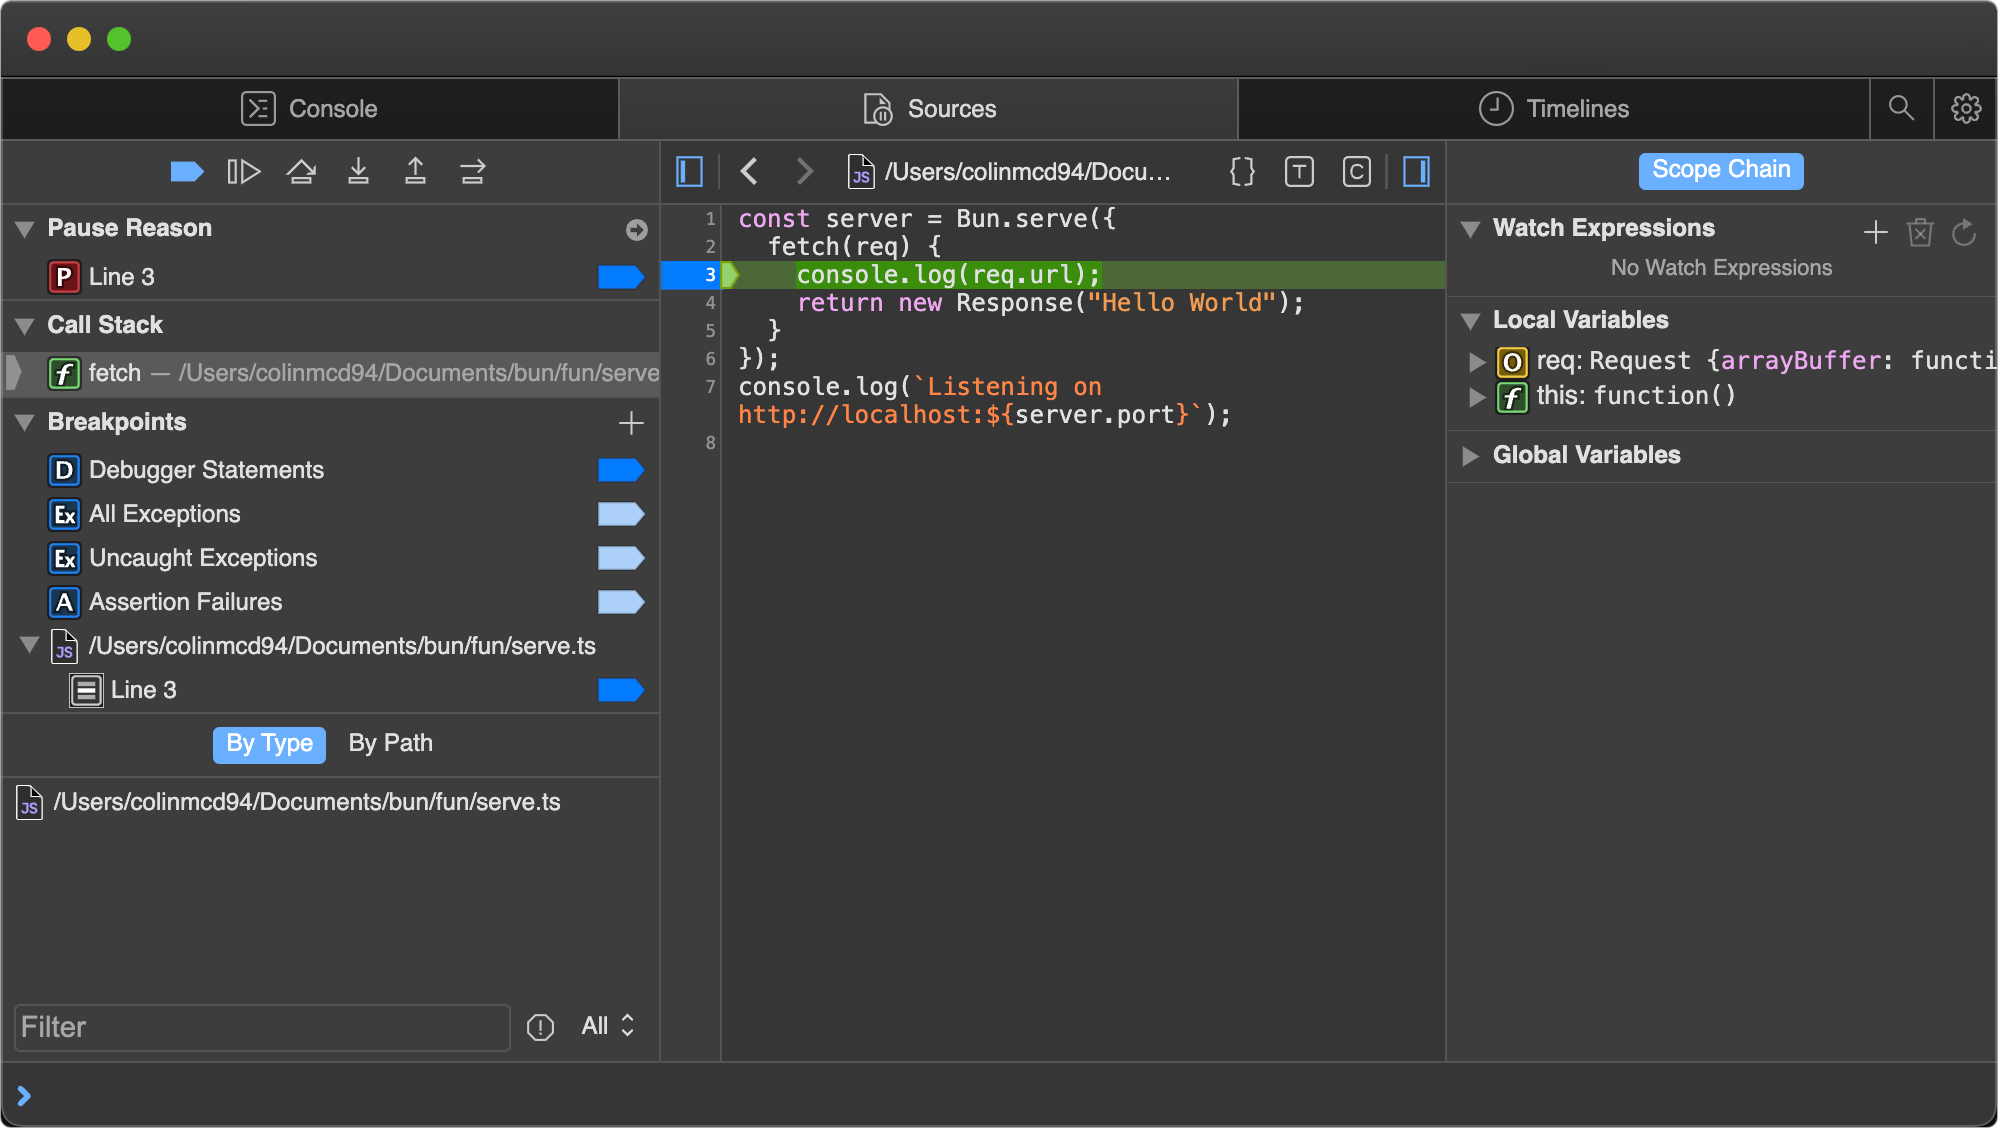 At this point there's a lot we can do to introspect the current execution environment. We can use the console at the bottom to run arbitrary code in the context of the program, with full access to the variables in scope at our breakpoint. 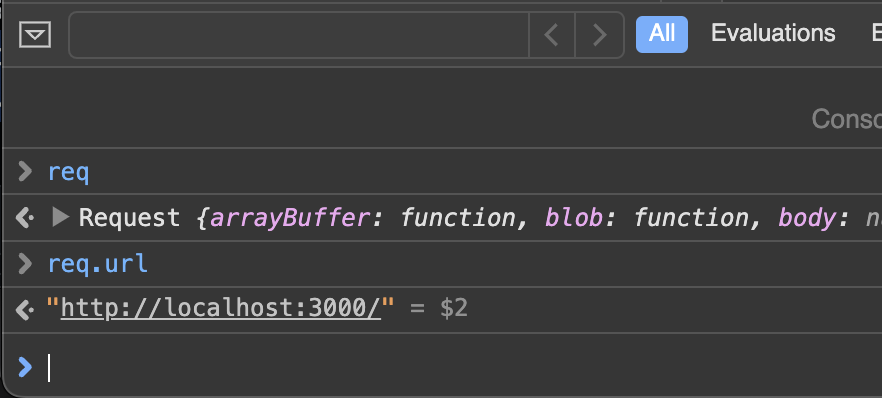 On the right side of the Sources pane, we can see all local variables currently in scope, and drill down to see their properties and methods. Here, we're inspecting the `req` variable.  In the upper left of the Sources pane, we can control the execution of the program.  Here's a cheat sheet explaining the functions of the control flow buttons. * _Continue script execution_ — continue running the program until the next breakpoint or exception. * _Step over_ — The program will continue to the next line. * _Step into_ — If the current statement contains a function call, the debugger will "step into" the called function. * _Step out_ — If the current statement is a function call, the debugger will finish executing the call, then "step out" of the function to the location where it was called. 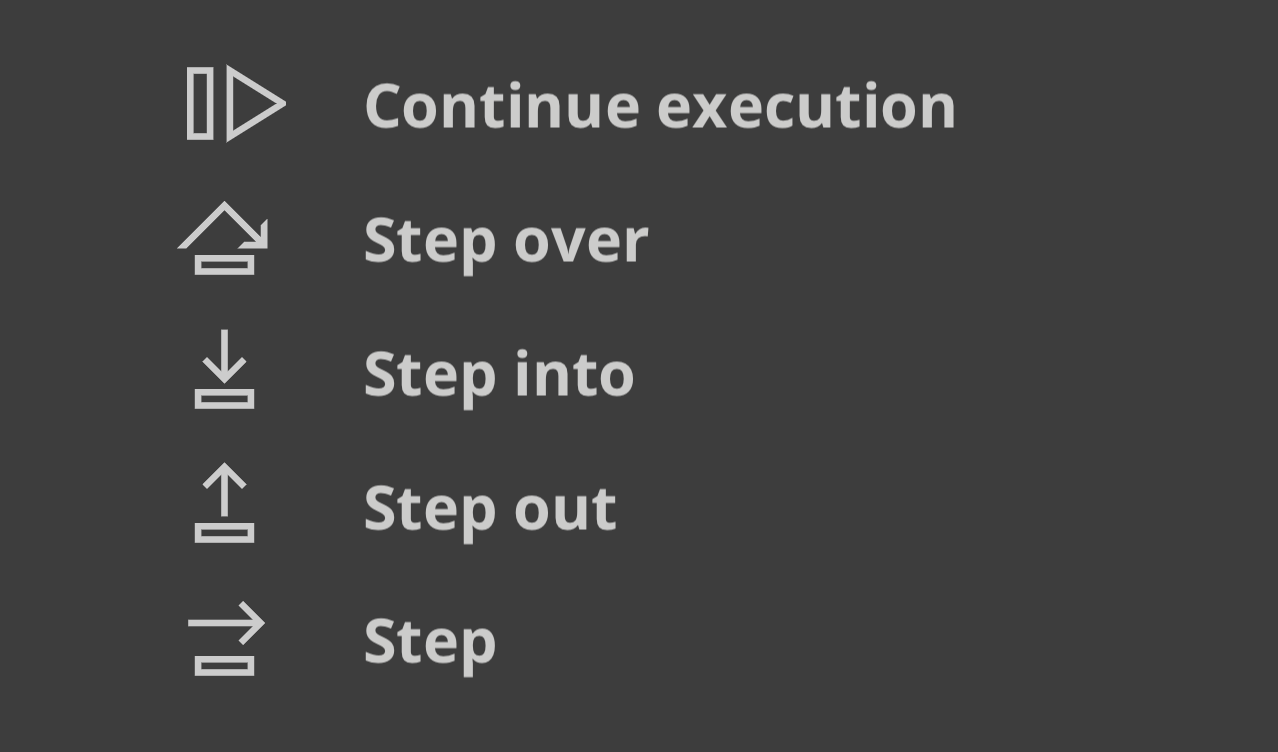 ### Visual Studio Code Debugger Experimental support for debugging Bun scripts is available in Visual Studio Code. To use it, you'll need to install the Bun VSCode extension. ## Debugging Network Requests The `BUN_CONFIG_VERBOSE_FETCH` environment variable lets you log network requests made with `fetch()` or `node:http` automatically. | Value | Description | | --- | --- | | `curl` | Print requests as `curl` commands. | | `true` | Print request & response info | | `false` | Don't print anything. Default | ### Print fetch & node:http requests as curl commands Bun also supports printing `fetch()` and `node:http` network requests as `curl` commands by setting the environment variable `BUN_CONFIG_VERBOSE_FETCH` to `curl`. process.env.BUN_CONFIG_VERBOSE_FETCH = "curl"; await fetch("https://example.com", { method: "POST", headers: { "Content-Type": "application/json", }, body: JSON.stringify({ foo: "bar" }), }); This prints the `fetch` request as a single-line `curl` command to let you copy-paste into your terminal to replicate the request. [fetch] $ curl --http1.1 "https://example.com/" -X POST -H "content-type: application/json" -H "Connection: keep-alive" -H "User-Agent: Bun/1.2.8" -H "Accept: */*" -H "Host: example.com" -H "Accept-Encoding: gzip, deflate, br" --compressed -H "Content-Length: 13" --data-raw "{\"foo\":\"bar\"}" [fetch] > HTTP/1.1 POST https://example.com/ [fetch] > content-type: application/json [fetch] > Connection: keep-alive [fetch] > User-Agent: Bun/1.2.8 [fetch] > Accept: */* [fetch] > Host: example.com [fetch] > Accept-Encoding: gzip, deflate, br [fetch] > Content-Length: 13 [fetch] < 200 OK [fetch] < Accept-Ranges: bytes [fetch] < Cache-Control: max-age=604800 [fetch] < Content-Type: text/html; charset=UTF-8 [fetch] < Date: Tue, 18 Jun 2024 05:12:07 GMT [fetch] < Etag: "3147526947" [fetch] < Expires: Tue, 25 Jun 2024 05:12:07 GMT [fetch] < Last-Modified: Thu, 17 Oct 2019 07:18:26 GMT [fetch] < Server: EOS (vny/044F) [fetch] < Content-Length: 1256 The lines with `[fetch] >` are the request from your local code, and the lines with `[fetch] <` are the response from the remote server. The `BUN_CONFIG_VERBOSE_FETCH` environment variable is supported in both `fetch()` and `node:http` requests, so it should just work. To print without the `curl` command, set `BUN_CONFIG_VERBOSE_FETCH` to `true`. process.env.BUN_CONFIG_VERBOSE_FETCH = "true"; await fetch("https://example.com", { method: "POST", headers: { "Content-Type": "application/json", }, body: JSON.stringify({ foo: "bar" }), }); This prints the following to the console: [fetch] > HTTP/1.1 POST https://example.com/ [fetch] > content-type: application/json [fetch] > Connection: keep-alive [fetch] > User-Agent: Bun/1.2.8 [fetch] > Accept: */* [fetch] > Host: example.com [fetch] > Accept-Encoding: gzip, deflate, br [fetch] > Content-Length: 13 [fetch] < 200 OK [fetch] < Accept-Ranges: bytes [fetch] < Cache-Control: max-age=604800 [fetch] < Content-Type: text/html; charset=UTF-8 [fetch] < Date: Tue, 18 Jun 2024 05:12:07 GMT [fetch] < Etag: "3147526947" [fetch] < Expires: Tue, 25 Jun 2024 05:12:07 GMT [fetch] < Last-Modified: Thu, 17 Oct 2019 07:18:26 GMT [fetch] < Server: EOS (vny/044F) [fetch] < Content-Length: 1256 ## Stacktraces & sourcemaps Bun transpiles every file, which sounds like it would mean that the stack traces you see in the console would unhelpfully point to the transpiled output. To address this, Bun automatically generates and serves sourcemapped files for every file it transpiles. When you see a stack trace in the console, you can click on the file path and be taken to the original source code, even though it was written in TypeScript or JSX, or has some other transformation applied. Bun automatically loads sourcemaps both at runtime when transpiling files on-demand, and when using `bun build` to precompile files ahead of time. ### Syntax-highlighted source code preview To help with debugging, Bun automatically prints a small source-code preview when an unhandled exception or rejection occurs. You can simulate this behavior by calling `Bun.inspect(error)`: // Create an error const err = new Error("Something went wrong"); console.log(Bun.inspect(err, { colors: true })); This prints a syntax-highlighted preview of the source code where the error occurred, along with the error message and stack trace. 1 | // Create an error 2 | const err = new Error("Something went wrong"); ^ error: Something went wrong at file.js:2:13 ### V8 Stack Traces Bun uses JavaScriptCore as it's engine, but much of the Node.js ecosystem & npm expects V8. JavaScript engines differ in `error.stack` formatting. Bun intends to be a drop-in replacement for Node.js, and that means it's our job to make sure that even though the engine is different, the stack traces are as similar as possible. That's why when you log `error.stack` in Bun, the formatting of `error.stack` is the same as in Node.js's V8 engine. This is especially useful when you're using libraries that expect V8 stack traces. #### V8 Stack Trace API Bun implements the V8 Stack Trace API, which is a set of functions that allow you to manipulate stack traces. ##### Error.prepareStackTrace The `Error.prepareStackTrace` function is a global function that lets you customize the stack trace output. This function is called with the error object and an array of `CallSite` objects and lets you return a custom stack trace. Error.prepareStackTrace = (err, stack) => { return stack.map(callSite => { return callSite.getFileName(); }); }; const err = new Error("Something went wrong"); console.log(err.stack); // [ "error.js" ] The `CallSite` object has the following methods: | Method | Returns | | --- | --- | | `getThis` | `this` value of the function call | | `getTypeName` | typeof `this` | | `getFunction` | function object | | `getFunctionName` | function name as a string | | `getMethodName` | method name as a string | | `getFileName` | file name or URL | | `getLineNumber` | line number | | `getColumnNumber` | column number | | `getEvalOrigin` | `undefined` | | `getScriptNameOrSourceURL` | source URL | | `isToplevel` | returns `true` if the function is in the global scope | | `isEval` | returns `true` if the function is an `eval` call | | `isNative` | returns `true` if the function is native | | `isConstructor` | returns `true` if the function is a constructor | | `isAsync` | returns `true` if the function is `async` | | `isPromiseAll` | Not implemented yet. | | `getPromiseIndex` | Not implemented yet. | | `toString` | returns a string representation of the call site | In some cases, the `Function` object may have already been garbage collected, so some of these methods may return `undefined`. ##### Error.captureStackTrace(error, startFn) The `Error.captureStackTrace` function lets you capture a stack trace at a specific point in your code, rather than at the point where the error was thrown. This can be helpful when you have callbacks or asynchronous code that makes it difficult to determine where an error originated. The 2nd argument to `Error.captureStackTrace` is the function where you want the stack trace to start. For example, the below code will make `err.stack` point to the code calling `fn()`, even though the error was thrown at `myInner`. const fn = () => { function myInner() { throw err; } try { myInner(); } catch (err) { console.log(err.stack); console.log(""); console.log("-- captureStackTrace --"); console.log(""); Error.captureStackTrace(err, fn); console.log(err.stack); } }; fn(); This logs the following: Error: here! at myInner (file.js:4:15) at fn (file.js:8:5) at module code (file.js:17:1) at moduleEvaluation (native) at moduleEvaluation (native) at <anonymous> (native) -- captureStackTrace -- Error: here! at module code (file.js:17:1) at moduleEvaluation (native) at moduleEvaluation (native) at <anonymous> (native) --- ## Page: https://bun.sh/docs/runtime/shell Bun Shell makes shell scripting with JavaScript & TypeScript fun. It's a cross-platform bash-like shell with seamless JavaScript interop. Quickstart: import { $ } from "bun"; const response = await fetch("https://example.com"); // Use Response as stdin. await $`cat < ${response} | wc -c`; // 1256 ## Features: * **Cross-platform**: works on Windows, Linux & macOS. Instead of `rimraf` or `cross-env`', you can use Bun Shell without installing extra dependencies. Common shell commands like `ls`, `cd`, `rm` are implemented natively. * **Familiar**: Bun Shell is a bash-like shell, supporting redirection, pipes, environment variables and more. * **Globs**: Glob patterns are supported natively, including `**`, `*`, `{expansion}`, and more. * **Template literals**: Template literals are used to execute shell commands. This allows for easy interpolation of variables and expressions. * **Safety**: Bun Shell escapes all strings by default, preventing shell injection attacks. * **JavaScript interop**: Use `Response`, `ArrayBuffer`, `Blob`, `Bun.file(path)` and other JavaScript objects as stdin, stdout, and stderr. * **Shell scripting**: Bun Shell can be used to run shell scripts (`.bun.sh` files). * **Custom interpreter**: Bun Shell is written in Zig, along with its lexer, parser, and interpreter. Bun Shell is a small programming language. ## Getting started The simplest shell command is `echo`. To run it, use the `$` template literal tag: import { $ } from "bun"; await $`echo "Hello World!"`; // Hello World! By default, shell commands print to stdout. To quiet the output, call `.quiet()`: import { $ } from "bun"; await $`echo "Hello World!"`.quiet(); // No output What if you want to access the output of the command as text? Use `.text()`: import { $ } from "bun"; // .text() automatically calls .quiet() for you const welcome = await $`echo "Hello World!"`.text(); console.log(welcome); // Hello World!\n By default, `await`ing will return stdout and stderr as `Buffer`s. import { $ } from "bun"; const { stdout, stderr } = await $`echo "Hello!"`.quiet(); console.log(stdout); // Buffer(7) [ 72, 101, 108, 108, 111, 33, 10 ] console.log(stderr); // Buffer(0) [] ## Error handling By default, non-zero exit codes will throw an error. This `ShellError` contains information about the command run. import { $ } from "bun"; try { const output = await $`something-that-may-fail`.text(); console.log(output); } catch (err) { console.log(`Failed with code ${err.exitCode}`); console.log(err.stdout.toString()); console.log(err.stderr.toString()); } Throwing can be disabled with `.nothrow()`. The result's `exitCode` will need to be checked manually. import { $ } from "bun"; const { stdout, stderr, exitCode } = await $`something-that-may-fail` .nothrow() .quiet(); if (exitCode !== 0) { console.log(`Non-zero exit code ${exitCode}`); } console.log(stdout); console.log(stderr); The default handling of non-zero exit codes can be configured by calling `.nothrow()` or `.throws(boolean)` on the `$` function itself. import { $ } from "bun"; // shell promises will not throw, meaning you will have to // check for `exitCode` manually on every shell command. $.nothrow(); // equivalent to $.throws(false) // default behavior, non-zero exit codes will throw an error $.throws(true); // alias for $.nothrow() $.throws(false); await $`something-that-may-fail`; // No exception thrown ## Redirection A command's _input_ or _output_ may be _redirected_ using the typical Bash operators: * `<` redirect stdin * `>` or `1>` redirect stdout * `2>` redirect stderr * `&>` redirect both stdout and stderr * `>>` or `1>>` redirect stdout, _appending_ to the destination, instead of overwriting * `2>>` redirect stderr, _appending_ to the destination, instead of overwriting * `&>>` redirect both stdout and stderr, _appending_ to the destination, instead of overwriting * `1>&2` redirect stdout to stderr (all writes to stdout will instead be in stderr) * `2>&1` redirect stderr to stdout (all writes to stderr will instead be in stdout) Bun Shell also supports redirecting from and to JavaScript objects. ### Example: Redirect output to JavaScript objects (`>`) To redirect stdout to a JavaScript object, use the `>` operator: import { $ } from "bun"; const buffer = Buffer.alloc(100); await $`echo "Hello World!" > ${buffer}`; console.log(buffer.toString()); // Hello World!\n The following JavaScript objects are supported for redirection to: * `Buffer`, `Uint8Array`, `Uint16Array`, `Uint32Array`, `Int8Array`, `Int16Array`, `Int32Array`, `Float32Array`, `Float64Array`, `ArrayBuffer`, `SharedArrayBuffer` (writes to the underlying buffer) * `Bun.file(path)`, `Bun.file(fd)` (writes to the file) ### Example: Redirect input from JavaScript objects (`<`) To redirect the output from JavaScript objects to stdin, use the `<` operator: import { $ } from "bun"; const response = new Response("hello i am a response body"); const result = await $`cat < ${response}`.text(); console.log(result); // hello i am a response body The following JavaScript objects are supported for redirection from: * `Buffer`, `Uint8Array`, `Uint16Array`, `Uint32Array`, `Int8Array`, `Int16Array`, `Int32Array`, `Float32Array`, `Float64Array`, `ArrayBuffer`, `SharedArrayBuffer` (reads from the underlying buffer) * `Bun.file(path)`, `Bun.file(fd)` (reads from the file) * `Response` (reads from the body) ### Example: Redirect stdin -> file import { $ } from "bun"; await $`cat < myfile.txt`; ### Example: Redirect stdout -> file import { $ } from "bun"; await $`echo bun! > greeting.txt`; ### Example: Redirect stderr -> file import { $ } from "bun"; await $`bun run index.ts 2> errors.txt`; ### Example: Redirect stderr -> stdout import { $ } from "bun"; // redirects stderr to stdout, so all output // will be available on stdout await $`bun run ./index.ts 2>&1`; ### Example: Redirect stdout -> stderr import { $ } from "bun"; // redirects stdout to stderr, so all output // will be available on stderr await $`bun run ./index.ts 1>&2`; ## Piping (`|`) Like in bash, you can pipe the output of one command to another: import { $ } from "bun"; const result = await $`echo "Hello World!" | wc -w`.text(); console.log(result); // 2\n You can also pipe with JavaScript objects: import { $ } from "bun"; const response = new Response("hello i am a response body"); const result = await $`cat < ${response} | wc -w`.text(); console.log(result); // 6\n ## Command substitution (`$(...)`) Command substitution allows you to substitute the output of another script into the current script: import { $ } from "bun"; // Prints out the hash of the current commit await $`echo Hash of current commit: $(git rev-parse HEAD)`; This is a textual insertion of the command's output and can be used to, for example, declare a shell variable: import { $ } from "bun"; await $` REV=$(git rev-parse HEAD) docker built -t myapp:$REV echo Done building docker image "myapp:$REV" `; **NOTE**: Because Bun internally uses the special `raw` property on the input template literal, using the backtick syntax for command substitution won't work: import { $ } from "bun"; await $`echo \`echo hi\``; Instead of printing: hi The above will print out: echo hi We instead recommend sticking to the `$(...)` syntax. ## Environment variables Environment variables can be set like in bash: import { $ } from "bun"; await $`FOO=foo bun -e 'console.log(process.env.FOO)'`; // foo\n You can use string interpolation to set environment variables: import { $ } from "bun"; const foo = "bar123"; await $`FOO=${foo + "456"} bun -e 'console.log(process.env.FOO)'`; // bar123456\n Input is escaped by default, preventing shell injection attacks: import { $ } from "bun"; const foo = "bar123; rm -rf /tmp"; await $`FOO=${foo} bun -e 'console.log(process.env.FOO)'`; // bar123; rm -rf /tmp\n ### Changing the environment variables By default, `process.env` is used as the environment variables for all commands. You can change the environment variables for a single command by calling `.env()`: import { $ } from "bun"; await $`echo $FOO`.env({ ...process.env, FOO: "bar" }); // bar You can change the default environment variables for all commands by calling `$.env`: import { $ } from "bun"; $.env({ FOO: "bar" }); // the globally-set $FOO await $`echo $FOO`; // bar // the locally-set $FOO await $`echo $FOO`.env({ FOO: "baz" }); // baz You can reset the environment variables to the default by calling `$.env()` with no arguments: import { $ } from "bun"; $.env({ FOO: "bar" }); // the globally-set $FOO await $`echo $FOO`; // bar // the locally-set $FOO await $`echo $FOO`.env(undefined); // "" ### Changing the working directory You can change the working directory of a command by passing a string to `.cwd()`: import { $ } from "bun"; await $`pwd`.cwd("/tmp"); // /tmp You can change the default working directory for all commands by calling `$.cwd`: import { $ } from "bun"; $.cwd("/tmp"); // the globally-set working directory await $`pwd`; // /tmp // the locally-set working directory await $`pwd`.cwd("/"); // / ## Reading output To read the output of a command as a string, use `.text()`: import { $ } from "bun"; const result = await $`echo "Hello World!"`.text(); console.log(result); // Hello World!\n ### Reading output as JSON To read the output of a command as JSON, use `.json()`: import { $ } from "bun"; const result = await $`echo '{"foo": "bar"}'`.json(); console.log(result); // { foo: "bar" } ### Reading output line-by-line To read the output of a command line-by-line, use `.lines()`: import { $ } from "bun"; for await (let line of $`echo "Hello World!"`.lines()) { console.log(line); // Hello World! } You can also use `.lines()` on a completed command: import { $ } from "bun"; const search = "bun"; for await (let line of $`cat list.txt | grep ${search}`.lines()) { console.log(line); } ### Reading output as a Blob To read the output of a command as a Blob, use `.blob()`: import { $ } from "bun"; const result = await $`echo "Hello World!"`.blob(); console.log(result); // Blob(13) { size: 13, type: "text/plain" } ## Builtin Commands For cross-platform compatibility, Bun Shell implements a set of builtin commands, in addition to reading commands from the PATH environment variable. * `cd`: change the working directory * `ls`: list files in a directory * `rm`: remove files and directories * `echo`: print text * `pwd`: print the working directory * `bun`: run bun in bun * `cat` * `touch` * `mkdir` * `which` * `mv` * `exit` * `true` * `false` * `yes` * `seq` * `dirname` * `basename` **Partially** implemented: * `mv`: move files and directories (missing cross-device support) **Not** implemented yet, but planned: * See Issue #9716 for the full list. ## Utilities Bun Shell also implements a set of utilities for working with shells. ### `$.braces` (brace expansion) This function implements simple brace expansion for shell commands: import { $ } from "bun"; await $.braces(`echo {1,2,3}`); // => ["echo 1", "echo 2", "echo 3"] ### `$.escape` (escape strings) Exposes Bun Shell's escaping logic as a function: import { $ } from "bun"; console.log($.escape('$(foo) `bar` "baz"')); // => \$(foo) \`bar\` \"baz\" If you do not want your string to be escaped, wrap it in a `{ raw: 'str' }` object: import { $ } from "bun"; await $`echo ${{ raw: '$(foo) `bar` "baz"' }}`; // => bun: command not found: foo // => bun: command not found: bar // => baz ## .sh file loader For simple shell scripts, instead of `/bin/sh`, you can use Bun Shell to run shell scripts. To do so, just run the script with `bun` on a file with the `.sh` extension. script.sh echo "Hello World! pwd=$(pwd)" bun ./script.sh Hello World! pwd=/home/demo Scripts with Bun Shell are cross platform, which means they work on Windows: bun .\script.sh Hello World! pwd=C:\Users\Demo ## Implementation notes Bun Shell is a small programming language in Bun that is implemented in Zig. It includes a handwritten lexer, parser, and interpreter. Unlike bash, zsh, and other shells, Bun Shell runs operations concurrently. ## Credits Large parts of this API were inspired by zx, dax, and bnx. Thank you to the authors of those projects.