W↓
All docs
🔑
Sign Up/Sign In
docs.deno.com/runtime/reference/cli/
Public Link
Apr 8, 2025, 12:53:52 PM - complete - 170.3 kB
Created by:
****ad@vlad.studio
Starting URLs:
https://docs.deno.com/runtime/reference/cli/add/
Crawl Prefixes:
https://docs.deno.com/runtime/reference/cli/
## Page: https://docs.deno.com/runtime/reference/cli/add/ * Runtime * Reference guides * CLI * deno add On this page * Options ### Command line usage deno add [OPTIONS] [packages]... Add dependencies to your configuration file. deno add jsr:@std/path You can also add npm packages: deno add npm:react Or multiple dependencies at once: deno add jsr:@std/path jsr:@std/assert npm:chalk ## Options Jump to heading ### `--allow-scripts` Jump to heading Allow running npm lifecycle scripts for the given packages Note: Scripts will only be executed when using a node\_modules directory (`--node-modules-dir`). ### `--dev` Jump to heading Short flag: `-D` Add the package as a dev dependency. Note: This only applies when adding to a `package.json` file. ## Did you find what you needed? * Options --- ## Page: https://docs.deno.com/runtime/reference/cli/bench/ ### Command line usage deno bench [OPTIONS] [files]... [-- [SCRIPT_ARG]...] Run benchmarks using Deno's built-in bench tool. Evaluate the given files, run all benches declared with 'Deno.bench()' and report results to standard output: deno bench src/fetch_bench.ts src/signal_bench.ts If you specify a directory instead of a file, the path is expanded to all contained files matching the glob `{*_,*.,}bench.{js,mjs,ts,mts,jsx,tsx}`: deno bench src/ ## Type checking options Jump to heading ### `--check` Jump to heading Set type-checking behavior. This subcommand type-checks local modules by default, so adding `--check` is redundant If the value of "all" is supplied, remote modules will be included. Alternatively, the 'deno check' subcommand can be used. ### `--no-check` Jump to heading Skip type-checking. If the value of "remote" is supplied, diagnostic errors from remote modules will be ignored. ## Dependency management options Jump to heading ### `--cached-only` Jump to heading Require that remote dependencies are already cached. ### `--frozen` Jump to heading Error out if lockfile is out of date. ### `--import-map` Jump to heading Load import map file from local file or remote URL. ### `--lock` Jump to heading Check the specified lock file. (If value is not provided, defaults to "./deno.lock"). ### `--no-lock` Jump to heading Disable auto discovery of the lock file. ### `--no-npm` Jump to heading Do not resolve npm modules. ### `--no-remote` Jump to heading Do not resolve remote modules. ### `--node-modules-dir` Jump to heading Sets the node modules management mode for npm packages. ### `--reload` Jump to heading Short flag: `-r` Reload source code cache (recompile TypeScript) no value Reload everything jsr:@std/http/file-server,jsr:@std/assert/assert-equals Reloads specific modules npm: Reload all npm modules npm:chalk Reload specific npm module. ### `--vendor` Jump to heading Toggles local vendor folder usage for remote modules and a node\_modules folder for npm packages. ## Options Jump to heading ### `--allow-scripts` Jump to heading Allow running npm lifecycle scripts for the given packages Note: Scripts will only be executed when using a node\_modules directory (`--node-modules-dir`). ### `--cert` Jump to heading Load certificate authority from PEM encoded file. ### `--config` Jump to heading Short flag: `-c` Configure different aspects of deno including TypeScript, linting, and code formatting. Typically the configuration file will be called `deno.json` or `deno.jsonc` and automatically detected; in that case this flag is not necessary. ### `--env-file` Jump to heading Load environment variables from local file Only the first environment variable with a given key is used. Existing process environment variables are not overwritten, so if variables with the same names already exist in the environment, their values will be preserved. Where multiple declarations for the same environment variable exist in your .env file, the first one encountered is applied. This is determined by the order of the files you pass as arguments. ### `--ext` Jump to heading Set content type of the supplied file. ### `--filter` Jump to heading Run benchmarks with this string or regexp pattern in the bench name. ### `--ignore` Jump to heading Ignore files. ### `--json` Jump to heading UNSTABLE: Output benchmark result in JSON format. ### `--location` Jump to heading Value of globalThis.location used by some web APIs. ### `--no-config` Jump to heading Disable automatic loading of the configuration file. ### `--no-run` Jump to heading Cache bench modules, but don't run benchmarks. ### `--permit-no-files` Jump to heading Don't return an error code if no bench files were found. ### `--seed` Jump to heading Set the random number generator seed. ### `--v8-flags` Jump to heading To see a list of all available flags use `--v8-flags=--help` Flags can also be set via the DENO\_V8\_FLAGS environment variable. Any flags set with this flag are appended after the DENO\_V8\_FLAGS environment variable. ## File watching options Jump to heading ### `--no-clear-screen` Jump to heading Do not clear terminal screen when under watch mode. ### `--watch` Jump to heading Watch for file changes and restart process automatically. Only local files from entry point module graph are watched. ### `--watch-exclude` Jump to heading Exclude provided files/patterns from watch mode. ## Quickstart Jump to heading Firstly, let's create a file `url_bench.ts` and register a bench using the `Deno.bench()` function. // url_bench.ts Deno.bench("URL parsing", () => { new URL("https://deno.land"); }); Secondly, run the benchmark using the `deno bench` subcommand. deno bench url_bench.ts cpu: Apple M1 Max runtime: deno 1.21.0 (aarch64-apple-darwin) file:///dev/deno/url_bench.ts benchmark time (avg) (min … max) p75 p99 p995 --------------------------------------------------- ----------------------------- URL parsing 17.29 µs/iter (16.67 µs … 153.62 µs) 17.25 µs 18.92 µs 22.25 µs ## Writing benchmarks Jump to heading To define a benchmark you need to register it with a call to the `Deno.bench` API. There are multiple overloads of this API to allow for the greatest flexibility and easy switching between the forms (eg. when you need to quickly focus a single bench for debugging, using the `only: true` option): // Compact form: name and function Deno.bench("hello world #1", () => { new URL("https://deno.land"); }); // Compact form: named function. Deno.bench(function helloWorld3() { new URL("https://deno.land"); }); // Longer form: bench definition. Deno.bench({ name: "hello world #2", fn: () => { new URL("https://deno.land"); }, }); // Similar to compact form, with additional configuration as a second argument. Deno.bench("hello world #4", { permissions: { read: true } }, () => { new URL("https://deno.land"); }); // Similar to longer form, with bench function as a second argument. Deno.bench( { name: "hello world #5", permissions: { read: true } }, () => { new URL("https://deno.land"); }, ); // Similar to longer form, with a named bench function as a second argument. Deno.bench({ permissions: { read: true } }, function helloWorld6() { new URL("https://deno.land"); }); ### Async functions Jump to heading You can also bench asynchronous code by passing a bench function that returns a promise. For this you can use the `async` keyword when defining a function: Deno.bench("async hello world", async () => { await 1; }); ### Critical sections Jump to heading Sometimes the benchmark case needs to include setup and teardown code that would taint the benchmark results. For example, if you want to measure how long it takes to read a small file, you need to open the file, read it, and then close it. If the file is small enough the time it takes to open and close the file might outweigh the time it takes to read the file itself. To help with such situations you can `Deno.BenchContext.start` and `Deno.BenchContext.end` to tell the benchmarking tool about the critical section you want to measure. Everything outside of the section between these two calls will be excluded from the measurement. Deno.bench("foo", async (b) => { // Open a file that we will act upon. using file = await Deno.open("a_big_data_file.txt"); // Tell the benchmarking tool that this is the only section you want // to measure. b.start(); // Now let's measure how long it takes to read all of the data from the file. await new Response(file.readable).arrayBuffer(); // End measurement here. b.end(); }); The above example requires the `--allow-read` flag to run the benchmark: `deno bench --allow-read file_reading.ts`. ## Grouping and baselines Jump to heading When registering a bench case, it can be assigned to a group, using `Deno.BenchDefinition.group` option: // url_bench.ts Deno.bench("url parse", { group: "url" }, () => { new URL("https://deno.land"); }); It is useful to assign several cases to a single group and compare how they perform against a "baseline" case. In this example we'll check how performant is `Date.now()` compared to `performance.now()`, to do that we'll mark the first case as a "baseline" using `Deno.BenchDefinition.baseline` option: // time_bench.ts Deno.bench("Date.now()", { group: "timing", baseline: true }, () => { Date.now(); }); Deno.bench("performance.now()", { group: "timing" }, () => { performance.now(); }); $ deno bench time_bench.ts cpu: Apple M1 Max runtime: deno 1.21.0 (aarch64-apple-darwin) file:///dev/deno/time_bench.ts benchmark time (avg) (min … max) p75 p99 p995 --------------------------------------------------------- ----------------------------- Date.now() 125.24 ns/iter (118.98 ns … 559.95 ns) 123.62 ns 150.69 ns 156.63 ns performance.now() 2.67 µs/iter (2.64 µs … 2.82 µs) 2.67 µs 2.82 µs 2.82 µs summary Date.now() 21.29x times faster than performance.now() You can specify multiple groups in the same file. ## Running benchmarks Jump to heading To run a benchmark, call `deno bench` with the file that contains your bench function. You can also omit the file name, in which case all benchmarks in the current directory (recursively) that match the glob `{*_,*.,}bench.{ts, tsx, mts, js, mjs, jsx}` will be run. If you pass a directory, all files in the directory that match this glob will be run. The glob expands to: * files named `bench.{ts, tsx, mts, js, mjs, jsx}`, * or files ending with `.bench.{ts, tsx, mts, js, mjs, jsx}`, * or files ending with `_bench.{ts, tsx, mts, js, mjs, jsx}` # Run all benches in the current directory and all sub-directories deno bench # Run all benches in the util directory deno bench util/ # Run just my_bench.ts deno bench my_bench.ts > ⚠️ If you want to pass additional CLI arguments to the bench files use `--` to inform Deno that remaining arguments are scripts arguments. # Pass additional arguments to the bench file deno bench my_bench.ts -- -e --foo --bar `deno bench` uses the same permission model as `deno run` and therefore will require, for example, `--allow-write` to write to the file system during benching. To see all runtime options with `deno bench`, you can reference the command line help: deno help bench ## Filtering Jump to heading There are a number of options to filter the benches you are running. ### Command line filtering Jump to heading Benches can be run individually or in groups using the command line `--filter` option. The filter flags accept a string or a pattern as value. Assuming the following benches: Deno.bench({ name: "my-bench", fn: () => {/* bench function zero */}, }); Deno.bench({ name: "bench-1", fn: () => {/* bench function one */}, }); Deno.bench({ name: "bench2", fn: () => {/* bench function two */}, }); This command will run all of these benches because they all contain the word "bench". deno bench --filter "bench" benchmarks/ On the flip side, the following command uses a pattern and will run the second and third benchmarks. deno bench --filter "/bench-*\d/" benchmarks/ _To let Deno know that you want to use a pattern, wrap your filter with forward-slashes like the JavaScript syntactic sugar for a regex._ ### Bench definition filtering Jump to heading Within the benches themselves, you have two options for filtering. #### Filtering out (ignoring these benches) Jump to heading Sometimes you want to ignore benches based on some sort of condition (for example you only want a benchmark to run on Windows). For this you can use the `ignore` boolean in the bench definition. If it is set to true the bench will be skipped. Deno.bench({ name: "bench windows feature", ignore: Deno.build.os !== "windows", fn() { // do windows feature }, }); #### Filtering in (only run these benches) Jump to heading Sometimes you may be in the middle of a performance problem within a large bench class and you would like to focus on just that single bench and ignore the rest for now. For this you can use the `only` option to tell the benchmark harness to only run benches with this set to true. Multiple benches can set this option. While the benchmark run will report on the success or failure of each bench, the overall benchmark run will always fail if any bench is flagged with `only`, as this is a temporary measure only which disables nearly all of your benchmarks. Deno.bench({ name: "Focus on this bench only", only: true, fn() { // bench complicated stuff }, }); ## JSON output Jump to heading To retrieve the output as JSON, use the `--json` flag: $ deno bench --json bench_me.js { "runtime": "Deno/1.31.0 x86_64-apple-darwin", "cpu": "Intel(R) Core(TM) i7-9750H CPU @ 2.60GHz", "benches": [ "origin": "file:///dev/bench_me.js", "group": null, "name": "Deno.UnsafePointerView#getUint32", "baseline": false, "result": { "ok": { "n": 49, "min": 1251.9348, "max": 1441.2696, "avg": 1308.7523755102038, "p75": 1324.1055, "p99": 1441.2696, "p995": 1441.2696, "p999": 1441.2696 } } ] } --- ## Page: https://docs.deno.com/runtime/reference/cli/check/ ### Command line usage deno check [OPTIONS] [file]... Download and type-check without execution. deno check jsr:@std/http/file-server Unless --reload is specified, this command will not re-download already cached dependencies ## Dependency management options Jump to heading ### `--frozen` Jump to heading Error out if lockfile is out of date. ### `--import-map` Jump to heading Load import map file from local file or remote URL. ### `--lock` Jump to heading Check the specified lock file. (If value is not provided, defaults to "./deno.lock"). ### `--no-lock` Jump to heading Disable auto discovery of the lock file. ### `--no-npm` Jump to heading Do not resolve npm modules. ### `--no-remote` Jump to heading Do not resolve remote modules. ### `--node-modules-dir` Jump to heading Sets the node modules management mode for npm packages. ### `--reload` Jump to heading Short flag: `-r` Reload source code cache (recompile TypeScript) no value Reload everything jsr:@std/http/file-server,jsr:@std/assert/assert-equals Reloads specific modules npm: Reload all npm modules npm:chalk Reload specific npm module. ### `--vendor` Jump to heading Toggles local vendor folder usage for remote modules and a node\_modules folder for npm packages. ## Options Jump to heading ### `--all` Jump to heading Type-check all code, including remote modules and npm packages. ### `--allow-import` Jump to heading Short flag: `-I` Allow importing from remote hosts. Optionally specify allowed IP addresses and host names, with ports as necessary. Default value: deno.land:443,jsr.io:443,esm.sh:443,cdn.jsdelivr.net:443,raw.githubusercontent.com:443,user.githubusercontent.com:443. ### `--cert` Jump to heading Load certificate authority from PEM encoded file. ### `--config` Jump to heading Short flag: `-c` Configure different aspects of deno including TypeScript, linting, and code formatting. Typically the configuration file will be called `deno.json` or `deno.jsonc` and automatically detected; in that case this flag is not necessary. ### `--doc` Jump to heading Type-check code blocks in JSDoc as well as actual code. ### `--doc-only` Jump to heading Type-check code blocks in JSDoc and Markdown only. ### `--no-code-cache` Jump to heading Disable V8 code cache feature. ### `--no-config` Jump to heading Disable automatic loading of the configuration file. --- ## Page: https://docs.deno.com/runtime/reference/cli/clean/ * Runtime * Reference guides * CLI * deno clean ### Command line usage deno clean [OPTIONS] Remove the cache directory (`$DENO_DIR`) ## Did you find what you needed? --- ## Page: https://docs.deno.com/runtime/reference/cli/compile/ ### Command line usage deno compile [OPTIONS] [SCRIPT_ARG]... Compiles the given script into a self contained executable. deno compile --allow-read --allow-net jsr:@std/http/file-server deno compile --output file_server jsr:@std/http/file-server Any flags specified which affect runtime behavior will be applied to the resulting binary. This allows distribution of a Deno application to systems that do not have Deno installed. Under the hood, it bundles a slimmed down version of the Deno runtime along with your JavaScript or TypeScript code. Cross-compiling to different target architectures is supported using the `--target` flag. On the first invocation of `deno compile`, Deno will download the relevant binary and cache it in `$DENO_DIR`. ## Type checking options Jump to heading ### `--check` Jump to heading Set type-checking behavior. This subcommand type-checks local modules by default, so adding `--check` is redundant If the value of "all" is supplied, remote modules will be included. Alternatively, the 'deno check' subcommand can be used. ### `--no-check` Jump to heading Skip type-checking. If the value of "remote" is supplied, diagnostic errors from remote modules will be ignored. ## Dependency management options Jump to heading ### `--cached-only` Jump to heading Require that remote dependencies are already cached. ### `--frozen` Jump to heading Error out if lockfile is out of date. ### `--import-map` Jump to heading Load import map file from local file or remote URL. ### `--lock` Jump to heading Check the specified lock file. (If value is not provided, defaults to "./deno.lock"). ### `--no-lock` Jump to heading Disable auto discovery of the lock file. ### `--no-npm` Jump to heading Do not resolve npm modules. ### `--no-remote` Jump to heading Do not resolve remote modules. ### `--node-modules-dir` Jump to heading Sets the node modules management mode for npm packages. ### `--reload` Jump to heading Short flag: `-r` Reload source code cache (recompile TypeScript) no value Reload everything jsr:@std/http/file-server,jsr:@std/assert/assert-equals Reloads specific modules npm: Reload all npm modules npm:chalk Reload specific npm module. ### `--vendor` Jump to heading Toggles local vendor folder usage for remote modules and a node\_modules folder for npm packages. ## Options Jump to heading ### `--allow-scripts` Jump to heading Allow running npm lifecycle scripts for the given packages Note: Scripts will only be executed when using a node\_modules directory (`--node-modules-dir`). ### `--cert` Jump to heading Load certificate authority from PEM encoded file. ### `--config` Jump to heading Short flag: `-c` Configure different aspects of deno including TypeScript, linting, and code formatting. Typically the configuration file will be called `deno.json` or `deno.jsonc` and automatically detected; in that case this flag is not necessary. ### `--env-file` Jump to heading Load environment variables from local file Only the first environment variable with a given key is used. Existing process environment variables are not overwritten, so if variables with the same names already exist in the environment, their values will be preserved. Where multiple declarations for the same environment variable exist in your .env file, the first one encountered is applied. This is determined by the order of the files you pass as arguments. ### `--ext` Jump to heading Set content type of the supplied file. ### `--location` Jump to heading Value of globalThis.location used by some web APIs. ### `--no-code-cache` Jump to heading Disable V8 code cache feature. ### `--no-config` Jump to heading Disable automatic loading of the configuration file. ### `--seed` Jump to heading Set the random number generator seed. ### `--v8-flags` Jump to heading To see a list of all available flags use `--v8-flags=--help` Flags can also be set via the DENO\_V8\_FLAGS environment variable. Any flags set with this flag are appended after the DENO\_V8\_FLAGS environment variable. ## Compile options Jump to heading ### `--icon` Jump to heading Set the icon of the executable on Windows (.ico). ### `--include` Jump to heading Includes an additional module or file/directory in the compiled executable. Use this flag if a dynamically imported module or a web worker main module fails to load in the executable or to embed a file or directory in the executable. This flag can be passed multiple times, to include multiple additional modules. ### `--no-terminal` Jump to heading Hide terminal on Windows. ### `--output` Jump to heading Short flag: `-o` Output file (defaults to $PWD/). ### `--target` Jump to heading Target OS architecture. ## Flags Jump to heading As with `deno install`, the runtime flags used to execute the script must be specified at compilation time. This includes permission flags. deno compile --allow-read --allow-net jsr:@std/http/file-server Script arguments can be partially embedded. deno compile --allow-read --allow-net jsr:@std/http/file-server -p 8080 ./file_server --help ## Cross Compilation Jump to heading You can cross-compile binaries for other platforms by using the `--target` flag. # Cross compile for Apple Silicon deno compile --target aarch64-apple-darwin main.ts # Cross compile for Windows with an icon deno compile --target x86_64-pc-windows-msvc --icon ./icon.ico main.ts ### Supported Targets Jump to heading Deno supports cross compiling to all targets regardless of the host platform. | OS | Architecture | Target | | --- | --- | --- | | Windows | x86\_64 | `x86_64-pc-windows-msvc` | | macOS | x86\_64 | `x86_64-apple-darwin` | | macOS | ARM64 | `aarch64-apple-darwin` | | Linux | x86\_64 | `x86_64-unknown-linux-gnu` | | Linux | ARM64 | `aarch64-unknown-linux-gnu` | ## Icons Jump to heading It is possible to add an icon to the executable by using the `--icon` flag when targeting Windows. The icon must be in the `.ico` format. deno compile --icon icon.ico main.ts # Cross compilation with icon deno compile --target x86_64-pc-windows-msvc --icon ./icon.ico main.ts ## Dynamic Imports Jump to heading By default, statically analyzable dynamic imports (imports that have the string literal within the `import("...")` call expression) will be included in the output. // calculator.ts and its dependencies will be included in the binary const calculator = await import("./calculator.ts"); But non-statically analyzable dynamic imports won't: const specifier = condition ? "./calc.ts" : "./better_calc.ts"; const calculator = await import(specifier); To include non-statically analyzable dynamic imports, specify an `--include <path>` flag. deno compile --include calc.ts --include better_calc.ts main.ts ## Including Data Files or Directories Jump to heading Starting in Deno 2.1, you can include files or directories in the executable by specifying them via the `--include <path>` flag. deno compile --include names.csv --include data main.ts Then read the file relative to the directory path of the current module via `import.meta.dirname`: // main.ts const names = Deno.readTextFileSync(import.meta.dirname + "/names.csv"); const dataFiles = Deno.readDirSync(import.meta.dirname + "/data"); // use names and dataFiles here Note this currently only works for files on the file system and not remote files. ## Workers Jump to heading Similarly to non-statically analyzable dynamic imports, code for workers is not included in the compiled executable by default. There are two ways to include workers: 1. Use the `--include <path>` flag to include the worker code. deno compile --include worker.ts main.ts 2. Import worker module using a statically analyzable import. // main.ts import "./worker.ts"; deno compile main.ts ## Code Signing Jump to heading ### macOS Jump to heading By default, on macOS, the compiled executable will be signed using an ad-hoc signature which is the equivalent of running `codesign -s -`: $ deno compile -o main main.ts $ codesign --verify -vv ./main ./main: valid on disk ./main: satisfies its Designated Requirement You can specify a signing identity when code signing the executable just like you would do with any other macOS executable: codesign -s "Developer ID Application: Your Name" ./main Refer to the official documentation for more information on codesigning and notarization on macOS. ### Windows Jump to heading On Windows, the compiled executable can be signed using the `SignTool.exe` utility. $ deno compile -o main.exe main.ts $ signtool sign /fd SHA256 main.exe ## Unavailable in executables Jump to heading * Web Storage API --- ## Page: https://docs.deno.com/runtime/reference/cli/completions/ * Runtime * Reference guides * CLI * deno completions On this page * Examples * Configure Bash shell completion * Configure PowerShell shell completion * Configure zsh shell completion * Configure fish shell completion ### Command line usage deno completions [OPTIONS] [shell] Output shell completion script to standard output. deno completions bash > /usr/local/etc/bash_completion.d/deno.bash source /usr/local/etc/bash_completion.d/deno.bash You can use the output script to configure autocompletion for `deno` commands. For example: `deno un` -> Tab -> `deno uninstall`. ## Examples Jump to heading ### Configure Bash shell completion Jump to heading deno completions bash > deno.bash sudo mv deno.bash /usr/local/etc/bash_completion.d/ source /usr/local/etc/bash_completion.d/deno.bash ### Configure PowerShell shell completion Jump to heading deno completions powershell | Out-String | Invoke-Expression ### Configure zsh shell completion Jump to heading First add the following to your `.zshrc` file: fpath=(~/.zsh/completion $fpath) autoload -U compinit compinit Then run the following commands: deno completions zsh > _deno mv _deno ~/.zsh/completion/_deno autoload -U compinit && compinit ### Configure fish shell completion Jump to heading deno completions fish > completions.fish chmod +x ./completions.fish ## Did you find what you needed? * Examples * Configure Bash shell completion * Configure PowerShell shell completion * Configure zsh shell completion * Configure fish shell completion --- ## Page: https://docs.deno.com/runtime/reference/cli/coverage/ ### Command line usage deno coverage [OPTIONS] [files]... Print coverage reports from coverage profiles. Collect a coverage profile with deno test: deno test --coverage=cov_profile Print a report to stdout: deno coverage cov_profile Include urls that start with the file schema and exclude files ending with `test.ts` and `test.js`, for an url to match it must match the include pattern and not match the exclude pattern: deno coverage --include="^file:" --exclude="test\.(ts|js)" cov_profile Write a report using the lcov format: deno coverage --lcov --output=cov.lcov cov_profile/ Generate html reports from lcov: genhtml -o html_cov cov.lcov ## Options Jump to heading ### `--detailed` Jump to heading Output coverage report in detailed format in the terminal. ### `--exclude` Jump to heading Exclude source files from the report. ### `--html` Jump to heading Output coverage report in HTML format in the given directory. ### `--ignore` Jump to heading Ignore coverage files. ### `--include` Jump to heading Include source files in the report. ### `--lcov` Jump to heading Output coverage report in lcov format. ### `--output` Jump to heading Exports the coverage report in lcov format to the given file. If no `--output` arg is specified then the report is written to stdout. ## Inclusions and Exclusions Jump to heading By default coverage includes any of your code that exists on the local file system, and it's imports. You can customize the inclusions and exclusions by using the `--include` and `--exclude` options. You can expand the coverage to include files that are not on the local file system by using the `--include` option and customizing the regex pattern. deno coverage --include="^file:|https:" The default inclusion pattern should be sufficient for most use cases, but you can customize it to be more specific about which files are included in your coverage report. Files that contain `test.js`, `test.ts`, `test.jsx`, or `test.tsx` in their name are excluded by default. This is equivalent to: deno coverage --exclude="test\.(js|mjs|ts|jsx|tsx)$" This default setting prevents your test code from contributing to your coverage report. For a URL to match it must match the include pattern and not match the exclude pattern. ## Ignoring Code Jump to heading Code can be ignored in generated coverage reports by adding coverage ignore comments. Branches and lines in ignored code will be excluded from the report. Ignored branches and lines do not count as covered lines. Instead, ignored lines of code are treated as empty lines. To ignore an entire file, add a `// deno-coverage-ignore-file` comment at the top of the file. // deno-coverage-ignore-file // all code in this file is ignored Ignored files will not appear in the coverage report. To ignore a single line, add a `// deno-coverage-ignore-next` comment on the line above the code you want to ignore. // deno-coverage-ignore-next console.log("this line is ignored"); To ignore multiple lines, add a `// deno-coverage-ignore-start` comment above the code you want to ignore and a `// deno-coverage-ignore-stop` comment below. // deno-coverage-ignore-start if (condition) { console.log("both the branch and lines are ignored"); } // deno-coverage-ignore-stop All code after a `// deno-coverage-ignore-start` comment is ignored until a `// deno-coverage-ignore-stop` is reached. However, if there are multiple consecutive start comments, each of these must be terminated by a corresponding stop comment. // deno-coverage-ignore-start if (condition) { // deno-coverage-ignore-start console.log("this line is ignored"); // deno-coverage-ignore-stop console.log("this line is also ignored"); } // deno-coverage-ignore-stop console.log("this line is not ignored"); Only white space may precede the coverage directive in a coverage comment. However, any text may trail the directive. // deno-coverage-ignore-next Trailing text is allowed. console.log("This line is ignored"); // But leading text isn't. deno-coverage-ignore-next console.log("This line is not ignored"); Coverage comments must start with `//`. Comments starting with `/*` are not valid coverage comments. // deno-coverage-ignore-next console.log("This line is ignored"); /* deno-coverage-ignore-next */ console.log("This line is not ignored"); ## Output Formats Jump to heading By default we support Deno's own coverage format - but you can also output coverage reports in the lcov format, or in html. deno coverage --lcov --output=cov.lcov This lcov file can be used with other tools that support the lcov format. deno coverage --html This will output a coverage report as a html file ## Examples Jump to heading Generate a coverage report from the default coverage profile in your workspace deno test --coverage deno coverage Generate a coverage report from a coverage profile with a custom name deno test --coverage=custom_profile_name deno coverage custom_profile_name Only include coverage that matches a specific pattern - in this case, only include tests from main.ts deno coverage --include="main.ts" Export test coverage from the default coverage profile to an lcov file deno test --coverage deno coverage --lcov --output=cov.lcov --- ## Page: https://docs.deno.com/runtime/reference/cli/doc/ ### Command line usage deno doc [OPTIONS] [source_file]... Show documentation for a module. Output documentation to standard output: deno doc ./path/to/module.ts Output documentation in HTML format: deno doc --html --name="My library" ./path/to/module.ts Lint a module for documentation diagnostics: deno doc --lint ./path/to/module.ts Target a specific symbol: deno doc ./path/to/module.ts MyClass.someField Show documentation for runtime built-ins: deno doc deno doc --filter Deno.Listener ## Dependency management options Jump to heading ### `--import-map` Jump to heading Load import map file from local file or remote URL. ### `--lock` Jump to heading Check the specified lock file. (If value is not provided, defaults to "./deno.lock"). ### `--no-lock` Jump to heading Disable auto discovery of the lock file. ### `--no-npm` Jump to heading Do not resolve npm modules. ### `--no-remote` Jump to heading Do not resolve remote modules. ### `--reload` Jump to heading Short flag: `-r` Reload source code cache (recompile TypeScript) no value Reload everything jsr:@std/http/file-server,jsr:@std/assert/assert-equals Reloads specific modules npm: Reload all npm modules npm:chalk Reload specific npm module. ## Options Jump to heading ### `--allow-import` Jump to heading Short flag: `-I` Allow importing from remote hosts. Optionally specify allowed IP addresses and host names, with ports as necessary. Default value: deno.land:443,jsr.io:443,esm.sh:443,cdn.jsdelivr.net:443,raw.githubusercontent.com:443,user.githubusercontent.com:443. ## Documentation options Jump to heading ### `--category-docs` Jump to heading Path to a JSON file keyed by category and an optional value of a markdown doc. ### `--default-symbol-map` Jump to heading Uses the provided mapping of default name to wanted name for usage blocks. ### `--filter` Jump to heading Dot separated path to symbol. ### `--html` Jump to heading Output documentation in HTML format. ### `--json` Jump to heading Output documentation in JSON format. ### `--lint` Jump to heading Output documentation diagnostics. ### `--name` Jump to heading The name that will be used in the docs (ie for breadcrumbs). ### `--output` Jump to heading Directory for HTML documentation output. ### `--private` Jump to heading Output private documentation. ### `--strip-trailing-html` Jump to heading Remove trailing .html from various links. Will still generate files with a .html extension. ### `--symbol-redirect-map` Jump to heading Path to a JSON file keyed by file, with an inner map of symbol to an external link. ## Examples Jump to heading `deno doc` followed by a list of one or more source files will print the JSDoc documentation for each of the module's **exported** members. For example, given a file `add.ts` with the contents: /** * Adds x and y. * @param {number} x * @param {number} y * @returns {number} Sum of x and y */ export function add(x: number, y: number): number { return x + y; } Running the Deno `doc` command, prints the function's JSDoc comment to `stdout`: deno doc add.ts function add(x: number, y: number): number Adds x and y. @param {number} x @param {number} y @returns {number} Sum of x and y ## Linting Jump to heading You can use `--lint` flag to check for problems in your documentation while it's being generated. `deno doc` will point out three kinds of problems: 1. Error for an exported type from the root module referencing a non-exported type. * Ensures API consumers have access to all the types the API uses. This can be suppressed by exporting the type from a root module (one of the files specified to `deno doc` on the command line) or by marking the type with an `@internal` jsdoc tag. 2. Error for missing return type or property type on a **public** type. * Ensures `deno doc` displays the return/property type and helps improve type checking performance. 3. Error for missing JS doc comment on a **public** type. * Ensures the code is documented. Can be suppressed by adding a jsdoc comment, or via an `@ignore` jsdoc tag to exclude it from the documentation. Alternatively, add an `@internal` tag to keep it in the docs, but signify it's internal. For example: /mod.ts interface Person { name: string; // ... } export function getName(person: Person) { return person.name; } $ deno doc --lint mod.ts Type 'getName' references type 'Person' which is not exported from a root module. Missing JS documentation comment. Missing return type. at file:///mod.ts:6:1 These lints are meant to help you write better documentation and speed up type-checking in your projects. If any problems are found, the program exits with non-zero exit code and the output is reported to standard error. Deno implements a large set of JSDoc tags, but does not strictly adhere to the JSDoc standard, but rather align with sensible standards and features provided by widely used tools and ecosystems in the same feature-space, like TSDoc and TypeDoc. For any free-form text places, ie the main description of a JSDoc comment, the description of a parameter, etc. accept markdown. ### Supported Tags Jump to heading The following tags are supported, being a selection of tags used and specified by JSDoc, TSDoc and TypeDoc: * `constructor`/`class`: mark a function to be a constructor. * `ignore`: ignore a symbol to be included in the output. * internal: mark a symbol to be used only for internal. In the HTML generator, the symbol will not get a listed entry, however it will still be generated and can be reached if a non-internal symbol links to it. * `public`: treat a symbol as public API. Equivalent of TypeScript `public` keyword. * `private`: treat a symbol as private API. Equivalent of TypeScript `private` keyword. * `protected`: treat a property or method as protected API. Equivalent of TypeScript `protected` keyword. * `readonly`: mark a symbol to be readonly, meaning that it cannot be overwritten. * `experimental`: mark a symbol as experimental, meaning that the API might change or be removed, or behaviour is not well-defined. * `deprecated`: mark a symbol as deprecated, meaning that it is not supported anymore and might be removed in a future version. * `module`: this tag can be defined on a top-level JSDoc comment, which will treat that comment to be for the file instead of the subsequent symbol. A value can be specified, which will use the value as an identifier for the module (ie for default exports). * `category`/`group`: mark a symbol to be of a specific category/group. This is useful for grouping together various symbols together. * `see`: define an external reference related to the symbol. * `example`: define an example for the symbol. Unlike JSDoc, code examples need to be wrapped in triple backtick (markdown-style codeblocks), which aligns more with TSDoc than JSDoc. * `tags`: define additional custom labels for a symbol, via a comma separated list. * `since`: define since when the symbol has been available. * `callback`: define a callback. * `template`/`typeparam`/`typeParam`: define a callback. * `prop`/`property`: define a property on a symbol. * `typedef`: define a type. * `param`/`arg`/`argument`: define a parameter on a function. * `return`/`returns`: define the return type and/or comment of a function. * `throws`/`exception`: define what a function throws when called. * `enum`: define an object to be an enum. * `extends`/`augments`: define a type that a function extends on. * `this`: define what the `this` keyword refers to in a function. * `type`: define the type of a symbol. * `default`: define the default value for a variable, property or field. ### Inline Linking Jump to heading Inline links let you specify links to other parts of the page, other symbols, or modules. Besides just supporting markdown-style links, JSDoc style inline-links are also supported. For example, you can do`{@link https://docs.deno.com}`, which will be rendered as the following 'https://docs.deno.com'. `{@linkcode https://docs.deno.com}` can also be used, to make it in a monospace font, and will be rendered roughly like this: '`https://docs.deno.com`'. You can also specify a replacement label, via `{@link https://docs.deno.com | Deno Docs}`, which will use the text after `|` as the text to display instead of the link. The previous example would render as 'Deno Docs'. You can add inline links in your descriptions to other symbols via `{@link MySymbol}`. For module linking, the same applies, but you use the `{@link [myModule]}` syntax. You can also link to symbols in a different module via `{@link [myModule].mysymbol}`. ## HTML output Jump to heading Use the `--html` flag to generate a static site with documentation. $ deno doc --html --name="My library" ./mod.ts $ deno doc --html --name="My library" --output=./documentation/ ./mod.ts $ deno doc --html --name="My library" ./sub1/mod.ts ./sub2/mod.ts The generated documentation is a static site with multiple pages that can be deployed to any static site hosting service. A client-side search is included in the generated site, but is not available if user's browser has JavaScript disabled. ## JSON output Jump to heading Use the `--json` flag to output the documentation in JSON format. This JSON format is consumed by the deno doc website and is used to generate module documentation. --- ## Page: https://docs.deno.com/runtime/reference/cli/eval/ ### Command line usage deno eval [OPTIONS] [CODE_ARG]... Evaluate JavaScript from the command line. deno eval "console.log('hello world')" To evaluate as TypeScript: deno eval --ext=ts "const v: string = 'hello'; console.log(v)" This command has implicit access to all permissions. ## Type checking options Jump to heading ### `--check` Jump to heading Enable type-checking. This subcommand does not type-check by default If the value of "all" is supplied, remote modules will be included. Alternatively, the 'deno check' subcommand can be used. ### `--no-check` Jump to heading Skip type-checking. If the value of "remote" is supplied, diagnostic errors from remote modules will be ignored. ## Dependency management options Jump to heading ### `--cached-only` Jump to heading Require that remote dependencies are already cached. ### `--frozen` Jump to heading Error out if lockfile is out of date. ### `--import-map` Jump to heading Load import map file from local file or remote URL. ### `--lock` Jump to heading Check the specified lock file. (If value is not provided, defaults to "./deno.lock"). ### `--no-lock` Jump to heading Disable auto discovery of the lock file. ### `--no-npm` Jump to heading Do not resolve npm modules. ### `--no-remote` Jump to heading Do not resolve remote modules. ### `--node-modules-dir` Jump to heading Sets the node modules management mode for npm packages. ### `--reload` Jump to heading Short flag: `-r` Reload source code cache (recompile TypeScript) no value Reload everything jsr:@std/http/file-server,jsr:@std/assert/assert-equals Reloads specific modules npm: Reload all npm modules npm:chalk Reload specific npm module. ### `--vendor` Jump to heading Toggles local vendor folder usage for remote modules and a node\_modules folder for npm packages. ## Options Jump to heading ### `--allow-scripts` Jump to heading Allow running npm lifecycle scripts for the given packages Note: Scripts will only be executed when using a node\_modules directory (`--node-modules-dir`). ### `--cert` Jump to heading Load certificate authority from PEM encoded file. ### `--config` Jump to heading Short flag: `-c` Configure different aspects of deno including TypeScript, linting, and code formatting. Typically the configuration file will be called `deno.json` or `deno.jsonc` and automatically detected; in that case this flag is not necessary. ### `--env-file` Jump to heading Load environment variables from local file Only the first environment variable with a given key is used. Existing process environment variables are not overwritten, so if variables with the same names already exist in the environment, their values will be preserved. Where multiple declarations for the same environment variable exist in your .env file, the first one encountered is applied. This is determined by the order of the files you pass as arguments. ### `--ext` Jump to heading Set content type of the supplied file. ### `--location` Jump to heading Value of globalThis.location used by some web APIs. ### `--no-config` Jump to heading Disable automatic loading of the configuration file. ### `--print` Jump to heading Short flag: `-p` print result to stdout. ### `--seed` Jump to heading Set the random number generator seed. ### `--v8-flags` Jump to heading To see a list of all available flags use `--v8-flags=--help` Flags can also be set via the DENO\_V8\_FLAGS environment variable. Any flags set with this flag are appended after the DENO\_V8\_FLAGS environment variable. ## Debugging options Jump to heading ### `--inspect` Jump to heading Activate inspector on host:port \[default: 127.0.0.1:9229\] ### `--inspect-brk` Jump to heading Activate inspector on host:port, wait for debugger to connect and break at the start of user script. ### `--inspect-wait` Jump to heading Activate inspector on host:port and wait for debugger to connect before running user code. --- ## Page: https://docs.deno.com/runtime/reference/cli/fmt/ ### Command line usage deno fmt [OPTIONS] [files]... Auto-format various file types. deno fmt myfile1.ts myfile2.ts Supported file types are: JavaScript, TypeScript, Markdown, JSON(C) and Jupyter Notebooks Supported file types which are behind corresponding unstable flags (see formatting options): HTML, CSS, SCSS, SASS, LESS, YAML, Svelte, Vue, Astro and Angular Format stdin and write to stdout: cat file.ts | deno fmt - Check if the files are formatted: deno fmt --check Ignore formatting code by preceding it with an ignore comment: // deno-fmt-ignore Ignore formatting a file by adding an ignore comment at the top of the file: // deno-fmt-ignore-file ## Options Jump to heading ### `--config` Jump to heading Short flag: `-c` Configure different aspects of deno including TypeScript, linting, and code formatting. Typically the configuration file will be called `deno.json` or `deno.jsonc` and automatically detected; in that case this flag is not necessary. ### `--no-config` Jump to heading Disable automatic loading of the configuration file. ## Formatting options Jump to heading ### `--check` Jump to heading Check if the source files are formatted. ### `--ext` Jump to heading Set content type of the supplied file. ### `--ignore` Jump to heading Ignore formatting particular source files. ### `--indent-width` Jump to heading Define indentation width \[default: 2\] ### `--line-width` Jump to heading Define maximum line width \[default: 80\] ### `--no-semicolons` Jump to heading Don't use semicolons except where necessary \[default: false\] ### `--prose-wrap` Jump to heading Define how prose should be wrapped \[default: always\] ### `--single-quote` Jump to heading Use single quotes \[default: false\] ### `--unstable-component` Jump to heading Enable formatting Svelte, Vue, Astro and Angular files. ### `--unstable-sql` Jump to heading Enable formatting SQL files. ### `--use-tabs` Jump to heading Use tabs instead of spaces for indentation \[default: false\] ## File watching options Jump to heading ### `--no-clear-screen` Jump to heading Do not clear terminal screen when under watch mode. ### `--watch` Jump to heading Watch for file changes and restart process automatically. Only local files from entry point module graph are watched. ### `--watch-exclude` Jump to heading Exclude provided files/patterns from watch mode. ## Supported File Types Jump to heading Deno ships with a built-in code formatter that will auto-format the following files: | File Type | Extension | Notes | | --- | --- | --- | | JavaScript | `.js`, `.cjs`, `.mjs` | | | TypeScript | `.ts`, `.mts`, `.cts` | | | JSX | `.jsx` | | | TSX | `.tsx` | | | Markdown | `.md`, `.mkd`, `.mkdn`, `.mdwn`, `.mdown`, `.markdown` | | | JSON | `.json` | | | JSONC | `.jsonc` | | | CSS | `.css` | | | HTML | `.html` | | | Nunjucks | `.njk` | | | Vento | `.vto` | | | YAML | `.yml`, `.yaml` | | | Sass | `.sass` | | | SCSS | `.scss` | | | LESS | `.less` | | | Jupyter Notebook | `.ipynb` | | | Astro | `.astro` | Requires `--unstable-component` flag or `"unstable": ["fmt-component"]` config option. | | Svelte | `.svelte` | Requires `--unstable-component` flag or `"unstable": ["fmt-component"]` config option. | | Vue | `.vue` | Requires `--unstable-component` flag or `"unstable": ["fmt-component"]` config option. | | SQL | `.sql` | Requires `--unstable-sql` flag or `"unstable": ["fmt-sql"]` config option. | Note **`deno fmt` can format code snippets in Markdown files.** Snippets must be enclosed in triple backticks and have a language attribute. ## Ignoring Code Jump to heading ### JavaScript / TypeScript / JSONC Jump to heading Ignore formatting code by preceding it with a `// deno-fmt-ignore` comment: // deno-fmt-ignore export const identity = [ 1, 0, 0, 0, 1, 0, 0, 0, 1, ]; Or ignore an entire file by adding a `// deno-fmt-ignore-file` comment at the top of the file. ### Markdown / HTML / CSS Jump to heading Ignore formatting next item by preceding it with `<!--- deno-fmt-ignore -->` comment: <html> <body> <p> Hello there <!-- deno-fmt-ignore --> </p> </body> </html> To ignore a section of code, surround the code with `<!-- deno-fmt-ignore-start -->` and `<!-- deno-fmt-ignore-end -->` comments. Or ignore an entire file by adding a `<!-- deno-fmt-ignore-file -->` comment at the top of the file. ### YAML Jump to heading Ignore formatting next item by preceding it with `# deno-fmt-ignore` comment: # deno-fmt-ignore aaaaaa: bbbbbbb ## More about linting and formatting Jump to heading For more information about linting and formating in Deno, and the differences between these two utilities, visit the Linting and Formatting page in our Fundamentals section. --- ## Page: https://docs.deno.com/runtime/reference/cli/info/ ### Command line usage deno info [OPTIONS] [file] Show information about a module or the cache directories. Get information about a module: deno info jsr:@std/http/file-server The following information is shown: local: Local path of the file type: JavaScript, TypeScript, or JSON emit: Local path of compiled source code (TypeScript only) dependencies: Dependency tree of the source file ## Options Jump to heading ### `--allow-import` Jump to heading Short flag: `-I` Allow importing from remote hosts. Optionally specify allowed IP addresses and host names, with ports as necessary. Default value: deno.land:443,jsr.io:443,esm.sh:443,cdn.jsdelivr.net:443,raw.githubusercontent.com:443,user.githubusercontent.com:443. ### `--cert` Jump to heading Load certificate authority from PEM encoded file. ### `--config` Jump to heading Short flag: `-c` Configure different aspects of deno including TypeScript, linting, and code formatting. Typically the configuration file will be called `deno.json` or `deno.jsonc` and automatically detected; in that case this flag is not necessary. ### `--json` Jump to heading UNSTABLE: Outputs the information in JSON format. ### `--location` Jump to heading Show files used for origin bound APIs like the Web Storage API when running a script with `--location=<HREF>`. ### `--no-config` Jump to heading Disable automatic loading of the configuration file. ## Dependency management options Jump to heading ### `--import-map` Jump to heading Load import map file from local file or remote URL. ### `--lock` Jump to heading Check the specified lock file. (If value is not provided, defaults to "./deno.lock"). ### `--no-lock` Jump to heading Disable auto discovery of the lock file. ### `--no-npm` Jump to heading Do not resolve npm modules. ### `--no-remote` Jump to heading Do not resolve remote modules. ### `--node-modules-dir` Jump to heading Sets the node modules management mode for npm packages. ### `--reload` Jump to heading Short flag: `-r` Reload source code cache (recompile TypeScript) no value Reload everything jsr:@std/http/file-server,jsr:@std/assert/assert-equals Reloads specific modules npm: Reload all npm modules npm:chalk Reload specific npm module. ### `--vendor` Jump to heading Toggles local vendor folder usage for remote modules and a node\_modules folder for npm packages. ## Example Jump to heading $ deno info jsr:@std/http@1.0.0-rc.5/file-server local: /home/lucacasonato/.cache/deno/deps/https/jsr.io/3a0e5ef03d2090c75c81daf771ed9a73009518adfe688c333dc11d8006dc3598 emit: /home/lucacasonato/.cache/deno/gen/https/jsr.io/3a0e5ef03d2090c75c81daf771ed9a73009518adfe688c333dc11d8006dc3598.js type: TypeScript dependencies: 40 unique size: 326.42KB https://jsr.io/@std/http/1.0.0-rc.5/file_server.ts (24.74KB) ├─┬ https://jsr.io/@std/path/1.0.1/posix/join.ts (862B) │ ├── https://jsr.io/@std/path/1.0.1/_common/assert_path.ts (307B) │ └─┬ https://jsr.io/@std/path/1.0.1/posix/normalize.ts (1.31KB) │ ├─┬ https://jsr.io/@std/path/1.0.1/_common/normalize.ts (263B) │ │ └── https://jsr.io/@std/path/1.0.1/_common/assert_path.ts * │ ├─┬ https://jsr.io/@std/path/1.0.1/_common/normalize_string.ts (2.25KB) │ │ └── https://jsr.io/@std/path/1.0.1/_common/constants.ts (1.97KB) │ └─┬ https://jsr.io/@std/path/1.0.1/posix/_util.ts (391B) │ └── https://jsr.io/@std/path/1.0.1/_common/constants.ts * ├── https://jsr.io/@std/path/1.0.1/posix/normalize.ts * ├─┬ https://jsr.io/@std/path/1.0.1/extname.ts (906B) │ ├── https://jsr.io/@std/path/1.0.1/_os.ts (736B) │ ├─┬ https://jsr.io/@std/path/1.0.1/posix/extname.ts (2.28KB) │ │ ├── https://jsr.io/@std/path/1.0.1/_common/constants.ts * │ │ ├── https://jsr.io/@std/path/1.0.1/_common/assert_path.ts * │ │ └── https://jsr.io/@std/path/1.0.1/posix/_util.ts * │ └─┬ https://jsr.io/@std/path/1.0.1/windows/extname.ts (2.5KB) │ ├── https://jsr.io/@std/path/1.0.1/_common/constants.ts * │ ├── https://jsr.io/@std/path/1.0.1/_common/assert_path.ts * │ └─┬ https://jsr.io/@std/path/1.0.1/windows/_util.ts (828B) │ └── https://jsr.io/@std/path/1.0.1/_common/constants.ts * ├─┬ https://jsr.io/@std/path/1.0.1/join.ts (926B) │ ├── https://jsr.io/@std/path/1.0.1/_os.ts * │ ├── https://jsr.io/@std/path/1.0.1/posix/join.ts * │ └─┬ https://jsr.io/@std/path/1.0.1/windows/join.ts (2.41KB) │ ├── https://jsr.io/@std/path/1.0.1/_common/assert_path.ts * │ ├── https://jsr.io/@std/path/1.0.1/windows/_util.ts * │ └─┬ https://jsr.io/@std/path/1.0.1/windows/normalize.ts (3.84KB) │ ├── https://jsr.io/@std/path/1.0.1/_common/normalize.ts * │ ├── https://jsr.io/@std/path/1.0.1/_common/constants.ts * │ ├── https://jsr.io/@std/path/1.0.1/_common/normalize_string.ts * │ └── https://jsr.io/@std/path/1.0.1/windows/_util.ts * ├─┬ https://jsr.io/@std/path/1.0.1/relative.ts (1.08KB) │ ├── https://jsr.io/@std/path/1.0.1/_os.ts * │ ├─┬ https://jsr.io/@std/path/1.0.1/posix/relative.ts (3.25KB) │ │ ├── https://jsr.io/@std/path/1.0.1/posix/_util.ts * │ │ ├─┬ https://jsr.io/@std/path/1.0.1/posix/resolve.ts (1.84KB) │ │ │ ├── https://jsr.io/@std/path/1.0.1/_common/normalize_string.ts * │ │ │ ├── https://jsr.io/@std/path/1.0.1/_common/assert_path.ts * │ │ │ └── https://jsr.io/@std/path/1.0.1/posix/_util.ts * │ │ └─┬ https://jsr.io/@std/path/1.0.1/_common/relative.ts (287B) │ │ └── https://jsr.io/@std/path/1.0.1/_common/assert_path.ts * │ └─┬ https://jsr.io/@std/path/1.0.1/windows/relative.ts (4.24KB) │ ├── https://jsr.io/@std/path/1.0.1/_common/constants.ts * │ ├─┬ https://jsr.io/@std/path/1.0.1/windows/resolve.ts (5.02KB) │ │ ├── https://jsr.io/@std/path/1.0.1/_common/constants.ts * │ │ ├── https://jsr.io/@std/path/1.0.1/_common/normalize_string.ts * │ │ ├── https://jsr.io/@std/path/1.0.1/_common/assert_path.ts * │ │ └── https://jsr.io/@std/path/1.0.1/windows/_util.ts * │ └── https://jsr.io/@std/path/1.0.1/_common/relative.ts * ├─┬ https://jsr.io/@std/path/1.0.1/resolve.ts (1.02KB) │ ├── https://jsr.io/@std/path/1.0.1/_os.ts * │ ├── https://jsr.io/@std/path/1.0.1/posix/resolve.ts * │ └── https://jsr.io/@std/path/1.0.1/windows/resolve.ts * ├─┬ https://jsr.io/@std/path/1.0.1/constants.ts (705B) │ └── https://jsr.io/@std/path/1.0.1/_os.ts * ├─┬ https://jsr.io/@std/media-types/1.0.2/content_type.ts (3.09KB) │ ├─┬ https://jsr.io/@std/media-types/1.0.2/parse_media_type.ts (3.54KB) │ │ └── https://jsr.io/@std/media-types/1.0.2/_util.ts (3.18KB) │ ├─┬ https://jsr.io/@std/media-types/1.0.2/get_charset.ts (1.45KB) │ │ ├── https://jsr.io/@std/media-types/1.0.2/parse_media_type.ts * │ │ ├── https://jsr.io/@std/media-types/1.0.2/_util.ts * │ │ └─┬ https://jsr.io/@std/media-types/1.0.2/_db.ts (1.34KB) │ │ ├── https://jsr.io/@std/media-types/1.0.2/vendor/db.ts (190.69KB) │ │ └── https://jsr.io/@std/media-types/1.0.2/_util.ts * │ ├─┬ https://jsr.io/@std/media-types/1.0.2/format_media_type.ts (2.45KB) │ │ └── https://jsr.io/@std/media-types/1.0.2/_util.ts * │ ├── https://jsr.io/@std/media-types/1.0.2/_db.ts * │ └─┬ https://jsr.io/@std/media-types/1.0.2/type_by_extension.ts (1.15KB) │ └── https://jsr.io/@std/media-types/1.0.2/_db.ts * ├─┬ https://jsr.io/@std/http/1.0.0-rc.5/etag.ts (6.46KB) │ └─┬ https://jsr.io/@std/encoding/1.0.1/base64.ts (3.18KB) │ └── https://jsr.io/@std/encoding/1.0.1/_validate_binary_like.ts (798B) ├── https://jsr.io/@std/http/1.0.0-rc.5/status.ts (13.39KB) ├── https://jsr.io/@std/streams/1.0.0-rc.4/byte_slice_stream.ts (2.57KB) ├── https://jsr.io/@std/cli/1.0.0/parse_args.ts (21.94KB) ├── https://jsr.io/@std/http/1.0.0-rc.5/deno.json (415B) ├── https://jsr.io/@std/fmt/1.0.0-rc.1/bytes.ts (5.3KB) └── https://jsr.io/@std/net/1.0.0-rc.2/get_network_address.ts (1.68KB) Dependency inspector works with any local or remote ES modules. ## Cache location Jump to heading `deno info` can be used to display information about cache location: deno info DENO_DIR location: "/Users/deno/Library/Caches/deno" Remote modules cache: "/Users/deno/Library/Caches/deno/deps" TypeScript compiler cache: "/Users/deno/Library/Caches/deno/gen" --- ## Page: https://docs.deno.com/runtime/reference/cli/init/ ### Command line usage deno init [OPTIONS] [DIRECTORY OR PACKAGE]... scaffolds a basic Deno project with a script, test, and configuration file ## Options Jump to heading ### `--lib` Jump to heading Generate an example library project. ### `--npm` Jump to heading Generate a npm create-\* project. ### `--serve` Jump to heading Generate an example project for `deno serve`. ## Examples Jump to heading $ deno init ✅ Project initialized Run these commands to get started // Run the program deno run main.ts // Run the program and watch for file changes deno task dev // Run the tests deno test $ deno run main.ts Add 2 + 3 = 5 $ deno test Check file:///dev/main_test.ts running 1 test from main_test.ts addTest ... ok (6ms) ok | 1 passed | 0 failed (29ms) The `init` subcommand will create two files (`main.ts` and `main_test.ts`). These files provide a basic example of how to write a Deno program and how to write tests for it. The `main.ts` file exports a `add` function that adds two numbers together and the `main_test.ts` file contains a test for this function. You can also specify an argument to `deno init` to initialize a project in a specific directory: $ deno init my_deno_project ✅ Project initialized Run these commands to get started cd my_deno_project // Run the program deno run main.ts // Run the program and watch for file changes deno task dev // Run the tests deno test ## Init a JSR package Jump to heading By running `deno init --lib` Deno will bootstrap a project that is ready to be published on JSR. $ deno init --lib ✅ Project initialized Run these commands to get started # Run the tests deno test # Run the tests and watch for file changes deno task dev # Publish to JSR (dry run) deno publish --dry-run Inside `deno.json` you'll see that the entries for `name`, `exports` and `version` are prefilled. { "name": "my-lib", "version": "0.1.0", "exports": "./mod.ts", "tasks": { "dev": "deno test --watch mod.ts" }, "imports": { "@std/assert": "jsr:@std/assert@1" } } ## Initialize a web server Jump to heading Running `deno init --serve` bootstraps a web server that works with `deno serve`. $ deno init --serve ✅ Project initialized Run these commands to get started # Run the server deno serve -R main.ts # Run the server and watch for file changes deno task dev # Run the tests deno -R test Your `deno.json` file will look like this: { "tasks": { "dev": "deno serve --watch -R main.ts" }, "imports": { "@std/assert": "jsr:@std/assert@1", "@std/http": "jsr:@std/http@1" } } Now, you can start your web server, which watches for changes, by running `deno task dev`. $ deno task dev Task dev deno serve --watch -R main.ts Watcher Process started. deno serve: Listening on http://0.0.0.0:8000/ ## Generate a library project Jump to heading You can append a `--lib` flag to add extra parameters to your `deno.json`, such as "name", "version" and an "exports" fields. $ deno init my_deno_project --lib ✅ Project initialized The resulting \`deno.json will be as follows: { "name": "my_deno_project", "version": "0.1.0", "exports": "./mod.ts", "tasks": { "dev": "deno test --watch mod.ts" }, "license": "MIT", "imports": { "@std/assert": "jsr:@std/assert@1" } } --- ## Page: https://docs.deno.com/runtime/reference/cli/install/ ### Command line usage deno install [OPTIONS] [cmd]... Installs dependencies either in the local project or globally to a bin directory. ### Local installation Jump to heading Add dependencies to the local project's configuration (`deno.json / package.json`) and installs them in the package cache. If no dependency is specified, installs all dependencies listed in the config file. If the `--entrypoint` flag is passed, installs the dependencies of the specified entrypoint(s). deno install deno install jsr:@std/bytes deno install npm:chalk deno install --entrypoint entry1.ts entry2.ts ### Global installation Jump to heading If the `--global` flag is set, installs a script as an executable in the installation root's bin directory. deno install --global --allow-net --allow-read jsr:@std/http/file-server deno install -g https://examples.deno.land/color-logging.ts To change the executable name, use `-n`/`--name`: deno install -g --allow-net --allow-read -n serve jsr:@std/http/file-server The executable name is inferred by default: * Attempt to take the file stem of the URL path. The above example would become `file_server`. * If the file stem is something generic like `main`, `mod`, `index` or `cli`, and the path has no parent, take the file name of the parent path. Otherwise settle with the generic name. * If the resulting name has an `@...` suffix, strip it. To change the installation root, use `--root`: deno install -g --allow-net --allow-read --root /usr/local jsr:@std/http/file-server The installation root is determined, in order of precedence: * `--root` option * `DENO_INSTALL_ROOT` environment variable * `$HOME/.deno` These must be added to the path manually if required. ## Type checking options Jump to heading ### `--check` Jump to heading Set type-checking behavior. This subcommand type-checks local modules by default, so adding `--check` is redundant If the value of "all" is supplied, remote modules will be included. Alternatively, the 'deno check' subcommand can be used. ### `--no-check` Jump to heading Skip type-checking. If the value of "remote" is supplied, diagnostic errors from remote modules will be ignored. ## Dependency management options Jump to heading ### `--cached-only` Jump to heading Require that remote dependencies are already cached. ### `--frozen` Jump to heading Error out if lockfile is out of date. ### `--import-map` Jump to heading Load import map file from local file or remote URL. ### `--lock` Jump to heading Check the specified lock file. (If value is not provided, defaults to "./deno.lock"). ### `--no-lock` Jump to heading Disable auto discovery of the lock file. ### `--no-npm` Jump to heading Do not resolve npm modules. ### `--no-remote` Jump to heading Do not resolve remote modules. ### `--node-modules-dir` Jump to heading Sets the node modules management mode for npm packages. ### `--reload` Jump to heading Short flag: `-r` Reload source code cache (recompile TypeScript) no value Reload everything jsr:@std/http/file-server,jsr:@std/assert/assert-equals Reloads specific modules npm: Reload all npm modules npm:chalk Reload specific npm module. ### `--vendor` Jump to heading Toggles local vendor folder usage for remote modules and a node\_modules folder for npm packages. ## Options Jump to heading ### `--allow-scripts` Jump to heading Allow running npm lifecycle scripts for the given packages Note: Scripts will only be executed when using a node\_modules directory (`--node-modules-dir`). ### `--cert` Jump to heading Load certificate authority from PEM encoded file. ### `--config` Jump to heading Short flag: `-c` Configure different aspects of deno including TypeScript, linting, and code formatting. Typically the configuration file will be called `deno.json` or `deno.jsonc` and automatically detected; in that case this flag is not necessary. ### `--dev` Jump to heading Short flag: `-D` Add the package as a dev dependency. Note: This only applies when adding to a `package.json` file. ### `--entrypoint` Jump to heading Short flag: `-e` Install dependents of the specified entrypoint(s). ### `--env-file` Jump to heading Load environment variables from local file Only the first environment variable with a given key is used. Existing process environment variables are not overwritten, so if variables with the same names already exist in the environment, their values will be preserved. Where multiple declarations for the same environment variable exist in your .env file, the first one encountered is applied. This is determined by the order of the files you pass as arguments. ### `--force` Jump to heading Short flag: `-f` Forcefully overwrite existing installation. ### `--global` Jump to heading Short flag: `-g` Install a package or script as a globally available executable. ### `--location` Jump to heading Value of globalThis.location used by some web APIs. ### `--name` Jump to heading Short flag: `-n` Executable file name. ### `--no-config` Jump to heading Disable automatic loading of the configuration file. ### `--root` Jump to heading Installation root. ### `--seed` Jump to heading Set the random number generator seed. ### `--v8-flags` Jump to heading To see a list of all available flags use `--v8-flags=--help` Flags can also be set via the DENO\_V8\_FLAGS environment variable. Any flags set with this flag are appended after the DENO\_V8\_FLAGS environment variable. ## Debugging options Jump to heading ### `--inspect` Jump to heading Activate inspector on host:port \[default: 127.0.0.1:9229\] ### `--inspect-brk` Jump to heading Activate inspector on host:port, wait for debugger to connect and break at the start of user script. ### `--inspect-wait` Jump to heading Activate inspector on host:port and wait for debugger to connect before running user code. ## Examples Jump to heading ### deno install Jump to heading Use this command to install all dependencies defined in `deno.json` and/or `package.json`. The dependencies will be installed in the global cache, but if your project has a `package.json` file, a local `node_modules` directory will be set up as well. ### deno install \[PACKAGES\] Jump to heading Use this command to install particular packages and add them to `deno.json` or `package.json`. $ deno install jsr:@std/testing npm:express Tip You can also use `deno add` which is an alias to `deno install [PACKAGES]` If your project has a `package.json` file, the packages coming from npm will be added to `dependencies` in `package.json`. Otherwise all packages will be added to `deno.json`. ### deno install --entrypoint \[FILES\] Jump to heading Use this command to install all dependencies that are used in the provided files and their dependencies. This is particularly useful if you use `jsr:`, `npm:`, `http:` or `https:` specifiers in your code and want to cache all the dependencies before deploying your project. main.js import * as colors from "jsr:@std/fmt/colors"; import express from "npm:express"; $ deno install -e main.js Download jsr:@std/fmt Download npm:express Tip If you want to set up local `node_modules` directory, you can pass `--node-modules-dir=auto` flag. Some dependencies might not work correctly without a local `node_modules` directory. ### deno install --global \[PACKAGE\_OR\_URL\] Jump to heading Use this command to install provide package or script as a globally available binary on your system. This command creates a thin, executable shell script which invokes `deno` using the specified CLI flags and main module. It is placed in the installation root. Example: $ deno install --global --allow-net --allow-read jsr:@std/http/file-server Download jsr:@std/http/file-server... ✅ Successfully installed file-server. /Users/deno/.deno/bin/file-server To change the executable name, use `-n`/`--name`: deno install -g -N -R -n serve jsr:@std/http/file-server The executable name is inferred by default: * Attempt to take the file stem of the URL path. The above example would become 'file-server'. * If the file stem is something generic like 'main', 'mod', 'index' or 'cli', and the path has no parent, take the file name of the parent path. Otherwise settle with the generic name. * If the resulting name has an '@...' suffix, strip it. To change the installation root, use `--root`: deno install -g -N -R --root /usr/local/bin jsr:@std/http/file-server The installation root is determined, in order of precedence: * `--root` option * `DENO_INSTALL_ROOT` environment variable * `$HOME/.deno/bin` These must be added to the path manually if required. echo 'export PATH="$HOME/.deno/bin:$PATH"' >> ~/.bashrc You must specify permissions that will be used to run the script at installation time. deno install -g -N -R jsr:@std/http/file-server -- -p 8080 The above command creates an executable called `file_server` that runs with network and read permissions and binds to port 8080. For good practice, use the `import.meta.main` idiom to specify the entry point in an executable script. Example: // https://example.com/awesome/cli.ts async function myAwesomeCli(): Promise<void> { // -- snip -- } if (import.meta.main) { myAwesomeCli(); } When you create an executable script make sure to let users know by adding an example installation command to your repository: # Install using deno install $ deno install -n awesome_cli https://example.com/awesome/cli.ts ## Native Node.js addons Jump to heading A lot of popular packages npm packages like `npm:sqlite3` or `npm:duckdb` depend on "lifecycle scripts", eg. `preinstall` or `postinstall` scripts. Most often running these scripts is required for a package to work correctly. Unlike npm, Deno does not run these scripts by default as they pose a potential security vulnerability. You can still run these scripts by passing the `--allow-scripts=<packages>` flag when running `deno install`: deno install --allow-scripts=npm:sqlite3 _Install all dependencies and allow `npm:sqlite3` package to run its lifecycle scripts_. ## Uninstall Jump to heading You can uninstall dependencies or binary script with `deno uninstall` command: $ deno uninstall express Removed express $ deno uninstall -g file-server deleted /Users/deno/.deno/bin/file-server ✅ Successfully uninstalled file-server See `deno uninstall` page for more details. --- ## Page: https://docs.deno.com/runtime/reference/cli/jupyter/ Deno ships with a built-in Jupyter kernel that allows you to write JavaScript and TypeScript; use Web and Deno APIs and import `npm` packages straight in your interactive notebooks. `deno jupyter` always runs with `--allow-all` Currently all code executed in the Jupyter kernel runs with `--allow-all` flag. This is a temporary limitation and will be addressed in the future. ## Quickstart Jump to heading Run `deno jupyter --unstable` and follow the instructions. You can run `deno jupyter --unstable --install` to force installation of the kernel. Deno assumes that `jupyter` command is available in your `PATH`. After completing the installation process, the Deno kernel will be available in the notebook creation dialog in JupyterLab and the classic notebook: 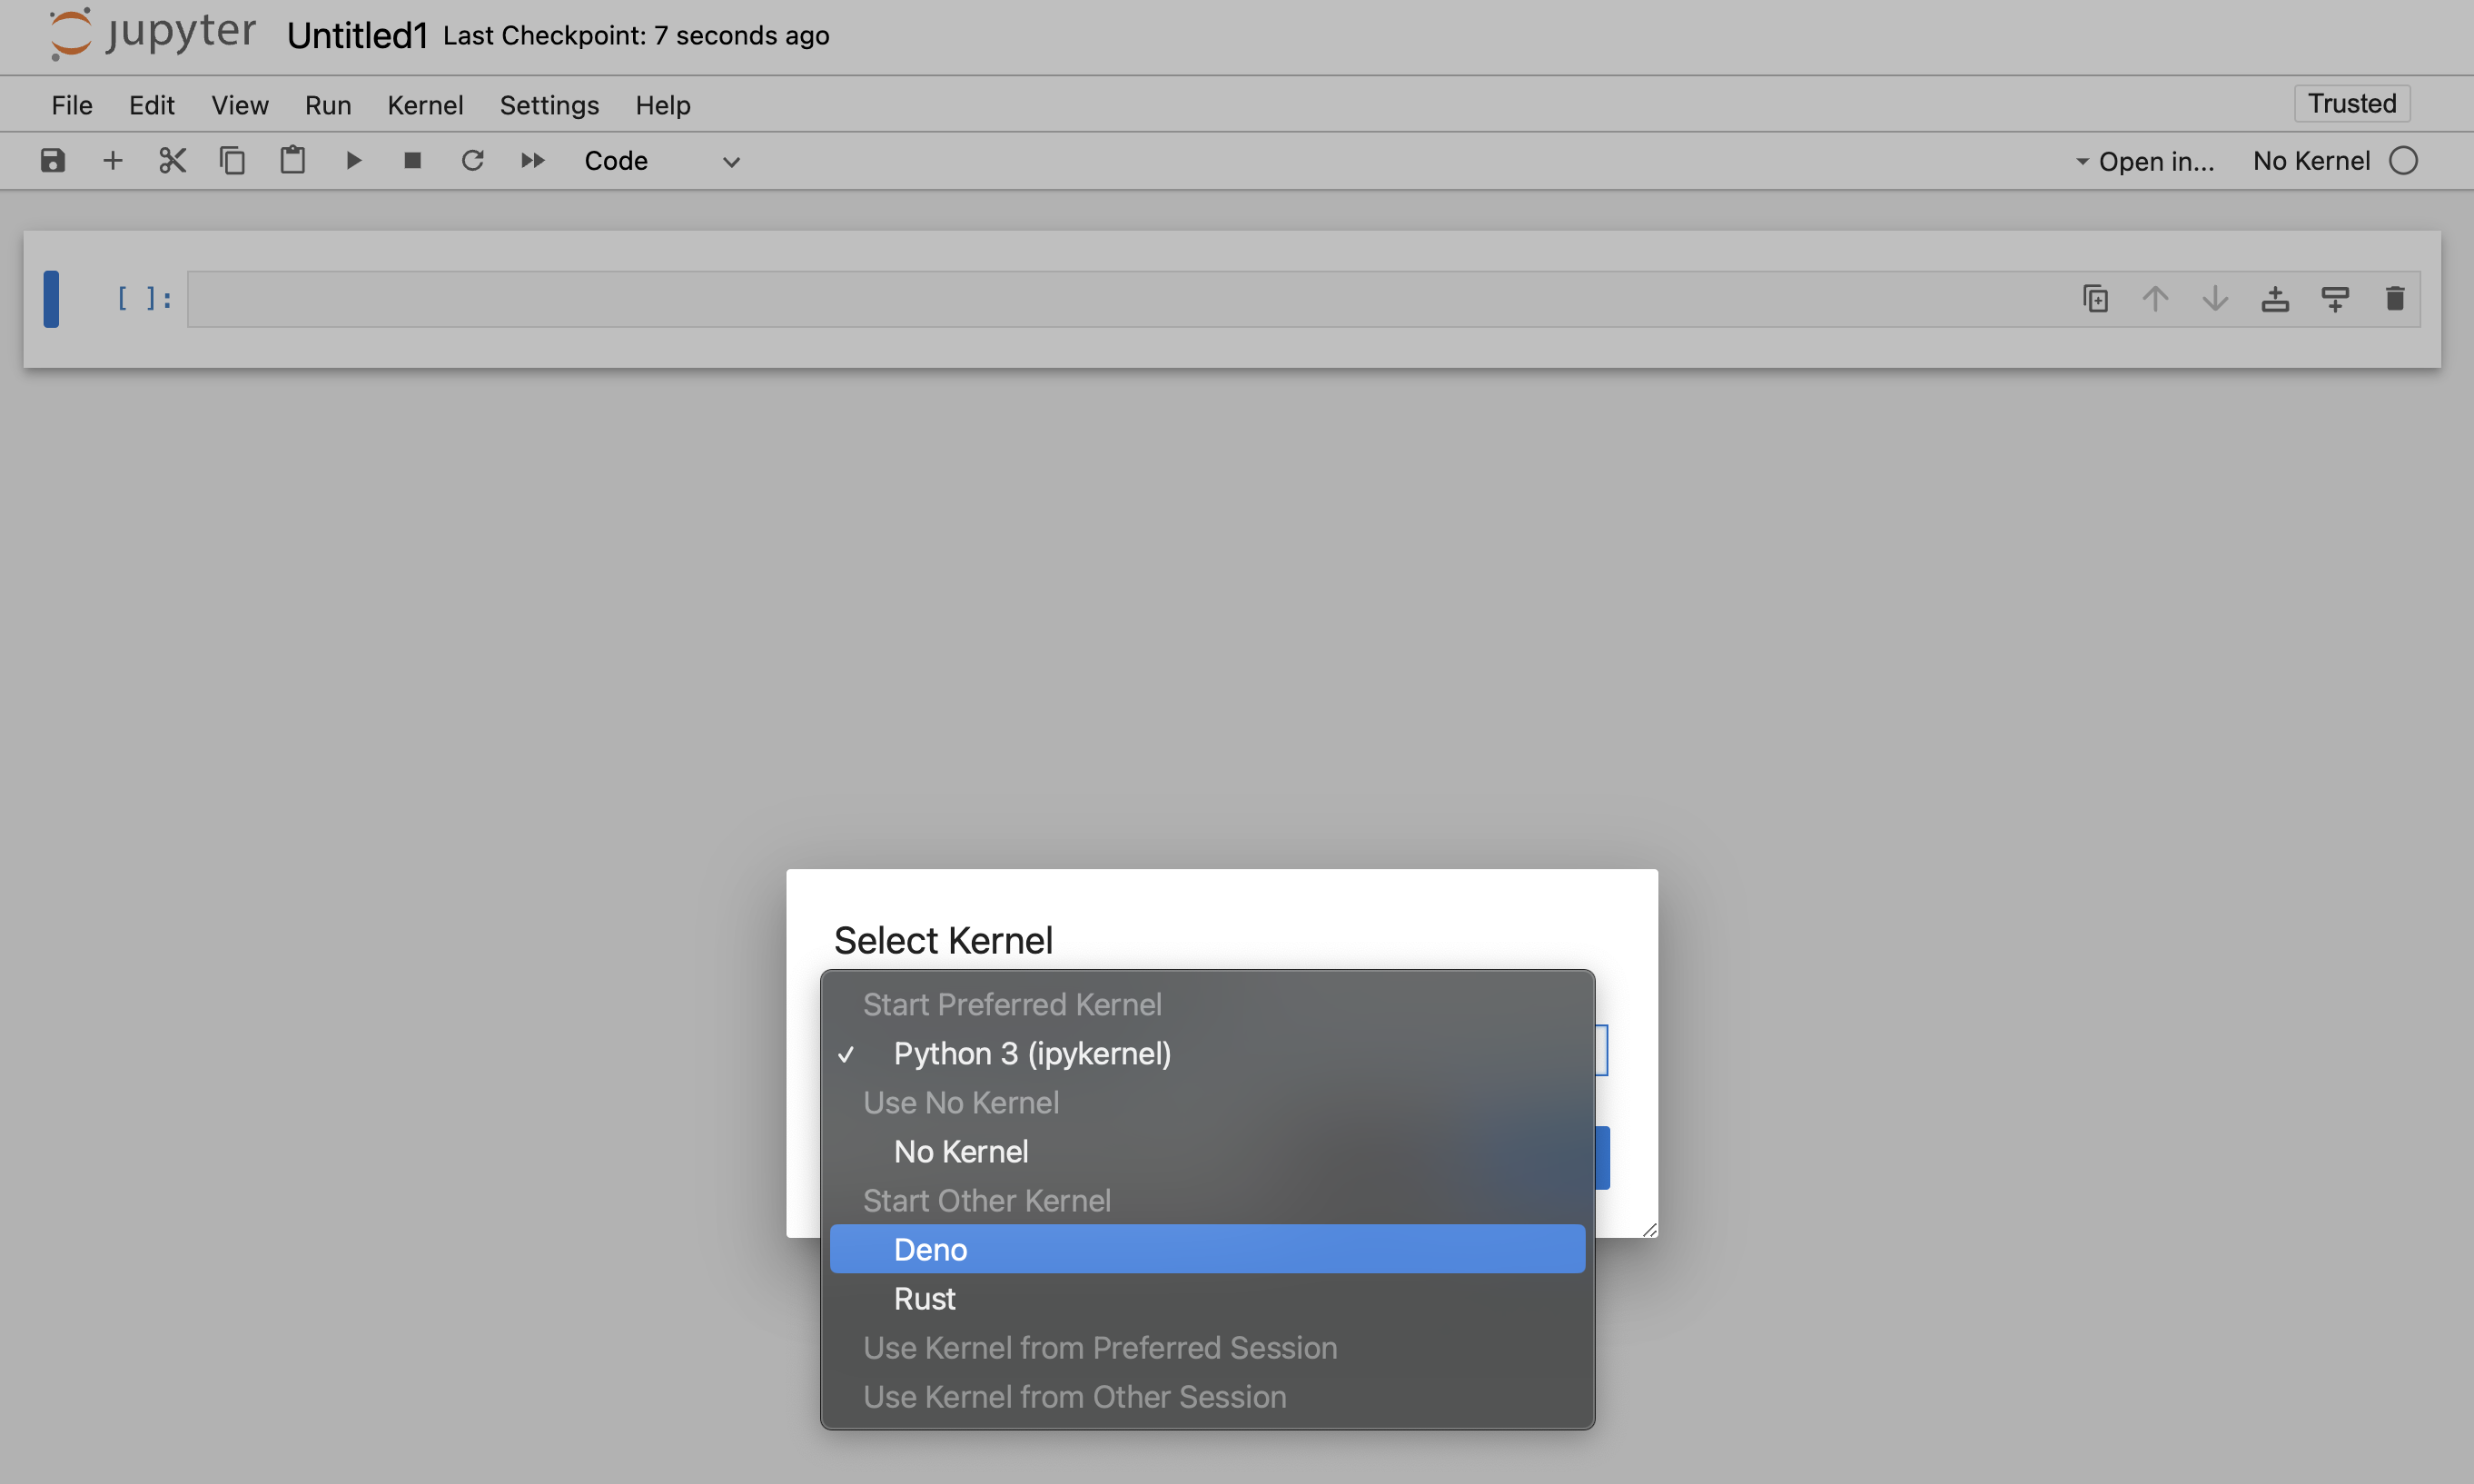 You can use the Deno Jupyter kernel in any editor that supports Jupyter notebooks. ### VS Code Jump to heading * Install the VSCode Jupyter extension * Open or create a notebook file by opening the Command Palette (Ctrl+Shift+P) and selecting "Create: New Jupyter Notebook". This can be done manually by creating a file with the ".ipynb" file extension. * When on a new or existing Notebook, click creating a new Jupyter Notebook select "Jupyter kernels" and then select Deno  ### JetBrains IDEs Jump to heading Jupyter Notebooks are available right out of the box. ## Rich content output Jump to heading `Deno.jupyter` namespaces provides helper function for displaying rich content in your notebooks using MIME types that Jupyter supports. * * * The easiest way to provide a rich output is to return an object that that has a `[Symbol.for("Jupyter.display")]` method. This method should return a dictionary mapping a MIME type to a value that should be displayed. { [Symbol.for("Jupyter.display")]() { return { // Plain text content "text/plain": "Hello world!", // HTML output "text/html": "<h1>Hello world!</h1>", } } } _Example of an object that returns plain text and HTML output._ Info You can also use `Deno.jupyter.$display` instead of typing `Symbol.for("Jupyter.display")` This is a regular function, so you you can use any library you want to format the output - eg. use `@std/fmt/colors` to provide a colorful output: import * as colors from "jsr:@std/fmt/colors"; { [Deno.jupyter.$display]() { return { "text/plain": colors.green("Hello world"), } } } You can also use `Deno.jupyter.display` function to directly display the MIME bundle: await Deno.jupyter.display({ "text/plain": "Hello, world!", "text/html": "<h1>Hello, world!</h1>", "text/markdown": "# Hello, world!", }, { raw: true });  Your notebook frontend will automatically select the "richest" MIME type to display based on its capabilities. * * * `Deno.jupyter` provides several helper methods for rich output of common media types. `Deno.jupyter.html` is a tagged template that will render the provided string as an HTML in the notebook. Deno.jupyter.html`<h1>Hello, world!</h1> <h2>From Deno kernel</h2> <p>Lorem ipsum <i>dolor</i> <b>sit</b> <u>amet</u></p>`; 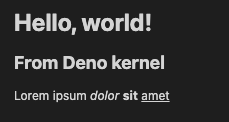 `Deno.jupyter.md` is a tagged template that will render provided string as a Markdown document in the notebook. Deno.jupyter .md`# Notebooks in TypeScript via Deno  **Interactive compute with Jupyter _built into Deno_!**`;  `Deno.jupyter.svg` is a tagged template that will render provided string as an SVG figure in the notebook. Deno.jupyter.svg`<svg xmlns="http://www.w3.org/2000/svg" viewBox="0 0 100 100"> <circle cx="50" cy="50" r="40" stroke="green" stroke-width="4" fill="yellow" /> </svg>`; 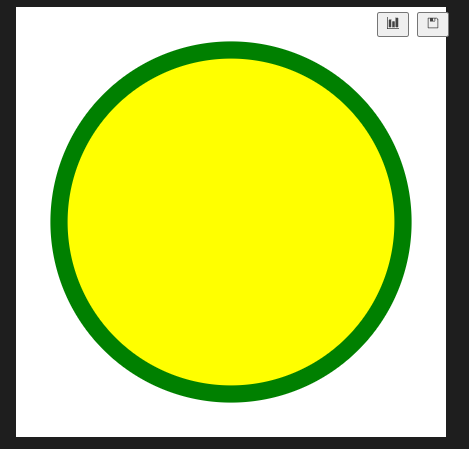 `Deno.jupyter.image` is function that will render a JPG or PNG image. You can pass a filepath, or already read bytes: Deno.jupyter.image("./cat.jpg"); const data = Deno.readFileSync("./dog.png"); Deno.jupyter.image(data); ## prompt and confirm APIs Jump to heading You can use `prompt` and `confirm` Web APIs to wait for user input in your notebook. confirm and prompt APIs example ## IO pub channel broadcasting Jump to heading `Deno.jupyter.broadcast` allows to publish messages to the IO pub channel allowing to provide live updates as the cell is evaluated. Consider this example that prints a message before we start a computation and another when the computation is finished: await Deno.jupyter.broadcast("display_data", { data: { "text/html": "<b>Processing...</b>" }, metadata: {}, transient: { display_id: "progress" }, }); // Pretend we're doing an expensive compute await new Promise((resolve) => setTimeout(resolve, 1500)); await Deno.jupyter.broadcast("update_display_data", { data: { "text/html": "<b>Done</b>" }, metadata: {}, transient: { display_id: "progress" }, }); Deno.jupyter.broadcast API example ## Examples Jump to heading Here's an example of using `@observablehq/plot` to generate a chart: import { document, penguins } from "jsr:@ry/jupyter-helper"; import * as Plot from "npm:@observablehq/plot"; let p = await penguins(); Plot.plot({ marks: [ Plot.dot(p.toRecords(), { x: "culmen_depth_mm", y: "culmen_length_mm", fill: "species", }), ], document, }); 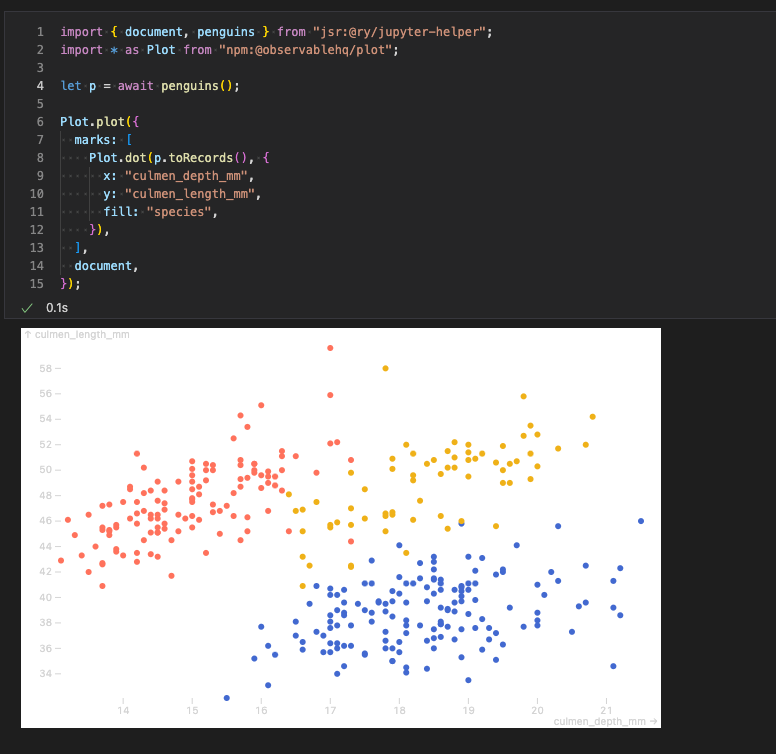 See https://github.com/rgbkrk/denotebooks for more advanced examples leveraging data analysis and visualisation libraries like Polars, Observable and d3. ## `jupyter console` integration Jump to heading You can also use Deno Jupyter kernel in the `jupyter console` REPL. To do that, you should launch your console with `jupyter console --kernel deno`.  --- ## Page: https://docs.deno.com/runtime/reference/cli/lint/ ### Command line usage deno lint [OPTIONS] [files]... Lint JavaScript/TypeScript source code. deno lint deno lint myfile1.ts myfile2.js Print result as JSON: deno lint --json Read from stdin: cat file.ts | deno lint - cat file.ts | deno lint --json - List available rules: deno lint --rules To ignore specific diagnostics, you can write an ignore comment on the preceding line with a rule name (or multiple): // deno-lint-ignore no-explicit-any // deno-lint-ignore require-await no-empty To ignore linting on an entire file, you can add an ignore comment at the top of the file: // deno-lint-ignore-file ## Linting options Jump to heading ### `--compact` Jump to heading Output lint result in compact format. ### `--fix` Jump to heading Fix any linting errors for rules that support it. ### `--ignore` Jump to heading Ignore linting particular source files. ### `--json` Jump to heading Output lint result in JSON format. ### `--rules` Jump to heading List available rules. ### `--rules-exclude` Jump to heading Exclude lint rules. ### `--rules-include` Jump to heading Include lint rules. ### `--rules-tags` Jump to heading Use set of rules with a tag. ## Options Jump to heading ### `--allow-import` Jump to heading Short flag: `-I` Allow importing from remote hosts. Optionally specify allowed IP addresses and host names, with ports as necessary. Default value: deno.land:443,jsr.io:443,esm.sh:443,cdn.jsdelivr.net:443,raw.githubusercontent.com:443,user.githubusercontent.com:443. ### `--config` Jump to heading Short flag: `-c` Configure different aspects of deno including TypeScript, linting, and code formatting. Typically the configuration file will be called `deno.json` or `deno.jsonc` and automatically detected; in that case this flag is not necessary. ### `--ext` Jump to heading Specify the file extension to lint when reading from stdin.For example, use `jsx` to lint JSX files or `tsx` for TSX files.This argument is necessary because stdin input does not automatically infer the file type.Example usage: `cat file.jsx | deno lint -` --ext=jsx`.` ### `--no-config` Jump to heading Disable automatic loading of the configuration file. ## File watching options Jump to heading ### `--no-clear-screen` Jump to heading Do not clear terminal screen when under watch mode. ### `--watch` Jump to heading Watch for file changes and restart process automatically. Only local files from entry point module graph are watched. ### `--watch-exclude` Jump to heading Exclude provided files/patterns from watch mode. ## Available rules Jump to heading For a complete list of supported rules, visit List of rules documentation page. ## Ignore directives Jump to heading ### File level Jump to heading To ignore a whole file use `// deno-lint-ignore-file` at the top of the file: // deno-lint-ignore-file function foo(): any { // ... } You can also specify the reason for ignoring the file: // deno-lint-ignore-file -- reason for ignoring function foo(): any { // ... } The ignore directive must be placed before the first statement or declaration: // Copyright 2018-2024 the Deno authors. All rights reserved. MIT license. /** * Some JS doc */ // deno-lint-ignore-file import { bar } from "./bar.js"; function foo(): any { // ... } You can also ignore certain diagnostics in the whole file: // deno-lint-ignore-file no-explicit-any no-empty function foo(): any { // ... } If there are multiple `// deno-lint-ignore-file` directives, all but the first one are ignored: // This is effective // deno-lint-ignore-file no-explicit-any no-empty // But this is NOT effective // deno-lint-ignore-file no-debugger function foo(): any { debugger; // not ignored! } ### Line level Jump to heading To ignore specific diagnostics use `// deno-lint-ignore <codes...>` on the preceding line of the offending line. // deno-lint-ignore no-explicit-any function foo(): any { // ... } // deno-lint-ignore no-explicit-any explicit-function-return-type function bar(a: any) { // ... } You must specify the names of the rules to be ignored. You can also specify the reason for ignoring the diagnostic: // deno-lint-ignore no-explicit-any -- reason for ignoring function foo(): any { // ... } ## Ignore `ban-unused-ignore` itself Jump to heading `deno lint` provides `ban-unused-ignore` rule, which will detect ignore directives that don't ever suppress certain diagnostics. This is useful when you want to discover ignore directives that are no longer necessary after refactoring the code. In a few cases, however, you might want to ignore `ban-unused-ignore` rule itself. One of the typical cases would be when working with auto-generated files; it makes sense to add file-level ignore directives for some rules, and there's almost no need for detecting unused directives via `ban-unused-ignore` in this case. You can use `// deno-lint-ignore-file ban-unused-ignore` as always if you want to suppress the rule for a whole file: // deno-lint-ignore-file ban-unused-ignore no-explicit-any // `no-explicit-any` isn't used but you'll get no diagnostics because of ignoring // `ban-unused-ignore` console.log(42); Do note that ignoring `ban-unused-ignore` itself only works via file-level ignore directives. This means that per line directives, like `// deno-lint-ignore ban-unused-ignore`, don't work at all. If you want to ignore `ban-unused-ignore` for some special reasons, make sure to add it as a file-level ignore directive. ## More about linting and formatting Jump to heading For more information about linting and formating in Deno, and the differences between these two utilities, visit the Linting and Formatting page in our Fundamentals section. --- ## Page: https://docs.deno.com/runtime/reference/cli/outdated/ ### Command line usage deno outdated [OPTIONS] [filters]... Find and update outdated dependencies. By default, outdated dependencies are only displayed. Display outdated dependencies: deno outdated deno outdated --compatible Update dependencies to latest semver compatible versions: deno outdated --update Update dependencies to latest versions, ignoring semver requirements: deno outdated --update --latest Filters can be used to select which packages to act on. Filters can include wildcards (\*) to match multiple packages. deno outdated --update --latest "@std/*" deno outdated --update --latest "react*" Note that filters act on their aliases configured in deno.json / package.json, not the actual package names: Given "foobar": "npm:react@17.0.0" in deno.json or package.json, the filter "foobar" would update npm:react to the latest version. deno outdated --update --latest foobar Filters can be combined, and negative filters can be used to exclude results: deno outdated --update --latest "@std/*" "!@std/fmt*" Specific version requirements to update to can be specified: deno outdated --update @std/fmt@^1.0.2 ## Dependency management options Jump to heading ### `--lock` Jump to heading Check the specified lock file. (If value is not provided, defaults to "./deno.lock"). ### `--no-lock` Jump to heading Disable auto discovery of the lock file. ## Options Jump to heading ### `--compatible` Jump to heading Only consider versions that satisfy semver requirements. ### `--interactive` Jump to heading Short flag: `-i` Interactively select which dependencies to update. ### `--latest` Jump to heading Consider the latest version, regardless of semver constraints. ### `--recursive` Jump to heading Short flag: `-r` include all workspace members. ### `--update` Jump to heading Short flag: `-u` Update dependency versions. ## Checking for outdated dependencies Jump to heading The `outdated` subcommand checks for new versions of NPM and JSR dependencies listed in `deno.json` or `package.json` files, and displays dependencies that could be updated. Workspaces are fully supported, including workspaces where some members use `package.json` and others use `deno.json`. For example, take a project with a `deno.json` file: { "imports": { "@std/fmt": "jsr:@std/fmt@^1.0.0", "@std/async": "jsr:@std/async@1.0.1", "chalk": "npm:chalk@4" } } and a lockfile that has `@std/fmt` at version `1.0.0`. $ deno outdated ┌────────────────┬─────────┬────────┬────────┐ │ Package │ Current │ Update │ Latest │ ├────────────────┼─────────┼────────┼────────┤ │ jsr:@std/fmt │ 1.0.0 │ 1.0.3 │ 1.0.3 │ ├────────────────┼─────────┼────────┼────────┤ │ jsr:@std/async │ 1.0.1 │ 1.0.1 │ 1.0.8 │ ├────────────────┼─────────┼────────┼────────┤ │ npm:chalk │ 4.1.2 │ 4.1.2 │ 5.3.0 │ └────────────────┴─────────┴────────┴────────┘ The `Update` column lists the newest semver-compatible version, while the `Latest` column lists the latest version. Notice that `jsr:@std/async` is listed, even though there is no semver-compatible version to update to. If you would prefer to only show packages that have new compatible versions you can pass the `--compatible` flag. $ deno outdated --compatible ┌────────────────┬─────────┬────────┬────────┐ │ Package │ Current │ Update │ Latest │ ├────────────────┼─────────┼────────┼────────┤ │ jsr:@std/fmt │ 1.0.0 │ 1.0.3 │ 1.0.3 │ └────────────────┴─────────┴────────┴────────┘ `jsr:@std/fmt` is still listed, since it could be compatibly updated to `1.0.3`, but `jsr:@std/async` is no longer shown. ## Updating dependencies Jump to heading The `outdated` subcommand can also update dependencies with the `--update` flag. By default, it will only update dependencies to semver-compatible versions (i.e. it won't update to a breaking version). $ deno outdated --update Updated 1 dependency: - jsr:@std/fmt 1.0.0 -> 1.0.3 To update to the latest versions (regardless of whether it's semver compatible), pass the `--latest` flag. $ deno outdated --update --latest Updated 3 dependencies: - jsr:@std/async 1.0.1 -> 1.0.8 - jsr:@std/fmt 1.0.0 -> 1.0.3 - npm:chalk 4.1.2 -> 5.3.0 ## Selecting packages Jump to heading The `outdated` subcommand also supports selecting which packages to operate on. This works with or without the \`--update flag. $ deno outdated --update --latest chalk Updated 1 dependency: - npm:chalk 4.1.2 -> 5.3.0 Multiple selectors can be passed, and wildcards (`*`) or exclusions (`!`) are also supported. For instance, to update all packages with the `@std` scope, except for `@std/fmt`: $ deno outdated --update --latest "@std/*" "!@std/fmt" Updated 1 dependency: - jsr:@std/async 1.0.1 -> 1.0.8 Note that if you use wildcards, you will probably need to surround the argument in quotes to prevent the shell from trying to expand them. ### Updating to specific versions Jump to heading In addition to selecting packages to update, the `--update` flag also supports selecting the new _version_ specifying the version after `@`. ❯ deno outdated --update chalk@5.2 @std/async@1.0.6 Updated 2 dependencies: - jsr:@std/async 1.0.1 -> 1.0.6 - npm:chalk 4.1.2 -> 5.2.0 ## Workspaces Jump to heading In a workspace setting, by default `outdated` will only operate on the _current_ workspace member. For instance, given a workspace: { "workspace": ["./member-a", "./member-b"] } Running deno outdated from the `./member-a` directory will only check for outdated dependencies listed in `./member-a/deno.json` or `./member-a/package.json`. To include all workspace members, pass the `--recursive` flag (the `-r` shorthand is also accepted) deno outdated --recursive deno outdated --update --latest -r --- ## Page: https://docs.deno.com/runtime/reference/cli/publish/ ### Command line usage deno publish [OPTIONS] Publish the current working directory's package or workspace to JSR ## Publishing options Jump to heading ### `--allow-dirty` Jump to heading Allow publishing if the repository has uncommitted changed. ### `--allow-slow-types` Jump to heading Allow publishing with slow types. ### `--dry-run` Jump to heading Prepare the package for publishing performing all checks and validations without uploading. ### `--no-provenance` Jump to heading Disable provenance attestation. Enabled by default on Github actions, publicly links the package to where it was built and published from. ### `--set-version` Jump to heading Set version for a package to be published. This flag can be used while publishing individual packages and cannot be used in a workspace. ### `--token` Jump to heading The API token to use when publishing. If unset, interactive authentication is be used. ## Options Jump to heading ### `--config` Jump to heading Short flag: `-c` Configure different aspects of deno including TypeScript, linting, and code formatting. Typically the configuration file will be called `deno.json` or `deno.jsonc` and automatically detected; in that case this flag is not necessary. ### `--no-config` Jump to heading Disable automatic loading of the configuration file. ## Type checking options Jump to heading ### `--check` Jump to heading Set type-checking behavior. This subcommand type-checks local modules by default, so adding `--check` is redundant If the value of "all" is supplied, remote modules will be included. Alternatively, the 'deno check' subcommand can be used. ### `--no-check` Jump to heading Skip type-checking. If the value of "remote" is supplied, diagnostic errors from remote modules will be ignored. ## Package Requirements Jump to heading Your package must have a `name` and `version` and an `exports` field in its `deno.json` or `jsr.json` file. * The `name` field must be unique and follow the `@<scope_name>/<package_name>` convention. * The `version` field must be a valid semver version. * The `exports` field must point to the main entry point of the package. Example: deno.json { "name": "@scope_name/package_name", "version": "1.0.0", "exports": "./main.ts" } Before you publish your package, you must create it in the registry by visiting JSR - Publish a package. ## Examples Jump to heading Publish your current workspace deno publish Publish your current workspace with a specific token, bypassing interactive authentication deno publish --token c00921b1-0d4f-4d18-b8c8-ac98227f9275 Publish and check for errors in remote modules deno publish --check=all Perform a dry run to simulate publishing. deno publish --dry-run Publish using settings from a specific configuration file deno publish --config custom-config.json --- ## Page: https://docs.deno.com/runtime/reference/cli/lsp/ * Runtime * Reference guides * CLI * deno lsp On this page * Description Info Usually humans do not use this subcommand directly. The 'deno lsp' can provide IDEs with go-to-definition support and automatic code formatting. Starts the Deno language server. The language server is used by editors to provide features like intellisense, code formatting, and more. Read more about integrating with the Deno LSP. ## Description Jump to heading The 'deno lsp' subcommand provides a way for code editors and IDEs to interact with Deno using the Language Server Protocol. Read more about how to connect editors and IDEs to `deno lsp`. ## Did you find what you needed? * Description --- ## Page: https://docs.deno.com/runtime/reference/cli/remove/ * Runtime * Reference guides * CLI * deno remove ### Command line usage deno remove [OPTIONS] [packages]... Remove dependencies from the configuration file. deno remove @std/path You can remove multiple dependencies at once: deno remove @std/path @std/assert ## Did you find what you needed? YesNo Edit this page Thank you! Feedback received. Any additional comments? (_optional_) Email address (_optional_) Privacy policy --- ## Page: https://docs.deno.com/runtime/reference/cli/repl/ ### Command line usage deno repl [OPTIONS] [-- [ARGS]...] Starts a read-eval-print-loop, which lets you interactively build up program state in the global context. It is especially useful for quick prototyping and checking snippets of code. TypeScript is supported, however it is not type-checked, only transpiled. ## Options Jump to heading ### `--cert` Jump to heading Load certificate authority from PEM encoded file. ### `--config` Jump to heading Short flag: `-c` Configure different aspects of deno including TypeScript, linting, and code formatting. Typically the configuration file will be called `deno.json` or `deno.jsonc` and automatically detected; in that case this flag is not necessary. ### `--env-file` Jump to heading Load environment variables from local file Only the first environment variable with a given key is used. Existing process environment variables are not overwritten, so if variables with the same names already exist in the environment, their values will be preserved. Where multiple declarations for the same environment variable exist in your .env file, the first one encountered is applied. This is determined by the order of the files you pass as arguments. ### `--eval` Jump to heading Evaluates the provided code when the REPL starts. ### `--eval-file` Jump to heading Evaluates the provided file(s) as scripts when the REPL starts. Accepts file paths and URLs. ### `--location` Jump to heading Value of globalThis.location used by some web APIs. ### `--no-config` Jump to heading Disable automatic loading of the configuration file. ### `--seed` Jump to heading Set the random number generator seed. ### `--v8-flags` Jump to heading To see a list of all available flags use `--v8-flags=--help` Flags can also be set via the DENO\_V8\_FLAGS environment variable. Any flags set with this flag are appended after the DENO\_V8\_FLAGS environment variable. ## Dependency management options Jump to heading ### `--cached-only` Jump to heading Require that remote dependencies are already cached. ### `--frozen` Jump to heading Error out if lockfile is out of date. ### `--import-map` Jump to heading Load import map file from local file or remote URL. ### `--lock` Jump to heading Check the specified lock file. (If value is not provided, defaults to "./deno.lock"). ### `--no-lock` Jump to heading Disable auto discovery of the lock file. ### `--no-npm` Jump to heading Do not resolve npm modules. ### `--no-remote` Jump to heading Do not resolve remote modules. ### `--node-modules-dir` Jump to heading Sets the node modules management mode for npm packages. ### `--reload` Jump to heading Short flag: `-r` Reload source code cache (recompile TypeScript) no value Reload everything jsr:@std/http/file-server,jsr:@std/assert/assert-equals Reloads specific modules npm: Reload all npm modules npm:chalk Reload specific npm module. ### `--vendor` Jump to heading Toggles local vendor folder usage for remote modules and a node\_modules folder for npm packages. ## Debugging options Jump to heading ### `--inspect` Jump to heading Activate inspector on host:port \[default: 127.0.0.1:9229\] ### `--inspect-brk` Jump to heading Activate inspector on host:port, wait for debugger to connect and break at the start of user script. ### `--inspect-wait` Jump to heading Activate inspector on host:port and wait for debugger to connect before running user code. ## Special variables Jump to heading The REPL provides a couple of special variables, that are always available: | Identifier | Description | | --- | --- | | \_ | Yields the last evaluated expression | | \_error | Yields the last thrown error | Deno 1.14.3 exit using ctrl+d or close() > "hello world!" "hello world!" > _ "hello world!" > const foo = "bar"; undefined > _ undefined ## Special functions Jump to heading The REPL provides several functions in the global scope: | Function | Description | | --- | --- | | clear() | Clears the entire terminal screen | | close() | Close the current REPL session | ## `--eval` flag Jump to heading `--eval` flag allows you to run some code in the runtime before you are dropped into the REPL. This is useful for importing some code you commonly use in the REPL, or modifying the runtime in some way: $ deno repl --allow-net --eval 'import { assert } from "jsr:@std/assert@1"' Deno 1.45.3 exit using ctrl+d, ctrl+c, or close() > assert(true) undefined > assert(false) Uncaught AssertionError at assert (https://jsr.io/@std/assert/1.0.0/assert.ts:21:11) at :1:22 ## `--eval-file` flag Jump to heading `--eval-file` flag allows you to run code from specified files before you are dropped into the REPL. Like the `--eval` flag, this is useful for importing code you commonly use in the REPL, or modifying the runtime in some way. Files can be specified as paths or URLs. URL files are cached and can be reloaded via the `--reload` flag. If `--eval` is also specified, then `--eval-file` files are run before the `--eval` code. $ deno repl --eval-file=https://docs.deno.com/examples/welcome.ts,https://docs.deno.com/examples/local.ts Download https://docs.deno.com/examples/welcome.ts Welcome to Deno! Download https://docs.deno.com/examples/local.ts Deno 1.45.3 exit using ctrl+d or close() > local // this variable is defined locally in local.ts, but not exported "This is a local variable inside of local.ts" ### Relative Import Path Resolution Jump to heading If `--eval-file` specifies a code file that contains relative imports, then the runtime will try to resolve the imports relative to the current working directory. It will not try to resolve them relative to the code file's location. This can cause "Module not found" errors when `--eval-file` is used with module files: $ deno repl --eval-file=https://jsr.io/@std/encoding/1.0.0/ascii85.ts error in --eval-file file https://jsr.io/@std/encoding/1.0.0/ascii85.ts. Uncaught TypeError: Module not found "file:///home/_validate_binary_like.ts". at async :2:13 Deno 1.45.3 exit using ctrl+d or close() > ## Tab completions Jump to heading Tab completions are crucial feature for quick navigation in REPL. After hitting `tab` key, Deno will now show a list of all possible completions. $ deno repl Deno 1.45.3 exit using ctrl+d or close() > Deno.read readTextFile readFile readDirSync readLinkSync readAll read readTextFileSync readFileSync readDir readLink readAllSync readSync ## Keyboard shortcuts Jump to heading | Keystroke | Action | | --- | --- | | Ctrl-A, Home | Move cursor to the beginning of line | | Ctrl-B, Left | Move cursor one character left | | Ctrl-C | Interrupt and cancel the current edit | | Ctrl-D | If line _is_ empty, signal end of line | | Ctrl-D, Del | If line is _not_ empty, delete character under cursor | | Ctrl-E, End | Move cursor to end of line | | Ctrl-F, Right | Move cursor one character right | | Ctrl-H, Backspace | Delete character before cursor | | Ctrl-I, Tab | Next completion | | Ctrl-J, Ctrl-M, Enter | Finish the line entry | | Ctrl-K | Delete from cursor to end of line | | Ctrl-L | Clear screen | | Ctrl-N, Down | Next match from history | | Ctrl-P, Up | Previous match from history | | Ctrl-R | Reverse Search history (Ctrl-S forward, Ctrl-G cancel) | | Ctrl-T | Transpose previous character with current character | | Ctrl-U | Delete from start of line to cursor | | Ctrl-V | Insert any special character without performing its associated action | | Ctrl-W | Delete word leading up to cursor (using white space as a word boundary) | | Ctrl-X Ctrl-U | Undo | | Ctrl-Y | Paste from Yank buffer | | Ctrl-Y | Paste from Yank buffer (Meta-Y to paste next yank instead) | | Ctrl-Z | Suspend (Unix only) | | Ctrl-\_ | Undo | | Meta-0, 1, ..., - | Specify the digit to the argument. `–` starts a negative argument. | | Meta < | Move to first entry in history | | Meta > | Move to last entry in history | | Meta-B, Alt-Left | Move cursor to previous word | | Meta-Backspace | Kill from the start of the current word, or, if between words, to the start of the previous word | | Meta-C | Capitalize the current word | | Meta-D | Delete forwards one word | | Meta-F, Alt-Right | Move cursor to next word | | Meta-L | Lower-case the next word | | Meta-T | Transpose words | | Meta-U | Upper-case the next word | | Meta-Y | See Ctrl-Y | | Ctrl-S | Insert a new line | ## `DENO_REPL_HISTORY` Jump to heading You can use `DENO_REPL_HISTORY` environmental variable to control where Deno stores the REPL history file. You can set it to an empty value, Deno will not store the history file. --- ## Page: https://docs.deno.com/runtime/reference/cli/run/ ### Command line usage deno run [OPTIONS] [SCRIPT_ARG]... Run a JavaScript or TypeScript program, or a task or script. By default all programs are run in sandbox without access to disk, network or ability to spawn subprocesses. deno run https://examples.deno.land/hello-world.ts Grant permission to read from disk and listen to network: deno run --allow-read --allow-net jsr:@std/http/file-server Grant permission to read allow-listed files from disk: deno run --allow-read=/etc jsr:@std/http/file-server Grant all permissions: deno run -A jsr:@std/http/file-server Specifying the filename '-' to read the file from stdin. curl https://examples.deno.land/hello-world.ts | deno run - ## Type checking options Jump to heading ### `--check` Jump to heading Enable type-checking. This subcommand does not type-check by default If the value of "all" is supplied, remote modules will be included. Alternatively, the 'deno check' subcommand can be used. ### `--no-check` Jump to heading Skip type-checking. If the value of "remote" is supplied, diagnostic errors from remote modules will be ignored. ## Dependency management options Jump to heading ### `--cached-only` Jump to heading Require that remote dependencies are already cached. ### `--frozen` Jump to heading Error out if lockfile is out of date. ### `--import-map` Jump to heading Load import map file from local file or remote URL. ### `--lock` Jump to heading Check the specified lock file. (If value is not provided, defaults to "./deno.lock"). ### `--no-lock` Jump to heading Disable auto discovery of the lock file. ### `--no-npm` Jump to heading Do not resolve npm modules. ### `--no-remote` Jump to heading Do not resolve remote modules. ### `--node-modules-dir` Jump to heading Sets the node modules management mode for npm packages. ### `--reload` Jump to heading Short flag: `-r` Reload source code cache (recompile TypeScript) no value Reload everything jsr:@std/http/file-server,jsr:@std/assert/assert-equals Reloads specific modules npm: Reload all npm modules npm:chalk Reload specific npm module. ### `--vendor` Jump to heading Toggles local vendor folder usage for remote modules and a node\_modules folder for npm packages. ## Options Jump to heading ### `--allow-scripts` Jump to heading Allow running npm lifecycle scripts for the given packages Note: Scripts will only be executed when using a node\_modules directory (`--node-modules-dir`). ### `--cert` Jump to heading Load certificate authority from PEM encoded file. ### `--config` Jump to heading Short flag: `-c` Configure different aspects of deno including TypeScript, linting, and code formatting. Typically the configuration file will be called `deno.json` or `deno.jsonc` and automatically detected; in that case this flag is not necessary. ### `--env-file` Jump to heading Load environment variables from local file Only the first environment variable with a given key is used. Existing process environment variables are not overwritten, so if variables with the same names already exist in the environment, their values will be preserved. Where multiple declarations for the same environment variable exist in your .env file, the first one encountered is applied. This is determined by the order of the files you pass as arguments. ### `--ext` Jump to heading Set content type of the supplied file. ### `--location` Jump to heading Value of globalThis.location used by some web APIs. ### `--no-code-cache` Jump to heading Disable V8 code cache feature. ### `--no-config` Jump to heading Disable automatic loading of the configuration file. ### `--seed` Jump to heading Set the random number generator seed. ### `--v8-flags` Jump to heading To see a list of all available flags use `--v8-flags=--help` Flags can also be set via the DENO\_V8\_FLAGS environment variable. Any flags set with this flag are appended after the DENO\_V8\_FLAGS environment variable. ## Debugging options Jump to heading ### `--inspect` Jump to heading Activate inspector on host:port \[default: 127.0.0.1:9229\] ### `--inspect-brk` Jump to heading Activate inspector on host:port, wait for debugger to connect and break at the start of user script. ### `--inspect-wait` Jump to heading Activate inspector on host:port and wait for debugger to connect before running user code. ## File watching options Jump to heading ### `--hmr` Jump to heading Watch for file changes and restart process automatically. Local files from entry point module graph are watched by default. Additional paths might be watched by passing them as arguments to this flag. ### `--no-clear-screen` Jump to heading Do not clear terminal screen when under watch mode. ### `--watch` Jump to heading Watch for file changes and restart process automatically. Local files from entry point module graph are watched by default. Additional paths might be watched by passing them as arguments to this flag. ### `--watch-exclude` Jump to heading Exclude provided files/patterns from watch mode. ## Usage Jump to heading To run this file use: deno run https://docs.deno.com/examples/scripts/hello_world.ts You can also run files locally. Ensure that you are in the correct directory and use: deno run hello-world.ts By default, Deno runs programs in a sandbox without access to disk, network or ability to spawn subprocesses. This is because the Deno runtime is secure by default. You can grant or deny required permissions using the `--allow-*` and `--deny-*` flags. ### Permissions examples Jump to heading Grant permission to read from disk and listen to network: deno run --allow-read --allow-net server.ts Grant permission to read allow-listed files from disk: deno run --allow-read=/etc server.ts Grant all permissions _this is not recommended and should only be used for testing_: deno run -A server.ts If your project requires multiple security flags you should consider using a `deno task` to execute them. ## Watch Jump to heading To watch for file changes and restart process automatically use the `--watch` flag. Deno's built in application watcher will restart your application as soon as files are changed. _Be sure to put the flag before the file name_ eg: deno run --allow-net --watch server.ts Deno's watcher will notify you of changes in the console, and will warn in the console if there are errors while you work. ## Running a package.json script Jump to heading `package.json` scripts can be executed with the `deno task` command. ## Running code from stdin Jump to heading You can pipe code from stdin and run it immediately with: curl https://docs.deno.com/examples/scripts/hello_world.ts | deno run - ## Terminate run Jump to heading To stop the run command use `ctrl + c`. --- ## Page: https://docs.deno.com/runtime/reference/cli/serve/ ### Command line usage deno serve [OPTIONS] [SCRIPT_ARG]... Run a server defined in a main module The serve command uses the default exports of the main module to determine which servers to start. Start a server defined in server.ts: deno serve server.ts Start a server defined in server.ts, watching for changes and running on port 5050: deno serve --watch --port 5050 server.ts ## Type checking options Jump to heading ### `--check` Jump to heading Enable type-checking. This subcommand does not type-check by default If the value of "all" is supplied, remote modules will be included. Alternatively, the 'deno check' subcommand can be used. ### `--no-check` Jump to heading Skip type-checking. If the value of "remote" is supplied, diagnostic errors from remote modules will be ignored. ## Dependency management options Jump to heading ### `--cached-only` Jump to heading Require that remote dependencies are already cached. ### `--frozen` Jump to heading Error out if lockfile is out of date. ### `--import-map` Jump to heading Load import map file from local file or remote URL. ### `--lock` Jump to heading Check the specified lock file. (If value is not provided, defaults to "./deno.lock"). ### `--no-lock` Jump to heading Disable auto discovery of the lock file. ### `--no-npm` Jump to heading Do not resolve npm modules. ### `--no-remote` Jump to heading Do not resolve remote modules. ### `--node-modules-dir` Jump to heading Sets the node modules management mode for npm packages. ### `--reload` Jump to heading Short flag: `-r` Reload source code cache (recompile TypeScript) no value Reload everything jsr:@std/http/file-server,jsr:@std/assert/assert-equals Reloads specific modules npm: Reload all npm modules npm:chalk Reload specific npm module. ### `--vendor` Jump to heading Toggles local vendor folder usage for remote modules and a node\_modules folder for npm packages. ## Options Jump to heading ### `--allow-scripts` Jump to heading Allow running npm lifecycle scripts for the given packages Note: Scripts will only be executed when using a node\_modules directory (`--node-modules-dir`). ### `--cert` Jump to heading Load certificate authority from PEM encoded file. ### `--config` Jump to heading Short flag: `-c` Configure different aspects of deno including TypeScript, linting, and code formatting. Typically the configuration file will be called `deno.json` or `deno.jsonc` and automatically detected; in that case this flag is not necessary. ### `--env-file` Jump to heading Load environment variables from local file Only the first environment variable with a given key is used. Existing process environment variables are not overwritten, so if variables with the same names already exist in the environment, their values will be preserved. Where multiple declarations for the same environment variable exist in your .env file, the first one encountered is applied. This is determined by the order of the files you pass as arguments. ### `--ext` Jump to heading Set content type of the supplied file. ### `--host` Jump to heading The TCP address to serve on, defaulting to 0.0.0.0 (all interfaces). ### `--location` Jump to heading Value of globalThis.location used by some web APIs. ### `--no-code-cache` Jump to heading Disable V8 code cache feature. ### `--no-config` Jump to heading Disable automatic loading of the configuration file. ### `--parallel` Jump to heading Run multiple server workers in parallel. Parallelism defaults to the number of available CPUs or the value of the DENO\_JOBS environment variable. ### `--port` Jump to heading The TCP port to serve on. Pass 0 to pick a random free port \[default: 8000\] ### `--seed` Jump to heading Set the random number generator seed. ### `--v8-flags` Jump to heading To see a list of all available flags use `--v8-flags=--help` Flags can also be set via the DENO\_V8\_FLAGS environment variable. Any flags set with this flag are appended after the DENO\_V8\_FLAGS environment variable. ## Debugging options Jump to heading ### `--inspect` Jump to heading Activate inspector on host:port \[default: 127.0.0.1:9229\] ### `--inspect-brk` Jump to heading Activate inspector on host:port, wait for debugger to connect and break at the start of user script. ### `--inspect-wait` Jump to heading Activate inspector on host:port and wait for debugger to connect before running user code. ## File watching options Jump to heading ### `--hmr` Jump to heading Watch for file changes and restart process automatically. Local files from entry point module graph are watched by default. Additional paths might be watched by passing them as arguments to this flag. ### `--no-clear-screen` Jump to heading Do not clear terminal screen when under watch mode. ### `--watch` Jump to heading Watch for file changes and restart process automatically. Local files from entry point module graph are watched by default. Additional paths might be watched by passing them as arguments to this flag. ### `--watch-exclude` Jump to heading Exclude provided files/patterns from watch mode. --- ## Page: https://docs.deno.com/runtime/reference/cli/task/ ## Description Jump to heading `deno task` provides a cross-platform way to define and execute custom commands specific to a codebase. To get started, define your commands in your codebase's Deno configuration file under a `"tasks"` key. For example: { "tasks": { "data": "deno task collect && deno task analyze", "collect": "deno run --allow-read=. --allow-write=. scripts/collect.js", "analyze": { "description": "Run analysis script", "command": "deno run --allow-read=. scripts/analyze.js" } } } ## Specifying the current working directory Jump to heading By default, `deno task` executes commands with the directory of the Deno configuration file (ex. _deno.json_) as the current working directory. This allows tasks to use relative paths and continue to work regardless of where in the directory tree you happen to execute the deno task from. In some scenarios, this may not be desired and this behavior can be overridden with the `INIT_CWD` environment variable. `INIT_CWD` will be set with the full path to the directory the task was run in, if not already set. This aligns with the same behavior as `npm run`. For example, the following task will change the current working directory of the task to be in the same directory the user ran the task from and then output the current working directory which is now that directory (remember, this works on Windows too because `deno task` is cross-platform). { "tasks": { "my_task": "cd $INIT_CWD && pwd" } } ## Getting directory `deno task` was run from Jump to heading Since tasks are run using the directory of the Deno configuration file as the current working directory, it may be useful to know the directory the `deno task` was executed from instead. This is possible by using the `INIT_CWD` environment variable in a task or script launched from `deno task` (works the same way as in `npm run`, but in a cross-platform way). For example, to provide this directory to a script in a task, do the following (note the directory is surrounded in double quotes to keep it as a single argument in case it contains spaces): { "tasks": { "start": "deno run main.ts \"$INIT_CWD\"" } } ## Wildcard matching of tasks Jump to heading The `deno task` command can run multiple tasks in parallel by passing a wildcard pattern. A wildcard pattern is specified with the `*` character. deno.json { "tasks": { "build-client": "deno run -RW client/build.ts", "build-server": "deno run -RW server/build.ts" } } Running `deno task "build-*"` will run both `build-client` and `build-server` tasks. Note **When using a wildcard** make sure to quote the task name (eg. `"build-*"`), otherwise your shell might try to expand the wildcard character, leading to surprising errors. ## Task dependencies Jump to heading You can specify dependencies for a task: deno.json { "tasks": { "build": "deno run -RW build.ts", "generate": "deno run -RW generate.ts", "serve": { "command": "deno run -RN server.ts", "dependencies": ["build", "generate"] } } } In the above example, running `deno task serve` will first execute `build` and `generate` tasks in parallel, and once both of them finish successfully the `serve` task will be executed: $ deno task serve Task build deno run -RW build.ts Task generate deno run -RW generate.ts Generating data... Starting the build... Build finished Data generated Task serve deno run -RN server.ts Listening on http://localhost:8000/ Dependency tasks are executed in parallel, with the default parallel limit being equal to number of cores on your machine. To change this limit, use the `DENO_JOBS` environmental variable. Dependencies are tracked and if multiple tasks depend on the same task, that task will only be run once: deno.json { // a // / \ // b c // \ / // d "tasks": { "a": { "command": "deno run a.js", "dependencies": ["b", "c"] }, "b": { "command": "deno run b.js", "dependencies": ["d"] }, "c": { "command": "deno run c.js", "dependencies": ["d"] }, "d": "deno run d.js" } } $ deno task a Task d deno run d.js Running d Task c deno run c.js Running c Task b deno run b.js Running b Task a deno run a.js Running a If a cycle between dependencies is discovered, an error will be returned: deno.json { "tasks": { "a": { "command": "deno run a.js", "dependencies": ["b"] }, "b": { "command": "deno run b.js", "dependencies": ["a"] } } } $ deno task a Task cycle detected: a -> b -> a You can also specify a task that has `dependencies` but no `command`. This is useful to logically group several tasks together: deno.json { "tasks": { "dev-client": "deno run --watch client/mod.ts", "dev-server": "deno run --watch sever/mod.ts", "dev": { "dependencies": ["dev-client", "dev-server"] } } } Running `deno task dev` will run both `dev-client` and `dev-server` in parallel. ## Node and npx binary support Jump to heading By default, `deno task` will execute commands with the `deno` binary. If you need to ensure that a command is run with the `npm` or `npx` binary, you can do so by invoking the `npm` or `npx` `run` command respectively. For example: { "tasks": { "test:node": "npm run test" } } ## Workspace support Jump to heading `deno task` can be used in workspaces, to run tasks from multiple member directories in parallel. To execute `dev` tasks from all workspace members use `--recursive` flag: deno.json { "workspace": [ "client", "server" ] } client/deno.json { "name": "@scope/client", "tasks": { "dev": "deno run -RN build.ts" } } server/deno.json { "name": "@scope/server", "tasks": { "dev": "deno run -RN server.ts" } } $ deno task --recursive dev Task dev deno run -RN build.ts Task dev deno run -RN server.ts Bundling project... Listening on http://localhost:8000/ Project bundled Tasks to run can be filtered based on the workspace members: $ deno task --filter "client" dev Task dev deno run -RN build.ts Bundling project... Project bundled Note that the filter matches against the workspace member names as specified in the `name` field of each member's `deno.json` file. ## Syntax Jump to heading `deno task` uses a cross-platform shell that's a subset of sh/bash to execute defined tasks. ### Boolean lists Jump to heading Boolean lists provide a way to execute additional commands based on the exit code of the initial command. They separate commands using the `&&` and `||` operators. The `&&` operator provides a way to execute a command and if it _succeeds_ (has an exit code of `0`) it will execute the next command: deno run --allow-read=. --allow-write=. collect.ts && deno run --allow-read=. analyze.ts The `||` operator is the opposite. It provides a way to execute a command and only if it _fails_ (has a non-zero exit code) it will execute the next command: deno run --allow-read=. --allow-write=. collect.ts || deno run play_sad_music.ts ### Sequential lists Jump to heading Sequential lists are similar to boolean lists, but execute regardless of whether the previous command in the list passed or failed. Commands are separated with a semi-colon (`;`). deno run output_data.ts ; deno run --allow-net server.ts ### Async commands Jump to heading Async commands provide a way to make a command execute asynchronously. This can be useful when starting multiple processes. To make a command asynchronous, add an `&` to the end of it. For example the following would execute `sleep 1 && deno run --allow-net server.ts` and `deno run --allow-net client.ts` at the same time: sleep 1 && deno run --allow-net server.ts & deno run --allow-net client.ts Unlike in most shells, the first async command to fail will cause all the other commands to fail immediately. In the example above, this would mean that if the server command fails then the client command will also fail and exit. You can opt out of this behavior by adding `|| true` to the end of a command, which will force a `0` exit code. For example: deno run --allow-net server.ts || true & deno run --allow-net client.ts || true ### Environment variables Jump to heading Environment variables are defined like the following: export VAR_NAME=value Here's an example of using one in a task with shell variable substitution and then with it being exported as part of the environment of the spawned Deno process (note that in the JSON configuration file the double quotes would need to be escaped with backslashes): export VAR=hello && echo $VAR && deno eval "console.log('Deno: ' + Deno.env.get('VAR'))" Would output: hello Deno: hello #### Setting environment variables for a command Jump to heading To specify environment variable(s) before a command, list them like so: VAR=hello VAR2=bye deno run main.ts This will use those environment variables specifically for the following command. ### Shell variables Jump to heading Shell variables are similar to environment variables, but won't be exported to spawned commands. They are defined with the following syntax: VAR_NAME=value If we use a shell variable instead of an environment variable in a similar example to what's shown in the previous "Environment variables" section: VAR=hello && echo $VAR && deno eval "console.log('Deno: ' + Deno.env.get('VAR'))" We will get the following output: hello Deno: undefined Shell variables can be useful when we want to re-use a value, but don't want it available in any spawned processes. ### Exit status variable Jump to heading The exit code of the previously run command is available in the `$?` variable. # outputs 10 deno eval 'Deno.exit(10)' || echo $? ### Pipelines Jump to heading Pipelines provide a way to pipe the output of one command to another. The following command pipes the stdout output "Hello" to the stdin of the spawned Deno process: echo Hello | deno run main.ts To pipe stdout and stderr, use `|&` instead: deno eval 'console.log(1); console.error(2);' |& deno run main.ts ### Command substitution Jump to heading The `$(command)` syntax provides a way to use the output of a command in other commands that get executed. For example, to provide the output of getting the latest git revision to another command you could do the following: deno run main.ts $(git rev-parse HEAD) Another example using a shell variable: REV=$(git rev-parse HEAD) && deno run main.ts $REV && echo $REV ### Negate exit code Jump to heading To negate the exit code, add an exclamation point and space before a command: # change the exit code from 1 to 0 ! deno eval 'Deno.exit(1);' ### Redirects Jump to heading Redirects provide a way to pipe stdout and/or stderr to a file. For example, the following redirects _stdout_ of `deno run main.ts` to a file called `file.txt` on the file system: deno run main.ts > file.txt To instead redirect _stderr_, use `2>`: deno run main.ts 2> file.txt To redirect both stdout _and_ stderr, use `&>`: deno run main.ts &> file.txt To append to a file, instead of overwriting an existing one, use two right angle brackets instead of one: deno run main.ts >> file.txt Suppressing either stdout, stderr, or both of a command is possible by redirecting to `/dev/null`. This works in a cross-platform way including on Windows. # suppress stdout deno run main.ts > /dev/null # suppress stderr deno run main.ts 2> /dev/null # suppress both stdout and stderr deno run main.ts &> /dev/null Or redirecting stdout to stderr and vice-versa: # redirect stdout to stderr deno run main.ts >&2 # redirect stderr to stdout deno run main.ts 2>&1 Input redirects are also supported: # redirect file.txt to the stdin of gzip gzip < file.txt Note that redirecting multiple redirects is currently not supported. ### Cross-platform shebang Jump to heading Starting in Deno 1.42, `deno task` will execute scripts that start with `#!/usr/bin/env -S` the same way on all platforms. For example: script.ts #!/usr/bin/env -S deno run console.log("Hello there!"); deno.json { "tasks": { "hi": "./script.ts" } } Then on a Windows machine: > pwd C:\Users\david\dev\my_project > deno task hi Hello there! ### Glob expansion Jump to heading Glob expansion is supported in Deno 1.34 and above. This allows for specifying globs to match files in a cross-platform way. # match .ts files in the current and descendant directories echo **/*.ts # match .ts files in the current directory echo *.ts # match files that start with "data", have a single number, then end with .csv echo data[0-9].csv The supported glob characters are `*`, `?`, and `[`/`]`. ## Built-in commands Jump to heading `deno task` ships with several built-in commands that work the same out of the box on Windows, Mac, and Linux. * `cp` - Copies files. * `mv` - Moves files. * `rm` - Remove files or directories. * Ex: `rm -rf [FILE]...` - Commonly used to recursively delete files or directories. * `mkdir` - Makes directories. * Ex. `mkdir -p DIRECTORY...` - Commonly used to make a directory and all its parents with no error if it exists. * `pwd` - Prints the name of the current/working directory. * `sleep` - Delays for a specified amount of time. * Ex. `sleep 1` to sleep for 1 second, `sleep 0.5` to sleep for half a second, or `sleep 1m` to sleep a minute * `echo` - Displays a line of text. * `cat` - Concatenates files and outputs them on stdout. When no arguments are provided it reads and outputs stdin. * `exit` - Causes the shell to exit. * `head` - Output the first part of a file. * `unset` - Unsets environment variables. * `xargs` - Builds arguments from stdin and executes a command. If you find a useful flag missing on a command or have any suggestions for additional commands that should be supported out of the box, then please open an issue on the deno\_task\_shell repo. Note that if you wish to execute any of these commands in a non-cross-platform way on Mac or Linux, then you may do so by running it through `sh`: `sh -c <command>` (ex. `sh -c cp source destination`). ## package.json support Jump to heading `deno task` falls back to reading from the `"scripts"` entries in a package.json file if it is discovered. Note that Deno does not respect or support any npm life cycle events like `preinstall` or `postinstall`—you must explicitly run the script entries you want to run (ex. `deno install --entrypoint main.ts && deno task postinstall`). --- ## Page: https://docs.deno.com/runtime/reference/cli/test/ ### Command line usage deno test [OPTIONS] [files]... [-- [SCRIPT_ARG]...] Run tests using Deno's built-in test runner. Evaluate the given modules, run all tests declared with `Deno.test()` and report results to standard output: deno test src/fetch_test.ts src/signal_test.ts Directory arguments are expanded to all contained files matching the glob `{*_,*.,}test.{js,mjs,ts,mts,jsx,tsx}` or `**/__tests__/**`: deno test src/ ## Type checking options Jump to heading ### `--check` Jump to heading Set type-checking behavior. This subcommand type-checks local modules by default, so adding `--check` is redundant If the value of "all" is supplied, remote modules will be included. Alternatively, the 'deno check' subcommand can be used. ### `--no-check` Jump to heading Skip type-checking. If the value of "remote" is supplied, diagnostic errors from remote modules will be ignored. ## Dependency management options Jump to heading ### `--cached-only` Jump to heading Require that remote dependencies are already cached. ### `--frozen` Jump to heading Error out if lockfile is out of date. ### `--import-map` Jump to heading Load import map file from local file or remote URL. ### `--lock` Jump to heading Check the specified lock file. (If value is not provided, defaults to "./deno.lock"). ### `--no-lock` Jump to heading Disable auto discovery of the lock file. ### `--no-npm` Jump to heading Do not resolve npm modules. ### `--no-remote` Jump to heading Do not resolve remote modules. ### `--node-modules-dir` Jump to heading Sets the node modules management mode for npm packages. ### `--reload` Jump to heading Short flag: `-r` Reload source code cache (recompile TypeScript) no value Reload everything jsr:@std/http/file-server,jsr:@std/assert/assert-equals Reloads specific modules npm: Reload all npm modules npm:chalk Reload specific npm module. ### `--vendor` Jump to heading Toggles local vendor folder usage for remote modules and a node\_modules folder for npm packages. ## Options Jump to heading ### `--allow-scripts` Jump to heading Allow running npm lifecycle scripts for the given packages Note: Scripts will only be executed when using a node\_modules directory (`--node-modules-dir`). ### `--cert` Jump to heading Load certificate authority from PEM encoded file. ### `--config` Jump to heading Short flag: `-c` Configure different aspects of deno including TypeScript, linting, and code formatting. Typically the configuration file will be called `deno.json` or `deno.jsonc` and automatically detected; in that case this flag is not necessary. ### `--env-file` Jump to heading Load environment variables from local file Only the first environment variable with a given key is used. Existing process environment variables are not overwritten, so if variables with the same names already exist in the environment, their values will be preserved. Where multiple declarations for the same environment variable exist in your .env file, the first one encountered is applied. This is determined by the order of the files you pass as arguments. ### `--ext` Jump to heading Set content type of the supplied file. ### `--hide-stacktraces` Jump to heading Hide stack traces for errors in failure test results. ### `--ignore` Jump to heading Ignore files. ### `--location` Jump to heading Value of globalThis.location used by some web APIs. ### `--no-config` Jump to heading Disable automatic loading of the configuration file. ### `--parallel` Jump to heading Run test modules in parallel. Parallelism defaults to the number of available CPUs or the value of the DENO\_JOBS environment variable. ### `--seed` Jump to heading Set the random number generator seed. ### `--v8-flags` Jump to heading To see a list of all available flags use `--v8-flags=--help` Flags can also be set via the DENO\_V8\_FLAGS environment variable. Any flags set with this flag are appended after the DENO\_V8\_FLAGS environment variable. ## Debugging options Jump to heading ### `--inspect` Jump to heading Activate inspector on host:port \[default: 127.0.0.1:9229\] ### `--inspect-brk` Jump to heading Activate inspector on host:port, wait for debugger to connect and break at the start of user script. ### `--inspect-wait` Jump to heading Activate inspector on host:port and wait for debugger to connect before running user code. ## Testing options Jump to heading ### `--clean` Jump to heading Empty the temporary coverage profile data directory before running tests. Note: running multiple `deno test` --clean\`\` calls in series or parallel for the same coverage directory may cause race conditions. ### `--coverage` Jump to heading Collect coverage profile data into DIR. If DIR is not specified, it uses 'coverage/'. ### `--doc` Jump to heading Evaluate code blocks in JSDoc and Markdown. ### `--fail-fast` Jump to heading Stop after N errors. Defaults to stopping after first failure. ### `--filter` Jump to heading Run tests with this string or regexp pattern in the test name. ### `--junit-path` Jump to heading Write a JUnit XML test report to PATH. Use '-' to write to stdout which is the default when PATH is not provided. ### `--no-run` Jump to heading Cache test modules, but don't run tests. ### `--permit-no-files` Jump to heading Don't return an error code if no test files were found. ### `--reporter` Jump to heading Select reporter to use. Default to 'pretty'. ### `--shuffle` Jump to heading Shuffle the order in which the tests are run. ### `--trace-leaks` Jump to heading Enable tracing of leaks. Useful when debugging leaking ops in test, but impacts test execution time. ## File watching options Jump to heading ### `--no-clear-screen` Jump to heading Do not clear terminal screen when under watch mode. ### `--watch` Jump to heading Watch for file changes and restart process automatically. Local files from entry point module graph are watched by default. Additional paths might be watched by passing them as arguments to this flag. ### `--watch-exclude` Jump to heading Exclude provided files/patterns from watch mode. --- ## Page: https://docs.deno.com/runtime/reference/cli/types/ * Runtime * Reference guides * CLI * deno types ### Command line usage deno types [OPTIONS] Print runtime TypeScript declarations. deno types > lib.deno.d.ts The declaration file could be saved and used for typing information. ## Did you find what you needed? --- ## Page: https://docs.deno.com/runtime/reference/cli/uninstall/ * Runtime * Reference guides * CLI * deno uninstall On this page * Options * deno uninstall \[PACKAGES\] * deno uninstall --global \[SCRIPT\_NAME\] ### Command line usage deno uninstall [OPTIONS] [name-or-package] [additional-packages]... Uninstalls a dependency or an executable script in the installation root's bin directory. deno uninstall @std/dotenv chalk deno uninstall --global file_server To change the installation root, use `--root` flag: deno uninstall --global --root /usr/local serve The installation root is determined, in order of precedence: * `--root` option * `DENO_INSTALL_ROOT` environment variable * `$HOME/.deno` ## Options Jump to heading ### `--global` Jump to heading Short flag: `-g` Remove globally installed package or module. ### `--root` Jump to heading Installation root. ## `deno uninstall [PACKAGES]` Jump to heading Remove dependencies specified in `deno.json` or `package.json`: $ deno add npm:express Add npm:express@5.0.0 $ cat deno.json { "imports": { "express": "npm:express@5.0.0" } } $ deno uninstall express Removed express $ cat deno.json { "imports": {} } Tip You can also use `deno remove` which is an alias to `deno uninstall [PACKAGES]` You can remove multiple dependencies at once: $ deno add npm:express jsr:@std/http Added npm:express@5.0.0 Added jsr:@std/http@1.0.7 $ cat deno.json { "imports": { "@std/http": "jsr:@std/http@^1.0.7", "express": "npm:express@^5.0.0", } } $ deno remove express @std/http Removed express Removed @std/http $ cat deno.json { "imports": {} } Info While dependencies are removed from the `deno.json` and `package.json` they still persist in the global cache for future use. If your project contains `package.json`, `deno uninstall` can work with it too: $ cat package.json { "dependencies": { "express": "^5.0.0" } } $ deno remove express Removed express $ cat package.json { "dependencies": {} } ## `deno uninstall --global [SCRIPT_NAME]` Jump to heading Uninstall `serve` deno uninstall --global serve Uninstall `serve` from a specific installation root deno uninstall -g --root /usr/local/bin serve ## Did you find what you needed? * Options * deno uninstall \[PACKAGES\] * deno uninstall --global \[SCRIPT\_NAME\] --- ## Page: https://docs.deno.com/runtime/reference/cli/upgrade/ * Runtime * Reference guides * CLI * deno upgrade On this page * Upgrade options * Options ### Command line usage deno upgrade [OPTIONS] [VERSION]... Upgrade deno executable to the given version. ### Latest Jump to heading deno upgrade ### Specific version Jump to heading deno upgrade 1.45.0 deno upgrade 1.46.0-rc.1 deno upgrade 9bc2dd29ad6ba334fd57a20114e367d3c04763d4 ### Channel Jump to heading deno upgrade stable deno upgrade rc deno upgrade canary The version is downloaded from `https://dl.deno.land` and is used to replace the current executable. If you want to not replace the current Deno executable but instead download an update to a different location, use the `--output` flag: deno upgrade --output $HOME/my_deno ## Upgrade options Jump to heading ### `--dry-run` Jump to heading Perform all checks without replacing old exe. ### `--force` Jump to heading Short flag: `-f` Replace current exe even if not out-of-date. ### `--output` Jump to heading The path to output the updated version to. ## Options Jump to heading ### `--cert` Jump to heading Load certificate authority from PEM encoded file. ## Did you find what you needed? * Upgrade options * Options --- ## Page: https://docs.deno.com/runtime/reference/cli/unstable_flags/ New features of the Deno runtime are often released behind feature flags, so users can try out new APIs and features before they are finalized. Current unstable feature flags are listed on this page, and can also be found in the CLI help text by running: deno --help ## Using flags at the command line Jump to heading You can enable a feature flag when you run a Deno program from the command line by passing in the flag as an option to the CLI. Here's an example of running a program with the `--unstable-node-globals` flag enabled: deno run --unstable-node-globals main.ts ## Configuring flags in `deno.json` Jump to heading You can specify which unstable features you'd like to enable for your project using a configuration option in `deno.json`. deno.json { "unstable": ["bare-node-builtins", "webgpu"] } The possible values in the `unstable` array are the flag names with the `--unstable-` prefix removed. ## Configuration via environment variables Jump to heading Some flags can be enabled by setting a value (any value) for an environment variable of a given name, rather than being passed as a flag or `deno.json` configuration option. Flags that are settable via environment variables will be noted below. Here's an example of setting the `--unstable-bare-node-builtins` flag via environment variable: export DENO_UNSTABLE_BARE_NODE_BUILTINS=true ## `--unstable-bare-node-builtins` Jump to heading **Environment variable:** `DENO_UNSTABLE_BARE_NODE_BUILTINS` This flag enables you to import Node.js built-in modules without a `node:` specifier, as in the example below. You can also use this flag to enable npm packages without an `npm:` specifier if you are manually managing your Node.js dependencies (see `byonm` flag). example.ts import { readFileSync } from "fs"; console.log(readFileSync("deno.json", { encoding: "utf8" })); ## `--unstable-detect-cjs` Jump to heading **Environment variable:** `DENO_UNSTABLE_DETECT_CJS` Loads `.js`, `.jsx`, `.ts`, and `.tsx` modules as possibly being CommonJS in the following additional scenarios: 1. The _package.json_ has no `"type"` field. 2. No _package.json_ exists. By default, Deno only loads these modules as being possibly CommonJS when you're in a project with a _package.json_ and the closest _package.json_ has `{ "type": "commonjs" }`. Requires Deno >= 2.1.2 ## `--unstable-node-globals` Jump to heading This flags injects Node specific globals into the global scope. The injected globals are: * `Buffer` * `global` * `setImmediate` * `clearImmediate` Note, that `process` is already available as a global starting with Deno 2.0. Requires Deno >= 2.1.0 ## `--unstable-sloppy-imports` Jump to heading **Environment variable:** `DENO_UNSTABLE_SLOPPY_IMPORTS` This flag enables behavior which will infer file extensions from imports that do not include them. Normally, the import statement below would produce an error: foo.ts import { Example } from "./bar"; console.log(Example); bar.ts export const Example = "Example"; Executing the script with sloppy imports enabled will remove the error, but provide guidance that a more performant syntax should be used. Sloppy imports will allow (but print warnings for) the following: * Omit file extensions from imports * Use incorrect file extensions (e.g. importing with a `.js` extension when the actual file is `.ts`) * Import a directory path, and automatically use `index.js` or `index.ts` as the import for that directory `deno compile` does not support sloppy imports. ## `--unstable-unsafe-proto` Jump to heading Deno made a conscious decision to not support `Object.prototype.__proto__` for security reasons. However there are still many npm packages that rely on this property to work correctly. This flag enables this property. Note that it is not recommended to use this, but if you really need to use a package that relies on it, the escape hatch is now available to you. ## `--unstable-webgpu` Jump to heading Enable the `WebGPU` API in the global scope, as in the browser. Below is a simple example to get basic information about the GPU using this API: // Try to get an adapter from the user agent. const adapter = await navigator.gpu.requestAdapter(); if (adapter) { // Print out some basic details about the adapter. const adapterInfo = await adapter.requestAdapterInfo(); // On some systems this will be blank... console.log(`Found adapter: ${adapterInfo.device}`); // Print GPU feature list const features = [...adapter.features.values()]; console.log(`Supported features: ${features.join(", ")}`); } else { console.error("No adapter found"); } Check out this repository for more examples using WebGPU. ## `--unstable-broadcast-channel` Jump to heading Enabling this flag makes the `BroadcastChannel` web API available for use in the global scope, as in the browser. ## `--unstable-worker-options` Jump to heading Enable unstable Web Worker API options. Specifically, it enables you to specify permissions available to workers: new Worker(`data:application/javascript;base64,${btoa(`postMessage("ok");`)}`, { type: "module", deno: { permissions: { read: true, }, }, }).onmessage = ({ data }) => { console.log(data); }; ## `--unstable-cron` Jump to heading Enabling this flag makes the `Deno.cron` API available on the `Deno` namespace. ## `--unstable-kv` Jump to heading Enabling this flag makes Deno KV APIs available in the `Deno` namespace. ## `--unstable-net` Jump to heading Enable unstable net APIs in the `Deno` namespace. These APIs include: * `Deno.DatagramConn` ## `--unstable-otel` Jump to heading Enable the OpenTelemetry integration for Deno. ## `--unstable` Jump to heading \--unstable is deprecated - use granular flags instead The `--unstable` flag is no longer being used for new features, and will be removed in a future release. All unstable features that were available using this flag are now available as granular unstable flags, notably: * `--unstable-kv` * `--unstable-cron` Please use these feature flags instead moving forward. Before more recent Deno versions (1.38+), unstable APIs were made available all at once using the `--unstable` flag. Notably, Deno KV and other cloud primitive APIs are available behind this flag. To run a program with access to these unstable features, you would run your script with: deno run --unstable your_script.ts It is recommended that you use the granular unstable flags instead of this, the `--unstable` flag is now deprecated and will be removed in Deno 2. --- ## Page: https://docs.deno.com/runtime/reference/cli/ The Deno CLI (Command Line Interface) allows you to interact with the Deno runtime environment from your terminal or command prompt. The CLI has a number of subcommands that can be used to perform different tasks, check the links below for more information on each subcommand. ## Execution Jump to heading * deno run - run a script * deno serve - run a web server * deno task - run a task * deno repl - starts a read-eval-print-loop * deno eval - evaluate provided script ## Dependency management Jump to heading * deno add - add dependencies * deno install - install a dependency or a script * deno uninstall - uninstall a dependency or a script * deno remove - Remove dependencies * deno outdated - view or update outdated dependencies ## Tooling Jump to heading * deno bench - benchmarking tool * deno check - type check your program without running it * deno compile - compile a program into a standalone executable * deno completions - generate shell completions * deno coverage - generate test coverage reports * deno doc - generate documentation for a module * deno fmt - format your code * deno info - inspect an ES module and all of its dependencies * deno init - create a new project * deno jupyter - run a Jupyter notebook * deno lint - lint your code * deno lsp - language server protocol integration * deno publish - publish a module to JSR * deno test - run your tests * deno types - print runtime types * deno upgrade - upgrade Deno to the latest version ## Other Jump to heading * Unstable feature flags * Integrating the Deno LSP --- ## Page: https://docs.deno.com/runtime/reference/cli/serve ### Command line usage deno serve [OPTIONS] [SCRIPT_ARG]... Run a server defined in a main module The serve command uses the default exports of the main module to determine which servers to start. Start a server defined in server.ts: deno serve server.ts Start a server defined in server.ts, watching for changes and running on port 5050: deno serve --watch --port 5050 server.ts ## Type checking options Jump to heading ### `--check` Jump to heading Enable type-checking. This subcommand does not type-check by default If the value of "all" is supplied, remote modules will be included. Alternatively, the 'deno check' subcommand can be used. ### `--no-check` Jump to heading Skip type-checking. If the value of "remote" is supplied, diagnostic errors from remote modules will be ignored. ## Dependency management options Jump to heading ### `--cached-only` Jump to heading Require that remote dependencies are already cached. ### `--frozen` Jump to heading Error out if lockfile is out of date. ### `--import-map` Jump to heading Load import map file from local file or remote URL. ### `--lock` Jump to heading Check the specified lock file. (If value is not provided, defaults to "./deno.lock"). ### `--no-lock` Jump to heading Disable auto discovery of the lock file. ### `--no-npm` Jump to heading Do not resolve npm modules. ### `--no-remote` Jump to heading Do not resolve remote modules. ### `--node-modules-dir` Jump to heading Sets the node modules management mode for npm packages. ### `--reload` Jump to heading Short flag: `-r` Reload source code cache (recompile TypeScript) no value Reload everything jsr:@std/http/file-server,jsr:@std/assert/assert-equals Reloads specific modules npm: Reload all npm modules npm:chalk Reload specific npm module. ### `--vendor` Jump to heading Toggles local vendor folder usage for remote modules and a node\_modules folder for npm packages. ## Options Jump to heading ### `--allow-scripts` Jump to heading Allow running npm lifecycle scripts for the given packages Note: Scripts will only be executed when using a node\_modules directory (`--node-modules-dir`). ### `--cert` Jump to heading Load certificate authority from PEM encoded file. ### `--config` Jump to heading Short flag: `-c` Configure different aspects of deno including TypeScript, linting, and code formatting. Typically the configuration file will be called `deno.json` or `deno.jsonc` and automatically detected; in that case this flag is not necessary. ### `--env-file` Jump to heading Load environment variables from local file Only the first environment variable with a given key is used. Existing process environment variables are not overwritten, so if variables with the same names already exist in the environment, their values will be preserved. Where multiple declarations for the same environment variable exist in your .env file, the first one encountered is applied. This is determined by the order of the files you pass as arguments. ### `--ext` Jump to heading Set content type of the supplied file. ### `--host` Jump to heading The TCP address to serve on, defaulting to 0.0.0.0 (all interfaces). ### `--location` Jump to heading Value of globalThis.location used by some web APIs. ### `--no-code-cache` Jump to heading Disable V8 code cache feature. ### `--no-config` Jump to heading Disable automatic loading of the configuration file. ### `--parallel` Jump to heading Run multiple server workers in parallel. Parallelism defaults to the number of available CPUs or the value of the DENO\_JOBS environment variable. ### `--port` Jump to heading The TCP port to serve on. Pass 0 to pick a random free port \[default: 8000\] ### `--seed` Jump to heading Set the random number generator seed. ### `--v8-flags` Jump to heading To see a list of all available flags use `--v8-flags=--help` Flags can also be set via the DENO\_V8\_FLAGS environment variable. Any flags set with this flag are appended after the DENO\_V8\_FLAGS environment variable. ## Debugging options Jump to heading ### `--inspect` Jump to heading Activate inspector on host:port \[default: 127.0.0.1:9229\] ### `--inspect-brk` Jump to heading Activate inspector on host:port, wait for debugger to connect and break at the start of user script. ### `--inspect-wait` Jump to heading Activate inspector on host:port and wait for debugger to connect before running user code. ## File watching options Jump to heading ### `--hmr` Jump to heading Watch for file changes and restart process automatically. Local files from entry point module graph are watched by default. Additional paths might be watched by passing them as arguments to this flag. ### `--no-clear-screen` Jump to heading Do not clear terminal screen when under watch mode. ### `--watch` Jump to heading Watch for file changes and restart process automatically. Local files from entry point module graph are watched by default. Additional paths might be watched by passing them as arguments to this flag. ### `--watch-exclude` Jump to heading Exclude provided files/patterns from watch mode. --- ## Page: https://docs.deno.com/runtime/reference/cli/add * Runtime * Reference guides * CLI * deno add On this page * Options ### Command line usage deno add [OPTIONS] [packages]... Add dependencies to your configuration file. deno add jsr:@std/path You can also add npm packages: deno add npm:react Or multiple dependencies at once: deno add jsr:@std/path jsr:@std/assert npm:chalk ## Options Jump to heading ### `--allow-scripts` Jump to heading Allow running npm lifecycle scripts for the given packages Note: Scripts will only be executed when using a node\_modules directory (`--node-modules-dir`). ### `--dev` Jump to heading Short flag: `-D` Add the package as a dev dependency. Note: This only applies when adding to a `package.json` file. ## Did you find what you needed? * Options --- ## Page: https://docs.deno.com/runtime/reference/cli/remove * Runtime * Reference guides * CLI * deno remove ### Command line usage deno remove [OPTIONS] [packages]... Remove dependencies from the configuration file. deno remove @std/path You can remove multiple dependencies at once: deno remove @std/path @std/assert ## Did you find what you needed? YesNo Edit this page Thank you! Feedback received. Any additional comments? (_optional_) Email address (_optional_) Privacy policy --- ## Page: https://docs.deno.com/runtime/reference/cli/outdated ### Command line usage deno outdated [OPTIONS] [filters]... Find and update outdated dependencies. By default, outdated dependencies are only displayed. Display outdated dependencies: deno outdated deno outdated --compatible Update dependencies to latest semver compatible versions: deno outdated --update Update dependencies to latest versions, ignoring semver requirements: deno outdated --update --latest Filters can be used to select which packages to act on. Filters can include wildcards (\*) to match multiple packages. deno outdated --update --latest "@std/*" deno outdated --update --latest "react*" Note that filters act on their aliases configured in deno.json / package.json, not the actual package names: Given "foobar": "npm:react@17.0.0" in deno.json or package.json, the filter "foobar" would update npm:react to the latest version. deno outdated --update --latest foobar Filters can be combined, and negative filters can be used to exclude results: deno outdated --update --latest "@std/*" "!@std/fmt*" Specific version requirements to update to can be specified: deno outdated --update @std/fmt@^1.0.2 ## Dependency management options Jump to heading ### `--lock` Jump to heading Check the specified lock file. (If value is not provided, defaults to "./deno.lock"). ### `--no-lock` Jump to heading Disable auto discovery of the lock file. ## Options Jump to heading ### `--compatible` Jump to heading Only consider versions that satisfy semver requirements. ### `--interactive` Jump to heading Short flag: `-i` Interactively select which dependencies to update. ### `--latest` Jump to heading Consider the latest version, regardless of semver constraints. ### `--recursive` Jump to heading Short flag: `-r` include all workspace members. ### `--update` Jump to heading Short flag: `-u` Update dependency versions. ## Checking for outdated dependencies Jump to heading The `outdated` subcommand checks for new versions of NPM and JSR dependencies listed in `deno.json` or `package.json` files, and displays dependencies that could be updated. Workspaces are fully supported, including workspaces where some members use `package.json` and others use `deno.json`. For example, take a project with a `deno.json` file: { "imports": { "@std/fmt": "jsr:@std/fmt@^1.0.0", "@std/async": "jsr:@std/async@1.0.1", "chalk": "npm:chalk@4" } } and a lockfile that has `@std/fmt` at version `1.0.0`. $ deno outdated ┌────────────────┬─────────┬────────┬────────┐ │ Package │ Current │ Update │ Latest │ ├────────────────┼─────────┼────────┼────────┤ │ jsr:@std/fmt │ 1.0.0 │ 1.0.3 │ 1.0.3 │ ├────────────────┼─────────┼────────┼────────┤ │ jsr:@std/async │ 1.0.1 │ 1.0.1 │ 1.0.8 │ ├────────────────┼─────────┼────────┼────────┤ │ npm:chalk │ 4.1.2 │ 4.1.2 │ 5.3.0 │ └────────────────┴─────────┴────────┴────────┘ The `Update` column lists the newest semver-compatible version, while the `Latest` column lists the latest version. Notice that `jsr:@std/async` is listed, even though there is no semver-compatible version to update to. If you would prefer to only show packages that have new compatible versions you can pass the `--compatible` flag. $ deno outdated --compatible ┌────────────────┬─────────┬────────┬────────┐ │ Package │ Current │ Update │ Latest │ ├────────────────┼─────────┼────────┼────────┤ │ jsr:@std/fmt │ 1.0.0 │ 1.0.3 │ 1.0.3 │ └────────────────┴─────────┴────────┴────────┘ `jsr:@std/fmt` is still listed, since it could be compatibly updated to `1.0.3`, but `jsr:@std/async` is no longer shown. ## Updating dependencies Jump to heading The `outdated` subcommand can also update dependencies with the `--update` flag. By default, it will only update dependencies to semver-compatible versions (i.e. it won't update to a breaking version). $ deno outdated --update Updated 1 dependency: - jsr:@std/fmt 1.0.0 -> 1.0.3 To update to the latest versions (regardless of whether it's semver compatible), pass the `--latest` flag. $ deno outdated --update --latest Updated 3 dependencies: - jsr:@std/async 1.0.1 -> 1.0.8 - jsr:@std/fmt 1.0.0 -> 1.0.3 - npm:chalk 4.1.2 -> 5.3.0 ## Selecting packages Jump to heading The `outdated` subcommand also supports selecting which packages to operate on. This works with or without the \`--update flag. $ deno outdated --update --latest chalk Updated 1 dependency: - npm:chalk 4.1.2 -> 5.3.0 Multiple selectors can be passed, and wildcards (`*`) or exclusions (`!`) are also supported. For instance, to update all packages with the `@std` scope, except for `@std/fmt`: $ deno outdated --update --latest "@std/*" "!@std/fmt" Updated 1 dependency: - jsr:@std/async 1.0.1 -> 1.0.8 Note that if you use wildcards, you will probably need to surround the argument in quotes to prevent the shell from trying to expand them. ### Updating to specific versions Jump to heading In addition to selecting packages to update, the `--update` flag also supports selecting the new _version_ specifying the version after `@`. ❯ deno outdated --update chalk@5.2 @std/async@1.0.6 Updated 2 dependencies: - jsr:@std/async 1.0.1 -> 1.0.6 - npm:chalk 4.1.2 -> 5.2.0 ## Workspaces Jump to heading In a workspace setting, by default `outdated` will only operate on the _current_ workspace member. For instance, given a workspace: { "workspace": ["./member-a", "./member-b"] } Running deno outdated from the `./member-a` directory will only check for outdated dependencies listed in `./member-a/deno.json` or `./member-a/package.json`. To include all workspace members, pass the `--recursive` flag (the `-r` shorthand is also accepted) deno outdated --recursive deno outdated --update --latest -r