W↓
All docs
🔑
Sign Up/Sign In
docs.n8n.io/
Public Link
Apr 10, 2025, 12:12:58 PM - complete - 5 MB
Created by:
****ls@flexmail.Be
Starting URLs:
https://docs.n8n.io/
Max Pages:
2000
## Page: https://docs.n8n.io/ ## Welcome to n8n Docs# This is the documentation for n8n, a fair-code licensed workflow automation tool that combines AI capabilities with business process automation. It covers everything from setup to usage and development. It's a work in progress and all contributions are welcome. ## Where to start# * **Quickstarts** Jump in with n8n's quickstart guides. Try it out * **Choose the right n8n for you** Cloud, npm, self-host . . . Options * **Explore integrations** Browse n8n's integrations library. Find your apps * **Build AI functionality** n8n supports building AI functionality and tools. Advanced AI ## About n8n# n8n (pronounced n-eight-n) helps you to connect any app with an API with any other, and manipulate its data with little or no code. * Customizable: highly flexible workflows and the option to build custom nodes. * Convenient: use the npm or Docker to try out n8n, or the Cloud hosting option if you want us to handle the infrastructure. * Privacy-focused: self-host n8n for privacy and security. --- ## Page: https://docs.n8n.io/integrations/ n8n calls integrations nodes. Nodes are the building blocks of workflows in n8n. They're an entry point for retrieving data, a function to process data, or an exit for sending data. The data process includes filtering, recomposing, and changing data. There can be one or several nodes for your API, service or app. You can connect multiple nodes, which allows you to create complex workflows. ## Built-in nodes# n8n includes a collection of built-in integrations. Refer to Built-in nodes for documentation on all n8n's built-in nodes. As well as using the built-in nodes, you can also install community-built nodes. Refer to Community nodes for more information. ## Credential-only nodes and custom operations# One of the most complex parts of setting up API calls is managing authentication. n8n provides credentials support for operations and services beyond those supported by built-in nodes. * Custom operations for existing nodes: n8n supplies hundreds of nodes to create workflows that link multiple products. However, some nodes don't include all the possible operations supported by a product's API. You can work around this by making a custom API call using the HTTP Request node. * Credential-only nodes: n8n includes credential-only nodes. These are integrations where n8n supports setting up credentials for use in the HTTP Request node, but doesn't provide a standalone node. You can find a credential-only node in the nodes panel, as you would for any other integration. Refer to Custom operations for more information. ## Generic integrations# If you need to connect to a service where n8n doesn't have a node, or a credential-only node, you can still use the HTTP Request node. Refer to the node page for details on how to set up authentication and create your API call. ## Where to go next# * If you want to create your own node, head over to the Creating Nodes section. * Check out Community nodes to learn about installing and managing community-built nodes. * If you'd like to learn more about the different nodes in n8n, their functionalities and example usage, check out n8n's node libraries: Core nodes, Actions, and Triggers. * If you'd like to learn how to add the credentials for the different nodes, head over to the Credentials section. --- ## Page: https://docs.n8n.io/hosting/ ## Self-hosting n8n# This section provides guidance on setting up n8n for both the Enterprise and Community self-hosted editions. The Community edition is free, the Enterprise edition isn't. See Community edition features for a list of available features. * **Installation and server setups** Install n8n on any platform using npm or Docker. Or follow our guides to popular hosting platforms. Docker installation guide * **Configuration** Learn how to configure n8n with environment variables. Environment Variables * **Users and authentication** Choose and set up user authentication for your n8n instance. Authentication * **Scaling** Manage data, modes, and processes to keep n8n running smoothly at scale. Scaling * **Securing n8n** Secure your n8n instance by setting up SSL, SSO, or 2FA or blocking or opting out of some data collection or features. Securing n8n guide * **Starter kits** New to n8n or AI? Try our Self-hosted AI Starter Kit. Curated by n8n, it combines the self-hosted n8n platform with compatible AI products and components to get you started building self-hosted AI workflows. Starter kits Self-hosting knowledge prerequisites Self-hosting n8n requires technical knowledge, including: * Setting up and configuring servers and containers * Managing application resources and scaling * Securing servers and applications * Configuring n8n n8n recommends self-hosting for expert users. Mistakes can lead to data loss, security issues, and downtime. If you aren't experienced at managing servers, n8n recommends n8n Cloud. --- ## Page: https://docs.n8n.io/code/ n8n is a low-code tool. This means you can do a lot without code, then add code when needed. ## Code in your workflows# There are two places in your workflows where you can use code: * **Expressions** Use expressions to transform data in your nodes. You can use JavaScript in expressions, as well as n8n's Built-in methods and variables and Data transformation functions. Expressions * **Code node** Use the Code node to add JavaScript or Python to your workflow. Code node ## Other technical resources# These are features that are relevant to technical users. ### Technical nodes# n8n provides core nodes, which simplify adding key functionality such as API requests, webhooks, scheduling, and file handling. * **Write a backend** The HTTP Request, Webhook, and Code nodes help you make API calls, respond to webhooks, and write any JavaScript in your workflow. Use this do things like Create an API endpoint. Core nodes * **Represent complex logic** You can build complex flows, using nodes like If, Switch, and Merge nodes. Flow logic ### Other developer resources# * **The n8n API** n8n provides an API, where you can programmatically perform many of the same tasks as you can in the GUI. There's an n8n API node to access the API in your workflows. API * **Self-host** You can self-host n8n. This keeps your data on your own infrastructure. Hosting * **Build your own nodes** You can build custom nodes, install them on your n8n instance, and publish them to npm. Creating nodes --- ## Page: https://docs.n8n.io/advanced-ai/ Build AI functionality using n8n: from creating your own chat bot, to using AI to process documents and data from other sources. Feature availability This feature is available on Cloud and self-hosted n8n, in version 1.19.4 and above. * **Get started** Work through the short tutorial to learn the basics of building AI workflows in n8n. Tutorial * **Use a Starter Kit** Try n8n's Self-hosted AI Starter Kit to quickly start building AI workflows. Self-hosted AI Starter Kit * **Explore examples and concepts** Browse examples and workflow templates to help you build. Includes explanations of important AI concepts. Examples * **How n8n uses LangChain** Learn more about how n8n builds on LangChain. LangChain in n8n * **Browse AI templates** Explore a wide range of AI workflow templates on the n8n website. AI workflows on n8n.io Related documentation and tools. ### Node types# This feature uses Cluster nodes: groups of root and sub nodes that work together. Cluster nodes are node groups that work together to provide functionality in an n8n workflow. Instead of using a single node, you use a root node and one or more sub-nodes that extend the functionality of the node. 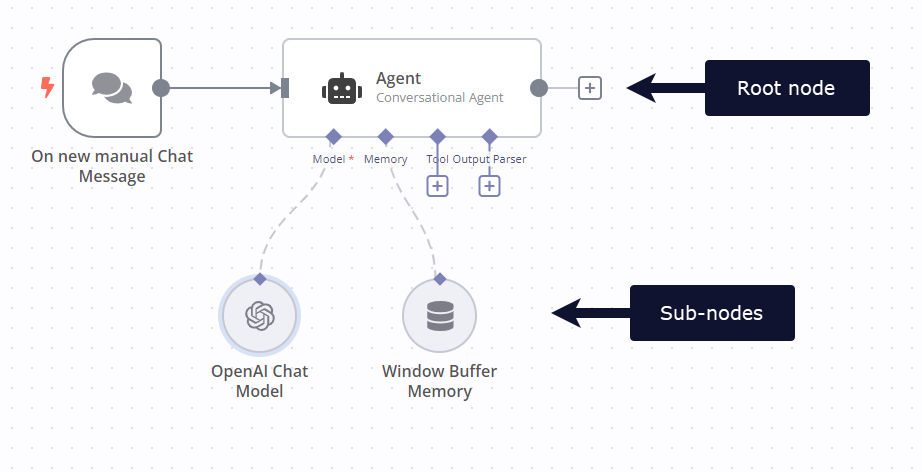 ### Workflow templates# You can browse workflow templates in-app or on the n8n website Workflows page. Refer to Templates for information on accessing templates in-app. ### Chat trigger# Use the n8n Chat Trigger to trigger a workflow based on chat interactions. ### Chatbot widget# n8n provides a chatbot widget that you can use as a frontend for AI-powered chat workflows. Refer to the @n8n/chat npm page for usage information. --- ## Page: https://docs.n8n.io/api/ Feature availability The n8n API isn't available during the free trial. Please upgrade to access this feature. Using n8n's public API, you can programmatically perform many of the same tasks as you can in the GUI. This section introduces n8n's REST API, including: * How to authenticate * Paginating results * Using the built-in API playground (self-hosted n8n only) * Endpoint reference n8n provides an n8n API node to access the API in your workflows. ## Learn about REST APIs# The API documentation assumes you are familiar with REST APIs. If you're not, these resources may be helpful: * KnowledgeOwl's guide to working with APIs: a basic introduction, including examples of how to call REST APIs. * IBM Cloud Learn Hub - What is an Application Programming Interface (API): this gives a general, but technical, introduction to APIs. * IBM Cloud Learn Hub - What is a REST API?: more detailed information about REST APIs. * MDN web docs - An overview of HTTP: REST APIs work over HTTP and use HTTP verbs, or methods, to specify the action to perform. Use the API playground (self-hosted n8n only) Trying out the API in the playground can help you understand how APIs work. If you're worried about changing live data, consider setting up a test workflow, or test n8n instance, to explore safely. --- ## Page: https://docs.n8n.io/embed/ n8n Embed is part of n8n's paid offering. Using Embed, you can white label n8n, or incorporate it in your software as part of your commercial product. For more information about when to use Embed, as well as costs and licensing processes, refer to Embed on the n8n website. ## Support# The community forum can help with various issues. If you are a current Embed customer, you can also contact n8n support, using the email provided when you bought the license. ## Russia and Belarus# n8n Embed isn't available in Russia and Belarus. Refer to n8n's blog post Update on n8n cloud accounts in Russia and Belarus for more information. --- ## Page: https://docs.n8n.io/learning-path/ This guide outlines a series of tutorials and resources designed to get you started with n8n. It's not necessary to complete all items listed to start using n8n. Use this as a reference to navigate to the most relevant parts of the documentation and other resources according to your needs. n8n has an active community where you can get and offer help. Connect, share, and learn with other n8n users: * Ask questions and make feature requests in the Community Forum. * Report bugs and contribute on GitHub. ## Set up your n8n# If you don't have an account yet, sign up to a free trial on n8n Cloud or install n8n's community edition with Docker (recommended) or npm. See Choose your n8n for more details. ## Try it out# Start with the quickstart guides to help you get up and running with building basic workflows. * A very quick quickstart * A longer introduction * Build an AI workflow in n8n ## Structured Courses# n8n offers two sets of courses. ### Video courses# Learn key concepts and n8n features, while building examples as you go. * The Beginner course covers the basics of n8n. * The Advanced course covers more complex workflows, more technical nodes, and enterprise features ### Text courses# Build more complex workflows while learning key concepts along the way. Earn a badge and an avatar in your community profile. * Level 1: Beginner Course * Level 2: Intermediate Course ## Self-hosting n8n# Explore various self-hosting options in n8n. If you’re not sure where to start, these are two popular options: * Hosting n8n on DigitalOcean * Hosting n8n on Amazon Web Services ## Build a node# If you can't find a node for a specific app or a service, you can build a node yourself and share with the community. See what others have built on npm website. * Build a declarative-style node * Learn how to build your own n8n nodes (Youtube Video) ## Stay updated# * Follow new features and bug fixes in the Release Notes * Follow n8n on socials: Twitter/X, Discord, LinkedIn, YouTube --- ## Page: https://docs.n8n.io/choose-n8n/ This section contains information on n8n's range of platforms, pricing plans, and licenses. ## Platforms# There are different ways to set up n8n depending on how you intend to use it: * n8n Cloud: hosted solution, no need to install anything. * Self-host: recommended method for production or customized use cases. * npm * Docker * Server setup guides for popular platforms * Embed: n8n Embed allows you to white label n8n and build it into your own product. Contact n8n on the Embed website for pricing and support. Self-hosting knowledge prerequisites Self-hosting n8n requires technical knowledge, including: * Setting up and configuring servers and containers * Managing application resources and scaling * Securing servers and applications * Configuring n8n n8n recommends self-hosting for expert users. Mistakes can lead to data loss, security issues, and downtime. If you aren't experienced at managing servers, n8n recommends n8n Cloud. ## Licenses# n8n's Sustainable Use License and n8n Enterprise License are based on the fair-code model. For a detailed explanation of the license, refer to Sustainable Use License. ## Free versions# n8n offers the following free options: * A free trial of Cloud * A free self-hosted community edition for self-hosted users ## Paid versions# n8n has two paid versions: * n8n Cloud: choose from a range of paid plans to suit your usage and feature needs. * Self-hosted: there are both free and paid versions of self-hosted. For details of the Cloud plans and contact details for Enterprise Self-hosted, refer to Pricing on the n8n website. --- ## Page: https://docs.n8n.io/try-it-out/ 1. Using n8n 2. Getting started 3. Quickstarts The best way to learn n8n is by using our tutorials to get familiar with the user interface and the many different types of nodes and integrations available. Here is a selection of material to get you started: * Looking for a quick introduction? Check out the "First Workflow" tutorial. * Interested in what you could do with AI? Find out how to build an AI chat agent with n8n. * Prefer to work through extensive examples? Maybe the courses are for you. --- ## Page: https://docs.n8n.io/try-it-out/quickstart/ This quickstart gets you started using n8n as quickly as possible. Its allows you to try out the UI and introduces two key features: workflow templates and expressions. It doesn't include detailed explanations or explore concepts in-depth. In this tutorial, you will: * Load a workflow from the workflow templates library * Add a node and configure it using expressions * Run your first workflow ## Step one: Sign up for n8n# This quickstart uses n8n Cloud. A free trial is available for new users. If you haven't already done so, sign up for an account now. ## Step two: Open a workflow template# n8n provides a quickstart template using training nodes. You can use this to work with fake data and avoid setting up credentials. 1. Go to Templates | Very quick quickstart. 2. Select **Use workflow** to view the options for using the template. 3. Select **Import template to cloud workspace** to load the template into your Cloud instance. This workflow: 1. Gets example data from the Customer Datastore node. 2. Uses the Edit Fields node to extract only the desired data and assigns that data to variables. In this example, you map the customer name, ID, and description. The individual pieces in an n8n workflow are called nodes. Double click a node to explore its settings and how it processes data. ## Step three: Run the workflow# Select **Test Workflow**. This runs the workflow, loading the data from the Customer Datastore node, then transforming it with Edit Fields. You need this data available in the workflow so that you can work with it in the next step. ## Step four: Add a node# Add a third node to message each customer and tell them their description. Use the Customer Messenger node to send a message to fake recipients. 1. Select the **Add node**  connector on the Edit Fields node. 2. Search for **Customer Messenger**. n8n shows a list of nodes that match the search. 3. Select **Customer Messenger (n8n training)** to add the node to the canvas. n8n opens the node automatically. 4. Use expressions to map in the **Customer ID** and create the **Message**: 1. In the **INPUT** panel select the **Schema** tab. 2. Drag **Edit Fields1** > **customer\_id** into the **Customer ID** field in the node settings. 3. Hover over **Message**. Select the **Expression** tab, then select the expand button  to open the full expressions editor. 4. Copy this expression into the editor: <table><tbody><tr><td><div><pre><span></span><span>1</span></pre></div></td><td><div><pre><span></span><code>Hi {{ $json.customer_name }}. Your description is: {{ $json.customer_description }} </code></pre></div></td></tr></tbody></table> 5. Close the expressions editor, then close the **Customer Messenger** node by clicking outside the node or selecting **Back to canvas**. 6. Select **Test Workflow**. n8n runs the workflow. The complete workflow should look like this: ## Next steps# * Read n8n's longer try it out tutorial for a more complex workflow, and an introduction to more features and n8n concepts. * Take the text courses or video courses. --- ## Page: https://docs.n8n.io/try-it-out/tutorial-first-workflow/ ## Your first workflow# This guide will show you how to construct a workflow in n8n, explaining key concepts along the way. You will: * Create a workflow from scratch. * Understand key concepts and skills, including: * Starting workflows with trigger nodes * Configuring credentials * Processing data * Representing logic in an n8n workflow * Using expressions 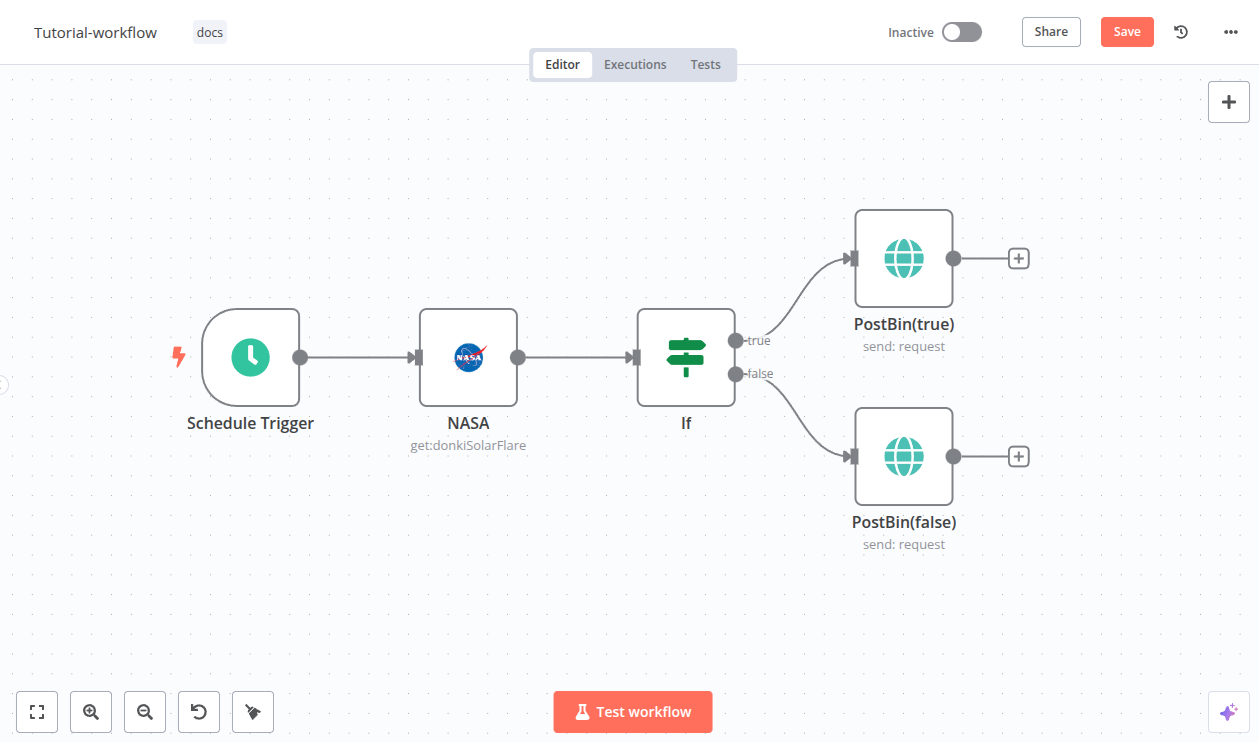 This quickstart uses n8n Cloud, which is recommended for new users. A free trial is available - if you haven't already done so, sign up for an account now. ## Step one: Create a new workflow# When you open n8n, you'll see either: * A window with a welcome message and two large buttons: Choose **Start from Scratch** to create a new workflow. * The **Workflows** list on the **Overview** page. Select the **Create Workflow** to create a new workflow. ## Step two: Add a trigger node# n8n provides two ways to start a workflow: * Manually, by selecting **Test Workflow**. * Automatically, using a trigger node as the first node. The trigger node runs the workflow in response to an external event, or based on your settings. For this tutorial, we'll use the Schedule trigger. This allows you to run the workflow on a schedule: 1. Select **Add first step**. 2. Search for **Schedule**. n8n shows a list of nodes that match the search. 3. Select **Schedule Trigger** to add the node to the canvas. n8n opens the node. 4. For **Trigger Interval**, select **Weeks**. 5. For **Weeks Between Triggers**, enter `1`. 6. Enter a time and day. For this example, select **Monday** in **Trigger on Weekdays**, select **9am** in **Trigger at Hour**, and enter `0` in **Trigger at Minute**. 7. Close the node details view to return to the canvas. ## Step three: Add the NASA node and set up credentials# The NASA node interacts with NASA's public APIs to fetch useful data. We will use the real-time data from the API to find solar events. Credentials Credentials are private pieces of information issued by apps and services to authenticate you as a user and allow you to connect and share information between the app or service and the n8n node. The type of information required varies depending on the app/service concerned. You should be careful about sharing or revealing the credentials outside of n8n. 1. Select the **Add node**  connector on the Schedule Trigger node. 2. Search for **NASA**. n8n shows a list of nodes that match the search. 3. Select **NASA** to view a list of operations. 4. Search for and select **Get a DONKI solar flare**. This operation returns a report about recent solar flares. When you select the operation, n8n adds the node to the canvas and opens it. 5. To access the NASA APIs, you need to set up credentials: 1. Select the **Credential for NASA API** dropdown. 2. Select **Create new credential**. n8n opens the credentials view. 3. Go to NASA APIs and fill out the form from the **Generate API Key** link. The NASA site generates the key and emails it to the address you entered. 4. Check your email account for the API key. Copy the key, and paste it into **API Key** in n8n. 5. Select **Save**. 6. Close the credentials screen. n8n returns to the node. The new credentials should be automatically selected in **Credential for NASA API**. 6. By default, DONKI Solar Flare provides data for the past 30 days. To limit it to just the last week, use **Additional Fields**: 1. Select **Add field**. 2. Select **Start date**. 3. To get a report starting from a week ago, you can use an expression: next to **Start date**, select the **Expression** tab, then select the expand button  to open the full expressions editor. 4. In the **Expression** field, enter the following expression: <table><tbody><tr><td><div><pre><span></span><span>1</span></pre></div></td><td><div><pre><span></span><code><span>{{</span><span> </span><span>$today</span><span>.</span><span>minus</span><span>(</span><span>7</span><span>,</span><span> </span><span>'days'</span><span>)</span><span> </span><span>}}</span> </code></pre></div></td></tr></tbody></table> This generates a date in the correct format, seven days before the current date. 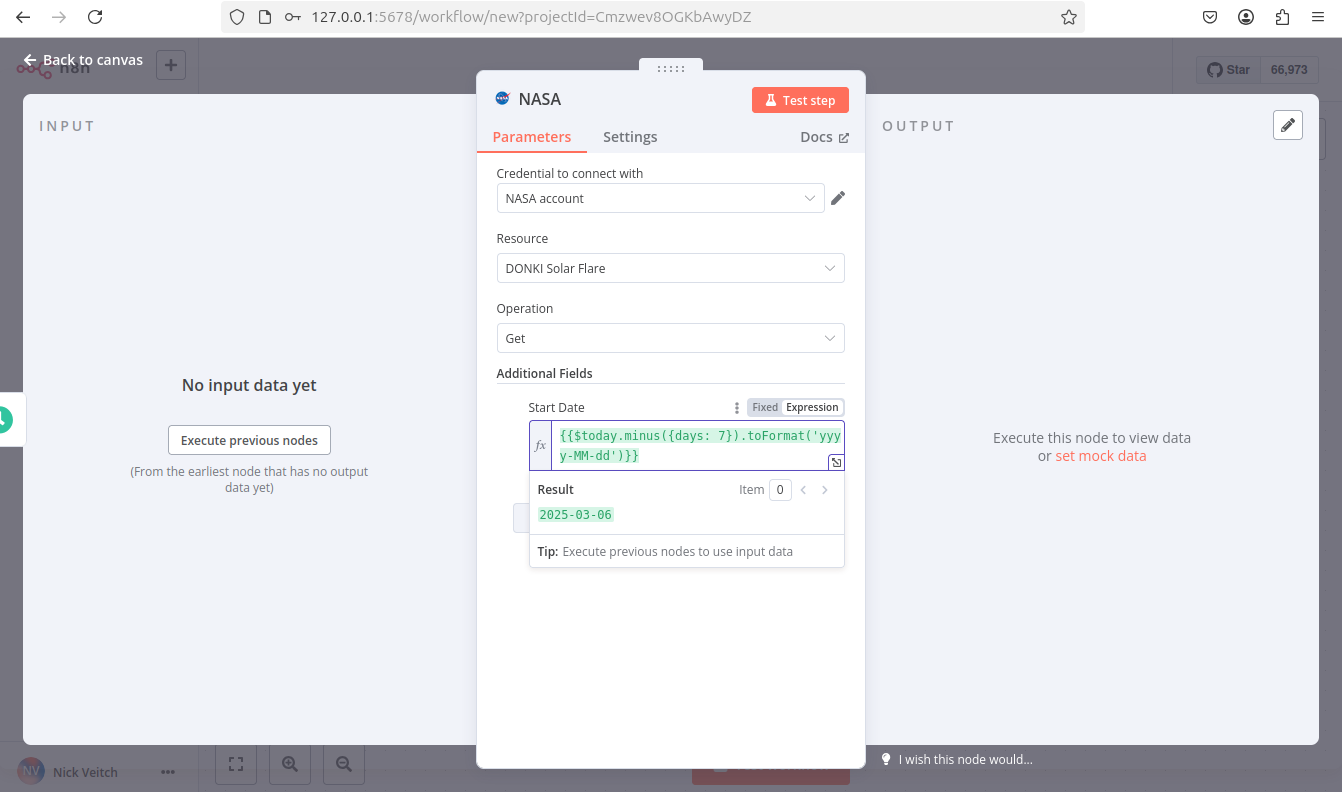 Date and time formats in n8n... n8n uses Luxon to work with date and time, and also provides two variables for convenience: `$now` and `$today`. For more information, refer to Expressions > Luxon. 7. Close the **Edit Expression** modal to return to the NASA node. 8. You can now check that the node is working and returning the expected date: select **Test step** to run the node manually. n8n calls the NASA API and displays details of solar flares in the past seven days in the **OUTPUT** section. 9. Close the NASA node to return to the workflow canvas. ## Step four: Add logic with the If node# n8n supports complex logic in workflows. In this tutorial we will use the If node to create two branches that each generate a report from the NASA data. Solar flares have five possible classifications; we will add logic that sends a report with the lower classifications to one output, and the higher classifications to another. Add the If node: 1. Select the **Add node**  connector on the NASA node. 2. Search for **If**. n8n shows a list of nodes that match the search. 3. Select **If** to add the node to the canvas. n8n opens the node. 4. You need to check the value of the `classType` property in the NASA data. To do this: 1. Drag **classType** into **Value 1**. Make sure you ran the NASA node in the previous section If you didn't follow the step in the previous section to run the NASA node, you won't see any data to work with in this step. 2. Change the comparison operation to **String > Contains**. 3. In **Value 2**, enter **X**. This is the highest classification of solar flare. In the next step, you will create two reports: one for X class solar flares, and one for all the smaller solar flares. 4. You can now check that the node is working and returning the expected date: select **Test step** to run the node manually. n8n tests the data against the condition, and shows which results match true or false in the **OUTPUT** panel. Weeks without large solar flares In this tutorial, you are working with live data. If you find there aren't any X class solar flares when you run the workflow, try replacing **X** in **Value 2** with either **A**, **B**, **C**, or **M**. 5. Once you are happy the node will return some events, you can close the node to return to the canvas. ## Step five: Output data from your workflow# The last step of the workflow is to send the two reports about solar flares. For this example, you'll send data to Postbin. Postbin is a service that receives data and displays it on a temporary web page. 1. On the If node, select the **Add node**  connector labeled **true**. 2. Search for **PostBin**. n8n shows a list of nodes that match the search. 3. Select **PostBin**. 4. Select **Send a request**. n8n adds the node to the canvas and opens it. 5. Go to Postbin and select **Create Bin**. Leave the tab open so you can come back to it when testing the workflow. 6. Copy the bin ID. It looks similar to `1651063625300-2016451240051`. 7. In n8n, paste your Postbin ID into **Bin ID**. 8. Now, configure the data to send to Postbin. Next to **Bin Content**, select the **Expression** tab (you will need to mouse-over the **Bin Content** for the tab to appear), then select the expand button  to open the full expressions editor. 9. You can now click and drag the correct field from the If Node output into the expressions editor to automatically create a reference for this label. In this case the input we want is 'classType'. 10. Once dropped into the expressions editor it will transform into this reference: `{{$json["classType"]}}`. Add a message to it, so that the full expression is: <table><tbody><tr><td><div><pre><span></span><span>1</span></pre></div></td><td><div><pre><span></span><code><span>There</span><span> </span><span>was</span><span> </span><span>a</span><span> </span><span>solar</span><span> </span><span>flare</span><span> </span><span>of</span><span> </span><span>class</span><span> </span><span>{{</span><span>$json</span><span>[</span><span>"classType"</span><span>]}}</span> </code></pre></div></td></tr></tbody></table> 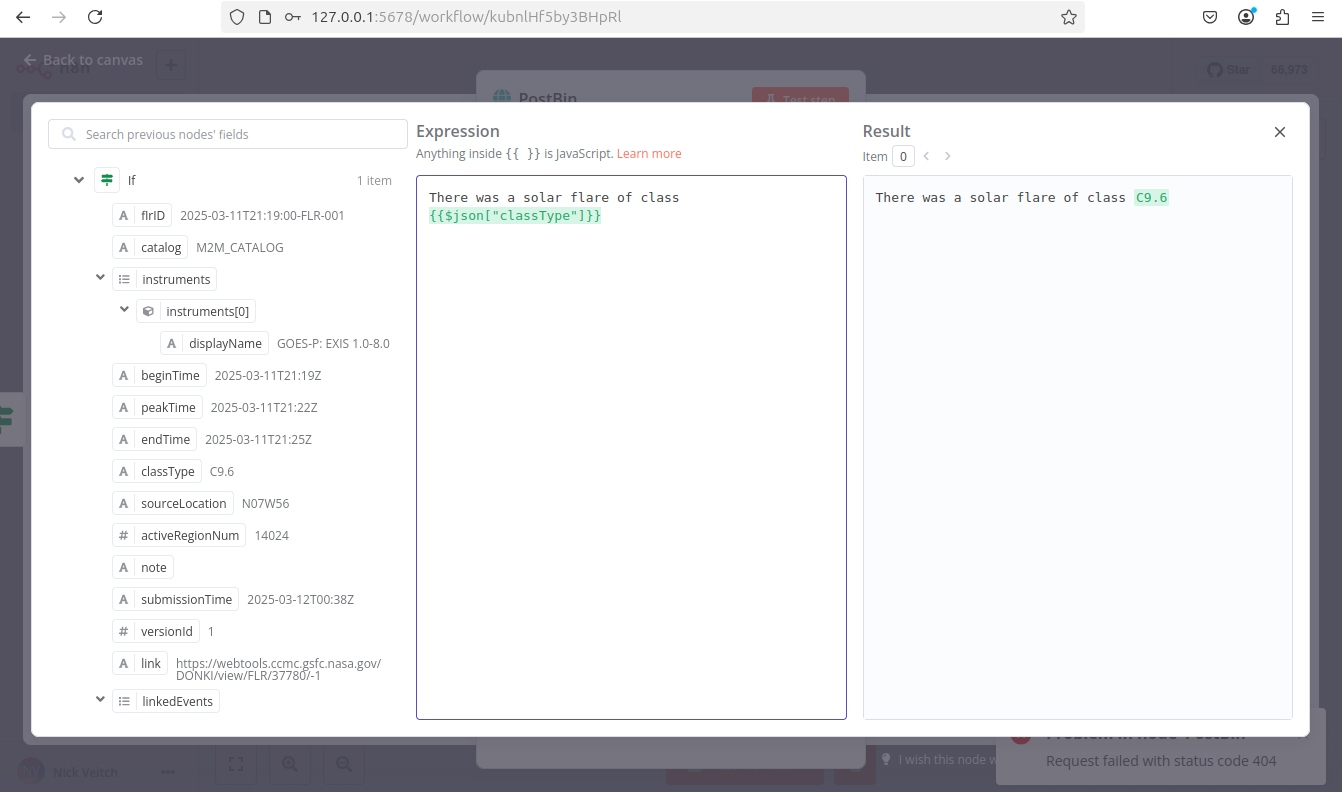 11. Close the expressions editor to return to the node. 12. Close the Postbin node to return to the canvas. 13. Add another Postbin node, to handle the **false** output path from the If node: 1. Hover over the Postbin node, then select **Node context menu**  > **Duplicate node** to duplicate the first Postbin node. 2. Drag the **false** connector from the If node to the left side of the new Postbin node. ## Step six: Test the workflow# 1. You can now test the entire workflow. Select **Test Workflow**. n8n runs the workflow, showing each stage in progress. 2. Go back to your Postbin bin. Refresh the page to see the output. 3. If you want to use this workflow (in other words, if you want it to run once a week automatically), you need to activate it by selecting the **Active** toggle. Time limit Postbin's bins exist for 30 minutes after creation. You may need to create a new bin and update the ID in the Postbin nodes, if you exceed this time limit. ## Congratulations# You now have a fully functioning workflow that does something useful! It should look something like this: Along the way you have discovered: * How to find the nodes you want and join them together * How to use expressions to manipulate data * How to create credentials and attach them to nodes * How to use logic in your workflows There are plenty of things you could add to this (perhaps add some more credentials and a node to send you an email of the results), or maybe you have a specific project in mind. Whatever your next steps, the resources linked below should help. ## Next steps# * Interested in what you could do with AI? Find out how to build an AI chat agent with n8n. * Take n8n's text courses or video courses. * Explore more examples in workflow templates. --- ## Page: https://docs.n8n.io/video-courses/ n8n provides two video courses on YouTube. For support, join the Forum. ## Beginner# The Beginner course covers the basics of n8n: * Introduction and workflows * APIs and Webhooks * Nodes * Data in n8n * Core workflow concepts * Useful nodes * Error handling * Debugging * Collaboration ## Advanced# The Advanced course covers more complex workflows, more technical nodes, and enterprise features: * Introduction and complex data flows * Advanced technical nodes * Pinning and editing output data * Sub-workflows * Error workflows * Building a full example * Handling files * Enterprise features --- ## Page: https://docs.n8n.io/courses/ If you've found your way here, it means you're serious about your interest in automation. Maybe you're tired of manually entering data into the same spreadsheet every day, of clicking through a series of tabs and buttons for that one piece of information you need, of managing tens of different tools and systems. Whatever the reason, one thing is clear: you shouldn't spend precious time doing things that don't spark joy or contribute to your personal and professional growth. These tasks can and should be automated! And you don't need advanced technical knowledge or excellent coding skills to do this–with no-code tools like n8n, automation is for everyone. ## Available courses# * Level 1: Beginner course * Level 2: Intermediate course --- ## Page: https://docs.n8n.io/courses/level-one/ ## Level one: Introduction# Welcome to the **n8n Course Level 1**! ## Is this course right for me?# This course introduces you to the fundamental concepts within n8n and develops your low-code automation expertise. This course is for you if you: * Are starting to use n8n for the first time. * Are looking for some extra help creating your first workflow. * Want to automate processes in your personal or working life. This course introduces n8n concepts and demonstrates practical workflow building without assuming any prior familiarity with n8n. If you'd like to get a feel for the basics without as much explanation, consult our quickstart guide. ## What will I learn in this course?# We believe in learning by doing. You can expect some theoretical information about the basic concepts and components of n8n, followed by practice of building workflows step by step. By the end of this course you will know: * How to set up n8n and navigate the Editor UI. * How n8n structures data. * How to configure different node parameters and add credentials. * When and how to use conditional logic in workflows. * How to schedule and control workflows. * How to import, download, and share workflows with others. You will build two workflows: * A two-node workflow to get articles from Hacker News * A seven-node workflow to help your client get records from a data warehouse, filter them, make calculations, and notify team members about the results ## What do I need to get started?# 1. **n8n set up**: You can use n8n Cloud (or the self-hosted version if you have experience hosting services). 2. **A course user ID**: Sign up here to get your unique ID and other credentials you will need in the course. 3. Basic knowledge of JavaScript and APIs would be helpful, but isn't necessary. 4. An account on the n8n community forum if you wish to receive a profile badge and avatar upon successful completion. ## How long does the course take?# Completing the course should take around **two hours**. You don't have to complete it in one go; feel free to take breaks and resume whenever you are ready. ## How do I complete the course?# There are two milestones in this course that test your knowledge of what you have learned in the lessons: * Building the main workflow * Passing the quiz at the end of the course Check your progress You can always **check your progress** throughout the course by entering your unique ID here. If you complete the milestones above, you will get **a badge and an avatar** in your forum profile. You can then share your profile and course verification ID to showcase your n8n skills to others. Let's get started! --- ## Page: https://docs.n8n.io/courses/level-one/chapter-1/ In this lesson you will learn how to navigate the Editor UI. We will walk through the canvas and show you what each icon means and where to find things you will need while building workflows in n8n. n8n version This course is based on n8n version 1.82.1. In other versions, some user interfaces might look different, but this shouldn't impact the core functionality. ## Getting started# Begin by setting up n8n. We recommend starting with n8n Cloud, a hosted solution that doesn't require installation and includes a free trial. Alternative set up If n8n Cloud isn't a good option for you, you can self-host with Docker. This is an advanced option recommended only for technical users familiar with hosting services, Docker, and the command line. For more details on the different ways to set up n8n, see our platforms documentation. Once you have n8n running, open the Editor UI in a browser window. Log in to your n8n instance. Select **Overview** and then **Create Workflow** to view the main canvas. It should look like this: 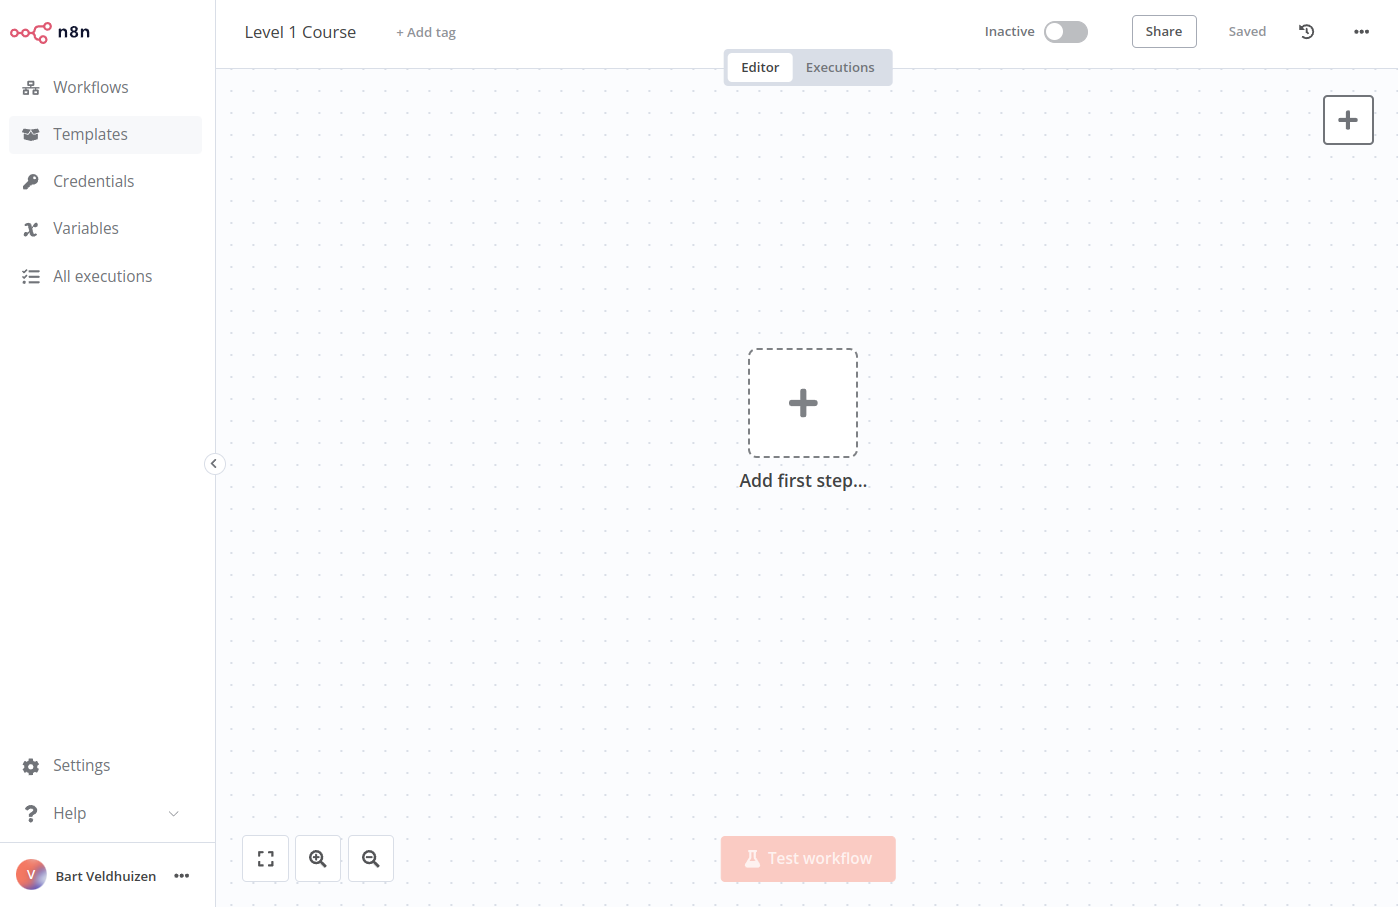 _Editor UI_ ## Editor UI settings# The editor UI is the web interface where you build workflows. You can access all your workflows and credentials, as well as support pages, from the Editor UI. ### Left-side panel# On the left side of the **Editor UI**, there is a panel which contains the core functionalities and settings for managing your workflows. Expand and collapse it by selecting the small arrow icon. The panel contains the following sections: * **Overview**: Contains all the workflows and credentials you have access to. During this course, create new workflows here. * **Projects**: (Not available on Community edition) Projects group workflows and credentials. You can assign roles to users in a project to control what they can do in a project. A **Personal** project is available by default. * **Admin Panel**: n8n Cloud only. Access your n8n instance usage, billing, and version settings. * **Templates**: A collection of pre-made workflows. Great place to get started with common use cases. * **Variables**: Used to store and access fixed data across your workflows. This feature is available on the Pro and Enterprise Plans. * **All executions**: Contains information about your workflow executions. * **Help**: Contains resources around n8n product and community. * **Update**: (When updates are available) Indicator for any recent product updates. * **Settings**: Under the ellipsis (`...`) menu by your username. Manage users and access settings for a variety of features.  _Editor UI left-side menu_ ### Top bar# The top bar of the **Editor UI** contains the following information: * **Workflow Name**: By default, n8n names a new workflow as "My workflow", but you can edit the name at any time. * **\+ Add Tag**: Tags help you organise your workflows by category, use case, or whatever is relevant for you. Tags are optional. * **Inactive/active toggle**: This button activates or deactivates the current workflow. By default, workflows are deactivated. * **Share**: You can share and collaborate with others on workflows on the Starter, Pro, and Enterprise plans. * **Save**: This button saves the current workflow. * **History**: Once you save your workflow, you can view previous versions here.  _Editor UI top bar_ ### Canvas# The **canvas** is the gray dotted grid background in the Editor UI. It displays several icons and a node with different functionalities: * Buttons to zoom the canvas to fit the screen, zoom in or out of the canvas, and tidy up the nodes on screen. * A button to **Test workflow** once you add your first node. When you click on it, n8n executes all nodes on the canvas in sequence. * A button with a **+** sign inside. This button opens the nodes panel. * A button with a note icon inside. This button adds a sticky note to the canvas (visible when hovering on the top right + icon). * A dotted square with the text "Add first step." This is where you add your first node.  _Workflow canvas_ Moving the canvas You can move the workflow canvas around in three ways: * Select Ctrl+Left Button on the canvas and move it around. * Select Middle Button on the canvas and move it around. * Place two fingers on your touchpad and slide. Don't worry about workflow execution and activation for now; we'll explain these concepts later on in the course. ## Nodes# You can think of nodes as building blocks that serve different functions that, when put together, make up a functioning machine: an automated workflow. Node A node is an individual step in your workflow: one that either (a) loads, (b) processes, or (c) sends data. Based on their function, n8n classifies nodes into four types: * **App** or **Action Nodes** add, remove, and edit data; request and send external data; and trigger events in other systems. Refer to the Action nodes library for a full list of these nodes. * **Trigger Nodes** start a workflow and supply the initial data. Refer to the Trigger nodes library for a list of trigger nodes. * **Core Nodes** can be trigger or app nodes. Whereas most nodes connect to a specific external service, core nodes provide functionality such as logic, scheduling, or generic API calls. Refer to the Core Nodes library for a full list of core nodes. * **Cluster Nodes** are node groups that work together to provide functionality in a workflow, primarily for AI workflows. Refer to Cluster nodes for more information. Learn more Refer to Node types for a more detailed explanation of all node types. ### Finding nodes# You can find all available nodes in the **nodes panel** on the right side of the Editor UI. There are three ways in which you can open the nodes panel: * Click the **+** icon in the top right corner of the canvas. * Click the **+** icon on the right side of an existing node on the canvas (the node to which you want to add another one). * Click the Tab key on your keyboard. 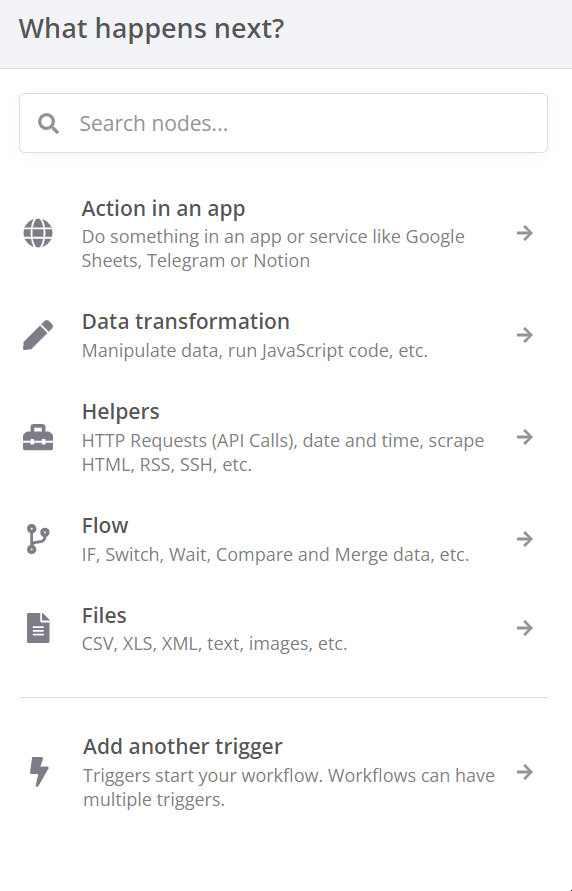 _Nodes panel_ In the nodes panel, notice that when adding your first node, you will see the different trigger node categories. After you have added your trigger node, you'll see that the nodes panel changes to show Advanced AI, Actions in an App, Data transformation, Flow, Core, and Human in the loop nodes. If you want to find a specific node, use the search input at the top of the nodes panel. ### Adding nodes# There are two ways to add nodes to your canvas: * Select the node you want in the nodes panel. The new node will automatically connect to the selected node on the canvas. * Drag and drop the node from the nodes panel to the canvas. ### Node buttons# If you hover on a node, you'll notice that three icons appear on top: * Execute the node (Play icon) * Deactivate/Activate the node (Power icon) * Delete the node (Trash icon) There will also be an ellipsis icon, which opens a context menu containing other node options. Moving a workflow To move a workflow around the canvas, select all nodes with your mouse or Ctrl+A, select and hold on a node, then drag it to any point you want on the canvas. ## Summary# In this lesson you learned how to navigate the Editor UI, what the icons mean, how to access the left-side and node panels, and how to add nodes to the canvas. In the next lesson, you will build a mini-workflow to put into practice what you've learned so far. --- ## Page: https://docs.n8n.io/courses/level-one/chapter-2/ In this lesson, you will build a small workflow that gets 10 articles about automation from Hacker News. The process consists of five steps: 1. Add a Manual Trigger node 2. Add the Hacker News node 3. Configure the Hacker News node 4. Execute the node 5. Save the workflow The finished workflow will look like this: ## 1\. Add a Manual Trigger node# Open the nodes panel (reminder: you can open this by selecting the **+** icon in the top right corner of the canvas or selecting Tab on your keyboard). Then: 1. Search for the **Manual Trigger** node. 2. Select it when it appears in the search. This will add the Manual Trigger node to your canvas, which allows you to run the workflow at any time by selecting the **Test workflow** button. Manual triggers For faster workflow creation, you can skip this step in the future. Adding any other node without a trigger will add the Manual Trigger node to the workflow. In a real-world scenario, you would probably want to set up a schedule or some other trigger to run the workflow. ## 2\. Add the Hacker News node# Select the **+** icon to the right of the Manual Trigger node to open the nodes panel. Then: 1. Search for the **Hacker News** node. 2. Select it when it appears in the search. 3. In the **Actions** section, select **Get many items**. n8n adds the node to your canvas and the node window opens to display its configuration details. ## 3\. Configure the Hacker News node# When you add a new node to the Editor UI, the node is automatically activated. The node details will open in a window with several options: * **Parameters**: Adjust parameters to refine and control the node's functionality. * **Settings**: Adjust settings to control the node's design and executions. * **Docs**: Open the n8n documentation for this node in a new window. Parameters vs. Settings * **Parameters** are different for each node, depending on its functionality. * **Settings** are the same for all nodes. ### Parameters# We need to configure several parameters for the Hacker News node to make it work: * **Resource**: All This resource selects all data records (articles). * **Operation**: Get Many This operation fetches all the selected articles. * **Limit**: 10 This parameter sets a limit to the number of results the Get Many operation returns. * **Additional Fields** > **Add Field** > **Keyword**: automation **Additional fields** are options that you can add to certain nodes to make your request more specific or filter the results. For this example, we want to get only articles that include the keyword "automation." The configuration of the parameters for the Hacker News node should now look like this: 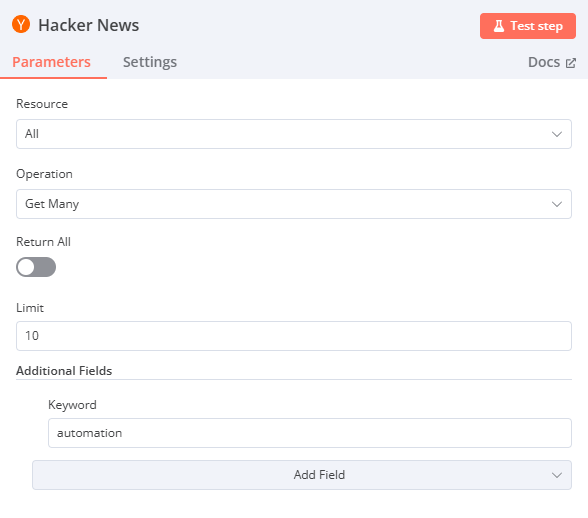 _Hacker News node parameters_ ### Settings# The **Settings** section includes several options for node design and executions. In this case, we'll configure only the final two settings, which set the node's appearance in the Editor UI canvas. In the Hacker News node Settings, edit: * **Notes**: Get the 10 latest articles. Node notes It's often helpful to add a short description in the node about what it does. This is helpful for complex or shared workflows in particular! * **Display note in flow?**: toggle to true This option will display the Note under the node in the canvas. The configuration of the settings for the Hacker News node should now look like this: 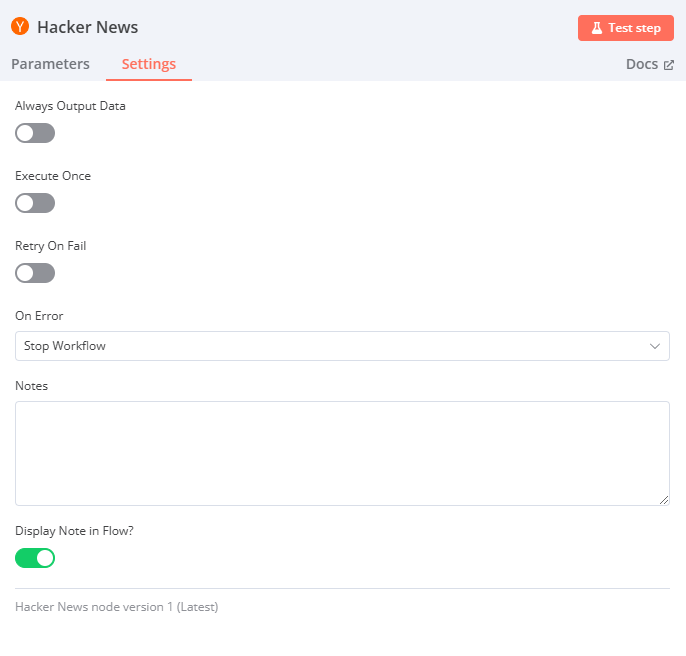 _Hacker News node settings_ Renaming a node You can rename the node with a name that's more descriptive for your use case. There are three ways to do this: * Select the node you want to rename and at the same time press the F2 key on your keyboard. * Double-click on the node to open the node window. Click on the name of the node in the top left corner of the window, rename it as you like, then click **Rename** to save the node under the new name. * Right-click on the node and select the **Rename** option, or select the node and press F2 on your keyboard.  _Renaming a node from the keyboard_ To find the original node name (the type of node), open the node window and select **Settings**. The bottom of the page contains the node type and version. ## 4\. Execute the node# Select the **Test step** button in the node details window. You should see 10 results in the Output **Table** view. 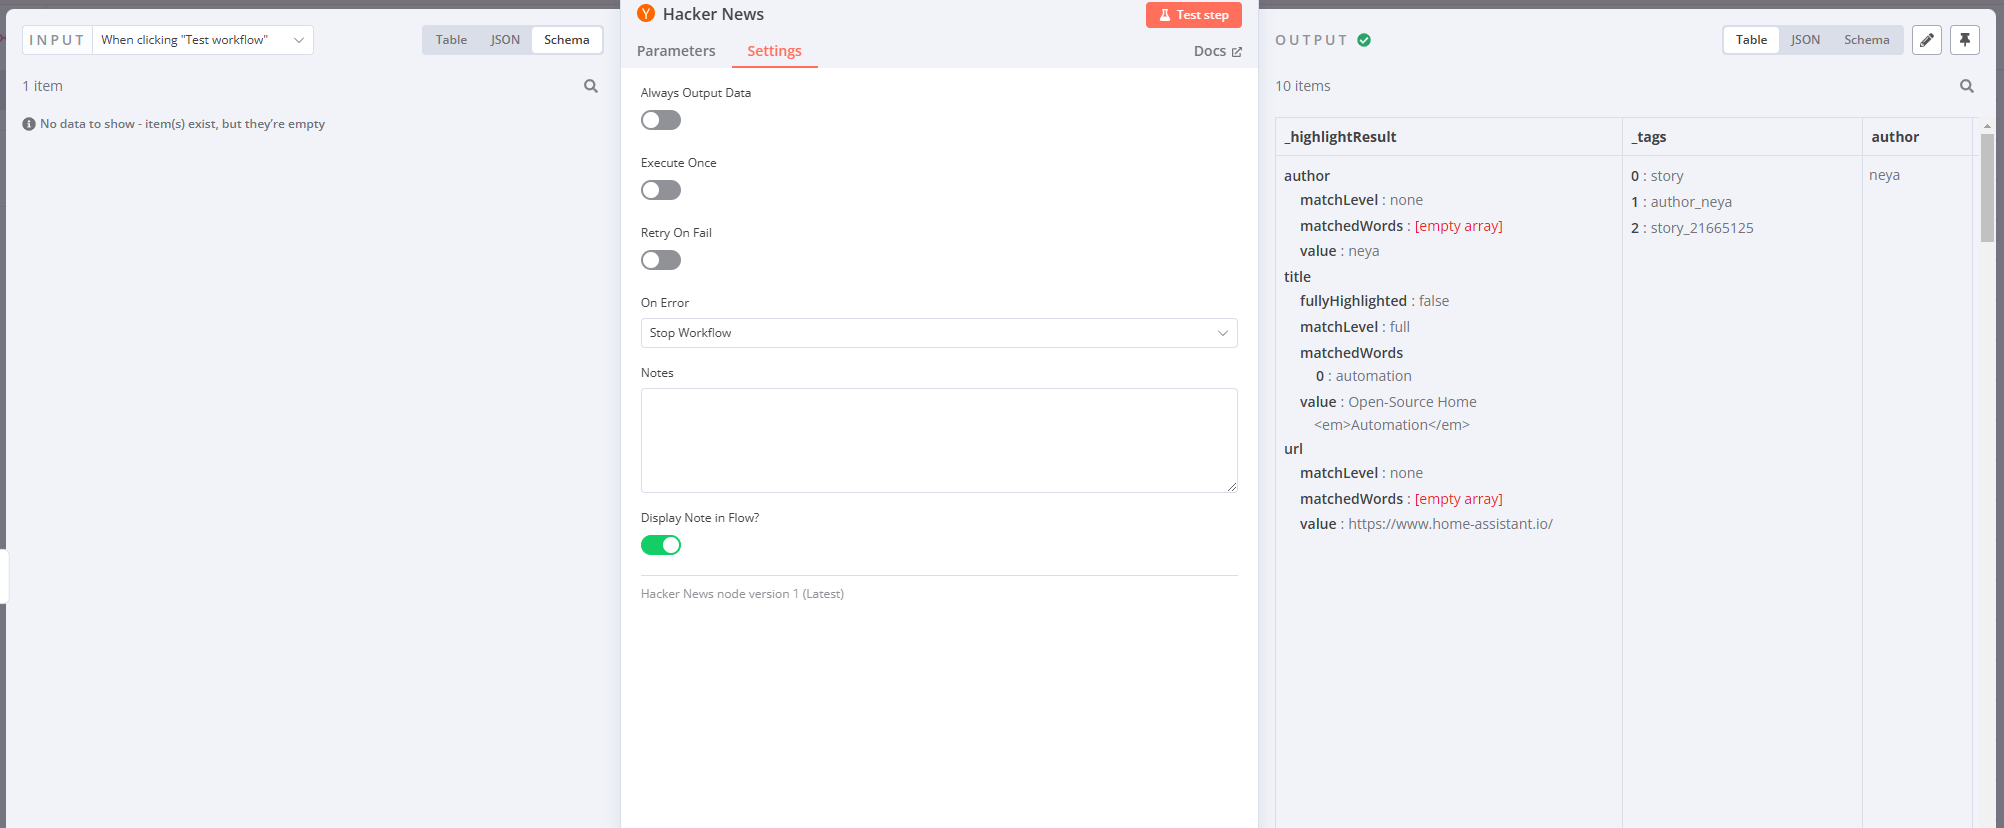 _Results in Table view for the Hacker News node_ ### Node executions# Node execution A node execution represents a run of that node to retrieve or process the specified data. If a node executes successfully, a small green checkmark appears on top of the node in the canvas 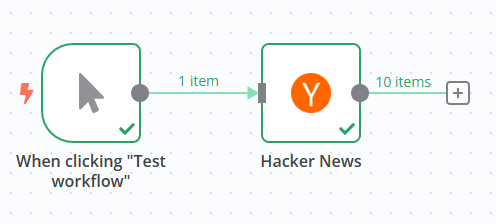 _Successfully executed workflow_ If there are no problems with the parameters and everything works fine, the requested data displays in the node window in **Table**, **JSON**, and **Schema** format. You can switch between these views by selecting the one you want from the **Table | JSON | Schema** button at the top of the node window. Table vs JSON views The **Table** view is the default. It displays the requested data in a table, where the rows are the records and the columns are the available attributes of those records. Here's our Hacker News output in JSON view: 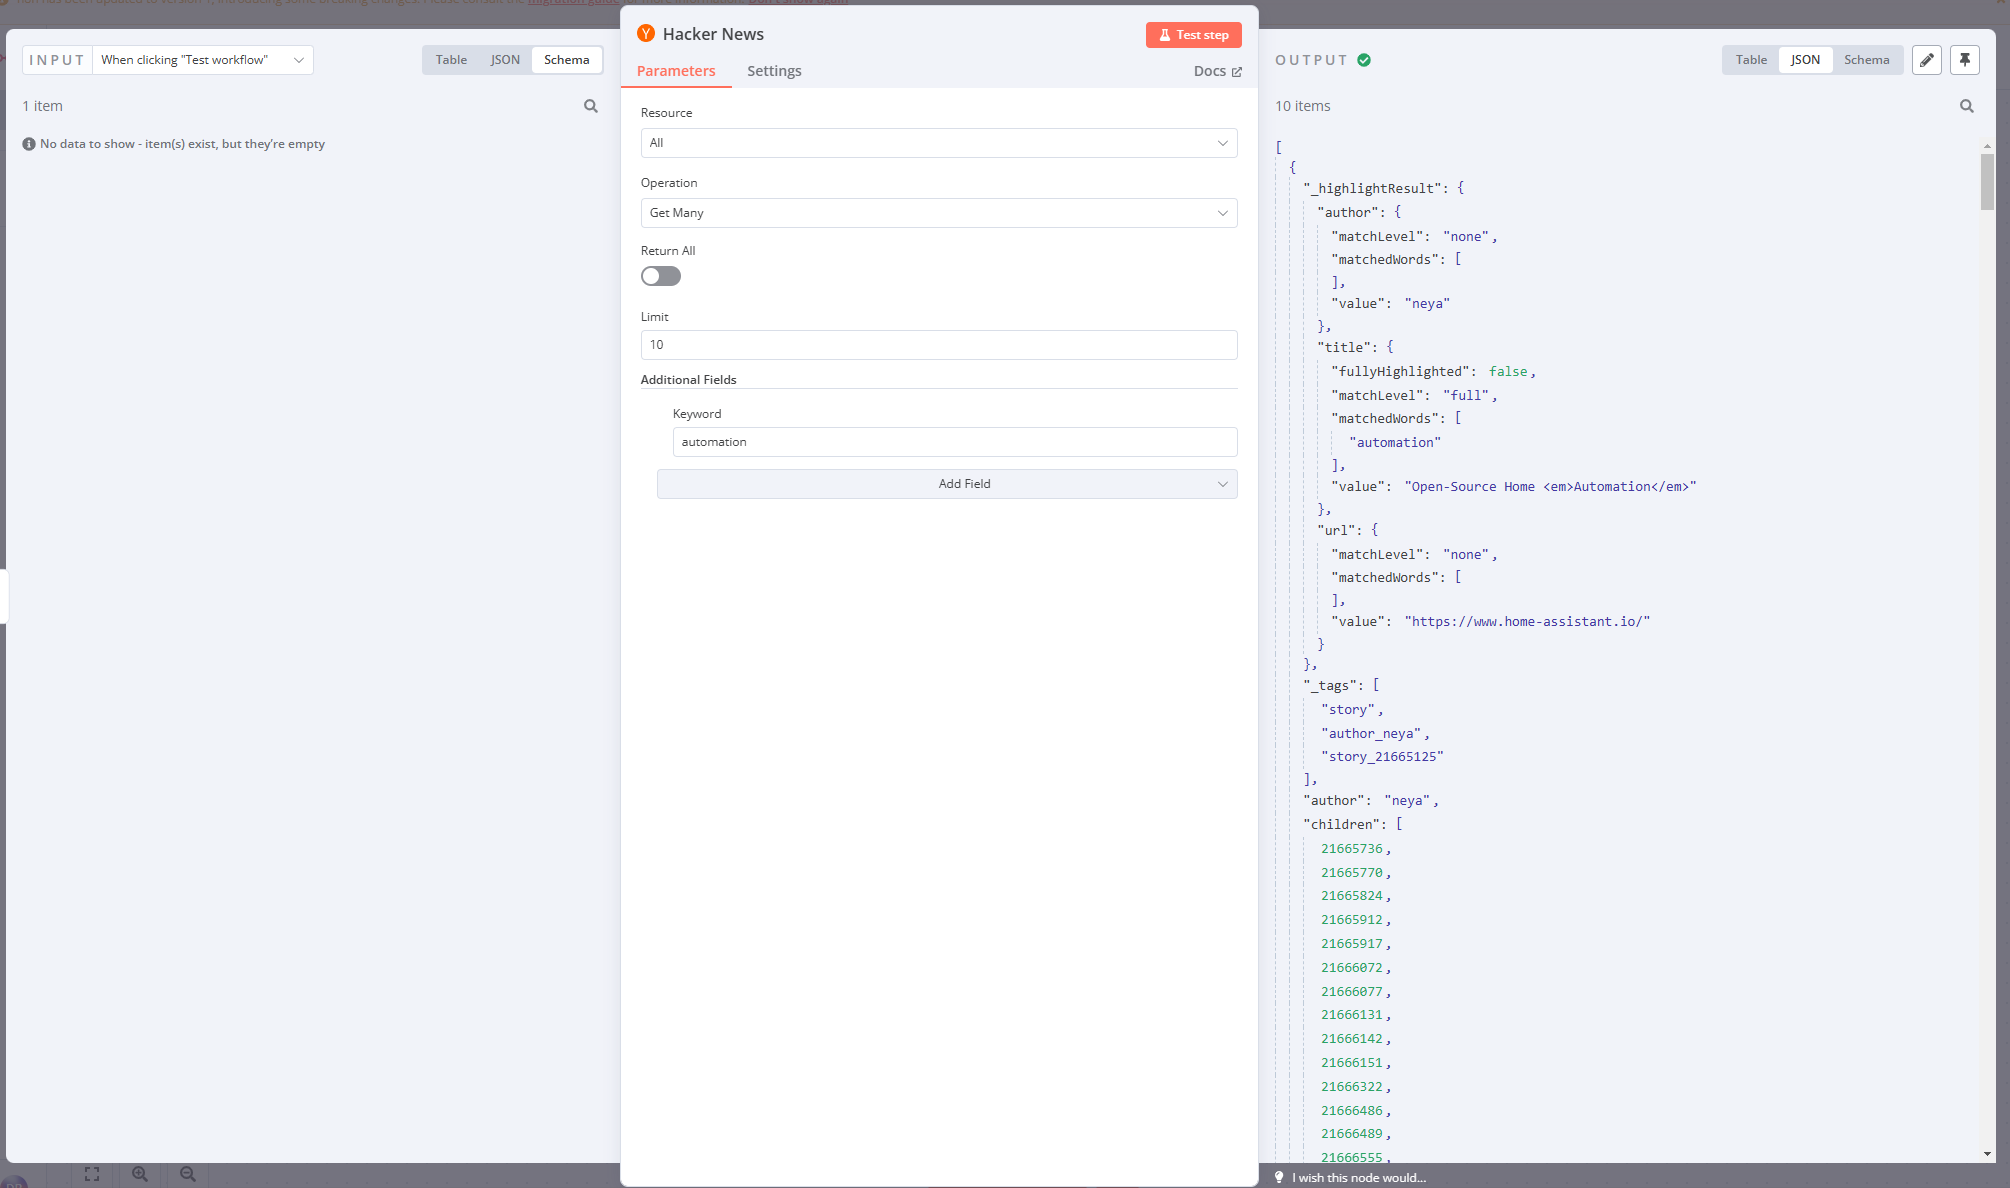 _Results in JSON view for the Hacker News node_ The node window displays more information about the node execution: * Next to the **Output** title, notice a small icon (this will be a green checkmark if the node execution succeeded). Beside it, there is an info icon. If you hover on it, you'll get two more pieces of information that can provide insights into the performance of each individual node in a workflow: * **Start Time**: When the node execution started. * **Execution Time**: How long it took for the node to return the results from the moment it started executing. * Just below the **Output** title, you'll notice another piece of information: **10 items**. This field displays the number of items (records) that the node request returned. In this example, it's expected to be 10, since this is the limit we set in step 2. But if you don't set a limit, it's useful to see how many records are actually returned. Error in nodes A red warning icon on a node means that the node has errors. This might happen if the node credentials are missing or incorrect or the node parameters aren't configured correctly.  _Error in nodes_ ## 5\. Save the workflow# Once you're finished editing the node, select **Back to canvas** to return to the main canvas. By default, your workflow is automatically saved as "My workflow." For this lesson, rename the workflow to be "Hacker News workflow." Reminder You can rename a workflow by clicking on the workflow's name at the top of the Editor UI. Once you've renamed the workflow, be sure to save it. There are two ways in which you can save a workflow: * From the Canvas in Editor UI, click **Ctrl + S** or **Cmd + S** on your keyboard. * Select the **Save** button in the top right corner of the Editor UI. You may need to leave the node editor first by clicking outside the dialog. If you see a grey **Saved** text instead of the **Save** button, your workflow was automatically saved. ## Summary# Congratulations, you just built your first workflow! In this lesson, you learned how to use actions in app nodes, configure their parameters and settings, and save and execute your workflow. In the next lesson, you'll meet your new client, Nathan, who needs to automate his sales reporting work. You will build a more complex workflow for his use case, helping him become more productive at work. --- ## Page: https://docs.n8n.io/courses/level-one/chapter-3/ Meet Nathan 🙋. Nathan works as an Analytics Manager at ABCorp. His job is to support the ABCorp team with reporting and analytics. Being a true jack of all trades, he also handles several miscellaneous initiatives. Some things that Nathan does are repetitive and mind-numbing. He wants to automate some of these tasks so that he doesn't burn out. As an **Automation Expert**, you are meeting with Nathan today to help him understand how he can offload some of his responsibilities to n8n. ## Understanding the scenario# **You 👩🔧:** Nice to meet you, Nathan. Glad to be doing this! What's a repetitive task that's error-prone and that you'd like to get off your plate first? **Nathan 🙋:** Thanks for coming in! The most annoying one's gotta be the weekly sales reporting. I have to collect sales data from our legacy data warehouse, which manages data from the main business processes of an organization, such as sales or production. Now, each sales order can have the status Processing or Booked. I have to calculate the sum of all the Booked orders and announce them in the company Discord every Monday. Then I have to create a spreadsheet of all the Processing sales so that the Sales Managers can review them and check if they need to follow up with customers. This manual work is tough and requires high attention to detail to make sure that all the numbers are right. Inevitably, I lose my focus and mistype a number or I don't get it done on time. I've been criticized once by my manager for miscalculating the data. **You 👩🔧:** Oh no! Doesn't the data warehouse have a way to export the data? **Nathan 🙋:** The data warehouse was written in-house ages ago. It doesn't have a CSV export but they recently added a couple of API endpoints that expose this data, if that helps. **You 👩🔧:** Perfect! That's a good start. If you have a generic API, we can add some custom code and a couple of services to make an automated workflow. This gig has n8n written all over it. Let's get started! --- ## Page: https://docs.n8n.io/courses/level-one/chapter-4/ Now that we know what Nathan wants to automate, let's consider the steps he needs to take to achieve his goals: 1. Get the relevant data (order id, order status, order value, employee name) from the data warehouse 2. Filter the orders by their status (Processing or Booked) 3. Calculate the total value of all the Booked orders 4. Notify the team members about the Booked orders in the company's Discord channel 5. Insert the details about the Processing orders in Airtable for follow-up 6. Schedule this workflow to run every Monday morning Nathan's workflow involves sending data from the company's data warehouse to two external services: * Discord * Airtable Before that, the data has to be wrangled with general functions (conditional filtering, calculation, scheduling). n8n provides integrations for all these steps, so Nathan's workflow in n8n would look like this: You will build this workflow in eight steps: 1. Getting data from the data warehouse 2. Inserting data into Airtable 3. Filtering orders 4. Setting values for processing orders 5. Calculating booked orders 6. Notifying the team 7. Scheduling the workflow 8. Activating and examining the workflow To build this workflow, you will need the credentials found in the email you received from n8n when you signed up for this course. If you haven't signed up already, you can do it here. If you haven't received a confirmation email after signing up, contact us. Start building! --- ## Page: https://docs.n8n.io/courses/level-one/chapter-5/chapter-5.1/ In this part of the workflow, you will learn how to get data by making HTTP requests with the **HTTP Request** node. After completing this section, your workflow will look like this: First, let's set the scene for building Nathan's workflow. ## Create new workflow# Open your Editor UI and create a new workflow with one of the two possible commands: * Select Ctrl+Alt+N or Cmd+Option+N on your keyboard. * Open the left menu, navigate to **Workflows**, and select **Add workflow**. Name this new workflow "Nathan's workflow." The first thing you need to do is get data from ABCorp's old data warehouse. In a previous chapter, you used an action node designed for a specific service (Hacker News). But not all apps or services have dedicated nodes, like the legacy data warehouse from Nathan's company. Though we can't directly export the data, Nathan told us that the data warehouse has a couple of API endpoints. That's all we need to access the data using the HTTP Request node in n8n. No node for that service? The HTTP Request node is one of the most versatile nodes, allowing you to make HTTP requests to query data from apps and services. You can use it to access data from apps or services that don't have a dedicated node in n8n. ## Add an HTTP Request node# Now, in your Editor UI, add an HTTP Request node like you learned in the lesson Adding nodes. The node window will open, where you need to configure some parameters.  _HTTP Request node_ This node will use credentials. Credentials Credentials are unique pieces of information that identify a user or a service and allow them to access apps or services (in our case, represented as n8n nodes). A common form of credentials is a username and a password, but they can take other forms depending on the service. In this case, you'll need the credentials for the ABCorp data warehouse API included in the email from n8n you received when you signed up for this course. If you haven't signed up yet, sign up here. In the **Parameters** of the HTTP Request node, make the following adjustments: * **Method**: This should default to GET. Make sure it's set to GET. * **URL**: Add the **Dataset URL** you received in the email when you signed up for this course. * **Send Headers**: Toggle this control to true. In **Specify Headers**, ensure **Using Fields Below** is selected. * **Header Parameters** > **Name**: Enter `unique_id`. * **Header Parameters** > **Value**: The Unique ID you received in the email when you signed up for this course. * **Authentication**: Select **Generic Credential Type**. This option requires credentials before allowing you to access the data. * **Generic Auth Type**: Select **Header Auth**. (This field will appear after you select the Generic Credential Type for the Authentication.) * **Credential for Header Auth**: To add your credentials, select **\+ Create new credential**. This will open the Credentials window. * In the Credentials window, set **Name** to be the **Header Auth name** you received in the email when you signed up for this course. * In the Credentials window, set **Value** to be the **Header Auth value** you received in the email when you signed up for this course. * Select the **Save** button in the Credentials window to save your credentials. Your **Credentials Connection** window should look like this:  _HTTP Request node credentials_ Credentials naming New credential names follow the " account" format by default. You can rename the credentials by clicking on the name, similarly to renaming nodes. It's good practice to give them names that identify the app/service, type, and purpose of the credential. A naming convention makes it easier to keep track of and identify your credentials. Once you save, exit out of the Credentials window to return to the HTTP Request node. ## Get the data# Select the **Test step** button in the HTTP Request node window. The table view of the HTTP request results should look like this:  _HTTP Request node output_ This view should be familiar to you from the Building a mini-workflow page. This is the data from ABCorp's data warehouse that Nathan needs to work with. This data set includes sales information from 30 customers with five columns: * `orderID`: The unique id of each order. * `customerID`: The unique id of each customer. * `employeeName`: The name of Nathan's colleague responsible for the customer. * `orderPrice`: The total price of the customer's order. * `orderStatus`: Whether the customer's order status is `booked` or still in `processing`. ## What's next?# **Nathan 🙋**: This is great! You already automated an important part of my job with only one node. Now instead of manually accessing the data every time I need it, I can use the HTTP Request Node to automatically get the information. **You 👩🔧**: Exactly! In the next step, I'll help you one step further and insert the data you retrieved into Airtable. --- ## Page: https://docs.n8n.io/courses/level-one/chapter-5/chapter-5.2/ In this step of the workflow, you will learn how to insert the data received from the HTTP Request node into Airtable using the Airtable node. Spreadsheet nodes You can replace the Airtable node with another spreadsheet app/service. For example, n8n also has a node for **Google Sheets**. After this step, your workflow should look like this: ## Configure your table# If we're going to insert data into Airtable, we first need to set up a table there. To do this: 1. Create an Airtable account. 2. In your Airtable workspace add a new base from scratch and name it, for example, _beginner course_.  _Create an Airtable base_ 3. In the beginner course base, by default, you have a table called **Table 1** with four fields: `Name`, `Notes`, `Assignee`, and `Status`. These fields aren't relevant for us since they aren't in our "orders" data set. This brings us to the next point: the names of the fields in Airtable have to match the names of the columns in the node result. Prepare the table by doing the following: * Rename the table from **Table 1** to **orders** to make it easier to identify. * Delete the 3 blank records created by default. * Delete the `Notes`, `Assignee`, and `Status` fields. * Edit the `Name` field (the primary field) to read `orderID`, with the **Number** field type. * Add the rest of the fields, and their field types, using the table below as a reference: | Field name | Field type | | --- | --- | | `orderID` | Number | | `customerID` | Number | | `employeeName` | Single line text | | `orderPrice` | Number | | `orderStatus` | Single line text | Now your table should look like this: 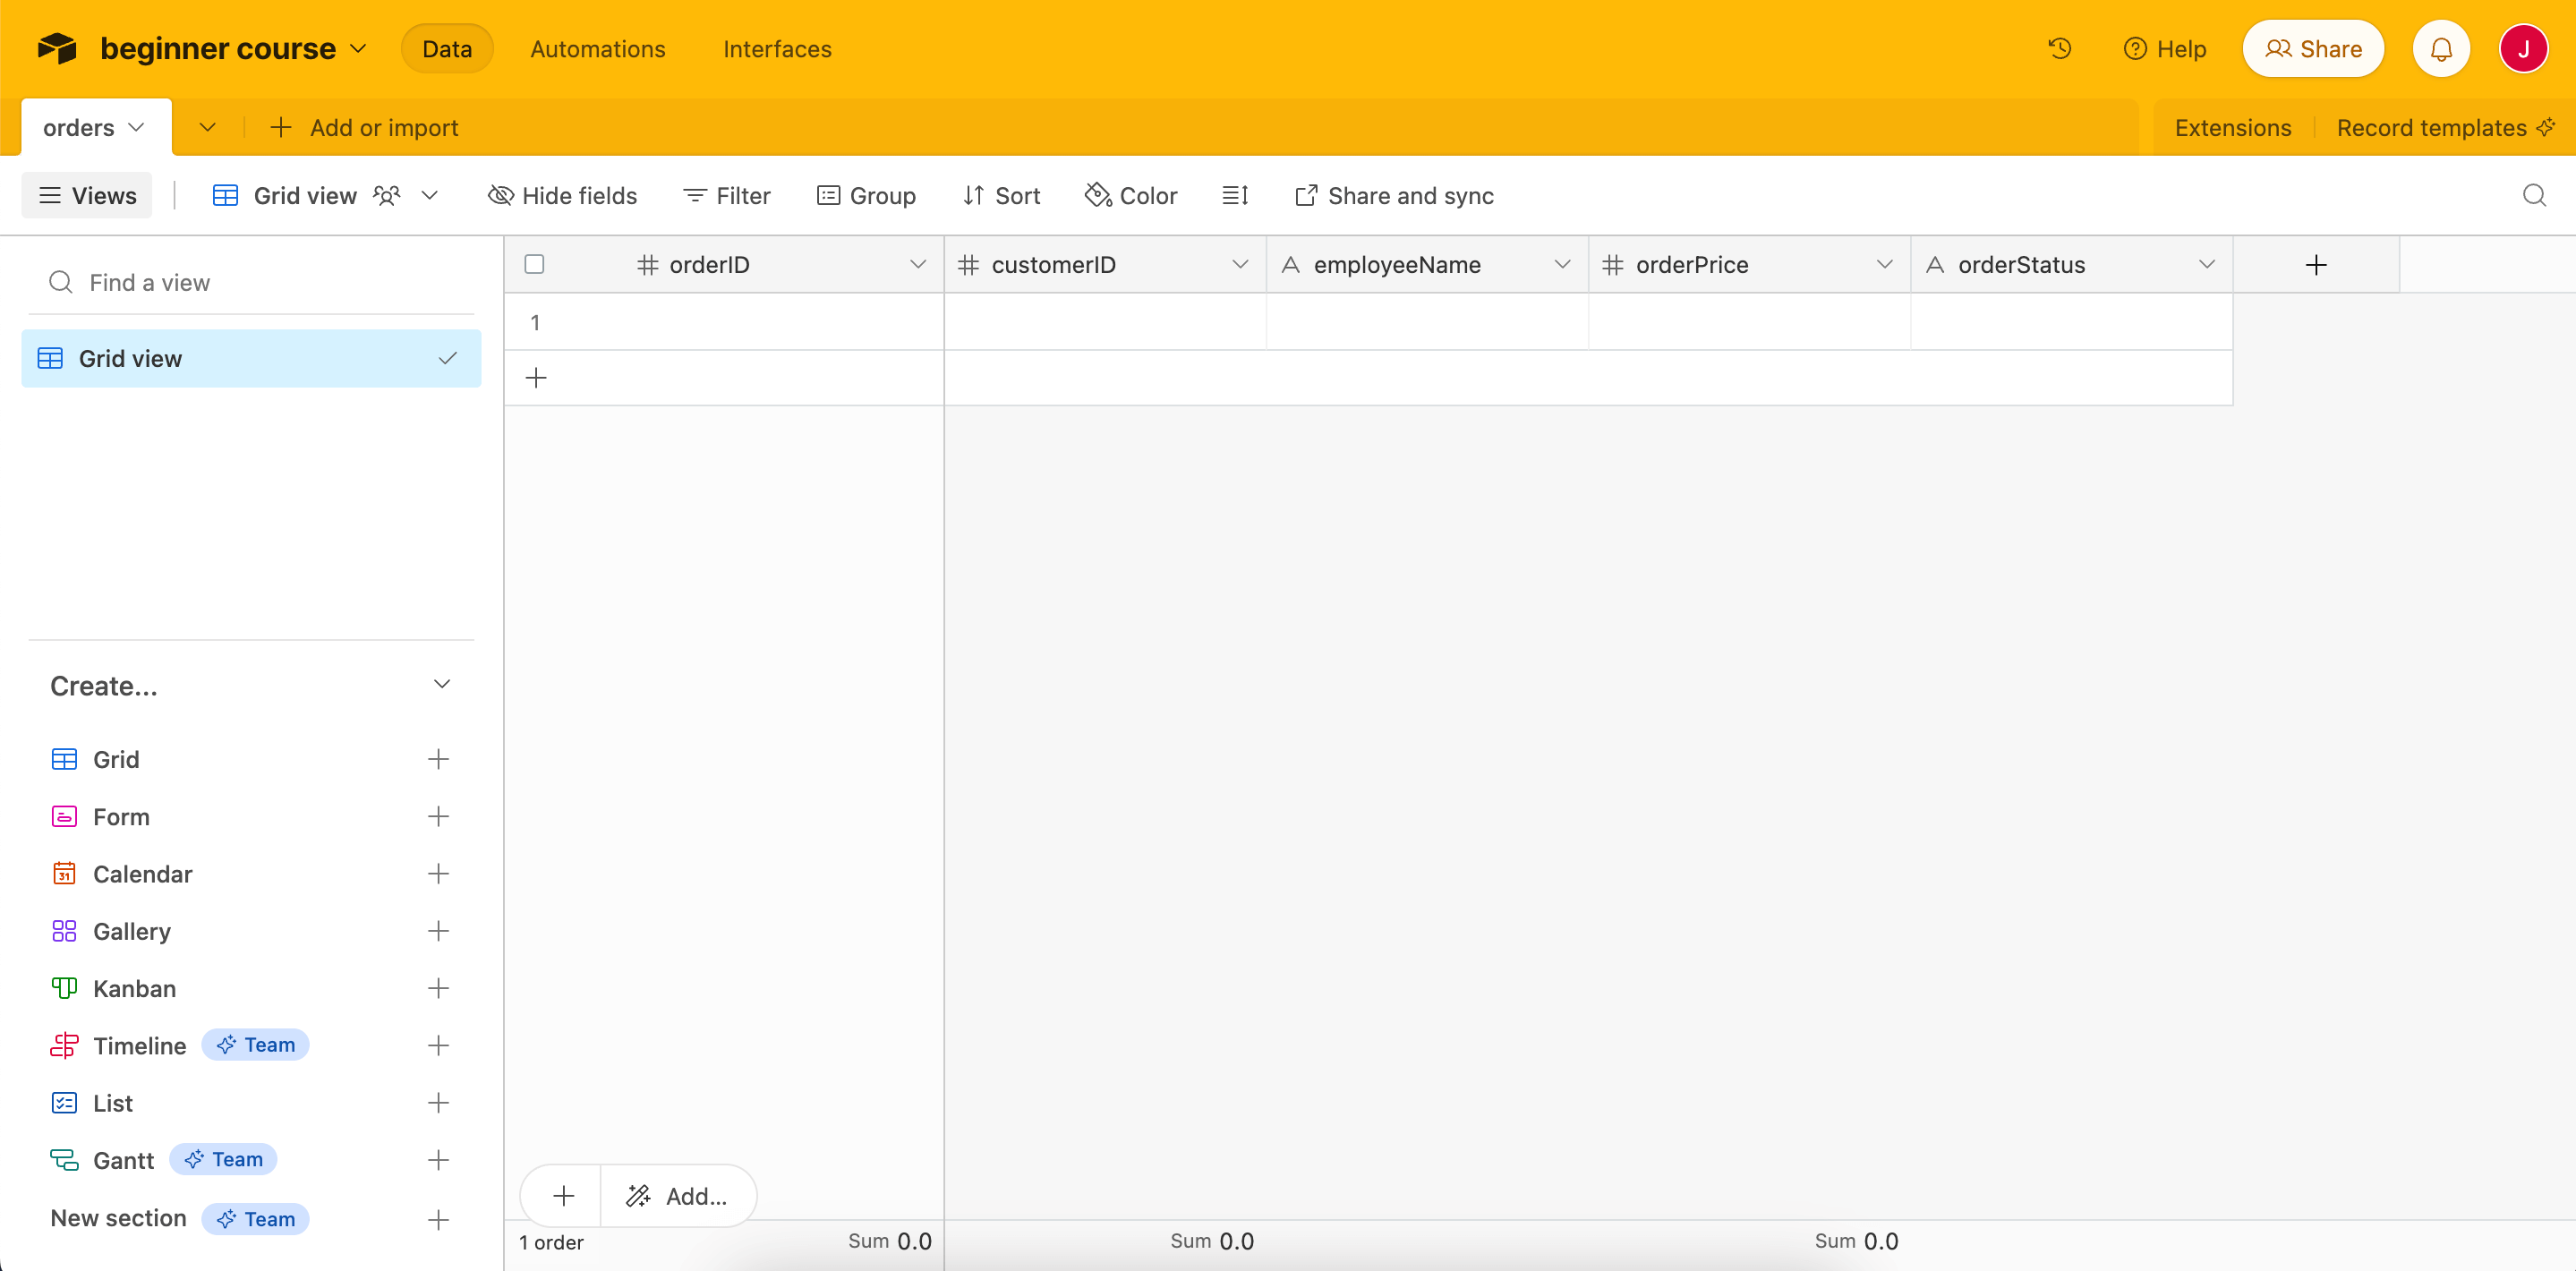 _Orders table in Airtable_ Now that the table is ready, let's return to the workflow in the n8n Editor UI. ## Add an Airtable node to the HTTP Request node# Add an Airtable node connected to the HTTP Request node. Remember You can add a node connected to an existing node by selecting the **+** icon next to the existing node. In the node panel: 1. Search for Airtable. 2. Select **Create a record** from the **Record Actions** search results. This will add the Airtable node to your canvas and open the node details window. In the Airtable node window, configure the following parameters: * **Credential to connect with**: * Select **Create new credential**. * Keep the default option **Connect using: Access Token** selected. * **Access token**: Follow the instructions from the Airtable credential page to create your token. Use the recommended scopes and add access to your beginners course base. Save the credential and close the Credential window when you're finished. * **Resource**: Record. * **Operation**: Create. This operation will create new records in the table. * **Base**: You can pick your base from a list (for example, beginner course). * **Table**: orders. * **Mapping Column Mode**: Map automatically. In this mode, the incoming data fields must have the same as the columns in Airtable. ## Test the Airtable node# Once you've finished configuring the Airtable node, execute it by selecting **Test step**. This might take a moment to process, but you can follow the progress by viewing the base in Airtable. Your results should look like this: 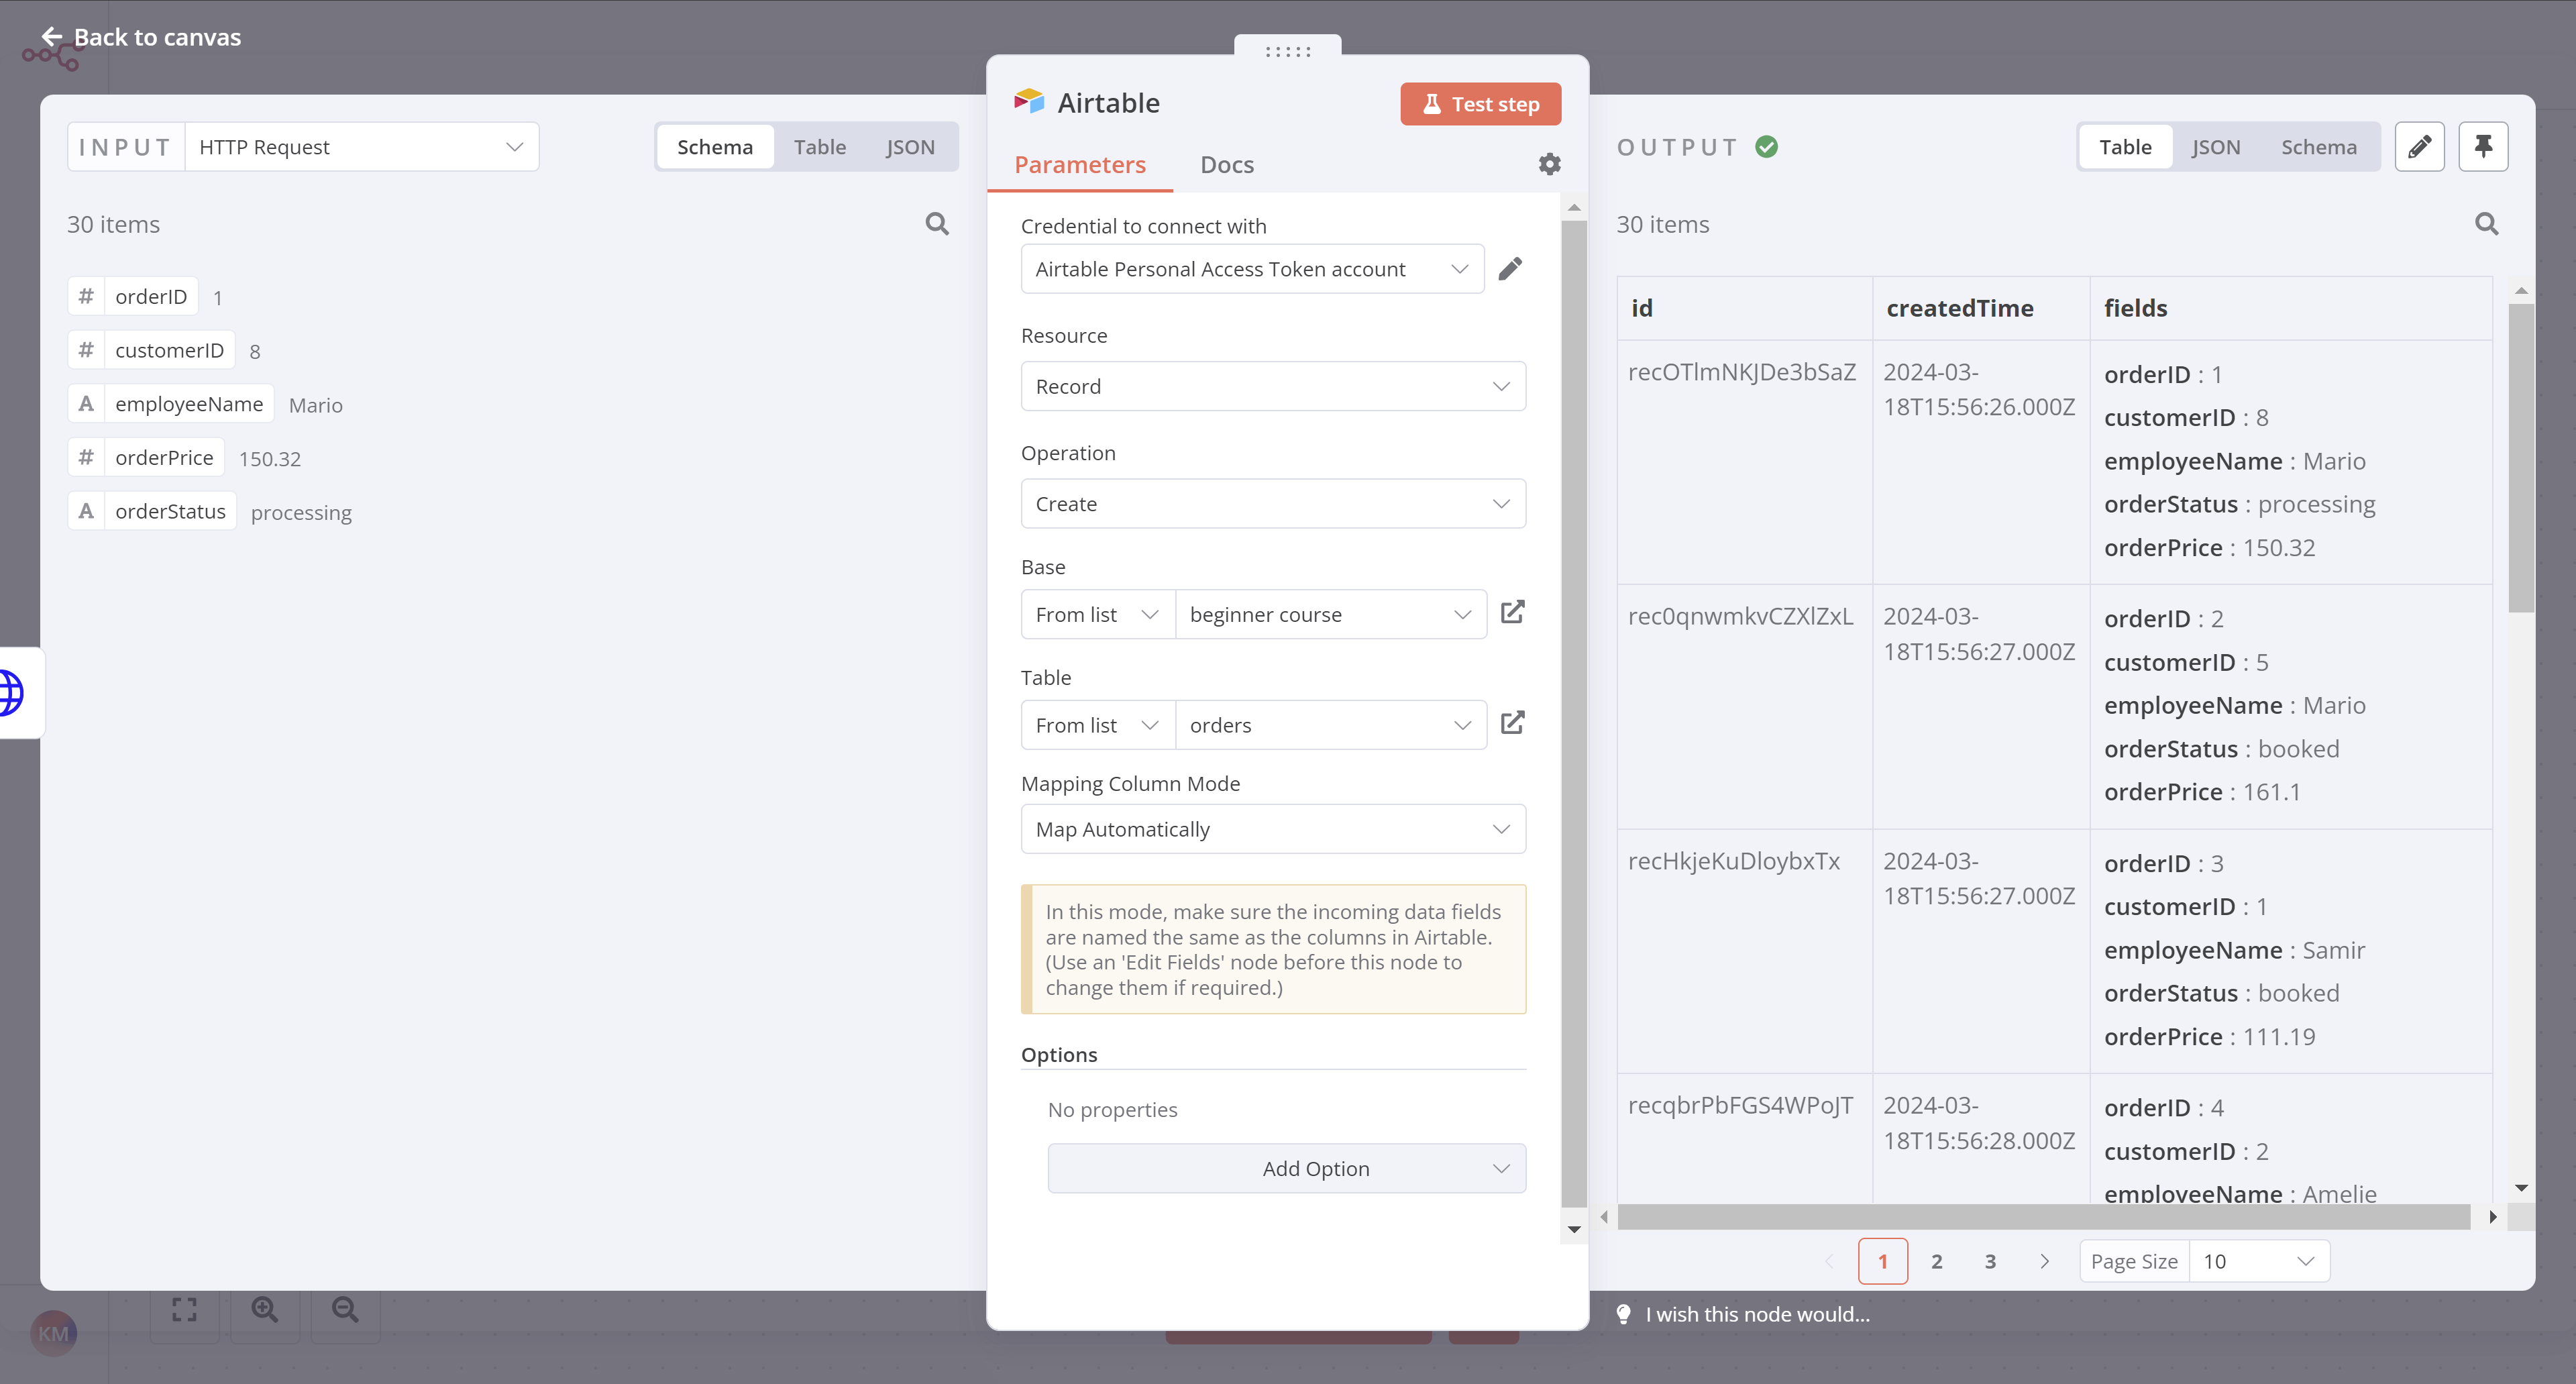 _Airtable node results_ All 30 data records will now appear in the orders table in Airtable: 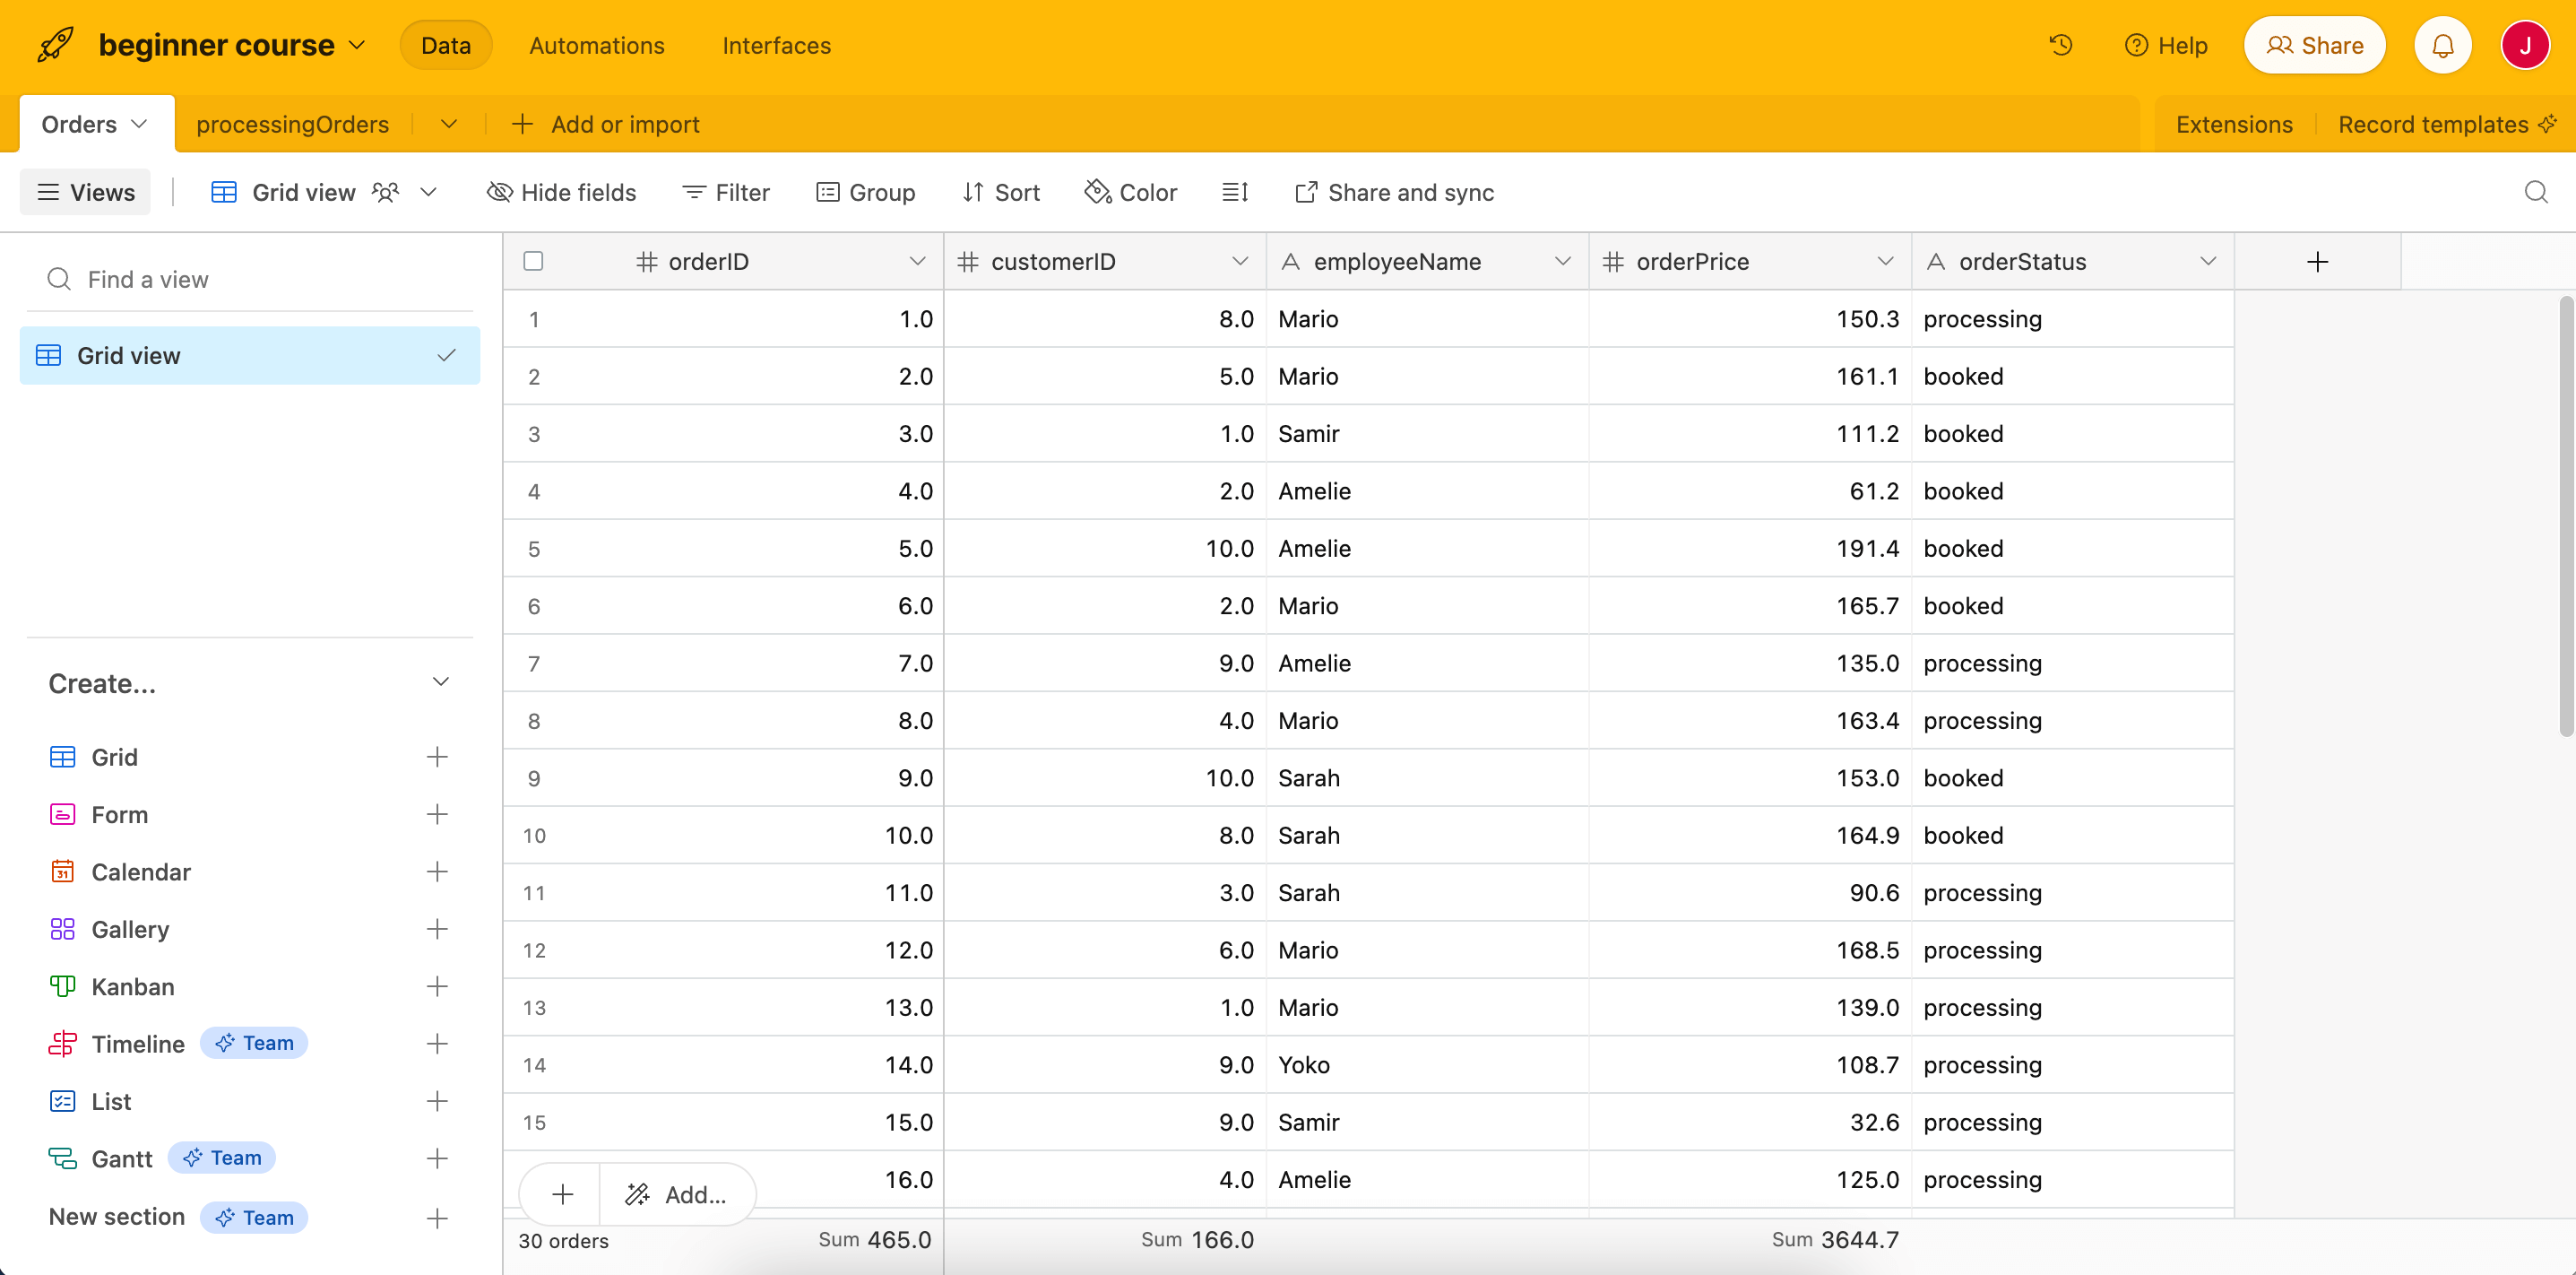 _Imported records in the orders table_ ## What's next?# **Nathan 🙋**: Wow, this automation is already so useful! But this inserts all collected data from the HTTP Request node into Airtable. Remember that I actually need to insert only processing orders in the table and calculate the price of booked orders? **You 👩🔧**: Sure, no problem. As a next step, I'll use a new node to filter the orders based on their status. --- ## Page: https://docs.n8n.io/courses/level-one/chapter-5/chapter-5.3/ In this step of the workflow, you will learn how to filter data using conditional logic and how to use expressions in nodes using the If node. After this step, your workflow should look like this: To insert only processing orders into Airtable we need to filter our data by `orderStatus`. Basically, we want to tell the program that _if_ the `orderStatus` is processing, _then_ insert all records with this status into Airtable; _else_, for example, if the `orderStatus` isn't _processing_, calculate the sum of all orders with the other `orderStatus` (`booked`). This if-then-else command is conditional logic. In n8n workflows, you can add conditional logic with the If node, which splits a workflow conditionally based on comparison operations. If vs. Switch If you need to filter data on more than boolean values (true and false), use the Switch node. The Switch node is similar to the If node, but supports multiple output connectors. ## Remove the connection to the Airtable node# First, let's remove the connection between the HTTP Request node and the Airtable node: 1. Hover over the arrow connection the **HTTP Request** node and the **Airtable** node. 2. Select the trash icon to remove the connection. ## Configure the If node# With the connection to the Airtable node removed, add an If node connected to the HTTP Request node: 1. Select the **+** sign coming off the HTTP Request node. 2. Search for the If node. 3. Select it when it appears in the search. For the If node, we'll use an expression. Expressions An expression is a string of characters and symbols in a programming language that can be evaluated to get a value, often according to its input. In n8n workflows, you can use expressions in a node to refer to another node for input data. In our example, the If node references the data output by the HTTP Request node. In the If node window, configure the parameters: * Set the `value1` placeholder to `{{ $json.orderStatus }}` with the following steps: 1. Hover over the value1 field. 2. Select the **Expression** tab on the right side of the `value1` field. 3. Next, open the expression editor by selecting the link icon:  _Opening the Expression Editor_ 4. Use the left-side panel to select **HTTP Request** > **orderStatus** and drag it into the **Expression** field in the center of the window.  _Expression Editor in the If node_ 5. Once you add the expression, close the **Edit Expression** dialog. * **Operation**: Select **String** > **is equal to** * Set the `value2` placeholder to `processing`. Data Type Make sure to select the correct data type (boolean, date & time, number, or string) when you select the **Operation**. Select **Test step** to test the If node. Your results should look like this: 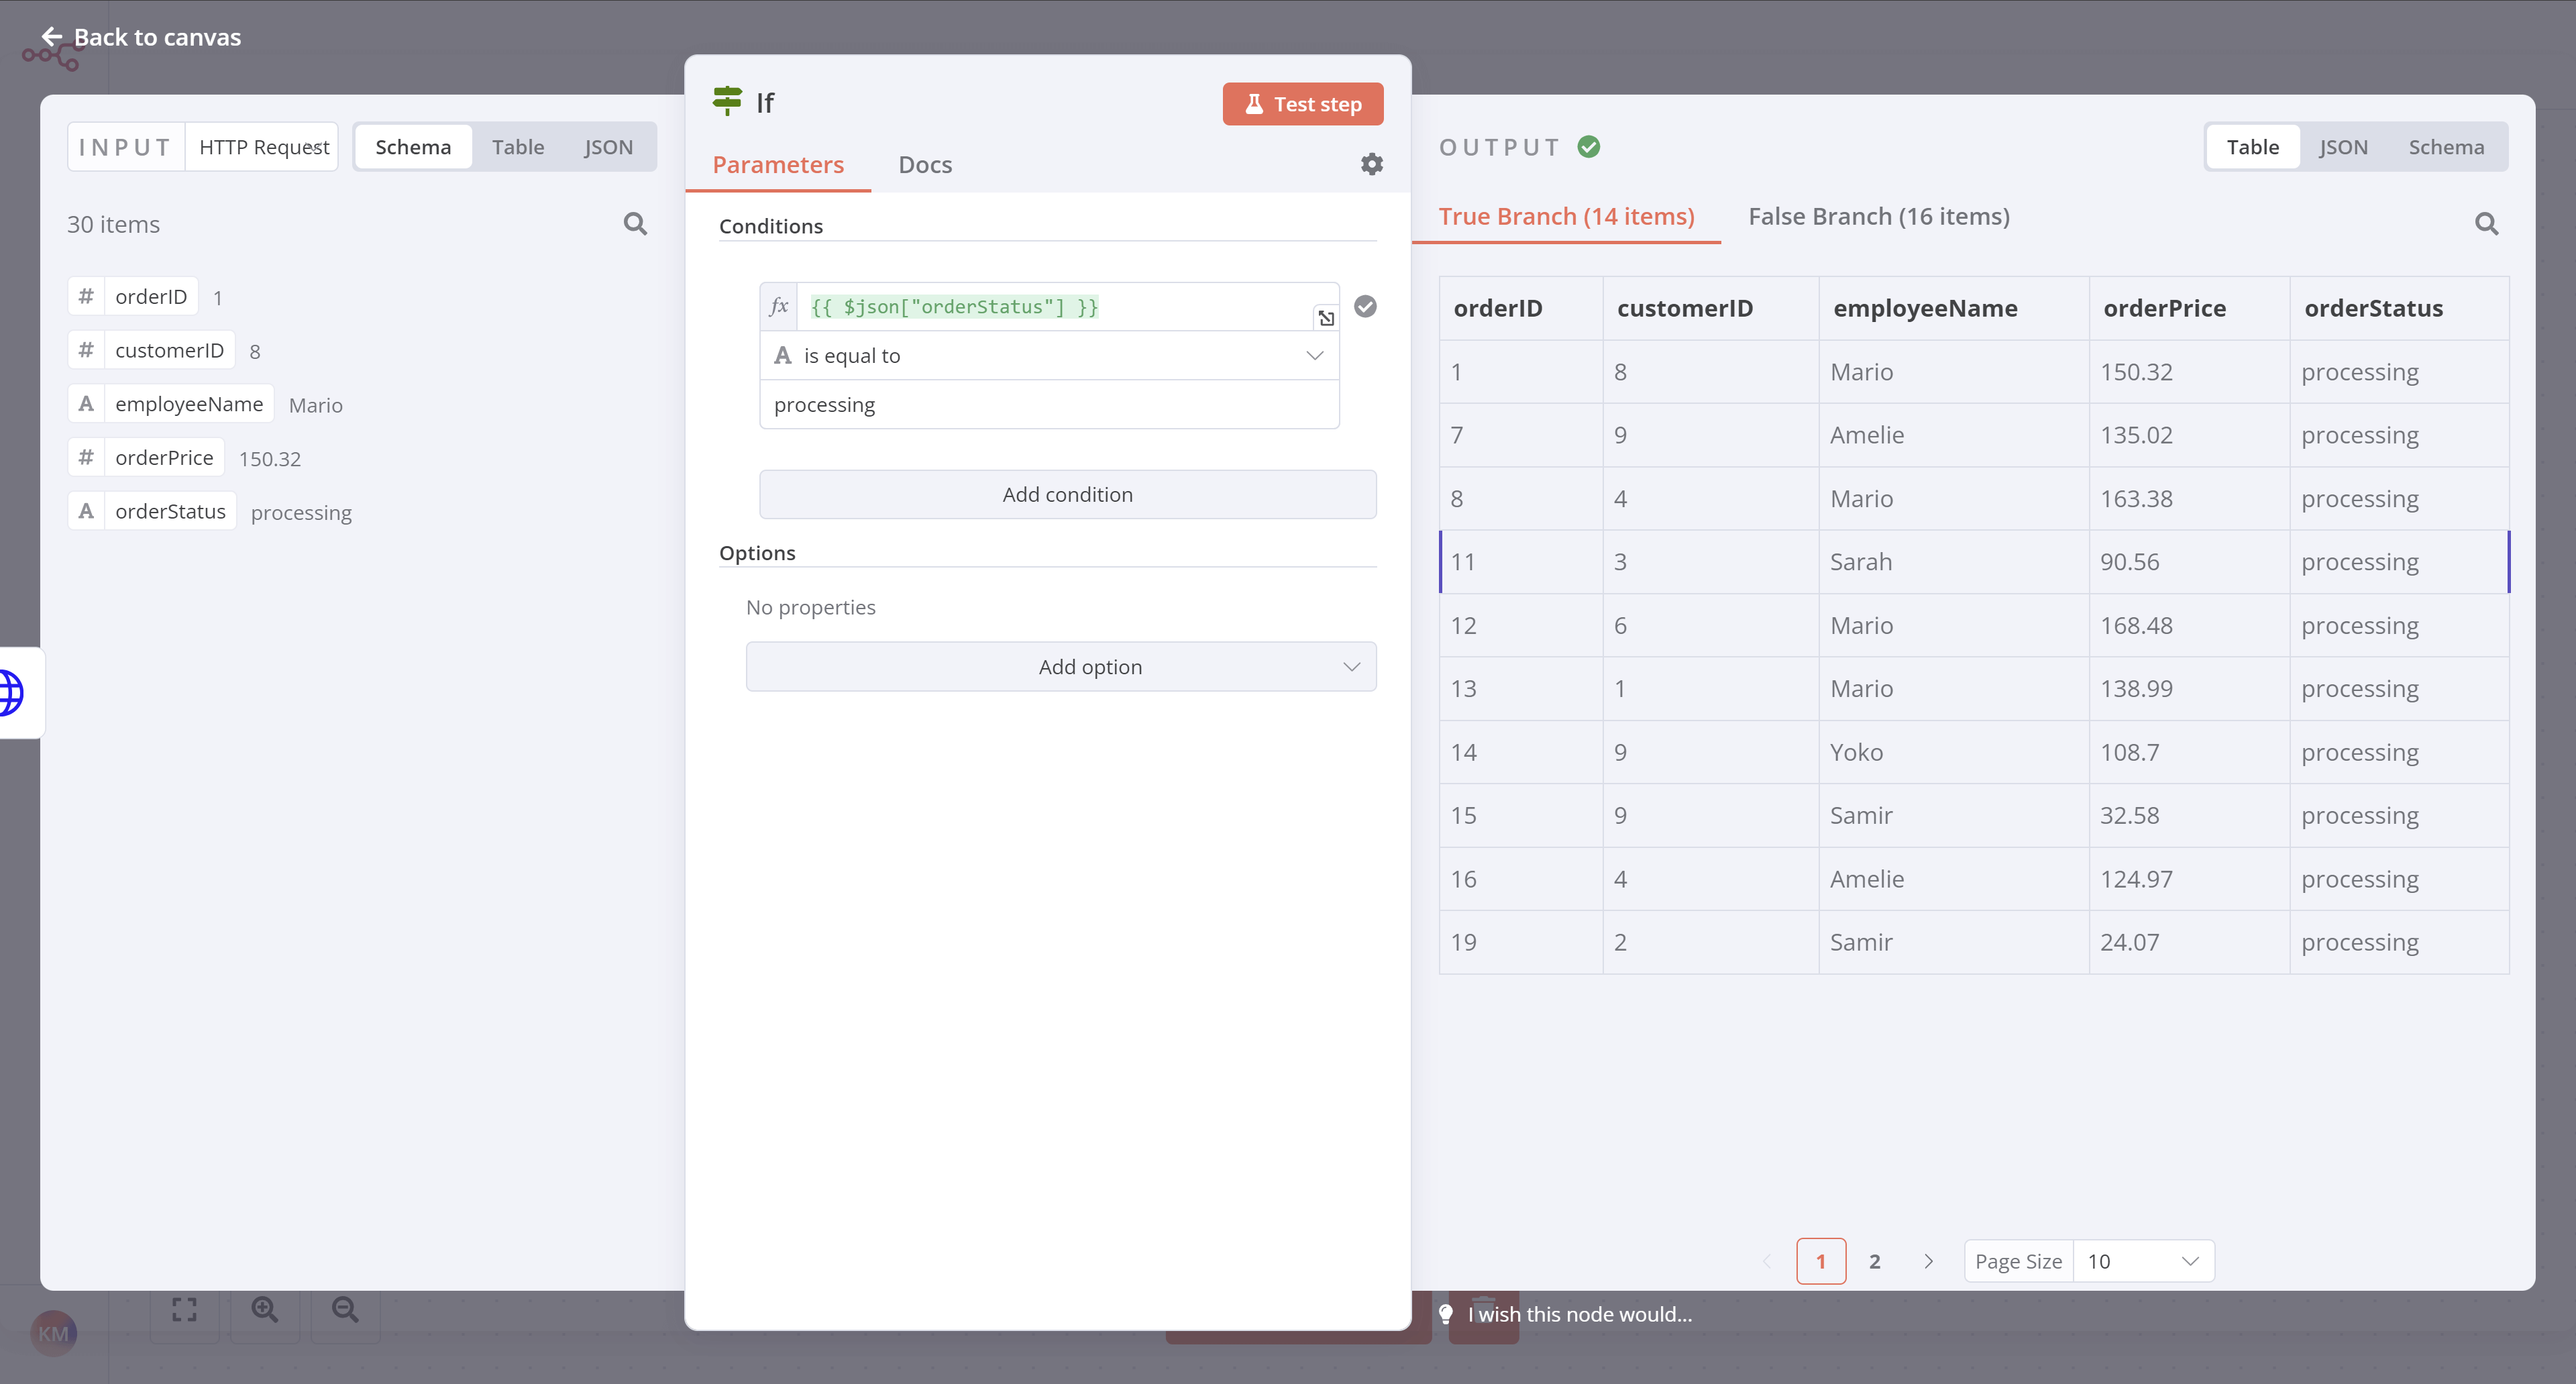 _If node output_ Note that the orders with a `processing` order status should show for the **True Branch** output, while the orders with a `booked` order status should show in the **False Branch** output. Close the If node detail view when you're finished. ## Insert data into Airtable# Next, we want to insert this data into Airtable. Remember what Nathan said at the end of the Inserting data into Airtable lesson? > I actually need to insert only processing orders in the table... Since Nathan only needs the `processing` orders in the table, we'll connect the Airtable node to the If node's `true` connector. In this case, since the Airtable node is already on our canvas, select the **If node** `true` connector and drag it to the Airtable node. It's a good idea at this point to retest the Airtable node. Before you do, open your table in Airtable and delete all existing rows. Then open the Airtable node window in n8n and select **Test step**. Review your data in Airtable to be sure your workflow only added the correct orders (those with `orderStatus` of `processing`). There should be 14 records now instead of 30. At this stage, your workflow should look like this: ## What's next?# **Nathan 🙋**: This If node is so useful for filtering data! Now I have all the information about processing orders. I actually only need the `employeeName` and `orderID`, but I guess I can keep all the other fields just in case. **You 👩🔧**: Actually, I wouldn't recommend doing that. Inserting more data requires more computational power, the data transfer is slower and takes longer, and takes up more storage resources in your table. In this particular case, 14 records with 5 fields might not seem like it'd make a significant difference, but if your business grows to thousands of records and dozens of fields, things add up and even one extra column can affect performance. **Nathan 🙋**: Oh, that's good to know. Can you select only two fields from the processing orders? **You 👩🔧**: Sure, I'll do that in the next step. --- ## Page: https://docs.n8n.io/courses/level-one/chapter-5/chapter-5.4/ In this step of the workflow, you will learn how to select and set data before transferring it to Airtable using the Edit Fields (Set) node. After this step, your workflow should look like this: The next step in Nathan's workflow is to filter the data to only insert the `employeeName` and `orderID` of all `processing` orders into Airtable. For this, you need to use the Edit Fields (Set) node, which allows you to select and set the data you want to transfer from one node to another. Edit Fields node The Edit Fields node can set completely new data as well as overwrite data that already exists. This node is crucial in workflows which expect incoming data from previous nodes, such as when inserting values into spreadsheets or databases. ## Disconnect the Airtable node# In your workflow, disconnect the **Airtable node** from the **If node** in the same way we disconnected it in the Filtering Orders lesson. Feel free to drag the Airtable node further away if your canvas feels crowded. ## Configure the Edit Fields node# Now add a new **Edit Fields (Set) node** by selecting the **+** icon for the If node's `true` connector and searching for **Edit Fields**. With the Edit Fields node window open, configure these parameters: * Ensure **Mode** is set to **Manual Mapping**. * While you can use the **Expression editor** we used in the Filtering Orders lesson, this time, let's drag the fields from the **Input** into the **Fields to Set**: * Drag **If** > **orderID** as the first field. * Drag **If** > **employeeName** as the second field. * Ensure that **Include Other Input Fields** is set to false. Select **Test step**. You should see the following results:  _Edit Fields (Set) node_ ## Add data to Airtable# Next, let's insert these values into Airtable: 1. Go to your Airtable base. 2. Add a new table called `processingOrders`. 3. Replace the existing columns with two new columns: * `orderID` (primary field): Number * `employeeName`: Single line text 4. Delete the three empty rows in the new table. 5. In n8n, connect the Edit Fields node **connector to the** Airtable node\*\*. 6. Update the Airtable node configuration to point to the new `processingOrders` table instead of the `orders` table. 7. Test your Airtable node to be sure it inserts records into the new `processingOrders` table. At this stage, your workflow should now look like this: ## What's next?# **Nathan 🙋**: You've already automated half of my work! Now I still need to calculate the booked orders for my colleagues. Can we automate that as well? **You 👩🔧**: Yes! In the next step, I'll use some JavaScript code in a node to calculate the booked orders. --- ## Page: https://docs.n8n.io/courses/level-one/chapter-5/chapter-5.5/ In this step of the workflow you will learn how n8n structures data and how to add custom JavaScript code to perform calculations using the Code node. After this step, your workflow should look like this: The next step in Nathan's workflow is to calculate two values from the booked orders: * The total number of booked orders * The total value of all booked orders To calculate data and add more functionality to your workflows you can use the Code node, which lets you write custom JavaScript code. ## About the Code node# Code node modes The Code node has two operational **modes**, depending on how you want to process items: * **Run Once for All Items** allows you to write code to process all input items at once, as a group. * **Run Once for Each Item** executes your code once for each input item. Learn more about how to use the Code node. In n8n, the data that's passed between nodes is an array of objects with the following JSON structure: <table><tbody><tr><td><div><pre><span></span><span> 1</span> <span> 2</span> <span> 3</span> <span> 4</span> <span> 5</span> <span> 6</span> <span> 7</span> <span> 8</span> <span> 9</span> <span>10</span> <span>11</span> <span>12</span> <span>13</span> <span>14</span> <span>15</span> <span>16</span> <span>17</span> <span>18</span> <span>19</span></pre></div></td><td><div><pre><span></span><code><span>[</span> <span> </span><span>{</span> <span> </span><span>"json"</span><span>:</span><span> </span><span>{</span><span> </span><span>// (1)!</span> <span> </span><span>"apple"</span><span>:</span><span> </span><span>"beets"</span><span>,</span> <span> </span><span>"carrot"</span><span>:</span><span> </span><span>{</span> <span> </span><span>"dill"</span><span>:</span><span> </span><span>1</span> <span> </span><span>}</span> <span> </span><span>},</span> <span> </span><span>"binary"</span><span>:</span><span> </span><span>{</span><span> </span><span>// (2)!</span> <span> </span><span>"apple-picture"</span><span>:</span><span> </span><span>{</span><span> </span><span>// (3)!</span> <span> </span><span>"data"</span><span>:</span><span> </span><span>"...."</span><span>,</span><span> </span><span>// (4)!</span> <span> </span><span>"mimeType"</span><span>:</span><span> </span><span>"image/png"</span><span>,</span><span> </span><span>// (5)!</span> <span> </span><span>"fileExtension"</span><span>:</span><span> </span><span>"png"</span><span>,</span><span> </span><span>// (6)!</span> <span> </span><span>"fileName"</span><span>:</span><span> </span><span>"example.png"</span><span>,</span><span> </span><span>// (7)!</span> <span> </span><span>}</span> <span> </span><span>}</span> <span> </span><span>},</span> <span> </span><span>...</span> <span>]</span> </code></pre></div></td></tr></tbody></table> 1. (required) n8n stores the actual data within a nested `json` key. This property is required, but can be set to anything from an empty object (like `{}`) to arrays and deeply nested data. The code node automatically wraps the data in a `json` object and parent array (`[]`) if it's missing. 2. (optional) Binary data of item. Most items in n8n don't contain binary data. 3. (required) Arbitrary key name for the binary data. 4. (required) Base64-encoded binary data. 5. (optional) Should set if possible. 6. (optional) Should set if possible. 7. (optional) Should set if possible. You can learn more about the expected format on the n8n data structure page. ## Configure the Code node# Now let's see how to accomplish Nathan's task using the Code node. In your workflow, add a **Code node** connected to the `false` branch of the **If node**. With the Code node window open, configure these parameters: * **Mode**: Select **Run Once for All Items**. * **Language**: Select **JavaScript**. Using Python in code nodes While we use JavaScript below, you can also use Python in the Code node. To learn more, refer to the Code node documentation. * Copy the Code below and paste it into the **Code** box to replace the existing code: <table><tbody><tr><td><div><pre><span></span><span>1</span> <span>2</span> <span>3</span> <span>4</span> <span>5</span> <span>6</span> <span>7</span> <span>8</span> <span>9</span></pre></div></td><td><div><pre><span></span><code><span>let</span><span> </span><span>items</span><span> </span><span>=</span><span> </span><span>$input</span><span>.</span><span>all</span><span>();</span> <span>let</span><span> </span><span>totalBooked</span><span> </span><span>=</span><span> </span><span>items</span><span>.</span><span>length</span><span>;</span> <span>let</span><span> </span><span>bookedSum</span><span> </span><span>=</span><span> </span><span>0</span><span>;</span> <span>for</span><span> </span><span>(</span><span>let</span><span> </span><span>i</span><span>=</span><span>0</span><span>;</span><span> </span><span>i</span><span> </span><span><</span><span> </span><span>items</span><span>.</span><span>length</span><span>;</span><span> </span><span>i</span><span>++</span><span>)</span><span> </span><span>{</span> <span> </span><span>bookedSum</span><span> </span><span>=</span><span> </span><span>bookedSum</span><span> </span><span>+</span><span> </span><span>items</span><span>[</span><span>i</span><span>].</span><span>json</span><span>.</span><span>orderPrice</span><span>;</span> <span>}</span> <span>return</span><span> </span><span>[{</span><span> </span><span>json</span><span>:</span><span> </span><span>{</span><span>totalBooked</span><span>,</span><span> </span><span>bookedSum</span><span>}</span><span> </span><span>}];</span> </code></pre></div></td></tr></tbody></table> Notice the format in which we return the results of the calculation: <table><tbody><tr><td><div><pre><span></span><span>1</span></pre></div></td><td><div><pre><span></span><code><span>return</span><span> </span><span>[{</span><span> </span><span>json</span><span>:</span><span> </span><span>{</span><span>totalBooked</span><span>,</span><span> </span><span>bookedSum</span><span>}</span><span> </span><span>}]</span> </code></pre></div></td></tr></tbody></table> Data structure error If you don't use the correct data structure, you will get an error message: `Error: Always an Array of items has to be returned!` Now select **Test step** and you should see the following results:  _Code node output_ ## What's next?# **Nathan 🙋**: Wow, the Code node is powerful! This means that if I have some basic JavaScript skills I can power up my workflows. **You 👩🔧**: Yes! You can progress from no-code to low-code! **Nathan 🙋**: Now, how do I send the calculations for the booked orders to my team's Discord channel? **You 👩🔧**: There's an n8n node for that. I'll set it up in the next step. --- ## Page: https://docs.n8n.io/courses/level-one/chapter-5/chapter-5.6/ In this step of the workflow, you will learn how to send messages to a Discord channel using the Discord node. After this step, your workflow should look like this: Now that you have a calculated summary of the booked orders, you need to notify Nathan's team in their Discord channel. For this workflow, you will send messages to the n8n server on Discord. Before you begin the steps below, use the link above to connect to the n8n server on Discord. Be sure you can access the `#course-level-1` channel. Communication app nodes You can replace the Discord node with another communication app. For example, n8n also has nodes for Slack and Mattermost. In your workflow, add a Discord node connected to the Code node. When you search for the Discord node, look for **Message Actions** and select **Send a message** to add the node. In the Discord node window, configure these parameters: * **Connection Type**: Select **Webhook**. * **Credential for Discord Webhook**: Select **\- Create New Credential -**. * Copy the **Webhook URL** from the email you received when you signed up for this course and paste it into the **Webhook URL** field of the credentials. * Select **Save** and then close the credentials dialog. * **Operation**: Select **Send a Message**. * **Message**: * Select the **Expression** tab on the right side of the Message field. * Copy the text below and paste it into the **Expression** window, or construct it manually using the **Expression Editor**. <table><tbody><tr><td><div><pre><span></span><span>1</span></pre></div></td><td><div><pre><span></span><code>This week we've {{$json["totalBooked"]}} booked orders with a total value of {{$json["bookedSum"]}}. My Unique ID: {{ $('HTTP Request').params["headerParameters"]["parameters"][0]["value"] }} </code></pre></div></td></tr></tbody></table> Now select **Test step** in the Discord node. If all works well, you should see this output in n8n:  _Discord node output_ And your message should appear in the Discord channel #course-level-1:  _Discord message_ ## What's next?# **Nathan 🙋**: Incredible, you've saved me hours of tedious work already! Now I can execute this workflow when I need it. I just need to remember to run it every Monday morning at 9 AM. **You 👩🔧**: Don't worry about that, you can actually schedule the workflow to run on a specific day, time, or interval. I'll set this up in the next step. --- ## Page: https://docs.n8n.io/courses/level-one/chapter-5/chapter-5.7/ In this step of the workflow, you will learn how to schedule your workflow so that it runs automatically at a set time/interval using the Schedule Trigger node. After this step, your workflow should look like this: The workflow you've built so far executes only when you click on **Test Workflow**. But Nathan needs it to run automatically every Monday morning. You can do this with the Schedule Trigger, which allows you to schedule workflows to run periodically at fixed dates, times, or intervals. To achieve this, we'll remove the Manual Trigger node we started with and replace it with a Schedule Trigger node instead. ## Remove the Manual Trigger node# First, let's remove the Manual Trigger node: 1. Select the Manual Trigger node connected to your HTTP Request node. 2. Select the trash can icon to delete. This removes the Manual Trigger node and you'll see an "Add first step" option. ## Add the Schedule Trigger node# 1. Open the nodes panel and search for **Schedule Trigger**. 2. Select it when it appears in the search results. In the Schedule Trigger node window, configure these parameters: * **Trigger Interval**: Select **Weeks**. * **Weeks Between Triggers**: Enter `1`. * **Trigger on weekdays**: Select **Monday** (and remove **Sunday** if added by default). * **Trigger at Hour**: Select **9am**. * **Trigger at Minute**: Enter `0`. Your Schedule Trigger node should look like this:  _Schedule Trigger Node_ Keep in mind To ensure accurate scheduling with the Schedule Trigger node, be sure to set the correct timezone for your n8n instance or the workflow's settings. The Schedule Trigger node will use the workflow's timezone if it's set; it will fall back to the n8n instance's timezone if it's not. ## Connect the Schedule Trigger node# Return to the canvas and connect your Schedule Trigger node to the HTTP Request node by dragging the arrow from it to the HTTP Request node. Your full workflow should look like this: ## What's next?# **You 👩🔧**: That was it for the workflow! I've added and configured all necessary nodes. Now every time you click on **Test workflow**, n8n will execute all the nodes: getting, filtering, calculating, and transferring the sales data. **Nathan 🙋**: This is just what I needed! My workflow will run automatically every Monday morning, correct? **You 👩🔧**: Not so fast. To do that, you need to activate your workflow. I'll do this in the next step and show you how to interpret the execution log. --- ## Page: https://docs.n8n.io/courses/level-one/chapter-5/chapter-5.8/ In this step of the workflow, you will learn how to activate your workflow and change the default workflow settings. Activating a workflow means that it will run automatically every time a trigger node receives input or meets a condition. By default, all newly created workflows start deactivated. To activate your workflow, set the **Inactive** toggle in the top navigation of the Editor UI to be **Activated**. Nathan's workflow will now be executed automatically every Monday at 9 AM:  _Activated workflow_ ## Workflow Executions# An execution represents a completed run of a workflow, from the first to the last node. n8n logs workflow executions, allowing you to see if the workflow succeeded or not. The execution log is useful for debugging your workflow and seeing at what stage it runs into issues. To view the executions for a specific workflow, you can switch to the **Executions** tab when the workflow is open on the canvas. Use the **Editor** tab to swap back to the node editor. To see the execution log for the entire n8n instance, in your Editor UI, select **Overview** and then select the **Executions** tab in the main panel.  _Execution List_ The **Executions** window displays a table with the following information: * **Name**: The name of the workflow * **Started At**: The date and time when the workflow started * **Status**: The status of the workflow (Waiting, Running, Succeeded, Cancelled, or Failed) and the amount of time it took the workflow to execute * **Execution ID**: The ID of this workflow execution Workflow execution status You can filter the displayed **Executions** by workflow and by status (**Any Status**, **Failed**, **Cancelled**, **Running**, **Success**, or **Waiting**). The information displayed here depends on which executions you configure to save in the **Workflow Settings**. ## Workflow Settings# You can customize your workflows and executions, or overwrite some global default settings in **Workflow Settings**. Access these settings by selecting the three dots in the upper right corner of the Editor UI when the workflow is open on the canvas, then select **Settings**.  _Workflow Settings_ In the **Workflow Settings** window you can configure the following settings: * **Execution Order**: Choose the execution logic for multi-branch workflows. You should leave this set to `v1` if you don't have workflows that rely on the legacy execution ordering. * **Error Workflow**: A workflow to run if the execution of the current workflow fails. * **This workflow can be called by**: Workflows allowed to call this workflow using the Execute Sub-workflow node. * **Timezone**: The timezone to use in the current workflow. If not set, the global timezone. In particular, this setting is important for the Schedule Trigger node, as you want to make sure that the workflow gets executed at the right time. * **Save failed production executions**: If n8n should save the Execution data of the workflow when it fails. Default is to save. * **Save successful production executions**: If n8n should save the Execution data of the workflow when it succeeds. Default is to save. * **Save manual executions**: If n8n should save executions started from the Editor UI. Default is to save. * **Save execution progress**: If n8n should save the execution data of each node. If set to Save, you can resume the workflow from where it stopped in case of an error, though keep in mind that this might make the execution slower. Default is to not save. * **Timeout Workflow**: Whether to cancel a workflow execution after a specific period of time. Default is to not timeout. ## What's next?# **You 👩🔧**: That was it! Now you have a 7-node workflow that will run automatically every Monday morning. You don't have to worry about remembering to wrangle the data. Instead, you can start your week with more meaningful or exciting work. **Nathan 🙋**: This workflow is incredibly helpful, thank you! Now, what's next for you? **You 👩🔧**: I'd like to build more workflows, share them with others, and use some workflows built by other people. --- ## Page: https://docs.n8n.io/courses/level-one/chapter-6/ In this chapter, you will learn how to export and import workflows. ## Exporting and importing workflows# You can save n8n workflows locally as JSON files. This is useful if you want to share your workflow with someone else or import a workflow from someone else. Sharing credentials Exported workflow JSON files include credential names and IDs. While IDs aren't sensitive, the names could be, depending on how you name your credentials. HTTP Request nodes may contain authentication headers when imported from cURL. Remove or anonymize this information from the JSON file before sharing to protect your credentials. 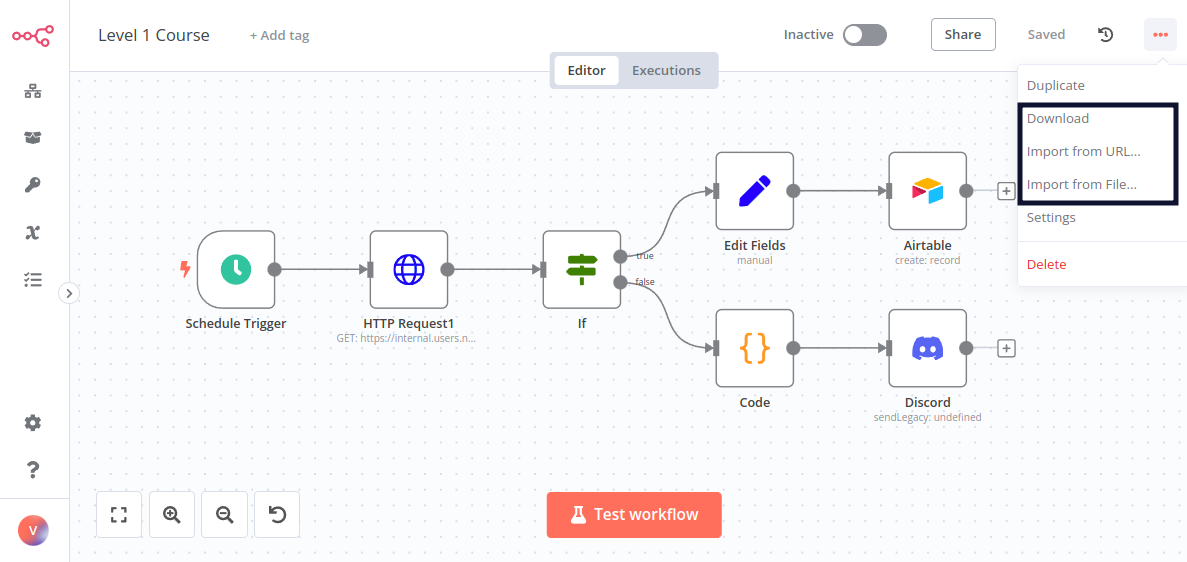 _Import & Export workflows menu_ You can export and import workflows in three ways: * From the **Editor UI** menu: * Export: From the top navigation bar, select the three dots in the upper right, then select **Download**. This will download your current workflow as a JSON file on your computer. * Import: From the top navigation bar, select the three dots in the upper right, then select **Import from URL** (to import a published workflow) or **Import from File** (to import a workflow as a JSON file). * From the **Editor UI** canvas: * Export: Select all the nodes on the canvas and use Ctrl+C to copy the workflow JSON. You can paste this into a file or share it directly with other people. * Import: You can paste a copied workflow JSON directly into the canvas with Ctrl+V. * From the command line: * Export: See the full list of commands for exporting workflows or credentials. * Import: See the full list of commands for importing workflows or credentials. --- ## Page: https://docs.n8n.io/courses/level-one/chapter-7/ Congratulations, you finished the n8n Course Level 1! You've learned a lot about workflow automation and built your first business workflow. Why not showcase your skills? You can test your knowledge by taking a **quiz**, which consists of questions about the theoretical concepts and workflows covered in this course. * You need to have at least 80% correct answers in each part to pass the quiz. * You can take the quiz as many times as you want. * There's no time limit on answering the quiz questions. Take the quiz! ## What's next?# * Create new workflows for your work or personal use and share them with us. Don't have any ideas? Find inspiration on our blog, YouTube channel, community forum, and Discord server. * Take the n8n Course Level 2. --- ## Page: https://docs.n8n.io/courses/level-two/ Welcome to the **n8n Course Level 2**! ## Is this course right for me?# This course is for you if you: * Want to automate somewhat complex business processes. * Want to dive deeper into n8n after taking the Level 1 course. ## What will I learn in this course?# The focus in this course is on working with data. You will learn how to: * Use the data structure of n8n correctly. * Process different data types (for example, XML, HTML, date, time, and binary data). * Merge data from different sources (for example, a database, spreadsheet, or CRM). * Use functions and JavaScript code in the Code node. * Deal with error workflows and workflow errors. You will learn all this by completing short practical exercises after the theoretical explanations and building a business workflow following instructions. ## What do I need to get started?# To follow along this course (at a comfortable pace) you will need the following: * **n8n set up**: You can use the self-hosted version or n8n Cloud. * **A user ID**: Sign up here to get your unique ID and other credentials you will need in the course. * **Basic n8n skills**: We strongly recommend taking the Level 1 course before this one. * **Basic JavaScript understanding** ## How long does the course take?# Completing the course should take around **two hours**. You don't have to complete it in one go; feel free to take breaks and resume whenever you are ready. ## How do I complete the course?# There are two milestones in this course that test your knowledge of what you have learned in the lessons: * Building the main workflow * Passing the quiz at the end of the course You can always **check your progress** throughout the course by entering your unique ID here. If you successfully complete the milestones above, you will get **a badge and an avatar** in your forum profile. You can then share your profile and course verification ID to showcase your n8n skills to others. Let's get started! --- ## Page: https://docs.n8n.io/courses/level-two/chapter-1/ In this chapter, you will learn about the data structure of n8n and how to use the Code node to transform data and simulate node outputs. ## Data structure of n8n# In a basic sense, n8n nodes function as an Extract, Transform, Load (ETL) tool. The nodes allow you to access (extract) data from multiple disparate sources, modify (transform) that data in a particular way, and pass (load) it along to where it needs to be. The data that moves along from node to node in your workflow must be in a format (structure) that can be recognized and interpreted by each node. In n8n, this required structure is an array of objects. About array of objects An array is a list of values. The array can be empty or contain several elements. Each element is stored at a position (index) in the list, starting at 0, and can be referenced by the index number. For example, in the array `["Leonardo", "Michelangelo", "Donatello", "Raphael"];` the element `Donatello` is stored at index 2. An object stores key-value pairs, instead of values at numbered indexes as in arrays. The order of the pairs isn't important, as the values can be accessed by referencing the key name. For example, the object below contains two properties (`name` and `color`): <table><tbody><tr><td><div><pre><span></span><span>1</span> <span>2</span> <span>3</span> <span>4</span></pre></div></td><td><div><pre><span></span><code><span>{</span> <span> </span><span>na</span><span>me</span><span>:</span><span> </span><span>'Michela</span><span>n</span><span>gelo'</span><span>,</span> <span> </span><span>color</span><span>:</span><span> </span><span>'blue'</span><span>,</span> <span>}</span> </code></pre></div></td></tr></tbody></table> An array of objects is an array that contains one or more objects. For example, the array `turtles` below contains four objects: <table><tbody><tr><td><div><pre><span></span><span> 1</span> <span> 2</span> <span> 3</span> <span> 4</span> <span> 5</span> <span> 6</span> <span> 7</span> <span> 8</span> <span> 9</span> <span>10</span> <span>11</span> <span>12</span> <span>13</span> <span>14</span> <span>15</span> <span>16</span> <span>17</span> <span>18</span></pre></div></td><td><div><pre><span></span><code><span>var</span><span> </span><span>turtles</span><span> </span><span>=</span><span> </span><span>[</span> <span> </span><span>{</span> <span> </span><span>name</span><span>:</span><span> </span><span>'Michelangelo'</span><span>,</span> <span> </span><span>color</span><span>:</span><span> </span><span>'orange'</span><span>,</span> <span> </span><span>},</span> <span> </span><span>{</span> <span> </span><span>name</span><span>:</span><span> </span><span>'Donatello'</span><span>,</span> <span> </span><span>color</span><span>:</span><span> </span><span>'purple'</span><span>,</span> <span> </span><span>},</span> <span> </span><span>{</span> <span> </span><span>name</span><span>:</span><span> </span><span>'Raphael'</span><span>,</span> <span> </span><span>color</span><span>:</span><span> </span><span>'red'</span><span>,</span> <span> </span><span>},</span> <span> </span><span>{</span> <span> </span><span>name</span><span>:</span><span> </span><span>'Leonardo'</span><span>,</span> <span> </span><span>color</span><span>:</span><span> </span><span>'blue'</span><span>,</span> <span> </span><span>}</span> <span>];</span> </code></pre></div></td></tr></tbody></table> You can access the properties of an object using dot notation with the syntax `object.property`. For example, `turtles[1].color` gets the color of the second turtle. Data sent from one node to another is sent as an array of JSON objects. The elements in this collection are called items.  _Items_ An n8n node performs its action on each item of incoming data.  _Items in the Customer Datastore node_ ## Creating data sets with the Code node# Now that you are familiar with the n8n data structure, you can use it to create your own data sets or simulate node outputs. To do this, use the Code node to write JavaScript code defining your array of objects with the following structure: <table><tbody><tr><td><div><pre><span></span><span>1</span> <span>2</span> <span>3</span> <span>4</span> <span>5</span> <span>6</span> <span>7</span></pre></div></td><td><div><pre><span></span><code><span>return</span><span> </span><span>[</span> <span> </span><span>{</span> <span> </span><span>json</span><span>:</span><span> </span><span>{</span> <span> </span><span>apple</span><span>:</span><span> </span><span>'beets'</span><span>,</span> <span> </span><span>}</span> <span> </span><span>}</span> <span>];</span> </code></pre></div></td></tr></tbody></table> For example, the array of objects representing the Ninja turtles would look like this in the Code node:  _Array of objects in the Code node_ JSON objects Notice that this array of objects contains an extra key: `json`. n8n expects you to wrap each object in an array in another object, with the key `json`.  _Illustration of data structure in n8n_ It's good practice to pass the data in the right structure used by n8n. But don't worry if you forget to add the `json` key to an item, n8n (version 0.166.0 and above) adds it automatically. You can also have nested pairs, for example if you want to define a primary and a secondary color. In this case, you need to further wrap the key-value pairs in curly braces `{}`. n8n data structure video This talk offers a more detailed explanation of data structure in n8n. ### Exercise# In a Code node, create an array of objects named `myContacts` that contains the properties `name` and `email`, and the `email` property is further split into `personal` and `work`. Show me the solution In the **Code node**, in the JavaScript Code field you have to write the following code: <table><tbody><tr><td><div><pre><span></span><span> 1</span> <span> 2</span> <span> 3</span> <span> 4</span> <span> 5</span> <span> 6</span> <span> 7</span> <span> 8</span> <span> 9</span> <span>10</span> <span>11</span> <span>12</span> <span>13</span> <span>14</span> <span>15</span> <span>16</span> <span>17</span> <span>18</span> <span>19</span> <span>20</span> <span>21</span> <span>22</span></pre></div></td><td><div><pre><span></span><code><span>var</span><span> </span><span>myContacts</span><span> </span><span>=</span><span> </span><span>[</span> <span> </span><span>{</span> <span> </span><span>json</span><span>:</span><span> </span><span>{</span> <span> </span><span>name</span><span>:</span><span> </span><span>'Alice'</span><span>,</span> <span> </span><span>email</span><span>:</span><span> </span><span>{</span> <span> </span><span>personal</span><span>:</span><span> </span><span>'alice@home.com'</span><span>,</span> <span> </span><span>work</span><span>:</span><span> </span><span>'alice@wonderland.org'</span> <span> </span><span>},</span> <span> </span><span>}</span> <span> </span><span>},</span> <span> </span><span>{</span> <span> </span><span>json</span><span>:</span><span> </span><span>{</span> <span> </span><span>name</span><span>:</span><span> </span><span>'Bob'</span><span>,</span> <span> </span><span>email</span><span>:</span><span> </span><span>{</span> <span> </span><span>personal</span><span>:</span><span> </span><span>'bob@mail.com'</span><span>,</span> <span> </span><span>work</span><span>:</span><span> </span><span>'contact@thebuilder.com'</span> <span> </span><span>},</span> <span> </span><span>}</span> <span> </span><span>},</span> <span>];</span> <span>return</span><span> </span><span>myContacts</span><span>;</span> </code></pre></div></td></tr></tbody></table> When you execute the **Code node**, the result should look like this:  _Result of Code node_ ## Referencing node data with the Code node# Just like you can use expressions to reference data from other nodes, you can also use some methods and variables in the **Code node**. Please make sure you read these pages before continuing to the next exercise. ### Exercise# Let's build on the previous exercise, in which you used the Code node to create a data set of two contacts with their names and emails. Now, connect a second Code node to the first one. In the new node, write code to create a new column named `workEmail` that references the work email of the first contact. Show me the solution In the **Code node**, in the JavaScript Code field you have to write the following code: <table><tbody><tr><td><div><pre><span></span><span>1</span> <span>2</span> <span>3</span></pre></div></td><td><div><pre><span></span><code><span>let</span><span> </span><span>items</span><span> </span><span>=</span><span> </span><span>$input</span><span>.</span><span>all</span><span>();</span> <span>items</span><span>[</span><span>0</span><span>].</span><span>json</span><span>.</span><span>workEmail</span><span> </span><span>=</span><span> </span><span>items</span><span>[</span><span>0</span><span>].</span><span>json</span><span>.</span><span>email</span><span>[</span><span>'work'</span><span>];</span> <span>return</span><span> </span><span>items</span><span>;</span> </code></pre></div></td></tr></tbody></table> When you execute the **Code node**, the result should look like this:  _Code node reference_ ## Transforming data# The incoming data from some nodes may have a different data structure than the one used in n8n. In this case, you need to transform the data, so that each item can be processed individually. The two most common operations for data transformation are: * Creating multiple items from one item * Creating a single item from multiple items There are several ways to transform data for the purposes mentioned above: * Use n8n's data transformation nodes. Use these nodes to modify the structure of incoming data that contain lists (arrays) without needing to use JavaScript code in the **Code node**: * Use the **Split Out node** to separate a single data item containing a list into multiple items. * Use the **Aggregate node** to take separate items, or portions of them, and group them together into individual items. * Use the **Code node** to write JavaScript functions to modify the data structure of incoming data using the **Run Once for All Items** mode: * To create multiple items from a single item, you can use JavaScript code like this. This example assumes that the item has a key named `data` set to an array of items in the form of: `[{ "data": [{<item_1>}, {<item_2>}, ...] }]`: <table><tbody><tr><td><div><pre><span></span><span>1</span> <span>2</span> <span>3</span> <span>4</span> <span>5</span></pre></div></td><td><div><pre><span></span><code><span>return</span><span> </span><span>$input</span><span>.</span><span>first</span><span>().</span><span>json</span><span>.</span><span>data</span><span>.</span><span>map</span><span>(</span><span>item</span><span> </span><span>=></span><span> </span><span>{</span> <span> </span><span>return</span><span> </span><span>{</span> <span> </span><span>json</span><span>:</span><span> </span><span>item</span> <span> </span><span>}</span> <span>});</span> </code></pre></div></td></tr></tbody></table> * To create a single item from multiple items, you can use this JavaScript code: <table><tbody><tr><td><div><pre><span></span><span>1</span> <span>2</span> <span>3</span> <span>4</span> <span>5</span> <span>6</span> <span>7</span></pre></div></td><td><div><pre><span></span><code><span>return</span><span> </span><span>[</span> <span> </span><span>{</span> <span> </span><span>json</span><span>:</span><span> </span><span>{</span> <span> </span><span>data_object</span><span>:</span><span> </span><span>$input</span><span>.</span><span>all</span><span>().</span><span>map</span><span>(</span><span>item</span><span> </span><span>=></span><span> </span><span>item</span><span>.</span><span>json</span><span>)</span> <span> </span><span>}</span> <span> </span><span>}</span> <span> </span><span>];</span> </code></pre></div></td></tr></tbody></table> These JavaScript examples assume your entire input is what you want to transform. As in the exercise above, you can also execute either operation on a specific field by identifying that in the items list, for example, if our workEmail example had multiple emails in a single field, we could run some code like this: <table><tbody><tr><td><div><pre><span></span><span>1</span> <span>2</span> <span>3</span> <span>4</span> <span>5</span> <span>6</span></pre></div></td><td><div><pre><span></span><code><span>let</span><span> </span><span>items</span><span> </span><span>=</span><span> </span><span>$input</span><span>.</span><span>all</span><span>();</span> <span>return</span><span> </span><span>items</span><span>[</span><span>0</span><span>].</span><span>json</span><span>.</span><span>workEmail</span><span>.</span><span>map</span><span>(</span><span>item</span><span> </span><span>=></span><span> </span><span>{</span> <span> </span><span>return</span><span> </span><span>{</span> <span> </span><span>json</span><span>:</span><span> </span><span>item</span> <span> </span><span>}</span> <span>});</span> </code></pre></div></td></tr></tbody></table> ### Exercise# 1. Use the **HTTP Request node** to make a GET request to the PokéAPI `https://pokeapi.co/api/v2/pokemon`. (This API requires no authentication). 2. Transform the data in the `results` field with the **Split Out node**. 3. Transform the data in the `results` field with the **Code node**. Show me the solution 1. To get the pokemon from the PokéAPI, execute the **HTTP Request node** with the following parameters: * **Authentication**: None * **Request Method**: GET * **URL**: https://pokeapi.co/api/v2/pokemon 2. To transform the data with the **Split Out node**, connect this node to the **HTTP Request node** and set the following parameters: * **Field To Split Out**: results * **Include**: No Other Fields 3. To transform the data with the **Code node**, connect this node to the **HTTP Request node** and write the following code in the JavaScript Code field: <table><tbody><tr><td><div><pre><span></span><span>1</span> <span>2</span> <span>3</span> <span>4</span> <span>5</span> <span>6</span></pre></div></td><td><div><pre><span></span><code><span>let</span><span> </span><span>items</span><span> </span><span>=</span><span> </span><span>$input</span><span>.</span><span>all</span><span>();</span> <span>return</span><span> </span><span>items</span><span>[</span><span>0</span><span>].</span><span>json</span><span>.</span><span>results</span><span>.</span><span>map</span><span>(</span><span>item</span><span> </span><span>=></span><span> </span><span>{</span> <span> </span><span>return</span><span> </span><span>{</span> <span> </span><span>json</span><span>:</span><span> </span><span>item</span> <span> </span><span>}</span> <span>});</span> </code></pre></div></td></tr></tbody></table> --- ## Page: https://docs.n8n.io/courses/level-two/chapter-2/ In this chapter, you will learn how to process different types of data using n8n core nodes. ## HTML and XML data# You're most likely familiar with HTML and XML. HTML vs. XML HTML is a markup language used to describe the structure and semantics of a web page. XML looks similar to HTML, but the tag names are different, as they describe the kind of data they hold. If you need to process HTML or XML data in your n8n workflows, use the **HTML node** or the **XML node**. Use the **HTML node** to extract HTML content of a webpage by referencing CSS selectors. This is useful if you want to collect structured information from a website (web-scraping). ### HTML Exercise# Let's get the title of the latest n8n blog post: 1. Use the **HTTP Request node** to make a GET request to the URL `https://blog.n8n.io/` (this endpoint requires no authentication). 2. Connect an **HTML node** and configure it to extract the title of the first blog post on the page. * Hint: If you're not familiar with CSS selectors or reading HTML, the CSS selector `.post .item-title a` should help! Show me the solution 1. Configure the HTTP Request node with the following parameters: * **Authentication**: None * **Request Method**: GET * **URL**: https://blog.n8n.io/ The result should look like this:  _Result of HTTP Request node_ 2. Connect an **HTML node** to the **HTTP Request node** and configure the former's parameters: * **Operation**: Extract HTML Content * **Source Data**: JSON * **JSON Property**: data * **Extraction Values**: * **Key**: title * **CSS Selector**: `.post .item-title a` * **Return Value**: HTML You can add more values to extract more data. The result should look like this:  _Result of HTML Extract node_ Use the **XML node** to convert XML to JSON and JSON to XML. This operation is useful if you work with different web services that use either XML or JSON and need to get and submit data between them in the two formats. ### XML Exercise# In the final exercise of Chapter 1, you used an **HTTP Request node** to make a request to the PokéAPI. In this exercise, we'll return to that same API but we'll convert the output to XML: 1. Add an **HTTP Request node** that makes the same request to the PokéAPI at `https://pokeapi.co/api/v2/pokemon`. 2. Use the XML node to convert the JSON output to XML. Show me the solution 1. To get the pokemon from the PokéAPI, execute the **HTTP Request node** with the following parameters: * **Authentication**: None * **Request Method**: GET * **URL**: https://pokeapi.co/api/v2/pokemon 2. Connect an **XML node** to it with the following parameters: * **Mode**: JSON to XML * **Property name**: data The result should look like this:  _XML node (JSON to XML) – Table View_ To transform data the other way around, select the mode **XML to JSON**. ## Date, time, and interval data# Date and time data types include `DATE`, `TIME`, `DATETIME`, `TIMESTAMP`, and `YEAR`. The dates and times can be passed in different formats, for example: * `DATE`: March 29 2022, 29-03-2022, 2022/03/29 * `TIME`: 08:30:00, 8:30, 20:30 * `DATETIME`: 2022/03/29 08:30:00 * `TIMESTAMP`: 1616108400 (Unix timestamp), 1616108400000 (Unix ms timestamp) * `YEAR`: 2022, 22 There are a few ways you can work with dates and times: * Use the **Date & Time node** to convert date and time data to different formats and calculate dates. * Use **Schedule Trigger node** to schedule workflows to run at a specific time, interval, or duration. Sometimes, you might need to pause the workflow execution. This might be necessary if you know that a service doesn't process the data instantly or it's slow to return all the results. In these cases, you don't want n8n to pass incomplete data to the next node. If you run into situations like this, use the **Wait node** after the node that you want to delay. The **Wait node** pauses the workflow execution and will resume execution: * At a specific time. * After a specified time interval. * On a webhook call. ### Date Exercise# Build a workflow that adds five days to an input date from the Customer Datastore node that you used before. Then, if the calculated date occurred after 1959, the workflow waits 1 minute before setting the calculated date as a value. The workflow should be triggered every 30 minutes. To begin: 1. Add the **Customer Datastore (n8n training) node** with the **Get All People** action selected. Return All. 2. Add the **Date & Time node** to Round Up the created Date from the datastore to End of Month. Output this to field new-date. Include all input fields. 3. Add the **If node** to check if that new rounded date is after `1960-01-01 00:00:00`. 4. Add the **Wait node** to the True output of that node and set it to wait for one minute. 5. Add the **Edit Fields (Set) node** to set a new field called outputValue to a String containing new-date. Include all input fields. 6. Add the **Schedule Trigger node** at the beginning of the workflow to trigger it every 30 minutes. (You can keep the Manual Trigger node for testing!) Show me the solution 1. Add the **Customer Datastore (n8n training) node** with the **Get All People** action selected. * Select the option to **Return All**. 2. Add a **Date & Time node** connected to the Customer Datastore node. Select the option to **Round a Date**. * Add the `created` date as the **Date** to round. * Select `Round Up` as the **Mode** and `End of Month` as the **To**. * Set the **Output Field Name** as `new-date`. * In **Options**, select **Add Option** and use the control to **Include Input Fields** 3. Add an **If node** connected to the **Date & Time node**. * Add the new-date field as the first part of the condition. * Set the comparison to **Date &Time > is after** * Add `1960-01-01 00:00:00` as the second part of the expression. (This should produce 3 items in the True Branch and 2 items in the False Branch) 4. Add a **Wait node** to the True output of the **If node**. * Set **Resume** to `After Time interval`. * Set **Wait Amount** to `1.00`. * Set **Wait Unit** to `Minutes`. 5. Add an **Edit Fields (Set) node** to the **Wait node**. * Use either JSON or Manual Mapping **Mode**. * Set a new field called `outputValue` to be the value of the new-date field. * Select the option to **Include Other Input Fields** and include **All** fields. 6. Add a **Schedule Trigger node** at the beginning of the workflow. * Set the **Trigger Interval** to use `Minutes`. * Set the **Minutes Between Triggers** to 30. * To test your schedule, be sure to activate the workflow. * Be sure to connect this node to the **Customer Datastore (n8n training) node** you began with! The workflow should look like this:  _Workflow for transforming dates_ To check the configuration of each node, you can copy the JSON code of this workflow and either paste it into the Editor UI or save it as a file and import from file into a new workflow. See Export and import workflows for more information. <table><tbody><tr><td><div><pre><span></span><span> 1</span> <span> 2</span> <span> 3</span> <span> 4</span> <span> 5</span> <span> 6</span> <span> 7</span> <span> 8</span> <span> 9</span> <span> 10</span> <span> 11</span> <span> 12</span> <span> 13</span> <span> 14</span> <span> 15</span> <span> 16</span> <span> 17</span> <span> 18</span> <span> 19</span> <span> 20</span> <span> 21</span> <span> 22</span> <span> 23</span> <span> 24</span> <span> 25</span> <span> 26</span> <span> 27</span> <span> 28</span> <span> 29</span> <span> 30</span> <span> 31</span> <span> 32</span> <span> 33</span> <span> 34</span> <span> 35</span> <span> 36</span> <span> 37</span> <span> 38</span> <span> 39</span> <span> 40</span> <span> 41</span> <span> 42</span> <span> 43</span> <span> 44</span> <span> 45</span> <span> 46</span> <span> 47</span> <span> 48</span> <span> 49</span> <span> 50</span> <span> 51</span> <span> 52</span> <span> 53</span> <span> 54</span> <span> 55</span> <span> 56</span> <span> 57</span> <span> 58</span> <span> 59</span> <span> 60</span> <span> 61</span> <span> 62</span> <span> 63</span> <span> 64</span> <span> 65</span> <span> 66</span> <span> 67</span> <span> 68</span> <span> 69</span> <span> 70</span> <span> 71</span> <span> 72</span> <span> 73</span> <span> 74</span> <span> 75</span> <span> 76</span> <span> 77</span> <span> 78</span> <span> 79</span> <span> 80</span> <span> 81</span> <span> 82</span> <span> 83</span> <span> 84</span> <span> 85</span> <span> 86</span> <span> 87</span> <span> 88</span> <span> 89</span> <span> 90</span> <span> 91</span> <span> 92</span> <span> 93</span> <span> 94</span> <span> 95</span> <span> 96</span> <span> 97</span> <span> 98</span> <span> 99</span> <span>100</span> <span>101</span> <span>102</span> <span>103</span> <span>104</span> <span>105</span> <span>106</span> <span>107</span> <span>108</span> <span>109</span> <span>110</span> <span>111</span> <span>112</span> <span>113</span> <span>114</span> <span>115</span> <span>116</span> <span>117</span> <span>118</span> <span>119</span> <span>120</span> <span>121</span> <span>122</span> <span>123</span> <span>124</span> <span>125</span> <span>126</span> <span>127</span> <span>128</span> <span>129</span> <span>130</span> <span>131</span> <span>132</span> <span>133</span> <span>134</span> <span>135</span> <span>136</span> <span>137</span> <span>138</span> <span>139</span> <span>140</span> <span>141</span> <span>142</span> <span>143</span> <span>144</span> <span>145</span> <span>146</span> <span>147</span> <span>148</span> <span>149</span> <span>150</span> <span>151</span> <span>152</span> <span>153</span> <span>154</span> <span>155</span> <span>156</span> <span>157</span> <span>158</span> <span>159</span> <span>160</span> <span>161</span> <span>162</span> <span>163</span> <span>164</span> <span>165</span> <span>166</span> <span>167</span> <span>168</span> <span>169</span> <span>170</span> <span>171</span> <span>172</span> <span>173</span> <span>174</span> <span>175</span> <span>176</span> <span>177</span> <span>178</span> <span>179</span> <span>180</span> <span>181</span> <span>182</span> <span>183</span> <span>184</span> <span>185</span> <span>186</span> <span>187</span> <span>188</span> <span>189</span> <span>190</span> <span>191</span> <span>192</span> <span>193</span> <span>194</span> <span>195</span> <span>196</span> <span>197</span> <span>198</span> <span>199</span> <span>200</span> <span>201</span> <span>202</span> <span>203</span> <span>204</span> <span>205</span> <span>206</span> <span>207</span> <span>208</span> <span>209</span></pre></div></td><td><div><pre><span></span><code><span>{</span> <span>"name"</span><span>:</span><span> </span><span>"Course 2, Ch 2, Date exercise"</span><span>,</span> <span>"nodes"</span><span>:</span><span> </span><span>[</span> <span> </span><span>{</span> <span> </span><span>"parameters"</span><span>:</span><span> </span><span>{},</span> <span> </span><span>"id"</span><span>:</span><span> </span><span>"6bf64d5c-4b00-43cf-8439-3cbf5e5f203b"</span><span>,</span> <span> </span><span>"name"</span><span>:</span><span> </span><span>"When clicking \"Test workflow\""</span><span>,</span> <span> </span><span>"type"</span><span>:</span><span> </span><span>"n8n-nodes-base.manualTrigger"</span><span>,</span> <span> </span><span>"typeVersion"</span><span>:</span><span> </span><span>1</span><span>,</span> <span> </span><span>"position"</span><span>:</span><span> </span><span>[</span> <span> </span><span>620</span><span>,</span> <span> </span><span>280</span> <span> </span><span>]</span> <span> </span><span>},</span> <span> </span><span>{</span> <span> </span><span>"parameters"</span><span>:</span><span> </span><span>{</span> <span> </span><span>"operation"</span><span>:</span><span> </span><span>"getAllPeople"</span><span>,</span> <span> </span><span>"returnAll"</span><span>:</span><span> </span><span>true</span> <span> </span><span>},</span> <span> </span><span>"id"</span><span>:</span><span> </span><span>"a08a8157-99ee-4d50-8fe4-b6d7e16e858e"</span><span>,</span> <span> </span><span>"name"</span><span>:</span><span> </span><span>"Customer Datastore (n8n training)"</span><span>,</span> <span> </span><span>"type"</span><span>:</span><span> </span><span>"n8n-nodes-base.n8nTrainingCustomerDatastore"</span><span>,</span> <span> </span><span>"typeVersion"</span><span>:</span><span> </span><span>1</span><span>,</span> <span> </span><span>"position"</span><span>:</span><span> </span><span>[</span> <span> </span><span>840</span><span>,</span> <span> </span><span>360</span> <span> </span><span>]</span> <span> </span><span>},</span> <span> </span><span>{</span> <span> </span><span>"parameters"</span><span>:</span><span> </span><span>{</span> <span> </span><span>"operation"</span><span>:</span><span> </span><span>"roundDate"</span><span>,</span> <span> </span><span>"date"</span><span>:</span><span> </span><span>"={{ $json.created }}"</span><span>,</span> <span> </span><span>"mode"</span><span>:</span><span> </span><span>"roundUp"</span><span>,</span> <span> </span><span>"outputFieldName"</span><span>:</span><span> </span><span>"new-date"</span><span>,</span> <span> </span><span>"options"</span><span>:</span><span> </span><span>{</span> <span> </span><span>"includeInputFields"</span><span>:</span><span> </span><span>true</span> <span> </span><span>}</span> <span> </span><span>},</span> <span> </span><span>"id"</span><span>:</span><span> </span><span>"f66a4356-2584-44b6-a4e9-1e3b5de53e71"</span><span>,</span> <span> </span><span>"name"</span><span>:</span><span> </span><span>"Date & Time"</span><span>,</span> <span> </span><span>"type"</span><span>:</span><span> </span><span>"n8n-nodes-base.dateTime"</span><span>,</span> <span> </span><span>"typeVersion"</span><span>:</span><span> </span><span>2</span><span>,</span> <span> </span><span>"position"</span><span>:</span><span> </span><span>[</span> <span> </span><span>1080</span><span>,</span> <span> </span><span>360</span> <span> </span><span>]</span> <span> </span><span>},</span> <span> </span><span>{</span> <span> </span><span>"parameters"</span><span>:</span><span> </span><span>{</span> <span> </span><span>"conditions"</span><span>:</span><span> </span><span>{</span> <span> </span><span>"options"</span><span>:</span><span> </span><span>{</span> <span> </span><span>"caseSensitive"</span><span>:</span><span> </span><span>true</span><span>,</span> <span> </span><span>"leftValue"</span><span>:</span><span> </span><span>""</span><span>,</span> <span> </span><span>"typeValidation"</span><span>:</span><span> </span><span>"strict"</span> <span> </span><span>},</span> <span> </span><span>"conditions"</span><span>:</span><span> </span><span>[</span> <span> </span><span>{</span> <span> </span><span>"id"</span><span>:</span><span> </span><span>"7c82823a-e603-4166-8866-493f643ba354"</span><span>,</span> <span> </span><span>"leftValue"</span><span>:</span><span> </span><span>"={{ $json['new-date'] }}"</span><span>,</span> <span> </span><span>"rightValue"</span><span>:</span><span> </span><span>"1960-01-01T00:00:00"</span><span>,</span> <span> </span><span>"operator"</span><span>:</span><span> </span><span>{</span> <span> </span><span>"type"</span><span>:</span><span> </span><span>"dateTime"</span><span>,</span> <span> </span><span>"operation"</span><span>:</span><span> </span><span>"after"</span> <span> </span><span>}</span> <span> </span><span>}</span> <span> </span><span>],</span> <span> </span><span>"combinator"</span><span>:</span><span> </span><span>"and"</span> <span> </span><span>},</span> <span> </span><span>"options"</span><span>:</span><span> </span><span>{}</span> <span> </span><span>},</span> <span> </span><span>"id"</span><span>:</span><span> </span><span>"cea39877-6183-4ea0-9400-e80523636912"</span><span>,</span> <span> </span><span>"name"</span><span>:</span><span> </span><span>"If"</span><span>,</span> <span> </span><span>"type"</span><span>:</span><span> </span><span>"n8n-nodes-base.if"</span><span>,</span> <span> </span><span>"typeVersion"</span><span>:</span><span> </span><span>2</span><span>,</span> <span> </span><span>"position"</span><span>:</span><span> </span><span>[</span> <span> </span><span>1280</span><span>,</span> <span> </span><span>360</span> <span> </span><span>]</span> <span> </span><span>},</span> <span> </span><span>{</span> <span> </span><span>"parameters"</span><span>:</span><span> </span><span>{</span> <span> </span><span>"amount"</span><span>:</span><span> </span><span>1</span><span>,</span> <span> </span><span>"unit"</span><span>:</span><span> </span><span>"minutes"</span> <span> </span><span>},</span> <span> </span><span>"id"</span><span>:</span><span> </span><span>"5aa860b7-c73c-4df0-ad63-215850166f13"</span><span>,</span> <span> </span><span>"name"</span><span>:</span><span> </span><span>"Wait"</span><span>,</span> <span> </span><span>"type"</span><span>:</span><span> </span><span>"n8n-nodes-base.wait"</span><span>,</span> <span> </span><span>"typeVersion"</span><span>:</span><span> </span><span>1.1</span><span>,</span> <span> </span><span>"position"</span><span>:</span><span> </span><span>[</span> <span> </span><span>1480</span><span>,</span> <span> </span><span>260</span> <span> </span><span>],</span> <span> </span><span>"webhookId"</span><span>:</span><span> </span><span>"be78732e-787d-463e-9210-2c7e8239761e"</span> <span> </span><span>},</span> <span> </span><span>{</span> <span> </span><span>"parameters"</span><span>:</span><span> </span><span>{</span> <span> </span><span>"assignments"</span><span>:</span><span> </span><span>{</span> <span> </span><span>"assignments"</span><span>:</span><span> </span><span>[</span> <span> </span><span>{</span> <span> </span><span>"id"</span><span>:</span><span> </span><span>"e058832a-2461-4c6d-b584-043ecc036427"</span><span>,</span> <span> </span><span>"name"</span><span>:</span><span> </span><span>"outputValue"</span><span>,</span> <span> </span><span>"value"</span><span>:</span><span> </span><span>"={{ $json['new-date'] }}"</span><span>,</span> <span> </span><span>"type"</span><span>:</span><span> </span><span>"string"</span> <span> </span><span>}</span> <span> </span><span>]</span> <span> </span><span>},</span> <span> </span><span>"includeOtherFields"</span><span>:</span><span> </span><span>true</span><span>,</span> <span> </span><span>"options"</span><span>:</span><span> </span><span>{}</span> <span> </span><span>},</span> <span> </span><span>"id"</span><span>:</span><span> </span><span>"be034e9e-3cf1-4264-9d15-b6760ce28f91"</span><span>,</span> <span> </span><span>"name"</span><span>:</span><span> </span><span>"Edit Fields"</span><span>,</span> <span> </span><span>"type"</span><span>:</span><span> </span><span>"n8n-nodes-base.set"</span><span>,</span> <span> </span><span>"typeVersion"</span><span>:</span><span> </span><span>3.3</span><span>,</span> <span> </span><span>"position"</span><span>:</span><span> </span><span>[</span> <span> </span><span>1700</span><span>,</span> <span> </span><span>260</span> <span> </span><span>]</span> <span> </span><span>},</span> <span> </span><span>{</span> <span> </span><span>"parameters"</span><span>:</span><span> </span><span>{</span> <span> </span><span>"rule"</span><span>:</span><span> </span><span>{</span> <span> </span><span>"interval"</span><span>:</span><span> </span><span>[</span> <span> </span><span>{</span> <span> </span><span>"field"</span><span>:</span><span> </span><span>"minutes"</span><span>,</span> <span> </span><span>"minutesInterval"</span><span>:</span><span> </span><span>30</span> <span> </span><span>}</span> <span> </span><span>]</span> <span> </span><span>}</span> <span> </span><span>},</span> <span> </span><span>"id"</span><span>:</span><span> </span><span>"6e8e4308-d0e0-4d0d-bc29-5131b57cf061"</span><span>,</span> <span> </span><span>"name"</span><span>:</span><span> </span><span>"Schedule Trigger"</span><span>,</span> <span> </span><span>"type"</span><span>:</span><span> </span><span>"n8n-nodes-base.scheduleTrigger"</span><span>,</span> <span> </span><span>"typeVersion"</span><span>:</span><span> </span><span>1.1</span><span>,</span> <span> </span><span>"position"</span><span>:</span><span> </span><span>[</span> <span> </span><span>620</span><span>,</span> <span> </span><span>480</span> <span> </span><span>]</span> <span> </span><span>}</span> <span>],</span> <span>"pinData"</span><span>:</span><span> </span><span>{},</span> <span>"connections"</span><span>:</span><span> </span><span>{</span> <span> </span><span>"When clicking \"Test workflow\""</span><span>:</span><span> </span><span>{</span> <span> </span><span>"main"</span><span>:</span><span> </span><span>[</span> <span> </span><span>[</span> <span> </span><span>{</span> <span> </span><span>"node"</span><span>:</span><span> </span><span>"Customer Datastore (n8n training)"</span><span>,</span> <span> </span><span>"type"</span><span>:</span><span> </span><span>"main"</span><span>,</span> <span> </span><span>"index"</span><span>:</span><span> </span><span>0</span> <span> </span><span>}</span> <span> </span><span>]</span> <span> </span><span>]</span> <span> </span><span>},</span> <span> </span><span>"Customer Datastore (n8n training)"</span><span>:</span><span> </span><span>{</span> <span> </span><span>"main"</span><span>:</span><span> </span><span>[</span> <span> </span><span>[</span> <span> </span><span>{</span> <span> </span><span>"node"</span><span>:</span><span> </span><span>"Date & Time"</span><span>,</span> <span> </span><span>"type"</span><span>:</span><span> </span><span>"main"</span><span>,</span> <span> </span><span>"index"</span><span>:</span><span> </span><span>0</span> <span> </span><span>}</span> <span> </span><span>]</span> <span> </span><span>]</span> <span> </span><span>},</span> <span> </span><span>"Date & Time"</span><span>:</span><span> </span><span>{</span> <span> </span><span>"main"</span><span>:</span><span> </span><span>[</span> <span> </span><span>[</span> <span> </span><span>{</span> <span> </span><span>"node"</span><span>:</span><span> </span><span>"If"</span><span>,</span> <span> </span><span>"type"</span><span>:</span><span> </span><span>"main"</span><span>,</span> <span> </span><span>"index"</span><span>:</span><span> </span><span>0</span> <span> </span><span>}</span> <span> </span><span>]</span> <span> </span><span>]</span> <span> </span><span>},</span> <span> </span><span>"If"</span><span>:</span><span> </span><span>{</span> <span> </span><span>"main"</span><span>:</span><span> </span><span>[</span> <span> </span><span>[</span> <span> </span><span>{</span> <span> </span><span>"node"</span><span>:</span><span> </span><span>"Wait"</span><span>,</span> <span> </span><span>"type"</span><span>:</span><span> </span><span>"main"</span><span>,</span> <span> </span><span>"index"</span><span>:</span><span> </span><span>0</span> <span> </span><span>}</span> <span> </span><span>]</span> <span> </span><span>]</span> <span> </span><span>},</span> <span> </span><span>"Wait"</span><span>:</span><span> </span><span>{</span> <span> </span><span>"main"</span><span>:</span><span> </span><span>[</span> <span> </span><span>[</span> <span> </span><span>{</span> <span> </span><span>"node"</span><span>:</span><span> </span><span>"Edit Fields"</span><span>,</span> <span> </span><span>"type"</span><span>:</span><span> </span><span>"main"</span><span>,</span> <span> </span><span>"index"</span><span>:</span><span> </span><span>0</span> <span> </span><span>}</span> <span> </span><span>]</span> <span> </span><span>]</span> <span> </span><span>},</span> <span> </span><span>"Schedule Trigger"</span><span>:</span><span> </span><span>{</span> <span> </span><span>"main"</span><span>:</span><span> </span><span>[</span> <span> </span><span>[</span> <span> </span><span>{</span> <span> </span><span>"node"</span><span>:</span><span> </span><span>"Customer Datastore (n8n training)"</span><span>,</span> <span> </span><span>"type"</span><span>:</span><span> </span><span>"main"</span><span>,</span> <span> </span><span>"index"</span><span>:</span><span> </span><span>0</span> <span> </span><span>}</span> <span> </span><span>]</span> <span> </span><span>]</span> <span> </span><span>}</span> <span>}</span> <span>}</span> </code></pre></div></td></tr></tbody></table> ## Binary data# Up to now, you have mainly worked with text data. But what if you want to process data that's not text, like images or PDF files? These types of files are represented in the binary numeral system, so they're considered binary data. In this form, binary data doesn't offer you useful information, so you'll need to convert it into a readable form. In n8n, you can process binary data with the following nodes: * HTTP Request to request and send files from/to web resources and APIs. * Read/Write Files from Disk to read and write files from/to the machine where n8n is running. * Convert to File to take input data and output it as a file. * Extract From File to get data from a binary format and convert it to JSON. Reading and writing files is only available on self-hosted n8n Reading and writing files to disk isn't available on n8n Cloud. You'll read and write to the machine where you installed n8n. If you run n8n in Docker, your command runs in the n8n container and not the Docker host. The Read/Write Files From Disk node looks for files relative to the n8n install path. n8n recommends using absolute file paths to prevent any errors. To read or write a binary file, you need to write the path (location) of the file in the node's `File(s) Selector` parameter (for the Read operation) or in the node's `File Path and Name` parameter (for the Write operation). Naming the right path The file path looks slightly different depending on how you are running n8n: * npm: `~/my_file.json` * n8n cloud / Docker: `/tmp/my_file.json` ### Binary Exercise 1# For our first binary exercise, let's convert a PDF file to JSON: 1. Make an HTTP request to get this PDF file: `https://media.kaspersky.com/pdf/Kaspersky_Lab_Whitepaper_Anti_blocker.pdf.` 2. Use the **Extract From File node** to convert the file from binary to JSON. Show me the solution In the **HTTP Request node**, you should see the PDF file, like this:  _HTTP Request node to get PDF_ When you convert the PDF from binary to JSON using the **Extract From File node**, the result should look like this:  _Extract From File node_ To check the configuration of the nodes, you can copy the JSON workflow code below and paste it into your Editor UI: <table><tbody><tr><td><div><pre><span></span><span> 1</span> <span> 2</span> <span> 3</span> <span> 4</span> <span> 5</span> <span> 6</span> <span> 7</span> <span> 8</span> <span> 9</span> <span>10</span> <span>11</span> <span>12</span> <span>13</span> <span>14</span> <span>15</span> <span>16</span> <span>17</span> <span>18</span> <span>19</span> <span>20</span> <span>21</span> <span>22</span> <span>23</span> <span>24</span> <span>25</span> <span>26</span> <span>27</span> <span>28</span> <span>29</span> <span>30</span> <span>31</span> <span>32</span> <span>33</span> <span>34</span> <span>35</span> <span>36</span> <span>37</span> <span>38</span> <span>39</span> <span>40</span> <span>41</span> <span>42</span> <span>43</span> <span>44</span> <span>45</span> <span>46</span> <span>47</span> <span>48</span> <span>49</span> <span>50</span> <span>51</span> <span>52</span> <span>53</span> <span>54</span> <span>55</span> <span>56</span> <span>57</span> <span>58</span> <span>59</span> <span>60</span> <span>61</span> <span>62</span> <span>63</span> <span>64</span> <span>65</span> <span>66</span> <span>67</span> <span>68</span> <span>69</span></pre></div></td><td><div><pre><span></span><code><span>{</span> <span> </span><span>"name"</span><span>:</span><span> </span><span>"Binary to JSON"</span><span>,</span> <span> </span><span>"nodes"</span><span>:</span><span> </span><span>[</span> <span> </span><span>{</span> <span> </span><span>"parameters"</span><span>:</span><span> </span><span>{},</span> <span> </span><span>"id"</span><span>:</span><span> </span><span>"78639a25-b69a-4b9c-84e0-69e045bed1a3"</span><span>,</span> <span> </span><span>"name"</span><span>:</span><span> </span><span>"When clicking \"Execute Workflow\""</span><span>,</span> <span> </span><span>"type"</span><span>:</span><span> </span><span>"n8n-nodes-base.manualTrigger"</span><span>,</span> <span> </span><span>"typeVersion"</span><span>:</span><span> </span><span>1</span><span>,</span> <span> </span><span>"position"</span><span>:</span><span> </span><span>[</span> <span> </span><span>480</span><span>,</span> <span> </span><span>520</span> <span> </span><span>]</span> <span> </span><span>},</span> <span> </span><span>{</span> <span> </span><span>"parameters"</span><span>:</span><span> </span><span>{</span> <span> </span><span>"url"</span><span>:</span><span> </span><span>"https://media.kaspersky.com/pdf/Kaspersky_Lab_Whitepaper_Anti_blocker.pdf"</span><span>,</span> <span> </span><span>"options"</span><span>:</span><span> </span><span>{}</span> <span> </span><span>},</span> <span> </span><span>"id"</span><span>:</span><span> </span><span>"a11310df-1287-4e9a-b993-baa6bd4265a6"</span><span>,</span> <span> </span><span>"name"</span><span>:</span><span> </span><span>"HTTP Request"</span><span>,</span> <span> </span><span>"type"</span><span>:</span><span> </span><span>"n8n-nodes-base.httpRequest"</span><span>,</span> <span> </span><span>"typeVersion"</span><span>:</span><span> </span><span>4.1</span><span>,</span> <span> </span><span>"position"</span><span>:</span><span> </span><span>[</span> <span> </span><span>700</span><span>,</span> <span> </span><span>520</span> <span> </span><span>]</span> <span> </span><span>},</span> <span> </span><span>{</span> <span> </span><span>"parameters"</span><span>:</span><span> </span><span>{</span> <span> </span><span>"operation"</span><span>:</span><span> </span><span>"pdf"</span><span>,</span> <span> </span><span>"options"</span><span>:</span><span> </span><span>{}</span> <span> </span><span>},</span> <span> </span><span>"id"</span><span>:</span><span> </span><span>"88697b6b-fb02-4c3d-a715-750d60413e9f"</span><span>,</span> <span> </span><span>"name"</span><span>:</span><span> </span><span>"Extract From File"</span><span>,</span> <span> </span><span>"type"</span><span>:</span><span> </span><span>"n8n-nodes-base.extractFromFile"</span><span>,</span> <span> </span><span>"typeVersion"</span><span>:</span><span> </span><span>1</span><span>,</span> <span> </span><span>"position"</span><span>:</span><span> </span><span>[</span> <span> </span><span>920</span><span>,</span> <span> </span><span>520</span> <span> </span><span>]</span> <span> </span><span>}</span> <span> </span><span>],</span> <span> </span><span>"pinData"</span><span>:</span><span> </span><span>{},</span> <span> </span><span>"connections"</span><span>:</span><span> </span><span>{</span> <span> </span><span>"When clicking \"Execute Workflow\""</span><span>:</span><span> </span><span>{</span> <span> </span><span>"main"</span><span>:</span><span> </span><span>[</span> <span> </span><span>[</span> <span> </span><span>{</span> <span> </span><span>"node"</span><span>:</span><span> </span><span>"HTTP Request"</span><span>,</span> <span> </span><span>"type"</span><span>:</span><span> </span><span>"main"</span><span>,</span> <span> </span><span>"index"</span><span>:</span><span> </span><span>0</span> <span> </span><span>}</span> <span> </span><span>]</span> <span> </span><span>]</span> <span> </span><span>},</span> <span> </span><span>"HTTP Request"</span><span>:</span><span> </span><span>{</span> <span> </span><span>"main"</span><span>:</span><span> </span><span>[</span> <span> </span><span>[</span> <span> </span><span>{</span> <span> </span><span>"node"</span><span>:</span><span> </span><span>"Extract From File"</span><span>,</span> <span> </span><span>"type"</span><span>:</span><span> </span><span>"main"</span><span>,</span> <span> </span><span>"index"</span><span>:</span><span> </span><span>0</span> <span> </span><span>}</span> <span> </span><span>]</span> <span> </span><span>]</span> <span> </span><span>}</span> <span> </span><span>}</span> <span>}</span> </code></pre></div></td></tr></tbody></table> ### Binary Exercise 2# For our second binary exercise, let's convert some JSON data to binary: 1. Make an HTTP request to the Poetry DB API `https://poetrydb.org/random/1`. 2. Convert the returned data from JSON to binary using the **Convert to File node**. 3. Write the new binary file data to the machine where n8n is running using the **Read/Write Files From Disk node**. 4. To check that it worked out, use the **Read/Write Files From Disk node** to read the generated binary file. Show me the solution The workflow for this exercise looks like this:  _Workflow for moving JSON to binary data_ To check the configuration of the nodes, you can copy the JSON workflow code below and paste it into your Editor UI: <table><tbody><tr><td><div><pre><span></span><span> 1</span> <span> 2</span> <span> 3</span> <span> 4</span> <span> 5</span> <span> 6</span> <span> 7</span> <span> 8</span> <span> 9</span> <span> 10</span> <span> 11</span> <span> 12</span> <span> 13</span> <span> 14</span> <span> 15</span> <span> 16</span> <span> 17</span> <span> 18</span> <span> 19</span> <span> 20</span> <span> 21</span> <span> 22</span> <span> 23</span> <span> 24</span> <span> 25</span> <span> 26</span> <span> 27</span> <span> 28</span> <span> 29</span> <span> 30</span> <span> 31</span> <span> 32</span> <span> 33</span> <span> 34</span> <span> 35</span> <span> 36</span> <span> 37</span> <span> 38</span> <span> 39</span> <span> 40</span> <span> 41</span> <span> 42</span> <span> 43</span> <span> 44</span> <span> 45</span> <span> 46</span> <span> 47</span> <span> 48</span> <span> 49</span> <span> 50</span> <span> 51</span> <span> 52</span> <span> 53</span> <span> 54</span> <span> 55</span> <span> 56</span> <span> 57</span> <span> 58</span> <span> 59</span> <span> 60</span> <span> 61</span> <span> 62</span> <span> 63</span> <span> 64</span> <span> 65</span> <span> 66</span> <span> 67</span> <span> 68</span> <span> 69</span> <span> 70</span> <span> 71</span> <span> 72</span> <span> 73</span> <span> 74</span> <span> 75</span> <span> 76</span> <span> 77</span> <span> 78</span> <span> 79</span> <span> 80</span> <span> 81</span> <span> 82</span> <span> 83</span> <span> 84</span> <span> 85</span> <span> 86</span> <span> 87</span> <span> 88</span> <span> 89</span> <span> 90</span> <span> 91</span> <span> 92</span> <span> 93</span> <span> 94</span> <span> 95</span> <span> 96</span> <span> 97</span> <span> 98</span> <span> 99</span> <span>100</span> <span>101</span> <span>102</span> <span>103</span> <span>104</span> <span>105</span> <span>106</span> <span>107</span> <span>108</span> <span>109</span> <span>110</span> <span>111</span> <span>112</span> <span>113</span> <span>114</span> <span>115</span> <span>116</span> <span>117</span> <span>118</span> <span>119</span> <span>120</span></pre></div></td><td><div><pre><span></span><code><span>{</span> <span> </span><span>"name"</span><span>:</span><span> </span><span>"JSON to file and Read-Write"</span><span>,</span> <span> </span><span>"nodes"</span><span>:</span><span> </span><span>[</span> <span> </span><span>{</span> <span> </span><span>"parameters"</span><span>:</span><span> </span><span>{},</span> <span> </span><span>"id"</span><span>:</span><span> </span><span>"78639a25-b69a-4b9c-84e0-69e045bed1a3"</span><span>,</span> <span> </span><span>"name"</span><span>:</span><span> </span><span>"When clicking \"Execute Workflow\""</span><span>,</span> <span> </span><span>"type"</span><span>:</span><span> </span><span>"n8n-nodes-base.manualTrigger"</span><span>,</span> <span> </span><span>"typeVersion"</span><span>:</span><span> </span><span>1</span><span>,</span> <span> </span><span>"position"</span><span>:</span><span> </span><span>[</span> <span> </span><span>480</span><span>,</span> <span> </span><span>520</span> <span> </span><span>]</span> <span> </span><span>},</span> <span> </span><span>{</span> <span> </span><span>"parameters"</span><span>:</span><span> </span><span>{</span> <span> </span><span>"url"</span><span>:</span><span> </span><span>"https://poetrydb.org/random/1"</span><span>,</span> <span> </span><span>"options"</span><span>:</span><span> </span><span>{}</span> <span> </span><span>},</span> <span> </span><span>"id"</span><span>:</span><span> </span><span>"a11310df-1287-4e9a-b993-baa6bd4265a6"</span><span>,</span> <span> </span><span>"name"</span><span>:</span><span> </span><span>"HTTP Request"</span><span>,</span> <span> </span><span>"type"</span><span>:</span><span> </span><span>"n8n-nodes-base.httpRequest"</span><span>,</span> <span> </span><span>"typeVersion"</span><span>:</span><span> </span><span>4.1</span><span>,</span> <span> </span><span>"position"</span><span>:</span><span> </span><span>[</span> <span> </span><span>680</span><span>,</span> <span> </span><span>520</span> <span> </span><span>]</span> <span> </span><span>},</span> <span> </span><span>{</span> <span> </span><span>"parameters"</span><span>:</span><span> </span><span>{</span> <span> </span><span>"operation"</span><span>:</span><span> </span><span>"toJson"</span><span>,</span> <span> </span><span>"options"</span><span>:</span><span> </span><span>{}</span> <span> </span><span>},</span> <span> </span><span>"id"</span><span>:</span><span> </span><span>"06be18f6-f193-48e2-a8d9-35f4779d8324"</span><span>,</span> <span> </span><span>"name"</span><span>:</span><span> </span><span>"Convert to File"</span><span>,</span> <span> </span><span>"type"</span><span>:</span><span> </span><span>"n8n-nodes-base.convertToFile"</span><span>,</span> <span> </span><span>"typeVersion"</span><span>:</span><span> </span><span>1</span><span>,</span> <span> </span><span>"position"</span><span>:</span><span> </span><span>[</span> <span> </span><span>880</span><span>,</span> <span> </span><span>520</span> <span> </span><span>]</span> <span> </span><span>},</span> <span> </span><span>{</span> <span> </span><span>"parameters"</span><span>:</span><span> </span><span>{</span> <span> </span><span>"operation"</span><span>:</span><span> </span><span>"write"</span><span>,</span> <span> </span><span>"fileName"</span><span>:</span><span> </span><span>"/tmp/poetrydb.json"</span><span>,</span> <span> </span><span>"options"</span><span>:</span><span> </span><span>{}</span> <span> </span><span>},</span> <span> </span><span>"id"</span><span>:</span><span> </span><span>"f2048e5d-fa8f-4708-b15a-d07de359f2e5"</span><span>,</span> <span> </span><span>"name"</span><span>:</span><span> </span><span>"Read/Write Files from Disk"</span><span>,</span> <span> </span><span>"type"</span><span>:</span><span> </span><span>"n8n-nodes-base.readWriteFile"</span><span>,</span> <span> </span><span>"typeVersion"</span><span>:</span><span> </span><span>1</span><span>,</span> <span> </span><span>"position"</span><span>:</span><span> </span><span>[</span> <span> </span><span>1080</span><span>,</span> <span> </span><span>520</span> <span> </span><span>]</span> <span> </span><span>},</span> <span> </span><span>{</span> <span> </span><span>"parameters"</span><span>:</span><span> </span><span>{</span> <span> </span><span>"fileSelector"</span><span>:</span><span> </span><span>"={{ $json.fileName }}"</span><span>,</span> <span> </span><span>"options"</span><span>:</span><span> </span><span>{}</span> <span> </span><span>},</span> <span> </span><span>"id"</span><span>:</span><span> </span><span>"d630906c-09d4-49f4-ba14-416c0f4de1c8"</span><span>,</span> <span> </span><span>"name"</span><span>:</span><span> </span><span>"Read/Write Files from Disk1"</span><span>,</span> <span> </span><span>"type"</span><span>:</span><span> </span><span>"n8n-nodes-base.readWriteFile"</span><span>,</span> <span> </span><span>"typeVersion"</span><span>:</span><span> </span><span>1</span><span>,</span> <span> </span><span>"position"</span><span>:</span><span> </span><span>[</span> <span> </span><span>1280</span><span>,</span> <span> </span><span>520</span> <span> </span><span>]</span> <span> </span><span>}</span> <span> </span><span>],</span> <span> </span><span>"pinData"</span><span>:</span><span> </span><span>{},</span> <span> </span><span>"connections"</span><span>:</span><span> </span><span>{</span> <span> </span><span>"When clicking \"Execute Workflow\""</span><span>:</span><span> </span><span>{</span> <span> </span><span>"main"</span><span>:</span><span> </span><span>[</span> <span> </span><span>[</span> <span> </span><span>{</span> <span> </span><span>"node"</span><span>:</span><span> </span><span>"HTTP Request"</span><span>,</span> <span> </span><span>"type"</span><span>:</span><span> </span><span>"main"</span><span>,</span> <span> </span><span>"index"</span><span>:</span><span> </span><span>0</span> <span> </span><span>}</span> <span> </span><span>]</span> <span> </span><span>]</span> <span> </span><span>},</span> <span> </span><span>"HTTP Request"</span><span>:</span><span> </span><span>{</span> <span> </span><span>"main"</span><span>:</span><span> </span><span>[</span> <span> </span><span>[</span> <span> </span><span>{</span> <span> </span><span>"node"</span><span>:</span><span> </span><span>"Convert to File"</span><span>,</span> <span> </span><span>"type"</span><span>:</span><span> </span><span>"main"</span><span>,</span> <span> </span><span>"index"</span><span>:</span><span> </span><span>0</span> <span> </span><span>}</span> <span> </span><span>]</span> <span> </span><span>]</span> <span> </span><span>},</span> <span> </span><span>"Convert to File"</span><span>:</span><span> </span><span>{</span> <span> </span><span>"main"</span><span>:</span><span> </span><span>[</span> <span> </span><span>[</span> <span> </span><span>{</span> <span> </span><span>"node"</span><span>:</span><span> </span><span>"Read/Write Files from Disk"</span><span>,</span> <span> </span><span>"type"</span><span>:</span><span> </span><span>"main"</span><span>,</span> <span> </span><span>"index"</span><span>:</span><span> </span><span>0</span> <span> </span><span>}</span> <span> </span><span>]</span> <span> </span><span>]</span> <span> </span><span>},</span> <span> </span><span>"Read/Write Files from Disk"</span><span>:</span><span> </span><span>{</span> <span> </span><span>"main"</span><span>:</span><span> </span><span>[</span> <span> </span><span>[</span> <span> </span><span>{</span> <span> </span><span>"node"</span><span>:</span><span> </span><span>"Read/Write Files from Disk1"</span><span>,</span> <span> </span><span>"type"</span><span>:</span><span> </span><span>"main"</span><span>,</span> <span> </span><span>"index"</span><span>:</span><span> </span><span>0</span> <span> </span><span>}</span> <span> </span><span>]</span> <span> </span><span>]</span> <span> </span><span>}</span> <span> </span><span>}</span> <span>}</span> </code></pre></div></td></tr></tbody></table> --- ## Page: https://docs.n8n.io/courses/level-two/chapter-3/ In this chapter, you will learn how to merge and split data, and in what cases it might be useful to perform these operations. ## Merging data# In some cases, you might need to merge (combine) and process data from different sources. Merging data can involve: * Creating one data set from multiple sources. * Synchronizing data between multiple systems. This could include removing duplicate data or updating data in one system when it changes in another. One-way vs. two-way sync In a one-way sync, data is synchronized in one direction. One system serves as the single source of truth. When information changes in that main system, it automatically changes in the secondary system; but if information changes in the secondary system, the changes aren't reflected in the main system. In a two-way sync, data is synchronized in both directions (between both systems). When information changes in either of the two systems, it automatically changes in the other one as well. This blog tutorial explains how to sync data one-way and two-way between two CRMs. In n8n, you can merge data from two different nodes using the Merge node, which provides several merging options: * Append * Combine * Merge by Fields: requires input fields to match on * Merge by Position * Combine all possible combinations * Choose Branch Notice that Combine > Merge by Fields requires you enter input fields to match on. These fields should contain identical values between the data sources so n8n can properly match data together. In the **Merge node**, they're called `Input 1 Field` and `Input 2 Field`.  _Property Input fields in the Merge node_ Property Input in dot notation If you want to reference nested values in the **Merge node** parameters `Input 1 Field` and `Input 2 Field`, you need to enter the property key in dot-notation format (as text, not as an expression). Note You can also find the **Merge node** under the alias Join. This might be more intuitive if you're familiar with SQL joins. ### Merge Exercise# Build a workflow that merges data from the Customer Datastore node and Code node. 1. Add a **Merge node** that takes `Input 1` from a **Customer Datastore node** and `Input 2` from a **Code node**. 2. In the **Customer Datastore node**, run the operation **Get All People**. 3. In the **Code node**, create an array of two objects with three properties: `name`, `language`, and `country`, where the property `country` has two sub-properties `code` and `name`. * Fill out the values of these properties with the information of two characters from the Customer Database. * For example, Jay Gatsby's language is English and country name is United States. 4. In the **Merge node**, try out different merge options. Show me the solution The workflow for this exercise looks like this:  _Workflow exercise for merging data_ If you merge data with the option **Keep Matches** using the name as the input fields to match, the result should look like this (note this example only contains Jay Gatsby; yours might look different depending on which characters you selected):  _Output of Merge node with option to keep matches_ To check the configuration of the nodes, you can copy the JSON workflow code below and paste it into your Editor UI: <table><tbody><tr><td><div><pre><span></span><span> 1</span> <span> 2</span> <span> 3</span> <span> 4</span> <span> 5</span> <span> 6</span> <span> 7</span> <span> 8</span> <span> 9</span> <span> 10</span> <span> 11</span> <span> 12</span> <span> 13</span> <span> 14</span> <span> 15</span> <span> 16</span> <span> 17</span> <span> 18</span> <span> 19</span> <span> 20</span> <span> 21</span> <span> 22</span> <span> 23</span> <span> 24</span> <span> 25</span> <span> 26</span> <span> 27</span> <span> 28</span> <span> 29</span> <span> 30</span> <span> 31</span> <span> 32</span> <span> 33</span> <span> 34</span> <span> 35</span> <span> 36</span> <span> 37</span> <span> 38</span> <span> 39</span> <span> 40</span> <span> 41</span> <span> 42</span> <span> 43</span> <span> 44</span> <span> 45</span> <span> 46</span> <span> 47</span> <span> 48</span> <span> 49</span> <span> 50</span> <span> 51</span> <span> 52</span> <span> 53</span> <span> 54</span> <span> 55</span> <span> 56</span> <span> 57</span> <span> 58</span> <span> 59</span> <span> 60</span> <span> 61</span> <span> 62</span> <span> 63</span> <span> 64</span> <span> 65</span> <span> 66</span> <span> 67</span> <span> 68</span> <span> 69</span> <span> 70</span> <span> 71</span> <span> 72</span> <span> 73</span> <span> 74</span> <span> 75</span> <span> 76</span> <span> 77</span> <span> 78</span> <span> 79</span> <span> 80</span> <span> 81</span> <span> 82</span> <span> 83</span> <span> 84</span> <span> 85</span> <span> 86</span> <span> 87</span> <span> 88</span> <span> 89</span> <span> 90</span> <span> 91</span> <span> 92</span> <span> 93</span> <span> 94</span> <span> 95</span> <span> 96</span> <span> 97</span> <span> 98</span> <span> 99</span> <span>100</span> <span>101</span> <span>102</span> <span>103</span> <span>104</span> <span>105</span> <span>106</span> <span>107</span> <span>108</span></pre></div></td><td><div><pre><span></span><code><span>{</span> <span>"meta"</span><span>:</span><span> </span><span>{</span> <span> </span><span>"templateCredsSetupCompleted"</span><span>:</span><span> </span><span>true</span><span>,</span> <span> </span><span>"instanceId"</span><span>:</span><span> </span><span>"cb484ba7b742928a2048bf8829668bed5b5ad9787579adea888f05980292a4a7"</span> <span>},</span> <span>"nodes"</span><span>:</span><span> </span><span>[</span> <span> </span><span>{</span> <span> </span><span>"parameters"</span><span>:</span><span> </span><span>{</span> <span> </span><span>"mode"</span><span>:</span><span> </span><span>"combine"</span><span>,</span> <span> </span><span>"mergeByFields"</span><span>:</span><span> </span><span>{</span> <span> </span><span>"values"</span><span>:</span><span> </span><span>[</span> <span> </span><span>{</span> <span> </span><span>"field1"</span><span>:</span><span> </span><span>"name"</span><span>,</span> <span> </span><span>"field2"</span><span>:</span><span> </span><span>"name"</span> <span> </span><span>}</span> <span> </span><span>]</span> <span> </span><span>},</span> <span> </span><span>"options"</span><span>:</span><span> </span><span>{}</span> <span> </span><span>},</span> <span> </span><span>"id"</span><span>:</span><span> </span><span>"578365f3-26dd-4fa6-9858-f0a5fdfc413b"</span><span>,</span> <span> </span><span>"name"</span><span>:</span><span> </span><span>"Merge"</span><span>,</span> <span> </span><span>"type"</span><span>:</span><span> </span><span>"n8n-nodes-base.merge"</span><span>,</span> <span> </span><span>"typeVersion"</span><span>:</span><span> </span><span>2.1</span><span>,</span> <span> </span><span>"position"</span><span>:</span><span> </span><span>[</span> <span> </span><span>720</span><span>,</span> <span> </span><span>580</span> <span> </span><span>]</span> <span> </span><span>},</span> <span> </span><span>{</span> <span> </span><span>"parameters"</span><span>:</span><span> </span><span>{},</span> <span> </span><span>"id"</span><span>:</span><span> </span><span>"71aa5aad-afdf-4f8a-bca0-34450eee8acc"</span><span>,</span> <span> </span><span>"name"</span><span>:</span><span> </span><span>"When clicking \"Test workflow\""</span><span>,</span> <span> </span><span>"type"</span><span>:</span><span> </span><span>"n8n-nodes-base.manualTrigger"</span><span>,</span> <span> </span><span>"typeVersion"</span><span>:</span><span> </span><span>1</span><span>,</span> <span> </span><span>"position"</span><span>:</span><span> </span><span>[</span> <span> </span><span>260</span><span>,</span> <span> </span><span>560</span> <span> </span><span>]</span> <span> </span><span>},</span> <span> </span><span>{</span> <span> </span><span>"parameters"</span><span>:</span><span> </span><span>{</span> <span> </span><span>"operation"</span><span>:</span><span> </span><span>"getAllPeople"</span> <span> </span><span>},</span> <span> </span><span>"id"</span><span>:</span><span> </span><span>"497174fe-3cab-4160-8103-78b44efd038d"</span><span>,</span> <span> </span><span>"name"</span><span>:</span><span> </span><span>"Customer Datastore (n8n training)"</span><span>,</span> <span> </span><span>"type"</span><span>:</span><span> </span><span>"n8n-nodes-base.n8nTrainingCustomerDatastore"</span><span>,</span> <span> </span><span>"typeVersion"</span><span>:</span><span> </span><span>1</span><span>,</span> <span> </span><span>"position"</span><span>:</span><span> </span><span>[</span> <span> </span><span>500</span><span>,</span> <span> </span><span>460</span> <span> </span><span>]</span> <span> </span><span>},</span> <span> </span><span>{</span> <span> </span><span>"parameters"</span><span>:</span><span> </span><span>{</span> <span> </span><span>"jsCode"</span><span>:</span><span> </span><span>"return [\n {\n 'name': 'Jay Gatsby',\n 'language': 'English',\n 'country': {\n 'code': 'US',\n 'name': 'United States'\n }\n \n }\n \n];"</span> <span> </span><span>},</span> <span> </span><span>"id"</span><span>:</span><span> </span><span>"387e8a1e-e796-4f05-8e75-7ce25c786c5f"</span><span>,</span> <span> </span><span>"name"</span><span>:</span><span> </span><span>"Code"</span><span>,</span> <span> </span><span>"type"</span><span>:</span><span> </span><span>"n8n-nodes-base.code"</span><span>,</span> <span> </span><span>"typeVersion"</span><span>:</span><span> </span><span>2</span><span>,</span> <span> </span><span>"position"</span><span>:</span><span> </span><span>[</span> <span> </span><span>500</span><span>,</span> <span> </span><span>720</span> <span> </span><span>]</span> <span> </span><span>}</span> <span>],</span> <span>"connections"</span><span>:</span><span> </span><span>{</span> <span> </span><span>"When clicking \"Test workflow\""</span><span>:</span><span> </span><span>{</span> <span> </span><span>"main"</span><span>:</span><span> </span><span>[</span> <span> </span><span>[</span> <span> </span><span>{</span> <span> </span><span>"node"</span><span>:</span><span> </span><span>"Customer Datastore (n8n training)"</span><span>,</span> <span> </span><span>"type"</span><span>:</span><span> </span><span>"main"</span><span>,</span> <span> </span><span>"index"</span><span>:</span><span> </span><span>0</span> <span> </span><span>},</span> <span> </span><span>{</span> <span> </span><span>"node"</span><span>:</span><span> </span><span>"Code"</span><span>,</span> <span> </span><span>"type"</span><span>:</span><span> </span><span>"main"</span><span>,</span> <span> </span><span>"index"</span><span>:</span><span> </span><span>0</span> <span> </span><span>}</span> <span> </span><span>]</span> <span> </span><span>]</span> <span> </span><span>},</span> <span> </span><span>"Customer Datastore (n8n training)"</span><span>:</span><span> </span><span>{</span> <span> </span><span>"main"</span><span>:</span><span> </span><span>[</span> <span> </span><span>[</span> <span> </span><span>{</span> <span> </span><span>"node"</span><span>:</span><span> </span><span>"Merge"</span><span>,</span> <span> </span><span>"type"</span><span>:</span><span> </span><span>"main"</span><span>,</span> <span> </span><span>"index"</span><span>:</span><span> </span><span>0</span> <span> </span><span>}</span> <span> </span><span>]</span> <span> </span><span>]</span> <span> </span><span>},</span> <span> </span><span>"Code"</span><span>:</span><span> </span><span>{</span> <span> </span><span>"main"</span><span>:</span><span> </span><span>[</span> <span> </span><span>[</span> <span> </span><span>{</span> <span> </span><span>"node"</span><span>:</span><span> </span><span>"Merge"</span><span>,</span> <span> </span><span>"type"</span><span>:</span><span> </span><span>"main"</span><span>,</span> <span> </span><span>"index"</span><span>:</span><span> </span><span>1</span> <span> </span><span>}</span> <span> </span><span>]</span> <span> </span><span>]</span> <span> </span><span>}</span> <span>},</span> <span>"pinData"</span><span>:</span><span> </span><span>{}</span> <span>}</span> </code></pre></div></td></tr></tbody></table> ## Looping# In some cases, you might need to perform the same operation on each element of an array or each data item (for example sending a message to every contact in your address book). In technical terms, you need to iterate through the data (with loops). n8n generally handles this repetitive processing automatically, as the nodes run once for each item, so you don't need to build loops into your workflows. However, there are some exceptions of nodes and operations that will require you to build a loop into your workflow. To create a loop in an n8n workflow, you need to connect the output of one node to the input of a previous node, and add an **If node** to check when to stop the loop. ## Splitting data in batches# If you need to process large volumes of incoming data, execute the **Code node** multiple times, or avoid API rate limits, it's best to split the data into batches (groups) and process these batches. For these processes, use the **Loop Over Items node**. This node splits input data into a specified batch size and, with each iteration, returns a predefined amount of data. Execution of Loop Over Items node The **Loop Over Items node** stops executing after all the incoming items get divided into batches and passed on to the next node in the workflow, so it's not necessary to add an **If node** to stop the loop. ### Loop/Batch Exercise# Build a workflow that reads the RSS feed from Medium and dev.to. The workflow should consist of three nodes: 1. A **Code node** that returns the URLs of the RSS feeds of Medium (`https://medium.com/feed/n8n-io`) and dev.to (`https://dev.to/feed/n8n`). 2. A **Loop Over Items node** with `Batch Size: 1`, that takes in the inputs from the **Code node** and **RSS Read node** and iterates over the items. 3. An **RSS Read node** that gets the URL of the Medium RSS feed, passed as an expression: `{{ $json.url }}`. * The **RSS Read node** is one of the exception nodes which processes only the first item it receives, so the **Loop Over Items node** is necessary for iterating over multiple items. Show me the solution 1. Add a **Code Node**. You can format the code in several ways, one way is: * Set **Mode** to `Run Once for All Items`. * Set **Language** to `JavaScript`. * Copy the code below and paste it into the JavaScript Code editor: <table><tbody><tr><td><div><pre><span></span><span> 1</span> <span> 2</span> <span> 3</span> <span> 4</span> <span> 5</span> <span> 6</span> <span> 7</span> <span> 8</span> <span> 9</span> <span>10</span> <span>11</span> <span>12</span> <span>13</span></pre></div></td><td><div><pre><span></span><code><span>let</span><span> </span><span>urls</span><span> </span><span>=</span><span> </span><span>[</span> <span> </span><span>{</span> <span> </span><span>json</span><span>:</span><span> </span><span>{</span> <span> </span><span>url</span><span>:</span><span> </span><span>'https://medium.com/feed/n8n-io'</span> <span> </span><span>}</span> <span> </span><span>},</span> <span> </span><span>{</span> <span> </span><span>json</span><span>:</span><span> </span><span>{</span> <span> </span><span>url</span><span>:</span><span> </span><span>'https://dev.to/feed/n8n'</span> <span> </span><span>}</span><span> </span> <span> </span><span>}</span> <span>]</span> <span>return</span><span> </span><span>urls</span><span>;</span> </code></pre></div></td></tr></tbody></table> 2. Add a **Loop Over Items node** connected to the **Code node**. * Set **Batch Size** to `1`. 3. The **Loop Over Items node** automatically adds a node called "Replace Me". Replace that node with an **RSS Read node**. * Set the **URL** to use the url from the Code Node: `{{ $json.url }}`. The workflow for this exercise looks like this:  _Workflow for getting RSS feeds from two blogs_ To check the configuration of the nodes, you can copy the JSON workflow code below and paste it into your Editor UI: <table><tbody><tr><td><div><pre><span></span><span> 1</span> <span> 2</span> <span> 3</span> <span> 4</span> <span> 5</span> <span> 6</span> <span> 7</span> <span> 8</span> <span> 9</span> <span> 10</span> <span> 11</span> <span> 12</span> <span> 13</span> <span> 14</span> <span> 15</span> <span> 16</span> <span> 17</span> <span> 18</span> <span> 19</span> <span> 20</span> <span> 21</span> <span> 22</span> <span> 23</span> <span> 24</span> <span> 25</span> <span> 26</span> <span> 27</span> <span> 28</span> <span> 29</span> <span> 30</span> <span> 31</span> <span> 32</span> <span> 33</span> <span> 34</span> <span> 35</span> <span> 36</span> <span> 37</span> <span> 38</span> <span> 39</span> <span> 40</span> <span> 41</span> <span> 42</span> <span> 43</span> <span> 44</span> <span> 45</span> <span> 46</span> <span> 47</span> <span> 48</span> <span> 49</span> <span> 50</span> <span> 51</span> <span> 52</span> <span> 53</span> <span> 54</span> <span> 55</span> <span> 56</span> <span> 57</span> <span> 58</span> <span> 59</span> <span> 60</span> <span> 61</span> <span> 62</span> <span> 63</span> <span> 64</span> <span> 65</span> <span> 66</span> <span> 67</span> <span> 68</span> <span> 69</span> <span> 70</span> <span> 71</span> <span> 72</span> <span> 73</span> <span> 74</span> <span> 75</span> <span> 76</span> <span> 77</span> <span> 78</span> <span> 79</span> <span> 80</span> <span> 81</span> <span> 82</span> <span> 83</span> <span> 84</span> <span> 85</span> <span> 86</span> <span> 87</span> <span> 88</span> <span> 89</span> <span> 90</span> <span> 91</span> <span> 92</span> <span> 93</span> <span> 94</span> <span> 95</span> <span> 96</span> <span> 97</span> <span> 98</span> <span> 99</span> <span>100</span> <span>101</span> <span>102</span> <span>103</span> <span>104</span> <span>105</span> <span>106</span> <span>107</span></pre></div></td><td><div><pre><span></span><code><span>{</span> <span>"meta"</span><span>:</span><span> </span><span>{</span> <span> </span><span>"templateCredsSetupCompleted"</span><span>:</span><span> </span><span>true</span><span>,</span> <span> </span><span>"instanceId"</span><span>:</span><span> </span><span>"cb484ba7b742928a2048bf8829668bed5b5ad9787579adea888f05980292a4a7"</span> <span>},</span> <span>"nodes"</span><span>:</span><span> </span><span>[</span> <span> </span><span>{</span> <span> </span><span>"parameters"</span><span>:</span><span> </span><span>{},</span> <span> </span><span>"id"</span><span>:</span><span> </span><span>"ed8dc090-ae8c-4db6-a93b-0fa873015c25"</span><span>,</span> <span> </span><span>"name"</span><span>:</span><span> </span><span>"When clicking \"Test workflow\""</span><span>,</span> <span> </span><span>"type"</span><span>:</span><span> </span><span>"n8n-nodes-base.manualTrigger"</span><span>,</span> <span> </span><span>"typeVersion"</span><span>:</span><span> </span><span>1</span><span>,</span> <span> </span><span>"position"</span><span>:</span><span> </span><span>[</span> <span> </span><span>460</span><span>,</span> <span> </span><span>460</span> <span> </span><span>]</span> <span> </span><span>},</span> <span> </span><span>{</span> <span> </span><span>"parameters"</span><span>:</span><span> </span><span>{</span> <span> </span><span>"jsCode"</span><span>:</span><span> </span><span>"let urls = [\n {\n json: {\n url: 'https://medium.com/feed/n8n-io'\n }\n },\n {\n json: {\n url: 'https://dev.to/feed/n8n'\n } \n }\n]\n\nreturn urls;"</span> <span> </span><span>},</span> <span> </span><span>"id"</span><span>:</span><span> </span><span>"1df2a9bf-f970-4e04-b906-92dbbc9e8d3a"</span><span>,</span> <span> </span><span>"name"</span><span>:</span><span> </span><span>"Code"</span><span>,</span> <span> </span><span>"type"</span><span>:</span><span> </span><span>"n8n-nodes-base.code"</span><span>,</span> <span> </span><span>"typeVersion"</span><span>:</span><span> </span><span>2</span><span>,</span> <span> </span><span>"position"</span><span>:</span><span> </span><span>[</span> <span> </span><span>680</span><span>,</span> <span> </span><span>460</span> <span> </span><span>]</span> <span> </span><span>},</span> <span> </span><span>{</span> <span> </span><span>"parameters"</span><span>:</span><span> </span><span>{</span> <span> </span><span>"options"</span><span>:</span><span> </span><span>{}</span> <span> </span><span>},</span> <span> </span><span>"id"</span><span>:</span><span> </span><span>"3cce249a-0eab-42e2-90e3-dbdf3684e012"</span><span>,</span> <span> </span><span>"name"</span><span>:</span><span> </span><span>"Loop Over Items"</span><span>,</span> <span> </span><span>"type"</span><span>:</span><span> </span><span>"n8n-nodes-base.splitInBatches"</span><span>,</span> <span> </span><span>"typeVersion"</span><span>:</span><span> </span><span>3</span><span>,</span> <span> </span><span>"position"</span><span>:</span><span> </span><span>[</span> <span> </span><span>900</span><span>,</span> <span> </span><span>460</span> <span> </span><span>]</span> <span> </span><span>},</span> <span> </span><span>{</span> <span> </span><span>"parameters"</span><span>:</span><span> </span><span>{</span> <span> </span><span>"url"</span><span>:</span><span> </span><span>"={{ $json.url }}"</span><span>,</span> <span> </span><span>"options"</span><span>:</span><span> </span><span>{}</span> <span> </span><span>},</span> <span> </span><span>"id"</span><span>:</span><span> </span><span>"50e1c1dc-9a5d-42d3-b7c0-accc31636aa6"</span><span>,</span> <span> </span><span>"name"</span><span>:</span><span> </span><span>"RSS Read"</span><span>,</span> <span> </span><span>"type"</span><span>:</span><span> </span><span>"n8n-nodes-base.rssFeedRead"</span><span>,</span> <span> </span><span>"typeVersion"</span><span>:</span><span> </span><span>1</span><span>,</span> <span> </span><span>"position"</span><span>:</span><span> </span><span>[</span> <span> </span><span>1120</span><span>,</span> <span> </span><span>460</span> <span> </span><span>]</span> <span> </span><span>}</span> <span>],</span> <span>"connections"</span><span>:</span><span> </span><span>{</span> <span> </span><span>"When clicking \"Test workflow\""</span><span>:</span><span> </span><span>{</span> <span> </span><span>"main"</span><span>:</span><span> </span><span>[</span> <span> </span><span>[</span> <span> </span><span>{</span> <span> </span><span>"node"</span><span>:</span><span> </span><span>"Code"</span><span>,</span> <span> </span><span>"type"</span><span>:</span><span> </span><span>"main"</span><span>,</span> <span> </span><span>"index"</span><span>:</span><span> </span><span>0</span> <span> </span><span>}</span> <span> </span><span>]</span> <span> </span><span>]</span> <span> </span><span>},</span> <span> </span><span>"Code"</span><span>:</span><span> </span><span>{</span> <span> </span><span>"main"</span><span>:</span><span> </span><span>[</span> <span> </span><span>[</span> <span> </span><span>{</span> <span> </span><span>"node"</span><span>:</span><span> </span><span>"Loop Over Items"</span><span>,</span> <span> </span><span>"type"</span><span>:</span><span> </span><span>"main"</span><span>,</span> <span> </span><span>"index"</span><span>:</span><span> </span><span>0</span> <span> </span><span>}</span> <span> </span><span>]</span> <span> </span><span>]</span> <span> </span><span>},</span> <span> </span><span>"Loop Over Items"</span><span>:</span><span> </span><span>{</span> <span> </span><span>"main"</span><span>:</span><span> </span><span>[</span> <span> </span><span>null</span><span>,</span> <span> </span><span>[</span> <span> </span><span>{</span> <span> </span><span>"node"</span><span>:</span><span> </span><span>"RSS Read"</span><span>,</span> <span> </span><span>"type"</span><span>:</span><span> </span><span>"main"</span><span>,</span> <span> </span><span>"index"</span><span>:</span><span> </span><span>0</span> <span> </span><span>}</span> <span> </span><span>]</span> <span> </span><span>]</span> <span> </span><span>},</span> <span> </span><span>"RSS Read"</span><span>:</span><span> </span><span>{</span> <span> </span><span>"main"</span><span>:</span><span> </span><span>[</span> <span> </span><span>[</span> <span> </span><span>{</span> <span> </span><span>"node"</span><span>:</span><span> </span><span>"Loop Over Items"</span><span>,</span> <span> </span><span>"type"</span><span>:</span><span> </span><span>"main"</span><span>,</span> <span> </span><span>"index"</span><span>:</span><span> </span><span>0</span> <span> </span><span>}</span> <span> </span><span>]</span> <span> </span><span>]</span> <span> </span><span>}</span> <span>},</span> <span>"pinData"</span><span>:</span><span> </span><span>{}</span> <span>}</span> </code></pre></div></td></tr></tbody></table> --- ## Page: https://docs.n8n.io/courses/level-two/chapter-4/ Sometimes you build a nice workflow, but it fails when you try to execute it. Workflow executions may fail for a variety of reasons, ranging from straightforward problems with incorrectly configuring a node or a failure in a third-party service to more mysterious errors. But don't panic. In this lesson, you'll learn how you can troubleshoot errors so you can get your workflow up and running as soon as possible. ## Checking failed workflows# n8n tracks executions of your workflows. When one of your workflows fails, you can check the Executions log to see what went wrong. The Executions log shows you a list of the latest execution time, status, mode, and running time of your saved workflows. Open the Executions log by selecting **Executions** in the left-side panel. To investigate a specific failed execution from the list, select the name or the **View** button that appears when you hover over the row of the respective execution.  _Executions log_ This will open the workflow in read-only mode, where you can see the execution of each node. This representation can help you identify at what point the workflow ran into issues. To toggle between viewing the execution and the editor, select the **Editor | Executions** button at the top of the page.  _Workflow execution view_ ## Catching erroring workflows# To catch failed workflows, create a separate **Error Workflow** with the **Error Trigger node**. This workflow will only execute if the main workflow execution fails. Use additional nodes in your **Error Workflow** that make sense, like sending notifications about the failed workflow and its errors using email or Slack. To receive error messages for a failed workflow, set the **Error Workflow** in the Workflow Settings to an Error Workflow that uses an **Error Trigger node**. The only difference between a regular workflow and an Error Workflow is that the latter contains an **Error Trigger node**. Make sure to create this node before you set this as another workflow's designated Error Workflow. Error workflows * If a workflow uses the Error Trigger node, you don't have to activate the workflow. * If a workflow contains the Error Trigger node, by default, the workflow uses itself as the error workflow. * You can't test error workflows when running workflows manually. The Error trigger only runs when an automatic workflow errors. * You can set the same Error Workflow for multiple workflows. ### Exercise# In the previous chapters, you've built several small workflows. Now, pick one of them that you want to monitor and create an Error Workflow for it: 1. Create a new Error Workflow. 2. Add the **Error Trigger node**. 3. Connect a node for the communication platform of your choice to the Error Trigger node, like Slack, Discord, Telegram, or even Gmail or a more generic Send Email. 4. In the workflow you want to monitor, open the Workflow Settings and select the new Error Workflow you just created. Note that this workflow needs to run automatically to trigger the error workflow. Show me the solution The workflow for this exercise looks like this:  _Error workflow_ To check the configuration of the nodes, you can copy the JSON workflow code below and paste it into your Editor UI: <table><tbody><tr><td><div><pre><span></span><span> 1</span> <span> 2</span> <span> 3</span> <span> 4</span> <span> 5</span> <span> 6</span> <span> 7</span> <span> 8</span> <span> 9</span> <span>10</span> <span>11</span> <span>12</span> <span>13</span> <span>14</span> <span>15</span> <span>16</span> <span>17</span> <span>18</span> <span>19</span> <span>20</span> <span>21</span> <span>22</span> <span>23</span> <span>24</span> <span>25</span> <span>26</span> <span>27</span> <span>28</span> <span>29</span> <span>30</span> <span>31</span> <span>32</span> <span>33</span> <span>34</span> <span>35</span> <span>36</span> <span>37</span> <span>38</span> <span>39</span> <span>40</span> <span>41</span> <span>42</span> <span>43</span> <span>44</span> <span>45</span> <span>46</span> <span>47</span> <span>48</span></pre></div></td><td><div><pre><span></span><code><span>{</span> <span> </span><span>"nodes"</span><span>:</span><span> </span><span>[</span> <span> </span><span>{</span> <span> </span><span>"parameters"</span><span>:</span><span> </span><span>{},</span> <span> </span><span>"name"</span><span>:</span><span> </span><span>"Error Trigger"</span><span>,</span> <span> </span><span>"type"</span><span>:</span><span> </span><span>"n8n-nodes-base.errorTrigger"</span><span>,</span> <span> </span><span>"typeVersion"</span><span>:</span><span> </span><span>1</span><span>,</span> <span> </span><span>"position"</span><span>:</span><span> </span><span>[</span> <span> </span><span>720</span><span>,</span> <span> </span><span>-380</span> <span> </span><span>]</span> <span> </span><span>},</span> <span> </span><span>{</span> <span> </span><span>"parameters"</span><span>:</span><span> </span><span>{</span> <span> </span><span>"channel"</span><span>:</span><span> </span><span>"channelname"</span><span>,</span> <span> </span><span>"text"</span><span>:</span><span> </span><span>"=This workflow {{$node[\"Error Trigger\"].json[\"workflow\"][\"name\"]}}failed.\nHave a look at it here: {{$node[\"Error Trigger\"].json[\"execution\"][\"url\"]}}"</span><span>,</span> <span> </span><span>"attachments"</span><span>:</span><span> </span><span>[],</span> <span> </span><span>"otherOptions"</span><span>:</span><span> </span><span>{}</span> <span> </span><span>},</span> <span> </span><span>"name"</span><span>:</span><span> </span><span>"Slack"</span><span>,</span> <span> </span><span>"type"</span><span>:</span><span> </span><span>"n8n-nodes-base.slack"</span><span>,</span> <span> </span><span>"position"</span><span>:</span><span> </span><span>[</span> <span> </span><span>900</span><span>,</span> <span> </span><span>-380</span> <span> </span><span>],</span> <span> </span><span>"typeVersion"</span><span>:</span><span> </span><span>1</span><span>,</span> <span> </span><span>"credentials"</span><span>:</span><span> </span><span>{</span> <span> </span><span>"slackApi"</span><span>:</span><span> </span><span>{</span> <span> </span><span>"id"</span><span>:</span><span> </span><span>"17"</span><span>,</span> <span> </span><span>"name"</span><span>:</span><span> </span><span>"slack_credentials"</span> <span> </span><span>}</span> <span> </span><span>}</span> <span> </span><span>}</span> <span> </span><span>],</span> <span> </span><span>"connections"</span><span>:</span><span> </span><span>{</span> <span> </span><span>"Error Trigger"</span><span>:</span><span> </span><span>{</span> <span> </span><span>"main"</span><span>:</span><span> </span><span>[</span> <span> </span><span>[</span> <span> </span><span>{</span> <span> </span><span>"node"</span><span>:</span><span> </span><span>"Slack"</span><span>,</span> <span> </span><span>"type"</span><span>:</span><span> </span><span>"main"</span><span>,</span> <span> </span><span>"index"</span><span>:</span><span> </span><span>0</span> <span> </span><span>}</span> <span> </span><span>]</span> <span> </span><span>]</span> <span> </span><span>}</span> <span> </span><span>}</span> <span>}</span> </code></pre></div></td></tr></tbody></table> ## Throwing exceptions in workflows# Another way of troubleshooting workflows is to include a **Stop and Error node** in your workflow. This node throws an error. You can specify the error type: * **Error Message**: returns a custom message about the error * **Error Object**: returns the type of error You can only use the **Stop and Error node** as the last node in a workflow. When to throw errors Throwing exceptions with the **Stop and Error node** is useful for verifying the data (or assumptions about the data) from a node and returning custom error messages. If you are working with data from a third-party service, you may come across problems such as: * Wrongly formatted JSON output * Data with the wrong type (for example, numeric data that has a non-numeric value) * Missing values * Errors from remote servers Though this kind of invalid data might not cause the workflow to fail right away, it could cause problems later on, and then it can become difficult to track the source error. This is why it's better to throw an error at the time you know there might be a problem.  _Stop and Error node with error message_ --- ## Page: https://docs.n8n.io/courses/level-two/chapter-5/chapter-5.0/ ## Automating a business workflow# Remember our friend Nathan? **Nathan 🙋:** Hello, it's me again. My manager was so impressed with my first workflow automation solution that she entrusted me with more responsibility. **You 👩🔧:** More work and responsibility. Congratulations, I guess. What do you need to do now? **Nathan 🙋:** I got access to all our sales data and I'm now responsible for creating two reports: one for regional sales and one for orders prices. They're based on data from different sources and come in different formats. **You 👩🔧:** Sounds like a lot of manual work, but the kind that can be automated. Let's do it! ## Workflow design# Now that we know what Nathan wants to automate, let's list the steps he needs to take to achieve this: 1. Get and combine data from all necessary sources. 2. Sort the data and format the dates. 3. Write binary files. 4. Send notifications using email and Discord. n8n provides core nodes for all these steps. This use case is somewhat complex. We should build it from three separate workflows: 1. A workflow that merges the company data with external information. 2. A workflow that generates the reports. 3. A workflow that monitors errors in the second workflow. ## Workflow prerequisites# To build the workflows, you will need the following: * An Airtable account and credentials. * A Google account and credentials to access Gmail. * A Discord account and webhook URL (you receive this using email when you sign up for this course). Next, you will build these three workflows with step-by-step instructions. --- ## Page: https://docs.n8n.io/courses/level-two/chapter-5/chapter-5.1/ ## Workflow 1: Merging data# Nathan's company stores its customer data in Airtable. This data contains information about the customers' ID, country, email, and join date, but lacks data about their respective region and subregion. You need to fill in these last two fields in order to create the reports for regional sales. To accomplish this task, you first need to make a copy of this table in your Airtable account: Next, build a small workflow that merges data from Airtable and a REST Countries API: 1. Use the **Airtable node** to list the data in the Airtable table named `customers`. 2. Use the **HTTP Request node** to get data from the REST Countries API: `https://restcountries.com/v3.1/all`. This will return data about world countries, split out into separate items. 3. Use the **Merge node** to merge data from Airtable and the Countries API by country name, represented as `customerCountry` in Airtable and `name.common` in the Countries API, respectively. 4. Use another Airtable node to update the fields `region` and `subregion` in Airtable with the data from the Countries API. The workflow should look like this: 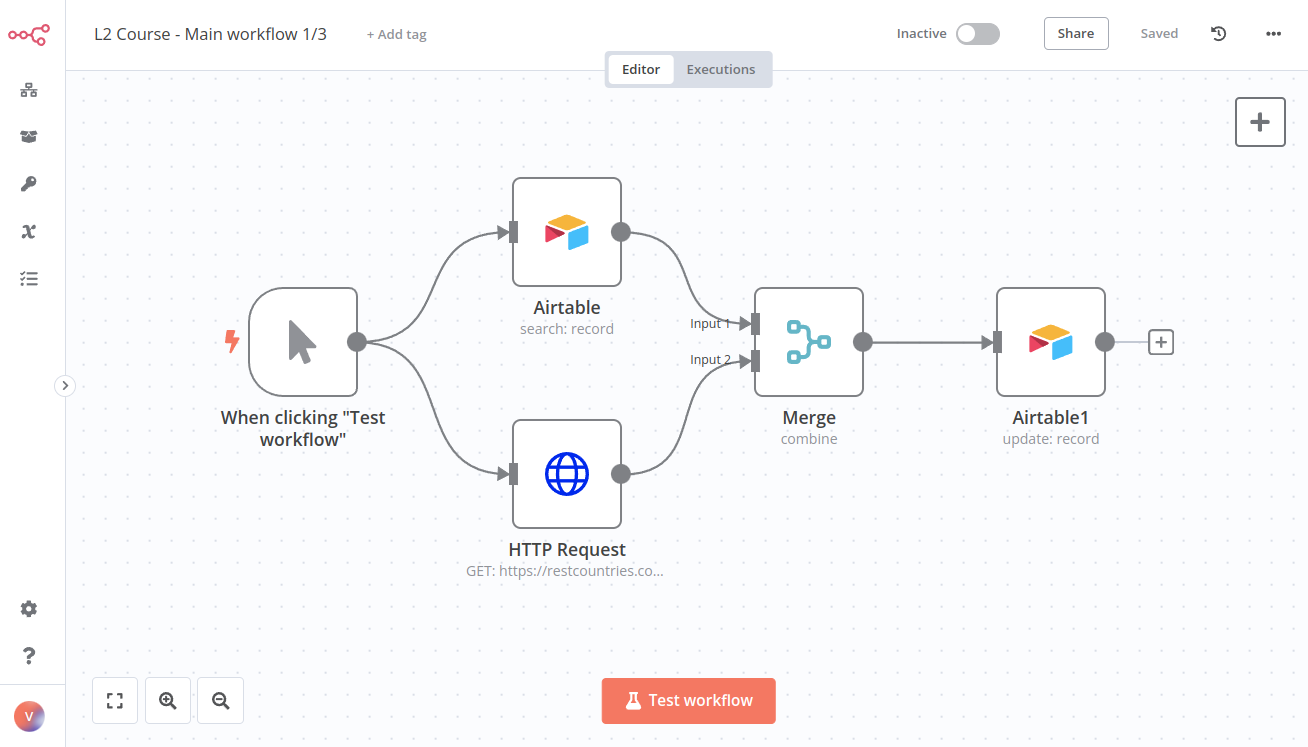 _Workflow 1 for merging data from Airtable and the Countries API_ Quiz questions * How many items does the **HTTP Request node** return? * How many items does the **Merge node** return? * How many unique regions are assigned in the customers table? * What's the subregion assigned to the customerID 10? --- ## Page: https://docs.n8n.io/courses/level-two/chapter-5/chapter-5.2/ To check the configuration of the nodes, you can copy the JSON workflow code below and paste it into your Editor UI: <table><tbody><tr><td><div><pre><span></span><span> 1</span> <span> 2</span> <span> 3</span> <span> 4</span> <span> 5</span> <span> 6</span> <span> 7</span> <span> 8</span> <span> 9</span> <span> 10</span> <span> 11</span> <span> 12</span> <span> 13</span> <span> 14</span> <span> 15</span> <span> 16</span> <span> 17</span> <span> 18</span> <span> 19</span> <span> 20</span> <span> 21</span> <span> 22</span> <span> 23</span> <span> 24</span> <span> 25</span> <span> 26</span> <span> 27</span> <span> 28</span> <span> 29</span> <span> 30</span> <span> 31</span> <span> 32</span> <span> 33</span> <span> 34</span> <span> 35</span> <span> 36</span> <span> 37</span> <span> 38</span> <span> 39</span> <span> 40</span> <span> 41</span> <span> 42</span> <span> 43</span> <span> 44</span> <span> 45</span> <span> 46</span> <span> 47</span> <span> 48</span> <span> 49</span> <span> 50</span> <span> 51</span> <span> 52</span> <span> 53</span> <span> 54</span> <span> 55</span> <span> 56</span> <span> 57</span> <span> 58</span> <span> 59</span> <span> 60</span> <span> 61</span> <span> 62</span> <span> 63</span> <span> 64</span> <span> 65</span> <span> 66</span> <span> 67</span> <span> 68</span> <span> 69</span> <span> 70</span> <span> 71</span> <span> 72</span> <span> 73</span> <span> 74</span> <span> 75</span> <span> 76</span> <span> 77</span> <span> 78</span> <span> 79</span> <span> 80</span> <span> 81</span> <span> 82</span> <span> 83</span> <span> 84</span> <span> 85</span> <span> 86</span> <span> 87</span> <span> 88</span> <span> 89</span> <span> 90</span> <span> 91</span> <span> 92</span> <span> 93</span> <span> 94</span> <span> 95</span> <span> 96</span> <span> 97</span> <span> 98</span> <span> 99</span> <span>100</span> <span>101</span> <span>102</span> <span>103</span> <span>104</span> <span>105</span> <span>106</span> <span>107</span> <span>108</span> <span>109</span> <span>110</span> <span>111</span> <span>112</span> <span>113</span> <span>114</span> <span>115</span> <span>116</span> <span>117</span> <span>118</span> <span>119</span> <span>120</span> <span>121</span> <span>122</span> <span>123</span> <span>124</span> <span>125</span> <span>126</span> <span>127</span> <span>128</span> <span>129</span> <span>130</span> <span>131</span> <span>132</span> <span>133</span> <span>134</span> <span>135</span> <span>136</span> <span>137</span> <span>138</span> <span>139</span> <span>140</span> <span>141</span> <span>142</span> <span>143</span> <span>144</span> <span>145</span> <span>146</span> <span>147</span> <span>148</span> <span>149</span> <span>150</span> <span>151</span> <span>152</span> <span>153</span> <span>154</span> <span>155</span> <span>156</span> <span>157</span> <span>158</span> <span>159</span> <span>160</span> <span>161</span> <span>162</span> <span>163</span> <span>164</span> <span>165</span> <span>166</span> <span>167</span> <span>168</span> <span>169</span> <span>170</span> <span>171</span> <span>172</span> <span>173</span> <span>174</span> <span>175</span> <span>176</span> <span>177</span> <span>178</span> <span>179</span> <span>180</span> <span>181</span> <span>182</span> <span>183</span> <span>184</span> <span>185</span> <span>186</span> <span>187</span> <span>188</span> <span>189</span> <span>190</span> <span>191</span> <span>192</span> <span>193</span> <span>194</span> <span>195</span> <span>196</span> <span>197</span> <span>198</span> <span>199</span> <span>200</span> <span>201</span> <span>202</span> <span>203</span> <span>204</span> <span>205</span> <span>206</span> <span>207</span> <span>208</span> <span>209</span> <span>210</span> <span>211</span> <span>212</span> <span>213</span> <span>214</span> <span>215</span> <span>216</span> <span>217</span> <span>218</span> <span>219</span> <span>220</span> <span>221</span> <span>222</span> <span>223</span> <span>224</span> <span>225</span> <span>226</span> <span>227</span> <span>228</span> <span>229</span> <span>230</span> <span>231</span> <span>232</span> <span>233</span> <span>234</span> <span>235</span> <span>236</span> <span>237</span> <span>238</span> <span>239</span> <span>240</span> <span>241</span> <span>242</span> <span>243</span> <span>244</span> <span>245</span> <span>246</span> <span>247</span> <span>248</span> <span>249</span> <span>250</span> <span>251</span> <span>252</span> <span>253</span> <span>254</span> <span>255</span> <span>256</span> <span>257</span> <span>258</span> <span>259</span> <span>260</span> <span>261</span> <span>262</span> <span>263</span> <span>264</span> <span>265</span> <span>266</span> <span>267</span> <span>268</span> <span>269</span> <span>270</span> <span>271</span> <span>272</span> <span>273</span> <span>274</span> <span>275</span> <span>276</span> <span>277</span> <span>278</span> <span>279</span> <span>280</span> <span>281</span> <span>282</span> <span>283</span> <span>284</span> <span>285</span> <span>286</span> <span>287</span> <span>288</span> <span>289</span> <span>290</span> <span>291</span> <span>292</span> <span>293</span> <span>294</span> <span>295</span> <span>296</span> <span>297</span> <span>298</span> <span>299</span> <span>300</span> <span>301</span> <span>302</span> <span>303</span> <span>304</span> <span>305</span> <span>306</span> <span>307</span> <span>308</span> <span>309</span> <span>310</span> <span>311</span> <span>312</span> <span>313</span> <span>314</span> <span>315</span> <span>316</span> <span>317</span> <span>318</span> <span>319</span> <span>320</span> <span>321</span> <span>322</span> <span>323</span> <span>324</span> <span>325</span> <span>326</span> <span>327</span> <span>328</span> <span>329</span> <span>330</span> <span>331</span> <span>332</span> <span>333</span> <span>334</span> <span>335</span> <span>336</span> <span>337</span> <span>338</span> <span>339</span> <span>340</span> <span>341</span> <span>342</span> <span>343</span> <span>344</span> <span>345</span> <span>346</span> <span>347</span> <span>348</span> <span>349</span> <span>350</span> <span>351</span> <span>352</span> <span>353</span> <span>354</span> <span>355</span> <span>356</span> <span>357</span> <span>358</span> <span>359</span> <span>360</span> <span>361</span> <span>362</span> <span>363</span> <span>364</span> <span>365</span> <span>366</span> <span>367</span> <span>368</span> <span>369</span> <span>370</span> <span>371</span> <span>372</span> <span>373</span> <span>374</span> <span>375</span> <span>376</span> <span>377</span> <span>378</span> <span>379</span> <span>380</span> <span>381</span> <span>382</span> <span>383</span> <span>384</span> <span>385</span> <span>386</span> <span>387</span> <span>388</span> <span>389</span> <span>390</span> <span>391</span> <span>392</span> <span>393</span> <span>394</span> <span>395</span> <span>396</span> <span>397</span> <span>398</span> <span>399</span> <span>400</span> <span>401</span> <span>402</span> <span>403</span> <span>404</span> <span>405</span> <span>406</span> <span>407</span> <span>408</span> <span>409</span> <span>410</span> <span>411</span> <span>412</span> <span>413</span> <span>414</span> <span>415</span> <span>416</span> <span>417</span> <span>418</span> <span>419</span> <span>420</span> <span>421</span> <span>422</span> <span>423</span> <span>424</span> <span>425</span> <span>426</span> <span>427</span> <span>428</span> <span>429</span> <span>430</span> <span>431</span> <span>432</span> <span>433</span> <span>434</span> <span>435</span> <span>436</span> <span>437</span> <span>438</span> <span>439</span> <span>440</span> <span>441</span> <span>442</span> <span>443</span> <span>444</span> <span>445</span> <span>446</span> <span>447</span> <span>448</span> <span>449</span> <span>450</span> <span>451</span> <span>452</span> <span>453</span> <span>454</span> <span>455</span> <span>456</span> <span>457</span> <span>458</span> <span>459</span> <span>460</span> <span>461</span> <span>462</span> <span>463</span> <span>464</span> <span>465</span> <span>466</span> <span>467</span> <span>468</span> <span>469</span> <span>470</span> <span>471</span> <span>472</span> <span>473</span> <span>474</span> <span>475</span> <span>476</span> <span>477</span> <span>478</span> <span>479</span> <span>480</span> <span>481</span> <span>482</span> <span>483</span> <span>484</span> <span>485</span> <span>486</span> <span>487</span> <span>488</span> <span>489</span> <span>490</span> <span>491</span> <span>492</span></pre></div></td><td><div><pre><span></span><code><span>{</span> <span>"meta"</span><span>:</span><span> </span><span>{</span> <span> </span><span>"templateCredsSetupCompleted"</span><span>:</span><span> </span><span>true</span><span>,</span> <span> </span><span>"instanceId"</span><span>:</span><span> </span><span>"cb484ba7b742928a2048bf8829668bed5b5ad9787579adea888f05980292a4a7"</span> <span>},</span> <span>"nodes"</span><span>:</span><span> </span><span>[</span> <span> </span><span>{</span> <span> </span><span>"parameters"</span><span>:</span><span> </span><span>{</span> <span> </span><span>"sendTo"</span><span>:</span><span> </span><span>"bart@n8n.io"</span><span>,</span> <span> </span><span>"subject"</span><span>:</span><span> </span><span>"Your TPS Reports"</span><span>,</span> <span> </span><span>"emailType"</span><span>:</span><span> </span><span>"text"</span><span>,</span> <span> </span><span>"message"</span><span>:</span><span> </span><span>"Please find your TPS report attached."</span><span>,</span> <span> </span><span>"options"</span><span>:</span><span> </span><span>{</span> <span> </span><span>"attachmentsUi"</span><span>:</span><span> </span><span>{</span> <span> </span><span>"attachmentsBinary"</span><span>:</span><span> </span><span>[</span> <span> </span><span>{}</span> <span> </span><span>]</span> <span> </span><span>}</span> <span> </span><span>}</span> <span> </span><span>},</span> <span> </span><span>"id"</span><span>:</span><span> </span><span>"d889eb42-8b34-4718-b961-38c8e7839ea6"</span><span>,</span> <span> </span><span>"name"</span><span>:</span><span> </span><span>"Gmail"</span><span>,</span> <span> </span><span>"type"</span><span>:</span><span> </span><span>"n8n-nodes-base.gmail"</span><span>,</span> <span> </span><span>"typeVersion"</span><span>:</span><span> </span><span>2.1</span><span>,</span> <span> </span><span>"position"</span><span>:</span><span> </span><span>[</span> <span> </span><span>2100</span><span>,</span> <span> </span><span>500</span> <span> </span><span>],</span> <span> </span><span>"credentials"</span><span>:</span><span> </span><span>{</span> <span> </span><span>"gmailOAuth2"</span><span>:</span><span> </span><span>{</span> <span> </span><span>"id"</span><span>:</span><span> </span><span>"HFesCcFcn1NW81yu"</span><span>,</span> <span> </span><span>"name"</span><span>:</span><span> </span><span>"Gmail account 7"</span> <span> </span><span>}</span> <span> </span><span>}</span> <span> </span><span>},</span> <span> </span><span>{</span> <span> </span><span>"parameters"</span><span>:</span><span> </span><span>{},</span> <span> </span><span>"id"</span><span>:</span><span> </span><span>"c0236456-40be-4f8f-a730-e56cb62b7b5c"</span><span>,</span> <span> </span><span>"name"</span><span>:</span><span> </span><span>"When clicking \"Test workflow\""</span><span>,</span> <span> </span><span>"type"</span><span>:</span><span> </span><span>"n8n-nodes-base.manualTrigger"</span><span>,</span> <span> </span><span>"typeVersion"</span><span>:</span><span> </span><span>1</span><span>,</span> <span> </span><span>"position"</span><span>:</span><span> </span><span>[</span> <span> </span><span>780</span><span>,</span> <span> </span><span>600</span> <span> </span><span>]</span> <span> </span><span>},</span> <span> </span><span>{</span> <span> </span><span>"parameters"</span><span>:</span><span> </span><span>{</span> <span> </span><span>"url"</span><span>:</span><span> </span><span>"https://internal.users.n8n.cloud/webhook/level2-erp"</span><span>,</span> <span> </span><span>"authentication"</span><span>:</span><span> </span><span>"genericCredentialType"</span><span>,</span> <span> </span><span>"genericAuthType"</span><span>:</span><span> </span><span>"httpHeaderAuth"</span><span>,</span> <span> </span><span>"sendHeaders"</span><span>:</span><span> </span><span>true</span><span>,</span> <span> </span><span>"headerParameters"</span><span>:</span><span> </span><span>{</span> <span> </span><span>"parameters"</span><span>:</span><span> </span><span>[</span> <span> </span><span>{</span> <span> </span><span>"name"</span><span>:</span><span> </span><span>"unique_id"</span><span>,</span> <span> </span><span>"value"</span><span>:</span><span> </span><span>"recFIcD6UlSyxaVMQ"</span> <span> </span><span>}</span> <span> </span><span>]</span> <span> </span><span>},</span> <span> </span><span>"options"</span><span>:</span><span> </span><span>{}</span> <span> </span><span>},</span> <span> </span><span>"id"</span><span>:</span><span> </span><span>"cc106fa0-6630-4c84-aea4-a4c7a3c149e9"</span><span>,</span> <span> </span><span>"name"</span><span>:</span><span> </span><span>"HTTP Request"</span><span>,</span> <span> </span><span>"type"</span><span>:</span><span> </span><span>"n8n-nodes-base.httpRequest"</span><span>,</span> <span> </span><span>"typeVersion"</span><span>:</span><span> </span><span>4.1</span><span>,</span> <span> </span><span>"position"</span><span>:</span><span> </span><span>[</span> <span> </span><span>1000</span><span>,</span> <span> </span><span>500</span> <span> </span><span>],</span> <span> </span><span>"credentials"</span><span>:</span><span> </span><span>{</span> <span> </span><span>"httpHeaderAuth"</span><span>:</span><span> </span><span>{</span> <span> </span><span>"id"</span><span>:</span><span> </span><span>"qeHdJdqqqaTC69cm"</span><span>,</span> <span> </span><span>"name"</span><span>:</span><span> </span><span>"Course L2 Credentials"</span> <span> </span><span>}</span> <span> </span><span>}</span> <span> </span><span>},</span> <span> </span><span>{</span> <span> </span><span>"parameters"</span><span>:</span><span> </span><span>{</span> <span> </span><span>"operation"</span><span>:</span><span> </span><span>"search"</span><span>,</span> <span> </span><span>"base"</span><span>:</span><span> </span><span>{</span> <span> </span><span>"__rl"</span><span>:</span><span> </span><span>true</span><span>,</span> <span> </span><span>"value"</span><span>:</span><span> </span><span>"apprtKkVasbQDbFa1"</span><span>,</span> <span> </span><span>"mode"</span><span>:</span><span> </span><span>"list"</span><span>,</span> <span> </span><span>"cachedResultName"</span><span>:</span><span> </span><span>"All your base"</span><span>,</span> <span> </span><span>"cachedResultUrl"</span><span>:</span><span> </span><span>"https://airtable.com/apprtKkVasbQDbFa1"</span> <span> </span><span>},</span> <span> </span><span>"table"</span><span>:</span><span> </span><span>{</span> <span> </span><span>"__rl"</span><span>:</span><span> </span><span>true</span><span>,</span> <span> </span><span>"value"</span><span>:</span><span> </span><span>"tblInZ7jeNdlUOvxZ"</span><span>,</span> <span> </span><span>"mode"</span><span>:</span><span> </span><span>"list"</span><span>,</span> <span> </span><span>"cachedResultName"</span><span>:</span><span> </span><span>"Course L2, Workflow 1"</span><span>,</span> <span> </span><span>"cachedResultUrl"</span><span>:</span><span> </span><span>"https://airtable.com/apprtKkVasbQDbFa1/tblInZ7jeNdlUOvxZ"</span> <span> </span><span>},</span> <span> </span><span>"options"</span><span>:</span><span> </span><span>{}</span> <span> </span><span>},</span> <span> </span><span>"id"</span><span>:</span><span> </span><span>"e5ae1927-b531-401c-9cb2-ecf1f2836ba6"</span><span>,</span> <span> </span><span>"name"</span><span>:</span><span> </span><span>"Airtable"</span><span>,</span> <span> </span><span>"type"</span><span>:</span><span> </span><span>"n8n-nodes-base.airtable"</span><span>,</span> <span> </span><span>"typeVersion"</span><span>:</span><span> </span><span>2</span><span>,</span> <span> </span><span>"position"</span><span>:</span><span> </span><span>[</span> <span> </span><span>1000</span><span>,</span> <span> </span><span>700</span> <span> </span><span>],</span> <span> </span><span>"credentials"</span><span>:</span><span> </span><span>{</span> <span> </span><span>"airtableTokenApi"</span><span>:</span><span> </span><span>{</span> <span> </span><span>"id"</span><span>:</span><span> </span><span>"MIplo6lY3AEsdf7L"</span><span>,</span> <span> </span><span>"name"</span><span>:</span><span> </span><span>"Airtable Personal Access Token account 4"</span> <span> </span><span>}</span> <span> </span><span>}</span> <span> </span><span>},</span> <span> </span><span>{</span> <span> </span><span>"parameters"</span><span>:</span><span> </span><span>{</span> <span> </span><span>"mode"</span><span>:</span><span> </span><span>"combine"</span><span>,</span> <span> </span><span>"mergeByFields"</span><span>:</span><span> </span><span>{</span> <span> </span><span>"values"</span><span>:</span><span> </span><span>[</span> <span> </span><span>{</span> <span> </span><span>"field1"</span><span>:</span><span> </span><span>"customerID"</span><span>,</span> <span> </span><span>"field2"</span><span>:</span><span> </span><span>"customerID"</span> <span> </span><span>}</span> <span> </span><span>]</span> <span> </span><span>},</span> <span> </span><span>"options"</span><span>:</span><span> </span><span>{}</span> <span> </span><span>},</span> <span> </span><span>"id"</span><span>:</span><span> </span><span>"1cddc984-7fca-45e0-83b8-0c502cb4c78c"</span><span>,</span> <span> </span><span>"name"</span><span>:</span><span> </span><span>"Merge"</span><span>,</span> <span> </span><span>"type"</span><span>:</span><span> </span><span>"n8n-nodes-base.merge"</span><span>,</span> <span> </span><span>"typeVersion"</span><span>:</span><span> </span><span>2.1</span><span>,</span> <span> </span><span>"position"</span><span>:</span><span> </span><span>[</span> <span> </span><span>1220</span><span>,</span> <span> </span><span>600</span> <span> </span><span>]</span> <span> </span><span>},</span> <span> </span><span>{</span> <span> </span><span>"parameters"</span><span>:</span><span> </span><span>{</span> <span> </span><span>"sortFieldsUi"</span><span>:</span><span> </span><span>{</span> <span> </span><span>"sortField"</span><span>:</span><span> </span><span>[</span> <span> </span><span>{</span> <span> </span><span>"fieldName"</span><span>:</span><span> </span><span>"orderPrice"</span><span>,</span> <span> </span><span>"order"</span><span>:</span><span> </span><span>"descending"</span> <span> </span><span>}</span> <span> </span><span>]</span> <span> </span><span>},</span> <span> </span><span>"options"</span><span>:</span><span> </span><span>{}</span> <span> </span><span>},</span> <span> </span><span>"id"</span><span>:</span><span> </span><span>"2f55af2e-f69b-4f61-a9e5-c7eefaad93ba"</span><span>,</span> <span> </span><span>"name"</span><span>:</span><span> </span><span>"Sort"</span><span>,</span> <span> </span><span>"type"</span><span>:</span><span> </span><span>"n8n-nodes-base.sort"</span><span>,</span> <span> </span><span>"typeVersion"</span><span>:</span><span> </span><span>1</span><span>,</span> <span> </span><span>"position"</span><span>:</span><span> </span><span>[</span> <span> </span><span>1440</span><span>,</span> <span> </span><span>600</span> <span> </span><span>]</span> <span> </span><span>},</span> <span> </span><span>{</span> <span> </span><span>"parameters"</span><span>:</span><span> </span><span>{</span> <span> </span><span>"conditions"</span><span>:</span><span> </span><span>{</span> <span> </span><span>"options"</span><span>:</span><span> </span><span>{</span> <span> </span><span>"caseSensitive"</span><span>:</span><span> </span><span>true</span><span>,</span> <span> </span><span>"leftValue"</span><span>:</span><span> </span><span>""</span><span>,</span> <span> </span><span>"typeValidation"</span><span>:</span><span> </span><span>"strict"</span> <span> </span><span>},</span> <span> </span><span>"conditions"</span><span>:</span><span> </span><span>[</span> <span> </span><span>{</span> <span> </span><span>"id"</span><span>:</span><span> </span><span>"d3afe65c-7c80-4caa-9d1c-33c62fbc2197"</span><span>,</span> <span> </span><span>"leftValue"</span><span>:</span><span> </span><span>"={{ $json.region }}"</span><span>,</span> <span> </span><span>"rightValue"</span><span>:</span><span> </span><span>"Americas"</span><span>,</span> <span> </span><span>"operator"</span><span>:</span><span> </span><span>{</span> <span> </span><span>"type"</span><span>:</span><span> </span><span>"string"</span><span>,</span> <span> </span><span>"operation"</span><span>:</span><span> </span><span>"equals"</span><span>,</span> <span> </span><span>"name"</span><span>:</span><span> </span><span>"filter.operator.equals"</span> <span> </span><span>}</span> <span> </span><span>}</span> <span> </span><span>],</span> <span> </span><span>"combinator"</span><span>:</span><span> </span><span>"and"</span> <span> </span><span>},</span> <span> </span><span>"options"</span><span>:</span><span> </span><span>{}</span> <span> </span><span>},</span> <span> </span><span>"id"</span><span>:</span><span> </span><span>"2ed874a9-5bcf-4cc9-9b52-ea503a562892"</span><span>,</span> <span> </span><span>"name"</span><span>:</span><span> </span><span>"If"</span><span>,</span> <span> </span><span>"type"</span><span>:</span><span> </span><span>"n8n-nodes-base.if"</span><span>,</span> <span> </span><span>"typeVersion"</span><span>:</span><span> </span><span>2</span><span>,</span> <span> </span><span>"position"</span><span>:</span><span> </span><span>[</span> <span> </span><span>1660</span><span>,</span> <span> </span><span>500</span> <span> </span><span>]</span> <span> </span><span>},</span> <span> </span><span>{</span> <span> </span><span>"parameters"</span><span>:</span><span> </span><span>{</span> <span> </span><span>"operation"</span><span>:</span><span> </span><span>"toJson"</span><span>,</span> <span> </span><span>"mode"</span><span>:</span><span> </span><span>"each"</span><span>,</span> <span> </span><span>"options"</span><span>:</span><span> </span><span>{</span> <span> </span><span>"fileName"</span><span>:</span><span> </span><span>"=report_orderID_{{ $('If').item.json.orderID }}.json"</span> <span> </span><span>}</span> <span> </span><span>},</span> <span> </span><span>"id"</span><span>:</span><span> </span><span>"d93b4429-2200-4a84-8505-16266fedfccd"</span><span>,</span> <span> </span><span>"name"</span><span>:</span><span> </span><span>"Convert to File"</span><span>,</span> <span> </span><span>"type"</span><span>:</span><span> </span><span>"n8n-nodes-base.convertToFile"</span><span>,</span> <span> </span><span>"typeVersion"</span><span>:</span><span> </span><span>1.1</span><span>,</span> <span> </span><span>"position"</span><span>:</span><span> </span><span>[</span> <span> </span><span>1880</span><span>,</span> <span> </span><span>500</span> <span> </span><span>]</span> <span> </span><span>},</span> <span> </span><span>{</span> <span> </span><span>"parameters"</span><span>:</span><span> </span><span>{</span> <span> </span><span>"authentication"</span><span>:</span><span> </span><span>"webhook"</span><span>,</span> <span> </span><span>"content"</span><span>:</span><span> </span><span>"I sent the file using email with the label ID and wrote the binary file {file name}. My ID: 123"</span><span>,</span> <span> </span><span>"options"</span><span>:</span><span> </span><span>{}</span> <span> </span><span>},</span> <span> </span><span>"id"</span><span>:</span><span> </span><span>"26f43f2c-1422-40de-9f40-dd2d80926b1c"</span><span>,</span> <span> </span><span>"name"</span><span>:</span><span> </span><span>"Discord"</span><span>,</span> <span> </span><span>"type"</span><span>:</span><span> </span><span>"n8n-nodes-base.discord"</span><span>,</span> <span> </span><span>"typeVersion"</span><span>:</span><span> </span><span>2</span><span>,</span> <span> </span><span>"position"</span><span>:</span><span> </span><span>[</span> <span> </span><span>2320</span><span>,</span> <span> </span><span>500</span> <span> </span><span>],</span> <span> </span><span>"credentials"</span><span>:</span><span> </span><span>{</span> <span> </span><span>"discordWebhookApi"</span><span>:</span><span> </span><span>{</span> <span> </span><span>"id"</span><span>:</span><span> </span><span>"WEBrtPdoLrhlDYKr"</span><span>,</span> <span> </span><span>"name"</span><span>:</span><span> </span><span>"L2 Course Discord Webhook account"</span> <span> </span><span>}</span> <span> </span><span>}</span> <span> </span><span>},</span> <span> </span><span>{</span> <span> </span><span>"parameters"</span><span>:</span><span> </span><span>{</span> <span> </span><span>"batchSize"</span><span>:</span><span> </span><span>5</span><span>,</span> <span> </span><span>"options"</span><span>:</span><span> </span><span>{}</span> <span> </span><span>},</span> <span> </span><span>"id"</span><span>:</span><span> </span><span>"0fa1fbf6-fe77-4044-a445-c49a1db37dec"</span><span>,</span> <span> </span><span>"name"</span><span>:</span><span> </span><span>"Loop Over Items"</span><span>,</span> <span> </span><span>"type"</span><span>:</span><span> </span><span>"n8n-nodes-base.splitInBatches"</span><span>,</span> <span> </span><span>"typeVersion"</span><span>:</span><span> </span><span>3</span><span>,</span> <span> </span><span>"position"</span><span>:</span><span> </span><span>[</span> <span> </span><span>1660</span><span>,</span> <span> </span><span>700</span> <span> </span><span>]</span> <span> </span><span>},</span> <span> </span><span>{</span> <span> </span><span>"parameters"</span><span>:</span><span> </span><span>{</span> <span> </span><span>"assignments"</span><span>:</span><span> </span><span>{</span> <span> </span><span>"assignments"</span><span>:</span><span> </span><span>[</span> <span> </span><span>{</span> <span> </span><span>"id"</span><span>:</span><span> </span><span>"ce839b80-c50d-48f5-9a24-bb2df6fdd2ff"</span><span>,</span> <span> </span><span>"name"</span><span>:</span><span> </span><span>"customerEmail"</span><span>,</span> <span> </span><span>"value"</span><span>:</span><span> </span><span>"={{ $json.customerEmail }}"</span><span>,</span> <span> </span><span>"type"</span><span>:</span><span> </span><span>"string"</span> <span> </span><span>},</span> <span> </span><span>{</span> <span> </span><span>"id"</span><span>:</span><span> </span><span>"0c613366-3808-45a2-89cc-b34c7b9f3fb7"</span><span>,</span> <span> </span><span>"name"</span><span>:</span><span> </span><span>"region"</span><span>,</span> <span> </span><span>"value"</span><span>:</span><span> </span><span>"={{ $json.region }}"</span><span>,</span> <span> </span><span>"type"</span><span>:</span><span> </span><span>"string"</span> <span> </span><span>},</span> <span> </span><span>{</span> <span> </span><span>"id"</span><span>:</span><span> </span><span>"0f19a88c-deb0-4119-8965-06ed62a840b2"</span><span>,</span> <span> </span><span>"name"</span><span>:</span><span> </span><span>"customerSince"</span><span>,</span> <span> </span><span>"value"</span><span>:</span><span> </span><span>"={{ $json.customerSince }}"</span><span>,</span> <span> </span><span>"type"</span><span>:</span><span> </span><span>"string"</span> <span> </span><span>},</span> <span> </span><span>{</span> <span> </span><span>"id"</span><span>:</span><span> </span><span>"a7e890d6-86af-4839-b5df-d2a4efe923f7"</span><span>,</span> <span> </span><span>"name"</span><span>:</span><span> </span><span>"orderPrice"</span><span>,</span> <span> </span><span>"value"</span><span>:</span><span> </span><span>"={{ $json.orderPrice }}"</span><span>,</span> <span> </span><span>"type"</span><span>:</span><span> </span><span>"number"</span> <span> </span><span>}</span> <span> </span><span>]</span> <span> </span><span>},</span> <span> </span><span>"options"</span><span>:</span><span> </span><span>{}</span> <span> </span><span>},</span> <span> </span><span>"id"</span><span>:</span><span> </span><span>"09b8584c-4ead-4007-a6cd-edaa4669a757"</span><span>,</span> <span> </span><span>"name"</span><span>:</span><span> </span><span>"Edit Fields"</span><span>,</span> <span> </span><span>"type"</span><span>:</span><span> </span><span>"n8n-nodes-base.set"</span><span>,</span> <span> </span><span>"typeVersion"</span><span>:</span><span> </span><span>3.3</span><span>,</span> <span> </span><span>"position"</span><span>:</span><span> </span><span>[</span> <span> </span><span>1880</span><span>,</span> <span> </span><span>700</span> <span> </span><span>]</span> <span> </span><span>},</span> <span> </span><span>{</span> <span> </span><span>"parameters"</span><span>:</span><span> </span><span>{</span> <span> </span><span>"operation"</span><span>:</span><span> </span><span>"formatDate"</span><span>,</span> <span> </span><span>"date"</span><span>:</span><span> </span><span>"={{ $json.customerSince }}"</span><span>,</span> <span> </span><span>"options"</span><span>:</span><span> </span><span>{</span> <span> </span><span>"includeInputFields"</span><span>:</span><span> </span><span>true</span> <span> </span><span>}</span> <span> </span><span>},</span> <span> </span><span>"id"</span><span>:</span><span> </span><span>"c96fae90-e080-48dd-9bff-3e4506aafb86"</span><span>,</span> <span> </span><span>"name"</span><span>:</span><span> </span><span>"Date & Time"</span><span>,</span> <span> </span><span>"type"</span><span>:</span><span> </span><span>"n8n-nodes-base.dateTime"</span><span>,</span> <span> </span><span>"typeVersion"</span><span>:</span><span> </span><span>2</span><span>,</span> <span> </span><span>"position"</span><span>:</span><span> </span><span>[</span> <span> </span><span>2100</span><span>,</span> <span> </span><span>700</span> <span> </span><span>]</span> <span> </span><span>},</span> <span> </span><span>{</span> <span> </span><span>"parameters"</span><span>:</span><span> </span><span>{</span> <span> </span><span>"options"</span><span>:</span><span> </span><span>{</span> <span> </span><span>"fileName"</span><span>:</span><span> </span><span>"={{$runIndex > 0 ? 'file_low_orders':'file_high_orders'}}"</span> <span> </span><span>}</span> <span> </span><span>},</span> <span> </span><span>"id"</span><span>:</span><span> </span><span>"43dc8634-2f16-442b-a754-89f47c51c591"</span><span>,</span> <span> </span><span>"name"</span><span>:</span><span> </span><span>"Convert to File1"</span><span>,</span> <span> </span><span>"type"</span><span>:</span><span> </span><span>"n8n-nodes-base.convertToFile"</span><span>,</span> <span> </span><span>"typeVersion"</span><span>:</span><span> </span><span>1.1</span><span>,</span> <span> </span><span>"position"</span><span>:</span><span> </span><span>[</span> <span> </span><span>2320</span><span>,</span> <span> </span><span>700</span> <span> </span><span>]</span> <span> </span><span>},</span> <span> </span><span>{</span> <span> </span><span>"parameters"</span><span>:</span><span> </span><span>{</span> <span> </span><span>"authentication"</span><span>:</span><span> </span><span>"webhook"</span><span>,</span> <span> </span><span>"content"</span><span>:</span><span> </span><span>"I created the spreadsheet {file name}. My ID: 123"</span><span>,</span> <span> </span><span>"options"</span><span>:</span><span> </span><span>{}</span> <span> </span><span>},</span> <span> </span><span>"id"</span><span>:</span><span> </span><span>"05da1c22-d1f6-4ea6-9102-f74f9ae2e9d3"</span><span>,</span> <span> </span><span>"name"</span><span>:</span><span> </span><span>"Discord1"</span><span>,</span> <span> </span><span>"type"</span><span>:</span><span> </span><span>"n8n-nodes-base.discord"</span><span>,</span> <span> </span><span>"typeVersion"</span><span>:</span><span> </span><span>2</span><span>,</span> <span> </span><span>"position"</span><span>:</span><span> </span><span>[</span> <span> </span><span>2540</span><span>,</span> <span> </span><span>700</span> <span> </span><span>],</span> <span> </span><span>"credentials"</span><span>:</span><span> </span><span>{</span> <span> </span><span>"discordWebhookApi"</span><span>:</span><span> </span><span>{</span> <span> </span><span>"id"</span><span>:</span><span> </span><span>"WEBrtPdoLrhlDYKr"</span><span>,</span> <span> </span><span>"name"</span><span>:</span><span> </span><span>"L2 Course Discord Webhook account"</span> <span> </span><span>}</span> <span> </span><span>}</span> <span> </span><span>}</span> <span>],</span> <span>"connections"</span><span>:</span><span> </span><span>{</span> <span> </span><span>"Gmail"</span><span>:</span><span> </span><span>{</span> <span> </span><span>"main"</span><span>:</span><span> </span><span>[</span> <span> </span><span>[</span> <span> </span><span>{</span> <span> </span><span>"node"</span><span>:</span><span> </span><span>"Discord"</span><span>,</span> <span> </span><span>"type"</span><span>:</span><span> </span><span>"main"</span><span>,</span> <span> </span><span>"index"</span><span>:</span><span> </span><span>0</span> <span> </span><span>}</span> <span> </span><span>]</span> <span> </span><span>]</span> <span> </span><span>},</span> <span> </span><span>"When clicking \"Test workflow\""</span><span>:</span><span> </span><span>{</span> <span> </span><span>"main"</span><span>:</span><span> </span><span>[</span> <span> </span><span>[</span> <span> </span><span>{</span> <span> </span><span>"node"</span><span>:</span><span> </span><span>"HTTP Request"</span><span>,</span> <span> </span><span>"type"</span><span>:</span><span> </span><span>"main"</span><span>,</span> <span> </span><span>"index"</span><span>:</span><span> </span><span>0</span> <span> </span><span>},</span> <span> </span><span>{</span> <span> </span><span>"node"</span><span>:</span><span> </span><span>"Airtable"</span><span>,</span> <span> </span><span>"type"</span><span>:</span><span> </span><span>"main"</span><span>,</span> <span> </span><span>"index"</span><span>:</span><span> </span><span>0</span> <span> </span><span>}</span> <span> </span><span>]</span> <span> </span><span>]</span> <span> </span><span>},</span> <span> </span><span>"HTTP Request"</span><span>:</span><span> </span><span>{</span> <span> </span><span>"main"</span><span>:</span><span> </span><span>[</span> <span> </span><span>[</span> <span> </span><span>{</span> <span> </span><span>"node"</span><span>:</span><span> </span><span>"Merge"</span><span>,</span> <span> </span><span>"type"</span><span>:</span><span> </span><span>"main"</span><span>,</span> <span> </span><span>"index"</span><span>:</span><span> </span><span>0</span> <span> </span><span>}</span> <span> </span><span>]</span> <span> </span><span>]</span> <span> </span><span>},</span> <span> </span><span>"Airtable"</span><span>:</span><span> </span><span>{</span> <span> </span><span>"main"</span><span>:</span><span> </span><span>[</span> <span> </span><span>[</span> <span> </span><span>{</span> <span> </span><span>"node"</span><span>:</span><span> </span><span>"Merge"</span><span>,</span> <span> </span><span>"type"</span><span>:</span><span> </span><span>"main"</span><span>,</span> <span> </span><span>"index"</span><span>:</span><span> </span><span>1</span> <span> </span><span>}</span> <span> </span><span>]</span> <span> </span><span>]</span> <span> </span><span>},</span> <span> </span><span>"Merge"</span><span>:</span><span> </span><span>{</span> <span> </span><span>"main"</span><span>:</span><span> </span><span>[</span> <span> </span><span>[</span> <span> </span><span>{</span> <span> </span><span>"node"</span><span>:</span><span> </span><span>"Sort"</span><span>,</span> <span> </span><span>"type"</span><span>:</span><span> </span><span>"main"</span><span>,</span> <span> </span><span>"index"</span><span>:</span><span> </span><span>0</span> <span> </span><span>}</span> <span> </span><span>]</span> <span> </span><span>]</span> <span> </span><span>},</span> <span> </span><span>"Sort"</span><span>:</span><span> </span><span>{</span> <span> </span><span>"main"</span><span>:</span><span> </span><span>[</span> <span> </span><span>[</span> <span> </span><span>{</span> <span> </span><span>"node"</span><span>:</span><span> </span><span>"Loop Over Items"</span><span>,</span> <span> </span><span>"type"</span><span>:</span><span> </span><span>"main"</span><span>,</span> <span> </span><span>"index"</span><span>:</span><span> </span><span>0</span> <span> </span><span>},</span> <span> </span><span>{</span> <span> </span><span>"node"</span><span>:</span><span> </span><span>"If"</span><span>,</span> <span> </span><span>"type"</span><span>:</span><span> </span><span>"main"</span><span>,</span> <span> </span><span>"index"</span><span>:</span><span> </span><span>0</span> <span> </span><span>}</span> <span> </span><span>]</span> <span> </span><span>]</span> <span> </span><span>},</span> <span> </span><span>"If"</span><span>:</span><span> </span><span>{</span> <span> </span><span>"main"</span><span>:</span><span> </span><span>[</span> <span> </span><span>[</span> <span> </span><span>{</span> <span> </span><span>"node"</span><span>:</span><span> </span><span>"Convert to File"</span><span>,</span> <span> </span><span>"type"</span><span>:</span><span> </span><span>"main"</span><span>,</span> <span> </span><span>"index"</span><span>:</span><span> </span><span>0</span> <span> </span><span>}</span> <span> </span><span>]</span> <span> </span><span>]</span> <span> </span><span>},</span> <span> </span><span>"Convert to File"</span><span>:</span><span> </span><span>{</span> <span> </span><span>"main"</span><span>:</span><span> </span><span>[</span> <span> </span><span>[</span> <span> </span><span>{</span> <span> </span><span>"node"</span><span>:</span><span> </span><span>"Gmail"</span><span>,</span> <span> </span><span>"type"</span><span>:</span><span> </span><span>"main"</span><span>,</span> <span> </span><span>"index"</span><span>:</span><span> </span><span>0</span> <span> </span><span>}</span> <span> </span><span>]</span> <span> </span><span>]</span> <span> </span><span>},</span> <span> </span><span>"Loop Over Items"</span><span>:</span><span> </span><span>{</span> <span> </span><span>"main"</span><span>:</span><span> </span><span>[</span> <span> </span><span>null</span><span>,</span> <span> </span><span>[</span> <span> </span><span>{</span> <span> </span><span>"node"</span><span>:</span><span> </span><span>"Edit Fields"</span><span>,</span> <span> </span><span>"type"</span><span>:</span><span> </span><span>"main"</span><span>,</span> <span> </span><span>"index"</span><span>:</span><span> </span><span>0</span> <span> </span><span>}</span> <span> </span><span>]</span> <span> </span><span>]</span> <span> </span><span>},</span> <span> </span><span>"Edit Fields"</span><span>:</span><span> </span><span>{</span> <span> </span><span>"main"</span><span>:</span><span> </span><span>[</span> <span> </span><span>[</span> <span> </span><span>{</span> <span> </span><span>"node"</span><span>:</span><span> </span><span>"Date & Time"</span><span>,</span> <span> </span><span>"type"</span><span>:</span><span> </span><span>"main"</span><span>,</span> <span> </span><span>"index"</span><span>:</span><span> </span><span>0</span> <span> </span><span>}</span> <span> </span><span>]</span> <span> </span><span>]</span> <span> </span><span>},</span> <span> </span><span>"Date & Time"</span><span>:</span><span> </span><span>{</span> <span> </span><span>"main"</span><span>:</span><span> </span><span>[</span> <span> </span><span>[</span> <span> </span><span>{</span> <span> </span><span>"node"</span><span>:</span><span> </span><span>"Convert to File1"</span><span>,</span> <span> </span><span>"type"</span><span>:</span><span> </span><span>"main"</span><span>,</span> <span> </span><span>"index"</span><span>:</span><span> </span><span>0</span> <span> </span><span>}</span> <span> </span><span>]</span> <span> </span><span>]</span> <span> </span><span>},</span> <span> </span><span>"Convert to File1"</span><span>:</span><span> </span><span>{</span> <span> </span><span>"main"</span><span>:</span><span> </span><span>[</span> <span> </span><span>[</span> <span> </span><span>{</span> <span> </span><span>"node"</span><span>:</span><span> </span><span>"Discord1"</span><span>,</span> <span> </span><span>"type"</span><span>:</span><span> </span><span>"main"</span><span>,</span> <span> </span><span>"index"</span><span>:</span><span> </span><span>0</span> <span> </span><span>}</span> <span> </span><span>]</span> <span> </span><span>]</span> <span> </span><span>},</span> <span> </span><span>"Discord1"</span><span>:</span><span> </span><span>{</span> <span> </span><span>"main"</span><span>:</span><span> </span><span>[</span> <span> </span><span>[</span> <span> </span><span>{</span> <span> </span><span>"node"</span><span>:</span><span> </span><span>"Loop Over Items"</span><span>,</span> <span> </span><span>"type"</span><span>:</span><span> </span><span>"main"</span><span>,</span> <span> </span><span>"index"</span><span>:</span><span> </span><span>0</span> <span> </span><span>}</span> <span> </span><span>]</span> <span> </span><span>]</span> <span> </span><span>}</span> <span>},</span> <span>"pinData"</span><span>:</span><span> </span><span>{}</span> <span>}</span> </code></pre></div></td></tr></tbody></table> --- ## Page: https://docs.n8n.io/courses/level-two/chapter-5/chapter-5.3/ ## Workflow 3: Monitoring workflow errors# Last but not least, let's help Nathan know if there are any errors running the workflow. To accomplish this task, create an Error workflow that monitors the main workflow: 1. Create a new workflow. 2. Add an **Error Trigger node** (and execute it as a test). 3. Connect a **Discord node** to the **Error Trigger node** and configure these fields: * **Webhook URL**: The Discord URL that you received in the email from n8n when you signed up for this course. * **Text**: "The workflow `{workflow name}` failed, with the error message: `{execution error message}`. Last node executed: `{name of the last executed node}`. Check this workflow execution here: `{execution URL}` My Unique ID: " followed by the unique ID emailed to you when you registered for this course. Note that you need to replace the text in curly brackets `{}` with expressions that take the respective information from the Error Trigger node. 4. Execute the Discord node. 5. Set the newly created workflow as the **Error Workflow** for the main workflow you created in the previous lesson. The workflow should look like this:  _Workflow 3 for monitoring workflow errors_ Quiz questions * What fields does the **Error Trigger node** return? * What information about the execution does the **Error Trigger node** return? * What information about the workflow does the **Error Trigger node** return? * What's the expression to reference the workflow name? --- ## Page: https://docs.n8n.io/courses/level-two/chapter-6/ Congratulations, you finished the n8n Course Level 2! You've learned a lot about workflow automation and built quite a complex business workflow. Why not showcase your skills? You can test your knowledge by taking a **quiz**, which consists of questions about the theoretical concepts and workflows covered in this course. * You need to have at least 80% correct answers to pass the quiz. * You can take the quiz as many times as you want. * There's no time limit on answering the quiz questions. Take the quiz! ## What's next?# * Create new workflows for your work or personal use and share them with us. Don't have any ideas? Find inspiration on the workflows page and on our blog. * Dive deeper into n8n's features by reading the docs. --- ## Page: https://docs.n8n.io/workflows/ 1. Using n8n 2. Using the app 3. Understand workflows A workflow is a collection of nodes connected together to automate a process. * Create a workflow. * Use Workflow templates to help you get started. * Learn about the key components of an automation in n8n. * Debug using the Executions list. * Share workflows between users. If it's your first time building a workflow, you may want to use the quickstart guides to quickly try out n8n features. --- ## Page: https://docs.n8n.io/workflows/create/ ## Create a workflow# A workflow is a collection of nodes connected together to automate a process. You build workflows on the workflow canvas. ## Create a workflow# 1. Select the  **button** in the upper-left corner of the side menu. Select workflow. 2. If your n8n instance supports projects, you'll also need to choose whether to create the workflow inside your **personal space** or a specific **project** you have access to. If you're using the community version, you'll always create workflows inside your personal space. 3. Get started by adding a trigger node: select **Add first step...** Or: 1. Select the  **create** button in the upper-right corner from either the **Overview** page or a specific **project**. Select workflow. 2. If you're doing this from the **Overview** page, you'll create the workflow inside your personal space. If you're doing this from inside a project, you'll create the workflow inside that specific project. 3. Get started by adding a trigger node: select **Add first step...** If it's your first time building a workflow, you may want to use the quickstart guides to quickly try out n8n features. ## Run workflows manually# You may need to run your workflow manually when building and testing, or if your workflow doesn't have a trigger node. To run manually, select **Test Workflow**. ## Run workflows automatically# All new workflows are inactive by default. You need to activate workflows that start with a trigger node or Webhook node so that they can run automatically. When a workflow is inactive, you must run it manually. To activate or deactivate your workflow, open your workflow and toggle **Inactive** / **Active**. Once a workflow is active, it runs whenever its trigger conditions are met. --- ## Page: https://docs.n8n.io/workflows/components/ * Using n8n * Integrations * Hosting n8n * Code in n8n * Advanced AI * API * Embed * n8n home ↗ * Forum ↗ * Blog ↗ 1. Using n8n 2. Using the app 3. Understand workflows 4. Components This section contains: * Nodes: integrations and operations. * Connections: node connectors. * Sticky notes: document your workflows. --- ## Page: https://docs.n8n.io/workflows/components/nodes/ Nodes are the key building blocks of a workflow. They perform a range of actions, including: * Starting the workflow. * Fetching and sending data. * Processing and manipulating data. n8n provides a collection of built-in nodes, as well as the ability to create your own nodes. Refer to: * Built-in integrations to browse the node library. * Community nodes for guidance on finding and installing community-created nodes. * Creating nodes to start building your own nodes. ## Add a node to your workflow# ### Add a node to an empty workflow# 1. Select **Add first step**. n8n opens the nodes panel, where you can search or browse trigger nodes. 2. Select the trigger you want to use. Choose the correct app event If you select **On App Event**, n8n shows a list of all the supported services. Use this list to browse n8n's integrations and trigger a workflow in response to an event in your chosen service. Not all integrations have triggers. To see which ones you can use as a trigger, select the node. If a trigger is available, you'll see it at the top of the available operations list. For example, this is the trigger for Asana:  ### Add a node to an existing workflow# Select the **Add node**  connector. n8n opens the nodes panel, where you can search or browse all nodes. ## Node operations: Triggers and Actions# When you add a node to a workflow, n8n displays a list of available operations. An operation is something a node does, such as getting or sending data. There are two types of operation: * Triggers start a workflow in response to specific events or conditions in your services. When you select a Trigger, n8n adds a trigger node to your workflow, with the Trigger operation you chose pre-selected. When you search for a node in n8n, Trigger operations have a bolt icon . * Actions are operations that represent specific tasks within a workflow, which you can use to manipulate data, perform operations on external systems, and trigger events in other systems as part of your workflows. When you select an Action, n8n adds a node to your workflow, with the Action operation you chose pre-selected. ## Node controls# To view node controls, hover over the node on the canvas: ## Node settings# The node settings under the **Settings** tab allow you to control node behaviors and add node notes. When active or set, they do the following: * **Request Options**: Select **Add Option** to view and select these options. * **Batching**: Control how to batch large numbers of input items. * **Ignore SSL Issues**: Download the response even if SSL validation isn't possible. * **Proxy**: Use this if you need to specify an HTTP proxy. * **Timeout**: Set a timeout for the request in ms. * **Always Output Data**: The node returns an empty item even if the node returns no data during execution. Be careful setting this on IF nodes, as it could cause an infinite loop. * **Execute Once**: The node executes once, with data from the first item it receives. It doesn't process any extra items. * **Retry On Fail**: When an execution fails, the node reruns until it succeeds. * **On Error**: * **Stop Workflow**: Halts the entire workflow when an error occurs, preventing further node execution. * **Continue**: Proceeds to the next node despite the error, using the last valid data. * **Continue (using error output)**: Continues workflow execution, passing error information to the next node for potential handling. You can document your workflow using node notes: * **Notes**: Note to save with the node. * **Display note in flow**: If active, n8n displays the note in the workflow as a subtitle. --- ## Page: https://docs.n8n.io/workflows/components/connections/ A connection establishes a link between nodes to route data through the workflow. A connection between two nodes passes data from one node's output to another node's input.  ## Create a connection# To create a connection between two nodes, select the grey dot or **Add node**  on the right side of a node and slide the arrow to the grey rectangle on the left side of the following node. ## Delete a connection# Hover over the connection, then select **Delete** . --- ## Page: https://docs.n8n.io/workflows/components/sticky-notes/ Sticky Notes allow you to annotate and comment on your workflows. n8n recommends using Sticky Notes heavily, especially on template workflows, to help other users understand your workflow. 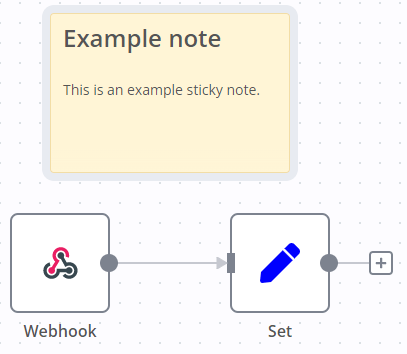 ## Create a Sticky Note# Sticky Notes are a core node. To add a new Sticky Note: 1. Open the nodes panel. 2. Search for `note`. 3. Click the **Sticky Note** node. n8n adds a new Sticky Note to the canvas. ## Edit a Sticky Note# 1. Double click the Sticky Note you want to edit. 2. Write your note. This guide explains how to format your text with Markdown. n8n uses markdown-it, which implements the CommonMark specification. 3. Click away from the note, or press `Esc`, to stop editing. ## Change the color# To change the Sticky Note color: 1. Hover over the Sticky Note 2. Select **Change color**  ## Sticky Note positioning# You can: * Drag a Sticky Note anywhere on the canvas. * Drag Sticky Notes behind nodes. You can use this to visually group nodes. * Resize Sticky Notes by hovering over the edge of the note and dragging to resize. * Change the color: select **Options**  to open the color selector. ## Writing in Markdown# Sticky Notes support Markdown formatting. This section describes some common options. <table><tbody><tr><td><div><pre><span></span><span> 1</span> <span> 2</span> <span> 3</span> <span> 4</span> <span> 5</span> <span> 6</span> <span> 7</span> <span> 8</span> <span> 9</span> <span>10</span> <span>11</span> <span>12</span> <span>13</span> <span>14</span> <span>15</span> <span>16</span> <span>17</span> <span>18</span> <span>19</span> <span>20</span> <span>21</span></pre></div></td><td><div><pre><span></span><code>The text in double asterisks will be **bold** The text in single asterisks will be *italic* Use # to indicate headings: # This is a top-level heading ## This is a sub-heading ### This is a smaller sub-heading You can add links: [Example](https://example.com/) Create lists with asterisks: * Item one * Item two Or created ordered lists with numbers: 1. Item one 2. Item two </code></pre></div></td></tr></tbody></table> For a more detailed guide, refer to CommonMark's help. n8n uses markdown-it, which implements the CommonMark specification. ## Make images full width# You can force images to be 100% width of the sticky note by appending `#full-width` to the filename: <table><tbody><tr><td><div><pre><span></span><span>1</span></pre></div></td><td><div><pre><span></span><code> </code></pre></div></td></tr></tbody></table> --- ## Page: https://docs.n8n.io/workflows/executions/ An execution is a single run of a workflow. ## Execution modes# There are two execution modes: * Manual: run workflows manually when testing. Select **Test Workflow** to start a manual execution. You can do manual executions of active workflows, but n8n recommends keeping your workflow set to **Inactive** while developing and testing. * Production: a production workflow is one that runs automatically. To enable this, set the workflow to **Active**. ## Execution lists# n8n provides two execution lists: * Workflow-level executions: this execution list shows the executions for a single workflow. * All executions: this list shows all executions for all your workflows. n8n supports adding custom data to executions. --- ## Page: https://docs.n8n.io/workflows/executions/manual-partial-and-production-executions/ There are some important differences in how n8n executes workflows manually (by clicking the **Test Workflow** button) and automatically (when the workflow is **Active** and triggered by an event or schedule). ## Manual executions# Manual executions allow you to run workflows directly from the canvas to test your workflow logic. These executions are "ad-hoc" — they run only when you manually select the **Test workflow** button. Manual executions make building workflows easier by allowing you to iteratively test as you go, following the flow logic and seeing data transformations. You can test conditional branching, data formatting changes, and loop behavior by providing different input items and modifying node options. Pinning execution data When performing manual executions, you can use data pinning to "pin" or "freeze" the output data of a node. You can optionally edit the pinned data as well. On future runs, instead of executing the pinned node, n8n will substitute the pinned data and continue following the flow logic. This allows you to iterate without operating on variable data or repeating queries to external services. Production executions ignore all pinned data. ## Partial executions# Clicking the **Test workflow** button at the bottom of the workflow in the **Editor** tab manually runs the entire workflow. You can also perform partial executions to run specific steps in your workflow. Partial executions are manual executions that only run a subset of your workflow nodes. To perform a partial execution, select a node, open its detail view, and select **Test step**. This executes the specific node and any preceding nodes required to fill in its input data. You can also temporarily disable specific nodes in the workflow chain to avoid interacting with those services while building. In particular, partial executions are useful when updating the logic of a specific node since they allow you to re-execute the node with the same input data. ### Troubleshooting partial executions# Some common issues you might come across when running partial executions include the following: > The destination node is not connected to any trigger. Partial executions need a trigger. This error message appears when you try to perform a partial execution without connecting the workflow to a trigger. Manual executions, including partial executions, attempt to mimic production executions when possible. Part of this includes requiring a trigger node to describe when the workflow logic should execute. To work around this, connect a trigger node to the workflow with the node you're trying to execute. Most often, a manual trigger is the simplest option. > Please execute the whole workflow, rather than just the node. (Existing execution data is too large.) This error can appear when performing partial executions on workflows with large numbers of branches. Partial executions involve sending data and workflow logic to the n8n backend in a way that isn't required for full executions. This error occurs when your workflow exceeds the maximum size allowed for these messages. To work around this, consider using the limit node to limit node output while running partial executions. Once the workflow is running as intended, you can disable or delete the limit node before enabling production execution. ## Production executions# Production executions occur when a triggering event or schedule automatically runs a workflow. To configure production executions, you must attach a trigger node (any trigger other than the manual trigger works) and switch workflow's toggle to **Active**. Once activated, the workflow automatically executes whenever the trigger condition occurs. The execution flow for production executions doesn't display in the Editor tab of the workflow as with manual executions. Instead, you can see executions in the workflow's **Executions** tab according to your workflow settings. From there, you can explore and troubleshoot problems using the debug in editor feature. --- ## Page: https://docs.n8n.io/workflows/executions/single-workflow-executions/ ## Workflow-level executions list# The **Executions** list in a workflow shows all executions for that workflow. Deleted workflows When you delete a workflow, n8n deletes its execution history as well. This means you can't view executions for deleted workflows. Execution history and workflow history Don't confuse the execution list with Workflow history. Executions are workflow runs. With the executions list, you can see previous runs of the current version of the workflow. You can copy previous executions into the editor to Debug and re-run past executions in your current workflow. Workflow history is previous versions of the workflow: for example, a version with a different node, or different parameters set. ## View executions for a single workflow# In the workflow, select the **Executions** tab in the top menu. You can preview all executions of that workflow. ## Filter executions# You can filter the executions list. 1. In your workflow, select **Executions**. 2. Select **Filters**. 3. Enter your filters. You can filter by: * **Status**: choose from **Failed**, **Running**, **Success**, or **Waiting**. * **Execution start**: see executions that started in the given time. * **Saved custom data**: this is data you create within the workflow using the Code node. Enter the key and value to filter. Refer to Custom executions data for information on adding custom data. Feature availability Custom executions data is available on: * Cloud: Pro, Enterprise * Self-Hosted: Enterprise, registered Community Available in version 0.222.0 and above. ## Retry failed workflows# If your workflow execution fails, you can retry the execution. To retry a failed workflow: 1. Open the **Executions** list. 2. For the workflow execution you want to retry, select **Refresh** . 3. Select either of the following options to retry the execution: * **Retry with currently saved workflow**: Once you make changes to your workflow, you can select this option to execute the workflow with the previous execution data. * **Retry with original workflow**: If you want to retry the execution without making changes to your workflow, you can select this option to retry the execution with the previous execution data. --- ## Page: https://docs.n8n.io/workflows/executions/all-executions/ To view **all executions** from an n8n instance, navigate to the **Overview** page and then click into the Executions tab. This will show you all executions from the workflows you have access to. If your n8n instance supports **projects**, you'll also be able to view the executions tab within projects you have access to. This will show you executions only from the workflows within the specified project. Deleted workflows When you delete a workflow, n8n deletes its execution history as well. This means you can't view executions for deleted workflows. ## Filter executions# You can filter the executions list: 1. Select the **Executions** tab either from within the **Overview** page or a specific **project** to open the list. 2. Select **Filters**. 3. Enter your filters. You can filter by: * **Workflows**: choose all workflows, or a specific workflow name. * **Status**: choose from **Failed**, **Running**, **Success**, or **Waiting**. * **Execution start**: see executions that started in the given time. * **Saved custom data**: this is data you create within the workflow using the Code node. Enter the key and value to filter. Refer to Custom executions data for information on adding custom data. Feature availability Custom executions data is available on: * Cloud: Pro, Enterprise * Self-Hosted: Enterprise, registered Community Available in version 0.222.0 and above. ## Retry failed workflows# If your workflow execution fails, you can retry the execution. To retry a failed workflow: 1. Select the **Executions** tab from within either the **Overview** page or a specific **project** to open the list. 2. On the execution you want to retry, select **Retry execution** . 3. Select either of the following options to retry the execution: * **Retry with currently saved workflow**: Once you make changes to your workflow, you can select this option to execute the workflow with the previous execution data. * **Retry with original workflow**: If you want to retry the execution without making changes to your workflow, you can select this option to retry the execution with the previous execution data. ## Load data from previous executions into your current workflow# You can load data from a previous workflow back into the canvas. Refer to Debug executions for more information. --- ## Page: https://docs.n8n.io/workflows/executions/custom-executions-data/ You can set custom data on your workflow using the Code node or the Execution Data node. n8n records this with each execution. You can then use this data when filtering the executions list, or fetch it in your workflows using the Code node. Feature availability Custom executions data is available on: * Cloud: Pro, Enterprise * Self-Hosted: Enterprise, registered Community Available in version 0.222.0 and above. ## Set and access custom data using the Code node# This section describes how to set and access data using the Code node. Refer to Execution Data node for information on using the Execution Data node to set data. You can't retrieve custom data using the Execution Data node. ### Set custom executions data# Set a single piece of extra data: JavaScriptPython <table><tbody><tr><td><div><pre><span></span><span>1</span></pre></div></td><td><div><pre><span></span><code><span>$execution</span><span>.</span><span>customData</span><span>.</span><span>set</span><span>(</span><span>"key"</span><span>,</span><span> </span><span>"value"</span><span>);</span> </code></pre></div></td></tr></tbody></table> <table><tbody><tr><td><div><pre><span></span><span>1</span></pre></div></td><td><div><pre><span></span><code><span>_execution</span><span>.</span><span>customData</span><span>.</span><span>set</span><span>(</span><span>"key"</span><span>,</span> <span>"value"</span><span>);</span> </code></pre></div></td></tr></tbody></table> Set all extra data. This overwrites the whole custom data object for this execution: JavaScriptPython <table><tbody><tr><td><div><pre><span></span><span>1</span></pre></div></td><td><div><pre><span></span><code><span>$execution</span><span>.</span><span>customData</span><span>.</span><span>setAll</span><span>({</span><span>"key1"</span><span>:</span><span> </span><span>"value1"</span><span>,</span><span> </span><span>"key2"</span><span>:</span><span> </span><span>"value2"</span><span>})</span> </code></pre></div></td></tr></tbody></table> <table><tbody><tr><td><div><pre><span></span><span>1</span></pre></div></td><td><div><pre><span></span><code><span>_execution</span><span>.</span><span>customData</span><span>.</span><span>setAll</span><span>({</span><span>"key1"</span><span>:</span> <span>"value1"</span><span>,</span> <span>"key2"</span><span>:</span> <span>"value2"</span><span>})</span> </code></pre></div></td></tr></tbody></table> There are limitations: * They must be strings * `key` has a maximum length of 50 characters * `value` has a maximum length of 255 characters * n8n supports a maximum of 10 items of custom data ### Access the custom data object during execution# You can retrieve the custom data object, or a specific value in it, during an execution: JavaScriptPython <table><tbody><tr><td><div><pre><span></span><span>1</span> <span>2</span> <span>3</span> <span>4</span> <span>5</span></pre></div></td><td><div><pre><span></span><code><span>// Access the current state of the object during the execution</span> <span>const</span><span> </span><span>customData</span><span> </span><span>=</span><span> </span><span>$execution</span><span>.</span><span>customData</span><span>.</span><span>getAll</span><span>();</span> <span>// Access a specific value set during this execution</span> <span>const</span><span> </span><span>customData</span><span> </span><span>=</span><span> </span><span>$execution</span><span>.</span><span>customData</span><span>.</span><span>get</span><span>(</span><span>"key"</span><span>);</span> </code></pre></div></td></tr></tbody></table> <table><tbody><tr><td><div><pre><span></span><span>1</span> <span>2</span> <span>3</span> <span>4</span> <span>5</span></pre></div></td><td><div><pre><span></span><code><span># Access the current state of the object during the execution</span> <span>customData</span> <span>=</span> <span>_execution</span><span>.</span><span>customData</span><span>.</span><span>getAll</span><span>();</span> <span># Access a specific value set during this execution</span> <span>customData</span> <span>=</span> <span>_execution</span><span>.</span><span>customData</span><span>.</span><span>get</span><span>(</span><span>"key"</span><span>);</span> </code></pre></div></td></tr></tbody></table> --- ## Page: https://docs.n8n.io/workflows/executions/debug/ Feature availability Available on n8n Cloud and registered Community plans. You can load data from a previous execution into your current workflow. This is useful for debugging data from failed production executions: you can see a failed execution, make changes to your workflow to fix it, then re-run it with the previous execution data. ## Load data# To load data from a previous execution: 1. In your workflow, select the **Executions** tab to view the **Executions** list. 2. Select the execution you want to debug. n8n displays options depending on whether the workflow was successful or failed: * For failed executions: select **Debug in editor**. * For successful executions: select **Copy to editor**. 3. n8n copies the execution data into your current workflow, and pins the data in the first node in the workflow. Check which executions you save The executions available on the **Executions** list depends on your Workflow settings. --- ## Page: https://docs.n8n.io/workflows/tags/ Workflow tags allow you to label your workflows. You can then filter workflows by tag. Tags are global. This means when you create a tag, it's available to all users on your n8n instance. ## Add a tag to a workflow# To add a tag to your workflow: 1. In your workflow, select **\+ Add tag**. 2. Select an existing tag, or enter a new tag name. 3. Once you select a tag and click away from the tag modal, n8n displays the tag next to the workflow name. You can add more than one tag. ## Filter by tag# When browsing the workflows on your instance, you can filter by tag. 1. On the **Workflows** page, select **Filters**. 2. Select **Tags**. 3. Select the tag or tags you want to filter by. n8n lists the workflows with that tag. You can edit existing tags. Instance owners can delete tags. 1. Select **Manage tags**. This is available from **Filters** > **Tags** on the **Workflows** page, or in the **\+ Add tag** modal in your workflow. 2. Hover over the tag you want to change. 3. Select **Edit**  to rename it, or **Delete**  to delete it. Global tags Tags are global. If you edit or delete a tag, this affects all users of your n8n instance. --- ## Page: https://docs.n8n.io/workflows/export-import/ n8n saves workflows in JSON format. You can export your workflows as JSON files or import JSON files into your n8n library. You can export and import workflows in several ways. Sharing credentials Exported workflow JSON files include credential names and IDs. While IDs aren't sensitive, the names could be, depending on how you name your credentials. HTTP Request nodes may contain authentication headers when imported from cURL. Remove or anonymize this information from the JSON file before sharing to protect your credentials. ## Copy-Paste# You can copy and paste a workflow or parts of it by selecting the nodes you want to copy to the clipboard (`Ctrl + c` or `cmd +c`) and pasting it (`Ctrl + v` or `cmd + v`) into the Editor UI. To select all nodes or a group of nodes, click and drag:  From the top navigation bar, select the three dots in the upper right  to see the following options:  _Import & Export workflows menu_ * **Download**: Downloads your current workflow as a JSON file to your computer. * **Import from URL**: Imports workflow JSON from a URL, for example, this workflow JSON file on GitHub. * **Import from File**: Imports a workflow as a JSON file from your computer. ## From the command line# * Export: See the full list of commands for exporting workflows or credentials. * Import: See the full list of commands for importing workflows or credentials. --- ## Page: https://docs.n8n.io/workflows/templates/ 1 2 3 4 5 6 7 8 9 10 11 12 13 14 15 16 17 18 19 20 21 22 23 24 25 26 27 28 29 30 31 32 33 34 35 36 37 38 39 40 41 42 43 44 45 46 47 48 49 50 51 52 53 54 55 56 57 58 59 60 61 62 63 64 65 66 67 68 69 70 71 72 73 74 75 76 77 78 79 80 81 82 83 84 85 86 87 88 89 90 91 92 93 94 95 96 97 98 99 100 101 102 103 104 105 106 107 108 109 110 111 112 113 114 115 116 117 118 119 120 121 122 123 124 125 126 127 128 129 130 131 132 133 134 135 136 137 138 139 140 141 142 143 144 145 146 147 148 149 150 151 152 153 154 155 156 157 158 159 160 161 162 163 164 165 166 167 168 169 170 171 172 173 174 175 176 177 178 179 180 181 182 183 184 185 186 187 188 189 190 191 192 193 194 195 196 197 198 199 200 201 202 203 204 205 206 207 `{ "$schema": "http://json-schema.org/draft-07/schema#", "title": "Generated schema for Root", "type": "object", "properties": { "id": { "type": "number" }, "name": { "type": "string" }, "totalViews": { "type": "number" }, "price": {}, "purchaseUrl": {}, "recentViews": { "type": "number" }, "createdAt": { "type": "string" }, "user": { "type": "object", "properties": { "username": { "type": "string" }, "verified": { "type": "boolean" } }, "required": [ "username", "verified" ] }, "nodes": { "type": "array", "items": { "type": "object", "properties": { "id": { "type": "number" }, "icon": { "type": "string" }, "name": { "type": "string" }, "codex": { "type": "object", "properties": { "data": { "type": "object", "properties": { "details": { "type": "string" }, "resources": { "type": "object", "properties": { "generic": { "type": "array", "items": { "type": "object", "properties": { "url": { "type": "string" }, "icon": { "type": "string" }, "label": { "type": "string" } }, "required": [ "url", "label" ] } }, "primaryDocumentation": { "type": "array", "items": { "type": "object", "properties": { "url": { "type": "string" } }, "required": [ "url" ] } } }, "required": [ "primaryDocumentation" ] }, "categories": { "type": "array", "items": { "type": "string" } }, "nodeVersion": { "type": "string" }, "codexVersion": { "type": "string" } }, "required": [ "categories" ] } } }, "group": { "type": "string" }, "defaults": { "type": "object", "properties": { "name": { "type": "string" }, "color": { "type": "string" } }, "required": [ "name" ] }, "iconData": { "type": "object", "properties": { "icon": { "type": "string" }, "type": { "type": "string" }, "fileBuffer": { "type": "string" } }, "required": [ "type" ] }, "displayName": { "type": "string" }, "typeVersion": { "type": "number" }, "nodeCategories": { "type": "array", "items": { "type": "object", "properties": { "id": { "type": "number" }, "name": { "type": "string" } }, "required": [ "id", "name" ] } } }, "required": [ "id", "icon", "name", "codex", "group", "defaults", "iconData", "displayName", "typeVersion" ] } } }, "required": [ "id", "name", "totalViews", "price", "purchaseUrl", "recentViews", "createdAt", "user", "nodes" ] }` --- ## Page: https://docs.n8n.io/workflows/sharing/ ## Workflow sharing# Feature availability Available on Pro and Enterprise Cloud plans, and Enterprise self-hosted plans. Workflow sharing allows you to share workflows between users of the same n8n instance. Users can share workflows they created. Instance owners, and users with the admin role, can view and share all workflows in the instance. Refer to Account types for more information about owners and admins. 1. Open the workflow you want to share. 2. Select **Share**. 3. In **Add users**, find and select the users you want to share with. 4. Select **Save**. You can browse and search workflows on the **Workflows** list. The workflows in the list depend on the project: * **Overview** lists all workflows you can access. This includes: * Your own workflows. * Workflows shared with you. * Workflows in projects you're a member of. * If you log in as the instance owner or admin: all workflows in the instance. * Other projects: all workflows in the project. ## Workflow roles and permissions# There are two workflow roles: creator and editor. The creator is the user who created the workflow. Editors are other users with access to the workflow. You can't change the workflow owner, except when deleting the user. Credentials Workflow sharing allows editors to use all credentials used in the workflow. This includes credentials that aren't explicitly shared with them using credential sharing. ### Permissions# | Permissions | Creator | Editor | | --- | --- | --- | | View workflow (read-only) |  |  | | View executions |  |  | | Update (including tags) |  |  | | Run |  |  | | Share |  |  | | Export |  |  | | Delete |  |  | Sharing in n8n works on the principle of least privilege. This means that if a user shares a workflow with you, but they don't share their credentials, you can't edit the nodes within the workflow that use those credentials. You can view and run the workflow, and edit nodes that don't use unshared credentials. Refer to Credential sharing for guidance on sharing credentials. --- ## Page: https://docs.n8n.io/workflows/settings/ * Using n8n * Integrations * Hosting n8n * Code in n8n * Advanced AI * API * Embed * n8n home ↗ * Forum ↗ * Blog ↗ 1. Using n8n 2. Using the app 3. Understand workflows ## Workflow settings# You can customize workflow behavior for individual workflows using workflow settings. To open the settings: 1. Open your workflow. 2. Select the **Options**  menu. 3. Select **Settings**. n8n opens the **Workflow settings** modal. The following settings are available: * **Execution order**: choose the execution order for multi-branch workflows. **v0 (legacy)** executes the first node of each branch, then the second node of each branch, and so on. **v1 (recommended)** executes each branch in turn, completing one branch before starting another. n8n orders the branches based on their position on the canvas, from topmost to bottommost. If two branches are at the same height, the leftmost branch executes first. * **Error Workflow**: select a workflow to trigger if the current workflow fails. See Error workflows for more details. * **This workflow can be called by**: choose whether other workflow can call this workflow. * **Timezone**: sets the timezone for the workflow to use. The default timezone is EDT (New York). The timezone setting is important for the Schedule Trigger node. * **Save failed production executions**: whether n8n should save failed executions for active workflows. * **Save successful production executions**: whether n8n should save successful executions for active workflows. * **Save manual executions**: whether n8n should save executions for workflows started by the user in the editor. * **Save execution progress**: whether n8n should save execution data for each node. If set to **Save**, the workflow resumes from where it stopped in case of an error. This might increase latency. * **Timeout Workflow**: toggle to enable setting a duration after which n8n should cancel the current workflow execution. * **Timeout After**: Set the time in hours, minutes, and seconds after which the workflow should timeout. For n8n Cloud users n8n enforces a maximum available timeout for each plan. --- ## Page: https://docs.n8n.io/workflows/history/ Feature availability * Full workflow history is available on Enterprise Cloud and Enterprise Self-hosted. * Versions from the last five days are available for Cloud Pro users. * Versions from the last 24 hours are available for registered Community users. Use workflow history to view and restore previous versions of your workflows. ## Understand workflow history# n8n creates a new version when you: * Save your workflow. * Restore an old version. n8n saves the latest version before restoring. * Pull from a Git repository using Source control. Note that n8n saves versions to the instance database, not to Git. Workflow history and execution history Don't confuse workflow history with the Workflow-level executions list. Executions are workflow runs. With the executions list, you can see previous runs of the current version of the workflow. You can copy previous executions into the editor to Debug and re-run past executions in your current workflow. Workflow history is previous versions of the workflow: for example, a version with a different node, or different parameters set. ## View workflow history# To view a workflow's history: 1. Open the workflow. 2. Select **Workflow history** . n8n opens a menu showing the saved workflow versions, and a canvas with a preview of the selected version. ## Restore or copy previous versions# You can restore a previous workflow version, or make a copy of it: 1. On the version you want to restore or copy, select **Options** . 2. Choose what you want to do: * **Restore this version**: replace your current workflow with the selected version. * **Clone to new workflow**: create a new workflow based on the selected version. * **Open version in new tab**: open a second tab displaying the selected version. Use this to compare versions. * **Download**: download the version as JSON. --- ## Page: https://docs.n8n.io/workflows/workflow-id/ 1. Using n8n 2. Using the app 3. Understand workflows ## Find your workflow ID# Your workflow ID is available in: * The URL of the open workflow. * The workflow settings title. --- ## Page: https://docs.n8n.io/credentials/ Credentials are private pieces of information issued by apps and services to authenticate you as a user and allow you to connect and share information between the app or service and the n8n node. Access the credentials UI by opening the left menu and selecting **Credentials**. n8n lists credentials you created on the **My credentials** tab. The **All credentials** tab shows all credentials you can use, included credentials shared with you by other users. * Create and edit credentials. * Learn about credential sharing. * Find information on setting up credentials for your services in the credentials library. --- ## Page: https://docs.n8n.io/credentials/add-edit-credentials/ ## Create and edit credentials# Credentials are securely stored authentication information used to connect n8n workflows to external services such as APIs, or databases. ## Create a credential# 1. Select the  **button** in the upper-left corner of the side menu. Select credential. 2. If your n8n instance supports projects, you'll also need to choose whether to create the credential inside your personal space or a specific project you have access to. If you're using the community version, you'll create the credential inside your personal space. 3. Select the app or service you wish to connect to. Or: 1. Using the  **Create** button in the upper-right corner from either the **Overview** page or a specific project. Select Credential. 2. If you're doing this from the **Overview** page, you'll create the credential inside your personal space. If you're doing this from inside a project, you'll create the credential inside that specific project. 3. Select the app or service you wish to connect to. You can also create new credential in the credential drop down when editing a node on the workflow editor. Once in the credential modal, enter the details required by your service. Refer to your service's page in the credentials library for guidance. When you save a credential, n8n tests it to confirm it works. Credentials naming n8n names new credentials "_node name_ account" by default. You can rename the credentials by clicking on the name, similarly to renaming nodes. It's good practice to give them names that identify the app or service, type, and purpose of the credential. A naming convention makes it easier to keep track of and identify your credentials. ## Expressions in credentials# You can use expressions to set credentials dynamically as your workflow runs: 1. In your workflow, find the data path containing the credential. This varies depending on the exact parameter names in your data. Make sure that the data containing the credential is available in the workflow when you get to the node that needs it. 2. When creating your credential, hover over the field where you want to use an expression. 3. Toggle **Expression** on. 4. Enter your expression. ### Example workflow# #### Using the example# To load the template into your n8n instance: 1. Download the workflow JSON file. 2. Open a new workflow in your n8n instance. 3. Copy in the JSON, or select **Workflow menu**  > **Import from file...**. The example workflows use Sticky Notes to guide you: * Yellow: notes and information. * Green: instructions to run the workflow. * Orange: you need to change something to make the workflow work. * Blue: draws attention to a key feature of the example. --- ## Page: https://docs.n8n.io/credentials/credential-sharing/ Feature availability Available on all Cloud plans, and Enterprise self-hosted plans. You can share a credential directly with other users to use in their own workflows. Or share a credential in a project for all members of that project to use. Any users using a shared credential won't be able to view or edit the credential details. Users can share credentials they created and own. Only project admins can share credentials created in and owned by a project. Instance owners and instance admins can view and share all credentials on an instance. Refer to Account types for more information about owners and admins. In projects, a user's role controls how they can interact with the workflows and credentials associated to the projects they're a member of. To share a credential: 1. From the left menu, select either **Overview** or a project. 2. Select **Credentials** to see a list of your credentials. 3. Select the credential you want to share. 4. Select **Sharing**. 5. In the **Share with projects or users** dropdown, browse or search for the user or project with which you want to share your credentials. 6. Select a user or project. 7. Select **Save** to apply the changes. ## Remove access to a credential# To unshare a credential: 1. From the left menu, select either **Overview** or a project. 2. Select **Credentials** to see a list of your credentials. 3. Select the credential you want to unshare. 4. Select **Sharing**. 5. Select **trash icon** on the user or project you want to remove from the list of shared users and projects. 6. Select **Save** to apply the changes. --- ## Page: https://docs.n8n.io/user-management/ User management in n8n allows you to invite people to work in your n8n instance. It includes: * Login and password management * Adding and removing users * Three account types: **Owner** and **Member** (and **Admin** for Pro & Enterprise plans) Privacy The user management feature doesn't send personal information, such as email or username, to n8n. ## Setup guides# This section contains most usage information for user management, and the Cloud setup guide. If you self-host n8n, there are extra steps to configure your n8n instance. Refer to the Self-hosted guide. This section includes guides to configuring LDAP and SAML in n8n. --- ## Page: https://docs.n8n.io/user-management/cloud-setup/ ## Set up user management on n8n Cloud# To access user management, upgrade to version 0.195.0 or newer. Irreversible upgrade Once you upgrade your Cloud instance to an n8n version with user management, you can't downgrade your version. ## Step one: In-app setup# When you set up user management for the first time, you create an owner account. 1. Open n8n. The app displays a signup screen. 2. Enter your details. Your password must be at least eight characters, including at least one number and one capital letter. 3. Click **Next**. n8n logs you in with your new owner account. ## Step two: Invite users# You can now invite other people to your n8n instance. 1. Sign into your workspace with your owner account. (If you are in the Admin Panel open your **Workspace** from the Dashboard) 2. Click the three dots next to your user icon at the bottom left and click **Settings**. n8n opens your **Personal settings** page. 3. Click **Users** to go to the **Users** page. 4. Click **Invite**. 5. Enter the new user's email address. 6. Click **Invite user**. n8n sends an email with a link for the new user to join. --- ## Page: https://docs.n8n.io/user-management/manage-users/ 1. Using n8n 2. Using the app 3. Manage users and access The **Settings** > **Users** page shows all users, including ones with pending invitations. ## Delete a user# 1. Select the menu icon by the user you want to delete. 2. Confirm you want to delete them. 3. If they're an active user, choose whether to copy their workflow data and credentials to a new user, or permanently delete their workflows and credentials. ## Resend an invitation to a pending user# Click the menu icon by the user, then click **Resend invite**. --- ## Page: https://docs.n8n.io/user-management/account-types/ There are three account types: owner, admin, and member. The account type affects the user permissions and access. Feature availability To use admin accounts, you need a pro or enterprise plan. Account types and role types Account types and role types are different things. Role types are part of RBAC. Every account has one type. The account can have different role types for different projects. Create a member-level account for the owner n8n recommends that owners create a member-level account for themselves. Owners can see and edit all workflows, credentials, and projects. However, there is no way to see who created a particular workflow, so there is a risk of overriding other people's work if you build and edit workflows as an owner. | Permission | Owner | Admin | Member | | --- | --- | --- | --- | | Manage own email and password |  |  |  | | Manage own workflows |  |  |  | | View, create, and use tags |  |  |  | | Delete tags |  |  |  | | View and share all workflows |  |  |  | | View, edit, and share all credentials |  |  |  | | Set up and use Source control |  |  |  | | Create projects |  |  |  | | View all projects |  |  |  | | Add and remove users |  |  |  | | Access the Cloud dashboard |  |  |  | --- ## Page: https://docs.n8n.io/user-management/rbac/ Feature availability RBAC is available on all plans except the Community edition. Different plans have different numbers of projects and roles. Refer to n8n's pricing page for plan details. Role types and account types Role types and account types are different things. Every account has one type. The account can have different role types for different projects. RBAC is a way of managing access to workflows and credentials based on user roles and projects. You group workflows into projects, and user access depends on the user's project role. This section provides guidance on using RBAC in n8n. * Role types * Projects --- ## Page: https://docs.n8n.io/user-management/rbac/role-types/ Feature availability * The Project Editor role is available on Pro Cloud and Self-hosted Enterprise plans. * The Project Viewer role is only available on Self-hosted Enterprise and Cloud Enterprise plans. Within projects, there are three user roles: Admin, Editor, and Viewer. These roles control what the user can do in a project. A user can have different roles within different projects. ## Project Admin# A Project Admin role has the highest level of permissions. Project admins can: * Manage project settings: Change name, delete project. * Manage project members: Invite members and remove members, change members' roles. * View, create, update, and delete any workflows, credentials, or executions within a project. ## Project Editor# A Project Editor can view, create, update, and delete any workflows, credentials, or executions within a project. ## Project Viewer# A Project Viewer is effectively a `read-only` role with access to all workflows, credentials, and executions within a project. Viewers aren't able to manually execute any workflows that exist in a project. Role types and account types Role types and account types are different things. Every account has one type. The account can have different role types for different projects. | Permission | Admin | Editor | Viewer | | --- | --- | --- | --- | | View workflows in the project |  |  |  | | View credentials in the project |  |  |  | | View executions |  |  |  | | Edit credentials and workflows |  |  |  | | Add workflows and credentials |  |  |  | | Execute workflows |  |  |  | | Manage members |  |  |  | | Modify the project |  |  |  | Variables and tags aren't affected by RBAC: they're global across the n8n instance. --- ## Page: https://docs.n8n.io/user-management/rbac/projects/ Feature availability RBAC is available on all plans except the Community edition. Different plans have different numbers of projects and roles. Refer to n8n's pricing page for plan details. n8n uses projects to group workflows and credentials, and assigns roles to users in each project. This means that a single user can have different roles in different projects, giving them different levels of access. ## Create a project# Instance owners and instance admins can create projects. To create a project: 1. Select  **Add project**. 2. Fill out the project settings. 3. Select **Save**. ## Add and remove users in a project# Project admins can add and remove users. To add a user to a project: 1. Select the project. 2. Select **Project settings**. 3. Under **Project members**, browse for users or search by username or email address. 4. Select the user you want to add. 5. Check the role type and change it if needed. 6. Select **Save**. To remove a user from a project: 1. Select the project. 2. Select **Project settings**. 3. In the role type dropdown for the user you want to remove, select **Remove access**. 4. Select **Save**. ## Delete a project# To delete a project: 1. Select the project. 2. Select **Project settings**. 3. Select **Delete project**. 4. Choose what to do with the workflows and credentials. You can select: * **Transfer its workflows and credentials to another project**: n8n prompts you to choose a project to move the data to. * **Delete its workflows and credentials**: n8n prompts you to confirm that you want to delete all the data in the project. ## Move workflows and credentials between projects or users# Workflow and credential owners can move workflows or credentials (changing ownership) to other users or projects they have access to. Moving revokes sharing Moving workflows or credentials removes all existing sharing. Be aware that this could impact other workflows currently sharing these resources. 1. Select **Workflow menu**  or **Credential menu**  > **Move**. Moving workflows with credentials When moving a workflow with credentials you have permission to share, you can choose to share the credentials as well. This ensures that the workflow continues to have access to the credentials it needs to execute. n8n will note any credentials that can't be moved (credentials you don't have permission to share). 2. Select the project or user you want to move to. 3. Select **Next**. 4. Confirm you understand the impact of the move: workflows may stop working if the credentials they need aren't available in the target project, and n8n removes any current individual sharing. 5. Select **Confirm move to new project**. ## Using external secrets in projects# To use external secrets in a project, you must have an instance owner or instance admin as a member of the project. --- ## Page: https://docs.n8n.io/user-management/best-practices/ * Using n8n * Integrations * Hosting n8n * Code in n8n * Advanced AI * API * Embed * n8n home ↗ * Forum ↗ * Blog ↗ 1. Using n8n 2. Using the app 3. Manage users and access ## Best practices for user management# This page contains advice on best practices relating to user management in n8n. ## All platforms# * n8n recommends that owners create a member-level account for themselves. Owners can see all workflows, but there is no way to see who created a particular workflow, so there is a risk of overriding other people's work if you build and edit workflows as an owner. * Users must be careful not to edit the same workflow simultaneously. It's possible to do it, but the users will overwrite each other's changes. * To move workflows between accounts, export the workflow as JSON, then import it to the new account. Note that this action loses the workflow history. * Webhook paths must be unique across the entire instance. This means each webhook path must be unique for all workflows and all users. By default, n8n generates a long random value for the webhook path, but users can edit this to their own custom path. If two users set the same path value: * The path works for the first workflow that's run or activated. * Other workflows will error if they try to run with the same path. ## Self-hosted# If you run n8n behind a reverse proxy, set the following environment variables so that n8n generates emails with the correct URL: * `N8N_HOST` * `N8N_PORT` * `N8N_PROTOCOL` * `N8N_EDITOR_BASE_URL` More information on these variables is available in Environment variables. --- ## Page: https://docs.n8n.io/user-management/two-factor-auth/ ## Two-factor authentication (2FA)# Two-factor authentication (2FA) adds a second authentication method on top of username and password. This increases account security. n8n supports 2FA using an authenticator app. ## Enable 2FA# You need an authenticator app on your phone. To enable 2FA in n8n: 1. Go to you **Settings** > **Personal**. 2. Select **Enable 2FA**. n8n opens a modal with a QR code. 3. Scan the QR code in your authenticator app. 4. Enter the code from your app in **Code from authenticator app**. 5. Select **Continue**. n8n displays recovery codes. 6. Save the recovery codes. You need these to regain access to your account if you lose your authenticator. ## Disable 2FA for your instance# Self-hosted users can configure their n8n instance to disable 2FA for all users by setting `N8N_MFA_ENABLED` to false. Note that n8n ignores this if existing users have 2FA enabled. Refer to Configuration methods for more information on configuring your n8n instance with environment variables. --- ## Page: https://docs.n8n.io/user-management/ldap/ ## Lightweight Directory Access Protocol (LDAP)# Feature availability * Available on Self-hosted Enterprise and Cloud Enterprise plans. * You need access to the n8n instance owner account. This page tells you how to enable LDAP in n8n. It assumes you're familiar with LDAP, and have an existing LDAP server set up. LDAP allows users to sign in to n8n with their organization credentials, instead of an n8n login. ## Enable LDAP# 1. Log in to n8n as the instance owner. 2. Select **Settings**  > **LDAP**. 3. Toggle on **Enable LDAP Login**. 4. Complete the fields with details from your LDAP server. 5. Select **Test connection** to check your connection setup, or **Save connection** to create the connection. After enabling LDAP, anyone on your LDAP server can sign in to the n8n instance, unless you exclude them using the **User Filter** setting. You can still create non-LDAP users (email users) on the **Settings** > **Users** page. ## Merging n8n and LDAP accounts# If n8n finds matching accounts (matching emails) for email users and LDAP users, the user must sign in with their LDAP account. n8n instance owner accounts are excluded from this: n8n never converts owner accounts to LDAP users. ## LDAP user accounts in n8n# On first sign in, n8n creates a user account in n8n for the LDAP user. You must manage user details on the LDAP server, not in n8n. If you update or delete a user on your LDAP server, the n8n account updates at the next scheduled sync, or when the user next tries to log in, whichever happens first. User deletion If you remove a user from your LDAP server, they lose n8n access on the next sync. ## Turn LDAP off# To turn LDAP off: 1. Log in to n8n as the instance owner. 2. Select **Settings**  > **LDAP**. 3. Toggle off **Enable LDAP Login**. If you turn LDAP off, n8n converts existing LDAP users to email users on their next login. The users must reset their password. --- ## Page: https://docs.n8n.io/user-management/saml/ Feature availability * Available on Enterprise plans. * You need access to the n8n instance owner account to enable and configure SAML Available from version 0.225.0. This section provides guidance on using SAML SSO (single sign-on) with n8n. It assumes you're familiar with SAML. If you're not, SAML Explained in Plain English can help you understand how SAML works, and its benefits. * Set up SAML: a general guide to setting up SAML in n8n, and links to resources for common IdPs. Start here. * Okta Workforce Identity SAML setup: step-by-step guidance to configuring Okta. * Troubleshooting: a list of things to check if you encounter issues. * Managing users with SAML: performing user management tasks with SAML enabled. --- ## Page: https://docs.n8n.io/user-management/saml/setup/ Feature availability * Available on Enterprise plans. * You need access to the n8n instance owner account to enable and configure SAML Available from version 0.225.0. This page tells you how to enable SAML SSO (single sign-on) in n8n. It assumes you're familiar with SAML. If you're not, SAML Explained in Plain English can help you understand how SAML works, and its benefits. ## Enable SAML# 1. In n8n, go to **Settings** > **SSO**. 2. Make a note of the n8n **Redirect URL** and **Entity ID**. 1. **Optional**: if your IdP allows you to set up SAML from imported metadata, navigate to the **Entity ID** URL and save the XML. 2. **Optional**: if you are running n8n behind a load balancer make sure you have `N8N_EDITOR_BASE_URL` configured. 3. Set up SAML with your IdP (identity provider). You need the redirect URL and entity ID. You may also need an email address and name for the IdP user. 4. After completing setup in your IdP, load the metadata XML into n8n. You can use a metadata URL or raw XML: 1. **Metadata URL**: Copy the metadata URL from your IdP into the **Identity Provider Settings** field in n8n. 2. **Raw XML**: Download the metadata XML from your IdP, toggle **Identiy Provider Settings** to **XML**, then copy the raw XML into **Identity Provider Settings**. 5. Select **Save settings**. 6. Select **Test settings** to check your SAML setup is working. 7. Set SAML 2.0 to **Activated**. ## Generic IdP setup# The steps to configure the IdP vary depending on your chosen IdP. These are some common setup tasks: * Create an app for n8n in your IdP. * Map n8n attributes to IdP attributes: | Name | Name format | Value (IdP side) | | --- | --- | --- | | http://schemas.xmlsoap.org/ws/2005/05/identity/claims/emailaddress | URI Reference | User email | | http://schemas.xmlsoap.org/ws/2005/05/identity/claims/firstname | URI Reference | User First Name | | http://schemas.xmlsoap.org/ws/2005/05/identity/claims/lastname | URI Reference | User Last Name | | http://schemas.xmlsoap.org/ws/2005/05/identity/claims/upn | URI Reference | User Email | ## Setup resources for common IdPs# Documentation links for common IdPs. | IdP | Documentation | | --- | --- | | Auth0 | Configure Auth0 as SAML Identity Provider: Manually configure SSO integrations | | Authentik | Applications and the SAML Provider | | Azure AD | SAML authentication with Azure Active Directory | | Keycloak | Choose a Getting Started guide depending on your hosting. | | Okta | n8n provides a Workforce Identity setup guide | | PingIdentity | PingOne SSO | --- ## Page: https://docs.n8n.io/user-management/saml/okta/ Set up SAML SSO in n8n with Okta. Workforce Identity and Customer Identity This guide covers setting up Workforce Identity. This is the original Okta product. Customer Identity is Okta's name for Auth0, which they've acquired. ## Prerequisites# You need an Okta Workforce Identity account, and the redirect URL and entity ID from n8n's SAML settings. Okta Workforce may enforce two factor authentication for users, depending on your Okta configuration. Read the Set up SAML guide first. ## Setup# 1. In your Okta admin panel, select **Applications** > **Applications**. 2. Select **Create App Integration**. Okta opens the app creation modal. 3. Select **SAML 2.0**, then select **Next**. 4. On the **General Settings** tab, enter `n8n` as the **App name**. 5. Select **Next** . 6. On the **Configure SAML** tab, complete the following **General** fields: * **Single sign-on URL**: the **Redirect URL** from n8n. * **Audience URI (SP Entity ID)**: the **Entity ID** from n8n. * **Default RelayState**: leave this empty. * **Name ID format**: `EmailAddress`. * **Application username**: `Okta username`. * **Update application username on**: `Create and update`. 7. Create **Attribute Statements**: | **Name** | **Name format** | **Value** | | --- | --- | --- | | http://schemas.xmlsoap.org/ws/2005/05/identity/claims/firstname | URI Reference | user.firstName | | http://schemas.xmlsoap.org/ws/2005/05/identity/claims/lastname | URI Reference | user.lastName | | http://schemas.xmlsoap.org/ws/2005/05/identity/claims/upn | URI Reference | user.login | | http://schemas.xmlsoap.org/ws/2005/05/identity/claims/emailaddress | URI Reference | user.email | 8. Select **Next**. Okta may prompt you to complete a marketing form, or may take you directly to your new n8n Okta app. 9. Assign the n8n app to people: 1. On the n8n app dashboard in Okta, select **Assignments**. 2. Select **Assign** > **Assign to People**. Okta displays a modal with a list of available people. 3. Select **Assign** next to the person you want to add. Okta displays a prompt to confirm the username. 4. Leave the username as email address. Select **Save and Go Back**. 5. Select **Done**. 10. Get the metadata XML: on the **Sign On** tab, copy the Metadata URL. Navigate to it, and copy the XML. Paste this into **Identity Provider Settings** in n8n. 11. Select **Save settings**. 12. Select **Test settings**. n8n opens a new tab. If you're not currently logged in, Okta prompts you to sign in. n8n then displays a success message confirming the attributes returned by Okta. --- ## Page: https://docs.n8n.io/user-management/saml/troubleshooting/ 1. Using n8n 2. Using the app 3. Manage users and access 4. SAML If you get an error when testing your SAML setup, check the following: * Does the app you created in your IdP support SAML? * Did you enter the n8n redirect URL and entity ID in the correct fields in your IdP? * Is the metadata XML correct? Check that the metadata you copied into n8n is formatted correctly. For more support, use the forum, or contact your support representative if you have a paid support plan. --- ## Page: https://docs.n8n.io/user-management/saml/managing/ 1. Using n8n 2. Using the app 3. Manage users and access 4. SAML There are some user management tasks that are affected by SAML. ## Exempt users from SAML# You can allow users to log in without using SAML. To do this: 1. Go to **Settings** > **Users**. 2. Select the menu icon by the user you want to exempt from SAML. 3. Select **Allow Manual Login**. ## Deleting users# If you remove a user from your IdP, they remain logged in to n8n. You need to manually remove them from n8n as well. Refer to Manage users for guidance on deleting users. --- ## Page: https://docs.n8n.io/keyboard-shortcuts/ * Using n8n * Integrations * Hosting n8n * Code in n8n * Advanced AI * API * Embed * n8n home ↗ * Forum ↗ * Blog ↗ 1. Using n8n 2. Using the app ## Keyboard shortcuts and controls# n8n provides keyboard shortcuts for some actions. ## Workflow controls# * **Ctrl** + **Alt** + **n**: create new workflow * **Ctrl** + **o**: open workflow * **Ctrl** + **s**: save the current workflow * **Ctrl** + **z**: undo * **Ctrl** + **shift** + **z**: redo * **Ctrl** + **Enter**: execute workflow ## Canvas# ### Move the canvas# * **Ctrl** + **Left Mouse Button** + drag: move node view * **Ctrl** + **Middle mouse button** + drag: move node view * **Space** + drag: move node view * **Middle mouse button** + drag: move node view * Two fingers on a touch screen: move node view ### Canvas zoom# * **+** or **\=**: zoom in * **\-** or **\_**: zoom out * **0**: reset zoom level * **1**: zoom to fit workflow * **Ctrl** + **Mouse wheel**: zoom in/out ### Nodes on the canvas# * **Ctrl** + **a**: select all nodes * **Ctrl** + **v**: paste nodes * **Shift** + **s**: add sticky note ### With one or more nodes selected in canvas# * **ArrowDown**: select sibling node below the current one * **ArrowLeft**: select node left of the current one * **ArrowRight**: select node right of the current one * **ArrowUp**: select sibling node above the current one * **Ctrl** + **c**: copy * **Ctrl** + **x**: cut * **D**: deactivate * **Delete**: delete * **Enter**: open * **F2**: rename * **P**: pin data in node. Refer to Data pinning for more information. * **Shift** + **ArrowLeft**: select all nodes left of the current one * **Shift** + **ArrowRight**: select all nodes right of the current one ## Node panel# * **Tab**: open the Node Panel * **Enter**: insert selected node into workflow * **Escape**: close Node panel ### Node panel categories# * **Enter**: insert node into workflow, collapse/expand category, open subcategory * **ArrowRight**: expand category, open subcategory * **ArrowLeft**: collapse category, close subcategory view ## Within nodes# * **\=**: in an empty parameter input, this switches to expressions mode. --- ## Page: https://docs.n8n.io/flow-logic/ n8n allows you to represent complex logic in your workflows. This section covers: * Splitting with conditionals * Merging data * Looping * Waiting * Sub-workflows * Error handling * Execution order in multi-branch workflows You need some understanding of Data in n8n, including Data structure and Data flow within nodes. When building your logic, you'll use n8n's Core nodes, including: * Splitting: IF and Switch. * Merging: Merge, Compare Datasets, and Code. * Looping: IF and Loop Over Items. * Waiting: Wait. * Creating sub-workflows: Execute Workflow and Execute Workflow Trigger. * Error handling: Stop And Error and Error Trigger. --- ## Page: https://docs.n8n.io/flow-logic/splitting/ 1. Using n8n 2. Key concepts 3. Flow logic ## Splitting workflows with conditional nodes# Splitting uses the IF or Switch nodes. It turns a single-branch workflow into a multi-branch workflow. This is a key piece of representing complex logic in n8n. Compare these workflows:  This is the power of splitting and conditional nodes in n8n. Refer to the IF or Switch documentation for usage details. --- ## Page: https://docs.n8n.io/flow-logic/merging/ Merging brings multiple data streams together. You can achieve this using different nodes depending on your workflow requirements. * Merge data from different data streams or nodes: Use the Merge node to combine data from various sources into one. * Merge data from multiple node executions: Use the Code node for complex scenarios where you need to merge data from multiple executions of a node or multiple nodes. * Compare and merge data: Use the Compare Datasets node to compare, merge, and output data streams based on the comparison. Explore each method in more detail in the sections below. ## Merge data from different data streams# If your workflow splits, you combine the separate streams back into one stream. Here's an example workflow showing different types of merging: appending data sets, keeping only new items, and keeping only existing items. The Merge node documentation contains details on each of the merge operations. ## Merge data from different nodes# You can use the Merge node to combine data from two previous nodes, even if the workflow hasn't split into separate data streams. This can be useful if you want to generate a single dataset from the data generated by multiple nodes.  Merging data from two previous nodes ## Merge data from multiple node executions# Use the Code node to merge data from multiple node executions. This is useful in some Looping scenarios. Node executions and workflow executions This section describes merging data from multiple node executions. This is when a node executes multiple times during a single workflow execution. Refer to this example workflow using Loop Over Items and Wait to artificially create multiple executions. ## Compare, merge, and split again# The Compare Datasets node compares data streams before merging them. It outputs up to four different data streams. Refer to this example workflow for an example. --- ## Page: https://docs.n8n.io/flow-logic/looping/ Looping is useful when you want to process multiple items or perform an action repeatedly, such as sending a message to every contact in your address book. n8n handles this repetitive processing automatically, meaning you don't need to specifically build loops into your workflows. There are some nodes where this isn't true. ## Using loops in n8n# n8n nodes take any number of items as input, process these items, and output the results. You can think of each item as a single data point, or a single row in the output table of a node.  Nodes usually run once for each item. For example, if you wanted to send the name and notes of the customers in the Customer Datastore node as a message on Slack, you would: 1. Connect the Slack node to the Customer Datastore node. 2. Configure the parameters. 3. Execute the node. You would receive five messages: one for each item. This is how you can process multiple items without having to explicitly connect nodes in a loop. ### Executing nodes once# For situations where you don't want a node to process all received items, for example sending a Slack message only to the first customer, you can do so by toggling the **Execute Once** parameter in the **Settings** tab of that node This setting is helpful when the incoming data contains multiple items and you want to only process the first one. ## Creating loops# n8n typically handles the iteration for all incoming items. However, there are certain scenarios where you will have to create a loop to iterate through all items. Refer to Node exceptions for a list of nodes that don't automatically iterate over all incoming items. ### Loop until a condition is met# To create a loop in an n8n workflow, connect the output of one node to the input of a previous node. Add an IF node to check when to stop the loop. Here is an example workflow that implements a loop with an `IF` node: 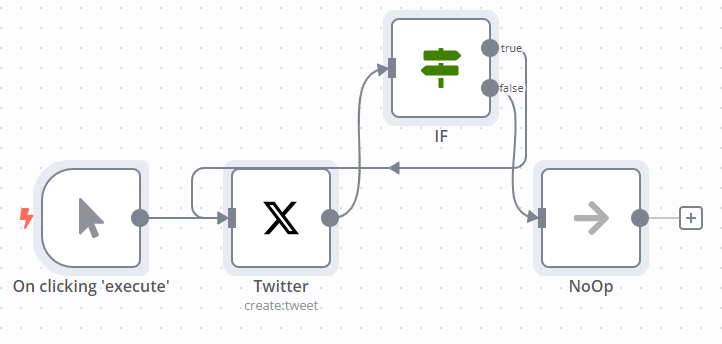 ### Loop until all items are processed# Use the Loop Over Items node when you want to loop until all items are processed. To process each item individually, set **Batch Size** to `1`. You can batch the data in groups and process these batches. This approach is useful for avoiding API rate limits when processing large incoming data or when you want to process a specific group of returned items. The Loop Over Items node stops executing after all the incoming items get divided into batches and passed on to the next node in the workflow so it's not necessary to add an IF node to stop the loop. ## Node exceptions# Nodes and operations where you need to design a loop into your workflow: * CrateDB executes once for `insert` and `update`. * Code node in **Run Once for All Items** mode: processes all the items based on the entered code snippet. * Execute Workflow node in **Run Once for All Items** mode. * HTTP Request: you must handle pagination yourself. If your API call returns paginated results you must create a loop to fetch one page at a time. * Microsoft SQL executes once for `insert`, `update`, and `delete`. * MongoDB executes once for `insert` and `update`. * QuestDB executes once for `insert`. * Redis: * Info: this operation executes only once, regardless of the number of items in the incoming data. * RSS Read executes once for the requested URL. * TimescaleDB executes once for `insert` and `update`. --- ## Page: https://docs.n8n.io/flow-logic/waiting/ Waiting allows you to pause a workflow mid-execution, then resume where the workflow left off, with the same data. This is useful if you need to rate limit your calls to a service, or wait for an external event to complete. You can wait for a specified duration, or until a webhook fires. Making a workflow wait uses the Wait node. Refer to the node documentation for usage details. n8n provides a workflow template with a basic example of Rate limiting and waiting for external events. --- ## Page: https://docs.n8n.io/flow-logic/subworkflows/ You can call one workflow from another workflow. This allows you to build modular, microservice-like workflows. It can also help if your workflow grows large enough to encounter memory issues. Creating sub-workflows uses the Execute Workflow and Execute Sub-workflow Trigger nodes. ## Set up and use a sub-workflow# This section walks through setting up both the parent workflow and sub-workflow. ### Create the sub-workflow# 1. Create a new workflow. Create sub-workflows from existing workflows You can optionally create a sub-workflow directly from an existing parent workflow using the Execute Sub-workflow node. In the node, select the **Database** and **From list** options and select **Create a sub-workflow** in the list. 2. **Optional**: configure which workflows can call the sub-workflow: 1. Select the **Options**  menu > **Settings**. n8n opens the **Workflow settings** modal. 2. Change the **This workflow can be called by** setting. Refer to Workflow settings for more information on configuring your workflows. 3. Add the **Execute Sub-workflow** trigger node (if you are searching under trigger nodes, this is also titled **When Executed by Another Workflow**). 4. Set the **Input data mode** to choose how you will define the sub-workflow's input data: * **Define using fields below**: Choose this mode to define individual input names and data types that the calling workflow needs to provide. * **Define using JSON example**: Choose this mode to provide an example JSON object that demonstrates the expected input items and their types. * **Accept all data**: Choose this mode to accept all data unconditionally. The sub-workflow won't define any required input items. This sub-workflow must handle any input inconsistencies or missing values. 5. Add other nodes as needed to build your sub-workflow functionality. 6. Save the sub-workflow. Sub-workflow mustn't contain errors If there are errors in the sub-workflow, the parent workflow can't trigger it. Load data into sub-workflow before building This requires the ability to load data from previous executions, which is available on n8n Cloud and registered Community plans. If you want to load data into your sub-workflow to use while building it: 1. Create the sub-workflow and add the **Execute Sub-workflow Trigger**. 2. Set the node's **Input data mode** to **Accept all data** or define the input items using fields or JSON if they're already known. 3. In the sub-workflow settings, set **Save successful production executions** to **Save**. 4. Skip ahead to setting up the parent workflow, and run it. 5. Follow the steps to load data from previous executions. 6. Adjust the **Input data mode** to match the input sent by the parent workflow if necessary. You can now pin example data in the trigger node, enabling you to work with real data while configuring the rest of the workflow. ### Call the sub-workflow# 1. Open the workflow where you want to call the sub-workflow. 2. Add the **Execute Sub-workflow** node. 3. In the **Execute Sub-workflow** node, set the sub-workflow you want to call. You can choose to call the workflow by ID, load a workflow from a local file, add workflow JSON as a parameter in the node, or target a workflow by URL. Find your workflow ID Your sub-workflow's ID is the alphanumeric string at the end of its URL. 4. Fill in the required input items defined by the sub-workflow. 5. Save your workflow. When your workflow executes, it will send data to the sub-workflow, and run it. You can follow the execution flow from the parent workflow to the sub-workflow by opening the Execute Sub-workflow node and selecting the **View sub-execution** link. Likewise, the sub-workflow's execution contains a link back to the parent workflow's execution to navigate in the other direction. ## How data passes between workflows# As an example, imagine you have an Execute Sub-workflow node in **Workflow A**. The Execute Sub-workflow node calls another workflow called **Workflow B**: 1. The Execute Sub-workflow node passes the data to the Execute Sub-workflow Trigger node (titled "When executed by another node" in the canvas) of **Workflow B**. 2. The last node of **Workflow B** sends the data back to the Execute Sub-workflow node in **Workflow A**. --- ## Page: https://docs.n8n.io/flow-logic/error-handling/ When designing your flow logic, it's a good practice to consider potential errors, and set up methods to handle them gracefully. With an error workflow, you can control how n8n responds to a workflow execution failure. ## Create and set an error workflow# For each workflow, you can set an error workflow in **Workflow Settings**. It runs if an execution fails. This means you can, for example, send email or Slack alerts when a workflow execution errors. The error workflow must start with the Error Trigger. You can use the same error workflow for multiple workflows. 1. Create a new workflow, with the Error Trigger as the first node. 2. Give the workflow a name, for example `Error Handler`. 3. Select **Save**. 4. In the workflow where you want to use this error workflow: 1. Select **Options**  > **Settings**. 2. In **Error workflow**, select the workflow you just created. For example, if you used the name Error Handler, select **Error handler**. 3. Select **Save**. Now, when this workflow errors, the related error workflow runs. ## Error data# The default error data received by the Error Trigger is: <table><tbody><tr><td><div><pre><span></span><span> 1</span> <span> 2</span> <span> 3</span> <span> 4</span> <span> 5</span> <span> 6</span> <span> 7</span> <span> 8</span> <span> 9</span> <span>10</span> <span>11</span> <span>12</span> <span>13</span> <span>14</span> <span>15</span> <span>16</span> <span>17</span> <span>18</span> <span>19</span></pre></div></td><td><div><pre><span></span><code><span>[</span> <span> </span><span>{</span> <span> </span><span>"execution"</span><span>:</span><span> </span><span>{</span> <span> </span><span>"id"</span><span>:</span><span> </span><span>"231"</span><span>,</span> <span> </span><span>"url"</span><span>:</span><span> </span><span>"https://n8n.example.com/execution/231"</span><span>,</span> <span> </span><span>"retryOf"</span><span>:</span><span> </span><span>"34"</span><span>,</span> <span> </span><span>"error"</span><span>:</span><span> </span><span>{</span> <span> </span><span>"message"</span><span>:</span><span> </span><span>"Example Error Message"</span><span>,</span> <span> </span><span>"stack"</span><span>:</span><span> </span><span>"Stacktrace"</span> <span> </span><span>},</span> <span> </span><span>"lastNodeExecuted"</span><span>:</span><span> </span><span>"Node With Error"</span><span>,</span> <span> </span><span>"mode"</span><span>:</span><span> </span><span>"manual"</span> <span> </span><span>},</span> <span> </span><span>"workflow"</span><span>:</span><span> </span><span>{</span> <span> </span><span>"id"</span><span>:</span><span> </span><span>"1"</span><span>,</span> <span> </span><span>"name"</span><span>:</span><span> </span><span>"Example Workflow"</span> <span> </span><span>}</span> <span> </span><span>}</span> <span>]</span> </code></pre></div></td></tr></tbody></table> All information is always present, except: * `execution.id`: requires the execution to be saved in the database. Not present if the error is in the trigger node of the main workflow, as the workflow doesn't execute. * `execution.url`: requires the execution to be saved in the database. Not present if the error is in the trigger node of the main workflow, as the workflow doesn't execute. * `execution.retryOf`: only present when the execution is a retry of a failed execution. If the error is caused by the trigger node of the main workflow, rather than a later stage, the data sent to the error workflow is different. There's less information in `execution{}` and more in `trigger{}`: <table><tbody><tr><td><div><pre><span></span><span> 1</span> <span> 2</span> <span> 3</span> <span> 4</span> <span> 5</span> <span> 6</span> <span> 7</span> <span> 8</span> <span> 9</span> <span>10</span> <span>11</span> <span>12</span> <span>13</span> <span>14</span> <span>15</span> <span>16</span> <span>17</span> <span>18</span> <span>19</span> <span>20</span> <span>21</span> <span>22</span></pre></div></td><td><div><pre><span></span><code><span>{</span> <span> </span><span>"trigger"</span><span>:</span><span> </span><span>{</span> <span> </span><span>"error"</span><span>:</span><span> </span><span>{</span> <span> </span><span>"context"</span><span>:</span><span> </span><span>{},</span> <span> </span><span>"name"</span><span>:</span><span> </span><span>"WorkflowActivationError"</span><span>,</span> <span> </span><span>"cause"</span><span>:</span><span> </span><span>{</span> <span> </span><span>"message"</span><span>:</span><span> </span><span>""</span><span>,</span> <span> </span><span>"stack"</span><span>:</span><span> </span><span>""</span> <span> </span><span>},</span> <span> </span><span>"timestamp"</span><span>:</span><span> </span><span>1654609328787</span><span>,</span> <span> </span><span>"message"</span><span>:</span><span> </span><span>""</span><span>,</span> <span> </span><span>"node"</span><span>:</span><span> </span><span>{</span> <span> </span><span>.</span><span> </span><span>.</span><span> </span><span>.</span><span> </span> <span> </span><span>}</span> <span> </span><span>},</span> <span> </span><span>"mode"</span><span>:</span><span> </span><span>"trigger"</span> <span> </span><span>},</span> <span> </span><span>"workflow"</span><span>:</span><span> </span><span>{</span> <span> </span><span>"id"</span><span>:</span><span> </span><span>""</span><span>,</span> <span> </span><span>"name"</span><span>:</span><span> </span><span>""</span> <span> </span><span>}</span> <span>}</span> </code></pre></div></td></tr></tbody></table> ## Cause a workflow execution failure using Stop And Error# When you create and set an error workflow, n8n runs it when an execution fails. Usually, this is due to things like errors in node settings, or the workflow running out of memory. You can add the Stop And Error node to your workflow to force executions to fail under your chosen circumstances, and trigger the error workflow. --- ## Page: https://docs.n8n.io/flow-logic/execution-order/ 1. Using n8n 2. Key concepts 3. Flow logic n8n's node execution order depends on the version of n8n you're using: * For workflows created before version 1.0: n8n executes the first node of each branch, then the second node of each branch, and so on. * For workflows created in version 1.0 and above: executes each branch in turn, completing one branch before starting another. n8n orders the branches based on their position on the canvas, from topmost to bottommost. If two branches are at the same height, the leftmost branch executes first. You can change the execution order in your workflow settings. --- ## Page: https://docs.n8n.io/data/ 1. Using n8n 2. Key concepts 3. Data Data is the information that n8n nodes receive and process. For basic usage of n8n you don't need to understand data structures and manipulation. However, it becomes important if you want to: * Create your own node * Write custom expressions * Use the Function or Function Item node This section covers: * Data structure * Data flow within nodes * Transforming data * Process data using code * Pinning and editing data during workflow development. * Data mapping and Item linking: how data items link to each other. ### Data transformation nodes# n8n provides a collection of nodes to transform data: * Aggregate: take separate items, or portions of them, and group them together into individual items. * Limit: remove items beyond a defined maximum number. * Remove Duplicates: identify and delete items that are identical across all fields or a subset of fields. * Sort: organize lists of in a desired ordering, or generate a random selection. * Split Out: separate a single data item containing a list into multiple items. * Summarize: aggregate items together, in a manner similar to Excel pivot tables. --- ## Page: https://docs.n8n.io/data/data-structure/ In n8n, all data passed between nodes is an array of objects. It has the following structure: <table><tbody><tr><td><div><pre><span></span><span> 1</span> <span> 2</span> <span> 3</span> <span> 4</span> <span> 5</span> <span> 6</span> <span> 7</span> <span> 8</span> <span> 9</span> <span>10</span> <span>11</span> <span>12</span> <span>13</span> <span>14</span> <span>15</span> <span>16</span> <span>17</span> <span>18</span> <span>19</span> <span>20</span> <span>21</span> <span>22</span> <span>23</span> <span>24</span></pre></div></td><td><div><pre><span></span><code><span>[</span> <span> </span><span>{</span> <span> </span><span>// For most data:</span> <span> </span><span>// Wrap each item in another object, with the key 'json'</span> <span> </span><span>"json"</span><span>:</span><span> </span><span>{</span> <span> </span><span>// Example data</span> <span> </span><span>"apple"</span><span>:</span><span> </span><span>"beets"</span><span>,</span> <span> </span><span>"carrot"</span><span>:</span><span> </span><span>{</span> <span> </span><span>"dill"</span><span>:</span><span> </span><span>1</span> <span> </span><span>}</span> <span> </span><span>},</span> <span> </span><span>// For binary data:</span> <span> </span><span>// Wrap each item in another object, with the key 'binary'</span> <span> </span><span>"binary"</span><span>:</span><span> </span><span>{</span> <span> </span><span>// Example data</span> <span> </span><span>"apple-picture"</span><span>:</span><span> </span><span>{</span> <span> </span><span>"data"</span><span>:</span><span> </span><span>"...."</span><span>,</span><span> </span><span>// Base64 encoded binary data (required)</span> <span> </span><span>"mimeType"</span><span>:</span><span> </span><span>"image/png"</span><span>,</span><span> </span><span>// Best practice to set if possible (optional)</span> <span> </span><span>"fileExtension"</span><span>:</span><span> </span><span>"png"</span><span>,</span><span> </span><span>// Best practice to set if possible (optional)</span> <span> </span><span>"fileName"</span><span>:</span><span> </span><span>"example.png"</span><span>,</span><span> </span><span>// Best practice to set if possible (optional)</span> <span> </span><span>}</span> <span> </span><span>}</span> <span> </span><span>},</span> <span>]</span> </code></pre></div></td></tr></tbody></table> Skipping the `json` key and array syntax From 0.166.0 on, when using the Function node or Code node, n8n automatically adds the `json` key if it's missing. It also automatically wraps your items in an array (`[]`) if needed. This is only the case when using the Function or Code nodes. When building your own nodes, you must still make sure the node returns data with the `json` key. ## Data item processing# Nodes can process multiple items. For example, if you set the Trello node to `Create-Card`, and create an expression that sets `Name` using a property called `name-input-value` from the incoming data, the node creates a card for each item, always choosing the `name-input-value` of the current item. For example, this input will create two cards. One named `test1` the other one named `test2`: <table><tbody><tr><td><div><pre><span></span><span>1</span> <span>2</span> <span>3</span> <span>4</span> <span>5</span> <span>6</span> <span>7</span> <span>8</span></pre></div></td><td><div><pre><span></span><code><span>[</span> <span> </span><span>{</span> <span> </span><span>na</span><span>me</span><span>-</span><span>i</span><span>n</span><span>pu</span><span>t</span><span>-</span><span>value</span><span>:</span><span> </span><span>"test1"</span> <span> </span><span>},</span> <span> </span><span>{</span> <span> </span><span>na</span><span>me</span><span>-</span><span>i</span><span>n</span><span>pu</span><span>t</span><span>-</span><span>value</span><span>:</span><span> </span><span>"test2"</span> <span> </span><span>}</span> <span>]</span> </code></pre></div></td></tr></tbody></table> --- ## Page: https://docs.n8n.io/data/data-flow-nodes/ Nodes can process multiple items. For example, if you set the Trello node to `Create-Card`, and create an expression that sets `Name` using a property called `name-input-value` from the incoming data, the node creates a card for each item, always choosing the `name-input-value` of the current item. For example, this input will create two cards. One named `test1` the other one named `test2`: <table><tbody><tr><td><div><pre><span></span><span>1</span> <span>2</span> <span>3</span> <span>4</span> <span>5</span> <span>6</span> <span>7</span> <span>8</span></pre></div></td><td><div><pre><span></span><code><span>[</span> <span> </span><span>{</span> <span> </span><span>na</span><span>me</span><span>-</span><span>i</span><span>n</span><span>pu</span><span>t</span><span>-</span><span>value</span><span>:</span><span> </span><span>"test1"</span> <span> </span><span>},</span> <span> </span><span>{</span> <span> </span><span>na</span><span>me</span><span>-</span><span>i</span><span>n</span><span>pu</span><span>t</span><span>-</span><span>value</span><span>:</span><span> </span><span>"test2"</span> <span> </span><span>}</span> <span>]</span> </code></pre></div></td></tr></tbody></table> --- ## Page: https://docs.n8n.io/data/transforming-data/ n8n uses a predefined data structure that allows all nodes to process incoming data correctly. Your incoming data may have a different data structure, in which case you will need to transform it to allow each item to be processed individually. For example, the image below shows the output of an HTTP Request node that returns data incompatible with n8n's data structure. The node returns the data and displays that only one item was returned. 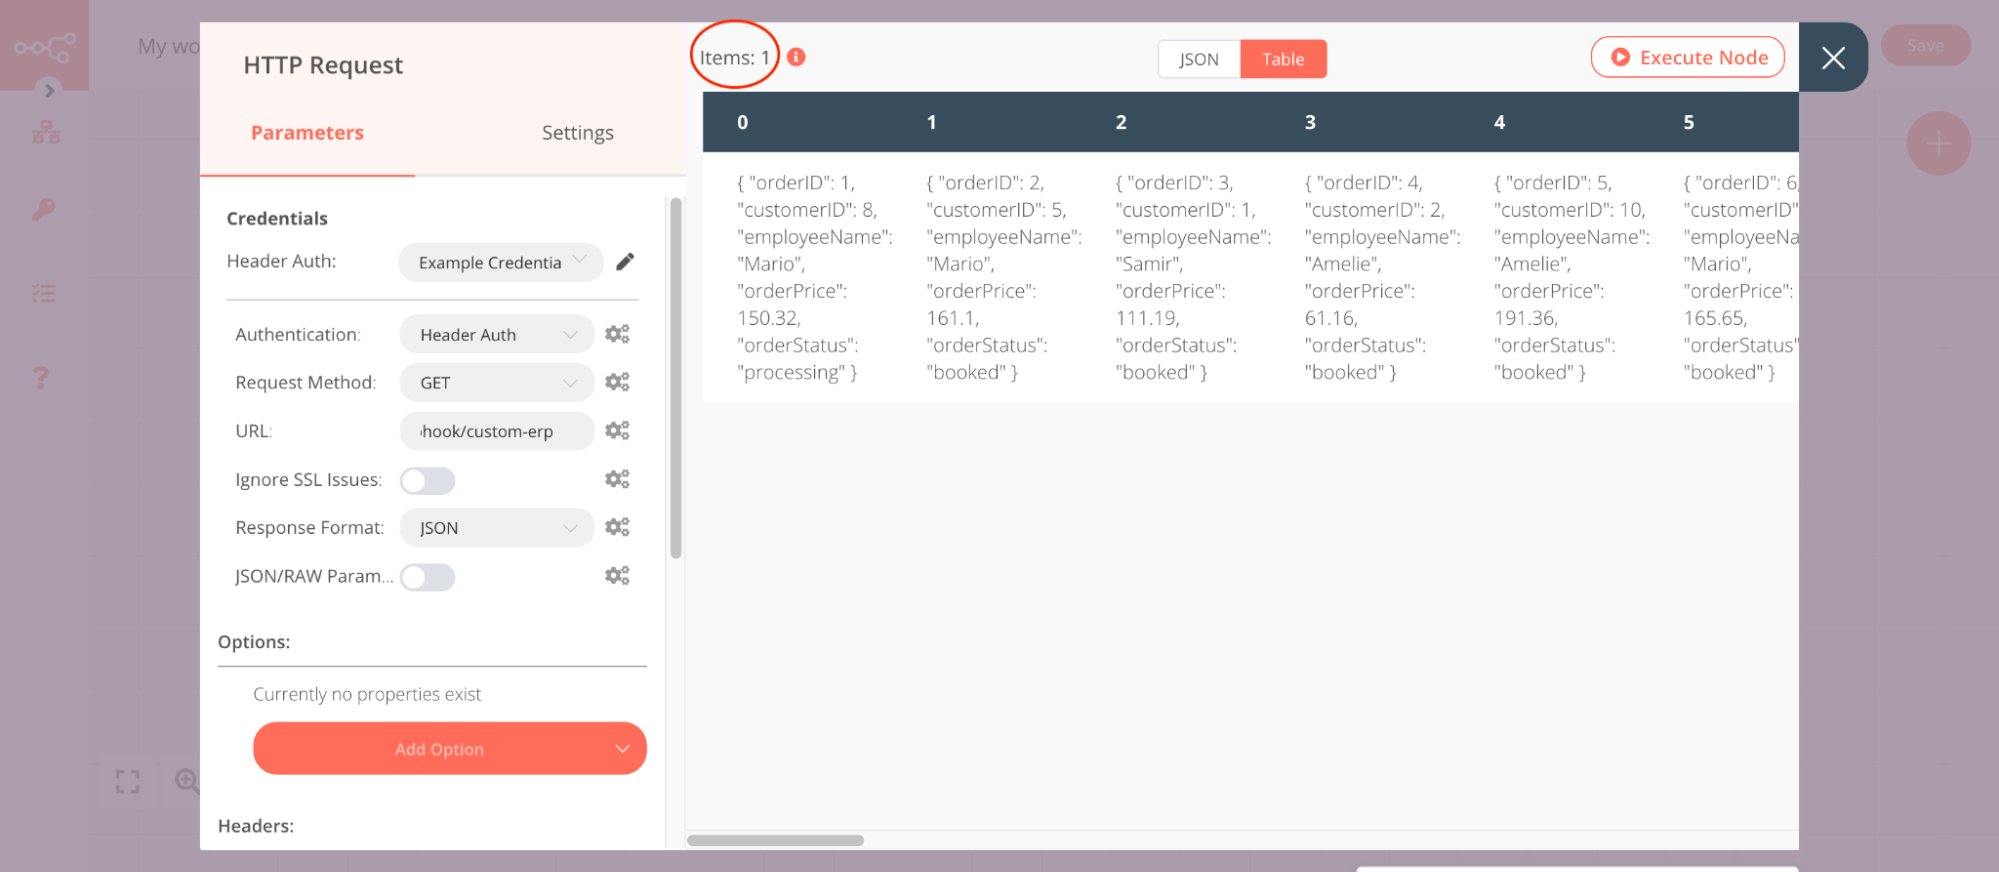 To transform this kind of structure into the n8n data structure you can use the data transformation nodes: * Aggregate: take separate items, or portions of them, and group them together into individual items. * Limit: remove items beyond a defined maximum number. * Remove Duplicates: identify and delete items that are identical across all fields or a subset of fields. * Sort: organize lists of in a desired ordering, or generate a random selection. * Split Out: separate a single data item containing a list into multiple items. * Summarize: aggregate items together, in a manner similar to Excel pivot tables. --- ## Page: https://docs.n8n.io/data/code/ ## Processing data with code# ## Function# A function is a block of code designed to perform a certain task. In n8n, you can write custom JavaScript or Python code snippets to add, remove, and update the data you receive from a node. The Code node gives you access to the incoming data and you can manipulate it. With this node you can create any function you want using JavaScript code. --- ## Page: https://docs.n8n.io/data/data-mapping/ 1. Using n8n 2. Key concepts 3. Data 4. Data mapping Data mapping means referencing data from previous nodes. This section contains guidance on: * Mapping data in most scenarios: Data mapping in the UI and Data mapping in expression * How to handle item linking when using the Code node or building your own nodes. --- ## Page: https://docs.n8n.io/data/data-mapping/data-mapping-ui/ Data mapping means referencing data from previous nodes. It doesn't include changing (transforming) data, just referencing it. You can map data in the following ways: * Using the expressions editor. * By dragging and dropping data from the **INPUT** into parameters. This generates the expression for you. For information on errors with mapping and linking items, refer to Item linking errors. ## How to drag and drop data# 1. Run your workflow to load data. 2. Open the node where you need to map data. 3. You can map in table, JSON, and schema view: * In table view: click and hold a table heading to map top level data, or a field in the table to map nested data. * In JSON view: click and hold a key. * In schema view: click and hold a key. 4. Drag the item into the field where you want to use the data. ### Understand what you're mapping with drag and drop# Data mapping maps the key path, and loads the key's value into the field. For example, given the following data: <table><tbody><tr><td><div><pre><span></span><span>1</span> <span>2</span> <span>3</span> <span>4</span> <span>5</span> <span>6</span></pre></div></td><td><div><pre><span></span><code><span>[</span> <span> </span><span>{</span> <span> </span><span>"fruit"</span><span>:</span><span> </span><span>"apples"</span><span>,</span> <span> </span><span>"color"</span><span>:</span><span> </span><span>"green"</span> <span> </span><span>}</span> <span>]</span> </code></pre></div></td></tr></tbody></table> You can map `fruit` by dragging and dropping **fruit** from the **INPUT** into the field where you want to use its value. This creates an expression, `{{ $json.fruit }}`. When the node iterates over input items, the value of the field becomes the value of `fruit` for each item. ### Understand nested data# Given the following data: <table><tbody><tr><td><div><pre><span></span><span> 1</span> <span> 2</span> <span> 3</span> <span> 4</span> <span> 5</span> <span> 6</span> <span> 7</span> <span> 8</span> <span> 9</span> <span>10</span> <span>11</span> <span>12</span> <span>13</span> <span>14</span> <span>15</span> <span>16</span></pre></div></td><td><div><pre><span></span><code><span>[</span> <span> </span><span>{</span> <span> </span><span>"name"</span><span>:</span><span> </span><span>"First item"</span><span>,</span> <span> </span><span>"nested"</span><span>:</span><span> </span><span>{</span> <span> </span><span>"example-number-field"</span><span>:</span><span> </span><span>1</span><span>,</span> <span> </span><span>"example-string-field"</span><span>:</span><span> </span><span>"apples"</span> <span> </span><span>}</span> <span> </span><span>},</span> <span> </span><span>{</span> <span> </span><span>"name"</span><span>:</span><span> </span><span>"Second item"</span><span>,</span> <span> </span><span>"nested"</span><span>:</span><span> </span><span>{</span> <span> </span><span>"example-number-field"</span><span>:</span><span> </span><span>2</span><span>,</span> <span> </span><span>"example-string-field"</span><span>:</span><span> </span><span>"oranges"</span> <span> </span><span>}</span> <span> </span><span>}</span> <span>]</span> </code></pre></div></td></tr></tbody></table> n8n displays it in table form like this:  --- ## Page: https://docs.n8n.io/data/data-mapping/data-mapping-expressions/ These examples show how to access linked items in the expressions editor. Refer to expressions for more information on expressions, including built in variables and methods. For information on errors with mapping and linking items, refer to Item linking errors. ## Access the linked item in a previous node's output# When you use this, n8n works back up the item linking chain, to find the parent item in the given node. <table><tbody><tr><td><div><pre><span></span><span>1</span> <span>2</span></pre></div></td><td><div><pre><span></span><code><span>// Returns the linked item</span> <span>{{</span><span>$</span><span>(</span><span>"<node-name>"</span><span>).</span><span>item</span><span>}}</span> </code></pre></div></td></tr></tbody></table> As a longer example, consider a scenario where a node earlier in the workflow has the following output data: <table><tbody><tr><td><div><pre><span></span><span> 1</span> <span> 2</span> <span> 3</span> <span> 4</span> <span> 5</span> <span> 6</span> <span> 7</span> <span> 8</span> <span> 9</span> <span>10</span> <span>11</span> <span>12</span> <span>13</span> <span>14</span> <span>15</span> <span>16</span> <span>17</span> <span>18</span> <span>19</span> <span>20</span> <span>21</span> <span>22</span></pre></div></td><td><div><pre><span></span><code><span>[</span> <span> </span><span>{</span> <span> </span><span>"id"</span><span>:</span><span> </span><span>"23423532"</span><span>,</span> <span> </span><span>"name"</span><span>:</span><span> </span><span>"Jay Gatsby"</span><span>,</span> <span> </span><span>},</span> <span> </span><span>{</span> <span> </span><span>"id"</span><span>:</span><span> </span><span>"23423533"</span><span>,</span> <span> </span><span>"name"</span><span>:</span><span> </span><span>"José Arcadio Buendía"</span><span>,</span> <span> </span><span>},</span> <span> </span><span>{</span> <span> </span><span>"id"</span><span>:</span><span> </span><span>"23423534"</span><span>,</span> <span> </span><span>"name"</span><span>:</span><span> </span><span>"Max Sendak"</span><span>,</span> <span> </span><span>},</span> <span> </span><span>{</span> <span> </span><span>"id"</span><span>:</span><span> </span><span>"23423535"</span><span>,</span> <span> </span><span>"name"</span><span>:</span><span> </span><span>"Zaphod Beeblebrox"</span><span>,</span> <span> </span><span>},</span> <span> </span><span>{</span> <span> </span><span>"id"</span><span>:</span><span> </span><span>"23423536"</span><span>,</span> <span> </span><span>"name"</span><span>:</span><span> </span><span>"Edmund Pevensie"</span><span>,</span> <span> </span><span>}</span> <span>]</span> </code></pre></div></td></tr></tbody></table> To extract the name, use the following expression: <table><tbody><tr><td><div><pre><span></span><span>1</span></pre></div></td><td><div><pre><span></span><code><span>{{</span><span>$</span><span>(</span><span>"<node-name>"</span><span>).</span><span>item</span><span>.</span><span>json</span><span>.</span><span>name</span><span>}}</span> </code></pre></div></td></tr></tbody></table> ### Access the linked item in the current node's input# In this case, the item linking is within the node: find the input item that the node links to an output item. <table><tbody><tr><td><div><pre><span></span><span>1</span> <span>2</span></pre></div></td><td><div><pre><span></span><code><span>// Returns the linked item</span> <span>{{</span><span>$input</span><span>.</span><span>item</span><span>}}</span> </code></pre></div></td></tr></tbody></table> As a longer example, consider a scenario where the current node has the following input data: <table><tbody><tr><td><div><pre><span></span><span> 1</span> <span> 2</span> <span> 3</span> <span> 4</span> <span> 5</span> <span> 6</span> <span> 7</span> <span> 8</span> <span> 9</span> <span>10</span> <span>11</span> <span>12</span> <span>13</span> <span>14</span> <span>15</span> <span>16</span> <span>17</span> <span>18</span> <span>19</span> <span>20</span> <span>21</span> <span>22</span></pre></div></td><td><div><pre><span></span><code><span>[</span> <span> </span><span>{</span> <span> </span><span>"id"</span><span>:</span><span> </span><span>"23423532"</span><span>,</span> <span> </span><span>"name"</span><span>:</span><span> </span><span>"Jay Gatsby"</span><span>,</span> <span> </span><span>},</span> <span> </span><span>{</span> <span> </span><span>"id"</span><span>:</span><span> </span><span>"23423533"</span><span>,</span> <span> </span><span>"name"</span><span>:</span><span> </span><span>"José Arcadio Buendía"</span><span>,</span> <span> </span><span>},</span> <span> </span><span>{</span> <span> </span><span>"id"</span><span>:</span><span> </span><span>"23423534"</span><span>,</span> <span> </span><span>"name"</span><span>:</span><span> </span><span>"Max Sendak"</span><span>,</span> <span> </span><span>},</span> <span> </span><span>{</span> <span> </span><span>"id"</span><span>:</span><span> </span><span>"23423535"</span><span>,</span> <span> </span><span>"name"</span><span>:</span><span> </span><span>"Zaphod Beeblebrox"</span><span>,</span> <span> </span><span>},</span> <span> </span><span>{</span> <span> </span><span>"id"</span><span>:</span><span> </span><span>"23423536"</span><span>,</span> <span> </span><span>"name"</span><span>:</span><span> </span><span>"Edmund Pevensie"</span><span>,</span> <span> </span><span>}</span> <span>]</span> </code></pre></div></td></tr></tbody></table> To extract the name, you'd normally use drag-and-drop Data mapping, but you could also write the following expression: <table><tbody><tr><td><div><pre><span></span><span>1</span></pre></div></td><td><div><pre><span></span><code><span>{{</span><span>$input</span><span>.</span><span>item</span><span>.</span><span>json</span><span>.</span><span>name</span><span>}}</span> </code></pre></div></td></tr></tbody></table> --- ## Page: https://docs.n8n.io/data/data-mapping/data-item-linking/ An item is a single piece of data. Nodes receive one or more items, operate on them, and output new items. Each item links back to previous items. You need to understand this behavior if you're: * Building a programmatic-style node that implements complex behaviors with its input and output data. * Using the Code node or expressions editor to access data from earlier items in the workflow. * Using the Code node for complex behaviors with input and output data. This section provides: * A conceptual overview of Item linking concepts. * Information on Item linking for node creators. * Support for end users who need to Work with the data path to retrieve item data from previous nodes, and link items when using the Code node. * Guidance on troubleshooting Errors. --- ## Page: https://docs.n8n.io/data/data-mapping/data-item-linking/item-linking-concepts/ Each output item created by a node includes metadata that links them to the input item (or items) that the node used to generate them. This creates a chain of items that you can work back along to access previous items. This can be complicated to understand, especially if the node splits or merges data. You need to understand item linking when building your own programmatic nodes, or in some scenarios using the Code node. This document provides a conceptual overview of this feature. For usage details, refer to: * Item linking for node creators, for details on how to handle item linking when building a node. * Item linking in the Code node, to learn how to handle item linking in the Code node. * Item linking errors, to understand the errors you may encounter in the editor UI. ## n8n's automatic item linking# If a node doesn't control how to link input items to output items, n8n tries to guess how to link the items automatically: * Single input, single output: the output links to the input. * Single input, multiple outputs: all outputs link to that input. * Multiple inputs and outputs: * If you keep the input items, but change the order (or remove some but keep others), n8n can automatically add the correct linked item information. * If the number of inputs and outputs is equal, n8n links the items in order. This means that output-1 links to input-1, output-2 to input-2, and so on. * If the number isn't equal, or you create completely new items, n8n can't automatically link items. If n8n can't link items automatically, and the node doesn't handle the item linking, n8n displays an error. Refer to Item linking errors for more information. ## Item linking example#  In this example, it's possible for n8n to link an item in one node back several steps, despite the item order changing. This means the node that sorts movies alphabetically can access information about the linked item in the node that gets famous movie actors. The methods for accessing linked items are different depending on whether you're using the UI, expressions, or the code node. Explore the following resources: * Mapping in the UI * Mapping in the expressions editor * Item linking in the Code node * Item linking errors --- ## Page: https://docs.n8n.io/data/data-mapping/data-item-linking/item-linking-code-node/ Use n8n's item linking to access data from items that precede the current item. It also has implications when using the Code node. Most nodes link every output item to an input item. This creates a chain of items that you can work back along to access previous items. For a deeper conceptual overview of this topic, refer to Item linking concepts. This document focuses on practical usage examples. When using the Code node, there are some scenarios where you need to manually supply item linking information if you want to be able to use `$("<node-name>").item` later in the workflow. All these scenarios only apply if you have more than one incoming item. n8n automatically handles item linking for single items. These scenarios are when you: * Add new items: the new items aren't linked to any input. * Return new items. * Want to manually control the item linking. n8n's automatic item linking handles the other scenarios. To control item linking, set `pairedItem` when returning data. For example, to link to the item at index 0: <table><tbody><tr><td><div><pre><span></span><span>1</span> <span>2</span> <span>3</span> <span>4</span> <span>5</span> <span>6</span> <span>7</span> <span>8</span> <span>9</span></pre></div></td><td><div><pre><span></span><code><span>[</span> <span> </span><span>{</span> <span> </span><span>"json"</span><span>:</span><span> </span><span>{</span> <span> </span><span>.</span><span> </span><span>.</span><span> </span><span>.</span><span> </span> <span> </span><span>},</span> <span> </span><span>// The index of the input item that generated this output item</span> <span> </span><span>"pairedItem"</span><span>:</span><span> </span><span>0</span> <span> </span><span>}</span> <span>]</span> </code></pre></div></td></tr></tbody></table> ### `pairedItem` usage example# Take this input data: <table><tbody><tr><td><div><pre><span></span><span> 1</span> <span> 2</span> <span> 3</span> <span> 4</span> <span> 5</span> <span> 6</span> <span> 7</span> <span> 8</span> <span> 9</span> <span>10</span> <span>11</span> <span>12</span> <span>13</span> <span>14</span> <span>15</span> <span>16</span> <span>17</span> <span>18</span> <span>19</span> <span>20</span> <span>21</span> <span>22</span></pre></div></td><td><div><pre><span></span><code><span>[</span> <span> </span><span>{</span> <span> </span><span>"id"</span><span>:</span><span> </span><span>"23423532"</span><span>,</span> <span> </span><span>"name"</span><span>:</span><span> </span><span>"Jay Gatsby"</span> <span> </span><span>},</span> <span> </span><span>{</span> <span> </span><span>"id"</span><span>:</span><span> </span><span>"23423533"</span><span>,</span> <span> </span><span>"name"</span><span>:</span><span> </span><span>"José Arcadio Buendía"</span> <span> </span><span>},</span> <span> </span><span>{</span> <span> </span><span>"id"</span><span>:</span><span> </span><span>"23423534"</span><span>,</span> <span> </span><span>"name"</span><span>:</span><span> </span><span>"Max Sendak"</span> <span> </span><span>},</span> <span> </span><span>{</span> <span> </span><span>"id"</span><span>:</span><span> </span><span>"23423535"</span><span>,</span> <span> </span><span>"name"</span><span>:</span><span> </span><span>"Zaphod Beeblebrox"</span> <span> </span><span>},</span> <span> </span><span>{</span> <span> </span><span>"id"</span><span>:</span><span> </span><span>"23423536"</span><span>,</span> <span> </span><span>"name"</span><span>:</span><span> </span><span>"Edmund Pevensie"</span> <span> </span><span>}</span> <span>]</span> </code></pre></div></td></tr></tbody></table> And use it to generate new items, containing just the name, along with a new piece of data: <table><tbody><tr><td><div><pre><span></span><span> 1</span> <span> 2</span> <span> 3</span> <span> 4</span> <span> 5</span> <span> 6</span> <span> 7</span> <span> 8</span> <span> 9</span> <span>10</span> <span>11</span> <span>12</span> <span>13</span> <span>14</span></pre></div></td><td><div><pre><span></span><code><span>newItems</span><span> </span><span>=</span><span> </span><span>[];</span> <span>for</span><span>(</span><span>let</span><span> </span><span>i</span><span>=</span><span>0</span><span>;</span><span> </span><span>i</span><span><</span><span>items</span><span>.</span><span>length</span><span>;</span><span> </span><span>i</span><span>++</span><span>){</span> <span> </span><span>newItems</span><span>.</span><span>push</span><span>(</span> <span> </span><span>{</span> <span> </span><span>"json"</span><span>:</span> <span> </span><span>{</span> <span> </span><span>"name"</span><span>:</span><span> </span><span>items</span><span>[</span><span>i</span><span>].</span><span>json</span><span>.</span><span>name</span><span>,</span> <span> </span><span>"aBrandNewField"</span><span>:</span><span> </span><span>"New data for item "</span><span> </span><span>+</span><span> </span><span>i</span> <span> </span><span>}</span> <span> </span><span>}</span> <span> </span><span>)</span> <span>}</span> <span>return</span><span> </span><span>newItems</span><span>;</span> </code></pre></div></td></tr></tbody></table> `newItems` is an array of items with no `pairedItem`. This means there's no way to trace back from these items to the items used to generate them. Add the `pairedItem` object: <table><tbody><tr><td><div><pre><span></span><span> 1</span> <span> 2</span> <span> 3</span> <span> 4</span> <span> 5</span> <span> 6</span> <span> 7</span> <span> 8</span> <span> 9</span> <span>10</span> <span>11</span> <span>12</span> <span>13</span> <span>14</span></pre></div></td><td><div><pre><span></span><code><span>newItems</span><span> </span><span>=</span><span> </span><span>[];</span> <span>for</span><span>(</span><span>let</span><span> </span><span>i</span><span>=</span><span>0</span><span>;</span><span> </span><span>i</span><span><</span><span>items</span><span>.</span><span>length</span><span>;</span><span> </span><span>i</span><span>++</span><span>){</span> <span> </span><span>newItems</span><span>.</span><span>push</span><span>(</span> <span> </span><span>{</span> <span> </span><span>"json"</span><span>:</span> <span> </span><span>{</span> <span> </span><span>"name"</span><span>:</span><span> </span><span>items</span><span>[</span><span>i</span><span>].</span><span>json</span><span>.</span><span>name</span><span>,</span> <span> </span><span>"aBrandNewField"</span><span>:</span><span> </span><span>"New data for item "</span><span> </span><span>+</span><span> </span><span>i</span> <span> </span><span>},</span> <span> </span><span>"pairedItem"</span><span>:</span><span> </span><span>i</span> <span> </span><span>}</span><span> </span> <span> </span><span>)</span> <span>}</span> <span>return</span><span> </span><span>newItems</span><span>;</span> </code></pre></div></td></tr></tbody></table> Each new item now links to the item used to create it. --- ## Page: https://docs.n8n.io/data/data-mapping/data-item-linking/item-linking-errors/ In n8n you can reference data from any previous node. This doesn't have to be the node just before: it can be any previous node in the chain. When referencing nodes further back, you use the expression syntax `$(node_name).item`.  Diagram of threads for different items. Due to the item linking, you can get the actor for each movie using `$('Get famous movie actors').item`. Since the previous node can have multiple items in it, n8n needs to know which one to use. When using `.item`, n8n figures this out for you behind the scenes. Refer to Item linking concepts for detailed information on how this works. `.item` fails if information is missing. To figure out which item to use, n8n maintains a thread back through the workflow's nodes for each item. For a given item, this thread tells n8n which items in previous nodes generated it. To find the matching item in a given previous node, n8n follows this thread back until it reaches the node in question. When using `.item`, n8n displays an error when: * The thread is broken * The thread points to more than one item in the previous node (as it's unclear which one to use) To solve these errors, you can either avoid using `.item`, or fix the root cause. You can avoid `.item` by using `.first()`, `.last()` or `.all()[index]` instead. They require you to know the position of the item that you’re targeting within the target node's output items. Refer to Built in methods and variables | Output of other nodes for more detail on these methods. The fix for the root cause depends on the exact error. ### Fix for 'Info for expressions missing from previous node'# If you see this error message: > ERROR: Info for expression missing from previous node There's a node in the chain that doesn't return pairing information. The solution here depends on the type of the previous node: * Code nodes: make sure you return which input items the node used to produce each output item. Refer to Item linking in the code node for more information. * Custom or community nodes: the node creator needs to update the node to return which input items it uses to produce each output item. Refer to Item linking for node creators for more information. ### Fix for 'Multiple matching items for expression'# This is the error message: > ERROR: Multiple matching items for expression Sometimes n8n uses multiple items to create a single item. Examples include the Summarize, Aggregate, and Merge nodes. These nodes can combine information from multiple items. When you use `.item` and there are multiple possible matches, n8n doesn't know which one to use. To solve this you can either: * Use `.first()`, `.last()` or `.all()[index]` instead. Refer to Built in methods and variables | Output of other nodes for more detail on these methods. * Reference a different node that contains the same information, but doesn't have multiple matching items. --- ## Page: https://docs.n8n.io/data/data-mapping/data-item-linking/item-linking-node-building/ Programmatic-style nodes only This guidance applies to programmatic-style nodes. If you're using declarative style, n8n handles paired items for you automatically. Use n8n's item linking to access data from items that precede the current item. n8n needs to know which input item a given output item comes from. If this information is missing, expressions in other nodes may break. As a node developer, you must ensure any items returned by your node support this. This applies to programmatic nodes (including trigger nodes). You don't need to consider item linking when building a declarative-style node. Refer to Choose your node building approach for more information on node styles. Start by reading Item linking concepts, which provides a conceptual overview of item linking, and details of the scenarios where n8n can handle the linking automatically. If you need to handle item linking manually, do this by setting `pairedItem` on each item your node returns: <table><tbody><tr><td><div><pre><span></span><span> 1</span> <span> 2</span> <span> 3</span> <span> 4</span> <span> 5</span> <span> 6</span> <span> 7</span> <span> 8</span> <span> 9</span> <span>10</span> <span>11</span> <span>12</span> <span>13</span> <span>14</span> <span>15</span> <span>16</span> <span>17</span> <span>18</span> <span>19</span> <span>20</span></pre></div></td><td><div><pre><span></span><code><span>// Use the pairedItem information of the incoming item</span> <span>newItem</span><span> </span><span>=</span><span> </span><span>{</span> <span> </span><span>"json"</span><span>:</span><span> </span><span>{</span><span> </span><span>.</span><span> </span><span>.</span><span> </span><span>.</span><span> </span><span>},</span> <span> </span><span>"pairedItem"</span><span>:</span><span> </span><span>{</span> <span> </span><span>"item"</span><span>:</span><span> </span><span>item</span><span>.</span><span>pairedItem</span><span>,</span> <span> </span><span>// Optional: choose the input to use</span> <span> </span><span>// Set this if your node combines multiple inputs</span> <span> </span><span>"input"</span><span>:</span><span> </span><span>0</span> <span>};</span> <span>// Or set the index manually</span> <span>newItem</span><span> </span><span>=</span><span> </span><span>{</span> <span> </span><span>"json"</span><span>:</span><span> </span><span>{</span><span> </span><span>.</span><span> </span><span>.</span><span> </span><span>.</span><span> </span><span>}</span> <span> </span><span>"pairedItem"</span><span>:</span><span> </span><span>{</span> <span> </span><span>"item"</span><span>:</span><span> </span><span>i</span><span>,</span> <span> </span><span>// Optional: choose the input to use</span> <span> </span><span>// Set this if your node combines multiple inputs</span> <span> </span><span>"input"</span><span>:</span><span> </span><span>0</span> <span> </span><span>},</span> <span>};</span> </code></pre></div></td></tr></tbody></table> --- ## Page: https://docs.n8n.io/data/data-pinning/ You can 'pin' data during workflow development. Data pinning means saving the output data of a node, and using the saved data instead of fetching fresh data in future workflow executions. You can use this when working with data from external sources to avoid having to repeat requests to the external system. This can save time and resources: * If your workflow relies on an external system to trigger it, such as a webhook call, being able to pin data means you don't need to use the external system every time you test the workflow. * If the external resource has data or usage limits, pinning data during tests avoids consuming your resource limits. * You can fetch and pin the data you want to test, then have confidence that the data is consistent in all your workflow tests. You can only pin data for nodes that have a single main output ("error" outputs don't count for this purpose). For development only Data pinning isn't available for production workflow executions. It's a feature to help test workflows during development. ## Pin data# To pin data in a node: 1. Run the node to load data. 2. In the **OUTPUT** view, select **Pin data** . When data pinning is active, the button is disabled and a "This data is pinned" banner is displayed in the **OUTPUT** view. Nodes that output binary data You can't pin data if the output data includes binary data. ## Unpin data# When data pinning is active, a banner appears at the top of the node's output panel indicating that n8n has pinned the data. To unpin data and fetch fresh data on the next execution, select the **Unpin** link in the banner. --- ## Page: https://docs.n8n.io/data/data-editing/ n8n allows you to edit pinned data. This means you can check different scenarios without setting up each scenario and sending the relevant data from your external system. It makes it easier to test edge cases. For development only Data editing isn't available for production workflow executions. It's a feature to help test workflows during development. ## Edit output data# To edit output data: 1. Run the node to load data. 2. In the **OUTPUT** view, select **JSON** to switch to JSON view. 3. Select **Edit** . 4. Edit your data. 5. Select **Save**. n8n saves your data changes and pins your data. ## Use data from previous executions# You can copy data from nodes in previous workflow executions: 1. Open the left menu. 2. Select **Executions**. 3. Browse the workflow executions list to find the one with the data you want to copy. 4. Select **Open Past Execution** . 5. Double click the node whose data you want to copy. 6. If it's table layout, select **JSON** to switch to JSON view. 7. There are two ways to copy the JSON: 8. Select the JSON you want by highlighting it, like selecting text. Then use `ctrl` + `c` to copy it. 9. Select the JSON you want to copy by clicking on a parameter. Then: 1. Hover over the JSON. n8n displays the **Copy**  button. 2. Select **Copy** . 3. You can choose what to copy: * **Copy Item Path** and **Copy Parameter Path** gives you expressions that access parts of the JSON. * **Copy Value**: copies the entire selected JSON. 10. Return to the workflow you're working on: 1. Open the left menu. 2. Select **Workflows**. 3. Select **Open**. 4. Select the workflow you want to open. 11. Open the node where you want to use the copied data. 12. If there is no data, run the node to load data. 13. In the **OUTPUT** view, select **JSON** to switch to JSON view. 14. Select **Edit** . 15. Paste in the data from the previous execution. 16. Select **Save**. n8n saves your data changes and pins your data. --- ## Page: https://docs.n8n.io/data/data-filtering/ Feature availability Available on Cloud Pro and Enterprise plans. Search and filter data in the node **INPUT** and **OUTPUT** panels. Use this to check your node's data. To search: 1. In a node, select **Search**  in the **INPUT** or **OUTPUT** panel. 2. Enter your search term. n8n filters as you type your search, displaying the objects or rows containing the term. Filtering is purely visual: n8n doesn't change or delete data. The filter resets when you close and reopen the node. --- ## Page: https://docs.n8n.io/data/data-mocking/ Data mocking is simulating or faking data. It's useful when developing a workflow. By mocking data, you can: * Avoid making repeated calls to your data source. This saves time and costs. * Work with a small, predictable dataset during initial development. * Avoid the risk of overwriting live data: in the early stages of building your workflow, you don't need to connect your real data source. ## Mocking with real data using data pinning# Using data pinning, you load real data into your workflow, then pin it in the output panel of a node. Using this approach you have realistic data, with only one call to your data source. You can edit pinned data. Use this approach when you need to configure your workflow to handle the exact data structure and parameters provided by your data source. To pin data in a node: 1. Run the node to load data. 2. In the **OUTPUT** view, select **Pin data** . When data pinning is active, the button is disabled and a "This data is pinned" banner is displayed in the **OUTPUT** view. Nodes that output binary data You can't pin data if the output data includes binary data. ## Generate custom data using the Code or Edit Fields nodes# You can create a custom dataset in your workflow using either the Code node or the Edit Fields (Set) node. In the Code node, you can create any data set you want, and return it as the node output. In the Edit Fields node, select **Add fields** to add your custom data. The Edit Fields node is a good choice for small tests. To create more complex datasets, use the Code node. ## Output a sample data set from the Customer Datastore node# The Customer Datastore node provides a fake dataset to work with. Add and execute the node to explore the data. Use this approach if you need some test data when exploring n8n, and you don't have a real use-case to work with. --- ## Page: https://docs.n8n.io/data/binary-data/ Binary data is any file-type data, such as image files or documents. This page collects resources relating to binary data in n8n. ## Working with binary data in your workflows# You can process binary data in n8n workflows. n8n provides nodes to help you work with binary data. You can also use code. ### Nodes# There are three key nodes dedicated to handling binary data files: * Read/Write Files from Disk to read and write files from/to the machine where n8n is running. * Convert to File to take input data and output it as a file. * Extract From File to get data from a binary format and convert it to JSON. There are separate nodes for working with XML and HTML data: * HTML * XML And nodes for performing common tasks: * Compression * Edit Image * FTP You can trigger a workflow based on changes to a local file using the Local File trigger. To split or concatenate binary data items, use the data transformation nodes. ### Code# You can use the Code node to manipulate binary data in your workflows. For example, Get the binary data buffer: get the binary data available in your workflow. ## Configure binary data mode when self-hosting# You can configure how your self-hosted n8n instance handles binary data using the Binary data environment variables. This includes tasks such as setting the storage path and choosing how to store binary data. Your configuration affects how well n8n scales: Scaling | Binary data filesystem mode. Reading and writing binary files can have security implications. If you want to disable reading and writing binary data, use the `NODES_EXCLUDE` environment variable. Refer to Environment variables | Nodes for more information. --- ## Page: https://docs.n8n.io/data/schema-preview/ * Using n8n * Integrations * Hosting n8n * Code in n8n * Advanced AI * API * Embed * n8n home ↗ * Forum ↗ * Blog ↗ 1. Using n8n 2. Key concepts 3. Data Schema Preview exposes expected schema data from the previous node in the Node Editor without the user having to provide credentials or execute the node. This makes it possible to construct workflows without having to provide credentials in advance. The preview doesn't include mock data, but it does expose the expected fields, making it possible to select and incorporate them into the input of subsequent nodes. ## Using the preview# 1. There must be a node with Schema Preview available in your workflow. 2. When clicking on the details of the next node in the sequence, the Schema Preview data will show up in the Node Editor where schema data would typically be exposed. 3. Use data from the Schema Preview just as you would other schemas - drag and drop fields as input into your node parameters and settings. --- ## Page: https://docs.n8n.io/glossary/ #### AI agent# AI agents are artificial intelligence systems capable of responding to requests, making decisions, and performing real-world tasks for users. They use large language models (LLMs) to interpret user input and make decisions about how to best process requests using the information and resources they have available. #### AI chain# AI chains allow you to interact with large language models (LLMs) and other resources in sequences of calls to components. AI chains in n8n don't use persistent memory, so you can't use them to reference previous context (use AI agents for this). #### AI embedding# Embeddings are numerical representations of data using vectors. They're used by AI to interpret complex data and relationships by mapping values across many dimensions. Vector databases, or vector stores, are databases designed to store and access embeddings. #### AI memory# In an AI context, memory allows AI tools to persist message context across interactions. This allows you to have a continuing conversations with AI agents, for example, without submitting ongoing context with each message. In n8n, AI agent nodes can use memory, but AI chains can't. #### AI tool# In an AI context, a tool is an add-on resource that the AI can refer to for specific information or functionality when responding to a request. The AI model can use a tool to interact with external systems or complete specific, focused tasks. #### AI vector store# Vector stores, or vector databases, are databases designed to store numerical representations of information called embeddings. #### API# APIs, or application programming interfaces, offer programmatic access to a service's data and functionality. APIs make it easier for software to interact with external systems. They're often offered as an alternative to traditional user-focused interfaces accessed through web browsers or UI. #### canvas (n8n)# The canvas is the main interface for building workflows in n8n's editor UI. You use the canvas to add and connect nodes to compose workflows. #### cluster node (n8n)# In n8n, cluster nodes are groups of nodes that work together to provide functionality in a workflow. They consist of a root node and one or more sub nodes that extend the node's functionality. #### credential (n8n)# In n8n, credentials store authentication information to connect with specific apps and services. After creating credentials with your authentication information (username and password, API key, OAuth secrets, etc.), you can use the associated app node to interact with the service. #### data pinning (n8n)# Data pinning allows you to temporarily freeze the output data of a node during workflow development. This allows you to develop workflows with predictable data without making repeated requests to external services. Production workflows ignore pinned data and request new data on each execution. #### editor (n8n)# The n8n editor UI allows you to create and manage workflows. The main area is the canvas, where you can compose workflows by adding, configuring, and connecting nodes. The side and top panels allow you to access other areas of the UI like credentials, templates, variables, executions, and more. #### entitlement (n8n)# In n8n, entitlements grant n8n instances access to plan-restricted features for a specific period of time. Floating entitlements are a pool of entitlements that you can distribute among various n8n instances. You can re-assign a floating entitlement to transfer its access to a different n8n instance. #### evaluation (n8n)# In n8n, evaluation allows you to tag and organize execution history and compare it against new executions. You can use this to understand how your workflow performs over time as you make changes. In particular, this is useful while developing AI-centered workflows. #### expression (n8n)# In n8n, expressions allow you to populate node parameters dynamically by executing JavaScript code. Instead of providing a static value, you can use the n8n expression syntax to define the value using data from previous nodes, other workflows, or your n8n environment. #### LangChain# LangChain is an AI-development framework used to work with large language models (LLMs). LangChain provides a standardized system for working with a wide variety of models and other resources and linking different components together to build complex applications. #### Large language model (LLM)# Large language models, or LLMs, are AI machine learning models designed to excel in natural language processing (NLP) tasks. They're built by training on large amounts of data to develop probabilistic models of language and other data. #### node (n8n)# In n8n, nodes are individual components that you compose to create workflows. Nodes define when the workflow should run, allow you to fetch, send, and process data, can define flow control logic, and connect with external services. #### project (n8n)# n8n projects allow you to separate workflows, variables, and credentials into separate groups for easier management. Projects make it easier for teams to collaborate by sharing and compartmentalizing related resources. #### root node (n8n)# Each n8n cluster node contains a single root nodes that defines the main functionality of the cluster. One or more sub nodes attach to the root node to extend its functionality. #### sub node (n8n)# n8n cluster nodes consist of one or more sub nodes connected to a root node. Sub nodes extend the functionality of the root node, providing access to specific services or resources or offering specific types of dedicated processing, like calculator functionality, for example. #### template (n8n)# n8n templates are pre-built workflows designed by n8n and community members that you can import into your n8n instance. When using templates, you may need to fill in credentials and adjust the configuration to suit your needs. #### trigger node (n8n)# A trigger node is a special node responsible for executing the workflow in response to certain conditions. All production workflows need at least one trigger to determine when the workflow should run. #### workflow (n8n)# An n8n workflow is a collection of nodes that automate a process. Workflows begin execution when a trigger condition occurs and execute sequentially to achieve complex tasks. --- ## Page: https://docs.n8n.io/manage-cloud/overview/ 1. Using n8n 2. n8n Cloud ## n8n Cloud# n8n Cloud is n8n's hosted solution. It provides: * No technical set up or maintenance for your n8n instance * Continual uptime monitoring * Managed OAuth for authentication * One-click upgrades to the newest n8n versions Sign up for n8n Cloud --- ## Page: https://docs.n8n.io/manage-cloud/cloud-admin-dashboard/ Instance owners can access the admin dashboard to manage their Cloud instance. This is where you can upgrade your n8n version and set the timezone. ## Access the dashboard from the app# 1. Log in to n8n 2. Select **Admin Dashboard**. n8n opens the dashboard. ## Access the dashboard if the app is offline# If your instance is down, you can still access the admin dashboard. When you log in to the app, n8n will ask you if you want a magic link to access your dashboard. Select **Send magic link**, then check your email for the link. --- ## Page: https://docs.n8n.io/manage-cloud/update-cloud-version/ n8n recommends regularly updating your Cloud version. Check the Release notes to learn more about changes. Info Only instance owners can upgrade n8n Cloud versions. Contact your instance owner if you don't have permission to update n8n Cloud. 1. Log in to the n8n Cloud dashboard 2. On your dashboard, select **Manage**. 3. Use the **n8n version** dropdown to select your preferred release version: * Latest Stable: recommended for most users. * Latest Beta: get the newest n8n. This may be unstable. 4. Select **Save Changes** to restart your n8n instance and perform the update. 5. In the confirmation modal, select **Confirm**. ## Best practices for updating# * Update frequently: this avoids having to jump multiple versions at once, reducing the risk of a disruptive update. Try to update at least once a month. * Check the Release notes for breaking changes. * Use Environments to create a test version of your instance. Test the update there first. ## Automatic update# n8n automatically updates outdated Cloud instances. If you don't update you instance for 120 days, n8n emails you to warn you to update. After a further 30 days, n8n automatically updates your instance. --- ## Page: https://docs.n8n.io/manage-cloud/set-cloud-timezone/ 1. Using n8n 2. n8n Cloud ## Set the Cloud instance timezone# You can change the timezone for your n8n instance. This affects the Schedule Trigger and Date & Time node. Users can configure the timezone for individual workflows in Workflow settings. 1. On your dashboard, select **Manage**. 2. Change the **Timezone** dropdown to the timezone you want. --- ## Page: https://docs.n8n.io/manage-cloud/cloud-ip/ * Using n8n * Integrations * Hosting n8n * Code in n8n * Advanced AI * API * Embed * n8n home ↗ * Forum ↗ * Blog ↗ 1. Using n8n 2. n8n Cloud Cloud IP addresses change without warning n8n can't guarantee static source IPs, as Cloud operates in a dynamic cloud provider environment and scales its infrastructure to meet demand. You should use strong authentication and secure transport protocols when connecting into and out of n8n. Outbound traffic may appear to originate from any of: * 20.79.227.226/32 * 20.113.47.122/32 * 20.218.202.73/32 * 98.67.233.91/32 * 4.182.111.50/32 * 4.182.129.20/32 * 4.182.88.118/32 * 4.182.212.136/32 * 98.67.244.108/32 * 72.144.128.145/32 * 72.144.83.147/32 * 72.144.69.38/32 * 72.144.111.50/32 * 4.182.128.108/32 * 4.182.190.144/32 * 4.182.191.184/32 * 98.67.233.200/32 * 20.52.126.0/28 * 20.218.238.112/28 * 4.182.64.64/28 --- ## Page: https://docs.n8n.io/manage-cloud/cloud-data-management/ There are two concerns when managing data on Cloud: * Memory usage: complex workflows processing large amounts of data can exceed n8n's memory limits. If this happens, the instance can crash and become inaccessible. * Data storage: depending on your execution settings and volume, your n8n database can grow in size and run out of storage. To avoid these issues, n8n recommends that you build your workflows with memory efficiency in mind, and don't save unnecessary data ## Memory limits on each Cloud plan# Current plans: * Trial: 320MiB RAM, 10 millicore CPU burstable * Starter: 320MiB RAM, 10 millicore CPU burstable * Pro-1 (10k executions): 640MiB RAM, 20 millicore CPU burstable * Pro-2 (50k executions): 1280MiB RAM, 80 millicore CPU burstable * Enterprise: 4096MiB RAM, 80 millicore CPU burstable Legacy plans: * Start: 320MiB RAM, 10 millicore CPU burstable * Power: 1280MiB RAM, 80 millicore CPU burstable n8n gives each instance up to 100GB of data storage. ## How to reduce memory consumption in your workflow# The way you build workflows affects how much data they consume when executed. Although these guidelines aren't applicable to all cases, they provide a baseline of best practices to avoid exceeding instance memory. * Split the data processed into smaller chunks. For example, instead of fetching 10,000 rows with each execution, process 200 rows with each execution. * Avoid using the Code node where possible. * Avoid manual executions when processing larger amounts of data. * Split the workflow up into sub-workflows and ensure each sub-workflow returns a limited amount of data to its parent workflow. Splitting the workflow might seem counter-intuitive at first as it usually requires adding at least two more nodes: the Loop Over Items node to split up the items into smaller batches and the Execute Workflow node to start the sub-workflow. However, as long as your sub-workflow does the heavy lifting for each batch and then returns only a small result set to the main workflow, this reduces memory consumption. This is because the sub-workflow only holds the data for the current batch in memory, after which the memory is free again. Note that n8n itself consumes memory to run. On average, the software alone uses around 180MiB RAM. Interactions with the UI also consume memory. Playing around with the workflow UI while it performs heavy executions could also push the memory capacity over the limit. ## How to manage execution data on Cloud# Execution data includes node data, parameters, variables, execution context, and binary data references. It's text-based. Binary data is non-textual data that n8n can't represent as plain text. This is files and media such as images, documents, audio files, and videos. It's much larger than textual data. If a workflow consumes a large amounts of data and is past testing stage, it's a good option to stop saving the successful executions. There are two ways you can control how much execution data n8n stores in the database: In the admin dashboard: 1. From your workspace or editor, navigate to **Admin Panel**. 2. Select **Manage**. 3. In **Executions to Save** deselect the executions you don't want to log. In your workflow settings: 1. Select the **Options**  menu. 2. Select **Settings**. n8n opens the **Workflow settings** modal. 3. Change **Save successful production executions** to **Do not save**. ## Cloud data pruning and out of memory incident prevention# ### Automatic data pruning# n8n automatically prunes execution logs after a certain time or once you reach the max storage limit, whichever comes first. The pruning always happens from oldest to newest and the limits depend on your Could plan: * Start and Starter plans: max 2500 executions saved and 7 days execution log retention; * Pro and Power plans: max 25000 executions saved and 30 days execution log retention; * Enterprise plan: max 50000 executions saved and unlimited execution log retention time. ### Manual data pruning# Heavier executions and use cases can exceed database capacity despite the automatic pruning practices. In cases like this, n8n will manually prune data to protect instance stability. 1. An alert system warns n8n if an instance is at 85% disk capacity. 2. n8n prunes execution data. n8n does this by running a backup of the instance (workflows, users, credentials and execution data) and restoring it without execution data. Due to the human steps in this process, the alert system isn't perfect. If warnings are triggered after hours or if data consumption rates are high, there might not be time to prune the data before the remaining disk space fills up. --- ## Page: https://docs.n8n.io/manage-cloud/change-ownership-or-username/ ## Change instance ownership# You can change the ownership of an instance by navigating to the **Settings** page in the owner's account and editing the **Email** field. After making the changes, scroll down and press **Save**. Note that for the change to be effective, the new email address can't be linked to any other n8n account. Changing emails will change the owner of the instance, the email you log in with, and the email your invoices and general communication gets sent to. If the workspace is deactivated, there will be no **Settings** page and no possibility to change the email address or the owner info. ## Change instance username# It's not currently possible to change usernames. If you want your instance to have a different name you will need to create a new account and transfer your work into it. The import/export documentation explains how you can transfer your work to a new n8n instance. --- ## Page: https://docs.n8n.io/manage-cloud/concurrency/ ## Cloud concurrency# Too many concurrent executions can cause performance degradation and unresponsiveness. To prevent this and improve instance stability, n8n sets concurrency limits for production executions in regular mode. Any executions beyond the limits queue for later processing. These executions remain in the queue until concurrency capacity frees up, and are then processed in FIFO order. ## Concurrency limits# n8n limits the number of concurrent executions for Cloud instances according to their plan: * Starter and Trial: 5 * Pro (10k workflow executions, 15 active workflows): 20 * Pro (50k workflow executions, 50 active workflows): 50 * Enterprise (in regular mode): 200 You can view the number of active executions and your plan's concurrency limit at the top of a project's or workflow's executions tab. ## Details# Some other details about concurrency to keep in mind: * Concurrency control applies only to production executions: those started from a webhook or trigger node. It doesn't apply to any other kinds, such as manual executions, sub-workflow executions, or error executions. * Test evaluations do not count towards concurrency limits. Your test evaluation concurrency limit is equal to, but separate from, your plan's regular concurrency limit. * You can't retry queued executions. Cancelling or deleting a queued execution also removes it from the queue. * On instance startup, n8n resumes queued executions up to the concurrency limit and re-enqueues the rest. ## Comparison to queue mode# Feature availability Queue mode is available for Cloud Enterprise plans. To enable it, contact n8n. Concurrency in queue mode is a separate mechanism from concurrency in regular mode. In queue mode, the concurrency settings determine how many jobs each worker can run in parallel. In regular mode, concurrency limits apply to the entire instance. --- ## Page: https://docs.n8n.io/manage-cloud/ai-assistant/ The n8n AI Assistant helps you build, debug, and optimize your workflows seamlessly. From answering questions about n8n to providing help with coding and expressions, the AI Assistant can streamline your workflow-building process and support you as you navigate n8n's capabilities. ## Current capabilities# The AI Assistant offers a range of tools to support you: * **Debug helper**: Identify and troubleshoot node execution issues in your workflows to keep them running without issues. * **Answer n8n questions**: Get instant answers to your n8n-related questions, whether they're about specific features or general functionality. * **Coding support**: Receive guidance on coding, including SQL and JSON, to optimize your nodes and data processing. * **Expression assistance**: Learn how to create and refine expressions to get the most out of your workflows. * **Credential setup tips**: Find out how to set up and manage node credentials securely and efficiently. ## Tips for getting the most out of the Assistant# 1. **Engage in a conversation**: The AI Assistant can collaborate with you step-by-step. If a suggestion isn't what you need, let it know! The more context you provide, the better the recommendations will be. 2. **Ask specific questions**: For the best results, ask focused questions (for example, "How do I set up credentials for Google Sheets?"). The assistant works best with clear queries. 3. **Iterate on suggestions**: Don't hesitate to build on the assistant's responses. Try different approaches and keep refining based on the assistant's feedback to get closer to your ideal solution. 4. **Things to try out**: * Debug any error you're seeing * Ask how to setup credentials * "Explain what this workflow does." * "I need your help to write code: \[Explain your code here\]" * "How can I build X in n8n?" ## FAQs# ### What context does the Assistant have?# The AI Assistant has access to all elements displayed on your n8n screen, excluding actual input and output data values (like customer information). To learn more about what data n8n shares with the Assistant, refer to AI in n8n. ### Who can use the Assistant?# Any user on a Cloud plan can use the assistant. ### How does the Assistant work?# The underlying logic of the assistant is build with the advanced AI capabilities of n8n. It uses a combination of different agents, specialized in different areas of n8n, RAG to gather knowledge from the docs and the community forum, and custom prompts, memory and context. --- ## Page: https://docs.n8n.io/source-control-environments/ * Using n8n * Integrations * Hosting n8n * Code in n8n * Advanced AI * API * Embed * n8n home ↗ * Forum ↗ * Blog ↗ 1. Using n8n 2. Enterprise features 3. Source control and environments Feature availability * Available on Enterprise. * You need to be an n8n instance owner, admin, or project owner to set up source control, and to send work to and from Git. n8n uses Git-based source control to support environments. Linking your n8n instances to a Git repository lets you create multiple n8n environments, backed by Git branches. In this section: * Understand: * Environments in n8n: The purpose of environments, and how they work in n8n. * Git and n8n: How n8n uses Git. * Branch patterns: The possible relationships between n8n instances and Git branches. * Set up source control for environments: How to connect your n8n instance to Git. * Using: * Push and pull: Send work to Git, and fetch work from Git to your instance. * Copy work between environments: How to copy work between different n8n instances. * Manage variables: Manage variable values using the n8n API and source control. * Tutorial: Create environments with source control: An end-to-end tutorial, setting up environments using n8n's recommended configurations. Related sections: * Variables: reusable values. * External secrets: manage credentials with an external secrets vault. --- ## Page: https://docs.n8n.io/source-control-environments/understand/ * Using n8n * Integrations * Hosting n8n * Code in n8n * Advanced AI * API * Embed * n8n home ↗ * Forum ↗ * Blog ↗ 1. Using n8n 2. Enterprise features 3. Source control and environments 4. Understand Feature availability * Available on Enterprise. * You need to be an n8n instance owner, admin, or project owner to set up source control, and to send work to and from Git. * Environments in n8n: The purpose of environments, and how they work in n8n. * Git in n8n: How n8n uses Git. * Branch patterns: The possible relationships between n8n instances and Git branches. --- ## Page: https://docs.n8n.io/source-control-environments/understand/environments/ n8n has built its environments feature on top of Git, a version control software. This document helps you understand: * The purpose of environments. * How environments work in n8n. ## Environments: What and why# In software development, the environment is all the infrastructure and tooling around the code, including the tools that run the software, and the specific configuration of those tools. For a more detailed introduction to environments in software development, refer to Codecademy | Environments. Low-code development in n8n is similar. n8n is where you build and run your workflows. Your instance may have particular configurations: on Cloud, n8n determines the configuration. On self-hosted instances, there are extensive configuration options. You may also have made changes to the settings of your instance. This combination of n8n and your instance's specific configuration and settings is the environment your workflows run in. There are advantages to having more than one environment. A common pattern is to have different environments for development and production: * Development: do work and make changes. * Production: the live environment. A setup like this helps you make changes to workflows without breaking workflows that are in use. ## Environments in n8n# In n8n, an environment comprises two parts, an n8n instance and a Git branch: * The n8n instance is where you build and run workflows. * The Git branch stores copies of the workflows, as well as tags, and variable and credential stubs. n8n doesn't sync credentials and variable values with Git. You must set up the credentials and variable values manually when setting up a new instance. For more information, refer to Push and pull | What gets committed and Manage variables. How you copy work between environments depends on your branch and n8n instance configuration: * Multiple instances, one branch: you can push from one instance to the Git branch, then pull the work to another instance. * Multiple instances, multiple branches: you need to create a pull request and merge in your Git provider. For example, if you have development, test, and production branches, each linked to their own instance, you need to merge the development branch into test to make the work from the development instance available on the test instance. Refer to Copy work between environments for more information, including steps to partially automate the process. For detailed guidance on pushing and pulling work, refer to Push and pull. Refer to Set up source control to learn more about linking your n8n instance to Git, or follow the Tutorial: Create environments with source control to set up your environments using one of n8n's recommended configurations. --- ## Page: https://docs.n8n.io/source-control-environments/understand/git/ n8n uses Git to provide source control. To use this feature, it helps to have some knowledge of basic Git concepts. n8n doesn't implement all Git functionality: you shouldn't view n8n's source control as full version control. New to Git and source control? If you're new to Git, don't panic. You don't need to learn Git to use n8n. This document explains the concepts you need. You do need some Git knowledge to set up the source control, as this involves work in your Git provider. Familiar with Git and source control? If you're familiar with Git, don't rely on behaviors matching exactly. In particular, be aware that source control in n8n doesn't support a pull request-style review and merge process, unless you do this outside n8n in your Git provider. This page introduces the Git concepts and terminology used in n8n. It doesn't cover everything you need to set up and manage a repository. The person doing the Setup should have some familiarity with Git and with their Git hosting provider. This is a brief introduction Git is a complex topic. This section provides a brief introduction to the key terms you need when using environments in n8n. If you want to learn about Git in depth, refer to GitHub | Git and GitHub learning resources. ## Git overview# Git is a tool for managing, tracking, and collaborating on multiple versions of documents. It's the basis for widely used platforms such as GitHub and GitLab. ## Branches: Multiple copies of a project# Git uses branches to maintain multiple copies of a document alongside each other. Every branch has its own version. A common pattern is to have a main branch, and then everyone who wants to contribute to the project works on their own branch (copy). When they finish their work, their branch is merged back into the main branch.  ## Local and remote: Moving work between your machine and a Git provider# A common pattern when using Git is to install Git on your own computer, and use a Git provider such as GitHub to work with Git in the cloud. In effect, you have a Git repository (project) on GitHub, and work with copies of it on your local machine. n8n uses this pattern for source control: you'll work with your workflows on your n8n instance, but send them to your Git provider to store them. ## Push, pull, and commit# n8n uses three key Git processes: * **Push**: send work from your instance to Git. This saves a copy of your workflows and tags, as well as credential and variable stubs, to Git. You can choose which workflows you want to save. * **Pull**: get the workflows, tags, and variables from Git and load it into n8n. You will need to populate any credentials or variable stubs included in the refreshed items. Pulling overwrites your work If you have made changes to a workflow in n8n, you must push the changes to Git before pulling. When you pull, it overwrites any changes you've made if they aren't stored in Git. * **Commit**: a commit in n8n is a single occurrence of pushing work to Git. In n8n, commit and push happen at the same time. Refer to Push and pull for detailed information about how n8n interacts with Git. --- ## Page: https://docs.n8n.io/source-control-environments/understand/patterns/ The relationship between n8n instances and Git branches is flexible. You can create different setups depending on your needs. Recommendation: don't push and pull to the same n8n instance You can push work from an instance to a branch, and pull to the same instance. n8n doesn't recommend this. To reduce the risk of merge conflicts and overwriting work, try to create a process where work goes in one direction: either to Git, or from Git, but not both. ## Multiple instances, multiple branches# This pattern involves having multiple n8n instances, each one linked to its own branch. You can use this pattern for environments. For example, create two n8n instances, development and production. Link them to their own branches. Push work from your development instance to its branch, do a pull request to move work to the production branch, then pull to the production instance. The advantages of this pattern are: * An added safety layer to prevent changes getting into your production environment by mistake. You have to do a pull request in GitHub to copy work between environments. * It supports more than two instances. The disadvantage is more manual steps to copy work between environments.  ## Multiple instances, one branch# Use this pattern if you want the same workflows, tags, and variables everywhere, but want to use them in different n8n instances. You can use this pattern for environments. For example, create two n8n instances, development and production. Link them both to the same branch. Push work from development, and pull it into production. This pattern is also useful when testing a new version of n8n: you can create a new n8n instance with the new version, connect it to the Git branch and test it, while your production instance remains on the older version until you're confident it's safe to upgrade. The advantage of this pattern is that work is instantly available to other environments when you push from one instance. The disadvantages are: * If you push by mistake, there is a risk the work will make it into your production instance. If you use a GitHub Action to automate pulls to production, you must either use the multi-instance, multi-branch pattern, or be careful to never push work that you don't want in production. * Pushing and pulling to the same instance can cause data loss as changes are overridden when performing these actions. You should set up processes to ensure content flows in one direction.  ## One instance, multiple branches# The instance owner can change which Git branch connects to the instance. The full setup in this case is likely to be a Multiple instances, multiple branches pattern, but with one instance switching between branches. This is useful to review work. For example, different users could work on their own instance and push to their own branch. The reviewer could work in a review instance, and switch between branches to load work from different users. No cleanup n8n doesn't clean up the existing contents of an instance when changing branches. Switching branches in this pattern results in all the workflows from each branch being in your instance.  ## One instance, one branch# This is the simplest pattern.  --- ## Page: https://docs.n8n.io/source-control-environments/setup/ ## Set up source control for environments# Link a Git repository to an n8n instance and configure your source control. n8n uses source control to provide environments. Refer to Environments in n8n for more information. ## Prerequisites# To use source control with n8n, you need a Git repository that allows SSH access. This document assumes you are familiar with Git and your Git provider. ## Step 1: Set up your repository and branches# For a new setup: 1. Create a new repository for use with n8n. 2. Create the branches you need. For example, if you plan to have different environments for test and production, set up a branch for each. To help decide what branches you need for your use case, refer to Branch patterns. ## Step 2: Configure Git in n8n# 1. Go to **Settings** > **Environments**. 2. In **Git repository URL** enter the SSH URL for your repository. 3. n8n supports ED25519 and RSA public key algorithms. ED25519 is the default. Select **RSA** under **SSH Key** if your git host requires RSA. 4. Copy the SSH key. ## Step 3: Set up a deploy key# Set up SSH access by creating a deploy key for the repository using the SSH key from n8n. The key must have write access. The steps depend on your Git provider. Help links for common providers: * GitHub | Managing deploy keys * GitLab | Deploy keys ## Step 4: Connect n8n and configure your instance# 1. In **Settings** > **Environments** in n8n, select **Connect**. n8n connects to your Git repository. 2. Under **Instance settings**, choose which branch you want to use for the current n8n instance. 3. **Optional**: select **Protected instance** to prevent users editing workflows in this instance. This is useful for protecting production instances. 4. **Optional**: choose a custom color for the instance. This will appear in the menu next to the source control push and pull buttons. It helps users know which instance they're in. 5. Select **Save settings**. --- ## Page: https://docs.n8n.io/source-control-environments/using/ * Using n8n * Integrations * Hosting n8n * Code in n8n * Advanced AI * API * Embed * n8n home ↗ * Forum ↗ * Blog ↗ 1. Using n8n 2. Enterprise features 3. Source control and environments 4. Using Feature availability * Available on Enterprise. * You need to be an n8n instance owner, admin, or project owner to set up source control, and to send work to and from Git. * Push and pull: Send work to Git, and fetch work from Git to your instance. Understand what gets committed, and how n8n handles merge conflicts. * Copy work between environments: How to copy work between different n8n instances. * Manage variables: Manage variable values using the n8n API and source control. --- ## Page: https://docs.n8n.io/source-control-environments/using/push-pull/ If your n8n instance connects to a Git repository, you need to keep your work in sync with Git. This document assumes some familiarity with Git concepts and terminology. Refer to Git and n8n for an introduction to how n8n works with Git. Recommendation: don't push and pull to the same n8n instance You can push work from an instance to a branch, and pull to the same instance. n8n doesn't recommend this. To reduce the risk of merge conflicts and overwriting work, try to create a process where work goes in one direction: either to Git, or from Git, but not both. ## Fetch other people's work# Restricted feature Ordinary users can't fetch work from Git. You must be an n8n instance owner, admin, or project owner to fetch work from Git. To pull work from Git, select **Pull**  in the main menu. View screenshot  Pull and push buttons when menu is closed  Pull and push buttons when menu is open n8n may display a warning about overriding local changes. Select **Pull and override** to override your local work with the content in Git. When the changes include new variable or credential stubs, n8n notifies you that you need to populate the values for the items before using them. How deleted resources are handled When workflows, credentials, variables, and tags are deleted from the repository, your local versions of these resources aren't deleted automatically. Instead, when you pull repository changes, n8n notifies you about any outdated resources and asks if you'd like to delete them. ### Workflow and credential owner may change on pull# When you pull from Git to an n8n instance, n8n tries to assign workflows and credentials to a matching user or project. If the original owner is a user: If the same owner is available on both instances (matching email), the owner remains the same. If the original owner isn't on the new instance, n8n sets the user performing the pull as the workflow owner. If the original owner is a project: n8n tries to match the original project name to a project name on the new instance. If no matching project exists, n8n creates a new project with the name, assigns the current user as project owner, and imports the workflows and credentials to the project. ### Pulling may cause brief service interruption# If you pull changes to an active workflow, n8n sets the workflow to inactive while pulling, then reactivates it. This may result in a few seconds of downtime for the workflow. ## Send your work to Git# Restricted feature Ordinary users can't send work to Git. You must be an n8n instance owner, admin, or project owner to send work to Git. To push work to Git: 1. Select **Push**  in the main menu. View screenshot  Pull and push buttons when menu is closed  Pull and push buttons when menu is open 2. In the **Commit and push changes** modal, select which workflows you want to push. You can filter by status (new, modified, deleted) and search for workflows. n8n automatically pushes tags, and variable and credential stubs. 3. Enter a commit message. This should be a one sentence description of the changes you're making. 4. Select **Commit and Push**. n8n sends the work to Git, and displays a success message on completion. ## What gets committed# n8n commits the following to Git: * Workflows, including their tags and the email address of the workflow owner. You can choose which workflows to push. * Credential stubs (ID, name, type) * Variable stubs (ID and name) * Projects * Folders You can programmatically Manage variables using the n8n API. ## Merge behaviors and conflicts# n8n's implementation of source control is opinionated. It resolves merge conflicts for credentials and variables automatically. n8n can't detect conflicts on workflows. ### Workflows# You have to explicitly tell n8n what to do about workflows when pushing or pulling. The Git repository acts as the source of truth. When pulling, you might get warned that your local copy of a workflow differs from Git, and if you accept, your local copy would be overridden. Be careful not to lose relevant changes when pulling. When you push, your local workflow will override what's in Git, so make sure that you have the most up to date version or you risk overriding recent changes. To prevent the issue described above, you should immediately push your changes to a workflow once you finish working on it. Then it's safe to pull. To avoid losing data: * Design your source control setup so that workflows flow in one direction. For example, make edits on a development instance, push to Git, then pull to production. Don't make edits on the production instance and push them. * Don't push all workflows. Select the ones you need. * Be cautious about manually editing files in the Git repository. ### Credentials, variables and workflow tags# Credentials and variables can't have merge issues, as n8n chooses the version to keep. On pull: * If the tag, variable or credential doesn't exist, n8n creates it. * If the tag, variable or credential already exists, n8n doesn't update it, unless: * You set the value of a variable using the API or externally. The new value overwrites any existing value. * The credential name has changed. n8n uses the version in Git. * The name of a tag has changed. n8n updates the tag name. Be careful when renaming tags as tag names are unique and this could cause database issues when it comes to uniqueness during the pull process. On push: * n8n overwrites the entire variables and tags files. * If a credential already exists, n8n overwrites it with the changes, but doesn't apply these changes to existing credentials on pull. Manage credentials with an external secrets vault If you need different credentials on different n8n environments, use external secrets. --- ## Page: https://docs.n8n.io/source-control-environments/using/copy-work/ The steps to send work from one n8n instance to another are different depending on whether you use a single Git branch or multiple branches. ## Single branch# If you have a single Git branch the steps to copy work are: 1. Push work from one instance to the Git branch. 2. Log in to the other instance to pull the work from Git. You can automate pulls. ## Multiple branches# If you have more than one Git branch, you need to merge the branches in your Git provider to copy work between environments. You can't copy work directly between environments in n8n. A common pattern is: 1. Do work in your developments instance. 2. Push the work to the development branch in Git. 3. Merge your development branch into your production branch. Refer to the documentation for your Git provider for guidance on doing this: * GitHub: Creating a pull request * GitLab: Creating merge requests * Git: Basic branching and merging 4. In your production n8n instance, pull the changes. You can automate pulls. ## Automatically send changes to n8n# You can automate parts of the process of copying work, using the `/source-control/pull` API endpoint. Call the API after merging the changes: <table><tbody><tr><td><div><pre><span></span><span>1</span> <span>2</span> <span>3</span> <span>4</span> <span>5</span></pre></div></td><td><div><pre><span></span><code>curl --request POST \ --location '<YOUR-INSTANCE-URL>/api/v1/source-control/pull' \ --header 'Content-Type: application/json' \ --header 'X-N8N-API-KEY: <YOUR-API-KEY>' \ --data '{"force": true}' </code></pre></div></td></tr></tbody></table> This means you can use a GitHub Action or GitLab CI/CD to automatically pull changes to the production instance on merge. A GitHub Action example: <table><tbody><tr><td><div><pre><span></span><span> 1</span> <span> 2</span> <span> 3</span> <span> 4</span> <span> 5</span> <span> 6</span> <span> 7</span> <span> 8</span> <span> 9</span> <span>10</span> <span>11</span> <span>12</span> <span>13</span> <span>14</span> <span>15</span> <span>16</span></pre></div></td><td><div><pre><span></span><code><span>name</span><span>:</span><span> </span><span>CI</span> <span>on</span><span>:</span> <span> </span><span># Trigger the workflow on push or pull request events for the "production" branch</span> <span> </span><span>push</span><span>:</span> <span> </span><span>branches</span><span>:</span><span> </span><span>[</span><span> </span><span>"production"</span><span> </span><span>]</span> <span> </span><span># Allows you to run this workflow manually from the Actions tab</span> <span> </span><span>workflow_dispatch</span><span>:</span> <span>jobs</span><span>:</span> <span> </span><span>run-pull</span><span>:</span> <span> </span><span>runs-on</span><span>:</span><span> </span><span>ubuntu-latest</span> <span> </span><span>steps</span><span>:</span> <span> </span><span>-</span><span> </span><span>name</span><span>:</span><span> </span><span>PULL</span> <span> </span><span># Use GitHub secrets to protect sensitive information</span> <span> </span><span>run</span><span>:</span><span> </span><span>></span> <span> </span><span>curl --location '${{ secrets.INSTANCE_URL }}/version-control/pull' --header</span> <span> </span><span>'Content-Type: application/json' --header 'X-N8N-API-KEY: ${{ secrets.INSTANCE_API_KEY }}'</span> </code></pre></div></td></tr></tbody></table> --- ## Page: https://docs.n8n.io/source-control-environments/using/manage-variables/ n8n doesn't sync variable values with Git. You must set up the credentials manually when setting up a new instance. You can choose to set up variables manually, or using the API. ## Manage variables using the API# n8n syncs variable names, but doesn't push variable values to your Git provider. You can either: * Manually set variable values in n8n. * Set variable values using the n8n API, using the `/pull` endpoint. Managing variables using the API has several advantages: * You can automatically update variable values using a CI (continuous integration) tool. * You may also be able to protect the values. For example, you can store values in GitHub secrets, then populate the variables in n8n using an API call from a GitHub Action. To manage variables using an API call, make a `POST` request to `/source-control/pull`: <table><tbody><tr><td><div><pre><span></span><span> 1</span> <span> 2</span> <span> 3</span> <span> 4</span> <span> 5</span> <span> 6</span> <span> 7</span> <span> 8</span> <span> 9</span> <span>10</span> <span>11</span></pre></div></td><td><div><pre><span></span><code> curl --location '<YOUR-INSTANCE-URL>/api/v1/source-control/pull' \ --header 'Content-Type: application/json' \ --header 'X-N8N-API-KEY: <YOUR-API-KEY>' \ --data '{ "force": true, "variables": { "key1": "value1", "key2": "value2" } } ' </code></pre></div></td></tr></tbody></table> If the key already exists in n8n, the API call updates the value. If there is no variable with the key, it creates a new variable. After setting values using the API, you can safely edit variables in n8n, and push and pull changes. --- ## Page: https://docs.n8n.io/source-control-environments/create-environments/ Feature availability * Available on Enterprise. * You need to be an n8n instance owner, admin, or project owner to set up source control, and to send work to and from Git. This tutorial walks through the process of setting up environments end-to-end. You'll create two environments: development and production. It uses GitHub as the Git provider. The process is similar for other providers. n8n has built its environments feature on top of Git, a version control software. You link an n8n instance to a Git branch, and use a push-pull pattern to move work between environments. You should have some understanding of environments and Git. If you need more information on these topics, refer to: * Environments in n8n: the purpose of environments, and how they work in n8n. * Git and n8n: Git concepts and source control in n8n. ## Choose your source control pattern# Before setting up source control and environments, you need to plan your environments, and how they relate to Git branches. n8n supports different Branch patterns. For environments, you need to choose between two patterns: multi-instance, multi-branch, or multi-instance, single-branch. This tutorial covers both patterns. Recommendation: don't push and pull to the same n8n instance You can push work from an instance to a branch, and pull to the same instance. n8n doesn't recommend this. To reduce the risk of merge conflicts and overwriting work, try to create a process where work goes in one direction: either to Git, or from Git, but not both. ### Multiple instances, multiple branches#  The advantages of this pattern are: * An added safety layer to prevent changes getting into your production environment by mistake. You have to do a pull request in GitHub to copy work between environments. * It supports more than two instances. The disadvantage is more manual steps to copy work between environments. ### Multiple instances, one branch#  The advantage of this pattern is that work is instantly available to other environments when you push from one instance. The disadvantages are: * If you push by mistake, there is a risk the work will make it into your production instance. If you use a GitHub Action to automate pulls to production, you must either use the multi-instance, multi-branch pattern, or be careful to never push work that you don't want in production. * Pushing and pulling to the same instance can cause data loss as changes are overridden when performing these actions. You should set up processes to ensure content flows in one direction. ## Set up your repository# Once you've chosen your pattern, you need to set up your GitHub repository. Multi-branchSingle-branch 1. Create a new repository. * Make sure the repository is private, unless you want your workflows, tags, and variable and credential stubs exposed to the internet. * Create the new repository with a README so you can immediately create branches. 2. Create one branch named `production` and another named `development`. Refer to Creating and deleting branches within your repository for guidance. Create a new repository. * Make sure the repository is private, unless you want your workflows, tags, and variable and credential stubs exposed to the internet. * Create the new repository with a README. This creates the `main` branch, which you'll connect to. ## Connect your n8n instances to your repository# Create two n8n instances, one for development, one for production. ### Configure Git in n8n# 1. Go to **Settings** > **Environments**. 2. In **Git repository URL** enter the SSH URL for your repository. 3. n8n supports ED25519 and RSA public key algorithms. ED25519 is the default. Select **RSA** under **SSH Key** if your git host requires RSA. 4. Copy the SSH key. ### Set up a deploy key# Set up SSH access by creating a deploy key for the repository using the SSH key from n8n. The key must have write access. Refer to GitHub | Managing deploy keys for guidance. ### Connect n8n and configure your instance# Multi-branchSingle-branch 1. In **Settings** > **Environments** in n8n, select **Connect**. n8n connects to your Git repository. 2. Under **Instance settings**, choose which branch you want to use for the current n8n instance. Connect the production branch to the production instance, and the development branch to the development instance. 3. Production instance only: select **Protected instance** to prevent users editing workflows in this instance. 4. Select **Save settings**. 1. In **Settings** > **Environments** in n8n, select **Connect**. 2. Under **Instance settings**, select the main branch. 3. Production instance only: select **Protected instance** to prevent users editing workflows in this instance. 4. Select **Save settings**. ## Push work from development# In your development instance, create a few workflows, tags, variables, and credentials. To push work to Git: 1. Select **Push**  in the main menu. View screenshot  Pull and push buttons when menu is closed  Pull and push buttons when menu is open 2. In the **Commit and push changes** modal, select which workflows you want to push. You can filter by status (new, modified, deleted) and search for workflows. n8n automatically pushes tags, and variable and credential stubs. 3. Enter a commit message. This should be a one sentence description of the changes you're making. 4. Select **Commit and Push**. n8n sends the work to Git, and displays a success message on completion. ## Pull work to production# Your work is now in GitHub. If you're using a multi-branch setup, it's on the development branch. If you chose the single-branch setup, it's on main. Multi-branchSingle-branch 1. In GitHub, create a pull request to merge development into production. 2. Merge the pull request. 3. In your production instance, select **Pull**  in the main menu. In your production instance, select **Pull**  in the main menu. View screenshot  Pull and push buttons when menu is closed  Pull and push buttons when menu is open ### Optional: Use a GitHub Action to automate pulls# If you want to avoid logging in to your production instance to pull, you can use a GitHub Action and the n8n API to automatically pull every time you push new work to your production or main branch. A GitHub Action example: <table><tbody><tr><td><div><pre><span></span><span> 1</span> <span> 2</span> <span> 3</span> <span> 4</span> <span> 5</span> <span> 6</span> <span> 7</span> <span> 8</span> <span> 9</span> <span>10</span> <span>11</span> <span>12</span> <span>13</span> <span>14</span> <span>15</span> <span>16</span></pre></div></td><td><div><pre><span></span><code><span>name</span><span>:</span><span> </span><span>CI</span> <span>on</span><span>:</span> <span> </span><span># Trigger the workflow on push or pull request events for the "production" branch</span> <span> </span><span>push</span><span>:</span> <span> </span><span>branches</span><span>:</span><span> </span><span>[</span><span> </span><span>"production"</span><span> </span><span>]</span> <span> </span><span># Allows you to run this workflow manually from the Actions tab</span> <span> </span><span>workflow_dispatch</span><span>:</span> <span>jobs</span><span>:</span> <span> </span><span>run-pull</span><span>:</span> <span> </span><span>runs-on</span><span>:</span><span> </span><span>ubuntu-latest</span> <span> </span><span>steps</span><span>:</span> <span> </span><span>-</span><span> </span><span>name</span><span>:</span><span> </span><span>PULL</span> <span> </span><span># Use GitHub secrets to protect sensitive information</span> <span> </span><span>run</span><span>:</span><span> </span><span>></span> <span> </span><span>curl --location '${{ secrets.INSTANCE_URL }}/version-control/pull' --header</span> <span> </span><span>'Content-Type: application/json' --header 'X-N8N-API-KEY: ${{ secrets.INSTANCE_API_KEY }}'</span> </code></pre></div></td></tr></tbody></table> ## Next steps# Learn more about: * Environments in n8n and Git and n8n * Source control patterns * Reusable Variables and Managing variables using the API when using source control. --- ## Page: https://docs.n8n.io/external-secrets/ Feature availability * External secrets are available on Enterprise Self-hosted and Enterprise Cloud plans. * n8n supports AWS Secrets Manager, Azure Key Vault, GCP Secrets Manager, Infisical and HashiCorp Vault. * n8n doesn't support HashiCorp Vault Secrets. You can use an external secrets store to manage credentials for n8n. n8n stores all credentials encrypted in its database, and restricts access to them by default. With the external secrets feature, you can store sensitive credential information in an external vault, and have n8n load it in when required. This provides an extra layer of security and allows you to manage credentials used across multiple n8n environments in one central place. ## Connect n8n to your secrets store# Secret names Your secret names can't contain spaces, hyphens, or other special characters. n8n supports secret names containing alphanumeric characters (`a-z`, `A-Z`, and `0-9`), and underscores. 1. In n8n, go to **Settings** > **External Secrets**. 2. Select **Set Up** for your store provider. 3. Enter the credentials for your provider: * Azure Key Vault: Provide your **vault name**, **tenant ID**, **client ID**, and **client secret**. Refer to the Azure documentation to register a Microsoft Entra ID app and create a service principal. n8n supports only single-line values for secrets. * AWS Secrets Manager: provide your **access key ID**, **secret access key**, and **region**. The IAM user must have the `secretsmanager:ListSecrets`, `secretsmanager:BatchGetSecretValue`, and `secretsmanager:GetSecretValue` permissions. To give n8n access to all secrets in your AWS Secrets Manager, you can attach the following policy to the IAM user: <table><tbody><tr><td><div><pre><span></span><span> 1</span> <span> 2</span> <span> 3</span> <span> 4</span> <span> 5</span> <span> 6</span> <span> 7</span> <span> 8</span> <span> 9</span> <span>10</span> <span>11</span> <span>12</span> <span>13</span> <span>14</span> <span>15</span> <span>16</span> <span>17</span> <span>18</span></pre></div></td><td><div><pre><span></span><code><span>{</span> <span> </span><span>"Version"</span><span>:</span><span> </span><span>"2012-10-17"</span><span>,</span> <span> </span><span>"Statement"</span><span>:</span><span> </span><span>[</span> <span> </span><span>{</span> <span> </span><span>"Sid"</span><span>:</span><span> </span><span>"AccessAllSecrets"</span><span>,</span> <span> </span><span>"Effect"</span><span>:</span><span> </span><span>"Allow"</span><span>,</span> <span> </span><span>"Action"</span><span>:</span><span> </span><span>[</span> <span> </span><span>"secretsmanager:ListSecrets"</span><span>,</span> <span> </span><span>"secretsmanager:BatchGetSecretValue"</span><span>,</span> <span> </span><span>"secretsmanager:GetResourcePolicy"</span><span>,</span> <span> </span><span>"secretsmanager:GetSecretValue"</span><span>,</span> <span> </span><span>"secretsmanager:DescribeSecret"</span><span>,</span> <span> </span><span>"secretsmanager:ListSecretVersionIds"</span><span>,</span> <span> </span><span>],</span> <span> </span><span>"Resource"</span><span>:</span><span> </span><span>"*"</span> <span> </span><span>}</span> <span> </span><span>]</span> <span>}</span> </code></pre></div></td></tr></tbody></table> You can also be more restrictive and give n8n access to select specific AWS Secret Manager secrets. You still need to allow the `secretsmanager:ListSecrets` and `secretsmanager:BatchGetSecretValue` permissions to access all resources. These permissions allow n8n to retrieve ARN-scoped secrets, but don't provide access to the secret values. Next, you need set the scope for the `secretsmanager:GetSecretValue` permission to the specific Amazon Resource Names (ARNs) for the secrets you wish to share with n8n. Ensure you use the correct region and account ID in each resource ARNs. You can find the ARN details in the AWS dashboard for your secrets. For example, the following IAM policy only allows access to secrets with a name starting with `n8n` in your specified AWS account and region: <table><tbody><tr><td><div><pre><span></span><span> 1</span> <span> 2</span> <span> 3</span> <span> 4</span> <span> 5</span> <span> 6</span> <span> 7</span> <span> 8</span> <span> 9</span> <span>10</span> <span>11</span> <span>12</span> <span>13</span> <span>14</span> <span>15</span> <span>16</span> <span>17</span> <span>18</span> <span>19</span> <span>20</span> <span>21</span> <span>22</span> <span>23</span> <span>24</span> <span>25</span></pre></div></td><td><div><pre><span></span><code><span>{</span> <span> </span><span>"Version"</span><span>:</span><span> </span><span>"2012-10-17"</span><span>,</span> <span> </span><span>"Statement"</span><span>:</span><span> </span><span>[</span> <span> </span><span>{</span> <span> </span><span>"Sid"</span><span>:</span><span> </span><span>"ListingSecrets"</span><span>,</span> <span> </span><span>"Effect"</span><span>:</span><span> </span><span>"Allow"</span><span>,</span> <span> </span><span>"Action"</span><span>:</span><span> </span><span>[</span> <span> </span><span>"secretsmanager:ListSecrets"</span><span>,</span> <span> </span><span>"secretsmanager:BatchGetSecretValue"</span> <span> </span><span>],</span> <span> </span><span>"Resource"</span><span>:</span><span> </span><span>"*"</span> <span> </span><span>},</span> <span> </span><span>{</span> <span> </span><span>"Sid"</span><span>:</span><span> </span><span>"RetrievingSecrets"</span><span>,</span> <span> </span><span>"Effect"</span><span>:</span><span> </span><span>"Allow"</span><span>,</span> <span> </span><span>"Action"</span><span>:</span><span> </span><span>[</span> <span> </span><span>"secretsmanager:GetSecretValue"</span><span>,</span> <span> </span><span>"secretsmanager:DescribeSecret"</span> <span> </span><span>],</span> <span> </span><span>"Resource"</span><span>:</span><span> </span><span>[</span> <span> </span><span>"arn:aws:secretsmanager:us-west-2:123456789000:secret:n8n*"</span> <span> </span><span>]</span> <span> </span><span>}</span> <span> </span><span>]</span> <span>}</span> </code></pre></div></td></tr></tbody></table> For more IAM permission policy examples, consult the AWS documentation. * HashiCorp Vault: provide the **Vault URL** for your vault instance, and select your **Authentication Method**. Enter your authentication details. Optionally provide a namespace. * Refer to the HashiCorp documentation for your authentication method: Token auth method AppRole auth method Userpass auth method * If you use vault namespaces, you can enter the namespace n8n should connect to. Refer to Vault Enterprise namespaces for more information on HashiCorp Vault namespaces. * Infisical: provide a **Service Token**. Refer to Infisical's Service token documentation for information on getting your token. If you self-host Infisical, enter the **Site URL**. Infisical environment Make sure you select the correct Infisical environment when creating your token. n8n will load secrets from this environment, and won't have access to secrets in other Infisical environments. n8n only support service tokens that have access to a single environment. * Google Cloud Platform: provide a **Service Account Key** (JSON) for a service account that has at least these roles: `Secret Manager Secret Accessor` and `Secret Manager Secret Viewer`. Refer to Google's service account documentation for more information. 4. **Save** your configuration. 5. Enable the provider using the **Disabled / Enabled** toggle. ## Use secrets in n8n credentials# To use a secret from your store in an n8n credential: 1. Create a new credential, or open an existing one. 2. On the field where you want to use a secret: 1. Hover over the field. 2. Select **Expression**. 3. In the field where you want to use a secret, enter an expression referencing the secret name: <table><tbody><tr><td><div><pre><span></span><span>1</span></pre></div></td><td><div><pre><span></span><code><span>{{</span><span> </span><span>$secrets</span><span>.</span><span><</span><span>vault</span><span>-</span><span>name</span><span>></span><span>.</span><span><</span><span>secret</span><span>-</span><span>name</span><span>></span><span> </span><span>}}</span> </code></pre></div></td></tr></tbody></table> `<vault-name>` is either `vault` (for HashiCorp) or `infisical` or `awsSecretsManager`. Replace `<secret-name>` with the name as it appears in your vault. ## Using external secrets with n8n environments# n8n's Source control and environments feature allows you to create different n8n environments, backed by Git. The feature doesn't support using different credentials in different instances. You can use an external secrets vault to provide different credentials for different environments by connecting each n8n instance to a different vault or project environment. For example, you have two n8n instances, one for development and one for production. You use Infisical for your vault. In Infisical, create a project with two environments, development and production. Generate a token for each Infisical environment. Use the token for the development environment to connect your development n8n instance, and the token for your production environment to connect your production n8n instance. ## Using external secrets in projects# To use external secrets in an RBAC project, you must have an instance owner or instance admin as a member of the project. ## Troubleshooting# ### Infisical version changes# Infisical version upgrades can introduce problems connecting to n8n. If your Infisical connection stops working, check if there was a recent version change. If so, report the issue to help@n8n.io. ### Only set external secrets on credentials owned by an instance owner or admin# Due to the permissions that instance owners and admins have, it's possible for owners and admins to update credentials owned by another user with a secrets expression. This will appear to work in preview for an instance owner or admin, but the secret won't resolve when the workflow runs in production. Only use external secrets for credentials that are owned by an instance admin or owner. This ensures they resolve correctly in production. --- ## Page: https://docs.n8n.io/log-streaming/ Feature availability Log streaming is available on Enterprise Self-hosted and Cloud plans. Log streaming allows you to send events from n8n to your own logging tools. This allows you to manage your n8n monitoring in your own alerting and logging processes. ## Set up log streaming# To use log streaming, you have to add a streaming destination. 1. Navigate to **Settings** > **Log Streaming**. 2. Select **Add new destination**. 3. Choose your destination type. n8n opens the **New Event Destination** modal. 4. In the **New Event Destination** modal, enter the configuration information for your event destination. These depend on the type of destination you're using. 5. Select **Events** to choose which events to stream. 6. Select **Save**. Self-hosted users If you self-host n8n, you can configure additional log streaming behavior using Environment variables. ## Events# The following events are available. You can choose which events to stream in **Settings** > **Log Streaming** > **Events**. * Workflow * Started * Success * Failed * Node executions * Started * Finished * Audit * User signed up * User updated * User deleted * User invited * User invitation accepted * User re-invited * User email failed * User reset requested * User reset * User credentials created * User credentials shared * User credentials updated * User credentials deleted * User API created * User API deleted * Package installed * Package updated * Package deleted * Workflow created * Workflow deleted * Workflow updated * AI node logs * Memory get messages * Memory added message * Output parser get instructions * Output parser parsed * Retriever get relevant documents * Embeddings embedded document * Embeddings embedded query * Document processed * Text splitter split * Tool called * Vector store searched * LLM generated * Vector store populated ## Destinations# n8n supports three destination types: * A syslog server * A generic webhook * A Sentry client --- ## Page: https://docs.n8n.io/license-key/ To enable certain licensed features, you must first activate your license. You can do this either through the UI or by setting environment variables. ## Add a license key using the UI# In your n8n instance: 1. Log in as **Admin** or **Owner**. 2. Select **Settings** > **Usage and plan**. 3. Select **Enter activation key**. 4. Paste in your license key. 5. Select **Activate**. ## Add a license key using an environment variables# In your n8n configuration, set `N8N_LICENSE_ACTIVATION_KEY` to your license key. If the instance already has an activated license, this variable will have no effect. Refer to Environment variables to learn more about configuring n8n. ## Allowlist the license server IP addresses# n8n uses Cloudflare to host the license server. As the specific IP addresses can change, you need to allowlist the full range of Cloudflare IP addresses to ensure n8n can always reach the license server. --- ## Page: https://docs.n8n.io/release-notes/ New features and bug fixes for n8n. You can also view the Releases in the GitHub repository. Latest and Next versions n8n releases a new minor version most weeks. The `latest` version is for production use. `next` is the most recent release. You should treat `next` as a beta: it may be unstable. To report issues, use the forum. Current `latest`: 1.86.1 Current `next`: 1.88.0 ## How to update n8n# The steps to update your n8n depend on which n8n platform you use. Refer to the documentation for your n8n: * Cloud * Self-hosted options: * npm * Docker ## Semantic versioning in n8n# n8n uses semantic versioning. All version numbers are in the format `MAJOR.MINOR.PATCH`. Version numbers increment as follows: * MAJOR version when making incompatible changes which can require user action. * MINOR version when adding functionality in a backward-compatible manner. * PATCH version when making backward-compatible bug fixes. Older versions You can find the release notes for older versions of n8n here ## n8n@1.88.0# View the commits for this version. **Release date:** 2025-04-10 Next version This is the `next` version. n8n recommends using the `latest` version. The `next` version may be unstable. To report issues, use the forum. This release contains new features, new nodes, performance improvements, and bug fixes. ### Model Context Protocol (MCP) nodes# MCP aims to standardise how LLMs like Claude, ChatGPT, or Cursor can interact with tools or integrate data for their agents. Many providers - both established or new - are adopting MCP as a standard way to build agentic systems. It is an easy way to either expose your own app as a server, making capabilities available to a model as tools, or as a client that can call on tools outside of your own system. While it’s still early in the development process, we want to give you access to our new MCP nodes. This will help us understand your requirements better and will also let us converge on a great general solution quicker. We are adding two new nodes: * a MCP Server Trigger for any workflow * a MCP Client Tool for the AI Agent The MCP Server Trigger turns n8n into an MCP server, providing n8n tools to models running outside of n8n. You can run multiple MCP servers from your n8n instance. The MCP Client Tool connects LLMs - and other intelligent agents - to any MCP-enabled service through a single interface. Max from our DevRel team created an official walkthrough for you to get started:  Studio Update #04 ### MCP Server Trigger# The MCP Server Trigger turns n8n into an MCP server, providing n8n tools to models running outside of n8n. The node acts as an entry point into n8n for MCP clients. It operates by exposing a URL that MCP clients can interact with to access n8n tools. This means your n8n workflows and integrations are now available to models run elsewhere. Pretty neat. 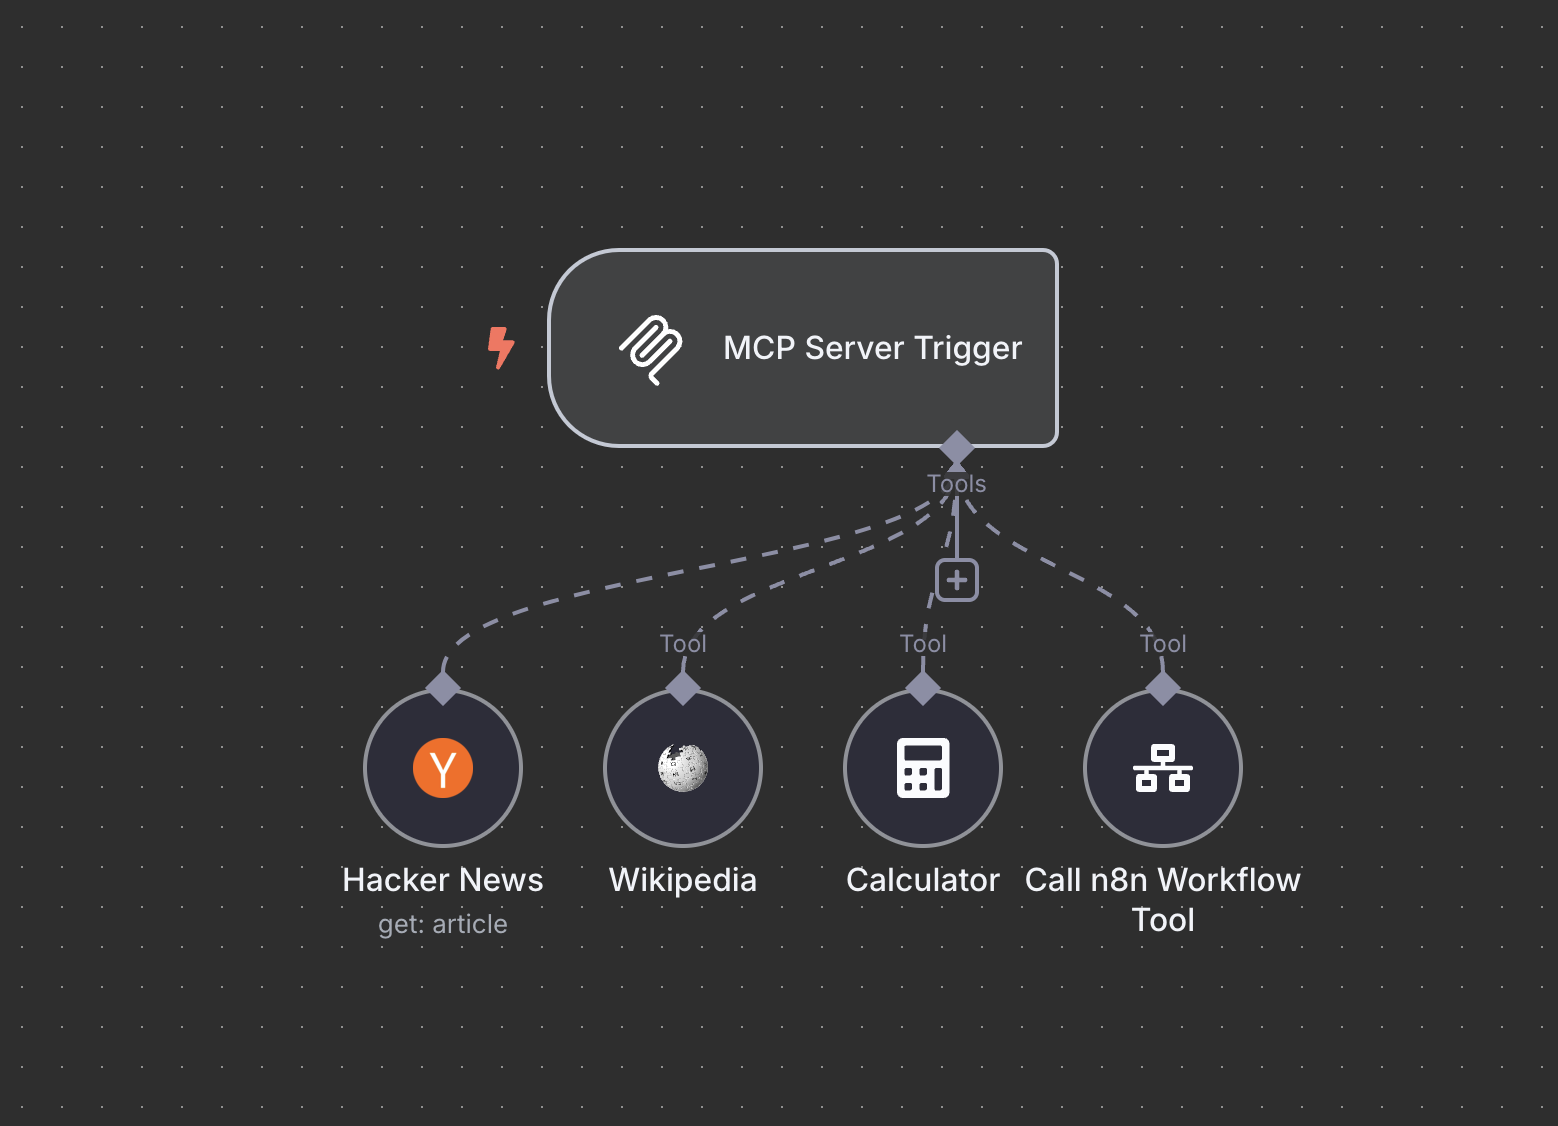 MCP Server Trigger Explore the MCP Server Trigger docs ### MCP Client Tool# The MCP Client Tool node is a MCP client, allowing you to use the tools exposed by an external MCP server. You can connect the MCP Client Tool node to your models to call external tools with n8n agents. In this regard it is similar to using a n8n tool with your AI agent. One advantage is that the MCP Client Tool can access multiple tools on the MCP server at once, keeping your canvas cleaner and easier to understand. 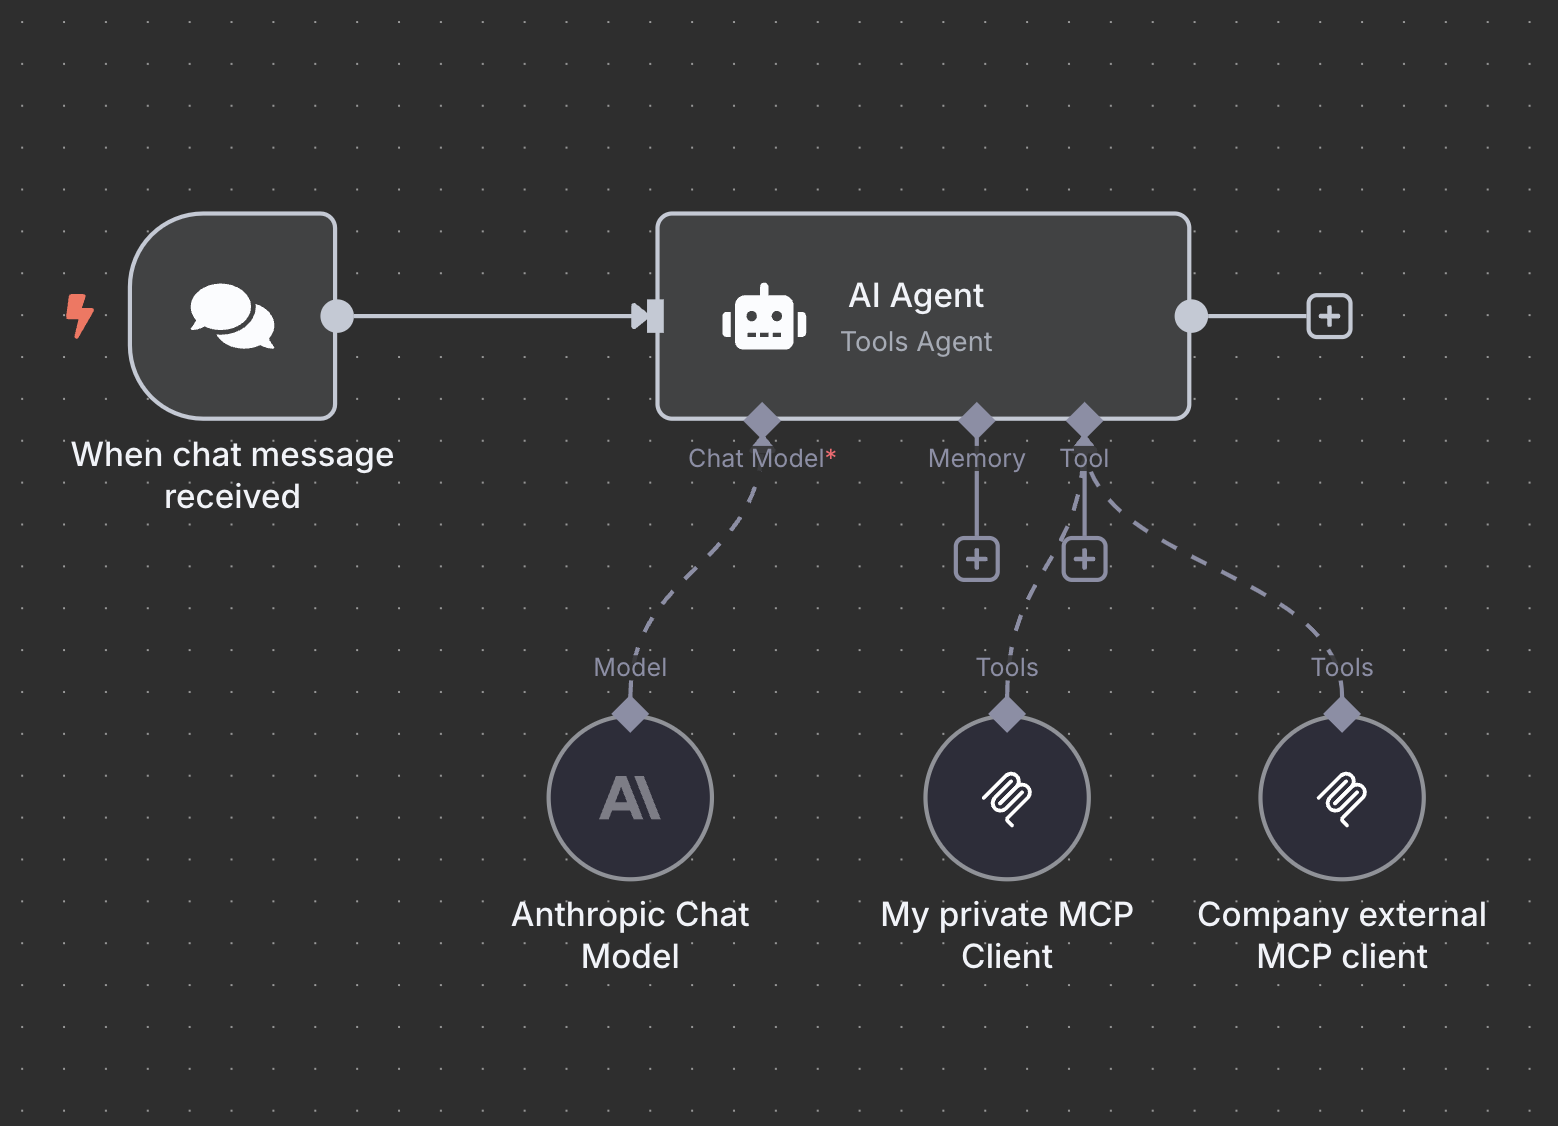 MCP Client Tools Explore the MCP Client Tool docs ### Node updates# * Added a node for Azure Cosmos DB * Added a node for Milvus Vector Store * Updated the Email Trigger (IMAP) node ### Contributors# adina-hub umanamente For full release details, refer to Releases on GitHub. ## n8n@1.87.2# View the commits for this version. **Release date:** 2025-04-09 This release contains bug fixes. For full release details, refer to Releases on GitHub. ## n8n@1.86.1# View the commits for this version. **Release date:** 2025-04-09 Latest version This is the `latest` version. n8n recommends using the `latest` version. The `next` version may be unstable. To report issues, use the forum. This release contains a bug fix. For full release details, refer to Releases on GitHub. ## n8n@1.87.1# View the commits for this version. **Release date:** 2025-04-08 This release contains bug fixes. For full release details, refer to Releases on GitHub. ## n8n@1.87.0# View the commits for this version. **Release date:** 2025-04-07 This release contains new nodes, node updates, API updates, core updates, editor updates, and bug fixes. ### Contributors# cesars-gh Stamsy Pash10g For full release details, refer to Releases on GitHub. ## n8n@1.86.0# View the commits for this version. **Release date:** 2025-03-31 This release contains API updates, core updates, editor improvements, node updates, and bug fixes. ### Contributors# Aijeyomah ownerer ulevitsky For full release details, refer to Releases on GitHub. ## n8n@1.85.4# View the commits for this version. **Release date:** 2025-03-27 This release contains a bug fix. For full release details, refer to Releases on GitHub. ## n8n@1.84.3# View the commits for this version. **Release date:** 2025-03-27 This release contains a bug fix. For full release details, refer to Releases on GitHub. ## n8n@1.84.2# View the commits for this version. **Release date:** 2025-03-26 This release contains a bug fix. For full release details, refer to Releases on GitHub. ## n8n@1.85.3# View the commits for this version. **Release date:** 2025-03-26 This release contains a bug fix. For full release details, refer to Releases on GitHub. ## n8n@1.85.2# View the commits for this version. **Release date:** 2025-03-25 This release contains a bug fix. For full release details, refer to Releases on GitHub. ## n8n@1.85.1# View the commits for this version. **Release date:** 2025-03-25 This release contains bug fixes. For full release details, refer to Releases on GitHub. ## n8n@1.85.0# View the commits for this version. **Release date:** 2025-03-24 This release contains a new node, a new credential, core updates, editor updates, node updates, and bug fixes. ### Folders# What can we say about folders? Well, they’re super handy for categorizing just about everything and they’re finally available for your n8n workflows. Tidy up your workspace with unlimited folders and nested folders. Search for workflows within folders. It’s one of the ways we’re making it easier to organize your n8n instances more effectively. **How to use it:** Create and manage folders within your personal space or within projects. You can also create workflows from within a folder. You may need to restart your instance in order to activate folders. 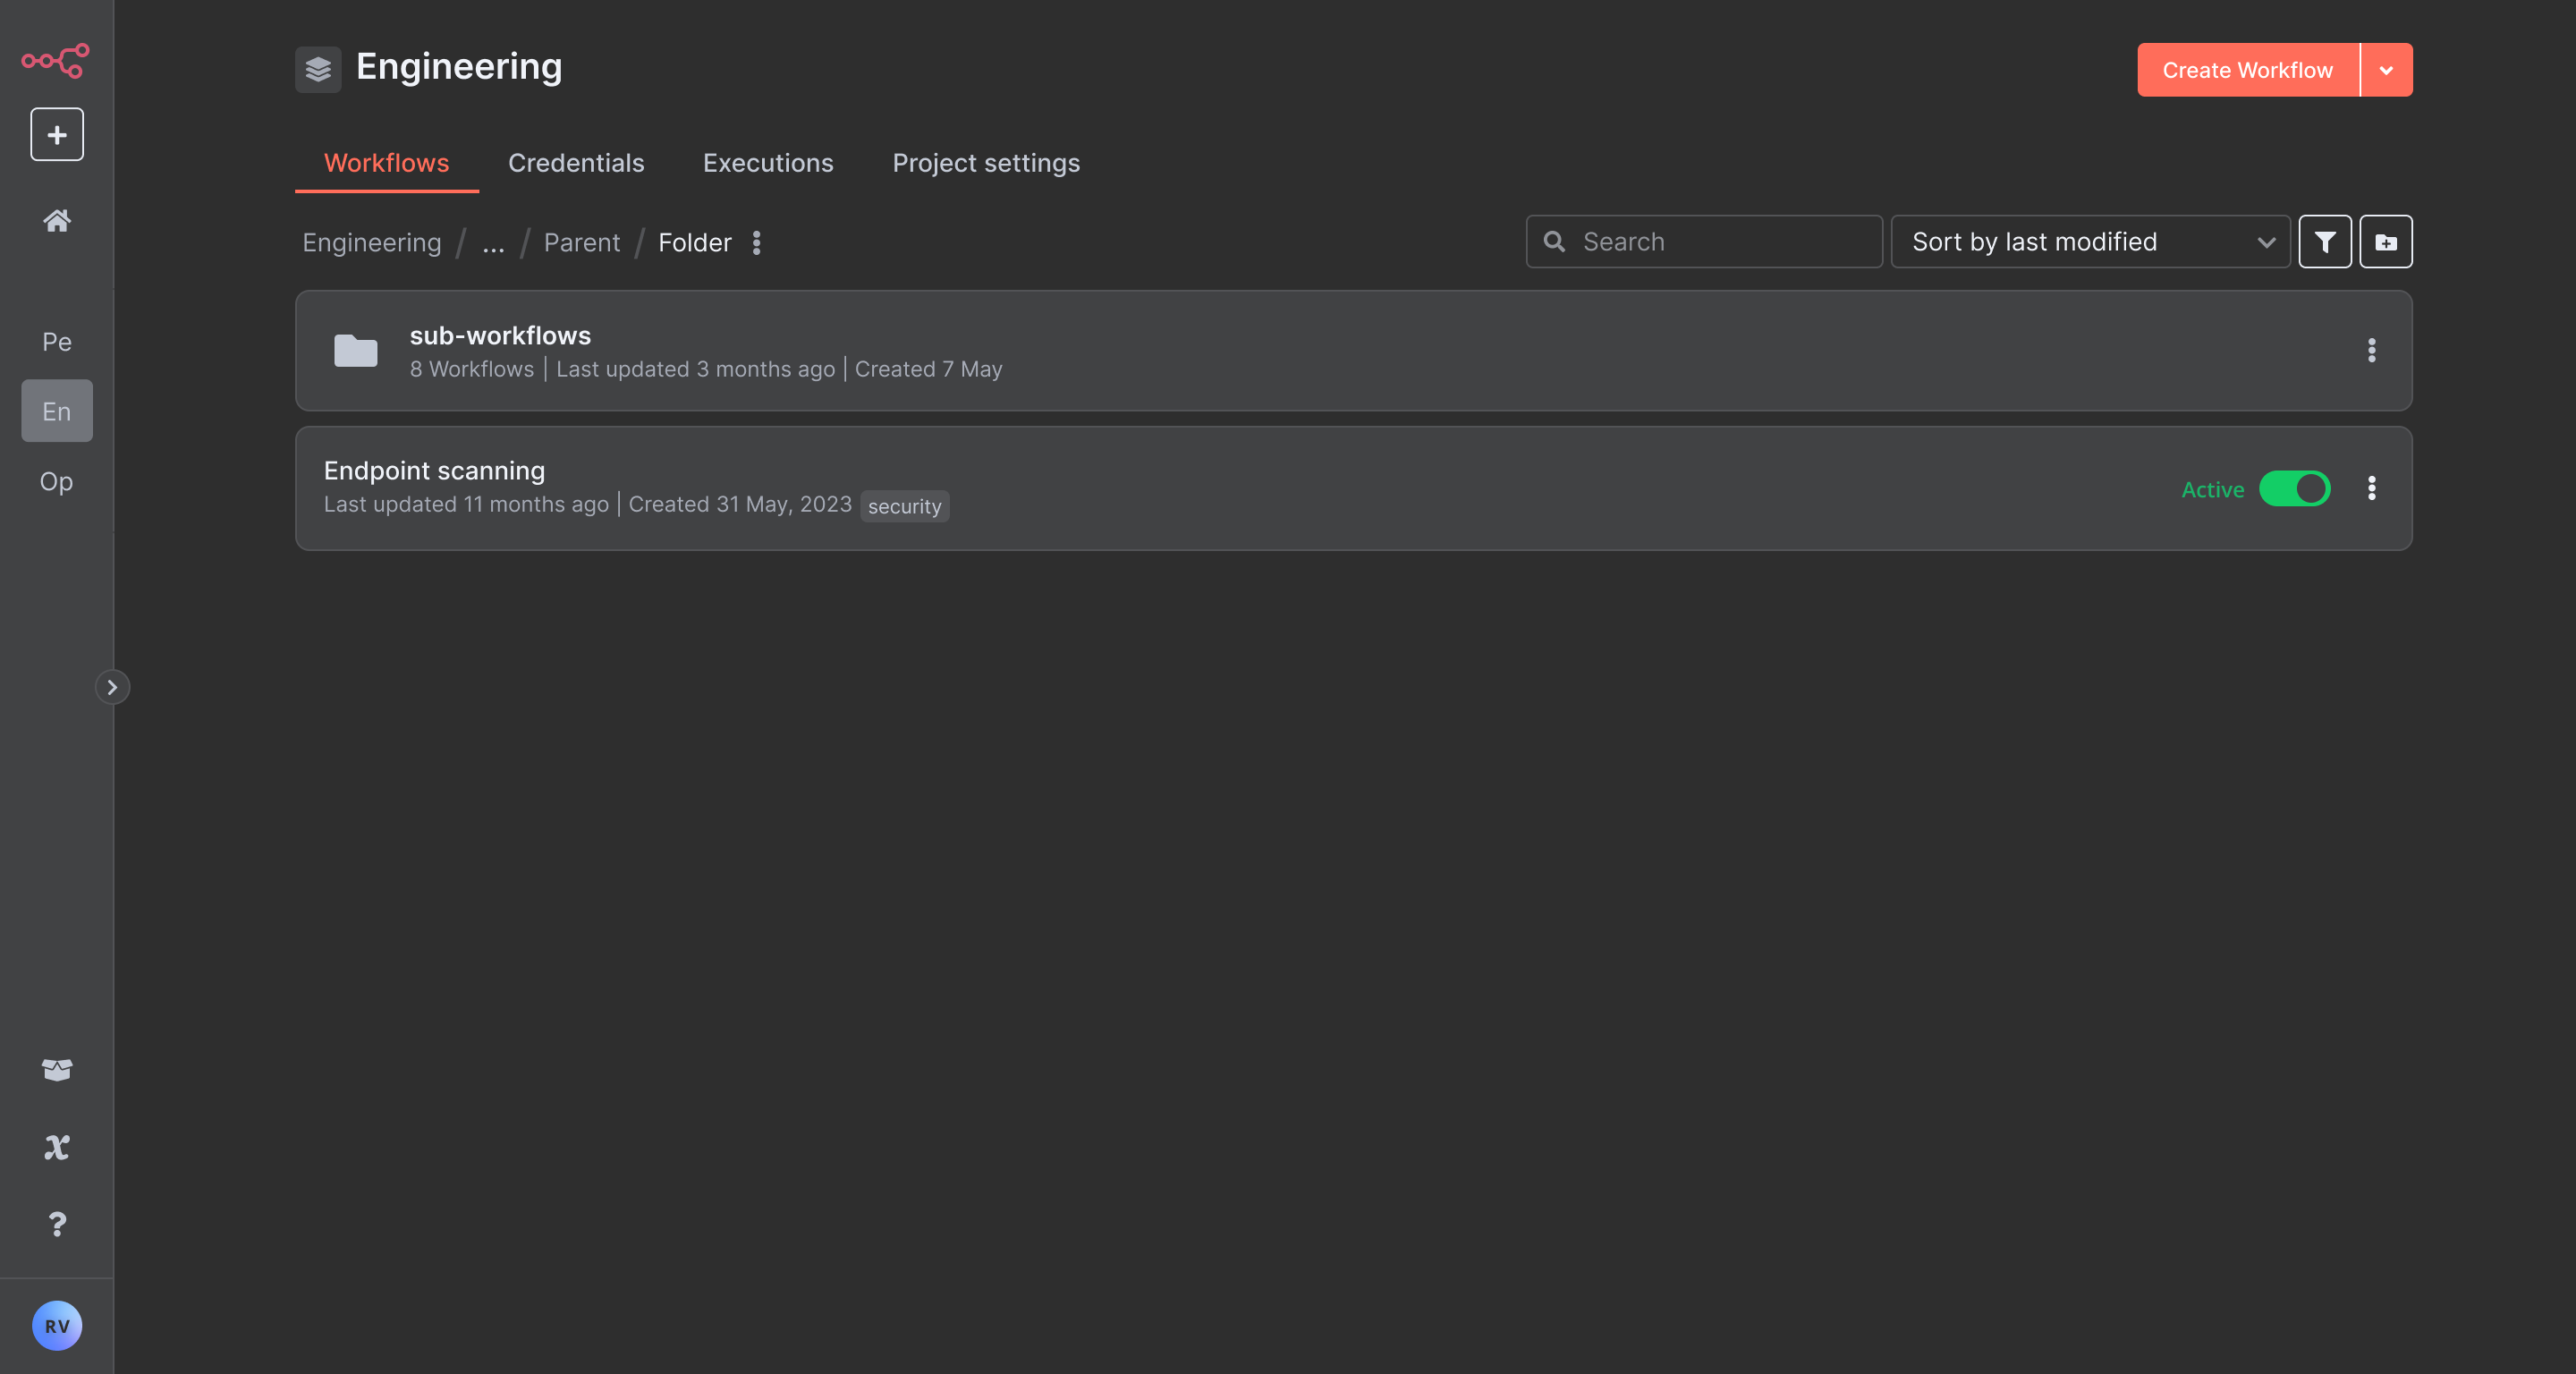 It's a folder alright Folders are available for all registered users so get started with decluttering your workspace now and look for more features (like drag and drop) to organize your instances soon. ### Enhancements to Form Trigger Node# Recent updates to the Form Trigger node have made it a more powerful tool for building business solutions. These enhancements provide more flexibility and customization, enabling teams to create visually engaging and highly functional workflows with forms. * **HTML customization:** Add custom HTML to forms, including embedded images and videos, for richer user experiences. * **Custom CSS support**: Apply custom styles to user-facing components to align forms with your brand’s look and feel. Adjust fonts, colors, and spacing for a seamless visual identity. * **Form previews:** Your form’s description and title will pull into previews of your form when sharing on social media or messaging apps, providing a more polished look. * **Hidden fields:** Use query parameters to add hidden fields, allowing you to pass data—such as a referral source—without exposing it to the user. * **New responses options:** Respond to user submissions in multiple ways including text, HTML, or a downloadable file (binary format). This enables forms to display rich webpages or deliver digital assets such as dynamically generated invoices or personalized certificates. 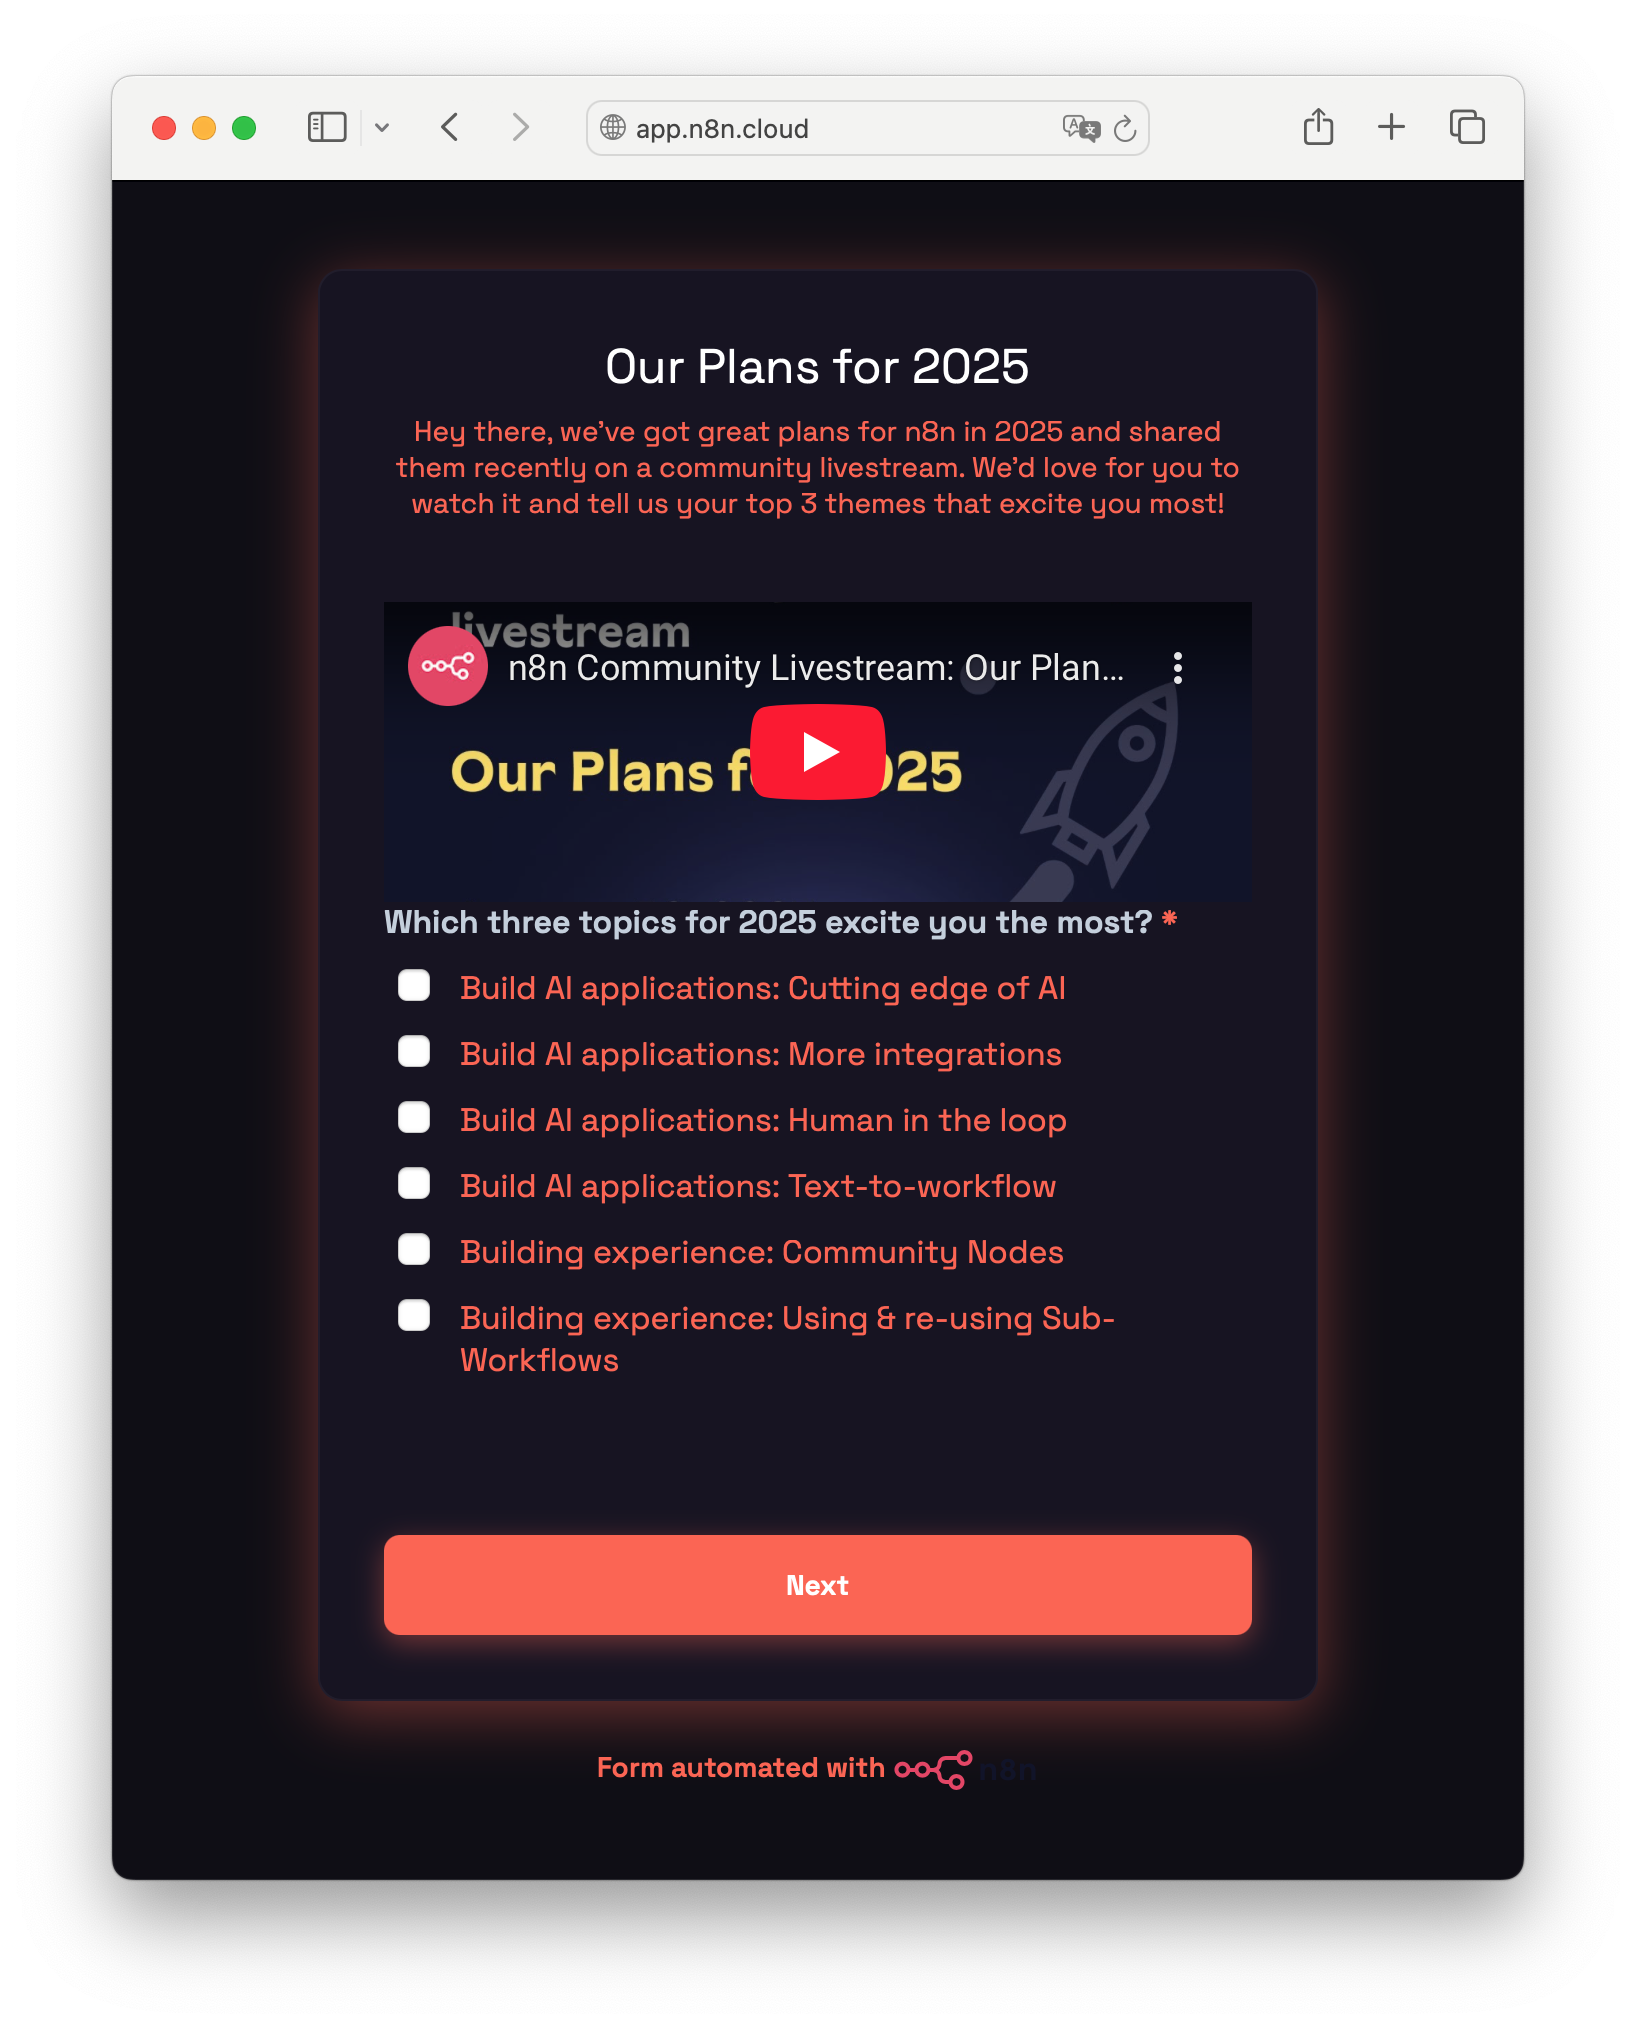 Form with custom CSS applied These improvements elevate the Form Trigger node beyond a simple workflow trigger, transforming it into a powerful tool for addressing use cases from data collection and order processing to custom content creation. ### Contributors# Fank For full release details, refer to Releases on GitHub. ## n8n@1.84.1# View the commits for this version. **Release date:** 2025-03-18 This release contains bug fixes. For full release details, refer to Releases on GitHub. ## n8n@1.84.0# View the commits for this version. **Release date:** 2025-03-17 This release contains a new node, node updates, editor updates, and bug fixes. ### Contributors# Pash10g For full release details, refer to Releases on GitHub. ## n8n@1.83.2# View the commits for this version. **Release date:** 2025-03-14 This release contains bug fixes. For full release details, refer to Releases on GitHub. ## n8n@1.82.4# View the commits for this version. **Release date:** 2025-03-14 This release contains a bug fix. For full release details, refer to Releases on GitHub. ## n8n@1.82.3# View the commits for this version. **Release date:** 2025-03-13 This release contains a bug fix. For full release details, refer to Releases on GitHub. ## n8n@1.83.1# View the commits for this version. **Release date:** 2025-03-12 This release contains bug fixes. For full release details, refer to Releases on GitHub. ## n8n@1.83.0# View the commits for this version. **Release date:** 2025-03-12 This release contains bug fixes and an editor update. ### Schema Preview# Schema Preview lets you view and work with a node’s expected output without executing it or adding credentials, keeping you in flow while building. * **See expected node outputs instantly.** View schemas for over 100+ nodes to help you design workflows efficiently without extra steps. * **Define workflow logic first, take care of credentials later.** Build your end-to-end workflow without getting sidetracked by credential setup. * **Avoid unwanted executions when building.** Prevent unnecessary API calls, unwanted data changes, or potential third-party service costs by viewing outputs without executing nodes. **How to use it:** * Add a node with Schema Preview support to your workflow. * Open the next node in the sequence - Schema Preview data appears in the Node Editor where you would typically find it in the Schema View. * Use Schema Preview fields just like other schema data - drag and drop them into parameters and settings as needed. Don’t forget to add the required credentials before putting your workflow into production. ### Contributors# pemontto Haru922 For full release details, refer to Releases on GitHub. ## n8n@1.82.2# View the commits for this version. **Release date:** 2025-03-12 This release contains bug fixes. For full release details, refer to Releases on GitHub. ## n8n@1.82.1# View the commits for this version. **Release date:** 2025-03-04 This release contains bug fixes. For full release details, refer to Releases on GitHub. ## n8n@1.82.0# View the commits for this version. **Release date:** 2025-03-03 This release contains core updates, editor updates, new nodes, node updates, new credentials, credential updates, and bug fixes. ### Tidy up# Tidy up instantly aligns nodes, centers stickies, untangles connections, and brings structure to your workflows. Whether you're preparing to share a workflow or just want to improve readability, this feature saves you time and makes your logic easier to follow. Clean, well-organized workflows aren't just nicer to look at—they’re also quicker to understand. **How to:** Open the workflow you want to tidy, then choose one of these options: * Click the **Tidy up** button in the bottom-left corner of the canvas (it looks like a broom 🧹) * Press **Shift + Alt + T** on your keyboard * Right-click anywhere on the canvas and select **Tidy up workflow** Want to tidy up just part of your workflow? Select the specific nodes you want to clean up first - Tidy up will only adjust those, along with any stickies behind them. ### Multiple API keys# n8n now supports multiple API keys, allowing users to generate and manage separate keys for different workflows or integrations. This improves security by enabling easier key rotation and isolation of credentials. Future updates will introduce more granular controls. 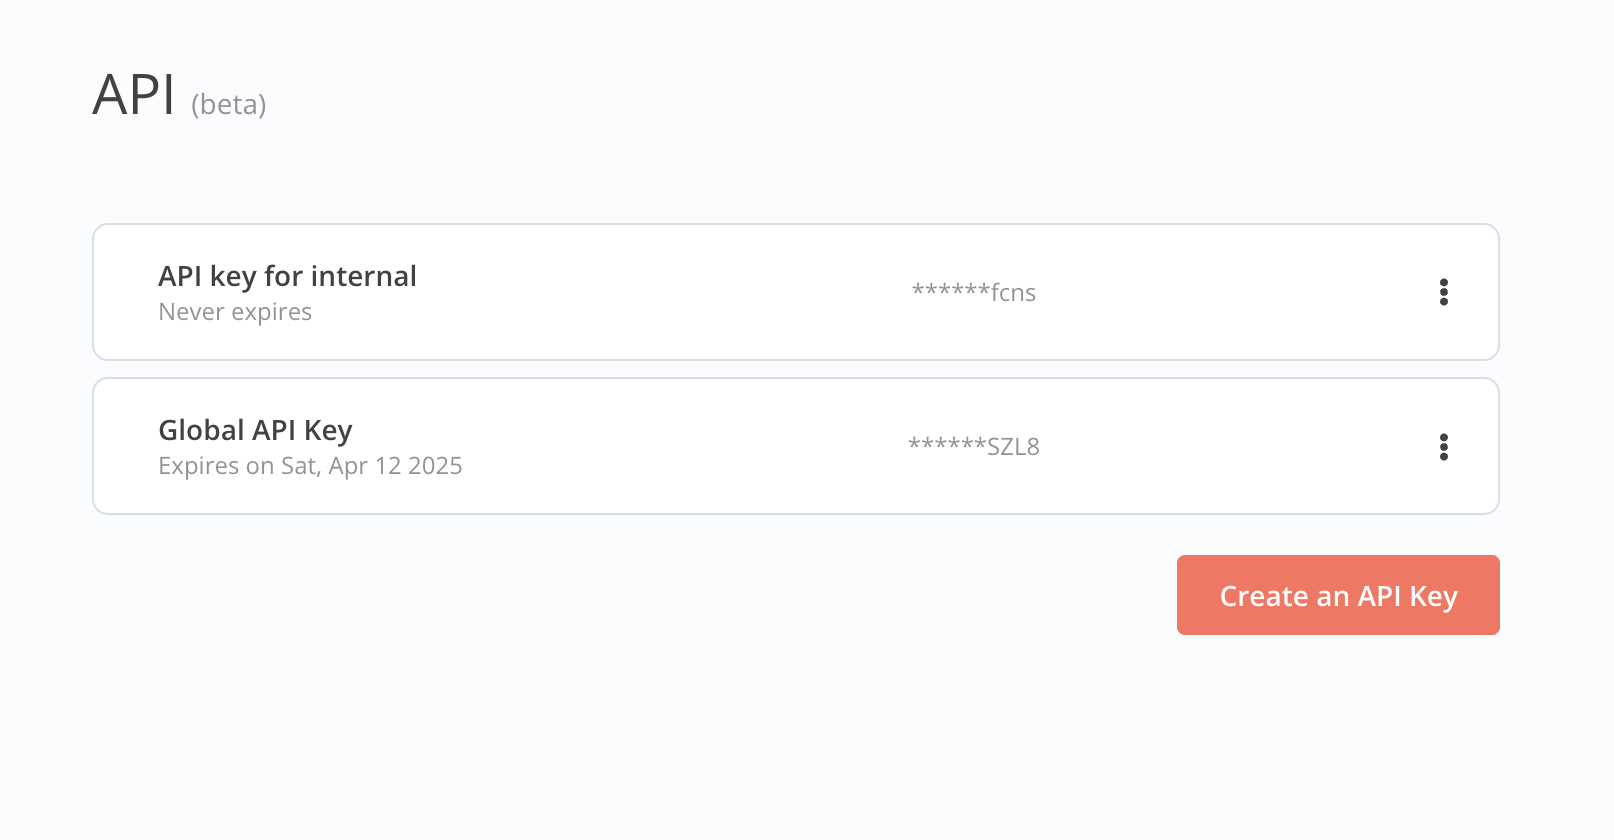 Multiple API keys ### Contributors# Rostammahabadi Lanhild matthiez feelgood-interface adina-hub For full release details, refer to Releases on GitHub. ## n8n@1.81.4# View the commits for this version. **Release date:** 2025-03-03 This release contains a bug fix. For full release details, refer to Releases on GitHub. ## n8n@1.81.3# View the commits for this version. **Release date:** 2025-03-03 This release contains bug fixes. For full release details, refer to Releases on GitHub. ## n8n@1.81.2# View the commits for this version. **Release date:** 2025-02-28 This release contains bug fixes. For full release details, refer to Releases on GitHub. ## n8n@1.80.5# View the commits for this version. **Release date:** 2025-02-28 This release contains a bug fix. For full release details, refer to Releases on GitHub. ## n8n@1.80.4# View the commits for this version. **Release date:** 2025-02-27 This release contains a bug fix. For full release details, refer to Releases on GitHub. ## n8n@1.81.1# View the commits for this version. **Release date:** 2025-02-27 This release contains bug fixes. For full release details, refer to Releases on GitHub. ## n8n@1.81.0# View the commits for this version. **Release date:** 2025-02-24 This release contains bug fixes, a core update, editor improvements, and a node update. ### Improved partial executions# The new execution engine for partial executions ensures that testing parts of a workflow in the builder closely mirrors production behaviour. This makes iterating with updated run-data faster and more reliable, particularly for complex workflows. Before, user would test parts of a workflow in the builder that didn't consistently reflect production behaviour, leading to unexpected results during development. This update aligns workflow execution in the builder with production behavior. Here is an example for loops: Before After For full release details, refer to Releases on GitHub. ## n8n@1.80.3# View the commits for this version. **Release date:** 2025-02-21 This release contains a bug fix. For full release details, refer to Releases on GitHub. ## n8n@1.79.4# View the commits for this version. **Release date:** 2025-02-21 This release contains a bug fix. For full release details, refer to Releases on GitHub. ## n8n@1.80.2# View the commits for this version. **Release date:** 2025-02-21 This release contains a bug fix. For full release details, refer to Releases on GitHub. ## n8n@1.79.3# View the commits for this version. **Release date:** 2025-02-21 This release contains a bug fix. For full release details, refer to Releases on GitHub. ## n8n@1.80.1# View the commits for this version. **Release date:** 2025-02-20 This release contains bug fixes. For full release details, refer to Releases on GitHub. ## n8n@1.79.2# View the commits for this version. **Release date:** 2025-02-20 This release contains bug fixes. For full release details, refer to Releases on GitHub. ## n8n@1.80.0# View the commits for this version. **Release date:** 2025-02-17 This release contains bug fixes and an editor improvement. For full release details, refer to Releases on GitHub. ## n8n@1.75.3# View the commits for this version. **Release date:** 2025-02-17 This release contains a bug fix. For full release details, refer to Releases on GitHub. ## n8n@1.74.4# View the commits for this version. **Release date:** 2025-02-17 This release contains a bug fix. For full release details, refer to Releases on GitHub. ## n8n@1.79.1# View the commits for this version. **Release date:** 2025-02-15 This release contains a bug fix. For full release details, refer to Releases on GitHub. ## n8n@1.78.1# View the commits for this version. **Release date:** 2025-02-15 This release contains a bug fix. For full release details, refer to Releases on GitHub. ## n8n@1.77.4# View the commits for this version. **Release date:** 2025-02-15 This release contains a bug fix. For full release details, refer to Releases on GitHub. ## n8n@1.76.4# View the commits for this version. **Release date:** 2025-02-15 This release contains a bug fix. For full release details, refer to Releases on GitHub. ## n8n@1.79.0# View the commits for this version. **Release date:** 2025-02-12 This release contains new features, node updates, and bug fixes. For full release details, refer to Releases on GitHub. ## n8n@1.77.3# View the commits for this version. **Release date:** 2025-02-06 This release contains a bug fix. For full release details, refer to Releases on GitHub. ## n8n@1.78.0# View the commits for this version. **Release date:** 2025-02-05 This release contains new features, node updates, and bug fixes. ### Contributors# mocanew Timtendo12 For full release details, refer to Releases on GitHub. ## n8n@1.77.2# View the commits for this version. **Release date:** 2025-02-04 This release contains bug fixes. For full release details, refer to Releases on GitHub. ## n8n@1.76.3# View the commits for this version. **Release date:** 2025-02-04 This release contains bug fixes. For full release details, refer to Releases on GitHub. ## n8n@1.77.1# View the commits for this version. **Release date:** 2025-02-03 This release contains bug fixes. For full release details, refer to Releases on GitHub. ## n8n@1.76.2# View the commits for this version. **Release date:** 2025-02-03 This release contains bug fixes. For full release details, refer to Releases on GitHub. ## n8n@1.77.0# View the commits for this version. **Release date:** 2025-01-29 This release contains new features, editor updates, new nodes, new credentials, node updates, and bug fixes. For full release details, refer to Releases on GitHub. ## n8n@1.76.1# View the commits for this version. **Release date:** 2025-01-23 This release contains a bug fix. For full release details, refer to Releases on GitHub. ## n8n@1.76.0# View the commits for this version. **Release date:** 2025-01-22 This release contains new features, editor updates, new credentials, node improvements, and bug fixes. ### Contributors# Stamsy GKdeVries For full release details, refer to Releases on GitHub. ## n8n@1.75.2# View the commits for this version. **Release date:** 2025-01-17 This release contains a bug fix. For full release details, refer to Releases on GitHub. ## n8n@1.74.3# View the commits for this version. **Release date:** 2025-01-17 This release contains a bug fix. For full release details, refer to Releases on GitHub. ## n8n@1.75.1# View the commits for this version. **Release date:** 2025-01-17 This release contains bug fixes. For full release details, refer to Releases on GitHub. ## n8n@1.74.2# View the commits for this version. **Release date:** 2025-01-17 This release contains bug fixes. For full release details, refer to Releases on GitHub. ## n8n@1.75.0# View the commits for this version. **Release date:** 2025-01-15 This release contains bug fixes and editor updates. ### Improved consistency across environments# We added new UX and automatic changes improvements resulting in a better consistency between your staging and production instances. Previously, users faced issues like: * Lack of visibility into required credential updates when pulling changes * Incomplete synchronization, where changes — such as deletions — weren’t always applied across environments * Confusing commit process, making it unclear what was being pushed or pulled We addressed these by: * Clearly indicating required credential updates when pulling changes * Ensuring deletions and other modifications sync correctly across environments * Improving commit selection to provide better visibility into what’s being pushed  Commit modal  Pull notification For full release details, refer to Releases on GitHub. ## n8n@1.74.1# View the commits for this version. **Release date:** 2025-01-09 This release contains a bug fix. For full release details, refer to Releases on GitHub. ## n8n@1.74.0# View the commits for this version. **Release date:** 2025-01-08 This release contains new features, a new node, node updates, performance improvements and bug fixes. ### Overhauled Code node editing experience# We added a ton of new helpers to the Code node, making edits of your code much faster and more comfortable. You get: * TypeScript autocomplete * TypeScript linting * TypeScript hover tips * Search and replace * New keyboard shortcuts based on the VSCode keymap * Auto-formatting using prettier (Alt+Shift+F) * Remember folded regions and history after refresh * Multi cursor * Type function in the Code node using JSDoc types * Drag and drop for all Code node modes * Indentation markers We build this on a web worker architecture so you won't have to suffer from performance degradation while typing. To get the full picture, check out our Studio update with Max and Elias, where they discuss and demo the new editing experience. 👇  Studio Update #04 ### New node: Microsoft Entra ID# Microsoft Entra ID (formerly known as Microsoft Azure Active Directory or Azure AD) is used for cloud-based identity and access management. The new node supports a wide range of Microsoft Entra ID features, which includes creating, getting, updating, and deleting users and groups, as well as adding users to and removing them from groups. ### Node updates# * AI Agent: Vector stores can now be directly used as tools for the agent * Code: Tons of new speed and convenience features, see above for details * Google Vertex Chat: Added option to specify the GCP region for the Google API credentials * HighLevel: Added support for calendar items We also added a custom projects icon selector on top of the available emojis. Pretty! ### Contributors# igatanasov Stamsy feelgood-interface For full release details, refer to Releases on GitHub. ## n8n@1.73.1# View the commits for this version. **Release date:** 2024-12-19 This release contains a bug fix. For full release details, refer to Releases on GitHub. ## n8n@1.73.0# View the commits for this version. **Release date:** 2024-12-19 This release contains node updates, performance improvements, and bug fixes. ### Node updates# * AI Agent: Updated descriptions for Chat Trigger options * Facebook Graph API: Updated for API v21.0 * Gmail: Added two new options for the `Send and wait` operation, free text and custom form * Linear Trigger: Added support for admin scope * MailerLite: Now supports the new API * Slack: Added two new options for the `Send and wait` operation, free text and custom form We also added credential support for SolarWinds IPAM and SolarWinds Observability. Last, but not least, we improved the schema view performance in the node details view by 90% and added drag and drop re-ordering to parameters. This comes in very handy in the If or Edit Fields nodes. ### Contributors# CodeShakingSheep mickaelandrieu Stamsy pbdco For full release details, refer to Releases on GitHub. ## n8n@1.72.1# View the commits for this version. **Release date:** 2024-12-12 This release contains bug fixes. For full release details, refer to Releases on GitHub. ## n8n@1.71.3# View the commits for this version. **Release date:** 2024-12-12 This release contains bug fixes. For full release details, refer to Releases on GitHub. ## n8n@1.72.0# View the commits for this version. **Release date:** 2024-12-11 This release contains node updates, usability improvements, and bug fixes. ### Node updates# * AI Transform: The `maximum context length` error now retries with reduced payload size * Redis: Added support for `continue on fail` ### Improved commit modal# We added filters and text search to the commit modal when working with Environments. This will make committing easier as we provide more information and better visibility. Environments are available on the Enterprise plan. For full release details, refer to Releases on GitHub. ## n8n@1.71.2# View the commits for this version. **Release date:** 2024-12-10 This release contains bug fixes. For full release details, refer to Releases on GitHub. ## n8n@1.70.4# View the commits for this version. **Release date:** 2024-12-10 This release contains bug fixes. For full release details, refer to Releases on GitHub. ## n8n@1.71.1# View the commits for this version. **Release date:** 2024-12-06 This release contains bug fixes. For full release details, refer to Releases on GitHub. ## n8n@1.70.3# View the commits for this version. **Release date:** 2024-12-05 This release contains bug fixes. For full release details, refer to Releases on GitHub. ## n8n@1.71.0# View the commits for this version. **Release date:** 2024-12-04 This release contains node updates, performance improvements, and bug fixes. ### Task runners for the Code node in public beta# We're introducing a significant performance upgrade to the Code node with our new Task runner system. This enhancement moves JavaScript code execution to a separate process, improving your workflow execution speed while adding better isolation.  Task runners overview Our benchmarks show up to 6x improvement in workflow executions using Code nodes - from approximately 6 to 35 executions per second. All these improvements happen under the hood, keeping your Code node experience exactly the same. The Task runner comes in two modes: * Internal mode (default): Perfect for getting started, automatically managing task runners as child processes * External mode: For advanced hosting scenarios requiring maximum isolation and security Currently, this feature is opt-in and can be enabled using environment variables. Once stable, it will become the default execution method for Code nodes. To start using Task runners today, check out the docs. ### Node updates# * AI Transform node: We improved the prompt for code generation to transform data * Code node: We added a warning if `pairedItem` is absent or could not be auto mapped For full release details, refer to Releases on GitHub. ## n8n@1.70.2# View the commits for this version. **Release date:** 2024-12-04 This release contains bug fixes. For full release details, refer to Releases on GitHub. ## n8n@1.70.1# View the commits for this version. **Release date:** 2024-11-29 This release contains bug fixes. For full release details, refer to Releases on GitHub. ## n8n@1.70.0# View the commits for this version. **Release date:** 2024-11-27 This release contains node updates, performance improvements and bug fixes. ### New canvas in beta# The new canvas is now the default setting for all users. It should bring significant performance improvements and adds a handy minimap. As it is still a beta version you can still revert to the previous version with the three dot menu. We're looking forward to your feedback. Should you encounter a bug, you will find a handy button to create an issue at the bottom of the new canvas as well. ### Node updates# * We added credential support for Zabbix to the HTTP request node * We added new OAuth2 credentials for Microsoft SharePoint * The Slack node now uses markdown for the approval message when using the `Send and Wait for Approval` operation ### Contributors# feelgood-interface adina-hub For full release details, refer to Releases on GitHub. ## n8n@1.68.1# View the commits for this version. **Release date:** 2024-11-26 This release contains bug fixes. For full release details, refer to Releases on GitHub. ## n8n@1.69.2# View the commits for this version. **Release date:** 2024-11-26 This release contains a bug fix. For full release details, refer to Releases on GitHub. ## n8n@1.69.1# View the commits for this version. **Release date:** 2024-11-25 This release contains bug fixes. For full release details, refer to Releases on GitHub. ## n8n@1.69.0# View the commits for this version. **Release date:** 2024-11-20 This release contains a new feature, node improvements and bug fixes. ### Sub-workflow debugging# We made it much easier to debug sub-workflows by improving their accessibility from the parent workflow. For full release details, refer to Releases on GitHub. ## n8n@1.68.0# View the commits for this version. **Release date:** 2024-11-13 This release contains node updates, performance improvements and many bug fixes. #### New AI agent canvas chat# We revamped the chat experience for AI agents on the canvas. A neatly organized view instead of a modal hiding the nodes. You can now see the canvas, chat and logs at the same time when testing your workflow. For full release details, refer to Releases on GitHub. ## n8n@1.67.1# View the commits for this version. **Release date:** 2024-11-07 This release contains a bug fix. For full release details, refer to Releases on GitHub. ## n8n@1.67.0# View the commits for this version. **Release date:** 2024-11-06 This release contains node updates and bug fixes. ### Node updates# * AI Transform: Improved usability * Anthropic Chat Model Node: Added Haiku 3.5 support * Convert to File: Added delimiter option for writing to CSV * Gmail Trigger: Added option to filter for draft messages * Intercom: Credential can now be used in the HTTP Request node * Rapid7 InsightVM: Added credential support For full release details, refer to Releases on GitHub. ## n8n@1.66.0# View the commits for this version. **Release date:** 2024-10-31 This release contains performance improvements, a node update and bug fixes. ### Node update# * Anthropic Chat Model: Added support for claude-3-5-sonnet-20241022 We made updates to how projects and workflow ownership are displayed making them easier to understand and navigate. We further improved the performance logic of partial executions, leading to a smoother and more enjoyable building experience. ### New n8n canvas alpha# We have enabled the alpha version of our new canvas. The canvas is the ‘drawing board’ of the n8n editor, and we’re working on a full rewrite. Your feedback and testing will help us improve it. Read all about it on our community forum. For full release details, refer to Releases on GitHub. ## n8n@1.65.2# View the commits for this version. **Release date:** 2024-10-28 This release contains bug fixes. For full release details, refer to Releases on GitHub. ## n8n@1.64.3# View the commits for this version. **Release date:** 2024-10-25 This release contains bug fixes. For full release details, refer to Releases on GitHub. ## n8n@1.65.1# View the commits for this version. **Release date:** 2024-10-25 This release contains bug fixes. For full release details, refer to Releases on GitHub. ## n8n@1.65.0# View the commits for this version. **Release date:** 2024-10-24 Breaking change What changed? Queue polling via the environment variable `QUEUE_RECOVERY_INTERVAL` has been removed. When is action necessary? If you have set `QUEUE_RECOVERY_INTERVAL`, you can remove it as it no longer has any effect. This release contains a new features, new nodes, node enhancements, and bug fixes. ### New node: n8n Form# Use the n8n Form node to create user-facing forms with multiple pages. You can add other nodes with custom logic between to process user input. Start the workflow with a n8n Form Trigger.  A multi-page form with branching Additionally you can: * Set default selections with query parameters * Define the form with a JSON array of objects * Show a completion screen and redirect to another URL ### Node updates# New nodes: * Google Business Profile and Google Business Profile Trigger: Use these to integrate Google Business Profile reviews and posts with your workflows Enhanced nodes: * AI Agent: Removed the requirement to add at least one tool * GitHub: Added workflows as a resource operation * Structured Output Parser: Added more user-friendly error messages For additional security, we improved how we handle multi-factor authentication, hardened config file permissions and introduced JWT for the public API. For better performance, we improved how partial executions are handled in loops. For full release details, refer to Releases on GitHub. ### Contributors# * Idan Fishman ## n8n@1.64.2# View the commits for this version. **Release date:** 2024-10-24 This release contains a bug fix. For full release details, refer to Releases on GitHub. ## n8n@1.64.1# View the commits for this version. **Release date:** 2024-10-21 This release contains a bug fix. For full release details, refer to Releases on GitHub. ## n8n@1.64.0# View the commits for this version. **Release date:** 2024-10-16 This release contains a new node, node enhancements, performance improvements and bug fixes. ### Enhanced node: Remove Duplicates# The Remove Duplicates node got a major makeover with the addition of two new operations: * Remove Items Processed in Previous Executions: Compare items in the current input to items from previous executions and remove duplicates * Clear Deduplication History: Wipe the memory of items from previous executions. This makes it easier to only process new items from any data source. For example, you can now more easily poll a Google sheet for new entries by `id` or remove duplicate orders from the same customer by comparing their `order date`. The great thing is, you can now do this within **and across** workflow runs. ### New node: Gong# The new node for Gong allows you to get users and calls to process them further in n8n. Very useful for sales related workflows. For full release details, refer to Releases on GitHub. ### Contributors# * Sören Uhrbach ## n8n@1.63.4# View the commits for this version. **Release date:** 2024-10-15 This release contains a bug fix. For full release details, refer to Releases on GitHub. ## n8n@1.62.6# View the commits for this version. **Release date:** 2024-10-15 This release contains a bug fix. For full release details, refer to Releases on GitHub. ## n8n@1.63.3# View the commits for this version. **Release date:** 2024-10-15 This release contains a bug fix. For full release details, refer to Releases on GitHub. ## n8n@1.63.2# View the commits for this version. **Release date:** 2024-10-11 This release contains a bug fix. For full release details, refer to Releases on GitHub. ## n8n@1.62.5# View the commits for this version. **Release date:** 2024-10-11 This release contains a bug fix. For full release details, refer to Releases on GitHub. ## n8n@1.63.1# View the commits for this version. **Release date:** 2024-10-11 This release contains a bug fix. For full release details, refer to Releases on GitHub. ## n8n@1.62.4# View the commits for this version. **Release date:** 2024-10-11 This release contains a bug fix. For full release details, refer to Releases on GitHub. ## n8n@1.63.0# View the commits for this version. **Release date:** 2024-10-09 Breaking change What changed? * The worker server used to bind to IPv6 by default. It now binds to IPv4 by default. * The worker server's `/healthz` used to report healthy status based on database and Redis checks. It now reports healthy status regardless of database and Redis status, and the database and Redis checks are part of `/healthz/readiness`. When is action necessary? * If you experience a port conflict error when starting a worker server using its default port, set a different port for the worker server with `QUEUE_HEALTH_CHECK_PORT`. * If you are relying on database and Redis checks for worker health status, switch to checking `/healthz/readiness` instead of `/healthz`. This release contains new features, node enhancements and bug fixes. ### Node updates# * OpenAI: Added the option to choose between the default memory connector to provide memory to the assistant or to specify a thread ID * Gmail and Slack: Added custom approval operations to have a human in the loop of a workflow We have also optimized the worker health checks (see breaking change above). Each credential now has a seperate url you can link to. This makes sharing much easier. For full release details, refer to Releases on GitHub. ### Contributors# Pemontto ## n8n@1.62.3# View the commits for this version. **Release date:** 2024-10-08 This release contains bug fixes. For full release details, refer to Releases on GitHub. ## n8n@1.62.2# View the commits for this version. **Release date:** 2024-10-07 This release contains bug fixes. For full release details, refer to Releases on GitHub. ## n8n@1.62.1# View the commits for this version. **Release date:** 2024-10-02 This release contains new features, node enhancements and bug fixes. Skipped 1.62.0 We skipped 1.62.0 and went straight to 1.62.1 with an additional fix. #### Additional nodes as tools# Additionally, we have added a `$fromAI()` placeholder function to use with tools, allowing you to dynamically pass information from the models to the connected tools. This function works similarly to placeholders used elsewhere in n8n. Both of these new features enable you to build even more powerful AI agents by drawing directly from the apps your business uses. This makes integrating LLMs into your business processes even easier than before. ### Node updates# * Google BigQuery: Added option to return numeric values as integers and not strings * HTTP Request: Added credential support for Sysdig * Invoice Ninja: Additional query params for getAll requests * Question and Answer Chain: Added the option to use a custom prompt Drag and drop insertion on cursor position from schema view is now also enabled for code, SQL and Html fields in nodes. Customers with an enterprise license can now rate, tag and highlight execution data in the executions view. To use highlighting, add an Execution Data Node (or Code node) to the workflow to set custom executions data. For full release details, refer to Releases on GitHub. ### Contributors# Benjamin Roedell CodeShakingSheep manuelbcd Miguel Prytoluk ## n8n@1.61.0# View the commits for this version. **Release date:** 2024-09-25 This release contains new features, node enhancements and bug fixes. ### Node updates# * Brandfetch: Updated to use the new API * Slack: Made adding or removing the workflow link to a message easier Big datasets now render faster thanks to virtual scrolling and execution annotations are harder to delete. For full release details, refer to Releases on GitHub. ## n8n@1.59.4# View the commits for this version. **Release date:** 2024-09-20 This release contains bug fixes. For full release details, refer to Releases on GitHub. ## n8n@1.60.1# View the commits for this version. **Release date:** 2024-09-20 This release contains bug fixes. For full release details, refer to Releases on GitHub. ## n8n@1.60.0# View the commits for this version. **Release date:** 2024-09-18 This release contains new features, node enhancements and bug fixes. You can now customize the maximum file size when uploading files within forms to webhooks. The environment variable to set for this is `N8N_FORMDATA_FILE_SIZE_MAX`. The default setting is 200MiB. ### Node updates# Enhanced nodes: * Invoice Ninja: Added actions for bank transactions * OpenAI: Added O1 models to the model select For full release details, refer to Releases on GitHub. ### Contributors# CodeShakingSheep ## n8n@1.59.3# View the commits for this version. **Release date:** 2024-09-18 This release contains a bug fix. For full release details, refer to Releases on GitHub. ## n8n@1.59.2# View the commits for this version. **Release date:** 2024-09-17 This release contains a bug fix. For full release details, refer to Releases on GitHub. ## n8n@1.59.1# View the commits for this version. **Release date:** 2024-09-16 This release contains bug fixes. For full release details, refer to Releases on GitHub. ## n8n@1.58.2# View the commits for this version. **Release date:** 2024-09-12 This release contains bug fixes. For full release details, refer to Releases on GitHub. ## n8n@1.59.0# View the commits for this version. **Release date:** 2024-09-11 Chat Trigger If you are using the Chat Trigger in "Embedded Chat" mode, with authentication turned on, you could see errors connecting to n8n if the authentication on the sending/embedded side is mis-configured. This release contains bug fixes and feature enhancements. For full release details, refer to Releases on GitHub. ### Contributors# oscarpedrero ## n8n@1.58.1# View the commits for this version. **Release date:** 2024-09-06 This release contains bug fixes. For full release details, refer to Releases on GitHub. ## n8n@1.58.0# View the commits for this version. **Release date:** 2024-09-05 This release contains new features, bug fixes and feature enhancements. #### New node: PGVector Vector Store# This release adds the PGVector Vector Store node. Use this node to interact with the PGVector tables in your PostgreSQL database. You can insert, get, and retrieve documents from a vector table to provide them to a retriever connected to a chain. #### See active collaborators on workflows# We added collaborator avatars back to the workflow canvas. You will see other users who are active on the workflow, preventing you from overriding each other's work.  Collaboration avatars For full release details, refer to Releases on GitHub. ## n8n@1.57.0# View the commits for this version. **Release date:** 2024-08-28 This release contains new features and bug fixes. #### Improved execution queue handling# We are exposing new execution queue metrics to give users more visibility of the queue length. This helps to inform decisions on horizontal scaling, based on queue status. We have also made querying executions faster. #### New credentials for the HTTP Request node# We added credential support for Datadog, Dynatrace, Elastic Security, Filescan, Iris, and Malcore to the HTTP Request node making it easier to use existing credentials. We also made it easier to select workflows as tools when working with AI agents by implementing a new `workflow selector` parameter type. For full release details, refer to Releases on GitHub. ### Contributors# Bram Kn ## n8n@1.56.2# View the commits for this version. **Release date:** 2024-08-26 This release contains a bug fix. For full release details, refer to Releases on GitHub. ## n8n@1.56.1# View the commits for this version. **Release date:** 2024-08-23 This release contains bug fixes. For full release details, refer to Releases on GitHub. ## n8n@1.56.0# View the commits for this version. **Release date:** 2024-08-21 This release contains node updates, security and bug fixes. For full release details, refer to Releases on GitHub. ### Contributors# CodeShakingSheep Oz Weiss For full release details, refer to Releases on GitHub. ## n8n@1.55.3# View the commits for this version. **Release date:** 2024-08-16 This release contains bug fixes. For full release details, refer to Releases on GitHub. ## n8n@1.55.2# View the commits for this version. **Release date:** 2024-08-16 This release contains bug fixes. For full release details, refer to Releases on GitHub. ## n8n@1.55.1# View the commits for this version. **Release date:** 2024-08-15 This release contains bug fixes. For full release details, refer to Releases on GitHub. ## n8n@1.54.4# View the commits for this version. **Release date:** 2024-08-15 This release contains bug fixes. For full release details, refer to Releases on GitHub. ## n8n@1.54.3# View the commits for this version. **Release date:** 2024-08-15 This release contains bug fixes. For full release details, refer to Releases on GitHub. ## n8n@1.54.2# View the commits for this version. **Release date:** 2024-08-14 This release contains bug fixes. For full release details, refer to Releases on GitHub. ## n8n@1.55.0# View the commits for this version. **Release date:** 2024-08-14 Breaking change The N8N\_BLOCK\_FILE\_ACCESS\_TO\_N8N\_FILES environment variable now also blocks access to n8n's static cache directory at ~/.cache/n8n/public. If you are writing to or reading from a file at n8n's static cache directory via a node, e.g. Read/Write Files from Disk, please update your node to use a different path. This release contains a new feature, a new node, a node update and bug fixes. #### Override the npm registry# This release adds the option to override the npm registry for installing community packages. This is a paid feature. We now also prevent npm downloading community packages from a compromised npm registry by explicitly using --registry in all npm install commands. #### New node: AI Transform# This release adds the AI Transform node. Use the AI Transform node to generate code snippets based on your prompt. The AI is context-aware, understanding the workflow’s nodes and their data types. The node is only available on Cloud plans. #### New node: Okta# This release adds the Okta node. Use the Okta node to automate work in Okta and integrate Okta with other applications. n8n has built-in support for a wide range of Okta features, which includes creating, updating, and deleting users. ### Node updates# Enhanced node: * MySQL This release also adds the new schema view for the expression editor modal. For full release details, refer to Releases on GitHub. ## n8n@1.54.1# View the commits for this version. **Release date:** 2024-08-13 This release contains a bug fix. For full release details, refer to Releases on GitHub. ## n8n@1.53.2# View the commits for this version. **Release date:** 2024-08-08 This release contains a bug fix. For full release details, refer to Releases on GitHub. ## n8n@1.54.0# View the commits for this version. **Release date:** 2024-08-07 This release contains new features, node enhancements, bug fixes and updates to our API. ### API update# Our public REST API now supports additional operations: * Create, delete, and edit roles for users * Create, read, update and delete projects Find the details in the API reference. ### Contributors# CodeShakingSheep Javier Ferrer González Mickaël Andrieu Oz Weiss Pemontto For full release details, refer to Releases on GitHub. ## n8n@1.45.2# View the commits for this version. **Release date:** 2024-08-06 This release contains a bug fix. For full release details, refer to Releases on GitHub. ## n8n@1.53.1# View the commits for this version. **Release date:** 2024-08-02 This release contains bug fixes. For full release details, refer to Releases on GitHub. ## n8n@1.53.0# View the commits for this version. **Release date:** 2024-07-31 This release contains new features, new nodes, node enhancements, bug fixes and updates to our API. #### Added Google Cloud Platform Secrets Manager support# This release adds Google Cloud Platform Secrets Manager to the list of external secret stores. We already support AWS secrets, Azure Key Vault, Infisical and HashiCorp Vault. External secret stores are available under an enterprise license. This release adds the Information Extractor node. The node is specifically tailored for information extraction tasks. It uses Structured Output Parser under the hood, but provides a simpler way to extract information from text in a structured JSON form. #### New node: Sentiment Analysis# This release adds the Sentiment Analysis node. The node leverages LLMs to analyze and categorize the sentiment of input text. Users can easily integrate this node into their workflows to perform sentiment analysis on text data. The node is flexible enough to handle various use cases, from basic positive/negative classification to more nuanced sentiment categories. ### Node updates# Enhanced nodes: * Calendly Trigger * HTTP Request * n8n Form Trigger * Shopify ### API update# Our public REST API now supports additional operations: * Create, read, and delete for variables * Filtering workflows by project * Transferring workflows Find the details in the API reference. ### Contributors# feelgood-interface Oz Weiss For full release details, refer to Releases on GitHub. ## n8n@1.52.2# View the commits for this version. **Release date:** 2024-07-31 This release contains bug fixes. For full release details, refer to Releases on GitHub. ## n8n@1.52.1# View the commits for this version. **Release date:** 2024-07-26 This release contains bug fixes. For full release details, refer to Releases on GitHub. ## n8n@1.51.2# View the commits for this version. **Release date:** 2024-07-26 This release contains bug fixes. For full release details, refer to Releases on GitHub. ## n8n@1.52.0# View the commits for this version. **Release date:** 2024-07-25 Breaking change Prometheus metrics enabled via N8N\_METRICS\_INCLUDE\_DEFAULT\_METRICS and N8N\_METRICS\_INCLUDE\_API\_ENDPOINTS were fixed to include the default n8n\_ prefix. If you are using Prometheus metrics from these categories and are using a non-empty prefix, please update those metrics to match their new prefixed names. This release contains new features, node enhancements and bug fixes. #### Added Azure Key Vault support# This release adds Azure Key Vault to the list of external secret stores. We already support AWS secrets, Infisical and HashiCorp Vault and are working on Google Secrets Manager. External secret stores are available under an enterprise license. ### Node updates# Enhanced nodes: * Pinecone Vector Store * Supabase Vector Store * Send Email Deprecated nodes: * OpenAI Model: You can use the OpenAI Chat Model instead * Google Palm Chat Model: You can use Google Vertex or Gemini instead * Google Palm Model: You can use Google Vertex or Gemini instead ## n8n@1.51.1# View the commits for this version. **Release date:** 2024-07-23 This release contains bug fixes. For full release details, refer to Releases on GitHub. ## n8n@1.50.2# View the commits for this version. **Release date:** 2024-07-23 This release contains bug fixes. For full release details, refer to Releases on GitHub. ## n8n@1.51.0# View the commits for this version. **Release date:** 2024-07-18 This release contains new nodes, node enhancements and bug fixes. For full release details, refer to Releases on GitHub. ### Node updates# * Enhanced nodes: Asana ## n8n@1.50.1# View the commits for this version. **Release date:** 2024-07-16 This release contains bug fixes. For full release details, refer to Releases on GitHub. ## n8n@1.50.0# View the commits for this version. **Release date:** 2024-07-10 This release contains node enhancements and bug fixes. ### Node updates# * Enhanced nodes: Chat Trigger, Google Cloud Firestore, Qdrant Vector Store, Splunk, Telegram * Deprecated node: Orbit (product shut down) ### Beta Feature Removal# The Ask AI beta feature for the HTTP Request node has been removed from this version ### Contributors# Stanley Yoshinori Takamatsu CodeShakingSheep jeanpaul adrian-martinez-onestic Malki Davis ## n8n@1.49.0# View the commits for this version. **Release date:** 2024-07-03 This release contains a new node, node enhancements, and bug fixes. ### Node updates# * New node added: Vector Store Tool for the AI Agent * Enhanced nodes: Zep Cloud Memory, Copper, Embeddings Cohere, GitHub, Merge, Zammad For full release details, refer to Releases on GitHub. ### Contributors# Jochem KhDu Nico Weichbrodt Pavlo Paliychuk ## n8n@1.48.3# View the commits for this version. **Release date:** 2024-07-03 This release contains bug fixes. For full release details, refer to Releases on GitHub. ## n8n@1.47.3# View the commits for this version. **Release date:** 2024-07-03 This release contains bug fixes. For full release details, refer to Releases on GitHub. ## n8n@1.48.2# View the commits for this version. **Release date:** 2024-07-01 This release contains bug fixes. For full release details, refer to Releases on GitHub. ## n8n@1.47.2# View the commits for this version. **Release date:** 2024-07-01 This release contains bug fixes. For full release details, refer to Releases on GitHub. ## n8n@1.48.1# View the commits for this version. **Release date:** 2024-06-27 This release contains bug fixes. For full release details, refer to Releases on GitHub. ## n8n@1.48.0# View the commits for this version. **Release date:** 2024-06-27 This release contains bug fixes and feature enhancements. For full release details, refer to Releases on GitHub. ### Contributors# KubeAl ## n8n@1.47.1# View the commits for this version. **Release date:** 2024-06-26 This is a bug fix release. For full release details, refer to Releases on GitHub. ## n8n@1.47.0# View the commits for this version. **Release date:** 2024-06-20 Breaking change Calling `$(...).last()` (or `(...).first()` or `$(...).all()`) without arguments now returns the last item (or first or all items) of the output that connects two nodes. Previously, it returned the item/items of the first output of that node. Refer to the breaking changes log for details. This release contains bug fixes, feature enhancements, a new node, node enhancements and performance improvements. For full release details, refer to Releases on GitHub. #### New node: HTTP request tool# This release adds the HTTP request tool. You can use it with an AI agent as a tool to collect information from a website or API. Refer to the HTTP request tool for details. ### Contributors# Daniel ekadin-mtc Eric Francis Josh Sorenson Mohammad Alsmadi Nikolai T. Jensen n8n-ninja pebosi Taylor Hoffmann ## n8n@1.45.1# View the commits for this version. **Release date:** 2024-06-12 This is a bug fix release. For full release details, refer to Releases on GitHub. ## n8n@1.46.0# View the commits for this version. **Release date:** 2024-06-12 This release contains feature enhancements, node enhancements, and bug fixes. For full release details, refer to Releases on GitHub. ### Contributors# Jean Khawand pemontto Valentin Coppin ## n8n@1.44.2# View the commits for this version. **Release date:** 2024-06-12 This is a bug fix release. For full release details, refer to Releases on GitHub. ## n8n@1.42.2# View the commits for this version. **Release date:** 2024-06-10 This is a bug fix release. For full release details, refer to Releases on GitHub. ## n8n@1.45.0# View the commits for this version. **Release date:** 2024-06-06 This release contains new features, node enhancements, and bug fixes. For full release details, refer to Releases on GitHub. ## n8n@1.44.1# View the commits for this version. **Release date:** 2024-06-03 This is a bug fix release. For full release details, refer to Releases on GitHub. ## n8n@1.44.0# View the commits for this version. **Release date:** 2024-05-30 This release contains new features, node enhancements, and bug fixes. For full release details, refer to Releases on GitHub. ## n8n@1.43.1# View the commits for this version. **Release date:** 2024-05-28 This is a bug fix release. For full release details, refer to Releases on GitHub. ## n8n@1.43.0# View the commits for this version. **Release date:** 2024-05-22 This release contains new features, node enhancements, and bug fixes. Backup recommended Although this release doesn't include a breaking change, it is a significant update including database migrations. n8n recommends backing up your data before updating to this version. Credential sharing required for manual executions Instance owners and admins: you will see changes if you try to manually execute a workflow where the credentials aren't shared with you. Manual workflow executions now use the same permissions checks as production executions, meaning you can't do a manual execution of a workflow if you don't have access to the credentials. Previously, owners and admins could do manual executions without credentials being shared with them. To resolve this, the credential creator needs to share the credential with you. #### New feature: Projects# With projects and roles, you can give your team access to collections of workflows and credentials, rather than having to share each workflow and credential individually. Simultaneously, you tighten security by limiting access to people on the relevant team. Refer to the RBAC documentation for information on creating projects and using roles. The number of projects and role types vary depending on your plan. Refer to Pricing for details. ### Other highlights# * Improved memory support for OpenAI assistants. ### Rolling back to a previous version# If you update to this version, then decide you need to role back: Self-hosted n8n: 1. Delete any RBAC projects you created. 2. Revert the database migrations using `n8n db:revert`. Cloud: contact help@n8n.io. ### Contributors# Ayato Hayashi Daniil Zobov Guilherme Barile Romain MARTINEAU ## n8n@1.42.1# View the commits for this version. **Release date:** 2024-05-20 This is a bug fix release. For full release details, refer to Releases on GitHub. ## n8n@1.41.1# View the commits for this version. **Release date:** 2024-05-16 This is a bug fix release. For full release details, refer to Releases on GitHub. ## n8n@1.42.0# View the commits for this version. **Release date:** 2024-05-15 This release contains new features, node enhancements, and bug fixes. Note that this release removes the AI error debugger. We're working on a new and improved version. #### New feature: Tools Agent# This release adds a new option to the Agent node: the Tools Agent. This agent has an enhanced ability to work with tools, and can ensure a standard output format. This is now the recommended default agent. For full release details, refer to Releases on GitHub. ### Contributors# Mike Quinlan guangwu ## n8n@1.41.0# View the commits for this version. **Release date:** 2024-05-08 This release contains new features, node enhancements, and bug fixes. Note that this release temporarily disables the AI error helper. For full release details, refer to Releases on GitHub. ### Contributors# Florin Lungu ## n8n@1.40.0# View the commits for this version. **Release date:** 2024-05-02 Breaking change Please note that this version contains a breaking change for instances using a Postgres database. The default value for the DB\_POSTGRESDB\_USER environment variable was switched from `root` to `postgres`. Refer to the breaking changes log for details. This release contains new features, new nodes, node enhancements, and bug fixes. #### New feature: Ask AI in the HTTP node# You can now ask AI to help create API requests in the HTTP Request node: 1. In the HTTP Request node, select **Ask AI**. 2. Enter the **Service** and **Request** you want to use. For example, to use the NASA API to get their picture of the day, enter `NASA` in **Service** and `get picture of the day` in **Request**. 3. Check the parameters: the AI tries to fill them out, but you may still need to adjust or correct the configuration. Self-hosted users need to enable AI features and provide their own API keys For full release details, refer to Releases on GitHub. ### Contributors# Alberto Pasqualetto Bram Kn CodeShakingSheep Nicolas-nwb pemontto pengqiseven webk Yoshino-s ## n8n@1.39.1# View the commits for this version. **Release date:** 2024-04-25 This release contains bug fixes. For full release details, refer to Releases on GitHub. ## n8n@1.38.2# View the commits for this version. **Release date:** 2024-04-25 This release contains bug fixes. For full release details, refer to Releases on GitHub. ## n8n@1.37.4# View the commits for this version. **Release date:** 2024-04-25 This release contains bug fixes. For full release details, refer to Releases on GitHub. ## n8n@1.39.0# View the commits for this version. **Release date:** 2024-04-24 This release contains new nodes, node enhancements, and bug fixes. #### Node enhancement: Multiple methods, one Webhook node# The Webhook Trigger node can now handle calls to multiple HTTP methods. Refer to the Webhook node documentation for information on enabling this. For full release details, refer to Releases on GitHub. ### Contributors# Bram Kn ## n8n@1.38.1# View the commits for this version. **Release date:** 2024-04-18 This release contains bug fixes. For full release details, refer to Releases on GitHub. ## n8n@1.37.3# View the commits for this version. **Release date:** 2024-04-18 This release contains bug fixes. For full release details, refer to Releases on GitHub. ## n8n@1.38.0# View the commits for this version. **Release date:** 2024-04-17 This release contains new nodes, bug fixes, and node enhancements. For full release details, refer to Releases on GitHub. ### Contributors# Chengyou Liu Francesco Mannino ## n8n@1.37.2# View the commits for this version. **Release date:** 2024-04-17 This release contains bug fixes. For full release details, refer to Releases on GitHub. ## n8n@1.36.4# View the commits for this version. **Release date:** 2024-04-15 This release contains bug fixes. For full release details, refer to Releases on GitHub. ## n8n@1.36.3# View the commits for this version. **Release date:** 2024-04-12 This release contains bug fixes. For full release details, refer to Releases on GitHub. ## n8n@1.37.1# View the commits for this version. **Release date:** 2024-04-11 Breaking change Please note that this version contains a breaking change for self-hosted n8n. It removes the `--file` flag for the `execute` CLI command. If you have scripts relying on the `--file` flag, update them to first import the workflow and then execute it using the `--id` flag. Refer to CLI commands for more information on CLI options. This release contains bug fixes. For full release details, refer to Releases on GitHub. ## n8n@1.36.2# View the commits for this version. **Release date:** 2024-04-11 This release contains bug fixes. For full release details, refer to Releases on GitHub. ## n8n@1.37.0# View the commits for this version. **Release date:** 2024-04-10 Breaking change Please note that this version contains a breaking change for self-hosted n8n. It removes the `--file` flag for the `execute` CLI command. If you have scripts relying on the `--file` flag, update them to first import the workflow and then execute it using the `--id` flag. Refer to CLI commands for more information on CLI options. This release contains a new node, improvements to error handling and messaging, node enhancements, and bug fixes. For full release details, refer to Releases on GitHub. ### Contributors# Miguel Prytoluk ## n8n@1.36.1# View the commits for this version. **Release date:** 2024-04-04 This release contains bug fixes. For full release details, refer to Releases on GitHub. ## n8n@1.36.0# View the commits for this version. **Release date:** 2024-04-03 This release contains new nodes, enhancements and bug fixes. For full release details, refer to Releases on GitHub. ## n8n@1.35.0# View the commits for this version. **Release date:** 2024-03-28 This release contains enhancements and bug fixes. For full release details, refer to Releases on GitHub. ## n8n@1.34.2# View the commits for this version. **Release date:** 2024-03-26 This release contains bug fixes. For full release details, refer to Releases on GitHub. ## n8n@1.34.1# View the commits for this version. **Release date:** 2024-03-25 This release contains bug fixes. For full release details, refer to Releases on GitHub. ## n8n@1.34.0# View the commits for this version. **Release date:** 2024-03-20 This release contains new features, new nodes, and bug fixes. #### New node: Microsoft OneDrive Trigger node# This release adds the Microsoft OneDrive Trigger node. You can now trigger workflows on file and folder creation and update events. #### New data transformation functions# This release introduces new data transformation functions: **String** <table><tbody><tr><td><div><pre><span></span><span>1</span> <span>2</span> <span>3</span> <span>4</span> <span>5</span> <span>6</span></pre></div></td><td><div><pre><span></span><code><span>toDateTime</span><span>()</span><span> </span><span>//replaces toDate(). toDate() is retained for backwards compatability.</span> <span>parseJson</span><span>()</span> <span>extractUrlPath</span><span>()</span> <span>toBoolean</span><span>()</span> <span>base64Encode</span><span>()</span> <span>base64Decode</span><span>()</span> </code></pre></div></td></tr></tbody></table> **Number** <table><tbody><tr><td><div><pre><span></span><span>1</span> <span>2</span></pre></div></td><td><div><pre><span></span><code><span>toDateTime</span><span>()</span> <span>toBoolean</span><span>()</span> </code></pre></div></td></tr></tbody></table> **Object** <table><tbody><tr><td><div><pre><span></span><span>1</span></pre></div></td><td><div><pre><span></span><code><span>toJsonString</span><span>()</span> </code></pre></div></td></tr></tbody></table> **Array** <table><tbody><tr><td><div><pre><span></span><span>1</span></pre></div></td><td><div><pre><span></span><code><span>toJsonString</span><span>()</span> </code></pre></div></td></tr></tbody></table> **Date & DateTime** <table><tbody><tr><td><div><pre><span></span><span>1</span> <span>2</span></pre></div></td><td><div><pre><span></span><code><span>toDateTime</span><span>()</span> <span>toInt</span><span>()</span> </code></pre></div></td></tr></tbody></table> **Boolean** <table><tbody><tr><td><div><pre><span></span><span>1</span></pre></div></td><td><div><pre><span></span><code><span>toInt</span><span>()</span> </code></pre></div></td></tr></tbody></table> ### Contributors# Bram Kn pemontto ## n8n@1.33.1# View the commits for this version. **Release date:** 2024-03-15 This release contains bug fixes. For full release details, refer to Releases on GitHub. ## n8n@1.32.2# View the commits for this version. **Release date:** 2024-03-15 This release contains bug fixes. For full release details, refer to Releases on GitHub. ## n8n@1.33.0# View the commits for this version. **Release date:** 2024-03-13 This release contains new features, node enhancements, and bug fixes. For full release details, refer to Releases on GitHub. ### Contributors# gumida Ayato Hayashi Jordan MC Naveen ## n8n@1.32.1# View the commits for this version. **Release date:** 2024-03-07 This is a bug fix release. For full release details, refer to Releases on GitHub. ## n8n@1.31.2# View the commits for this version. **Release date:** 2024-03-07 This is a bug fix release. For full release details, refer to Releases on GitHub. ## n8n@1.32.0# View the commits for this version. **Release date:** 2024-03-06 This release contains new features, node enhancements, performance improvements, and bug fixes. For full release details, refer to Releases on GitHub. ## n8n@1.31.1# View the commits for this version. **Release date:** 2024-03-06 Breaking changes Please note that this version contains a breaking change. HTTP connections to the editor will fail on domains other than localhost. You can read more about it here. This is a bug fix release and it contains a breaking change. For full release details, refer to Releases on GitHub. ## n8n@1.31.0# View the commits for this version. **Release date:** 2024-02-28 This release contains new features, new nodes, node enhancements and bug fixes. For full release details, refer to Releases on GitHub. ## n8n@1.30.1# View the commits for this version. **Release date:** 2024-02-23 This release contains bug fixes. For full release details, refer to Releases on GitHub. ## n8n@1.30.0# View the commits for this version. **Release date:** 2024-02-21 This release contains new features, node enhancements, and bug fixes. For full release details, refer to Releases on GitHub. ## n8n@1.29.1# View the commits for this version. **Release date:** 2024-02-16 This release contains bug fixes. For full release details, refer to Releases on GitHub. ## n8n@1.29.0# View the commits for this version. **Release date:** 2024-02-15 This release contains new features, node enhancements, and bug fixes. For full release details, refer to Releases on GitHub. ### New features# #### OpenAI node overhaul# This release includes a new version of the OpenAI node, adding more operations, including support for working with assistants. Other highlights: * Support for AI events in log streaming. * Added support for workflow tags in the public API. ### Contributors# Bruno Inec Jesús Burgers ## n8n@1.27.3# View the commits for this version. **Release date:** 2024-02-15 This release contains bug fixes. For full release details, refer to Releases on GitHub. ## n8n@1.28.0# View the commits for this version. **Release date:** 2024-02-07 This release contains new features, new nodes, node enhancements and bug fixes. For full release details, refer to Releases on GitHub. ### Contributors# Andrea Ascari ## n8n@1.27.2# View the commits for this version. **Release date:** 2024-02-02 This release contains bug fixes. For full release details, refer to Releases on GitHub. ## n8n@1.27.1# View the commits for this version. **Release date:** 2024-01-31 This release contains new features, node enhancements, and bug fixes. For full release details, refer to Releases on GitHub. ## n8n@1.27.0# View the commits for this version. **Release date:** 2024-01-31 Breaking change This release removes `own` mode for self-hosted n8n. You must now use `EXECUTIONS_MODE` and set to either `regular` or `queue`. Refer to Queue mode for information on configuring queue mode. Skip this release Please upgrade directly to 1.27.1. This release contains node enhancements and bug fixes. For full release details, refer to Releases on GitHub. ## n8n@1.26.0# View the commits for this version. **Release date:** 2024-01-24 This release contains new features, node enhancements, and bug fixes. For full release details, refer to Releases on GitHub. ### Contributors# Daniel Schröder Nihaal Sangha ## n8n@1.25.1# View the commits for this version. **Release date:** 2024-01-22 This is a bug fix release. For full release details, refer to Releases on GitHub. ### Contributors# Nihaal Sangha ## n8n@1.25.0# View the commits for this version. **Release date:** 2024-01-17 This release contains a new node, feature improvements, and bug fixes. #### New node: Chat Memory Manager# The Chat Memory Manager node replaces the Chat Messages Retriever node. It manages chat message memories within your AI workflows. For full release details, refer to Releases on GitHub. ## n8n@1.24.1# View the commits for this version. **Release date:** 2024-01-16 This is a bug fix release. For full release details, refer to Releases on GitHub. ## n8n@1.22.6# View the commits for this version. **Release date:** 2024-01-10 This is a bug fix release. It includes important fixes for the HTTP Request and monday.com nodes. For full release details, refer to Releases on GitHub. ## n8n@1.24.0# View the commits for this version. **Release date:** 2024-01-10 This release contains new nodes for advanced AI, node enhancements, new features, performance enhancements, and bug fixes. #### Chat trigger# n8n has created a new Chat Trigger node. The new node provides a chat interface that you can make publicly available, with customization and authentication options. ### Contributors# Anush Eric Koleda Mason Geloso vacitbaydarman ## n8n@1.22.5# View the commits for this version. **Release date:** 2024-01-09 This is a bug fix release. For full release details, refer to Releases on GitHub. ## n8n@1.23.0# View the commits for this version. **Release date:** 2024-01-03 This release contains new nodes, node enhancements, new features, and bug fixes. #### New nodes and improved experience for working with files# This release includes a major overhaul of nodes relating to files (binary data). There are now three key nodes dedicated to handling binary data files: * Read/Write Files from Disk to read and write files from/to the machine where n8n is running. * Convert to File to take input data and output it as a file. * Extract From File to get data from a binary format and convert it to JSON. n8n has moved support for iCalendar, PDF, and spreadsheet formats into these nodes, and removed the iCalendar, Read PDF, and Spreadsheet File nodes. There are still standalone nodes for HTML and XML. ### Contributors# Aaron Gutierrez Advaith Gundu Anush Bin Nihaal Sangha ## n8n@1.22.4# View the commits for this version. **Release date:** 2024-01-03 This is a bug fix release. For full release details, refer to Releases on GitHub. ## n8n@1.22.3# View the commits for this version. **Release date:** 2023-12-27 Upgrade directly to 1.22.4 Due to issues with this release, upgrade directly to 1.22.4. This is a bug fix release. For full release details, refer to Releases on GitHub. ## n8n@1.22.2# View the commits for this version. **Release date:** 2023-12-27 Upgrade directly to 1.22.4 Due to issues with this release, upgrade directly to 1.22.4. This is a bug fix release. For full release details, refer to Releases on GitHub. ## n8n@1.22.1# View the commits for this version. **Release date:** 2023-12-21 This is a bug fix release. For full release details, refer to Releases on GitHub. ## n8n@1.22.0# View the commits for this version. **Release date:** 2023-12-21 This release contains node enhancements, new features, performance improvements, and bug fixes. For full release details, refer to Releases on GitHub. ## n8n@1.18.4# View the commits for this version. **Release date:** 2023-12-19 This is a bug fix release. For full release details, refer to Releases on GitHub. ## n8n@1.21.1# View the commits for this version. **Release date:** 2023-12-15 This is a bug fix release. For full release details, refer to Releases on GitHub. ## n8n@1.18.3# View the commits for this version. **Release date:** 2023-12-15 This is a bug fix release. For full release details, refer to Releases on GitHub. ## n8n@1.21.0# View the commits for this version. **Release date:** 2023-12-13 This release contains new features and nodes, node enhancements, and bug fixes. #### New user role: Admin# This release introduces a third account type: admin. This role is available on pro and enterprise plans. Admins have similar permissions to instance owners. Read more about user roles #### New data transformation nodes# This release replaces the Item Lists node with a collection of nodes for data transformation tasks: * Aggregate: take separate items, or portions of them, and group them together into individual items. * Limit: remove items beyond a defined maximum number. * Remove Duplicates: identify and delete items that are identical across all fields or a subset of fields. * Sort: organize lists of in a desired ordering, or generate a random selection. * Split Out: separate a single data item containing a list into multiple items. * Summarize: aggregate items together, in a manner similar to Excel pivot tables. #### Increased sharing permissions for owners and admins# Instance owners and users with the admin role can now see and share all workflows and credentials. They can't view sensitive credential information. For full release details, refer to Releases on GitHub. ## n8n@1.20.0# View the commits for this version. **Release date:** 2023-12-06 This release contains bug fixes, node enhancements, and ongoing new feature work. For full release details, refer to Releases on GitHub. ### Contributors# Andrey Starostin ## n8n@1.19.5# View the commits for this version. **Release date:** 2023-12-05 This is a bug fix release. Breaking change This release removes the TensorFlow Embeddings node. For full release details, refer to Releases on GitHub. ## n8n@1.18.2# View the commits for this version. **Release date:** 2023-12-05 This is a bug fix release. For full release details, refer to Releases on GitHub. ## n8n@1.19.4# View the commits for this version. **Release date:** 2023-12-01 Missing ARM v7 support This version doesn't support ARM v7. n8n is working on fixing this in future releases. For full release details, refer to Releases on GitHub. ## n8n@1.19.0# View the commits for this version. **Release date:** 2023-11-29 Upgrade directly to 1.19.4 Due to issues with this release, upgrade directly to 1.19.4. This release contains new features, node enhancements, and bug fixes. #### LangChain general availability# This release adds LangChain support to the main n8n version. Refer to LangChain for more information on how to build AI tools in n8n, the new nodes n8n has introduced, and related learning resources. #### Show avatars of users working on the same workflow# This release improves the experience of users collaborating on workflows. You can now see who else is editing at the same time as you. ## n8n@1.18.1# View the commits for this version. **Release date:** 2023-11-30 This is a bug fix release. For full release details, refer to Releases on GitHub. ## n8n@1.18.0# View the commits for this version. **Release date:** 2023-11-22 This release contains new features and bug fixes. #### Template creator hub# Built a template you want to share? This release introduces the n8n Creator hub. Refer to the creator hub Notion doc for more information on this project. #### Node input and output search filter# Cloud Pro and Enterprise users can now search and filter the input and output data in nodes. Refer to Data filtering for more information. For full release details, refer to Releases on GitHub. ## n8n@1.17.1# View the commits for this version. **Release date:** 2023-11-17 This release contains bug fixes. For full release details, refer to Releases on GitHub. ## n8n@1.17.0# View the commits for this version. **Release date:** 2023-11-15 This release contains node enhancements and bug fixes. #### Sticky Note Colors# You can now select background colors for sticky notes. #### Discord Node Overhaul# An overhaul of the Discord node, improving the UI making it easier to configure, improving error handling, and fixing issues. For full release details, refer to Releases on GitHub. ### Contributors# antondollmaier teomane ## n8n@1.16.0# View the commits for this version. **Release date:** 2023-11-08 This release contains node enhancements and bug fixes. For full release details, refer to Releases on GitHub. ## n8n@1.15.2# View the commits for this version. **Release date:** 2023-11-07 This release contains bug fixes. For full release details, refer to Releases on GitHub. ## n8n@1.15.1# View the commits for this version. **Release date:** 2023-11-02 This release contains new features, node enhancements, and bug fixes. #### Workflow history# This release introduces workflow history: view and load previous versions of your workflows. Workflow history is available in Enterprise n8n, and with limited history for Cloud Pro. Learn more in the Workflow history documentation. #### Dark mode# _Almost_ in time for Halloween: this release introduces dark mode. To enable dark mode: 1. Select **Settings** > **Personal**. 2. Under **Personalisation**, change **Theme** to **Dark theme**. #### Optional error output for nodes# All nodes apart from sub-nodes and trigger nodes have a new optional output: **Error**. Use this to add steps to handle node errors. The HTTP Request node now supports an pagination. Read the node docs for information and examples. For full release details, refer to Releases on GitHub. ### Contributors# Yoshino-s ## n8n@1.14.2# View the commits for this version. **Release date:** 2023-10-26 This release contains bug fixes. For full release details, refer to Releases on GitHub. ## n8n@1.14.1# View the commits for this version. **Release date:** 2023-10-26 This release contains bug fixes. For full release details, refer to Releases on GitHub. ## n8n@1.14.0# View the commits for this version. **Release date:** 2023-10-25 This release contains node enhancements and bug fixes. #### Switch node supports more outputs# The Switch node now supports an unlimited number of outputs. For full release details, refer to Releases on GitHub. ## n8n@1.13.0# View the commits for this version. **Release date:** 2023-10-25 This release contains new features, feature enhancements, and bug fixes. Upgrade directly to 1.14.0 This release failed to publish to npm. Upgrade directly to 1.14.0. This releases introduces a new node, the RSS Feed Trigger. Use this node to start a workflow when a new RSS feed item is published. #### Facebook Lead Ads Trigger node# This releases add another new node, the Facebook Lead Ads Trigger. Use this node to trigger a workflow when you get a new lead. For full release details, refer to Releases on GitHub. ## n8n@1.12.2# View the commits for this version. **Release date:** 2023-10-24 This release contains bug fixes. For full release details, refer to Releases on GitHub. ### Contributors# Burak Akgün ## n8n@1.12.1# View the commits for this version. **Release date:** 2023-10-23 This release contains bug fixes. For full release details, refer to Releases on GitHub. ### Contributors# Léo Martinez ## n8n@1.11.2# View the commits for this version. **Release date:** 2023-10-23 This release contains bug fixes. For full release details, refer to Releases on GitHub. ### Contributors# Inga pemontto ## n8n@1.12.0# View the commits for this version. **Release date:** 2023-10-18 This release contains new features, node enhancements, and bug fixes. #### Form Trigger node# This releases introduces a new node, the n8n Form Trigger. Use this node to start a workflow based on a user submitting a form. It provides a configurable form interface. For full release details, refer to Releases on GitHub. ### Contributors# Damian Karzon Inga pemontto ## n8n@1.11.1# View the commits for this version. **Release date:** 2023-10-13 This release contains bug fixes. For full release details, refer to Releases on GitHub. ## n8n@1.11.0# View the commits for this version. **Release date:** 2023-10-11 This release contains new features and bug fixes. #### External storage for binary files# Self-hosted users can now use an external service to store binary data. Learn more in External storage. If you're using n8n Cloud and are interested in this feature, please contact n8n. #### Item Lists node supports binary data# The Item Lists node now supports splitting and concatenating binary data inputs. This means you no longer need to use code to split a collection of files into multiple items. For full release details, refer to Releases on GitHub. ## n8n@1.10.1# View the commits for this version. **Release date:** 2023-10-11 This release contains bug fixes. For full release details, refer to Releases on GitHub. ## n8n@1.9.3# View the commits for this version. **Release date:** 2023-10-10 This release contains bug fixes. For full release details, refer to Releases on GitHub. ## n8n@1.9.2# View the commits for this version. **Release date:** 2023-10-09 This release contains bug fixes. For full release details, refer to Releases on GitHub. ## n8n@1.10.0# View the commits for this version. **Release date:** 2023-10-05 This release contains bug fixes and preparatory work for new features. For full release details, refer to Releases on GitHub. ## n8n@1.9.1# View the commits for this version. **Release date:** 2023-10-04 This release contains bug fixes. For full release details, refer to Releases on GitHub. ## LangChain in n8n (beta)# **Release date:** 2023-10-04 This release introduces support for building with LangChain in n8n. With n8n's LangChain nodes you can build AI-powered functionality within your workflows. The LangChain nodes are configurable, meaning you can choose your preferred agent, LLM, memory, and other components. Alongside the LangChain nodes, you can connect any n8n node as normal: this means you can integrate your LangChain logic with other data sources and services. Read more: * This is a beta release, and not yet available in the main product. Follow the instructions in Access LangChain in n8n to try it out. Self-hosted and Cloud options are available. * Learn how LangChain concepts map to n8n nodes in LangChain concepts in n8n. * Browse n8n's new Cluster nodes. This is a new set of node types that allows for multiple nodes to work together to configure each other. ## n8n@1.9.0# View the commits for this version. **Release date:** 2023-09-28 This release contains new features, performance improvements, and bug fixes. #### Tournament# This releases replaces RiotTmpl, the templating language used in expressions, with n8n's own templating language, Tournament. You can now use arrow functions in expressions. #### `N8N_BINARY_DATA_TTL` and `EXECUTIONS_DATA_PRUNE_TIMEOUT` removed# The environment variables `N8N_BINARY_DATA_TTL` and `EXECUTIONS_DATA_PRUNE_TIMEOUT` no longer have any effect and can be removed. Instead of relying on a TTL system for binary data, n8n cleans up binary data together with executions during pruning. For full release details, refer to Releases on GitHub. ## n8n@1.8.2# View the commits for this version. **Release date:** 2023-09-25 This release contains bug fixes. For full release details, refer to Releases on GitHub. ## n8n@1.8.1# View the commits for this version. **Release date:** 2023-09-21 This release contains bug fixes. For full release details, refer to Releases on GitHub. ## n8n@1.8.0# View the commits for this version. **Release date:** 2023-09-20 This release contains node enhancements and bug fixes. For full release details, refer to Releases on GitHub. ## n8n@1.7.1# View the commits for this version. **Release date:** 2023-09-14 This release contains bug fixes. For full release details, refer to Releases on GitHub. ## n8n@1.7.0# View the commits for this version. **Release date:** 2023-09-13 This release contains node enhancements and bug fixes. For full release details, refer to Releases on GitHub. ### Contributors# Quang-Linh LE MC Naveen ## n8n@1.6.1# View the commits for this version. **Release date:** 2023-09-06 This is a bug fix release. For full release details, refer to Releases on GitHub. ## n8n@1.6.0# View the commits for this version. **Release date:** 2023-09-06 This release contains bug fixes, new features, and node enhancements. Upgrade directly to 1.6.1 Skip this version and upgrade directly to 1.6.1, which contains essential bug fixes. #### TheHive 5# This release introduces support for TheHive API version 5. This uses a new node and credentials: * TheHive 5 node * TheHive 5 Trigger node * TheHive 5 credentials #### `N8N_PERSISTED_BINARY_DATA_TTL` removed# The environment variables `N8N_PERSISTED_BINARY_DATA_TTL` no longer has any effect and can be removed. This legacy flag was originally introduced to support ephemeral executions (see details), which are no longer supported. For full release details, refer to Releases on GitHub. ## n8n@1.5.1# View the commits for this version. **Release date:** 2023-08-31 This is a bug fix release. For full release details, refer to Releases on GitHub. ## n8n@1.5.0# View the commits for this version. **Release date:** 2023-08-31 This release contains new features, node enhancements, and bug fixes. Upgrade directly to 1.5.1 Skip this version and upgrade directly to 1.5.1, which contains essential bug fixes. ### Highlights# #### External secrets storage for credentials# Enterprise-tier accounts can now use external secrets vaults to manage credentials in n8n. This allows you to store credential information securely outside your n8n instance. n8n supports Infisical and HashiCorp Vault. Refer to External secrets for guidance on enabling and using this feature. #### Two-factor authentication# n8n now supports two-factor authentication (2FA) for self-hosted instances. n8n is working on bringing support to Cloud. Refer to Two-factor authentication for guidance on enabling and using it. #### Debug executions# Users on a paid n8n plan can now load data from previous executions into their current workflow. This is useful when debugging a failed execution. Refer to Debug executions for guidance on using this feature. For full release details, refer to Releases on GitHub. ## n8n@1.4.1# View the commits for this version. **Release date:** 2023-08-29 This is a bug fix release. For full release details, refer to Releases on GitHub. ## n8n@1.4.0# View the commits for this version. **Release date:** 2023-08-23 This release contains new features, node enhancements, and bug fixes. For full release details, refer to Releases on GitHub. ### Contributors# pemontto ## n8n@1.3.1# View the commits for this version. **Release date:** 2023-08-18 This is a bug fix release. For full release details, refer to Releases on GitHub. ## n8n@1.3.0# View the commits for this version. **Release date:** 2023-08-16 This release contains new features and bug fixes. ### Highlights# #### Trial feature: AI support in the Code node# This release introduces limited support for using AI to generate code in the Code node. Initially this feature is only available on Cloud, and will gradually be rolled out, starting with about 20% of users. Learn how to use the feature, including guidance on writing prompts, in Generate code with ChatGPT. For full release details, refer to Releases on GitHub. ### Contributors# Ian Gallagher Xavier Calland ## n8n@1.2.2# View the commits for this version. **Release date:** 2023-08-14 This is a bug fix release. For full release details, refer to Releases on GitHub. ## n8n@1.2.1# View the commits for this version. **Release date:** 2023-08-09 This is a bug fix release. For full release details, refer to Releases on GitHub. ## n8n@1.2.0# View the commits for this version. **Release date:** 2023-08-09 This release contains new features, node enhancements, bug fixes, and performance improvements. Upgrade directly to 1.2.1 When upgrading, skip this release and go directly to 1.2.1. ### Highlights# For full release details, refer to Releases on GitHub. ## n8n@1.1.1# View the commits for this version. **Release date:** 2023-07-27 This is a bug fix release. Breaking changes Please note that this version contains breaking changes if upgrading from a `0.x.x` version. For full details, refer to the n8n v1.0 migration guide. For full release details, refer to Releases on GitHub. ## n8n@1.1.0# View the commits for this version. **Release date:** 2023-07-26 This release contains new features, bug fixes, and node enhancements. Breaking changes Please note that this version contains breaking changes if upgrading from a `0.x.x` version. For full details, refer to the n8n v1.0 migration guide. ### Highlights# #### Source control and environments# This release introduces source control and environments for enterprise users. n8n uses Git-based source control to support environments. Linking your n8n instances to a Git repository lets you create multiple n8n environments, backed by Git branches. Refer to Source control and environments to learn more about the features and set up your environments. For full release details, refer to Releases on GitHub. ### Contributors# Adrián Martínez Alberto Pasqualetto Marten Steketee perseus-algol Sandra Ashipala ZergRael ## n8n@1.0.5# View the commits for this version. **Release date:** 2023-07-24 This is a bug fix release. Breaking changes Please note that this version contains breaking changes if upgrading from a `0.x.x` version. For full details, refer to the n8n v1.0 migration guide. For full release details, refer to Releases on GitHub. ## n8n@1.0.4# View the commits for this version. **Release date:** 2023-07-19 This is a bug fix release. Breaking changes Please note that this version contains breaking changes if upgrading from a `0.x.x` version. For full details, refer to the n8n v1.0 migration guide. For full release details, refer to Releases on GitHub. ### Contributors# Romain Dunand noctarius aka Christoph Engelbert ## n8n@1.0.3# View the commits for this version. **Release date:** 2023-07-13 This release contains API enhancements and adds support for sending messages to forum threads in the Telegram node. Breaking changes Please note that this version contains breaking changes if upgrading from a `0.x.x` version. For full details, refer to the n8n v1.0 migration guide. For full release details, refer to Releases on GitHub. ### Contributors# Kirill ## n8n@1.0.2# View the commits for this version. **Release date:** 2023-07-05 This is a bug fix release. Breaking changes Please note that this version contains breaking changes if upgrading from a `0.x.x` version. For full details, refer to the n8n v1.0 migration guide. ### Contributors# Romain Dunand ## n8n@1.0.1# View the commits for this version. **Release date:** 2023-07-05 Breaking changes Please note that this version contains breaking changes. For full details, refer to the n8n v1.0 migration guide. This is n8n's version one release. For full details, refer to the n8n v1.0 migration guide. ### Highlights# #### Python support# Although JavaScript remains the default language, you can now also select Python as an option in the Code node and even make use of many Python modules. Note that Python is unavailable in Code nodes added to a workflow before v1.0. ### Contributors# Marten Steketee --- ## Page: https://docs.n8n.io/release-notes/0-x/ Features and bug fixes for n8n before the release of 1.0.0. You can also view the Releases in the GitHub repository. Latest and Next versions n8n releases a new minor version most weeks. The `latest` version is for production use. `next` is the most recent release. You should treat `next` as a beta: it may be unstable. To report issues, use the forum. Current `latest`: 1.86.1 Current `next`: 1.88.0 ## How to update n8n# The steps to update your n8n depend on which n8n platform you use. Refer to the documentation for your n8n: * Cloud * Self-hosted options: * npm * Docker ## Semantic versioning in n8n# n8n uses semantic versioning. All version numbers are in the format `MAJOR.MINOR.PATCH`. Version numbers increment as follows: * MAJOR version when making incompatible changes which can require user action. * MINOR version when adding functionality in a backward-compatible manner. * PATCH version when making backward-compatible bug fixes. ## n8n@0.237.0# View the commits for this version. **Release date:** 2023-08-17 This is a bug fix release. For full release details, refer to Releases on GitHub. ### Contributors# Jordan Hall Xavier Calland ## n8n@0.236.3# View the commits for this version. **Release date:** 2023-07-18 This is a bug fix release. For full release details, refer to Releases on GitHub. ### Contributors# Romain Dunand noctarius aka Christoph Engelbert ## n8n@0.236.2# View the commits for this version. **Release date:** 2023-07-14 This is a bug fix release. For full release details, refer to Releases on GitHub. ## n8n@0.236.1# View the commits for this version. **Release date:** 2023-07-12 This is a bug fix release. For full release details, refer to Releases on GitHub. ## n8n@0.236.0# View the commits for this version. **Release date:** 2023-07-05 This release contains new nodes, node enhancements, and bug fixes. For full release details, refer to Releases on GitHub. ### New nodes# #### crowd.dev# This release includes a crowd.dev node and crowd.dev Trigger node. crowd.dev is a tool to help you understand who is engaging with your open source project. crowd.dev node documentation. ### Contributors# Alberto Pasqualetto perseus-algol Romeo Balta ZergRael ## n8n@0.234.1# View the commits for this version. **Release date:** 2023-07-05 This is a bug fix release. For full release details, refer to Releases on GitHub. ## n8n@0.235.0# View the commits for this version. **Release date:** 2023-06-28 This release contains new features, new nodes, node enhancements, and bug fixes. Unstable version This version is (as of 4th July 2023) considered unstable. n8n recommends against upgrading. For full release details, refer to Releases on GitHub. ### Contributors# Marten Steketee Sandra Ashipala ## n8n@0.234.0# View the commits for this version. **Release date:** 2023-06-22 This release contains new features, new nodes, node enhancements, and bug fixes. Unstable version This version is (as of 4th July 2023) considered unstable. n8n recommends upgrading directly to 0.234.1. Irreversible database migration This version contains a database migration that changes credential and workflow IDs to use nanoId strings, This migration may take a while to complete in some environments. This change doesn't break anything using the older numeric IDs. If you upgrade to 0.234.0, you can't roll back to an earlier version. For full release details, refer to Releases on GitHub. ### New nodes# #### Debug Helper# The Debug Helper node can be used to trigger different error types or generate random datasets to help test n8n workflows. Debug Helper node documentation. ## n8n@0.233.1# View the commits for this version. **Release date:** 2023-06-19 This is a bug fix release. For full release details, refer to Releases on GitHub. ## n8n@0.233.0# View the commits for this version. **Release date:** 2023-06-14 This is a bug fix release. For full release details, refer to Releases on GitHub. ## n8n@0.232.0# View the commits for this version. **Release date:** 2023-06-07 This release contains new features, new nodes, node enhancements, and bug fixes. For full release details, refer to Releases on GitHub. ### New nodes# This release includes a new trigger node for Postgres, which allows you to listen to events, as well as listen to custom channels. Refer to Postgres Trigger for more information. ## n8n@0.231.3# View the commits for this version. **Release date:** 2023-06-17 This is a bug fix release. For full release details, refer to Releases on GitHub. ## n8n@0.231.2# View the commits for this version. **Release date:** 2023-06-14 This is a bug fix release. For full release details, refer to Releases on GitHub. ## n8n@0.231.1# View the commits for this version. **Release date:** 2023-06-06 This is a bug fix release. For full release details, refer to Releases on GitHub. ## n8n@0.231.0# View the commits for this version. **Release date:** 2023-05-31 This release contains bug fixes and new features. For full release details, refer to Releases on GitHub. ### New features# Notable new features. #### Resource mapper UI component# This release includes a new UI component, the resource mapper. This component is useful for node creators. If your node does insert, update, or upsert operations, you need to send data from the node in a format supported by the service you're integrating with. Often it's necessary to use a Set node before a node that sends data, to get the data to match the schema of the service you're connecting to. The resource mapper UI component provides a way to get data into the required format directly within the node. Refer to Node user interface elements | Resource mapper for guidance for node builders. ## n8n@0.230.3# View the commits for this version. **Release date:** 2023-06-05 This is a bug fix release. For full release details, refer to Releases on GitHub. ## n8n@0.230.2# View the commits for this version. **Release date:** 2023-05-25 This is a bug fix release. For full release details, refer to Releases on GitHub. ## n8n@0.230.1# View the commits for this version. **Release date:** 2023-05-25 This is a bug fix release. For full release details, refer to Releases on GitHub. ## n8n@0.230.0# View the commits for this version. **Release date:** 2023-05-24 This release contains new features, new nodes, node enhancements, and bug fixes. For full release details, refer to Releases on GitHub. ### New nodes# #### LDAP node# The LDAP node allows you to interact with your LDAP servers from your n8n workflows. LDAP node documentation. ### Contributors# Bram Kn pemontto Yann Aleman ## n8n@0.229.0# View the commits for this version. **Release date:** 2023-05-17 This release contains bug fixes, improves UI copy and error messages in some nodes, and other node enhancements. For full release details, refer to Releases on GitHub. ### Node enhancements# The Google Ads node now supports v13. ## n8n@0.228.2# View the commits for this version. **Release date:** 2023-05-15 This is a bug fix release. For full release details, refer to Releases on GitHub. ## n8n@0.228.1# View the commits for this version. **Release date:** 2023-05-11 This is a bug fix release. For full release details, refer to Releases on GitHub. ## n8n@0.228.0# View the commits for this version. **Release date:** 2023-05-11 This release contains new features, node enhancements, and bug fixes. For full release details, refer to Releases on GitHub. ### New nodes# #### npm node# This release introduces the npm node. This is a new core node. It provides a way to query an npm registry within your workflow. ### Contributors# Adam Charnock ## n8n@0.227.1# View the commits for this version. **Release date:** 2023-05-15 This is a bug fix release. For full release details, refer to Releases on GitHub. ## n8n@0.227.0# View the commits for this version. **Release date:** 2023-05-03 This release contains new features, node enhancements, and bug fixes. For full release details, refer to Releases on GitHub. ### Node enhancements# * An overhaul of the Microsoft Excel 365 node, improve the UI making it easier to configure, improve error handling, and fix issues. ### Deprecations# This release deprecates the following: * The `EXECUTIONS_PROCESS` environment variable. * Running n8n in own mode. Main mode is now the default. Use Queue mode if you need full execution isolation. * The `WEBHOOK_TUNNEL_URL` flag. Replaced by `WEBHOOK_URL`. * Support for MySQL and MariaDB as n8n backend databases. n8n will remove support completely in version 1.0. n8n recommends using PostgreSQL instead. ## n8n@0.226.2# View the commits for this version. **Release date:** 2023-05-03 This is a bug fix release. For full release details, refer to Releases on GitHub. ## n8n@0.226.1# View the commits for this version. **Release date:** 2023-05-02 This is a bug fix release. For full release details, refer to Releases on GitHub. ## n8n@0.226.0# View the commits for this version. **Release date:** 2023-04-26 This release contains new features, node enhancements, and bug fixes. Breaking changes Please note that this version contains a breaking change to `extractDomain` and `isDomain`. You can read more about it here. For full release details, refer to Releases on GitHub. ### New features# * A new command to get information about licenses for self-hosted users: <table><tbody><tr><td><div><pre><span></span><span>1</span></pre></div></td><td><div><pre><span></span><code>n8n<span> </span>license:info </code></pre></div></td></tr></tbody></table> ### Node enhancements# * Nodes that use SQL, such as the PostgresSQL node, now have a better SQL editor for writing custom queries. * An overhaul of the Google BigQuery node to support executing queries, improve the UI making it easier to configure, improve error handling, and fix issues. ## n8n@0.225.2# View the commits for this version. **Release date:** 2023-04-25 This is a bug fix release. ### Bug fixes# * Core: Upgrade google-timezones-json to use the correct timezone for Sao Paulo. * Code Node: Update vm2 to address CVE-2023-30547. ## n8n@0.225.1# View the commits for this version. **Release date:** 2023-04-20 This is a bug fix release. ### Bug fixes# * Editor: Clean up demo and template callouts from workflows page. * Editor: Fix memory leak in Node Detail View by correctly unsubscribing from event buses. * Editor: Settings sidebar should disconnect from push when navigating away. * Notion Node: Update credential test to not require user permissions. ## n8n@0.225.0# View the commits for this version. **Release date:** 2023-04-19 ### New features# This release introduces Variables. You can now create variables that allows you to store and reuse values in n8n workflows. This is the first phase of a larger project to support Environments in n8n. * Core: Add support for Google Service account authentication in the HTTP Request node. * GitLab Node: Add **Additional Parameters** for the file list operation. * MySQL Node: This node has been overhauled. ### Bug fixes# * Core: Fix broken API permissions in public API. * Core: Fix paired item returning wrong data. * Core: Improve SAML connection test result views. * Core: Make getExecutionId available on all nodes types. * Core: Skip SAML onboarding for users with first- and lastname. * Editor: Add padding to prepend input. * Editor: Clean up demo/video experiment. * Editor: Enterprise features missing with user management. * Editor: Fix moving canvas on middle click preventing lasso selection. * Editor: Make sure to redirect to blank canvas after personalisation modal. * Editor: Fix an issue that was preventing typing certain characters in the UI on devices with touchscreen. * Editor: Fix n8n-checkbox alignment. * Code Node: Handle user code returning null and undefined. * GitHub Trigger Node: Remove content\_reference event. * Google Sheets Trigger Node: Return actual error message. * HTTP Request Node: Fix `itemIndex` in HTTP Request errors. * NocoDB Node: Fix for updating or deleting rows with not default primary keys. * OpenAI Node: Update models to only show those supported. * OpenAI Node: Update OpenAI Text Moderate input placeholder text. ### Contributors# Bram Kn Eddy Hernandez Filipe Dobreira Jimw383 ## n8n@0.224.4# View the commits for this version. **Release date:** 2023-04-24 This is a bug fix release. ### Bug fixes# * Core: Upgrade google-timezones-json to use the correct timezone for Sao Paulo. * Code Node: Update vm2 to address CVE-2023-30547. ## n8n@0.224.2# View the commits for this version. **Release date:** 2023-04-20 This is a bug fix release. ### Bug fixes# * Core: Fix paired item returning wrong data. * Core: Make getExecutionId available on all nodes types. * Editor: Fix memory leak in Node Detail View by correctly unsubscribing from event buses. * Editor: Fix moving canvas on middle click preventing lasso selection. * Editor: Settings sidebar should disconnect from push when navigating away. * Google Sheets Trigger Node: Return actual error message. * HTTP Request Node: Fix `itemIndex` in HTTP Request errors. * Notion Node: Update credential test to not require user permissions. ### Contributors# Filipe Dobreira ## n8n@0.224.1# View the commits for this version. **Release date:** 2023-04-14 This is a bug fix release. ### Bug fixes# * Core: Fix broken API permissions in public API. * Editor: Fix an issue that was preventing typing certain characters in the UI on devices with touchscreen. ## n8n@0.224.0# View the commits for this version. **Release date:** 2023-04-12 This release contains a new node, updates, and bug fixes. ### New nodes# This release introduces the TOTP node. This is a new core node. It provides a way to generate a TOTP (time-based one-time password) within your workflow. ### Bug fixes# * Code Node: Update vm2 to address CVE-2023-29017. * Core: App shouldn't crash with a custom REST endpoint. * Core: Do not execute workflowExecuteBefore hook when resuming executions from a waiting state. * Core: Fix issue where sub workflows would display as running forever after failure to start. * Core: Update xml2js to address CVE-2023-0842. * Editor: Drop mergeDeep in favor of lodash merge. * HTTP Request Node: Restore detailed error message. ### Contributors# Loganaden Velvindron ## n8n@0.223.0# View the commits for this version. **Release date:** 2023-04-05 This release contains new features and bug fixes. Breaking changes Please note that this version contains a breaking change. The minimum Node.js version is now v16. You can read more about it here. ### New features# * Core: Convert `eventBus` controller to decorator style and improve permissions. * Core: Prevent non owners password reset when SAML is enabled (this is preparation for an upcoming feature). * Core: Read ephemeral license from environment and clean up `ee` flags. * Editor: Allow tab to accept completion. * Editor: Enable saving workflow when node details view is open. * Editor: SSO onboarding (this is preparation for an upcoming feature). * Editor: SSO setup (this is preparation for an upcoming feature). ### Node enhancements# * Filter Node: Show discarded items. * HTTP Request Node: Follow redirects by default. * Postgres Node: Overhaul node. * ServiceNow Node: Add support for work notes when updating an incident. * SSH Node: Hide the private key within the SSH credential. ### Bug fixes# * Add droppable state for booleans when mapping. * Compare Datasets Node: Fuzzy comparen't comparing keys missing in one of the inputs. * Compare Datasets Node: Fix support for dot notation in skip fields. * Core: Deactivate active workflows during import. * Core: Stop marking duplicates as circular references in `jsonStringify`. * Core: Stop using `util.types.isProxy` for tracking of augmented objects. * Core: Fix curl import error when no data. * Core: Handle Date and RegExp correctly in `jsonStringify`. * Core: Handle Date and RegExp objects in `augmentObject`. * Core: Prevent `augmentObject` from creating infinitely deep proxies. * Core: Service account private key as a password field. * Core: Update lock file. * Core: Waiting workflows not stopping. * Date & Time Node: Add info box at top of date and time explaining expressions. * Date & Time Node: Convert Luxon DateTime object to ISO. * Editor: Add `$if`, `$min`, `$max` to root expression autocomplete. * Editor: Curb overeager item access linting. * Editor: Disable Grammarly in expression editors. * Editor: Disable password reset on desktop with no user management. * Editor: Fix connection lost hover text not showing. * Editor: Fix issue preventing execution preview loading when in an Iframe. * Editor: Fix mapping with special characters. * Editor: Prevent error from showing-up when duplicating unsaved workflow. * Editor: Prevent NDV schema view pagination. * Editor: Support backspacing with modifier key. * Google Sheets Node: Fix insertOrUpdate cell update with object. * HTML Extract Node: Support for dot notation in JSON property. * HTTP Request Node: Fix AWS credentials to stop removing URL parameters for STS. * HTTP Request Node: Refresh token properly on never fail option. * HTTP Request Node: Support for dot notation in JSON body. * LinkedIn Node: Update the version of the API. * Redis Node: Fix issue with hash set not working as expected. ## n8n@0.222.3# View the commits for this version. **Release date:** 2023-04-14 This is a bug fix release. ### Bug fixes# * Core: Fix broken API permissions in public API. * Editor: Fix an issue that was preventing typing certain characters in the UI on devices with touchscreen. ## n8n@0.222.2# View the commits for this version. **Release date:** 2023-04-11 This is a bug fix release. ### Bug fixes# * Code node: Update vm2 to address CVE-2023-29017. * Core: Update xml2js to address CVE-2023-0842. ### Contributors# Loganaden Velvindron ## n8n@0.222.1# View the commits for this version. **Release date:** 2023-04-04 This is a bug fix release. ### Bug fixes# * AWS SNS Node: Fix an issue with messages failing to send if they contain certain characters. * Core: `augmentObject` should clone Buffer/Uint8Array instead of wrapping them in a proxy. * Core: `augmentObject` should use existing property descriptors whenever possible. * Core: Fix the issue of nodes not loading when run using npx. * Core: Improve Axios error handling in nodes. * Core: Password reset should pass in the correct values to external hooks. * Core: Prevent `augmentObject` from creating infinitely deep proxies. * Core: Use table-prefixes in queries in import commands. * Editor: Fix focused state in Code node editor. * Editor: Fix loading executions in long execution list. * Editor: Show correct status on canceled executions. * Gmail Node: Gmail Luxon object support, fix for timestamp. * HTTP Request Node: Detect mime-type from streaming responses. * HubSpot Trigger Node: Developer API key is required for webhooks. * Set Node: Convert string to number. ## n8n@0.222.0# View the commits for this version. **Release date:** 2023-03-30 This release contains new features, including custom filters for the executions list, and a new node to filter items in your workflows. Upgrade to 0.222.1 Upgrade directly to 0.222.1. ### New features# * Add test overrides. * Core: Improve LDAP/SAML toggle and tests. * Core: Limit user invites when SAML is enabled. * Core: Make OAuth2 error handling consistent with success handling. * Editor: Fix ResourceLocator dropdown style. ### New nodes# This release introduces the Filter node. The node allows you to filter items based on a condition. If the item meets the condition, the Filter node passes it on to the next node in the Filter node output. If the item doesn't meet the condition, the Filter node omits the item from its output. ### Bug fixes# * Core: Assign `properties.success` earlier to set `executionStatus` correctly. * Core: Don't mark duplicates as circular references in `jsonStringify`. * Core: Don't use `util.types.isProxy` for tracking of augmented objects. * Core: Ensure that all non-lazy-loaded community nodes get post-processed correctly. * Core: Force-upgrade decode-uri-component to address CVE-2022-38900. * Core: Force-upgrade http-cache-semantics to address CVE-2022-25881. * Core: Handle `Date` and `RegExp` correctly in `jsonStringify`. * Core: Handle `Date` and `RegExp` objects in `augmentObject`. * Core: Improve Axios error handling in nodes. * Core: Improve community nodes loading. * Core: Initialize queue in the webhook server as well. * Core: Persist `CurrentAuthenticationMethod` setting change. * Core: Remove circular references from Code and push message. * Core: Require authentication on icons and nodes/credentials types static files. * Core: Return SAML service provider URls with configuration. * Core: Service account private key should display as a password field. * Core: Upgrade Luxon to address CVE-2023-22467. * Core: Upgrade simple-git to address CVE-2022-25912. * Core: Upgrade SQLite3 to address CVE-2022-43441. * Core: Upgrade Convict to address CVE-2023-0163. * Core: Waiting workflows not stopping. * Editor: Fix connection lost hover text not showing. * Editor: Fix issue preventing execution preview loading when in an iframe. * Editor: Use credentials when fetching node and credential types. * Google Sheets Node: Fix `insertOrUpdate` cell update with object. * HTTP Request Node: Add streaming to binary response. * HTTP Request Node: Fix AWS credentials to automatically deconstruct the URL. * HTTP Request Node: Fix AWS credentials to stop removing URL parameters for STS. * Split In Batches Node: Roll back changes in v1 and create v2. * Update PostHog no-capture. ### Contributors# Manish Dhanwal ## n8n@0.221.3# View the commits for this version. **Release date:** 2023-04-11 This is a bug fix release. ### Bug fixes# * Code node: Update vm2 to address CVE-2023-29017. * Core: Update xml2js to address CVE-2023-0842. ### Contributors# Loganaden Velvindron ## n8n@0.221.2# View the commits for this version. **Release date:** 2023-03-24 This is a bug fix release. It fixes an issue with `properties.success` that was causing `executionStatus` to sometimes be incorrect. ## n8n@0.221.1# View the commits for this version. **Release date:** 2023-03-23 This is a bug fix release. It ensures the job queue is initiated before starting the webhook server. ## n8n@0.221.0# View the commits for this version. **Release date:** 2023-03-23 ### New features# * Core: n8n now augments data rather than copying it in the Code node. This is a performance improvement. * Editor: you can now move the canvas by holding `Space` and dragging with the mouse, or by holding the middle mouse button and dragging. * Editor: add authentication type recommendations in the credentials modal. * Editor: add the SSO login button. ### New nodes# This release adds a node for QuickChart, an open source chart generation tool. ### Bug fixes# * Core: ensure n8n calls available error workflows in main mode recovery. * Core: fix telemetry execution status for manual workflows executions. * Core: return SAML attributes after connection test. * Editor: disable mapping tooltip for display modes that don't support mapping. * Editor: fix execution list item selection. * Editor: fix for large notifications being cut off. * Editor: fix redo in code and expression editor. * Editor: fix the canvas node distance when automatically injecting manual trigger. * HTTP Request Node: fix AWS credentials to automatically deconstruct the URL. * Split In Batches Node: roll back changes in v1 and create v2. ## n8n@0.220.1# View the commits for this version. **Release date:** 2023-03-22 This is a bug fix release. It reverts changes to version 1 of the Split In Batches node, and creates a version 2 containing the updates. ## n8n@0.220.0# View the commits for this version. **Release date:** 2023-03-16 This release adds schema view to the node output panel, and includes node enhancements and bug fixes. ### New features# * Core: improve SAML connection test. * Editor: add basic Datatable and Pagination components. * Editor: add support for schema view in the NDV output. * Editor: don't show actions panel for single-action nodes. ### Node enhancements# * Item Lists Node: update actions text. * OpenAI Node: add support for GPT4 on chat completion. * Split In Batches Node: make it easier to combine processed data. ### Bug fixes# * Core: initialize license and LDAP in the correct order. * Editor: display correct error message for `$env` access. * Editor: fix autocomplete for complex expressions. * Editor: fix owner set-up checkbox wording. * Editor: properly handle mapping of dragged expression if it contains hyphen. * Metabase Node: fix issue with question results not correctly being returned. ## n8n@0.219.1# View the commits for this version. **Release date:** 2023-03-10 This is a bug fix release. It resolves an issue with the HTTP Request node by removing the streaming response. ## n8n@0.219.0# View the commits for this version. **Release date:** 2023-03-09 ### New features# * Core: add `advancedFilters` feature flag. * Core: add SAML post and test endpoints. * Core: add SAML XML validation. * Core: limit user changes when SAML is enabled. * Core: refactor and add SAML preferences for service provider instance. * Editor: don't automatically add the manual trigger when the user adds another node. * Editor: redirect users to canvas if they don't have any workflows. ### Node enhancements# * Cal Trigger Node: update to support v2 webhooks. * HTTP Request Node: move from binary buffer to binary streaming. * Mattermost Node: add self signed certificate support. * Microsoft SQL Node: add support for self signed certificates. * Mindee Node: add support for v4 API. * Slack Node: move from binary buffer to binary streaming. ### Bug fixes# * Core: allow serving icons for custom nodes with npm scoped names. * Core: rename `advancedFilters` to `advancedExecutionFilters`. * Editor: fix ElButton overrides. * Editor: only fetch new versions at app launch. * Fetch credentials on workflows view to include in duplicated workflows. * Fix color discrepancies for executions list items. * OpenAI Node: fix issue with expressions not working with chat complete. * OpenAI Node: simplify code. ### Contributors# Syed Ali Shahbaz ## n8n@0.218.0# View the commits for this version. **Release date:** 2023-03-02 This release contains node enhancements, bug fixes, and new features that lay groundwork for upcoming releases, along with some UX improvements. ### New features# * Add distribution test tracking. * Add events to enable onboarding checklist. * Core: add SAML login setup (for upcoming feature). * Core: add SAML settings and consolidate LDAP under SSO (for upcoming feature). * Editor: add missing documentation to autocomplete items for inline code editor. * Editor: Show parameter hint on multiline inputs. ### Node enhancements# * JIRA node: support binary streaming for very large binary files. * OpenAI node: add support for ChatGPT. * Telegram node: add parse mode option to Send Document operation. ### Bug fixes# * Core: fix execution pruning queries. * Core: fix filtering workflow by tags. * Core: revert isPending check on the user entity. * Fix issues with nodes missing in nodes panel. * Fix mapping paths when appending to empty expression. * Item Lists Node: tweak item list summarize field naming. * Prevent executions from displaying as running forever. * Show Execute Workflow node in the nodes panel. * Show RabbitMQ node in the nodes panel. * Stop showing mapping hint after mapping. ## n8n@0.217.2# View the commits for this version. **Release date:** 2023-02-27 This is a bug fix release. ### Bug fixes# * Core: fix issue with execution pruning queries. * Core: fix for workflow filtering by tag. * Core: revert isPending check on the user entity. ## n8n@0.217.1# View the commits for this version. **Release date:** 2023-02-24 This is a bug fix release. ### Bug fixes# Prevent executions appearing to run forever. ## n8n@0.217.0# View the commits for this version. **Release date:** 2023-02-23 This release contains new features and bug fixes. It includes improvements to the nodes panel and executions list. It also deprecates the Read Binary File node. ### New features# * Add new event hooks to support telemetry around the new onboarding experience. * Update nodes to set required path type. * Core: add configurable execution history limit. Use this to improve performance when self-hosting. Refer to Execution Data | Enable data pruning for more information. * Core: add execution runData recovery and status field. This allows us to show execution statuses on the **Executions** list. * Core: add SAML feature flag. This is preparatory for an upcoming feature. * Editor: improvements to the nodes panel search. When searching in root view, n8n now displays results from both trigger and regular nodes. When searching in a category view, n8n shows results from the category, and also suggests results from other categories. * Hide sensitive value in authentication header credentials and authentication query credentials. * Support feature flag evaluation server side. * Deprecate the Read Binary File node. Use the Read Binary Files node instead. ### Bug fixes# * Baserow Node: fix issue with **Get All** not correctly using filters. * Compare Datasets Node: UI tweaks and fixes. * Core: don't allow arbitrary path traversal in BinaryDataManager. * Core: don't allow arbitrary path traversal in the credential-translation endpoint. * Core: don't explicitly bypass authentication on URLs containing `.svg`. * Core: don't remove empty output connections arrays in PurgeInvalidWorkflowConnections migration. * Core: fix execution status filters. * Core: user update endpoint should only allow updating email, firstName, and lastName. * Discord Node: fix wrong error message being displayed. * Discourse Node: fix issue with credential test not working. * Editor: apply correct IRunExecutionData to finished workflow. * Editor: fix an issue with zoom and canvas nodes connections. * Editor: fix unexpected date rendering on front-end. * Editor: remove `crashed` status from filter. * Fix typo in error messages when a property doesn't exist. * Fixes an issue when saving an active workflow without triggers would cause n8n to be stuck. * Google Calendar Node: fix incorrect labels for start and end times when getting all events. * Postgres Node: fix for tables containing field named JSON. * AWS S3 Node: fix issue with get many buckets not outputting data. ## How to update n8n# The steps to update your n8n depend on which n8n platform you use. Refer to the documentation for your n8n: * Cloud * Self-hosted options: * npm * Docker ## n8n@0.216.3# View the commits for this version. **Release date:** 2023-03-09 This is a bug fix release. It reverts the `isPending` check on the user entity, resolving an issue with displaying user options when user management is disabled. ## n8n@0.216.2# View the commits for this version. **Release date:** 2023-02-23 This is a bug fix release. ### Bug fixes# Core: don't remove empty output connections arrays in PurgeInvalidWorkflowConnections migration. ## n8n@0.215.4# View the commits for this version. **Release date:** 2023-03-14 This is a bug fix release. It reverts the `isPending` check on the user entity, resolving an issue with displaying user options when user management is disabled. ## How to update n8n# The steps to update your n8n depend on which n8n platform you use. Refer to the documentation for your n8n: * Cloud * Self-hosted options: * npm * Docker ## n8n@0.215.3# View the commits for this version. **Release date:** 2023-02-23 This is a bug fix release. It contains an important security fix. ### Bug fixes# * Core: don't allow arbitrary path traversal in BinaryDataManager. * Core: don't allow arbitrary path traversal in the credential-translation endpoint. * Core: don't explicitly bypass authentication on URLs containing `.svg`. * Core: don't remove empty output connections arrays in PurgeInvalidWorkflowConnections migration. * Core: the user update endpoint should only allow updating email, first name, and last name. ## n8n@0.214.5# View the commits for this version. **Release date:** 2023-03-14 This is a bug fix release. It reverts the `isPending` check on the user entity, resolving an issue with displaying user options when user management is disabled. ## How to update n8n# The steps to update your n8n depend on which n8n platform you use. Refer to the documentation for your n8n: * Cloud * Self-hosted options: * npm * Docker ## n8n@0.214.4# View the commits for this version. **Release date:** 2023-02-23 This is a bug fix release. It contains an important security fix. ### Bug fixes# * Core: don't allow arbitrary path traversal in BinaryDataManager. * Core: don't allow arbitrary path traversal in the credential-translation endpoint. * Core: don't explicitly bypass authentication on URLs containing `.svg`. * Core: don't remove empty output connections arrays in PurgeInvalidWorkflowConnections migration. * Core: the user update endpoint should only allow updating email, first name, and last name. ## n8n@0.216.1# View the commits for this version. **Release date:** 2023-02-21 This is a bug fix release. ### Bug fixes# * Core: don't allow arbitrary path traversal in BinaryDataManager. * Core: don't allow arbitrary path traversal in the credential-translation endpoint. * Core: don't explicitly bypass auth on URLs containing `.svg`. * Core: user update endpoint should only allow updating email, firstName, and lastName. ## n8n@0.216.0# View the commits for this version. **Release date:** 2023-02-16 This release contains new features, node enhancements, and bug fixes. ### New features# * Add workflow and credential sharing access e2e tests. * Editor: add correct credential owner contact details for readonly credentials. * Editor: add most important native properties and methods to autocomplete. * Editor: update to personalization survey v4. * Update telemetry API endpoints. ### Node enhancements# * GitHub node: update code to use resource locator component. * GitHub Trigger node: update code to use resource locator component. * Notion node: add option to set icons when creating pages or database pages. * Slack node: add support for manually inputting a channel name for channel operations. ### Bug fixes# * Core: fix data transformation functions. * Core: remove unnecessary info from GET `/workflows` response. * Bubble node: fix pagination issue when returning all objects. * HTTP Request Node: ignore empty body when auto-detecting JSON. ### Contributors# feelgood-interface ## n8n@0.215.2# View the commits for this version. **Release date:** 2023-02-14 This is a bug fix release. It solves an issue that was causing webhooks to be removed when they shouldn't be. ## n8n@0.215.1# View the commits for this version. **Release date:** 2023-02-11 This is a bug fix release. ### Bug fixes# * Core: fix issue causing worker and webhook service to close on start. * Core: handle versioned custom nodes correctly. ## n8n@0.215.0# View the commits for this version. **Release date:** 2023-02-10 This release contains new features, node enhancements, and bug fixes. ### New features# * Refactor the n8n Desktop user management experience. * Core: add support for WebSockets as an alternative to server-sent events. This introduces a new way for n8n's backend to push changes to the UI. The default is still server-sent events. If you're experiencing issues with the UI not updating, try changing to WebSockets by setting the `N8N_PUSH_BACKEND` environment variable to `websocket`. * Editor: add autocomplete for objects. * Editor: add autocomplete for expressions to the HTML editor component. ### Node enhancements# * Edit Image node: add support for WebP image format. * HubSpot Trigger node: add conversation events. ### Bug fixes# * Core: disable transactions on SQLite migrations that use PRAGMA foreign\_keys. * Core: ensure expression extension doesn't fail with optional chaining. * Core: fix import command for workflows with old format (affects workflows created before user management was introduced). * Core: stop copying icons to cache. * Editor: prevent creation of input connections for nodes without input slot. * Error workflow now correctly checks for subworkflow permissions. * ActiveCampaign Node: fix additional fields not being sent when updating account contacts. * Linear Node: fix issue with Issue States not loading correctly. * MySQL migration parses database contents if necessary (fix for MariaDB). ### Contributors# Kirill ## n8n@0.214.3# View the commits for this version. **Release date:** 2023-02-09 This is a bug fix release. ### Bug fixes# Editor: prevent creation of input connections for nodes without input slot. ## n8n@0.214.2# View the commits for this version. **Release date:** 2023-02-06 This is a bug fix release. ### Bug fixes# * Editor: correctly show OAuth reconnect button. * Editor: fix resolvable highlighting for HTML editor. ## n8n@0.214.1# View the commits for this version. **Release date:** 2023-02-06 This is a bug fix release. It also contains an overhaul of the Slack node. ### Node enhancements# This release includes an overhaul of the Slack node, adding new operations and a better user interface. ### Bug fixes# * Editor: fix an issue with mapping to empty expression input. * Editor: fix merge node connectors. * Editor: fix multiple-output endpoints success style after connection is detached. ## n8n@0.214.0# View the commits for this version. **Release date:** 2023-02-03 This release contains new features, node enhancements, and bug fixes. The expressions editor now supports autocomplete for some built in data transformation functions. The new features also include two of interest to node builders: a way to allow users to drag and drop data keys, and the new HTML editor component. Breaking changes Please note that this version contains a breaking change to Luxon. You can read more about it here. ### New features# * Core: export OpenAPI spec for external tools. * Core: set custom Cache-Control headers for static assets. * Core: simplify pagination in declarative node design. * Editor: support mapping keys with drag and drop. Any field with the hint **Enter the field name as text** should now support mapping a data key using drag and drop. Node builders can enable this in their own nodes. Refer to Creating nodes | UI elements for more information. * Editor: add the HTML editor component for use in parameters. This means node builders can now use the HTML editor that n8n uses in the HTML node as a UI component. * Editor: append expressions in fixed values when mapping to string and JSON inputs. * Editor: continue to show mapping tooltip after dismiss. * Editor: roll out schema view. ### Node enhancements# * FTP Node: stream binary data for uploads and downloads. * Notion Node: add support for image blocks. * OpenAI Node: add **Frequency Penalty** and **Presence Penalty** to the node options for the text resource. * Salesforce Node: add **Has Opted Out Of Email** field to lead resource options. * SSH Node: stream binary data for uploads and downloads. * Write Binary File Node: stream binary data for writes. * YouTube Node: switch upload operation over to streaming and resumable uploads API. ### Bug fixes# * Add paired item to the most used nodes. * Core: fix OAuth2 client credentials not always working. * Core: fix populating of node custom API call options. * Core: fix value resolution in declarative node design. * Core: prevent shared user details being saved alongside execution data. * Core: revert custom API option injecting. * Editor: add SMTP info translation link slot. * Editor: change executions title to match menu. * Editor: fix JSON field completions while typing. * Editor: handling router errors when navigation is canceled by user. * Editor: set max width for executions list. * Editor: stop unsaved changes popup display when navigating away from an untouched workflow. * Editor: fix workflow executions view. * Invoice Ninja Node: fix line items not being correctly set for quotes and invoices. * Linear Node: fix pagination issue for get all issues. * Mailchimp Trigger Node: fix webhook recreation. * Prevent unnecessarily touching `updatedAt` when n8n starts. * Schedule Trigger Node: change scheduler behaviour for intervals days and hours. * Set Node: fix behaviour when selecting `continueOnFail` and `pairedItem`. ## n8n@0.213.0# View the commits for this version. **Release date:** 2023-01-27 This release introduces LDAP, and a new node for working with HTML in n8n. It also contains node enhancements and bug fixes. ### New features# #### LDAP# This release introduces support for LDAP on Self-hosted Enterprise and Cloud Enterprise plans. Refer to LDAP for more information on this feature. * Simplify the Node Details View by moving authentication details to the Credentials modal. * Improve workflow list performance. ### New nodes# #### HTML node# n8n has a new HTML node. This replaces the HTML Extract node, and adds new functionality to generate HTML templates. ### Node enhancements# * GitLab node: add file resource and operations. * JIRA Software node: introduce the resource locator component to improve UX. * Send Email node: this node has been overhauled. ### Bug fixes# * Core: don't crash express app on unhandled rejected promises. * Core: handle missing binary metadata in download URLs. * Core: upsert (update and insert) credentials and workflows in the `import:` commands. * Core: validate numeric IDs in the public API. * Editor: don't request workflow data twice when opening a workflow. * Editor: execution list micro optimization. * Editor: fix node authentication options ordering and hiding options based on node version. * Editor: fix save modal appearing after duplicating a workflow. * Editor: prevent workflow execution list infinite no network error. * Extension being too eager and making calls when it shouldn't. * Google Drive Node: use the correct MIME type on converted downloads. * HelpScout Node: fix tag search not working when getting all conversations. * Notion (Beta) Node: fix create database page with multiple relation IDs not working. * Update **Sign in with Google** button to properly match design guidelines. ### Contributors# * Devin Buhl * Sven Ziegler ## n8n@0.212.1# View the commits for this version. **Release date:** 2023-01-23 This release includes an overhaul of the Google Analytics node, and bug fixes. ### Node enhancements# This release includes an overhaul of the Google Analytics node. This brings the node's code and components in line with n8n's latest node building styles, and adds support for GA4 properties. ### Bug fixes# * Add schema to Postgres migrations. * Core: fix execute-once incoming data handling. * Core: fix expression extension miss-detection. * Core: fix onWorkflowPostExecute not being called. * Core: fix URL in error handling for the error Trigger. * Core: make pinned data with webhook responding on last node manual-only. * Editor: making parameter input components label configurable. * Editor: remove infinite loading in not found workflow level execution. * Linear Node: fix issue with single item not being returned. * Notion (Beta) Node: fix create database page fails if relation parameter is empty/undefined. ## n8n@0.212.0# View the commits for this version. **Release date:** 2023-01-19 This release contains enhancements to the Item Lists node, and bug fixes. ### New features# This release adds experimental support for more Prometheus metrics. Self-hosting users can configure Prometheus using environment variables. ### Node enhancements# The Item Lists node now supports a Summarize operation. This acts similarly to generating pivot tables in Excel, allowing you to aggregate and compare data. ### Bug fixes# * Core: revert a lint rule `@typescript-eslint/prefer-nullish-coalescing`. * Editor: allow special characters in node selector completion. * GitLab Node: update the credential test endpoint. * Gmail Trigger Node: resolve an issue that was preventing filter by labels from working. * HTTP Request Node: ensure node enforces the requirement for valid JSON input. * HTTP Request Node: convert responses to text for all formats, including JSON. ### Contributors# Sven Ziegler ## n8n@0.211.2# View the commits for this version. **Release date:** 2023-01-17 This release contains a bug fix for community nodes, and a new trigger node. ### New nodes# #### Google Sheets Trigger node# This release adds a new Google Sheets Trigger node. You can now start workflows in response to row changes or new rows in a Google Sheet. ### Bug fixes# Fixes an issue that was preventing users from installing community nodes. ## n8n@0.211.1# View the commits for this version. **Release date:** 2023-01-16 This is a bug fix release. It resolves major issues with 0.211.0. ### New features# Editor: suppress validation errors for freshly added nodes. ### Node enhancements# * Google Ads node: update the API version to 11. * Google Drive Trigger node: start using the resource locator component. ### Bug fixes# * Build CLI to fix Postgres and MySQL test runs. * Extend date functions clobbering plus/minus. * Extension deep comparen't quite working for some primitives. * Upgrade jsonwebtoken to address CVE-2022-23540. ## n8n@0.211.0# View the commits for this version. **Release date:** 2023-01-13 Don't use this version Upgrade directly to 0.211.1. ### New features# * Add demo experiment to help users activate. * Editor: Improvements to the **Executions** page. * Editor: Remove prevent-ndv-auto-open feature flag. * Editor: Update callout component design. * Add the expression extension framework. ### Bug fixes# * Core: Fixes event message confirmations if no subscribers present. * Core: Remove threads package, rewrite log writer worker. * Core: Throw error in UI on expression referencing missing node but don't fail execution. * DB revert command shouldn't run full migrations before each revert. * Editor: Disable data pinning on multiple output node types. * Editor: Don't overwrite `window.onerror` in production. * Editor: Execution page bug fixes. * Editor: Fixes event bus test. * Editor: Hide data pinning discoverability tooltip in execution view. * Editor: Mapping tooltip dismiss. * Editor: Recover from unsaved finished execution. * Editor: Setting NDV session ID. * First/last being extended on proxy objects. * Handle memory issues gracefully. * PayPal Trigger Node: Omit verification in sandbox environment. * Report app startup and database migration errors to Sentry. * Run every database migration inside a transaction. * Upgrade class-validator to address CVE-2019-18413. * Zoom Node: Add notice about deprecation of Zoom JWT app support. ### Known issues# You may encounter errors when using the optional chaining operator in expressions. If this happens, avoid using the operator for now. ## n8n@0.210.2# View the commits for this version. **Release date:** 2023-01-09 ### New features# #### Typeahead for expressions# When using expressions, n8n will now offer you suggestions as you type.  ### Bug fixes# * Core: fix crash of manual workflow executions for unsaved workflows. * Editor: omit pairedItem from proxy completions. * Editor: prevent refresh on submit in credential edit modal. * Google Sheets Node: fix for auto-range detection. * Read Binary File Node: don't crash the execution when the source file doesn't exist. * Remove anonymous ID from tracking calls. * Stop OOM crashes in Execution Data pruning. * Update links for user management and SMTP help. ## n8n@0.210.1# View the commits for this version. **Release date:** 2023-01-05 This is a bug fix release. It also contains a new feature to support user management without SMTP set up. ### New features# #### Invite link for users on self-hosted n8n# In earlier versions of self-hosted n8n, you needed SMTP set up on your n8n instance for user management to work. User management required SMTP to sent invitation emails. 0.210.1 introduces an invite link, which you can copy and send to users manually. n8n still recommends setting up SMTP, as this is needed for password resets. ### Bug fixes# * Google Sheets node: fix an issue that was causing append and update operations to fail for numeric values. * Resolve issues with external hooks. ## n8n@0.210.0# View the commits for this version. **Release date:** 2023-01-05 This release introduces two major new features: log streaming and security audits. It also contains node enhancements, bug fixes, and performance improvements. ### New features# #### Log streaming# This release introduces log streaming for users on Enterprise self-hosted plans and custom Cloud plans. Log streaming allows you to send events from n8n to your own logging tools. This allows you to manage your n8n monitoring in your own alerting and logging processes. #### Security audit# This release adds a security audit feature. You can now run a security audit on your n8n instance, to detect common security issues. * Core: add support for Redis 6+ ACLs system using username in queue mode. Add the `QUEUE_BULL_REDIS_USERNAME` environment variable. ### Node enhancements# * Compare Datasets node: add an option for fuzzy compare. ### Bug fixes# * Apply credential overwrites recursively. This ensures that overwrites defined for a parent credential type also apply to all credentials extending it. * Core: enable full manual execution of a workflow using the error trigger. * Core: fix OAuth credential creation using the API. * Core: fix an issue with workflow lastUpdated field. * Editor: clear node creator and scrim on workspace reset. * Editor: fix an infinite loop while loading executions that aren't on the current executions list. * Editor: make node title non-editable in executions view. * Editor: prevent scrim on executable triggers. * Editor: support tabbing away from inline expression editor. * Fix executions bulk deletion. * Google Sheets Node: fix exception when no **Values to Send** are set. * Respond to Webhook Node: fix issue that caused the content-type header to be overwritten. * Slack Node: add missing channels:read OAuth2 scope. ### Performance improvements# * Lazy-load public API dependencies to reduce baseline memory usage. * Lazy-load queue mode and analytics dependencies. ### Contributors# Thomas S. ## n8n@0.209.4# View the commits for this version. **Release date:** 2022-12-28 This is primarily a bug fix release. ### Bug fixes# * Editor: add sticky note without manual trigger. * Editor: display default missing value in table view as undefined. * Editor: fix displaying of some trigger nodes in the creator panel. * Editor: fix trigger node type identification on add to canvas. * Editor: add the usage and plans page to Desktop. ### New features# Editor: pressing **\=** in an empty parameter input switches to expression mode. ## n8n@0.209.3# View the commits for this version. **Release date:** 2022-12-27 This is primarily a bug fix release. ### Bug fixes# * Core: don't send credentials to browser console. * Core: permit a workflow user who isn't the owner to use their own credentials. * Editor: fix for loading executions that aren't on the current executions list. * Editor: make the tertiary button on the **Usage** page transparent. * Editor: update credential owner warning when sharing. ### New features# Editor: Improve UX for brace completion in the inline expressions editor. ### Node enhancements# Webhook node: when test the node by selecting **Listen For Test Event** then dispatching a call to the webhook, n8n now only runs the Webhook node. Previously, n8n ran the entire workflow. You can still test the full workflow by selecting **Test Workflow**, then dispatching a test call. ## n8n@0.209.2# View the commits for this version. **Release date:** 2022-12-23 This is a bug fix release. ### Bug fixes# * Editor: ensure full tree on expression editor parse. This resolves an issue with the expressions editor cutting off results. * Fix automatic credential selection when credentials are shared. ### Performance improvements# Improvements to the workflows list performance. ## n8n@0.209.1# View the commits for this version. **Release date:** 2022-12-22 This is a bug fix release. ### Bug fixes# * Editor: fix for executions preview scroll load bug and wrong execution being displayed. * Editor: force parse on long expressions. * Editor: restore trigger to the nodes panel. * Nodes: AWS DynamoDB Node Fix issue pagination and simplify issue. * Nodes: fix DynamoDB node type issues. * Resolve an issue with credentials and workflows not being matched correctly due to incorrect typing. * Restore missing tags when retrieving a workflow. ### Contributors# Nathan Apter ## n8n@0.209.0# View the commits for this version. **Release date:** 2022-12-21 This release introduces workflow sharing, and changes to licensing and payment plans. ### New features# #### Workflow sharing# This release introduces workflow sharing for users on some plans. With workflow sharing, users can invite other users on the same n8n instance to use and edit their workflows. Refer to Workflow sharing for details. ### Bug fixes# * Editor: Correctly display trigger nodes without actions and with related regular node in the "On App Events" category. * Fix stickies resize. * Hide trigger tooltip for nodes with static test output. * Keep expression when dropping mapped value. * Prevent keyboard shortcuts in expression editor modal. * Redirect home to workflows always. * Update mapping GIFs. * Upgrade amqplib to address CVE-2022-0686. * View option for binary-data shouldn't download the file on Chrome/Edge. ## n8n@0.208.1# View the commits for this version. **Release date:** 2022-12-19 This is a bug fix release. ### Bug fixes# * Always retain original errors in the error chain on NodeOperationError. * BinaryDataManager should store metadata when saving from buffer. * Editor: fix for wrong execution data displayed in executions preview. * Pick up credential test functions from versioned nodes. ## n8n@0.208.0# View the commits for this version. **Release date:** 2022-12-16 This release introduces a new inline expressions editor, and a new node: OpenAI. It also contains updates and bug fixes. ### New features# #### Inline expression editor# You can now quickly write expressions inline in a node parameter. You can still choose to open the full expressions editor.  * Add workflow sharing telemetry. * Core: allow for hiding page usage with environment variables (for upcoming feature) * Editor: update UI copy for user management setup when sharing is disabled. * Editor: hide credentials password values. * Editor: set **All workflows** view as default view on the **Workflows** page. * Editor: update UI copy for workflow overwriting message. ### New nodes# ### Node enhancements# Send Email node: add support for a "Reply to" email address. ### Bug fixes# * Core: fix for Google and Microsoft generic OAuth2 credentials. * Core: fix HTTP Digest Auth for responses without an opaque parameter. * Disqus node: fix thread parameter for "Get All Threads" operation. * Don't crash the server when Telemetry is blocked using DNS. * Editor: allow mapping onto expression editor with selection range. * Editor: don't show actions dialog for actionless triggers when selected using keyboard. * Editor: fix an issue where some node actions wouldn't select default parameters correctly. * Editor: fix typo in retry-button option "Retry with original workflow". * Update permission for showing workflow caller policy. * Update pnpm-lock to fix build. ### Contributors# Daemonxiao Kirill Ricardo Duarte ## n8n@0.207.1# View the commits for this version. **Release date:** 2022-12-13 This is a bug fix release. It resolves an issue with undo. ## n8n@0.207.0# View the commits for this version. **Release date:** 2022-12-12 This release adds support for undo/redo actions on the canvas, and includes bug fixes. ### New features# #### Undo/redo# You can now undo and redo actions on the canvas. Use `ctrl`/`cmd` + `z` to undo, `ctrl`/`cmd` + `shift` + `z` to redo. Currently, n8n supports undo/redo for the following canvas actions: * Adding nodes * Deleting nodes * Adding connections * Deleting connections * Moving nodes * Moving connections * Import workflow (from file/from URL) * Copy/paste nodes * Renaming nodes * Duplicating nodes * Disabling/enabling nodes * App integration actions are now displayed in the nodes pane. * Add sharing permissions info for workflow sharees. * Handle sharing features when the user skips instance owner setup. * Update the credential test error message for credential sharees. ### Bug fixes# * Core: remove nodeGetter. * Core: Increase workflow reactivation max timeout to one day. * Core: Resolve an issue listing executions with Postgres. * Core: Remove foreign credentials when copying nodes or duplicating workflow. * Core: upgrade sse-channel to mitigate CVE-2019-10744. * Core: use license-sdk v1.6.1. * Editor: avoid adding Manual Trigger node when webhook node is added. * Editor: fix credential sharing issues handler when no matching ID or name. * Editor: fix for broken tab navigation. * Editor: schema view shows checkbox in case of empty data. * Editor: Stop returning UNKNOWN ERROR in the response if an actual error message is available. * Editor: update duplicate workflow action. * Move Binary Data Node: stringify objects before encoding them in MoveBinaryData. * Split In Batches Node: fix issue with pairedItem. ## n8n@0.206.1# View the commits for this version. **Release date:** 2022-12-06 This is a bug fix release. ### Bug fixes# * Core: make expression resolution improvements. * Editor: schema unit test stub for Font Awesome icons. * Remove unnecessary console message. ## n8n@0.206.0# View the commits for this version. **Release date:** 2022-12-06 This release contains bug fixes, node enhancements, and a new node input view: schema view. ### New features# #### Schema view# Schema view is a new node input view. It helps you browse the structure of your data, using the first input item. * Core: add workflow execution statistics. * Editor: add the alert design system component. * Editor: fix checkbox line hight and make checkbox label clickable. * Nodes: add a message for read-only nodes. * Nodes: add a prompt to overwrite changes when concurrent editing occurs. ### Node enhancements# KoBo Toolbox node: add support for the media file API. ### Bug fixes# * Core: fix linter error. * Core: fix partial execution with pinned data on child node run. * Core: OAuth2 scopes now save. * Enable source-maps on WorkflowRunnerProcess in own mode. * Handle error when workflow doesn'texist or is inaccessible. * Make nodes.exclude and nodes.include work with lazy-loaded nodes. * Code Node: restore `pairedItem` to required n8n item keys. * Execute Workflow Node: update Execute Workflow node info notice text. * Gmail Trigger Node: trigger node missing some emails. * Local File Trigger Node: fix issue that causes a crash if the ignore field is empty. ### Contributors# Marcel Yann Jouanique ## n8n@0.205.0# View the commits for this version. **Release date:** 2022-12-02 This release contains an overhaul of the expressions editor, node enhancements, and bug fixes. ### New features# #### Expressions editor usability overhaul# This release contains usability enhancements for the expressions editor. The editor now includes color signals to indicate when syntax is valid or invalid, and better error messages and tips. ### Node enhancements# * Facebook Graph APInode: update to support API version 15. * Google Calendar node: introduce the resource locator component to help users retrieve calendar parameters. * Postmark Trigger node: update credentials so they can be used with the HTTP Request node (for custom API calls). * Todoist node: update to use API version 2. ### Bug fixes# * Core: ensure executions list is properly filtered for all users. * Core: fix `$items().length` in Execute Once mode. * Core: mark binary data to be deleted when pruning executions. * Core: OAuth2 scope saved to database fix. * Editor: fix slots rendering of NodeCreator's NoResults component. * Editor: JSON view values can be mapped like keys. * AWS SNS Node: fix a pagination issue. * Google Sheets Node: fix exception if no matching rows are found. * Google Sheets Node: fix for append operation if no empty rows in sheet. * Microsoft Outlook Node: fix binary attachment upload. * Pipedrive Node: resolve properties not working. * Lazy load nodes for credentials testing. * Credential overwrites should take precedence over credential default values. * Remove background for resource ownership selector. * Update padding for resource filters dropdown. * Update size of select components in filters dropdown. * Update workflow save button type and design and share button type. ## n8n@0.204.0# View the commits for this version. **Release date:** 2022-11-24 This release contains performance enhancements and bug fixes. ### New features# * Core: lazy-load nodes and credentials to reduce baseline memory usage. * Core: use longer stack traces when error reporting is enabled. * Dev: add credentials E2E test suite and page object. ### Bug fixes# * Core: fix $items().length behavior in executeOnce mode. * Core: fix for unused imports. * Core: use CredentialsOverwrites when testing credentials. * Core: disable workflow locking due to issues. * Editor: fix for missing node connections in dev environment. * Editor: fix missing resource locator component. * Editor: prevent node-creator tabs from showing when toggled by CanvasAddButton. * Editor: table view column limit tooltip. * Editor: fix broken n8n-info-tip slots. * IF Node: fix "Is Empty" and "Is Not Empty" operation failures for date objects. * Remove redundant `await` in nodes API request functions without try/catch. * Schedule Trigger Node: fixes inconsistent behavior with cron and weekly intervals. * Workflow activation shouldn't crash if one of the credential is invalid. ## n8n@0.203.1# View the commits for this version. **Release date:** 2022-11-18 This is a bug fix release. It resolves an issue with the Google Sheets node versioning. ## n8n@0.203.0# View the commits for this version. **Release date:** 2022-11-17 This release includes an overhaul of the Google Sheets node, as well as other new features, node enhancements, and bug fixes. ### New features# * Add duplicate workflow error handler. * Add workflow data reset action. * Add credential runtime checks and prevent tampering during a manual run. ### Node enhancements# * Compare Datasets: UI copy changes to improve usability. * Google Sheets: n8n has overhauled this node, including improved lookup for document and sheet selection. * Notion (beta) node: use the resource locator component for database and page parameters. ### Bug fixes# * Core: deduplicate error handling in nodes. * Editor: show back mapping hint when parameter is focused. * Editor: add **Stop execution** button to execution preview. * Editor: curb direct item access linting. * Editor: fix expression editor variable selector filter. * Editor: fix for execution retry dropdown not closing. * Editor: fix for logging error on user logout. * Editor: fix zero treated as missing value in resource locator. * Editor: hide pin data in production executions. * Editor: skip optional chaining operators in Code Node editor linting. * Editor: update to **Expression/Fixed** toggle - keep expression when switching to **Fixed**. * Editor: fix foreign credentials being shown for new nodes. * Editor: store copy of workflow in `workflowsById` to prevent node data bugs. * Editor: fix user redirect to signin bug. ## n8n@0.202.1# View the commits for this version. **Release date:** 2022-11-10 This is a bug fix release. It removes some error tracking. ## n8n@0.202.0# View the commits for this version. **Release date:** 2022-11-10 This release contains core product improvements and bug fixes. ### New features# * API: report unhandled app crashes using Sentry. * API: set up error tracking using Sentry. * Core: Add ownership, sharing and credential details to `GET /workflows` in n8n's internal API. * Editor: when building nodes, you can now add a property with type `notice` to your credentials `properties`.This was previously available in nodes but not credentials. Refer to Node UI elements for more information. ### Bug fixes# * API: Don't use names for type ORM connections. * Core: Fix manual execution of pinned trigger on main mode. * Core: Streamline multiple pinned triggers behavior. * Editor: Curb argument linting for `$input.first()` and `$input.last()` * Editor: Fix duplicate bug when new workflow is open. * Editor: Fix for incorrect execution saving indicator in executions view. * Editor: Fix for OAuth authorization. * Editor: Fix workflow activation from the Workflows view. * Editor: Fix workflow back button navigation. * Editor: Prevent adding of the start node when importing workflow in the demo mode. * Editor: Show string numbers and null properly in JSON view. * Editor: Switch CodeNodeEditor linter parser to esprima-next. * Editor: Tweak dragged mapping state. * Editor: Update workflow buttons spacings. * Editor: Use base path in workflow preview component URL. * HTTP Request Node: Show error cause in the output. * HTTP Request Node: Use the data in **Put Output in Field** field. * HubSpot Node: Add notice to HubSpot credentials about API Key Sunset. * Notion Trigger (Beta) Node: Fix Notion trigger polling strategy. * Raindrop Node: Update access token URL. * SendInBlue Trigger Node: Fix typo in credential name. * Update E2E testing ENV variables. ### Contributors# feelgood-interface Ugo Bataillard ## n8n@0.201.0# View the commits for this version. **Release date:** 2022-11-02 This release contains workflow and node enhancements, and bug fixes. ### New features# * Core: reimplement blocking workflow updates on interim changes. * Editor: block the UI in node details view when the workflow is listening for an event. * Performance improvements ### Node enhancements# Venafi TLS Protect Cloud node: make issuing template depend on application. ### Bug fixes# * Core: fix wokflow hashing for MySQL. * Core: make `deepCopy` backward compatible. * Editor: ensure `displayOptions` received the value from the resource locator component. * Editor: disable the settings link in executions view for unsaved workflows. * Editor: ensure forms reliably save. * Editor: fix issues with interim updates in executions view. * Editor: fix for node creator search. * Editor: limit columns in table view to prevent the UI becoming unresponsive in the node details view. ## n8n@0.200.1# View the commits for this version. **Release date:** 2022-10-28 This is a bug fix release. ### Bug fixes# * API: do not reset the auth cookie on every request to GET `/login`. * AWS SNS Trigger node: add missing jsonParse import. * Core: avoid callstack with circular dependencies. * Editor: resolve issues with the executions list auto-refresh, and with saving new workflows. * Editor: redirect the outdated `/workflow` path. * Editor: remove a filter that prevented display of running executions. ## n8n@0.200.0# View the commits for this version. **Release date:** 2022-10-27 This release contains improvements to the editor, node enhancements and bug fixes. ### New features# * Core, editor: introduce workflow caller policy. * Core: block workflow update on interim change. * Editor: add a read-only state for nodes. * Editor: add execution previews using the new **Executions** tab in the node view. * Editor: improvements to node panel search. ### Node enhancements# * Airtable Trigger node: add the resource locator component. * HTTP Request node: add options for raw JSON headers and queries. * InvoiceNinja node: add support for V5. * Write Binary File node: add option to append to a file. ### Bug fixes# * API: validate executions and workflow filter parameters. * Core: amend typing for `jsonParse()` options. * Core: fix `predefinedCredentialType` in node graph item. * Core: fix canvas node execution skipping parent nodes. * Core: fix single node execution failing in `main` mode. * Core: set JWT authentication token `sameSite` policy to `lax`. * Core: update to imports in helpers. * Editor: curb item method linting in single-item mode. * Editor: stop rendering expressions as HTML. * Email Trigger node: backport V2 mark-seen-after processing to V1. * Email Trigger node: improve connection handling and credentials. * HTTP Request node: fix sending previously selected credentials. * TheHive node: small fixes. ### Contributors# Bram Kn Nicholas Penree ## n8n@0.199.0# View the commits for this version. **Release date:** 2022-10-21 This release includes new nodes, an improved workflow UI, performance improvements, and bug fixes. ### New features# #### New workflow experience# This release brings a collection of UI changes, aimed at improving the workflow experience for users. This includes: * Removing the Start node, and adding help to guide users to find a trigger node. * Improved node search. * New nodes: Manual Trigger and Execute Workflow Trigger. * Core: block workflow updates on interim changes. * Core: enable sending client credentials in the body of API calls. * Editor: add automatic credential selection for new nodes. ### New nodes# #### Compare node# The Compare Datasets node helps you compare data from two input streams. You can find documentation for the new node here. #### Execute Workflow Trigger node# The Execute Workflow Trigger starts a workflow in response to another workflow. You can find documentation for the new node here. #### Manual Trigger node# The Manual Trigger allows you to start a workflow by clicking **Test Workflow**, without any option to run it automatically. You can find documentation for the new node here. #### Schedule Trigger node# This release introduces the Schedule Trigger node, replacing the Cron node. You can find documentation for the new node here. ### Node enhancements# * HubSpot node: you can now use your HubSpot credentials in the HTTP Request node to make a custom API call. * Rundeck node: you can now use your Rundeck credentials in the HTTP Request node to make a custom API call. ### Bug fixes# * Editor: fix a hover bug in the bottom menu. * Editor: resolve performance issues when opening a node, or editing a code node, with a large amount of data. * Editor: ensure workflows always stop when clicking the stop button. * Editor: fix a bug that was causing text highlighting when mapping data in Firefox. * Editor: ensure correct linting in the Code node editor. * Editor: handle null values in table view. * Elasticsearch node: fix a pagination issue. * Google Drive node: fix typo. * HTTP Request node: avoid errors when a response doesn't provide a content type. * n8n node: fix a bug that was preventing the resource locator component from returning all items. ### Contributors# AndLLA Nicholas Penree vcrwr ## n8n@0.198.2# View the commits for this version. **Release date:** 2022-10-14 This release fixes a bug affecting scrolling through parameter lists. ## n8n@0.198.1# View the commits for this version. **Release date:** 2022-10-14 This is a bug fix release. ### Bug fixes# * Editor: change the initial position of the Start node. * Editor: align JSON view properties with their values. * Editor: fix `BASE_PATH` for Vite dev mode. * Editor: fix data pinning success source. ### Contributor# Bram Kn ## n8n@0.198.0# View the commits for this version. **Release date:** 2022-10-14 Breaking changes Please note that this version contains breaking changes to the Merge node. You can read more about them here. ### New features# * Editor: update the expressions display. * Editor: update the n8n-menu component. ### New nodes# #### Code node# This release introduces the Code node. This node replaces both the Function and Function Item nodes. Refer to the Code node documentation for more information. #### Venafi TLS Protect Cloud Trigger node# Start a workflow in response to events in your Venafi Cloud service. ### Node enhancements# * Citrix ADC node: add Certificate Install operation. * Kafka node: add a **Use key** option for messages. * MySQL node: use the resource locator component for table parameters, making it easier for users to browse and select their database fields from within n8n. ### Bug fixes# * Core, Editor: prevent overlap between running and pinning data. * Core: expression evaluation of processes now respects `N8N_BLOCK_ENV_ACCESS_IN_NODE`. * Editor: ensure the Axios base URL still works when hosted in a subfolder. * Editor: fixes for horizontal scrollbar rendering. * Editor: ensure the menu closes promptly when loading a credentials page. * Editor: menu UI fixes. * Box node: fix an issue that was causing the Create Folder operation to show extra items. * GSuite Admin node: resolve issue that was causing the User Update operation to fail. * GitLab Trigger node: ensure this node activates reliably. * HTTP Request node: ensure OAuth credentials work properly with predefined credentials. * KoboToolbox node: fix the hook logs. * SeaTable node: ensure link items show in response. * Zoom node: resolve an issue that was causing missing output items. ### Contributors# Jakob Backlund Yan Jouanique ## n8n@0.197.1# View the commits for this version. **Release date:** 2022-10-10 This is a bug fix release. It resolves an issue with display width on the resource locator UI component. ## n8n@0.197.0# View the commits for this version. **Release date:** 2022-10-10 This release includes six new nodes, focused around infrastructure management. It also adds support for drag and drop data mapping in the JSON input view, and includes bug fixes. ### New features# * Core: improve light versioning support in declarative node design. * Editor UI: data mapping for JSON view. You can now map data using drag and drop from JSON view, as well as table view. ### New nodes# #### AWS Certificate Manager# A new integration with AWS Certificate Manager. You can find the documentation here. #### AWS Elastic Load Balancing# Manage your AWS load balancers from your workflow using the new AWS Elastic Load Balancing node. You can find the documentation here. #### Citrix ADC# Citrix ADC is an application delivery and load balancing solution for monolithic and microservices-based applications. You can find the documentation here. #### Cloudflare# Cloudflare provides a range of services to manage and protect your websites. This new node allows you to manage zone certificates in Cloudflare from your workflows. You can find the documentation here. #### Venafi nodes# This release includes two new Venafi nodes, to integrate with their Protect TLS service. ### Node enhancements# Crypto node: add SHA3 support. ### Bug fixes# * CLI: cache generated assets in a user-writeable directory. * Core: prevent excess runs when data is pinned in a trigger node. * Core: ensure hook URLs always added correctly. * Editor: a fix for an issue affecting linked items in combination with data pinning. * Editor: resolve a bug with the binary data view. * GitHub Trigger node: ensure trigger executes reliably. * Microsoft Excel node: fix pagination issue. * Microsoft ToDo node: fix pagination issue. ### Contributors# Stratos Theodorou ## n8n@0.196.0# View the commits for this version. **Release date:** 2022-09-30 This release includes major new features: * Better item linking * New built-in variables and methods * A redesigned main navigation * New nodes, as well as an overhaul of the HTTP Request node It also contains bug fixes and node enhancements. ### New features# #### Improved item linking# Introducing improved support for item linking (paired items). Item linking is a key concept in the n8n data flow. Learn more in Data item linking. #### Overhauled built-in variables# n8n's built-in methods and variables have been overhauled, introducing new variables, and providing greater consistency in behavior and naming. #### Redesigned main navigation# We've redesigned the main navigation (the left hand menu) to create a simpler user experience. #### Other new features# * Improved error text when loading options in a node. * On reset, share unshared credentials with the instance owner. ### New nodes# #### n8n node# The n8n node allows you to consume the n8n API in your workflows. #### WhatsApp Business Platform node# The WhatsApp Business Platform node allows you to use the WhatsApp Business Platform Cloud API in your workflows. ### Node enhancements# * HTTP Request node: a major overhaul. It's now much simpler to build a custom API request. Refer to the HTTP Request node documentation for more information. * RabbitMQ Trigger node: now automatically reconnects on disconnect. * Slack node: add the 'get many' operation for users. ### Bug fixes# * Build: add typing for SSE channel. * Build: fix lint issue. * CLI: add git to all Docker images * CLI: disable X-Powered-By: Express header. * CLI: disable CORS on SSE connections in production. * Core: remove commented out lines. * Core: delete unused dependencies. * Core: fix and harmonize documentation links for nodes. * Core: remove the --forceExit flag from CLI tests. * Editor: add missing event handler to accordion component. * Editor: fix Storybook setup. * Editor: ensure BASE\_URL replacement works correctly on Windows. * Editor: fix parameter input field focus. * Editor: make lodash aliases work on case-sensitive file systems. * Editor: fix an issue affecting copy-pasting workflows into pinned data in the code editor. * Editor: ensure the run data pagination selector displays when appropriate. * Editor: ensure the run selector can open. * Editor: tidy up leftover i18n references in the node view. * Editor: correct an i18n string. * Editor: resolve slow loading times for node types, node creators, and push connections in the settings view. * Nodes: update descriptions in the Merge node * Nodes: ensure the card ID property displays for completed checklists in the Trello node. * Nodes: fix authentication for the new verions of WeKan. * Nodes: ensure form names list correctly in the Wufoo Trigger node. ### Contributors# Cristobal Schlaubitz Garcia ## n8n@0.195.5# View the commits for this version. **Release date:** 2022-09-23 This is a bug fix release. It fixes an issue with extracting values in expressions. ## n8n@0.195.4# View the commits for this version. **Release date:** 2022-09-22 This release: * Adds the ability to resize the main node panel. * Resolves an issue with resource locator in expressions. ## n8n@0.195.3# View the commits for this version. **Release date:** 2022-09-22 This is a bug fix release. * Editor: fix an expressions bug affecting numbers and booleans. * Added support for setting the TDS version in Microsoft SQL credentials. ## n8n@0.195.2# View the commits for this version. **Release date:** 2022-09-22 This is a bug fix release. It resolves an issue with MySQL migrations. ## n8n@0.195.1# View the commits for this version. **Release date:** 2022-09-21 This is a bug fix release. It resolves an issue with Postgres migrations. ## n8n@0.195.0# View the commits for this version. **Release date:** 2022-09-21 This release introduces user management and credential sharing for n8n's Cloud platform. It also contains other enhancements and bug fixes. ### New features# #### User management and credential sharing for Cloud# This release adds support for n8n's existing user management functionality to Cloud, and introduces a new feature: credential sharing. Credential sharing is currently only available on Cloud. Also in this release: * Added a `resourceLocator` parameter type for nodes, and started upgrading n8n's built-in nodes to use it. This new option helps users who need to specify the ID of a record or item in an external service. For example, when using the Trello node, you can now search for a specific card by ID, URL, or do a free text search for card titles. Node builders can learn more about working with this new UI element in n8n's UI elements documentation. * Cache npm dependencies to improve performance on self-hosted n8n ### Bug fixes# * Box node: fix an issue that sometimes prevented response data from being returned. * CLI: prevent n8n from crashing when it encounters an error in poll method. * Core: prevent calls to constructor, to forbid arbitrary code execution. * Editor: fix the output panel for Wait node executions. * HTTP node: ensure instance doesn't crash when batching enabled. * Public API: corrections to the OAuth schema. * Xero node: fix an issue that was causing line amount types to be ignored when creating new invoices. ### Contributors# Ikko Ashimine ## n8n@0.194.0# View the commits for this version. **Release date:** 2022-09-15 This release includes new nodes: a Gmail trigger, Google Cloud Storage, and Adalo. It also contains major overhauls of the Gmail and Merge nodes. ### New features# * CLI: load all nodes and credentials code in isolation. * Core, Editor UI: introduce support for node deprecation. * Editor: implement HTML sanitization for Notification and Message components. * Editor: display the input number on multi-input nodes. ### New nodes# #### Gmail Trigger# n8n now has a Gmail Trigger node. This allows you to trigger workflows in response to a Gmail account receiving an email. ### Node enhancements# * Gmail node: this release includes an overhaul of the Gmail node, with updated resources and operations. * Merge node: a major overhaul. Merge mode's have new names, and have been simplified. Refer to the Merge node documentation to learn more. * MongoDB node: updated the Mongo driver to 4.9.1. ### Bug fixes# * CLI: core: address Dependabot warnings. * CLI: avoid scanning unnecessary directories on Windows. * CLI: load nodes and directories on Windows using the correct file path. * CLI: ensure password reset triggers internal and external hooks. * CLI: use absolute paths for loading custom nodes and credentials. * Core: returnJsonArray helper no longer breaks nodes that return no data. * Core: fix an issue with node renaming and expressions. * Core: update OAuth endpoints to use the instance base URL. * Nodes: resolved an issue that was preventing versioned nodes from loading. * Public API: better error handling for bad requests. * AWS nodes: fixed an issue with credentials testing. * GoogleBigQuery node: fix for empty responses when creating records. * HubSpot node: correct the node name on the canvas. ### Contributors# Rhys Williams ## n8n@0.193.5# View the commits for this version. **Release date:** 2022-09-07 This is a bug fix release. ### Bug fixes# * Editor: prevent editing in the Function nodes in executions view. * Editor: ensure button widths are correct. * Editor: fix a popup title. * Gmail node: fix an issue introduced due to incorrect automatic data formatting. ## n8n@0.193.4# View the commits for this version. **Release date:** 2022-09-06 This release contains new features that lay the groundwork for upcoming releases, and bug fixes. ### New features# * It's now possible to configure the stop time for workers. * CLI: Added external hooks for when members are added or deleted. * Editor: Use the i18n component for localization (replacing v-html) ### Bug fixes# * CLI: include "auth-excluded" endpoints on the history middleware as well. * Core: fix MySQL migration issue with table prefix. * Correct spelling. * Fix n8n-square-button import. * AWS nodes: handle query string and body properly for AWS related requests. * AWS Lambda node: fix JSON data being sent to AWS Lambda as string. * Beeminder node: fix request ID not being sent when creating a new data point. * GitHub node: fix binary data not being returned. * GraphQL node: fix issue with return items. * Postgres node: fix issue with Postgres insert and paired item. * Kafka Trigger node: fix Kafka trigger not working with default max requests value. * MonicaCrm node: fix pagination when using return all. * Gmail node: fix bug related to paired items. * Raindrop node: fix issue refreshing OAuth2 credentials. * Shopify node: fix pagination when empty fields are sent. ### Contributors# Aaron Delasy ruanjiefeng ## n8n@0.193.3# View the commits for this version. **Release date:** 2022-09-01 This release contains bug fixes and node enhancements. ### Node enhancements# MongoDB node: add credential testing and two new operations. ### Bug fixes# * CLI: only initialize the mailer if the connection can be verified. * Core: fix an issue with disabled parent outputs in partial executions. * Nodes: remove duplicate wrapping of paired item data. ## n8n@0.193.2# View the commits for this version. **Release date:** 2022-09-01 This is a bug fix release. It resolves an issue that was causing errors with OAuth2 credentials. ## n8n@0.193.1# View the commits for this version. **Release date:** 2022-08-31 This is a bug fix release. It resolves an issue that was preventing column headings from displaying correctly in the editor. ## n8n@0.193.0# View the commits for this version. **Release date:** 2022-08-31 This release contains a new node, feature enhancements, and bug fixes. ### New nodes# This release adds an integration for HighLevel, an all-in-one sales and marketing platform. ### Enhancements# * Docker: reduce the size of Alpine Docker images. * Editor: improve mapping tooltip behavior. ### Bug fixes# * Core: make digest auth work with query parameters. * Editor: send data as query on DELETE requests. * Fix credentials\_entity table migration for MySQL. * Improve `.npmignore` to reduce the size of the published packages. ### Contributors# pemontto Tzachi Shirazi ## n8n@0.192.2# View the commits for this version. **Release date:** 2022-08-25 This is a bug fix release. ### Bug fixes# * Editor: fix the feature flag check when PostHog is unavailable. * Editor: fix for a mapping bug that occured when value is null. ## n8n@0.192.1# View the commits for this version. **Release date:** 2022-08-25 This is a bug fix release. ### Bug fixes# Account for non-array types in `pinData` migration. ## n8n@0.192.0# View the commits for this version. **Release date:** 2022-08-24 This release contains new features and enhancements, as well as bug fixes. ### New features# #### Map nested fields# n8n@0.187.0 saw the first release of data mapping, allowing you to drag and drop top level data from a node's **INPUT** panel into parameter fields. With this release, you can now drag and drop data from any level. * Core and editor: support `pairedItem` for pinned data. * Core and editor: integrate PostHog. * Core: add a command to scripts making it easier to launch n8n with tunnel. * CLI: notify external hooks about user profile and password changes. ### Bug fixes# * Core: account for the enabled state in the first pinned trigger in a workflow. * Core: fix pinned trigger execution. * CLI: handle unparseable strings during JSON key migration. * CLI: fix the excessive instantiation type error for flattened executions. * CLI: initiate the nodes directory to ensure `npm install` succeeds. * CLI: ensure tsc build errors also cause Turbeorepo builds to fail. * Nextcloud node: fix an issue with credential verification. * Freshdesk node: fix an issue where the getAll operation required non-existant options. ## n8n@0.191.1# View the commits for this version. **Release date:** 2022-08-19 This is a bug fix release. It resolves an issue that was causing node connectors to disappear after a user renamed them. ## n8n@0.191.0# View the commits for this version. **Release date:** 2022-08-17 This release lays the groundwork for wider community nodes support. It also includes some bug fixes. ### New features# * Community nodes are now enabled based on npm availability on the host system. This allows n8n to introduce community nodes to the Desktop edition in a future release. * Improved in-app guidance on mapping data. ### Bug fixes# * CLI: fix the community node tests on Postgres and MySQL. * Core: fix an issue preventing child workflow executions from displaying. * Editor: handle errors when opening settings and executions. * Editor: improve expression and parameters performance. * Public API: fix executions pagination for n8n instances using Postgres and MySQL. ## n8n@0.190.0# View the commits for this version. **Release date:** 2022-08-10 This is a bug fix release. ### Bug fixes# * Core: fix a crash caused by parallel calls to test webhooks. * Core: fix an issue preventing static data being saved for poll triggers. * Public API: fix a pagination issue. * GitHub Trigger: typo fix. ### Contributors# Nathan Poirier ## n8n@0.189.1# View the commits for this version. **Release date:** 2022-08-05 This is a bug fix release. ### Bug fixes# Fixed an issue with MySQL and MariaDB migrations. ## n8n@0.189.0# View the commits for this version. **Release date:** 2022-08-03 This release includes a new node, Sendinblue, as well as bug fixes. ### New nodes# Sendinblue node and Sendinblue Trigger node: introducing n8n's Sendinblue integration. ### Node enhancements# NocoDB node: add support for v0.90.0+ ### Bug fixes# * Editor: fix a label cut off. * Fix an issue with saving workflows when tags are disabled. * Ensure support for community nodes on Windows. ### Contributors# mertmit Nicholas Penree ## n8n@0.188.0# View the commits for this version. **Release date:** 2022-07-27 This release contains a new node for Metabase, bug fixes, and node and product enhancements. ### New nodes# ### Enhancements# This release includes improvements to n8n's core pairedItems functionality. ### Node enhancements# * Item Lists node: add an operation to create arrays from input items. * Kafka Trigger node: add more option fields. ### Bug fixes# * Core: add Windows support to `import:credentials --separate`. * Editor: correct linking buttons color. * Editor: ensure data pinning works as expected when `pinData` is null. * Editor: fix a bug with spaces. * Editor: resolve an issue with sticky note duplication and positioning. * Editor: restore missing header colors. * AWS DynamoDB node: fix for errors with expression attribute names. * Mautic node: fix an authentication issue. * Rocketchat node: fix an authentication issue. ### Contributors# Nicholas Penree ## n8n@0.187.2# View the commits for this version. **Release date:** 2022-07-21 This is a bug fix release. * Editor: fix for a console issue. * Editor: fix a login issue for non-admin users. * Editor: fix problems with the credentials modal that occured when no node is open. * NocoDB node: fix for an authentication issue. ## n8n@0.187.1# View the commits for this version. **Release date:** 2022-07-20 This release fixes a bug that was preventing new nodes from reliably displaying in all browsers. ## n8n@0.187.0# View the commits for this version. **Release date:** 2022-07-20 This release includes several major new features, including: * The community nodes repository: a new way to build and share nodes. * Data pinning and data mapping: accelerate workflow development with better data manipulation functionality. ### New features# This release introduces the community node repository. This allows developers to build and share nodes as npm packages. Users can install community-built nodes directly in n8n. #### Data pinning# Data pinning allows you to freeze and edit data during workflow development. Data pinning means saving the output data of a node, and using the saved data instead of fetching fresh data in future workflow executions. This avoids repeated API calls when developing a workflow, reducing calls to external systems, and speeding up workflow development. #### Data mapping# This release introduces a drag and drop interface for data mapping, as a quick way to map data without using expressions. #### Simplify authentication setup for node creators# This release introduces a simpler way of handling authorization when building a node. All credentials should now contain an `authenticate` property that dictates how the credential is used in a request. n8n has also simplified authentication types: instead of specifying an authentication type and using the correct interface, you can now set the type as `"generic"`, and use the `IAuthenticateGeneric` interface. You can use this approach for any authentication method where data is sent in the header, body, or query string. This includes methods like bearer and basic auth. You can't use this approach for more complex authentication types that require multiple calls, or for methods that don't pass authentication data. This includes OAuth. For an example of the new authentication syntax, refer to n8n's Asana node. <table><tbody><tr><td><div><pre><span></span><span> 1</span> <span> 2</span> <span> 3</span> <span> 4</span> <span> 5</span> <span> 6</span> <span> 7</span> <span> 8</span> <span> 9</span> <span>10</span> <span>11</span> <span>12</span> <span>13</span> <span>14</span> <span>15</span> <span>16</span> <span>17</span> <span>18</span> <span>19</span> <span>20</span> <span>21</span> <span>22</span> <span>23</span> <span>24</span> <span>25</span> <span>26</span> <span>27</span> <span>28</span> <span>29</span></pre></div></td><td><div><pre><span></span><code><span>// in AsanaApi.credentials.ts</span> <span>import</span><span> </span><span>{</span> <span> </span><span>IAuthenticateGeneric</span><span>,</span> <span> </span><span>ICredentialType</span><span>,</span> <span> </span><span>INodeProperties</span><span>,</span> <span>}</span><span> </span><span>from</span><span> </span><span>'n8n-workflow'</span><span>;</span> <span>export</span><span> </span><span>class</span><span> </span><span>AsanaApi</span><span> </span><span>implements</span><span> </span><span>ICredentialType</span><span> </span><span>{</span> <span> </span><span>name</span><span> </span><span>=</span><span> </span><span>'asanaApi'</span><span>;</span> <span> </span><span>displayName</span><span> </span><span>=</span><span> </span><span>'Asana API'</span><span>;</span> <span> </span><span>documentationUrl</span><span> </span><span>=</span><span> </span><span>'asana'</span><span>;</span> <span> </span><span>properties</span><span>:</span><span> </span><span>INodeProperties</span><span>[]</span><span> </span><span>=</span><span> </span><span>[</span> <span> </span><span>{</span> <span> </span><span>displayName</span><span>:</span><span> </span><span>'Access Token'</span><span>,</span> <span> </span><span>name</span><span>:</span><span> </span><span>'accessToken'</span><span>,</span> <span> </span><span>type</span><span>:</span><span> </span><span>'string'</span><span>,</span> <span> </span><span>default</span><span>:</span><span> </span><span>''</span><span>,</span> <span> </span><span>},</span> <span> </span><span>];</span> <span> </span><span>authenticate</span><span>:</span><span> </span><span>IAuthenticateGeneric</span><span> </span><span>=</span><span> </span><span>{</span> <span> </span><span>type</span><span>:</span><span> </span><span>'generic'</span><span>,</span> <span> </span><span>properties</span><span>:</span><span> </span><span>{</span> <span> </span><span>headers</span><span>:</span><span> </span><span>{</span> <span> </span><span>Authorization</span><span>:</span><span> </span><span>'=Bearer {{$credentials.accessToken}}'</span><span>,</span> <span> </span><span>},</span> <span> </span><span>},</span> <span> </span><span>};</span> <span>}</span> </code></pre></div></td></tr></tbody></table> #### Other new features# * Added a `preAuthentication` method to credentials. * Added more credentials tests. * Introduce automatic fixing for paired item information in some scenarios. ### Node enhancements# * ERPNext node: add credential tests, and add support for unauthorized certs. * Google Drive node: add support for move to trash. * Mindee node: support new version. * Notion node: support ignoring the Notion URL property if empty. * Shopify node: add OAuth support. ### Bug fixes# * API: add missing node settings parameters. * API: validate static data value for resource workflow. * Baserow Node: fix an issue preventing table names from loading. * Editor: hide the **Execute previous node** button when in read-only mode. * Editor: hide tabs if there's only one branch. * Roundup of link fixes in nodes. ### Contributors# Florian Bachmann Olivier Aygalenq ## n8n@0.186.1# View the commits for this version. **Release date:** 2022-07-14 This is a bug fix release. It includes a fix for an issue with the Airtable node. ## n8n@0.186.0# View the commits for this version. **Release date:** 2022-07-13 This release contains bug fixes and node enhancements. ### New features# * Add item information to more node errors. * Update multiple credentials with tests, and add support for custom operations. ### Node enhancements# * AWS DynamoDB node: improve error handling and add an optional GetAll Scan FilterExpression. * Customer.io node: add support for tracking region selection. * Elasticsearch node: add 'Source Excludes' and 'Source Includes' options to the Document: getAll operation. Add credential tests, index pipelines, and index refresh. * Freshworks CRM node: add search and lookup functionality. * JIRA node: add optional query authentication. * Postgres node: improve handling of large numbers. * Redis node: add push and pop operations. * Rename node: add regex replace. * Spreadsheet file node: allow skipping headers when writing spreadsheets. ### Bug fixes# * Editor: Fix an error that occured after repeated executions. * EmailReadImap node: improve handling of network problems. * Google Drive node: process input items using the list operation. * Telegram node: fix for a bug affecting sending binary data (images, documents and so on). ### Contributors# Bryce Sheehan h4ux miguel-mconf Nicholas Penree pemontto Yann Jouanique ## n8n@0.185.0# View the commits for this version. **Release date:** 2022-07-05 This release adds a new node, Google Ads. It also contains bug fixes and node enhancements, as well as a small addition to core. ### New features# Core: add the `action` parameter to INodePropertyOptions. This parameter is now available when building nodes. ### New nodes# Google Ads node: n8n now provides a Google Ads node, allowing you to get data from Google Ad campaigns. ### Node enhancements# * DeepL node: Add support for longer text fields, and add credentials tests. * Facebook Graph API node: Add support for Facebook Graph API 14. * JIRA node: Add support for the simplified option with rendered fields. * Webflow Trigger node: Reduce the chance of webhook duplication. Add a credentials test. * WordPress node: Add a post template option. ### Bug fixes# * HubSpot node: Fix for search endpoints. * KoboToolbox node: Improve attachment matching logic and GeoJSON Polygon format. * Odoo node: Prevent possible issues with some custom fields. * Sticky note node: Fix an issue that was causing the main header to hide. * Todoist node: Improve multi-item support. ### Contributors# cgobrech pemontto Yann Jouanique Zapfmeister ## n8n@0.184.0# View the commits for this version. **Release date:** 2022-06-29 This release includes: * New core features * Enhancements to the Clockify node. * Bug fixes. ### New features# * You can now access `getBinaryDataBuffer` in the pre-send method. * n8n now exposes the item index being processed by a node. * Migrated the expressions templating engine to n8n's fork of riot-tmpl. ### Node enhancements# Clockify node: added three new resources: Client, User, and Workspace. Also added support for custom API calls. ### Bug fixes# * Core: fixed an error with logging circular links in JSON. * Editor UI: now display the full text of long error messages. * Editor UI: fix for an issue with credentials rendering when the node has no parameters. * Cortex node: fix an issue preventing all analyzers being returned. * HTTP Request node: ensure all OAuth2 credentials work with this node. * LinkedIn node: fix an issue with image preview. * Salesforce node: fix an issue that was causing the lead status to not use the new name when name is updated. * Fixed an issue with required/optional parameters. ### Contributors# pemontto ## n8n@0.183.0# View the commits for this version. **Release date:** 2022-06-21 This release contains node enhancements and bug fixes, as well as an improved trigger nodes panel. ### New features# Enhancements to the **Trigger** inputs panel: When using a trigger node, you will now see an **INPUT** view that gives guidance on how to load data into your trigger. ### Node enhancements# * HubSpot node: you can now assign a stage on ticket update. * Todoist node: it's now possible to move tasks between sections. * Twake node: updated icon, credential test added, and added support for custom operations. ### Bug fixes# * Core: don't allow OPTIONS requests from any source. * Core: GET `/workflows/:id` now returns tags. * Core: ensure predefined credentials show up in the HTTP Request node. * Core: return the correct error message on Axios error. * Core: updates to the expressions allow-list and deny-list. ### Contributors# Bryce Sheehan Rahimli Rahim ## n8n@0.182.1# View the commits for this version. **Release date:** 2022-06-16 This is a bug fix release. It resolves an issue with restarting waiting executions. ## n8n@0.182.0# View the commits for this version. **Release date:** 2022-06-14 This release contains enhancements to the Twilio and Wise integrations, and adds support for a new grant type for OAuth2. It also includes some bug fixes. ### New features# Added support for the client\_credentials grant type for OAuth2. ### Node enhancements# * Twilio node: added the ability to make a voice call using TTS. * Wise node: added support for downloading statements as JSON, CSV, or PDF. ### Bug fixes# * Core: fixes an issue that was causing parameters to get lost in some edge cases. * Core: fixes an issue with combined expressions not resolving if one expression was invalid. * Core: fixed an issue that was causing the public API to fail to build on Windows. * Editor: ensure errors display correctly. * HTTP Request node: better handling for requests that return null. * Pipedrive node: fixes a limits issue with the GetAll operation on the Lead resource. * Postbin node: remove a false error. ### Contributors# Albrecht Schmidt Erick Friis JoLo Shaun Valentin Mocanu ## n8n@0.181.2# View the commits for this version. **Release date:** 2022-06-09 This is a bug fix release. It resolves an issue that was sometimes causing nodes to error when they didn't return data. ## n8n@0.181.1# View the commits for this version. **Release date:** 2022-06-09 This is a bug fix release. It fixes two issues with multi-input nodes. ## n8n@0.181.0# View the commits for this version. **Release date:** 2022-06-08 This release introduces the public API. ### New feature highlights# #### The n8n public API# This release introduces the n8n public REST API. Using n8n's public API, you can programmatically perform many of the same tasks as you can in the GUI. The API includes a built-in Swagger UI playground. Refer to the API documentation for more information. ### Other new features# * **Core**: you can now block user access to environment variables using the `N8N_BLOCK_ENV_ACCESS_IN_NODE` variable. ### Bug fixes# * **Core**: properly resolve expressions in declarative style nodes. ## n8n@0.180.0# View the commits for this version. **Release date:** 2022-06-07 This release adds a new node for Cal.com, support for tags in workflow import and export, UI improvements, node enhancements, and bug fixes. ### New features# #### Tags in workflow import and export# When importing or exporting a workflow, the JSON can now include workflow tags. #### Improved handling of activation errors# n8n now supports running an error workflow in response to an activation error. ### New nodes# ### Node enhancements# * GitHub node: add the Get All operation to the Organization resource. * QuickBooks node: add a new optional field for tax items. ### Bug fixes# * Restore support for `window` in expressions. * Fix to the `user-management:reset` command. * Resolve crashes in queue mode. * Correct delete button hover spacing. * Resolve a bug causing stuck loading states. * EmailReadImap node: improve error handling. * HubSpot node: fix contact loading. ### Contributors# Mark Steve Samson Syed Ali Shahbaz ## n8n@0.179.0# View the commits for this version. **Release date:** 2022-05-30 This release features a new node for PostBin, as well as various node enhancements and bug fixes. ### New nodes# #### PostBin node# PostBin serves as a wrapper for standard HTTP libraries which can be used to test arbitrary API/Webhooks by sending requests and providing more advanced ways to analyze the responses. ### Node enhancements# * RabbitMQ Trigger node: Made message acknowledgement and parallel processing configurable. * ServiceNow node: Added support for attachments. * Todoist node: Added support for specifying the parent task when adding and listing tasks. ### Bug fixes# * **Core**: Fixed migrations on non-public Postgres schema. * **Core**: Mitigated possible XSS vulnerability when importing workflow templates. * **Editor UI**: fixed erroneous hover state detection close to the sticky note button. * **Editor UI**: fixed display behavior of credentials assigned to versioned nodes. * Discord node: Fixed rate limit handling. * Gmail node: Fixed sending attachments in filesystem data mode. * Google Sheets node: Fixed an error preventing the _Use Header Names as JSON Paths_ option from working as expected. * Nextcloud node: Updated the node so the list:folder operation works with Nextcloud version 24. * YouTube node: Fixed problem with uploading large files. ## n8n@0.178.2# View the commits for this version. **Release date:** 2022-05-25 This is a bug fix release. It solves an issue with loading parameters when making custom operations calls. ## n8n@0.178.1# View the commits for this version. **Release date:** 2022-05-24 This is a bug fix release. It solves an issue with setting credentials in the HTTP Request node. ## n8n@0.178.0# View the commits for this version. **Release date:** 2022-05-24 This release adds support for reusing existing credentials in the HTTP Request node, making it easier to do custom operation with APIs where n8n already has an integration. The release also includes improvements to the nodes view, giving better detail about incoming data, as well as some bug fixes. ### New features# #### Credential reuse for custom API operations# n8n supplies hundreds of nodes, allowing you to create workflows that link multiple products. However, some nodes don't include all the possible operations supported by a product's API. You can work around this by making a custom API call using the HTTP Request node. One of the most complex parts of setting up API calls is managing authentication. To simplify this, n8n now provides a way to use existential credential types (credentials associated with n8n nodes) in the HTTP Request node. For more information, refer to Custom API operations. #### Node details view# An improved node view, showing more detail about node inputs. ### Node enhancements# Salesforce Node: Add the **Country** field. ### Bug fixes# * **Editor UI**: don't display the dividing line unless necessary. * **Editor UI**: don't display the 'Welcome' sticky in template workflows. * Slack Node: Fix the kick operation for the channel resource. ## n8n@0.177.0# View the commits for this version. **Release date:** 2022-05-17 This release contains node enhancements, an improved welcome experience, and bug fixes. ### New features# #### Improved welcome experience# A new introductory video, automatically displayed for new users. #### Automatically convert Luxon dates to strings# n8n now automatically converts Luxon DateTime objects to strings. ### Node enhancements# * Google Drive Node: Drive upload, delete, and share operations now support shared Drives. * Microsoft OneDrive: Add the rename operation for files and folders. * Trello: Add support for operations relating to board members. ### Bug fixes# * **core:** Fix call to `/executions-current` with unsaved workflow. * **core:** Fix issue with fixedCollection having all default values. * Edit Image Node: Fix font selection. * Ghost Node: Fix post tags and add credential tests. * Google Calendar Node: Make it work with public calendars and clean up. * KoBoToolbox Node: Fix query and sort + use question name in attachments. * Mailjet Trigger Node: Fix issue that node couldn't get activated. * Pipedrive Node: Fix resolve properties when using multi option field. ### Contributors# Cristobal Schlaubitz Garcia Yann Jouanique ## n8n@0.176.0# View the commits for this version. **Release date:** 2022-05-10 This release contains bug fixes and node enhancements. ### Node enhancements# * Pipedrive node: adds support for filters to the Organization: Get All operation. * Pushover node: adds an HTML formatting option, and a credential test. * UProc node: adds new tools. ### Bug fixes# * **core**: a fix for filtering the executions list by waiting status. * **core**: improved webhook error messages. * Edit Image node: node now works correctly with the binary-data-mode 'filesystem'. ### Contributors# Albert Kiskorov Miquel Colomer ## n8n@0.175.1# View the commits for this version. **Release date:** 2022-05-03 This is a bug fix release. ### Bug fixes# Fixes a bug in the editor UI related to node versioning. ## n8n@0.175.0# View the commits for this version. **Release date:** 2022-05-02 This release adds support for node versioning, along with node enhancements and bug fixes. ### New features# #### Node versioning# 0.175.0 adds support for a lightweight method of node versioning. One node can contain multiple versions, allowing small version increments without code duplication. To use this feature, change the `version` parameter in your node to an array, and add your version numbers, including your existing version. You can then access the version parameter with `@version` in your `displayOptions` (to control which version n8n displays). You can also query the version in your `execute` function using `const nodeVersion = this.getNode().typeVersion;`. ### Node enhancements# * Google Sheets node: n8n now handles header names formatted as JSON paths. * Microsoft Dynamics CRM node: add support for regions other than North America. * Telegram node: add support for querying chat administrators. ### Bug fixes# * **core**: fixed an issue that was causing n8n to apply authentication checks, even when user management was disabled. * **core**: n8n now skips credentials checks for disabled nodes. * **editor**: fix a bug affecting touchscreen monitors. * HubSpot node: fix for search operators. * SendGrid node: fixed an issue with sending attachments. * Wise node: respect the time parameter on `get: exchangeRate`. ### Contributors# Jack Rudenko MC Naveen vcrwr ## n8n@0.174.0# View the commits for this version. **Release date:** 2022-04-25 ### New features# #### Sticky Notes# This release adds Sticky Notes, a new feature that allows you to annotate and comment on your workflows. Refer to the Sticky Notes for more information. ### Enhancements# * **core**: allow external OAuth connection. This enhancement adds support for connecting OAuth apps without access to n8n. * All AWS nodes now support AWS temporary credentials. * Google Sheets node: Added upsert support. * Microsoft Teams node: adds several enhancements: * An option to limit groups to "member of", rather than retrieving the whole directory. * An option to get all tasks from a plan instead of just a group member. * Autocompletion for plans, buckets, labels, and members in update fields for tasks. * MongoDB node: you can now parse dates using dot notation. ### Bug fixes# * Calendly Trigger node: updated the logo. * Microsoft OneDrive node: fixed an issue that was preventing upload of files with special characters in the file name. * QuickBooks node: fixed a pagination issue. ### Contributors# Basit Ali Cody Stamps Luiz Eduardo de Oliveira Oliver Trajceski pemontto Ryan Goggin ## n8n@0.173.1# View the commits for this version. **Release date:** 2022-04-19 Fixes a bug with the Discord node icon name. ## n8n@0.173.0# View the commits for this version. **Release date:** 2022-04-19 ### New nodes# #### Markdown node# Markdown node: added a new Markdown node to convert between Markdown and HTML. ### Enhancements# **editor**: you can now drag and drop nodes from the nodes panel onto the canvas. ### Node enhancements# * Discord node: additional fields now available when sending a message to Discord. * GoogleBigQuery: added support for service account authentication. * Google Cloud Realtime Database node: you can now select a region. * PagerDuty node: now supports more detail in incidents. * Slack node: added support for blocks in Slack message update. ### Bug fixes# * **core**: make the email for user management case insensitive. * **core**: add `rawBody` for XML requests. * **editor**: fix a glitch that caused dropdowns to break after adding expressions. * **editor**: reset text input value when closed with `Esc`. * Discourse node: fix an issue that was causing incomplete results when getting posts. Added a credentials test. * Zendesk Trigger node: remove deprecated targets, replace with webhooks. * Zoho node: fix pagination issue. ### Contributors# Florian Metz Francesco Pongiluppi Mark Steve Samson Mike Quinlan ## n8n@0.172.0# View the commits for this version. **Release date:** 2022-04-11 ### Enhancements# * Changes to the data output display in nodes. ### Node enhancements# Magento 2 Node: Added credential tests. PayPal Node: Added credential tests and updated the API URL. ### Bug fixes# **core**: Luxon now applies the correct timezone. Refer to Luxon for more information. **core**: fixed an issue with localization that was preventing i18n files from loading. Action Network Node: Fix a pagination issue and add credentials test. ### Contributors# Paolo Rechia ## n8n@0.171.1# View the commits for this version. **Release date:** 2022-04-06 This is a small bug fix release. ### Bug fixes# * **core**: fix issue with current executions not displaying. * **core**: fix an issue causing n8n to falsely skip some authentication. * WooCommerce Node: Fix a pagination issue with the GetAll operation. ## n8n@0.171.0# View the commits for this version. **Release date:** 2022-04-03 Breaking changes Please note that this version contains breaking changes. You can read more about them here. This release focuses on bug fixes and node enhancements, with one new feature, and one breaking change to the GraphQL node. ### Breaking change to GraphQL node# The GraphQL node now errors when the response includes an error. If you use this node, you can choose to: * Do nothing: a GraphQL response containing an error will now cause the workflow to fail. * Update your GraphQL node settings: set **Continue on Fail** to true to allow the workflow to continue even when the GraphQL response contains an error. ### New features# You can now download binary data from individual nodes in your workflow. ### Enhanced nodes# * Emelia Node: Add Campaign > Duplicate functionality. * FTP Node: Add option to recursively create directories on rename. * Mautic Node: Add credential test and allow trailing slash in host. * Microsoft Teams Node: Add chat message support. * Mocean Node: Add 'Delivery Report URL' option and credential tests. * ServiceNow Node: Add basicAuth support and fix getColumns loadOptions. * Strava Node: Add 'Get Streams' operation. ### Bug fixes# * **core:** Fix crash on webhook when last node did not return data * EmailReadImap Node: Fix issue that crashed process if node was configured wrong. * Google Tasks Node: Fix 'Show Completed' option and hide title field where not needed. * NocoDB Node: Fix pagination. * Salesforce Node: Fix issue that 'status' did not get used for Case => Create & Update ### Contributors# * Charles Lecalier * d3no * Ketan Somvanshi * Luis Cipriani * pemontto * Rhys Williams ## n8n@0.170.0# View the commits for this version. **Release date:** 2022-03-27 This release focuses on bug fixes and adding functionality to existing nodes. ### Enhanced nodes# * Crypto Node: Add Generate operation to generate random values. * HTTP Request Node: Add support for OPTIONS method. * Jira Node: Add Simplify Output option to Issue > Get. * Reddit Node: Add possibility to query saved posts. * Zendesk Node: Add ticket status On-hold. ### Bug fixes# * **core:** Add logs and error catches for possible failures in queue mode. * AWS Lambda Node: Fix Invocation Type > Continue Workflow. * Supabase Node: Send token also using Authorization Bearer; fix Row > Get operation. * Xero Node: Fix some operations and add support for setting address and phone number. * Wise Node: Fix issue when executing a transfer. ### Contributors# * FFTDB * Fred * Jasper Zonneveld * pemontto * Sergio * TheFSilver * Valentin Mocanu * Yassine Fathi ## n8n@0.169.0# View the commits for this version. **Release date:** 2022-03-20 This release includes: * New functionality for existing nodes * A new node for Linear * Bug fixes * And a license change! ### New license# This release changes n8n's license, from Apache 2.0 with Commons Clause to Sustainable Use License. This change aims to clarify n8n's license terms, and n8n's position as a fair-code project. Read more about the new license in License. ### New nodes# * Linear Node: Add Linear Node. ### Enhanced nodes# * HTTP Request Node: Allow Delete requests with body. * KoBoToolbox Node: Add KoBoToolbox Regular and Trigger Node. * Mailjet Node: Add credential tests and support for sandbox, JSON parameters & variables. * Mattermost Node: Add support for Channel search. ### Other improvements# * Add support for reading IDs from file with executeBatch command. ### Bug fixes# * GitHub node: Fix credential tests and File List operation. * Telegram node: Fix sending binary data when disable notification is set. ### Contributors# * Manuel * Marcin Kozey * Matthew Walther * Yann Jouanique ## n8n@0.168.2# For a comprehensive list of changes, view the commits for this version. **Release date:** 2022-03-16 This release contains an important bug fix for 0.168.0. Users on 0.168.0 or 0.168.1 should upgrade to this. ## n8n@0.168.1# For a comprehensive list of changes, view the commits for this version. **Release date:** 2022-03-15 A bug fix for user management: fixed an issue with email templates that was preventing owners from inviting members. ## n8n@0.168.0# For a comprehensive list of changes, view the commits for this version. **Release date:** 2022-03-14 ### New feature: user management# User management in n8n allows you to invite people to work in your self-hosted n8n instance. It includes: * Login and password management * Adding and removing users * Two account types: owner and member Check out the user management documentation for more information. ## n8n@0.167.0# For a comprehensive list of changes, view the commits for this version. **Release date:** 2022-03-13 ### Highlights# #### Luxon and JMESPath# 0.167.0 adds support for two new libraries: * Luxon: a JavaScript library for working with date and time * JMESPath: a query language for JSON You can use Luxon and JMESPath in the code editor and in expressions. #### New expressions variables# We've added two new variables to simplify working with date and time in expressions: * `$now`: a Luxon object containing the current timestamp. Equivalent to DateTime.now(). * `$today`: a Luxon object containing the current timestamp, rounded down to the day. Equivalent to DateTime.now().set({ hour: 0, minute: 0, second: 0, millisecond: 0 }). #### Negative operations in If and Switch nodes# Made it easier to perform negative operations on strings. This release adds one new operation for numbers: * Is Not Empty And the following new operations for strings: * Not Ends With * Regex Not Match * Not Starts With * Is Not Empty Additionally, Regex is now labelled Regex Match. #### New node: Redis Trigger# Added a Redis Trigger node, so you can now start workflows based on a Redis event. * Redis Trigger: Added a Redis Trigger node. ### Core functionality# * Added support for Luxon and JMESPath. * Added two new expressions variables, `$now` and `$today`. * Added more negative operations for numbers and strings. * Added a link to the course from the help menu. ### Nodes# * Facebook Graph API: Added suport for Facebook Graph API 13. * HubSpot: Added suport for private app token authentication. * MongoDB: Added the aggregate operation. * Redis Trigger: Added a Redis Trigger node. * Redis: Added support for publish operations. * Strapi: Added support for Strapi 4. * WordPress: Added status as an option to getAll post requests. ### Bugfixes# * The Google Calendar node now correctly applies timezones when creating, updating, and scheduling all day events. * Fixed a bug that occasionally caused n8n to crash, or shut down workflows unexpectedly. * You can now use long credential type names with Postgres. ### Contributors# * Luiz Eduardo de Oliveira Fonseca * Vitaliy Fratkin * sol * vcrwr * FFTDB ## n8n@0.166.0# For a comprehensive list of changes, view the commits for this version. **Release date:** 2022-03-08 ### New nodes# * Odoo ### Enhanced nodes# * Function: Added support for items without a JSON key. ### Core functionality# * Added new environment variable `N8N_HIRING_BANNER_ENABLED` to enable/disable the hiring banner. * Fixed a bug preventing keyboard shortcuts from working as expected. * Fixed a bug causing tooltips to be hidden behind other elements. * Fixed a bug causing some credentials to be hidden from the credentials list. ### Bug fixes# * Baserow: Fixed a bug preventing the Sorting option of the Get All operation from working as expected. * HTTP Request: Fixed a bug causing Digest Authentication to fail in some scenarios. * Wise: Fixed a bug causing API requests requiring Strong Customer Authentication (SCA) to fail. ### Contributors# pemontto ## n8n@0.165.0# For a comprehensive list of changes, view the commits for this version. **Release date:** 2022-02-28 Breaking changes Please note that this version contains breaking changes. You can read more about them here. ### New nodes# * Onfleet ### Enhanced nodes# * Asana: Added Create operation to the Project resource. * Mautic: Added Edit Contact Points, Edit Do Not Contact List, Send Email operations to Contact resource. Also added new Segment Email resource. * Notion (Beta): Added support for rollup fields to the Simplify Output option. Also added the Parent ID to the Get All operation of the Block resource. * Pipedrive: Added Marketing Status field to the Create operation of the Person resource, also added User ID field to the Create and Update operations of the Person resource. ### Core functionality# * Added support for workflow templates. * Fixed a bug causing credentials tests to fail for versioned nodes. * Fixed a build problem by addind dependencies `@types/lodash.set` to the `workflow` package and `@types/uuid` to the `core` package. * Fixed an error causing some resources to ignore a non-standard `N8N_PATH` value. * Fixed an error preventing the placeholder text from being shown when entering credentials. * Improved error handling for telemetry-related errors. ### Bug fixes# * Orbit: Fixed a bug causing API requests to use an incorrect workspace identifier. * TheHive: Fixed a bug causing the Ignore SSL Issues option to be applied incorrectly. ### Contributors# alexwitkowski, Iñaki Breinbauer, lsemaj, Luiz Eduardo de Oliveira Fonseca, Rodrigo Correia, Santiago Botero Ruiz, Saurabh Kashyap, Ugo Bataillard ## n8n@0.164.1# For a comprehensive list of changes, check out the commits for this version. **Release date:** 2022-02-20 ### Core Functionality# * Fixed a bug preventing webhooks from working as expected in some scenarios. ## n8n@0.164.0# For a comprehensive list of changes, check out the commits for this version. **Release date:** 2022-02-20 ### New nodes# * Google Chat ### Enhanced nodes# * Grist: Added support for self-hosted Grist instances. * Telegram Trigger: Added new Extra Large option to Image Size field. * Webhook: Added new No Response Body option. Also added support for DELETE, PATCH and PUT methods. ### Core Functionality# * Added new database indices to improve the performance when querying past executions. * Fixed a bug causing the base portion of a URL not to be prepended as expected in some scenarios. * Fixed a bug cuasing expressions to resolve incorrectly when referencing non-existent nodes or parameters. ### Contributors# Jhalter5Stones, Valentina Lilova, thorstenfreitag ## n8n@0.163.1# For a comprehensive list of changes, check out the commits for this version. **Release date:** 2022-02-13 ### Core Functionality# * Fixed a bug preventing OAuth2 authentication from working as expected in some scenarios. ## n8n@0.163.0# For a comprehensive list of changes, check out the commits for this version. **Release date:** 2022-02-13 ### New nodes# * HaloPSA * Linear Trigger * Zammad ### Enhanced nodes# * GitHub: Added Reference option to the Get operation of the File resource. * Twilio: Added Status Callbacks option. * uProc: Sanitized Data Webhook field description. ### Core Functionality# * Added automatic sorting by relative position to the node list inside the expression editor. * Added new `/workflows/demo` page to allow read-only rendering of workflows inside an iframe. * Added optional `/healthz` health check endpoint to worker instances. * Fixed unwanted list autofill behaviour inside the expression editor. * Improved the GitHub actions used by the nightly Docker image. ### Bug fixes# * Function: Fixed a bug leaving the code editor size unchanged after resizing the window. * Function Item: Fixed a bug leaving the code editor size unchanged after resizing the window. * IF: Removed the empty sections left after removing a condition. * Item Lists: Fixed an erroneous placeholder text. ### Contributors# Iñaki Breinbauer, Manuel, pemontto ## n8n@0.162.0# For a comprehensive list of changes, check out the commits for this version. **Release date:** 2022-02-06 ### Enhanced nodes# * GitHub: Added new List operation to File resource. ### Core Functionality# * Added configurable debug logging for telemetry. * Added support for defining nodes through JSON. This functionality is in alpha state and breaking changes to the interface can take place in upcoming versions. * Added telemetry support to page events occuring before telemetry is initialized. * Fixed a bug preventing errors in sub-workflows from appearing in parent executions. * Fixed a bug where node versioning would not work as expected. * Fixed a bug where remote parameters would not load as expected. * Fixed a bug where unkown node types would not work as expected. * Prevented the node details view from opening automatically after duplicating a node. * Removed dependency `fibers` which is incompatible with the current LTS version 16 of Node.js. ### Bug fixes# * XML: Fixed a bug causing the node to alter incoming data. ### Contributors# pemontto ## n8n@0.161.1# For a comprehensive list of changes, check out the commits for this version. **Release date:** 2022-02-01 ### Core Functionality# * Added optional debug logging to health check functionality. ## n8n@0.161.0# For a comprehensive list of changes, check out the commits for this version. **Release date:** 2022-01-30 ### Core Functionality# * Added default polling interval for trigger nodes using polling. * Added support for additional hints below parameter fields. * Fixed a bug preventing default values from being used when testing credentials. * Improved the wording in the _Save your Changes?_ dialog. ### Bug fixes# * Airtable: Improved field description. * Airtable Trigger: Improved field description. * erpNext: Prevented the node from throwing an error when no data is found. * Gmail: Fixed a bug causing the BCC field to be ignored. * Move Binary Data: Fixed a bug causing the binary data to JSON conversion to fail when using filesystem-based binary data handling. * Slack: Fixed a typo in the Type field. ### Contributors# fabian wohlgemuth ## n8n@0.160.0# For a comprehensive list of changes, check out the commits for this version. **Release date:** 2022-01-22 ### New nodes# * BambooHR ### Core Functionality# * Fixed a bug preventing the binary data preview from using the full available height and width. * Fixed a build problem by pinning chokidar version 3.5.2. * Prevent workflow activation when no trigger is presentand introduced a modal explaining production data handling. * Fixed _Filter by tags_ placeholder text used in the Open Workflow modal. ### Bug fixes# * HTTP Request: Fixed a bug causing custom headers from being ignored. * Mautic: Fixed a bug preventing all items from being returned in some situations. * Microsoft OneDrive: Fixed a bug preventing more than 200 items from being returned. * Spotify: Fixed a bug causing the execution to fail if there are more than 1000 search results, also fixed a bug preventing the Get New Releases operation of the Album resource from working as expected. ### Contributors# fabian wohlgemuth ## n8n@0.159.1# For a comprehensive list of changes, check out the commits for this version. **Release date:** 2022-01-18 ### Core Functionality# * Temporarily removed debug logging for Axios requests. ## n8n@0.159.0# For a comprehensive list of changes, check out the commits for this version. **Release date:** 2022-01-16 ### New nodes# * Jenkins ### Enhanced nodes# * GraphQL: Added support for additional authentication methods Basic Auth, Digest Auth, OAuth1, OAuth2, and Query Auth. ### Core Functionality# * Added support for executing workflows without an ID through the CLI. * Fixed a build problem. * Fixed a bug preventing the tag description from being shown on the canvas. * Improved build performance by skipping the `node-dev` package during build. ### Bug fixes# * Box: Fixed a bug causing some files to be corrupted during download. * Philips Hue: Fixed a bug preventing the node from connecting to Philips Hue. * Salesforce: Fixed a bug preventing filters on date and datetime fields from working as expected. * Supabase: Fixed an errorneous documentation link. ### Contributors# Phil Clifford ## n8n@0.158.0# For a comprehensive list of changes, check out the commits for this version. **Release date:** 2022-01-09 ### New nodes# * Microsoft Graph Security * SyncroMSP * Supabase ### Enhanced nodes# * Edit Image: Added Transparent operation. * Kafka: Added Use Schema Registry option. * Kafka Trigger: Added Use Schema Registry option. * Redis: Added database field to credentials. * Salesforce: Added Account Number field. ### Core Functionality# * Added new external hook when active workflows finished initializing. * Fixed a bug preventing the personalisation survey from showing up. * Improved telemetry. ### Bug fixes# * Edit Image: Fixed a bug causing two items to be returned. * iCalendar: Fixed a bug preventing dates in January from working as expected. * Merge: Fixed causing empty binary data to overwrite other binary data on merge. ### Contributors# Ricardo Georgel, Pierre, Vahid Sebto ## n8n@0.157.1# For a comprehensive list of changes, check out the commits for this version. **Release date:** 2022-01-03 ### Core Functionality# * Fixed a bug where not all nodes could use the new binary data handling. ## n8n@0.157.0# For a comprehensive list of changes, check out the commits for this version. **Release date:** 2022-01-02 ### Enhanced nodes# * Function: The node now prevents unsupported data from being returned. * Function Item: The node now prevents unsupported data from being returned. * HubSpot: Added Engagement resource with Create, Delete, Get, and Get All operations. * Notion (Beta): Upgraded the Notion node: Added Search operation for the Database resource, Get operation for Database Page resource, Archive operation for the Page resource. Also added Simplify Output option and test for credential validity. * Wait: Added new Ignore Bots option. * Webhook: Added new Ignore Bots option. ### Core Functionality# * Fixed a bug where a wrong number suffix was used after duplicating nodes. ### Bug fixes# * HTTP Request: Fixed a bug where using Digest Auth would fail. ### Contributors# pemontto ## n8n@0.156.0# For a comprehensive list of changes, check out the commits for this version. **Release date:** 2021-12-25 ### Enhanced nodes# * GitLab Trigger: Added new trigger events: Confidential Issue, Confidential Comment, Deployment, Release. * Google Drive: Added support for downloading and converting native Google files. * Kitemaker: Added Space ID field to Create operation of Work Item resource. * Raindrop: Added Parse Metadata option to Create, Update operations of the Bookmark resource. ### Core Functionality# * Added execution ID to workflow.postExecute hook * Added response body to UI for failed Axios requests * Added support for automatically removing new lines from Google Service Account credentials * Added support for disabling the UI using environment variable * Fixed a bug causing the wrong expression result to be shown for items from an output other than the first * Improved binary data management * Introduced Monaco as new UI code editor ### Contributors# Arpad Gabor, Leo Lou, Manuel ## n8n@0.155.2# For a comprehensive list of changes, check out the commits for this version. **Release date:** 2021-12-19 ### Core Functionality# * Added support for internationalization (i18n). This functionality is currently in alpha status and breaking changes are to be expected. ## n8n@0.154.0# For a comprehensive list of changes, check out the commits for this version. **Release date:** 2021-12-19 ### Enhanced nodes# * Plivo: Added user agent to all API requests. ### Core Functionality# * Allow deletion of nodes from the canvas using the backspace key * Fixed an issue causing clicks in the value survey to impact the main view * Fixed an issue preventing the update panel from closing ### Bug fixes# * Todoist: Fixed a bug where using the additional field Due Date Time on the Task resource would cause the Create operation to fail. ### Contributors# Mohammed Huzaif, Лебедев Иван ## n8n@0.153.0# For a comprehensive list of changes, check out the commits for this version. **Release date:** 2021-12-11 ### New nodes# * Figma Trigger (Beta) * Workable Trigger ### Enhanced nodes# * Google Contacts: Added Query option to Get All operation, also prevented the node from failing when no contacts are found. * HTTP Request: Added support for query-based authentication. * Home Assistant: Added support for loading possible options in the Domain, Service, and Entity ID fields. * One Simple API: Added support for Social Profile resources. * PagerDuty: Write scope is now requested upon authentication against the PagerDuty OAuth2 API. ### Core Functionality# * Added frontend for value surveys * Fixed an issue preventing the recommendation logic from working as expected after selecting a work area * Fixed an issue where a wrong exit code was sent when running n8n on an unsupported version of Node.js * Fixed an issue where node options would disappear on hovering when a node isn't selected * Fixed an issue where the execution id was missing when running n8n in queue mode * Fixed an issue where execution data was missing when waiting for a webhook in queue mode * Improved error handling when the n8n port is already in use * Improved diagnostic events * Removed toast notification on webhook deletion, added toast notification after node is copied * Removed default trigger tooltip for polling trigger nodes ### Bug fixes# * APITemplate.io: Fixed a bug where the Create operation on the Image resource would fail when the Download option isn't enabled. * HubSpot: Fixed authentication for new HubSpot applications by using granular scopes when authenticating against the HubSpot OAuth2 API. * HubSpot Trigger: Fixed authentication for new HubSpot applications by using granular scopes when authenticating against the HubSpot Developer API. * Jira Software: Fixed an issue where the Reporter field would not work as expected on Jira Server instances. * Salesforce: Fixed a typo preventing the value in the amount field of from being saved. ### Contributors# pemontto, Jascha Lülsdorf, Jonathan Bennetts ## n8n@0.152.0# For a comprehensive list of changes, check out the commits for this version. **Release date:** 2021-12-04 ### New nodes# * Google Calendar Trigger ### Enhanced nodes# * Telegram Trigger: Added support for downloading images to channel\_post updates. ### Core Functionality# * Added a plus (+) connector to end nodes * Allowed opening workflows and executions in a new window when using Ctrl + Click * Enforced type checking for all node parameters * Fixed a build issue in the custom n8n docker image * Fixed a memory leak in the UI which could occur when renaming nodes or navigate to another workflow * Improved stability of internal test workflows * Improved expression security * Introduced redirect to a new page and UI error message when trying to open a deleted workflow * Introduced support for multiple arguments when logging * Updated the onboarding survey ### Bug fixes# * Google BigQuery: Fixed a bug preventing pagination from working as expected when the Return All option is enabled. * RabbitMQ Trigger: Added Trigger to the name of the trigger node. * Salesforce: Fixed a typo affecting the Type field of the Opportunity resource. ### Contributors# Zvonimir Erdelja, m2scared ## n8n@0.151.0# For a comprehensive list of changes, check out the commits for this version. **Release date:** 2021-11-26 ### New nodes# * DHL * Grafana ### Core Functionality# * Fixed a bug causing connections between nodes to disappear when renaming a newly added node after drawing a connection to its endpoints. * Fixed a build issue by adding TypeScript definitions for validator.js to CLI package, also fixed a linting issue by removing an unused import. * Improved the waiting state of trigger nodes to explain when an external event is required. * Loops are now drawn below their source node. ### Bug fixes# * Edit Image: Fixed an issue preventing the Composite operation from working correctly in some cases. ### Contributors# Jonathan Bennetts ## n8n@0.150.0# For a comprehensive list of changes, check out the commits for this version. **Release date:** 2021-11-19 ### Enhanced nodes# * Jira Software: Added Components as an additional field. ### Core Functionality# * Fixed a build issue by pinning rudder-sdk-node version 1.0.6 in CLI package. * Fixed an issue preventing the `n8n import:workflow --separate` CLI command from finding workflows on Windows. * Further improved the expression security. * Moved all nodes into separate directories in preparation for internationalization. * Removing default headers for PUT and PATCH operations when using Axios. * Revamped the workflow canvas. ### Bug fixes# * HTTP Request: Fixed an issue causing the wrong Content-Type header to be set when downloading a file. * ServiceNow: Fixed incorrect mapping of incident urgency and impact values. * Start: Fixed an issue causing the node to be disabled in a new workflow. * Xero: Fixed an issue causing the node to only fetch the first page when querying the Xero API. ## n8n@0.149.0# For a comprehensive list of changes, check out the commits for this version. **Release date:** 2021-11-13 ### New nodes# * One Simple API ### Enhanced nodes# * Edit Image: Added Circle Primitive to Draw operation. Also added Composite operation. * Zendesk: Added check for API credentials validity. * Zulip: Added additional field Role to the Update operation of the User resource. ### Core Functionality# * Fixed an issue causing an error message to be thrown when executing a workflow through the CLI. * Improved expression security by limiting the available process properties. * Improved the behaviour of internal tests executed through the CLI. * Updated the owner of the node user's home directory in the custom docker image. ### Bug fixes# * Google Tasks: Fixed an issue where the Due Date field had no effect (Update operation) or was unavailable (Create operation). * HTTP Request: Fixed an issue where the Content-Length header was not calculated and sent when using the a Body Content Type of Form-Data Multipart. * Stripe Trigger: Fixed an issue preventing the node from being activated when a previously created webhook no longer exists. * Toggl Trigger: Updated the API URL used by the node. ### Contributors# GeylaniBerk, Jonathan Bennetts ## n8n@0.148.0# For a comprehensive list of changes, check out the commits for this version. **Release date:** 2021-11-05 ### New nodes# * Dropcontact * Respond to Webhook ### Enhanced nodes# * Lemlist: Added additional fields to Create operation of Lead resource. * Slack: Added User Group resource. * Todoist: Added Update operation to Task resource. * Wait: Improved descriptions of available Respond options. * WooCommerce: Added password field to Crate operation of Customer resource. ### Core Functionality# * Added a hook after workflow creation. * Fixed a build issue with npm v7 by overriding unwanted behaviour through the .npmrc file. * Fixed an issue preventing unknown node types from being imported. * Fixed an issue with the UI falsely indicating a credential can't be selected when using SQLite and multiple credentials with the same name exist. ### Bug fixes# * Stripe: Fixed an issue where setting additional Metadata fields would not have the expected effect. Also fixed an issue where pagination would not work as expected. * Zendesk: Fixed an issue preventing the additional field External ID from being evaulated correctly. ### Contributors# mizzimizzi, nikozila, Pauline ## n8n@0.147.1# For a comprehensive list of changes, check out the commits for this version. **Release date:** 2021-11-03 ### Core Functionality# * Fixed a build issue by moving the `chokidar` dependency to a regular dependency. ## n8n@0.147.0# For a comprehensive list of changes, check out the commits for this version. **Release date:** 2021-11-03 ### New nodes# * Local File Trigger ### Core Functionality# * Improved the database migration process to reduce memory footprint. * Fixed an issue with telemetry by adding an anonymous ID. ## n8n@0.146.0# For a comprehensive list of changes, check out the commits for this version. **Release date:** 2021-10-29 ### New nodes# * Microsoft Dynamics CRM ### Enhanced nodes# * Agile CRM: Added Filters to Get All operation of Contact and Company resources. * Date & Time: Ensuring the return values are always of type string. * IF: Added support for moment types to Date & Time condition. ### Core Functionality# * Added name and ID of a workflow to its settings. * Added parameter inputs to be multi-line. * Fixed an issue with declaring proxies when Axios is used. * Fixed an issue with serializing arrays and special characters. * Fixed an issue with updating expressions after renaming a node. ### Bug fixes# * HTTP Request: Fixed an issue with the Full Response option not taking effect when used with the Ignore Response Code option. ### Contributors# Valentina Lilova, Oliver Trajceski ## n8n@0.145.0# For a comprehensive list of changes, check out the commits for this version. **Release date:** 2021-10-22 ### New nodes# * AWS Textract * Google Drive Trigger ### Enhanced nodes# * Bitbucket Trigger: Added check for credentials validity. Removed deprecated User and Team resources, and added the Workspace resource. * GitHub: Added check for API credentials validity. * Home Assistant: Added check for credentials validity. * Jira Software: Added check for credentials validity. * Microsoft OneDrive: Added functionality to create folder hierarchy automatically upon subfolder creation. * Pipedrive: Added All Users option to Get All operation of Activity resource. * Slack: Increase the Slack default query limit from 5 to 100 in order to reduce number of requests. * Twitter: Added Tweet Mode additional field to the Search operation of Tweet resource. ### Core Functionality# * Changed `vm2` library version from `3.9.3` to `3.9.5`. * Fixed an issue with ignoring the response code. * Fixed an issue with overwriting credentials using environment variables. * Fixed an issue with using query strings combined with the `x-www-form-urlencoded` content type. * Introduced telemetry. ### Bug fixes# * Jira Software: Fixed an issue with the Expand option for the Issue resource. Also fixed an issue with using custom fields on Jira Server. * Slack: Fixed an issue with pagination when loading more than 1,000 channels. * Strapi: Fixed an issue using the Where option of the Get All operation. * WooCommerce: Fixed an issue where a wrong postcode field name was used for the Order resource. ### Contributors# pemontto, rdd2, robertodamiani, Rodrigo Correia ## n8n@0.144.0# For a comprehensive list of changes, check out the commits for this version. **Release date:** 2021-10-15 ### Enhanced nodes# * Nextcloud: Added Share operation to the File and Folder resources. * Zendesk: Added support for deleting, listing, getting, and recovering suspended tickets. Added the query option for regular tickets. Added assignee emails, internal notes, and public replies options to the update ticket operation. ### Core Functionality# * Improved the autofill behaviour on Google Chrome when entering credentials. ### Bug fixes# * Airtable: Fixed an issue with the sort field. * Cron: Set the version of the cron library to 1.7.2. ### Contributors# Jonathan Bennetts ## n8n@0.143.0# For a comprehensive list of changes, check out the commits for this version. **Release date:** 2021-10-14 ### Enhanced nodes# * Pipedrive: Added support for getting activities from deal ID. * Facebook Graph API: Added support for Facebook Graph API versions 11 and 12. ### Core Functionality# * Fixed a build issue affecting a number of AWS nodes. * Changed workflows to use credential ids primarily (instead of names), allowing users to have different credentials with the same name. ### Bug fixes# * FTP: Fixed error when opening FTP/SFTP credentials. ### Contributors# Rodrigo Correia ## n8n@0.142.0# For a comprehensive list of changes, check out the commits for this version. **Release date:** 2021-10-07 ### New nodes# * Stop and Error ### Core Functionality# * Fixed overlapping buttons when viewing on mobile. * Fixed issue with partial workflow executions when Wait node was last. * Fixed issue with broken non-JSON requests. * Node errors now only displayed for executing nodes, not disconnected nodes. * Automatic save when executing new workflows with Webhook node. * Fixed an issue with how arrays were serialized for certain nodes. * Fixed an issue where executions could not be cancelled when running in Main mode. * Duplicated workflows now open in a new window. ### Bug fixes# * HTTP Request: Fixed 'Ignore response code' flag. * Rundeck: Fixed issue with async loading of credentials. * SeaTable: Fixed issue when entering a Baser URI with a trailing slash. ### Contributors# Günther, Tom Klingenberg ## n8n@0.141.1# For a comprehensive list of changes, check out the commits for this version. **Release date:** 2021-10-01 ### Core Functionality# * Fixed issue with body formatting of `x-form-www-urlencoded` requests. ## n8n@0.141.0# For a comprehensive list of changes, check out the commits for this version. **Release date:** 2021-09-30 ### New nodes# * Grist * SeaTable * SeaTable Trigger * urlscan.io ### Core Functionality# * Performance improvements in Editor UI * Improved error reporting ### Contributors# Alex Hall, Tom Klingenberg ## n8n@0.140.0# For a comprehensive list of changes, check out the commits for this version. **Release date:** 2021-09-29 ### New nodes# * Splunk ### Enhanced nodes# * Telegram: Added binary data support to the Send Animation, Send Audio, Send Document, Send Photo, Send Video, and Send Sticker operations. ### Core Functionality# * Fixed startup behavior when running n8n in scaled mode (i.e. `skipWebhoooksDeregistrationOnShutdown` is enabled). * Fixed behavior around handling empty response bodies. * Fixed an issue with handling of refresh tokens. ### Contributors# pemontto ## n8n@0.139.1# For a comprehensive list of changes, check out the commits for this version. **Release date:** 2021-09-23 ### Core Functionality# * Bug fixes and improvements for Editor UI. ## n8n@0.139.0# For a comprehensive list of changes, check out the commits for this version. **Release date:** 2021-09-22 ### New nodes# * Elastic Security * Misp * Netlify * Netlify Trigger ### Enhanced nodes# * HubSpot Trigger: Authentication method changed to OAuth2. * Wait: Added improved status messages for Wait behavior. ### Core Functionality# * Updated node design to include support for versioned nodes. ### Bug fixes# * SendGrid: Fixed issue with adding contacts to lists. ### Contributors# Matías Aguirre ## n8n@0.138.0# For a comprehensive list of changes, check out the commits for this version. **Release date:** 2021-09-15 ### New nodes# * Item Lists * Magento 2 ### Enhanced nodes# * Baserow: Added the following filter options: Contains, Contains Not, Date Before Date, Date After Date, Filename Contains, Is Empty, Is Not Empty, Link Row Has, Link Row Does Not Have, Single Select Equal, and Single Select Not Equal. * Pipedrive: Added support for Notes on Leads. * WeKan: Added Sort field to the Card resource. ### Core Functionality# * General UX improvements to the Editor UI. * Fixed an issue with the `PayloadTooLargeError`. ### Bug fixes# * Lemlist: Fixed issue where events were not sent in the correct property. * Notion: Fixed issue listed unnamed databases. ### Contributors# bramknuever, Chris Magnuson ## n8n@0.137.0# For a comprehensive list of changes, check out the commits for this version. **Release date:** 2021-09-05 ### New nodes# * Freshservice ### Enhanced nodes# * Clockify: Added Task resource. * HubSpot: Added dropdown selection for Properties and Properties with History filters for Get All Deals operations. * Mautic: Added Campaign Contact resource. * MongoDB: Added ability to query documents by '\_id'. * MQTT: Added SSL/TLS support to authentication. * MQTT Trigger: Added SSL/TLS support to authentication. * Salesforce: Added File Extension option to the Document resource. Added Type field to Task resource. * Sms77: Added Voice Call resource. Added the following options to SMS resource: Debug, Delay, Foreign ID, Flash, Label, No Reload, Performance Tracking, TTL. * Zendesk: Added Organization resource. Added Get Organizations and Get Related Data operations to User resource. ### Core Functionality# * Added execution ID to logs of queue processes. * Added description to operation errors. * Added ability for webhook processes to wake waiting executions. ### Bug fixes# * HubSpot: Fixed issue with 'RequestAllItems' API. * WordPress: Fixed issue with 'RequestAllItems' API only returning the first 10 items. ### Contributors# André Matthies, DeskYT, Frederic Alix, Jonathan Bennetts, Ketan Somvanshi, Luiz Eduardo de Oliveira Fonseca, TheFSilver ## n8n@0.136.0# For a comprehensive list of changes, check out the commits for this version. **Release date:** 2021-08-30 ### Enhanced nodes# * Notion: Added handling of Rich Text when simplifying data. ### Core Functionality# * General UI design improvements. * Improved errors messages during debugging of custom nodes. * All packages upgraded to TypeScript 4.3.5, improved linting and formatting. ### Bug fixes# * FTP: Fixed issue where incorrect paths were displayed when using the node. * Wait: Fixed issue when receiving multiple files using On Webhook Call operation. * Webhook: Fixed issue when receiving multiple files. ## n8n@0.135.3# For a comprehensive list of changes, check out the commits for this version. **Release date:** 2021-08-27 ### Core Functionality# * Fixed Canvas UI inconsistencies when duplicating workflows. * Added log message during upgrade to indicate database migration has started. * General improvements to parameter labels and tooltips. ### Contributors# Kyle Mohr ## n8n@0.135.2# For a comprehensive list of changes, check out the commits for this version. **Release date:** 2021-08-26 ### Core Functionality# * Added expression support for credentials. * Fixed performance issues when loading credentials. ## n8n@0.135.1# For a comprehensive list of changes, check out the commits for this version. **Release date:** 2021-08-23 ### Core Functionality# * Fixed an issue where if n8n was shutdown during database migration while upgrading versions, errors would result upon next startup. ## n8n@0.135.0# For a comprehensive list of changes, check out the commits for this version. **Release date:** 2021-08-22 Breaking changes Please note that this version contains breaking changes. You can read more about it here. The features that introduced the breaking changes have been flagged below. ### New nodes# * Form.io Trigger * Formstack Trigger * Wait ### Core Functionality# * In-node method for accessing binary data is now asynchronous and a helper function for this has been implemented. * Credentials are now loaded from the database on-demand. * Webhook UUIDs are automatically updated when duplicating a workflow. * Fixed an issue when referencing values before loops. ### Bug fixes# * Interval: Fixed issue where entering too large a value (> 2147483647ms) resulted in an interval of 1sec being used rather than an error. ### Contributors# Aniruddha Adhikary, lublak, parthibanbalaji ## n8n@0.134.0# For a comprehensive list of changes, check out the commits for this version. **Release date:** 2021-08-15 ### Enhanced nodes# * AWS DynamoDB: Added Scan option to Item > Get All operation. * Google Drive: Added File Name option to File > Update operation. * Mautic: Added the following fields to Company resource: Address, Annual Revenue, Company Email, Custom Fields, Description, Fax, Industry, Number of Employees, Phone, Website. * Notion: Added Timezone option when inserting Date fields. * Pipedrive: Added the following Filters options to the Deal > Get All operation: Predefined Filter, Stage ID, Status, and User ID. * QuickBooks: Added the Transaction resource and Get Report operation. ### Core Functionality# * Integrated Nodelinter in n8n. * Fix to add a trailing slash (`/`) to all webhook URLs for proper functionality. ### Bug fixes# * AWS SES: Fixed issue where special characters in the message were not encoded. * Baserow: Fixed issue where Create operation inserted null values. * HubSpot: Fixed issue when sending context parameter. ### Contributors# calvintwr, CFarcy, Jeremie Dokime, Michael Hirschler, Rodrigo Correia, sol ## n8n@0.133.0# For a comprehensive list of changes, check out the commits for this version. **Release date:** 2021-08-08 ### New nodes# * Monica CRM ### Enhanced nodes# * HTTP Request: Added Follow All Redirects option. * Salesforce: Added Record Type ID field. ### Core Functionality# * Fixed UI lag when editing large workflows. ### Bug fixes# * Nextcloud: Fixed issue where List operation on an empty Folder returned an error. * Spotify: Fixed issues with pagination and infinite executions. ### Contributors# Jacob Burrell, Лебедев Иван ## n8n@0.132.2# For a comprehensive list of changes, check out the commits for this version. **Release date:** 2021-08-02 ### Bug fixes# * Interval: Fixed issue with infinite executions. ### Contributors# Лебедев Иван ## n8n@0.132.1# For a comprehensive list of changes, check out the commits for this version. **Release date:** 2021-08-02 ### Core Functionality# * Changed TypeORM version to 0.2.34 ## n8n@0.132.0# For a comprehensive list of changes, check out the commits for this version. **Release date:** 2021-08-01 ### New nodes# * Freshworks CRM * Google Perspective * Marketstack * NocoDB ### Enhanced nodes# * Facebook Trigger: Added Fields parameter. * Gmail: Added Sender Name parameter. * Home Assistant: Added Event resource. * Pipedrive: Added Deal Product resource. * Salesforce: Added Document resource with Upload operation. * WooCommerce: Added Customer resource. ### Core Functionality# * Fixed an issue for large internal values. ### Contributors# Ed Linklater, Rodrigo Correia ## n8n@0.131.0# For a comprehensive list of changes, check out the commits for this version. **Release date:** 2021-07-24 Breaking change Please note that this version contains a breaking change. You can read more about it here. The features that introduced the breaking changes have been flagged below. ### New nodes# * Webex by Cisco * Webex by Cisco Trigger ### Enhanced nodes# * Pipedrive: Added Lead resource. Added Search operation to Organization resource. * Taiga Trigger: Added Resource and Operations filters. ### Core Functionality# * Added Continue-on-fail support to all nodes. * Added new version notifications. * Added Refresh List for remote options lists. * Added `$position` expression variable to return the index of an item within a list. ### Bug fixes# * Spreadsheet File: Fixed issue when saving dates. ### Contributors# Anthr@x, Felipe Cecagno ## n8n@0.130.0# For a comprehensive list of changes, check out the commits for this version. **Release date:** 2021-07-18 Breaking change Please note that this version contains a breaking change. You can read more about it here. The features that introduced the breaking changes have been flagged below. ### New nodes# * AWS DynamoDB * Elasticsearch * ServiceNow ### Enhanced nodes# * Kafka Trigger: Added Read Messages From Beginning option. * Salesforce: Added Sandbox Environment Type for OAuth2 credentials. * Taiga: Added Epic, Task, and User Story operations. * TheHive: Added Custom Fields option to the available Additional Fields. ### Core Functionality# * Fixed an issue where failed workflows were displayed as "running". * Fixes issues with uncaught errors. ### Bug fixes# * Notion: Fixed issue when filtering field data type. ### Contributors# Michael Hirschler, Mika Luhta, Pierre Lanvin ## n8n@0.129.0# For a comprehensive list of changes, check out the commits for this version. **Release date:** 2021-07-12 ### New nodes# * Baserow ### Bug fixes# * SSH: Fixed issue with access rights when downloading files. ### Contributors# Jérémie Pardou-Piquemal ## n8n@0.128.0# For a comprehensive list of changes, check out the commits for this version. **Release date:** 2021-07-11 ### New nodes# * Home Assistant * Stripe ### Enhanced nodes# * HTTP Request: Added support for arrays in Querystring. Any parameter appearing multiple times with the same name is grouped into an array. * Mautic: Added Contact Segment resource. * Telegram: Added Delete operation to the Message resource. ### Core Functionality# * Performance improvement for loading of historical executions (> 3mil) when using Postgres. * Fixed error handling for unending workflows and display of "unknown" workflow status. * Fixed format of Workflow ID when downloading from UI Editor to enable compatibility with importing from CLI. ### Bug fixes# * Microsoft SQL: Fixed an issue with sending the connectionTimeout parameter, and creating and updating data using columns with spaces. ### Contributors# Kaito Udagawa, Rodrigo Correia ## n8n@0.127.0# For a comprehensive list of changes, check out the commits for this version. **Release date:** 2021-07-04 Breaking change Please note that this version contains a breaking change. You can read more about it here. The features that introduced the breaking changes have been flagged below. ### Enhanced nodes# * Airtable: Added Bulk Size option to all Operations. * Box: Added Share operation to File and Folder resources. * Salesforce: Added Last Name field to Update operation on Contact resource. * Zoho CRM: Added Account, Contact, Deal, Invoice, Product, Purchase, Quote, Sales Order, and Vendor resources. ### Core Functionality# * Added a workflow testing framework using a new CLI command to execute all desired workflows. Run `n8n executeBatch --help` for details. * Added support to display binary video content in Editor UI. ### Bug fixes# * Google Sheets: Fixed an issue with handling 0 value that resulted in empty cells. * SSH: Fixed an issue with setting passphrases. ### Contributors# flybluewolf, Kaito Udagawa ## n8n@0.126.1# For a comprehensive list of changes, check out the commits for this version. **Release date:** 2021-06-29 ### Core Functionality# * Fixed issues with keyboard shortcuts when a modal was open. ### Bug fixes# * Microsoft SQL: Fixed an issue with handling of Boolean values when inserting. * Pipedrive: Fixed an issue with the node icon. ## n8n@0.126.0# For a comprehensive list of changes, check out the commits for this version. **Release date:** 2021-06-27 ### New nodes# * Action Network * Google Docs ### Enhanced nodes# * AWS S3: Added Delete operation to the Bucket Resource. * Google Analytics: Added Dimension Filters to the available Additional Fields. * HTTP Request: Added Split Into Items option. * MQTT: Added mqqts protocol for MQTT credentials. * QuickBooks: Added Purchase resource with Get and Get All operations. ### Core Functionality# * Templates from the n8n Workflows page can now be directly imported by appending `/workflows/templates/<templateId>` to your instance base URL. For example, `localhost:5678/workflows/templates/1142`. * Added new Editor UI shortcuts. See Keyboard Shortcuts for details. * Fixed an issue causing console errors when deleting a node from the canvas. ### Bug fixes# * Ghost: Fixed an issue with the Get All operation functionality. * Google Analytics: Fixed an issue that caused an error when attempting to sort with no data present. * Microsoft SQL: Fixed an issue when escaping single quotes and mapping empty fields. * Notion: Fixed an issue with pagination of databases and users. ### Contributors# calvintwr, Jan Baykara ## n8n@0.125.0# For a comprehensive list of changes, check out the commits for this version. **Release date:** 2021-06-20 ### Enhanced nodes# * Spotify: Added Search operation to Album, Artist, Playlist, and Track resources, and Resume and Volume operations to Player resource. ### Core Functionality# * Implemented new design of the Nodes Panel, adding categories and subcategories, along with improved search. For full details, see the commits. ### Bug fixes# * MySQL: Fixed an issue where n8n was unable to save data due to collation, resulting in workflows ending with Unknown status. ### Contributors# Amudhan Manivasagam, Carlos Alexandro Becker, Kaito Udagawa ## n8n@0.124.1# For a comprehensive list of changes, check out the commits for this version. **Release date:** 2021-06-16 ### Core Functionality# * Improved error log messages * Fixed an issue where the tags got removed when deactivating the workflow or updating settings * Removed the circular references for the error caused by the request library ## n8n@0.124.0# For a comprehensive list of changes, check out the commits for this version. **Release date:** 2021-06-13 ### Enhanced nodes# * Google Drive: Added APP Properties and Properties options to the Upload operation of the File resource * HTTP Request: Added the functionality to log the request to the browser console for testing * Notion: Added the Include Time parameter date field types * Salesforce: Added Upsert operation to Account, Contact, Custom Object, Lead, and Opportunity resources * Todoist: Added the Description option to the Task resource ### Core Functionality# * Implemented the functionality to display the error details in a toast message for trigger nodes * Improved error handling by removing circular references from API errors ### Bug fixes# * Jira: Fixed an issues with the API version and fixed an issue with fetching the custom fields for the Issue resource ### Contributors# Jean M, romaincolombo-daily, Thomas Jost, Vincent ## n8n@0.123.1# For a comprehensive list of changes, check out the commits for this version. **Release date:** 2021-06-06 ### Core Functionality# * Fixed a build issue for missing node icons ## n8n@0.123.0# For a comprehensive list of changes, check out the commits for this version. **Release date:** 2021-06-06 ### New nodes# * Git * Microsoft To Do ### Enhanced nodes# * Pipedrive: Added a feature to fetch data from the Pipedrive API, added Search operation to the Deals resource, and added custom fields option * Spotify: Added My Data resource ### Core Functionality# * Fixed issues with NodeViewNew navigation handling * Fixed an issue with the view crashing with large requests ### Bug fixes# * ASW Transcribe: Fixed issues with options ### Contributors# Rodrigo Correia, Sam Roquitte ## n8n@0.122.3# For a comprehensive list of changes, check out the commits for this version. **Release date:** 2021-06-04 ### Core Functionality# * Fixed error messages for the text area field * Added the missing `winston` dependency * Fixed an issue with adding values using the Variable selector. The deleted values don't reappear * Fixed an issue with the Error Workflows not getting executed in the queue mode ### Bug fixes# * Notion: Fixed an issue with parsing the last edited time ## n8n@0.122.2# For a comprehensive list of changes, check out the commits for this version. **Release date:** 2021-05-31 ### Enhanced nodes# * Function: Added console.log support for writing to browser console * Function Item: Added console.log support for writing to browser console ### Core Functionality# * Fixed an issue that enables clicks on tags * Fixed an issue with escaping workflow name * Fixed an issue with selecting variables in the Expression Editor ## n8n@0.122.1# For a comprehensive list of changes, check out the commits for this version. **Release date:** 2021-05-30 ### Core Functionality# * Fixed an issue with the order in migration rollback ## n8n@0.122.0# For a comprehensive list of changes, check out the commits for this version. **Release date:** 2021-05-30 ### New nodes# * AWS Transcribe * SSH * UptimeRobot ### Enhanced nodes# * DeepL: Added support for Free API * Function: Added the functionality to log console.log messages to the browser console * Function Item: Added the functionality to log console.log messages to the browser console ### Core Functionality# * Changed `bcrypt` library from `@node-rs/bcrypt` to `bcryptjs` * Fixed an issue with optional parameters that have the same name * Added the functionality to tag workflows * Fixed errors in the Expression Editor * Fixed an issue with nodes that only get connected to the second input. This solves the issue of copying and pasting the workflows where only one output of the IF node gets connected to a node ### Bug fixes# * Google Drive: Fixed an issue with the Drive resource * Notion: Fixed an issue with the filtering fields type and fixed an issue with the link option * Switch: Fixed an issue with the Expression mode ### Contributors# Alexander Mustafin ## n8n@0.121.1# For a comprehensive list of changes, check out the commits for this version. **Release date:** 2021-06-01 ### Core Functionality# * Fixed an issue with copying the output values * Fixed issues with the Expression Editor * Made improvements to the Expression Editor ## n8n@0.121.0# For a comprehensive list of changes, check out the commits for this version. **Release date:** 2021-05-20 ### New nodes# * Notion * Notion Trigger ### Enhanced nodes# * GraphQL: Added Header Auth authentication method * Twilio: Added API Key authentication method ### Bug fixes# * HubSpot: Fixed an issue with pagination for Deals resource * Keap: Fixed an issue with the data type of the Order Title field * Orbit: Fixed an issue with the activity type in Post operation * Slack: Fixed an issue with the Get Profile operation * Strava: Fixed an issue with the paging parameter ### Contributors# Jacob Spizziri ## n8n@0.120.0# For a comprehensive list of changes, check out the commits for this version. **Release date:** 2021-05-17 ### New nodes# * iCalendar ### Enhanced nodes# * Google Cloud Firestore: Added the functionality for GeoPoint parsing and added ISO-8601 format for date validation * IMAP Email: Added the Force reconnect option * Paddle: Added the Use Sandbox environment API parameter * Spotify: Added the Position parameter to the Add operation of the Playlist resource * WooCommerce: Added the Include Credentials in Query parameter ### Core Functionality# * Added await to hooks to fix issues with the `Unknown` status of the workflows * Changed the data type of the `credentials_entity` field for MySQL database to fix issues with long credentials * Fixed an issue with the ordering of the executions when the list is auto-refreshed * Added the functionality that allows reading sibling parameters ### Bug fixes# * Clockify Trigger: Fixed an issue that occurred when the node returned an empty array * Google Cloud Firestore: Fixed an issue with parsing empty document, and an issue with the detection of date * HubSpot: Fixed an issue with the Return All option ### Contributors# DeskYT, Daniel Lazaro, DerEnderKeks, mdasmendel ## n8n@0.119.0# For a comprehensive list of changes, check out the commits for this version. **Release date:** 2021-05-09 ### Enhanced nodes# * AWS Comprehend: Added the Detect Entities operation * AWS Lambda: Added the ability to list functions recursively if the number of functions exceeds 50 * Google Analytics: Added pagination to the Report resource * Mailjet: Added Reply To parameter * Redis: Added the Increment operation * Spreadsheet File: Added the Header Row option * Webflow Trigger: Added Collection Item Created, Collection Item Updated, and Collection Item Deleted events ### Core Functionality# * Implemented timeout for subworkflows * Removed the deregistration webhooks functionality from the webhook process ### Bug fixes# * Google Cloud Firestore: Fixed an issue with parsing null value * Google Sheets: Fixed an issue with the Key Row parameter * HubSpot: Fixed an issue with the authentication ### Contributors# Nikita ## n8n@0.118.1# For a comprehensive list of changes, check out the commits for this version. **Release date:** 2021-05-05 ### Core Functionality# * Fixed an issue with error workflows ## n8n@0.118.0# For a comprehensive list of changes, check out the commits for this version. **Release date:** 2021-05-02 Breaking change Please note that this version contains a breaking change. You can read more about it here. The features that introduced the breaking changes have been flagged below. ### New nodes# * Kitemaker * MQTT ### Enhanced nodes# * CrateDB: Added query parameters. The Execute Query operation returns the result from all queries executed instead of just one of the results. * ERPNext: Added support for self-hosted ERPNext instances * FTP: Added the functionality to delete folders * Google Calendar: Added the Continue on Fail functionality * Google Drive: Added the functionality to add file name when downloading files * Gmail: Added functionality to handle multiple binary properties * Microsoft Outlook: Added Is Read and Move option to the Message resource * Postgres: Added query parameters. The Execute Query operation returns the result from all queries executed instead of just one of the results. * QuestDB: Added query parameters. The Execute Query operation returns the result from all queries executed instead of just one of the results. * QuickBase: Added option to use Field IDs * TimescaleDB: Added query parameters. The Execute Query operation returns the result from all queries executed instead of just one of the results. * Twist: Added Get, Get All, Delete, and Update operations to the Message Conversation resource. Added Archive, Unarchive, and Delete operations to the Channel resource. Added Thread and Comment resource ### Core Functionality# * Implemented the native `fs/promise` library where possible * Added the functionality to output logs to the console or a file * We have updated the minimum required version for Node.js to v14.15. For more details, check out the entry in the breaking changes page ### Bug fixes# * GetResponse Trigger: Fixed an issue with error handling * GitHub Trigger: Fixed an issue with error handling * GitLab Trigger: Fixed an issue with error handling * Google Sheets: Fixed an issue with the Lookup operation for returning empty rows * Orbit: Fixed issues with the Post resource * Redis: Fixed an issue with the node not returning an error * Xero: Fixed an issue with the Create operation for the Contact resource ### Contributors# Gustavo Arjones, lublak, Colton Anglin, Mika Luhta ## n8n@0.117.0# For a comprehensive list of changes, check out the commits for this version. **Release date:** 2021-04-24 Breaking change Please note that this version contains a breaking change. You can read more about it here. The features that introduced the breaking changes have been flagged below. ### New nodes# * Mailcheck * n8n Trigger * Workflow Trigger ### Enhanced nodes# * CrateDB: Added the Mode option that allows you to execute queries as transactions * Nextcloud: Added Delete, Get, Get All, and Update operation to the User resource * Postgres: Added the Mode option that allows you to execute queries as transactions * QuestDB: Added the Mode option that allows you to execute queries as transactions * Salesforce: Added Owner option to the Case and Lead resources. Added custom fields to Create and Update operations of the Case resource * Sentry.io: Added Delete and Update operations to Project, Release, and Team resources * TimescaleDB: Added the Mode option that allows you to execute queries as transactions * Zendesk Trigger: Added support to retrieve custom fields ### Core Functionality# * The Activation Trigger node has been deprecated. It has been replaced by two new nodes - the n8n Trigger and the Workflow Trigger node. For more details, check out the entry in the breaking changes page * Added the functionality to open the New Credentials dropdown by default ### Bug fixes# * Google Sheets: Fixed an issue with the Lookup operation for returning multiple empty rows * Intercom: Fixed an issue with the User operation in the Company resource * Mautic: Fixed an issue with sending the lastActive parameter ### Contributors# Bart Vollebregt, Ivan Timoshenko, Konstantin Nosov, lublak, Umair Kamran, ## n8n@0.116.1# For a comprehensive list of changes, check out the commits for this version. **Release date:** 2021-04-20 ### Core Functionality# * Fixed a timeout issue with the workflows in the main process ## n8n@0.116.0# For a comprehensive list of changes, check out the commits for this version. **Release date:** 2021-04-17 ### New nodes# * Google BigQuery * Webflow ### Enhanced nodes# * Date & Time: Added Calculate a Date action that allows you to add or subtract time from a date * GitLab: Added Get, Get All, Update, and Delete operations to the Release resource * Microsoft OneDrive: Added Delete operation to the Folder resource * Monday: Added support for OAuth2 authentication * MongoDB: Added Limit, Skip, and Sort options to the Find operation and added Upsert parameter to the Update operation. Added the functionality to close the connection after use * MySQL: Added support for insert modifiers and added support for SSL * RabbitMQ: Added the functionality to close the connection after use and added support for AMPQS ### Core Functionality# * Changed `bcrypt` library from `bcryptjs` to `@node-rs/bcrypt` * Improved node error handling. Status codes and error messages in API responses have been standardized * Added global timeout setting for all HTTP requests (except HTTP Request node) * Implemented timeout for workers and corrected timeout for sub workflows ### Bug fixes# * AWS SQS: Fixed an issue with API version and casing * IMAP: Fixed re-connection issue * Keap: Fixed an issue with the Opt In Reason parameter * Salesforce: Fixed an issue with loading custom fields ### Contributors# Allan Daemon, Anton Romanov, Bart Vollebregt, Cassiano Vailati, entrailz, Konstantin Nosov, LongYinan ## n8n@0.115.0# For a comprehensive list of changes, check out the commits for this version. **Release date:** 2021-04-10 ### New nodes# * Google Slides ### Enhanced nodes# * GitHub: Added Release resource * TheHive: Added support to fetch observable data types * RabbitMQ: Added header parameters ### Core Functionality# * Fixed an issue with expressions not being displayed in read-only mode * Fixed an issue that didn't allow editing JavaScript code in read-only mode * Added support for configuring the maximum payload size * Added support to dynamically add menu items ### Bug fixes# * Jira: Fixed an issue with loading issue types with classic project type * RabbitMQ Trigger: Fixed an issue with the node reusing the same item * SendGrid: Fixed an issue with the dynamic field generation ### Contributors# Mika Luhta, Loran, stwonary ## n8n@0.114.0# For a comprehensive list of changes, check out the commits for this version. **Release date:** 2021-04-03 ### New nodes# * AWS SQS * Copper * ERPNext * Oura ### Enhanced nodes# * Google Drive: Added support for creating folders for shared drives * Google Sheets: Added Create and Remove operation to the Sheet resource * Harvest: Added Update operation to the Task resource * Jira: Added Reporter field to the Issue resource * Postgres: Added support for type casting ### Core Functionality# * Fixed an issue with the Redis connection to prevent memory leaks ### Bug fixes# * Bitwarden: Fixed an issue with the Update operation of the Group resource * Cortex: Fixed an issue where only the last item got returned * Invoice Ninja: Fixed an issue with the Project parameter * Salesforce: Fixed an issue with the Get All operation of the Custom Object resource ### Contributors# Agata M, Allan Daemon, Craig McElroy, mjysci ## n8n@0.113.0# For a comprehensive list of changes, check out the commits for this version. **Release date:** 2021-03-26 * New nodes * Activation Trigger * Plivo * Enhanced nodes * ClickUp: Added Space Tag, Task List, and Task Tag resource * GitHub: Added pagination to Get Issues and Get Repositories operations * Mattermost: Added Reaction resource and Post Ephemeral operation * Move Binary Data: Added Encoding and Add BOM option to JSON to Binary mode and Strip BOM to Binary to JSON mode * SendGrid: Added Mail resource * Spotify: Added Library resource * Telegram: Added Answer Inline Query operation to the Callback resource * uProc: Added Get ASIN code by EAN code, Get EAN code by ASIN code, Get Email by Social Profile, Get Email by Full name and Company's domain, and Get Email by Full name and Company's name operations * Bug fixes * Clearbit: Fixed an issue with the autocomplete URI * Dropbox: Fixed an issue with the Dropbox credentials by adding the APP Access Type parameter in the credentials. For more details, check out the entry in the breaking changes page * Spotify: Fixed an issue with the Delete operation of the Playlist resource * The variable selector now displays empty arrays * Fixed a permission issue with the Raspberry Pi Docker image ## n8n@0.112.0# For a comprehensive list of changes, check out the commits for this version. **Release date:** 2021-03-19 * New nodes * DeepL * Enhanced nodes * TheHive: Added Mark as Read and Mark as Unread operations and added Ignore SSL Issues parameter to the credentials * Bug fixes * AWS SES: Fixed an issue to map CC addresses correctly * Salesforce: Fixed an issue with custom object for Get All operations and fixed an issue with the first name field for the Create and Update operations for the Lead resource * Strava: Fixed an issue with the access tokens not getting refreshed * TheHive: Fixed an issue with the case resolution status * Fixed an issue with importing separate decrypted credentials * Fixed issues with the sub-workflows not finishing * Fixed an issue with the sub-workflows running on the main process * Fixed concurrency issues with sub-workflows ## n8n@0.111.0# For a comprehensive list of changes, check out the commits for this version. **Release date:** 2021-03-12 * New nodes * Autopilot * Autopilot Trigger * Wise * Wise Trigger * Enhanced nodes * Box: Added Get operation to the Folder resource * Dropbox: Added Search operation to the File resource. All operations are now performed relative to the user's root directory. For more details, check out the entry in the breaking changes page * Facebook Graph API: Added new API versions * Google Drive: Added Update operation to the File resource * HubSpot: Added the Deal Description option * Kafka: Added the SASL mechanism * Monday.com: Added Move operation to Board Item resource * MongoDB: Added Date field to the Insert and Update operations * Micrsoft SQL: Added connection timeout parameter to credentials * Salesforce: Added Mobile Phone field to the Lead resource * Spotify: Added Create a Playlist operation to Playlist resource and Get New Releases to the Album resource * Bug fixes * Airtable: Fixed a bug with updating and deleting records * Added the functionality to expose metrics to Prometheus. Read more about that here * Updated fallback values to match the value type * Added the functionality to display debugging information for pending workflows on exit * Fixed an issue with queue mode for the executions that shouldn't be saved * Fixed an issue with workflows crashing and displaying `Unknown` status in the execution list * Fixed an issue to prevent crashing while saving execution data when the `data` field has over 64KB in MySQL * Updated `jws-rsa` to version `1.12.1` ## n8n@0.110.3# For a comprehensive list of changes, check out the commits for this version. **Release date:** 2021-03-04 * Bug fixes * APITemplate.io: Fixed an issue with the naming of the node ## n8n@0.110.0# For a comprehensive list of changes, check out the commits for this version. **Release date:** 2021-03-04 * New nodes * APITemplate.io * Bubble * Lemlist * Lemlist Trigger * Enhanced nodes * Microsoft Teams: Added option to reply to a message * Bug fixes * Dropbox: Fixed an issue with parsing the response with the Upload operation * Gmail: Fixed an issue with the scope for the Service Account authentication method and fixed an issue with the label filter * Google Drive: Fixed an issue with the missing Parent ID field for the Create operation and fixed an issue with the Permissions field * HelpScout: Fixed an issue with sending tags when creating a conversation * HTTP Request: Fixed an issue with the raw data and file response * HubSpot: Fixed an issue with the OAuth2 credentials * Added support for Date & Time in the IF node and the Switch node * Fixed an issue with mouse selection when zooming in or out * Fixed an issue with current executing workflows when using queues for Postgres * Fixed naming and description for the `N8N_SKIP_WEBHOOK_DEREGISTRATION_SHUTDOWN` environment variable * Fixed an issue with auto-refresh of the execution list ## n8n@0.109.0# For a comprehensive list of changes, check out the commits for this version. **Release date:** 2021-02-22 * New nodes * Bitwarden * Emelia * Emelia Trigger * GoToWebinar * Raindrop * Enhanced nodes * AWS Rekognition: Added the Detect Text type to the Analyze operation for the Image resource * Google Calendar: Added RRULE parameter to the Get All operation for the Event resource * Jira: Added User resource and operations * Reddit: Added the Search operation for the Post resource * Telegram: Added the Send Location operation * Bug fixes * RocketChat: Fixed error responses * Fixed the issue which caused the execution history of subworkflows (workflows started using the Execute Workflow node) not to be saved * Added an option to export the credential data in plain text format using the CLI ## n8n@0.108.0# For a comprehensive list of changes, check out the commits for this version. **Release date:** 2021-02-15 * New nodes * Demio * PostHog * QuickBooks * Enhanced nodes * Trello: Added Create Checklist Item operation to the Checklist resource * Webhook: Removed trailing slash in routes and updated logic to select dynamic webhook * Bug fixes * Google Drive: Fixed an issue with returning the fields the user selects for the Folder and File resources * Twitter: Fixed a typo in the description * Webhook: Fixed logic for static route matching * Added the functionality to sort the values that you add in the IF node, Rename node, and the Set node * Added the functionality to optionally save execution data after each node * Added queue mode to scale workflow execution * Separated webhook from the core to scale webhook separately * Fixed an issue with current execution query for unsaved running workflows * Fixed an issue with the regex that detected node names * n8n now generates a unified execution ID instead of two separate IDs for currently running and saved executions ## n8n@0.107.0# For a comprehensive list of changes, check out the commits for this version. **Release date:** 2021-02-08 * New nodes * AWS Comprehend * GetResponse Trigger * Peekalink * Stackby * Enhanced nodes * AWS SES: Added Custom Verification Email resource * Microsoft Teams: Added Task resource * Twitter: Added Delete operation to the Tweet resource * Bug fixes * Google Drive: Fixed an issue with the Delete and Share operations * FileMaker: Fixed an issue with the script list parsing * Updated Node.js version of Docker images to `14.15` * Added a shortcut `CTRL + scroll` to zoom ## n8n@0.106.0# For a comprehensive list of changes, check out the commits for this version. **Release date:** 2021-02-05 * New nodes * Reddit * Tapfiliate * Enhanced nodes * Airtable Trigger: Added Download Attachment option * HubSpot: Added Custom Properties option to the Create and Update operations of the Company resource * MySQL: Added Connection Timeout parameter to the credentials * Telegram: Added Pin Chat Message and Unpin Chat Message operations for the Message resource * Bug fixes * Typeform: Fixed an issue with the OAuth2 authentication method * Added support for `s` and `u` flags for regex in the IF node and the Switch node ## n8n@0.105.0# For a comprehensive list of changes, check out the commits for this version. **Release date:** 2021-02-01 * New nodes * Discourse * SecurityScorecard * TimescaleDB * Enhanced nodes * Affinity: Added List and List Entry resource * Asana: Added Project IDs option to the Create operation of the Task resource * HubSpot Trigger: Added support for multiple subscriptions * Jira: Added Issue Attachment resource and added custom fields to Create and Update operations of the Issue resource * Todoist: Added Section option * Bug fixes * SIGNL4: Fixed an issue with the attachment functionality * Added variable `$mode` to check the mode in which the workflow is being executed ## n8n@0.104.2# For a comprehensive list of changes, check out the commits for this version. **Release date:** 2021-01-27 * Fixed an issue with the credentials parameters that have the same name ## n8n@0.104.1# For a comprehensive list of changes, check out the commits for this version. **Release date:** 2021-01-26 * Fixed a bug with expressions in credentials ## n8n@0.104.0# For a comprehensive list of changes, check out the commits for this version. **Release date:** 2021-01-26 * New nodes * Compression * Enhanced nodes * GitHub: Added Invite operation to the User resource * EmailReadImap: Increased the authentication timeout * Mautic: Added Custom Fields option to the Create and Update operations of the Contact resource. Also, the Mautic OAuth credentials have been updated. Now you don't have to enter the Authorization URL and the Access Token URL * Nextcloud: Added User resource * Slack: Added Get Permalink and Delete operations to the Message resource * Webhook: Added support for request parameters in webhook paths * Bug fixes * Google Drive: Fixed the default value for the Send Notification Email option * Added support for expressions to credentials * Removed support for MongoDB as a database for n8n. For more details, check out the entry in the breaking changes page ## n8n@0.103.1# For a comprehensive list of changes, check out the commits for this version. **Release date:** 2021-01-21 * Bug fixes * Trello: Fixed the icon ## n8n@0.103.0# For a comprehensive list of changes, check out the commits for this version. **Release date:** 2021-01-21 * New nodes * SendGrid * Enhanced nodes * AMQP: Added Container ID, Reconnect, and Reconnect limit options * AMQP Trigger: Added Container ID, Reconnect, and Reconnect Limit options * GitHub: Added Review resource * Google Drive: Added Drive resource * Trello: Added Get All and Get Cards operation to the List resource * Bug fixes * AWS Lambda: Fixed an issue with signature * AWS SNS: Fixed an issue with signature * Fixed an issue with nodes not executing if two input gets passed and one of them didn't return any data * The code editor doesn'tget closed when clicked anywhere outside the editor * Added CLI commands to export and import credentials and workflows * The title in the browser tab now resets for new workflows ## n8n@0.102.0# For a comprehensive list of changes, check out the commits for this version. **Release date:** 2021-01-15 * New nodes * Beeminder * Enhanced nodes * Crypto: Added hash type `SHA384` * Google Books: Added support for user impersonation * Google Drive: Added support for user impersonation * Google Sheets: Added support for user impersonation * Gmail: Added support for user impersonation * Microsoft Outlook: Added support for a shared mailbox * RabbitMQ: Added Exchange mode * Salesforce: Added filters to all Get All operations * Slack: Made changes to the properties `As User` and `Ephemeral`. For more details, check out the entry in the breaking changes page * Typeform Trigger: The node now displays the recall information in the question in square brackets. For more details, check out the entry in the breaking changes page * Zendesk: Removed the `Authorization URL` and `Access Token URL` fields from the OAuth2 credentials. The node now uses the subdomain passed by a user to connect to Zendesk. * Bug fixes * CoinGecko: Fixed an issue to process multiple input items correctly ## n8n@0.101.0# For a comprehensive list of changes, check out the commits for this version. **Release date:** 2021-01-07 * New nodes * Google Analytics * PhantomBuster * Enhanced nodes * AWS: Added support for custom endpoints * Gmail: Added an option to send messages formatted as HTML * Philips Hue: Added Room/Group name to Light name to make it easier to identify lights * Slack: Added ephemeral message option * Telegram: Removed the Bot resource as the endpoint is no longer supported * Bug fixes * E-goi: Fixed the name of the node * Edit Image: Fixed an issue with the Border operation * HTTP Request: Fixed batch sizing to work when `batchSize = 1` * PayPal: Fixed a typo in the Environment field * Split In Batches: Fixed a typo in the description * Telegram: Fixed an issue with the Send Audio operation * Based on your settings, vacuum runs on SQLite on startup * Updated Axios to version `0.21.1` ## n8n@0.100.0# For a comprehensive list of changes, check out the commits for this version. **Release date:** 2020-12-30 * New nodes * Microsoft Outlook * Enhanced nodes * ActiveCampaign: The node loads more options for the fields * Asana: Added Subtask resource and Get All operation for the Task resource * Edit Image: Added Multi Step operation * HTTP Request: Added Use Querystring option * IF: Added Ends With and Starts With operations * Jira: Added Issue Comment resource * Switch: Added Ends With and Starts With operations * Telegram: Added File resource * Bug fixes * Box Trigger: Fixed a typo in the description * Edit Image: Fixed an issue with multiple composite operations * HTTP Request: Fixed an issue with the binary data getting used by multiple nodes * S3: Fixed an issue with uploading files * Stripe Trigger: Fixed an issue with the existing webhooks * Telegram: Fixed an issue with the Send Audio operation * Binary data stays visible if a node gets re-executed ## n8n@0.99.1# For a comprehensive list of changes, check out the commits for this version. **Release date:** 2020-12-24 * Fixed a bug that caused HTML to render in JSON view ## n8n@0.99.0# For a comprehensive list of changes, check out the commits for this version. **Release date:** 2020-12-24 * New nodes * e-goi * RabbitMQ * RabbitMQ Trigger * uProc * Enhanced nodes * ActiveCampaign: Added the functionality to load the tags for a user * FTP: Added Delete and Rename operation * Google Cloud Firestore: The node now gives the Collection ID in response * Iterable: Added User List resource * MessageBird: Added Balance resource * TheHive Trigger: Added support for the TheHive3 webhook events, and added Log Updated and Log Deleted events * Bug fixes * Dropbox: Fixed an issue with the OAuth credentials * Google Sheets: Fixed an issue with the parameters getting hidden for other operations * Added functionality to copy the data and the path from the output * Fixed an issue with the node getting selected after it was duplicated ## n8n@0.98.0# For a comprehensive list of changes, check out the commits for this version. **Release date:** 2020-12-16 * New nodes * Brandfetch * Pushcut * Pushcut Trigger * Enhanced nodes * Google Sheets: Added Spreadsheet resource * IF: Added Is Empty option * Slack: Added Reaction and User resource, and Member operation to the Channel resource * Spreadsheet File: Added the option Include Empty Cell to display empty cells * Webhook: Added option to send a custom response body. The node can now also return string data * Bug fixes * GitLab: Fixed an issue with GitLab OAuth credentials. You can now specify your GitLab server to configure the credentials * Mautic: Fixed an issue with the OAuth credentials * If a workflow is using the Error Trigger node, by default, the workflow will use itself as the Error Workflow * Fixed a bug that caused the Editor UI to display an incorrect (save) state upon activating or deactivating a workflow ## n8n@0.97.0# For a comprehensive list of changes, check out the commits for this version. **Release date:** 2020-12-10 * New nodes * Ghost * NASA * Snowflake * Twist * Enhanced nodes * Automizy: Added options to add and remove tabs for the Update operation of the Contact resource * Pipedrive: Added label field to Person, Organization, and Deal resources. Also added Update operation for the Organization resource * Bug fixes * Fixed a bug that caused OAuth1 requests to break * Fixed Docker user mount path ## n8n@0.96.0# For a comprehensive list of changes, check out the commits for this version. **Release date:** 2020-12-03 * New nodes * Cortex * Iterable * Kafka Trigger * TheHive * TheHive Trigger * Yourls * Enhanced nodes * HubSpot: Added Contact List resource and Search operation for the Deal resource * Google Calendar: You can now add multiple attendees in the Attendees field * Slack: The node now loads both private and public channels * Bug Fixes * MQTT: Fixed an issue with the connection. The node now uses `mqtt@4.2.1` * Fixed a bug which caused the Trigger-Nodes to require data from the first output * Added configuration to load only specific nodes ## n8n@0.95.1# For a comprehensive list of changes, check out the commits for this version. **Release date:** 2020-11-25 * Bug Fixes * Airtable Trigger: Fixed the icon of the node ## n8n@0.95.0# For a comprehensive list of changes, check out the commits for this version. **Release date:** 2020-11-25 * New nodes * Airtable Trigger * LingvaNex * OpenThesaurus * ProfitWell * Quick Base * Spontit * Enhanced nodes * Airtable: The Application ID field has been renamed to Base ID, and the Table ID field has been renamed to Table. The List operation now downloads attachments automatically * Harvest: Moved the account field from the credentials to the node parameters. For more details, check out the entry in the breaking changes page * Bug Fixes * Slack: Fixed an issue with creating channels and inviting users to a channel ## n8n@0.94.1# For a comprehensive list of changes, check out the commits for this version. **Release date:** 2020-11-20 * Bug Fixes * GraphQL: Fixed an issue with the variables * WooCommerce Trigger: Fixed an issue with the webhook. The node now reuses a webhook if it already exists. ## n8n@0.94.0# For a comprehensive list of changes, check out the commits for this version. **Release date:** 2020-11-19 * New nodes * Google Cloud Natural Language * Google Firebase Cloud Firestore * Google Firebase Realtime Database * Humantic AI * Enhanced nodes * ActiveCampaign: Added Contact List and List resource * Edit Image: Added support for drawing, font selection, creating a new image, and added the Composite resource * FTP: Added Private Key and Passphrase fields to the SFTP credentials and made the directory creation more robust * IMAP: Increased the timeout * Matrix: Added option to send notice, emote, and HTML messages * Segment: Made changes to the properties `traits` and `properties`. For more details, check out the entry in the breaking changes page * Bug Fixes * GraphQL: Fixed an issue with the variables * Mailchimp: Fixed an issue with the OAuth credentials. The credentials are now sent with the body instead of the header * YouTube: Fixed a typo for the Unlisted option * Added horizontal scrolling ## n8n@0.93.0# For a comprehensive list of changes, check out the commits for this version. **Release date:** 2020-11-11 * New nodes * GetResponse * Gotify * Line * Strapi * Enhanced nodes * AMQP: Connection is now closed after a message is sent * AMQP Trigger: Added Message per Cycle option to retrieve the specified number of messages from the bus for every cycle * HubSpot: Added Custom Properties for the Deal resource as Additional Fields * Jira: The node retrieves all the projects for the Project field instead of just 50 * Mattermost: Improved the channel selection * Microsoft SQL: Added TLS parameter for the credentials * Pipedrive Trigger: Added OAuth authentication method. For more details, check out the entry in the breaking changes page * Segment: Added Custom Traits option for the Traits field * Bug Fixes * Shopify Trigger: Fixed an issue with activating the workflow * For custom nodes, you can now set custom documentation URLs ## n8n@0.92.0# For a comprehensive list of changes, check out the commits for this version. **Release date:** 2020-11-04 * New nodes * Facebook Trigger * Google Books * Orbit * Storyblok * Enhanced nodes * Google Drive: Removed duplicate parameters * Twitter: Added Direct Message resource * Bug Fixes * Gmail: Fixed an issue with the encoding for the subject field * Improved the Editor UI for the save workflow functionality ## n8n@0.91.0# For a comprehensive list of changes, check out the commits for this version. **Release date:** 2020-10-23 * New nodes * Kafka * MailerLite * MailerLite Trigger * Pushbullet * Enhanced nodes * Airtable: Added Ignore Fields option for the Update operation * AMQP Sender: Added Azure Service Bus support * Google Calendar: Added Calendar resource and an option to add a conference link * G Suite Admin: Added Group resource * HTTP Request: Added Batch Size and Batch Interval option * Mautic: Added Company resource * Salesforce: Added OAuth 2.0 JWT authentication method * Bug Fixes * IF: Fixed an issue with undefined expression * Paddle: Fixed an issue with the Return All parameter * Switch: Fixed an issue with undefined expression * Added CLI commands to deactivate the workflow * Added an option to get the full execution data from the server * The Editor UI gives an alert if you redirect without saving a workflow * The Editor UI now indicates if a workflow is saved or not * Improved support for touch devices * Node properties now load on demand * Updated the Node.js version for the Docker images ## n8n@0.90.0# For a comprehensive list of changes, check out the commits for this version. **Release date:** 2020-10-23 * Added a check for the Node.js version on startup. For more details, check out the entry in the breaking changes page * Bug Fixes * Google Translate: Fixed an issue with the rendering of the image in n8n.io ## n8n@0.89.2# For a comprehensive list of changes, check out the commits for this version. **Release date:** 2020-10-22 * Bug Fixes * Strava Trigger: Fixed a typo in the node name ## n8n@0.89.1# For a comprehensive list of changes, check out the commits for this version. **Release date:** 2020-10-22 * Removed debug messages ## n8n@0.89.0# For a comprehensive list of changes, check out the commits for this version. **Release date:** 2020-10-22 * New Nodes * Pushover * Strava * Strava Trigger * Google Translate * Bug Fixes * HTTP Request: Fixed an issue with the POST request method for the 'File' response format * Fixed issue with displaying non-active workflows as active * Fixed an issue related to multiple-webhooks ## n8n@0.88.1# For a comprehensive list of changes, check out the commits for this version. **Release date:** 2020-10-16 * Bug Fixes * HTTP Request: Fixed an issue with the Form-Data Multipart and the RAW/Custom Body Content Types ## n8n@0.88.0# For a comprehensive list of changes, check out the commits for this version. **Release date:** 2020-10-16 * Enhanced Fixes * Matrix: Added support for specifying a Matrix Homeserver URL * Salesforce: Added Custom Object resource and Custom Fields and Sort options * Bug Fixes * AWS SES: Fixed an issue with the Send Template operation for the Email resource * AWS SNS Trigger: Fixed an issue with the Subscriptions topic ## n8n@0.87.2# For a comprehensive list of changes, check out the commits for this version. **Release date:** 2020-10-15 * Bug Fixes * Google Sheets: Fixed an issue with spaces in sheet names * Automizy: Fixed an issue with the default resource ## n8n@0.87.1# For a comprehensive list of changes, check out the commits for this version. **Release date:** 2020-10-15 * Bug Fixes * Gmail: Fixed an issue with the Message ID * HTTP Request: Fixed an issue with the GET Request * Added `HMAC-SHA512` signature method for OAuth 1.0 ## n8n@0.87.0# For a comprehensive list of changes, check out the commits for this version. **Release date:** 2020-10-14 * New nodes * Automizy * AWS Rekognition * Matrix * Sendy * Vonage * WeKan * Enhanced nodes * AWS SES: Added Send Template operation for the Email resource and added the Template resource * ClickUp: Added Time Entry and Time Entry Tag resources * Function: The Function field is now called the JavaScript Code field * Mailchimp: Added Campaign resource * Mindee: Added currency to the simplified response * OneDrive: Added Share operation * OpenWeatherMap: Added Language parameter * Pipedrive: Added additional parameters to the Get All operation for the Note resource * Salesforce: Added Flow resource * Spreadsheet File: Added Range option for the Read from file operation * Bug Fixes * ClickUp Trigger: Fixed issue with creating credentials * Pipedrive Trigger: Fixed issue with adding multiple webhooks to Pipedrive * The link.fish Scrape node has been removed from n8n. For more details, check out the entry in the breaking changes page ## n8n@0.86.1# For a comprehensive list of changes, check out the commits for this version. **Release date:** 2020-10-06 * Enhanced nodes * CoinGecko: Small fixes to the CoinGecko node ## n8n@0.86.0# For a comprehensive list of changes, check out the commits for this version. **Release date:** 2020-10-05 * New nodes * Clockify * CoinGecko * G Suite Admin * Mindee * Wufoo Trigger * Enhanced nodes * Slack: Added User Profile resource * Mattermost: Added Create and Invite operations for the User resource * Bug Fixes * S3: Fixed issue with uploading files * Webhook ID gets refreshed on node duplication ## n8n@0.85.0# For a comprehensive list of changes, check out the commits for this version. **Release date:** 2020-09-30 * Enhanced nodes * Postgres: Added Schema parameter for the Update operation * Bug Fixes * Jira: Fixed a bug with the Issue Type field * Pipedrive Trigger: Fixed issues with the credentials * Changed the bcrypt library to `bcrypt.js` to make it compatible with Windows * The OAuth callback URLs are now generated in the backend ## n8n@0.84.4# For a comprehensive list of changes, check out the commits for this version. **Release date:** 2020-09-23 * Bug Fixes * Google Sheets: Fixed issues with the update and append operations ## n8n@0.84.3# For a comprehensive list of changes, check out the commits for this version. **Release date:** 2020-09-23 * Fixed an issue with the build by setting `jwks-rsa` to an older version ## n8n@0.84.2# For a comprehensive list of changes, check out the commits for this version. **Release date:** 2020-09-23 * Fixed an issue with the OAuth window. The OAuth window now closes after authentication is complete ## n8n@0.84.1# For a comprehensive list of changes, check out the commits for this version. **Release date:** 2020-09-23 * Additional endpoints can be excluded from authentication checks. Multiple endpoints can be added separated by colons ## n8n@0.84.0# For a comprehensive list of changes, check out the commits for this version. **Release date:** 2020-09-23 * Enhanced nodes * Twitter: Added support for auto mention of users in reply tweets * Bug Fixes * Google Sheets: Fixed issue with non-Latin sheet names * HubSpot: Fixed naming of credentials * Microsoft: Fixed naming of credentials * Mandrill: Fixed attachments with JSON parameters * Expressions now use short variables when selecting input data for the current node * Fixed issue with renaming credentials for active workflows ## n8n@0.83.0# For a comprehensive list of changes, check out the commits for this version. **Release date:** 2020-09-18 * New nodes * LinkedIn * Taiga * Taiga Trigger * Enhanced nodes * ActiveCampaign: Added multiple functions, read more here * Airtable: Added typecast functionality * Asana: Added OAuth2 support * ClickUp: Added OAuth2 support * Google Drive: Added share operation * IMAP Email: Added support for custom rules when checking emails * Sentry.io: Added support for self-hosted version * Twitter: Added retweet, reply, and like operations * WordPress: Added author field to the post resource * Bug Fixes * Asana Trigger: Webhook validation has been deactivated * Paddle: Fixed `returnData` format and coupon description * The ActiveCampaign node has breaking changes * Fixed issues with test-webhook registration ## n8n@0.82.1# For a comprehensive list of changes, check out the commits for this version. **Release date:** 2020-09-14 * Speed for basic authentication with hashed password has been improved ## n8n@0.82.0# For a comprehensive list of changes, check out the commits for this version. **Release date:** 2020-09-14 * New nodes * Microsoft Teams * Enhanced nodes * Freshdesk: Added Freshdesk contact resource * HTTP Request: Run parallel requests in HTTP Request Node * Bug Fixes * Philips Hue: Added `APP ID` to Philips Hue node credentials * Postmark Trigger: Fixed parameters for the node * The default space between nodes has been increased to two units * Expression support has been added to the credentials * Passwords for your n8n instance can now be hashed ## n8n@0.81.0# For a comprehensive list of changes, check out the commits for this version. **Release date:** 2020-09-09 * New nodes * Sentry.io * Enhanced nodes * Asana * ClickUp * Clockify * Google Contacts * Salesforce * Segment * Telegram * Telegram Trigger ## n8n@0.80.0# For a comprehensive list of changes, check out the commits for this version. **Release date:** 2020-09-02 * New nodes * Customer.io * MQTT Trigger * S3 * Enhanced nodes * Acuity Scheduling * AWS S3 * ClickUp * FTP * Telegram Trigger * Zendesk ## n8n@0.79.3# For a comprehensive list of changes, check out the commits for this version. **Release date:** 2020-08-30 * The bug that caused the workflows to not get activated correctly has been fixed ## n8n@0.79.2# For a comprehensive list of changes, check out the commits for this version. **Release date:** 2020-08-28 * Added missing rawBody for "application/x-www-form-urlencoded" ## n8n@0.79.1# For a comprehensive list of changes, check out the commits for this version. **Release date:** 2020-08-28 * Enhanced nodes * Contentful * HTTP Request * Postgres * Webhook * Removed Test-Webhook also in case checkExists fails * HTTP Request node doesn'toverwrite accept header if it's already set * Add rawBody to every request so that n8n doesn'tgive an error if body is missing ## n8n@0.79.0# For a comprehensive list of changes, check out the commits for this version. **Release date:** 2020-08-27 * New nodes * Contentful * ConvertKit * ConvertKit Trigger * Paddle * Enhanced nodes * Airtable * Coda * Gmail * HubSpot * IMAP Email * Postgres * Salesforce * SIGNL4 * Todoist * Trello * YouTube * The Todoist node has breaking changes * Added dynamic titles on workflow execution * Nodes will now display a link to associated credential documentation ## n8n@0.78.0# For a comprehensive list of changes, check out the commits for this version. **Release date:** 2020-08-18 * New nodes * Gmail * Google Contacts * Unleashed Software * YouTube * Enhanced nodes * AMQP * AMQP Trigger * Bitly * Function Item * Google Sheets * Shopify * Todoist * Enhanced support for JWT based authentication * Added an option to execute a node once, using data of only the first item ## n8n@0.76.0# For a comprehensive list of changes, check out the commits for this version. **Release date:** 2020-08-05 * New nodes * Customer.io Trigger * FTP * Medium * Philips Hue * TravisCI * Twake * Enhanced nodes * CrateDB * Move Binary Data * Nodes will now display a link to associated documentation ## n8n@0.75.0# For a comprehensive list of changes, check out the commits for this version. **Release date:** 2020-07-26 * New nodes * Box * Box Trigger * CrateDB * Jira Trigger * Enhanced nodes * GitLab * Nextcloud * Pipedrive * QuestDB * Webhooks now support OPTIONS request ## n8n@0.74.0# For a comprehensive list of changes, check out the commits for this version. **Release date:** 2020-07-15 * New nodes * Hacker News * QuestDB * Xero * Enhanced nodes * Affinity Trigger * HTTP Request * Mailchimp * MongoDB * Pipedrive * Postgres * UpLead * Webhook * Webhook URLs are now handled independently of the workflow ID by `https://{hostname}/webhook/{path}` instead of the older `https://{hostname}/webhook/{workflow_id}/{node_name}/{path}`. ## n8n@0.73.1# For a comprehensive list of changes, check out the commits for this version. **Release date:** 2020-07-08 * Enhanced nodes * Microsoft SQL ## n8n@0.73.0# For a comprehensive list of changes, check out the commits for this version. **Release date:** 2020-07-08 * New nodes * CircleCI * Microsoft SQL * Zoom * Enhanced nodes * Postmark Trigger * Salesforce * It's now possible to set default values for credentials that get prefilled, and the user can't change. ## n8n@0.72.0# For a comprehensive list of changes, check out the commits for this version. **Release date:** 2020-07-02 * Enhanced nodes * Drift * Eventbrite Trigger * Facebook Graph API * Pipedrive * Fixed credential issue for the Execute Workflow node ## n8n@0.71.0# For a comprehensive list of changes, check out the commits for this version. **Release date:** 2020-06-25 * New nodes * Google Tasks * SIGNL4 * Spotify * Enhanced nodes * HubSpot * Mailchimp * Typeform * Webflow * Zendesk * Added Postgres SSL support * It's now possible to deploy n8n under a subfolder ## n8n@0.70.0# For a comprehensive list of changes, check out the commits for this version. **Release date:** 2020-06-13 * Enhanced nodes * GitHub * Mautic Trigger * Monday.com * MongoDB * Fixed the issue with multiuser-setup --- ## Page: https://docs.n8n.io/1-0-migration-checklist/ This document provides a summary of what you should be aware of before updating to version 1.0 of n8n. The release of n8n 1.0 marks a milestone in n8n's journey to make n8n available for demanding production environments. Version 1.0 represents the hard work invested over the last four years to make n8n the most accessible, powerful, and versatile automation tool. n8n 1.0 is now ready for use in production. ## New features# ### Python support in the Code node# Although JavaScript remains the default language, you can now also select Python as an option in the Code node and even make use of many Python modules. Note that Python is unavailable in Code nodes added to a workflow before v1.0. PR #4295, PR #6209 ### Execution order# n8n 1.0 introduces a new execution order for multi-branch workflows: In multi-branch workflows, n8n needs to determine the order in which to execute nodes on branches. Previously, n8n executed the first node of each branch, then the second of each branch, and so on (breadth-first). The new execution order ensures that each branch executes completely before starting the next one (depth-first). Branches execute based on their position on the canvas, from top to bottom. If two branches are at the same height, the leftmost one executes first. n8n used to execute multi-input nodes as long as they received data on their first input. Nodes connected to the second input of multi-input nodes automatically executed regardless of whether they received data. The new execution order introduced in n8n 1.0 simplifies this behavior: Nodes are now executed only when they receive data, and multi-input nodes require data on at least one of their inputs to execute. Your existing workflows will use the legacy order, while new workflows will execute using the v1 order. You can configure the execution order for each workflow in workflow settings. PR #4238, PR #6246, PR #6507 ## Deprecations# ### MySQL and MariaDB# n8n has removed support for MySQL and MariaDB as storage backends for n8n. These database systems are used by only a few users, yet they require continuous development and maintenance efforts. n8n recommends migrating to PostgreSQL for better compatibility and long-term support. PR #6189 ### EXECUTIONS\_PROCESS and "own" mode# Previously, you could use the `EXECUTIONS_PROCESS` environment variable to specify whether executions should run in the `main` process or in their `own` processes. This option and `own` mode are now deprecated and will be removed in a future version of n8n. This is because it led to increased code complexity while offering marginal benefits. Starting from n8n 1.0, `main` will be the new default. Note that executions start much faster in `main` mode than in `own` mode. However, if a workflow consumes more memory than is available, it might crash the entire n8n application instead of just the worker thread. To mitigate this, make sure to allocate enough system resources or configure queue mode to distribute executions among multiple workers. PR #6196 ## Breaking changes# ### Docker# #### Permissions change# When using Docker-based deployments, the n8n process is now run by the user `node` instead of `root`. This change increases security. If permission errors appear in your n8n container logs when starting n8n, you may need to update the permissions by executing the following command on the Docker host: <table><tbody><tr><td><div><pre><span></span><span>1</span></pre></div></td><td><div><pre><span></span><code>docker<span> </span>run<span> </span>--rm<span> </span>-it<span> </span>--user<span> </span>root<span> </span>-v<span> </span>~/.n8n:/home/node/.n8n<span> </span>--entrypoint<span> </span>chown<span> </span>n8nio/base:16<span> </span>-R<span> </span>node:node<span> </span>/home/node/.n8n </code></pre></div></td></tr></tbody></table> #### Image removal# We've removed the Debian and RHEL images. If you were using these you need to change the image you use. This shouldn't result in any errors unless you were making a custom image based on one of those images. #### Entrypoint change# The entrypoint for the container has changed and you no longer need to specify the n8n command. If you were previously running `n8n worker --concurrency=5` it's now `worker --concurrency=5` PR #6365 ### Workflow failures due to expression errors# Workflow executions may fail due to syntax or runtime errors in expressions, such as those that reference non-existent nodes. While expressions already throw errors on the frontend, this change ensures that n8n also throws errors on the backend, where they were previously silently ignored. To receive notifications of failing workflows, n8n recommends setting up an "error workflow" under workflow settings. PR #6352 ### Mandatory owner account# This change makes User Management mandatory and removes support for other authentication methods, such as BasicAuth and External JWT. Note that the number of permitted users on n8n.cloud or custom plans still varies depending on your subscription. PR #6362 ### Directory for installing custom nodes# n8n will no longer load custom nodes from its global `node_modules` directory. Instead, you must install (or link) them to `~/.n8n/custom` (or a directory defined by `N8N_CUSTOM_EXTENSIONS`). Custom nodes that are npm packages will be located in `~/.n8n/nodes`. If you have custom nodes that were linked using `npm link` into the global `node_modules` directory, you need to link them again, into `~/.n8n/nodes` instead. PR #6396 ### WebSockets# The `N8N_PUSH_BACKEND` environment variable can be used to configure one of two available methods for pushing updates to the user interface: `sse` and `websocket`. Starting with n8n 1.0, `websocket` is the default method. PR #6196 ### Date transformation functions# n8n provides various transformation functions that operate on dates. These functions may return either a JavaScript `Date` or a Luxon `DateTime` object. With the new behavior, the return type always matches the input. If you call a date transformation function on a `Date`, it returns a `Date`. Similarly, if you call it on a `DateTime` object, it returns a `DateTime` object. To identify any workflows and nodes that might be impacted by this change, you can use this utility workflow. For more information about date transformation functions, please refer to the official documentation. PR #6435 ### Execution data retention# Starting from n8n 1.0, all successful, failed, and manual workflow executions will be saved by default. These settings can be modified for each workflow under "Workflow Settings," or globally using the respective environment variables. Additionally, the `EXECUTIONS_DATA_PRUNE` setting will be enabled by default, with `EXECUTIONS_DATA_PRUNE_MAX_COUNT` set to 10,000. These default settings are designed to prevent performance degradation when using SQLite. Make sure to configure them according to your individual requirements and system capacity. PR #6577 ### Removed N8N\_USE\_DEPRECATED\_REQUEST\_LIB# The legacy `request` library has been deprecated for some time now. As of n8n 1.0, the ability to fall back to it in the HTTP Request node by setting the `N8N_USE_DEPRECATED_REQUEST_LIB` environment variable has been fully removed. The HTTP Request node will now always use the new `HttpRequest` interface. If you build custom nodes, refer to HTTP request helpers for more information on migrating to the new interface. PR #6413 ### Removed WEBHOOK\_TUNNEL\_URL# As of version 0.227.0, n8n has renamed the `WEBHOOK_TUNNEL_URL` configuration option to `WEBHOOK_URL`. In n8n 1.0, `WEBHOOK_TUNNEL_URL` has been removed. Update your setup to reflect the new name. For more information about this configuration option, refer to the docs. PR #1408 ### Remove Node 16 support# n8n now requires Node 18.17.0 or above. ## Updating to n8n 1.0# 1. Create a full backup of n8n. 2. n8n recommends updating to the latest n8n 0.x release before updating to n8n 1.x. This will allow you to pinpoint any potential issues to the correct release. Once you have verified that n8n 0.x starts up without any issues, proceed to the next step. 3. Carefully read the Deprecations and Breaking Changes sections above to assess how they may affect your setup. 4. Update to n8n 1.0: * During beta (before July 24th 2023): If using Docker, pull the `next` Docker image. * After July 24th 2023: If using Docker, pull the `latest` Docker image. 5. If you encounter any issues, redeploy the previous n8n version and restore the backup. ## Reporting issues# If you encounter any issues during the process of updating to n8n 1.0, please seek help in the community forum. ## Thank you# We would like to take a moment to express our gratitude to all of our users for their continued support and feedback. Your contributions are invaluable in helping us make n8n the best possible automation tool. We're excited to continue working with you as we move forward with the release of version 1.0 and beyond. Thank you for being a part of our journey! --- ## Page: https://docs.n8n.io/help-community/help/ If you need more help with n8n, you can ask for support in the forum. This is the best source of answers, as both the n8n support team and community members can help. If your Cloud instance is having issues, or if you're an enterprise customer who needs support, you can contact help@n8n.io. ## Use the About n8n debug tool# Whether you're posting to the forum or emailing customer support, you'll get help faster if you provide details about your n8n instance in your first post or email. The fastest way to do this is to use the **About n8n** debug tool: 1. Open the left-side panel. 2. Select **Help**. 3. Select **About n8n**. 4. The **About n8n** modal opens to display your current information. 5. Select **Copy debug information** to copy your information. 6. n8n recommends pasting this information into your forum post or support email. Don't see **Copy debug**? The **Copy debug** option is available beginning in n8n version 1.49.0. If you're using an earlier version of n8n, n8n recommends manually providing this information: * n8n version * Database * n8n EXECUTIONS\_PROCESS setting * Running n8n via (Docker, npm, n8n cloud) * Operating system --- ## Page: https://docs.n8n.io/help-community/contributing/ ## How can you contribute?# There are a several ways in which you can contribute to n8n, depending on your skills and interests. Each form of contribution is valuable to us! * Star n8n on GitHub and Docker Hub. * Follow us on Twitter, LinkedIn, and Facebook. * Upvote n8n on AlternativeTo and Alternative.me. * Add n8n to your stack on Stackshare. * Write a review about n8n on G2, Slant, and Capterra. You can participate in the forum and help the community members out with their questions. When sharing workflows in the community forum for debugging, use code blocks. Use triple backticks ` ``` ` to wrap the workflow JSON in a code block. The following video demonstrates the steps of sharing workflows on the community forum: ## Contribute a workflow template# You can submit your workflows to n8n's template library. n8n is working on a creator program, and developing a marketplace of templates. This is an ongoing project, and details are likely to change. Refer to n8n Creator hub for information on how to submit templates and become a creator. ## Build a node# Create an integration for a third party service. Check out the node creation docs for guidance on how to create and publish a community node. ## Contribute to the code# There are different ways in which you can contribute to the n8n code base: * Fix issues reported on GitHub. The CONTRIBUTING guide will help you get your development environment ready in minutes. * Add additional functionality to an existing third party integration. * Add a new feature to n8n. ## Contribute to the docs# You can contribute to the n8n documentation, for example by documenting nodes or fixing issues. The repository for the docs is here and the guidelines for contributing to the docs are here. ## Contribute to the blog# You can write an article for the n8n blog. Your article can be, for example, a workflow tutorial, an opinion piece on automation, or some domain-specific automation guides. ### How to submit a post# n8n appreciates all contributions. Publishing a tutorial on your own site that supports the community is a great contribution. If you want n8n to highlight your post on the blog, follow these steps: 1. Email your idea to marketing@n8n.io with the subject "Blog contribution: \[Your Topic\]." 2. Submit your draft: * Write your post in a Google Doc following the style guide. * If your blog post includes example workflows, include the workflow JSON in a separate section at the end. * For author credit, provide a second Google Doc with your full name, a short byline, and your image. n8n will use this to create your author page and credit you as the author of the post. 3. Wait for feedback. We will respond if your draft fits with the blog's strategy and requirements. If you don't hear back within 30 days, it means we won't be moving forward with your blog post. ## Refer a candidate# Do you know someone who would be a great fit for one of our open positions? Refer them to us! In return, we'll pay you €1,000 when the referral successfully passes their probationary period. Here's how this works: 1. **Search**: Have a look at the description and requirements of each role, and consider if someone you know would be a great fit. 2. **Referral**: Once you've identified a potential candidate, send an email to Jobs at n8n with the subject line _Employee referral - \[job title\]_ and a short description of the person you're referring (and the reason why). Also, tell your referral to apply for the job through our careers page. 3. **Evaluation**: We'll screen the application and inform you about the next steps of the hiring process. 4. **Reward**: As soon as your referral has successfully finished the probationary period, we'll reward you for your efforts by transferring the €1,000 to your bank account. --- ## Page: https://docs.n8n.io/privacy-security/ n8n is committed to the privacy and security of your data. This section outlines how n8n handles and secures data. This isn't an exhaustive list of practices, but an overview of key policies and procedures. If you have any questions related to data privacy, email privacy@n8n.io. If you have any security-related questions, or if you want to report a suspected vulnerability, email security@n8n.io. * Privacy * Security * Incident response * What you can do --- ## Page: https://docs.n8n.io/privacy-security/privacy/ This page describes n8n's data privacy practices. ### Data processing agreement# For Cloud versions of n8n, n8n is considered both a Controller and a Processor as defined by the GDPR. As a Processor, n8n implements policies and practices that secure the personal data you send to the platform, and includes a Data Processing Agreement as part of the company's standard Terms of Service. The n8n Data Processing Agreement includes the Standard Contractual Clauses (SCCs). These clarify how n8n handles your data, and they update n8n's GDPR policies to cover the latest standards set by the European Commission. You can find a list of n8n sub-processors here. Self-hosted n8n For self-hosted versions, n8n is neither a Controller nor a Processor, as we don't manage your data Email privacy@n8n.io to request data deletion. ### Sub-processors# This is a list of sub-processors authorized to process customer data for n8n's service. n8n audits each sub-processor's security controls and applicable regulations for the protection of personal data. | Sub-processor name | Contact details | Geographic location of processing | | --- | --- | --- | | Microsoft Azure | Microsoft Azure 1 Microsoft Way Redmond WA 98052 USA Contact information: https://privacy.microsoft.com/en-GB/privacystatement#mainhowtocontactusmodule | Germany (West Central Region) | | Hetzner Online | Hetzner Online GmbH Industriestr. 25 91710 Gunzenhausen Germany data-protection@hetzner.com | Germany | Subscribe here to receive updates when n8n adds or changes a sub-processor. If you self-host n8n, you are responsible for deleting user data. If you need to delete data on behalf of one of your users, you can delete the respective execution. n8n recommends configuring n8n to prune execution data automatically every few days to avoid effortful GDPR request handling as much as possible. Configure this using the `EXECUTIONS_DATA_MAX_AGE` environment variable. Refer to Environment variables for more information. ## Data collection# n8n collects selected usage and performance data to help diagnose problems and improve the platform. Read about how n8n stores and processes this information in the privacy policy. The data gathered is different in self-hosted n8n and n8n Cloud. ### Data collection in self-hosted n8n# n8n takes care to keep self-hosted data anonymous and avoids collecting sensitive data. #### What n8n collects# * Error codes and messages of failed executions (excluding any payload data, and not for custom nodes) * Error reports for app crashes and API issues * The graph of a workflow (types of nodes used and how they're connected) * From node parameters: * The 'resource' and 'operation' that a node is set to (if applicable) * For HTTP request nodes, the domain, path, and method (with personal data anonymized) * Data around workflow executions: * Status * The user ID of the user who ran the execution * The first time a workflow loads data from an external source * The first successful production (non-manual) workflow execution * The domain of webhook calls, if specified (excluding subdomain). * Details on how the UI is used (for example, navigation, nodes panel searches) * Diagnostic information: * n8n version * Selected settings: * DB\_TYPE * N8N\_VERSION\_NOTIFICATIONS\_ENABLED * N8N\_DISABLE\_PRODUCTION\_MAIN\_PROCESS * Execution variables * OS, RAM, and CPUs * Anonymous instance ID * IP address #### What n8n doesn't collect# n8n doesn't collect private or sensitive information, such as: * Personally identifiable information (except IP address) * Credential information * Node parameters (except 'resource' and 'operation') * Execution data * Sensitive settings (for example, endpoints, ports, DB connections, username/password) * Error payloads #### How collection works# Most data is sent to n8n as events that generate it occur. Workflow execution counts and an instance pulse are sent periodically (every 6 hours). #### Opting out of telemetry# Telemetry collection is enabled by default. To disable it you can configure the following environment variables. To opt out of telemetry events: <table><tbody><tr><td><div><pre><span></span><span>1</span></pre></div></td><td><div><pre><span></span><code><span>export</span><span> </span><span>N8N_DIAGNOSTICS_ENABLED</span><span>=</span><span>false</span> </code></pre></div></td></tr></tbody></table> To opt out of checking for new versions of n8n: <table><tbody><tr><td><div><pre><span></span><span>1</span></pre></div></td><td><div><pre><span></span><code><span>export</span><span> </span><span>N8N_VERSION_NOTIFICATIONS_ENABLED</span><span>=</span><span>false</span> </code></pre></div></td></tr></tbody></table> See configuration for more info on how to set environment variables. ### Data collection in n8n Cloud# n8n Cloud collects everything listed in Data collection in self-hosted n8n. Additionally, in n8n Cloud, n8n uses PostHog to track events and visualise usage, including using session recordings. Session recordings comprise the data seen by a user on screen, with the exception of credential values. n8n's product team uses this data to improve the product. All recordings are deleted after 21 days. ### AI in n8n# To provide enhanced assistance, n8n integrates AI-powered features that leverage Large Language Models (LLMs). #### How n8n uses AI# To assist and improve user experience, n8n may send specific context data to LLMs. This context data is strictly limited to information about the current workflow. n8n does not send any values from credential fields or actual output data to AI services. The data will not be incorporated, used, or retained to train the models of the AI services. Any data will be deleted after 30 days. #### When n8n shares data# Data is only sent to AI services if workspaces have opted in to use the assistant. The Assistant is enabled by default for n8n Cloud users. When a workspace opts in to use the assistant, node-specific data is transmitted only during direct interactions and active sessions with the AI assistant, ensuring no unnecessary data sharing occurs. #### What n8n shares# * **General Workflow Information**: This includes details about which nodes are present in your workflow, the number of items currently in the workflow, and whether the workflow is active. * **Input & Output Schemas of Nodes**: This includes the schema of all nodes with incoming data and the output schema of a node in question. We do not send the actual data value of the schema. * **Node Configuration**: This includes the operations, options, and settings chosen in the referenced node. * **Code and Expressions**: This includes any code or expressions in the node in question to help with debugging potential issues and optimizations. * **Credentials**: Any values of the credential fields of your nodes. * **Output Data**: The actual data processed by your workflows. * **Sensitive Information**: Any personally identifiable information or other sensitive data that could compromise your privacy or security that you have not explicitly mentioned in node parameters or your code of a Code Node. ### Documentation telemetry# n8n's documentation (this website) uses cookies to recognize your repeated visits and preferences, as well as to measure the effectiveness of n8n's documentation and whether users find what they're searching for. With your consent, you're helping n8n to make our documentation better. Change cookie settings ## Retention and deletion of personal identifiable data# PID (personal identifiable data) is data that's personal to you and would identify you as an individual. ### n8n Cloud# #### PID retention# n8n only retains data for as long as necessary to provide the core service. For n8n Cloud, n8n stores your workflow code, credentials, and other data indefinitely, until you choose to delete it or close your account. The platform stores execution data according to the retention rules on your account. n8n deletes most internal application logs and logs tied to subprocessors within 90 days. The company retains a subset of logs for longer periods where required for security investigations. #### PID deletion# If you choose to delete your n8n account, n8n deletes all customer data and event data associated with your account. n8n deletes customer data in backups within 90 days. ### Self-hosted# Self-hosted users should have their own PID policy and data deletion processes. Refer to What you can do for more information. ## Payment processor# n8n uses Paddle.com to process payments. When you sign up for a paid plan, Paddle transmits and stores the details of your payment method according to their security policy. n8n stores no information about your payment method. --- ## Page: https://docs.n8n.io/privacy-security/incident-response/ n8n implements incident response best practices for identifying, documenting, resolving and communicating incidents. n8n publishes incident notifications to a status page at n8n Status. n8n notifies customers of any data breaches according to the company's Data Processing Addendum. --- ## Page: https://docs.n8n.io/privacy-security/what-you-can-do/ It's also your responsibility as a customer to ensure you are securing your code and data. This document lists some steps you can take. ## All users# * Report security issues and terms of service violations to security@n8n.io. * If more than one person uses your n8n instance, set up User management and follow the Best practices. * Use OAuth to connect integrations whenever possible. ## Self-hosted users# If you self-host n8n, there are additional steps you can take: * Set up a reverse proxy to handle TLS, ensuring data is encrypted in transit. * Ensure data is encrypted at rest by using encrypted partitions, or encryption at the hardware level, and ensuring n8n and its database is written to that location. * Run a Security audit. * Be aware of the Risks when installing community nodes, or choose to disable them. * Make sure users can't import external modules in the Code node. Refer to Environment variables | Nodes for more information. * Choose to exclude certain nodes. For example, you can disable nodes like Execute Command or SSH. Refer to Environment variables | Nodes for more information. * For maximum privacy, you can Isolate n8n. If you self-host n8n, you are responsible for deleting user data. If you need to delete data on behalf of one of your users, you can delete the respective execution. n8n recommends configuring n8n to prune execution data automatically every few days to avoid effortful GDPR request handling as much as possible. Configure this using the `EXECUTIONS_DATA_MAX_AGE` environment variable. Refer to Environment variables for more information. --- ## Page: https://docs.n8n.io/sustainable-use-license/ Proprietary licenses for Enterprise Proprietary licenses are available for enterprise customers. Get in touch for more information. n8n's Sustainable Use License and n8n Enterprise License are based on the fair-code model. ## License FAQs# ### What license do you use?# n8n uses the Sustainable Use License and n8n Enterprise License. These licenses are based on the fair-code model. ### What source code is covered by the Sustainable Use License?# The Sustainable Use License applies to all our source code hosted in our main GitHub repository except: * Content of branches other than master. * Source code files that contain `.ee.` in their file name. These are licensed under the n8n Enterprise License. ### What is the Sustainable Use License?# The Sustainable Use License is a fair-code software license created by n8n in 2022. You can read more about why we did this here. The license allows you the free right to use, modify, create derivative works, and redistribute, with three limitations: * You may use or modify the software only for your own internal business purposes or for non-commercial or personal use. * You may distribute the software or provide it to others only if you do so free of charge for non-commercial purposes. * You may not alter, remove, or obscure any licensing, copyright, or other notices of the licensor in the software. Any use of the licensor's trademarks is subject to applicable law. We encourage anyone who wants to use the Sustainable Use License. If you are building something out in the open, it makes sense to think about licensing earlier in order to avoid problems later. Contact us at license@n8n.io if you would like to ask any questions about it. ### What is and isn't allowed under the license in the context of n8n's product?# Our license restricts use to "internal business purposes". In practice this means all use is allowed unless you are selling a product, service, or module in which the value derives entirely or substantially from n8n functionality. Here are some examples that wouldn't be allowed: * White-labeling n8n and offering it to your customers for money. * Hosting n8n and charging people money to access it. All of the following examples are allowed under our license: * Using n8n to sync the data you control as a company, for example from a CRM to an internal database. * Creating an n8n node for your product or any other integration between your product and n8n. * Providing consulting services related to n8n, for example building workflows, custom features closely connect to n8n, or code that gets executed by n8n. * Supporting n8n, for example by setting it up or maintaining it on an internal company server. #### Can I use n8n to act as the back-end to power a feature in my app?# Usually yes, as long as the back-end process doesn't use users' own credentials to access their data. Here are two examples to clarify: ##### Example 1: Sync ACME app with HubSpot# Bob sets up n8n to collect a user's HubSpot credentials to sync data in the ACME app with data in HubSpot. **NOT ALLOWED** under the Sustainable Use License. This use case collects the user's own HubSpot credentials to pull information to feed into the ACME app. ##### Example 2: Embed AI chatbot in ACME app# Bob sets up n8n to embed an AI chatbot within the ACME app. The AI chatbot's credentials in n8n use Bob's company credentials. ACME app end-users only enter their questions or queries to the chatbot. **ALLOWED** under the Sustainable Use License. No user credentials are being collected. ### What if I want to use n8n for something that's not permitted by the license?# You must sign a separate commercial agreement with us. We actively encourage software creators to embed n8n within their products; we just ask them to sign an agreement laying out the terms of use, and the fees owed to n8n for using the product in this way. We call this mode of use n8n Embed. You can learn more, and contact us about it here. If you are unsure whether the use case you have in mind constitutes an internal business purpose or not, take a look at the examples, and if you're still unclear, email us at license@n8n.io. ### Why don't you use an open source license?# n8n's mission is to give everyone who uses a computer technical superpowers. We've decided the best way for us to achieve this mission is to make n8n as widely and freely available as possible for users, while ensuring we can build a sustainable, viable business. By making our product free to use, easy to distribute, and source-available we help everyone access the product. By operating as a business, we can continue to release features, fix bugs, and provide reliable software at scale long-term. ### Why did you create a license?# Creating a license was our least favorite option. We only went down this path after reviewing the possible existing licenses and deciding nothing fit our specific needs. There are two ways in which we try to mitigate the pain and friction of using a proprietary license: 1. By using plain English, and keeping it as short as possible. 2. By promoting fair-code with the goal of making it a well-known umbrella term to describe software models like ours. Our goals when we created the Sustainable Use License were: 1. To be as permissive as possible. 2. Safeguarding our ability to build a business. 3. Being as clear as possible what use was permitted or not. ### My company has a policy against using code that restricts commercial use – can I still use n8n?# Provided you are using n8n for internal business purposes, and not making n8n available to your customers for them to connect their accounts and build workflows, you should be able to use n8n. If you are unsure whether the use case you have in mind constitutes an internal business purpose or not, take a look at the examples, and if you're still unclear, email us at license@n8n.io. ### What happens to the code I contribute to n8n in light of the Sustainable Use License?# Any code you contribute on GitHub is subject to GitHub's terms of use. In simple terms, this means you own, and are responsible for, anything you contribute, but that you grant other GitHub users certain rights to use this code. When you contribute code to a repository containing notice of a license, you license the code under the same terms. n8n asks every contributor to sign our Contributor License Agreement. In addition to the above, this gives n8n the ability to change its license without seeking additional permission. It also means you aren't liable for your contributions (e.g. in case they cause damage to someone else's business). It's easy to get started contributing code to n8n here, and we've listed broader ways of participating in our community here. ### Why did you switch to the Sustainable Use License from your previous license arrangement (Apache 2.0 with Commons Clause)?# n8n was licensed under Apache 2.0 with Commons Clause until 17 March 2022. Commons Clause was initiated by various software companies wanting to protect their rights against cloud providers. The concept involved adding a commercial restriction on top of an existing open source license. However, the use of the Commons Clause as an additional condition to an open source license, as well as the use of wording that's open to interpretation, created some confusion and uncertainty regarding the terms of use. The Commons Clause also restricted people's ability to offer consulting and support services: we realized these services are critical in enabling people to get value from n8n, so we wanted to remove this restriction. We created the Sustainable Use License to be more permissive and more clear about what use is allowed, while continuing to ensure n8n gets the funding needed to build and improve our product. ### What are the main differences between the Sustainable Use License and your previous license arrangement (Apache 2.0 with Commons Clause)?# There are two main differences between the Sustainable Use License and our previous license arrangement. The first is that we have tightened the definition of how you can use the software. Previously the Commons Clause restricted users ability to "sell" the software; we have redefined this to restrict use to internal business purposes. The second difference is that our previous license restricted people's ability to charge fees for consulting or support services related to the software: we have lifted that restriction altogether. That means you are now free to offer commercial consulting or support services (e.g. building n8n workflows) without the need for a separate license agreement with us. If you are interested in joining our community of n8n experts providing these services, you can learn more here. ### Is n8n open source?# Although n8n's source code is available under the Sustainable Use License, according to the Open Source Initiative (OSI), open source licenses can't include limitations on use, so we do not call ourselves open source. In practice, n8n offers most users many of the same benefits as OSI-approved open source. We coined the term 'fair-code' as a way of describing our licensing model, and the model of other companies who are source-available, but restrict commercial use of their source code. ### What is fair-code, and how does the Sustainable Use License relate to it?# Fair-code isn't a software license. It describes a software model where software: * Is generally free to use and can be distributed by anybody. * Has its source code openly available. * Can be extended by anybody in public and private communities. * Is commercially restricted by its authors. The Sustainable Use License is a fair-code license. You can read more about it and see other examples of fair-code licenses here. We're always excited to talk about software licenses, fair-code, and other principles around sharing code with interested parties. To get in touch to chat, email license@n8n.io. ### Can I use n8n's Sustainable Use License for my own project?# Yes! We're excited to see more software use the Sustainable Use License. We'd love to hear about your project if you're using our license: license@n8n.io. --- ## Page: https://docs.n8n.io/integrations/builtin/node-types/ ## Built-in integrations# This section contains the node library: reference documentation for every built-in node in n8n, and their credentials. ## Node operations: Triggers and Actions# When you add a node to a workflow, n8n displays a list of available operations. An operation is something a node does, such as getting or sending data. There are two types of operation: * Triggers start a workflow in response to specific events or conditions in your services. When you select a Trigger, n8n adds a trigger node to your workflow, with the Trigger operation you chose pre-selected. When you search for a node in n8n, Trigger operations have a bolt icon . * Actions are operations that represent specific tasks within a workflow, which you can use to manipulate data, perform operations on external systems, and trigger events in other systems as part of your workflows. When you select an Action, n8n adds a node to your workflow, with the Action operation you chose pre-selected. ## Core nodes# Core nodes can be actions or triggers. Whereas most nodes connect to a specific external service, core nodes provide functionality such as logic, scheduling, or generic API calls. ## Cluster nodes# Cluster nodes are node groups that work together to provide functionality in an n8n workflow. Instead of using a single node, you use a root node and one or more sub-nodes that extend the functionality of the node.  ## Credentials# External services need a way to identify and authenticate users. This data can range from an API key over an email/password combination to a long multi-line private key. You can save these in n8n as credentials. Nodes in n8n can then request that credential information. As another layer of security, only node types with specific access rights can access the credentials. To make sure that the data is secure, it gets saved to the database encrypted. n8n uses a random personal encryption key, which it automatically generates on the first run of n8n and then saved under `~/.n8n/config`. To learn more about creating, managing, and sharing credentials, refer to Manage credentials. n8n supports custom nodes built by the community. Refer to Community nodes for guidance on installing and using these nodes. For help building your own custom nodes, and publish them to npm, refer to Creating nodes for more information. --- ## Page: https://docs.n8n.io/integrations/builtin/core-nodes/ 1. Integrations 2. Built-in nodes 3. Core nodes This section provides information about n8n's core nodes. --- ## Page: https://docs.n8n.io/integrations/builtin/core-nodes/n8n-nodes-base.activationtrigger/ The Activation Trigger node gets triggered when an event gets fired by n8n or a workflow. Keep in mind If you want to use the Activation Trigger node for a workflow, add the node to the workflow. You don't have to create a separate workflow. The Activation Trigger node gets triggered for the workflow that it gets added to. You can use the Activation Trigger node to trigger a workflow to notify the state of the workflow. ## Node parameters# * Events * **Activation**: Run when the workflow gets activated * **Start**: Run when n8n starts or restarts * **Update**: Run when the workflow gets saved while it's active ## Templates and examples# --- ## Page: https://docs.n8n.io/integrations/builtin/core-nodes/n8n-nodes-base.aggregate/ Use the Aggregate node to take separate items, or portions of them, and group them together into individual items. ## Node parameters# To begin using the node, select the **Aggregate** you'd like to use: * **Individual Fields**: Aggregate individual fields separately. * **All Item Data**: Aggregate all item data into a single list. ### Individual Fields# * **Input Field Name**: Enter the name of the field in the input data to aggregate together. * **Rename Field**: This toggle controls whether to give the field a different name in the aggregated output data. Turn this on to add a different field name. If you're aggregating multiple fields, you must provide new output field names. You can't leave multiple fields undefined. * **Output Field Name**: This field is displayed when you turn on **Rename Field**. Enter the field name for the aggregated output data. Refer to Node options for more configuration options. ### All Item Data# * **Put Output in Field**: Enter the name of the field to output the data in. * **Include**: Select which fields to include in the output. Choose from: * **All fields**: The output includes data from all fields with no further parameters. * **Specified Fields**: If you select this option, enter a comma-separated list of fields the output should include data from in the **Fields To Include** parameter. The output will include only the fields in this list. * **All Fields Except**: If you select this option, enter a comma-separated list of fields the output should exclude data from in the **Fields To Exclude** parameter. The output will include all fields not in this list. Refer to Node options for more configuration options. ## Node options# You can further configure this node using these **Options**: * **Disable Dot Notation**: The node displays this toggle when you select the **Individual Fields** Aggregate. It controls whether to disallow referencing child fields using `parent.child` in the field name (turned on), or allow it (turned off, default). * **Merge Lists**: The node displays this toggle when you select the **Individual Fields** Aggregate. Turn it on if the field to aggregate is a list and you want to output a single flat list rather than a list of lists. * **Include Binaries**: The node displays this toggle for both Aggregate types. Turn it on if you want to include binary data from the input in the new output. * **Keep Missing And Null Values**: The node displays this toggle when you select the **Individual Fields** Aggregate. Turn it on to add a null (empty) entry in the output list when there is a null or missing value in the input. If turned off, the output ignores null or empty values. ## Templates and examples# Learn more about data structure and data flow in n8n workflows. --- ## Page: https://docs.n8n.io/integrations/builtin/core-nodes/n8n-nodes-base.aitransform/ Use the AI Transform node to generate code snippets based on your prompt. The AI is context-aware, understanding the workflow’s nodes and their data types. ## Node parameters# ### Instructions# Enter your prompt for the AI and click the **Generate code** button to automatically populate the **Transformation Code**. For example, you can specify how you want to process or categorize your data. Refer to Writing good prompts for more information. The prompt should be in plain English and under 500 characters. ### Transformation Code# The code snippet generated by the node is read-only. To edit this code, adjust your prompt in **Instructions** or copy and paste it into a Code node. ## Templates and examples# Browse AI Transform integration templates, or search all templates --- ## Page: https://docs.n8n.io/integrations/builtin/core-nodes/n8n-nodes-base.code/ Use the Code node to write custom JavaScript or Python and run it as a step in your workflow. Examples and templates For usage examples and templates to help you get started, refer to n8n's Code integrations page. ## Usage# How to use the Code node. ### Choose a mode# There are two modes: * **Run Once for All Items**: this is the default. When your workflow runs, the code in the code node executes once, regardless of how many input items there are. * **Run Once for Each Item**: choose this if you want your code to run for every input item. ## JavaScript# The Code node supports Node.js. ### Supported JavaScript features# The Code node supports: * Promises. Instead of returning the items directly, you can return a promise which resolves accordingly. * Writing to your browser console using `console.log`. This is useful for debugging and troubleshooting your workflows. ### External libraries# If you self-host n8n, you can import and use built-in and external npm modules in the Code node. To learn how to enable external modules, refer to the Enable modules in Code node guide. If you use n8n Cloud, you can't import external npm modules. n8n makes two modules available for you: * crypto Node.js module * moment npm package ### Built-in methods and variables# n8n provides built-in methods and variables for working with data and accessing n8n data. Refer to Built-in methods and variables for more information. The syntax to use the built-in methods and variables is `$variableName` or `$methodName()`. Type `$` in the Code node or expressions editor to see a list of suggested methods and variables. ### Keyboard shortcuts# The Code node editing environment supports time-saving and useful keyboard shortcuts for a range of operations from autocompletion to code-folding and using multiple-cursors. A full list can be found in the list of keyboard shortcuts. ## Python# n8n added Python support in version 1.0. It doesn't include a Python executable. Instead, n8n provides Python support using Pyodide, which is a port of CPython to WebAssembly. This limits the available Python packages to the Packages included with Pyodide. n8n downloads the package automatically the first time you use it. Slower than JavaScript The Code node takes longer to process Python than JavaScript. This is due to the extra compilation steps. ### Built-in methods and variables# n8n provides built-in methods and variables for working with data and accessing n8n data. Refer to Built-in methods and variables for more information. The syntax to use the built-in methods and variables is `_variableName` or `_methodName()`. Type `_` in the Code node to see a list of suggested methods and variables. ### Keyboard shortcuts# The Code node editing environment supports time-saving and useful keyboard shortcuts for a range of operations from autocompletion to code-folding and using multiple-cursors. A full list can be found in the list of keyboard shortcuts. ## File system and HTTP requests# You can't access the file system or make HTTP requests. Use the following nodes instead: * Read/Write File From Disk * HTTP Request ## Coding in n8n# There are two places where you can use code in n8n: the Code node and the expressions editor. When using either area, there are some key concepts you need to know, as well as some built-in methods and variables to help with common tasks. ### Key concepts# When working with the Code node, you need to understand the following concepts: * Data structure: understand the data you receive in the Code node, and requirements for outputting data from the node. * Item linking: learn how data items work, and how to link to items from previous nodes. You need to handle item linking in your code when the number of input and output items doesn't match. ### Built-in methods and variables# n8n includes built-in methods and variables. These provide support for: * Accessing specific item data * Accessing data about workflows, executions, and your n8n environment * Convenience variables to help with data and time Refer to Built-in methods and variables for more information. ## Use AI in the Code node# Feature availability AI assistance in the Code node is available to Cloud users. It isn't available in self-hosted n8n. AI generated code overwrites your code If you've already written some code on the **Code** tab, the AI generated code will replace it. n8n recommends using AI as a starting point to create your initial code, then editing it as needed. To use ChatGPT to generate code in the Code node: 1. In the Code node, set **Language** to **JavaScript**. 2. Select the **Ask AI** tab. 3. Write your query. 4. Select **Generate Code**. n8n sends your query to ChatGPT, then displays the result in the **Code** tab. ## Common issues# For common questions or issues and suggested solutions, refer to Common Issues. --- ## Page: https://docs.n8n.io/integrations/builtin/core-nodes/n8n-nodes-base.code/keyboard-shortcuts/ 1. Integrations 2. Built-in nodes 3. Core nodes 4. Code ## Keyboard shortcuts when using the Code editor# The Code node editing environment supports a range of keyboard shortcuts to speed up and enhance your experience. Select the appropriate tab to see the relevant shortcuts for your operating system. ## Cursor Movement# WindowsmacOSLinux | Action | Shortcut | | --- | --- | | Move cursor left | Left | | Move cursor right | Right | | Move cursor up | Up | | Move cursor down | Down | | Move cursor by word left | Ctrl+Left | | Move cursor by word right | Ctrl+Right | | Move to line start | Home **or** Ctrl+Left | | Move to line end | End or Ctrl+Right | | Move to document start | Ctrl+Home | | Move to document end | Ctrl+End | | Move page up | Page Up | | Move page down | Page Down | | Action | Shortcut | | --- | --- | | Move cursor left | Left **or** Ctrl+B | | Move cursor right | Right **or** Ctrl+F | | Move cursor up | Up **or** Ctrl+P | | Move cursor down | Down **or** Ctrl+N | | Move cursor by word left | Option+Left | | Move cursor by word right | Option+Right | | Move to line start | Cmd+Left **or** Ctrl+A | | Move to line end | Cmd+Right **or** Ctrl+E | | Move to document start | Cmd+Up | | Move to document end | Cmd+Down | | Move page up | Page Up **or** Option+V | | Move page down | Page Down **or** Ctrl+V | | Action | Shortcut | | --- | --- | | Move cursor left | Left | | Move cursor right | Right | | Move cursor up | Up | | Move cursor down | Down | | Move cursor by word left | Ctrl+Left | | Move cursor by word right | Ctrl+Right | | Move to line start | Home **or** Ctrl+Left | | Move to line end | End or Ctrl+Right | | Move to document start | Ctrl+Home | | Move to document end | Ctrl+End | | Move page up | Page Up | | Move page down | Page Down | ## Selection# WindowsmacOSLinux | Action | Shortcut | | --- | --- | | Selection with any movement key | Shift + \[Movement Key\] | | Select all | Ctrl+A | | Select line | Ctrl+L | | Select next occurrence | Ctrl+D | | Select all occurrences | Shift+Ctrl+L | | Go to matching bracket | Shift+Ctrl+\\ | | Action | Shortcut | | --- | --- | | Selection with any movement key | Shift + \[Movement Key\] | | Select all | Cmd+A | | Select line | Cmd+L | | Select next occurrence | Cmd+D | | Go to matching bracket | Shift+Cmd+\\ | | Action | Shortcut | | --- | --- | | Selection with any movement key | Shift + \[Movement Key\] | | Select all | Ctrl+A | | Select line | Ctrl+L | | Select next occurrence | Ctrl+D | | Select all occurrences | Shift+Ctrl+L | | Go to matching bracket | Shift+Ctrl+\\ | ## Basic Operations# WindowsmacOSLinux | Action | Shortcut | | --- | --- | | New line with indentation | Enter | | Undo | Ctrl+Z | | Redo | Ctrl+Y **or** Ctrl+Shift+Z | | Undo selection | Ctrl+U | | Copy | Ctrl+C | | Cut | Ctrl+X | | Paste | Ctrl+V | | Action | Shortcut | | --- | --- | | New line with indentation | Enter | | Undo | Cmd+Z | | Redo | Cmd+Y **or** Cmd+Shift+Z | | Undo selection | Cmd+U | | Copy | Cmd+C | | Cut | Cmd+X | | Paste | Cmd+V | | Action | Shortcut | | --- | --- | | New line with indentation | Enter | | Undo | Ctrl+Z | | Redo | Ctrl+Y **or** Ctrl+Shift+Z | | Undo selection | Ctrl+U | | Copy | Ctrl+C | | Cut | Ctrl+X | | Paste | Ctrl+V | ## Delete Operations# WindowsmacOSLinux | Action | Shortcut | | --- | --- | | Delete character left | Backspace | | Delete character right | Del | | Delete word left | Ctrl+Backspace | | Delete word right | Ctrl+Del | | Delete line | Shift+Ctrl+K | | Action | Shortcut | | --- | --- | | Delete character left | Backspace | | Delete character right | Del | | Delete word left | Option+Backspace **or** Ctrl+Cmd+H | | Delete word right | Option+Del **or** Fn+Option+Backspace | | Delete line | Shift+Cmd+K | | Delete to line start | Cmd+Backspace | | Delete to line end | Cmd+Del **or** Ctrl+K | | Action | Shortcut | | --- | --- | | Delete character left | Backspace | | Delete character right | Del | | Delete word left | Ctrl+Backspace | | Delete word right | Ctrl+Del | | Delete line | Shift+Ctrl+K | ## Line Operations# WindowsmacOSLinux | Action | Shortcut | | --- | --- | | Move line up | Alt+Up | | Move line down | Alt+Down | | Copy line up | Shift+Alt+Up | | Copy line down | Shift+Alt+Down | | Toggle line comment | Ctrl+/ | | Add line comment | Ctrl+K **then** Ctrl+C | | Remove line comment | Ctrl+K **then** Ctrl+U | | Toggle block comment | Shift+Alt+A | | Action | Shortcut | | --- | --- | | Move line up | Option+Up | | Move line down | Option+Down | | Copy line up | Shift+Option+Up | | Copy line down | Shift+Option+Down | | Toggle line comment | Cmd+/ | | Add line comment | Cmd+K **then** Cmd+C | | Remove line comment | Cmd+K **then** Cmd+U | | Toggle block comment | Shift+Option+A | | Split line | Ctrl+O | | Transpose characters | Ctrl+T | | Action | Shortcut | | --- | --- | | Move line up | Alt+Up | | Move line down | Alt+Down | | Copy line up | Shift+Alt+Up | | Copy line down | Shift+Alt+Down | | Toggle line comment | Ctrl+/ | | Add line comment | Ctrl+K **then** Ctrl+C | | Remove line comment | Ctrl+K **then** Ctrl+C | | Toggle block comment | Shift+Alt+A | ## Autocomplete# WindowsmacOSLinux | Action | Shortcut | | --- | --- | | Start completion | Ctrl+Space | | Accept completion | Enter **or** Tab | | Close completion | Esc | | Navigate completion options | Up **or** Down | | Action | Shortcut | | --- | --- | | Start completion | Ctrl+Space | | Accept completion | Enter **or** Tab | | Close completion | Esc | | Navigate completion options | Up **or** Down | | Action | Shortcut | | --- | --- | | Start completion | Ctrl+Space | | Accept completion | Enter **or** Tab | | Close completion | Esc | | Navigate completion options | Up **or** Down | ## Indentation# WindowsmacOSLinux | Action | Shortcut | | --- | --- | | Indent more | Tab **or** Ctrl+\] | | Indent less | Shift+Tab **or** Ctrl+\[ | | Action | Shortcut | | --- | --- | | Indent more | Cmd+\] | | Indent less | Cmd+\[ | | Action | Shortcut | | --- | --- | | Indent more | Tab **or** Ctrl+\] | | Indent less | Shift+Tab **or** Ctrl+\[ | ## Code Folding# WindowsmacOSLinux | Action | Shortcut | | --- | --- | | Fold code | Ctrl+Shift+\[ | | Unfold code | Ctrl+Shift+\] | | Fold all | Ctrl+K **then** Ctrl+0 | | Unfold all | Ctrl+K **then** Ctrl+J | | Action | Shortcut | | --- | --- | | Fold code | Cmd+Option+\[ | | Unfold code | Cmd+Option+\] | | Fold all | Cmd+K **then** Cmd+0 | | Unfold all | Cmd+K **then** Cmd+J | | Action | Shortcut | | --- | --- | | Fold code | Ctrl+Shift+\[ | | Unfold code | Ctrl+Shift+\] | | Fold all | Ctrl+K **then** Ctrl+0 | | Unfold all | Ctrl+K **then** Ctrl+J | ## Multi-cursor# WindowsmacOSLinux | Action | Shortcut | | --- | --- | | Add cursor at click position | Alt+Left Button | | Add cursor above | Ctrl+Alt+Up | | Add cursor below | Ctrl+Alt+Down | | Add cursors to line ends | Shift+Alt+I | | Clear multiple cursors | Esc | | Action | Shortcut | | --- | --- | | Add cursor at click position | Option+Left Button | | Add cursor above | Ctrl+Option+Up | | Add cursor below | Ctrl+Option+Down | | Add cursors to line ends | Shift+Option+I | | Clear multiple cursors | Esc | | Action | Shortcut | | --- | --- | | Add cursor at click position | Alt+Left Button | | Add cursor above | Shift+Alt+Up | | Add cursor below | Shift+Alt+Down | | Add cursors to line ends | Shift+Alt+I | | Clear multiple cursors | Esc | ## Formatting# WindowsmacOSLinux | Action | Shortcut | | --- | --- | | Format document | Shift+Alt+F | | Action | Shortcut | | --- | --- | | Format document | Shift+Cmd+F | | Action | Shortcut | | --- | --- | | Format document | Ctrl+Shift+I | ## Search & Navigation# WindowsmacOSLinux | Action | Shortcut | | --- | --- | | Open Search | Ctrl+F | | Select All | Alt+Enter | | Replace All | Ctrl+Alt+Enter | | Go To Line | Ctrl+G | | Next Diagnostic | F8 | | Previous Diag. | Shift+F8 | | Open Lint Panel | Ctrl+Shift+M | | Action | Shortcut | | --- | --- | | Open Search | Cmd+F | | Select All | Cmd+Enter | | Replace All | Cmd+Option+Enter | | Go To Line | Cmd+G | | Next Diagnostic | F8 | | Previous Diag. | Shift+F8 | | Open Lint Panel | Cmd+Shift+M | | Action | Shortcut | | --- | --- | | Open Search | Ctrl+F | | Select All | Alt+Enter | | Replace All | Ctrl+Alt+Enter | | Go To Line | Ctrl+G | | Next Diagnostic | F8 | | Previous Diag. | Shift+F8 | | Open Lint Panel | Ctrl+Shift+M | --- ## Page: https://docs.n8n.io/integrations/builtin/core-nodes/n8n-nodes-base.code/common-issues/ Here are some common errors and issues with the Code node and steps to resolve or troubleshoot them. ## Code doesn't return items properly# This error occurs when the code in your Code node doesn't return data in the expected format. In n8n, all data passed between nodes is an array of objects. Each of these objects wraps another object with the `json` key: <table><tbody><tr><td><div><pre><span></span><span>1</span> <span>2</span> <span>3</span> <span>4</span> <span>5</span> <span>6</span> <span>7</span></pre></div></td><td><div><pre><span></span><code><span>[</span> <span> </span><span>{</span> <span> </span><span>"json"</span><span>:</span><span> </span><span>{</span> <span> </span><span>// your data goes here</span> <span> </span><span>}</span> <span> </span><span>}</span> <span>]</span> </code></pre></div></td></tr></tbody></table> To troubleshoot this error, check the following: * Read the data structure to understand the data you receive in the Code node and the requirements for outputting data from the node. * Understand how data items work and how to connect data items from previous nodes with item linking. ## A 'json' property isn't an object# This error occurs when the Code node returns data where the `json` key isn't pointing to an object. This may happen if you set `json` to a different data structure, like an array: <table><tbody><tr><td><div><pre><span></span><span>1</span> <span>2</span> <span>3</span> <span>4</span> <span>5</span> <span>6</span> <span>7</span></pre></div></td><td><div><pre><span></span><code><span>[</span> <span> </span><span>{</span> <span> </span><span>"json"</span><span>:</span><span> </span><span>[</span> <span> </span><span>// Setting `json` to an array like this will produce an error</span> <span> </span><span>]</span> <span> </span><span>}</span> <span>]</span> </code></pre></div></td></tr></tbody></table> To resolve this, ensure that the `json` key references an object in your return data: <table><tbody><tr><td><div><pre><span></span><span>1</span> <span>2</span> <span>3</span> <span>4</span> <span>5</span> <span>6</span> <span>7</span></pre></div></td><td><div><pre><span></span><code><span>[</span> <span> </span><span>{</span> <span> </span><span>"json"</span><span>:</span><span> </span><span>{</span> <span> </span><span>// Setting `json` to an object as expected</span> <span> </span><span>}</span> <span> </span><span>}</span> <span>]</span> </code></pre></div></td></tr></tbody></table> ## Code doesn't return an object# This error may occur when your Code node doesn't return anything or if it returns an unexpected result. To resolve this, ensure that your Code node returns the expected data structure: <table><tbody><tr><td><div><pre><span></span><span>1</span> <span>2</span> <span>3</span> <span>4</span> <span>5</span> <span>6</span> <span>7</span></pre></div></td><td><div><pre><span></span><code><span>[</span> <span> </span><span>{</span> <span> </span><span>"json"</span><span>:</span><span> </span><span>{</span> <span> </span><span>// your data goes here</span> <span> </span><span>}</span> <span> </span><span>}</span> <span>]</span> </code></pre></div></td></tr></tbody></table> This error may also occur if the code you provided returns `'undefined'` instead of the expected result. In that case, ensure that the data you are referencing in your Code node exists in each execution and that it has the structure your code expects. ## 'import' and 'export' may only appear at the top level# This error occurs if you try to use `import` or `export` in the Code node. These aren't supported by n8n's JavaScript sandbox. Instead, use the `require` function to load modules. To resolve this issue, try changing your `import` statements to use `require`: <table><tbody><tr><td><div><pre><span></span><span>1</span> <span>2</span> <span>3</span> <span>4</span></pre></div></td><td><div><pre><span></span><code><span>// Original code:</span> <span>// import express from "express";</span> <span>// New code:</span> <span>const</span><span> </span><span>express</span><span> </span><span>=</span><span> </span><span>require</span><span>(</span><span>"express"</span><span>);</span> </code></pre></div></td></tr></tbody></table> ## Cannot find module '<module>'# This error occurs if you try to use `require` in the Code node and n8n can't find the module. Only for self-hosted n8n doesn't support importing modules in the Cloud version. If you're self-hosting n8n, follow these steps: * Install the module into your n8n environment. * If you are running n8n with npm, install the module in the same environment as n8n. * If you are running n8n with Docker, you need to extend the official n8n image with a custom image that includes your module. * Set the `NODE_FUNCTION_ALLOW_BUILTIN` and `NODE_FUNCTION_ALLOW_EXTERNAL` environment variables to allow importing modules. ## Using global variables# Sometimes you may wish to set and retrieve simple global data related to a workflow across and within executions. For example, you may wish to include the date of the previous report when compiling a report with a list of project updates. To set, update, and retrieve data directly to a workflow, use the static data functions within your code. You can manage data either globally or tied to specific nodes. Use Remove Duplicates when possible If you're interested in using variables to avoid processing the same data items more than once, consider using the Remove Duplicates node instead. The Remove Duplicates node can save information across executions to avoid processing the same items multiple times. --- ## Page: https://docs.n8n.io/integrations/builtin/core-nodes/n8n-nodes-base.comparedatasets/ The Compare Datasets node helps you compare data from two input streams. ## Node parameters# 1. Decide which fields to compare. In **Input A Field**, enter the name of the field you want to use from input stream A. In **Input B Field**, enter the name of the field you want to use from input stream B. 2. **Optional**: You can compare by multiple fields. Select **Add Fields to Match** to set up more comparisons. 3. Choose how to handle differences between the datasets. In **When There Are Differences**, select one of the following: * **Use Input A Version** to treat input stream A as the source of truth. * **Use Input B Version** to treat input stream B as the source of truth. * **Use a Mix of Versions** to use different inputs for different fields. * Use **Prefer** to select either **Input A Version** or **Input B Version** as the main source of truth. * Enter input fields that are exceptions to **For Everything Except** to pull from the other input source. To add multiple input fields, enter a comma-separated list. * **Include Both Versions** to include both input streams in the output, which may make the structure more complex. 4. Decide whether to use **Fuzzy Compare**. When turned on, the comparison will tolerate small type differences when comparing fields. For example, the number 3 and the string `3` are treated as the same with **Fuzzy Compare** turned on, but wouldn't be treated the same with it turned off. ## Understand item comparison# Item comparison is a two stage process: 1. n8n checks if the values of the fields you selected to compare match across both inputs. 2. If the fields to compare match, n8n then compares all fields within the items, to determine if the items are the same or different. ## Node options# Use the node **Options** to refine your comparison or tweak comparison behavior. ### Fields to Skip Comparing# Enter field names that you want to ignore in the comparison. For example, if you compare the two datasets below using `person.language` as the **Fields to Match**, n8n returns them as different. If you add `person.name` to **Fields to Skip Comparing**, n8n returns them as matching. <table><tbody><tr><td><div><pre><span></span><span> 1</span> <span> 2</span> <span> 3</span> <span> 4</span> <span> 5</span> <span> 6</span> <span> 7</span> <span> 8</span> <span> 9</span> <span>10</span> <span>11</span> <span>12</span> <span>13</span> <span>14</span> <span>15</span> <span>16</span> <span>17</span> <span>18</span> <span>19</span> <span>20</span> <span>21</span> <span>22</span> <span>23</span> <span>24</span> <span>25</span> <span>26</span> <span>27</span> <span>28</span> <span>29</span> <span>30</span> <span>31</span> <span>32</span> <span>33</span> <span>34</span> <span>35</span> <span>36</span> <span>37</span> <span>38</span> <span>39</span> <span>40</span> <span>41</span> <span>42</span> <span>43</span> <span>44</span> <span>45</span> <span>46</span> <span>47</span> <span>48</span></pre></div></td><td><div><pre><span></span><code><span> </span><span>// Input 1</span> <span> </span><span>[</span> <span> </span><span>{</span> <span> </span><span>"person"</span><span>:</span> <span> </span><span>{</span> <span> </span><span>"name"</span><span>:</span><span> </span><span>"Stefan"</span><span>,</span> <span> </span><span>"language"</span><span>:</span><span> </span><span>"de"</span> <span> </span><span>}</span> <span> </span><span>},</span> <span> </span><span>{</span> <span> </span><span>"person"</span><span>:</span> <span> </span><span>{</span> <span> </span><span>"name"</span><span>:</span><span> </span><span>"Jim"</span><span>,</span> <span> </span><span>"language"</span><span>:</span><span> </span><span>"en"</span> <span> </span><span>}</span> <span> </span><span>},</span> <span> </span><span>{</span> <span> </span><span>"person"</span><span>:</span> <span> </span><span>{</span> <span> </span><span>"name"</span><span>:</span><span> </span><span>"Hans"</span><span>,</span> <span> </span><span>"language"</span><span>:</span><span> </span><span>"de"</span> <span> </span><span>}</span> <span> </span><span>}</span> <span> </span><span>]</span> <span> </span><span>// Input 2</span> <span> </span><span>[</span> <span> </span><span>{</span> <span> </span><span>"person"</span><span>:</span> <span> </span><span>{</span> <span> </span><span>"name"</span><span>:</span><span> </span><span>"Sara"</span><span>,</span> <span> </span><span>"language"</span><span>:</span><span> </span><span>"de"</span> <span> </span><span>}</span> <span> </span><span>},</span> <span> </span><span>{</span> <span> </span><span>"person"</span><span>:</span> <span> </span><span>{</span> <span> </span><span>"name"</span><span>:</span><span> </span><span>"Jane"</span><span>,</span> <span> </span><span>"language"</span><span>:</span><span> </span><span>"en"</span> <span> </span><span>}</span> <span> </span><span>},</span> <span> </span><span>{</span> <span> </span><span>"person"</span><span>:</span> <span> </span><span>{</span> <span> </span><span>"name"</span><span>:</span><span> </span><span>"Harriet"</span><span>,</span> <span> </span><span>"language"</span><span>:</span><span> </span><span>"de"</span> <span> </span><span>}</span> <span> </span><span>}</span> <span> </span><span>]</span> </code></pre></div></td></tr></tbody></table> ### Disable Dot Notation# Whether to disallow referencing child fields using `parent.child` in the field name (turned on) or allow it (turned off, default). ### Multiple Matches# Choose how to handle duplicate data. The default is **Include All Matches**. You can choose **Include First Match Only**. For example, given these two datasets: <table><tbody><tr><td><div><pre><span></span><span> 1</span> <span> 2</span> <span> 3</span> <span> 4</span> <span> 5</span> <span> 6</span> <span> 7</span> <span> 8</span> <span> 9</span> <span>10</span> <span>11</span> <span>12</span> <span>13</span> <span>14</span> <span>15</span> <span>16</span> <span>17</span> <span>18</span> <span>19</span> <span>20</span> <span>21</span> <span>22</span> <span>23</span> <span>24</span> <span>25</span> <span>26</span> <span>27</span> <span>28</span> <span>29</span> <span>30</span> <span>31</span> <span>32</span> <span>33</span> <span>34</span> <span>35</span> <span>36</span> <span>37</span> <span>38</span> <span>39</span> <span>40</span> <span>41</span> <span>42</span></pre></div></td><td><div><pre><span></span><code><span> </span><span>// Input 1</span> <span> </span><span>[</span> <span> </span><span>{</span> <span> </span><span>"fruit"</span><span>:</span><span> </span><span>{</span> <span> </span><span>"type"</span><span>:</span><span> </span><span>"apple"</span><span>,</span> <span> </span><span>"color"</span><span>:</span><span> </span><span>"red"</span> <span> </span><span>}</span> <span> </span><span>},</span> <span> </span><span>{</span> <span> </span><span>"fruit"</span><span>:</span><span> </span><span>{</span> <span> </span><span>"type"</span><span>:</span><span> </span><span>"apple"</span><span>,</span> <span> </span><span>"color"</span><span>:</span><span> </span><span>"red"</span> <span> </span><span>}</span> <span> </span><span>},</span> <span> </span><span>{</span> <span> </span><span>"fruit"</span><span>:</span><span> </span><span>{</span> <span> </span><span>"type"</span><span>:</span><span> </span><span>"banana"</span><span>,</span> <span> </span><span>"color"</span><span>:</span><span> </span><span>"yellow"</span> <span> </span><span>}</span> <span> </span><span>}</span> <span> </span><span>]</span> <span> </span><span>// Input 2</span> <span> </span><span>[</span> <span> </span><span>{</span> <span> </span><span>"fruit"</span><span>:</span><span> </span><span>{</span> <span> </span><span>"type"</span><span>:</span><span> </span><span>"apple"</span><span>,</span> <span> </span><span>"color"</span><span>:</span><span> </span><span>"red"</span> <span> </span><span>}</span> <span> </span><span>},</span> <span> </span><span>{</span> <span> </span><span>"fruit"</span><span>:</span><span> </span><span>{</span> <span> </span><span>"type"</span><span>:</span><span> </span><span>"apple"</span><span>,</span> <span> </span><span>"color"</span><span>:</span><span> </span><span>"red"</span> <span> </span><span>}</span> <span> </span><span>},</span> <span> </span><span>{</span> <span> </span><span>"fruit"</span><span>:</span><span> </span><span>{</span> <span> </span><span>"type"</span><span>:</span><span> </span><span>"banana"</span><span>,</span> <span> </span><span>"color"</span><span>:</span><span> </span><span>"yellow"</span> <span> </span><span>}</span> <span> </span><span>}</span> <span> </span><span>]</span> </code></pre></div></td></tr></tbody></table> n8n returns three items in the **Same Branch** tab. The data is the same in both branches. If you select **Include First Match Only**, n8n returns two items, in the **Same Branch** tab. The data is the same in both branches, but n8n only returns the first occurrence of the matching "apple" items. ## Understand the output# There are four output options: * **In A only Branch**: Contains data that occurs only in the first input. * **Same Branch**: Contains data that's the same in both inputs. * **Different Branch**: Contains data that's different between inputs. * **In B only Branch**: Contains data that occurs only in the second output. ## Templates and examples# --- ## Page: https://docs.n8n.io/integrations/builtin/core-nodes/n8n-nodes-base.compression/ Use the Compression node to compress and decompress files. Supports Zip and Gzip formats. ## Node parameters# This node can be used as an AI tool This node can be used to enhance the capabilities of an AI agent. When used in this way, many parameters can be set automatically, or with information directed by AI - find out more in the AI tool parameters documentation. The node parameters depend on which **Operation** you select. Choose to: * **Compress**: Create a compressed file from your input data. * **Decompress**: Decompress an existing compressed file. Refer to the sections below for parameters specific to each **Operation**. ### Compress# * **Input Binary Field(s)**: Enter the name of the fields in the input data that contain the binary files you want to compress. To compress more than one file, use a comma-separated list. * **Output Format**: Choose whether to format the compressed output as **Zip** or **Gzip**. * **File Name**: Enter the name of the zip file the node creates. * **Put Output File in Field**: Enter the name of the field in the output data to contain the file. ### Decompress# * **Put Output File in Field**: Enter the name of the fields in the input data that contain the binary files you want to decompress. To decompress more than one file, use a comma-separated list. * **Output Prefix**: Enter a prefix to add to the output file name. ## Templates and examples# --- ## Page: https://docs.n8n.io/integrations/builtin/core-nodes/n8n-nodes-langchain.chattrigger/ Use the Chat Trigger node when building AI workflows for chatbots and other chat interfaces. You can configure how users access the chat, using one of n8n's provided interfaces, or your own. You can add authentication. You must connect either an agent or chain root node. Workflow execution usage Every message to the Chat Trigger executes your workflow. This means that one conversation where a user sends 10 messages uses 10 executions from your execution allowance. Check your payment plan for details of your allowance. Manual Chat trigger This node replaces the Manual Chat Trigger node from version 1.24.0. ## Node parameters# ### Make Chat Publicly Available# Set whether the chat should be publicly available (turned on) or only available through the manual chat interface (turned off). Leave this turned off while you're building the workflow. Turn it on when you're ready to activate the workflow and allow users to access the chat. ### Mode# Choose how users access the chat. Select from: * **Hosted Chat**: Use n8n's hosted chat interface. Recommended for most users because you can configure the interface using the node options and don't have to do any other setup. * **Embedded Chat**: This option requires you to create your own chat interface. You can use n8n's chat widget or build your own. Your chat interface must call the webhook URL shown in **Chat URL** in the node. ### Authentication# Choose whether and how to restrict access to the chat. Select from: * **None**: The chat doesn't use authentication. Anyone can use the chat. * **Basic Auth**: The chat uses basic authentication. * Select or create a **Credential for Basic Auth** with a username and password. All users must use the same username and password. * **n8n User Auth**: Only users logged in to an n8n account can use the chat. ### Initial Message(s)# This parameter's only available if you're using **Hosted Chat**. Use it to configure the message the n8n chat interface displays when the user arrives on the page. ## Node options# Available options depend on the chat mode. ### Hosted chat options# #### Allowed Origin (CORS)# Set the origins that can access the chat URL. Enter a comma-separated list of URLs allowed for cross-origin non-preflight requests. Use `*` (default) to allow all origins. #### Input Placeholder, Title, and Subtitle# Enter the text for these elements in the chat interface. View screenshot  #### Load Previous Session# Select whether to load chat messages from a previous chat session. If you select any option other than **Off**, you must connect the Chat trigger and the Agent you're using to a memory sub-node. The memory connector on the Chat trigger appears when you set **Load Previous Session** to **From Memory**. n8n recommends connecting both the Chat trigger and Agent to the same memory sub-node, as this ensures a single source of truth for both nodes. View screenshot  #### Response Mode# Use this option when building a workflow with steps after the agent or chain that's handling the chat. Choose from: * **When Last Node Finishes**: The Chat Trigger node returns the response code and the data output from the last node executed in the workflow. * **Using 'Respond to Webhook' Node**: The Chat Trigger node responds as defined in the Respond to Webhook node. #### Require Button Click to Start Chat# Set whether to display a **New Conversation** button on the chat interface (turned on) or not (turned off). View screenshot  ### Embedded chat options# #### Allowed Origin (CORS)# Set the origins that can access the chat URL. Enter a comma-separated list of URLs allowed for cross-origin non-preflight requests. Use `*` (default) to allow all origins. #### Load Previous Session# Select whether to load chat messages from a previous chat session. If you select any option other than **Off**, you must connect the Chat trigger and the Agent you're using to a memory sub-node. The memory connector on the Chat trigger appears when you set **Load Previous Session** to **From Memory**. n8n recommends connecting both the Chat trigger and Agent to the same memory sub-node, as this ensures a single source of truth for both nodes. View screenshot  #### Response Mode# Use this option when building a workflow with steps after the agent or chain that's handling the chat. Choose from: * **When Last Node Finishes**: The Chat Trigger node returns the response code and the data output from the last node executed in the workflow. * **Using 'Respond to Webhook' Node**: The Chat Trigger node responds as defined in the Respond to Webhook node. ## Templates and examples# View n8n's Advanced AI documentation. ## Set the chat response manually# You need to manually set the chat response when you don't want to directly send the output of an Agent or Chain node to the user. Instead, you want to take the output of an Agent or Chain node and modify it or do something else with it before sending it back to the user. In a basic workflow, the Agent and Chain nodes output a parameter named either `output` or `text`, and the Chat trigger sends the value of this parameter to the user as the chat response. If you need to manually create the response sent to the user, you must create a parameter named either `text` or `output`. If you use a different parameter name, the Chat trigger sends the entire object as its response, not just the value. ## Common issues# For common questions or issues and suggested solutions, refer to Common Issues. --- ## Page: https://docs.n8n.io/integrations/builtin/core-nodes/n8n-nodes-langchain.chattrigger/common-issues/ Here are some common errors and issues with the Chat Trigger node and steps to resolve or troubleshoot them. ## Pass data from a website to an embedded Chat Trigger node# When embedding the Chat Trigger node in a website, you might want to pass extra information to the Chat Trigger. For example, passing a user ID stored in a site cookie. To do this, use the `metadata` field in the JSON object you pass to the `createChat` function in your embedded chat window: <table><tbody><tr><td><div><pre><span></span><span>1</span> <span>2</span> <span>3</span> <span>4</span> <span>5</span> <span>6</span></pre></div></td><td><div><pre><span></span><code><span>createChat</span><span>({</span> <span> </span><span>webhookUrl</span><span>:</span><span> </span><span>'YOUR_PRODUCTION_WEBHOOK_URL'</span><span>,</span> <span> </span><span>metadata</span><span>:</span><span> </span><span>{</span> <span> </span><span>'YOUR_KEY'</span><span>:</span><span> </span><span>'YOUR_DATA'</span> <span> </span><span>};</span> <span>});</span> </code></pre></div></td></tr></tbody></table> The `metadata` field can contain arbitrary data that will appear in the Chat Trigger output alongside other output data. From there, you can query and process the data from downstream nodes as usual using n8n's data processing features. ## Chat Trigger node doesn't fetch previous messages# When you configure a Chat Trigger node, you might experience problems fetching previous messages if you aren't careful about how you configure session loading. This often manifests as a `workflow could not be started!` error. In Chat Triggers, the **Load Previous Session** option retrieves previous chat messages for a session using the `sessionID`. When you set the **Load Previous Session** option to **From memory**, it's almost always best to connect the same memory node to both the Chat Trigger and the Agent in your workflow: 1. In your **Chat Trigger** node, set the **Load Previous Session** option to **From Memory**. This is only visible if you've made the chat publicly available. 2. Attach a **Simple Memory** node to the **Memory** connector. 3. Attach the same **Simple Memory** node to **Memory** connector of your **Agent**. 4. In the **Simple Memory** node, set **Session ID** to **Connected Chat Trigger Node**. One instance where you may want to attach separate memory nodes to your Chat Trigger and the Agent is if you want to set the **Session ID** in your memory node to **Define below**. If you're retrieving the session ID from an expression, the same expression must work for each of the nodes attached to it. If the expression isn't compatible with each of the nodes that need memory, you might need to use separate memory nodes so you can customize the expression for the session ID on a per-node basis. --- ## Page: https://docs.n8n.io/integrations/builtin/core-nodes/n8n-nodes-base.converttofile/ Use the Convert to File node to take input data and output it as a file. This converts the input JSON data into a binary format. Extract From File To extract data from a file and convert it to JSON, use the Extract from File node. ## Operations# * **Convert to CSV** * **Convert to HTML** * **Convert to ICS** * **Convert to JSON** * **Convert to ODS** * **Convert to RTF** * **Convert to Text File** * **Convert to XLS** * **Convert to XLSX** * **Move Base64 String to File** Node parameters and options depend on the operation you select. ### Convert to CSV# Configure the node for this operation with the **Put Output File in Field** parameter. Enter the name of the field in the output data to contain the file. #### Convert to CSV options# You can also configure this operation with these **Options**: * **File Name**: Enter the file name for the generated output file. * If the first row of the file contains header names, turn on the **Header Row** option. ### Convert to HTML# Configure the node for this operation with the **Put Output File in Field** parameter. Enter the name of the field in the output data to contain the file. #### Convert to HTML options# You can also configure this operation with these **Options**: * **File Name**: Enter the file name for the generated output file. * If the first row of the file contains header names, turn on the **Header Row** option. ### Convert to ICS# * **Put Output File in Field**. Enter the name of the field in the output data to contain the file. * **Event Title**: Enter the title for the event. * **Start**: Enter the date and time the event will start. All-day events ignore the time. * **End**: Enter the date and time the event will end. All-day events ignore the time. If unset, the node uses the start date. * **All Day**: Select whether the event is an all day event (turned on) or not (turned off). #### Convert to ICS options# You can also configure this operation with these **Options**: * **File Name**: Enter the file name for the generated output file. * **Attendees**: Use this option to add attendees to the event. For each attendee, add: * **Name** * **Email** * **RSVP**: Select whether the attendee needs to confirm attendance (turned on) or doesn't (turned off). * **Busy Status**: Use this option to set the busy status for Microsoft applications like Outlook. Choose from: * **Busy** * **Tentative** * **Calendar Name**: For Apple and Microsoft calendars, enter the calendar name for the event. * **Description**: Enter an event description. * **Geolocation**: Enter the **Latitude** and **Longitude** for the event's location. * **Location**: Enter the event's intended venue/location. * **Recurrence Rule**: Enter a rule to define the repeat pattern of the event (RRULE). Generate rules using the iCalendar.org RRULE Tool. * **Organizer**: Enter the organizer's **Name** and **Email**. * **Sequence**: If you're sending an update for an event with the same universally unique ID (UID), enter the revision sequence number. * **Status**: Set the status of the event. Choose from: * **Confirmed** * **Cancelled** * **Tentative** * **UID**: Enter a universally unique ID (UID) for the event. The UID should be globally unique. The node automatically generates a UID if you don't enter one. * **URL**: Enter a URL associated with the event. * **Use Workflow Timezone**: Whether to use UTC time zone (turned off) or the workflow's timezone (turned on). Set the workflow's timezone in the Workflow Settings. ### Convert to JSON# Choose the best output **Mode** for your needs from these options: * **All Items to One File**: Send all input items to a single file. * **Each Item to Separate File**: Create a file for every input item. #### Convert to JSON options# You can also configure this operation with these **Options**: * **File Name**: Enter the file name for the generated output file. * **Format**: Choose whether to format the JSON for easier reading (turned on) or not (turned off). * **Encoding**: Choose the character set to use to encode the data. The default is **utf8**. ### Convert to ODS# Configure the node for this operation with the **Put Output File in Field** parameter. Enter the name of the field in the output data to contain the file. #### Convert to ODS options# You can also configure this operation with these **Options**: * **File Name**: Enter the file name for the generated output file. * **Compression**: Choose whether to compress and reduce the file's output size. * **Header Row**: Turn on if the first row of the file contains header names. * **Sheet Name**: Enter the Sheet Name to create in the spreadsheet. ### Convert to RTF# Configure the node for this operation with the **Put Output File in Field** parameter. Enter the name of the field in the output data to contain the file. #### Convert to RFT options# You can also configure this operation with these **Options**: * **File Name**: Enter the file name for the generated output file. * If the first row of the file contains header names, turn on the **Header Row** option. ### Convert to Text File# Enter the name of the **Text Input Field** that contains a string to convert to a file. Use dot-notation for deep fields, for example `level1.level2.currentKey`. #### Convert to Text File options# You can also configure this operation with these **Options**: * **File Name**: Enter the file name for the generated output file. * **Encoding**: Choose the character set to use to encode the data. The default is **utf8**. ### Convert to XLS# Configure the node for this operation with the **Put Output File in Field** parameter. Enter the name of the field in the output data to contain the file. #### Convert to XLS options# You can also configure this operation with these **Options**: * **File Name**: Enter the file name for the generated output file. * **Header Row**: Turn on if the first row of the file contains header names. * **Sheet Name**: Enter the Sheet Name to create in the spreadsheet. ### Convert to XLSX# Configure the node for this operation with the **Put Output File in Field** parameter. Enter the name of the field in the output data to contain the file. #### Convert to XLSX options# You can also configure this operation with these **Options**: * **File Name**: Enter the file name for the generated output file. * **Compression**: Choose whether to compress and reduce the file's output size. * **Header Row**: Turn on if the first row of the file contains header names. * **Sheet Name**: Enter the Sheet Name to create in the spreadsheet. ### Move Base64 String to File# Enter the name of the **Base64 Input Field** that contains the Base64 string to convert to a file. Use dot-notation for deep fields, for example `level1.level2.currentKey`. #### Move Base64 String to File options# You can also configure this operation with these **Options**: * **File Name**: Enter the file name for the generated output file. * **MIME Type**: Enter the MIME type of the output file. Refer to Common MIME types for a list of common MIME types and the file extensions they relate to. ## Templates and examples# --- ## Page: https://docs.n8n.io/integrations/builtin/core-nodes/n8n-nodes-base.crypto/ Use the Crypto node to encrypt data in workflows. ## Actions# * **Generate** a random string * **Hash** a text or file in a specified format * **Hmac** a text or file in a specified format * **Sign** a string using a private key ## Node parameters# This node can be used as an AI tool This node can be used to enhance the capabilities of an AI agent. When used in this way, many parameters can be set automatically, or with information directed by AI - find out more in the AI tool parameters documentation. Node parameters depend on the action you select. ### Generate parameters# * **Property Name**: Enter the name of the property to write the random string to. * **Type**: Select the encoding type to use to generate the string. Choose from: * **ASCII** * **BASE64** * **HEX** * **UUID** ### Hash parameters# * **Type**: Select the hash type to use. Choose from: * **MD5** * **SHA256** * **SHA3-256** * **SHA3-384** * **SHA3-512** * **SHA385** * **SHA512** * **Binary File**: Turn this parameter on if the data you want to hash is from a binary file. * **Value**: If you turn off **Binary File**, enter the value you want to hash. * **Binary Property Name**: If you turn on **Binary File**, enter the name of the binary property that contains the data you want to hash. * **Property Name**: Enter the name of the property you want to write the hash to. * **Encoding**: Select the encoding type to use. Choose from: * **BASE64** * **HEX** ### Hmac parameters# * **Binary File**: Turn this parameter on if the data you want to encrypt is from a binary file. * **Value**: If you turn off **Binary File**, enter the value you want to encrypt. * **Binary Property Name**: If you turn on **Binary File**, enter the name of the binary property that contains the data you want to encrypt. * **Type**: Select the encryption type to use. Choose from: * **MD5** * **SHA256** * **SHA3-256** * **SHA3-384** * **SHA3-512** * **SHA385** * **SHA512** * **Property Name**: Enter the name of the property you want to write the hash to. * **Secret**: Enter the secret or secret key used for decoding. * **Encoding**: Select the encoding type to use. Choose from: * **BASE64** * **HEX** ### Sign parameters# * **Value**: Enter the value you want to sign. * **Property Name**: Enter the name of the property you want to write the signed value to. * **Algorithm Name or ID**: Choose an algorithm name from the list or specify an ID using an expression. * **Encoding**: Select the encoding type to use. Choose from: * **BASE64** * **HEX** * **Private Key**: Enter a private key to use when signing the string. ## Templates and examples# --- ## Page: https://docs.n8n.io/integrations/builtin/core-nodes/n8n-nodes-base.datetime/ The Date & Time node manipulates date and time data and convert it to different formats. Timezone settings The node relies on the timezone setting. n8n uses either: 1. The workflow timezone, if set. Refer to Workflow settings for more information. 2. The n8n instance timezone, if the workflow timezone isn't set. The default is `America/New York` for self-hosted instances. n8n Cloud tries to detect the instance owner's timezone when they sign up, falling back to GMT as the default. Self-hosted users can change the instance setting using Environment variables. Cloud admins can change the instance timezone in the Admin dashboard. Date and time in other nodes You can work with data and time in the Code node, and in expressions in any node. n8n supports Luxon to help work with date and time in JavaScript. Refer to Date and time with Luxon for more information. ## Operations# * **Add to a Date**: Add a specified amount of time to a date. * **Extract Part of a Date**: Extract part of a date, such as the year, month, or day. * **Format a Date**: Transform a date's format to a new format using preset options or a custom expression. * **Get Current Date**: Get the current date and choose whether to include the current time or not. Useful for triggering other flows and conditional logic. * **Get Time Between Dates**: Calculate the amount of time in specific units between two dates. * **Round a Date**: Round a date up or down to the nearest unit of your choice, such as month, day, or hour. * **Subtract From a Date**: Subtract a specified amount of time from a date. Refer to the sections below for parameters and options specific to each operation. ## Add to a Date# Configure the node for this operation using these parameters: * **Date to Add To**: Enter the date you want to change. * **Time Unit to Add**: Select the time unit for the **Duration** parameter. * **Duration**: Enter the number of time units to add to the date. * **Output Field Name**: Enter the name of the field to output the new date to. ### Add to a Date options# This operation has one option: **Include Input Fields**. If you'd like to include all of the input fields in the output, turn this option on. If turned off, only the **Output Field Name** and its contents are output. Configure the node for this operation using these parameters: * **Date**: Enter the date you want to round or extract part of. * **Part**: Select the part of the date you want to extract. Choose from: * **Year** * **Month** * **Week** * **Day** * **Hour** * **Minute** * **Second** * **Output Field Name**: Enter the name of the field to output the extracted date part to. This operation has one option: **Include Input Fields**. If you'd like to include all of the input fields in the output, turn this option on. If turned off, only the **Output Field Name** and its contents are output. ## Format a Date# Configure the node for this operation using these parameters: * **Date**: Enter the date you want to format. * **Format**: Select the format you want to change the date to. Choose from: * **Custom Format**: Enter your own custom format using Luxon's special tokens. Tokens are case-sensitive. * **MM/DD/YYYY**: For `4 September 1986`, this formats the date as `09/04/1986`. * **YYYY/MM/DD**: For `4 September 1986`, this formats the date as `1986/09/04`. * **MMMM DD YYYY**: For `4 September 1986`, this formats the date as `September 04 1986`. * **MM-DD-YYYY**: For `4 September 1986`, this formats the date as `09-04-1986`. * **YYYY-MM-DD**: For `4 September 1986`, this formats the date as `1986-09-04`. * **Output Field Name**: Enter the name of the field to output the formatted date to. ### Format a Date options# This operation includes these options: * **Include Input Fields**: If you'd like to include all of the input fields in the output, turn this option on. If turned off, only the **Output Field Name** and its contents are output. * **From Date Format**: If the node isn't recognizing the **Date** format correctly, enter the format for that **Date** here so the node can process it properly. Use Luxon's special tokens to enter the format. Tokens are case-sensitive * **Use Workflow Timezone**: Whether to use the input's time zone (turned off) or the workflow's timezone (turned on). ## Get Current Date# Configure the node for this operation using these parameters: * **Include Current Time**: Choose whether to include the current time (turned on) or to set the time to midnight (turned off). * **Output Field Name**: Enter the name of the field to output the current date to. ### Get Current Date options# This operation includes these options: * **Include Input Fields**: If you'd like to include all of the input fields in the output, turn this option on. If turned off, only the **Output Field Name** and its contents are output. * **Timezone**: Set the timezone to use. If left blank, the node uses the n8n instance's timezone. +00:00 timezone Use `GMT` for +00:00 timezone. ## Get Time Between Dates# Configure the node for this operation using these parameters: * **Start Date**: Enter the earlier date you want to compare. * **End Date**: Enter the later date you want to compare. * **Units**: Select the units you want to calculate the time between. You can include multiple units. Choose from: * **Year** * **Month** * **Week** * **Day** * **Hour** * **Minute** * **Second** * **Millisecond** * **Output Field Name**: Enter the name of the field to output the calculated time between to. ### Get Time Between Dates options# The Get Time Between Dates operation includes the **Include Input Fields** option as well as an **Output as ISO String** option. If you leave this option off, each unit you selected will return its own time difference calculation, for example: <table><tbody><tr><td><div><pre><span></span><span>1</span> <span>2</span> <span>3</span> <span>4</span></pre></div></td><td><div><pre><span></span><code>timeDifference years : 1 months : 3 days : 13 </code></pre></div></td></tr></tbody></table> If you turn on the **Output as ISO String** option, the node formats the output as a single ISO duration string, for example: `P1Y3M13D`. ISO duration format displays a format as `P<n>Y<n>M<n>DT<n>H<n>M<n>S`. `<n>` is the number for the unit after it. * P = period (duration). It begins all ISO duration strings. * Y = years * M = months * W = weeks * D = days * T = delineator between dates and times, used to avoid confusion between months and minutes * H = hours * M = minutes * S = seconds Milliseconds don't get their own unit, but instead are decimal seconds. For example, 2.1 milliseconds is `0.0021S`. ## Round a Date# Configure the node for this operation using these parameters: * **Date**: Enter the date you'd like to round. * **Mode**: Choose whether to **Round Down** or **Round Up**. * **To Nearest**: Select the unit you'd like to round to. Choose from: * **Year** * **Month** * **Week** * **Day** * **Hour** * **Minute** * **Second** * **Output Field Name**: Enter the name of the field to output the rounded date to. ### Round a Date options# This operation has one option: **Include Input Fields**. If you'd like to include all of the input fields in the output, turn this option on. If turned off, only the **Output Field Name** and its contents are output. ## Subtract From a Date# Configure the node for this operation using these parameters: * **Date to Subtract From**: Enter the date you'd like to subtract from. * **Time Unit to Subtract**: Select the unit for the **Duration** amount you want to subtract. * **Duration**: Enter the amount of the time units you want to subtract from the **Date to Subtract From**. * **Output Field Name**: Enter the name of the field to output the rounded date to. ### Subtract From a Date options# This operation has one option: **Include Input Fields**. If you'd like to include all of the input fields in the output, turn this option on. If turned off, only the **Output Field Name** and its contents are output. ## Templates and examples# The Date & Time node uses Luxon. You can also use Luxon in the Code node and expressions. Refer to Date and time with Luxon for more information. ### Supported date formats# n8n supports all date formats supported by Luxon. Tokens are case-sensitive. --- ## Page: https://docs.n8n.io/integrations/builtin/core-nodes/n8n-nodes-base.debughelper/ Use the Debug Helper node to trigger different error types or generate random datasets to help test n8n workflows. ## Operations# Define the operation by selecting the **Category**: * **Do Nothing**: Don't do anything. * **Throw Error**: Throw an error with the specified type and message. * **Out Of Memory**: Generate a specific memory size to simulate being out of memory. * **Generate Random Data**: Generate some random data in a selected format. ## Node parameters# The node parameters depend on the **Category** selected. The **Do Nothing** Category has no other parameters. ### Throw Error# * **Error Type**: Select the type of error to throw. Choose from: * **NodeApiError** * **NodeOperationError** * **Error** * **Error Message**: Enter the error message to throw. ### Out Of Memory# The Out of Memory Category adds one parameter, the **Memory Size to Generate**. Enter the approximate amount of memory to generate. ### Generate Random Data# * **Data Type**: Choose the type of random data you'd like to generate. Options include: * **Address** * **Coordinates** * **Credit Card** * **Email** * **IPv4** * **IPv6** * **MAC** * **Nanoids**: If you select this data type, you'll also need to enter: * **Nanoid Alphabet**: The alphabet the generator will use to generate the nanoids. * **Nanoid Length**: The length of each nanoid. * **URL** * **User Data** * **UUID** * **Version** * **Seed**: If you'd like to generate the data using a specific seed, enter it here. This ensures the data gets generated consistently. If you'd rather use random data generation, leave this field empty. * **Number of Items to Generate**: Enter the number of random items you'd like to generate. * **Output as Single Array**: Whether to generate the data as a single array (turned on) or multiple items (turned off). ## Templates and examples# Browse Debug Helper integration templates, or search all templates --- ## Page: https://docs.n8n.io/integrations/builtin/core-nodes/n8n-nodes-base.set/ Use the Edit Fields node to set workflow data. This node can set new data as well as overwrite data that already exists. This node is crucial in workflows which expect incoming data from previous nodes, such as when inserting values to Google Sheets or databases. ## Node parameters# The are the settings and options available in the Edit Fields node. ### Mode# You can either use **Manual Mapping** to edit fields using the GUI or **JSON Output** to write JSON that n8n adds to the input data. ### Fields to Set# If you select **Mode** > **Manual Mapping**, you can configure the fields by dragging and dropping values from **INPUT**. The default behavior when you drag a value is: * n8n sets the value's name as the field name. * The field value contains an expression which accesses the value. If you don't want to use expressions: 1. Hover over a field. n8n displays the **Fixed | Expressions** toggle. 2. Select **Fixed**. You can do this for both the name and value of the field.  ### Keep Only Set Fields# Enable this to discard any input data that you don't use in **Fields to Set**. ### Include in Output# Choose which input data to include in the node's output data. ## Node options# Use these options to customize the behavior of the node. ### Include Binary Data# If the input data includes binary data, choose whether to include it in the Edit Fields node's output data. ### Ignore Type Conversion Errors# Manual Mapping only. Enabling this allows n8n to ignore some data type errors when mapping fields. ### Support Dot Notation# By default, n8n supports dot notation. For example, when using manual mapping, the node follows the dot notation for the **Name** field. That means if you set the name in the **Name** field as `number.one` and the value in the **Value** field as `20`, the resulting JSON is: <table><tbody><tr><td><div><pre><span></span><span>1</span></pre></div></td><td><div><pre><span></span><code><span>{</span><span> </span><span>"number"</span><span>:</span><span> </span><span>{</span><span> </span><span>"one"</span><span>:</span><span> </span><span>20</span><span>}</span><span> </span><span>}</span> </code></pre></div></td></tr></tbody></table> You can prevent this behavior by selecting **Add Option** > **Support Dot Notation**, and setting the **Dot Notion** field to off. Now the resulting JSON is: <table><tbody><tr><td><div><pre><span></span><span>1</span></pre></div></td><td><div><pre><span></span><code><span>{</span><span> </span><span>"number.one"</span><span>:</span><span> </span><span>20</span><span> </span><span>}</span> </code></pre></div></td></tr></tbody></table> ## Templates and examples# ## Arrays and expressions in JSON Output mode# You can use arrays and expressions when creating your JSON Output. For example, given this input data generated by the Customer Datastore node: <table><tbody><tr><td><div><pre><span></span><span> 1</span> <span> 2</span> <span> 3</span> <span> 4</span> <span> 5</span> <span> 6</span> <span> 7</span> <span> 8</span> <span> 9</span> <span>10</span> <span>11</span> <span>12</span> <span>13</span> <span>14</span> <span>15</span> <span>16</span> <span>17</span> <span>18</span> <span>19</span> <span>20</span> <span>21</span> <span>22</span> <span>23</span> <span>24</span> <span>25</span> <span>26</span> <span>27</span> <span>28</span> <span>29</span> <span>30</span> <span>31</span> <span>32</span> <span>33</span> <span>34</span> <span>35</span> <span>36</span> <span>37</span> <span>38</span> <span>39</span> <span>40</span> <span>41</span> <span>42</span></pre></div></td><td><div><pre><span></span><code><span>[</span> <span> </span><span>{</span> <span> </span><span>"id"</span><span>:</span><span> </span><span>"23423532"</span><span>,</span> <span> </span><span>"name"</span><span>:</span><span> </span><span>"Jay Gatsby"</span><span>,</span> <span> </span><span>"email"</span><span>:</span><span> </span><span>"gatsby@west-egg.com"</span><span>,</span> <span> </span><span>"notes"</span><span>:</span><span> </span><span>"Keeps asking about a green light??"</span><span>,</span> <span> </span><span>"country"</span><span>:</span><span> </span><span>"US"</span><span>,</span> <span> </span><span>"created"</span><span>:</span><span> </span><span>"1925-04-10"</span> <span> </span><span>},</span> <span> </span><span>{</span> <span> </span><span>"id"</span><span>:</span><span> </span><span>"23423533"</span><span>,</span> <span> </span><span>"name"</span><span>:</span><span> </span><span>"José Arcadio Buendía"</span><span>,</span> <span> </span><span>"email"</span><span>:</span><span> </span><span>"jab@macondo.co"</span><span>,</span> <span> </span><span>"notes"</span><span>:</span><span> </span><span>"Lots of people named after him. Very confusing"</span><span>,</span> <span> </span><span>"country"</span><span>:</span><span> </span><span>"CO"</span><span>,</span> <span> </span><span>"created"</span><span>:</span><span> </span><span>"1967-05-05"</span> <span> </span><span>},</span> <span> </span><span>{</span> <span> </span><span>"id"</span><span>:</span><span> </span><span>"23423534"</span><span>,</span> <span> </span><span>"name"</span><span>:</span><span> </span><span>"Max Sendak"</span><span>,</span> <span> </span><span>"email"</span><span>:</span><span> </span><span>"info@in-and-out-of-weeks.org"</span><span>,</span> <span> </span><span>"notes"</span><span>:</span><span> </span><span>"Keeps rolling his terrible eyes"</span><span>,</span> <span> </span><span>"country"</span><span>:</span><span> </span><span>"US"</span><span>,</span> <span> </span><span>"created"</span><span>:</span><span> </span><span>"1963-04-09"</span> <span> </span><span>},</span> <span> </span><span>{</span> <span> </span><span>"id"</span><span>:</span><span> </span><span>"23423535"</span><span>,</span> <span> </span><span>"name"</span><span>:</span><span> </span><span>"Zaphod Beeblebrox"</span><span>,</span> <span> </span><span>"email"</span><span>:</span><span> </span><span>"captain@heartofgold.com"</span><span>,</span> <span> </span><span>"notes"</span><span>:</span><span> </span><span>"Felt like I was talking to more than one person"</span><span>,</span> <span> </span><span>"country"</span><span>:</span><span> </span><span>null</span><span>,</span> <span> </span><span>"created"</span><span>:</span><span> </span><span>"1979-10-12"</span> <span> </span><span>},</span> <span> </span><span>{</span> <span> </span><span>"id"</span><span>:</span><span> </span><span>"23423536"</span><span>,</span> <span> </span><span>"name"</span><span>:</span><span> </span><span>"Edmund Pevensie"</span><span>,</span> <span> </span><span>"email"</span><span>:</span><span> </span><span>"edmund@narnia.gov"</span><span>,</span> <span> </span><span>"notes"</span><span>:</span><span> </span><span>"Passionate sailor"</span><span>,</span> <span> </span><span>"country"</span><span>:</span><span> </span><span>"UK"</span><span>,</span> <span> </span><span>"created"</span><span>:</span><span> </span><span>"1950-10-16"</span> <span> </span><span>}</span> <span>]</span> </code></pre></div></td></tr></tbody></table> Add the following JSON in the **JSON Output** field, with **Include in Output** set to **All Input Fields**: <table><tbody><tr><td><div><pre><span></span><span>1</span> <span>2</span> <span>3</span> <span>4</span> <span>5</span> <span>6</span> <span>7</span> <span>8</span> <span>9</span></pre></div></td><td><div><pre><span></span><code><span>{</span> <span> </span><span>"newKey"</span><span>:</span><span> </span><span>"new value"</span><span>,</span> <span> </span><span>"array"</span><span>:</span><span> </span><span>[{{</span><span> </span><span>$jso</span><span>n</span><span>.id</span><span> </span><span>}},</span><span>"{{ $json.name }}"</span><span>],</span> <span> </span><span>"object"</span><span>:</span><span> </span><span>{</span> <span> </span><span>"innerKey1"</span><span>:</span><span> </span><span>"new value"</span><span>,</span> <span> </span><span>"innerKey2"</span><span>:</span><span> </span><span>"{{ $json.id }}"</span><span>,</span> <span> </span><span>"innerKey3"</span><span>:</span><span> </span><span>"{{ $json.name }}"</span><span>,</span> <span> </span><span>}</span> <span>}</span> </code></pre></div></td></tr></tbody></table> You get this output: <table><tbody><tr><td><div><pre><span></span><span> 1</span> <span> 2</span> <span> 3</span> <span> 4</span> <span> 5</span> <span> 6</span> <span> 7</span> <span> 8</span> <span> 9</span> <span>10</span> <span>11</span> <span>12</span> <span>13</span> <span>14</span> <span>15</span> <span>16</span> <span>17</span> <span>18</span> <span>19</span> <span>20</span> <span>21</span> <span>22</span> <span>23</span> <span>24</span> <span>25</span> <span>26</span> <span>27</span> <span>28</span> <span>29</span> <span>30</span> <span>31</span> <span>32</span> <span>33</span> <span>34</span> <span>35</span> <span>36</span> <span>37</span> <span>38</span> <span>39</span> <span>40</span> <span>41</span> <span>42</span> <span>43</span> <span>44</span> <span>45</span> <span>46</span> <span>47</span> <span>48</span> <span>49</span> <span>50</span> <span>51</span> <span>52</span> <span>53</span> <span>54</span> <span>55</span> <span>56</span> <span>57</span> <span>58</span> <span>59</span> <span>60</span> <span>61</span> <span>62</span> <span>63</span> <span>64</span> <span>65</span> <span>66</span> <span>67</span> <span>68</span> <span>69</span> <span>70</span> <span>71</span> <span>72</span> <span>73</span> <span>74</span> <span>75</span> <span>76</span> <span>77</span> <span>78</span> <span>79</span> <span>80</span> <span>81</span> <span>82</span> <span>83</span> <span>84</span> <span>85</span> <span>86</span> <span>87</span> <span>88</span> <span>89</span> <span>90</span> <span>91</span> <span>92</span></pre></div></td><td><div><pre><span></span><code><span>[</span> <span> </span><span>{</span> <span> </span><span>"id"</span><span>:</span><span> </span><span>"23423532"</span><span>,</span> <span> </span><span>"name"</span><span>:</span><span> </span><span>"Jay Gatsby"</span><span>,</span> <span> </span><span>"email"</span><span>:</span><span> </span><span>"gatsby@west-egg.com"</span><span>,</span> <span> </span><span>"notes"</span><span>:</span><span> </span><span>"Keeps asking about a green light??"</span><span>,</span> <span> </span><span>"country"</span><span>:</span><span> </span><span>"US"</span><span>,</span> <span> </span><span>"created"</span><span>:</span><span> </span><span>"1925-04-10"</span><span>,</span> <span> </span><span>"newKey"</span><span>:</span><span> </span><span>"new value"</span><span>,</span> <span> </span><span>"array"</span><span>:</span><span> </span><span>[</span> <span> </span><span>23423532</span><span>,</span> <span> </span><span>"Jay Gatsby"</span> <span> </span><span>],</span> <span> </span><span>"object"</span><span>:</span><span> </span><span>{</span> <span> </span><span>"innerKey1"</span><span>:</span><span> </span><span>"new value"</span><span>,</span> <span> </span><span>"innerKey2"</span><span>:</span><span> </span><span>"23423532"</span><span>,</span> <span> </span><span>"innerKey3"</span><span>:</span><span> </span><span>"Jay Gatsby"</span> <span> </span><span>}</span> <span> </span><span>},</span> <span> </span><span>{</span> <span> </span><span>"id"</span><span>:</span><span> </span><span>"23423533"</span><span>,</span> <span> </span><span>"name"</span><span>:</span><span> </span><span>"José Arcadio Buendía"</span><span>,</span> <span> </span><span>"email"</span><span>:</span><span> </span><span>"jab@macondo.co"</span><span>,</span> <span> </span><span>"notes"</span><span>:</span><span> </span><span>"Lots of people named after him. Very confusing"</span><span>,</span> <span> </span><span>"country"</span><span>:</span><span> </span><span>"CO"</span><span>,</span> <span> </span><span>"created"</span><span>:</span><span> </span><span>"1967-05-05"</span><span>,</span> <span> </span><span>"newKey"</span><span>:</span><span> </span><span>"new value"</span><span>,</span> <span> </span><span>"array"</span><span>:</span><span> </span><span>[</span> <span> </span><span>23423533</span><span>,</span> <span> </span><span>"José Arcadio Buendía"</span> <span> </span><span>],</span> <span> </span><span>"object"</span><span>:</span><span> </span><span>{</span> <span> </span><span>"innerKey1"</span><span>:</span><span> </span><span>"new value"</span><span>,</span> <span> </span><span>"innerKey2"</span><span>:</span><span> </span><span>"23423533"</span><span>,</span> <span> </span><span>"innerKey3"</span><span>:</span><span> </span><span>"José Arcadio Buendía"</span> <span> </span><span>}</span> <span> </span><span>},</span> <span> </span><span>{</span> <span> </span><span>"id"</span><span>:</span><span> </span><span>"23423534"</span><span>,</span> <span> </span><span>"name"</span><span>:</span><span> </span><span>"Max Sendak"</span><span>,</span> <span> </span><span>"email"</span><span>:</span><span> </span><span>"info@in-and-out-of-weeks.org"</span><span>,</span> <span> </span><span>"notes"</span><span>:</span><span> </span><span>"Keeps rolling his terrible eyes"</span><span>,</span> <span> </span><span>"country"</span><span>:</span><span> </span><span>"US"</span><span>,</span> <span> </span><span>"created"</span><span>:</span><span> </span><span>"1963-04-09"</span><span>,</span> <span> </span><span>"newKey"</span><span>:</span><span> </span><span>"new value"</span><span>,</span> <span> </span><span>"array"</span><span>:</span><span> </span><span>[</span> <span> </span><span>23423534</span><span>,</span> <span> </span><span>"Max Sendak"</span> <span> </span><span>],</span> <span> </span><span>"object"</span><span>:</span><span> </span><span>{</span> <span> </span><span>"innerKey1"</span><span>:</span><span> </span><span>"new value"</span><span>,</span> <span> </span><span>"innerKey2"</span><span>:</span><span> </span><span>"23423534"</span><span>,</span> <span> </span><span>"innerKey3"</span><span>:</span><span> </span><span>"Max Sendak"</span> <span> </span><span>}</span> <span> </span><span>},</span> <span> </span><span>{</span> <span> </span><span>"id"</span><span>:</span><span> </span><span>"23423535"</span><span>,</span> <span> </span><span>"name"</span><span>:</span><span> </span><span>"Zaphod Beeblebrox"</span><span>,</span> <span> </span><span>"email"</span><span>:</span><span> </span><span>"captain@heartofgold.com"</span><span>,</span> <span> </span><span>"notes"</span><span>:</span><span> </span><span>"Felt like I was talking to more than one person"</span><span>,</span> <span> </span><span>"country"</span><span>:</span><span> </span><span>null</span><span>,</span> <span> </span><span>"created"</span><span>:</span><span> </span><span>"1979-10-12"</span><span>,</span> <span> </span><span>"newKey"</span><span>:</span><span> </span><span>"new value"</span><span>,</span> <span> </span><span>"array"</span><span>:</span><span> </span><span>[</span> <span> </span><span>23423535</span><span>,</span> <span> </span><span>"Zaphod Beeblebrox"</span> <span> </span><span>],</span> <span> </span><span>"object"</span><span>:</span><span> </span><span>{</span> <span> </span><span>"innerKey1"</span><span>:</span><span> </span><span>"new value"</span><span>,</span> <span> </span><span>"innerKey2"</span><span>:</span><span> </span><span>"23423535"</span><span>,</span> <span> </span><span>"innerKey3"</span><span>:</span><span> </span><span>"Zaphod Beeblebrox"</span> <span> </span><span>}</span> <span> </span><span>},</span> <span> </span><span>{</span> <span> </span><span>"id"</span><span>:</span><span> </span><span>"23423536"</span><span>,</span> <span> </span><span>"name"</span><span>:</span><span> </span><span>"Edmund Pevensie"</span><span>,</span> <span> </span><span>"email"</span><span>:</span><span> </span><span>"edmund@narnia.gov"</span><span>,</span> <span> </span><span>"notes"</span><span>:</span><span> </span><span>"Passionate sailor"</span><span>,</span> <span> </span><span>"country"</span><span>:</span><span> </span><span>"UK"</span><span>,</span> <span> </span><span>"created"</span><span>:</span><span> </span><span>"1950-10-16"</span><span>,</span> <span> </span><span>"newKey"</span><span>:</span><span> </span><span>"new value"</span><span>,</span> <span> </span><span>"array"</span><span>:</span><span> </span><span>[</span> <span> </span><span>23423536</span><span>,</span> <span> </span><span>"Edmund Pevensie"</span> <span> </span><span>],</span> <span> </span><span>"object"</span><span>:</span><span> </span><span>{</span> <span> </span><span>"innerKey1"</span><span>:</span><span> </span><span>"new value"</span><span>,</span> <span> </span><span>"innerKey2"</span><span>:</span><span> </span><span>"23423536"</span><span>,</span> <span> </span><span>"innerKey3"</span><span>:</span><span> </span><span>"Edmund Pevensie"</span> <span> </span><span>}</span> <span> </span><span>}</span> <span>]</span> </code></pre></div></td></tr></tbody></table> --- ## Page: https://docs.n8n.io/integrations/builtin/core-nodes/n8n-nodes-base.editimage/ Use the Edit Image node to manipulate and edit images. Dependencies 1. If you aren't running n8n on Docker, you need to install GraphicsMagick. 2. You need to use a node such as the Read/Write Files from Disk node or the HTTP Request node to pass the image file as a data property to the Edit Image node. ## Operations# * Add a **Blur** to the image to reduce sharpness * Add a **Border** to the image * **Composite** an image on top of another image * **Create** a new image * **Crop** the image * **Draw** on an image * **Get Information** about the image * **Multi Step** perform multiple operations on the image * **Resize**: Change the size of the image * **Rotate** the image * **Shear** image along the X or Y axis * Add **Text** to the image * Make a color in image **Transparent** ## Node parameters# The parameters for this node depend on the operation you select. ### Blur parameters# * **Property Name**: Enter the name of the binary property that stores the image data. * **Blur**: Enter a number to set how strong the blur should be, between 0 and 1000. Higher numbers create blurrier images. * **Sigma**: Enter a number to set the stigma for the blur, between 0 and 1000. Higher numbers create blurrier images. Refer to Node options for optional configuration options. ### Border parameters# * **Property Name**: Enter the name of the binary property that stores the image data. * **Border Width**: Enter the width of the border. * **Border Height**: Enter the height of the border. * **Border Color**: Set the color for the border. You can either enter a hex or select the color swatch to open a color picker. Refer to Node options for optional configuration options. ### Composite parameters# * **Property Name**: Enter the name of the binary property that stores the image data. This image is your base image. * **Composite Image Property**: Enter the name of the binary property that stores image to composite on top of the **Property Name** image. * **Operator**: Select composite operator, which determines how the composite works. Options include: * **Add** * **Atop** * **Bumpmap** * **Copy** * **Copy Black** * **Copy Blue** * **Copy Cyan** * **Copy Green** * **Copy Magenta** * **Copy Opacity** * **Copy Red** * **Copy Yellow** * **Difference** * **Divide** * **In** * **Minus** * **Multiply** * **Out** * **Over** * **Plus** * **Subtract** * **Xor** * **Position X**: Enter the x axis position (horizontal) of the composite image. * **Position Y**: Enter the y axis position (vertical) of the composite image. Refer to Node options for optional configuration options. ### Create parameters# * **Property Name**: Enter the name of the binary property that stores the image data. * **Background Color**: Set the background color for the image. You can either enter a hex or select the color swatch to open a color picker. * **Image Width**: Enter the width of the image. * **Image Height**: Enter the height of the image. Refer to Node options for optional configuration options. ### Crop parameters# * **Property Name**: Enter the name of the binary property that stores the image data. * **Width**: Enter the width you'd like to crop to. * **Height**: Enter the height you'd like to crop to. * **Position X**: Enter the x axis position (horizontal) to start the crop from. * **Position Y**: Enter the y axis position (vertical) to start the crop from. Refer to Node options for optional configuration options. ### Draw parameters# * **Property Name**: Enter the name of the binary property that stores the image data. * **Primitive**: Select the primitive shape to draw. Choose from: * **Circle** * **Line** * **Rectangle** * **Color**: Set the color for the primitive. You can either enter a hex or select the color swatch to open a color picker. * **Start Position X**: Enter the x axis position (horizontal) to start drawing from. * **Start Position Y**: Enter the y axis position (vertical) to start drawing from. * **End Position X**: Enter the x axis position (horizontal) to stop drawing at. * **End Position Y**: Enter the y axis position (vertical) to start drawing at. * **Corner Radius**: Enter a number to set the corner radius. Adding a corner radius will round the corners of the drawn primitive. Refer to Node options for optional configuration options. ### Get Information parameters# For this operation, you only need to add the **Property Name** of the binary property that stores the image data. Refer to Node options for optional configuration options. ### Multi Step parameters# * **Property Name**: Enter the name of the binary property that stores the image data. * **Operations**: Add the operations you want the multi step operation to perform. You can use any of the other operations. Refer to Node options for optional configuration options. ### Resize parameters# * **Property Name**: Enter the name of the binary property that stores the image data. * **Width**: Enter the new width you'd like for the image. * **Height**: Enter the new height you'd like for the image. * **Option**: Select how you'd like to resize the image. Choose from: * **Ignore Aspect Ratio**: Ignore the aspect ratio and resize to the exact height and width you've entered. * **Maximum Area**: The height and width you've entered is the maximum area/size for the image. The image maintains its aspect ratio and won't be larger than the height and/or width you've entered. * **Minimum Area**: The height and width you've entered is the minimum area/size for the image. The image maintains its aspect ratio and won't be smaller than the height and/or width you've entered. * **Only if Larger**: Resize the image only if it's larger than the width and height you entered. The image maintains its aspect ratio. * **Only if Smaller**: Resize the image only if it's smaller than the width and height you entered. The image maintains its aspect ratio. * **Percent**: Resize the image using the width and height as percentages of the original image. Refer to Node options for optional configuration options. ### Rotate parameters# * **Property Name**: Enter the name of the binary property that stores the image data. * **Rotate**: Enter the number of degrees to rotate the image, from --360 to 360. * **Background Color**: Set the background color for the image. You can either enter a hex or select the color swatch to open a color picker. This color is used to fill in the empty background whenever the image is rotated by multiples of 90 degrees. If multipled of 90 degrees are used for the **Rotate** field, the background color isn't used. Refer to Node options for optional configuration options. ### Shear parameters# * **Property Name**: Enter the name of the binary property that stores the image data. * **Degrees X**: Enter the number of degrees to shear from the x axis. * **Degrees Y**: Enter the number of degrees to shear from the y axis. Refer to Node options for optional configuration options. ### Text parameters# * **Property Name**: Enter the name of the binary property that stores the image data. * **Text**: Enter the text you'd like to write on the image. * **Font Size**: Select the font size for the text. * **Font Color**: Set the font color. You can either enter a hex or select the color swatch to open a color picker. * **Position X**: Enter the x axis position (horizontal) to begin the text at. * **Position Y**: Enter the y axis position (vertical) to begin the text at. * **Max Line Length**: Enter the maximum amount of characters in a line before adding a line break. Refer to Node options for optional configuration options. ### Transparent parameters# * **Property Name**: Enter the name of the binary property that stores the image data. * **Color**: Set the color to make transparent. You can either enter a hex or select the color swatch to open a color picker. Refer to Node options for optional configuration options. ## Node options# * **File Name**: Enter the filename of the output file. * **Format**: Enter the image format of the output file. Choose from: * **bmp** * **gif** * **jpeg** * **png** * **tiff** * **WebP** The **Text** operation also includes the option for **Font Name or ID**. Select the text font from the dropdown or specify an ID using an expression. ## Templates and examples# --- ## Page: https://docs.n8n.io/integrations/builtin/core-nodes/n8n-nodes-base.emailimap/ Use the IMAP Email node to receive emails using an IMAP email server. This node is a trigger node. Credential You can find authentication information for this node here. ## Operations# * Receive an email ## Node parameters# Configure the node using the following parameters. ### Credential to connect with# Select or create an IMAP credential to connect to the server with. ### Mailbox Name# Enter the mailbox from which you want to receive emails. ### Action# Choose whether you want an email marked as read when n8n receives it. **None** will leave it marked unread. **Mark as Read** will mark it as read. ### Download Attachments# This toggle controls whether to download email attachments (turned on) or not (turned off). Only set this if necessary, since it increases processing. ### Format# Choose the format to return the message in from these options: * **RAW**: This format returns the full email message data with body content in the raw field as a base64url encoded string. It doesn't use the payload field. * **Resolved**: This format returns the full email with all data resolved and attachments saved as binary data. * **Simple**: This format returns the full email. Don't use it if you want to gather inline attachments. ## Node options# You can further configure the node using these **Options**. ### Custom Email Rules# Enter custom email fetching rules to determine which emails the node fetches. Refer to node-imap's search function criteria for more information. ### Force Reconnect Every Minutes# Set an interval in minutes to force reconnection. ## Templates and examples# --- ## Page: https://docs.n8n.io/integrations/builtin/core-nodes/n8n-nodes-base.errortrigger/ You can use the Error Trigger node to create error workflows. When another linked workflow fails, this node gets details about the failed workflow and the errors, and runs the error workflow. ## Usage# 1. Create a new workflow, with the Error Trigger as the first node. 2. Give the workflow a name, for example `Error Handler`. 3. Select **Save**. 4. In the workflow where you want to use this error workflow: 1. Select **Options**  > **Settings**. 2. In **Error workflow**, select the workflow you just created. For example, if you used the name Error Handler, select **Error handler**. 3. Select **Save**. Now, when this workflow errors, the related error workflow runs. Note the following: * If a workflow uses the Error Trigger node, you don't have to activate the workflow. * If a workflow contains the Error Trigger node, by default, the workflow uses itself as the error workflow. * You can't test error workflows when running workflows manually. The Error Trigger only runs when an automatic workflow errors. ## Templates and examples# Browse Error Trigger integration templates, or search all templates You can use the Stop And Error node to send custom messages to the Error Trigger. Read more about Error workflows in n8n workflows. ## Error data# The default error data received by the Error Trigger is: <table><tbody><tr><td><div><pre><span></span><span> 1</span> <span> 2</span> <span> 3</span> <span> 4</span> <span> 5</span> <span> 6</span> <span> 7</span> <span> 8</span> <span> 9</span> <span>10</span> <span>11</span> <span>12</span> <span>13</span> <span>14</span> <span>15</span> <span>16</span> <span>17</span> <span>18</span> <span>19</span></pre></div></td><td><div><pre><span></span><code><span>[</span> <span> </span><span>{</span> <span> </span><span>"execution"</span><span>:</span><span> </span><span>{</span> <span> </span><span>"id"</span><span>:</span><span> </span><span>"231"</span><span>,</span> <span> </span><span>"url"</span><span>:</span><span> </span><span>"https://n8n.example.com/execution/231"</span><span>,</span> <span> </span><span>"retryOf"</span><span>:</span><span> </span><span>"34"</span><span>,</span> <span> </span><span>"error"</span><span>:</span><span> </span><span>{</span> <span> </span><span>"message"</span><span>:</span><span> </span><span>"Example Error Message"</span><span>,</span> <span> </span><span>"stack"</span><span>:</span><span> </span><span>"Stacktrace"</span> <span> </span><span>},</span> <span> </span><span>"lastNodeExecuted"</span><span>:</span><span> </span><span>"Node With Error"</span><span>,</span> <span> </span><span>"mode"</span><span>:</span><span> </span><span>"manual"</span> <span> </span><span>},</span> <span> </span><span>"workflow"</span><span>:</span><span> </span><span>{</span> <span> </span><span>"id"</span><span>:</span><span> </span><span>"1"</span><span>,</span> <span> </span><span>"name"</span><span>:</span><span> </span><span>"Example Workflow"</span> <span> </span><span>}</span> <span> </span><span>}</span> <span>]</span> </code></pre></div></td></tr></tbody></table> All information is always present, except: * `execution.id`: requires the execution to be saved in the database. Not present if the error is in the trigger node of the main workflow, as the workflow doesn't execute. * `execution.url`: requires the execution to be saved in the database. Not present if the error is in the trigger node of the main workflow, as the workflow doesn't execute. * `execution.retryOf`: only present when the execution is a retry of a failed execution. If the error is caused by the trigger node of the main workflow, rather than a later stage, the data sent to the error workflow is different. There's less information in `execution{}` and more in `trigger{}`: <table><tbody><tr><td><div><pre><span></span><span> 1</span> <span> 2</span> <span> 3</span> <span> 4</span> <span> 5</span> <span> 6</span> <span> 7</span> <span> 8</span> <span> 9</span> <span>10</span> <span>11</span> <span>12</span> <span>13</span> <span>14</span> <span>15</span> <span>16</span> <span>17</span> <span>18</span> <span>19</span> <span>20</span> <span>21</span> <span>22</span></pre></div></td><td><div><pre><span></span><code><span>{</span> <span> </span><span>"trigger"</span><span>:</span><span> </span><span>{</span> <span> </span><span>"error"</span><span>:</span><span> </span><span>{</span> <span> </span><span>"context"</span><span>:</span><span> </span><span>{},</span> <span> </span><span>"name"</span><span>:</span><span> </span><span>"WorkflowActivationError"</span><span>,</span> <span> </span><span>"cause"</span><span>:</span><span> </span><span>{</span> <span> </span><span>"message"</span><span>:</span><span> </span><span>""</span><span>,</span> <span> </span><span>"stack"</span><span>:</span><span> </span><span>""</span> <span> </span><span>},</span> <span> </span><span>"timestamp"</span><span>:</span><span> </span><span>1654609328787</span><span>,</span> <span> </span><span>"message"</span><span>:</span><span> </span><span>""</span><span>,</span> <span> </span><span>"node"</span><span>:</span><span> </span><span>{</span> <span> </span><span>.</span><span> </span><span>.</span><span> </span><span>.</span><span> </span> <span> </span><span>}</span> <span> </span><span>},</span> <span> </span><span>"mode"</span><span>:</span><span> </span><span>"trigger"</span> <span> </span><span>},</span> <span> </span><span>"workflow"</span><span>:</span><span> </span><span>{</span> <span> </span><span>"id"</span><span>:</span><span> </span><span>""</span><span>,</span> <span> </span><span>"name"</span><span>:</span><span> </span><span>""</span> <span> </span><span>}</span> <span>}</span> </code></pre></div></td></tr></tbody></table> --- ## Page: https://docs.n8n.io/integrations/builtin/core-nodes/n8n-nodes-base.executecommand/ The Execute Command node runs shell commands on the host machine that runs n8n. Which shell runs the command? This node executes the command in the default shell of the host machine. For example, `cmd` on Windows and `zsh` on macOS. If you run n8n with Docker, your command will run in the n8n container and not the Docker host. Not available on Cloud This node isn't available on n8n Cloud. ## Node parameters# Configure the node using the following parameters. ### Execute Once# Choose whether you want the node to execute only once (turned on) or once for every item it receives as input (turned off). ### Command# Enter the command to execute on the host machine. Refer to sections below for examples of running multiple commands and cURL commands. #### Run multiple commands# Use one of two methods to run multiple commands in one Execute Command node: * Enter each command on one line separated by `&&`. For example, you can combine the change directory (cd) command with the list (ls) command using `&&`. <table><tbody><tr><td><div><pre><span></span><span>1</span></pre></div></td><td><div><pre><span></span><code><span>cd</span><span> </span>bin<span> </span><span>&&</span><span> </span>ls </code></pre></div></td></tr></tbody></table> * Enter each command on a separate line. For example, you can write the list (ls) command on a new line after the change directory (cd) command. <table><tbody><tr><td><div><pre><span></span><span>1</span> <span>2</span></pre></div></td><td><div><pre><span></span><code><span>cd</span><span> </span>bin ls </code></pre></div></td></tr></tbody></table> #### Run cURL command# You can also use the HTTP Request node to make a cURL request. If you want to run the curl command in the Execute Command node, you will have to build a Docker image based on the existing n8n image. The default n8n Docker image uses Alpine Linux. You will have to install the curl package. 1. Create a file named `Dockerfile`. 2. Add the below code snippet to the Dockerfile. <table><tbody><tr><td><div><pre><span></span><span>1</span> <span>2</span> <span>3</span> <span>4</span></pre></div></td><td><div><pre><span></span><code>FROM<span> </span>docker.n8n.io/n8nio/n8n USER<span> </span>root RUN<span> </span>apk<span> </span>--update<span> </span>add<span> </span>curl USER<span> </span>node </code></pre></div></td></tr></tbody></table> 3. In the same folder, execute the command below to build the Docker image. <table><tbody><tr><td><div><pre><span></span><span>1</span></pre></div></td><td><div><pre><span></span><code>docker<span> </span>build<span> </span>-t<span> </span>n8n-curl </code></pre></div></td></tr></tbody></table> 4. Replace the Docker image you used before. For example, replace `docker.n8n.io/n8nio/n8n` with `n8n-curl`. 5. Run the newly created Docker image. You'll now be able to execute ssh using the Execute Command Node. ## Templates and examples# ## Common issues# For common questions or issues and suggested solutions, refer to Common Issues. --- ## Page: https://docs.n8n.io/integrations/builtin/core-nodes/n8n-nodes-base.executecommand/common-issues/ Here are some common errors and issues with the Execute Command node and steps to resolve or troubleshoot them. ## Command failed: <command> /bin/sh: <command>: not found# This error occurs when the shell environment can't find one of the commands in the **Command** parameter. To fix this error, review the following: * Check that the command and its arguments don't have typos in the **Command** parameter. * Check that the command is in the `PATH` of the user running n8n. * If you are running n8n with Docker, check if the command is available within the container by trying to run it manually. If your command isn't included in the container, you might have to extend the official n8n image with a custom image that includes your command. * If n8n is already running: <table><tbody><tr><td><div><pre><span></span><span>1</span> <span>2</span> <span>3</span> <span>4</span></pre></div></td><td><div><pre><span></span><code><span># Find n8n's container ID, it will be the first column</span> docker<span> </span>ps<span> </span><span>|</span><span> </span>grep<span> </span>n8n <span># Try to execute the command within the running container</span> docker<span> </span>container<span> </span><span>exec</span><span> </span><container_ID><span> </span><command_to_run> </code></pre></div></td></tr></tbody></table> * If n8n isn't running: <table><tbody><tr><td><div><pre><span></span><span>1</span> <span>2</span> <span>3</span></pre></div></td><td><div><pre><span></span><code><span># Start up a new container that runs the command instead of n8n</span> <span># Use the same image and tag that you use to run n8n normally</span> docker<span> </span>run<span> </span>-it<span> </span>--rm<span> </span>--entrypoint<span> </span>/bin/sh<span> </span>docker.n8n.io/n8nio/n8n<span> </span>-c<span> </span><command_to_run> </code></pre></div></td></tr></tbody></table> ## Error: stdout maxBuffer length exceeded# This error happens when your command returns more output than the Execute Command node is able to process at one time. To avoid this error, reduce output your command produces. Check your command's manual page or documentation to see if there are flags to limit or filter output. If not, you may need to pipe the output to another command to remove unneeded info. --- ## Page: https://docs.n8n.io/integrations/builtin/core-nodes/n8n-nodes-base.executeworkflow/ Use the Execute Sub-workflow node to run a different workflow on the host machine that runs n8n. ## Node parameters# ### Source# Select where the node should get the sub-workflow's information from: * **Database**: Select this option to load the workflow from the database by ID. You must also enter either: * **From list**: Select the workflow from a list of workflows available to your account. * **Workflow ID**: Enter the ID for the workflow. The URL of the workflow contains the ID after `/workflow/`. For example, if the URL of a workflow is `https://my-n8n-acct.app.n8n.cloud/workflow/abCDE1f6gHiJKL7`, the **Workflow ID** is `abCDE1f6gHiJKL7`. * **Local File**: Select this option to load the workflow from a locally saved JSON file. You must also enter: * **Workflow Path**: Enter the path to the local JSON workflow file you want the node to execute. * **Parameter**: Select this option to load the workflow from a parameter. You must also enter: * **Workflow JSON**: Enter the JSON code you want the node to execute. * **URL**: Select this option to load the workflow from a URL. You must also enter: * **Workflow URL**: Enter the URL you want to load the workflow from. ### Workflow Inputs# If you select a sub-workflow using the **database** and **From list** options, the sub-workflow's input items will automatically display, ready for you to fill in or map values. You can optionally remove requested input items, in which case the sub-workflow receives `null` as the item's value. You can also enable **Attempt to convert types** to try to automatically convert data to the sub-workflow item's requested type. Input items won't appear if the sub-workflow's Workflow Input Trigger node uses the "Accept all data" input data mode. ### Mode# Use this parameter to control the execution mode for the node. Choose from these options: * **Run once with all items**: Pass all input items into a single execution of the node. * **Run once for each item**: Execute the node once for each input item in turn. ## Node options# This node includes one option: **Wait for Sub-Workflow Completion**. This lets you control whether the main workflow should wait for the sub-workflow's completion before moving on to the next step (turned on) or whether the main workflow should continue without waiting (turned off). ## Templates and examples# ## Set up and use a sub-workflow# This section walks through setting up both the parent workflow and sub-workflow. ### Create the sub-workflow# 1. Create a new workflow. Create sub-workflows from existing workflows You can optionally create a sub-workflow directly from an existing parent workflow using the Execute Sub-workflow node. In the node, select the **Database** and **From list** options and select **Create a sub-workflow** in the list. 2. **Optional**: configure which workflows can call the sub-workflow: 1. Select the **Options**  menu > **Settings**. n8n opens the **Workflow settings** modal. 2. Change the **This workflow can be called by** setting. Refer to Workflow settings for more information on configuring your workflows. 3. Add the **Execute Sub-workflow** trigger node (if you are searching under trigger nodes, this is also titled **When Executed by Another Workflow**). 4. Set the **Input data mode** to choose how you will define the sub-workflow's input data: * **Define using fields below**: Choose this mode to define individual input names and data types that the calling workflow needs to provide. * **Define using JSON example**: Choose this mode to provide an example JSON object that demonstrates the expected input items and their types. * **Accept all data**: Choose this mode to accept all data unconditionally. The sub-workflow won't define any required input items. This sub-workflow must handle any input inconsistencies or missing values. 5. Add other nodes as needed to build your sub-workflow functionality. 6. Save the sub-workflow. Sub-workflow mustn't contain errors If there are errors in the sub-workflow, the parent workflow can't trigger it. Load data into sub-workflow before building This requires the ability to load data from previous executions, which is available on n8n Cloud and registered Community plans. If you want to load data into your sub-workflow to use while building it: 1. Create the sub-workflow and add the **Execute Sub-workflow Trigger**. 2. Set the node's **Input data mode** to **Accept all data** or define the input items using fields or JSON if they're already known. 3. In the sub-workflow settings, set **Save successful production executions** to **Save**. 4. Skip ahead to setting up the parent workflow, and run it. 5. Follow the steps to load data from previous executions. 6. Adjust the **Input data mode** to match the input sent by the parent workflow if necessary. You can now pin example data in the trigger node, enabling you to work with real data while configuring the rest of the workflow. ### Call the sub-workflow# 1. Open the workflow where you want to call the sub-workflow. 2. Add the **Execute Sub-workflow** node. 3. In the **Execute Sub-workflow** node, set the sub-workflow you want to call. You can choose to call the workflow by ID, load a workflow from a local file, add workflow JSON as a parameter in the node, or target a workflow by URL. Find your workflow ID Your sub-workflow's ID is the alphanumeric string at the end of its URL. 4. Fill in the required input items defined by the sub-workflow. 5. Save your workflow. When your workflow executes, it will send data to the sub-workflow, and run it. You can follow the execution flow from the parent workflow to the sub-workflow by opening the Execute Sub-workflow node and selecting the **View sub-execution** link. Likewise, the sub-workflow's execution contains a link back to the parent workflow's execution to navigate in the other direction. ## How data passes between workflows# As an example, imagine you have an Execute Sub-workflow node in **Workflow A**. The Execute Sub-workflow node calls another workflow called **Workflow B**: 1. The Execute Sub-workflow node passes the data to the Execute Sub-workflow Trigger node (titled "When executed by another node" in the canvas) of **Workflow B**. 2. The last node of **Workflow B** sends the data back to the Execute Sub-workflow node in **Workflow A**. --- ## Page: https://docs.n8n.io/integrations/builtin/core-nodes/n8n-nodes-base.executeworkflowtrigger/ Use this node to start a workflow in response to another workflow. It should be the first node in the workflow. n8n allows you to call workflows from other workflows. This is useful if you want to: * Reuse a workflow: for example, you could have multiple workflows pulling and processing data from different sources, then have all those workflows call a single workflow that generates a report. * Break large workflows into smaller components. ## Usage# This node runs in response to a call from the Execute Workflow node. ### Create the sub-workflow# 1. Create a new workflow. Create sub-workflows from existing workflows You can optionally create a sub-workflow directly from an existing parent workflow using the Execute Sub-workflow node. In the node, select the **Database** and **From list** options and select **Create a sub-workflow** in the list. 2. **Optional**: configure which workflows can call the sub-workflow: 1. Select the **Options**  menu > **Settings**. n8n opens the **Workflow settings** modal. 2. Change the **This workflow can be called by** setting. Refer to Workflow settings for more information on configuring your workflows. 3. Add the **Execute Sub-workflow** trigger node (if you are searching under trigger nodes, this is also titled **When Executed by Another Workflow**). 4. Set the **Input data mode** to choose how you will define the sub-workflow's input data: * **Define using fields below**: Choose this mode to define individual input names and data types that the calling workflow needs to provide. * **Define using JSON example**: Choose this mode to provide an example JSON object that demonstrates the expected input items and their types. * **Accept all data**: Choose this mode to accept all data unconditionally. The sub-workflow won't define any required input items. This sub-workflow must handle any input inconsistencies or missing values. 5. Add other nodes as needed to build your sub-workflow functionality. 6. Save the sub-workflow. Sub-workflow mustn't contain errors If there are errors in the sub-workflow, the parent workflow can't trigger it. Load data into sub-workflow before building This requires the ability to load data from previous executions, which is available on n8n Cloud and registered Community plans. If you want to load data into your sub-workflow to use while building it: 1. Create the sub-workflow and add the **Execute Sub-workflow Trigger**. 2. Set the node's **Input data mode** to **Accept all data** or define the input items using fields or JSON if they're already known. 3. In the sub-workflow settings, set **Save successful production executions** to **Save**. 4. Skip ahead to setting up the parent workflow, and run it. 5. Follow the steps to load data from previous executions. 6. Adjust the **Input data mode** to match the input sent by the parent workflow if necessary. You can now pin example data in the trigger node, enabling you to work with real data while configuring the rest of the workflow. ### Call the sub-workflow# 1. Open the workflow where you want to call the sub-workflow. 2. Add the **Execute Sub-workflow** node. 3. In the **Execute Sub-workflow** node, set the sub-workflow you want to call. You can choose to call the workflow by ID, load a workflow from a local file, add workflow JSON as a parameter in the node, or target a workflow by URL. Find your workflow ID Your sub-workflow's ID is the alphanumeric string at the end of its URL. 4. Fill in the required input items defined by the sub-workflow. 5. Save your workflow. When your workflow executes, it will send data to the sub-workflow, and run it. You can follow the execution flow from the parent workflow to the sub-workflow by opening the Execute Sub-workflow node and selecting the **View sub-execution** link. Likewise, the sub-workflow's execution contains a link back to the parent workflow's execution to navigate in the other direction. ## Templates and examples# Browse Execute Sub-workflow Trigger integration templates, or search all templates ## How data passes between workflows# As an example, imagine you have an Execute Sub-workflow node in **Workflow A**. The Execute Sub-workflow node calls another workflow called **Workflow B**: 1. The Execute Sub-workflow node passes the data to the Execute Sub-workflow Trigger node (titled "When executed by another node" in the canvas) of **Workflow B**. 2. The last node of **Workflow B** sends the data back to the Execute Sub-workflow node in **Workflow A**. --- ## Page: https://docs.n8n.io/integrations/builtin/core-nodes/n8n-nodes-base.executiondata/ Use this node to save metadata for workflow executions. You can then search by this data in the **Executions** list. You can retrieve custom execution data during workflow execution using the Code node. Refer to Custom executions data for more information. Feature availability Available on Pro and Enterprise plans. ## Operations# * Save Execution Data for Search ## Data to Save# Add a **Saved Field** for each key/value pair of metadata you'd like to save. ## Limitations# The Execution Data node has the following restrictions when storing execution metadata: * `key`: limited to 50 characters * `value`: limited to 512 characters If either the `key` or `value` exceed the above limitations, n8n truncates to their maximum length and outputs a log entry. ## Templates and examples# --- ## Page: https://docs.n8n.io/integrations/builtin/core-nodes/n8n-nodes-base.extractfromfile/ A common pattern in n8n workflows is to receive a file, either from and HTTP Request node (for files you are fetching from a website), a Webhook Node (for files which are sent to your workflow from elsewhere), or from a local source. Data obtained in this way is often in a binary format, for example a spreadsheet or PDF. The Extract From File node extracts data from a binary format file and converts it to JSON, which can then be easily manipulated by the rest of your workflow. For converting JSON back into a binary file type, please see the Convert to File node. ## Operations# Use the **Operations** drop-down to select the format of the source file to extract data from. * **Extract From CSV**: The "Comma Separated Values" file type is commonly used for tabulated data. * **Extract From HTML**: Extract fields from standard web page HTML format files. * **Extract From JSON**: Extract JSON data from a binary file. * **Extract From ICS**: Extract fields from iCalendar format files. * **Extract From ODS**: Extract fields from ODS spreadsheet files. * **Extract From PDF**: Extract fields from Portable Document Format files. * **Extract From RTF**: Extract fields from Rich Text Format files. * **Extract From Text File**: Extract fields from a standard text file format. * **Extract From XLS**: Extract fields from a Microsoft Excel file (older format). * **Extract From XLSX**: Extract fields from a Microsoft Excel file. * **Move File to Base64 String**: Converts binary data to a text-friendly base64 format. ## Example workflow# In this example, a Webhook node is used to trigger the workflow. When a CSV file is sent to the webhook address, the file data is output and received by the Extract From File node. Set to operate as 'Extract from CSV', the node then outputs the data as a series of JSON 'row' objects: <table><tbody><tr><td><div><pre><span></span><span>1</span> <span>2</span> <span>3</span> <span>4</span> <span>5</span> <span>6</span> <span>7</span> <span>8</span></pre></div></td><td><div><pre><span></span><code>{ "row": { "0": "apple", "1": "1", "2": "2", "3": "3" } ... </code></pre></div></td></tr></tbody></table> Receiving files with a webhook Select the Webhook Node's **Add Options** button and select **Raw body**, then enable that setting to get the node to output the binary file that the subsequent node is expecting. ## Node parameters# ### Input Binary Field# Enter the name of the field from the node input data that contains the binary file. The default is 'data'. ### Destination Output Field# Enter the name of the field in the node output that will contain the extracted data. This parameter is only available for these operations: * Extract From JSON * Extract From ICS * Extract From Text File * Move File to Base64 String ## Templates and examples# --- ## Page: https://docs.n8n.io/integrations/builtin/core-nodes/n8n-nodes-base.filter/ Filter items based on a condition. If the item meets the condition, the Filter node passes it on to the next node in the Filter node output. If the item doesn't meet the condition, the Filter node omits the item from its output. ## Node parameters# Create filter comparison **Conditions** to perform your filter. * Use the data type dropdown to select the data type and comparison operation type for your condition. For example, to filter for dates after a particular date, select **Date & Time > is after**. * The fields and values to enter into the condition change based on the data type and comparison you select. Refer to Available data type comparisons for a full list of all comparisons by data type. Select **Add condition** to create more conditions. ### Combining conditions# You can choose to keep items: * When they meet all conditions: Create two or more conditions and select **AND** in the dropdown between them. * When they meet any of the conditions: Create two or more conditions and select **OR** in the dropdown between them. You can't create a mix of AND and OR rules. ## Node options# * **Ignore Case**: Whether to ignore letter case (turned on) or be case sensitive (turned off). * **Less Strict Type Validation**: Whether you want n8n to attempt to convert value types based on the operator you choose (turned on) or not (turned off). Turn this on when facing a "wrong type:" error in your node. ## Templates and examples# ## Available data type comparisons# ### String# String data type supports these comparisons: * exists * does not exist * is empty * is not empty * is equal to * is not equal to * contains * does not contain * starts with * does not start with * ends with * does not end with * matches regex * does not match regex ### Number# Number data type supports these comparisons: * exists * does not exist * is empty * is not empty * is equal to * is not equal to * is greater than * is less than * is greater than or equal to * is less than or equal to ### Date & Time# Date & Time data type supports these comparisons: * exists * does not exist * is empty * is not empty * is equal to * is not equal to * is after * is before * is after or equal to * is before or equal to ### Boolean# Boolean data type supports these comparisons: * exists * does not exist * is empty * is not empty * is true * is false * is equal to * is not equal to ### Array# Array data type supports these comparisons: * exists * does not exist * is empty * is not empty * contains * does not contain * length equal to * length not equal to * length greater than * length less than * length greater than or equal to * length less than or equal to ### Object# Object data type supports these comparisons: * exists * does not exist * is empty * is not empty --- ## Page: https://docs.n8n.io/integrations/builtin/core-nodes/n8n-nodes-base.ftp/ The FTP node is useful to access and upload files to an FTP or SFTP server. Credentials You can find authentication information for this node here. To connect to an SFTP server, use an SFTP credential. Refer to FTP credentials for more information. ## Operations# * **Delete** a file or folder * **Download** a file * **List** folder content * **Rename** or move a file or folder * **Upload** a file ## Delete# This operation includes one parameter: **Path**. Enter the remote path that you would like to connect to. ### Delete options# The delete operation adds one new option: **Folder**. If you turn this option on, the node can delete both folders and files. This configuration also displays one more option: * **Recursive**: If you turn this option on and you delete a folder or directory, the node will delete all files and directories within the target directory. ## Download# Configure this operation with these parameters: * **Path**: Enter the remote path that you would like to connect to. * **Put Output File in Field**: Enter the name of the output binary field to put the file in. ## List# Configure this operation with these parameters: * **Path**: Enter the remote path that you would like to connect to. * **Recursive**: Select whether to return an object representing all directories / objects recursively found within the FTP/SFTP server (turned on) or not (turned off). ## Rename# Configure this operation with these parameters: * **Old Path**: Enter the existing path of the file you'd like to rename in this field. * **New Path**: Enter the new path for the renamed file in this field. ### Rename options# This operation adds one new option: **Create Directories**. If you turn this option on, the node will recursively create the destination directory when renaming an existing file or folder. ## Upload# Configure this operation with these parameters: * **Path**: Enter the remote path that you would like to connect to. * **Binary File**: Select whether you'll upload a binary file (turned on) or enter text content to be uploaded (turned off). Other parameters depend on your selection in this field. * **Input Binary Field**: Displayed if you turn on **Binary File**. Enter the name of the input binary field that contains the file you'll upload in this field. * **File Content**: Displayed if you turn off **Binary File** Enter the text content of the file you'll upload in this field. ## Templates and examples# --- ## Page: https://docs.n8n.io/integrations/builtin/core-nodes/n8n-nodes-base.git/ Git is a free and open-source distributed version control system designed to handle everything from small to large projects with speed and efficiency. Credentials You can find authentication information for this node here. ## Operations# * **Add** a file or folder to commit. Performs a git add. * **Add Config**: Add configuration property. Performs a git config set or add. * **Clone** a repository: Performs a git clone. * **Commit** files or folders to git. Performs a git commit. * **Fetch** from remote repository. Performs a git fetch. * **List Config**: Return current configuration. Performs a git config query. * **Log**: Return git commit history. Performs a git log. * **Pull** from remote repository: Performs a git pull. * **Push** to remote repository: Performs a git push. * **Push Tags** to remote repository: Performs a git push --tags. * Return **Status** of current repository: Performs a git status. * Create a new **Tag**: Performs a git tag. * **User Setup**: Set the user. Refer to the sections below for more details on the parameters and options for each operation. ## Add# Configure this operation with these parameters: * **Repository Path**: Enter the local path of the git repository. * **Paths to Add**: Enter a comma-separated list of paths of files or folders to add in this field. You can use absolute paths or relative paths from the **Repository Path**. ## Add Config# Configure this operation with these parameters: * **Repository Path**: Enter the local path of the git repository. * **Key**: Enter the name of the key to set. * **Value**: Enter the value of the key to set. ### Add Config options# The add config operation adds the **Mode** option. Choose whether to **Set** or **Append** the setting in the local config. ## Clone# Configure this operation with these parameters: * **Repository Path**: Enter the local path of the git repository. * **Authentication**: Select **Authenticate** to pass credentials in. Select **None** to not use authentication. * **Credential for Git**: If you select **Authenticate**, you must select or create credentials for the node to use. Refer to Git credential for more information. * **New Repository Path**: Enter the local path where you'd like to locate the cloned repository. * **Source Repository**: Enter the URL or path of the repository you want to clone. ## Commit# Configure this operation with these parameters: * **Repository Path**: Enter the local path of the git repository. * **Message**: Enter the commit message to use in this field. ### Commit options# The commit operation adds the **Paths to Add** option. To commit all "added" files and folders, leave this field blank. To commit specific "added" files and folders, enter a comma-separated list of paths of files or folders in this field. You can use absolute paths or relative paths from the **Repository Path**. ## Fetch# This operation only prompts you to enter the local path of the git repository in the **Repository Path** parameter. ## List Config# This operation only prompts you to enter the local path of the git repository in the **Repository Path** parameter. ## Log# Configure this operation with these parameters: * **Repository Path**: Enter the local path of the git repository. * **Return All**: When turned on, the node will return all results. When turned off, the node will return results up to the set **Limit**. * **Limit**: Only available when you turn off **Return All**. Enter the maximum number of results to return. ### Log options# The log operation adds the **File** option. Enter the path of a file or folder to get the history of in this field. You can use absolute paths or relative paths from the **Repository Path**. ## Pull# This operation only prompts you to enter the local path of the git repository in the **Repository Path** parameter. ## Push# Configure this operation with these parameters: * **Repository Path**: Enter the local path of the git repository. * **Authentication**: Select **Authenticate** to pass credentials in or **None** to not use authentication. * If you select **Authenticate**, you must select or create **Credential for Git** for the node to use. Refer to Git credential for more information. ### Push options# The push operation adds the **Target Repository** option. Enter the URL or path of the repository to push to in this field. This operation only prompts you to enter the local path of the git repository in the **Repository Path** parameter. ## Status# This operation only prompts you to enter the local path of the git repository in the **Repository Path** parameter. ## Tag# Configure this operation with these parameters: * **Repository Path**: Enter the local path of the git repository. * **Name**: Enter the name of the tag to create in this field. ## User Setup# This operation only prompts you to enter the local path of the git repository in the **Repository Path** parameter. ## Templates and examples# --- ## Page: https://docs.n8n.io/integrations/builtin/core-nodes/n8n-nodes-base.graphql/ GraphQL is an open-source data query and manipulation language for APIs, and a runtime for fulfilling queries with existing data. Use the GraphQL node to query a GraphQL endpoint. ## Node parameters# This node can be used as an AI tool This node can be used to enhance the capabilities of an AI agent. When used in this way, many parameters can be set automatically, or with information directed by AI - find out more in the AI tool parameters documentation. ### Authentication# Select the type of authentication to use. If you select anything other than **None**, the **Credential for** parameter appears for you to select an existing or create a new authentication credential for that authentication type. ### HTTP Request Method# Select the underlying HTTP Request method the node should use. Choose from: * **GET** * **POST**: If you select this method, you'll also need to select the **Request Format** the node should use for the query payload. Choose from: * **GraphQL (Raw)** * **JSON** ### Endpoint# Enter the GraphQL Endpoint you'd like to hit. ### Ignore SSL Issues# When you turn on this control, n8n ignores SSL certificate validation failure. ### Query# Enter the GraphQL query you want to execute. Refer to Related Resources for information on writing your query. ### Response Format# Select the format you'd like to receive query results in. Choose between: * **JSON** * **String**: If you select this format, enter a **Response Data Property Name** to define the property the string is written to. Enter any **Headers** you want to pass as part of the query as **Name** / **Value** pairs. ## Templates and examples# To use the GraphQL node, you need to understand GraphQL query language. GraphQL have their own Introduction to GraphQL tutorial. --- ## Page: https://docs.n8n.io/integrations/builtin/core-nodes/n8n-nodes-base.html/ The HTML node provides operations to help you work with HTML in n8n. HTML Extract node The HTML node replaces the HTML Extract node from version 0.213.0 on. If you're using an older version of n8n, you can still view the HTML Extract node documentation. Cross-site scripting When using the HTML node to generate an HTML template you can introduce XSS (cross-site scripting). This is a security risk. Be careful with un-trusted inputs. ## Operations# * **Generate HTML template**: Use this operation to create an HTML template. This allows you to take data from your workflow and output it as HTML. * **Extract HTML content**: Extract contents from an HTML-formatted source. The source can be in JSON or a binary file (`.html`). * **Convert to HTML Table**: Convert content to an HTML table. The node parameters and options depend on the operation you select. Refer to the sections below for more details on configuring each operation. ## Generate HTML template# Create an HTML template. This allows you to take data from your workflow and output it as HTML. You can include: * Standard HTML * CSS in `<style>` tags. * JavaScript in `<script>` tags. n8n doesn't execute the JavaScript. * Expressions, wrapped in `{{}}`. You can use Expressions in the template, including n8n's Built-in methods and variables. ## Extract HTML Content# Extract contents from an HTML-formatted source. The source can be in JSON or a binary file (`.html`). Use these parameters: ### Source Data# Select the source type for your HTML content. Choose between: * **JSON**: If you select this source data, enter the **JSON Property**: the name of the input containing the HTML you want to extract. The property can contain a string or an array of strings. * **Binary**: If you select this source data, enter the **Input Binary Field**: the name of the input containing the HTML you want to extract. The property can contain a string or an array of strings. * **Key**: Enter the key to save the extracted value under. * **CSS Selector**: Enter the CSS selector to search for. * **Return Value**: Select the type of data to return. Choose from: * **Attribute**: Return an attribute value like `class` from an element. * If you select this option, enter the name of the **Attribute** to return the value of. * **HTML**: Return the HTML that the element contains. * **Text**: Return the text content of the element. * If you choose this option, you can also enter a comma-separated list of selectors to skip in the **Skip Selectors**. * **Value**: Return the value of an input, select, or text area. * **Return Array**: Choose whether to return multiple extraction values as an array (turned on) or as a single string (turned off). ### Extract HTML Content options# You can also configure this operation with these options: * **Trim Values**: Controls whether to remove all spaces and newlines from the beginning and end of the values (turned on) or leaves them (turned off). * **Clean Up Text**: Controls whether to remove leading whitespaces, trailing whitespaces, and line breaks (newlines) and condense multiple consecutive whitespaces into a single space (turned on) or to leave them as-is (turned off). ## Convert to HTML Table# This operation expects data from another node. It has no parameters. It includes these options: * **Capitalize Headers**: Controls whether to capitalize the table's headers (turned on) or not (turned off). * **Custom Styling**: Controls whether to use custom styling (turned on) or not (turned off). * **Caption**: Enter a caption to add to the table. * **Table Attributes**: Enter any attributes to apply to the `<table>`, such as style attributes. * **Header Attributes**: Enter any attributes to apply to the table's headers `<th>`. * **Row Attributes**: Enter any attributes to apply to the table's rows `<tr>`. * **Cell Attributes**: Enter any attributes to apply to the table's cells `<td>`. ## Templates and examples# --- ## Page: https://docs.n8n.io/integrations/builtin/core-nodes/n8n-nodes-base.httprequest/ The HTTP Request node is one of the most versatile nodes in n8n. It allows you to make HTTP requests to query data from any app or service with a REST API. When using this node, you're creating a REST API call. You need some understanding of basic API terminology and concepts. There are two ways to create an HTTP request: configure the node parameters or import a curl command. ## Node parameters# ### Method# Select the method to use for the request: * DELETE * GET * HEAD * OPTIONS * PATCH * POST * PUT ### URL# Enter the endpoint you want to use. ### Authentication# n8n recommends using the **Predefined Credential Type** option when it's available. It offers an easier way to set up and manage credentials, compared to configuring generic credentials. #### Predefined credentials# Credentials for integrations supported by n8n, including both built-in and community nodes. Use **Predefined Credential Type** for custom operations without extra setup. Refer to Custom API operations for more information. #### Generic credentials# Credentials for integrations not supported by n8n. You'll need to manually configure the authentication process, including specifying the required API endpoints, necessary parameters, and the authentication method. You can select one of the following methods: * Basic auth * Custom auth * Digest auth * Header auth * OAuth1 API * OAuth2 API * Query auth Refer to HTTP request credentials for more information on setting up each credential type. ### Send Query Parameters# Query parameters act as filters on HTTP requests. If the API you're interacting with supports them and the request you're making needs a filter, turn this option on. **Specify your query parameters** using one of the available options: * **Using Fields Below**: Enter **Name**/**Value** pairs of **Query Parameters**. To enter more query parameter name/value pairs, select **Add Parameter**. The name is the name of the field you're filtering on, and the value is the filter value. * **Using JSON**: Enter **JSON** to define your query parameters. Refer to your service's API documentation for detailed guidance. Use this parameter to send headers with your request. Headers contain metadata or context about your request. **Specify Headers** using one of the available options: * **Using Fields Below**: Enter **Name**/**Value** pairs of **Header Parameters**. To enter more header parameter name/value pairs, select **Add Parameter**. The name is the header you wish to set, and the value is the value you want to pass for that header. * **Using JSON**: Enter **JSON** to define your header parameters. Refer to your service's API documentation for detailed guidance. ### Send Body# If you need to send a body with your API request, turn this option on. Then select the **Body Content Type** that best matches the format for the body content you wish to send. #### Form URLencoded# Use this option to send your body as `application/x-www-form-urlencoded`. **Specify Body** using one of the available options: * **Using Fields Below**: Enter **Name**/**Value** pairs of **Body Parameters**. To enter more body parameter name/value pairs, select **Add Parameter**. The name should be the form field name, and the value is what you wish to set that field to. * **Using Single Field**: Enter your name/value pairs in a single **Body** parameter with format `fieldname1=value1&fieldname2=value2`. Refer to your service's API documentation for detailed guidance. #### Form-Data# Use this option to send your body as `multipart/form-data`. Configure your **Body Parameters** by selecting the **Parameter Type**: * Choose **Form Data** to enter **Name**/**Value** pairs. * Choose **n8n Binary File** to pull the body from a file the node has access to. * **Name**: Enter the ID of the field to set. * **Input Data Field Name**: Enter the name of the incoming field containing the binary file data you want to process. Select **Add Parameter** to enter more parameters. Refer to your service's API documentation for detailed guidance. #### JSON# Use this option to send your body as JSON. **Specify Body** using one of the available options: * **Using Fields Below**: Enter **Name**/**Value** pairs of **Body Parameters**. To enter more body parameter name/value pairs, select **Add Parameter**. * **Using JSON**: Enter **JSON** to define your body. Refer to your service's API documentation for detailed guidance. #### n8n Binary File# Use this option to send the contents of a file stored in n8n as the body. Enter the name of the incoming field that contains the file as the **Input Data Field Name**. Refer to your service's API documentation for detailed guidance on how to format the file. #### Raw# Use this option to send raw data in the body. * **Content Type**: Enter the `Content-Type` header to use for the raw body content. Refer to the IANA Media types documentation for a full list of MIME content types. * **Body**: Enter the raw body content to send. Refer to your service's API documentation for detailed guidance. ## Node options# Select **Add Option** to view and select these options. Options are available to all parameters unless otherwise noted. ### Array Format in Query Parameters# Option availability This option is only available when you turn on **Send Query Parameters**. Use this option to control the format for arrays included in query parameters. Choose from these options: * **No Brackets**: Arrays will format as the name=value for each item in the array, for example: `foo=bar&foo=qux`. * **Brackets Only**: The node adds square brackets after each array name, for example: `foo[]=bar&foo[]=qux`. * **Brackets with Indices**: The node adds square brackets with an index value after each array name, for example: `foo[0]=bar&foo[1]=qux`. Refer to your service's API documentation for guidance on which option to use. ### Batching# Control how to batch large numbers of input items: * **Items per Batch**: Enter the number of input items to include in each batch. * **Batch Interval**: Enter the time to wait between each batch of requests in milliseconds. Enter 0 for no batch interval. ### Ignore SSL Issues# By default, n8n only downloads the response if SSL certificate validation succeeds. If you'd like to download the response even if SSL certificate validation fails, turn this option on. Choose whether to lowercase header names (turned on, default) or not (turned off). ### Redirects# Choose whether to follow redirects (turned on by default) or not (turned off). If turned on, enter the maximum number of redirects the request should follow in **Max Redirects**. ### Response# Use this option to set some details about the expected API response, including: * **Include Response Headers and Status**: By default, the node returns only the body. Turn this option on to return the full response (headers and response status code) as well as the body. * **Never Error**: By default, the node returns success only when the response returns with a 2xx code. Turn this option on to return success regardless of the code returned. * **Response Format**: Select the format in which the data gets returned. Choose from: * **Autodetect** (default): The node detects and formats the response based on the data returned. * **File**: Select this option to put the response into a file. Enter the field name where you want the file returned in **Put Output in Field**. * **JSON**: Select this option to format the response as JSON. * **Text**: Select this option to format the response as plain text. Enter the field name where you want the file returned in **Put Output in Field**. Use this option to paginate results, useful for handling query results that are too big for the API to return in a single call. Inspect the API data first Some options for pagination require knowledge of the data returned by the API you're using. Before setting up pagination, either check the API documentation, or do an API call without pagination, to see the data it returns. Understand pagination Pagination means splitting a large set of data into multiple pages. The amount of data on each page depends on the limit you set. For example, you make an API call to an endpoint called `/users`. The API wants to send back information on 300 users, but this is too much data for the API to send in one response. If the API supports pagination, you can incrementally fetch the data. To do this, you call `/users` with a pagination limit, and a page number or URL to tell the API which page to send. In this example, say you use a limit of 10, and start from page 0. The API sends the first 10 users in its response. You then call the API again, increasing the page number by 1, to get the next 10 results. Configure the pagination settings: * **Pagination Mode**: * **Off**: Turn off pagination. * **Update a Parameter in Each Request**: Use this when you need to dynamically set parameters for each request. * **Response Contains Next URL**: Use this when the API response includes the URL of the next page. Use an expression to set **Next URL**. For example setups, refer to HTTP Request node cookbook | Pagination. n8n provides built-in variables for working with HTTP node requests and responses when using pagination: | Variable | Description | | --- | --- | | `$pageCount` | The pagination count. Tracks how many pages the node has fetched. | | `$request` | The request object sent by the HTTP node. | | `$response` | The response object from the HTTP call. Includes `$response.body`, `$response.headers`, and `$response.statusCode`. The contents of `body` and `headers` depend on the data sent by the API. | API differences Different APIs implement pagination in different ways. Check the API documentation for the API you're using for details. You need to find out things like: * Does the API provide the URL for the next page? * Are there API-specific limits on page size or page number? * The structure of the data that the API returns. ### Proxy# Use this option if you need to specify an HTTP proxy. Enter the **Proxy** the request should use. ### Timeout# Use this option to set how long the node should wait for the server to send response headers (and start the response body). The node aborts requests that exceed this value for the initial response. Enter the **Timeout** time to wait in milliseconds. ## Import curl command# curl is a command line tool and library for transferring data with URLs. You can use curl to call REST APIs. If the API documentation of the service you want to use provides curl examples, you can copy them out of the documentation and into n8n to configure the HTTP Request node. Import a curl command: 1. From the HTTP Request node's **Parameters** tab, select **Import cURL**. The **Import cURL command** modal opens. 2. Paste your curl command into the text box. 3. Select **Import**. n8n loads the request configuration into the node fields. This overwrites any existing configuration. ## Templates and examples# ## Common issues# For common questions or issues and suggested solutions, refer to Common Issues. --- ## Page: https://docs.n8n.io/integrations/builtin/core-nodes/n8n-nodes-base.httprequest/common-issues/ Here are some common errors and issues with the HTTP Request node and steps to resolve or troubleshoot them. ## Bad request - please check your parameters# This error displays when the node receives a 400 error indicating a bad request. This error most often occurs because: * You're using an invalid name or value in a **Query Parameter**. * You're passing array values in a **Query Parameter** but the array isn't formatted correctly. Try using the **Array Format in Query Parameters** option. Review the API documentation for your service to format your query parameters. ## The resource you are requesting could not be found# This error displays when the endpoint **URL** you entered is invalid. This may be due to a typo in the URL or a deprecated API. Refer to your service's API documentation to verify you have a valid endpoint. ## JSON parameter need to be an valid JSON# This error displays when you've passed a parameter as JSON and it's not formatted as valid JSON. To resolve, review the JSON you've entered for these issues: * Test your JSON in a JSON checker or syntax parser to find errors like missing quotation marks, extra or missing commas, incorrectly formatted arrays, extra or missing square brackets or curly brackets, and so on. * If you've used an **Expression** in the node, be sure you've wrapped the entire JSON in double curly brackets, for example: <table><tbody><tr><td><div><pre><span></span><span> 1</span> <span> 2</span> <span> 3</span> <span> 4</span> <span> 5</span> <span> 6</span> <span> 7</span> <span> 8</span> <span> 9</span> <span>10</span> <span>11</span></pre></div></td><td><div><pre><span></span><code>{{ { "myjson": { "name1": "value1", "name2": "value2", "array1": ["value1","value2"] } } }} </code></pre></div></td></tr></tbody></table> ## Forbidden - perhaps check your credentials# This error displays when the node receives a 403 error indicating authentication failed. To resolve, review the selected credentials and make sure you can authenticate with them. You may need to: * Update permissions or scopes so that your API key or account can perform the operation you've selected. * Format your generic credential in a different way. * Generate a new API key or token with the appropriate permissions or scopes. ## 429 - The service is receiving too many requests from you# This error displays when the node receives a 429 error from the service that you're calling. This often means that you have hit the rate limits of that service. You can find out more on the Handling API rate limits page. To resolve the error, you can use one of the built-in options of the HTTP request node: ### Batching# Use this option to send requests in batches and introduce a delay between them. 1. In the HTTP Request node, select **Add Option > Batching**. 2. Set **Items per Batch** to the number of input items to include in each request. 3. Set **Batch Interval (ms)** to introduce a delay between requests in milliseconds. For example, to send one request to an API per second, set **Batch Interval (ms)** to `1000`. ### Retry on Fail# Use this option to retry the node after a failed attempt. 1. In the HTTP Request node, go to **Settings** and enable **Retry on Fail**. 2. Set **Max Tries** to the maximum number of times n8n should retry the node. 3. Set **Wait Between Tries (ms)** to the desired delay in milliseconds between retries. For example, to wait one second before retrying the request again, set **Wait Between Tries (ms)** to `1000`. --- ## Page: https://docs.n8n.io/integrations/builtin/core-nodes/n8n-nodes-base.if/ Use the If node to split a workflow conditionally based on comparison operations. ## Add conditions# Create comparison **Conditions** for your If node. * Use the data type dropdown to select the data type and comparison operation type for your condition. For example, to filter for dates after a particular date, select **Date & Time > is after**. * The fields and values to enter into the condition change based on the data type and comparison you select. Refer to Available data type comparisons for a full list of all comparisons by data type. Select **Add condition** to create more conditions. ### Combining conditions# You can choose to keep data: * When it meets all conditions: Create two or more conditions and select **AND** in the dropdown between them. * When it meets any of the conditions: Create two or more conditions and select **OR** in the dropdown between them. ## Templates and examples# ## Branch execution with If and Merge nodes# 0.236.0 and below n8n removed this execution behavior in version 1.0. This section applies to workflows using the **v0 (legacy)** workflow execution order. By default, this is all workflows built before version 1.0. You can change the execution order in your workflow settings. If you add a Merge node to a workflow containing an If node, it can result in both output data streams of the If node executing. One data stream triggers the Merge node, which then goes and executes the other data stream. For example, in the screenshot below there's a workflow containing an Edit Fields node, If node, and Merge node. The standard If node behavior is to execute one data stream (in the screenshot, this is the **true** output). However, due to the Merge node, both data streams execute, despite the If node not sending any data down the **false** data stream. 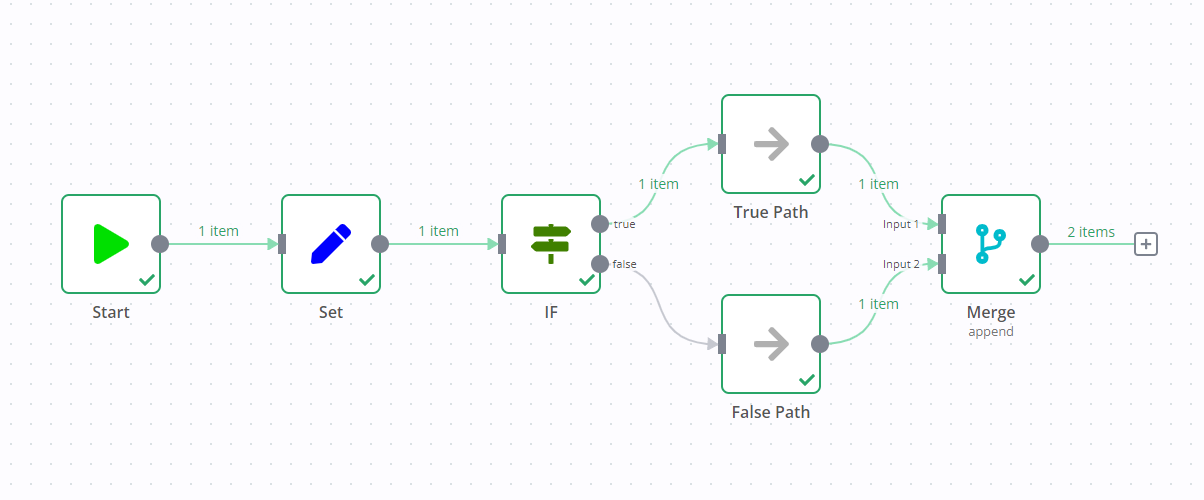 Refer to Splitting with conditionals for more information on using conditionals to create complex logic in n8n. If you need more than two conditional outputs, use the Switch node. ## Available data type comparisons# ### String# String data type supports these comparisons: * exists * does not exist * is empty * is not empty * is equal to * is not equal to * contains * does not contain * starts with * does not start with * ends with * does not end with * matches regex * does not match regex ### Number# Number data type supports these comparisons: * exists * does not exist * is empty * is not empty * is equal to * is not equal to * is greater than * is less than * is greater than or equal to * is less than or equal to ### Date & Time# Date & Time data type supports these comparisons: * exists * does not exist * is empty * is not empty * is equal to * is not equal to * is after * is before * is after or equal to * is before or equal to ### Boolean# Boolean data type supports these comparisons: * exists * does not exist * is empty * is not empty * is true * is false * is equal to * is not equal to ### Array# Array data type supports these comparisons: * exists * does not exist * is empty * is not empty * contains * does not contain * length equal to * length not equal to * length greater than * length less than * length greater than or equal to * length less than or equal to ### Object# Object data type supports these comparisons: * exists * does not exist * is empty * is not empty --- ## Page: https://docs.n8n.io/integrations/builtin/core-nodes/n8n-nodes-base.jwt/ Work with JSON web tokens in your n8n workflows. Credentials You can find authentication information for this node here. ## Operations# * Decode * Sign * Verify ## Node parameters# This node can be used as an AI tool This node can be used to enhance the capabilities of an AI agent. When used in this way, many parameters can be set automatically, or with information directed by AI - find out more in the AI tool parameters documentation. * **Credential to connect with**: Select or create a JWT credential to connect with. * **Token**: Enter the token to **Verify** or **Decode**. * If you select the **Sign** operation, you'll also have this parameter: * **Use JSON to Build Payload**: When turned on, the node uses JSON to build the claims. The selection here influences what appears in the Payload Claims section. ## Payload Claims# The node only displays payload claims if you select the **Sign** operation. What you see depends on what you select for **Use JSON to Build Payload**: * If you select **Use JSON to Build Payload**, this section displays a JSON editor where you can construct the claims. * If you don't select **Use JSON to Build Payload**, this section prompts you to **Add Claim**. You can add the following claims. ### Audience# The **Audience** or `aud` claim identifies the intended recipients of the JWT. Refer to "aud" (Audience) Claim for more information. ### Expires In# The **Expires In** or `exp` claim identifies the time after which the JWT expires and must not be accepted for processing. Refer to "exp" (Expiration Time) Claim for more information. ### Issuer# The **Issuer** or `iss` claim identifies the principal that issued the JWT. Refer to "iss" (Issuer) Claim for more information. ### JWT ID# The **JWT ID** or `jti` claim provides a unique identifier for the JWT. Refer to "jti" (JWT ID) Claim for more information. ### Not Before# The **Not Before** or `nbf` claim identifies the time before which the JWT must not be accepted for processing. Refer to "nbf" (Not Before) Claim for more information. ### Subject# The **Subject** or `sub` claim identifies the principal that's the subject of the JWT. Refer to "sub" (Subject) Claim for more information. ## Node options# ### Decode node options# The **Return Additional Info** toggle controls how much information the node returns. When turned on, the node returns the complete decoded token with information about the header and signature. When turned off, the node only returns the payload. ### Sign node options# Use the **Override Algorithm** control to select the algorithm to use for verifying the token. This algorithm will override the algorithm selected in the credentials. ### Verify node options# This operation includes several node options: * **Return Additional Info**: This toggle controls how much information the node returns. When turned on, the node returns the complete decoded token with information about the header and signature. When turned off, the node only returns the payload. * **Ignore Expiration**: This toggle controls whether the node should ignore the token's expiration time claim (`exp`). Refer to "exp" (Expiration Time) Claim for more information. * **Ignore Not Before Claim**: This toggle controls whether to ignore the token's not before claim (`nbf`). Refer to "nbf" (Not Before) Claim for more information. * **Clock Tolerance**: Enter the number of seconds to tolerate when checking the `nbf` and `exp` claims. This allows you to deal with small clock differences among different servers. Refer to "exp" (Expiration Time) Claim for more information. * **Override Algorithm**: The algorithm to use for verifying the token. This algorithm will override the algorithm selected in the credentials. ## Templates and examples# Browse JWT integration templates, or search all templates --- ## Page: https://docs.n8n.io/integrations/builtin/core-nodes/n8n-nodes-base.ldap/ This node allows you to interact with your LDAP servers to create, find, and update objects. Credentials You can find authentication information for this node here. ## Operations# * **Compare** an attribute * **Create** a new entry * **Delete** an entry * **Rename** the DN of an existing entry * **Search** LDAP * **Update** attributes Refer to the sections below for details on configuring the node for each operation. This node can be used as an AI tool This node can be used to enhance the capabilities of an AI agent. When used in this way, many parameters can be set automatically, or with information directed by AI - find out more in the AI tool parameters documentation. ## Compare# Configure this operation using these parameters: * **Credential to connect with**: Select or create an LDAP credential to connect with. * **DN**: Enter the Distinguished Name (DN) of the entry to compare. * **Attribute ID**: Enter the ID of the attribute to compare. * **Value**: Enter the value to compare. ## Create# Configure this operation using these parameters: * **Credential to connect with**: Select or create an LDAP credential to connect with. * **DN**: Enter the Distinguished Name (DN) of the entry to create. * **Attributes**: Add the **Attribute ID**/**Value** pairs you'd like to create. ## Delete# Configure this operation using these parameters: * **Credential to connect with**: Select or create an LDAP credential to connect with. * **DN**: Enter the Distinguished Name (DN) of the entry to be deleted. ## Rename# Configure this operation using these parameters: * **Credential to connect with**: Select or create an LDAP credential to connect with. * **DN**: Enter the current Distinguished Name (DN) of the entry to rename. * **New DN**: Enter the new Distinguished Name (DN) for the entry in this field. ## Search# Configure this operation using these parameters: * **Credential to connect with**: Select or create an LDAP credential to connect with. * **Base DN**: Enter the Distinguished Name (DN) of the subtree to search in. * **Search For**: Select the directory object class to search for. * **Attribute**: Select the attribute to search for. * **Search Text**: Enter the text to search for. Use `*` for a wildcard. * **Return All**: When turned on, the node will return all results. When turned off, the node will return results up to the set **Limit**. * **Limit**: Only available when you turn off **Return All**. Enter the maximum number of results to return. ### Search options# You can also configure this operation using these options: * **Attribute Names or IDs**: Enter a comma-separated list of attributes to return. Choose from the list or specify IDs using an expression. * **Page Size**: Enter the maximum number of results to request at one time. Set to 0 to disable paging. * **Scopes**: The set of entries at or below the **Base DN** to search for potential matches. Select from: * **Base Tree**: Often referred to as subordinateSubtree or just "subordinates," selecting this option will search the subordinates of the **Base DN** entry but not the **Base DN** entry itself. * **Single Level**: Often referred to as "one," selecting this option will search only the immediate children of the **Base DN** entry. * **Whole Subtree**: Often referred to as "sub," selecting this option will search the **Base DN** entry and all its subordinates to any depth. Refer to The LDAP Search Operation for more information on search scopes. ## Update# Configure this operation using these parameters: * **Credential to connect with**: Select or create an LDAP credential to connect with. * **DN**: Enter the Distinguished Name (DN) of the entry to update. * **_Update Attributes_\*: Select whether to** Add **new,** Remove **existing, or** Replace\*\* existing attribute. * Then enter the **Attribute ID**/**Value** pair you'd like to update. ## Templates and examples# Browse LDAP integration templates, or search all templates --- ## Page: https://docs.n8n.io/integrations/builtin/core-nodes/n8n-nodes-base.limit/ Use the Limit node to remove items beyond a defined maximum number. You can choose whether n8n takes the items from the beginning or end of the input data. ## Node parameters# Configure this node using the following parameters. ### Max Items# Enter the maximum number of items that n8n should keep. If the input data contains more than this value, n8n removes the items. ### Keep# If the node has to remove items, select where it keeps the input items from: * **First Items**: Keeps the **Max Items** number of items from the beginning of the input data. * **Last Items**: Keeps the **Max Items** number of items from the end of the input data. ## Templates and examples# Learn more about data structure and data flow in n8n workflows. --- ## Page: https://docs.n8n.io/integrations/builtin/core-nodes/n8n-nodes-base.localfiletrigger/ The Local File Trigger node starts a workflow when it detects changes on the file system. These changes involve a file or folder getting added, changed, or deleted. Self-hosted n8n only This node isn't available on n8n Cloud. ## Node parameters# You can choose what event to watch for using the **Trigger On** parameter. ## Changes to a Specific File# The node triggers when the specified file changes. Enter the path for the file to watch in **File to Watch**. ## Changes Involving a Specific Folder# The node triggers when a change occurs in the selected folder. Configure these parameters: * **Folder to Watch**: Enter the path of the folder to watch. * **Watch for**: Select the type of change to watch for. ## Node options# Use the node **Options** to include or exclude files and folders. * **Include Linked Files/Folders**: also watch for changes to linked files or folders. * **Ignore**: files or paths to ignore. n8n tests the whole path, not just the filename. Supports the Anymatch syntax. * **Max Folder Depth**: how deep into the folder structure to watch for changes. ### Examples for Ignore# Ignore a single file: <table><tbody><tr><td><div><pre><span></span><span>1</span> <span>2</span></pre></div></td><td><div><pre><span></span><code>**/<fileName>.<suffix> <span># For example, **/myfile.txt</span> </code></pre></div></td></tr></tbody></table> Ignore a sub-directory of a directory you're watching: <table><tbody><tr><td><div><pre><span></span><span>1</span> <span>2</span></pre></div></td><td><div><pre><span></span><code>**/<directoryName>/** <span># For example, **/myDirectory/**</span> </code></pre></div></td></tr></tbody></table> ## Templates and examples# --- ## Page: https://docs.n8n.io/integrations/builtin/core-nodes/n8n-nodes-base.splitinbatches/ The Loop Over Items node helps you loop through data when needed. The node saves the original incoming data, and with each iteration, returns a predefined amount of data through the **loop** output. When the node execution completes, it combines all of the processed data and returns it through the **done** output. ## When to use the Loop Over Items node# By default, n8n nodes are designed to process a list of input items (with some exceptions, detailed below). Depending on what you're trying to achieve, you often don't need the Loop Over Items node in your workflow. You can learn more about how n8n processes multiple items on the looping in n8n page. These links highlight some of the cases where the Loop Over Items node can be useful: * Loop until all items are processed: describes how the Loop Over Items node differs from normal item processing and when you might want to incorporate this node. * Node exceptions: outlines specific cases and nodes where you may need to use the Loop Over Items node to manually build looping logic. * Avoiding rate limiting: demonstrates how to batch API requests to avoid rate limits from other services. ## Node parameters# ### Batch Size# Enter the number of items to return with each call. ## Node options# ### Reset# If turned on, the node will reset with the current input-data newly initialized with each loop. Use this when you want the Loop Over Items node to treat incoming data as a new set of data instead of a continuation of previous items. For example, you can use the Loop Over Items node with the reset option and an If node to query a paginated service when you don't know how many pages you need in advance. The loop queries pages one at a time, performs any processing, and increments the page number. The loop reset ensures the loop recognizes each iteration as a new set of data. The If node evaluates an exit condition to decide whether to perform another iteration or not. Include a valid termination condition For workflows like the example described above, it's critical to include a valid termination condition for the loop. If your termination condition never matches, your workflow execution will get stuck in an infinite loop. When enabled, you can adjust the reset conditions by switching the parameter representation from **Fixed** to **Expression**. The results of your expression evaluation determine when the node will reset item processing. ## Templates and examples# This workflow allows you to read an RSS feed from two different sources using the Loop Over Items node. You need the Loop Over Items node in the workflow as the RSS Feed Read node only processes the first item it receives. You can also find the workflow on n8n.io. The example walks through building the workflow, but assumes you are already familiar with n8n. To build your first workflow, including learning how to add nodes to a workflow, refer to Try it out. The final workflow looks like this: Copy the workflow file above and paste into your instance, or manually build it by following these steps: 1. Add the manual trigger. 2. Add the Code node. 3. Copy this code into the Code node: <table><tbody><tr><td><div><pre><span></span><span> 1</span> <span> 2</span> <span> 3</span> <span> 4</span> <span> 5</span> <span> 6</span> <span> 7</span> <span> 8</span> <span> 9</span> <span>10</span> <span>11</span> <span>12</span></pre></div></td><td><div><pre><span></span><code><span>return</span><span> </span><span>[</span> <span> </span><span>{</span> <span> </span><span>json</span><span>:</span><span> </span><span>{</span> <span> </span><span>url</span><span>:</span><span> </span><span>'https://medium.com/feed/n8n-io'</span><span>,</span> <span> </span><span>}</span> <span> </span><span>},</span> <span> </span><span>{</span> <span> </span><span>json</span><span>:</span><span> </span><span>{</span> <span> </span><span>url</span><span>:</span><span> </span><span>'https://dev.to/feed/n8n'</span><span>,</span> <span> </span><span>}</span> <span> </span><span>}</span> <span>];</span> </code></pre></div></td></tr></tbody></table> 4. Add the Loop Over Items node. 5. Configure Loop Over Items: set the batch size to `1` in the **Batch Size** field. 6. Add the RSS Feed Read node. 7. Select **Test Workflow**. This runs the workflow to load data into the RSS Feed Read node. 8. Configure RSS Feed Read: map `url` from the input to the **URL** field. You can do this by dragging and dropping from the **INPUT** panel, or using this expression: `{{ $json.url }}`. 9. Select **Test Workflow** to run the workflow and see the resulting data. ### Check that the node has processed all items# To check if the node still has items to process, use the following expression: `{{$node["Loop Over Items"].context["noItemsLeft"]}}`. This expression returns a boolean value. If the node still has data to process, the expression returns `false`, otherwise it returns `true`. ### Get the current running index of the node# To get the current running index of the node, use the following expression: `{{$node["Loop Over Items"].context["currentRunIndex"];}}`. --- ## Page: https://docs.n8n.io/integrations/builtin/core-nodes/n8n-nodes-base.manualworkflowtrigger/ Use this node if you want to start a workflow by selecting **Test Workflow** and don't want any option for the workflow to run automatically. Workflows always need a trigger, or start point. Most workflows start with a trigger node firing in response to an external event or the Schedule Trigger firing on a set schedule. The Manual Trigger node serves as the workflow trigger for workflows that don't have an automatic trigger. Use this trigger: * To test your workflow before you add an automatic trigger of some kind. * When you don't want the workflow to run automatically. ## Common issues# Here are some common errors and issues with the Manual Trigger node and steps to resolve or troubleshoot them. ### Only one 'Manual Trigger' node is allowed in a workflow# This error displays if you try to add a Manual Trigger node to a workflow which already includes a Manual Trigger node. Remove your existing Manual Trigger or edit your workflow to connect that trigger to a different node. --- ## Page: https://docs.n8n.io/integrations/builtin/core-nodes/n8n-nodes-base.markdown/ The Markdown node converts between Markdown and HTML formats. ## Operations# This node's operations are **Modes**: * **Markdown to HTML**: Use this mode to convert from Markdown to HTML. * **HTML to Markdown**: Use this mode to convert from HTML to Markdown. ## Node parameters# * **HTML** or **Markdown**: Enter the data you want to convert. The field name changes based on which **Mode** you select. * **Destination Key**: Enter the field you want to put the output in. Specify nested fields using dots, for example `level1.level2.newKey`. ## Node options# The node's **Options** depend on the **Mode** selected. Test out the options Some of the options depend on each other or can interact. We recommend testing out options to confirm the effects are what you want. ### Markdown to HTML options# | Option | Description | Default | | --- | --- | --- | | **Add Blank To Links** | Whether to open links a new window (enabled) or not (disabled). | Disabled | | **Automatic Linking To URLs** | Whether to automatically link to URLs (enabled) or not (disabled). If enabled, n8n converts any string that it identifies as a URL to a link. | Disabled | | **Backslash Escapes HTML Tags** | Whether to allow backslash escaping of HTML tags (enabled) or not (disabled). When enabled, n8n escapes any `<` or `>` prefaced with `\`. For example, `\<div\>` renders as `<div>`. | Disabled | | **Complete HTML Document** | Whether to output a complete HTML document (enabled) or an HTML fragment (disabled). A complete HTML document includes the `<DOCTYPE HTML>` declaration, `<html>` and `<body>` tags, and the `<head>` element. | Disabled | | **Customized Header ID** | Whether to support custom heading IDs (enabled) or not (disabled). When enabled, you can add custom heading IDs using `{header ID here}` after the heading text. | Disabled | | **Emoji Support** | Whether to support emojis (enabled) or not (disabled). | Disabled. | | **Encode Emails** | Whether to transform ASCII character emails into their equivalent decimal entities (enabled) or not (disabled). | Enabled | | **Exclude Trailing Punctuation From URLs** | Whether to exclude trailing punctuation from automatically linked URLs (enabled) or not (disabled). For use with **Automatic Linking To URLs**. | Disabled | | **GitHub Code Blocks** | Whether to enable GitHub Flavored Markdown code blocks (enabled) or not (disabled). | Enabled | | **GitHub Compatible Header IDs** | Whether to generate GitHub Flavored Markdown heading IDs (enabled) or not (disabled). GitHub Flavored Markdown generates heading IDs with `-` in place of spaces and removes non-alphanumeric characters. | Disabled | | **GitHub Mention Link** | Change the link used with **GitHub Mentions**. | Disabled | | **GitHub Mentions** | Whether to support tagging GitHub users with `@` (enabled) or not (disabled). When enabled, n8n replaces `@name` with `https://github.com/name`. | Disabled | | **GitHub Task Lists** | Whether to support GitHub Flavored Markdown task lists (enabled) or not (disabled). | Disabled | | **Header Level Start** | Number. Set the start level for headers. For example, changing this field to `2` causes n8n to treat `#` as `<h2>`, `##` as `<h3>`, and so on. | 1 | | **Mandatory Space Before Header** | Whether to make a space between `#` and heading text required (enabled) or not (disabled). When enabled, n8n renders a heading written as `##Some header text` literally (it doesn't turn it into a heading element) | Disabled | | **Middle Word Asterisks** | Whether n8n should treat asterisks in words as Markdown (disabled) or render them as literal asterisks (enabled). | Disabled | | **Middle Word Underscores** | Whether n8n should treat underscores in words as Markdown (disabled) or render them as literal underscores (enabled). | Disabled | | **No Header ID** | Disable automatic generation of header IDs (enabled). | Disabled | | **Parse Image Dimensions** | Support setting maximum image dimensions in Markdown syntax (enabled). | Disabled | | **Prefix Header ID** | Define a prefix to add to header IDs. | None | | **Raw Header ID** | Whether to remove spaces, `'`, and `"` from header IDs, including prefixes, replacing them with `-` (enabled) or not (disabled). | Disabled | | **Raw Prefix Header ID** | Whether to prevent n8n from modifying header prefixes (enabled) or not (disabled) | Disabled | | **Simple Line Breaks** | Whether to create line breaks without a double space at the end of a line (enabled) or not (disabled). | Disabled | | **Smart Indentation Fix** | Whether to try to smartly fix indentation problems related to ES6 template strings in indented code blocks (enabled) or not (disabled). | Disabled | | **Spaces Indented Sublists** | Whether to remove the requirement to indent sublists four spaces (enabled) or not (disabled). | Disabled | | **Split Adjacent Blockquotes** | Whether to split adjacent blockquote blocks (enabled) or not (disabled). If you don't enable this, n8n treats quotes (indicated by `>` at the start of the line) on separate lines as a single blockquote, even when separated by an empty line. | Disabled | | **Strikethrough** | Whether to support strikethrough syntax (enabled) or not (disabled). When enabled, you can add a ~~strikethrough~~ effect using `~~` around the word or phrase. | Disabled | | **Tables Header ID** | Whether to add an ID to table header tags (enabled) or not (disabled). | Disabled | | **Tables Support** | Whether to support tables (enabled) or not (disabled). | Disabled | ### HTML to Markdown options# | Option | Description | Default | | --- | --- | --- | | **Bullet Marker** | Specify the character to use for unordered lists. | \* | | **Code Block Fence** | Specify the characters to use for code blocks. | \`\`\` | | **Emphasis Delimiter** | Specify the character `<em>`. | \_ | | **Global Escape Pattern** | Overrides the default character escape settings. You may want to use Text Replacement Pattern instead. | None | | **Ignored Elements** | Ignore given HTML elements, and their children. | None | | **Keep Images With Data** | Whether to keep images with data (enabled) or not (disabled). Support files up to 1MB. | Disabled | | **Line Start Escape Pattern** | Overrides the default character escape settings. You may want to use Text Replacement Pattern instead. | None | | **Max Consecutive New Lines** | Number. Specify the maximum number of consecutive new lines allowed. | 3 | | **Place URLs At The Bottom** | Whether to place URLs at the bottom of the page and format using link reference definitions (enabled) or not (disabled). | Disabled | | **Strong Delimiter** | Specify the characters for `<strong>`. | \*\* | | **Style For Code Block** | Specify the styling for code blocks. Options are **Fence** and **Indented**. | Fence | | **Text Replacement Pattern** | Define a text replacement pattern using regex. | None | | **Treat As Blocks** | Specify HTML elements to treat as blocks (surround with blank lines) | None | ## Templates and examples# ## Parsers# n8n uses the following parsers: * To convert from HTML to Markdown: node-html-markdown. * To convert from Markdown to HTML: Showdown. Some options allow you to extend your Markdown with GitHub Flavored Markdown. --- ## Page: https://docs.n8n.io/integrations/builtin/core-nodes/n8n-nodes-langchain.mcptrigger/ Use the MCP Server Trigger node to allow n8n to act as a Model Context Protocol (MCP) server, making n8n tools and workflows available to MCP clients. Credentials You can find authentication information for this node here. ## How the MCP Server Trigger node works# The MCP Server Trigger node acts as an entry point into n8n for MCP clients. It operates by exposing a URL that MCP clients can interact with to access n8n tools. Unlike conventional trigger nodes, which respond to events and pass their output to the next connected node, the MCP Server Trigger node only connects to and executes tool nodes. Clients can list the available tools and call individual tools to perform work. You can expose n8n workflows to clients by attaching them with the Custom n8n Workflow Tool node. ## Node parameters# Use these parameters to configure your node. ### MCP URL# The MCP Server Trigger node has two **MCP URLs**: test and production. n8n displays the URLs at the top of the node panel. Select **Test URL** or **Production URL** to toggle which URL n8n displays. * **Test**: n8n registers a test MCP URL when you select **Listen for Test Event** or **Test workflow**, if the workflow isn't active. When you call the MCP URL, n8n displays the data in the workflow. * **Production**: n8n registers a production MCP URL when you activate the workflow. When using the production URL, n8n doesn't display the data in the workflow. You can still view workflow data for a production execution: select the **Executions** tab in the workflow, then select the workflow execution you want to view. ### Authentication# You can require authentication for clients connecting to your MCP URL. Choose from these authentication methods: * Bearer auth * Header auth Refer to the HTTP request credentials for more information on setting up each credential type. ### Path# By default, this field contains a randomly generated MCP URL path, to avoid conflicts with other MCP Server Trigger nodes. You can manually specify a URL path, including adding route parameters. For example, you may need to do this if you use n8n to prototype an API and want consistent endpoint URLs. The **Path** field can take the following formats: * `/:variable` * `/path/:variable` * `/:variable/path` * `/:variable1/path/:variable2` * `/:variable1/:variable2` ## Templates and examples# ### Integrating with Claude Desktop# You can connect to the MCP Server Trigger node from Claude Desktop by running a gateway to proxy SSE messages to stdio-based servers. To do so, add the following to your Claude Desktop configuration: <table><tbody><tr><td><div><pre><span></span><span> 1</span> <span> 2</span> <span> 3</span> <span> 4</span> <span> 5</span> <span> 6</span> <span> 7</span> <span> 8</span> <span> 9</span> <span>10</span> <span>11</span> <span>12</span> <span>13</span> <span>14</span> <span>15</span></pre></div></td><td><div><pre><span></span><code><span>{</span> <span> </span><span>"mcpServers"</span><span>:</span><span> </span><span>{</span> <span> </span><span>"n8n"</span><span>:</span><span> </span><span>{</span> <span> </span><span>"command"</span><span>:</span><span> </span><span>"npx"</span><span>,</span> <span> </span><span>"args"</span><span>:</span><span> </span><span>[</span> <span> </span><span>"-y"</span><span>,</span> <span> </span><span>"supergateway"</span><span>,</span> <span> </span><span>"--sse"</span><span>,</span> <span> </span><span>"<MCP_URL>"</span><span>,</span> <span> </span><span>"--header"</span><span>,</span> <span> </span><span>"Authorization: Bearer <MCP_BEARER_TOKEN>"</span> <span> </span><span>]</span> <span> </span><span>}</span> <span> </span><span>}</span> <span>}</span> </code></pre></div></td></tr></tbody></table> Be sure to replace the `<MCP_URL>` and `<MCP_BEARER_TOKEN>` placeholders with the values from your MCP Server Trigger node parameters and credentials. ## Limitations# The MCP Server Trigger node doesn't yet support n8n instances running in queue mode mode. n8n also provides an MCP Client Tool node that allows you to connect your n8n AI agents to external tools. Refer to the MCP documentation and MCP specification for more details about the protocol, servers, and clients. --- ## Page: https://docs.n8n.io/integrations/builtin/core-nodes/n8n-nodes-base.merge/ Use the Merge node to combine data from multiple streams, once data of all streams is available. Major changes in 0.194.0 The n8n team overhauled this node in n8n 0.194.0. This document reflects the latest version of the node. If you're using an older version of n8n, you can find the previous version of this document here. Minor changes in 1.49.0 n8n version 1.49.0 introduced the option to add more than two inputs. Older versions only support up to two inputs. If you're running an older version and want to combine multiple inputs in these versions, use the Code node. The **Mode > SQL Query** feature was also added in n8n version 1.49.0 and isn't available in older versions. ## Node parameters# You can specify how the Merge node should combine data from different data streams by choosing a **Mode**: ### Append# Keep data from all inputs. Choose a **Number of Inputs** to output items of each input, one after another. The node waits for the execution of all connected inputs.  Append mode inputs and output ### Combine# Combine data from two inputs. Select an option in **Combine By** to determine how you want to merge the input data. #### Matching Fields# Compare items by field values. Enter the fields you want to compare in **Fields to Match**. n8n's default behavior is to keep matching items. You can change this using the **Output Type** setting: * **Keep Matches**: Merge items that match. This is like an inner join. * **Keep Non-Matches**: Merge items that don't match. * **Keep Everything**: Merge items together that do match and include items that don't match. This is like an outer join. * **Enrich Input 1**: Keep all data from Input 1, and add matching data from Input 2. This is like a left join. * **Enrich Input 2**: Keep all data from Input 2, and add matching data from Input 1. This is like a right join.  Combine by Matching Fields mode inputs and output #### Position# Combine items based on their order. The item at index 0 in Input 1 merges with the item at index 0 in Input 2, and so on.  Combine by Position mode inputs and output #### All Possible Combinations# Output all possible item combinations, while merging fields with the same name.  Combine by All Possible Combinations mode inputs and output #### Combine mode options# When merging data by **Mode > Combine**, you can set these **Options**: * **Clash Handling**: Choose how to merge when data streams clash, or when there are sub-fields. Refer to Clash handling for details. * **Fuzzy Compare**: Whether to tolerate type differences when comparing fields (enabled), or not (disabled, default). For example, when you enable this, n8n treats `"3"` and `3` as the same. * **Disable Dot Notation**: This prevents accessing child fields using `parent.child` in the field name. * **Multiple Matches**: Choose how n8n handles multiple matches when comparing data streams. * **Include All Matches**: Output multiple items if there are multiple matches, one for each match. * **Include First Match Only**: Keep the first item per match and discard the remaining multiple matches. * **Include Any Unpaired Items**: Choose whether to keep or discard unpaired items when merging by position. The default behavior is to leave out the items without a match. ##### Clash Handling# If multiple items at an index have a field with the same name, this is a clash. For example, if all items in both Input 1 and Input 2 have a field named `language`, these fields clash. By default, n8n prioritizes Input 2, meaning if `language` has a value in Input 2, n8n uses that value when merging the items. You can change this behavior by selecting **Options** > **Clash Handling**: * **When Field Values Clash**: Choose which input to prioritize, or choose **Always Add Input Number to Field Names** to keep all fields and values, with the input number appended to the field name to show which input it came from. * **Merging Nested Fields** * **Deep Merge**: Merge properties at all levels of the items, including nested objects. This is useful when dealing with complex, nested data structures where you need to ensure the merging of all levels of nested properties. * **Shallow Merge**: Merge properties at the top level of the items only, without merging nested objects. This is useful when you have flat data structures or when you only need to merge top-level properties without worrying about nested properties. ### SQL Query# Write a custom SQL Query to merge the data. Example: <table><tbody><tr><td><div><pre><span></span><span>1</span></pre></div></td><td><div><pre><span></span><code><span>SELECT</span><span> </span><span>*</span><span> </span><span>FROM</span><span> </span><span>input1</span><span> </span><span>LEFT</span><span> </span><span>JOIN</span><span> </span><span>input2</span><span> </span><span>ON</span><span> </span><span>input1</span><span>.</span><span>name</span><span> </span><span>=</span><span> </span><span>input2</span><span>.</span><span>id</span> </code></pre></div></td></tr></tbody></table> Data from previous nodes are available as tables and you can use them in the SQL query as input1, input2, input3, and so on, based on their order. Refer to AlaSQL GitHub page for a full list of supported SQL statements. ### Choose Branch# Choose which input to keep. This option always waits until the data from both inputs is available. You can choose to **Output**: * The **Input 1 Data** * The **Input 2 Data** * **A Single, Empty Item** The node outputs the data from the chosen input, without changing it. ## Templates and examples# ## Merging data streams with uneven numbers of items# The items passed into Input 1 of the Merge node will take precedence. For example, if the Merge node receives five items in Input 1 and 10 items in Input 2, it only processes five items. The remaining five items from Input 2 aren't processed. ## Branch execution with If and Merge nodes# 0.236.0 and below n8n removed this execution behavior in version 1.0. This section applies to workflows using the **v0 (legacy)** workflow execution order. By default, this is all workflows built before version 1.0. You can change the execution order in your workflow settings. If you add a Merge node to a workflow containing an If node, it can result in both output data streams of the If node executing. One data stream triggers the Merge node, which then goes and executes the other data stream. For example, in the screenshot below there's a workflow containing an Edit Fields node, If node, and Merge node. The standard If node behavior is to execute one data stream (in the screenshot, this is the **true** output). However, due to the Merge node, both data streams execute, despite the If node not sending any data down the **false** data stream.  ## Try it out: A step by step example# Create a workflow with some example input data to try out the Merge node. ### Set up sample data using the Code nodes# 1. Add a Code node to the canvas and connect it to the Start node. 2. Paste the following JavaScript code snippet in the **JavaScript Code** field: <table><tbody><tr><td><div><pre><span></span><span> 1</span> <span> 2</span> <span> 3</span> <span> 4</span> <span> 5</span> <span> 6</span> <span> 7</span> <span> 8</span> <span> 9</span> <span>10</span> <span>11</span> <span>12</span> <span>13</span> <span>14</span> <span>15</span> <span>16</span> <span>17</span> <span>18</span> <span>19</span> <span>20</span></pre></div></td><td><div><pre><span></span><code><span>return</span><span> </span><span>[</span> <span> </span><span>{</span> <span> </span><span>json</span><span>:</span><span> </span><span>{</span> <span> </span><span>name</span><span>:</span><span> </span><span>'Stefan'</span><span>,</span> <span> </span><span>language</span><span>:</span><span> </span><span>'de'</span><span>,</span> <span> </span><span>}</span> <span> </span><span>},</span> <span> </span><span>{</span> <span> </span><span>json</span><span>:</span><span> </span><span>{</span> <span> </span><span>name</span><span>:</span><span> </span><span>'Jim'</span><span>,</span> <span> </span><span>language</span><span>:</span><span> </span><span>'en'</span><span>,</span> <span> </span><span>}</span> <span> </span><span>},</span> <span> </span><span>{</span> <span> </span><span>json</span><span>:</span><span> </span><span>{</span> <span> </span><span>name</span><span>:</span><span> </span><span>'Hans'</span><span>,</span> <span> </span><span>language</span><span>:</span><span> </span><span>'de'</span><span>,</span> <span> </span><span>}</span> <span> </span><span>}</span> <span>];</span> </code></pre></div></td></tr></tbody></table> 3. Add a second Code node, and connect it to the Start node. 4. Paste the following JavaScript code snippet in the **JavaScript Code** field: <table><tbody><tr><td><div><pre><span></span><span> 1</span> <span> 2</span> <span> 3</span> <span> 4</span> <span> 5</span> <span> 6</span> <span> 7</span> <span> 8</span> <span> 9</span> <span>10</span> <span>11</span> <span>12</span> <span>13</span> <span>14</span></pre></div></td><td><div><pre><span></span><code><span>return</span><span> </span><span>[</span> <span> </span><span>{</span> <span> </span><span>json</span><span>:</span><span> </span><span>{</span> <span> </span><span>greeting</span><span>:</span><span> </span><span>'Hello'</span><span>,</span> <span> </span><span>language</span><span>:</span><span> </span><span>'en'</span><span>,</span> <span> </span><span>}</span> <span> </span><span>},</span> <span> </span><span>{</span> <span> </span><span>json</span><span>:</span><span> </span><span>{</span> <span> </span><span>greeting</span><span>:</span><span> </span><span>'Hallo'</span><span>,</span> <span> </span><span>language</span><span>:</span><span> </span><span>'de'</span><span>,</span> <span> </span><span>}</span> <span> </span><span>}</span> <span>];</span> </code></pre></div></td></tr></tbody></table> ### Try out different merge modes# Add the Merge node. Connect the first Code node to **Input 1**, and the second Code node to **Input 2**. Run the workflow to load data into the Merge node. The final workflow should look like this: Now try different options in **Mode** to see how it affects the output data. #### Append# Select **Mode** > **Append**, then select **Test step**. Your output in table view should look like this: | **name** | **language** | **greeting** | | --- | --- | --- | | Stefan | de | | | Jim | en | | | Hans | de | | | | en | Hello | | | de | Hallo | #### Combine by Matching Fields# You can merge these two data inputs so that each person gets the correct greeting for their language. 1. Select **Mode** > **Combine**. 2. Select **Combine by** > **Matching Fields**. 3. In both **Input 1 Field** and **Input 2 Field**, enter `language`. This tells n8n to combine the data by matching the values in the `language` field in each data set. 4. Select **Test step**. Your output in table view should look like this: | **name** | **language** | **greeting** | | --- | --- | --- | | Stefan | de | Hallo | | Jim | en | Hello | | Hans | de | Hallo | #### Combine by Position# Select **Mode** > **Combine**, **Combine by** > **Position**, then select **Test step**. Your output in table view should look like this: | **name** | **language** | **greeting** | | --- | --- | --- | | Stefan | en | Hello | | Jim | de | Hallo | ##### Keep unpaired items# If you want to keep all items, select **Add Option** > **Include Any Unpaired Items**, then turn on **Include Any Unpaired Items**. Your output in table view should look like this: | **name** | **language** | **greeting** | | --- | --- | --- | | Stefan | en | Hello | | Jim | de | Hallo | | Hans | de | | #### Combine by All Possible Combinations# Select **Mode** > **Combine**, **Combine by** > **All Possible Combinations**, then select **Test step**. Your output in table view should look like this: | **name** | **language** | **greeting** | | --- | --- | --- | | Stefan | en | Hello | | Stefan | de | Hallo | | Jim | en | Hello | | Jim | de | Hallo | | Hans | en | Hello | | Hans | de | Hallo | --- ## Page: https://docs.n8n.io/integrations/builtin/core-nodes/n8n-nodes-base.n8n/ A node to integrate with n8n itself. This node allows you to consume the n8n API in your workflows. Refer to the n8n REST API documentation for more information on using the n8n API. Refer to API endpoint reference for working with the API endpoints directly. Credentials You can find authentication information for this node in the API authentication documentation. ## Operations# * Audit * **Generate** a security audit * Credential * **Create** a credential * **Delete** a credential * **Get Schema**: Use this operation to get credential data schema for type * Execution * **Get** an execution * **Get Many** executions * **Delete** an execution * Workflow * **Activate** a workflow * **Create** a workflow * **Deactivate** a workflow * **Delete** a workflow * **Get** a workflow * **Get Many** workflows * **Update** a workflow ## Generate audit# This operation has no parameters. Configure it with these options: * **Categories**: Select the risk categories you want the audit to include. Options include: * **Credentials** * **Database** * **Filesystem** * **Instance** * **Nodes** * **Days Abandoned Workflow**: Use this option to set the number of days without execution after which a workflow should be considered abandoned. Enter a number of days. The default is `90`. ## Create credential# Configure this operation with these parameters: * **Name**: Enter the name of the credential you'd like to create. * **Credential Type**: Enter the credential's type. The available types depend on nodes installed on the n8n instance. Some built-in types include `githubApi`, `notionApi`, and `slackApi`. * **Data**: Enter a valid JSON object with the required properties for this **Credential Type**. To see the expected format, use the **Get Schema** operation. ## Delete credential# Configure this operation with this parameter: * **Credential ID**: Enter the ID of the credential you want to delete. ## Get credential schema# Configure this operation with this parameter: * **Credential Type**: Enter the credential's type. The available types depend on nodes installed on the n8n instance. Some built-in types include `githubApi`, `notionApi`, and `slackApi`. ## Get execution# Configure this operation with this parameter: * **Execution ID**: Enter the ID of the execution you want to retrieve. ### Get execution option# You can further configure this operation with this **Option**: * **Include Execution Details**: Use this control to set whether to include the detailed execution data (turned on) or not (turned off). ## Get many executions# Configure this operation with these parameters: * **Return All**: Set whether to return all results (turned on) or whether to limit the results to the entered **Limit** (turned on). * **Limit**: Set the number of results to return if the **Return All** control is turned off. ### Get many executions filters# You can further configure this operation with these **Filters**: * **Workflow**: Filter the executions by workflow. Options include: * **From list**: Select a workflow to use as a filter. * **By URL**: Enter a workflow URL to use as a filter. * **By ID**: Enter a workflow ID to use as a filter. * **Status**: Filter the executions by status. Options include: * **Error** * **Success** * **Waiting** ### Get many execution options# You can further configure this operation with this **Option**: * **Include Execution Details**: Use this control to set whether to include the detailed execution data (turned on) or not (turned off). ## Delete execution# Configure this operation with this parameter: * **Execution ID**: Enter the ID of the execution you want to delete. ## Activate, deactivate, delete, and get workflow# The **Activate**, **Deactivate**, **Delete**, and **Get** workflow operations all include the same parameter for you to select the **Workflow** you want to perform the operation on. Options include: * **From list**: Select the workflow from the list. * **By URL**: Enter the URL of the workflow. * **By ID**: Enter the ID of the workflow. ## Create workflow# Configure this operation with this parameter: * **Workflow Object**: Enter a valid JSON object with the new workflow's details. The object requires these fields: * `name` * `nodes` * `connections` * `settings` Refer to the n8n API | Create a workflow documentation for more information. ## Get many workflows# Configure this operation with these parameters: * **Return All**: Set whether to return all results (turned on) or whether to limit the results to the entered **Limit** (turned on). * **Limit**: Set the number of results to return if the **Return All** control is turned off. ### Get many workflows filters# You can further configure this operation with these **Filters**: * **Return Only Active Workflows**: Select whether to return only active workflows (turned on) or active and inactive workflows (turned off). * **Tags**: Enter a comma-separated list of tags the returned workflows must have. ## Update workflow# Configure this operation with these parameters: * **Workflow**: Select the workflow you want to update. Options include: * **From list**: Select the workflow from the list. * **By URL**: Enter the URL of the workflow. * **By ID**: Enter the ID of the workflow. * **Workflow Object**: Enter a valid JSON object to update the workflow with. The object requires these fields: * `name` * `nodes` * `connections` * `settings` Refer to the n8n API | Update a workflow documentation for more information. ## Templates and examples# --- ## Page: https://docs.n8n.io/integrations/builtin/core-nodes/n8n-nodes-base.form/ Use the n8n Form node to create user-facing forms with multiple steps. You can add other nodes with custom logic between to process user input. You must start the workflow with the n8n Form Trigger. ## Setting up the node# ### Set default selections with query parameters# You can set the initial values for fields by using query parameters with the initial URL provided by the n8n Form Trigger. Every page in the form receives the same query parameters sent to the n8n Form Trigger URL. Only for production Query parameters are only available when using the form in production mode. n8n won't populate field values from query parameters in testing mode. When using query parameters, percent-encode any field names or values that use special characters. This ensures n8n uses the initial values for the given fields. You can use tools like URL Encode/Decode to format your query parameters using percent-encoding. As an example, imagine you have a form with the following properties: * Production URL: `https://my-account.n8n.cloud/form/my-form` * Fields: * `name`: `Jane Doe` * `email`: `jane.doe@example.com` With query parameters and percent-encoding, you could use the following URL to set initial field values to the data above: <table><tbody><tr><td><div><pre><span></span><span>1</span></pre></div></td><td><div><pre><span></span><code>https://my-account.n8n.cloud/form/my-form?email=jane.doe%40example.com&name=Jane%20Doe </code></pre></div></td></tr></tbody></table> Here, percent-encoding replaces the at-symbol (`@`) with the string `%40` and the space character () with the string `%20`. This will set the initial value for these fields no matter which page of the form they appear on. ### Displaying custom HTML# You can display custom HTML on your form by adding a **Custom HTML** field to your form. This provides an **HTML** box where you can insert arbitrary HTML code to display as part of the form page. You can use the HTML field to enrich your form page by including things like links, images, videos, and more. n8n will render the content with the rest of the form fields in the normal document flow. Because custom HTML content is read-only, these fields aren't included in the form output data by default. To include the raw HTML content in the node output, provide a name for the data using the **Element Name** field. The HTML field doesn't support `<script>`, `<style>`, or `<input>` elements. ### Including hidden fields# It's possible to include fields in a form without displaying them to users. This is useful when you want to pass extra data to the form that doesn't require interactive user input. To add fields that won't show up on the form, use the **Hidden Field** form element. There, you can define the **Field Name** and optionally provide a default value by filling out the **Field Value**. When serving the form, you can pass values for hidden fields using query parameters. ### Defining the form using JSON# Use **Define Form** > **Using JSON** to define the fields of your form with a JSON array of objects. Each object defines a single field by using a combination of these keys: * `fieldLabel`: The label that appears above the input field. * `fieldType`: Choose from `date`, `dropdown`, `email`, `file`, `number`, `password`, `text`, or `textarea`. * Use `date` to include a date picker in the form. Refer to Date and time with Luxon for more information on formatting dates. * When using `dropdown`, set the choices with `fieldOptions` (reference the example below). By default, the dropdown is single-choice. To make it multiple-choice, set `multiselect` to `true`. * When using `file`, set `multipleFiles` to `true` to allow users to select more than one file. To define the file types to allow, set `acceptFileTypes` to a string containing a comma-separated list of file extensions (reference the example below). * `placeholder`: Specify placeholder data for the field. You can use this for every `fieldType` except `dropdown`, `date`, and `file`. * `requiredField`: Require users to complete this field on the form. An example JSON that shows the general format required and the keys available: <table><tbody><tr><td><div><pre><span></span><span> 1</span> <span> 2</span> <span> 3</span> <span> 4</span> <span> 5</span> <span> 6</span> <span> 7</span> <span> 8</span> <span> 9</span> <span>10</span> <span>11</span> <span>12</span> <span>13</span> <span>14</span> <span>15</span> <span>16</span> <span>17</span> <span>18</span> <span>19</span> <span>20</span> <span>21</span> <span>22</span> <span>23</span> <span>24</span> <span>25</span> <span>26</span> <span>27</span> <span>28</span> <span>29</span> <span>30</span> <span>31</span> <span>32</span> <span>33</span> <span>34</span> <span>35</span> <span>36</span> <span>37</span> <span>38</span> <span>39</span> <span>40</span> <span>41</span> <span>42</span> <span>43</span> <span>44</span> <span>45</span> <span>46</span> <span>47</span> <span>48</span> <span>49</span> <span>50</span> <span>51</span> <span>52</span> <span>53</span> <span>54</span> <span>55</span> <span>56</span> <span>57</span> <span>58</span> <span>59</span> <span>60</span> <span>61</span> <span>62</span> <span>63</span> <span>64</span> <span>65</span> <span>66</span> <span>67</span> <span>68</span> <span>69</span></pre></div></td><td><div><pre><span></span><code><span>// Use the "requiredField" key on any field to mark it as mandatory</span> <span>// Use the "placeholder" key to specify placeholder data for all fields</span> <span>// except 'dropdown', 'date' and 'file'</span> <span>[</span> <span> </span><span>{</span> <span> </span><span>"fieldLabel"</span><span>:</span><span> </span><span>"Date Field"</span><span>,</span> <span> </span><span>"fieldType"</span><span>:</span><span> </span><span>"date"</span><span>,</span> <span> </span><span>"formatDate"</span><span>:</span><span> </span><span>"mm/dd/yyyy"</span><span>,</span><span> </span><span>// how to format received date in n8n</span> <span> </span><span>"requiredField"</span><span>:</span><span> </span><span>true</span> <span> </span><span>},</span> <span> </span><span>{</span> <span> </span><span>"fieldLabel"</span><span>:</span><span> </span><span>"Dropdown Options"</span><span>,</span> <span> </span><span>"fieldType"</span><span>:</span><span> </span><span>"dropdown"</span><span>,</span> <span> </span><span>"fieldOptions"</span><span>:</span><span> </span><span>{</span> <span> </span><span>"values"</span><span>:</span><span> </span><span>[</span> <span> </span><span>{</span> <span> </span><span>"option"</span><span>:</span><span> </span><span>"option 1"</span> <span> </span><span>},</span> <span> </span><span>{</span> <span> </span><span>"option"</span><span>:</span><span> </span><span>"option 2"</span> <span> </span><span>}</span> <span> </span><span>]</span> <span> </span><span>},</span> <span> </span><span>"requiredField"</span><span>:</span><span> </span><span>true</span> <span> </span><span>},</span> <span> </span><span>{</span> <span> </span><span>"fieldLabel"</span><span>:</span><span> </span><span>"Multiselect"</span><span>,</span> <span> </span><span>"fieldType"</span><span>:</span><span> </span><span>"dropdown"</span><span>,</span> <span> </span><span>"fieldOptions"</span><span>:</span><span> </span><span>{</span> <span> </span><span>"values"</span><span>:</span><span> </span><span>[</span> <span> </span><span>{</span> <span> </span><span>"option"</span><span>:</span><span> </span><span>"option 1"</span> <span> </span><span>},</span> <span> </span><span>{</span> <span> </span><span>"option"</span><span>:</span><span> </span><span>"option 2"</span> <span> </span><span>}</span> <span> </span><span>]</span> <span> </span><span>},</span> <span> </span><span>"multiselect"</span><span>:</span><span> </span><span>true</span><span> </span><span>// setting to true allows multi-select</span> <span> </span><span>},</span> <span> </span><span>{</span> <span> </span><span>"fieldLabel"</span><span>:</span><span> </span><span>"Email"</span><span>,</span> <span> </span><span>"fieldType"</span><span>:</span><span> </span><span>"email"</span><span>,</span> <span> </span><span>"placeholder"</span><span>:</span><span> </span><span>"me@mail.con"</span> <span> </span><span>},</span> <span> </span><span>{</span> <span> </span><span>"fieldLabel"</span><span>:</span><span> </span><span>"File"</span><span>,</span> <span> </span><span>"fieldType"</span><span>:</span><span> </span><span>"file"</span><span>,</span> <span> </span><span>"multipleFiles"</span><span>:</span><span> </span><span>true</span><span>,</span><span> </span><span>// setting to true allows multiple files selection</span> <span> </span><span>"acceptFileTypes"</span><span>:</span><span> </span><span>".jpg, .png"</span><span> </span><span>// allowed file types</span> <span> </span><span>},</span> <span> </span><span>{</span> <span> </span><span>"fieldLabel"</span><span>:</span><span> </span><span>"Number"</span><span>,</span> <span> </span><span>"fieldType"</span><span>:</span><span> </span><span>"number"</span> <span> </span><span>},</span> <span> </span><span>{</span> <span> </span><span>"fieldLabel"</span><span>:</span><span> </span><span>"Password"</span><span>,</span> <span> </span><span>"fieldType"</span><span>:</span><span> </span><span>"password"</span> <span> </span><span>},</span> <span> </span><span>{</span> <span> </span><span>// "fieldType": "text" can be omitted since it's the default type</span> <span> </span><span>"fieldLabel"</span><span>:</span><span> </span><span>"Text"</span> <span> </span><span>},</span> <span> </span><span>{</span> <span> </span><span>"fieldLabel"</span><span>:</span><span> </span><span>"Textarea"</span><span>,</span> <span> </span><span>"fieldType"</span><span>:</span><span> </span><span>"textarea"</span> <span> </span><span>}</span> <span>]</span> </code></pre></div></td></tr></tbody></table> ### Form Ending# Use the **Form Ending** Page Type to end a form and either show a completion page, redirect the user to a URL, or display custom HTML or text. Only one Form Ending page displays per execution, even when n8n executes multiple branches that contain Form Ending nodes. Choose between these options when using **On n8n Form Submission**: * **Show Completion Screen**: Shows users a final screen to confirm that they submitted the form. * Fill in **Completion Title** to set the `h1` title on the form. * n8n displays the **Completion Message** as a subtitle below the main `h1` title on the form. Use `\n` or `<br>` to add a line break. * Select **Add option** and fill in **Completion Page Title** to set the page's title in the browser tab. When using **Redirect to URL**, fill in the **URL** field with the page you want to redirect to when users complete the form. Use **Show Text** to display a final page defined by arbitrary plain text and HTML. Fill in the **Text** field with the HTML or plain text content you wish to show. ### Forms with branches# The n8n Form node executes and displays its associated form page whenever it receives data from a previous node. When building forms with n8n, to avoid confusion, it's important to understand how forms behave when branching occurs. #### Workflows with mutually exclusive branches# Form workflows containing mutually exclusive branches work as expected. n8n will execute a single branch according to the submitted data and conditions you outline. As it executes, n8n will display each page in the branch, ending with an n8n Form node with the **Form Ending** page type. This workflow demonstrates mutually exclusive branching. Each selection can only execute a single branch. #### Workflows that may execute multiple branches# Form workflows that send data to multiple branches at the same time require more care. When multiple branches receive data during an execution (for example, from a switch node), n8n executes each branch that receives data sequentially. Upon reaching the end of one branch, the execution will move to the next branch with data. n8n only executes a single **Form Ending** n8n Form node for each execution. When multiple branches of a form workflow receive data, n8n ignores all Form Ending nodes except for the one associated with the final branch. This workflow may execute more than one branch during an execution. Here, n8n executes all valid branches sequentially. This impacts which n8n Form nodes n8n executes (in particular, which **Form Ending** node displays): ### Node options# Select **Add Option** to view more configuration options: * **Form Title**: The title for your form. n8n displays the **Form Title** as the webpage title and main `h1` title on the form. * **Form Description**: The description for your form. n8n displays the **Form Description** as a subtitle below the main `h1` title on the form. This field supports HTML. Use `\n` or `<br>` to add a line break. The Form Description also populates the HTML meta description for the page. * **Button Label**: The label to use for your form's submit button. n8n displays the **Button Label** as the name of the submit button. ## Running the node# ### Build and test workflows# While building or testing a workflow, use the **Test URL** in the n8n Form Trigger. Using a test URL ensures that you can view the incoming data in the editor UI, which is useful for debugging. There are two ways to test: * Select **Test Step**. n8n opens the form. When you submit the form, n8n runs the node and any previous nodes, but not the rest of the workflow. * Select **Test Workflow**. n8n opens the form. When you submit the form, n8n runs the workflow. ### Production workflows# When your workflow is ready, switch to using the n8n Form Trigger's **Production URL** by opening the trigger node and selecting the **Production URL** in the **From URLS** selector. You can then activate your workflow, and n8n runs it automatically when a user submits the form. When working with a production URL, ensure that you have saved and activated the workflow. Data flowing through the Form trigger isn't visible in the editor UI with the production URL. ## Templates and examples# --- ## Page: https://docs.n8n.io/integrations/builtin/core-nodes/n8n-nodes-base.formtrigger/ Use the n8n Form trigger to start a workflow when a user submits a form, taking the input data from the form. The node generates the form web page for you to use. You can add more pages to continue the form with the n8n Form node. ## Build and test workflows# While building or testing a workflow, use the **Test URL**. Using a test URL ensures that you can view the incoming data in the editor UI, which is useful for debugging. There are two ways to test: * Select **Test Step**. n8n opens the form. When you submit the form, n8n runs the node, but not the rest of the workflow. * Select **Test Workflow**. n8n opens the form. When you submit the form, n8n runs the workflow. ## Production workflows# When your workflow is ready, switch to using the **Production URL**. You can then activate your workflow, and n8n runs it automatically when a user submits the form. When working with a production URL, ensure that you have saved and activated the workflow. Data flowing through the Form trigger isn't visible in the editor UI with the production URL. ## Set default selections with query parameters# You can set the initial values for fields by using query parameters with the initial URL provided by the n8n Form Trigger. Every page in the form receives the same query parameters sent to the n8n Form Trigger URL. Only for production Query parameters are only available when using the form in production mode. n8n won't populate field values from query parameters in testing mode. When using query parameters, percent-encode any field names or values that use special characters. This ensures n8n uses the initial values for the given fields. You can use tools like URL Encode/Decode to format your query parameters using percent-encoding. As an example, imagine you have a form with the following properties: * Production URL: `https://my-account.n8n.cloud/form/my-form` * Fields: * `name`: `Jane Doe` * `email`: `jane.doe@example.com` With query parameters and percent-encoding, you could use the following URL to set initial field values to the data above: <table><tbody><tr><td><div><pre><span></span><span>1</span></pre></div></td><td><div><pre><span></span><code>https://my-account.n8n.cloud/form/my-form?email=jane.doe%40example.com&name=Jane%20Doe </code></pre></div></td></tr></tbody></table> Here, percent-encoding replaces the at-symbol (`@`) with the string `%40` and the space character () with the string `%20`. This will set the initial value for these fields no matter which page of the form they appear on. ## Node parameters# These are the main node configuration fields: ### Authentication# * **Basic Auth** * **None** #### Using basic auth# To configure this credential, you'll need: * The **Username** you use to access the app or service your HTTP Request is targeting. * The **Password** that goes with that username. ### Form URLs# The Form Trigger node has two URLs: **Test URL** and **Production URL**. n8n displays the URLs at the top of the node panel. Select **Test URL** or **Production URL** to toggle which URL n8n displays.  * **Test URL**: n8n registers a test webhook when you select **Test Step** or **Test Workflow**, if the workflow isn't active. When you call the URL, n8n displays the data in the workflow. * **Production URL**: n8n registers a production webhook when you activate the workflow. When using the production URL, n8n doesn't display the data in the workflow. You can still view workflow data for a production execution. Select the **Executions** tab in the workflow, then select the workflow execution you want to view. ### Form Path# Set a custom slug for the form. ### Form Title# Enter the title for your form. n8n displays the **Form Title** as the webpage title and main `h1` title on the form. ### Form Description# Enter the description for your form. n8n displays the **Form Description** as a subtitle below the main `h1` title on the form. Use `\n` or `<br>` to add a line break. ### Form Elements# Create the question fields for your form. Select **Add Form Element** to add a new field. Every field has the following settings: * **Field Label**: Enter the label that appears above the input field. * **Element Type**: Choose from **Custom HTML**, **Date**, **Dropdown List**, **Email**, **File**, **Hidden Field**, **Number**, **Password**, **Text**, or **Textarea**. * Select **Custom HTML** to insert arbitrary HTML. * You can include elements like links, images, video, and more. You can't include `<script>`, `<style>`, or `<input>` elements. * By default, Custom HTML fields aren't included in the node output. To include the Custom HTML content in the output, fill out the associated **Element Name** field. * Select **Date** to include a date picker in the form. Refer to Date and time with Luxon for more information on formatting dates. * Select **Dropdown List** > **Add Field Option** to add multiple options. By default, the dropdown is single-choice. To make it multiple-choice, turn on **Multiple Choice**. * Select **Hidden Field** to include a form element without displaying it on the form. You can set a default value using the **Field Value** parameter or pass values for the field using query parameters. * **Required Field**: Turn on to require users to complete this field on the form. ### Respond When# Choose when n8n sends a response to the form submission. You can respond when: * **Form Is Submitted**: Send a response to the user as soon as they submit the form. * **Workflow Finishes**: Use this if you want the workflow to complete its execution before you send a response to the user. If the workflow errors, it sends a response to the user telling them there was a problem submitting the form. ## Node options# Select **Add Option** to view more configuration options: * **Append n8n Attribution**: Turn off to hide the **Form automated with n8n** attribute at the bottom of the form. * **Form Response**: Choose how to respond when the user submits the form. * **Respond With** > **Form Submitted Text**: Show a message to the user. * **Respond With** > **Redirect URL**: Send the user to a new page. * **Ignore Bots**: Turn on to ignore requests from bots like link previewers and web crawlers. * **Use Workflow Timezone**: Turn on to use the timezone in the Workflow settings instead of UTC (default). This affects the value of the `submittedAt` timestamp in the node output. ## Templates and examples# --- ## Page: https://docs.n8n.io/integrations/builtin/core-nodes/n8n-nodes-base.n8ntrigger/ The n8n Trigger node triggers when the current workflow updates or activates, or when the n8n instance starts or restarts. You can use the n8n Trigger node to notify when these events occur. ## Node parameters# The node includes a single parameter to identify the **Events** that should trigger it. Choose from these events: * **Active Workflow Updated**: If you select this event, the node triggers when this workflow is updated. * **Instance started**: If you select this event, the node triggers when the n8n instance starts or restarts. * **Workflow Activated**: If you select this event, the node triggers when this workflow is activated. You can select one or more of these events. ## Templates and examples# --- ## Page: https://docs.n8n.io/integrations/builtin/core-nodes/n8n-nodes-base.noop/ n8n Docs * Using n8n * Getting started Getting started * Learning path * Choose your n8n * Quickstarts * A very quick quickstart * A longer introduction * Video courses * Text courses * Level one * Navigating the editor UI * Building a mini-workflow * Automating a (real-world) use case * Designing the workflow * Building the workflow Building the workflow * Getting data from the data warehouse * Inserting data into airtable * Filtering orders * Setting values for processing orders * Calculating booked orders * Notifying the team * Scheduling the workflow * Activating and examining the workflow * Exporting and importing workflows * Test your knowledge * Level two * Understanding the data structure * Processing different data types * Merging and splitting data * Dealing with errors in workflows * Automating a business workflow Automating a business workflow * Use case * Workflow 1 * Workflow 2 * Workflow 3 * Test your knowledge * Using the app Using the app * Understand workflows * Create and run * Components * Nodes * Connections * Sticky Notes * Executions * Manual, partial, and production executions * Workflow-level executions * All executions * Custom executions data * Debug executions * Tags * Export and import * Templates * Sharing * Settings * Workflow history * Workflow ID * Manage credentials * Create and edit * Credential sharing * Manage users and access * Cloud setup * Manage users * Account types * Role-based access control * Role types * Projects * Best practices * 2FA * LDAP * SAML * Set up SAML * Okta Workforce Identity SAML setup * Troubleshooting * Manage users with SAML * Keyboard shortcuts * Key concepts Key concepts * Flow logic * Splitting with conditionals * Merging data * Looping * Waiting * Sub-workflows * Error handling * Execution order in multi-branch workflows * Data * Data structure * Data flow within nodes * Transforming data * Process data using code * Data mapping * Data mapping in the UI * Data mapping in the expressions editor * Data item linking * Item linking concepts * Item linking in the Code node * Item linking errors * Item linking for node creators * Data pinning * Data editing * Data filtering * Data mocking * Binary data * Schema preview * Glossary * n8n Cloud n8n Cloud * Overview * Access the Cloud admin dashboard * Update your n8n Cloud version * Set the timezone * Cloud IP addresses * Cloud data management * Change ownership or username * Concurrency * AI Assistant * Enterprise features Enterprise features * Source control and environments * Understand * Environments * Git in n8n * Branch patterns * Set up * Using * Push and pull * Copy work between environments * Manage variables * Tutorial: Create environments with source control * External secrets * Log streaming * License key * Releases Releases * Release notes Release notes * 1.x * 0.x * v1.0 migration guide * Help and community Help and community * Where to get help * Contributing * Licenses and privacy Licenses and privacy * Privacy and security * Privacy * Security * Incident response * What you can do * Sustainable use license * Integrations * Built-in nodes Built-in nodes * Node types * Core nodes * Activation Trigger * Aggregate * AI Transform * Code * Keyboard shortcuts * Common issues * Compare Datasets * Compression * Chat Trigger * Common issues * Convert to File * Crypto * Date & Time * Debug Helper * Edit Fields (Set) * Edit Image * Email Trigger (IMAP) * Error Trigger * Execute Command * Common issues * Execute Sub-workflow * Execute Sub-workflow Trigger * Execution Data * Extract From File * Filter * FTP * Git * GraphQL * HTML * HTTP Request * Common issues * If * JWT * LDAP * Limit * Local File Trigger * Loop Over Items (Split in Batches) * Manual Trigger * Markdown * MCP Server Trigger * Merge * n8n * n8n Form * n8n Form Trigger * n8n Trigger * No Operation, do nothing No Operation, do nothing Table of contents * Templates and examples * Read/Write Files from Disk * Remove Duplicates * Templates and examples * Rename Keys * Respond to Webhook * RSS Read * RSS Feed Trigger * Schedule Trigger * Common issues * Send Email * Sort * Split Out * SSE Trigger * SSH * Stop And Error * Summarize * Switch * TOTP * Wait * Webhook * Workflow development * Common issues * Workflow Trigger * XML * Actions * Action Network * ActiveCampaign * Adalo * Affinity * Agile CRM * Airtable * Common issues * Airtop * AMQP Sender * APITemplate.io * Asana * Automizy * Autopilot * AWS Certificate Manager * AWS Comprehend * AWS DynamoDB * AWS Elastic Load Balancing * AWS Lambda * AWS Rekognition * AWS S3 * AWS SES * AWS SNS * AWS SQS * AWS Textract * AWS Transcribe * Azure Storage * BambooHR * Bannerbear * Baserow * Beeminder * Bitly * Bitwarden * Box * Brandfetch * Brevo * Bubble * Chargebee * CircleCI * Webex by Cisco * Clearbit * ClickUp * Clockify * Cloudflare * Cockpit * Coda * CoinGecko * Contentful * ConvertKit * Copper * Cortex * CrateDB * crowd.dev * Customer.io * DeepL * Demio * DHL * Discord * Common issues * Discourse * Disqus * Drift * Dropbox * Dropcontact * E-goi * Elasticsearch * Elastic Security * Emelia * ERPNext * Facebook Graph API * FileMaker * Flow * Freshdesk * Freshservice * Freshworks CRM * GetResponse * Ghost * GitHub * GitLab * Gmail * Draft operations * Label operations * Message operations * Thread operations * Common issues * Gong * Google Ads * Google Analytics * Google BigQuery * Google Books * Google Business Profile * Google Calendar * Calendar operations * Event operations * Google Chat * Google Cloud Firestore * Google Cloud Natural Language * Google Cloud Realtime Database * Google Cloud Storage * Google Contacts * Google Docs * Google Drive * File operations * File and folder operations * Folder operations * Shared drive operations * Common issues * Google Perspective * Google Sheets * Document operations * Sheet within Document operations * Common issues * Google Slides * Google Tasks * Google Translate * Google Workspace Admin * Gotify * GoToWebinar * Grafana * Grist * Hacker News * HaloPSA * Harvest * Help Scout * HighLevel * Home Assistant * HubSpot * Humantic AI * Hunter * Intercom * Invoice Ninja * Iterable * Jenkins * Jira Software * Kafka * Keap * Kitemaker * KoboToolbox * Lemlist * Line * Linear * LingvaNex * LinkedIn * LoneScale * Magento 2 * Mailcheck * Mailchimp * MailerLite * Mailgun * Mailjet * Mandrill * marketstack * Matrix * Mattermost * Mautic * Medium * MessageBird * Metabase * Microsoft Dynamics CRM * Microsoft Entra ID * Microsoft Excel 365 * Microsoft Graph Security * Microsoft OneDrive * Microsoft Outlook * Microsoft SQL * Microsoft Teams * Microsoft To Do * Mindee * MISP * Mocean * monday.com * MongoDB * Monica CRM * MQTT * MSG91 * MySQL * Common issues * Customer Datastore (n8n Training) * Customer Messenger (n8n Training) * NASA * Netlify * Netscaler ADC * Nextcloud * NocoDB * Notion * Common issues * npm * Odoo * Okta * One Simple API * Onfleet * OpenAI * Assistant operations * Audio operations * File operations * Image operations * Text operations * Common issues * OpenThesaurus * OpenWeatherMap * Oura * Paddle * PagerDuty * PayPal * Peekalink * PhantomBuster * Philips Hue * Pipedrive * Plivo * PostBin * Postgres * Common issues * PostHog * ProfitWell * Pushbullet * Pushcut * Pushover * QuestDB * Quick Base * QuickBooks Online * QuickChart * RabbitMQ * Raindrop * Reddit * Redis * Rocket.Chat * Rundeck * S3 * Salesforce * Salesmate * SeaTable * SecurityScorecard * Segment * SendGrid * Sendy * Sentry.io * ServiceNow * seven * Shopify * SIGNL4 * Slack * Snowflake * Splunk * Spontit * Spotify * Stackby * Storyblok * Strapi * Strava * Stripe * Supabase * Common issues * SyncroMSP * Taiga * Tapfiliate * Telegram * Chat operations * Callback operations * File operations * Message operations * Common issues * TheHive * TheHive 5 * TimescaleDB * Todoist * Travis CI * Trello * Twake * Twilio * Twist * Unleashed Software * UpLead * uProc * UptimeRobot * urlscan.io * Venafi TLS Protect Cloud * Venafi TLS Protect Datacenter * Vero * Vonage * Webflow * Wekan * WhatsApp Business Cloud * Common issues * Wise * WooCommerce * WordPress * X (Formerly Twitter) * Xero * Yourls * YouTube * Zammad * Zendesk * Zoho CRM * Zoom * Zulip * Triggers * ActiveCampaign Trigger * Acuity Scheduling Trigger * Affinity Trigger * Airtable Trigger * AMQP Trigger * Asana Trigger * Autopilot Trigger * AWS SNS Trigger * Bitbucket Trigger * Box Trigger * Brevo Trigger * Calendly Trigger * Cal Trigger * Chargebee Trigger * ClickUp Trigger * Clockify Trigger * ConvertKit Trigger * Copper Trigger * crowd.dev Trigger * Customer.io Trigger * Emelia Trigger * Eventbrite Trigger * Facebook Lead Ads Trigger * Facebook Trigger * Ad Account * Application * Certificate Transparency * Group * Instagram * Link * Page * Permissions * User * WhatsApp Business Account * Workplace Security * Figma Trigger (Beta) * Flow Trigger * Form.io Trigger * Formstack Trigger * GetResponse Trigger * GitHub Trigger * GitLab Trigger * Gmail Trigger * Poll Mode options * Common issues * Google Calendar Trigger * Google Drive Trigger * Common issues * Google Business Profile Trigger * Google Sheets Trigger * Common issues * Gumroad Trigger * Help Scout Trigger * Hubspot Trigger * Invoice Ninja Trigger * Jira Trigger * JotForm Trigger * Kafka Trigger * Keap Trigger * KoboToolbox Trigger * Lemlist Trigger * Linear Trigger * LoneScale Trigger * Mailchimp Trigger * MailerLite Trigger * Mailjet Trigger * Mautic Trigger * Microsoft OneDrive Trigger * Microsoft Outlook Trigger * MQTT Trigger * Netlify Trigger * Notion Trigger * Onfleet Trigger * PayPal Trigger * Pipedrive Trigger * Postgres Trigger * Postmark Trigger * Pushcut Trigger * RabbitMQ Trigger * Redis Trigger * Salesforce Trigger * SeaTable Trigger * Shopify Trigger * Slack Trigger * Strava Trigger * Stripe Trigger * SurveyMonkey Trigger * Taiga Trigger * Telegram Trigger * Common issues * TheHive 5 Trigger * TheHive Trigger * Toggl Trigger * Trello Trigger * Twilio Trigger * Typeform Trigger * Venafi TLS Protect Cloud Trigger * Webex by Cisco Trigger * Webflow Trigger * WhatsApp Trigger * Wise Trigger * WooCommerce Trigger * Workable Trigger * Wufoo Trigger * Zendesk Trigger * Cluster nodes * Root nodes * AI Agent * Conversational Agent * OpenAI Functions Agent * Plan and Execute Agent * ReAct Agent * SQL Agent * Tools Agent * Common issues * Basic LLM Chain * Question and Answer Chain * Common issues * Summarization Chain * Information Extractor * Text Classifier * Sentiment Analysis * LangChain Code * Simple Vector Store * Milvus Vector Store * MongoDB Atlas Vector Store * PGVector Vector Store * Pinecone Vector Store * Qdrant Vector Store * Supabase Vector Store * Zep Vector Store * Sub-nodes * Default Data Loader * GitHub Document Loader * Embeddings AWS Bedrock * Embeddings Azure OpenAI * Embeddings Cohere * Embeddings Google Gemini * Embeddings Google PaLM * Embeddings Google Vertex * Embeddings HuggingFace Inference * Embeddings Mistral Cloud * Embeddings Ollama * Embeddings OpenAI * Anthropic Chat Model * AWS Bedrock Chat Model * Azure OpenAI Chat Model * DeepSeek Chat Model * Google Gemini Chat Model * Google Vertex Chat Model * Groq Chat Model * Mistral Cloud Chat Model * Ollama Chat Model * Common issues * OpenAI Chat Model * Common issues * OpenRouter Chat Model * Cohere Model * Ollama Model * Common issues * Hugging Face Inference Model * Chat Memory Manager * Simple Memory * Common issues * Motorhead * MongoDB Chat Memory * Redis Chat Memory * Postgres Chat Memory * Xata * Zep * Auto-fixing Output Parser * Item List Output Parser * Structured Output Parser * Common issues * Contextual Compression Retriever * MultiQuery Retriever * Vector Store Retriever * Workflow Retriever * Character Text Splitter * Recursive Character Text Splitter * Token Splitter * Calculator * Custom Code Tool * HTTP Request Tool * MCP Client Tool * SerpApi (Google Search) * Think Tool * Vector Store Question Answer Tool * Wikipedia * Wolfram|Alpha * Custom n8n Workflow Tool * Credentials * Action Network credentials * ActiveCampaign credentials * Acuity Scheduling credentials * Adalo credentials * Affinity credentials * Agile CRM credentials * Airtable credentials * Airtop credentials * AlienVault credentials * AMQP credentials * Anthropic credentials * APITemplate.io credentials * Asana credentials * Auth0 Management credentials * Automizy credentials * Autopilot credentials * AWS credentials * Azure OpenAI credentials * Azure Storage credentials * BambooHR credentials * Bannerbear credentials * Baserow credentials * Beeminder credentials * Bitbucket credentials * Bitly credentials * Bitwarden credentials * Box credentials * Brandfetch credentials * Brevo credentials * Bubble credentials * Cal.com credentials * Calendly credentials * Carbon Black credentials * Chargebee credentials * CircleCI credentials * Cisco Meraki credentials * Cisco Secure Endpoint credentials * Cisco Umbrella credentials * Clearbit credentials * ClickUp credentials * Clockify credentials * Cloudflare credentials * Cockpit credentials * Coda credentials * Cohere credentials * Contentful credentials * ConvertAPI credentials * ConvertKit credentials * Copper credentials * Cortex credentials * CrateDB credentials * crowd.dev credentials * CrowdStrike credentials * Customer.io credentials * Datadog credentials * DeepL credentials * DeepSeek credentials * Demio credentials * DFIR-IRIS credentials * DHL credentials * Discord credentials * Discourse credentials * Disqus credentials * Drift credentials * Dropbox credentials * Dropcontact credentials * Dynatrace credentials * E-goi credentials * Elasticsearch credentials * Elastic Security credentials * Emelia credentials * ERPNext credentials * Eventbrite credentials * F5 Big-IP credentials * Facebook App credentials * Facebook Graph API credentials * Facebook Lead Ads credentials * Figma credentials * FileMaker credentials * Filescan credentials * Flow credentials * Form.io Trigger credentials * Formstack Trigger credentials * Fortinet FortiGate credentials * Freshdesk credentials * Freshservice credentials * Freshworks CRM credentials * FTP credentials * GetResponse credentials * Ghost credentials * Git credentials * GitHub credentials * GitLab credentials * Gong credentials * Google * Google OAuth2 single service * Google OAuth2 generic * Google Service Account * Google Gemini(PaLM) credentials * Gotify credentials * GoToWebinar credentials * Grafana credentials * Grist credentials * Groq credentials * Gumroad credentials * HaloPSA credentials * Harvest credentials * Help Scout credentials * HighLevel credentials * Home Assistant credentials * HTTP Request credentials * HubSpot credentials * Hugging Face credentials * Humantic AI credentials * Hunter credentials * Hybrid Analysis credentials * IMAP * Gmail * Outlook.com * Yahoo * Imperva WAF credentials * Intercom credentials * Invoice Ninja credentials * Iterable credentials * Jenkins credentials * Jira credentials * JotForm credentials * JWT credentials * Kafka credentials * Keap credentials * Kibana credentials * Kitemaker credentials * KoboToolbox credentials * LDAP credentials * Lemlist credentials * Line credentials * Linear credentials * LingvaNex credentials * LinkedIn credentials * LoneScale credentials * Magento 2 credentials * Mailcheck credentials * Mailchimp credentials * MailerLite credentials * Mailgun credentials * Mailjet credentials * Malcore credentials * Mandrill credentials * Marketstack credentials * Matrix credentials * Mattermost credentials * Mautic credentials * Medium credentials * MessageBird credentials * Metabase credentials * Microsoft credentials * Microsoft Azure Monitor credentials * Microsoft Entra ID credentials * Microsoft SQL credentials * Milvus credentials * Mindee credentials * Miro credentials * MISP credentials * Mist credentials * Mistral Cloud credentials * Mocean credentials * monday.com credentials * MongoDB credentials * Monica CRM credentials * Motorhead credentials * MQTT credentials * MSG91 credentials * MySQL credentials * NASA credentials * Netlify credentials * Netscaler ADC credentials * Nextcloud credentials * NocoDB credentials * Notion credentials * npm credentials * Odoo credentials * Okta credentials * Ollama credentials * One Simple API credentials * Onfleet credentials * OpenAI credentials * OpenCTI credentials * OpenRouter credentials * OpenWeatherMap credentials * Oura credentials * Paddle credentials * PagerDuty credentials * PayPal credentials * Peekalink credentials * PhantomBuster credentials * Philips Hue credentials * Pinecone credentials * Pipedrive credentials * Plivo credentials * Postgres credentials * PostHog credentials * Postmark credentials * ProfitWell credentials * Pushbullet credentials * Pushcut credentials * Pushover credentials * QRadar credentials * Qdrant credentials * Qualys credentials * QuestDB credentials * Quick Base credentials * QuickBooks credentials * RabbitMQ credentials * Raindrop credentials * Rapid7 InsightVM credentials * Recorded Future credentials * Reddit credentials * Redis credentials * Rocket.Chat credentials * Rundeck credentials * S3 credentials * Salesforce credentials * Salesmate credentials * SeaTable credentials * SecurityScorecard credentials * Segment credentials * Sekoia credentials * Send Email * Gmail * Outlook.com * Yahoo * SendGrid credentials * Sendy credentials * Sentry.io credentials * Serp credentials * ServiceNow credentials * seven credentials * Shopify credentials * Shuffler credentials * SIGNL4 credentials * Slack credentials * Snowflake credentials * SolarWinds IPAM credentials * SolarWinds Observability SaaS credentials * Splunk credentials * Spontit credentials * Spotify credentials * SSH credentials * Stackby credentials * Storyblok credentials * Strapi credentials * Strava credentials * Stripe credentials * Supabase credentials * SurveyMonkey credentials * SyncroMSP credentials * Sysdig credentials * Taiga credentials * Tapfiliate credentials * Telegram credentials * TheHive credentials * TheHive 5 credentials * TimescaleDB credentials * Todoist credentials * Toggl credentials * TOTP credentials * Travis CI credentials * Trellix ePO credentials * Trello credentials * Twake credentials * Twilio credentials * Twist credentials * Typeform credentials * Unleashed Software credentials * UpLead credentials * uProc credentials * UptimeRobot credentials * urlscan.io credentials * Venafi TLS Protect Cloud credentials * Venafi TLS Protect Datacenter credentials * Vero credentials * VirusTotal credentials * Vonage credentials * Webex by Cisco credentials * Webflow credentials * Webhook credentials * Wekan credentials * WhatsApp Business Cloud credentials * Wise credentials * Wolfram|Alpha credentials * WooCommerce credentials * WordPress credentials * Workable credentials * Wufoo credentials * X (formerly Twitter) credentials * Xata credentials * Xero credentials * Yourls credentials * Zabbix credentials * Zammad credentials * Zendesk credentials * Zep credentials * Zoho credentials * Zoom credentials * Zscaler ZIA credentials * Zulip credentials * Custom API actions for existing nodes * Handle rate limits * Community nodes Community nodes * Installation and management * GUI installation * Manual installation * Risks * Blocklist * Using community nodes * Troubleshooting * Building community nodes * Creating nodes Creating nodes * Overview * Plan your node * Choose a node type * Choose a node building style * Node UI design * Choose node file structure * Build your node * Set up your development environment * Tutorial: Build a declarative-style node * Tutorial: Build a programmatic-style node * Reference * Node UI elements * Code standards * Versioning * Choose node file structure * Base files * Structure * Standard parameters * Declarative-style parameters * Programmatic-style parameters * Programmatic-style execute method * Codex files * Credentials files * HTTP request helpers * Item linking * Test your node * Run your node locally * Node linter * Troubleshooting * Deploy your node * Submit community nodes * Install private nodes * Hosting n8n * Community vs Enterprise * Installation Installation * npm * Docker * Server setups * Digital Ocean * Heroku * Hetzner * Amazon Web Services * Azure * Google Cloud * Docker Compose * Updating * Configuration Configuration * Environment variables * Binary data * Credentials * Database * Deployment * Endpoints * Executions * External data storage * External hooks * External secrets * Logs * License * Nodes * Queue mode * Security * Source control * Task runners * Timezone and localization * User management and 2FA * Workflows * Configuration methods * Configuration examples * Isolate n8n * Configure the Base URL * Configure custom SSL certificate authorities * Set a custom encryption key * Configure workflow timeouts * Specify custom nodes location * Enable modules in Code node * Set the timezone * Specify user folder path * Configure webhook URLs with reverse proxy * Enable Prometheus metrics * Supported databases and settings * Task runners * User management * Logging and monitoring Logging and monitoring * Logging * Monitoring * Security audit * Scaling and performance Scaling and performance * Overview * Performance and benchmarking * Configuring queue mode * Concurrency control * Execution data * Binary data * External storage for binary data * Memory-related errors * Securing n8n Securing n8n * Overview * Set up SSL * Set up SSO * Security audit * Disable the API * Opt out of data collection * Blocking nodes * Hardening task runners * Starter Kits Starter Kits * AI Starter Kit * Architecture Architecture * Overview * Database structure * Using the CLI Using the CLI * CLI commands * Code in n8n * Expressions * Using the Code node * AI coding * Built in methods and variables Built in methods and variables * Overview * Current node input * Output of other nodes * Date and time * JMESPath * HTTP node * LangChain Code node * n8n metadata * Convenience methods * Data transformation functions * Arrays * Booleans * Dates * Numbers * Objects * Strings * Custom variables Custom variables * Create custom variables * Cookbook Cookbook * Handling dates * Query JSON with JMESPath * Built-in methods and variables examples * execution * getWorkflowStaticData * Retrieve linked items from earlier in the workflow * (node-name).all * vars * Expressions * Check incoming data * Common issues * Code node * Get number of items returned by last node * Get the binary data buffer * Output to the browser console * HTTP Request node * Pagination * Advanced AI * Tutorial: Build an AI workflow in n8n * LangChain in n8n LangChain in n8n * Overview * Langchain concepts in n8n * LangChain learning resources * Use LangSmith with n8n * Examples and concepts Examples and concepts * Introduction * What is a chain? * What is an agent? * Agents vs chains example * What is memory? * What is a tool? * Use Google Sheets as a data source * Call an API to fetch data * Set a human fallback for AI workflows * Let AI specify tool parameters * What is a vector database? * Populate a Pinecone vector database from a website * API * Authentication * Pagination * Using the API playground * API reference * Embed * Prerequisites * Deployment * Configuration * Workflow management * Workflows templates * White labelling Table of contents * Templates and examples 1. Integrations 2. Built-in nodes 3. Core nodes Use the No Operation, do nothing node when you don't want to perform any operations. The purpose of this node is to make the workflow easier to read and understand where the flow of data stops. This can help others visually get a better understanding of the workflow. ## Templates and examples# --- ## Page: https://docs.n8n.io/integrations/builtin/core-nodes/n8n-nodes-base.readwritefile/ Use the Read/Write Files from Disk node to read and write files from/to the machine where n8n is running. Self-hosted n8n only This node isn't available on n8n Cloud. ## Operations# * **Read File(s) From Disk**: Use this operation to retrieve one or more files from the computer that runs n8n. * **Write File to Disk**: Use this operation to create a binary file on the computer that runs n8n. Refer to the sections below for more information on configuring the node for each operation. ## Read File(s) From Disk# Configure this operation with these parameters: * **File(s) Selector**: Enter the path of the file you want to read. * To enter multiple files, enter a page path pattern. You can use these characters to define a path pattern: * `*`: Matches any character zero or more times, excluding path separators. * `**`: Matches any character zero or more times, include path separators. * `?`: Matches any character except for path separators one time. * `[]`: Matches any characters inside the brackets. For example, `[abc]` would match the characters `a`, `b`, or `c`, and nothing else. Refer to Picomatch's Basic globbing documentation for more information on these characters and their expected behavior. ### Read File(s) From Disk options# You can also configure this operation with these **Options**: * **File Extension**: Enter the extension for the file in the node output. * **File Name**: Enter the name for the file in the node output. * **MIME Type**: Enter the file's MIME type in the node output. Refer to Common MIME types for a list of file extensions and their MIME types. * **Put Output File in Field**: Enter the name of the field in the output data to contain the file. ## Write File to Disk# Configure this operation with these parameters: * **File Path and Name**: Enter the destination for the file, the file's name, and the file's extension. * **Input Binary Field**: Enter the name of the field in the node input data that will contain the binary file. ### Write File to Disk options# You can also configure this operation with these **Options**: This operation includes a single option, whether to **Append** data to an existing file instead of creating a new one (turned on) or to create a new file instead of appending to existing (turned off). ## Templates and examples# ## File locations# If you run n8n in Docker, your command runs in the n8n container and not the Docker host. This node looks for files relative to the n8n install path. n8n recommends using absolute file paths to prevent any errors. --- ## Page: https://docs.n8n.io/integrations/builtin/core-nodes/n8n-nodes-base.removeduplicates/ Use the Remove Duplicates node to identify and delete items that are: * identical across all fields or a subset of fields in a single execution * identical to or surpassed by items seen in previous executions This is helpful in situations where you can end up with duplicate data, such as a user creating multiple accounts, or a customer submitting the same order multiple times. When working with large datasets it becomes more difficult to spot and remove these items. By comparing against data from previous executions, the Remove Duplicates node can delete items seen in earlier executions. It can also ensure that new items have a later date or a higher value than previous values. Major changes in 1.64.0 The n8n team overhauled this node in n8n 1.64.0. This document reflects the latest version of the node. If you're using an older version of n8n, you can find the previous version of this document here. ## Operation modes# The remove duplication node works differently depending on the value of the **operation** parameter: * **Remove Items Repeated Within Current Input**: Identify and remove duplicate items in the current input across all fields or a subset of fields. * **Remove Items Processed in Previous Executions**: Compare items in the current input to items from previous executions and remove duplicates. * **Clear Deduplication History**: Wipe the memory of items from previous executions. ### Remove Items Repeated Within Current Input# When you set the "Operations" field to **Remove Items Repeated Within Current Input**, the Remove Duplicate node identifies and removes duplicate items in the current input. It can do this across all fields, or within a subset of fields. #### Remove Items Repeated Within Current Input parameters# When using the **Remove Items Repeated Within Current Input** operation, the following parameter is available: * **Compare**: Select which fields of the input data n8n should compare to check if they're the same. The following options are available: * **All Fields**: Compares all fields of the input data. * **All Fields Except**: Enter which input data fields n8n should exclude from the comparison. You can provide multiple values separated by commas. * **Selected Fields**: Enter which input data fields n8n should include in the comparison. You can provide multiple values separated by commas. #### Remove Items Repeated Within Current Input options# If you choose **All Fields Except** or **Selected Fields** as your compare type, you can add these options: * **Disable Dot Notation**: Set whether to use dot notation to reference child fields in the format `parent.child` (turned off) or not (turn on). * **Remove Other Fields**: Set whether to remove any fields that aren't used in the comparison (turned on) or not (turned off). ### Remove Items Processed in Previous Executions# When you set the "Operation" field to **Remove Items Processed in Previous Executions**, the Remove Duplicate node compares items in the current input to items from previous executions. #### Remove Items Processed in Previous Executions parameters# When using the **Remove Items Processed in Previous Executions** operation, the following parameters are available: * **Keep Items Where**: Select how n8n decides which items to keep. The following options are available: * **Value Is New**: n8n removes items if their value matches items from earlier executions. * **Value Is Higher than Any Previous Value**: n8n removes items if the current value isn't higher than previous values. * **Value Is a Date Later than Any Previous Date**: n8n removes date items if the current date isn't later than previous dates. * **Value to Dedupe On**: The input field or fields to compare. The option you select for the **Keep Items Where** parameter determines the exact format you need: * When using **Value Is New**, this must be an input field or combination of fields with a unique ID. * When using **Value Is Higher than Any Previous Value**, this must be an input field or combination of fields that has an incremental value. * When using **Value Is a Date Later than Any Previous Date**, this must be an input field that has a date value in ISO format. #### Remove Items Processed in Previous Executions options# When using the **Remove Items Processed in Previous Executions** operation, the following option is available: * **Scope**: Sets how n8n stores and uses the deduplication data for comparisons. The following options are available: * **Node**: (default) Stores the data for this node independently from other Remove Duplicates instances in the workflow. When you use this scope, you can clear the duplication history for this node instance without affecting other nodes. * **Workflow**: Stores the duplication data at the workflow level. This shares duplication data with any other Remove Duplicate nodes set to use "workflow" scope. n8n will still manage the duplication data for other Remove Duplicate nodes set to "node" scope independently. When you select **Value Is New** as your **Keep Items Where** choice, this option is also available: * **History Size**: The number of items for n8n to store to track duplicates across executions. The value of the **Scope** option determines whether this history size is specific to this individual Remove Duplicate node instance or shared with other instances in the workflow. By default, n8n stores 10,000 items. ### Clear Deduplication History# When you set the "Operation" field to **Clear Deduplication History**, the Remove Duplicates node manages and clears the stored items from previous executions. This operation doesn't affect any items in the current input. Instead, it manages the database of items that the "Remove Items Processed in Previous Executions" operation uses. #### Clear Deduplication History parameters# When using the **Clear Deduplication History** operation, the following parameter is available: * **Mode**: How you want to manage the key / value items stored in the database. The following option is available: * **Clean Database**: Deletes all duplication data stored in the database. This resets the duplication database to its original state. #### Clear Deduplication History options# When using the **Clear Deduplication History** operation, the following option is available: * **Scope**: Sets the scope n8n uses when managing the duplication database. * **Node**: (default) Manages the duplication database specific to this Remove Duplicates node instance. * **Workflow**: Manages the duplication database shared by all Remove Duplicate node instances that use workflow scope. ## Templates and examples# For templates using the Remove Duplicates node and examples of how to use it, refer to Templates and examples. Learn more about data structure and data flow in n8n workflows. --- ## Page: https://docs.n8n.io/integrations/builtin/core-nodes/n8n-nodes-base.removeduplicates/templates-and-examples/ Here are some templates and examples for the Remove Duplicates node. Continuous examples The examples included in this section are a sequence. Follow from one to another to avoid unexpected results. ## Templates# Browse Templates and examples integration templates, or search all templates ## Set up sample data using the Code node# Create a workflow with some example input data to try out the Remove Duplicates node. 1. Add a Code node to the canvas and connect it to the Manual Trigger node. 2. In the Code node, set **Mode** to **Run Once for Each Item** and **Language** to **JavaScript**. 3. Paste the following JavaScript code snippet in the **JavaScript** field: <table><tbody><tr><td><div><pre><span></span><span> 1</span> <span> 2</span> <span> 3</span> <span> 4</span> <span> 5</span> <span> 6</span> <span> 7</span> <span> 8</span> <span> 9</span> <span>10</span> <span>11</span> <span>12</span> <span>13</span> <span>14</span> <span>15</span> <span>16</span> <span>17</span> <span>18</span> <span>19</span> <span>20</span> <span>21</span> <span>22</span></pre></div></td><td><div><pre><span></span><code><span>let</span><span> </span><span>data</span><span> </span><span>=</span><span>[];</span> <span>return</span><span> </span><span>{</span> <span> </span><span>data</span><span>:</span><span> </span><span>[</span> <span> </span><span>{</span><span> </span><span>id</span><span>:</span><span> </span><span>1</span><span>,</span><span> </span><span>name</span><span>:</span><span> </span><span>'Taylor Swift'</span><span>,</span><span> </span><span>job</span><span>:</span><span> </span><span>'Pop star'</span><span>,</span><span> </span><span>last_updated</span><span>:</span><span> </span><span>'2024-09-20T10:12:43.493Z'</span><span> </span><span>},</span> <span> </span><span>{</span><span> </span><span>id</span><span>:</span><span> </span><span>2</span><span>,</span><span> </span><span>name</span><span>:</span><span> </span><span>'Ed Sheeran'</span><span>,</span><span> </span><span>job</span><span>:</span><span> </span><span>'Singer-songwriter'</span><span>,</span><span> </span><span>last_updated</span><span>:</span><span> </span><span>'2024-10-05T08:30:59.493Z'</span><span> </span><span>},</span> <span> </span><span>{</span><span> </span><span>id</span><span>:</span><span> </span><span>3</span><span>,</span><span> </span><span>name</span><span>:</span><span> </span><span>'Adele'</span><span>,</span><span> </span><span>job</span><span>:</span><span> </span><span>'Singer-songwriter'</span><span>,</span><span> </span><span>last_updated</span><span>:</span><span> </span><span>'2024-10-07T14:15:59.493Z'</span><span> </span><span>},</span> <span> </span><span>{</span><span> </span><span>id</span><span>:</span><span> </span><span>4</span><span>,</span><span> </span><span>name</span><span>:</span><span> </span><span>'Bruno Mars'</span><span>,</span><span> </span><span>job</span><span>:</span><span> </span><span>'Singer-songwriter'</span><span>,</span><span> </span><span>last_updated</span><span>:</span><span> </span><span>'2024-08-25T17:45:12.493Z'</span><span> </span><span>},</span> <span> </span><span>{</span><span> </span><span>id</span><span>:</span><span> </span><span>1</span><span>,</span><span> </span><span>name</span><span>:</span><span> </span><span>'Taylor Swift'</span><span>,</span><span> </span><span>job</span><span>:</span><span> </span><span>'Pop star'</span><span>,</span><span> </span><span>last_updated</span><span>:</span><span> </span><span>'2024-09-20T10:12:43.493Z'</span><span> </span><span>},</span><span> </span><span>// duplicate</span> <span> </span><span>{</span><span> </span><span>id</span><span>:</span><span> </span><span>5</span><span>,</span><span> </span><span>name</span><span>:</span><span> </span><span>'Billie Eilish'</span><span>,</span><span> </span><span>job</span><span>:</span><span> </span><span>'Singer-songwriter'</span><span>,</span><span> </span><span>last_updated</span><span>:</span><span> </span><span>'2024-09-10T09:30:12.493Z'</span><span> </span><span>},</span> <span> </span><span>{</span><span> </span><span>id</span><span>:</span><span> </span><span>6</span><span>,</span><span> </span><span>name</span><span>:</span><span> </span><span>'Katy Perry'</span><span>,</span><span> </span><span>job</span><span>:</span><span> </span><span>'Pop star'</span><span>,</span><span> </span><span>last_updated</span><span>:</span><span> </span><span>'2024-10-08T12:30:45.493Z'</span><span> </span><span>},</span> <span> </span><span>{</span><span> </span><span>id</span><span>:</span><span> </span><span>2</span><span>,</span><span> </span><span>name</span><span>:</span><span> </span><span>'Ed Sheeran'</span><span>,</span><span> </span><span>job</span><span>:</span><span> </span><span>'Singer-songwriter'</span><span>,</span><span> </span><span>last_updated</span><span>:</span><span> </span><span>'2024-10-05T08:30:59.493Z'</span><span> </span><span>},</span><span> </span><span>// duplicate</span> <span> </span><span>{</span><span> </span><span>id</span><span>:</span><span> </span><span>7</span><span>,</span><span> </span><span>name</span><span>:</span><span> </span><span>'Lady Gaga'</span><span>,</span><span> </span><span>job</span><span>:</span><span> </span><span>'Pop star'</span><span>,</span><span> </span><span>last_updated</span><span>:</span><span> </span><span>'2024-09-15T14:45:30.493Z'</span><span> </span><span>},</span> <span> </span><span>{</span><span> </span><span>id</span><span>:</span><span> </span><span>8</span><span>,</span><span> </span><span>name</span><span>:</span><span> </span><span>'Rihanna'</span><span>,</span><span> </span><span>job</span><span>:</span><span> </span><span>'Pop star'</span><span>,</span><span> </span><span>last_updated</span><span>:</span><span> </span><span>'2024-10-01T11:50:22.493Z'</span><span> </span><span>},</span> <span> </span><span>{</span><span> </span><span>id</span><span>:</span><span> </span><span>3</span><span>,</span><span> </span><span>name</span><span>:</span><span> </span><span>'Adele'</span><span>,</span><span> </span><span>job</span><span>:</span><span> </span><span>'Singer-songwriter'</span><span>,</span><span> </span><span>last_updated</span><span>:</span><span> </span><span>'2024-10-07T14:15:59.493Z'</span><span> </span><span>},</span><span> </span><span>// duplicate</span> <span> </span><span>//{ id: 9, name: 'Tom Hanks', job: 'Actor', last_updated: '2024-10-17T13:58:31.493Z' },</span> <span> </span><span>//{ id: 0, name: 'Madonna', job: 'Pop star', last_updated: '2024-10-17T17:11:38.493Z' },</span> <span> </span><span>//{ id: 15, name: 'Bob Dylan', job: 'Folk singer', last_updated: '2024-09-24T08:03:16.493Z'},</span> <span> </span><span>//{ id: 10, name: 'Harry Nilsson', job: 'Singer-songwriter', last_updated: '2020-10-17T17:11:38.493Z' },</span> <span> </span><span>//{ id: 11, name: 'Kylie Minogue', job: 'Pop star', last_updated: '2024-10-24T08:03:16.493Z'},</span> <span> </span><span>]</span> <span>}</span> </code></pre></div></td></tr></tbody></table> 4. Add a Split Out node to the canvas and connect it to the Code node. 5. In the Split Out node, enter `data` in the **Fields To Split Out** field. ## Removing duplicates from the current input# 1. Add a Remove Duplicates node to the canvas and connect it to the Split Out node. Choose **Remove items repeated within current input** as the **Action** to start. 2. Open the Remove Duplicates node and ensure that the **Operation** is set to **Remove Items Repeated Within Current Input**. 3. Choose **All fields** in the **Compare** field. 4. Select **Test step** to run the Remove Duplicates node, removing duplicated data in the current input. n8n removes the items that have the same data across all fields. Your output in table view should look like this: | **id** | **name** | **job** | **last\_updated** | | --- | --- | --- | --- | | 1 | Taylor Swift | Pop star | 2024-09-20T10:12:43.493Z | | 2 | Ed Sheeran | Singer-songwriter | 2024-10-05T08:30:59.493Z | | 3 | Adele | Singer-songwriter | 2024-10-07T14:15:59.493Z | | 4 | Bruno Mars | Singer-songwriter | 2024-08-25T17:45:12.493Z | | 5 | Billie Eilish | Singer-songwriter | 2024-09-10T09:30:12.493Z | | 6 | Katy Perry | Pop star | 2024-10-08T12:30:45.493Z | | 7 | Lady Gaga | Pop star | 2024-09-15T14:45:30.493Z | | 8 | Rihanna | Pop star | 2024-10-01T11:50:22.493Z | 5. Open the Remove Duplicates node again and change the **Compare** parameter to **Selected Fields**. 6. In the **Fields To Compare** field, enter `job`. 7. Select **Test step** to run the Remove Duplicates node, removing duplicated data in the current input. n8n removes the items in the current input that have the same `job` data. Your output in table view should look like this: | **id** | **name** | **job** | **last\_updated** | | --- | --- | --- | --- | | 1 | Taylor Swift | Pop star | 2024-09-20T10:12:43.493Z | | 2 | Ed Sheeran | Singer-songwriter | 2024-10-05T08:30:59.493Z | ## Keep items where the value is new# 1. Open the Remove Duplicates node and set the **Operation** to **Remove Items Processed in Previous Executions**. 2. Set the **Keep Items Where** parameter to **Value Is New**. 3. Set the **Value to Dedupe On** parameter to `{{ $json.name }}`. 4. On the canvas, select **Test workflow** to run the workflow. Open the Remove Duplicates node to examine the results. n8n compares the current input data to the items stored from previous executions. Since this is the first time running the Remove Duplicates node with this operation, n8n processes all data items and places them into the **Kept** output tab. The order of the items may be different than the order in the input data: | **id** | **name** | **job** | **last\_updated** | | --- | --- | --- | --- | | 1 | Taylor Swift | Pop star | 2024-09-20T10:12:43.493Z | | 1 | Taylor Swift | Pop star | 2024-09-20T10:12:43.493Z | | 2 | Ed Sheeran | Singer-songwriter | 2024-10-05T08:30:59.493Z | | 2 | Ed Sheeran | Singer-songwriter | 2024-10-05T08:30:59.493Z | | 3 | Adele | Singer-songwriter | 2024-10-07T14:15:59.493Z | | 3 | Adele | Singer-songwriter | 2024-10-07T14:15:59.493Z | | 4 | Bruno Mars | Singer-songwriter | 2024-08-25T17:45:12.493Z | | 5 | Billie Eilish | Singer-songwriter | 2024-09-10T09:30:12.493Z | | 6 | Katy Perry | Pop star | 2024-10-08T12:30:45.493Z | | 7 | Lady Gaga | Pop star | 2024-09-15T14:45:30.493Z | | 8 | Rihanna | Pop star | 2024-10-01T11:50:22.493Z | Items are only compared against previous executions The current input items are only compared against the stored items from previous executions. This means that items repeated within the current input aren't removed in this mode of operation. If you need to remove duplicate items within the current input _and_ across executions, connect two Remove Duplicate nodes together sequentially. Set the first to use the **Remove Items Repated Within Current Input** operation and the second to use the **Remove Items Processed in Previous Executions** operation. 5. Open the Code node and uncomment (remove the `//` from) the line for "Tom Hanks." 6. On the canvas, select **Test workflow** again. Open the Remove Duplicates node again to examine the results. n8n compares the current input data to the items stored from previous executions. This time, the **Kept** tab contains the one new record from the Code node: | **id** | **name** | **job** | **last\_updated** | | --- | --- | --- | --- | | 9 | Tom Hanks | Actor | 2024-10-17T13:58:31.493Z | The **Discarded** tab contains the items processed by the previous execution: | **id** | **name** | **job** | **last\_updated** | | --- | --- | --- | --- | | 1 | Taylor Swift | Pop star | 2024-09-20T10:12:43.493Z | | 1 | Taylor Swift | Pop star | 2024-09-20T10:12:43.493Z | | 2 | Ed Sheeran | Singer-songwriter | 2024-10-05T08:30:59.493Z | | 2 | Ed Sheeran | Singer-songwriter | 2024-10-05T08:30:59.493Z | | 3 | Adele | Singer-songwriter | 2024-10-07T14:15:59.493Z | | 3 | Adele | Singer-songwriter | 2024-10-07T14:15:59.493Z | | 4 | Bruno Mars | Singer-songwriter | 2024-08-25T17:45:12.493Z | | 5 | Billie Eilish | Singer-songwriter | 2024-09-10T09:30:12.493Z | | 6 | Katy Perry | Pop star | 2024-10-08T12:30:45.493Z | | 7 | Lady Gaga | Pop star | 2024-09-15T14:45:30.493Z | | 8 | Rihanna | Pop star | 2024-10-01T11:50:22.493Z | Before continuing, clear the duplication history to get ready for the next example: 7. Open the Remove Duplicates node and set the **Operation** to **Clear Deduplication History**. 8. Select **Test step** to clear the current duplication history. ## Keep items where the value is higher than any previous value# 1. Open the Remove Duplicates node and set the **Operation** to **Remove Items Processed in Previous Executions**. 2. Set the **Keep Items Where** parameter to **Value Is Higher than Any Previous Value**. 3. Set the **Value to Dedupe On** parameter to `{{ $json.id }}`. 4. On the canvas, select **Test workflow** to run the workflow. Open the Remove Duplicates node to examine the results. n8n compares the current input data to the items stored from previous executions. Since this is the first time running the Remove Duplicates node after clearing the history, n8n processes all data items and places them into the **Kept** output tab. The order of the items may be different than the order in the input data: | **id** | **name** | **job** | **last\_updated** | | --- | --- | --- | --- | | 1 | Taylor Swift | Pop star | 2024-09-20T10:12:43.493Z | | 1 | Taylor Swift | Pop star | 2024-09-20T10:12:43.493Z | | 2 | Ed Sheeran | Singer-songwriter | 2024-10-05T08:30:59.493Z | | 2 | Ed Sheeran | Singer-songwriter | 2024-10-05T08:30:59.493Z | | 3 | Adele | Singer-songwriter | 2024-10-07T14:15:59.493Z | | 3 | Adele | Singer-songwriter | 2024-10-07T14:15:59.493Z | | 4 | Bruno Mars | Singer-songwriter | 2024-08-25T17:45:12.493Z | | 5 | Billie Eilish | Singer-songwriter | 2024-09-10T09:30:12.493Z | | 6 | Katy Perry | Pop star | 2024-10-08T12:30:45.493Z | | 7 | Lady Gaga | Pop star | 2024-09-15T14:45:30.493Z | | 8 | Rihanna | Pop star | 2024-10-01T11:50:22.493Z | | 9 | Tom Hanks | Actor | 2024-10-17T13:58:31.493Z | 5. Open the Code node and uncomment (remove the `//` from) the lines for "Madonna" and "Bob Dylan." 6. On the canvas, select **Test workflow** again. Open the Remove Duplicates node again to examine the results. n8n compares the current input data to the items stored from previous executions. This time, the **Kept** tab contains a single entry for "Bob Dylan." n8n keeps this item because its `id` column value (15) is higher than any previous values (the previous maximum value was 9): | **id** | **name** | **job** | **last\_updated** | | --- | --- | --- | --- | | 15 | Bob Dylan | Folk singer | 2024-09-24T08:03:16.493Z | The **Discarded** tab contains the 13 items with an `id` column value equal to or less than the previous maximum value (9). Even though it's new, this table includes the entry for "Madonna" because its `id` value isn't larger than the previous maximum value: | **id** | **name** | **job** | **last\_updated** | | --- | --- | --- | --- | | 0 | Madonna | Pop star | 2024-10-17T17:11:38.493Z | | 1 | Taylor Swift | Pop star | 2024-09-20T10:12:43.493Z | | 1 | Taylor Swift | Pop star | 2024-09-20T10:12:43.493Z | | 2 | Ed Sheeran | Singer-songwriter | 2024-10-05T08:30:59.493Z | | 2 | Ed Sheeran | Singer-songwriter | 2024-10-05T08:30:59.493Z | | 3 | Adele | Singer-songwriter | 2024-10-07T14:15:59.493Z | | 3 | Adele | Singer-songwriter | 2024-10-07T14:15:59.493Z | | 4 | Bruno Mars | Singer-songwriter | 2024-08-25T17:45:12.493Z | | 5 | Billie Eilish | Singer-songwriter | 2024-09-10T09:30:12.493Z | | 6 | Katy Perry | Pop star | 2024-10-08T12:30:45.493Z | | 7 | Lady Gaga | Pop star | 2024-09-15T14:45:30.493Z | | 8 | Rihanna | Pop star | 2024-10-01T11:50:22.493Z | | 9 | Tom Hanks | Actor | 2024-10-17T13:58:31.493Z | Before continuing, clear the duplication history to get ready for the next example: 7. Open the Remove Duplicates node and set the **Operation** to **Clear Deduplication History**. 8. Select **Test step** to clear the current duplication history. ## Keep items where the value is a date later than any previous date# 1. Open the Remove Duplicates node and set the **Operation** to **Remove Items Processed in Previous Executions**. 2. Set the **Keep Items Where** parameter to **Value Is a Date Later than Any Previous Date**. 3. Set the **Value to Dedupe On** parameter to `{{ $json.last_updated }}`. 4. On the canvas, select **Test workflow** to run the workflow. Open the Remove Duplicates node to examine the results. n8n compares the current input data to the items stored from previous executions. Since this is the first time running the Remove Duplicates node after clearing the history, n8n processes all data items and places them into the **Kept** output tab. The order of the items may be different than the order in the input data: | **id** | **name** | **job** | **last\_updated** | | --- | --- | --- | --- | | 0 | Madonna | Pop star | 2024-10-17T17:11:38.493Z | | 1 | Taylor Swift | Pop star | 2024-09-20T10:12:43.493Z | | 1 | Taylor Swift | Pop star | 2024-09-20T10:12:43.493Z | | 2 | Ed Sheeran | Singer-songwriter | 2024-10-05T08:30:59.493Z | | 2 | Ed Sheeran | Singer-songwriter | 2024-10-05T08:30:59.493Z | | 3 | Adele | Singer-songwriter | 2024-10-07T14:15:59.493Z | | 3 | Adele | Singer-songwriter | 2024-10-07T14:15:59.493Z | | 4 | Bruno Mars | Singer-songwriter | 2024-08-25T17:45:12.493Z | | 5 | Billie Eilish | Singer-songwriter | 2024-09-10T09:30:12.493Z | | 6 | Katy Perry | Pop star | 2024-10-08T12:30:45.493Z | | 7 | Lady Gaga | Pop star | 2024-09-15T14:45:30.493Z | | 8 | Rihanna | Pop star | 2024-10-01T11:50:22.493Z | | 9 | Tom Hanks | Actor | 2024-10-17T13:58:31.493Z | | 15 | Bob Dylan | Folk singer | 2024-09-24T08:03:16.493Z | 5. Open the Code node and uncomment (remove the `//` from) the lines for "Harry Nilsson" and "Kylie Minogue." 6. On the canvas, select **Test workflow** again. Open the Remove Duplicates node again to examine the results. n8n compares the current input data to the items stored from previous executions. This time, the **Kept** tab contains a single entry for "Kylie Minogue." n8n keeps this item because its `last_updated` column value (`2024-10-24T08:03:16.493Z`) is later than any previous values (the previous latest date was `2024-10-17T17:11:38.493Z`): | **id** | **name** | **job** | **last\_updated** | | --- | --- | --- | --- | | 11 | Kylie Minogue | Pop star | 2024-10-24T08:03:16.493Z | The **Discarded** tab contains the 15 items with a `last_updated` column value equal to or earlier than the previous latest date (`2024-10-17T17:11:38.493Z`). Even though it's new, this table includes the entry for "Harry Nilsson" because its `last_updated` value isn't later than the previous maximum value: | **id** | **name** | **job** | **last\_updated** | | --- | --- | --- | --- | | 10 | Harry Nilsson | Singer-songwriter | 2020-10-17T17:11:38.493Z | | 0 | Madonna | Pop star | 2024-10-17T17:11:38.493Z | | 1 | Taylor Swift | Pop star | 2024-09-20T10:12:43.493Z | | 1 | Taylor Swift | Pop star | 2024-09-20T10:12:43.493Z | | 2 | Ed Sheeran | Singer-songwriter | 2024-10-05T08:30:59.493Z | | 2 | Ed Sheeran | Singer-songwriter | 2024-10-05T08:30:59.493Z | | 3 | Adele | Singer-songwriter | 2024-10-07T14:15:59.493Z | | 3 | Adele | Singer-songwriter | 2024-10-07T14:15:59.493Z | | 4 | Bruno Mars | Singer-songwriter | 2024-08-25T17:45:12.493Z | | 5 | Billie Eilish | Singer-songwriter | 2024-09-10T09:30:12.493Z | | 6 | Katy Perry | Pop star | 2024-10-08T12:30:45.493Z | | 7 | Lady Gaga | Pop star | 2024-09-15T14:45:30.493Z | | 8 | Rihanna | Pop star | 2024-10-01T11:50:22.493Z | | 9 | Tom Hanks | Actor | 2024-10-17T13:58:31.493Z | | 15 | Bob Dylan | Folk singer | 2024-09-24T08:03:16.493Z | --- ## Page: https://docs.n8n.io/integrations/builtin/core-nodes/n8n-nodes-base.renamekeys/ Use the Rename Keys node to rename the keys of a key-value pair in n8n. ## Node parameters# You can rename one or multiple keys using the Rename Keys node. Select the **Add new key** button to rename a key. For each key, enter the: * **Current Key Name**: The current name of the key you want to rename. * **New Key Name**: The new name you want to assign to the key. ## Node options# Choose whether to use a **Regex** regular expression to identify keys to rename. To use this option, you must also enter: * The **Regular Expression** you'd like to use. * **Replace With**: Enter the new name you want to assign to the key(s) that match the **Regular Expression**. * You can also choose these Regex-specific options: * **Case Insensitive**: Set whether the regular expression should match case (turned off) or be case insensitive (turned on). * **Max Depth**: Enter the maximum depth to replace keys, using `-1` for unlimited and `0` for top-level only. Regex impacts Using a regular expression can affect any keys that match the expression, including keys you've already renamed. ## Templates and examples# --- ## Page: https://docs.n8n.io/integrations/builtin/core-nodes/n8n-nodes-base.respondtowebhook/ Use the Respond to Webhook node to control the response to incoming webhooks. This node works with the Webhook node. Runs once for the first data item The Respond to Webhook node runs once, using the first incoming data item. Refer to Return more than one data item for more information. ## How to use Respond to Webhook# To use the Respond to Webhook node: 1. Add a Webhook node as the trigger node for the workflow. 2. In the Webhook node, set **Respond** to **Using 'Respond to Webhook' node**. 3. Add the Respond to Webhook node anywhere in your workflow. If you want it to return data from other nodes, place it after those nodes. ## Node parameters# Configure the node behavior using these parameters. ### Respond With# Choose what data to send in the webhook response. * **All Incoming Items**: Respond with all the JSON items from the input. * **Binary**: Respond with a binary file defined in **Response Data Source**. * **First Incoming Item**: Respond with the first incoming item's JSON. * **JSON**: Respond with a JSON object defined in **Response Body**. * **No Data**: No response payload. * **Redirect**: Redirect to a URL set in **Redirect URL**. * **Text**: Respond with text set in **Response Body**. ## Node options# Select **Add Option** to view and set the options. * **Response Code**: Set the response code to use. * **Response Headers**: Define the response headers to send. * **Put Response in Field**: Available when you respond with **All Incoming Items** or **First Incoming Item**. Set the field name for the field containing the response data. ## Templates and examples# ## Workflow behavior# When using the Respond to Webhook node, workflows behave as follows: * The workflow finishes without executing the Respond to Webhook node: it returns a standard message with a 200 status. * The workflow errors before the first Respond to Webhook node executes: the workflow returns an error message with a 500 status. * A second Respond to Webhook node executes after the first one: the workflow ignores it. * A Respond to Webhook node executes but there was no webhook: the workflow ignores the Respond to Webhook node. ## Return more than one data item (deprecated)# Deprecated in 1.22.0 n8n 1.22.0 added support for returning all data items using the **All Incoming Items** option. n8n recommends upgrading to the latest version of n8n, instead of using the workarounds described in this section. The Respond to Webhook node runs once, using the first incoming data item. This includes when using expressions. You can't force looping using the Loop node: the workflow will run, but the webhook response will still only contain the results of the first execution. If you need to return more than one data item, choose one of these options: * Instead of using the Respond to Webhook node, use the **When Last Node Finishes** option in **Respond** in the Webhook node. Use this when you want to return the final data that the workflow outputs. * Use the Aggregate node to turn multiple items into a single item before passing the data to the Respond to Webhook node. Set **Aggregate** to **All Item Data (Into a Single List)**. --- ## Page: https://docs.n8n.io/integrations/builtin/core-nodes/n8n-nodes-base.rssfeedread/ n8n Docs * Using n8n * Getting started Getting started * Learning path * Choose your n8n * Quickstarts * A very quick quickstart * A longer introduction * Video courses * Text courses * Level one * Navigating the editor UI * Building a mini-workflow * Automating a (real-world) use case * Designing the workflow * Building the workflow Building the workflow * Getting data from the data warehouse * Inserting data into airtable * Filtering orders * Setting values for processing orders * Calculating booked orders * Notifying the team * Scheduling the workflow * Activating and examining the workflow * Exporting and importing workflows * Test your knowledge * Level two * Understanding the data structure * Processing different data types * Merging and splitting data * Dealing with errors in workflows * Automating a business workflow Automating a business workflow * Use case * Workflow 1 * Workflow 2 * Workflow 3 * Test your knowledge * Using the app Using the app * Understand workflows * Create and run * Components * Nodes * Connections * Sticky Notes * Executions * Manual, partial, and production executions * Workflow-level executions * All executions * Custom executions data * Debug executions * Tags * Export and import * Templates * Sharing * Settings * Workflow history * Workflow ID * Manage credentials * Create and edit * Credential sharing * Manage users and access * Cloud setup * Manage users * Account types * Role-based access control * Role types * Projects * Best practices * 2FA * LDAP * SAML * Set up SAML * Okta Workforce Identity SAML setup * Troubleshooting * Manage users with SAML * Keyboard shortcuts * Key concepts Key concepts * Flow logic * Splitting with conditionals * Merging data * Looping * Waiting * Sub-workflows * Error handling * Execution order in multi-branch workflows * Data * Data structure * Data flow within nodes * Transforming data * Process data using code * Data mapping * Data mapping in the UI * Data mapping in the expressions editor * Data item linking * Item linking concepts * Item linking in the Code node * Item linking errors * Item linking for node creators * Data pinning * Data editing * Data filtering * Data mocking * Binary data * Schema preview * Glossary * n8n Cloud n8n Cloud * Overview * Access the Cloud admin dashboard * Update your n8n Cloud version * Set the timezone * Cloud IP addresses * Cloud data management * Change ownership or username * Concurrency * AI Assistant * Enterprise features Enterprise features * Source control and environments * Understand * Environments * Git in n8n * Branch patterns * Set up * Using * Push and pull * Copy work between environments * Manage variables * Tutorial: Create environments with source control * External secrets * Log streaming * License key * Releases Releases * Release notes Release notes * 1.x * 0.x * v1.0 migration guide * Help and community Help and community * Where to get help * Contributing * Licenses and privacy Licenses and privacy * Privacy and security * Privacy * Security * Incident response * What you can do * Sustainable use license * Integrations * Built-in nodes Built-in nodes * Node types * Core nodes * Activation Trigger * Aggregate * AI Transform * Code * Keyboard shortcuts * Common issues * Compare Datasets * Compression * Chat Trigger * Common issues * Convert to File * Crypto * Date & Time * Debug Helper * Edit Fields (Set) * Edit Image * Email Trigger (IMAP) * Error Trigger * Execute Command * Common issues * Execute Sub-workflow * Execute Sub-workflow Trigger * Execution Data * Extract From File * Filter * FTP * Git * GraphQL * HTML * HTTP Request * Common issues * If * JWT * LDAP * Limit * Local File Trigger * Loop Over Items (Split in Batches) * Manual Trigger * Markdown * MCP Server Trigger * Merge * n8n * n8n Form * n8n Form Trigger * n8n Trigger * No Operation, do nothing * Read/Write Files from Disk * Remove Duplicates * Templates and examples * Rename Keys * Respond to Webhook * RSS Read RSS Read Table of contents * Node parameters * Node options * Templates and examples * Related resources * RSS Feed Trigger * Schedule Trigger * Common issues * Send Email * Sort * Split Out * SSE Trigger * SSH * Stop And Error * Summarize * Switch * TOTP * Wait * Webhook * Workflow development * Common issues * Workflow Trigger * XML * Actions * Action Network * ActiveCampaign * Adalo * Affinity * Agile CRM * Airtable * Common issues * Airtop * AMQP Sender * APITemplate.io * Asana * Automizy * Autopilot * AWS Certificate Manager * AWS Comprehend * AWS DynamoDB * AWS Elastic Load Balancing * AWS Lambda * AWS Rekognition * AWS S3 * AWS SES * AWS SNS * AWS SQS * AWS Textract * AWS Transcribe * Azure Storage * BambooHR * Bannerbear * Baserow * Beeminder * Bitly * Bitwarden * Box * Brandfetch * Brevo * Bubble * Chargebee * CircleCI * Webex by Cisco * Clearbit * ClickUp * Clockify * Cloudflare * Cockpit * Coda * CoinGecko * Contentful * ConvertKit * Copper * Cortex * CrateDB * crowd.dev * Customer.io * DeepL * Demio * DHL * Discord * Common issues * Discourse * Disqus * Drift * Dropbox * Dropcontact * E-goi * Elasticsearch * Elastic Security * Emelia * ERPNext * Facebook Graph API * FileMaker * Flow * Freshdesk * Freshservice * Freshworks CRM * GetResponse * Ghost * GitHub * GitLab * Gmail * Draft operations * Label operations * Message operations * Thread operations * Common issues * Gong * Google Ads * Google Analytics * Google BigQuery * Google Books * Google Business Profile * Google Calendar * Calendar operations * Event operations * Google Chat * Google Cloud Firestore * Google Cloud Natural Language * Google Cloud Realtime Database * Google Cloud Storage * Google Contacts * Google Docs * Google Drive * File operations * File and folder operations * Folder operations * Shared drive operations * Common issues * Google Perspective * Google Sheets * Document operations * Sheet within Document operations * Common issues * Google Slides * Google Tasks * Google Translate * Google Workspace Admin * Gotify * GoToWebinar * Grafana * Grist * Hacker News * HaloPSA * Harvest * Help Scout * HighLevel * Home Assistant * HubSpot * Humantic AI * Hunter * Intercom * Invoice Ninja * Iterable * Jenkins * Jira Software * Kafka * Keap * Kitemaker * KoboToolbox * Lemlist * Line * Linear * LingvaNex * LinkedIn * LoneScale * Magento 2 * Mailcheck * Mailchimp * MailerLite * Mailgun * Mailjet * Mandrill * marketstack * Matrix * Mattermost * Mautic * Medium * MessageBird * Metabase * Microsoft Dynamics CRM * Microsoft Entra ID * Microsoft Excel 365 * Microsoft Graph Security * Microsoft OneDrive * Microsoft Outlook * Microsoft SQL * Microsoft Teams * Microsoft To Do * Mindee * MISP * Mocean * monday.com * MongoDB * Monica CRM * MQTT * MSG91 * MySQL * Common issues * Customer Datastore (n8n Training) * Customer Messenger (n8n Training) * NASA * Netlify * Netscaler ADC * Nextcloud * NocoDB * Notion * Common issues * npm * Odoo * Okta * One Simple API * Onfleet * OpenAI * Assistant operations * Audio operations * File operations * Image operations * Text operations * Common issues * OpenThesaurus * OpenWeatherMap * Oura * Paddle * PagerDuty * PayPal * Peekalink * PhantomBuster * Philips Hue * Pipedrive * Plivo * PostBin * Postgres * Common issues * PostHog * ProfitWell * Pushbullet * Pushcut * Pushover * QuestDB * Quick Base * QuickBooks Online * QuickChart * RabbitMQ * Raindrop * Reddit * Redis * Rocket.Chat * Rundeck * S3 * Salesforce * Salesmate * SeaTable * SecurityScorecard * Segment * SendGrid * Sendy * Sentry.io * ServiceNow * seven * Shopify * SIGNL4 * Slack * Snowflake * Splunk * Spontit * Spotify * Stackby * Storyblok * Strapi * Strava * Stripe * Supabase * Common issues * SyncroMSP * Taiga * Tapfiliate * Telegram * Chat operations * Callback operations * File operations * Message operations * Common issues * TheHive * TheHive 5 * TimescaleDB * Todoist * Travis CI * Trello * Twake * Twilio * Twist * Unleashed Software * UpLead * uProc * UptimeRobot * urlscan.io * Venafi TLS Protect Cloud * Venafi TLS Protect Datacenter * Vero * Vonage * Webflow * Wekan * WhatsApp Business Cloud * Common issues * Wise * WooCommerce * WordPress * X (Formerly Twitter) * Xero * Yourls * YouTube * Zammad * Zendesk * Zoho CRM * Zoom * Zulip * Triggers * ActiveCampaign Trigger * Acuity Scheduling Trigger * Affinity Trigger * Airtable Trigger * AMQP Trigger * Asana Trigger * Autopilot Trigger * AWS SNS Trigger * Bitbucket Trigger * Box Trigger * Brevo Trigger * Calendly Trigger * Cal Trigger * Chargebee Trigger * ClickUp Trigger * Clockify Trigger * ConvertKit Trigger * Copper Trigger * crowd.dev Trigger * Customer.io Trigger * Emelia Trigger * Eventbrite Trigger * Facebook Lead Ads Trigger * Facebook Trigger * Ad Account * Application * Certificate Transparency * Group * Instagram * Link * Page * Permissions * User * WhatsApp Business Account * Workplace Security * Figma Trigger (Beta) * Flow Trigger * Form.io Trigger * Formstack Trigger * GetResponse Trigger * GitHub Trigger * GitLab Trigger * Gmail Trigger * Poll Mode options * Common issues * Google Calendar Trigger * Google Drive Trigger * Common issues * Google Business Profile Trigger * Google Sheets Trigger * Common issues * Gumroad Trigger * Help Scout Trigger * Hubspot Trigger * Invoice Ninja Trigger * Jira Trigger * JotForm Trigger * Kafka Trigger * Keap Trigger * KoboToolbox Trigger * Lemlist Trigger * Linear Trigger * LoneScale Trigger * Mailchimp Trigger * MailerLite Trigger * Mailjet Trigger * Mautic Trigger * Microsoft OneDrive Trigger * Microsoft Outlook Trigger * MQTT Trigger * Netlify Trigger * Notion Trigger * Onfleet Trigger * PayPal Trigger * Pipedrive Trigger * Postgres Trigger * Postmark Trigger * Pushcut Trigger * RabbitMQ Trigger * Redis Trigger * Salesforce Trigger * SeaTable Trigger * Shopify Trigger * Slack Trigger * Strava Trigger * Stripe Trigger * SurveyMonkey Trigger * Taiga Trigger * Telegram Trigger * Common issues * TheHive 5 Trigger * TheHive Trigger * Toggl Trigger * Trello Trigger * Twilio Trigger * Typeform Trigger * Venafi TLS Protect Cloud Trigger * Webex by Cisco Trigger * Webflow Trigger * WhatsApp Trigger * Wise Trigger * WooCommerce Trigger * Workable Trigger * Wufoo Trigger * Zendesk Trigger * Cluster nodes * Root nodes * AI Agent * Conversational Agent * OpenAI Functions Agent * Plan and Execute Agent * ReAct Agent * SQL Agent * Tools Agent * Common issues * Basic LLM Chain * Question and Answer Chain * Common issues * Summarization Chain * Information Extractor * Text Classifier * Sentiment Analysis * LangChain Code * Simple Vector Store * Milvus Vector Store * MongoDB Atlas Vector Store * PGVector Vector Store * Pinecone Vector Store * Qdrant Vector Store * Supabase Vector Store * Zep Vector Store * Sub-nodes * Default Data Loader * GitHub Document Loader * Embeddings AWS Bedrock * Embeddings Azure OpenAI * Embeddings Cohere * Embeddings Google Gemini * Embeddings Google PaLM * Embeddings Google Vertex * Embeddings HuggingFace Inference * Embeddings Mistral Cloud * Embeddings Ollama * Embeddings OpenAI * Anthropic Chat Model * AWS Bedrock Chat Model * Azure OpenAI Chat Model * DeepSeek Chat Model * Google Gemini Chat Model * Google Vertex Chat Model * Groq Chat Model * Mistral Cloud Chat Model * Ollama Chat Model * Common issues * OpenAI Chat Model * Common issues * OpenRouter Chat Model * Cohere Model * Ollama Model * Common issues * Hugging Face Inference Model * Chat Memory Manager * Simple Memory * Common issues * Motorhead * MongoDB Chat Memory * Redis Chat Memory * Postgres Chat Memory * Xata * Zep * Auto-fixing Output Parser * Item List Output Parser * Structured Output Parser * Common issues * Contextual Compression Retriever * MultiQuery Retriever * Vector Store Retriever * Workflow Retriever * Character Text Splitter * Recursive Character Text Splitter * Token Splitter * Calculator * Custom Code Tool * HTTP Request Tool * MCP Client Tool * SerpApi (Google Search) * Think Tool * Vector Store Question Answer Tool * Wikipedia * Wolfram|Alpha * Custom n8n Workflow Tool * Credentials * Action Network credentials * ActiveCampaign credentials * Acuity Scheduling credentials * Adalo credentials * Affinity credentials * Agile CRM credentials * Airtable credentials * Airtop credentials * AlienVault credentials * AMQP credentials * Anthropic credentials * APITemplate.io credentials * Asana credentials * Auth0 Management credentials * Automizy credentials * Autopilot credentials * AWS credentials * Azure OpenAI credentials * Azure Storage credentials * BambooHR credentials * Bannerbear credentials * Baserow credentials * Beeminder credentials * Bitbucket credentials * Bitly credentials * Bitwarden credentials * Box credentials * Brandfetch credentials * Brevo credentials * Bubble credentials * Cal.com credentials * Calendly credentials * Carbon Black credentials * Chargebee credentials * CircleCI credentials * Cisco Meraki credentials * Cisco Secure Endpoint credentials * Cisco Umbrella credentials * Clearbit credentials * ClickUp credentials * Clockify credentials * Cloudflare credentials * Cockpit credentials * Coda credentials * Cohere credentials * Contentful credentials * ConvertAPI credentials * ConvertKit credentials * Copper credentials * Cortex credentials * CrateDB credentials * crowd.dev credentials * CrowdStrike credentials * Customer.io credentials * Datadog credentials * DeepL credentials * DeepSeek credentials * Demio credentials * DFIR-IRIS credentials * DHL credentials * Discord credentials * Discourse credentials * Disqus credentials * Drift credentials * Dropbox credentials * Dropcontact credentials * Dynatrace credentials * E-goi credentials * Elasticsearch credentials * Elastic Security credentials * Emelia credentials * ERPNext credentials * Eventbrite credentials * F5 Big-IP credentials * Facebook App credentials * Facebook Graph API credentials * Facebook Lead Ads credentials * Figma credentials * FileMaker credentials * Filescan credentials * Flow credentials * Form.io Trigger credentials * Formstack Trigger credentials * Fortinet FortiGate credentials * Freshdesk credentials * Freshservice credentials * Freshworks CRM credentials * FTP credentials * GetResponse credentials * Ghost credentials * Git credentials * GitHub credentials * GitLab credentials * Gong credentials * Google * Google OAuth2 single service * Google OAuth2 generic * Google Service Account * Google Gemini(PaLM) credentials * Gotify credentials * GoToWebinar credentials * Grafana credentials * Grist credentials * Groq credentials * Gumroad credentials * HaloPSA credentials * Harvest credentials * Help Scout credentials * HighLevel credentials * Home Assistant credentials * HTTP Request credentials * HubSpot credentials * Hugging Face credentials * Humantic AI credentials * Hunter credentials * Hybrid Analysis credentials * IMAP * Gmail * Outlook.com * Yahoo * Imperva WAF credentials * Intercom credentials * Invoice Ninja credentials * Iterable credentials * Jenkins credentials * Jira credentials * JotForm credentials * JWT credentials * Kafka credentials * Keap credentials * Kibana credentials * Kitemaker credentials * KoboToolbox credentials * LDAP credentials * Lemlist credentials * Line credentials * Linear credentials * LingvaNex credentials * LinkedIn credentials * LoneScale credentials * Magento 2 credentials * Mailcheck credentials * Mailchimp credentials * MailerLite credentials * Mailgun credentials * Mailjet credentials * Malcore credentials * Mandrill credentials * Marketstack credentials * Matrix credentials * Mattermost credentials * Mautic credentials * Medium credentials * MessageBird credentials * Metabase credentials * Microsoft credentials * Microsoft Azure Monitor credentials * Microsoft Entra ID credentials * Microsoft SQL credentials * Milvus credentials * Mindee credentials * Miro credentials * MISP credentials * Mist credentials * Mistral Cloud credentials * Mocean credentials * monday.com credentials * MongoDB credentials * Monica CRM credentials * Motorhead credentials * MQTT credentials * MSG91 credentials * MySQL credentials * NASA credentials * Netlify credentials * Netscaler ADC credentials * Nextcloud credentials * NocoDB credentials * Notion credentials * npm credentials * Odoo credentials * Okta credentials * Ollama credentials * One Simple API credentials * Onfleet credentials * OpenAI credentials * OpenCTI credentials * OpenRouter credentials * OpenWeatherMap credentials * Oura credentials * Paddle credentials * PagerDuty credentials * PayPal credentials * Peekalink credentials * PhantomBuster credentials * Philips Hue credentials * Pinecone credentials * Pipedrive credentials * Plivo credentials * Postgres credentials * PostHog credentials * Postmark credentials * ProfitWell credentials * Pushbullet credentials * Pushcut credentials * Pushover credentials * QRadar credentials * Qdrant credentials * Qualys credentials * QuestDB credentials * Quick Base credentials * QuickBooks credentials * RabbitMQ credentials * Raindrop credentials * Rapid7 InsightVM credentials * Recorded Future credentials * Reddit credentials * Redis credentials * Rocket.Chat credentials * Rundeck credentials * S3 credentials * Salesforce credentials * Salesmate credentials * SeaTable credentials * SecurityScorecard credentials * Segment credentials * Sekoia credentials * Send Email * Gmail * Outlook.com * Yahoo * SendGrid credentials * Sendy credentials * Sentry.io credentials * Serp credentials * ServiceNow credentials * seven credentials * Shopify credentials * Shuffler credentials * SIGNL4 credentials * Slack credentials * Snowflake credentials * SolarWinds IPAM credentials * SolarWinds Observability SaaS credentials * Splunk credentials * Spontit credentials * Spotify credentials * SSH credentials * Stackby credentials * Storyblok credentials * Strapi credentials * Strava credentials * Stripe credentials * Supabase credentials * SurveyMonkey credentials * SyncroMSP credentials * Sysdig credentials * Taiga credentials * Tapfiliate credentials * Telegram credentials * TheHive credentials * TheHive 5 credentials * TimescaleDB credentials * Todoist credentials * Toggl credentials * TOTP credentials * Travis CI credentials * Trellix ePO credentials * Trello credentials * Twake credentials * Twilio credentials * Twist credentials * Typeform credentials * Unleashed Software credentials * UpLead credentials * uProc credentials * UptimeRobot credentials * urlscan.io credentials * Venafi TLS Protect Cloud credentials * Venafi TLS Protect Datacenter credentials * Vero credentials * VirusTotal credentials * Vonage credentials * Webex by Cisco credentials * Webflow credentials * Webhook credentials * Wekan credentials * WhatsApp Business Cloud credentials * Wise credentials * Wolfram|Alpha credentials * WooCommerce credentials * WordPress credentials * Workable credentials * Wufoo credentials * X (formerly Twitter) credentials * Xata credentials * Xero credentials * Yourls credentials * Zabbix credentials * Zammad credentials * Zendesk credentials * Zep credentials * Zoho credentials * Zoom credentials * Zscaler ZIA credentials * Zulip credentials * Custom API actions for existing nodes * Handle rate limits * Community nodes Community nodes * Installation and management * GUI installation * Manual installation * Risks * Blocklist * Using community nodes * Troubleshooting * Building community nodes * Creating nodes Creating nodes * Overview * Plan your node * Choose a node type * Choose a node building style * Node UI design * Choose node file structure * Build your node * Set up your development environment * Tutorial: Build a declarative-style node * Tutorial: Build a programmatic-style node * Reference * Node UI elements * Code standards * Versioning * Choose node file structure * Base files * Structure * Standard parameters * Declarative-style parameters * Programmatic-style parameters * Programmatic-style execute method * Codex files * Credentials files * HTTP request helpers * Item linking * Test your node * Run your node locally * Node linter * Troubleshooting * Deploy your node * Submit community nodes * Install private nodes * Hosting n8n * Community vs Enterprise * Installation Installation * npm * Docker * Server setups * Digital Ocean * Heroku * Hetzner * Amazon Web Services * Azure * Google Cloud * Docker Compose * Updating * Configuration Configuration * Environment variables * Binary data * Credentials * Database * Deployment * Endpoints * Executions * External data storage * External hooks * External secrets * Logs * License * Nodes * Queue mode * Security * Source control * Task runners * Timezone and localization * User management and 2FA * Workflows * Configuration methods * Configuration examples * Isolate n8n * Configure the Base URL * Configure custom SSL certificate authorities * Set a custom encryption key * Configure workflow timeouts * Specify custom nodes location * Enable modules in Code node * Set the timezone * Specify user folder path * Configure webhook URLs with reverse proxy * Enable Prometheus metrics * Supported databases and settings * Task runners * User management * Logging and monitoring Logging and monitoring * Logging * Monitoring * Security audit * Scaling and performance Scaling and performance * Overview * Performance and benchmarking * Configuring queue mode * Concurrency control * Execution data * Binary data * External storage for binary data * Memory-related errors * Securing n8n Securing n8n * Overview * Set up SSL * Set up SSO * Security audit * Disable the API * Opt out of data collection * Blocking nodes * Hardening task runners * Starter Kits Starter Kits * AI Starter Kit * Architecture Architecture * Overview * Database structure * Using the CLI Using the CLI * CLI commands * Code in n8n * Expressions * Using the Code node * AI coding * Built in methods and variables Built in methods and variables * Overview * Current node input * Output of other nodes * Date and time * JMESPath * HTTP node * LangChain Code node * n8n metadata * Convenience methods * Data transformation functions * Arrays * Booleans * Dates * Numbers * Objects * Strings * Custom variables Custom variables * Create custom variables * Cookbook Cookbook * Handling dates * Query JSON with JMESPath * Built-in methods and variables examples * execution * getWorkflowStaticData * Retrieve linked items from earlier in the workflow * (node-name).all * vars * Expressions * Check incoming data * Common issues * Code node * Get number of items returned by last node * Get the binary data buffer * Output to the browser console * HTTP Request node * Pagination * Advanced AI * Tutorial: Build an AI workflow in n8n * LangChain in n8n LangChain in n8n * Overview * Langchain concepts in n8n * LangChain learning resources * Use LangSmith with n8n * Examples and concepts Examples and concepts * Introduction * What is a chain? * What is an agent? * Agents vs chains example * What is memory? * What is a tool? * Use Google Sheets as a data source * Call an API to fetch data * Set a human fallback for AI workflows * Let AI specify tool parameters * What is a vector database? * Populate a Pinecone vector database from a website * API * Authentication * Pagination * Using the API playground * API reference * Embed * Prerequisites * Deployment * Configuration * Workflow management * Workflows templates * White labelling 1. Integrations 2. Built-in nodes 3. Core nodes Use the RSS Read node to read data from RSS feeds published on the internet. ## Node parameters# * **URL**: Enter the URL for the RSS publication you want to read. ## Node options# * **Ignore SSL Issues**: Choose whether n8n should ignore SSL/TLS verification (turned on) or not (turned off). ## Templates and examples# ## Related resources# n8n provides a trigger node for RSS Read. You can find the trigger node docs here. --- ## Page: https://docs.n8n.io/integrations/builtin/core-nodes/n8n-nodes-base.rssfeedreadtrigger/ The RSS Feed Trigger node allows you to start an n8n workflow when a new RSS feed item has been published. On this page, you'll find a list of operations the RSS Feed Trigger node supports, and links to more resources. ## Node parameters# * **Poll Times**: Select a poll **Mode** to set how often to trigger the poll. Your **Mode** selection will add or remove relevant fields. Refer to the sections below to configure the parameters for each mode type. * **Feed URL**: Enter the URL of the RSS feed to poll. ### Every Hour mode# Enter the **Minute** of the hour to trigger the poll, from `0` to `59`. ### Every Day mode# * Enter the **Hour** of the day to trigger the poll in 24-hour format, from `0` to `23`. * Enter the **Minute** of the hour to trigger the poll, from `0` to `59`. ### Every Week mode# * Enter the **Hour** of the day to trigger the poll in 24-hour format, from `0` to `23`. * Enter the **Minute** of the hour to trigger the poll, from `0` to `59`. * Select the **Weekday** to trigger the poll. ### Every Month mode# * Enter the **Hour** of the day to trigger the poll in 24-hour format, from `0` to `23`. * Enter the **Minute** of the hour to trigger the poll, from `0` to `59`. * Enter the **Day of the Month** to trigger the poll, from `0` to `31`. ### Every X mode# * Enter the **Value** of measurement for how often to trigger the poll in either minutes or hours. * Select the **Unit** for the value. Supported units are **Minutes** and **Hours**. ### Custom mode# Enter a custom **Cron Expression** to trigger the poll. Use these values and ranges: * Seconds: `0` - `59` * Minutes: `0` - `59` * Hours: `0` - `23` * Day of Month: `1` - `31` * Months: `0` - `11` (Jan - Dec) * Day of Week: `0` - `6` (Sun - Sat) To generate a Cron expression, you can use crontab guru. Paste the Cron expression that you generated using crontab guru in the **Cron Expression** field in n8n. #### Examples# If you want to trigger your workflow every day at 04:08:30, enter the following in the **Cron Expression** field. <table><tbody><tr><td><div><pre><span></span><span>1</span></pre></div></td><td><div><pre><span></span><code>30 8 4 * * * </code></pre></div></td></tr></tbody></table> If you want to trigger your workflow every day at 04:08, enter the following in the **Cron Expression** field. <table><tbody><tr><td><div><pre><span></span><span>1</span></pre></div></td><td><div><pre><span></span><code>8 4 * * * </code></pre></div></td></tr></tbody></table> #### Why there are six asterisks in the Cron expression# The sixth asterisk in the Cron expression represents seconds. Setting this is optional. The node will execute even if you don't set the value for seconds. | \* | \* | \* | \* | \* | \* | | --- | --- | --- | --- | --- | --- | | second | minute | hour | day of month | month | day of week | ## Templates and examples# n8n provides an app node for RSS Feeds. You can find the node docs here. --- ## Page: https://docs.n8n.io/integrations/builtin/core-nodes/n8n-nodes-base.scheduletrigger/ Use the Schedule Trigger node to run workflows at fixed intervals and times. This works in a similar way to the Cron software utility in Unix-like systems. You must activate the workflow If a workflow uses the Schedule node as a trigger, make sure that you save and activate the workflow. Timezone settings The node relies on the timezone setting. n8n uses either: 1. The workflow timezone, if set. Refer to Workflow settings for more information. 2. The n8n instance timezone, if the workflow timezone isn't set. The default is `America/New York` for self-hosted instances. n8n Cloud tries to detect the instance owner's timezone when they sign up, falling back to GMT as the default. Self-hosted users can change the instance setting using Environment variables. Cloud admins can change the instance timezone in the Admin dashboard. ## Node parameters# Add **Trigger Rules** to determine when the trigger should run. Use the **Trigger Interval** to select the time interval unit of measure to schedule the trigger for. All other parameters depend on the interval you select. Choose from: * Seconds trigger interval * Minutes trigger interval * Hours trigger interval * Days trigger interval * Weeks trigger interval * Months trigger interval * Custom (Cron) interval You can add multiple **Trigger Rules** to run the node on different schedules. Refer to the sections below for more detail on configuring each **Trigger Interval**. Refer to Templates and examples for further examples. ### Seconds trigger interval# * **Seconds Between Triggers**: Enter the number of seconds between each workflow trigger. For example, if you enter `30` here, the trigger will run every 30 seconds. ### Minutes trigger interval# * **Minutes Between Triggers**: Enter the number of minutes between each workflow trigger. For example, if you enter `5` here, the trigger will run every 5 minutes. ### Hours trigger interval# * **Hours Between Triggers**: Enter the number of hours between each workflow trigger. * **Trigger at Minute**: Enter the minute past the hour to trigger the node when it runs, from `0` to `59`. For example, if you enter `6` **Hours Between Triggers** and `30` **Trigger at Minute**, the node will run every six hours at 30 minutes past the hour. ### Days trigger interval# * **Days Between Triggers**: Enter the number of days between each workflow trigger. * **Trigger at Hour**: Select the hour of the day to trigger the node. * **Trigger at Minute**: Enter the minute past the hour to trigger the node when it runs, from `0` to `59`. For example, if you enter `2` **Days Between Triggers**, **9am** for **Trigger at Hour**, and `15` **Trigger at Minute**, the node will run every two days at 9:15am. ### Weeks trigger interval# * **Weeks Between Triggers**: Enter the number of weeks between each workflow trigger. * **Trigger on Weekdays**: Select the day(s) of the week you want to trigger the node. * **Trigger at Hour**: Select the hour of the day to trigger the node. * **Trigger at Minute**: Enter the minute past the hour to trigger the node when it runs, from `0` to `59`. For example, if you enter `2` **Weeks Between Triggers**, **Monday** for **Trigger on Weekdays**, **3pm** for **Trigger at Hour**, and `30` **Trigger at Minute**, the node will run every two weeks on Monday at 3:30 PM. ### Months trigger interval# * **Months Between Triggers**: Enter the number of months between each workflow trigger. * **Trigger at Day of Month**: Enter the day of the month the day should trigger at, from `1` to `31`. If a month doesn't have this day, the node won't trigger. For example, if you enter `30` here, the node won't trigger in February. * **Trigger at Hour**: Select the hour of the day to trigger the node. * **Trigger at Minute**: Enter the minute past the hour to trigger the node when it runs, from `0` to `59`. For example, if you enter `3` **Months Between Triggers**, `28` **Trigger at Day of Month**, **9am** for **Trigger at Hour**, and `0` **Trigger at Minute**, the node will run each quarter on the 28th day of the month at 9:00 AM. ### Custom (Cron) interval# Enter a custom cron **Expression** to set the schedule for the trigger. To generate a Cron expression, you can use crontab guru. Paste the Cron expression that you generated using crontab guru in the **Expression** field in n8n. #### Examples# | Type | Cron Expression | Description | | --- | --- | --- | | Every X Seconds | `*/10 * * * * *` | Every 10 seconds. | | Every X Minutes | `*/5 * * * *` | Every 5 minutes. | | Hourly | `0 * * * *` | Every hour on the hour. | | Daily | `0 6 * * *` | At 6:00 AM every day. | | Weekly | `0 12 * * 1` | At noon every Monday. | | Monthly | `0 0 1 * *` | At midnight on the 1st of every month. | | Every X Days | `0 0 */3 * *` | At midnight every 3rd day. | | Only Weekdays | `0 9 * * 1-5` | At 9:00 AM Monday through Friday. | | Custom Hourly Range | `0 9-17 * * *` | Every hour from 9:00 AM to 5:00 PM every day. | | Quarterly | `0 0 1 1,4,7,10 *` | At midnight on the 1st of January, April, July, and October. | Using variables in the Cron expression While variables can be used in the scheduled trigger, their values only get evaluated when the workflow is activated. If you alter a variable's value in the settings after a workflow is activated, the changes won't alter the cron schedule. To re-evaluate the variable, set the workflow to **Inactive** and then back to **Active** again #### Why there are six asterisks in the Cron expression# The sixth asterisk in the Cron expression represents seconds. Setting this is optional. The node will execute even if you don't set the value for seconds. | (\*) | \* | \* | \* | \* | \* | | --- | --- | --- | --- | --- | --- | | (second) | minute | hour | day of month | month | day of week(Sun-Sat) | ## Templates and examples# Browse Schedule Trigger integration templates, or search all templates ## Common issues# For common questions or issues and suggested solutions, refer to Common Issues. --- ## Page: https://docs.n8n.io/integrations/builtin/core-nodes/n8n-nodes-base.scheduletrigger/common-issues/ Here are some common errors and issues with the Schedule Trigger node and steps to resolve or troubleshoot them. ## Invalid cron expression# This error occurs when you set **Trigger Interval** to **Custom (Cron)** and n8n doesn't understand your cron expression. This may mean that there is a mistake in your cron expression or that you're using an incompatible syntax. To debug, check that the following: * That your cron expression follows the syntax used in the cron examples * That your cron expression (after removing the seconds column) validates on crontab guru ## Scheduled workflows run at the wrong time# If the Schedule Trigger node runs at the wrong time, it may mean that you need to adjust the time zone n8n uses. ### Adjust the timezone globally# If you're using n8n Cloud, follow the instructions on the set the Cloud instance timezone page to ensure that n8n executes in sync with your local time. If you're self hosting, set your global timezone using the `GENERIC_TIMEZONE` environment variable. ### Adjust the timezone for an individual workflow# To set the timezone for an individual workflow: 1. Open the workflow on the canvas. 2. Select the  **Three dots icon** in the upper-right corner. 3. Select **Settings**. 4. Change the **Timezone** setting. 5. Select **Save**. ### Variables not working as expected# While variables can be used in the scheduled trigger, their values only get evaluated when the workflow is activated. After activating the worfklow, you can alter a variable's value in the settings but it won't change how often the workflow runs. To work around this, you must stop and then re-activate the workflow to apply the updated variable value. ### Changing the trigger interval# You can update the scheduled trigger interval at any time but it only gets updated when the workflow is activated. If you change the trigger interval after the workflow is active, the changes won't take effect until you stop and then re-activate the workflow. Also, the schedule begins from the time when you activate the workflow. For example, if you had originally set a schedule of every 1 hour and it should execute at 12:00, if you changed it to a 2 hour schedule and re-activated the workflow at 11:30, the next execution will be at 13:30, 2 hours from when you activated it. --- ## Page: https://docs.n8n.io/integrations/builtin/core-nodes/n8n-nodes-base.sendemail/ The Send Email node sends emails using an SMTP email server. Credential You can find authentication information for this node here. ## Node parameters# This node can be used as an AI tool This node can be used to enhance the capabilities of an AI agent. When used in this way, many parameters can be set automatically, or with information directed by AI - find out more in the AI tool parameters documentation. Configure this node using the following parameters. ### Credential to connect with# Select or create an SMTP account credential for the node to use. ### From Email# Enter the email address you want to send the email from. You can also include a name using this format: `Name Name <email@sample.com>`, for example: `Nathan Doe <nate@n8n.io>`. ### To Email# Enter the email address you want to send the email to. You can also include a name using this format: `Name Name <email@sample.com>`, for example: `Nathan Doe <nate@n8n.io>`. ### Subject# Enter the subject line for the email. ### Email Format# Select the format to send the email in. Choose from: * **Text**: Send the email in plain-text format. * **HTML**: Send the email in HTML format. * **Both**: Send the email in both formats. If you choose this option, the email recipient's client will set which format to display. ## Node options# Use these **Options** to further refine the node's behavior. ### Append n8n Attribution# Set whether to include the phrase `This email was sent automatically with n8n` at the end of the email (turned on) or not (turned off). ### Attachments# Enter the name of the binary properties that contain data to add as an attachment. Some tips on using this option: * Use the Read/Write Files from Disk node or the HTTP Request node to upload the file to your workflow. * Add multiple attachments by entering a comma-separated list of binary properties. * Reference embedded images or other content within the body of an email message, for example `<img src="cid:image_1">`. ### CC Email# Enter an email address for the cc: field. ### BCC Email# Enter an email address for the bcc: field. ### Ignore SSL Issues# Set whether n8n should ignore failures with TLS/SSL certificate validation (turned on) or enforce them (turned off). ### Reply To# Enter an email address for the Reply To field. ## Templates and examples# --- ## Page: https://docs.n8n.io/integrations/builtin/core-nodes/n8n-nodes-base.sort/ Use the Sort node to organize lists of items in a desired ordering, or generate a random selection. Array sort behavior The Sort operation uses the default JavaScript operation where the elements to be sorted are converted into strings and their values compared. Refer to Mozilla's guide to Array sort to learn more. ## Node parameters# Configure this node using the **Type** parameter. Use the dropdown to select how you want to input the sorting from these options. ### Simple# Performs an ascending or descending sort using the selected fields. When you select this **Type**: * Use the **Add Field To Sort By** button to input the **Field Name**. * Select whether to use **Ascending** or **Descending** order. #### Simple options# When you select **Simple** as the **Type**, you have the option to **Disable Dot Notation**. By default, n8n enables dot notation to reference child fields in the format `parent.child`. Use this option to disable dot notation (turned on) or to continue using dot (turned off). ### Random# Creates a random order in the list. ### Code# Input custom JavaScript code to perform the sort operation. This is a good option if a simple sort won't meet your needs. Enter your custom JavaScript code in the **Code** input field. ## Templates and examples# Learn more about data structure and data flow in n8n workflows. --- ## Page: https://docs.n8n.io/integrations/builtin/core-nodes/n8n-nodes-base.splitout/ Use the Split Out node to separate a single data item containing a list into multiple items. For example, a list of customers, and you want to split them so that you have an item for each customer. ## Node parameters# Configure this node using the following parameters. ### Field to Split Out# Enter the field containing the list you want to separate out into individual items. If you're working with binary data inputs, use `$binary` in an expression to set the field to split out. ### Include# Select whether and how you want n8n to keep any other fields from the input data with each new individual item. You can select: * **No Other Fields**: No other fields will be included. * **All Other Fields**: All other fields will be included. * **Selected Other Fields**: Only the selected fields will be included. * **Fields to Include**: Enter a comma separated list of the fields you want to include. ## Node options# ### Disable Dot Notation# By default, n8n enables dot notation to reference child fields in the format `parent.child`. Use this option to disable dot notation (turned on) or to continue using dot (turned off). ### Destination Field Name# Enter the field in the output where the split field contents should go. ### Include Binary# Choose whether to include binary data from the input in the new output (turned on) or not (turned off). ## Templates and examples# Learn more about data structure and data flow in n8n workflows. --- ## Page: https://docs.n8n.io/integrations/builtin/core-nodes/n8n-nodes-base.ssetrigger/ Server-Sent Events (SSE) is a server push technology enabling a client to receive automatic updates from a server using HTTP connection. The SSE Trigger node is used to receive server-sent events. ## Node parameters# The SSE Trigger node has one parameter, the **URL**. Enter the URL from which to receive the server-sent events (SSE). ## Templates and examples# Browse SSE Trigger integration templates, or search all templates --- ## Page: https://docs.n8n.io/integrations/builtin/core-nodes/n8n-nodes-base.ssh/ The SSH node is useful for executing commands using the Secure Shell Protocol. Credentials You can find authentication information for this node here. ## Operations# * **Execute** a command * **Download** a file * **Upload** a file ### Execute Command# Configure this operation with these parameters: * **Credential to connect with**: Select an existing or create a new SSH credential to connect with. * **Command**: Enter the command to execute on the remote device. * **Working Directory**: Enter the directory where n8n should execute the command. ### Download File# * **Credential to connect with**: Select an existing or create a new SSH credential to connect with. * **Path**: Enter the path for the file you want to download. This path must include the file name. The downloaded file will use this file name. To use a different name, use the **File Name** option. Refer to Download File options for more information. * **File Property**: Enter the name of the object property that holds the binary data you want to download. #### Download File options# You can further configure this operation with the **File Name** option. Use this option to override the binary data file name to a name of your choice. ### Upload File# * **Credential to connect with**: Select an existing or create a new SSH credential to connect with. * **Input Binary Field**: Enter the name of the input binary field that contains the file you want to upload. * **Target Directory**: The directory to upload the file to. The name of the file is taken from the binary data file name. To enter a different name, use the **File Name** option. Refer to Upload File options for more information. #### Upload File options# You can further configure this operation with the **File Name** option. Use this option to override the binary data file name to a name of your choice. ## Templates and examples# --- ## Page: https://docs.n8n.io/integrations/builtin/core-nodes/n8n-nodes-base.stopanderror/ Use the Stop And Error node to display custom error messages, cause executions to fail under certain conditions, and send custom error information to error workflows. ## Operations# * Error Message * Error Object ## Node parameters# Both operations include one node parameter, the **Error Type**. Use this parameter to select the type of error to throw. Choose between the two operations: **Error Message** and **Error Object**. The other parameters depend on which operation you select. ### Error Message parameters# The Error Message Error Type adds one parameter, the **Error Message** field. Enter the message you'd like to throw. ### Error Object parameters# The Error Object Error Type adds one parameter, the **Error Object**. Enter a JSON object that contains the error properties you'd like to throw. ## Templates and examples# You can use the Stop And Error node with the Error trigger node. Read more about Error workflows in n8n workflows. --- ## Page: https://docs.n8n.io/integrations/builtin/core-nodes/n8n-nodes-base.summarize/ Use the Summarize node to aggregate items together, in a manner similar to Excel pivot tables. ## Node parameters# ### Fields to Summarize# Use these fields to define how you want to summarize your input data. * **Aggregation**: Select the aggregation method to use on a given field. Options include: * **Append**: Append * If you select this option, decide whether you want to **Include Empty Values** or not. * **Average**: Calculate the numeric average of your input data. * **Concatenate**: Combine together values in your input data. * If you select this option, decide whether you want to **Include Empty Values** or not. * **Separator**: Select the separator you want to insert between concatenated values. * **Count**: Count the total number of values in your input data. * **Count Unique**: Count the number of unique values in your input data. * **Max**: Find the highest numeric value in your input data. * **Min**: Find the lowest numeric value in your input data. * **Sum**: Add together the numeric values in your input data. * **Field**: Enter the name of the field you want to perform the aggregation on. ### Fields to Split By# Enter the name of the input fields that you want to split the summary by (similar to a group by statement). This allows you to get separate summaries based on values in other fields. For example, if our input data contains columns for `Sales Rep` and `Deal Amount` and we're performing a **Sum** on the `Deal Amount` field, we could split by `Sales Rep` to get a **Sum** total for each Sales Rep. To enter multiple fields to split by, enter a comma-separated list. ## Node options# ### Continue if Field Not Found# By default, if a **Field to Summarize** isn't in any items, the node throws an error. Use this option to continue and return a single empty item (turned on) instead or keep the default error behavior (turned off). ### Disable Dot Notation# By default, n8n enables dot notation to reference child fields in the format `parent.child`. Use this option to disable dot notation (turned on) or to continue using dot (turned off). ### Output Format# Select the format for your output format. This option is recommended if you're using **Fields to Split By** * **Each Split in a Separate Item**: Use this option to generate a separate output item for each split out field. * **All Splits in a Single Item**: Use this option to generate a single item that lists the split out fields. ## Ignore items without valid fields to group by# Set whether to ignore input items that don't contain the **Fields to Split By** (turned on) or not (turned off). ## Templates and examples# Learn more about data structure and data flow in n8n workflows. --- ## Page: https://docs.n8n.io/integrations/builtin/core-nodes/n8n-nodes-base.switch/ Use the Switch node to route a workflow conditionally based on comparison operations. It's similar to the IF node, but supports multiple output routes. ## Node parameters# Select the **Mode** the node should use: * **Rules**: Select this mode to build a matching rule for each output. * **Expression**: Select this mode to write an expression to return the output index programmatically. Node configuration depends on the **Mode** you select. ### Rules# To configure the node with this operation, use these parameters: * Create **Routing Rules** to define comparison conditions. * Use the data type dropdown to select the data type and comparison operation type for your condition. For example, to create a rules for dates after a particular date, select **Date & Time > is after**. * The fields and values to enter into the condition change based on the data type and comparison you select. Refer to Available data type comparisons for a full list of all comparisons by data type. * **Rename Output**: Turn this control on to rename the output field to put matching data into. Enter your desired **Output Name**. Select **Add Routing Rule** to add more rules. #### Rule options# You can further configure the node with this operation using these **Options**: * **Fallback Output**: Choose how to route the workflow when an item doesn't match any of the rules or conditions. * **None**: Ignore the item. This is the default behavior. * **Extra Output**: Send items to an extra, separate output. * **Output 0**: Send items to the same output as those matching the first rule. * **Ignore Case**: Set whether to ignore letter case when evaluating conditions (turned on) or enforce letter case (turned off). * **Less Strict Type Validation**: Set whether you want n8n to attempt to convert value types based on the operator you choose (turned on) or not (turned off). * **Send data to all matching outputs**: Set whether to send data to all outputs meeting conditions (turned on) or whether to send the data to the first output matching the conditions (turned off). ### Expression# To configure the node with this operation, use these parameters: * **Number of Outputs**: Set how many outputs the node should have. * **Output Index**: Create an expression to calculate which input item should be routed to which output. The expression must return a number. ## Templates and examples# Refer to Splitting with conditionals for more information on using conditionals to create complex logic in n8n. ## Available data type comparisons# ### String# String data type supports these comparisons: * exists * does not exist * is empty * is not empty * is equal to * is not equal to * contains * does not contain * starts with * does not start with * ends with * does not end with * matches regex * does not match regex ### Number# Number data type supports these comparisons: * exists * does not exist * is empty * is not empty * is equal to * is not equal to * is greater than * is less than * is greater than or equal to * is less than or equal to ### Date & Time# Date & Time data type supports these comparisons: * exists * does not exist * is empty * is not empty * is equal to * is not equal to * is after * is before * is after or equal to * is before or equal to ### Boolean# Boolean data type supports these comparisons: * exists * does not exist * is empty * is not empty * is true * is false * is equal to * is not equal to ### Array# Array data type supports these comparisons: * exists * does not exist * is empty * is not empty * contains * does not contain * length equal to * length not equal to * length greater than * length less than * length greater than or equal to * length less than or equal to ### Object# Object data type supports these comparisons: * exists * does not exist * is empty * is not empty --- ## Page: https://docs.n8n.io/integrations/builtin/core-nodes/n8n-nodes-base.totp/ The TOTP node provides a way to generate a TOTP (time-based one-time password). Credentials Refer to TOTP credentials for guidance on setting up authentication. ## Node parameters# This node can be used as an AI tool This node can be used to enhance the capabilities of an AI agent. When used in this way, many parameters can be set automatically, or with information directed by AI - find out more in the AI tool parameters documentation. Configure this node with these parameters. ### Credential to connect with# Select or create a TOTP credential for the node to use. ### Operation# **Generate Secret** is the only operation currently supported. ## Node options# Use these **Options** to further configure the node. ### Algorithm# Select the HMAC hashing algorithm to use. Default is SHA1. ### Digits# Enter the number of digits in the generated code. Default is `6`. ### Period# Enter how many seconds the TOTP is valid for. Default is `30`. ## Templates and examples# Browse TOTP integration templates, or search all templates --- ## Page: https://docs.n8n.io/integrations/builtin/core-nodes/n8n-nodes-base.wait/ Use the Wait node pause your workflow's execution. When the workflow pauses it offloads the execution data to the database. When the resume condition is met, the workflow reloads the data and the execution continues. ## Operations# The Wait node can **Resume** on the following conditions: * **After Time Interval**: The node waits for a certain amount of time. * **At Specified Time**: The node waits until a specific time. * **On Webhook Call**: The node waits until it receives an HTTP call. * **On Form Submitted**: The node waits until it receives a form submission. Refer to the more detailed sections below for more detailed instructions. ### After Time Interval# Wait for a certain amount of time. This parameter includes two more fields: * **Wait Amount**: Enter the amount of time to wait. * **Wait Unit**: Select the unit of measure for the **Wait Amount**. Choose from: * **Seconds** * **Minutes** * **Hours** * **Days** Refer to Time-based operations for more detail on how these intervals work and the timezone used. ### At Specified Time# Wait until a specific date and time to continue. Use the date and time picker to set the **Date and Time**. Refer to Time-based operations for more detail on the timezone used. ### On Webhook Call# This parameter enables your workflows to resume when the Wait node receives an HTTP call. The webhook URL that resumes the execution when called is generated at runtime. The Wait node provides the `$execution.resumeUrl` variable so that you can reference and send the yet-to-be-generated URL wherever needed, for example to a third-party service or in an email. When the workflow executes, the Wait node generates the resume URL and the webhook(s) in your workflow using the `$execution.resumeUrl`. This generated URL is unique to each execution, so your workflow can contain multiple Wait nodes and as the webhook URL is called it will resume each Wait node sequentially. For this **Resume** style, set more parameters listed below. #### Authentication# Select if and how incoming resume-webhook-requests to `$execution.resumeUrl` should be authenticated. Options include: * **Basic Auth**: Use basic authentication. Select or enter a new **Credential for Basic Auth** to use. * **Header Auth**: Use header authentication. Select or enter a new **Credential for Header Auth** to use. * **JWT Auth**: Use JWT authentication. Select or enter a new **Credential for JWT Auth** to use. * **None**: Don't use authentication. #### HTTP Method# Select the HTTP method the webhook should use. Refer to the Webhook node | HTTP Method documentation for more information. #### Response Code# Enter the Response Code the webhook should return. You can use common codes or enter a custom code. #### Respond# Set when and how to respond to the webhook from these options: * **Immediately**: Respond as soon as the node executes. * **When Last Node Finishes**: Return the response code and the data output from the last node executed in the workflow. If you select this option, also set: * **Response Data**: Select what data should be returned and what format to use. Options include: * **All Entries**: Returns all the entries of the last node in an array. * **First Entry JSON**: Return the JSON data of the first entry of the last node in a JSON object. * **First Entry Binary**: Return the binary data of the first entry of the last node in a binary file. * **No Response Body**: Return with no body. * **Using 'Respond to Webhook' Node**: Respond as defined in the Respond to Webhook node. #### Limit Wait Time# Set whether the workflow will automatically resume execution after a specific limit type (turned on) or not (turned off). If turned on, also set: * **Limit Type**: Select what type of limit to enforce from these options: * **After Time Interval**: Wait for a certain amount of time. * Enter the limit's **Amount** of time. * Select the limit's **Unit** of time. * **At Specified Time**: Wait until a specific date and time to resume. * **Max Date and Time**: Use the date and time picker to set the specified time the node should resume. #### On Webhook Call options# * **Binary Property**: Enter the name of the binary property to write the data of the received file to. This option's only relevant if binary data is received. * **Ignore Bots**: Set whether to ignore requests from bots like link previewers and web crawlers (turned on) or not (turned off). * **IP(s) Whitelist**: Enter IP addresses here to limit who (or what) can invoke the webhook URL. Enter a comma-separated list of allowed IP addresses. Access from IPs outside the whitelist throws a 403 error. If left blank, all IP addresses can invoke the webhook URL. * **No Response Body**: Set whether n8n should send a body in the response (turned off) or prevent n8n from sending a body in the response (turned on). * **Raw Body**: Set whether to return the body in a raw format like JSON or XML (turned on) or not (turned off). * **Response Data**: Enter any custom data you want to send in the response. * **Response Headers**: Send more headers in the webhook response. Refer to MDN Web Docs | Response header to learn more about response headers. * **Webhook Suffix**: Enter a suffix to append to the resume URL. This is useful for creating unique webhook URLs for each Wait node when a workflow contains multiple Wait nodes. Note that the generated `$resumeWebhookUrl` won't automatically include this suffix, you must manually append it to the webhook URL before exposing it. #### On Webhook Call limitations# There are some limitations to keep in mind when using On Webhook Call: * Partial executions of your workflow changes the `$resumeWebhookUrl`, so be sure that the node sending this URL to your desired third-party runs in the same execution as the Wait node. ### On Form Submitted# Wait for a form submission before continuing. Set up these parameters: #### Form Title# Enter the title to display at the top of the form. #### Form Description# Enter a form description to display beneath the title. This description can help prompt the user on how to complete the form. #### Form Fields# Set up each field you want to appear on your form using these parameters: * **Field Label**: Enter the field label you want to appear in the form. * **Field Type**: Select the type of field to display in the form. Choose from: * **Date** * **Dropdown List**: Enter each dropdown options in the **Field Options**. * **Multiple Choice**: Select whether the user can select a single dropdown option (turned off) or multiple dropdown options (turned on) * **Number** * **Password** * **Text** * **Textarea** * **Required Field**: Set whether the user must complete this field in order to submit the form (turned on) or if the user can submit the form without completing it (turned off). #### Respond When# Set when to respond to the form submission. Choose from: * **Form Is Submitted**: Respond as soon as this node receives the form submission. * **Workflow Finishes**: Respond when the last node of this workflow finishes. * **Using 'Respond to Webhook' Node**: Respond when the Respond to Webhook node executes. #### Limit Wait Time# Set whether the workflow will automatically resume execution after a specific limit type (turned on) or not (turned off). If turned on, also set: \* **Limit Type**: Select what type of limit to enforce from these options: \* **After Time Interval**: Wait for a certain amount of time. \* Enter the limit's **Amount** of time. \* Select the limit's **Unit** of time. \* **At Specified Time**: Wait until a specific date and time to resume. \* **Max Date and Time**: Use the date and time picker to set the specified time the node should resume. #### On Form Response options# * **Form Response**: Choose how and what you want the form to **Respond With** from these options: * **Form Submitted Text**: The form displays whatever text is entered in **Text to Show** after a user fills out the form. Use this option if you want to display a confirmation message. * **Redirect URL**: The form will redirect the user to the **URL to Redirect to** after they fill out the form. This must be a valid URL. * **Webhook Suffix**: Enter a suffix to append to the resume URL. This is useful for creating unique webhook URLs for each Wait node when a workflow contains multiple Wait nodes. Note that the generated `$resumeWebhookUrl` won't automatically include this suffix, you must manually append it to the webhook URL before exposing it. ## Templates and examples# ## Time-based operations# For the time-based resume operations, note that: * For wait times less than 65 seconds, the workflow doesn't offload execution data to the database. Instead, the process continues to run and the execution resumes after the specified interval passes. * The n8n server time is always used regardless of the timezone setting. Workflow timezone settings, and any changes made to them, don't affect the Wait node interval or specified time. --- ## Page: https://docs.n8n.io/integrations/builtin/core-nodes/n8n-nodes-base.webhook/ Use the Webhook node to create webhooks, which can receive data from apps and services when an event occurs. It's a trigger node, which means it can start an n8n workflow. This allows services to connect to n8n and run a workflow. You can use the Webhook node as a trigger for a workflow when you want to receive data and run a workflow based on the data. The Webhook node also supports returning the data generated at the end of a workflow. This makes it useful for building a workflow to process data and return the results, like an API endpoint. The webhook allows you to trigger workflows from services that don't have a dedicated app trigger node. ## Workflow development process# n8n provides different **Webhook URL**s for testing and production. The testing URL includes an option to **Listen for test event**. Refer to Workflow development for more information on building, testing, and shifting your Webhook node to production. ## Node parameters# Use these parameters to configure your node. ### Webhook URLs# The Webhook node has two **Webhook URLs**: test and production. n8n displays the URLs at the top of the node panel. Select **Test URL** or **Production URL** to toggle which URL n8n displays.  Sample Webhook URLs in the Webhook node's Parameters tab * **Test**: n8n registers a test webhook when you select **Listen for Test Event** or **Test workflow**, if the workflow isn't active. When you call the webhook URL, n8n displays the data in the workflow. * **Production**: n8n registers a production webhook when you activate the workflow. When using the production URL, n8n doesn't display the data in the workflow. You can still view workflow data for a production execution: select the **Executions** tab in the workflow, then select the workflow execution you want to view. ### HTTP Method# The Webhook node supports standard HTTP Request Methods: * DELETE * GET * HEAD * PATCH * POST * PUT Webhook max payload The webhook maximum payload size is 16MB. If you're self-hosting n8n, you can change this using the endpoint environment variable `N8N_PAYLOAD_SIZE_MAX`. ### Path# By default, this field contains a randomly generated webhook URL path, to avoid conflicts with other webhook nodes. You can manually specify a URL path, including adding route parameters. For example, you may need to do this if you use n8n to prototype an API and want consistent endpoint URLs. The **Path** field can take the following formats: * `/:variable` * `/path/:variable` * `/:variable/path` * `/:variable1/path/:variable2` * `/:variable1/:variable2` ### Supported authentication methods# You can require authentication for any service calling your webhook URL. Choose from these authentication methods: * Basic auth * Header auth * JWT auth * None Refer to Webhook credentials for more information on setting up each credential type. ### Respond# * **Immediately**: The Webhook node returns the response code and the message **Workflow got started**. * **When Last Node Finishes**: The Webhook node returns the response code and the data output from the last node executed in the workflow. * **Using 'Respond to Webhook' Node**: The Webhook node responds as defined in the Respond to Webhook node. ### Response Code# Customize the HTTP response code that the Webhook node returns upon successful execution. Select from common response codes or create a custom code. ### Response Data# Choose what data to include in the response body: * **All Entries**: The Webhook returns all the entries of the last node in an array. * **First Entry JSON**: The Webhook returns the JSON data of the first entry of the last node in a JSON object. * **First Entry Binary**: The Webhook returns the binary data of the first entry of the last node in a binary file. * **No Response Body**: The Webhook returns without a body. Applies only to **Respond > When Last Node Finishes**. ## Node options# Select **Add Option** to view more configuration options. The available options depend on your node parameters. Refer to the table for option availability. * **Allowed Origins (CORS)**: Set the permitted cross-origin domains. Enter a comma-separated list of URLs allowed for cross-origin non-preflight requests. Use `*` (default) to allow all origins. * **Binary Property**: Enabling this setting allows the Webhook node to receive binary data, such as an image or audio file. Enter the name of the binary property to write the data of the received file to. * **Ignore Bots**: Ignore requests from bots like link previewers and web crawlers. * **IP(s) Whitelist**: Enable this to limit who (or what) can invoke a Webhook trigger URL. Enter a comma-separated list of allowed IP addresses. Access from IPs outside the whitelist throws a 403 error. If left blank, all IP addresses can invoke the webhook trigger URL. * **No Response Body**: Enable this to prevent n8n sending a body with the response. * **Raw Body**: Specify that the Webhook node will receive data in a raw format, such as JSON or XML. * **Response Content-Type**: Choose the format for the webhook body. * **Response Data**: Send custom data with the response. * **Response Headers**: Send extra headers in the Webhook response. Refer to MDN Web Docs | Response header to learn more about response headers. * **Property Name**: by default, n8n returns all available data. You can choose to return a specific JSON key, so that n8n returns the value. | Option | Required node configuration | | --- | --- | | Allowed Origins (CORS) | Any | | Binary Property | Either: HTTP Method > POST HTTP Method > PATCH HTTP Method > PUT | | Ignore Bots | Any | | IP(s) Whitelist | Any | | Property Name | Both: Respond > When Last Node Finishes Response Data > First Entry JSON | | No Response Body | Respond > Immediately | | Raw Body | Any | | Response Code | Any except Respond > Using 'Respond to Webhook' Node | | Response Content-Type | Both: Respond > When Last Node Finishes Response Data > First Entry JSON | | Response Data | Respond > Immediately | | Response Headers | Any | ## Templates and examples# Browse Webhook node documentation integration templates, or search all templates ## Common issues# For common questions or issues and suggested solutions, refer to Common issues. --- ## Page: https://docs.n8n.io/integrations/builtin/core-nodes/n8n-nodes-base.webhook/workflow-development/ The Webhook node works a bit differently from other core nodes. n8n recommends following these processes for building, testing, and using your Webhook node in production. n8n generates two **Webhook URLs** for each Webhook node: a **Test URL** and a **Production URL**. ## Build and test workflows# While building or testing a workflow, use the **Test** webhook URL. Using a test webhook ensures that you can view the incoming data in the editor UI, which is useful for debugging. Select **Listen for test event** to register the webhook before sending the data to the test webhook. The test webhook stays active for 120 seconds. When using the Webhook node on localhost on a self-hosted n8n instance, run n8n in tunnel mode: * npm with tunnel * Docker with tunnel ## Production workflows# When your workflow is ready, switch to using the **Production** webhook URL. You can then activate your workflow, and n8n runs it automatically when an external service calls the webhook URL. When working with a Production webhook, ensure that you have saved and activated the workflow. Data flowing through the webhook isn't visible in the editor UI with the production webhook. Refer to Create a workflow for more information on activating workflows. --- ## Page: https://docs.n8n.io/integrations/builtin/core-nodes/n8n-nodes-base.webhook/common-issues/ ## Common issues and questions# Here are some common issues and questions for the Webhook node and suggested solutions. ## Listen for multiple HTTP methods# By default, the Webhook node accepts calls that use a single method. For example, it can accept GET or POST requests, but not both. If you want to accept calls using multiple methods: 1. Open the node **Settings**. 2. Turn on **Allow Multiple HTTP Methods**. 3. Return to **Parameters**. By default, the node now accepts GET and POST calls. You can add other methods in the **HTTP Methods** field. The Webhook node has an output for each method, so you can perform different actions depending on the method. ## Use the HTTP Request node to trigger the Webhook node# The HTTP Request node makes HTTP requests to the URL you specify. 1. Create a new workflow. 2. Add the HTTP Request node to the workflow. 3. Select a method from the **Request Method** dropdown list. For example, if you select GET as the **HTTP method** in your Webhook node, select GET as the request method in the HTTP Request node. 4. Copy the URL from the Webhook node, and paste it in the **URL** field in the HTTP Request node. 5. If using the test URL for the webhook node: execute the workflow with the Webhook node. 6. Execute the HTTP Request node. ## Use curl to trigger the Webhook node# You can use curl to make HTTP requests that trigger the Webhook node. Note In the examples, replace `<https://your-n8n.url/webhook/path>` with your webhook URL. The examples make GET requests. You can use whichever HTTP method you set in **HTTP Method**. Make an HTTP request without any parameters: <table><tbody><tr><td><div><pre><span></span><span>1</span></pre></div></td><td><div><pre><span></span><code>curl<span> </span>--request<span> </span>GET<span> </span><https://your-n8n.url/webhook/path> </code></pre></div></td></tr></tbody></table> Make an HTTP request with a body parameter: <table><tbody><tr><td><div><pre><span></span><span>1</span></pre></div></td><td><div><pre><span></span><code>curl<span> </span>--request<span> </span>GET<span> </span><https://your-n8n.url/webhook/path><span> </span>--data<span> </span><span>'key=value'</span> </code></pre></div></td></tr></tbody></table> Make an HTTP request with header parameter: <table><tbody><tr><td><div><pre><span></span><span>1</span></pre></div></td><td><div><pre><span></span><code>curl<span> </span>--request<span> </span>GET<span> </span><https://your-n8n.url/webhook/path><span> </span>--header<span> </span><span>'key=value'</span> </code></pre></div></td></tr></tbody></table> Make an HTTP request to send a file: <table><tbody><tr><td><div><pre><span></span><span>1</span></pre></div></td><td><div><pre><span></span><code>curl<span> </span>--request<span> </span>GET<span> </span><https://your-n8n.url/webhook/path><span> </span>--from<span> </span><span>'key=@/path/to/file'</span> </code></pre></div></td></tr></tbody></table> Replace `/path/to/file` with the path of the file you want to send. ## Send a response of type string# By default, the response format is JSON or an array. To send a response of type string: 1. Select **Response Mode** > **When Last Node Finishes**. 2. Select **Response Data** > **First Entry JSON**. 3. Select **Add Option** > **Property Name**. 4. Enter the name of the property that contains the response. This defaults to `data`. 5. Connect an Edit Fields node to the Webhook node. 6. In the Edit Fields node, select **Add Value** > **String**. 7. Enter the name of the property in the **Name** field. The name should match the property name from step 4. 8. Enter the string value in the **Value** field. 9. Toggle **Keep Only Set** to on (green). When you call the Webhook, it sends the string response from the Edit Fields node. ## Test URL versus Production URL# n8n generates two **Webhook URLs** for each Webhook node: a **Test URL** and a **Production URL**. While building or testing a workflow, use the **Test URL**. Once you're ready to use your Webhook URL in production, use the **Production URL**. | **URL type** | **How to trigger** | **Listening duration** | **Data shown in editor UI?** | | --- | --- | --- | --- | | Test URL | Select **Listen for test event** and trigger a test event from the source. | 120 seconds |  | | Production URL | Activate the workflow | Until workflow deactivated |  | Refer to Workflow development for more information. ## IPs in Whitelist are failing to connect# If you're unable to connect from IPs in your IP Whitelist, check if you are running n8n behind a reverse proxy. If so, set the `N8N_PROXY_HOPS` environment variable to the number of reverse-proxies n8n is running behind. --- ## Page: https://docs.n8n.io/integrations/builtin/core-nodes/n8n-nodes-base.workflowtrigger/ The Workflow Trigger node gets triggered when a workflow is updated or activated. Deprecated n8n has deprecated the Workflow Trigger node and moved its functionality to the n8n Trigger node. Keep in mind If you want to use the Workflow Trigger node for a workflow, add the node to the workflow. You don't have to create a separate workflow. The Workflow Trigger node gets triggered for the workflow that it gets added to. You can use the Workflow Trigger node to trigger a workflow to notify the state of the workflow. ## Node parameters# The node includes a single parameter to identify the **Events** that should trigger it. Choose from these events: * **Active Workflow Updated**: If you select this event, the node triggers when this workflow is updated. * **Workflow Activated**: If you select this event, the node triggers when this workflow is activated. You can select one or both of these events. ## Templates and examples# Browse Workflow Trigger integration templates, or search all templates --- ## Page: https://docs.n8n.io/integrations/builtin/core-nodes/n8n-nodes-base.xml/ Use the XML node to convert data from and to XML. Binary files If your XML is within a binary file, use the Extract from File node to convert it to text first. ## Node parameters# * **Mode**: The format the data should be converted from and to. * **JSON to XML**: Converts data from JSON to XML. * **XML to JSON**: Converts data from XML to JSON. * **Property Name**: Enter the name of the property which contains the data to convert. ## Node options# These options are available regardless of the **Mode** you select: * **Attribute Key**: Enter the prefix used to access the attributes. Default is `$`. * **Character Key**: Enter the prefix used to access the character content. Default is `_`. All other options depend on the selected **Mode**. ### JSON to XML options# These options only appear if you select **JSON to XML** as the **Mode**: * **Allow Surrogate Chars**: Set whether to allow using characters from the Unicode surrogate blocks (turned on) or not (turned off). * **Cdata**: Set whether to wrap text nodes in `<![CDATA[ ... ]]>` instead of escaping when it's required (turned on) or not (turned off). * Turning this option on doesn't add `<![CDATA[ ... ]]>` if it's not required. * **Headless**: Set whether to omit the XML header (turned on) or include it (turned off). * **Root Name**: Enter the root element name to use. ### XML to JSON options# These options only appear if you select **XML to JSON** as the **Mode**: * **Explicit Array**: Set whether to put child nodes in an array (turned on) or create an array only if there's more than one child node (turned off). * **Explicit Root**: Set whether to get the root node in the resulting object (turned on) or not (turned off). * **Ignore Attributes**: Set whether to ignore all XML attributes and only create text nodes (turned on) or not (turned off). * **Merge Attributes**: Set whether to merge attributes and child elements as properties of the parent (turned on) or key attributes off a child attribute object (turned off). This option is ignored if **Ignore Attribute** is turned on. * **Normalize**: Set whether to trim whitespaces inside the text nodes (turned on) or not to trim them (turned off). * **Normalize Tags**: Set whether to normalize all tag names to lowercase (turned on) or keep tag names as-is (turned off). * **Trim**: Set whether to trim the whitespace at the beginning and end of text nodes (turned on) or to leave the whitespace as-is (turned off). ## Templates and examples# --- ## Page: https://docs.n8n.io/integrations/builtin/app-nodes/ 1. Integrations 2. Built-in nodes 3. Actions This section provides information about n8n's Actions. --- ## Page: https://docs.n8n.io/integrations/builtin/app-nodes/n8n-nodes-base.actionnetwork/ Use the Action Network node to automate work in Action Network, and integrate Action Network with other applications. n8n has built-in support for a wide range of Action Network features, including creating, updating, and deleting events, people, tags, and signatures. On this page, you'll find a list of operations the Action Network node supports, and links to more resources. This node can be used as an AI tool This node can be used to enhance the capabilities of an AI agent. When used in this way, many parameters can be set automatically, or with information directed by AI - find out more in the AI tool parameters documentation. ## Operations# * Attendance * Create * Get * Get All * Event * Create * Get * Get All * Person * Create * Get * Get All * Update * Person Tag * Add * Remove * Petition * Create * Get * Get All * Update * Signature * Create * Get * Get All * Update * Tag * Create * Get * Get All ## Templates and examples# Browse Action Network integration templates, or search all templates ## What to do if your operation isn't supported# If this node doesn't support the operation you want to do, you can use the HTTP Request node to call the service's API. You can use the credential you created for this service in the HTTP Request node: 1. In the HTTP Request node, select **Authentication** > **Predefined Credential Type**. 2. Select the service you want to connect to. 3. Select your credential. Refer to Custom API operations for more information. --- ## Page: https://docs.n8n.io/integrations/builtin/app-nodes/n8n-nodes-base.activecampaign/ Use the ActiveCampaign node to automate work in ActiveCampaign, and integrate ActiveCampaign with other applications. n8n has built-in support for a wide range of ActiveCampaign features, including creating, getting, updating, and deleting accounts, contact, orders, e-commerce customers, connections, lists, tags, and deals. On this page, you'll find a list of operations the ActiveCampaign node supports and links to more resources. This node can be used as an AI tool This node can be used to enhance the capabilities of an AI agent. When used in this way, many parameters can be set automatically, or with information directed by AI - find out more in the AI tool parameters documentation. ## Operations# * Account * Create an account * Delete an account * Get data of an account * Get data of all accounts * Update an account * Account Contact * Create an association * Delete an association * Update an association * Contact * Create a contact * Delete a contact * Get data of a contact * Get data of all contact * Update a contact * Contact List * Add contact to a list * Remove contact from a list * Contact Tag * Add a tag to a contact * Remove a tag from a contact * Connection * Create a connection * Delete a connection * Get data of a connection * Get data of all connections * Update a connection * Deal * Create a deal * Delete a deal * Get data of a deal * Get data of all deals * Update a deal * Create a deal note * Update a deal note * E-commerce Order * Create a order * Delete a order * Get data of a order * Get data of all orders * Update a order * E-Commerce Customer * Create a E-commerce Customer * Delete a E-commerce Customer * Get data of a E-commerce Customer * Get data of all E-commerce Customer * Update a E-commerce Customer * E-commerce Order Products * Get data of all order products * Get data of a ordered product * Get data of an order's products * List * Get all lists * Tag * Create a tag * Delete a tag * Get data of a tag * Get data of all tags * Update a tag ## Templates and examples# Browse ActiveCampaign integration templates, or search all templates ## What to do if your operation isn't supported# If this node doesn't support the operation you want to do, you can use the HTTP Request node to call the service's API. You can use the credential you created for this service in the HTTP Request node: 1. In the HTTP Request node, select **Authentication** > **Predefined Credential Type**. 2. Select the service you want to connect to. 3. Select your credential. Refer to Custom API operations for more information. --- ## Page: https://docs.n8n.io/integrations/builtin/app-nodes/n8n-nodes-base.adalo/ Use the Adalo node to automate work in Adalo, and integrate Adalo with other applications. n8n has built-in support for a wide range of Adalo features, including like creating, getting, updating and deleting databases, records, and collections. On this page, you'll find a list of operations the Adalo node supports and links to more resources. ## Operations# * Collection * Create * Delete * Get * Get Many * Update ## Templates and examples# Browse Adalo integration templates, or search all templates Refer to Adalo's documentation for more information on using Adalo. Their External Collections with APIs page gives more detail about what you can do with Adalo collections. ## What to do if your operation isn't supported# If this node doesn't support the operation you want to do, you can use the HTTP Request node to call the service's API. You can use the credential you created for this service in the HTTP Request node: 1. In the HTTP Request node, select **Authentication** > **Predefined Credential Type**. 2. Select the service you want to connect to. 3. Select your credential. Refer to Custom API operations for more information. --- ## Page: https://docs.n8n.io/integrations/builtin/app-nodes/n8n-nodes-base.affinity/ Use the Affinity node to automate work in Affinity, and integrate Affinity with other applications. n8n has built-in support for a wide range of Affinity features, including creating, getting, updating and deleting lists, entries, organization, and persons. On this page, you'll find a list of operations the Affinity node supports and links to more resources. This node can be used as an AI tool This node can be used to enhance the capabilities of an AI agent. When used in this way, many parameters can be set automatically, or with information directed by AI - find out more in the AI tool parameters documentation. ## Operations# * List * Get a list * Get all lists * List Entry * Create a list entry * Delete a list entry * Get a list entry * Get all list entries * Organization * Create an organization * Delete an organization * Get an organization * Get all organizations * Update an organization * Person * Create a person * Delete a person * Get a person * Get all persons * Update a person ## Templates and examples# Browse Affinity integration templates, or search all templates --- ## Page: https://docs.n8n.io/integrations/builtin/app-nodes/n8n-nodes-base.agilecrm/ Use the Agile CRM node to automate work in Agile CRM, and integrate Agile CRM with other applications. n8n has built-in support for a wide range of Agile CRM features, including creating, getting, updating and deleting companies, contracts, and deals. On this page, you'll find a list of operations the Agile CRM node supports and links to more resources. This node can be used as an AI tool This node can be used to enhance the capabilities of an AI agent. When used in this way, many parameters can be set automatically, or with information directed by AI - find out more in the AI tool parameters documentation. ## Operations# * Company * Create a new company * Delete a company * Get a company * Get all companies * Update company properties * Contact * Create a new contact * Delete a contact * Get a contact * Get all contacts * Update contact properties * Deal * Create a new deal * Delete a deal * Get a deal * Get all deals * Update deal properties ## Templates and examples# Browse Agile CRM integration templates, or search all templates --- ## Page: https://docs.n8n.io/integrations/builtin/app-nodes/n8n-nodes-base.airtable/ Use the Airtable node to automate work in Airtable, and integrate Airtable with other applications. n8n has built-in support for a wide range of Airtable features, including creating, reading, listing, updating and deleting tables. On this page, you'll find a list of operations the Airtable node supports and links to more resources. ## Operations# * Append the data to a table * Delete data from a table * List data from a table * Read data from a table * Update data in a table ## Templates and examples# n8n provides a trigger node for Airtable. You can find the trigger node docs here. Refer to Airtable's documentation for more information about the service. ## What to do if your operation isn't supported# If this node doesn't support the operation you want to do, you can use the HTTP Request node to call the service's API. You can use the credential you created for this service in the HTTP Request node: 1. In the HTTP Request node, select **Authentication** > **Predefined Credential Type**. 2. Select the service you want to connect to. 3. Select your credential. Refer to Custom API operations for more information. ## Node reference# ### Get the Record ID# To fetch data for a particular record, you need the Record ID. There are two ways to get the Record ID. ### Create a Record ID column in Airtable# To create a `Record ID` column in your table, refer to this article. You can then use this Record ID in your Airtable node. ### Use the List operation# To get the Record ID of your record, you can use the **List** operation of the Airtable node. This operation will return the Record ID along with the fields. You can then use this Record ID in your Airtable node. ### Filter records when using the List operation# To filter records from your Airtable base, use the **Filter By Formula** option. For example, if you want to return all the users that belong to the organization `n8n`, follow the steps mentioned below: 1. Select 'List' from the **Operation** dropdown list. 2. Enter the base ID and the table name in the **Base ID** and **Table** field, respectively. 3. Click on **Add Option** and select 'Filter By Formula' from the dropdown list. 4. Enter the following formula in the **Filter By Formula** field: `{Organization}='n8n'`. Similarly, if you want to return all the users that don't belong to the organization `n8n`, use the following formula: `NOT({Organization}='n8n')`. Refer to the Airtable documentation to learn more about the formulas. ## Common issues# For common errors or issues and suggested resolution steps, refer to Common Issues. --- ## Page: https://docs.n8n.io/integrations/builtin/app-nodes/n8n-nodes-base.airtable/common-issues/ Here are some common errors and issues with the Airtable node and steps to resolve or troubleshoot them. ## Forbidden - perhaps check your credentials# This error displays when trying to perform actions not permitted by your current level of access. The full text looks something like this: <table><tbody><tr><td><div><pre><span></span><span>1</span></pre></div></td><td><div><pre><span></span><code>There was a problem loading the parameter options from server: "Forbidden - perhaps check your credentials?" </code></pre></div></td></tr></tbody></table> The error most often displays when the credential you're using doesn't have the scopes it requires on the resources you're attempting to manage. Refer to the Airtable credentials and Airtables scopes documentation for more information. ## Service is receiving too many requests from you# Airtable has a hard API limit on the number of requests generated using personal access tokens. If you send more than five requests per second per base, you will receive a 429 error, indicating that you have sent too many requests. You will have to wait 30 seconds before resuming requests. This same limit applies for sending more than 50 requests across all bases per access token. You can find out more in the Airtable's rate limits documentation. If you find yourself running into rate limits with the Airtable node, consider implementing one of the suggestions on the handling rate limits page. --- ## Page: https://docs.n8n.io/integrations/builtin/app-nodes/n8n-nodes-base.airtop/ Use the Airtop node to automate work in Airtop, and integrate Airtop with other applications. n8n has built-in support for a wide range of Airtop features, enabling you to control a cloud-based web browser for tasks like querying, scraping, and interacting with web pages. On this page, you'll find a list of operations the Airtop node supports, and links to more resources. ## Operations# * Session * Create session * Save profile on termination * Terminate session * Window * Create a new browser window * Load URL * Take screenshot * Close window * Extraction * Query page * Query page with pagination * Smart scrape page * Interaction * Click an element * Hover on an element * Type ## Templates and examples# Browse Airtop integration templates, or search all templates Refer to Airtop's documentation for more information about the service. ## What to do if your operation isn't supported# If this node doesn't support the operation you want to do, you can use the HTTP Request node to call the service's API. You can use the credential you created for this service in the HTTP Request node: 1. In the HTTP Request node, select **Authentication** > **Predefined Credential Type**. 2. Select the service you want to connect to. 3. Select your credential. Refer to Custom API operations for more information. Contact Airtop's Support for assistance or to create a feature request. ## Node reference# ### Create a session and window# Create an Airtop browser session to get a **Session ID**, then use it to create a new browser window. After this, you can use any extraction or interaction operation. ### Extract content# Extract content from a web browser using these operations: * **Query page**: Extract information from the current window. * **Query page with pagination**: Extract information from pages with pagination or infinite scrolling. * **Smart scrape page**: Get the window content as markdown. Get JSON responses by using the **JSON Output Schema** parameter in query operations. ### Interacting with pages# Click, hover, or type on elements by describing the element you want to interact with. ### Terminate a session# End your session to save resources. Sessions are automatically terminated based on the **Idle Timeout** set in the **Create Session** operation or can be manually terminated using the **Terminate Session** operation. --- ## Page: https://docs.n8n.io/integrations/builtin/app-nodes/n8n-nodes-base.amqp/ Use the AMQP Sender node to automate work in AMQP Sender, and integrate AMQP Sender with other applications. n8n has built-in support for a wide range of AMQP Sender features, including sending messages. On this page, you'll find a list of operations the AMQP Sender node supports and links to more resources. Credentials Refer to AMQP Sender credentials for guidance on setting up authentication. ## Operations# * Send message ## Templates and examples# Browse AMQP Sender integration templates, or search all templates --- ## Page: https://docs.n8n.io/integrations/builtin/app-nodes/n8n-nodes-base.apitemplateio/ Use the APITemplate.io node to automate work in APITemplate.io, and integrate APITemplate.io with other applications. n8n has built-in support for a wide range of APITemplate.io features, including getting and creating accounts and PDF. On this page, you'll find a list of operations the APITemplate.io node supports and links to more resources. This node can be used as an AI tool This node can be used to enhance the capabilities of an AI agent. When used in this way, many parameters can be set automatically, or with information directed by AI - find out more in the AI tool parameters documentation. ## Operations# * Account * Get * Image * Create * PDF * Create ## Templates and examples# Browse APITemplate.io integration templates, or search all templates ## What to do if your operation isn't supported# If this node doesn't support the operation you want to do, you can use the HTTP Request node to call the service's API. You can use the credential you created for this service in the HTTP Request node: 1. In the HTTP Request node, select **Authentication** > **Predefined Credential Type**. 2. Select the service you want to connect to. 3. Select your credential. Refer to Custom API operations for more information. --- ## Page: https://docs.n8n.io/integrations/builtin/app-nodes/n8n-nodes-base.asana/ Use the Asana node to automate work in Asana, and integrate Asana with other applications. n8n has built-in support for a wide range of Asana features, including creating, updating, deleting, and getting users, tasks, projects, and subtasks. On this page, you'll find a list of operations the Asana node supports and links to more resources. Update to 1.22.2 or above Due to changes in Asana's API, some operations in this node stopped working on 17th January 2023. Upgrade to n8n 1.22.2 or above. This node can be used as an AI tool This node can be used to enhance the capabilities of an AI agent. When used in this way, many parameters can be set automatically, or with information directed by AI - find out more in the AI tool parameters documentation. ## Operations# * Project * Create a new project * Delete a project * Get a project * Get all projects * Update a project * Subtask * Create a subtask * Get all subtasks * Task * Create a task * Delete a task * Get a task * Get all tasks * Move a task * Search for tasks * Update a task * Task Comment * Add a comment to a task * Remove a comment from a task * Task Tag * Add a tag to a task * Remove a tag from a task * Task Project * Add a task to a project * Remove a task from a project * User * Get a user * Get all users ## Templates and examples# ## What to do if your operation isn't supported# If this node doesn't support the operation you want to do, you can use the HTTP Request node to call the service's API. You can use the credential you created for this service in the HTTP Request node: 1. In the HTTP Request node, select **Authentication** > **Predefined Credential Type**. 2. Select the service you want to connect to. 3. Select your credential. Refer to Custom API operations for more information. --- ## Page: https://docs.n8n.io/integrations/builtin/app-nodes/n8n-nodes-base.automizy/ Use the Automizy node to automate work in Automizy, and integrate Automizy with other applications. n8n has built-in support for a wide range of Automizy features, including creating, reading, listing, updating, deleting contacts, and lists. On this page, you'll find a list of operations the Automizy node supports and links to more resources. ## Operations# * Contact * Create a contact * Delete a contact * Get a contact * Get all contacts * Update a contact * List * Create a list * Delete a list * Get a list * Get all lists * Update a list ## Templates and examples# Browse Automizy integration templates, or search all templates --- ## Page: https://docs.n8n.io/integrations/builtin/app-nodes/n8n-nodes-base.autopilot/ Use the Autopilot node to automate work in Autopilot, and integrate Autopilot with other applications. n8n has built-in support for a wide range of Autopilot features, including creating, deleting, and updating contacts, as well as adding contacts to a list. On this page, you'll find a list of operations the Autopilot node supports and links to more resources. Autopilot branding change Autopilot has become Ortto. The Autopilot credentials and nodes are only compatible with Autopilot, not the new Ortto API. ## Operations# * Contact * Create/Update a contact * Delete a contact * Get a contact * Get all contacts * Contact Journey * Add contact to list * Contact List * Add contact to list * Check if contact is on list * Get all contacts on list * Remove a contact from a list * List * Create a list * Get all lists ## Templates and examples# Browse Autopilot integration templates, or search all templates --- ## Page: https://docs.n8n.io/integrations/builtin/app-nodes/n8n-nodes-base.awscertificatemanager/ Use the AWS Certificate Manager node to automate work in AWS Certificate Manager, and integrate AWS Certificate Manager with other applications. n8n has built-in support for a wide range of AWS Certificate Manager features, including creating, deleting, getting, and renewing SSL certificates. On this page, you'll find a list of operations the AWS Certificate Manager node supports and links to more resources. ## Operations# * Certificate * Delete * Get * Get Many * Get Metadata * Renew ## Templates and examples# Refer to AWS Certificate Manager's documentation for more information on this service. ## What to do if your operation isn't supported# If this node doesn't support the operation you want to do, you can use the HTTP Request node to call the service's API. You can use the credential you created for this service in the HTTP Request node: 1. In the HTTP Request node, select **Authentication** > **Predefined Credential Type**. 2. Select the service you want to connect to. 3. Select your credential. Refer to Custom API operations for more information. --- ## Page: https://docs.n8n.io/integrations/builtin/app-nodes/n8n-nodes-base.awscomprehend/ Use the AWS Comprehend node to automate work in AWS Comprehend, and integrate AWS Comprehend with other applications. n8n has built-in support for a wide range of AWS Comprehend features, including identifying and analyzing texts. On this page, you'll find a list of operations the AWS Comprehend node supports and links to more resources. ## Operations# **Text** * Identify the dominant language * Analyse the sentiment of the text ## Templates and examples# Browse AWS Comprehend integration templates, or search all templates ## What to do if your operation isn't supported# If this node doesn't support the operation you want to do, you can use the HTTP Request node to call the service's API. You can use the credential you created for this service in the HTTP Request node: 1. In the HTTP Request node, select **Authentication** > **Predefined Credential Type**. 2. Select the service you want to connect to. 3. Select your credential. Refer to Custom API operations for more information. --- ## Page: https://docs.n8n.io/integrations/builtin/app-nodes/n8n-nodes-base.awsdynamodb/ Use the AWS DynamoDB node to automate work in AWS DynamoDB, and integrate AWS DynamoDB with other applications. n8n has built-in support for a wide range of AWS DynamoDB features, including creating, reading, updating, deleting items, and records on a database. On this page, you'll find a list of operations the AWS DynamoDB node supports and links to more resources. Credentials Refer to AWS credentials for guidance on setting up authentication. ## Operations# * Item * Create a new record, or update the current one if it already exists (upsert/put) * Delete an item * Get an item * Get all items ## Templates and examples# ## What to do if your operation isn't supported# If this node doesn't support the operation you want to do, you can use the HTTP Request node to call the service's API. You can use the credential you created for this service in the HTTP Request node: 1. In the HTTP Request node, select **Authentication** > **Predefined Credential Type**. 2. Select the service you want to connect to. 3. Select your credential. Refer to Custom API operations for more information. --- ## Page: https://docs.n8n.io/integrations/builtin/app-nodes/n8n-nodes-base.awselb/ Use the AWS Elastic Load Balancing node to automate work in AWS ELB, and integrate AWS ELB with other applications. n8n has built-in support for a wide range of AWS ELB features, including adding, getting, removing, deleting certificates and load balancers. On this page, you'll find a list of operations the AWS ELB node supports and links to more resources. ## Operations# * Listener Certificate * Add * Get Many * Remove * Load Balancer * Create * Delete * Get * Get Many This node supports creating and managing application and network load balancers. It doesn't currently support gateway load balancers. ## Templates and examples# Refer to AWS ELB's documentation for more information on this service. ## What to do if your operation isn't supported# If this node doesn't support the operation you want to do, you can use the HTTP Request node to call the service's API. You can use the credential you created for this service in the HTTP Request node: 1. In the HTTP Request node, select **Authentication** > **Predefined Credential Type**. 2. Select the service you want to connect to. 3. Select your credential. Refer to Custom API operations for more information. --- ## Page: https://docs.n8n.io/integrations/builtin/app-nodes/n8n-nodes-base.awslambda/ Use the AWS Lambda node to automate work in AWS Lambda, and integrate AWS Lambda with other applications. n8n has built-in support for a wide range of AWS Lambda features, including invoking functions. On this page, you'll find a list of operations the AWS Lambda node supports and links to more resources. This node can be used as an AI tool This node can be used to enhance the capabilities of an AI agent. When used in this way, many parameters can be set automatically, or with information directed by AI - find out more in the AI tool parameters documentation. ## Operations# * Invoke a function ## Templates and examples# Browse AWS Lambda integration templates, or search all templates ## What to do if your operation isn't supported# If this node doesn't support the operation you want to do, you can use the HTTP Request node to call the service's API. You can use the credential you created for this service in the HTTP Request node: 1. In the HTTP Request node, select **Authentication** > **Predefined Credential Type**. 2. Select the service you want to connect to. 3. Select your credential. Refer to Custom API operations for more information. --- ## Page: https://docs.n8n.io/integrations/builtin/app-nodes/n8n-nodes-base.awsrekognition/ Use the AWS Rekognition node to automate work in AWS Rekognition, and integrate AWS Rekognition with other applications. n8n has built-in support for a wide range of AWS Rekognition features, including analyzing images. On this page, you'll find a list of operations the AWS Rekognition node supports and links to more resources. ## Operations# **Image** * Analyze ## Templates and examples# Browse AWS Rekognition integration templates, or search all templates ## What to do if your operation isn't supported# If this node doesn't support the operation you want to do, you can use the HTTP Request node to call the service's API. You can use the credential you created for this service in the HTTP Request node: 1. In the HTTP Request node, select **Authentication** > **Predefined Credential Type**. 2. Select the service you want to connect to. 3. Select your credential. Refer to Custom API operations for more information. --- ## Page: https://docs.n8n.io/integrations/builtin/app-nodes/n8n-nodes-base.awss3/ Use the AWS S3 node to automate work in AWS S3, and integrate AWS S3 with other applications. n8n has built-in support for a wide range of AWS S3 features, including creating and deleting buckets, copying and downloading files, as well as getting folders. On this page, you'll find a list of operations the AWS S3 node supports and links to more resources. Credentials Refer to AWS credentials for guidance on setting up authentication. This node can be used as an AI tool This node can be used to enhance the capabilities of an AI agent. When used in this way, many parameters can be set automatically, or with information directed by AI - find out more in the AI tool parameters documentation. ## Operations# * Bucket * Create a bucket * Delete a bucket * Get all buckets * Search within a bucket * File * Copy a file * Delete a file * Download a file * Get all files * Upload a file * Folder * Create a folder * Delete a folder * Get all folders ## Templates and examples# ## What to do if your operation isn't supported# If this node doesn't support the operation you want to do, you can use the HTTP Request node to call the service's API. You can use the credential you created for this service in the HTTP Request node: 1. In the HTTP Request node, select **Authentication** > **Predefined Credential Type**. 2. Select the service you want to connect to. 3. Select your credential. Refer to Custom API operations for more information. --- ## Page: https://docs.n8n.io/integrations/builtin/app-nodes/n8n-nodes-base.awsses/ Use the AWS SES node to automate work in AWS SES, and integrate AWS SES with other applications. n8n has built-in support for a wide range of AWS SES features, including creating, getting, deleting, sending, updating, and adding templates and emails. On this page, you'll find a list of operations the AWS SES node supports and links to more resources. This node can be used as an AI tool This node can be used to enhance the capabilities of an AI agent. When used in this way, many parameters can be set automatically, or with information directed by AI - find out more in the AI tool parameters documentation. ## Operations# * Custom Verification Email * Create a new custom verification email template * Delete an existing custom verification email template * Get the custom email verification template * Get all the existing custom verification email templates for your account * Add an email address to the list of identities * Update an existing custom verification email template. * Email * Send * Send Template * Template * Create a template * Delete a template * Get a template * Get all templates * Update a template ## Templates and examples# ## What to do if your operation isn't supported# If this node doesn't support the operation you want to do, you can use the HTTP Request node to call the service's API. You can use the credential you created for this service in the HTTP Request node: 1. In the HTTP Request node, select **Authentication** > **Predefined Credential Type**. 2. Select the service you want to connect to. 3. Select your credential. Refer to Custom API operations for more information. --- ## Page: https://docs.n8n.io/integrations/builtin/app-nodes/n8n-nodes-base.awssns/ Use the AWS SNS node to automate work in AWS SNS, and integrate AWS SNS with other applications. n8n has built-in support for a wide range of AWS SNS features, including publishing messages. On this page, you'll find a list of operations the AWS SNS node supports and links to more resources. ## Operations# * Publish a message to a topic ## Templates and examples# Browse AWS SNS integration templates, or search all templates ## What to do if your operation isn't supported# If this node doesn't support the operation you want to do, you can use the HTTP Request node to call the service's API. You can use the credential you created for this service in the HTTP Request node: 1. In the HTTP Request node, select **Authentication** > **Predefined Credential Type**. 2. Select the service you want to connect to. 3. Select your credential. Refer to Custom API operations for more information. --- ## Page: https://docs.n8n.io/integrations/builtin/app-nodes/n8n-nodes-base.awssqs/ Use the AWS SQS node to automate work in AWS SNS, and integrate AWS SQS with other applications. n8n has built-in support for a wide range of AWS SQS features, including sending messages. On this page, you'll find a list of operations the AWS SQS node supports and links to more resources. ## Operations# * Send a message to a queue. ## Templates and examples# Browse AWS SQS integration templates, or search all templates ## What to do if your operation isn't supported# If this node doesn't support the operation you want to do, you can use the HTTP Request node to call the service's API. You can use the credential you created for this service in the HTTP Request node: 1. In the HTTP Request node, select **Authentication** > **Predefined Credential Type**. 2. Select the service you want to connect to. 3. Select your credential. Refer to Custom API operations for more information. --- ## Page: https://docs.n8n.io/integrations/builtin/app-nodes/n8n-nodes-base.awstextract/ Use the AWS Textract node to automate work in AWS Textract, and integrate AWS Textract with other applications. n8n has built-in support for a wide range of AWS Textract features, including analyzing invoices. On this page, you'll find a list of operations the AWS Textract node supports and links to more resources. This node can be used as an AI tool This node can be used to enhance the capabilities of an AI agent. When used in this way, many parameters can be set automatically, or with information directed by AI - find out more in the AI tool parameters documentation. ## Operations# * Analyze Receipt or Invoice ## Templates and examples# Browse AWS Textract integration templates, or search all templates ## What to do if your operation isn't supported# If this node doesn't support the operation you want to do, you can use the HTTP Request node to call the service's API. You can use the credential you created for this service in the HTTP Request node: 1. In the HTTP Request node, select **Authentication** > **Predefined Credential Type**. 2. Select the service you want to connect to. 3. Select your credential. Refer to Custom API operations for more information. --- ## Page: https://docs.n8n.io/integrations/builtin/app-nodes/n8n-nodes-base.awstranscribe/ Use the AWS Transcribe node to automate work in AWS Transcribe, and integrate AWS Transcribe with other applications. n8n has built-in support for a wide range of AWS Transcribe features, including creating, deleting, and getting transcription jobs. On this page, you'll find a list of operations the AWS Transcribe node supports and links to more resources. This node can be used as an AI tool This node can be used to enhance the capabilities of an AI agent. When used in this way, many parameters can be set automatically, or with information directed by AI - find out more in the AI tool parameters documentation. ## Operations# **Transcription Job** * Create a transcription job * Delete a transcription job * Get a transcription job * Get all transcriptions job ## Templates and examples# Browse AWS Transcribe integration templates, or search all templates ## What to do if your operation isn't supported# If this node doesn't support the operation you want to do, you can use the HTTP Request node to call the service's API. You can use the credential you created for this service in the HTTP Request node: 1. In the HTTP Request node, select **Authentication** > **Predefined Credential Type**. 2. Select the service you want to connect to. 3. Select your credential. Refer to Custom API operations for more information. --- ## Page: https://docs.n8n.io/integrations/builtin/app-nodes/n8n-nodes-base.azurestorage/ The Azure Storage node has built-in support for a wide range of features, which includes creating, getting, and deleting blobs and containers. Use this node to automate work within the Azure Storage service or integrate it with other services in your workflow. On this page, you'll find a list of operations the Azure Storage node supports, and links to more resources. Credentials You can find authentication information for this node here. ## Operations# * **Blob** * **Create blob**: Create a new blob or replace an existing one. * **Delete blob**: Delete an existing blob. * **Get blob**: Retrieve data for a specific blob. * **Get many blobs**: Retrieve a list of blobs. * **Container** * **Create container**: Create a new container. * **Delete container**: Delete an existing container. * **Get container**: Retrieve data for a specific container. * **Get many containers**: Retrieve a list of containers. ## Templates and examples# Refer to Microsoft's Azure Storage documentation for more information about the service. ## What to do if your operation isn't supported# If this node doesn't support the operation you want to do, you can use the HTTP Request node to call the service's API. You can use the credential you created for this service in the HTTP Request node: 1. In the HTTP Request node, select **Authentication** > **Predefined Credential Type**. 2. Select the service you want to connect to. 3. Select your credential. Refer to Custom API operations for more information. --- ## Page: https://docs.n8n.io/integrations/builtin/app-nodes/n8n-nodes-base.bamboohr/ Use the BambooHR node to automate work in BambooHR, and integrate BambooHR with other applications. n8n has built-in support for a wide range of BambooHR features, including creating, deleting, downloading, and getting company reports, employee documents, and files. On this page, you'll find a list of operations the BambooHR node supports and links to more resources. ## Operations# * Company Report * Get a company report * Employee * Create an employee * Get an employee * Get all employees * Update an employee * Employee Document * Delete an employee document * Download an employee document * Get all employee document * Update an employee document * Upload an employee document * File * Delete a company file * Download a company file * Get all company files * Update a company file * Upload a company file ## Templates and examples# Browse BambooHR integration templates, or search all templates --- ## Page: https://docs.n8n.io/integrations/builtin/app-nodes/n8n-nodes-base.bannerbear/ Use the Bannerbear node to automate work in Bannerbear, and integrate Bannerbear with other applications. n8n has built-in support for a wide range of Bannerbear features, including creating and getting images and templates. On this page, you'll find a list of operations the Bannerbear node supports and links to more resources. Credentials Refer to Bannerbear credentials for guidance on setting up authentication. ## Operations# * Image * Create an image * Get an image * Template * Get a template * Get all templates ## Templates and examples# **Speed Up Social Media Banners With BannerBear.com** by Jimleuk View template details **Render custom text over images** by tanaypant View template details **Send Airtable data as tasks to Trello** by tanaypant View template details Browse Bannerbear integration templates, or search all templates --- ## Page: https://docs.n8n.io/integrations/builtin/app-nodes/n8n-nodes-base.baserow/ Use the Baserow node to automate work in Baserow, and integrate Baserow with other applications. n8n has built-in support for a wide range of Baserow features, including creating, getting, retrieving, and updating rows. On this page, you'll find a list of operations the Baserow node supports and links to more resources. This node can be used as an AI tool This node can be used to enhance the capabilities of an AI agent. When used in this way, many parameters can be set automatically, or with information directed by AI - find out more in the AI tool parameters documentation. ## Operations# * Row * Create a row * Delete a row * Retrieve a row * Retrieve all rows * Update a row ## Templates and examples# --- ## Page: https://docs.n8n.io/integrations/builtin/app-nodes/n8n-nodes-base.beeminder/ Use the Beeminder node to automate work in Beeminder, and integrate Beeminder with other applications. n8n has built-in support for a wide range of Beeminder features, including creating, deleting, and updating data points. On this page, you'll find a list of operations the Beeminder node supports and links to more resources. ## Operations# **data point** - Create data point for a goal - Delete a data point - Get all data points for a goal - Update a data point ## Templates and examples# Browse Beeminder integration templates, or search all templates ## What to do if your operation isn't supported# If this node doesn't support the operation you want to do, you can use the HTTP Request node to call the service's API. You can use the credential you created for this service in the HTTP Request node: 1. In the HTTP Request node, select **Authentication** > **Predefined Credential Type**. 2. Select the service you want to connect to. 3. Select your credential. Refer to Custom API operations for more information. --- ## Page: https://docs.n8n.io/integrations/builtin/app-nodes/n8n-nodes-base.bitly/ Use the Bitly node to automate work in Bitly, and integrate Bitly with other applications. n8n has built-in support for a wide range of Bitly features, including creating, getting, and updating links. On this page, you'll find a list of operations the Bitly node supports and links to more resources. ## Operations# * Link * Create a link * Get a link * Update a link ## Templates and examples# Browse Bitly integration templates, or search all templates ## What to do if your operation isn't supported# If this node doesn't support the operation you want to do, you can use the HTTP Request node to call the service's API. You can use the credential you created for this service in the HTTP Request node: 1. In the HTTP Request node, select **Authentication** > **Predefined Credential Type**. 2. Select the service you want to connect to. 3. Select your credential. Refer to Custom API operations for more information. --- ## Page: https://docs.n8n.io/integrations/builtin/app-nodes/n8n-nodes-base.bitwarden/ Use the Bitwarden node to automate work in Bitwarden, and integrate Bitwarden with other applications. n8n has built-in support for a wide range of Bitwarden features, including creating, getting, deleting, and updating collections, events, groups, and members. On this page, you'll find a list of operations the Bitwarden node supports and links to more resources. ## Operations# * Collection * Delete * Get * Get All * Update * Event * Get All * Group * Create * Delete * Get * Get All * Get Members * Update * Update Members * Member * Create * Delete * Get * Get All * Get Groups * Update * Update Groups ## Templates and examples# Browse Bitwarden integration templates, or search all templates --- ## Page: https://docs.n8n.io/integrations/builtin/app-nodes/n8n-nodes-base.box/ Use the Box node to automate work in Box, and integrate Box with other applications. n8n has built-in support for a wide range of Box features, including creating, copying, deleting, searching, uploading, and downloading files and folders. On this page, you'll find a list of operations the Box node supports and links to more resources. Credentials Refer to Box credentials for guidance on setting up authentication. ## Operations# * File * Copy a file * Delete a file * Download a file * Get a file * Search files * Share a file * Upload a file * Folder * Create a folder * Get a folder * Delete a folder * Search files * Share a folder * Update folder ## Templates and examples# Browse Box integration templates, or search all templates ## What to do if your operation isn't supported# If this node doesn't support the operation you want to do, you can use the HTTP Request node to call the service's API. You can use the credential you created for this service in the HTTP Request node: 1. In the HTTP Request node, select **Authentication** > **Predefined Credential Type**. 2. Select the service you want to connect to. 3. Select your credential. Refer to Custom API operations for more information. --- ## Page: https://docs.n8n.io/integrations/builtin/app-nodes/n8n-nodes-base.brandfetch/ Use the Brandfetch node to automate work in Brandfetch, and integrate Brandfetch with other applications. n8n has built-in support for a wide range of Brandfetch features, including returning a company’s information. On this page, you'll find a list of operations the Brandfetch node supports and links to more resources. ## Operations# * Return a company's colors * Return a company's data * Return a company's fonts * Return a company's industry * Return a company's logo & icon ## Templates and examples# Browse Brandfetch integration templates, or search all templates --- ## Page: https://docs.n8n.io/integrations/builtin/app-nodes/n8n-nodes-base.brevo/ Use the Brevo node to automate work in Brevo, and integrate Brevo with other applications. n8n has built-in support for a wide range of Brevo features, including creating, updating, deleting, and getting contacts, attributes, as well as sending emails. On this page, you'll find a list of operations the Brevo node supports and links to more resources. ## Operations# * Contact * Create * Create or Update * Delete * Get * Get All * Update * Contact Attribute * Create * Delete * Get All * Update * Email * Send * Send Template * Sender * Create * Delete * Get All ## Templates and examples# Browse Brevo integration templates, or search all templates ## What to do if your operation isn't supported# If this node doesn't support the operation you want to do, you can use the HTTP Request node to call the service's API. You can use the credential you created for this service in the HTTP Request node: 1. In the HTTP Request node, select **Authentication** > **Predefined Credential Type**. 2. Select the service you want to connect to. 3. Select your credential. Refer to Custom API operations for more information. --- ## Page: https://docs.n8n.io/integrations/builtin/app-nodes/n8n-nodes-base.bubble/ Use the Bubble node to automate work in Bubble, and integrate Bubble with other applications. n8n has built-in support for a wide range of Bubble features, including creating, deleting, getting, and updating objects. On this page, you'll find a list of operations the Bubble node supports and links to more resources. This node can be used as an AI tool This node can be used to enhance the capabilities of an AI agent. When used in this way, many parameters can be set automatically, or with information directed by AI - find out more in the AI tool parameters documentation. ## Operations# * Object * Create * Delete * Get * Get All * Update ## Templates and examples# Browse Bubble integration templates, or search all templates --- ## Page: https://docs.n8n.io/integrations/builtin/app-nodes/n8n-nodes-base.chargebee/ Use the Chargebee node to automate work in Chargebee, and integrate Chargebee with other applications. n8n has built-in support for a wide range of Chargebee features, including creating customers, returning invoices, and canceling subscriptions. On this page, you'll find a list of operations the Chargebee node supports and links to more resources. ## Operations# * Customer * Create a customer * Invoice * Return the invoices * Get URL for the invoice PDF * Subscription * Cancel a subscription * Delete a subscription ## Templates and examples# Browse Chargebee integration templates, or search all templates --- ## Page: https://docs.n8n.io/integrations/builtin/app-nodes/n8n-nodes-base.circleci/ Use the CircleCI node to automate work in CircleCI, and integrate CircleCI with other applications. n8n has built-in support for a wide range of CircleCI features, including getting and triggering pipelines. On this page, you'll find a list of operations the CircleCI node supports and links to more resources. Credentials Refer to CircleCI credentials for guidance on setting up authentication. ## Operations# * Pipeline * Get a pipeline * Get all pipelines * Trigger a pipeline ## Templates and examples# Browse CircleCI integration templates, or search all templates --- ## Page: https://docs.n8n.io/integrations/builtin/app-nodes/n8n-nodes-base.ciscowebex/ Use the Webex by Cisco node to automate work in Webex, and integrate Webex with other applications. n8n has built-in support for a wide range of Webex features, including creating, getting, updating, and deleting meetings and messages. On this page, you'll find a list of operations the Webex node supports and links to more resources. Examples and Templates For usage examples and templates to help you get started, take a look at n8n's Webex integrations list. ## Operations# * Meeting * Create * Delete * Get * Get All * Update * Message * Create * Delete * Get * Get All * Update ## Templates and examples# Browse Webex by Cisco integration templates, or search all templates ## What to do if your operation isn't supported# If this node doesn't support the operation you want to do, you can use the HTTP Request node to call the service's API. You can use the credential you created for this service in the HTTP Request node: 1. In the HTTP Request node, select **Authentication** > **Predefined Credential Type**. 2. Select the service you want to connect to. 3. Select your credential. Refer to Custom API operations for more information. --- ## Page: https://docs.n8n.io/integrations/builtin/app-nodes/n8n-nodes-base.clearbit/ Use the Clearbit node to automate work in Clearbit, and integrate Clearbit with other applications. n8n has built-in support for a wide range of Clearbit features, including autocompleting and looking up companies and persons. On this page, you'll find a list of operations the Clearbit node supports and links to more resources. ## Operations# * Company * Auto-complete company names and retrieve logo and domain * Look up person and company data based on an email or domain * Person * Look up a person and company data based on an email or domain ## Templates and examples# --- ## Page: https://docs.n8n.io/integrations/builtin/app-nodes/n8n-nodes-base.clickup/ Use the ClickUp node to automate work in ClickUp, and integrate ClickUp with other applications. n8n has built-in support for a wide range of ClickUp features, including creating, getting, deleting, and updating folders, checklists, tags, comments, and goals. On this page, you'll find a list of operations the ClickUp node supports and links to more resources. This node can be used as an AI tool This node can be used to enhance the capabilities of an AI agent. When used in this way, many parameters can be set automatically, or with information directed by AI - find out more in the AI tool parameters documentation. ## Operations# * Checklist * Create a checklist * Delete a checklist * Update a checklist * Checklist Item * Create a checklist item * Delete a checklist item * Update a checklist item * Comment * Create a comment * Delete a comment * Get all comments * Update a comment * Folder * Create a folder * Delete a folder * Get a folder * Get all folders * Update a folder * Goal * Create a goal * Delete a goal * Get a goal * Get all goals * Update a goal * Goal Key Result * Create a key result * Delete a key result * Update a key result * List * Create a list * Retrieve list's custom fields * Delete a list * Get a list * Get all lists * Get list members * Update a list * Space Tag * Create a space tag * Delete a space tag * Get all space tags * Update a space tag * Task * Create a task * Delete a task * Get a task * Get all tasks * Get task members * Set a custom field * Update a task * Task List * Add a task to a list * Remove a task from a list * Task Tag * Add a tag to a task * Remove a tag from a task * Task Dependency * Create a task dependency * Delete a task dependency * Time Entry * Create a time entry * Delete a time entry * Get a time entry * Get all time entries * Start a time entry * Stop the current running timer * Update a time Entry * Time Entry Tag * Add tag to time entry * Get all time entry tags * Remove tag from time entry ## Templates and examples# ## What to do if your operation isn't supported# If this node doesn't support the operation you want to do, you can use the HTTP Request node to call the service's API. You can use the credential you created for this service in the HTTP Request node: 1. In the HTTP Request node, select **Authentication** > **Predefined Credential Type**. 2. Select the service you want to connect to. 3. Select your credential. Refer to Custom API operations for more information. --- ## Page: https://docs.n8n.io/integrations/builtin/app-nodes/n8n-nodes-base.clockify/ Use the Clockify node to automate work in Clockify, and integrate Clockify with other applications. n8n has built-in support for a wide range of Clockify features, including creating, updating, getting, and deleting tasks, time entries, projects, and tags. On this page, you'll find a list of operations the Clockify node supports and links to more resources. ## Operations# * Project * Create a project * Delete a project * Get a project * Get all projects * Update a project * Tag * Create a tag * Delete a tag * Get all tags * Update a tag * Task * Create a task * Delete a task * Get a task * Get all tasks * Update a task * Time Entry * Create a time entry * Delete a time entry * Get time entry * Update a time entry ## Templates and examples# ## What to do if your operation isn't supported# If this node doesn't support the operation you want to do, you can use the HTTP Request node to call the service's API. You can use the credential you created for this service in the HTTP Request node: 1. In the HTTP Request node, select **Authentication** > **Predefined Credential Type**. 2. Select the service you want to connect to. 3. Select your credential. Refer to Custom API operations for more information. --- ## Page: https://docs.n8n.io/integrations/builtin/app-nodes/n8n-nodes-base.cloudflare/ Use the Cloudflare node to automate work in Cloudflare, and integrate Cloudflare with other applications. n8n has built-in support for a wide range of Cloudflare features, including deleting, getting, and uploading zone certificates. On this page, you'll find a list of operations the Cloudflare node supports and links to more resources. ## Operations# * Zone Certificate * Delete * Get * Get Many * Upload ## Templates and examples# Browse Cloudflare integration templates, or search all templates Refer to Cloudflare's API documentation on zone-level authentication for more information on this service. ## What to do if your operation isn't supported# If this node doesn't support the operation you want to do, you can use the HTTP Request node to call the service's API. You can use the credential you created for this service in the HTTP Request node: 1. In the HTTP Request node, select **Authentication** > **Predefined Credential Type**. 2. Select the service you want to connect to. 3. Select your credential. Refer to Custom API operations for more information. --- ## Page: https://docs.n8n.io/integrations/builtin/app-nodes/n8n-nodes-base.cockpit/ Use the Cockpit node to automate work in Cockpit, and integrate Cockpit with other applications. n8n has built-in support for a wide range of Cockpit features, including creating a collection entry, storing data from a form submission, and getting singletons. On this page, you'll find a list of operations the Cockpit node supports and links to more resources. ## Operations# * Collection * Create a collection entry * Get all collection entries * Update a collection entry * Form * Store data from a form submission * Singleton * Get a singleton ## Templates and examples# Browse Cockpit integration templates, or search all templates --- ## Page: https://docs.n8n.io/integrations/builtin/app-nodes/n8n-nodes-base.coda/ Use the Coda node to automate work in Coda, and integrate Coda with other applications. n8n has built-in support for a wide range of Coda features, including creating, getting, and deleting controls, formulas, tables, and views. On this page, you'll find a list of operations the Coda node supports and links to more resources. Credentials Refer to Coda credentials for guidance on setting up authentication. ## Operations# * Control * Get a control * Get all controls * Formula * Get a formula * Get all formulas * Table * Create/Insert a row * Delete one or multiple rows * Get all columns * Get all the rows * Get a column * Get a row * Pushes a button * View * Delete view row * Get a view * Get all views * Get all views columns * Get all views rows * Update row * Push view button ## Templates and examples# Browse Coda integration templates, or search all templates --- ## Page: https://docs.n8n.io/integrations/builtin/app-nodes/n8n-nodes-base.coingecko/ Use the CoinGecko node to automate work in CoinGecko, and integrate CoinGecko with other applications. n8n has built-in support for a wide range of CoinGecko features, including getting coins and events. On this page, you'll find a list of operations the CoinGecko node supports and links to more resources. This node can be used as an AI tool This node can be used to enhance the capabilities of an AI agent. When used in this way, many parameters can be set automatically, or with information directed by AI - find out more in the AI tool parameters documentation. ## Operations# * Coin * Get a candlestick open-high-low-close chart for the selected currency * Get current data for a coin * Get all coins * Get historical data (name, price, market, stats) at a given date for a coin * Get prices and market related data for all trading pairs that match the selected currency * Get historical market data include price, market cap, and 24h volume (granularity auto) * Get the current price of any cryptocurrencies in any other supported currencies that you need * Get coin tickers * Event * Get all events ## Templates and examples# --- ## Page: https://docs.n8n.io/integrations/builtin/app-nodes/n8n-nodes-base.contentful/ Use the Contentful node to automate work in Contentful, and integrate Contentful with other applications. n8n has built-in support for a wide range of Contentful features, including getting assets, content types, entries, locales, and space. On this page, you'll find a list of operations the Contentful node supports and links to more resources. ## Operations# * Asset * Get * Get All * Content Type * Get * Entry * Get * Get All * Locale * Get All * Space * Get ## Templates and examples# Browse Contentful integration templates, or search all templates --- ## Page: https://docs.n8n.io/integrations/builtin/app-nodes/n8n-nodes-base.convertkit/ Use the ConvertKit node to automate work in ConvertKit, and integrate ConvertKit with other applications. n8n has built-in support for a wide range of ConvertKit features, including creating and deleting custom fields, getting tags, and adding subscribers. On this page, you'll find a list of operations the ConvertKit node supports and links to more resources. ## Operations# * Custom Field * Create a field * Delete a field * Get all fields * Update a field * Form * Add a subscriber * Get all forms * List subscriptions to a form including subscriber data * Sequence * Add a subscriber * Get all sequences * Get all subscriptions to a sequence including subscriber data * Tag * Create a tag * Get all tags * Tag Subscriber * Add a tag to a subscriber * List subscriptions to a tag including subscriber data * Delete a tag from a subscriber ## Templates and examples# --- ## Page: https://docs.n8n.io/integrations/builtin/app-nodes/n8n-nodes-base.copper/ Use the Copper node to automate work in Copper, and integrate Copper with other applications. n8n has built-in support for a wide range of Copper features, including getting, updating, deleting, and creating companies, customer sources, leads, projects and tasks. On this page, you'll find a list of operations the Copper node supports and links to more resources. ## Operations# * Company * Create * Delete * Get * Get All * Update * Customer Source * Get All * Lead * Create * Delete * Get * Get All * Update * Opportunity * Create * Delete * Get * Get All * Update * Person * Create * Delete * Get * Get All * Update * Project * Create * Delete * Get * Get All * Update * Task * Create * Delete * Get * Get All * Update * User * Get All ## Templates and examples# Browse Copper integration templates, or search all templates --- ## Page: https://docs.n8n.io/integrations/builtin/app-nodes/n8n-nodes-base.cortex/ Use the Cortex node to automate work in Cortex, and integrate Cortex with other applications. n8n has built-in support for a wide range of Cortex features, including executing analyzers, and responders, as well as getting job details. On this page, you'll find a list of operations the Cortex node supports and links to more resources. ## Operations# * Analyzer * Execute Analyzer * Job * Get job details * Get job report * Responder * Execute Responder ## Templates and examples# Browse Cortex integration templates, or search all templates ## What to do if your operation isn't supported# If this node doesn't support the operation you want to do, you can use the HTTP Request node to call the service's API. You can use the credential you created for this service in the HTTP Request node: 1. In the HTTP Request node, select **Authentication** > **Predefined Credential Type**. 2. Select the service you want to connect to. 3. Select your credential. Refer to Custom API operations for more information. --- ## Page: https://docs.n8n.io/integrations/builtin/app-nodes/n8n-nodes-base.cratedb/ Use the CrateDB node to automate work in CrateDB, and integrate CrateDB with other applications. n8n has built-in support for a wide range of CrateDB features, including executing, inserting, and updating rows in the database. On this page, you'll find a list of operations the CrateDB node supports and links to more resources. ## Operations# * Execute an SQL query * Insert rows in database * Update rows in database ## Templates and examples# Browse CrateDB integration templates, or search all templates ## Node reference# ### Specify a column's data type# To specify a column's data type, append the column name with `:type`, where `type` is the data type you want for the column. For example, if you want to specify the type `int` for the column **id** and type `text` for the column **name**, you can use the following snippet in the **Columns** field: `id:int,name:text`. --- ## Page: https://docs.n8n.io/integrations/builtin/app-nodes/n8n-nodes-base.crowddev/ Use the crowd.dev node to automate work in crowd.dev and integrate crowd.dev with other applications. n8n has built-in support for a wide range of crowd.dev features, which includes creating, updating, and deleting members, notes, organizations, and tasks. On this page, you'll find a list of operations the crowd.dev node supports, and links to more resources. Credentials You can find authentication information for this node here. ## Operations# * Activity * Create or Update with a Member * Create * Automation * Create * Destroy * Find * List * Update * Member * Create or Update * Delete * Find * Update * Note * Create * Delete * Find * Update * Organization * Create * Delete * Find * Update * Task * Create * Delete * Find * Update ## Templates and examples# Browse crowd.dev integration templates, or search all templates n8n provides a trigger node for crowd.dev. You can find the trigger node docs here. Refer to crowd.dev's documentation for more information about the service. ## What to do if your operation isn't supported# If this node doesn't support the operation you want to do, you can use the HTTP Request node to call the service's API. You can use the credential you created for this service in the HTTP Request node: 1. In the HTTP Request node, select **Authentication** > **Predefined Credential Type**. 2. Select the service you want to connect to. 3. Select your credential. Refer to Custom API operations for more information. --- ## Page: https://docs.n8n.io/integrations/builtin/app-nodes/n8n-nodes-base.customerio/ Use the Customer.io node to automate work in Customer.io, and integrate Customer.io with other applications. n8n has built-in support for a wide range of Customer.io features, including creating and updating customers, tracking events, and getting campaigns. On this page, you'll find a list of operations the Customer.io node supports and links to more resources. ## Operations# * Customer * Create/Update a customer. * Delete a customer. * Event * Track a customer event. * Track an anonymous event. * Campaign * Get * Get All * Get Metrics * Segment * Add Customer * Remove Customer ## Templates and examples# Browse Customer.io integration templates, or search all templates ## What to do if your operation isn't supported# If this node doesn't support the operation you want to do, you can use the HTTP Request node to call the service's API. You can use the credential you created for this service in the HTTP Request node: 1. In the HTTP Request node, select **Authentication** > **Predefined Credential Type**. 2. Select the service you want to connect to. 3. Select your credential. Refer to Custom API operations for more information. --- ## Page: https://docs.n8n.io/integrations/builtin/app-nodes/n8n-nodes-base.deepl/ Use the DeepL node to automate work in DeepL, and integrate DeepL with other applications. n8n has built-in support for a wide range of DeepL features, including translating languages. On this page, you'll find a list of operations the DeepL node supports and links to more resources. This node can be used as an AI tool This node can be used to enhance the capabilities of an AI agent. When used in this way, many parameters can be set automatically, or with information directed by AI - find out more in the AI tool parameters documentation. ## Operations# * Language * Translate data ## Templates and examples# Browse DeepL integration templates, or search all templates ## What to do if your operation isn't supported# If this node doesn't support the operation you want to do, you can use the HTTP Request node to call the service's API. You can use the credential you created for this service in the HTTP Request node: 1. In the HTTP Request node, select **Authentication** > **Predefined Credential Type**. 2. Select the service you want to connect to. 3. Select your credential. Refer to Custom API operations for more information. --- ## Page: https://docs.n8n.io/integrations/builtin/app-nodes/n8n-nodes-base.demio/ Use the Demio node to automate work in Demio, and integrate Demio with other applications. n8n has built-in support for a wide range of Demio features, including getting, and registering events and reports. On this page, you'll find a list of operations the Demio node supports and links to more resources. Credentials Refer to Demio credentials for guidance on setting up authentication. ## Operations# * Event * Get an event * Get all events * Register someone to an event * Report * Get an event report ## Templates and examples# Browse Demio integration templates, or search all templates --- ## Page: https://docs.n8n.io/integrations/builtin/app-nodes/n8n-nodes-base.dhl/ Use the DHL node to automate work in DHL, and integrate DHL with other applications. n8n has built-in support for a wide range of DHL features, including tracking shipment. On this page, you'll find a list of operations the DHL node supports and links to more resources. Credentials Refer to DHL credentials for guidance on setting up authentication. This node can be used as an AI tool This node can be used to enhance the capabilities of an AI agent. When used in this way, many parameters can be set automatically, or with information directed by AI - find out more in the AI tool parameters documentation. ## Operations# * Shipment * Get Tracking Details ## Templates and examples# Browse DHL integration templates, or search all templates --- ## Page: https://docs.n8n.io/integrations/builtin/app-nodes/n8n-nodes-base.discord/ Use the Discord node to automate work in Discord, and integrate Discord with other applications. n8n has built-in support for a wide range of Discord features, including sending messages in a Discord channel and managing channels. On this page, you'll find a list of operations the Discord node supports and links to more resources. This node can be used as an AI tool This node can be used to enhance the capabilities of an AI agent. When used in this way, many parameters can be set automatically, or with information directed by AI - find out more in the AI tool parameters documentation. ## Operations# * Channel * Create * Delete * Get * Get Many * Update * Message * Delete * Get * Get Many * React with Emoji * Send * Member * Get Many * Role Add * Role Remove ## Templates and examples# Refer to Discord's documentation for more information about the service. ## What to do if your operation isn't supported# If this node doesn't support the operation you want to do, you can use the HTTP Request node to call the service's API. You can use the credential you created for this service in the HTTP Request node: 1. In the HTTP Request node, select **Authentication** > **Predefined Credential Type**. 2. Select the service you want to connect to. 3. Select your credential. Refer to Custom API operations for more information. ## Common issues# For common errors or issues and suggested resolution steps, refer to Common Issues. --- ## Page: https://docs.n8n.io/integrations/builtin/app-nodes/n8n-nodes-base.discord/common-issues/ Here are some common errors and issues with the Discord node and steps to resolve or troubleshoot them. Discord messages can optionally include embeds, a rich preview component that can include a title, description, image, link, and more. The Discord node supports embeds when using the **Send** operation on the **Message** resource. Select **Add Embeds** to set extra fields including Description, Author, Title, URL, and URL Image. To add fields that aren't included by default, set **Input Method** to **Raw JSON**. From here, add a JSON object to the **Value** parameter defining the field names and values you want to include. For example, to include `footer` and `fields`, neither of which are available using the **Enter Fields** Input Method, you could use a JSON object like this: <table><tbody><tr><td><div><pre><span></span><span> 1</span> <span> 2</span> <span> 3</span> <span> 4</span> <span> 5</span> <span> 6</span> <span> 7</span> <span> 8</span> <span> 9</span> <span>10</span> <span>11</span> <span>12</span> <span>13</span> <span>14</span></pre></div></td><td><div><pre><span></span><code><span>{</span> <span> </span><span>"author"</span><span>:</span><span> </span><span>"My Name"</span><span>,</span> <span> </span><span>"url"</span><span>:</span><span> </span><span>"https://discord.js.org"</span><span>,</span> <span> </span><span>"fields"</span><span>:</span><span> </span><span>[</span> <span> </span><span>{</span> <span> </span><span>"name"</span><span>:</span><span> </span><span>"Regular field title"</span><span>,</span> <span> </span><span>"value"</span><span>:</span><span> </span><span>"Some value here"</span> <span> </span><span>}</span> <span> </span><span>],</span> <span> </span><span>"footer"</span><span>:</span><span> </span><span>{</span> <span> </span><span>"text"</span><span>:</span><span> </span><span>"Some footer text here"</span><span>,</span> <span> </span><span>"icon_url"</span><span>:</span><span> </span><span>"https://i.imgur.com/AfFp7pu.png"</span> <span> </span><span>}</span> <span>}</span> </code></pre></div></td></tr></tbody></table> You can learn more about embeds in Using Webhooks and Embeds | Discord. If you experience issues when working with embeds with the Discord node, you can use the HTTP Request with your existing Discord credentials to `POST` to the following URL: <table><tbody><tr><td><div><pre><span></span><span>1</span></pre></div></td><td><div><pre><span></span><code>https://discord.com/api/v10/channels/<CHANNEL_ID>/messages </code></pre></div></td></tr></tbody></table> In the body, include your embed information in the message content like this: <table><tbody><tr><td><div><pre><span></span><span> 1</span> <span> 2</span> <span> 3</span> <span> 4</span> <span> 5</span> <span> 6</span> <span> 7</span> <span> 8</span> <span> 9</span> <span>10</span> <span>11</span> <span>12</span> <span>13</span> <span>14</span> <span>15</span> <span>16</span> <span>17</span> <span>18</span> <span>19</span></pre></div></td><td><div><pre><span></span><code><span>{</span> <span> </span><span>"content"</span><span>:</span><span> </span><span>"Test"</span><span>,</span> <span> </span><span>"embeds"</span><span>:</span><span> </span><span>[</span> <span> </span><span>{</span> <span> </span><span>"author"</span><span>:</span><span> </span><span>"My Name"</span><span>,</span> <span> </span><span>"url"</span><span>:</span><span> </span><span>"https://discord.js.org"</span><span>,</span> <span> </span><span>"fields"</span><span>:</span><span> </span><span>[</span> <span> </span><span>{</span> <span> </span><span>"name"</span><span>:</span><span> </span><span>"Regular field title"</span><span>,</span> <span> </span><span>"value"</span><span>:</span><span> </span><span>"Some value here"</span> <span> </span><span>}</span> <span> </span><span>],</span> <span> </span><span>"footer"</span><span>:</span><span> </span><span>{</span> <span> </span><span>"text"</span><span>:</span><span> </span><span>"Some footer text here"</span><span>,</span> <span> </span><span>"icon_url"</span><span>:</span><span> </span><span>"https://i.imgur.com/AfFp7pu.png"</span> <span> </span><span>}</span> <span> </span><span>}</span> <span> </span><span>]</span> <span>}</span> </code></pre></div></td></tr></tbody></table> ## Mention users and channels# To mention users and channels in Discord messages, you need to format your message according to Discord's message formatting guidelines. To mention a user, you need to know the Discord user's user ID. Keep in mind that the user ID is different from the user's display name. Similarly, you need a channel ID to link to a specific channel. You can learn how to enable developer mode and copy the user or channel IDs in Discord's documentation on finding User/Server/Message IDs. Once you have the user or channel ID, you can format your message with the following syntax: * **User**: `<@USER_ID>` * **Channel**: `<#CHANNEL_ID>` * **Role**: `<@&ROLE_ID>` --- ## Page: https://docs.n8n.io/integrations/builtin/app-nodes/n8n-nodes-base.discourse/ Use the Discourse node to automate work in Discourse, and integrate Discourse with other applications. n8n has built-in support for a wide range of Discourse features, including creating, getting, updating, and removing categories, groups, posts, and users. On this page, you'll find a list of operations the Discourse node supports and links to more resources. ## Operations# * Category * Create a category * Get all categories * Update a category * Group * Create a group * Get a group * Get all groups * Update a group * Post * Create a post * Get a post * Get all posts * Update a post * User * Create a user * Get a user * Get all users * User Group * Create a user to group * Remove user from group ## Templates and examples# Browse Discourse integration templates, or search all templates ## What to do if your operation isn't supported# If this node doesn't support the operation you want to do, you can use the HTTP Request node to call the service's API. You can use the credential you created for this service in the HTTP Request node: 1. In the HTTP Request node, select **Authentication** > **Predefined Credential Type**. 2. Select the service you want to connect to. 3. Select your credential. Refer to Custom API operations for more information. --- ## Page: https://docs.n8n.io/integrations/builtin/app-nodes/n8n-nodes-base.disqus/ Use the Disqus node to automate work in Disqus, and integrate Disqus with other applications. n8n has built-in support for a wide range of Disqus features, including returning forums. On this page, you'll find a list of operations the Disqus node supports and links to more resources. ## Operations# * Forum * Return forum details * Return a list of categories within a forum * Return a list of threads within a forum * Return a list of posts within a forum ## Templates and examples# Browse Disqus integration templates, or search all templates --- ## Page: https://docs.n8n.io/integrations/builtin/app-nodes/n8n-nodes-base.drift/ Use the Drift node to automate work in Drift, and integrate Drift with other applications. n8n has built-in support for a wide range of Drift features, including creating, updating, deleting, and getting contacts. On this page, you'll find a list of operations the Drift node supports and links to more resources. ## Operations# * Contact * Create a contact * Get custom attributes * Delete a contact * Get a contact * Update a contact ## Templates and examples# Browse Drift integration templates, or search all templates ## What to do if your operation isn't supported# If this node doesn't support the operation you want to do, you can use the HTTP Request node to call the service's API. You can use the credential you created for this service in the HTTP Request node: 1. In the HTTP Request node, select **Authentication** > **Predefined Credential Type**. 2. Select the service you want to connect to. 3. Select your credential. Refer to Custom API operations for more information. --- ## Page: https://docs.n8n.io/integrations/builtin/app-nodes/n8n-nodes-base.dropbox/ Use the Dropbox node to automate work in Dropbox, and integrate Dropbox with other applications. n8n has built-in support for a wide range of Dropbox features, including creating, downloading, moving, and copying files and folders. On this page, you'll find a list of operations the Dropbox node supports and links to more resources. This node can be used as an AI tool This node can be used to enhance the capabilities of an AI agent. When used in this way, many parameters can be set automatically, or with information directed by AI - find out more in the AI tool parameters documentation. ## Operations# * File * Copy a file * Delete a file * Download a file * Move a file * Upload a file * Folder * Copy a folder * Create a folder * Delete a folder * Return the files and folders in a given folder * Move a folder * Search * Query ## Templates and examples# ## What to do if your operation isn't supported# If this node doesn't support the operation you want to do, you can use the HTTP Request node to call the service's API. You can use the credential you created for this service in the HTTP Request node: 1. In the HTTP Request node, select **Authentication** > **Predefined Credential Type**. 2. Select the service you want to connect to. 3. Select your credential. Refer to Custom API operations for more information. --- ## Page: https://docs.n8n.io/integrations/builtin/app-nodes/n8n-nodes-base.dropcontact/ Use the Dropcontact node to automate work in Dropcontact, and integrate Dropcontact with other applications. n8n has built-in support for a wide range of Dropcontact features, including fetching contacts. On this page, you'll find a list of operations the Dropcontact node supports and links to more resources. ## Operations# **Contact** - Enrich - Fetch Request ## Templates and examples# ## What to do if your operation isn't supported# If this node doesn't support the operation you want to do, you can use the HTTP Request node to call the service's API. You can use the credential you created for this service in the HTTP Request node: 1. In the HTTP Request node, select **Authentication** > **Predefined Credential Type**. 2. Select the service you want to connect to. 3. Select your credential. Refer to Custom API operations for more information. --- ## Page: https://docs.n8n.io/integrations/builtin/app-nodes/n8n-nodes-base.egoi/ Use the E-goi node to automate work in E-goi, and integrate E-goi with other applications. n8n has built-in support for a wide range of E-goi features, including creating, updating, deleting, and getting contacts. On this page, you'll find a list of operations the E-goi node supports and links to more resources. Credentials Refer to E-goi credentials for guidance on setting up authentication. ## Operations# **Contact** * Create a member * Get a member * Get all members * Update a member ## Templates and examples# Browse E-goi integration templates, or search all templates --- ## Page: https://docs.n8n.io/integrations/builtin/app-nodes/n8n-nodes-base.elasticsearch/ Use the Elasticsearch node to automate work in Elasticsearch, and integrate Elasticsearch with other applications. n8n has built-in support for a wide range of Elasticsearch features, including creating, updating, deleting, and getting documents and indexes. On this page, you'll find a list of operations the Elasticsearch node supports and links to more resources. This node can be used as an AI tool This node can be used to enhance the capabilities of an AI agent. When used in this way, many parameters can be set automatically, or with information directed by AI - find out more in the AI tool parameters documentation. ## Operations# * Document * Create a document * Delete a document * Get a document * Get all documents * Update a document * Index * Create * Delete * Get * Get All ## Templates and examples# Browse Elasticsearch integration templates, or search all templates ## What to do if your operation isn't supported# If this node doesn't support the operation you want to do, you can use the HTTP Request node to call the service's API. You can use the credential you created for this service in the HTTP Request node: 1. In the HTTP Request node, select **Authentication** > **Predefined Credential Type**. 2. Select the service you want to connect to. 3. Select your credential. Refer to Custom API operations for more information. --- ## Page: https://docs.n8n.io/integrations/builtin/app-nodes/n8n-nodes-base.elasticsecurity/ Use the Elastic Security node to automate work in Elastic Security, and integrate Elastic Security with other applications. n8n's has built-in support for a wide range of Elastic Security features, including creating, updating, deleting, retrieving, and getting cases. On this page, you'll find a list of operations the Elastic Security node supports and links to more resources. ## Operations# * Case * Create a case * Delete a case * Get a case * Retrieve all cases * Retrieve a summary of all case activity * Update a case * Case Comment * Add a comment to a case * Get a case comment * Retrieve all case comments * Remove a comment from a case * Update a comment in a case * Case Tag * Add a tag to a case * Remove a tag from a case * Connector * Create a connector ## Templates and examples# Browse Elastic Security integration templates, or search all templates --- ## Page: https://docs.n8n.io/integrations/builtin/app-nodes/n8n-nodes-base.emelia/ Use the Emelia node to automate work in Emelia, and integrate Emelia with other applications. n8n has built-in support for a wide range of Emelia features, including creating campaigns, and adding contacts to a list. On this page, you'll find a list of operations the Emelia node supports and links to more resources. Credentials Refer to Emelia credentials for guidance on setting up authentication. ## Operations# * Campaign * Add Contact * Create * Get * Get All * Pause * Start * Contact List * Add * Get All ## Templates and examples# Browse Emelia integration templates, or search all templates --- ## Page: https://docs.n8n.io/integrations/builtin/app-nodes/n8n-nodes-base.erpnext/ Use the ERPNext node to automate work in ERPNext, and integrate ERPNext with other applications. n8n has built-in support for a wide range of ERPNext features, including creating, updating, retrieving, and deleting documents. On this page, you'll find a list of operations the ERPNext node supports and links to more resources. This node can be used as an AI tool This node can be used to enhance the capabilities of an AI agent. When used in this way, many parameters can be set automatically, or with information directed by AI - find out more in the AI tool parameters documentation. ## Operations# **Document** - Create a document - Delete a document - Retrieve a document - Retrieve all documents - Update a document ## Templates and examples# Browse ERPNext integration templates, or search all templates ## What to do if your operation isn't supported# If this node doesn't support the operation you want to do, you can use the HTTP Request node to call the service's API. You can use the credential you created for this service in the HTTP Request node: 1. In the HTTP Request node, select **Authentication** > **Predefined Credential Type**. 2. Select the service you want to connect to. 3. Select your credential. Refer to Custom API operations for more information. --- ## Page: https://docs.n8n.io/integrations/builtin/app-nodes/n8n-nodes-base.facebookgraphapi/ Use the Facebook Graph API node to automate work in Facebook Graph API, and integrate Facebook Graph API with other applications. n8n has built-in support for a wide range of Facebook Graph API features, including using queries GET POST DELETE for several parameters like host URL, request methods and much more. On this page, you'll find a list of operations the Facebook Graph API node supports and links to more resources. ## Operations# * **Default** * GET * POST * DELETE * **Video Uploads** * GET * POST * DELETE ### Parameters# This node can be used as an AI tool This node can be used to enhance the capabilities of an AI agent. When used in this way, many parameters can be set automatically, or with information directed by AI - find out more in the AI tool parameters documentation. * **Host URL**: The host URL for the request. The following options are available: * **Default**: Requests are passed to the `graph.facebook.com` host URL. Used for the majority of requests. * **Video**: Requests are passed to the `graph-video.facebook.com` host URL. Used for video upload requests only. * **HTTP Request Method**: The method to be used for this request, from the following options: * **GET** * **POST** * **DELETE** * **Graph API Version**: The version of the Facebook Graph API to be used for this request. * **Node**: The node on which to operate, for example `/<page-id>/feed`. Read more about it in the official Facebook Developer documentation. * **Edge**: Edge of the node on which to operate. Edges represent collections of objects which are attached to the node. * **Ignore SSL Issues**: Toggle to still download the response even if SSL certificate validation isn't possible. * **Send Binary File**: Available for `POST` operations. If enabled binary data is sent as the body. Requires setting the following: * **Input Binary Field**: Name of the binary property which contains the data for the file to be uploaded. ## Templates and examples# --- ## Page: https://docs.n8n.io/integrations/builtin/app-nodes/n8n-nodes-base.filemaker/ Use the FileMaker node to automate work in FileMaker, and integrate FileMaker with other applications. n8n has built-in support for a wide range of FileMaker features, including creating, finding, getting, editing, and duplicating files. On this page, you'll find a list of operations the FileMaker node supports and links to more resources. This node can be used as an AI tool This node can be used to enhance the capabilities of an AI agent. When used in this way, many parameters can be set automatically, or with information directed by AI - find out more in the AI tool parameters documentation. ## Operations# * Find Records * Get Records * Get Records by Id * Perform Script * Create Record * Edit Record * Duplicate Record * Delete Record ## Templates and examples# --- ## Page: https://docs.n8n.io/integrations/builtin/app-nodes/n8n-nodes-base.flow/ Use the Flow node to automate work in Flow, and integrate Flow with other applications. n8n has built-in support for a wide range of Flow features, including creating, updating, and getting tasks. On this page, you'll find a list of operations the Flow node supports and links to more resources. Credentials Refer to Flow credentials for guidance on setting up authentication. ## Operations# * Task * Create a new task * Update a task * Get a task * Get all the tasks ## Templates and examples# **Scale Deal Flow with a Pitch Deck AI Vision, Chatbot and QDrant Vector Store** by Jimleuk View template details **Intelligent Web Query and Semantic Re-Ranking Flow using Brave and Google Gemini** by Mind-Front View template details **Get all the tasks in Flow** by tanaypant View template details Browse Flow integration templates, or search all templates --- ## Page: https://docs.n8n.io/integrations/builtin/app-nodes/n8n-nodes-base.freshdesk/ Use the Freshdesk node to automate work in Freshdesk and integrate Freshdesk with other applications. n8n has built-in support for a wide range of Freshdesk features, including creating, updating, deleting, and getting contacts and tickets. On this page, you'll find a list of operations the Freshdesk node supports and links to more resources. ## Operations# * Contact * Create a new contact * Delete a contact * Get a contact * Get all contacts * Update a contact * Ticket * Create a new ticket * Delete a ticket * Get a ticket * Get all tickets * Update a ticket ## Templates and examples# Browse Freshdesk integration templates, or search all templates --- ## Page: https://docs.n8n.io/integrations/builtin/app-nodes/n8n-nodes-base.freshservice/ Use the Freshservice node to automate work in Freshservice and integrate Freshservice with other applications. n8n has built-in support for a wide range of Freshdesk features, including creating, updating, deleting, and getting agent information and departments. On this page, you'll find a list of operations the Freshservice node supports and links to more resources. ## Operations# * Agent * Create an agent * Delete an agent * Retrieve an agent * Retrieve all agents * Update an agent * Agent Group * Create an agent group * Delete an agent group * Retrieve an agent group * Retrieve all agent groups * Update an agent group * Agent Role * Retrieve an agent role * Retrieve all agent roles * Announcement * Create an announcement * Delete an announcement * Retrieve an announcement * Retrieve all announcements * Update an announcement * Asset Type * Create an asset type * Delete an asset type * Retrieve an asset type * Retrieve all asset types * Update an asset type * Change * Create a change * Delete a change * Retrieve a change * Retrieve all changes * Update a change * Department * Create a department * Delete a department * Retrieve a department * Retrieve all departments * Update a department * Location * Create a location * Delete a location * Retrieve a location * Retrieve all locations * Update a location * Problem * Create a problem * Delete a problem * Retrieve a problem * Retrieve all problems * Update a problem * Product * Create a product * Delete a product * Retrieve a product * Retrieve all products * Update a product * Release * Create a release * Delete a release * Retrieve a release * Retrieve all releases * Update a release * Requester * Create a requester * Delete a requester * Retrieve a requester * Retrieve all requesters * Update a requester * Requester Group * Create a requester group * Delete a requester group * Retrieve a requester group * Retrieve all requester groups * Update a requester group * Software * Create a software application * Delete a software application * Retrieve a software application * Retrieve all software applications * Update a software application * Ticket * Create a ticket * Delete a ticket * Retrieve a ticket * Retrieve all tickets * Update a ticket ## Templates and examples# Browse Freshservice integration templates, or search all templates --- ## Page: https://docs.n8n.io/integrations/builtin/app-nodes/n8n-nodes-base.freshworkscrm/ Use the Freshworks CRM node to automate work in Freshworks CRM, and integrate Freshworks CRM with other applications. n8n has built-in support for a wide range of Freshworks CRM features, including creating, updating, deleting, and retrieve, accounts, appointments, contacts, deals, notes, sales activity and more. On this page, you'll find a list of operations the Freshworks CRM node supports and links to more resources. ## Operations# * Account * Create an account * Delete an account * Retrieve an account * Retrieve all accounts * Update an account * Appointment * Create an appointment * Delete an appointment * Retrieve an appointment * Retrieve all appointments * Update an appointment * Contact * Create a contact * Delete a contact * Retrieve a contact * Retrieve all contacts * Update a contact * Deal * Create a deal * Delete a deal * Retrieve a deal * Retrieve all deals * Update a deal * Note * Create a note * Delete a note * Update a note * Sales Activity * Retrieve a sales activity * Retrieve all sales activities * Task * Create a task * Delete a task * Retrieve a task * Retrieve all tasks * Update a task ## Templates and examples# ## What to do if your operation isn't supported# If this node doesn't support the operation you want to do, you can use the HTTP Request node to call the service's API. You can use the credential you created for this service in the HTTP Request node: 1. In the HTTP Request node, select **Authentication** > **Predefined Credential Type**. 2. Select the service you want to connect to. 3. Select your credential. Refer to Custom API operations for more information. --- ## Page: https://docs.n8n.io/integrations/builtin/app-nodes/n8n-nodes-base.getresponse/ Use the GetResponse node to automate work in GetResponse, and integrate GetResponse with other applications. n8n has built-in support for a wide range of GetResponse features, including creating, updating, deleting, and getting contacts. On this page, you'll find a list of operations the GetResponse node supports and links to more resources. ## Operations# * Contact * Create a new contact * Delete a contact * Get a contact * Get all contacts * Update contact properties ## Templates and examples# Browse GetResponse integration templates, or search all templates ## What to do if your operation isn't supported# If this node doesn't support the operation you want to do, you can use the HTTP Request node to call the service's API. You can use the credential you created for this service in the HTTP Request node: 1. In the HTTP Request node, select **Authentication** > **Predefined Credential Type**. 2. Select the service you want to connect to. 3. Select your credential. Refer to Custom API operations for more information. --- ## Page: https://docs.n8n.io/integrations/builtin/app-nodes/n8n-nodes-base.ghost/ Use the Ghost node to automate work in Ghost, and integrate Ghost with other applications. n8n has built-in support for a wide range of Ghost features, including creating, updating, deleting, and getting posts for the Admin and content API. On this page, you'll find a list of operations the Ghost node supports and links to more resources. This node can be used as an AI tool This node can be used to enhance the capabilities of an AI agent. When used in this way, many parameters can be set automatically, or with information directed by AI - find out more in the AI tool parameters documentation. ## Operations# ### Admin API# * **Post** * Create a post * Delete a post * Get a post * Get all posts * Update a post ### Content API# * **Post** * Get a post * Get all posts ## Templates and examples# ## What to do if your operation isn't supported# If this node doesn't support the operation you want to do, you can use the HTTP Request node to call the service's API. You can use the credential you created for this service in the HTTP Request node: 1. In the HTTP Request node, select **Authentication** > **Predefined Credential Type**. 2. Select the service you want to connect to. 3. Select your credential. Refer to Custom API operations for more information. --- ## Page: https://docs.n8n.io/integrations/builtin/app-nodes/n8n-nodes-base.github/ Use the GitHub node to automate work in GitHub, and integrate GitHub with other applications. n8n has built-in support for a wide range of GitHub features, including creating, updating, deleting, and editing files, repositories, issues, releases, and users. On this page, you'll find a list of operations the GitHub node supports and links to more resources. This node can be used as an AI tool This node can be used to enhance the capabilities of an AI agent. When used in this way, many parameters can be set automatically, or with information directed by AI - find out more in the AI tool parameters documentation. ## Operations# * File * Create * Delete * Edit * Get * List * Issue * Create * Create Comment * Edit * Get * Lock * Organization * Get Repositories * Release * Create * Delete * Get * Get Many * Update * Repository * Get * Get Issues * Get License * Get Profile * Get Pull Requests * List Popular Paths * List Referrers * Review * Create * Get * Get Many * Update * User * Get Repositories * Invite * Workflow * Disable * Dispatch * Enable * Get * Get Usage * List ## Templates and examples# ## What to do if your operation isn't supported# If this node doesn't support the operation you want to do, you can use the HTTP Request node to call the service's API. You can use the credential you created for this service in the HTTP Request node: 1. In the HTTP Request node, select **Authentication** > **Predefined Credential Type**. 2. Select the service you want to connect to. 3. Select your credential. Refer to Custom API operations for more information. --- ## Page: https://docs.n8n.io/integrations/builtin/app-nodes/n8n-nodes-base.gitlab/ Use the GitLab node to automate work in GitLab, and integrate GitLab with other applications. n8n has built-in support for a wide range of GitLab features, including creating, updating, deleting, and editing issues, repositories, releases and users. On this page, you'll find a list of operations the GitLab node supports and links to more resources. This node can be used as an AI tool This node can be used to enhance the capabilities of an AI agent. When used in this way, many parameters can be set automatically, or with information directed by AI - find out more in the AI tool parameters documentation. ## Operations# * File * Create * Delete * Edit * Get * List * Issue * Create a new issue * Create a new comment on an issue * Edit an issue * Get the data of a single issue * Lock an issue * Release * Create a new release * Delete a new release * Get a new release * Get all releases * Update a new release * Repository * Get the data of a single repository * Returns issues of a repository * User * Returns the repositories of a user ## Templates and examples# Refer to GitLab's documentation for more information about the service. n8n provides a trigger node for GitLab. You can find the trigger node docs here. ## What to do if your operation isn't supported# If this node doesn't support the operation you want to do, you can use the HTTP Request node to call the service's API. You can use the credential you created for this service in the HTTP Request node: 1. In the HTTP Request node, select **Authentication** > **Predefined Credential Type**. 2. Select the service you want to connect to. 3. Select your credential. Refer to Custom API operations for more information. --- ## Page: https://docs.n8n.io/integrations/builtin/app-nodes/n8n-nodes-base.gmail/ Use the Gmail node to automate work in Gmail, and integrate Gmail with other applications. n8n has built-in support for a wide range of Gmail features, including creating, updating, deleting, and getting drafts, messages, labels, thread. On this page, you'll find a list of operations the Gmail node supports and links to more resources. This node can be used as an AI tool This node can be used to enhance the capabilities of an AI agent. When used in this way, many parameters can be set automatically, or with information directed by AI - find out more in the AI tool parameters documentation. ## Operations# * **Draft** * **Create** a draft * **Delete** a draft * **Get** a draft * **Get Many** drafts * **Label** * **Create** a label * **Delete** a label * **Get** a label * **Get Many** labels * **Message** * **Add Label** to a message * **Delete** a message * **Get** a message * **Get Many** messages * **Mark as Read** * **Mark as Unread** * **Remove Label** from a message * **Reply** to a message * **Send** a message * **Thread** * **Add Label** to a thread * **Delete** a thread * **Get** a thread * **Get Many** threads * **Remove Label** from thread * **Reply** to a message * **Trash** a thread * **Untrash** a thread ## Templates and examples# Refer to Google's Gmail API documentation for detailed information about the API that this node integrates with. n8n provides a trigger node for Gmail. You can find the trigger node docs here. ## What to do if your operation isn't supported# If this node doesn't support the operation you want to do, you can use the HTTP Request node to call the service's API. You can use the credential you created for this service in the HTTP Request node: 1. In the HTTP Request node, select **Authentication** > **Predefined Credential Type**. 2. Select the service you want to connect to. 3. Select your credential. Refer to Custom API operations for more information. ## Common issues# For common errors or issues and suggested resolution steps, refer to Common Issues. --- ## Page: https://docs.n8n.io/integrations/builtin/app-nodes/n8n-nodes-base.gmail/draft-operations/ Use the Draft operations to create, delete, or get a draft or list drafts in Gmail. Refer to the Gmail node for more information on the Gmail node itself. ## Create a draft# Use this operation to create a new draft. Enter these parameters: * Select the **Credential to connect with** or create a new one. * **Resource**: Select **Draft**. * **Operation**: Select **Create**. * **Subject**: Enter the subject line. * Select the **Email Type**. Choose from **Text** or **HTML**. * **Message**: Enter the email message body. ### Create draft options# Use these options to further refine the node's behavior: * **Attachments**: Select **Add Attachment** to add an attachment. Enter the **Attachment Field Name (in Input)** to identify which field from the input node contains the attachment. * For multiple properties, enter a comma-separated list. * **BCC**: Enter one or more email addresses for blind copy recipients. Separate multiple email addresses with a comma, for example `jay@gatsby.com, jon@smith.com`. * **CC**: Enter one or more email addresses for carbon copy recipients. Separate multiple email addresses with a comma, for example `jay@gatsby.com, jon@smith.com`. * **From Alias Name or ID**: Select an alias to send the draft from. This field populates based on the credential you selected in the parameters. * **Send Replies To**: Enter an email address to set as the reply to address. * **Thread ID**: If you want this draft attached to a thread, enter the ID for that thread. * **To Email**: Enter one or more email addresses for recipients. Separate multiple email addresses with a comma, for example `jay@gatsby.com, jon@smith.com`. Refer to the Gmail API Method: users.drafts.create documentation for more information. ## Delete a draft# Use this operation to delete a draft. Enter these parameters: * Select the **Credential to connect with** or create a new one. * **Resource**: Select **Draft**. * **Operation**: Select **Delete**. * **Draft ID**: Enter the ID of the draft you wish to delete. Refer to the Gmail API Method: users.drafts.delete documentation for more information. ## Get a draft# Use this operation to get a single draft. Enter these parameters: * Select the **Credential to connect with** or create a new one. * **Resource**: Select **Draft**. * **Operation**: Select **Get**. * **Draft ID**: Enter the ID of the draft you wish to get information about. ### Get draft options# Use these options to further refine the node's behavior: * **Attachment Prefix**: Enter a prefix for the name of the binary property the node should write any attachments to. n8n adds an index starting with `0` to the prefix. For example, if you enter \`attachment\_' as the prefix, the first attachment saves to 'attachment\_0'. * **Download Attachments**: Select whether the node should download the draft's attachments (turned on) or not (turned off). Refer to the Gmail API Method: users.drafts.get documentation for more information. ## Get Many drafts# Use this operation to get two or more drafts. Enter these parameters: * Select the **Credential to connect with** or create a new one. * **Resource**: Select **Draft**. * **Operation**: Select **Get Many**. * **Return All**: Choose whether the node returns all drafts (turned on) or only up to a set limit (turned off). * **Limit**: Enter the maximum number of drafts to return. Only used if you've turned off **Return All**. ### Get Many drafts options# Use these options to further refine the node's behavior: * **Attachment Prefix**: Enter a prefix for the name of the binary property the node should write any attachments to. n8n adds an index starting with `0` to the prefix. For example, if you enter \`attachment\_' as the prefix, the first attachment saves to 'attachment\_0'. * **Download Attachments**: Select whether the node should download the draft's attachments (turned on) or not (turned off). * **Include Spam and Trash**: Select whether the node should get drafts in the Spam and Trash folders (turned on) or not (turned off). Refer to the Gmail API Method: users.drafts.list documentation for more information. ## Common issues# For common errors or issues and suggested resolution steps, refer to Common Issues. --- ## Page: https://docs.n8n.io/integrations/builtin/app-nodes/n8n-nodes-base.gmail/label-operations/ Use the Label operations to create, delete, or get a label or list labels in Gmail. Refer to the Gmail node for more information on the Gmail node itself. ## Create a label# Use this operation to create a new label. Enter these parameters: * Select the **Credential to connect with** or create a new one. * **Resource**: Select **Label**. * **Operation**: Select **Create**. * **Name**: Enter a display name for the label. ### Create label options# Use these options to further refine the node's behavior: * **Label List Visibility**: Sets the visibility of the label in the label list in the Gmail web interface. Choose from: * **Hide**: Don't show the label in the label list. * **Show** (default): Show the label in the label list. * **Show if Unread**: Show the label if there are any unread messages with that label. * **Message List Visibility**: Sets the visibility of messages with this label in the message list in the Gmail web interface. Choose whether to **Show** or **Hide** messages with this label. Refer to the Gmail API Method: users.labels.create documentation for more information. ## Delete a label# Use this operation to delete an existing label. Enter these parameters: * Select the **Credential to connect with** or create a new one. * **Resource**: Select **Label**. * **Operation**: Select **Delete**. * **Label ID**: Enter the ID of the label you want to delete. Refer to the Gmail API Method: users.labels.delete documentation for more information. ## Get a label# Use this operation to get an existing label. Enter these parameters: * Select the **Credential to connect with** or create a new one. * **Resource**: Select **Label**. * **Operation**: Select **Get**. * **Label ID**: Enter the ID of the label you want to get. Refer to the Gmail API Method: users.labels.get documentation for more information. ## Get Many labels# Use this operation to get two or more labels. Enter these parameters: * Select the **Credential to connect with** or create a new one. * **Resource**: Select **Label**. * **Operation**: Select **Get Many**. * **Return All**: Choose whether the node returns all labels (turned on) or only up to a set limit (turned off). * **Limit**: Enter the maximum number of labels to return. Only used if you've turned off **Return All**. Refer to the Gmail API Method: users.labels.list documentation for more information. ## Common issues# For common errors or issues and suggested resolution steps, refer to Common Issues. --- ## Page: https://docs.n8n.io/integrations/builtin/app-nodes/n8n-nodes-base.gmail/message-operations/ Use the Message operations to send, reply to, delete, mark read or unread, add a label to, remove a label from, or get a message or get a list of messages in Gmail. Refer to the Gmail node for more information on the Gmail node itself. ## Add Label to a message# Use this operation to add one or more labels to a message. Enter these parameters: * Select the **Credential to connect with** or create a new one. * **Resource**: Select **Message**. * **Operation**: Select **Add Label**. * **Message ID**: Enter the ID of the message you want to add the label to. * **Label Names or IDs**: Select the Label names you want to add or enter an expression to specify IDs. The dropdown populates based on the **Credential** you selected. Refer to the Gmail API Method: users.messages.modify documentation for more information. ## Delete a message# Use this operation to immediately and permanently delete a message. Permanent deletion This operation can't be undone. For recoverable deletions, use the Thread Trash operation instead. Enter these parameters: * Select the **Credential to connect with** or create a new one. * **Resource**: Select **Message**. * **Operation**: Select **Delete**. * **Message ID**: Enter the ID of the message you want to delete. Refer to the Gmail API Method: users.messages.delete documentation for more information. ## Get a message# Use this operation to get a single message. Enter these parameters: * Select the **Credential to connect with** or create a new one. * **Resource**: Select **Message**. * **Operation**: Select **Get**. * **Message ID**: Enter the ID of the message you wish to retrieve. * **Simplify**: Choose whether to return a simplified version of the response (turned on) or the raw data (turned off). Default is on. * This is the same as setting the `format` for the API call to `metadata`, which returns email message IDs, labels, and email headers, including: From, To, CC, BCC, and Subject. Refer to the Gmail API Method: users.messages.get documentation for more information. ## Get Many messages# Use this operation to get two or more messages. Enter these parameters: * Select the **Credential to connect with** or create a new one. * **Resource**: Select **Message**. * **Operation**: Select **Get Many**. * **Return All**: Choose whether the node returns all messages (turned on) or only up to a set limit (turned off). * **Limit**: Enter the maximum number of messages to return. Only used if you've turned off **Return All**. * **Simplify**: Choose whether to return a simplified version of the response (turned on) or the raw data (turned off). Default is on. * This is the same as setting the `format` for the API call to `metadata`, which returns email message IDs, labels, and email headers, including: From, To, CC, BCC, and Subject. ### Get Many messages filters# Use these filters to further refine the node's behavior: * **Include Spam and Trash**: Select whether the node should get messages in the Spam and Trash folders (turned on) or not (turned off). * **Label Names or IDs**: Only return messages with the selected labels added to them. Select the Label names you want to apply or enter an expression to specify IDs. The dropdown populates based on the **Credential** you selected. * **Search**: Enter Gmail search refine filters, like `from:`, to filter the messages returned. Refer to Refine searches in Gmail for more information. * **Read Status**: Choose whether to receive **Unread and read emails**, **Unread emails only** (default), or **Read emails only**. * **Received After**: Return only those emails received after the specified date and time. Use the date picker to select the day and time or enter an expression to set a date as a string in ISO format or a timestamp in milliseconds. Refer to ISO 8601 for more information on formatting the string. * **Received Before**: Return only those emails received before the specified date and time. Use the date picker to select the day and time or enter an expression to set a date as a string in ISO format or a timestamp in milliseconds. Refer to ISO 8601 for more information on formatting the string. * **Sender**: Enter an email or a part of a sender name to return messages from only that sender. Refer to the Gmail API Method: users.messages.list documentation for more information. ## Mark as Read# Use this operation to mark a message as read. Enter these parameters: * Select the **Credential to connect with** or create a new one. * **Resource**: Select **Message**. * **Operation**: Select **Mark as Read**. * **Message ID**: Enter the ID of the message you wish to mark as read. Refer to the Gmail API Method: users.messages.modify documentation for more information. ## Mark as Unread# Use this operation to mark a message as unread. Enter these parameters: * Select the **Credential to connect with** or create a new one. * **Resource**: Select **Message**. * **Operation**: Select **Mark as Unread**. * **Message ID**: Enter the ID of the message you wish to mark as unread. Refer to the Gmail API Method: users.messages.modify documentation for more information. ## Remove Label from a message# Use this operation to remove one or more labels from a message. Enter these parameters: * Select the **Credential to connect with** or create a new one. * **Resource**: Select **Message**. * **Operation**: Select **Remove Label**. * **Message ID**: Enter the ID of the message you want to remove the label from. * **Label Names or IDs**: Select the Label names you want to remove or enter an expression to specify IDs. The dropdown populates based on the **Credential** you selected. Refer to the Gmail API Method: users.messages.modify documentation for more information. ## Reply to a message# Use this operation to send a message as a reply to an existing message. Enter these parameters: * Select the **Credential to connect with** or create a new one. * **Resource**: Select **Message**. * **Operation**: Select **Reply**. * **Message ID**: Enter the ID of the message you want to reply to. * Select the **Email Type**. Choose from **Text** or **HTML**. * **Message**: Enter the email message body. ### Reply options# Use these options to further refine the node's behavior: * **Append n8n attribution**: By default, the node appends the statement `This email was sent automatically with n8n` to the end of the email. To remove this statement, turn this option off. * **Attachments**: Select **Add Attachment** to add an attachment. Enter the **Attachment Field Name (in Input)** to identify which field from the input node contains the attachment. * For multiple properties, enter a comma-separated list. * **BCC**: Enter one or more email addresses for blind copy recipients. Separate multiple email addresses with a comma, for example `jay@gatsby.com, jon@smith.com`. * **CC**: Enter one or more email addresses for carbon copy recipients. Separate multiple email addresses with a comma, for example `jay@gatsby.com, jon@smith.com`. * **Sender Name**: Enter the name you want displayed in your recipients' email as the sender. * **Reply to Sender Only**: Choose whether to reply all (turned off) or reply to the sender only (turned on). Refer to the Gmail API Method: users.messages.send documentation for more information. ## Send a message# Use this operation to send a message. Enter these parameters: * Select the **Credential to connect with** or create a new one. * **Resource**: Select **Message**. * **Operation**: Select **Send**. * **To**: Enter the email address you want the email sent to. * **Subject**: Enter the subject line. * Select the **Email Type**. Choose from **Text** or **HTML**. * **Message**: Enter the email message body. ### Send options# Use these options to further refine the node's behavior: * **Append n8n attribution**: By default, the node appends the statement `This email was sent automatically with n8n` to the end of the email. To remove this statement, turn this option off. * **Attachments**: Select **Add Attachment** to add an attachment. Enter the **Attachment Field Name (in Input)** to identify which field from the input node contains the attachment. * For multiple properties, enter a comma-separated list. * **BCC**: Enter one or more email addresses for blind copy recipients. Separate multiple email addresses with a comma, for example `jay@gatsby.com, jon@smith.com`. * **CC**: Enter one or more email addresses for carbon copy recipients. Separate multiple email addresses with a comma, for example `jay@gatsby.com, jon@smith.com`. * **Sender Name**: Enter the name you want displayed in your recipients' email as the sender. * **Send Replies To**: Enter an email address to set as the reply to address. * **Reply to Sender Only**: Choose whether to reply all (turned off) or reply to the sender only (turned on). Refer to the Gmail API Method: users.messages.send documentation for more information. ## Send a message and wait for approval# Use this operation to send a message and wait for approval from the recipient before continuing the workflow execution. Use Wait for complex approvals The **Send and Wait for Approval** operation is well-suited for simple approval processes. For more complex approvals, consider using the Wait node. Enter these parameters: * Select the **Credential to connect with** or create a new one. * **Resource**: Select **Message**. * **Operation**: Select **Send and Wait for Approval**. * **To**: Enter the email address you want the email sent to. * **Subject**: Enter the subject line. * **Message**: Enter the email message body. ### Send and wait for approval options# Use these options to further refine the node's behavior: * **Type of Approval**: Choose **Approve Only** (default) to include only an approval button or **Approve and Disapprove** to also include a disapproval option. * **Approve Button Label**: The label to use for the approval button (**Approve** by default). * **Approve Button Style**: Whether to style the approval button as a **Primary** (default) or **Secondary** button. * **Disapprove Button Label**: The label to use for the disapproval button (**Decline** by default). Only visible when you set **Type of Approval** to **Approve and Disapprove**. * **Disapprove Button Style**: Whether to style the disapproval button as a **Primary** or **Secondary** (default) button. Only visible when you set **Type of Approval** to **Approve and Disapprove**. Refer to the Gmail API Method: users.messages.send documentation for more information. ## Common issues# For common errors or issues and suggested resolution steps, refer to Common Issues. --- ## Page: https://docs.n8n.io/integrations/builtin/app-nodes/n8n-nodes-base.gmail/thread-operations/ Use the Thread operations to delete, reply to, trash, untrash, add/remove labels, get one, or list threads. Refer to the Gmail node for more information on the Gmail node itself. ## Add Label to a thread# Use this operation to create a new draft. Enter these parameters: * Select the **Credential to connect with** or create a new one. * **Resource**: Select **Thread**. * **Operation**: Select **Add Label**. * **Thread ID**: Enter the ID of the thread you want to add the label to. * **Label Names or IDs**: Select the Label names you want to apply or enter an expression to specify IDs. The dropdown populates based on the **Credential** you selected. Refer to the Gmail API Method: users.threads.modify documentation for more information. ## Delete a thread# Use this operation to immediately and permanently delete a thread and all its messages. Permanent deletion This operation can't be undone. For recoverable deletions, use the Trash operation instead. Enter these parameters: * Select the **Credential to connect with** or create a new one. * **Resource**: Select **Thread**. * **Operation**: Select **Delete**. * **Thread ID**: Enter the ID of the thread you want to delete. Refer to the Gmail API Method: users.threads.delete documentation for more information. ## Get a thread# Use this operation to get a single thread. Enter these parameters: * Select the **Credential to connect with** or create a new one. * **Resource**: Select **Thread**. * **Operation**: Select **Get**. * **Thread ID**: Enter the ID of the thread you wish to retrieve. * **Simplify**: Choose whether to return a simplified version of the response (turned on) or the raw data (turned off). Default is on. * This is the same as setting the `format` for the API call to `metadata`, which returns email message IDs, labels, and email headers, including: From, To, CC, BCC, and Subject. ### Get thread options# Use these options to further refine the node's behavior: * **Return Only Messages**: Choose whether to return only thread messages (turned on). Refer to the Gmail API Method: users.threads.get documentation for more information. ## Get Many threads# Use this operation to get two or more threads. Enter these parameters: * Select the **Credential to connect with** or create a new one. * **Resource**: Select **Thread**. * **Operation**: Select **Get Many**. * **Return All**: Choose whether the node returns all threads (turned on) or only up to a set limit (turned off). * **Limit**: Enter the maximum number of threads to return. Only used if you've turned off **Return All**. ### Get Many threads filters# Use these filters to further refine the node's behavior: * **Include Spam and Trash**: Select whether the node should get threads in the Spam and Trash folders (turned on) or not (turned off). * **Label Names or IDs**: Only return threads with the selected labels added to them. Select the Label names you want to apply or enter an expression to specify IDs. The dropdown populates based on the **Credential** you selected. * **Search**: Enter Gmail search refine filters, like `from:`, to filter the threads returned. Refer to Refine searches in Gmail for more information. * **Read Status**: Choose whether to receive **Unread and read emails**, **Unread emails only** (default), or **Read emails only**. * **Received After**: Return only those emails received after the specified date and time. Use the date picker to select the day and time or enter an expression to set a date as a string in ISO format or a timestamp in milliseconds. Refer to ISO 8601 for more information on formatting the string. * **Received Before**: Return only those emails received before the specified date and time. Use the date picker to select the day and time or enter an expression to set a date as a string in ISO format or a timestamp in milliseconds. Refer to ISO 8601 for more information on formatting the string. Refer to the Gmail API Method: users.threads.list documentation for more information. ## Remove label from a thread# Use this operation to remove a label from a thread. Enter these parameters: * Select the **Credential to connect with** or create a new one. * **Resource**: Select **Thread**. * **Operation**: Select **Remove Label**. * **Thread ID**: Enter the ID of the thread you want to remove the label from. * **Label Names or IDs**: Select the Label names you want to remove or enter an expression to specify their IDs. The dropdown populates based on the **Credential** you selected. Refer to the Gmail API Method: users.threads.modify documentation for more information. ## Reply to a message# Use this operation to reply to a message. Enter these parameters: * Select the **Credential to connect with** or create a new one. * **Resource**: Select **Thread**. * **Operation**: Select **Reply**. * **Thread ID**: Enter the ID of the thread you want to reply to. * **Message Snippet or ID**: Select the Message you want to reply to or enter an expression to specify its ID. The dropdown populates based on the **Credential** you selected. * Select the **Email Type**. Choose from **Text** or **HTML**. * **Message**: Enter the email message body. ### Reply options# Use these options to further refine the node's behavior: * **Attachments**: Select **Add Attachment** to add an attachment. Enter the **Attachment Field Name (in Input)** to identify which field from the input node contains the attachment. * For multiple properties, enter a comma-separated list. * **BCC**: Enter one or more email addresses for blind copy recipients. Separate multiple email addresses with a comma, for example `jay@gatsby.com, jon@smith.com`. * **CC**: Enter one or more email addresses for carbon copy recipients. Separate multiple email addresses with a comma, for example `jay@gatsby.com, jon@smith.com`. * **Sender Name**: Enter the name you want displayed in your recipients' email as the sender. * **Reply to Sender Only**: Choose whether to reply all (turned off) or reply to the sender only (turned on). Refer to the Gmail API Method: users.messages.send documentation for more information. ## Trash a thread# Use this operation to move a thread and all its messages to the trash. Enter these parameters: * Select the **Credential to connect with** or create a new one. * **Resource**: Select **Thread**. * **Operation**: Select **Trash**. * **Thread ID**: Enter the ID of the thread you want to move to the trash. Refer to the Gmail API Method: users.threads.trash documentation for more information. ## Untrash a thread# Use this operation to recover a thread and all its messages from the trash. Enter these parameters: * Select the **Credential to connect with** or create a new one. * **Resource**: Select **Thread**. * **Operation**: Select **Untrash**. * **Thread ID**: Enter the ID of the thread you want to move to the trash. Refer to the Gmail API Method: users.threads.untrash documentation for more information. ## Common issues# For common errors or issues and suggested resolution steps, refer to Common Issues. --- ## Page: https://docs.n8n.io/integrations/builtin/app-nodes/n8n-nodes-base.gmail/common-issues/ Here are some common errors and issues with the Gmail node and steps to resolve or troubleshoot them. ## Remove the n8n attribution from sent messages# If you're using the node to send a message or reply to a message, the node appends this statement to the end of the email: > This email was sent automatically with n8n To remove this attribution: 1. In the node's **Options** section, select **Add option**. 2. Select **Append n8n attribution**. 3. Turn the toggle off. Refer to Send options and Reply options for more information. ## Forbidden - perhaps check your credentials# This error displays next to certain dropdowns in the node, like the **Label Names or IDs** dropdown. The full text looks something like this: <table><tbody><tr><td><div><pre><span></span><span>1</span></pre></div></td><td><div><pre><span></span><code>There was a problem loading the parameter options from server: "Forbidden - perhaps check your credentials?" </code></pre></div></td></tr></tbody></table> The error most often displays when you're using a Google Service Account as the credential and the credential doesn't have **Impersonate a User** turned on. Refer to Google Service Account: Finish your n8n credential for more information. The full text of the error looks like this: <table><tbody><tr><td><div><pre><span></span><span>1</span></pre></div></td><td><div><pre><span></span><code>401 - {"error":"unauthorized_client","error_description":"Client is unauthorized to retrieve access tokens using this method, or client not authorized for any of the scopes requested."} </code></pre></div></td></tr></tbody></table> This error occurs when there's an issue with the credential you're using and its scopes or permissions. To resolve: 1. For OAuth2 credentials, make sure you've enabled the Gmail API in **APIs & Services > Library**. Refer to Google OAuth2 Single Service - Enable APIs for more information. 2. For Service Account credentials: 1. Enable domain-wide delegation. 2. Make sure you add the Gmail API as part of the domain-wide delegation configuration. ## Bad request - please check your parameters# This error most often occurs if you enter a Message ID, Thread ID, or Label ID that doesn't exist. Try a **Get** operation with the ID to confirm it exists. --- ## Page: https://docs.n8n.io/integrations/builtin/app-nodes/n8n-nodes-base.gong/ Use the Gong node to automate work in Gong and integrate Gong with other applications. n8n has built-in support for a wide range of Gong features, which includes getting one or more calls and users. On this page, you'll find a list of operations the Gong node supports, and links to more resources. Credentials You can find authentication information for this node here. ## Operations# * Call * Get * Get Many * User * Get * Get Many ## Templates and examples# Refer to Gong's documentation for more information about the service. ## What to do if your operation isn't supported# If this node doesn't support the operation you want to do, you can use the HTTP Request node to call the service's API. You can use the credential you created for this service in the HTTP Request node: 1. In the HTTP Request node, select **Authentication** > **Predefined Credential Type**. 2. Select the service you want to connect to. 3. Select your credential. Refer to Custom API operations for more information. --- ## Page: https://docs.n8n.io/integrations/builtin/app-nodes/n8n-nodes-base.googleads/ Use the Google Ads node to automate work in Google Ads, and integrate Google Ads with other applications. n8n has built-in support for a wide range of Google Ads features, including getting campaigns. On this page, you'll find a list of operations the Google Ads node supports and links to more resources. ## Operations# * Campaign * Get all campaigns * Get a campaign ## Templates and examples# Refer to Google Ads' documentation for more information about the service. ## What to do if your operation isn't supported# If this node doesn't support the operation you want to do, you can use the HTTP Request node to call the service's API. You can use the credential you created for this service in the HTTP Request node: 1. In the HTTP Request node, select **Authentication** > **Predefined Credential Type**. 2. Select the service you want to connect to. 3. Select your credential. Refer to Custom API operations for more information. --- ## Page: https://docs.n8n.io/integrations/builtin/app-nodes/n8n-nodes-base.googleanalytics/ Use the Google Analytics node to automate work in Google Analytics, and integrate Google Analytics with other applications. n8n has built-in support for a wide range of Google Analytics features, including returning reports and user activities. On this page, you'll find a list of operations the Google Analytics node supports and links to more resources. This node can be used as an AI tool This node can be used to enhance the capabilities of an AI agent. When used in this way, many parameters can be set automatically, or with information directed by AI - find out more in the AI tool parameters documentation. ## Operations# * Report * Get * User Activity * Search ## Templates and examples# Refer to Google Analytics' documentation for more information about the service. ## What to do if your operation isn't supported# If this node doesn't support the operation you want to do, you can use the HTTP Request node to call the service's API. You can use the credential you created for this service in the HTTP Request node: 1. In the HTTP Request node, select **Authentication** > **Predefined Credential Type**. 2. Select the service you want to connect to. 3. Select your credential. Refer to Custom API operations for more information. --- ## Page: https://docs.n8n.io/integrations/builtin/app-nodes/n8n-nodes-base.googlebigquery/ Use the Google BigQuery node to automate work in Google BigQuery, and integrate Google BigQuery with other applications. n8n has built-in support for a wide range of Google BigQuery features, including creating, and retrieving records. On this page, you'll find a list of operations the Google BigQuery node supports and links to more resources. This node can be used as an AI tool This node can be used to enhance the capabilities of an AI agent. When used in this way, many parameters can be set automatically, or with information directed by AI - find out more in the AI tool parameters documentation. ## Operations# * Execute Query * Insert ## Templates and examples# Browse Google BigQuery integration templates, or search all templates Refer to Google BigQuery's documentation for more information about the service. ## What to do if your operation isn't supported# If this node doesn't support the operation you want to do, you can use the HTTP Request node to call the service's API. You can use the credential you created for this service in the HTTP Request node: 1. In the HTTP Request node, select **Authentication** > **Predefined Credential Type**. 2. Select the service you want to connect to. 3. Select your credential. Refer to Custom API operations for more information. --- ## Page: https://docs.n8n.io/integrations/builtin/app-nodes/n8n-nodes-base.googlebooks/ Use the Google Books node to automate work in Google Books, and integrate Google Books with other applications. n8n has built-in support for a wide range of Google Books features, including retrieving a specific bookshelf resource for the specified user, adding volume to a bookshelf, and getting volume. On this page, you'll find a list of operations the Google Books node supports and links to more resources. ## Operations# * Bookshelf * Retrieve a specific bookshelf resource for the specified user * Get all public bookshelf resource for the specified user * Bookshelf Volume * Add a volume to a bookshelf * Clears all volumes from a bookshelf * Get all volumes in a specific bookshelf for the specified user * Moves a volume within a bookshelf * Removes a volume from a bookshelf * Volume * Get a volume resource based on ID * Get all volumes filtered by query ## Templates and examples# Browse Google Books integration templates, or search all templates ## What to do if your operation isn't supported# If this node doesn't support the operation you want to do, you can use the HTTP Request node to call the service's API. You can use the credential you created for this service in the HTTP Request node: 1. In the HTTP Request node, select **Authentication** > **Predefined Credential Type**. 2. Select the service you want to connect to. 3. Select your credential. Refer to Custom API operations for more information. --- ## Page: https://docs.n8n.io/integrations/builtin/app-nodes/n8n-nodes-base.googlebusinessprofile/ Use the Google Business Profile node to automate work in Google Business Profile and integrate Google Business Profile with other applications. n8n has built-in support for a wide range of Google Business Profile features, which includes creating, updating, and deleting posts and reviews. On this page, you'll find a list of operations the Google Business Profile node supports, and links to more resources. Credentials You can find authentication information for this node here. ## Operations# * Post * Create * Delete * Get * Get Many * Update * Review * Delete Reply * Get * Get Many * Reply ## Templates and examples# n8n provides a trigger node for Google Business Profile. You can find the trigger node docs here. Refer to Google Business Profile's documentation for more information about the service. ## What to do if your operation isn't supported# If this node doesn't support the operation you want to do, you can use the HTTP Request node to call the service's API. You can use the credential you created for this service in the HTTP Request node: 1. In the HTTP Request node, select **Authentication** > **Predefined Credential Type**. 2. Select the service you want to connect to. 3. Select your credential. Refer to Custom API operations for more information. --- ## Page: https://docs.n8n.io/integrations/builtin/app-nodes/n8n-nodes-base.googlecalendar/ Use the Google Calendar node to automate work in Google Calendar, and integrate Google Calendar with other applications. n8n has built-in support for a wide range of Google Calendar features, including adding, retrieving, deleting and updating calendar events. On this page, you'll find a list of operations the Google Calendar node supports and links to more resources. This node can be used as an AI tool This node can be used to enhance the capabilities of an AI agent. When used in this way, many parameters can be set automatically, or with information directed by AI - find out more in the AI tool parameters documentation. ## Operations# * **Calendar** * **Availability**: If a time-slot is available in a calendar * **Event** * **Create**: Add an event to calendar * **Delete**: Delete an event * **Get**: Retrieve an event * **Get Many**: Retrieve all events from a calendar * **Update**: Update an event ## Templates and examples# n8n provides a trigger node for Google Calendar. You can find the trigger node docs here. Refer to Google Calendar's documentation for more information about the service. View example workflows and related content on n8n's website. --- ## Page: https://docs.n8n.io/integrations/builtin/app-nodes/n8n-nodes-base.googlecalendar/calendar-operations/ * Using n8n * Integrations * Hosting n8n * Code in n8n * Advanced AI * API * Embed * n8n home ↗ * Forum ↗ * Blog ↗ 1. Integrations 2. Built-in nodes 3. Actions 4. Google Calendar Use this operation to check availability in a calendar in Google Calendar. Refer to Google Calendar for more information on the Google Calendar node itself. ## Availability# Use this operation to check if a time-slot is available in a calendar. Enter these parameters: * **Credential to connect with**: Create or select an existing Google Calendar credentials. * **Resource**: Select **Calendar**. * **Operation**: Select **Availability**. * **Calendar**: Choose a calendar you want to check against. Select **From list** to choose the title from the dropdown list or **By ID** to enter a calendar ID. * **Start Time**: The start time for the time-slot you want to check. By default, uses an expression evaluating to the current time (`{{ $now }}`). * **End Time**: The end time for the time-slot you want to check. By default, uses an expression evaluating to an hour from now (`{{ $now.plus(1, 'hour') }}`). ### Options# * **Output Format**: Select the format for the availability information: * **Availability**: Returns if there are already events overlapping with the given time slot or not. * **Booked Slots**: Returns the booked slots. * **RAW**: Returns the RAW data from the API. * **Timezone**: The timezone used in the response. By default, uses the n8n timezone. Refer to the Freebusy: query | Google Calendar API documentation for more information. --- ## Page: https://docs.n8n.io/integrations/builtin/app-nodes/n8n-nodes-base.googlecalendar/event-operations/ Use these operations to create, delete, get, and update events in Google Calendar. Refer to Google Calendar for more information on the Google Calendar node itself. ## Create# Use this operation to add an event to a Google Calendar. Enter these parameters: * **Credential to connect with**: Create or select an existing Google Calendar credentials. * **Resource**: Select **Event**. * **Operation**: Select **Create**. * **Calendar**: Choose a calendar you want to add an event to. Select **From list** to choose the title from the dropdown list or **By ID** to enter a calendar ID. * **Start Time**: The start time for the event. By default, uses an expression evaluating to the current time (`{{ $now }}`). * **End Time**: The end time for the event. By default, this uses an expression evaluating to an hour from now (`{{ $now.plus(1, 'hour') }}`). * **Use Default Reminders**: Whether to enable default reminders for the event according to the calendar configuration. ### Options# * **All Day**: Whether the event is all day or not. * **Attendees**: Attendees to invite to the event. * **Color Name or ID**: The color of the event. Choose from the list or specify the ID using an expression. * **Conference Data**: Creates a conference link (Hangouts, Meet, etc.) and attaches it to the event. * **Description**: A description for the event. * **Guests Can Invite Others**: Whether attendees other than the organizer can invite others to the event. * **Guests Can Modify**: Whether attendees other than the organizer can modify the event. * **Guests Can See Other Guests**: Whether attendees other than the organizer can see who the event's attendees are. * **ID**: Opaque identifier of the event. * **Location**: Geographic location of the event as free-form text. * **Max Attendees**: The maximum number of attendees to include in the response. If there are more than the specified number of attendees, only returns the participant. * **Repeat Frequency**: The repetition interval for recurring events. * **Repeat How Many Times?**: The number of instances to create for recurring events. * **Repeat Until**: The date at which recurring events should stop. * **RRULE**: Recurrence rule. When set, ignores the Repeat Frequency, Repeat How Many Times, and Repeat Until parameters. * **Send Updates**: Whether to send notifications about the creation of the new event. * **Show Me As**: Whether the event blocks time on the calendar. * **Summary**: The title of the event. Refer to the Events: insert | Google Calendar API documentation for more information. ## Delete# Use this operation to delete an event from a Google Calendar. Enter these parameters: * **Credential to connect with**: Create or select an existing Google Calendar credentials. * **Resource**: Select **Event**. * **Operation**: Select **Delete**. * **Calendar**: Choose a calendar you want to delete an event from. Select **From list** to choose the title from the dropdown list or **By ID** to enter a calendar ID. * **Event ID**: The ID of the event to delete. ### Options# * **Send Updates**: Whether to send notifications about the deletion of the event. Refer to the Events: delete | Google Calendar API documentation for more information. ## Get# Use this operation to retrieve an event from a Google Calendar. Enter these parameters: * **Credential to connect with**: Create or select an existing Google Calendar credentials. * **Resource**: Select **Event**. * **Operation**: Select **Get**. * **Calendar**: Choose a calendar you want to get an event from. Select **From list** to choose the title from the dropdown list or **By ID** to enter a calendar ID. * **Event ID**: The ID of the event to get. ### Options# * **Max Attendees**: The maximum number of attendees to include in the response. If there are more than the specified number of attendees, only returns the participant. * **Return Next Instance of Recurrent Event**: Whether to return the next instance of a recurring event instead of the event itself. * **Timezone**: The timezone used in the response. By default, uses the n8n timezone. Refer to the Events: get | Google Calendar API documentation for more information. ## Get Many# Use this operation to retrieve more than one event from a Google Calendar. Enter these parameters: * **Credential to connect with**: Create or select an existing Google Calendar credentials. * **Resource**: Select **Event**. * **Operation**: Select **Get Many**. * **Calendar**: Choose a calendar you want to get an event from. Select **From list** to choose the title from the dropdown list or **By ID** to enter a calendar ID. * **Return All**: Whether to return all results or only up to a given limit. * **Limit**: (When "Return All" isn't selected) The maximum number of results to return. * **After**: Retrieve events that occur after this time. At least part of the event must be after this time. By default, this uses an expression evaluating to the current time (`{{ $now }}`). Switch the field to "fixed" to select a date from a date widget. * **Before**: Retrieve events that occur before this time. At least part of the event must be before this time. By default, this uses an expression evaluating to the current time plus a week (`{{ $now.plus({ week: 1 }) }}`). Switch the field to "fixed" to select a date from a date widget. ### Options# * **Fields**: Specify the fields to return. By default, returns a set of commonly used fields predefined by Google. Use "\*" to return all fields. You can find out more in Google Calendar's documentation on working with partial resources. * **iCalUID**: Specifies an event ID (in the iCalendar format) to include in the response. * **Max Attendees**: The maximum number of attendees to include in the response. If there are more than the specified number of attendees, only returns the participant. * **Order By**: The order to use for the events in the response. * **Query**: Free text search terms to find events that match. This searches all fields except for extended properties. * **Recurring Event Handling**: What to do for recurring events: * **All Occurrences**: Return all instances of the recurring event for the specified time range. * **First Occurrence**: Return the first event of a recurring event within the specified time range. * **Next Occurrence**: Return the next instance of a recurring event within the specified time range. * **Show Deleted**: Whether to include deleted events (with status equal to "cancelled") in the results. * **Show Hidden Invitations**: Whether to include hidden invitations in the results. * **Timezone**: The timezone used in the response. By default, uses the n8n timezone. * **Updated Min**: The lower bounds for an event's last modification time (as an RFC 3339 timestamp) Refer to the Events: list | Google Calendar API documentation for more information. ## Update# Use this operation to update an event in a Google Calendar. Enter these parameters: * **Credential to connect with**: Create or select an existing Google Calendar credentials. * **Resource**: Select **Event**. * **Operation**: Select **Update**. * **Calendar**: Choose a calendar you want to add an event to. Select **From list** to choose the title from the dropdown list or **By ID** to enter a calendar ID. * **Event ID**: The ID of the event to update. * **Modify**: For recurring events, choose whether to update the recurring event or a specific instance of the recurring event. * **Use Default Reminders**: Whether to enable default reminders for the event according to the calendar configuration. * **Update Fields**: The fields of the event to update: * **All Day**: Whether the event is all day or not. * **Attendees**: Attendees to invite to the event. You can choose to either add attendees or replace the existing attendee list. * **Color Name or ID**: The color of the event. Choose from the list or specify the ID using an expression. * **Description**: A description for the event. * **End**: The end time of the event. * **Guests Can Invite Others**: Whether attendees other than the organizer can invite others to the event. * **Guests Can Modify**: Whether attendees other than the organizer can make changes to the event. * **Guests Can See Other Guests**: Whether attendees other than the organizer can see who the event's attendees are. * **ID**: Opaque identifier of the event. * **Location**: Geographic location of the event as free-form text. * **Max Attendees**: The maximum number of attendees to include in the response. If there are more than the specified number of attendees, only returns the participant. * **Repeat Frequency**: The repetition interval for recurring events. * **Repeat How Many Times?**: The number of instances to create for recurring events. * **Repeat Until**: The date at which recurring events should stop. * **RRULE**: Recurrence rule. When set, ignores the Repeat Frequency, Repeat How Many Times, and Repeat Until parameters. * **Send Updates**: Whether to send notifications about the creation of the new event. * **Show Me As**: Whether the event blocks time on the calendar. * **Start**: The start time of the event. * **Summary**: The title of the event. * **Visibility**: The visibility of the event: * **Confidential**: The event is private. This value is provided for compatibility. * **Default**: Uses the default visibility for events on the calendar. * **Public**: The event is public and the event details are visible to all readers of the calendar. * **Private**: The event is private and only event attendees may view event details. Refer to the Events: update | Google Calendar API documentation for more information. --- ## Page: https://docs.n8n.io/integrations/builtin/app-nodes/n8n-nodes-base.googlechat/ Use the Google Chat node to automate work in Google Chat, and integrate Google Chat with other applications. n8n has built-in support for a wide range of Google Chat features, including getting membership and spaces, as well as creating and deleting messages. On this page, you'll find a list of operations the Google Chat node supports and links to more resources. This node can be used as an AI tool This node can be used to enhance the capabilities of an AI agent. When used in this way, many parameters can be set automatically, or with information directed by AI - find out more in the AI tool parameters documentation. ## Operations# * Member * Get a membership * Get all memberships in a space * Message * Create a message * Delete a message * Get a message * Update a message * Space * Get a space * Get all spaces the caller is a member of ## Templates and examples# --- ## Page: https://docs.n8n.io/integrations/builtin/app-nodes/n8n-nodes-base.googlecloudfirestore/ Use the Google Cloud Firestore node to automate work in Google Cloud Firestore, and integrate Google Cloud Firestore with other applications. n8n has built-in support for a wide range of Google Cloud Firestore features, including creating, deleting, and getting documents. On this page, you'll find a list of operations the Google Cloud Firestore node supports and links to more resources. This node can be used as an AI tool This node can be used to enhance the capabilities of an AI agent. When used in this way, many parameters can be set automatically, or with information directed by AI - find out more in the AI tool parameters documentation. ## Operations# * Document * Create a document * Create/Update a document * Delete a document * Get a document * Get all documents from a collection * Runs a query against your documents * Collection * Get all root collections ## Templates and examples# Browse Google Cloud Firestore integration templates, or search all templates ## What to do if your operation isn't supported# If this node doesn't support the operation you want to do, you can use the HTTP Request node to call the service's API. You can use the credential you created for this service in the HTTP Request node: 1. In the HTTP Request node, select **Authentication** > **Predefined Credential Type**. 2. Select the service you want to connect to. 3. Select your credential. Refer to Custom API operations for more information. --- ## Page: https://docs.n8n.io/integrations/builtin/app-nodes/n8n-nodes-base.googlecloudnaturallanguage/ Use the Google Cloud Natural Language node to automate work in Google Cloud Natural Language, and integrate Google Cloud Natural Language with other applications. n8n has built-in support for a wide range of Google Cloud Natural Language features, including analyzing documents. On this page, you'll find a list of operations the Google Cloud Natural Language node supports and links to more resources. ## Operations# * Document * Analyze Sentiment ## Templates and examples# ## What to do if your operation isn't supported# If this node doesn't support the operation you want to do, you can use the HTTP Request node to call the service's API. You can use the credential you created for this service in the HTTP Request node: 1. In the HTTP Request node, select **Authentication** > **Predefined Credential Type**. 2. Select the service you want to connect to. 3. Select your credential. Refer to Custom API operations for more information. --- ## Page: https://docs.n8n.io/integrations/builtin/app-nodes/n8n-nodes-base.googlecloudrealtimedatabase/ Use the Google Cloud Realtime Database node to automate work in Google Cloud Realtime Database, and integrate Google Cloud Realtime Database with other applications. n8n has built-in support for a wide range of Google Cloud Realtime Database features, including writing, deleting, getting, and appending databases. On this page, you'll find a list of operations the Google Cloud Realtime Database node supports and links to more resources. This node can be used as an AI tool This node can be used to enhance the capabilities of an AI agent. When used in this way, many parameters can be set automatically, or with information directed by AI - find out more in the AI tool parameters documentation. ## Operations# * Write data to a database * Delete data from a database * Get a record from a database * Append to a list of data * Update item on a database ## Templates and examples# Browse Google Cloud Realtime Database integration templates, or search all templates --- ## Page: https://docs.n8n.io/integrations/builtin/app-nodes/n8n-nodes-base.googlecloudstorage/ Use the Google Cloud Storage node to automate work in Google Cloud Storage, and integrate Google Cloud Storage with other applications. n8n has built-in support for a wide range of Google Cloud Storage features, including creating, updating, deleting, and getting buckets and objects. On this page, you'll find a list of operations the Google Cloud Storage node supports and links to more resources. ## Operations# * Bucket * Create * Delete * Get * Get Many * Update * Object * Create * Delete * Get * Get Many * Update ## Templates and examples# Refer to Google's Cloud Storage API documentation for detailed information about the API that this node integrates with. ## What to do if your operation isn't supported# If this node doesn't support the operation you want to do, you can use the HTTP Request node to call the service's API. You can use the credential you created for this service in the HTTP Request node: 1. In the HTTP Request node, select **Authentication** > **Predefined Credential Type**. 2. Select the service you want to connect to. 3. Select your credential. Refer to Custom API operations for more information. --- ## Page: https://docs.n8n.io/integrations/builtin/app-nodes/n8n-nodes-base.googlecontacts/ Use the Google Contacts node to automate work in Google Contacts, and integrate Google Contacts with other applications. n8n has built-in support for a wide range of Google Contacts features, including creating, updating, retrieving, deleting, and getting contacts. On this page, you'll find a list of operations the Google Contacts node supports and links to more resources. This node can be used as an AI tool This node can be used to enhance the capabilities of an AI agent. When used in this way, many parameters can be set automatically, or with information directed by AI - find out more in the AI tool parameters documentation. ## Operations# * Contact * Create a contact * Delete a contact * Get a contact * Retrieve all contacts * Update a contact ## Templates and examples# ## What to do if your operation isn't supported# If this node doesn't support the operation you want to do, you can use the HTTP Request node to call the service's API. You can use the credential you created for this service in the HTTP Request node: 1. In the HTTP Request node, select **Authentication** > **Predefined Credential Type**. 2. Select the service you want to connect to. 3. Select your credential. Refer to Custom API operations for more information. --- ## Page: https://docs.n8n.io/integrations/builtin/app-nodes/n8n-nodes-base.googledocs/ Use the Google Docs node to automate work in Google Docs, and integrate Google Docs with other applications. n8n has built-in support for a wide range of Google Docs features, including creating, updating, and getting documents. On this page, you'll find a list of operations the Google Docs node supports and links to more resources. This node can be used as an AI tool This node can be used to enhance the capabilities of an AI agent. When used in this way, many parameters can be set automatically, or with information directed by AI - find out more in the AI tool parameters documentation. ## Operations# * Document * Create * Get * Update ## Templates and examples# ## What to do if your operation isn't supported# If this node doesn't support the operation you want to do, you can use the HTTP Request node to call the service's API. You can use the credential you created for this service in the HTTP Request node: 1. In the HTTP Request node, select **Authentication** > **Predefined Credential Type**. 2. Select the service you want to connect to. 3. Select your credential. Refer to Custom API operations for more information. --- ## Page: https://docs.n8n.io/integrations/builtin/app-nodes/n8n-nodes-base.googledrive/ Use the Google Drive node to automate work in Google Drive, and integrate Google Drive with other applications. n8n has built-in support for a wide range of Google Drive features, including creating, updating, listing, deleting, and getting drives, files, and folders. On this page, you'll find a list of operations the Google Drive node supports and links to more resources. ## Operations# * **File** * **Copy** a file * **Create from text** * **Delete** a file * **Download** a file * **Move** a file * **Share** a file * **Update** a file * **Upload** a file * **File/Folder** * **Search** files and folders * **Folder** * **Create** a folder * **Delete** a folder * **Share** a folder * **Shared Drive** * **Create** a shared drive * **Delete** a shared drive * **Get** a shared drive * **Get Many** shared drives * **Update** a shared drive ## Templates and examples# ## Common issues# For common questions or issues and suggested solutions, refer to Common issues. ## What to do if your operation isn't supported# If this node doesn't support the operation you want to do, you can use the HTTP Request node to call the service's API. You can use the credential you created for this service in the HTTP Request node: 1. In the HTTP Request node, select **Authentication** > **Predefined Credential Type**. 2. Select the service you want to connect to. 3. Select your credential. Refer to Custom API operations for more information. --- ## Page: https://docs.n8n.io/integrations/builtin/app-nodes/n8n-nodes-base.googledrive/file-operations/ Use this operation to create, delete, change, and manage files in Google Drive. Refer to Google Drive for more information on the Google Drive node itself. This node can be used as an AI tool This node can be used to enhance the capabilities of an AI agent. When used in this way, many parameters can be set automatically, or with information directed by AI - find out more in the AI tool parameters documentation. ## Copy a file# Use this operation to copy a file to a drive. Enter these parameters: * **Credential to connect with**: Create or select an existing Google Drive credentials. * **Resource**: Select **File**. * **Operation**: Select **Copy**. * **File**: Choose a file you want to copy. * Select **From list** to choose the title from the dropdown list, **By URL** to enter the URL of the file, or **By ID** to enter the `fileId`. * You can find the `fileId` in a shareable Google Drive file URL: `https://docs.google.com/document/d/fileId/edit#gid=0`. In your Google Drive, select **Share > Copy link** to get the shareable file URL. * **File Name**: The name to use for the new copy of the file. * **Copy In The Same Folder**: Choose whether to copy the file to the same folder. If disabled, set the following: * **Parent Drive**: Select **From list** to choose the drive from the dropdown list, **By URL** to enter the URL of the drive, or **By ID** to enter the `driveId`. * **Parent Folder**: Select **From list** to choose the folder from the dropdown list, **By URL** to enter the URL of the folder, or **By ID** to enter the `folderId`. * You can find the `driveId` and `folderID` by visiting the shared drive or folder in your browser and copying the last URL component: `https://drive.google.com/drive/u/1/folders/driveId`. ### Options# * **Copy Requires Writer Permissions**: Select whether to enable readers and commenters to copy, print, or download the new file. * **Description**: A short description of the file. Refer to the Method: files.copy | Google Drive API documentation for more information. ## Create from text# Use this operation to create a new file in a drive from provided text. Enter these parameters: - **Credential to connect with**: Create or select an existing Google Drive credentials. - **Resource**: Select **File**. - **Operation**: Select **Create From Text**. - **File Content**: Enter the file content to use to create the new file. - **File Name**: The name to use for the new file. - **Parent Drive**: Select **From list** to choose the drive from the dropdown list, **By URL** to enter the URL of the drive, or **By ID** to enter the `driveId`. - **Parent Folder**: Select **From list** to choose the folder from the dropdown list, **By URL** to enter the URL of the folder, or **By ID** to enter the `folderId`. You can find the `driveId` and `folderID` by visiting the shared drive or folder in your browser and copying the last URL component: `https://drive.google.com/drive/u/1/folders/driveId`. ### Options# * **APP Properties**: A bundle of arbitrary key-value pairs which are private to the requesting app. * **Properties**: A bundle of arbitrary key-value pairs which are visible to all apps. * **Keep Revision Forever**: Choose whether to set the `keepForever` field in the new head revision. This only applies to files with binary content. You can keep a maximum of 200 revisions, after which you must delete the pinned revisions. * **OCR Language**: An ISO 639-1 language code to help the OCR interpret the content during import. * **Use Content As Indexable Text**: Choose whether to mark the uploaded content as indexable text. * **Convert to Google Document**: Choose whether to create a Google Document instead of the default `.txt` format. You must enable the Google Docs API in the Google API Console for this to work. Refer to the Method: files.insert | Google Drive API documentation for more information. ## Delete a file# Use this operation to delete a file from a drive. Enter these parameters: * **Credential to connect with**: Create or select an existing Google Drive credentials. * **Resource**: Select **File**. * **Operation**: Select **Delete**. * **File**: Choose a file you want to delete. * Select **From list** to choose the title from the dropdown list, **By URL** to enter the URL of the file, or **By ID** to enter the `fileId`. * You can find the `fileId` in a shareable Google Drive file URL: `https://docs.google.com/document/d/fileId/edit#gid=0`. In your Google Drive, select **Share > Copy link** to get the shareable file URL. ### Options# * **Delete Permanently**: Choose whether to delete the file now instead of moving it to the trash. Refer to the Method: files.delete | Google Drive API documentation for more information. ## Download a file# Use this operation to download a file from a drive. Enter these parameters: * **Credential to connect with**: Create or select an existing Google Drive credentials. * **Resource**: Select **File**. * **Operation**: Select **Download**. * **File**: Choose a file you want to download. * Select **From list** to choose the title from the dropdown list, **By URL** to enter the URL of the file, or **By ID** to enter the `fileId`. * You can find the `fileId` in a shareable Google Drive file URL: `https://docs.google.com/document/d/fileId/edit#gid=0`. In your Google Drive, select **Share > Copy link** to get the shareable file URL. ### Options# * **Put Output File in Field**: Choose the field name to place the binary file contents to make it available to following nodes. * **Google File Conversion**: Choose the formats to export as when downloading Google Files: * **Google Docs**: Choose the export format to use when downloading Google Docs files: **HTML**, **MS Word Document**, **Open Office Document**, **PDF**, **Rich Text (rtf)**, or **Text (txt)**. * **Google Drawings**: Choose the export format to use when downloading Google Drawing files: **JPEG**, **PDF**, **PNG**, or **SVG**. * **Google Slides**: Choose the export format to use when downloading Google Slides files: **MS PowerPoint**, **OpenOffice Presentation**, or **PDF**. * **Google Sheets**: Choose the export format to use when downloading Google Sheets files: **CSV**, **MS Excel**, **Open Office Sheet**, or **PDF**. * **File Name**: The name to use for the downloaded file. Refer to the Method: files.get | Google Drive API documentation for more information. ## Move a file# Use this operation to move a file to a different location in a drive. Enter these parameters: * **Credential to connect with**: Create or select an existing Google Drive credentials. * **Resource**: Select **File**. * **Operation**: Select **Move**. * **File**: Choose a file you want to move. * Select **From list** to choose the title from the dropdown list, **By URL** to enter the URL of the file, or **By ID** to enter the `fileId`. * You can find the `fileId` in a shareable Google Drive file URL: `https://docs.google.com/document/d/fileId/edit#gid=0`. In your Google Drive, select **Share > Copy link** to get the shareable file URL. * **Parent Drive**: Select **From list** to choose the drive from the dropdown list, **By URL** to enter the URL of the drive, or **By ID** to enter the `driveId`. * **Parent Folder**: Select **From list** to choose the folder from the dropdown list, **By URL** to enter the URL of the folder, or **By ID** to enter the `folderId`. You can find the `driveId` and `folderID` by visiting the shared drive or folder in your browser and copying the last URL component: `https://drive.google.com/drive/u/1/folders/driveId`. Refer to the Method: parents.insert | Google Drive API documentation for more information. Use this operation to add sharing permissions to a file. Enter these parameters: * **Credential to connect with**: Create or select an existing Google Drive credentials. * **Resource**: Select **File**. * **Operation**: Select **Share**. * **File**: Choose a file you want to share. * Select **From list** to choose the title from the dropdown list, **By URL** to enter the URL of the file, or **By ID** to enter the `fileId`. * You can find the `fileId` in a shareable Google Drive file URL: `https://docs.google.com/document/d/fileId/edit#gid=0`. In your Google Drive, select **Share > Copy link** to get the shareable file URL. * **Permissions**: The permissions to add to the file: * **Role**: Select what users can do with the file. Can be one of **Commenter**, **File Organizer**, **Organizer**, **Owner**, **Reader**, **Writer**. * **Type**: Select the scope of the new permission: * **User**: Grant permission to a specific user, defined by entering their **Email Address**. * **Group**: Grant permission to a specific group, defined by entering its **Email Address**. * **Domain**: Grant permission to a complete domain, defined by the **Domain**. * **Anyone**: Grant permission to anyone. Can optionally **Allow File Discovery** to make the file discoverable through search. ### Options# * **Email Message**: A plain text custom message to include in the notification email. * **Move to New Owners Root**: Available when trying to transfer ownership while sharing an item not in a shared drive. When enabled, moves the file to the new owner's My Drive root folder. * **Send Notification Email**: Whether to send a notification email when sharing to users or groups. * **Transfer Ownership**: Whether to transfer ownership to the specified user and downgrade the current owner to writer permissions. * **Use Domain Admin Access**: Whether to perform the action as a domain administrator. Refer to the REST Resources: files | Google Drive API documentation for more information. ## Update a file# Use this operation to update a file. Enter these parameters: * **Credential to connect with**: Create or select an existing Google Drive credentials. * **Resource**: Select **File**. * **Operation**: Select **Update**. * **File to Update**: Choose a file you want to update. * Select **From list** to choose the title from the dropdown list, **By URL** to enter the URL of the file, or **By ID** to enter the `fileId`. * You can find the `fileId` in a shareable Google Drive file URL: `https://docs.google.com/document/d/fileId/edit#gid=0`. In your Google Drive, select **Share > Copy link** to get the shareable file URL. * **Change File Content**: Choose whether to send new binary data to replace the existing file content. If enabled, fill in the following: * **Input Data Field Name**: The name of the input field that contains the binary file data you wish to use. * **New Updated File Name**: A new name for the file if you want to update the filename. ### Options# * **APP Properties**: A bundle of arbitrary key-value pairs which are private to the requesting app. * **Properties**: A bundle of arbitrary key-value pairs which are visible to all apps. * **Keep Revision Forever**: Choose whether to set the `keepForever` field in the new head revision. This only applies to files with binary content. You can keep a maximum of 200 revisions, after which you must delete the pinned revisions. * **OCR Language**: An ISO 639-1 language code to help the OCR interpret the content during import. * **Use Content As Indexable Text**: Choose whether to mark the uploaded content as indexable text. * **Move to Trash**: Whether to move the file to the trash. Only possible for the file owner. * **Return Fields**: Return metadata fields about the file. Can be one or more of the following: **\[All\]**, **explicitlyTrashed**, **exportLinks**, **hasThumbnail**, **iconLink**, **ID**, **Kind**, **mimeType**, **Name**, **Permissions**, **Shared**, **Spaces**, **Starred**, **thumbnailLink**, **Trashed**, **Version**, or **webViewLink**. Refer to the Method: files.update | Google Drive API documentation for more information. ## Upload a file# Use this operation to upload a file. Enter these parameters: * **Credential to connect with**: Create or select an existing Google Drive credentials. * **Resource**: Select **File**. * **Operation**: Select **Upload**. * **Input Data Field Name**: The name of the input field that contains the binary file data you wish to use. * **File Name**: The name to use for the new file. * **Parent Drive**: Select **From list** to choose the drive from the dropdown list, **By URL** to enter the URL of the drive, or **By ID** to enter the `driveId`. * **Parent Folder**: Select **From list** to choose the folder from the dropdown list, **By URL** to enter the URL of the folder, or **By ID** to enter the `folderId`. You can find the `driveId` and `folderID` by visiting the shared drive or folder in your browser and copying the last URL component: `https://drive.google.com/drive/u/1/folders/driveId`. ### Options# * **APP Properties**: A bundle of arbitrary key-value pairs which are private to the requesting app. * **Properties**: A bundle of arbitrary key-value pairs which are visible to all apps. * **Keep Revision Forever**: Choose whether to set the `keepForever` field in the new head revision. This only applies to files with binary content. You can keep a maximum of 200 revisions, after which you must delete the pinned revisions. * **OCR Language**: An ISO 639-1 language code to help the OCR interpret the content during import. * **Use Content As Indexable Text**: Choose whether to mark the uploaded content as indexable text. * **Simplify Output**: Choose whether to return a simplified version of the response instead of including all fields. Refer to the Method: files.insert | Google Drive API documentation for more information. --- ## Page: https://docs.n8n.io/integrations/builtin/app-nodes/n8n-nodes-base.googledrive/file-folder-operations/ Use this operation to search for files and folders in Google Drive. Refer to Google Drive for more information on the Google Drive node itself. This node can be used as an AI tool This node can be used to enhance the capabilities of an AI agent. When used in this way, many parameters can be set automatically, or with information directed by AI - find out more in the AI tool parameters documentation. ## Search files and folders# Use this operation to search for files and folders in a drive. Enter these parameters: * **Credential to connect with**: Create or select an existing Google Drive credentials. * **Resource**: Select **File/Folder**. * **Operation**: Select **Search**. * **Search Method**: Choose how you want to search: * **Search File/Folder Name**: Fill out the **Search Query** with the name of the file or folder you want to search for. Returns files and folders that are partial matches for the query as well. * **Advanced Search**: Fill out the **Query String** to search for files and folders using Google query string syntax. * **Return All**: Choose whether to return all results or only up to a given limit. * **Limit**: The maximum number of items to return when **Return All** is disabled. * **Filter**: Choose whether to limit the scope of your search: * **Drive**: The drive you want to search in. By default, uses your personal "My Drive". Select **From list** to choose the drive from the dropdown list, **By URL** to enter the URL of the drive, or **By ID** to enter the `driveId`. * You can find the `driveId` by visiting the shared drive in your browser and copying the last URL component: `https://drive.google.com/drive/u/1/folders/driveId`. * **Folder**: The folder to search in. Select **From list** to choose the folder from the dropdown list, **By URL** to enter the URL of the folder, or **By ID** to enter the `folderId`. * You can find the `folderId` by visiting the shared folder in your browser and copying the last URL component: `https://drive.google.com/drive/u/1/folders/folderId`. * **What to Search**: Whether to search for **Files and Folders**, **Files**, or **Folders**. * **Include Trashed Items**: Whether to also return items in the Drive's trash. ### Options# * **Fields**: Select the fields to return. Can be one or more of the following: **\[All\]**, **explicitlyTrashed**, **exportLinks**, **hasThumbnail**, **iconLink**, **ID**, **Kind**, **mimeType**, **Name**, **Permissions**, **Shared**, **Spaces**, **Starred**, **thumbnailLink**, **Trashed**, **Version**, or **webViewLink**. Refer to the Method: files.list | Google Drive API documentation for more information. --- ## Page: https://docs.n8n.io/integrations/builtin/app-nodes/n8n-nodes-base.googledrive/folder-operations/ Use this operation to create, delete, and share folders in Google Drive. Refer to Google Drive for more information on the Google Drive node itself. This node can be used as an AI tool This node can be used to enhance the capabilities of an AI agent. When used in this way, many parameters can be set automatically, or with information directed by AI - find out more in the AI tool parameters documentation. ## Create a folder# Use this operation to create a new folder in a drive. Enter these parameters: - **Credential to connect with**: Create or select an existing Google Drive credentials. - **Resource**: Select **Folder**. - **Operation**: Select **Create**. - **Folder Name**: The name to use for the new folder. - **Parent Drive**: Select **From list** to choose the drive from the dropdown list, **By URL** to enter the URL of the drive, or **By ID** to enter the `driveId`. - **Parent Folder**: Select **From list** to choose the folder from the dropdown list, **By URL** to enter the URL of the folder, or **By ID** to enter the `folderId`. You can find the `driveId` and `folderID` by visiting the shared drive or folder in your browser and copying the last URL component: `https://drive.google.com/drive/u/1/folders/driveId`. ### Options# * **Simplify Output**: Choose whether to return a simplified version of the response instead of including all fields. * **Folder Color**: The color of the folder as an RGB hex string. Refer to the Method: files.insert | Google Drive API documentation for more information. ## Delete a folder# Use this operation to delete a folder from a drive. Enter these parameters: * **Credential to connect with**: Create or select an existing Google Drive credentials. * **Resource**: Select **Folder**. * **Operation**: Select **Delete**. * **Folder**: Choose a folder you want to delete. * Select **From list** to choose the folder from the dropdown list, **By URL** to enter the URL of the folder, or **By ID** to enter the `folderId`. * You can find the `folderId` in a Google Drive folder URL: `https://drive.google.com/drive/u/0/folders/folderID`. ### Options# * **Delete Permanently**: Choose whether to delete the folder now instead of moving it to the trash. Refer to the Method: files.delete | Google Drive API documentation for more information. Use this operation to add sharing permissions to a folder. Enter these parameters: * **Credential to connect with**: Create or select an existing Google Drive credentials. * **Resource**: Select **Folder**. * **Operation**: Select **Share**. * **Folder**: Choose a file you want to move. * Select **From list** to choose the folder from the dropdown list, **By URL** to enter the URL of the folder, or **By ID** to enter the `folderId`. * You can find the `folderId` in a Google Drive folder URL: `https://drive.google.com/drive/u/0/folders/folderID`. * **Permissions**: The permissions to add to the folder: * **Role**: Select what users can do with the folder. Can be one of **Commenter**, **File Organizer**, **Organizer**, **Owner**, **Reader**, **Writer**. * **Type**: Select the scope of the new permission: * **User**: Grant permission to a specific user, defined by entering their **Email Address**. * **Group**: Grant permission to a specific group, defined by entering its **Email Address**. * **Domain**: Grant permission to a complete domain, defined by the **Domain**. * **Anyone**: Grant permission to anyone. Can optionally **Allow File Discovery** to make the file discoverable through search. ### Options# * **Email Message**: A plain text custom message to include in the notification email. * **Move to New Owners Root**: Available when trying to transfer ownership while sharing an item not in a shared drive. When enabled, moves the folder to the new owner's My Drive root folder. * **Send Notification Email**: Whether to send a notification email when sharing to users or groups. * **Transfer Ownership**: Whether to transfer ownership to the specified user and downgrade the current owner to writer permissions. * **Use Domain Admin Access**: Whether to perform the action as a domain administrator. Refer to the REST Resources: files | Google Drive API documentation for more information. --- ## Page: https://docs.n8n.io/integrations/builtin/app-nodes/n8n-nodes-base.googledrive/shared-drive-operations/ Use this operation to create, delete, get, and update shared drives in Google Drive. Refer to Google Drive for more information on the Google Drive node itself. This node can be used as an AI tool This node can be used to enhance the capabilities of an AI agent. When used in this way, many parameters can be set automatically, or with information directed by AI - find out more in the AI tool parameters documentation. Use this operation to create a new shared drive. Enter these parameters: * **Credential to connect with**: Create or select an existing Google Drive credentials. * **Resource**: Select **Shared Drive**. * **Operation**: Select **Create**. * **Name**: The name to use for the new shared drive. ### Options# * **Capabilities**: The capabilities to set for the new shared drive (see REST Resources: drives | Google Drive for more details): * **Can Add Children**: Whether the current user can add children to folders in this shared drive. * **Can Change Copy Requires Writer Permission Restriction**: Whether the current user can change the `copyRequiresWriterPermission` restriction on this shared drive. * **Can Change Domain Users Only Restriction**: Whether the current user can change the `domainUsersOnly` restriction on this shared drive. * **Can Change Drive Background**: Whether the current user can change the background on this shared drive. * **Can Change Drive Members Only Restriction**: Whether the current user can change the `driveMembersOnly` restriction on this shared drive. * **Can Comment**: Whether the current user can comment on files in this shared drive. * **Can Copy**: Whether the current user can copy files in this shared drive. * **Can Delete Children**: Whether the current user can delete children from folders in this shared drive. * **Can Delete Drive**: Whether the current user can delete this shared drive. This operation may still fail if there are items not in the trash in the shared drive. * **Can Download**: Whether the current user can download files from this shared drive. * **Can Edit**: Whether the current user can edit files from this shared drive. * **Can List Children**: Whether the current user can list the children of folders in this shared drive. * **Can Manage Members**: Whether the current user can add, remove, or change the role of members of this shared drive. * **Can Read Revisions**: Whether the current user can read the revisions resource of files in this shared drive. * **Can Rename Drive**: Whether the current user can rename this shared drive. * **Can Share**: Whether the current user can share files or folders in this shared drive. * **Can Trash Children**: Whether the current user can trash children from folders in this shared drive. * **Color RGB**: The color of this shared drive as an RGB hex string. * **Hidden**: Whether to hide this shared drive in the default view. * **Restrictions**: Restrictions to add to this shared drive (see REST Resources: drives | Google Drive for more details): * **Admin Managed Restrictions**: When enabled, restrictions here will override the similarly named fields to true for any file inside of this shared drive. * **Copy Requires Writer Permission**: Whether the options to copy, print, or download files inside this shared drive should be disabled for readers and commenters. * **Domain Users Only**: Whether to restrict access to this shared drive and items inside this shared drive to users of the domain to which this shared drive belongs. * **Drive Members Only**: Whether to restrict access to items inside this shared drive to its members. Refer to the Method: drives.insert | Google Drive API documentation for more information. Use this operation to delete a shared drive. Enter these parameters: * **Credential to connect with**: Create or select an existing Google Drive credentials. * **Resource**: Select **Shared Drive**. * **Operation**: Select **Delete**. * **Shared Drive**: Choose the shared drive want to delete. * Select **From list** to choose the title from the dropdown list, **By URL** to enter the URL of the drive, or **By ID** to enter the `driveId`. * You can find the `driveId` in the URL for the shared Google Drive: `https://drive.google.com/drive/u/0/folders/driveID`. Refer to the Method: drives.delete | Google Drive API documentation for more information. Use this operation to get a shared drive. Enter these parameters: * **Credential to connect with**: Create or select an existing Google Drive credentials. * **Resource**: Select **Shared Drive**. * **Operation**: Select **Get**. * **Shared Drive**: Choose the shared drive want to get. * Select **From list** to choose the title from the dropdown list, **By URL** to enter the URL of the drive, or **By ID** to enter the `driveId`. * You can find the `driveId` in the URL for the shared Google Drive: `https://drive.google.com/drive/u/0/folders/driveID`. ### Options# * **Use Domain Admin Access**: Whether to issue the request as a domain administrator. When enabled, grants the requester access if they're an administrator of the domain to which the shared drive belongs. Refer to the Method: drives.get | Google Drive API documentation for more information. Use this operation to get many shared drives. Enter these parameters: * **Credential to connect with**: Create or select an existing Google Drive credentials. * **Resource**: Select **Shared Drive**. * **Operation**: Select **Get Many**. * **Return All**: Choose whether to return all results or only up to a given limit. * **Limit**: The maximum number of items to return when **Return All** is disabled. * **Shared Drive**: Choose the shared drive want to get. * Select **From list** to choose the title from the dropdown list, **By URL** to enter the URL of the drive, or **By ID** to enter the `driveId`. * You can find the `driveId` in the URL for the shared Google Drive: `https://drive.google.com/drive/u/0/folders/driveID`. ### Options# * **Query**: The query string to use to search for shared drives. See Search for shared drives | Google Drive for more information. * **Use Domain Admin Access**: Whether to issue the request as a domain administrator. When enabled, grants the requester access if they're an administrator of the domain to which the shared drive belongs. Refer to the Method: drives.get | Google Drive API documentation for more information. Use this operation to update a shared drive. Enter these parameters: * **Credential to connect with**: Create or select an existing Google Drive credentials. * **Resource**: Select **Shared Drive**. * **Operation**: Select **Update**. * **Shared Drive**: Choose the shared drive you want to update. * Select **From list** to choose the drive from the dropdown list, **By URL** to enter the URL of the drive, or **By ID** to enter the `driveId`. * You can find the `driveId` in the URL for the shared Google Drive: `https://drive.google.com/drive/u/0/folders/driveID`. ### Update Fields# * **Color RGB**: The color of this shared drive as an RGB hex string. * **Name**: The updated name for the shared drive. * **Restrictions**: Restrictions for this shared drive (see REST Resources: drives | Google Drive for more details): * **Admin Managed Restrictions**: When enabled, restrictions here will override the similarly named fields to true for any file inside of this shared drive. * **Copy Requires Writer Permission**: Whether the options to copy, print, or download files inside this shared drive should be disabled for readers and commenters. * **Domain Users Only**: Whether to restrict access to this shared drive and items inside this shared drive to users of the domain to which this shared drive belongs. * **Drive Members Only**: Whether to restrict access to items inside this shared drive to its members. Refer to the Method: drives.update | Google Drive API documentation for more information. --- ## Page: https://docs.n8n.io/integrations/builtin/app-nodes/n8n-nodes-base.googledrive/common-issues/ Here are some common errors and issues with the Google Drive node and steps to resolve or troubleshoot them. ## Google hasn't verified this app# If using the OAuth authentication method, you might see the warning **Google hasn't verified this app**. To avoid this, you can create OAuth credentials from the same account you want to authenticate. If you need to use credentials generated by another account (by a developer or another third party), follow the instructions in Google Cloud documentation | Authorization errors: Google hasn't verified this app. For Google Cloud apps with **Publishing status** set to **Testing** and **User type** set to **External**, consent and tokens expire after seven days. Refer to Google Cloud Platform Console Help | Setting up your OAuth consent screen for more information. To resolve this, reconnect the app in the n8n credentials modal. ## Google Drive OAuth error# If using the OAuth authentication method, you may see an error indicating that you can't sign in because the app doesn't meet Google's expectations for keeping apps secure. Most often, the actual cause of this issue is that the URLs don't match between Google's OAuth configuration and n8n. To avoid this, start by reviewing any links included in Google's error message. This will contain details about the exact error that occurred. If you are self-hostin n8n, check the n8n configuration items used to construct external URLs. Verify that the `N8N_EDITOR_BASE_URL` and `WEBHOOK_URL` environment variables use fully qualified domains. ## Get recent files from Google Drive# To retrieve recent files from Google Drive, you need to sort files by modification time. To do this, you need to search for existing files and retrieve their modification times. Next you can sort the files to find the most recent file and use another Google Drive node target the file by ID. The process looks like this: 1. Add a **Google Drive** node to your canvas. 2. Select the **File/Folder** resource and the **Search** operation. 3. Enable **Return All** to sort through all files. 4. Set the **What to Search** filter to **Files**. 5. In the **Options**, set the **Fields** to **All**. 6. Connect a **Sort** node to the output of the **Google Drive** node. 7. Choose **Simple** sort type. 8. Enter `modifiedTime` as the **Field Name** in the **Fields To Sort By** section. 9. Choose **Descending** sort order. 10. Add a **Limit** node to the output of the **Sort** node. 11. Set **Max Items** to **1** to keep the most recent file. 12. Connect another **Google Drive** node to the output of the **Limit** node. 13. Select **File** as the **Resource** and the operation of your choice. 14. In the **File** selection, choose **By ID**. 15. Select **Expression** and enter `{{ $json.id }}` as the expression. --- ## Page: https://docs.n8n.io/integrations/builtin/app-nodes/n8n-nodes-base.googleperspective/ Use the Google Perspective node to automate work in Google Perspective, and integrate Google Perspective with other applications. n8n has built-in support for a wide range of Google Perspective features, including analyzing comments. On this page, you'll find a list of operations the Google Perspective node supports and links to more resources. ## Operations# * Analyze Comment ## Templates and examples# Browse Google Perspective integration templates, or search all templates ## What to do if your operation isn't supported# If this node doesn't support the operation you want to do, you can use the HTTP Request node to call the service's API. You can use the credential you created for this service in the HTTP Request node: 1. In the HTTP Request node, select **Authentication** > **Predefined Credential Type**. 2. Select the service you want to connect to. 3. Select your credential. Refer to Custom API operations for more information. --- ## Page: https://docs.n8n.io/integrations/builtin/app-nodes/n8n-nodes-base.googlesheets/ Use the Google Sheets node to automate work in Google Sheets, and integrate Google Sheets with other applications. n8n has built-in support for a wide range of Google Sheets features, including creating, updating, deleting, appending, removing and getting documents. On this page, you'll find a list of operations the Google Sheets node supports and links to more resources. ## Operations# * **Document** * **Create** a spreadsheet. * **Delete** a spreadsheet. * **Sheet Within Document** * **Append or Update Row**: Append a new row, or update the current one if it already exists. * **Append Row**: Create a new row. * **Clear** all data from a sheet. * **Create** a new sheet. * **Delete** a sheet. * **Delete Rows or Columns**: Delete columns and rows from a sheet. * **Get Row(s)**: Read all rows in a sheet. * **Update Row**: Update a row in a sheet. ## Templates and examples# Refer to Google Sheet's API documentation for more information about the service. ## Common issues# For common questions or issues and suggested solutions, refer to Common issues. ## What to do if your operation isn't supported# If this node doesn't support the operation you want to do, you can use the HTTP Request node to call the service's API. You can use the credential you created for this service in the HTTP Request node: 1. In the HTTP Request node, select **Authentication** > **Predefined Credential Type**. 2. Select the service you want to connect to. 3. Select your credential. Refer to Custom API operations for more information. --- ## Page: https://docs.n8n.io/integrations/builtin/app-nodes/n8n-nodes-base.googlesheets/document-operations/ Use this operation to create or delete a Google spreadsheet from Google Sheets. Refer to Google Sheets for more information on the Google Sheets node itself. This node can be used as an AI tool This node can be used to enhance the capabilities of an AI agent. When used in this way, many parameters can be set automatically, or with information directed by AI - find out more in the AI tool parameters documentation. ## Create a spreadsheet# Use this operation to create a new spreadsheet. Enter these parameters: * **Credential to connect with**: Create or select an existing Google Sheets credentials. * **Resource**: Select **Document**. * **Operation**: Select **Create**. * **Title**: Enter the title of the new spreadsheet you want to create. * **Sheets**: Add the **Title(s)** of the sheet(s) you want to create within the spreadsheet. ### Options# * **Locale**: Enter the locale of the spreadsheet. This affects formatting details such as functions, dates, and currency. Use one of the following formats: * `en` (639-1) * `fil` (639-2 if no 639-1 format exists) * `en_US` (combination of ISO language and country). * Refer to List of ISO 639 language codes and List of ISO 3166 country codes for language and country codes. Note that Google doesn't support all locales/languages. * **Recalculation Interval**: Enter the desired recalculation interval for the spreadsheet functions. This affects how often `NOW`, `TODAY`, `RAND`, and `RANDBETWEEN` are updated. Select **On Change** for recalculating whenever there is a change in the spreadsheet, **Minute** for recalculating every minute, or **Hour** for recalculating every hour. Refer to Set a spreadsheet’s location & calculation settings for more information about these options. Refer to the Method: spreadsheets.create | Google Sheets API documentation for more information. ## Delete a spreadsheet# Use this operation to delete an existing spreadsheet. Enter these parameters: * **Credential to connect with**: Create or select an existing Google Sheets credentials. * **Resource**: Select **Document**. * **Operation**: Select **Delete**. * **Document**: Choose a spreadsheet you want to delete. * Select **From list** to choose the title from the dropdown list, **By URL** to enter the url of the spreadsheet, or **By ID** to enter the `spreadsheetId`. * You can find the `spreadsheetId` in a Google Sheets URL: `https://docs.google.com/spreadsheets/d/spreadsheetId/edit#gid=0`. Refer to the Method: files.delete | Google Drive API documentation for more information. --- ## Page: https://docs.n8n.io/integrations/builtin/app-nodes/n8n-nodes-base.googlesheets/sheet-operations/ Use this operation to create, update, clear or delete a sheet in a Google spreadsheet from Google Sheets. Refer to Google Sheets for more information on the Google Sheets node itself. This node can be used as an AI tool This node can be used to enhance the capabilities of an AI agent. When used in this way, many parameters can be set automatically, or with information directed by AI - find out more in the AI tool parameters documentation. ## Append or Update Row# Use this operation to update an existing row or add a new row at the end of the data if a matching entry isn't found in a sheet. Enter these parameters: * **Credential to connect with**: Create or select an existing Google Sheets credentials. * **Resource**: Select **Sheet Within Document**. * **Operation**: Select **Append or Update Row**. * **Document**: Choose a spreadsheet that contains the sheet you want to append or update row(s) to. * Select **From list** to choose the spreadsheet title from the dropdown list, **By URL** to enter the url of the spreadsheet, or **By ID** to enter the `spreadsheetId`. * You can find the `spreadsheetId` in a Google Sheets URL: `https://docs.google.com/spreadsheets/d/spreadsheetId/edit#gid=0`. * **Sheet**: Choose a sheet you want to append or update row(s) to. * Select **From list** to choose the sheet title from the dropdown list, **By URL** to enter the url of the sheet, **By ID** to enter the `sheetId`, or **By Name** to enter the sheet title. * You can find the `sheetId` in a Google Sheets URL: `https://docs.google.com/spreadsheets/d/aBC-123_xYz/edit#gid=sheetId`. * **Mapping Column Mode**: * **Map Each Column Manually**: Enter **Values to Send** for each column. * **Map Automatically**: n8n looks for incoming data that matches the columns in Google Sheets automatically. In this mode, make sure the incoming data fields are the same as the columns in Google Sheets. (Use an Edit Fields node before this node to change them if required.) * **Nothing**: Don't map any data. ### Options# * **Cell Format**: Use this option to choose how to format the data in cells. Refer to Google Sheets API | CellFormat for more information. * **Let Google Sheets format** (default): n8n formats text and numbers in the cells according to Google Sheets' default settings. * **Let n8n format**: New cells in your sheet will have the same data types as the input data provided by n8n. * **Data Location on Sheet**: Use this option when you need to specify the data range on your sheet. * **Header Row**: Specify the row index that contains the column headers. * **First Data Row**: Specify the row index where the actual data starts. * **Handling extra fields in input**: When using **Mapping Column Mode > Map Automatically**, use this option to decide how to handle fields in the input data that don't match any existing columns in the sheet. * **Insert in New Column(s)** (default): Adds new columns for any extra data. * **Ignore Them**: Ignores extra data that don't match the existing columns. * **Error**: Throws an error and stops execution. * **Use Append**: Turn on this option to use the Google API append endpoint for adding new data rows. * By default, n8n appends empty rows or columns and then adds the new data. This approach can ensure data alignment but may be less efficient. Using the append endpoint can lead to better performance by minimizing the number of API calls and simplifying the process. But if the existing sheet data has inconsistencies such as gaps or breaks between rows and columns, n8n may add the new data in the wrong place, leading to misalignment issues. * Use this option when performance is a priority and the data structure in the sheet is consistent without gaps. Refer to the Method: spreadsheets.values.update | Google Sheets API documentation for more information. ## Append Row# Use this operation to append a new row at the end of the data in a sheet. Enter these parameters: * **Credential to connect with**: Create or select an existing Google Sheets credentials. * **Resource**: Select **Sheet Within Document**. * **Operation**: Select **Append Row**. * **Document**: Choose a spreadsheet with the sheet you want to append a row to. * Select **From list** to choose the spreadsheet title from the dropdown list, **By URL** to enter the url of the spreadsheet, or **By ID** to enter the `spreadsheetId`. * You can find the `spreadsheetId` in a Google Sheets URL: `https://docs.google.com/spreadsheets/d/spreadsheetId/edit#gid=0`. * **Sheet**: Choose a sheet you want to append a row to. * Select **From list** to choose the sheet title from the dropdown list, **By URL** to enter the url of the sheet, **By ID** to enter the `sheetId`, or **By Name** to enter the sheet title. * You can find the `sheetId` in a Google Sheets URL: `https://docs.google.com/spreadsheets/d/aBC-123_xYz/edit#gid=sheetId`. * **Mapping Column Mode**: * **Map Each Column Manually**: Select the **Column to Match On** when finding the rows to update. Enter **Values to Send** for each column. * **Map Automatically**: n8n looks for incoming data that matches the columns in Google Sheets automatically. In this mode, make sure the incoming data fields are the same as the columns in Google Sheets. (Use an Edit Fields node before this node to change them if required.) * **Nothing**: Don't map any data. ### Options# * **Cell Format**: Use this option to choose how to format the data in cells. Refer to Google Sheets API | CellFormat for more information. * **Let Google Sheets format** (default): n8n formats text and numbers in the cells according to Google Sheets' default settings. * **Let n8n format**: New cells in your sheet will have the same data types as the input data provided by n8n. * **Data Location on Sheet**: Use this option when you need to specify the data range on your sheet. * **Header Row**: Specify the row index that contains the column headers. * **First Data Row**: Specify the row index where the actual data starts. * **Handling extra fields in input**: When using **Mapping Column Mode > Map Automatically**, use this option to decide how to handle fields in the input data that don't match any existing columns in the sheet. * **Insert in New Column(s)** (default): Adds new columns for any extra data. * **Ignore Them**: Ignores extra data that don't match the existing columns. * **Error**: Throws an error and stops execution. * **Use Append**: Turn on this option to use the Google API append endpoint for adding new data rows. * By default, n8n appends empty rows or columns and then adds the new data. This approach can ensure data alignment but may be less efficient. Using the append endpoint can lead to better performance by minimizing the number of API calls and simplifying the process. But if the existing sheet data has inconsistencies such as gaps or breaks between rows and columns, n8n may add the new data in the wrong place, leading to misalignment issues. * Use this option when performance is a priority and the data structure in the sheet is consistent without gaps. Refer to the Method: spreadsheets.values.append | Google Sheets API documentation for more information. ## Clear a sheet# Use this operation to clear all data from a sheet. Enter these parameters: * **Credential to connect with**: Create or select an existing Google Sheets credentials. * **Resource**: Select **Sheet Within Document**. * **Operation**: Select **Clear**. * **Document**: Choose a spreadsheet with the sheet you want to clear data from. * Select **From list** to choose the spreadsheet title from the dropdown list, **By URL** to enter the url of the spreadsheet, or **By ID** to enter the `spreadsheetId`. * You can find the `spreadsheetId` in a Google Sheets URL: `https://docs.google.com/spreadsheets/d/spreadsheetId/edit#gid=0`. * **Sheet**: Choose a sheet you want to clear data from. * Select **From list** to choose the sheet title from the dropdown list, **By URL** to enter the url of the sheet, **By ID** to enter the `sheetId`, or **By Name** to enter the sheet title. * You can find the `sheetId` in a Google Sheets URL: `https://docs.google.com/spreadsheets/d/aBC-123_xYz/edit#gid=sheetId`. * **Clear**: Select what data you want cleared from the sheet. * **Whole Sheet**: Clear the entire sheet's data. Turn on **Keep First Row** to keep the first row of the sheet. * **Specific Rows**: Clear data from specific rows. Also enter: * **Start Row Number**: Enter the first row number you want to clear. * **Number of Rows to Delete**: Enter the number of rows to clear. `1` clears data only the row in the **Start Row Number**. * **Specific Columns**: Clear data from specific columns. Also enter: * **Start Column**: Enter the first column you want to clear using the letter notation. * **Number of Columns to Delete**: Enter the number of columns to clear. `1` clears data only in the **Start Column**. * **Specific Range**: Enter the table range to clear data from, in A1 notation. Refer to the Method: spreadsheets.values.clear | Google Sheets API documentation for more information. ## Create a new sheet# Use this operation to create a new sheet. Enter these parameters: * **Credential to connect with**: Create or select an existing Google Sheets credentials. * **Resource**: Select **Sheet Within Document**. * **Operation**: Select **Create**. * **Document**: Choose a spreadsheet in which you want to create a new sheet. * Select **From list** to choose the spreadsheet title from the dropdown list, **By URL** to enter the url of the spreadsheet, or **By ID** to enter the `spreadsheetId`. * You can find the `spreadsheetId` in a Google Sheets URL: `https://docs.google.com/spreadsheets/d/spreadsheetId/edit#gid=0`. * **Title**: Enter the title for your new sheet. ### Options# * **Hidden**: Turn on this option to keep the sheet hidden in the UI. * **Right To Left**: Turn on this option to use RTL sheet instead of an LTR sheet. * **Sheet ID**: Enter the ID of the sheet. * You can find the `sheetId` in a Google Sheets URL: `https://docs.google.com/spreadsheets/d/aBC-123_xYz/edit#gid=sheetId` * **Sheet Index**: By default, the new sheet is the last sheet in the spreadsheet. To override this behavior, enter the index you want the new sheet to use. When you add a sheet at a given index, Google increments the indices for all following sheets. Refer to Sheets | SheetProperties documentation for more information. * **Tab Color**: Enter the color as hex code or use the color picker to set the color of the tab in the UI. Refer to the Method: spreadsheets.batchUpdate | Google Sheets API documentation for more information. ## Delete a sheet# Use this operation to permanently delete a sheet. Enter these parameters: * **Credential to connect with**: Create or select an existing Google Sheets credentials. * **Resource**: Select **Sheet Within Document**. * **Operation**: Select **Delete**. * **Document**: Choose a spreadsheet that contains the sheet you want to delete. * Select **From list** to choose the spreadsheet title from the dropdown list, **By URL** to enter the url of the spreadsheet, or **By ID** to enter the `spreadsheetId`. * You can find the `spreadsheetId` in a Google Sheets URL: `https://docs.google.com/spreadsheets/d/spreadsheetId/edit#gid=0`. * **Sheet**: Choose the sheet you want to delete. * Select **From list** to choose the sheet title from the dropdown list, **By URL** to enter the url of the sheet, **By ID** to enter the `sheetId`, or **By Name** to enter the name of the sheet. * You can find the `sheetId` in a Google Sheets URL: `https://docs.google.com/spreadsheets/d/aBC-123_xYz/edit#gid=sheetId`. Refer to the Method: spreadsheets.batchUpdate | Google Sheets API documentation for more information. ## Delete Rows or Columns# Use this operation to delete rows or columns in a sheet. Enter these parameters: * **Credential to connect with**: Create or select an existing Google Sheets credentials. * **Resource**: Select **Sheet Within Document**. * **Operation**: Select **Delete Rows or Columns**. * **Document**: Choose a spreadsheet that contains the sheet you want to delete rows or columns from. * Select **From list** to choose the spreadsheet title from the dropdown list, **By URL** to enter the url of the spreadsheet, or **By ID** to enter the `spreadsheetId`. * You can find the `spreadsheetId` in a Google Sheets URL: `https://docs.google.com/spreadsheets/d/spreadsheetId/edit#gid=0`. * **Sheet**: Choose the sheet in which you want to delete rows or columns. * Select **From list** to choose the sheet title from the dropdown list, **By URL** to enter the url of the sheet, **By ID** to enter the `sheetId`, or **By Name** to enter the name of the sheet. * You can find the `sheetId` in a Google Sheets URL: `https://docs.google.com/spreadsheets/d/aBC-123_xYz/edit#gid=sheetId`. * **Start Row Number** or **Start Column**: Enter the row number or column letter to start deleting. * **Number of Rows to Delete** or **Number of Columns to delete**: Enter the number of rows or columns to delete. Refer to the Method: spreadsheets.batchUpdate | Google Sheets API documentation for more information. ## Get Row(s)# Use this operation to read one or more rows from a sheet. Enter these parameters: * **Credential to connect with**: Create or select an existing Google Sheets credentials. * **Resource**: Select **Sheet Within Document**. * **Operation**: Select **Get Row(s)**. * **Document**: Choose a spreadsheet that contains the sheet you want to get rows from. * Select **From list** to choose the spreadsheet title from the dropdown list, **By URL** to enter the url of the spreadsheet, or **By ID** to enter the `spreadsheetId`. * You can find the `spreadsheetId` in a Google Sheets URL: `https://docs.google.com/spreadsheets/d/spreadsheetId/edit#gid=0`. * **Sheet**: Choose a sheet you want to read rows from. * Select **From list** to choose the sheet title from the dropdown list, **By URL** to enter the url of the sheet, **By ID** to enter the `sheetId`, or **By Name** to enter the name of the sheet. * You can find the `sheetId` in a Google Sheets URL: `https://docs.google.com/spreadsheets/d/aBC-123_xYz/edit#gid=sheetId`. * **Filters**: By default, the node returns all rows in the sheet. Set filters to return a limited set of results: * **Column**: Select the column in your sheet to search against. * **Value**: Enter a cell value to search for. You can drag input data parameters here. If your filter matches multiple rows, n8n returns the first result. If you want all matching rows: 1. Under **Options**, select **Add Option** > **When Filter Has Multiple Matches**. 2. Change **When Filter Has Multiple Matches** to **Return All Matches**. ### Options# * **Data Location on Sheet**: Use this option to specify a data range. By default, n8n will detect the range automatically until the last row in the sheet. * **Output Formatting**: Use this option to choose how n8n formats the data returned by Google Sheets. * **General Formatting**: * **Values (unformatted)** (default): n8n removes currency signs and other special formatting. Data type remains as number. * **Values (formatted)**: n8n displays the values as they appear in Google Sheets (for example, retaining commas or currency signs) by converting the data type from number to string. * **Formulas**: n8n returns the formula. It doesn't calculate the formula output. For example, if a cell B2 has the formula `=A2`, n8n returns B2's value as `=A2` (in text). Refer to About date & time values | Google Sheets for more information. * **Date Formatting**: Refer to DateTimeRenderOption | Google Sheets for more information. - **Formatted Text** (default): As displayed in Google Sheets, which depends on the spreadsheet locale. For example `01/01/2024`. - **Serial Number**: Number of days since December 30th 1899. * **When Filter Has Multiple Matches**: Set to **Return All Matches** to get multiple matches. By default only the first result gets returned. First row n8n treats the first row in a Google Sheet as a heading row, and doesn't return it when reading all rows. If you want to read the first row, use the **Options** to set **Data Location on Sheet**. Refer to the Method: spreadsheets.batchUpdate | Google Sheets API documentation for more information. ## Update Row# Use this operation to update existing row in a sheet. This operation only updates existing rows. To append rows when a matching entry isn't found in a sheet, use **Append or Update Row** operation instead. Enter these parameters: * **Credential to connect with**: Create or select an existing Google Sheets credentials. * **Resource**: Select **Sheet Within Document**. * **Operation**: Select **Update Row**. * **Document**: Choose a spreadsheet with the sheet you want to update. * Select **From list** to choose the spreadsheet title from the dropdown list, **By URL** to enter the url of the spreadsheet, or **By ID** to enter the `spreadsheetId`. * You can find the `spreadsheetId` in a Google Sheets URL: `https://docs.google.com/spreadsheets/d/spreadsheetId/edit#gid=0`. * **Sheet**: Choose a sheet you want to update. * Select **From list** to choose the sheet title from the dropdown list, **By URL** to enter the url of the sheet, **By ID** to enter the `sheetId`, or **By Name** to enter the sheet title. * You can find the `sheetId` in a Google Sheets URL: `https://docs.google.com/spreadsheets/d/aBC-123_xYz/edit#gid=sheetId`. * **Mapping Column Mode**: * **Map Each Column Manually**: Enter **Values to Send** for each column. * **Map Automatically**: n8n looks for incoming data that matches the columns in Google Sheets automatically. In this mode, make sure the incoming data fields are the same as the columns in Google Sheets. (Use an Edit Fields node before this node to change them if required.) * **Nothing**: Don't map any data. ### Options# * **Cell Format**: Use this option to choose how to format the data in cells. Refer to Google Sheets API | CellFormat for more information. * **Let Google Sheets format** (default): n8n formats text and numbers in the cells according to Google Sheets' default settings. * **Let n8n format**: New cells in your sheet will have the same data types as the input data provided by n8n. * **Data Location on Sheet**: Use this option when you need to specify where the data range on your sheet. * **Header Row**: Specify the row index that contains the column headers. * **First Data Row**: Specify the row index where the actual data starts. Refer to the Method: spreadsheets.batchUpdate | Google Sheets API documentation for more information. --- ## Page: https://docs.n8n.io/integrations/builtin/app-nodes/n8n-nodes-base.googlesheets/common-issues/ Here are some common errors and issues with the Google Sheets node and steps to resolve or troubleshoot them. ## Append an array# To insert an array of data into Google Sheets, you must convert the array into a valid JSON (key, value) format. To do so, consider using: 1. The Split Out node. 2. The AI Transform node. For example, try entering something like: <table><tbody><tr><td><div><pre><span></span><span>1</span></pre></div></td><td><div><pre><span></span><code>Convert 'languages' array to JSON (key, value) pairs. </code></pre></div></td></tr></tbody></table> 3. The Code node. ## Column names were updated after the node's setup# You'll receive this error if the Google Sheet's column names have changed since you set up the node. To refresh the column names, re-select **Mapping Column Mode**. This should prompt the node to fetch the column names again. Once the column names refresh, update the node parameters. --- ## Page: https://docs.n8n.io/integrations/builtin/app-nodes/n8n-nodes-base.googleslides/ Use the Google Slides node to automate work in Google Slides, and integrate Google Slides with other applications. n8n has built-in support for a wide range of Google Slides features, including creating presentations, and getting pages. On this page, you'll find a list of operations the Google Slides node supports and links to more resources. This node can be used as an AI tool This node can be used to enhance the capabilities of an AI agent. When used in this way, many parameters can be set automatically, or with information directed by AI - find out more in the AI tool parameters documentation. ## Operations# * Page * Get a page * Get a thumbnail * Presentation * Create a presentation * Get a presentation * Get presentation slides * Replace text in a presentation ## Templates and examples# ## What to do if your operation isn't supported# If this node doesn't support the operation you want to do, you can use the HTTP Request node to call the service's API. You can use the credential you created for this service in the HTTP Request node: 1. In the HTTP Request node, select **Authentication** > **Predefined Credential Type**. 2. Select the service you want to connect to. 3. Select your credential. Refer to Custom API operations for more information. --- ## Page: https://docs.n8n.io/integrations/builtin/app-nodes/n8n-nodes-base.googletasks/ Use the Google Tasks node to automate work in Google Tasks, and integrate Google Tasks with other applications. n8n has built-in support for a wide range of Google Tasks features, including adding, updating, and retrieving contacts. On this page, you'll find a list of operations the Google Tasks node supports and links to more resources. This node can be used as an AI tool This node can be used to enhance the capabilities of an AI agent. When used in this way, many parameters can be set automatically, or with information directed by AI - find out more in the AI tool parameters documentation. ## Operations# * Task * Add a task to task list * Delete a task * Retrieve a task * Retrieve all tasks from a task list * Update a task ## Templates and examples# ## What to do if your operation isn't supported# If this node doesn't support the operation you want to do, you can use the HTTP Request node to call the service's API. You can use the credential you created for this service in the HTTP Request node: 1. In the HTTP Request node, select **Authentication** > **Predefined Credential Type**. 2. Select the service you want to connect to. 3. Select your credential. Refer to Custom API operations for more information. --- ## Page: https://docs.n8n.io/integrations/builtin/app-nodes/n8n-nodes-base.googletranslate/ Use the Google Translate node to automate work in Google Translate, and integrate Google Translate with other applications. n8n has built-in support for a wide range of Google Translate features, including translating languages. On this page, you'll find a list of operations the Google Translate node supports and links to more resources. This node can be used as an AI tool This node can be used to enhance the capabilities of an AI agent. When used in this way, many parameters can be set automatically, or with information directed by AI - find out more in the AI tool parameters documentation. ## Operations# * Language * Translate data ## Templates and examples# ## What to do if your operation isn't supported# If this node doesn't support the operation you want to do, you can use the HTTP Request node to call the service's API. You can use the credential you created for this service in the HTTP Request node: 1. In the HTTP Request node, select **Authentication** > **Predefined Credential Type**. 2. Select the service you want to connect to. 3. Select your credential. Refer to Custom API operations for more information. --- ## Page: https://docs.n8n.io/integrations/builtin/app-nodes/n8n-nodes-base.gsuiteadmin/ Use the Google Workspace Admin node to automate work in Google Workspace Admin, and integrate Google Workspace Admin with other applications. n8n has built-in support for a wide range of Google Workspace Admin features, including creating, updating, deleting, and getting users, and groups. On this page, you'll find a list of operations the Google Workspace Admin node supports and links to more resources. This node can be used as an AI tool This node can be used to enhance the capabilities of an AI agent. When used in this way, many parameters can be set automatically, or with information directed by AI - find out more in the AI tool parameters documentation. ## Operations# * Group * Create a group * Delete a group * Get a group * Get all groups * Update a group * User * Create a user * Delete a user * Get a user * Get all users * Update a user ## Templates and examples# Browse Google Workspace Admin integration templates, or search all templates ## How to project a user's information# There are three different ways to project a user's information: * **Basic**: Doesn't include any custom fields. * **Custom**: Includes the custom fields from schemas in `customField`. * **Full**: Include all the fields associated with the user. To include custom fields, follow these steps: 1. Select **Custom** from the **Projection** dropdown list. 2. Select the **Add Options** button and select **Custom Schemas** from the dropdown list. 3. Select the schema names you want to include from the **Custom Schemas** dropdown list. --- ## Page: https://docs.n8n.io/integrations/builtin/app-nodes/n8n-nodes-base.gotify/ Use the Gotify node to automate work in Gotify, and integrate Gotify with other applications. n8n has built-in support for a wide range of Gotify features, including creating, deleting, and getting messages. On this page, you'll find a list of operations the Gotify node supports and links to more resources. This node can be used as an AI tool This node can be used to enhance the capabilities of an AI agent. When used in this way, many parameters can be set automatically, or with information directed by AI - find out more in the AI tool parameters documentation. ## Operations# * Message * Create * Delete * Get All ## Templates and examples# Browse Gotify integration templates, or search all templates --- ## Page: https://docs.n8n.io/integrations/builtin/app-nodes/n8n-nodes-base.gotowebinar/ Use the GoToWebinar node to automate work in GoToWebinar, and integrate GoToWebinar with other applications. n8n has built-in support for a wide range of GoToWebinar features, including creating, getting, and deleting attendees, organizers, and registrants. On this page, you'll find a list of operations the GoToWebinar node supports and links to more resources. ## Operations# * Attendee * Get * Get All * Get Details * Co-Organizer * Create * Delete * Get All * Re-invite * Panelist * Create * Delete * Get All * Re-invite * Registrant * Create * Delete * Get * Get All * Session * Get * Get All * Get Details * Webinar * Create * Get * Get All * Update ## Templates and examples# Browse GoToWebinar integration templates, or search all templates ## What to do if your operation isn't supported# If this node doesn't support the operation you want to do, you can use the HTTP Request node to call the service's API. You can use the credential you created for this service in the HTTP Request node: 1. In the HTTP Request node, select **Authentication** > **Predefined Credential Type**. 2. Select the service you want to connect to. 3. Select your credential. Refer to Custom API operations for more information. --- ## Page: https://docs.n8n.io/integrations/builtin/app-nodes/n8n-nodes-base.grafana/ Use the Grafana node to automate work in Grafana, and integrate Grafana with other applications. n8n has built-in support for a wide range of Grafana features, including creating, updating, deleting, and getting dashboards, teams, and users. On this page, you'll find a list of operations the Grafana node supports and links to more resources. This node can be used as an AI tool This node can be used to enhance the capabilities of an AI agent. When used in this way, many parameters can be set automatically, or with information directed by AI - find out more in the AI tool parameters documentation. ## Operations# * Dashboard * Create a dashboard * Delete a dashboard * Get a dashboard * Get all dashboards * Update a dashboard * Team * Create a team * Delete a team * Get a team * Retrieve all teams * Update a team * Team Member * Add a member to a team * Retrieve all team members * Remove a member from a team * User * Delete a user from the current organization * Retrieve all users in the current organization * Update a user in the current organization ## Templates and examples# Browse Grafana integration templates, or search all templates ## What to do if your operation isn't supported# If this node doesn't support the operation you want to do, you can use the HTTP Request node to call the service's API. You can use the credential you created for this service in the HTTP Request node: 1. In the HTTP Request node, select **Authentication** > **Predefined Credential Type**. 2. Select the service you want to connect to. 3. Select your credential. Refer to Custom API operations for more information. --- ## Page: https://docs.n8n.io/integrations/builtin/app-nodes/n8n-nodes-base.grist/ Use the Grist node to automate work in Grist, and integrate Grist with other applications. n8n has built-in support for a wide range of Grist features, including creating, updating, deleting, and reading rows in a table. On this page, you'll find a list of operations the Grist node supports and links to more resources. ## Operations# * Create rows in a table * Delete rows from a table * Read rows from a table * Update rows in a table ## Templates and examples# Browse Grist integration templates, or search all templates ## Get the Row ID# To update or delete a particular record, you need the Row ID. There are two ways to get the Row ID: **Create a Row ID column in Grist** Create a new column in your Grist table with the formula `$id`. **Use the Get All operation** The **Get All** operation returns the Row ID of each record along with the fields. You can get it with the expression `{{$node["GristNodeName"].json["id"]}}`. ## Filter records when using the Get All operation# * Select **Add Option** and select **Filter** from the dropdown list. * You can add filters for any number of columns. The result will only include records which match all the columns. * For each column, you can enter any number of values separated by commas. The result will include records which match any of the values for that column. --- ## Page: https://docs.n8n.io/integrations/builtin/app-nodes/n8n-nodes-base.hackernews/ Use the Hacker News node to automate work in Hacker News, and integrate Hacker News with other applications. n8n has built-in support for a wide range of Hacker News features, including getting articles, and users. On this page, you'll find a list of operations the Hacker News node supports and links to more resources. Credentials This node doesn't require authentication. This node can be used as an AI tool This node can be used to enhance the capabilities of an AI agent. When used in this way, many parameters can be set automatically, or with information directed by AI - find out more in the AI tool parameters documentation. ## Operations# * All * Get all items * Article * Get a Hacker News article * User * Get a Hacker News user ## Templates and examples# --- ## Page: https://docs.n8n.io/integrations/builtin/app-nodes/n8n-nodes-base.halopsa/ Use the HaloPSA node to automate work in HaloPSA, and integrate HaloPSA with other applications. n8n has built-in support for a wide range of HaloPSA features, including creating, updating, deleting, and getting clients, sites and tickets. On this page, you'll find a list of operations the HaloPSA node supports and links to more resources. ## Operations# * Client * Create a client * Delete a client * Get a client * Get all clients * Update a client * Site * Create a site * Delete a site * Get a site * Get all sites * Update a site * Ticket * Create a ticket * Delete a ticket * Get a ticket * Get all tickets * Update a ticket * User * Create a user * Delete a user * Get a user * Get all users * Update a user ## Templates and examples# Browse HaloPSA integration templates, or search all templates --- ## Page: https://docs.n8n.io/integrations/builtin/app-nodes/n8n-nodes-base.harvest/ Use the Harvest node to automate work in Harvest, and integrate Harvest with other applications. n8n has built-in support for a wide range of Harvest features, including creating, updating, deleting, and getting clients, contacts, invoices, tasks, expenses, users, and projects. On this page, you'll find a list of operations the Harvest node supports and links to more resources. ## Operations# * Client * Create a client * Delete a client * Get data of a client * Get data of all clients * Update a client * Company * Retrieves the company for the currently authenticated user * Contact * Create a contact * Delete a contact * Get data of a contact * Get data of all contacts * Update a contact * Estimate * Create an estimate * Delete an estimate * Get data of an estimate * Get data of all estimates * Update an estimate * Expense * Get data of an expense * Get data of all expenses * Create an expense * Update an expense * Delete an expense * Invoice * Get data of an invoice * Get data of all invoices * Create an invoice * Update an invoice * Delete an invoice * Project * Create a project * Delete a project * Get data of a project * Get data of all projects * Update a project * Task * Create a task * Delete a task * Get data of a task * Get data of all tasks * Update a task * Time Entries * Create a time entry using duration * Create a time entry using start and end time * Delete a time entry * Delete a time entry's external reference. * Get data of a time entry * Get data of all time entries * Restart a time entry * Stop a time entry * Update a time entry * User * Create a user * Delete a user * Get data of a user * Get data of all users * Get data of authenticated user * Update a user ## Templates and examples# Browse Harvest integration templates, or search all templates ## What to do if your operation isn't supported# If this node doesn't support the operation you want to do, you can use the HTTP Request node to call the service's API. You can use the credential you created for this service in the HTTP Request node: 1. In the HTTP Request node, select **Authentication** > **Predefined Credential Type**. 2. Select the service you want to connect to. 3. Select your credential. Refer to Custom API operations for more information. --- ## Page: https://docs.n8n.io/integrations/builtin/app-nodes/n8n-nodes-base.helpscout/ Use the Help Scout node to automate work in Help Scout, and integrate Help Scout with other applications. n8n has built-in support for a wide range of Help Scout features, including creating, updating, deleting, and getting conversations, and customers. On this page, you'll find a list of operations the Help Scout node supports and links to more resources. ## Operations# * Conversation * Create a new conversation * Delete a conversation * Get a conversation * Get all conversations * Customer * Create a new customer * Get a customer * Get all customers * Get customer property definitions * Update a customer * Mailbox * Get data of a mailbox * Get all mailboxes * Thread * Create a new chat thread * Get all chat threads ## Templates and examples# Browse Help Scout integration templates, or search all templates ## What to do if your operation isn't supported# If this node doesn't support the operation you want to do, you can use the HTTP Request node to call the service's API. You can use the credential you created for this service in the HTTP Request node: 1. In the HTTP Request node, select **Authentication** > **Predefined Credential Type**. 2. Select the service you want to connect to. 3. Select your credential. Refer to Custom API operations for more information. --- ## Page: https://docs.n8n.io/integrations/builtin/app-nodes/n8n-nodes-base.highlevel/ Use the HighLevel node to automate work in HighLevel, and integrate HighLevel with other applications. n8n has built-in support for a wide range of HighLevel features, including creating, updating, deleting, and getting contacts, opportunities, and tasks, as well as booking appointments and getting free time slots in calendars. On this page, you'll find a list of operations the HighLevel node supports and links to more resources. ## Operations# * Contact * Create or update * Delete * Get * Get many * Update * Opportunity * Create * Delete * Get * Get many * Update * Task * Create * Delete * Get * Get many * Update * Calendar * Book an appointment * Get free slots ## Templates and examples# Browse HighLevel integration templates, or search all templates Refer to HighLevel's API documentation and support forums for more information about the service. ## What to do if your operation isn't supported# If this node doesn't support the operation you want to do, you can use the HTTP Request node to call the service's API. You can use the credential you created for this service in the HTTP Request node: 1. In the HTTP Request node, select **Authentication** > **Predefined Credential Type**. 2. Select the service you want to connect to. 3. Select your credential. Refer to Custom API operations for more information. --- ## Page: https://docs.n8n.io/integrations/builtin/app-nodes/n8n-nodes-base.homeassistant/ Use the Home Assistant node to automate work in Home Assistant, and integrate Home Assistant with other applications. n8n has built-in support for a wide range of Home Assistant features, including getting, creating, and checking camera proxies, configurations, logs, services, and templates. On this page, you'll find a list of operations the Home Assistant node supports and links to more resources. This node can be used as an AI tool This node can be used to enhance the capabilities of an AI agent. When used in this way, many parameters can be set automatically, or with information directed by AI - find out more in the AI tool parameters documentation. ## Operations# * Camera Proxy * Get the camera screenshot * Config * Get the configuration * Check the configuration * Event * Create an event * Get all events * Log * Get a log for a specific entity * Get all logs * Service * Call a service within a specific domain * Get all services * State * Create a new record, or update the current one if it already exists (upsert) * Get a state for a specific entity * Get all states * Template * Create a template ## Templates and examples# Browse Home Assistant integration templates, or search all templates Refer to Home Assistant's documentation for more information about the service. --- ## Page: https://docs.n8n.io/integrations/builtin/app-nodes/n8n-nodes-base.hubspot/ Use the HubSpot node to automate work in HubSpot, and integrate HubSpot with other applications. n8n has built-in support for a wide range of HubSpot features, including creating, updating, deleting, and getting contacts, deals, lists, engagements and companies. On this page, you'll find a list of operations the HubSpot node supports and links to more resources. This node can be used as an AI tool This node can be used to enhance the capabilities of an AI agent. When used in this way, many parameters can be set automatically, or with information directed by AI - find out more in the AI tool parameters documentation. ## Operations# * Contact * Create/Update a contact * Delete a contact * Get a contact * Get all contacts * Get recently created/updated contacts * Search contacts * Contact List * Add contact to a list * Remove a contact from a list * Company * Create a company * Delete a company * Get a company * Get all companies * Get recently created companies * Get recently modified companies * Search companies by domain * Update a company * Deal * Create a deal * Delete a deal * Get a deal * Get all deals * Get recently created deals * Get recently modified deals * Search deals * Update a deal * Engagement * Create an engagement * Delete an engagement * Get an engagement * Get all engagements * Form * Get all fields from a form * Submit data to a form * Ticket * Create a ticket * Delete a ticket * Get a ticket * Get all tickets * Update a ticket ## Templates and examples# ## What to do if your operation isn't supported# If this node doesn't support the operation you want to do, you can use the HTTP Request node to call the service's API. You can use the credential you created for this service in the HTTP Request node: 1. In the HTTP Request node, select **Authentication** > **Predefined Credential Type**. 2. Select the service you want to connect to. 3. Select your credential. Refer to Custom API operations for more information. --- ## Page: https://docs.n8n.io/integrations/builtin/app-nodes/n8n-nodes-base.humanticai/ Use the Humantic AI node to automate work in Humantic AI, and integrate Humantic AI with other applications. n8n has built-in support for a wide range of Humantic AI features, including creating, retrieving, and updating profiles. On this page, you'll find a list of operations the Humantic AI node supports and links to more resources. Credentials Refer to Humantic AI credentials for guidance on setting up authentication. ## Operations# * Profile * Create a profile * Retrieve a profile * Update a profile ## Templates and examples# Browse Humantic AI integration templates, or search all templates --- ## Page: https://docs.n8n.io/integrations/builtin/app-nodes/n8n-nodes-base.hunter/ Use the Hunter node to automate work in Hunter, and integrate Hunter with other applications. n8n has built-in support for a wide range of Hunter features, including getting, generating, and verifying email addresses. On this page, you'll find a list of operations the Hunter node supports and links to more resources. ## Operations# * Get every email address found on the internet using a given domain name, with sources * Generate or retrieve the most likely email address from a domain name, a first name and a last name * Verify the deliverability of an email address ## Templates and examples# --- ## Page: https://docs.n8n.io/integrations/builtin/app-nodes/n8n-nodes-base.intercom/ Use the Intercom node to automate work in Intercom, and integrate Intercom with other applications. n8n has built-in support for a wide range of Intercom features, including creating, updating, deleting, and getting companies, leads, and users. On this page, you'll find a list of operations the Intercom node supports and links to more resources. ## Operations# * Company * Create a new company * Get data of a company * Get data of all companies * Update a company * List company's users * Lead * Create a new lead * Delete a lead * Get data of a lead * Get data of all leads * Update new lead * User * Create a new user * Delete a user * Get data of a user * Get data of all users * Update a user ## Templates and examples# Browse Intercom integration templates, or search all templates --- ## Page: https://docs.n8n.io/integrations/builtin/app-nodes/n8n-nodes-base.invoiceninja/ Use the Invoice Ninja node to automate work in Invoice Ninja, and integrate Invoice Ninja with other applications. n8n has built-in support for a wide range of Invoice Ninja features, including creating, updating, deleting, and getting clients, expense, invoice, payments and quotes. On this page, you'll find a list of operations the Invoice Ninja node supports and links to more resources. ## Operations# * Client * Create a new client * Delete a client * Get data of a client * Get data of all clients * Expense * Create a new expense * Delete an expense * Get data of an expense * Get data of all expenses * Invoice * Create a new invoice * Delete a invoice * Email an invoice * Get data of a invoice * Get data of all invoices * Payment * Create a new payment * Delete a payment * Get data of a payment * Get data of all payments * Quote * Create a new quote * Delete a quote * Email an quote * Get data of a quote * Get data of all quotes * Task * Create a new task * Delete a task * Get data of a task * Get data of all tasks ## Templates and examples# Browse Invoice Ninja integration templates, or search all templates ## What to do if your operation isn't supported# If this node doesn't support the operation you want to do, you can use the HTTP Request node to call the service's API. You can use the credential you created for this service in the HTTP Request node: 1. In the HTTP Request node, select **Authentication** > **Predefined Credential Type**. 2. Select the service you want to connect to. 3. Select your credential. Refer to Custom API operations for more information. --- ## Page: https://docs.n8n.io/integrations/builtin/app-nodes/n8n-nodes-base.iterable/ Use the Iterable node to automate work in Iterable, and integrate Iterable with other applications. n8n has built-in support for a wide range of Iterable features, including creating users, recording the actions performed by the users, and adding and removing users from the list. On this page, you'll find a list of operations the Iterable node supports and links to more resources. ## Operations# * Event * Record the actions a user perform * User * Create/Update a user * Delete a user * Get a user * User List * Add user to list * Remove a user from a list ## Templates and examples# Browse Iterable integration templates, or search all templates --- ## Page: https://docs.n8n.io/integrations/builtin/app-nodes/n8n-nodes-base.jenkins/ Use the Jenkins node to automate work in Jenkins, and integrate Jenkins with other applications. n8n has built-in support for a wide range of Jenkins features, including listing builds, managing instances, and creating and copying jobs. On this page, you'll find a list of operations the Jenkins node supports and links to more resources. This node can be used as an AI tool This node can be used to enhance the capabilities of an AI agent. When used in this way, many parameters can be set automatically, or with information directed by AI - find out more in the AI tool parameters documentation. ## Operations# * Build * List Builds * Instance * Cancel quiet down state * Put Jenkins in quiet mode, no builds can be started, Jenkins is ready for shutdown * Restart Jenkins immediately on environments where it's possible * Restart Jenkins once no jobs are running on environments where it's possible * Shutdown once no jobs are running * Shutdown Jenkins immediately * Job * Copy a specific job * Create a new job * Trigger a specific job * Trigger a specific job ## Templates and examples# Browse Jenkins integration templates, or search all templates --- ## Page: https://docs.n8n.io/integrations/builtin/app-nodes/n8n-nodes-base.jira/ Use the Jira Software node to automate work in Jira, and integrate Jira with other applications. n8n has built-in support for a wide range of Jira features, including creating, updating, deleting, and getting issues, and users. On this page, you'll find a list of operations the Jira Software node supports and links to more resources. Credentials Refer to Jira credentials for guidance on setting up authentication. This node can be used as an AI tool This node can be used to enhance the capabilities of an AI agent. When used in this way, many parameters can be set automatically, or with information directed by AI - find out more in the AI tool parameters documentation. ## Operations# * Issue * Get issue changelog * Create a new issue * Delete an issue * Get an issue * Get all issues * Create an email notification for an issue and add it to the mail queue * Return either all transitions or a transition that can be performed by the user on an issue, based on the issue's status * Update an issue * Issue Attachment * Add attachment to issue * Get an attachment * Get all attachments * Remove an attachment * Issue Comment * Add comment to issue * Get a comment * Get all comments * Remove a comment * Update a comment * User * Create a new user. * Delete a user. * Retrieve a user. ## Templates and examples# ## What to do if your operation isn't supported# If this node doesn't support the operation you want to do, you can use the HTTP Request node to call the service's API. You can use the credential you created for this service in the HTTP Request node: 1. In the HTTP Request node, select **Authentication** > **Predefined Credential Type**. 2. Select the service you want to connect to. 3. Select your credential. Refer to Custom API operations for more information. Refer to the official JQL documentation about Jira Query Language (JQL) to learn more about it. ## Fetch issues for a specific project# The **Get All** operation returns all the issues from Jira. To fetch issues for a particular project, you need to use Jira Query Language (JQL). For example, if you want to receive all the issues of a project named `n8n`, you'd do something like this: * Select **Get All** from the **Operation** dropdown list. * Toggle **Return All** to true. * Select **Add Option** and select **JQL**. * Enter `project=n8n` in the **JQL** field. This query will fetch all the issues in the project named `n8n`. Enter the name of your project instead of `n8n` to fetch all the issues for your project. --- ## Page: https://docs.n8n.io/integrations/builtin/app-nodes/n8n-nodes-base.kafka/ Use the Kafka node to automate work in Kafka, and integrate Kafka with other applications. n8n has built-in support for a wide range of Kafka features, including sending messages. On this page, you'll find a list of operations the Kafka node supports and links to more resources. This node can be used as an AI tool This node can be used to enhance the capabilities of an AI agent. When used in this way, many parameters can be set automatically, or with information directed by AI - find out more in the AI tool parameters documentation. ## Operations# * Send message ## Templates and examples# Browse Kafka integration templates, or search all templates --- ## Page: https://docs.n8n.io/integrations/builtin/app-nodes/n8n-nodes-base.keap/ Use the Keap node to automate work in Keap, and integrate Keap with other applications. n8n has built-in support for a wide range of Keap features, including creating, updating, deleting, and getting companies, products, ecommerce orders, emails, and files. On this page, you'll find a list of operations the Keap node supports and links to more resources. Credentials Refer to Keap credentials for guidance on setting up authentication. ## Operations# * Company * Create a company * Retrieve all companies * Contact * Create/update a contact * Delete an contact * Retrieve an contact * Retrieve all contacts * Contact Note * Create a note * Delete a note * Get a notes * Retrieve all notes * Update a note * Contact Tag * Add a list of tags to a contact * Delete a contact's tag * Retrieve all contact's tags * Ecommerce Order * Create an ecommerce order * Get an ecommerce order * Delete an ecommerce order * Retrieve all ecommerce orders * Ecommerce Product * Create an ecommerce product * Delete an ecommerce product * Get an ecommerce product * Retrieve all ecommerce product * Email * Create a record of an email sent to a contact * Retrieve all sent emails * Send Email * File * Delete a file * Retrieve all files * Upload a file ## Templates and examples# ## What to do if your operation isn't supported# If this node doesn't support the operation you want to do, you can use the HTTP Request node to call the service's API. You can use the credential you created for this service in the HTTP Request node: 1. In the HTTP Request node, select **Authentication** > **Predefined Credential Type**. 2. Select the service you want to connect to. 3. Select your credential. Refer to Custom API operations for more information. --- ## Page: https://docs.n8n.io/integrations/builtin/app-nodes/n8n-nodes-base.kitemaker/ Use the Kitemaker node to automate work in Kitemaker, and integrate Kitemaker with other applications. n8n has built-in support for a wide range of Kitemaker features, including retrieving data on organizations, spaces and users, as well as creating, getting, and updating work items. On this page, you'll find a list of operations the Kitemaker node supports and links to more resources. ## Operations# * Organization * Retrieve data on the logged-in user's organization. * Space * Retrieve data on all the spaces in the logged-in user's organization. * User * Retrieve data on all the users in the logged-in user's organization. * Work Item * Create * Get * Get All * Update ## Templates and examples# --- ## Page: https://docs.n8n.io/integrations/builtin/app-nodes/n8n-nodes-base.kobotoolbox/ Use the KoboToolbox node to automate work in KoboToolbox, and integrate KoboToolbox with other applications. n8n has built-in support for a wide range of KoboToolbox features, including creating, updating, deleting, and getting files, forms, hooks, and submissions. On this page, you'll find a list of operations the KoboToolbox node supports and links to more resources. ## Operations# * File * Create * Delete * Get * Get Many * Form * Get * Get Many * Redeploy * Hook * Get * Get Many * Logs * Retry All * Retry One * Submission * Delete * Get * Get Many * Get Validation Status * Update Validation Status ## Templates and examples# Browse KoboToolbox integration templates, or search all templates ## Options# ### Query Options# The Query Submission operation supports query options: * In the main section of the **Parameters** panel: * **Start** controls the index offset to start the query from (to use the API pagination logic). * **Limit** sets the maximum number of records to return. Note that the API always has a limit of 30,000 returned records, whatever value you provide. * In the **Query Options** section, you can activate the following parameters: * **Query** lets you specify filter predicates in MongoDB's JSON query format. For example: `{"status": "success", "_submission_time": {"$lt": "2021-11-01T01:02:03"}}` queries for all submissions with the value `success` for the field `status`, and submitted before November 1st, 2021, 01:02:03. * **Fields** lets you specify the list of fields you want to fetch, to make the response lighter. * **Sort** lets you provide a list of sorting criteria in MongoDB JSON format. For example, `{"status": 1, "_submission_time": -1}` specifies a sort order by ascending status, and then descending submission time. More details about these options can be found in the Formhub API docs ### Submission options# All operations that return form submission data offer options to tweak the response. These include: * Download options lets you download any attachment linked to each particular form submissions, such as pictures and videos. It also lets you select the naming pattern, and the file size to download (if available - typically for images). * Formatting options perform some reformatting as described in About reformatting. #### About reformatting# The default JSON format for KoboToolbox submission data is sometimes hard to deal with, because it's not schema-aware, and all fields are therefore returned as strings. This node provides a lightweight opinionated reformatting logic, enabled with the **Reformat?** parameter, available on all operations that return form submissions: the submission query, get, and the attachment download operations. When enabled, the reformatting: * Reorganizes the JSON into a multi-level hierarchy following the form's groups. By default, question grouping hierarchy is materialized by a `/` character in the field names, for example `Group1/Question1`. With reformatting enabled, n8n reorganizes these into `Group1.Question1`, as nested JSON objects. * Renames fields to trim `_` (not supported by many downstream systems). * Parses all geospatial fields (Point, Line, and Area question types) into their standard GeoJSON equivalent. * Splits all fields matching any of the **Multiselect Mask** wildcard masks into an array. Since the multi-select fields appear as space-separated strings, they can't be guessed algorithmically, so you must provide a field naming mask. Format the masks as a comma-separated list. Lists support the `*` wildcard. * Converts all fields matching any of the **Number Mask** wildcard masks into a JSON float. Here's a detailed example in JSON: <table><tbody><tr><td><div><pre><span></span><span> 1</span> <span> 2</span> <span> 3</span> <span> 4</span> <span> 5</span> <span> 6</span> <span> 7</span> <span> 8</span> <span> 9</span> <span>10</span> <span>11</span> <span>12</span> <span>13</span> <span>14</span> <span>15</span> <span>16</span> <span>17</span> <span>18</span> <span>19</span> <span>20</span> <span>21</span> <span>22</span> <span>23</span> <span>24</span> <span>25</span> <span>26</span></pre></div></td><td><div><pre><span></span><code><span>{</span> <span> </span><span>"_id"</span><span>:</span><span> </span><span>471987</span><span>,</span> <span> </span><span>"formhub/uuid"</span><span>:</span><span> </span><span>"189436bb09a54957bfcc798e338b54d6"</span><span>,</span> <span> </span><span>"start"</span><span>:</span><span> </span><span>"2021-12-05T16:13:38.527+02:00"</span><span>,</span> <span> </span><span>"end"</span><span>:</span><span> </span><span>"2021-12-05T16:15:33.407+02:00"</span><span>,</span> <span> </span><span>"Field_Details/Field_Name"</span><span>:</span><span> </span><span>"Test Fields"</span><span>,</span> <span> </span><span>"Field_Details/Field_Location"</span><span>:</span><span> </span><span>"-1.932914 30.078211 1421 165"</span><span>,</span> <span> </span><span>"Field_Details/Field_Shape"</span><span>:</span><span> </span><span>"-1.932914 30.078211 1421 165;-1.933011 30.078085 0 0;-1.933257 30.078004 0 0;-1.933338 30.078197 0 0;-1.933107 30.078299 0 0;-1.932914 30.078211 1421 165"</span><span>,</span> <span> </span><span>"Field_Details/Crops_Grown"</span><span>:</span><span> </span><span>"maize beans avocado"</span><span>,</span> <span> </span><span>"Field_Details/Field_Size_sqm"</span><span>:</span><span> </span><span>"2300"</span><span>,</span> <span> </span><span>"__version__"</span><span>:</span><span> </span><span>"veGcULpqP6JNFKRJbbMvMs"</span><span>,</span> <span> </span><span>"meta/instanceID"</span><span>:</span><span> </span><span>"uuid:2356cbbe-c1fd-414d-85c8-84f33e92618a"</span><span>,</span> <span> </span><span>"_xform_id_string"</span><span>:</span><span> </span><span>"ajXVJpBkTD5tB4Nu9QXpgm"</span><span>,</span> <span> </span><span>"_uuid"</span><span>:</span><span> </span><span>"2356cbbe-c1fd-414d-85c8-84f33e92618a"</span><span>,</span> <span> </span><span>"_attachments"</span><span>:</span><span> </span><span>[],</span> <span> </span><span>"_status"</span><span>:</span><span> </span><span>"submitted_via_web"</span><span>,</span> <span> </span><span>"_geolocation"</span><span>:</span><span> </span><span>[</span> <span> </span><span>-1.932914</span><span>,</span> <span> </span><span>30.078211</span> <span> </span><span>],</span> <span> </span><span>"_submission_time"</span><span>:</span><span> </span><span>"2021-12-05T14:15:44"</span><span>,</span> <span> </span><span>"_tags"</span><span>:</span><span> </span><span>[],</span> <span> </span><span>"_notes"</span><span>:</span><span> </span><span>[],</span> <span> </span><span>"_validation_status"</span><span>:</span><span> </span><span>{},</span> <span> </span><span>"_submitted_by"</span><span>:</span><span> </span><span>null</span> <span>}</span> </code></pre></div></td></tr></tbody></table> With reformatting enabled, and the appropriate masks for multi-select and number formatting (for example, `Crops_*` and `*_sqm` respectively), n8n parses it into: <table><tbody><tr><td><div><pre><span></span><span> 1</span> <span> 2</span> <span> 3</span> <span> 4</span> <span> 5</span> <span> 6</span> <span> 7</span> <span> 8</span> <span> 9</span> <span>10</span> <span>11</span> <span>12</span> <span>13</span> <span>14</span> <span>15</span> <span>16</span> <span>17</span> <span>18</span> <span>19</span> <span>20</span> <span>21</span> <span>22</span> <span>23</span> <span>24</span> <span>25</span> <span>26</span> <span>27</span> <span>28</span> <span>29</span> <span>30</span> <span>31</span> <span>32</span> <span>33</span> <span>34</span> <span>35</span> <span>36</span> <span>37</span> <span>38</span> <span>39</span> <span>40</span> <span>41</span> <span>42</span> <span>43</span> <span>44</span> <span>45</span> <span>46</span> <span>47</span> <span>48</span> <span>49</span> <span>50</span> <span>51</span> <span>52</span> <span>53</span> <span>54</span> <span>55</span> <span>56</span> <span>57</span> <span>58</span> <span>59</span> <span>60</span> <span>61</span> <span>62</span> <span>63</span> <span>64</span> <span>65</span> <span>66</span> <span>67</span></pre></div></td><td><div><pre><span></span><code><span>{</span> <span> </span><span>"id"</span><span>:</span><span> </span><span>471987</span><span>,</span> <span> </span><span>"formhub"</span><span>:</span><span> </span><span>{</span> <span> </span><span>"uuid"</span><span>:</span><span> </span><span>"189436bb09a54957bfcc798e338b54d6"</span> <span> </span><span>},</span> <span> </span><span>"start"</span><span>:</span><span> </span><span>"2021-12-05T16:13:38.527+02:00"</span><span>,</span> <span> </span><span>"end"</span><span>:</span><span> </span><span>"2021-12-05T16:15:33.407+02:00"</span><span>,</span> <span> </span><span>"Field_Details"</span><span>:</span><span> </span><span>{</span> <span> </span><span>"Field_Name"</span><span>:</span><span> </span><span>"Test Fields"</span><span>,</span> <span> </span><span>"Field_Location"</span><span>:</span><span> </span><span>{</span> <span> </span><span>"lat"</span><span>:</span><span> </span><span>-1.932914</span><span>,</span> <span> </span><span>"lon"</span><span>:</span><span> </span><span>30.078211</span> <span> </span><span>},</span> <span> </span><span>"Field_Shape"</span><span>:</span><span> </span><span>{</span> <span> </span><span>"type"</span><span>:</span><span> </span><span>"polygon"</span><span>,</span> <span> </span><span>"coordinates"</span><span>:</span><span> </span><span>[</span> <span> </span><span>{</span> <span> </span><span>"lat"</span><span>:</span><span> </span><span>-1.932914</span><span>,</span> <span> </span><span>"lon"</span><span>:</span><span> </span><span>30.078211</span> <span> </span><span>},</span> <span> </span><span>{</span> <span> </span><span>"lat"</span><span>:</span><span> </span><span>-1.933011</span><span>,</span> <span> </span><span>"lon"</span><span>:</span><span> </span><span>30.078085</span> <span> </span><span>},</span> <span> </span><span>{</span> <span> </span><span>"lat"</span><span>:</span><span> </span><span>-1.933257</span><span>,</span> <span> </span><span>"lon"</span><span>:</span><span> </span><span>30.078004</span> <span> </span><span>},</span> <span> </span><span>{</span> <span> </span><span>"lat"</span><span>:</span><span> </span><span>-1.933338</span><span>,</span> <span> </span><span>"lon"</span><span>:</span><span> </span><span>30.078197</span> <span> </span><span>},</span> <span> </span><span>{</span> <span> </span><span>"lat"</span><span>:</span><span> </span><span>-1.933107</span><span>,</span> <span> </span><span>"lon"</span><span>:</span><span> </span><span>30.078299</span> <span> </span><span>},</span> <span> </span><span>{</span> <span> </span><span>"lat"</span><span>:</span><span> </span><span>-1.932914</span><span>,</span> <span> </span><span>"lon"</span><span>:</span><span> </span><span>30.078211</span> <span> </span><span>}</span> <span> </span><span>]</span> <span> </span><span>},</span> <span> </span><span>"Crops_Grown"</span><span>:</span><span> </span><span>[</span> <span> </span><span>"maize"</span><span>,</span> <span> </span><span>"beans"</span><span>,</span> <span> </span><span>"avocado"</span> <span> </span><span>],</span> <span> </span><span>"Field_Size_sqm"</span><span>:</span><span> </span><span>2300</span> <span> </span><span>},</span> <span> </span><span>"version"</span><span>:</span><span> </span><span>"veGcULpqP6JNFKRJbbMvMs"</span><span>,</span> <span> </span><span>"meta"</span><span>:</span><span> </span><span>{</span> <span> </span><span>"instanceID"</span><span>:</span><span> </span><span>"uuid:2356cbbe-c1fd-414d-85c8-84f33e92618a"</span> <span> </span><span>},</span> <span> </span><span>"xform_id_string"</span><span>:</span><span> </span><span>"ajXVJpBkTD5tB4Nu9QXpgm"</span><span>,</span> <span> </span><span>"uuid"</span><span>:</span><span> </span><span>"2356cbbe-c1fd-414d-85c8-84f33e92618a"</span><span>,</span> <span> </span><span>"attachments"</span><span>:</span><span> </span><span>[],</span> <span> </span><span>"status"</span><span>:</span><span> </span><span>"submitted_via_web"</span><span>,</span> <span> </span><span>"geolocation"</span><span>:</span><span> </span><span>{</span> <span> </span><span>"lat"</span><span>:</span><span> </span><span>-1.932914</span><span>,</span> <span> </span><span>"lon"</span><span>:</span><span> </span><span>30.078211</span> <span> </span><span>},</span> <span> </span><span>"submission_time"</span><span>:</span><span> </span><span>"2021-12-05T14:15:44"</span><span>,</span> <span> </span><span>"tags"</span><span>:</span><span> </span><span>[],</span> <span> </span><span>"notes"</span><span>:</span><span> </span><span>[],</span> <span> </span><span>"validation_status"</span><span>:</span><span> </span><span>{},</span> <span> </span><span>"submitted_by"</span><span>:</span><span> </span><span>null</span> <span>}</span> </code></pre></div></td></tr></tbody></table> ## What to do if your operation isn't supported# If this node doesn't support the operation you want to do, you can use the HTTP Request node to call the service's API. You can use the credential you created for this service in the HTTP Request node: 1. In the HTTP Request node, select **Authentication** > **Predefined Credential Type**. 2. Select the service you want to connect to. 3. Select your credential. Refer to Custom API operations for more information. --- ## Page: https://docs.n8n.io/integrations/builtin/app-nodes/n8n-nodes-base.lemlist/ Use the Lemlist node to automate work in Lemlist, and integrate Lemlist with other applications. n8n has built-in support for a wide range of Lemlist features, including getting activities, teams and campaigns, as well as creating, updating, and deleting leads. On this page, you'll find a list of operations the Lemlist node supports and links to more resources. ## Operations# * Activity * Get Many: Get many activities * Campaign * Get Many: Get many campaigns * Get Stats: Get campaign stats * Enrichment * Get: Fetches a previously completed enrichment * Enrich Lead: Enrich a lead using an email or LinkedIn URL * Enrich Person: Enrich a person using an email or LinkedIn URL * Lead * Create: Create a new lead * Delete: Delete an existing lead * Get: Get an existing lead * Unsubscribe: Unsubscribe an existing lead * Team * Get: Get an existing team * Get Credits: Get an existing team's credits * Unsubscribe * Add: Add an email to an unsubscribe list * Delete: Delete an email from an unsubscribe list * Get Many: Get many unsubscribed emails ## Templates and examples# ## What to do if your operation isn't supported# If this node doesn't support the operation you want to do, you can use the HTTP Request node to call the service's API. You can use the credential you created for this service in the HTTP Request node: 1. In the HTTP Request node, select **Authentication** > **Predefined Credential Type**. 2. Select the service you want to connect to. 3. Select your credential. Refer to Custom API operations for more information. --- ## Page: https://docs.n8n.io/integrations/builtin/app-nodes/n8n-nodes-base.line/ Deprecated: End of service LINE Notify is discontinuing service as of April 1st 2025 and this node will no longer work after that date. View LINE Notify's end of service announement for more information. Use the Line node to automate work in Line, and integrate Line with other applications. n8n has built-in support for a wide range of Line features, including sending notifications. On this page, you'll find a list of operations the Line node supports and links to more resources. Credentials Refer to Line credentials for guidance on setting up authentication. This node can be used as an AI tool This node can be used to enhance the capabilities of an AI agent. When used in this way, many parameters can be set automatically, or with information directed by AI - find out more in the AI tool parameters documentation. ## Operations# * Notification * Sends notifications to users or groups ## Templates and examples# ## What to do if your operation isn't supported# If this node doesn't support the operation you want to do, you can use the HTTP Request node to call the service's API. You can use the credential you created for this service in the HTTP Request node: 1. In the HTTP Request node, select **Authentication** > **Predefined Credential Type**. 2. Select the service you want to connect to. 3. Select your credential. Refer to Custom API operations for more information. --- ## Page: https://docs.n8n.io/integrations/builtin/app-nodes/n8n-nodes-base.linear/ Use the Linear node to automate work in Linear, and integrate Linear with other applications. n8n has built-in support for a wide range of Linear features, including creating, updating, deleting, and getting issues. On this page, you'll find a list of operations the Linear node supports and links to more resources. ## Operations# * Issue * Create * Delete * Get * Get All * Update ## Templates and examples# ## What to do if your operation isn't supported# If this node doesn't support the operation you want to do, you can use the HTTP Request node to call the service's API. You can use the credential you created for this service in the HTTP Request node: 1. In the HTTP Request node, select **Authentication** > **Predefined Credential Type**. 2. Select the service you want to connect to. 3. Select your credential. Refer to Custom API operations for more information. --- ## Page: https://docs.n8n.io/integrations/builtin/app-nodes/n8n-nodes-base.lingvanex/ Use the LingvaNex node to automate work in LingvaNex, and integrate LingvaNex with other applications. n8n has built-in support for translating data with LingvaNex. On this page, you'll find a list of operations the LingvaNex node supports and links to more resources. Credentials Refer to LingvaNex credentials for guidance on setting up authentication. ## Operations# * Translate data ## Templates and examples# **Get data from Hacker News and send to Airtable or via SMS** by isa024787bel View template details **Get daily poems in Telegram** by Lorena View template details **Translate instructions using LingvaNex** by ghagrawal17 View template details Browse LingvaNex integration templates, or search all templates --- ## Page: https://docs.n8n.io/integrations/builtin/app-nodes/n8n-nodes-base.linkedin/ Use the LinkedIn node to automate work in LinkedIn, and integrate LinkedIn with other applications. n8n supports creating posts. On this page, you'll find a list of operations the LinkedIn node supports and links to more resources. This node can be used as an AI tool This node can be used to enhance the capabilities of an AI agent. When used in this way, many parameters can be set automatically, or with information directed by AI - find out more in the AI tool parameters documentation. ## Operations# * Post * Create ## Parameters# * **Post As**: choose whether to post as a **Person** or **Organization**. * **Person Name or ID** and **Organization URN**: enter an identifier for the person or organization. Posting as organization If posting as an Organization enter the organization number in the URN field. For example, `03262013` not `urn:li:company:03262013`. * **Text**: the post contents. * **Media Category**: use this when including images or article URLs in your post. ## Templates and examples# Refer to LinkedIn's API documentation for more information about the service. ## What to do if your operation isn't supported# If this node doesn't support the operation you want to do, you can use the HTTP Request node to call the service's API. You can use the credential you created for this service in the HTTP Request node: 1. In the HTTP Request node, select **Authentication** > **Predefined Credential Type**. 2. Select the service you want to connect to. 3. Select your credential. Refer to Custom API operations for more information. --- ## Page: https://docs.n8n.io/integrations/builtin/app-nodes/n8n-nodes-base.lonescale/ Use the LoneScale node to automate work in LoneScale and integrate LoneScale with other applications. n8n has built-in support for managing Lists and Items in LoneScale. On this page, you'll find a list of operations the LoneScale node supports, and links to more resources. Credentials You can find authentication information for this node here. ## Operations# * List * Create * Item * Create ## Templates and examples# Browse LoneScale integration templates, or search all templates Refer to LoneScales documentation for more information about the service. n8n provides a trigger node for LoneScale. You can find the trigger node docs here. ## What to do if your operation isn't supported# If this node doesn't support the operation you want to do, you can use the HTTP Request node to call the service's API. You can use the credential you created for this service in the HTTP Request node: 1. In the HTTP Request node, select **Authentication** > **Predefined Credential Type**. 2. Select the service you want to connect to. 3. Select your credential. Refer to Custom API operations for more information. --- ## Page: https://docs.n8n.io/integrations/builtin/app-nodes/n8n-nodes-base.magento2/ Use the Magento 2 node to automate work in Magento 2, and integrate Magento 2 with other applications. n8n has built-in support for a wide range of Magento 2 features, including creating, updating, deleting, and getting customers, invoices, orders, and projects. On this page, you'll find a list of operations the Magento 2 node supports and links to more resources. ## Operations# * Customer * Create a new customer * Delete a customer * Get a customer * Get all customers * Update a customer * Invoice * Create an invoice * Order * Cancel an order * Get an order * Get all orders * Ship an order * Product * Create a product * Delete a product * Get a product * Get all products * Update a product ## Templates and examples# Browse Magento 2 integration templates, or search all templates ## What to do if your operation isn't supported# If this node doesn't support the operation you want to do, you can use the HTTP Request node to call the service's API. You can use the credential you created for this service in the HTTP Request node: 1. In the HTTP Request node, select **Authentication** > **Predefined Credential Type**. 2. Select the service you want to connect to. 3. Select your credential. Refer to Custom API operations for more information. --- ## Page: https://docs.n8n.io/integrations/builtin/app-nodes/n8n-nodes-base.mailcheck/ Use the Mailcheck node to automate work in Mailcheck, and integrate Mailcheck with other applications. n8n has built-in support for a wide range of Mailcheck features, including checking emails. On this page, you'll find a list of operations the Mailcheck node supports and links to more resources. This node can be used as an AI tool This node can be used to enhance the capabilities of an AI agent. When used in this way, many parameters can be set automatically, or with information directed by AI - find out more in the AI tool parameters documentation. ## Operations# * Email * Check ## Templates and examples# Browse Mailcheck integration templates, or search all templates --- ## Page: https://docs.n8n.io/integrations/builtin/app-nodes/n8n-nodes-base.mailchimp/ Use the Mailchimp node to automate work in Mailchimp, and integrate Mailchimp with other applications. n8n has built-in support for a wide range of Mailchimp features, including creating, updating, and deleting campaigns, as well as getting list groups. On this page, you'll find a list of operations the Mailchimp node supports and links to more resources. ## Operations# * Campaign * Delete a campaign * Get a campaign * Get all the campaigns * Replicate a campaign * Creates a Resend to Non-Openers version of this campaign * Send a campaign * List Group * Get all groups * Member * Create a new member on list * Delete a member on list * Get a member on list * Get all members on list * Update a new member on list * Member Tag * Add tags from a list member * Remove tags from a list member ## Templates and examples# ## What to do if your operation isn't supported# If this node doesn't support the operation you want to do, you can use the HTTP Request node to call the service's API. You can use the credential you created for this service in the HTTP Request node: 1. In the HTTP Request node, select **Authentication** > **Predefined Credential Type**. 2. Select the service you want to connect to. 3. Select your credential. Refer to Custom API operations for more information. --- ## Page: https://docs.n8n.io/integrations/builtin/app-nodes/n8n-nodes-base.mailerlite/ Use the MailerLite node to automate work in MailerLite, and integrate MailerLite with other applications. n8n has built-in support for a wide range of MailerLite features, including creating, updating, deleting, and getting subscribers. On this page, you'll find a list of operations the MailerLite node supports and links to more resources. ## Operations# * Subscriber * Create a new subscriber * Get an subscriber * Get all subscribers * Update an subscriber ## Templates and examples# Browse MailerLite integration templates, or search all templates --- ## Page: https://docs.n8n.io/integrations/builtin/app-nodes/n8n-nodes-base.mailgun/ Use the Mailgun node to automate work in Mailgun, and integrate Mailgun with other applications. n8n has built-in support for sending emails with Mailgun. On this page, you'll find a list of operations the Mailgun node supports and links to more resources. This node can be used as an AI tool This node can be used to enhance the capabilities of an AI agent. When used in this way, many parameters can be set automatically, or with information directed by AI - find out more in the AI tool parameters documentation. ## Operations# * Send an email ## Templates and examples# ## What to do if your operation isn't supported# If this node doesn't support the operation you want to do, you can use the HTTP Request node to call the service's API. You can use the credential you created for this service in the HTTP Request node: 1. In the HTTP Request node, select **Authentication** > **Predefined Credential Type**. 2. Select the service you want to connect to. 3. Select your credential. Refer to Custom API operations for more information. --- ## Page: https://docs.n8n.io/integrations/builtin/app-nodes/n8n-nodes-base.mailjet/ Use the Mailjet node to automate work in Mailjet, and integrate Mailjet with other applications. n8n has built-in support for a wide range of Mailjet features, including sending emails, and SMS. On this page, you'll find a list of operations the Mailjet node supports and links to more resources. ## Operations# * Email * Send an email * Send an email template * SMS * Send an SMS ## Templates and examples# ## What to do if your operation isn't supported# If this node doesn't support the operation you want to do, you can use the HTTP Request node to call the service's API. You can use the credential you created for this service in the HTTP Request node: 1. In the HTTP Request node, select **Authentication** > **Predefined Credential Type**. 2. Select the service you want to connect to. 3. Select your credential. Refer to Custom API operations for more information. --- ## Page: https://docs.n8n.io/integrations/builtin/app-nodes/n8n-nodes-base.mandrill/ Use the Mandrill node to automate work in Mandrill, and integrate Mandrill with other applications. n8n supports sending messages based on templates or HTML with Mandrill. On this page, you'll find a list of operations the Mandrill node supports and links to more resources. Credentials Refer to Mandrill credentials for guidance on setting up authentication. ## Operations# * Message * Send message based on template. * Send message based on HTML. ## Templates and examples# Browse Mandrill integration templates, or search all templates --- ## Page: https://docs.n8n.io/integrations/builtin/app-nodes/n8n-nodes-base.marketstack/ Use the marketstack node to automate work in marketstack, and integrate marketstack with other applications. n8n has built-in support for a wide range of marketstack features, including getting exchanges, end-of-day data, and tickers. On this page, you'll find a list of operations the marketstack node supports and links to more resources. Credentials Refer to marketstack credentials for guidance on setting up authentication. ## Operations# * End-of-Day Data * Get All * Exchange * Get * Ticker * Get ## Templates and examples# Browse marketstack integration templates, or search all templates --- ## Page: https://docs.n8n.io/integrations/builtin/app-nodes/n8n-nodes-base.matrix/ Use the Matrix node to automate work in Matrix, and integrate Matrix with other applications. n8n has built-in support for a wide range of Matrix features, including getting current user's account information, sending media and messages to a room, and getting room members and messages. On this page, you'll find a list of operations the Matrix node supports and links to more resources. ## Operations# * Account * Get current user's account information * Event * Get single event by ID * Media * Send media to a chat room * Message * Send a message to a room * Gets all messages from a room * Room * New chat room with defined settings * Invite a user to a room * Join a new room * Kick a user from a room * Leave a room * Room Member * Get all members ## Templates and examples# Browse Matrix integration templates, or search all templates --- ## Page: https://docs.n8n.io/integrations/builtin/app-nodes/n8n-nodes-base.mattermost/ Use the Mattermost node to automate work in Mattermost, and integrate Mattermost with other applications. n8n has built-in support for a wide range of Mattermost features, including creating, deleting, and getting channels, and users, as well as posting messages, and adding reactions. On this page, you'll find a list of operations the Mattermost node supports and links to more resources. This node can be used as an AI tool This node can be used to enhance the capabilities of an AI agent. When used in this way, many parameters can be set automatically, or with information directed by AI - find out more in the AI tool parameters documentation. ## Operations# * Channel * Add a user to a channel * Create a new channel * Soft delete a channel * Get a page of members for a channel * Restores a soft deleted channel * Search for a channel * Get statistics for a channel * Message * Soft delete a post, by marking the post as deleted in the database * Post a message into a channel * Post an ephemeral message into a channel * Reaction * Add a reaction to a post. * Remove a reaction from a post * Get all the reactions to one or more posts * User * Create a new user * Deactivates the user and revokes all its sessions by archiving its user object. * Retrieve all users * Get a user by email * Get a user by ID * Invite user to team ## Templates and examples# Refer to Mattermost's documentation for more information about the service. ## What to do if your operation isn't supported# If this node doesn't support the operation you want to do, you can use the HTTP Request node to call the service's API. You can use the credential you created for this service in the HTTP Request node: 1. In the HTTP Request node, select **Authentication** > **Predefined Credential Type**. 2. Select the service you want to connect to. 3. Select your credential. Refer to Custom API operations for more information. ## Channel ID field error# If you're not the System Administrator, you might get an error: **there was a problem loading the parameter options from server: "Mattermost error response: You do not have the appropriate permissions.** next to the **Channel ID** field. Ask your system administrator to grant you the `post:channel` permission. ## Find the channel ID# To find the channel ID in Mattermost: 1. Select the channel from the left sidebar. 2. Select the channel name at the top. 3. Select **View Info**. --- ## Page: https://docs.n8n.io/integrations/builtin/app-nodes/n8n-nodes-base.mautic/ Use the Mautic node to automate work in Mautic, and integrate Mautic with other applications. n8n has built-in support for a wide range of Mautic features, including creating, updating, deleting, and getting companies, and contacts, as well as adding and removing campaign contacts. On this page, you'll find a list of operations the Mautic node supports and links to more resources. This node can be used as an AI tool This node can be used to enhance the capabilities of an AI agent. When used in this way, many parameters can be set automatically, or with information directed by AI - find out more in the AI tool parameters documentation. ## Operations# * Campaign Contact * Add contact to a campaign * Remove contact from a campaign * Company * Create a new company * Delete a company * Get data of a company * Get data of all companies * Update a company * Company Contact * Add contact to a company * Remove a contact from a company * Contact * Create a new contact * Delete a contact * Edit contact's points * Add/remove contacts from/to the don't contact list * Get data of a contact * Get data of all contacts * Send email to contact * Update a contact * Contact Segment * Add contact to a segment * Remove contact from a segment * Segment Email * Send ## Templates and examples# ## What to do if your operation isn't supported# If this node doesn't support the operation you want to do, you can use the HTTP Request node to call the service's API. You can use the credential you created for this service in the HTTP Request node: 1. In the HTTP Request node, select **Authentication** > **Predefined Credential Type**. 2. Select the service you want to connect to. 3. Select your credential. Refer to Custom API operations for more information. --- ## Page: https://docs.n8n.io/integrations/builtin/app-nodes/n8n-nodes-base.medium/ Use the Medium node to automate work in Medium, and integrate Medium with other applications. n8n has built-in support for a wide range of Medium features, including creating posts, and getting publications. On this page, you'll find a list of operations the Medium node supports and links to more resources. This node can be used as an AI tool This node can be used to enhance the capabilities of an AI agent. When used in this way, many parameters can be set automatically, or with information directed by AI - find out more in the AI tool parameters documentation. ## Operations# * Post * Create a post * Publication * Get all publications ## Templates and examples# ## What to do if your operation isn't supported# If this node doesn't support the operation you want to do, you can use the HTTP Request node to call the service's API. You can use the credential you created for this service in the HTTP Request node: 1. In the HTTP Request node, select **Authentication** > **Predefined Credential Type**. 2. Select the service you want to connect to. 3. Select your credential. Refer to Custom API operations for more information. --- ## Page: https://docs.n8n.io/integrations/builtin/app-nodes/n8n-nodes-base.messagebird/ Use the MessageBird node to automate work in MessageBird, and integrate MessageBird with other applications. n8n has built-in support for a wide range of MessageBird features, including sending messages, and getting balances. On this page, you'll find a list of operations the MessageBird node supports and links to more resources. Credentials Refer to MessageBird credentials for guidance on setting up authentication. ## Operations# * SMS * Send text messages (SMS) * Balance * Get the balance ## Templates and examples# Browse MessageBird integration templates, or search all templates --- ## Page: https://docs.n8n.io/integrations/builtin/app-nodes/n8n-nodes-base.metabase/ Use the Metabase node to automate work in Metabase, and integrate Metabase with other applications. n8n has built-in support for a wide range of Metabase features, including adding, and getting alerts, databases, metrics, and questions. On this page, you'll find a list of operations the Metabase node supports and links to more resources. ## Operations# * Alert * Get * Get All * Database * Add * Get All * Get Fields * Metric * Get * Get All * Question * Get * Get All * Result Data ## Templates and examples# ## What to do if your operation isn't supported# If this node doesn't support the operation you want to do, you can use the HTTP Request node to call the service's API. You can use the credential you created for this service in the HTTP Request node: 1. In the HTTP Request node, select **Authentication** > **Predefined Credential Type**. 2. Select the service you want to connect to. 3. Select your credential. Refer to Custom API operations for more information. --- ## Page: https://docs.n8n.io/integrations/builtin/app-nodes/n8n-nodes-base.microsoftdynamicscrm/ Use the Microsoft Dynamics CRM node to automate work in Microsoft Dynamics CRM, and integrate Microsoft Dynamics CRM with other applications. n8n has built-in support for creating, updating, deleting, and getting Microsoft Dynamics CRM accounts. On this page, you'll find a list of operations the Microsoft Dynamics CRM node supports and links to more resources. ## Operations# * Account * Create * Delete * Get * Get All * Update ## Templates and examples# ## What to do if your operation isn't supported# If this node doesn't support the operation you want to do, you can use the HTTP Request node to call the service's API. You can use the credential you created for this service in the HTTP Request node: 1. In the HTTP Request node, select **Authentication** > **Predefined Credential Type**. 2. Select the service you want to connect to. 3. Select your credential. Refer to Custom API operations for more information. --- ## Page: https://docs.n8n.io/integrations/builtin/app-nodes/n8n-nodes-base.microsoftentra/ Use the Microsoft Entra ID node to automate work in Microsoft Entra ID and integrate Microsoft Entra ID with other applications. n8n has built-in support for a wide range of Microsoft Entra ID features, which includes creating, getting, updating, and deleting users and groups, as well as adding users to and removing them from groups. On this page, you'll find a list of operations the Microsoft Entra ID node supports, and links to more resources. Credentials You can find authentication information for this node here. ## Operations# * **Group** * **Create**: Create a new group * **Delete**: Delete an existing group * **Get**: Retrieve data for a specific group * **Get Many**: Retrieve a list of groups * **Update**: Update a group * **User** * **Create**: Create a new user * **Delete**: Delete an existing user * **Get**: Retrieve data for a specific user * **Get Many**: Retrieve a list of users * **Update**: Update a user * **Add to Group**: Add user to a group * **Remove from Group**: Remove user from a group ## Templates and examples# Refer to Microsoft Entra ID's documentation for more information about the service. ## What to do if your operation isn't supported# If this node doesn't support the operation you want to do, you can use the HTTP Request node to call the service's API. You can use the credential you created for this service in the HTTP Request node: 1. In the HTTP Request node, select **Authentication** > **Predefined Credential Type**. 2. Select the service you want to connect to. 3. Select your credential. Refer to Custom API operations for more information. ## Common issues# Here are some common errors and issues with the Microsoft Entra ID node and steps to resolve or troubleshoot them. ### Updating the Allow External Senders and Auto Subscribe New Members options fails# You can't update the **Allow External Senders** and **Auto Subscribe New Members** options directly after creating a new group. You must wait after creating a group before you can change the values of these options. When designing workflows that use multiple Microsoft Entra ID nodes to first create groups and then update these options, add a Wait node between the two operations. A Wait node configured to pause for at least two seconds allows time for the group to fully initialize. After the wait, the update operation can complete without erroring. --- ## Page: https://docs.n8n.io/integrations/builtin/app-nodes/n8n-nodes-base.microsoftexcel/ Use the Microsoft Excel node to automate work in Microsoft Excel, and integrate Microsoft Excel with other applications. n8n has built-in support for a wide range of Microsoft Excel features, including adding and retrieving lists of table data, and workbooks, as well as getting worksheets. On this page, you'll find a list of operations the Microsoft Excel node supports and links to more resources. This node can be used as an AI tool This node can be used to enhance the capabilities of an AI agent. When used in this way, many parameters can be set automatically, or with information directed by AI - find out more in the AI tool parameters documentation. ## Operations# * Table * Adds rows to the end of the table * Retrieve a list of table columns * Retrieve a list of table rows * Looks for a specific column value and then returns the matching row * Workbook * Adds a new worksheet to the workbook. * Get data of all workbooks * Worksheet * Get all worksheets * Get worksheet content ## Templates and examples# ## What to do if your operation isn't supported# If this node doesn't support the operation you want to do, you can use the HTTP Request node to call the service's API. You can use the credential you created for this service in the HTTP Request node: 1. In the HTTP Request node, select **Authentication** > **Predefined Credential Type**. 2. Select the service you want to connect to. 3. Select your credential. Refer to Custom API operations for more information. --- ## Page: https://docs.n8n.io/integrations/builtin/app-nodes/n8n-nodes-base.microsoftgraphsecurity/ Use the Microsoft Graph Security node to automate work in Microsoft Graph Security, and integrate Microsoft Graph Security with other applications. n8n has built-in support for a wide range of Microsoft Graph Security features, including getting, and updating scores, and profiles. On this page, you'll find a list of operations the Microsoft Graph Security node supports and links to more resources. ## Operations# * Secure Score * Get * Get All * Secure Score Control Profile * Get * Get All * Update ## Templates and examples# Browse Microsoft Graph Security integration templates, or search all templates ## What to do if your operation isn't supported# If this node doesn't support the operation you want to do, you can use the HTTP Request node to call the service's API. You can use the credential you created for this service in the HTTP Request node: 1. In the HTTP Request node, select **Authentication** > **Predefined Credential Type**. 2. Select the service you want to connect to. 3. Select your credential. Refer to Custom API operations for more information. --- ## Page: https://docs.n8n.io/integrations/builtin/app-nodes/n8n-nodes-base.microsoftonedrive/ Use the Microsoft OneDrive node to automate work in Microsoft OneDrive, and integrate Microsoft OneDrive with other applications. n8n has built-in support for a wide range of Microsoft OneDrive features, including creating, updating, deleting, and getting files, and folders. On this page, you'll find a list of operations the Microsoft OneDrive node supports and links to more resources. This node can be used as an AI tool This node can be used to enhance the capabilities of an AI agent. When used in this way, many parameters can be set automatically, or with information directed by AI - find out more in the AI tool parameters documentation. ## Operations# * File * Copy a file * Delete a file * Download a file * Get a file * Rename a file * Search a file * Share a file * Upload a file up to 4MB in size * Folder * Create a folder * Delete a folder * Get Children (get items inside a folder) * Rename a folder * Search a folder * Share a folder ## Templates and examples# Refer to Microsoft's OneDrive API documentation for more information about the service. ## Find the folder ID# To perform operations on folders, you need to supply the ID. You can find this: * In the URL of the folder * By searching for it using the node. You need to do this if using MS 365 (where OneDrive uses SharePoint behind the scenes): 1. Select **Resource** > **Folder**. 2. Select **Operation** > **Search**. 3. In **Query**, enter the folder name. 4. Select **Test step**. n8n runs the query and returns data about the folder, including an `id` field containing the folder ID. --- ## Page: https://docs.n8n.io/integrations/builtin/app-nodes/n8n-nodes-base.microsoftoutlook/ Use the Microsoft Outlook node to automate work in Microsoft Outlook, and integrate Microsoft Outlook with other applications. n8n has built-in support for a wide range of Microsoft Outlook features, including creating, updating, deleting, and getting folders, messages, and drafts. On this page, you'll find a list of operations the Microsoft Outlook node supports and links to more resources. This node can be used as an AI tool This node can be used to enhance the capabilities of an AI agent. When used in this way, many parameters can be set automatically, or with information directed by AI - find out more in the AI tool parameters documentation. ## Operations# * Calendar * Create * Delete * Get * Get Many * Update * Contact * Create * Delete * Get * Get Many * Update * Draft * Create * Delete * Get * Send * Update * Event * Create * Delete * Get * Get Many * Update * Folder * Create * Delete * Get * Get Many * Update * Folder Message * Get Many * Message * Delete * Get * Get Many * Move * Reply * Send * Update * Message Attachment * Add * Download * Get * Get Many ## Templates and examples# Refer to Outlook's API documentation for more information about the service. ## What to do if your operation isn't supported# If this node doesn't support the operation you want to do, you can use the HTTP Request node to call the service's API. You can use the credential you created for this service in the HTTP Request node: 1. In the HTTP Request node, select **Authentication** > **Predefined Credential Type**. 2. Select the service you want to connect to. 3. Select your credential. Refer to Custom API operations for more information. --- ## Page: https://docs.n8n.io/integrations/builtin/app-nodes/n8n-nodes-base.microsoftsql/ Use the Microsoft SQL node to automate work in Microsoft SQL, and integrate Microsoft SQL with other applications. n8n has built-in support for a wide range of Microsoft SQL features, including executing SQL queries, and inserting rows into the database. On this page, you'll find a list of operations the Microsoft SQL node supports and links to more resources. This node can be used as an AI tool This node can be used to enhance the capabilities of an AI agent. When used in this way, many parameters can be set automatically, or with information directed by AI - find out more in the AI tool parameters documentation. ## Operations# * Execute an SQL query * Insert rows in database * Update rows in database * Delete rows in database ## Templates and examples# Browse Microsoft SQL integration templates, or search all templates --- ## Page: https://docs.n8n.io/integrations/builtin/app-nodes/n8n-nodes-base.microsoftteams/ Use the Microsoft Teams node to automate work in Microsoft Teams, and integrate Microsoft Teams with other applications. n8n has built-in support for a wide range of Microsoft Teams features, including creating and deleting, channels, messages, and tasks. On this page, you'll find a list of operations the Microsoft Teams node supports and links to more resources. This node can be used as an AI tool This node can be used to enhance the capabilities of an AI agent. When used in this way, many parameters can be set automatically, or with information directed by AI - find out more in the AI tool parameters documentation. ## Operations# * Channel * Create * Delete * Get * Get Many * Update * Channel Message * Create * Get Many * Chat Message * Create * Get * Get Many * Task * Create * Delete * Get * Get Many * Update ## Templates and examples# Refer to Microsoft Teams' API documentation for more information about the service. ## What to do if your operation isn't supported# If this node doesn't support the operation you want to do, you can use the HTTP Request node to call the service's API. You can use the credential you created for this service in the HTTP Request node: 1. In the HTTP Request node, select **Authentication** > **Predefined Credential Type**. 2. Select the service you want to connect to. 3. Select your credential. Refer to Custom API operations for more information. --- ## Page: https://docs.n8n.io/integrations/builtin/app-nodes/n8n-nodes-base.microsofttodo/ Use the Microsoft To Do node to automate work in Microsoft To Do, and integrate Microsoft To Do with other applications. n8n has built-in support for a wide range of Microsoft To Do features, including creating, updating, deleting, and getting linked resources, lists, and tasks. On this page, you'll find a list of operations the Microsoft To Do node supports and links to more resources. This node can be used as an AI tool This node can be used to enhance the capabilities of an AI agent. When used in this way, many parameters can be set automatically, or with information directed by AI - find out more in the AI tool parameters documentation. ## Operations# * Linked Resource * Create * Delete * Get * Get All * Update * List * Create * Delete * Get * Get All * Update * Task * Create * Delete * Get * Get All * Update ## Templates and examples# ## What to do if your operation isn't supported# If this node doesn't support the operation you want to do, you can use the HTTP Request node to call the service's API. You can use the credential you created for this service in the HTTP Request node: 1. In the HTTP Request node, select **Authentication** > **Predefined Credential Type**. 2. Select the service you want to connect to. 3. Select your credential. Refer to Custom API operations for more information. --- ## Page: https://docs.n8n.io/integrations/builtin/app-nodes/n8n-nodes-base.mindee/ Use the Mindee node to automate work in Mindee, and integrate Mindee with other applications. n8n has built-in support for a wide range of Mindee features, including predicting invoices. On this page, you'll find a list of operations the Mindee node supports and links to more resources. ## Operations# * **Invoice** * Predict * **Receipt** * Predict ## Templates and examples# ## What to do if your operation isn't supported# If this node doesn't support the operation you want to do, you can use the HTTP Request node to call the service's API. You can use the credential you created for this service in the HTTP Request node: 1. In the HTTP Request node, select **Authentication** > **Predefined Credential Type**. 2. Select the service you want to connect to. 3. Select your credential. Refer to Custom API operations for more information. --- ## Page: https://docs.n8n.io/integrations/builtin/app-nodes/n8n-nodes-base.misp/ Use the MISP node to automate work in MISP, and integrate MISP with other applications. n8n has built-in support for a wide range of MISP features, including creating, updating, deleting and getting events, feeds, and organizations. On this page, you'll find a list of operations the MISP node supports and links to more resources. Credentials Refer to MISP credentials for guidance on setting up authentication. ## Operations# * Attribute * Create * Delete * Get * Get All * Search * Update * Event * Create * Delete * Get * Get All * Publish * Search * Unpublish * Update * Event Tag * Add * Remove * Feed * Create * Disable * Enable * Get * Get All * Update * Galaxy * Delete * Get * Get All * Noticelist * Get * Get All * Object * Search * Organisation * Create * Delete * Get * Get All * Update * Tag * Create * Delete * Get All * Update * User * Create * Delete * Get * Get All * Update * Warninglist * Get * Get All ## Templates and examples# ## What to do if your operation isn't supported# If this node doesn't support the operation you want to do, you can use the HTTP Request node to call the service's API. You can use the credential you created for this service in the HTTP Request node: 1. In the HTTP Request node, select **Authentication** > **Predefined Credential Type**. 2. Select the service you want to connect to. 3. Select your credential. Refer to Custom API operations for more information. --- ## Page: https://docs.n8n.io/integrations/builtin/app-nodes/n8n-nodes-base.mocean/ Use the Mocean node to automate work in Mocean, and integrate Mocean with other applications. n8n has built-in support for a wide range of Mocean features, including sending SMS, and voice messages. On this page, you'll find a list of operations the Mocean node supports and links to more resources. Credentials Refer to Mocean credentials for guidance on setting up authentication. ## Operations# * SMS * Send SMS/Voice message * Voice * Send SMS/Voice message ## Templates and examples# Browse Mocean integration templates, or search all templates --- ## Page: https://docs.n8n.io/integrations/builtin/app-nodes/n8n-nodes-base.mondaycom/ Use the monday.com node to automate work in monday.com, and integrate monday.com with other applications. n8n has built-in support for a wide range of monday.com features, including creating a new board, and adding, deleting, and getting items on the board. On this page, you'll find a list of operations the monday.com node supports and links to more resources. Minimum required version This node requires n8n version 1.22.6 or above. This node can be used as an AI tool This node can be used to enhance the capabilities of an AI agent. When used in this way, many parameters can be set automatically, or with information directed by AI - find out more in the AI tool parameters documentation. ## Operations# * Board * Archive a board * Create a new board * Get a board * Get all boards * Board Column * Create a new column * Get all columns * Board Group * Delete a group in a board * Create a group in a board * Get list of groups in a board * Board Item * Add an update to an item. * Change a column value for a board item * Change multiple column values for a board item * Create an item in a board's group * Delete an item * Get an item * Get all items * Get items by column value * Move item to group ## Templates and examples# ## What to do if your operation isn't supported# If this node doesn't support the operation you want to do, you can use the HTTP Request node to call the service's API. You can use the credential you created for this service in the HTTP Request node: 1. In the HTTP Request node, select **Authentication** > **Predefined Credential Type**. 2. Select the service you want to connect to. 3. Select your credential. Refer to Custom API operations for more information. --- ## Page: https://docs.n8n.io/integrations/builtin/app-nodes/n8n-nodes-base.mongodb/ Use the MongoDB node to automate work in MongoDB, and integrate MongoDB with other applications. n8n has built-in support for a wide range of MongoDB features, including aggregating, updating, finding, deleting, and getting documents. On this page, you'll find a list of operations the MongoDB node supports and links to more resources. This node can be used as an AI tool This node can be used to enhance the capabilities of an AI agent. When used in this way, many parameters can be set automatically, or with information directed by AI - find out more in the AI tool parameters documentation. ## Operations# * Aggregate documents * Delete documents * Find documents * Find and replace documents * Find and update documents * Insert documents * Update documents ## Templates and examples# --- ## Page: https://docs.n8n.io/integrations/builtin/app-nodes/n8n-nodes-base.monicacrm/ Use the Monica CRM node to automate work in Monica CRM, and integrate Monica CRM with other applications. n8n has built-in support for a wide range of Monica CRM features, including creating, updating, deleting, and getting activities, calls, contracts, messages, tasks, and notes. On this page, you'll find a list of operations the Monica CRM node supports and links to more resources. ## Operations# * Activity * Create an activity * Delete an activity * Retrieve an activity * Retrieve all activities * Update an activity * Call * Create a call * Delete a call * Retrieve a call * Retrieve all calls * Update a call * Contact * Create a contact * Delete a contact * Retrieve a contact * Retrieve all contacts * Update a contact * Contact Field * Create a contact field * Delete a contact field * Retrieve a contact field * Update a contact field * Contact Tag * Add * Remove * Conversation * Create a conversation * Delete a conversation * Retrieve a conversation * Update a conversation * Conversation Message * Add a message to a conversation * Update a message in a conversation * Journal Entry * Create a journal entry * Delete a journal entry * Retrieve a journal entry * Retrieve all journal entries * Update a journal entry * Note * Create a note * Delete a note * Retrieve a note * Retrieve all notes * Update a note * Reminder * Create a reminder * Delete a reminder * Retrieve a reminder * Retrieve all reminders * Update a reminder * Tag * Create a tag * Delete a tag * Retrieve a tag * Retrieve all tags * Update a tag * Task * Create a task * Delete a task * Retrieve a task * Retrieve all tasks * Update a task ## Templates and examples# --- ## Page: https://docs.n8n.io/integrations/builtin/app-nodes/n8n-nodes-base.mqtt/ Use the MQTT node to automate work in MQTT, and integrate MQTT with other applications. n8n supports transporting messages with MQTT. On this page, you'll find a list of operations the MQTT node supports and links to more resources. Credentials Refer to MQTT credentials for guidance on setting up authentication. This node can be used as an AI tool This node can be used to enhance the capabilities of an AI agent. When used in this way, many parameters can be set automatically, or with information directed by AI - find out more in the AI tool parameters documentation. ## Operations# Use the MQTT node to send a message. You can set the message topic, and choose whether to send the node input data as part of the message. ## Templates and examples# n8n provides a trigger node for MQTT. You can find the trigger node docs here. Refer to MQTT's documentation for more information about the service. --- ## Page: https://docs.n8n.io/integrations/builtin/app-nodes/n8n-nodes-base.msg91/ Use the MSG91 node to automate work in MSG91, and integrate MSG91 with other applications. n8n supports sending SMS with MSG91. On this page, you'll find a list of operations the MSG91 node supports and links to more resources. ## Operations# * SMS * Send SMS ## Templates and examples# Browse MSG91 integration templates, or search all templates ## Find your Sender ID# 1. Log in to your MSG91 dashboard. 2. Select **Sender Id** in the left panel. 3. If you don't already have one, select **Add Sender Id +**, fill in the details, and select **Save Sender Id**. --- ## Page: https://docs.n8n.io/integrations/builtin/app-nodes/n8n-nodes-base.mysql/ Use the MySQL node to automate work in MySQL, and integrate MySQL with other applications. n8n has built-in support for a wide range of MySQL features, including executing an SQL query, as well as inserting, and updating rows in a database. On this page, you'll find a list of operations the MySQL node supports and links to more resources. This node can be used as an AI tool This node can be used to enhance the capabilities of an AI agent. When used in this way, many parameters can be set automatically, or with information directed by AI - find out more in the AI tool parameters documentation. ## Operations# * Delete * Execute SQL * Insert * Insert or Update * Select * Update ## Templates and examples# Refer to MySQL's Connectors and APIs documentation for more information about the service. Refer to MySQL's SELECT statement documentation for more information on writing SQL queries. ## Use query parameters# When creating a query to run on a MySQL database, you can use the **Query Parameters** field in the **Options** section to load data into the query. n8n sanitizes data in query parameters, which prevents SQL injection. For example, you want to find a person by their email address. Given the following input data: <table><tbody><tr><td><div><pre><span></span><span> 1</span> <span> 2</span> <span> 3</span> <span> 4</span> <span> 5</span> <span> 6</span> <span> 7</span> <span> 8</span> <span> 9</span> <span>10</span> <span>11</span> <span>12</span></pre></div></td><td><div><pre><span></span><code><span>[</span> <span> </span><span>{</span> <span> </span><span>"email"</span><span>:</span><span> </span><span>"alex@example.com"</span><span>,</span> <span> </span><span>"name"</span><span>:</span><span> </span><span>"Alex"</span><span>,</span> <span> </span><span>"age"</span><span>:</span><span> </span><span>21</span><span> </span> <span> </span><span>},</span> <span> </span><span>{</span> <span> </span><span>"email"</span><span>:</span><span> </span><span>"jamie@example.com"</span><span>,</span> <span> </span><span>"name"</span><span>:</span><span> </span><span>"Jamie"</span><span>,</span> <span> </span><span>"age"</span><span>:</span><span> </span><span>33</span><span> </span> <span> </span><span>}</span> <span>]</span> </code></pre></div></td></tr></tbody></table> You can write a query like: <table><tbody><tr><td><div><pre><span></span><span>1</span></pre></div></td><td><div><pre><span></span><code><span>SELECT</span><span> </span><span>*</span><span> </span><span>FROM</span><span> </span><span>$</span><span>1</span><span>:</span><span>name</span><span> </span><span>WHERE</span><span> </span><span>email</span><span> </span><span>=</span><span> </span><span>$</span><span>2</span><span>;</span> </code></pre></div></td></tr></tbody></table> Then in **Query Parameters**, provide the field values to use. You can provide fixed values or expressions. For this example, use expressions so the node can pull the email address from each input item in turn: <table><tbody><tr><td><div><pre><span></span><span>1</span> <span>2</span></pre></div></td><td><div><pre><span></span><code><span>// users is an example table name</span> <span>users</span><span>,</span><span> </span><span>{{</span><span> </span><span>$json</span><span>.</span><span>email</span><span> </span><span>}}</span><span> </span> </code></pre></div></td></tr></tbody></table> ## Common issues# For common errors or issues and suggested resolution steps, refer to Common issues. --- ## Page: https://docs.n8n.io/integrations/builtin/app-nodes/n8n-nodes-base.mysql/common-issues/ Here are some common errors and issues with the MySQL node and steps to resolve or troubleshoot them. ## Update rows by composite key# The MySQL node's **Update** operation lets you to update rows in a table by providing a **Column to Match On** and a value. This works for tables where single column values can uniquely identify individual rows. You can't use this pattern for tables that use composite keys, where you need multiple columns to uniquely identify a row. A example of this is MySQL's `user` table in the `mysql` database, where you need both the `user` and `host` columns to uniquely identify rows. To update tables with composite keys, write the query manually with the **Execute SQL** operation instead. There, you can match on multiple values, like in this example which matches on both `customer_id` and `product_id`: <table><tbody><tr><td><div><pre><span></span><span>1</span></pre></div></td><td><div><pre><span></span><code><span>UPDATE</span><span> </span><span>orders</span><span> </span><span>SET</span><span> </span><span>quantity</span><span> </span><span>=</span><span> </span><span>3</span><span> </span><span>WHERE</span><span> </span><span>customer_id</span><span> </span><span>=</span><span> </span><span>538</span><span> </span><span>AND</span><span> </span><span>product_id</span><span> </span><span>=</span><span> </span><span>800</span><span>;</span> </code></pre></div></td></tr></tbody></table> ## Can't connect to a local MySQL server when using Docker# When you run either n8n or MySQL in Docker, you need to configure the network so that n8n can connect to MySQL. The solution depends on how you're hosting the two components. ### If only MySQL is in Docker# If only MySQL is running in Docker, configure MySQL to listen on all interfaces by binding to `0.0.0.0` inside of the container (the official images are already configured this way). When running the container, publish the port with the `-p` flag. By default, MySQL runs on port 3306, so your Docker command should look like this: <table><tbody><tr><td><div><pre><span></span><span>1</span></pre></div></td><td><div><pre><span></span><code>docker<span> </span>run<span> </span>-p<span> </span><span>3306</span>:3306<span> </span>--name<span> </span>my-mysql<span> </span>-d<span> </span>mysql:latest </code></pre></div></td></tr></tbody></table> When configuring MySQL credentials, the `localhost` address should work without a problem (set the **Host** to `localhost`). ### If only n8n is in Docker# If only n8n is running in Docker, configure MySQL to listen on all interfaces by binding to `0.0.0.0` on the host. If you are running n8n in Docker on **Linux**, use the `--add-host` flag to map `host.docker.internal` to `host-gateway` when you start the container. For example: <table><tbody><tr><td><div><pre><span></span><span>1</span></pre></div></td><td><div><pre><span></span><code>docker<span> </span>run<span> </span>-it<span> </span>--rm<span> </span>--add-host<span> </span>host.docker.internal:host-gateway<span> </span>--name<span> </span>n8n<span> </span>-p<span> </span><span>5678</span>:5678<span> </span>-v<span> </span>n8n_data:/home/node/.n8n<span> </span>docker.n8n.io/n8nio/n8n </code></pre></div></td></tr></tbody></table> If you are using Docker Desktop, this is automatically configured for you. When configuring MySQL credentials, use `host.docker.internal` as the **Host** address instead of `localhost`. ### If MySQL and n8n are running in separate Docker containers# If both n8n and MySQL are running in Docker in separate containers, you can use Docker networking to connect them. Configure MySQL to listen on all interfaces by binding to `0.0.0.0` inside of the container (the official images are already configured this way). Add both the MySQL and n8n containers to the same user-defined bridge network. When configuring MySQL credentials, use the MySQL container's name as the host address instead of `localhost`. For example, if you call the MySQL container `my-mysql`, you would set the **Host** to `my-mysql`. ### If MySQL and n8n are running in the same Docker container# If MySQL and n8n are running in the same Docker container, the `localhost` address doesn't need any special configuration. You can configure MySQL to listen on `localhost` and configure the **Host** in the MySQL credentials in n8n to use `localhost`. ## Decimal numbers returned as strings# By default, the MySQL node returns `DECIMAL` values as strings. This is done intentionally to avoid loss of precision that can occur due to limitation with the way JavaScript represents numbers. You can learn more about the decision in the documentation for the MySQL library that n8n uses. To output decimal values as numbers instead of strings and ignore the risks in loss of precision, enable the **Output Decimals as Numbers** option. This will output the values as numbers instead of strings. As an alternative, you can manually convert from the string to a decimal using the `toFloat()` function with `toFixed()` or with the Edit Fields (Set) node after the MySQL node. Be aware that you may still need to account for a potential loss of precision. --- ## Page: https://docs.n8n.io/integrations/builtin/app-nodes/n8n-nodes-base.n8ntrainingcustomerdatastore/ Use this node only for the n8n new user onboarding tutorial. It provides dummy data for testing purposes and has no further functionality. --- ## Page: https://docs.n8n.io/integrations/builtin/app-nodes/n8n-nodes-base.n8ntrainingcustomermessenger/ Use this node only for the n8n new user onboarding tutorial. It provides no further functionality. --- ## Page: https://docs.n8n.io/integrations/builtin/app-nodes/n8n-nodes-base.nasa/ Use the NASA node to automate work in NASA, and integrate NASA with other applications. n8n has built-in support for a wide range of NASA features, including retrieving imagery and data. On this page, you'll find a list of operations the NASA node supports and links to more resources. Credentials Refer to NASA credentials for guidance on setting up authentication. This node can be used as an AI tool This node can be used to enhance the capabilities of an AI agent. When used in this way, many parameters can be set automatically, or with information directed by AI - find out more in the AI tool parameters documentation. ## Operations# * Astronomy Picture of the Day * Get the Astronomy Picture of the Day * Asteroid Neo-Feed * Retrieve a list of asteroids based on their closest approach date to Earth * Asteroid Neo-Lookup * Look up an asteroid based on its NASA SPK-ID * Asteroid Neo-Browse * Browse the overall asteroid dataset * DONKI Coronal Mass Ejection * Retrieve DONKI coronal mass ejection data * DONKI Interplanetary Shock * Retrieve DONKI interplanetary shock data * DONKI Solar Flare * Retrieve DONKI solar flare data * DONKI Solar Energetic Particle * Retrieve DONKI solar energetic particle data * DONKI Magnetopause Crossing * Retrieve data on DONKI magnetopause crossings * DONKI Radiation Belt Enhancement * Retrieve DONKI radiation belt enhancement data * DONKI High Speed Stream * Retrieve DONKI high speed stream data * DONKI WSA+EnlilSimulation * Retrieve DONKI WSA+EnlilSimulation data * DONKI Notifications * Retrieve DONKI notifications data * Earth Imagery * Retrieve Earth imagery * Earth Assets * Retrieve Earth assets ## Templates and examples# Browse NASA integration templates, or search all templates --- ## Page: https://docs.n8n.io/integrations/builtin/app-nodes/n8n-nodes-base.netlify/ Use the Netlify node to automate work in Netlify, and integrate Netlify with other applications. n8n has built-in support for a wide range of Netlify features, including getting and cancelling deployments, as well as deleting, and getting sites. On this page, you'll find a list of operations the Netlify node supports and links to more resources. ## Operations# * Deploy * Cancel a deployment * Create a new deployment * Get a deployment * Get all deployments * Site * Delete a site * Get a site * Returns all sites ## Templates and examples# --- ## Page: https://docs.n8n.io/integrations/builtin/app-nodes/n8n-nodes-base.netscaleradc/ Use the Netscaler ADC node to automate work in Netscaler ADC, and integrate Netscaler ADC with other applications. n8n has built-in support for a wide range of Netscaler ADC features, including creating and installing certificates and files. On this page, you'll find a list of operations the Netscaler ADC node supports and links to more resources. ## Operations# * Certificate * Create * Install * File * Delete * Download * Upload ## Templates and examples# Browse Netscaler ADC integration templates, or search all templates Refer to Netscaler ADC's documentation for more information about the service. ## What to do if your operation isn't supported# If this node doesn't support the operation you want to do, you can use the HTTP Request node to call the service's API. You can use the credential you created for this service in the HTTP Request node: 1. In the HTTP Request node, select **Authentication** > **Predefined Credential Type**. 2. Select the service you want to connect to. 3. Select your credential. Refer to Custom API operations for more information. --- ## Page: https://docs.n8n.io/integrations/builtin/app-nodes/n8n-nodes-base.nextcloud/ Use the Nextcloud node to automate work in Nextcloud, and integrate Nextcloud with other applications. n8n has built-in support for a wide range of Nextcloud features, including creating, updating, deleting, and getting files, and folders as well as retrieving, and inviting users. On this page, you'll find a list of operations the Nextcloud node supports and links to more resources. This node can be used as an AI tool This node can be used to enhance the capabilities of an AI agent. When used in this way, many parameters can be set automatically, or with information directed by AI - find out more in the AI tool parameters documentation. ## Operations# * File * Copy a file * Delete a file * Download a file * Move a file * Share a file * Upload a file * Folder * Copy a folder * Create a folder * Delete a folder * Return the contents of a given folder * Move a folder * Share a folder * User * Invite a user to a Nextcloud organization * Delete a user. * Retrieve information about a single user. * Retrieve a list of users. * Edit attributes related to a user. ## Templates and examples# ## What to do if your operation isn't supported# If this node doesn't support the operation you want to do, you can use the HTTP Request node to call the service's API. You can use the credential you created for this service in the HTTP Request node: 1. In the HTTP Request node, select **Authentication** > **Predefined Credential Type**. 2. Select the service you want to connect to. 3. Select your credential. Refer to Custom API operations for more information. --- ## Page: https://docs.n8n.io/integrations/builtin/app-nodes/n8n-nodes-base.nocodb/ Use the NocoDB node to automate work in NocoDB, and integrate NocoDB with other applications. n8n has built-in support for a wide range of NocoDB features, including creating, updating, deleting, and retrieving rows. On this page, you'll find a list of operations the NocoDB node supports and links to more resources. This node can be used as an AI tool This node can be used to enhance the capabilities of an AI agent. When used in this way, many parameters can be set automatically, or with information directed by AI - find out more in the AI tool parameters documentation. ## Operations# * Row * Create * Delete * Get * Get Many * Update a row ## Templates and examples# ## Relates resources# Refer to NocoDB's documentation for more information about the service. ## What to do if your operation isn't supported# If this node doesn't support the operation you want to do, you can use the HTTP Request node to call the service's API. You can use the credential you created for this service in the HTTP Request node: 1. In the HTTP Request node, select **Authentication** > **Predefined Credential Type**. 2. Select the service you want to connect to. 3. Select your credential. Refer to Custom API operations for more information. --- ## Page: https://docs.n8n.io/integrations/builtin/app-nodes/n8n-nodes-base.notion/ Use the Notion node to automate work in Notion, and integrate Notion with other applications. n8n has built-in support for a wide range of Notion features, including getting and searching databases, creating pages, and getting users. On this page, you'll find a list of operations the Notion node supports and links to more resources. This node can be used as an AI tool This node can be used to enhance the capabilities of an AI agent. When used in this way, many parameters can be set automatically, or with information directed by AI - find out more in the AI tool parameters documentation. ## Operations# * Block * Append After * Get Child Blocks * Database * Get * Get Many * Search * Database Page * Create * Get * Get Many * Update * Page * Archive * Create * Search * User * Get * Get Many ## Templates and examples# n8n provides an app node for Notion. You can find the trigger node docs here. Refer to Notion's documentation for details about their API. ## What to do if your operation isn't supported# If this node doesn't support the operation you want to do, you can use the HTTP Request node to call the service's API. You can use the credential you created for this service in the HTTP Request node: 1. In the HTTP Request node, select **Authentication** > **Predefined Credential Type**. 2. Select the service you want to connect to. 3. Select your credential. Refer to Custom API operations for more information. ## Common issues# For common errors or issues and suggested resolution steps, refer to Common issues. --- ## Page: https://docs.n8n.io/integrations/builtin/app-nodes/n8n-nodes-base.notion/common-issues/ Here are some common errors and issues with the Notion node and steps to resolve or troubleshoot them. ## Relation property not displaying# The Notion node only supports displaying the data relation property for two-way relations. When you connect two Notion databases with a two-way relationship, you can select or filter by the relation property when working with the Notion node's **Database Page** resource. To enable two-way relations, edit the relation property in Notion and enable the **Show on \[name of related database\]** option to create a reverse relation. Select a name to use for the relation in the new context. The relation is now accessible in n8n when filtering or selecting. If you need to work with Notion databases with one-way relationship, you can use the HTTP Request with your existing Notion credentials. For example, to update a one-way relationship, you can send a `PATCH` request to the following URL: <table><tbody><tr><td><div><pre><span></span><span>1</span></pre></div></td><td><div><pre><span></span><code>https://api.notion.com/v1/pages/<page_id> </code></pre></div></td></tr></tbody></table> Enable **Send Body**, set the **Body Content Type** to **JSON**, and set **Specify Body** to **Using JSON**. Afterward, you can enter a JSON object like the following into the **JSON** field: <table><tbody><tr><td><div><pre><span></span><span> 1</span> <span> 2</span> <span> 3</span> <span> 4</span> <span> 5</span> <span> 6</span> <span> 7</span> <span> 8</span> <span> 9</span> <span>10</span> <span>11</span></pre></div></td><td><div><pre><span></span><code><span>{</span> <span> </span><span>"properties"</span><span>:</span><span> </span><span>{</span> <span> </span><span>"Account"</span><span>:</span><span> </span><span>{</span> <span> </span><span>"relation"</span><span>:</span><span> </span><span>[</span> <span> </span><span>{</span> <span> </span><span>"id"</span><span>:</span><span> </span><span>"<your_relation_ID>"</span> <span> </span><span>}</span> <span> </span><span>]</span> <span> </span><span>}</span> <span> </span><span>}</span> <span>}</span> </code></pre></div></td></tr></tbody></table> ## Create toggle heading# The Notion node allows you to create headings and toggles when adding blocks to **Page**, **Database Page**, or **Block** resources. Creating toggleable headings isn't yet supported by the Notion node itself. You can work around this be creating a regular heading and then modifying it to enable the `is_toggleable` property: 1. Add a heading with Notion node. 2. Select the resource you want to add a heading to: * To add a new page with a heading, select the **Page** or **Database Page** resources with the **Create** operation. * To add a heading to an existing page, select the **Block** resource with the **Append After** operation. 3. Select **Add Block** and set the **Type Name or ID** to either **Heading 1**, **Heading 2**, or **Heading 3**. 4. Add an HTTP Request node connected to the Notion node and select the `GET` method. 5. Set the **URL** to `https://api.notion.com/v1/blocks/<block_ID>`. For example, if your added the heading to an existing page, you could use the following URL: `https://api.notion.com/v1/blocks/{{ $json.results[0].id }}`. If you created a new page instead of appending a block, you may need to discover the block ID by querying the page contents first. 6. Select **Predefined Credential Type** and connect your existing Notion credentials. 7. Add an Edit Fields (Set) node after the HTTP Request node. 8. Add `heading_1.is_toggleable` as a new **Boolean** field set to `true`. Swap `heading_1` for a different heading number as necessary. 9. Add a second HTTP Request node after the Edit Fields (Set) node. 10. Set the **Method** to `PATCH` and use `https://api.notion.com/v1/blocks/{{ $json.id }}` as the **URL** value. 11. Select **Predefined Credential Type** and connect your existing Notion credentials. 12. Enable **Send Body** and set a parameter. 13. Set the parameter **Name** to `heading_1` (substitute `heading_1` for the heading level you are using). 14. Set the parameter **Value** to `{{ $json.heading_1 }}` (substitute `heading_1` for the heading level you are using). The above sequence will create a regular heading block. It will query the newly created header, add the `is_toggleable` property, and update the heading block. ## Handle null and empty values# You may receive a validation error when working with the Notion node if you submit fields with empty or null values. This can occur any time you populate fields from previous nodes when that data is missing. To work around this, check for the existence of the field data before sending it to Notion or use a default value. To check for the data before executing the Notion node, use an If node to check whether the field is unset. This allows you to use the Edit Fields (Set) node to conditionally remove the field when it doesn't have a valid value. As an alternative, you can set a default value if the incoming data doesn't provide one. --- ## Page: https://docs.n8n.io/integrations/builtin/app-nodes/n8n-nodes-base.npm/ Use the npm node to automate work in npm, and integrate npm with other applications. On this page, you'll find a list of operations the npm node supports and links to more resources. Credentials Refer to npm credentials for guidance on setting up authentication. ## Operations# * Package * Get Package Metadata * Get Package Versions * Search for Packages * Distribution Tag * Get All Tags * Update a Tag ## Templates and examples# Browse npm integration templates, or search all templates Refer to npm's documentation for more information about the service. ## What to do if your operation isn't supported# If this node doesn't support the operation you want to do, you can use the HTTP Request node to call the service's API. You can use the credential you created for this service in the HTTP Request node: 1. In the HTTP Request node, select **Authentication** > **Predefined Credential Type**. 2. Select the service you want to connect to. 3. Select your credential. Refer to Custom API operations for more information. --- ## Page: https://docs.n8n.io/integrations/builtin/app-nodes/n8n-nodes-base.odoo/ Use the Odoo node to automate work in Odoo, and integrate Odoo with other applications. n8n has built-in support for a wide range of Odoo features, including creating, updating, deleting, and getting contracts, resources, and opportunities. On this page, you'll find a list of operations the Odoo node supports and links to more resources. Credentials Refer to Odoo credentials for guidance on setting up authentication. This node can be used as an AI tool This node can be used to enhance the capabilities of an AI agent. When used in this way, many parameters can be set automatically, or with information directed by AI - find out more in the AI tool parameters documentation. ## Operations# * Contact * Create a new contact * Delete a contact * Get a contact * Get all contacts * Update a contact * Custom Resource * Create a new item * Delete an item * Get an item * Get all items * Update an item * Note * Create a new note * Delete a note * Get a note * Get all notes * Update a note * Opportunity * Create a new opportunity * Delete an opportunity * Get an opportunity * Get all opportunities * Update an opportunity ## Templates and examples# --- ## Page: https://docs.n8n.io/integrations/builtin/app-nodes/n8n-nodes-base.okta/ Use the Okta node to automate work in Okta and integrate Okta with other applications. n8n has built-in support for a wide range of Okta features, which includes creating, updating, and deleting users. On this page, you'll find a list of operations the Okta node supports, and links to more resources. Credentials You can find authentication information for this node here. ## Operations# * User * Create a new user * Delete an existing user * Get details of a user * Get many users * Update an existing user ## Templates and examples# Browse Okta integration templates, or search all templates Refer to Okta's documentation for more information about the service. ## What to do if your operation isn't supported# If this node doesn't support the operation you want to do, you can use the HTTP Request node to call the service's API. You can use the credential you created for this service in the HTTP Request node: 1. In the HTTP Request node, select **Authentication** > **Predefined Credential Type**. 2. Select the service you want to connect to. 3. Select your credential. Refer to Custom API operations for more information. --- ## Page: https://docs.n8n.io/integrations/builtin/app-nodes/n8n-nodes-base.onesimpleapi/ Use the One Simple API node to automate work in One Simple API, and integrate One Simple API with other applications. n8n has built-in support for a wide range of One Simple API features, including getting profiles, retrieving information, and generating utilities. On this page, you'll find a list of operations the One Simple API node supports and links to more resources. ## Operations# * Information * Convert a value between currencies * Retrieve image metadata from a URL * Social Profile * Get details about an Instagram profile * Get details about a Spotify Artist * Utility * Expand a shortened url * Generate a QR Code * Validate an email address * Website * Generate a PDF from a webpage * Get SEO information from website * Create a screenshot from a webpage ## Templates and examples# Browse One Simple API integration templates, or search all templates Refer to One Simple API's documentation for more information about the service. --- ## Page: https://docs.n8n.io/integrations/builtin/app-nodes/n8n-nodes-base.onfleet/ Use the Onfleet node to automate work in Onfleet, and integrate Onfleet with other applications. n8n has built-in support for a wide range of Onfleet features, including creating and deleting tasks in Onfleet as well as retrieving organizations' details. On this page, you'll find a list of operations the Onfleet node supports and links to more resources. ## Operations# * Admin * Create a new Onfleet admin * Delete an Onfleet admin * Get all Onfleet admins * Update an Onfleet admin * Container * Add task at index (or append) * Get container information * Fully replace a container's tasks * Destination * Create a new destination * Get a specific destination * Hub * Create a new Onfleet hub * Get all Onfleet hubs * Update an Onfleet hub * Organization * Retrieve your own organization's details * Retrieve the details of an organization with which you are connected * Recipient * Create a new Onfleet recipient * Get a specific Onfleet recipient * Update an Onfleet recipient * Task * Create a new Onfleet task * Clone an Onfleet task * Force-complete a started Onfleet task * Delete an Onfleet task * Get all Onfleet tasks * Get a specific Onfleet task * Update an Onfleet task * Team * Automatically dispatch tasks assigned to a team to on-duty drivers * Create a new Onfleet team * Delete an Onfleet team * Get a specific Onfleet team * Get all Onfleet teams * Get estimated times for upcoming tasks for a team, returns a selected driver * Update an Onfleet team * Worker * Create a new Onfleet worker * Delete an Onfleet worker * Get a specific Onfleet worker * Get all Onfleet workers * Get a specific Onfleet worker schedule * Update an Onfleet worker ## Templates and examples# --- ## Page: https://docs.n8n.io/integrations/builtin/app-nodes/n8n-nodes-langchain.openai/ Use the OpenAI node to automate work in OpenAI and integrate OpenAI with other applications. n8n has built-in support for a wide range of OpenAI features, including creating images and assistants, as well as chatting with models. On this page, you'll find a list of operations the OpenAI node supports and links to more resources. OpenAI Assistant node The OpenAI node replaces the OpenAI assistant node from version 1.29.0 on. ## Operations# * **Assistant** * **Create an Assistant** * **Delete an Assistant** * **List Assistants** * **Message an Assistant** * **Update an Assistant** * **Text** * **Message a Model** * **Classify Text for Violations** * **Image** * **Analyze Image** * **Generate an Image** * **Audio** * **Generate Audio** * **Transcribe a Recording** * **Translate a Recording** * **File** * **Delete a File** * **List Files** * **Upload a File** ## Templates and examples# Refer to OpenAI's documentation for more information about the service. Refer to OpenAI's assistants documentation for more information about how assistants work. For help dealing with rate limits, refer to Handling rate limits. ## What to do if your operation isn't supported# If this node doesn't support the operation you want to do, you can use the HTTP Request node to call the service's API. You can use the credential you created for this service in the HTTP Request node: 1. In the HTTP Request node, select **Authentication** > **Predefined Credential Type**. 2. Select the service you want to connect to. 3. Select your credential. Refer to Custom API operations for more information. ## Using tools with OpenAI assistants# Some operations allow you to connect tools. Tools act like addons that your AI can use to access extra context or resources. Select the **Tools** connector to browse the available tools and add them. Once you add a tool connection, the OpenAI node becomes a root node, allowing it to form a cluster node with the tools sub-nodes. See Node types for more information on cluster nodes and root nodes. ### Operations that support tool connectors# * **Assistant** * **Message an Assistant** * **Text** * **Message a Model** ## Common issues# For common questions or issues and suggested solutions, refer to Common issues. --- ## Page: https://docs.n8n.io/integrations/builtin/app-nodes/n8n-nodes-langchain.openai/assistant-operations/ Use this operation to create, delete, list, message, or update an assistant in OpenAI. Refer to OpenAI for more information on the OpenAI node itself. ## Create an Assistant# Use this operation to create a new assistant. Enter these parameters: * **Credential to connect with**: Create or select an existing OpenAI credential. * **Resource**: Select **Assistant**. * **Operation**: Select **Create an Assistant**. * **Model**: Select the model that the assistant will use. If you’re not sure which model to use, try `gpt-4o` if you need high intelligence or `gpt-4o-mini` if you need the fastest speed and lowest cost. Refer to Models overview | OpenAI Platform for more information. * **Name**: Enter the name of the assistant. The maximum length is 256 characters. * **Description**: Enter the description of the assistant. The maximum length is 512 characters. <table><tbody><tr><td><div><pre><span></span><span>1</span></pre></div></td><td><div><pre><span></span><code>A virtual assistant that helps users with daily tasks, including setting reminders, answering general questions, and providing quick information. </code></pre></div></td></tr></tbody></table> * **Instructions**: Enter the system instructions that the assistant uses. The maximum length is 32,768 characters. Use this to specify the persona used by the model in its replies. <table><tbody><tr><td><div><pre><span></span><span>1</span></pre></div></td><td><div><pre><span></span><code>Always respond in a friendly and engaging manner. When a user asks a question, provide a concise answer first, followed by a brief explanation or additional context if necessary. If the question is open-ended, offer a suggestion or ask a clarifying question to guide the conversation. Keep the tone positive and supportive, and avoid technical jargon unless specifically requested by the user. </code></pre></div></td></tr></tbody></table> * **Code Interpreter**: Turn on to enable the code interpreter for the assistant, where it can write and execute code in a sandbox environment. Enable this tool for tasks that require computations, data analysis, or any logic-based processing. * **Knowledge Retrieval**: Turn on to enable knowledge retrieval for the assistant, allowing it to access external sources or a connected knowledge base. Refer to File Search | OpenAI Platform for more information. * **Files**: Select a file to upload for your external knowledge source. Use **Upload a File** operation to add more files. ### Options# * **Output Randomness (Temperature)**: Adjust the randomness of the response. The range is between `0.0` (deterministic) and `1.0` (maximum randomness). We recommend altering this or **Output Randomness (Top P)** but not both. Start with a medium temperature (around 0.7) and adjust based on the outputs you observe. If the responses are too repetitive or rigid, increase the temperature. If they’re too chaotic or off-track, decrease it. Defaults to `1.0`. * **Output Randomness (Top P)**: Adjust the Top P setting to control the diversity of the assistant's responses. For example, `0.5` means half of all likelihood-weighted options are considered. We recommend altering this or **Output Randomness (Temperature)** but not both. Defaults to `1.0`. * **Fail if Assistant Already Exists**: If enabled, the operation will fail if an assistant with the same name already exists. Refer to Create assistant | OpenAI documentation for more information. ## Delete an Assistant# Use this operation to delete an existing assistant from your account. Enter these parameters: * **Credential to connect with**: Create or select an existing OpenAI credential. * **Resource**: Select **Assistant**. * **Operation**: Select **Delete an Assistant**. * **Assistant**: Select the assistant you want to delete **From list** or **By ID**. Refer to Delete assistant | OpenAI documentation for more information. ## List Assistants# Use this operation to retrieve a list of assistants in your organization. * **Credential to connect with**: Create or select an existing OpenAI credential. * **Resource**: Select **Assistant**. * **Operation**: Select **List Assistants**. ### Options# * **Simplify Output**: Turn on to return a simplified version of the response instead of the raw data. This option is enabled by default. Refer to List assistants | OpenAI documentation for more information. ## Message an Assistant# Use this operation to send a message to an assistant and receive a response. Enter these parameters: * **Credential to connect with**: Create or select an existing OpenAI credential. * **Resource**: Select **Assistant**. * **Operation**: Select **Message an Assistant**. * **Assistant**: Select the assistant you want to message. * **Prompt**: Enter the text prompt or message that you want to send to the assistant. * **Connected Chat Trigger Node**: Automatically use the input from a previous node's `chatInput` field. * **Define Below**: Manually define the prompt by entering static text or using an expression to reference data from previous nodes. ### Options# * **Base URL**: Enter the base URL that the assistant should use for making API requests. This option is useful for directing the assistant to use endpoints provided by other LLM providers that offer an OpenAI-compatible API. * **Max Retries**: Specify the number of times the assistant should retry an operation in case of failure. * **Timeout**: Set the maximum amount of time in milliseconds, that the assistant should wait for a response before timing out. Use this option to prevent long waits during operations. * **Preserve Original Tools**: Turn off to remove the original tools associated with the assistant. Use this if you want to temporarily remove tools for this specific operation. Refer to Assistants | OpenAI documentation for more information. ## Update an Assistant# Use this operation to update the details of an existing assistant. Enter these parameters: * **Credential to connect with**: Create or select an existing OpenAI credential. * **Resource**: Select **Assistant**. * **Operation**: Select **Update an Assistant**. * **Assistant**: Select the assistant you want to update. ### Options# * **Code Interpreter**: Turn on to enable the code interpreter for the assistant, where it can write and execute code in a sandbox environment. Enable this tool for tasks that require computations, data analysis, or any logic-based processing. * **Description**: Enter the description of the assistant. The maximum length is 512 characters. <table><tbody><tr><td><div><pre><span></span><span>1</span></pre></div></td><td><div><pre><span></span><code>A virtual assistant that helps users with daily tasks, including setting reminders, answering general questions, and providing quick information. </code></pre></div></td></tr></tbody></table> * **Instructions**: Enter the system instructions that the assistant uses. The maximum length is 32,768 characters. Use this to specify the persona used by the model in its replies. <table><tbody><tr><td><div><pre><span></span><span>1</span></pre></div></td><td><div><pre><span></span><code>Always respond in a friendly and engaging manner. When a user asks a question, provide a concise answer first, followed by a brief explanation or additional context if necessary. If the question is open-ended, offer a suggestion or ask a clarifying question to guide the conversation. Keep the tone positive and supportive, and avoid technical jargon unless specifically requested by the user. </code></pre></div></td></tr></tbody></table> * **Knowledge Retrieval**: Turn on to enable knowledge retrieval for the assistant, allowing it to access external sources or a connected knowledge base. Refer to File Search | OpenAI Platform for more information. * **Files**: Select a file to upload for your external knowledge source. Use **Upload a File** operation to add more files. Note that this only updates the Code Interpreter tool, not the File Search tool. * **Model**: Select the model that the assistant will use. If you’re not sure which model to use, try `gpt-4o` if you need high intelligence or `gpt-4o-mini` if you need the fastest speed and lowest cost. Refer to Models overview | OpenAI Platform for more information. * **Name**: Enter the name of the assistant. The maximum length is 256 characters. * **Remove All Custom Tools (Functions)**: Turn on to remove all custom tools (functions) from the assistant. * **Output Randomness (Temperature)**: Adjust the randomness of the response. The range is between `0.0` (deterministic) and `1.0` (maximum randomness). We recommend altering this or **Output Randomness (Top P)** but not both. Start with a medium temperature (around 0.7) and adjust based on the outputs you observe. If the responses are too repetitive or rigid, increase the temperature. If they’re too chaotic or off-track, decrease it. Defaults to `1.0`. * **Output Randomness (Top P)**: Adjust the Top P setting to control the diversity of the assistant's responses. For example, `0.5` means half of all likelihood-weighted options are considered. We recommend altering this or **Output Randomness (Temperature)** but not both. Defaults to `1.0`. Refer to Modify assistant | OpenAI documentation for more information. ## Common issues# For common errors or issues and suggested resolution steps, refer to Common Issues. --- ## Page: https://docs.n8n.io/integrations/builtin/app-nodes/n8n-nodes-langchain.openai/audio-operations/ Use this operation to generate an audio, or transcribe or translate a recording in OpenAI. Refer to OpenAI for more information on the OpenAI node itself. ## Generate Audio# Use this operation to create audio from a text prompt. Enter these parameters: * **Credential to connect with**: Create or select an existing OpenAI credential. * **Resource**: Select **Audio**. * **Operation**: Select **Generate Audio**. * **Model**: Select the model you want to use to generate the audio. Refer to TTS | OpenAI for more information. * **TTS-1**: Use this to optimize for speed. * **TTS-1-HD**: Use this to optimize for quality. * **Text Input**: Enter the text to generate the audio for. The maximum length is 4096 characters. * **Voice**: Select a voice to use when generating the audio. Listen to the previews of the voices in Text to speech guide | OpenAI. ### Options# * **Response Format**: Select the format for the audio response. Choose from **MP3** (default), **OPUS**, **AAC**, **FLAC**, **WAV**, and **PCM**. * **Audio Speed**: Enter the speed for the generated audio from a value from `0.25` to `4.0`. Defaults to `1`. * **Put Output in Field**: Defaults to `data`. Enter the name of the output field to put the binary file data in. Refer to Create speech | OpenAI documentation for more information. ## Transcribe a Recording# Use this operation to transcribe audio into text. OpenAI API limits the size of the audio file to 25 MB. OpenAI will use the `whisper-1` model by default. Enter these parameters: * **Credential to connect with**: Create or select an existing OpenAI credential. * **Resource**: Select **Audio**. * **Operation**: Select **Transcribe a Recording**. * **Input Data Field Name**: Defaults to `data`. Enter the name of the binary property that contains the audio file in one of these formats: `.flac`, `.mp3`, `.mp4`, `.mpeg`, `.mpga`, `.m4a`, `.ogg`, `.wav`, or `.webm`. ### Options# * **Language of the Audio File**: Enter the language of the input audio in ISO-639-1. Use this option to improve accuracy and latency. * **Output Randomness (Temperature)**: Defaults to `1.0`. Adjust the randomness of the response. The range is between `0.0` (deterministic) and `1.0` (maximum randomness). We recommend altering this or **Output Randomness (Top P)** but not both. Start with a medium temperature (around 0.7) and adjust based on the outputs you observe. If the responses are too repetitive or rigid, increase the temperature. If they’re too chaotic or off-track, decrease it. Refer to Create transcription | OpenAI documentation for more information. ## Translate a Recording# Use this operation to translate audio into English. OpenAI API limits the size of the audio file to 25 MB. OpenAI will use the `whisper-1` model by default. Enter these parameters: * **Credential to connect with**: Create or select an existing OpenAI credential. * **Resource**: Select **Audio**. * **Operation**: Select **Translate a Recording**. * **Input Data Field Name**: Defaults to `data`. Enter the name of the binary property that contains the audio file in one of these formats: `.flac`, `.mp3`, `.mp4`, `.mpeg`, `.mpga`, `.m4a`, `.ogg`, `.wav`, or `.webm`. ### Options# * **Output Randomness (Temperature)**: Defaults to `1.0`. Adjust the randomness of the response. The range is between `0.0` (deterministic) and `1.0` (maximum randomness). We recommend altering this or **Output Randomness (Top P)** but not both. Start with a medium temperature (around 0.7) and adjust based on the outputs you observe. If the responses are too repetitive or rigid, increase the temperature. If they’re too chaotic or off-track, decrease it. Refer to Create transcription | OpenAI documentation for more information. ## Common issues# For common errors or issues and suggested resolution steps, refer to Common Issues. --- ## Page: https://docs.n8n.io/integrations/builtin/app-nodes/n8n-nodes-langchain.openai/file-operations/ Use this operation to create, delete, list, message, or update a file in OpenAI. Refer to OpenAI for more information on the OpenAI node itself. ## Delete a File# Use this operation to delete a file from the server. Enter these parameters: * **Credential to connect with**: Create or select an existing OpenAI credential. * **Resource**: Select **File**. * **Operation**: Select **Delete a File**. * **File**: Enter the ID of the file to use for this operation or select the file name from the dropdown. Refer to Delete file | OpenAI documentation for more information. ## List Files# Use this operation to list files that belong to the user's organization. Enter these parameters: * **Credential to connect with**: Create or select an existing OpenAI credential. * **Resource**: Select **File**. * **Operation**: Select **List Files**. ### Options# * **Purpose**: Use this to only return files with the given purpose. Use **Assistants** to return only files related to Assistants and Message operations. Use **Fine-Tune** for files related to Fine-tuning. Refer to List files | OpenAI documentation for more information. ## Upload a File# Use this operation to upload a file. This can be used across various operations. Enter these parameters: * **Credential to connect with**: Create or select an existing OpenAI credential. * **Resource**: Select **File**. * **Operation**: Select **Upload a File**. * **Input Data Field Name**: Defaults to `data`. Enter the name of the binary property which contains the file. The size of individual files can be a maximum of 512 MB or 2 million tokens for Assistants. ### Options# * **Purpose**: Enter the intended purpose of the uploaded file. Use **Assistants** for files associated with Assistants and Message operations. Use **Fine-Tune** for Fine-tuning. Refer to Upload file | OpenAI documentation for more information. ## Common issues# For common errors or issues and suggested resolution steps, refer to Common Issues. --- ## Page: https://docs.n8n.io/integrations/builtin/app-nodes/n8n-nodes-langchain.openai/image-operations/ Use this operation to analyze or generate an image in OpenAI. Refer to OpenAI for more information on the OpenAI node itself. ## Analyze Image# Use this operation to take in images and answer questions about them. Enter these parameters: * **Credential to connect with**: Create or select an existing OpenAI credential. * **Resource**: Select **Image**. * **Operation**: Select **Analayze Image**. * **Model**: Select the model you want to use to generate an image. * **Text Input**: Ask a question about the image. * **Input Type**: Select how you'd like to input the image. Options include: * **Image URL(s)**: Enter the **URL(s)** of the image(s) to analyze. Add multiple URLs in a comma-separated list. * **Binary File(s)**: Enter the name of the binary property which contains the image(s) in the **Input Data Field Name**. ### Options# * **Detail**: Specify the balance between response time versus token usage. * **Length of Description (Max Tokens)**: Defaults to 300. Fewer tokens will result in shorter, less detailed image description. Refer to Images | OpenAI documentation for more information. ## Generate an Image# Use this operation to create an image from a text prompt. Enter these parameters: * **Credential to connect with**: Create or select an existing OpenAI credential. * **Resource**: Select **Image**. * **Operation**: Select **Generate an Image**. * **Model**: Select the model you want to use to generate an image. * **Prompt**: Enter the text description of the desired image(s). The maximum length is 1000 characters for `dall-e-2` and 4000 characters for `dall-e-3`. ### Options# * **Quality**: The quality of the image you generate. **HD** creates images with finer details and greater consistency across the image. This option is only supported for `dall-e-3`. Otherwise, choose **Standard**. * **Resolution**: Select the resolution of the generated images. Select **1024x1024** for `dall-e-2`. Select one of **1024x1024**, **1792x1024**, or **1024x1792** for `dall-e-3` models. * **Style**: Select the style of the generated images. This option is only supported for `dall-e-3`. * **Natural**: Use this to produce more natural looking images. * **Vivid**: Use this to produce hyper-real and dramatic images. * **Respond with image URL(s)**: Whether to return image URL(s) instead of binary file(s). * **Put Output in Field**: Defaults to `data`. Enter the name of the output field to put the binary file data in. Only available if **Respond with image URL(s)** is turned off. Refer to Create image | OpenAI documentation for more information. ## Common issues# For common errors or issues and suggested resolution steps, refer to Common Issues. --- ## Page: https://docs.n8n.io/integrations/builtin/app-nodes/n8n-nodes-langchain.openai/text-operations/ Use this operation to message a model or classify text for violations in OpenAI. Refer to OpenAI for more information on the OpenAI node itself. ## Message a Model# Use this operation to send a message or prompt to an OpenAI model and receive a response. Enter these parameters: * **Credential to connect with**: Create or select an existing OpenAI credential. * **Resource**: Select **Text**. * **Operation**: Select **Message a Model**. * **Model**: Select the model you want to use. If you’re not sure which model to use, try `gpt-4o` if you need high intelligence or `gpt-4o-mini` if you need the fastest speed and lowest cost. Refer to Models overview | OpenAI Platform for more information. * **Messages**: Enter a **Text** prompt and assign a **Role** that the model will use to generate responses. Refer to Prompt engineering | OpenAI for more information on how to write a better prompt by using these roles. Choose from one of these roles: * **User**: Sends a message as a user and gets a response from the model. * **Assistant**: Tells the model to adopt a specific tone or personality. * **System**: By default, the system message is `"You are a helpful assistant"`. You can define instructions in the user message, but the instructions set in the system message are more effective. You can only set one system message per conversation. Use this to set the model's behavior or context for the next user message. * **Simplify Output**: Turn on to return a simplified version of the response instead of the raw data. * **Output Content as JSON**: Turn on to attempt to return the response in JSON format. Compatible with `GPT-4 Turbo` and all `GPT-3.5 Turbo` models newer than `gpt-3.5-turbo-1106`. ### Options# * **Frequency Penalty**: Apply a penalty to reduce the model's tendency to repeat similar lines. The range is between `0.0` and `2.0`. * **Maximum Number of Tokens**: Set the maximum number of tokens for the response. One token is roughly four characters for standard English text. Use this to limit the length of the output. * **Number of Completions**: Defaults to 1. Set the number of completions you want to generate for each prompt. Use carefully since setting a high number will quickly consume your tokens. * **Presence Penalty**: Apply a penalty to influence the model to discuss new topics. The range is between `0.0` and `2.0`. * **Output Randomness (Temperature)**: Adjust the randomness of the response. The range is between `0.0` (deterministic) and `1.0` (maximum randomness). We recommend altering this or **Output Randomness (Top P)** but not both. Start with a medium temperature (around `0.7`) and adjust based on the outputs you observe. If the responses are too repetitive or rigid, increase the temperature. If they’re too chaotic or off-track, decrease it. Defaults to `1.0`. * **Output Randomness (Top P)**: Adjust the Top P setting to control the diversity of the assistant's responses. For example, `0.5` means half of all likelihood-weighted options are considered. We recommend altering this or **Output Randomness (Temperature)** but not both. Defaults to `1.0`. Refer to Message a Model | OpenAI documentation for more information. ## Classify Text for Violations# Use this operation to identify and flag content that might be harmful. OpenAI model will analyze the text and return a response containing: * `flagged`: A boolean field indicating if the content is potentially harmful. * `categories`: A list of category-specific violation flags. * `category_scores`: Scores for each category. Enter these parameters: * **Credential to connect with**: Create or select an existing OpenAI credential. * **Resource**: Select **Text**. * **Operation**: Select **Classify Text for Violations**. * **Text Input**: Enter text to classify if it violates the moderation policy. * **Simplify Output**: Turn on to return a simplified version of the response instead of the raw data. ### Options# * **Use Stable Model**: Turn on to use the stable version of the model instead of the latest version, accuracy may be slightly lower. Refer to Moderations | OpenAI documentation for more information. ## Common issues# For common errors or issues and suggested resolution steps, refer to Common Issues. --- ## Page: https://docs.n8n.io/integrations/builtin/app-nodes/n8n-nodes-langchain.openai/common-issues/ Here are some common errors and issues with the OpenAI node and steps to resolve or troubleshoot them. ## The service is receiving too many requests from you# This error displays when you've exceeded OpenAI's rate limits. There are two ways to work around this issue: 1. Split your data up into smaller chunks using the Loop Over Items node and add a Wait node at the end for a time amount that will help. Copy the code below and paste it into a workflow to use as a template. <table><tbody><tr><td><div><pre><span></span><span> 1</span> <span> 2</span> <span> 3</span> <span> 4</span> <span> 5</span> <span> 6</span> <span> 7</span> <span> 8</span> <span> 9</span> <span> 10</span> <span> 11</span> <span> 12</span> <span> 13</span> <span> 14</span> <span> 15</span> <span> 16</span> <span> 17</span> <span> 18</span> <span> 19</span> <span> 20</span> <span> 21</span> <span> 22</span> <span> 23</span> <span> 24</span> <span> 25</span> <span> 26</span> <span> 27</span> <span> 28</span> <span> 29</span> <span> 30</span> <span> 31</span> <span> 32</span> <span> 33</span> <span> 34</span> <span> 35</span> <span> 36</span> <span> 37</span> <span> 38</span> <span> 39</span> <span> 40</span> <span> 41</span> <span> 42</span> <span> 43</span> <span> 44</span> <span> 45</span> <span> 46</span> <span> 47</span> <span> 48</span> <span> 49</span> <span> 50</span> <span> 51</span> <span> 52</span> <span> 53</span> <span> 54</span> <span> 55</span> <span> 56</span> <span> 57</span> <span> 58</span> <span> 59</span> <span> 60</span> <span> 61</span> <span> 62</span> <span> 63</span> <span> 64</span> <span> 65</span> <span> 66</span> <span> 67</span> <span> 68</span> <span> 69</span> <span> 70</span> <span> 71</span> <span> 72</span> <span> 73</span> <span> 74</span> <span> 75</span> <span> 76</span> <span> 77</span> <span> 78</span> <span> 79</span> <span> 80</span> <span> 81</span> <span> 82</span> <span> 83</span> <span> 84</span> <span> 85</span> <span> 86</span> <span> 87</span> <span> 88</span> <span> 89</span> <span> 90</span> <span> 91</span> <span> 92</span> <span> 93</span> <span> 94</span> <span> 95</span> <span> 96</span> <span> 97</span> <span> 98</span> <span> 99</span> <span>100</span> <span>101</span> <span>102</span> <span>103</span> <span>104</span> <span>105</span> <span>106</span></pre></div></td><td><div><pre><span></span><code>{ "nodes": [ { "parameters": {}, "id": "35d05920-ad75-402a-be3c-3277bff7cc67", "name": "When clicking ‘Test workflow’", "type": "n8n-nodes-base.manualTrigger", "typeVersion": 1, "position": [ 880, 400 ] }, { "parameters": { "batchSize": 500, "options": {} }, "id": "ae9baa80-4cf9-4848-8953-22e1b7187bf6", "name": "Loop Over Items", "type": "n8n-nodes-base.splitInBatches", "typeVersion": 3, "position": [ 1120, 420 ] }, { "parameters": { "resource": "chat", "options": {}, "requestOptions": {} }, "id": "a519f271-82dc-4f60-8cfd-533dec580acc", "name": "OpenAI", "type": "n8n-nodes-base.openAi", "typeVersion": 1, "position": [ 1380, 440 ] }, { "parameters": { "unit": "minutes" }, "id": "562d9da3-2142-49bc-9b8f-71b0af42b449", "name": "Wait", "type": "n8n-nodes-base.wait", "typeVersion": 1, "position": [ 1620, 440 ], "webhookId": "714ab157-96d1-448f-b7f5-677882b92b13" } ], "connections": { "When clicking ‘Test workflow’": { "main": [ [ { "node": "Loop Over Items", "type": "main", "index": 0 } ] ] }, "Loop Over Items": { "main": [ null, [ { "node": "OpenAI", "type": "main", "index": 0 } ] ] }, "OpenAI": { "main": [ [ { "node": "Wait", "type": "main", "index": 0 } ] ] }, "Wait": { "main": [ [ { "node": "Loop Over Items", "type": "main", "index": 0 } ] ] } }, "pinData": {} } </code></pre></div></td></tr></tbody></table> 2. Use the HTTP Request node with the built-in batch-limit option against the OpenAI API instead of using the OpenAI node. ## Insufficient quota# Quota issues There are a number of OpenAI issues surrounding quotas, including failures when quotas have been recently topped up. To avoid these issues, ensure that there is credit in the account and issue a new API key from the API keys screen. This error displays when your OpenAI account doesn't have enough credits or capacity to fulfill your request. This may mean that your OpenAI trial period has ended, that your account needs more credit, or that you've gone over a usage limit. To troubleshoot this error, on your OpenAI settings page: * Select the correct organization for your API key in the first selector in the upper-left corner. * Select the correct project for your API key in the second selector in the upper-left corner. * Check the organization-level billing overview page to ensure that the organization has enough credit. Double-check that you select the correct organization for this page. * Check the organization-level usage limits page. Double-check that you select the correct organization for this page and scroll to the **Usage limits** section to verify that you haven't exceeded your organization's usage limits. * Check your OpenAI project's usage limits. Double-check that you select the correct project in the second selector in the upper-left corner. Select **Project** > **Limits** to view or change the project limits. * Check that the OpenAI API is operating as expected. Balance waiting period After topping up your balance, there may be a delay before your OpenAI account reflects the new balance. In n8n: * check that the OpenAI credentials use a valid OpenAI API key for the account you've added money to * ensure that you connect the OpenAI node to the correct OpenAI credentials If you find yourself frequently running out of account credits, consider turning on auto recharge in your OpenAI billing settings to automatically reload your account with credits when your balance reaches $0. ## Bad request - please check your parameters# This error displays when the request results in an error but n8n wasn't able to interpret the error message from OpenAI. To begin troubleshooting, try running the same operation using the HTTP Request node, which should provide a more detailed error message. ## Referenced node is unexecuted# This error displays when a previous node in the workflow hasn't executed and isn't providing output that this node needs as input. The full text of this error will tell you the exact node that isn't executing in this format: <table><tbody><tr><td><div><pre><span></span><span>1</span></pre></div></td><td><div><pre><span></span><code>An expression references the node '<node-name>', but it hasn’t been executed yet. Either change the expression, or re-wire your workflow to make sure that node executes first. </code></pre></div></td></tr></tbody></table> To begin troubleshooting, test the workflow up to the named node. For nodes that call JavaScript or other custom code, determine if a node has executed before trying to use the value by calling: <table><tbody><tr><td><div><pre><span></span><span>1</span></pre></div></td><td><div><pre><span></span><code><span>$</span><span>(</span><span>"<node-name>"</span><span>).</span><span>isExecuted</span> </code></pre></div></td></tr></tbody></table> --- ## Page: https://docs.n8n.io/integrations/builtin/app-nodes/n8n-nodes-base.openthesaurus/ Use the OpenThesaurus node to automate work in OpenThesaurus, and integrate OpenThesaurus with other applications. n8n supports synonym look-up for German words. On this page, you'll find a list of operations the OpenThesaurus node supports and links to more resources. Credentials OpenThesaurus node doesn't require authentication. ## Operations# * Get synonyms for a German word in German ## Templates and examples# Browse OpenThesaurus integration templates, or search all templates --- ## Page: https://docs.n8n.io/integrations/builtin/app-nodes/n8n-nodes-base.openweathermap/ Use the OpenWeatherMap node to automate work in OpenWeatherMap, and integrate OpenWeatherMap with other applications. n8n supports retrieving current and upcoming weather data with OpenWeatherMap. On this page, you'll find a list of operations the OpenWeatherMap node supports and links to more resources. This node can be used as an AI tool This node can be used to enhance the capabilities of an AI agent. When used in this way, many parameters can be set automatically, or with information directed by AI - find out more in the AI tool parameters documentation. ## Operations# * Returns the current weather data * Returns the weather data for the next 5 days ## Templates and examples# --- ## Page: https://docs.n8n.io/integrations/builtin/app-nodes/n8n-nodes-base.oura/ Use the Oura node to automate work in Oura, and integrate Oura with other applications. n8n has built-in support for a wide range of Oura features, including getting profiles, and summaries. On this page, you'll find a list of operations the Oura node supports and links to more resources. Credentials Refer to Oura credentials for guidance on setting up authentication. ## Operations# * Profile * Get the user's personal information. * Summary * Get the user's activity summary. * Get the user's readiness summary. * Get the user's sleep summary ## Templates and examples# Browse Oura integration templates, or search all templates --- ## Page: https://docs.n8n.io/integrations/builtin/app-nodes/n8n-nodes-base.paddle/ Use the Paddle node to automate work in Paddle, and integrate Paddle with other applications. n8n has built-in support for a wide range of Paddle features, including creating, updating, and getting coupons, as well as getting plans, products, and users. On this page, you'll find a list of operations the Paddle node supports and links to more resources. ## Operations# * Coupon * Create a coupon. * Get all coupons. * Update a coupon. * Payment * Get all payment. * Reschedule payment. * Plan * Get a plan. * Get all plans. * Product * Get all products. * User * Get all users ## Templates and examples# Browse Paddle integration templates, or search all templates --- ## Page: https://docs.n8n.io/integrations/builtin/app-nodes/n8n-nodes-base.pagerduty/ Use the PagerDuty node to automate work in PagerDuty, and integrate PagerDuty with other applications. n8n has built-in support for a wide range of PagerDuty features, including creating incident notes, as well as updating, and getting all log entries and users. On this page, you'll find a list of operations the PagerDuty node supports and links to more resources. ## Operations# * Incident * Create an incident * Get an incident * Get all incidents * Update an incident * Incident Note * Create an incident note * Get all incident's notes * Log Entry * Get a log entry * Get all log entries * User * Get a user ## Templates and examples# ## What to do if your operation isn't supported# If this node doesn't support the operation you want to do, you can use the HTTP Request node to call the service's API. You can use the credential you created for this service in the HTTP Request node: 1. In the HTTP Request node, select **Authentication** > **Predefined Credential Type**. 2. Select the service you want to connect to. 3. Select your credential. Refer to Custom API operations for more information. --- ## Page: https://docs.n8n.io/integrations/builtin/app-nodes/n8n-nodes-base.paypal/ Use the PayPal node to automate work in PayPal, and integrate PayPal with other applications. n8n has built-in support for a wide range of PayPal features, including creating a batch payout and canceling unclaimed payout items. On this page, you'll find a list of operations the PayPal node supports and links to more resources. ## Operations# * Payout * Create a batch payout * Show batch payout details * Payout Item * Cancels an unclaimed payout item * Show payout item details ## Templates and examples# Browse PayPal integration templates, or search all templates --- ## Page: https://docs.n8n.io/integrations/builtin/app-nodes/n8n-nodes-base.peekalink/ Use the Peekalink node to automate work in Peekalink, and integrate Peekalink with other applications. n8n supports checking, and reviewing links with Peekalink. On this page, you'll find a list of operations the Peekalink node supports and links to more resources. Credentials Refer to Peekalink credentials for guidance on setting up authentication. ## Operations# * Check whether preview for a given link is available * Return the preview for a link ## Templates and examples# Browse Peekalink integration templates, or search all templates --- ## Page: https://docs.n8n.io/integrations/builtin/app-nodes/n8n-nodes-base.phantombuster/ Use the PhantomBuster node to automate work in PhantomBuster, and integrate PhantomBuster with other applications. n8n has built-in support for a wide range of PhantomBuster features, including adding, deleting, and getting agents. On this page, you'll find a list of operations the PhantomBuster node supports and links to more resources. ## Operations# * Agent * Delete an agent by ID. * Get an agent by ID. * Get all agents of the current user's organization. * Get the output of the most recent container of an agent. * Add an agent to the launch queue. ## Templates and examples# Browse PhantomBuster integration templates, or search all templates ## What to do if your operation isn't supported# If this node doesn't support the operation you want to do, you can use the HTTP Request node to call the service's API. You can use the credential you created for this service in the HTTP Request node: 1. In the HTTP Request node, select **Authentication** > **Predefined Credential Type**. 2. Select the service you want to connect to. 3. Select your credential. Refer to Custom API operations for more information. --- ## Page: https://docs.n8n.io/integrations/builtin/app-nodes/n8n-nodes-base.philipshue/ Use the Philips Hue node to automate work in Philips Hue, and integrate Philips Hue with other applications. n8n has built-in support for a wide range of Philips Hue features, including deleting, retrieving, and updating lights. On this page, you'll find a list of operations the Philips Hue node supports and links to more resources. ## Operations# * Light * Delete a light * Retrieve a light * Retrieve all lights * Update a light ## Templates and examples# Browse Philips Hue integration templates, or search all templates ## What to do if your operation isn't supported# If this node doesn't support the operation you want to do, you can use the HTTP Request node to call the service's API. You can use the credential you created for this service in the HTTP Request node: 1. In the HTTP Request node, select **Authentication** > **Predefined Credential Type**. 2. Select the service you want to connect to. 3. Select your credential. Refer to Custom API operations for more information. --- ## Page: https://docs.n8n.io/integrations/builtin/app-nodes/n8n-nodes-base.pipedrive/ Use the Pipedrive node to automate work in Pipedrive, and integrate Pipedrive with other applications. n8n has built-in support for a wide range of Pipedrive features, including creating, updating, deleting, and getting activity, files, notes, organizations, and leads. On this page, you'll find a list of operations the Pipedrive node supports and links to more resources. This node can be used as an AI tool This node can be used to enhance the capabilities of an AI agent. When used in this way, many parameters can be set automatically, or with information directed by AI - find out more in the AI tool parameters documentation. ## Operations# * Activity * Create an activity * Delete an activity * Get data of an activity * Get data of all activities * Update an activity * Deal * Create a deal * Delete a deal * Duplicate a deal * Get data of a deal * Get data of all deals * Search a deal * Update a deal * Deal Activity * Get all activities of a deal * Deal Product * Add a product to a deal * Get all products in a deal * Remove a product from a deal * Update a product in a deal * File * Create a file * Delete a file * Download a file * Get data of a file * Lead * Create a lead * Delete a lead * Get data of a lead * Get data of all leads * Update a lead * Note * Create a note * Delete a note * Get data of a note * Get data of all notes * Update a note * Organization * Create an organization * Delete an organization * Get data of an organization * Get data of all organizations * Update an organization * Search organizations * Person * Create a person * Delete a person * Get data of a person * Get data of all persons * Search all persons * Update a person * Product * Get data of all products ## Templates and examples# ## What to do if your operation isn't supported# If this node doesn't support the operation you want to do, you can use the HTTP Request node to call the service's API. You can use the credential you created for this service in the HTTP Request node: 1. In the HTTP Request node, select **Authentication** > **Predefined Credential Type**. 2. Select the service you want to connect to. 3. Select your credential. Refer to Custom API operations for more information. --- ## Page: https://docs.n8n.io/integrations/builtin/app-nodes/n8n-nodes-base.plivo/ Use the Plivo node to automate work in Plivo, and integrate Plivo with other applications. n8n has built-in support for a wide range of Plivo features, including making calls, and sending SMS/MMS. On this page, you'll find a list of operations the Plivo node supports and links to more resources. Credentials Refer to Plivo credentials for guidance on setting up authentication. ## Operations# * Call * Make a voice call * MMS * Send an MMS message (US/Canada only) * SMS * Send an SMS message. ## Templates and examples# Browse Plivo integration templates, or search all templates --- ## Page: https://docs.n8n.io/integrations/builtin/app-nodes/n8n-nodes-base.postbin/ PostBin is a service that helps you test API clients and webhooks. Use the PostBin node to automate work in PostBin, and integrate PostBin with other applications. n8n has built-in support for a wide range of PostBin features, including creating and deleting bins, and getting and sending requests. On this page, you'll find a list of operations the PostBin node supports, and links to more resources. ## Operations# * Bin * Create * Get * Delete * Request * Get * Remove First * Send ## Templates and examples# Browse PostBin integration templates, or search all templates ## Send requests# To send requests to a PostBin bin: 1. Go to PostBin and follow the steps to generate a new bin. PostBin gives you a unique URL, including a bin ID. 2. In the PostBin node, select the **Request** resource. 3. Choose the type of **Operation** you want to perform. 4. Enter your bin ID in **Bin ID**. ## Create and manage bins# You can create and manage PostBin bins using the PostBin node. 1. In **Resource**, select **Bin**. 2. Choose an **Operation**. You can create, delete, or get a bin. --- ## Page: https://docs.n8n.io/integrations/builtin/app-nodes/n8n-nodes-base.postgres/ Use the Postgres node to automate work in Postgres, and integrate Postgres with other applications. n8n has built-in support for a wide range of Postgres features, including executing queries, as well as inserting and updating rows in a database. On this page, you'll find a list of operations the Postgres node supports and links to more resources. This node can be used as an AI tool This node can be used to enhance the capabilities of an AI agent. When used in this way, many parameters can be set automatically, or with information directed by AI - find out more in the AI tool parameters documentation. ## Operations# * **Delete**: Delete an entire table or rows in a table * **Execute Query**: Execute an SQL query * **Insert**: Insert rows in a table * **Insert or Update**: Insert or update rows in a table * **Select**: Select rows from a table * **Update**: Update rows in a table ### Delete# Use this operation to delete an entire table or rows in a table. Enter these parameters: * **Credential to connect with**: Create or select an existing Postgres credential. * **Operation**: Select **Delete**. * **Schema**: Choose the schema that contains the table you want to work on. Select **From list** to choose the schema from the dropdown list or **By Name** to enter the schema name. * **Table**: Choose the table that you want to work on. Select **From list** to choose the table from the dropdown list or **By Name** to enter the table name. * **Command**: The deletion action to take: * **Truncate**: Removes the table's data but preserves the table's structure. * **Restart Sequences**: Whether to reset auto increment columns to their initial values as part of the Truncate process. * **Delete**: Delete the rows that match the "Select Rows" condition. If you don't select anything, Postgres deletes all rows. * **Select Rows**: Define a **Column**, **Operator**, and **Value** to match rows on. * **Combine Conditions**: How to combine the conditions in "Select Rows". **AND** requires all conditions to be true, while **OR** requires at least one condition to be true. * **Drop**: Deletes the table's data and structure permanently. #### Delete options# * **Cascade**: Whether to also drop all objects that depend on the table, like views and sequences. Available if using **Truncate** or **Drop** commands. * **Connection Timeout**: The number of seconds to try to connect to the database. * **Delay Closing Idle Connection**: The number of seconds to wait before considering idle connections eligible for closing. * **Query Batching**: The way to send queries to the database: * **Single Query**: A single query for all incoming items. * **Independently**: Execute one query per incoming item of the execution. * **Transaction**: Execute all queries in a transaction. If a failure occurs, Postgres rolls back all changes. * **Output Large-Format Numbers As**: The format to output `NUMERIC` and `BIGINT` columns as: * **Numbers**: Use this for standard numbers. * **Text**: Use this if you expect numbers longer than 16 digits. Without this, numbers may be incorrect. ### Execute Query# Use this operation to execute an SQL query. Enter these parameters: * **Credential to connect with**: Create or select an existing Postgres credential. * **Operation**: Select **Execute Query**. * **Query**: The SQL query to execute. You can use n8n expressions and tokens like `$1`, `$2`, and `$3` to build prepared statements to use with query parameters. #### Execute Query options# * **Connection Timeout**: The number of seconds to try to connect to the database. * **Delay Closing Idle Connection**: The number of seconds to wait before considering idle connections eligible for closing. * **Query Batching**: The way to send queries to the database: * **Single Query**: A single query for all incoming items. * **Independently**: Execute one query per incoming item of the execution. * **Transaction**: Execute all queries in a transaction. If a failure occurs, Postgres rolls back all changes. * **Query Parameters**: A comma-separated list of values that you want to use as query parameters. * **Output Large-Format Numbers As**: The format to output `NUMERIC` and `BIGINT` columns as: * **Numbers**: Use this for standard numbers. * **Text**: Use this if you expect numbers longer than 16 digits. Without this, numbers may be incorrect. * **Replace Empty Strings with NULL**: Whether to replace empty strings with NULL in input. This may be useful when working with data exported from spreadsheet software. ### Insert# Use this operation to insert rows in a table. Enter these parameters: * **Credential to connect with**: Create or select an existing Postgres credential. * **Operation**: Select **Insert**. * **Schema**: Choose the schema that contains the table you want to work on. Select **From list** to choose the schema from the dropdown list or **By Name** to enter the schema name. * **Table**: Choose the table that you want to work on. Select **From list** to choose the table from the dropdown list or **By Name** to enter the table name. * **Mapping Column Mode**: How to map column names to incoming data: * **Map Each Column Manually**: Select the values to use for each column. * **Map Automatically**: Automatically map incoming data to matching column names in Postgres. The incoming data field names must match the column names in Postgres for this to work. If necessary, consider using the edit fields (set) node before this node to adjust the format as needed. #### Insert options# * **Connection Timeout**: The number of seconds to try to connect to the database. * **Delay Closing Idle Connection**: The number of seconds to wait before considering idle connections eligible for closing. * **Query Batching**: The way to send queries to the database: * **Single Query**: A single query for all incoming items. * **Independently**: Execute one query per incoming item of the execution. * **Transaction**: Execute all queries in a transaction. If a failure occurs, Postgres rolls back all changes. * **Output Columns**: Choose which columns to output. You can select from a list of available columns or specify IDs using expressions. * **Output Large-Format Numbers As**: The format to output `NUMERIC` and `BIGINT` columns as: * **Numbers**: Use this for standard numbers. * **Text**: Use this if you expect numbers longer than 16 digits. Without this, numbers may be incorrect. * **Skip on Conflict**: Whether to skip the row if the insert violates a unique or exclusion constraint instead of throwing an error. * **Replace Empty Strings with NULL**: Whether to replace empty strings with NULL in input. This may be useful when working with data exported from spreadsheet software. ### Insert or Update# Use this operation to insert or update rows in a table. Enter these parameters: * **Credential to connect with**: Create or select an existing Postgres credential. * **Operation**: Select **Insert or Update**. * **Schema**: Choose the schema that contains the table you want to work on. Select **From list** to choose the schema from the dropdown list or **By Name** to enter the schema name. * **Table**: Choose the table that you want to work on. Select **From list** to choose the table from the dropdown list or **By Name** to enter the table name. * **Mapping Column Mode**: How to map column names to incoming data: * **Map Each Column Manually**: Select the values to use for each column. * **Map Automatically**: Automatically map incoming data to matching column names in Postgres. The incoming data field names must match the column names in Postgres for this to work. If necessary, consider using the edit fields (set) node before this node to adjust the format as needed. #### Insert or Update options# * **Connection Timeout**: The number of seconds to try to connect to the database. * **Delay Closing Idle Connection**: The number of seconds to wait before considering idle connections eligible for closing. * **Query Batching**: The way to send queries to the database: * **Single Query**: A single query for all incoming items. * **Independently**: Execute one query per incoming item of the execution. * **Transaction**: Execute all queries in a transaction. If a failure occurs, Postgres rolls back all changes. * **Output Columns**: Choose which columns to output. You can select from a list of available columns or specify IDs using expressions. * **Output Large-Format Numbers As**: The format to output `NUMERIC` and `BIGINT` columns as: * **Numbers**: Use this for standard numbers. * **Text**: Use this if you expect numbers longer than 16 digits. Without this, numbers may be incorrect. * **Replace Empty Strings with NULL**: Whether to replace empty strings with NULL in input. This may be useful when working with data exported from spreadsheet software. ### Select# Use this operation to select rows in a table. Enter these parameters: * **Credential to connect with**: Create or select an existing Postgres credential. * **Operation**: Select **Select**. * **Schema**: Choose the schema that contains the table you want to work on. Select **From list** to choose the schema from the dropdown list or **By Name** to enter the schema name. * **Table**: Choose the table that you want to work on. Select **From list** to choose the table from the dropdown list or **By Name** to enter the table name. * **Return All**: Whether to return all results or only up to a given limit. * **Limit**: The maximum number of items to return when **Return All** is disabled. * **Select Rows**: Set the conditions to select rows. Define a **Column**, **Operator**, and **Value** to match rows on. If you don't select anything, Postgres selects all rows. * **Combine Conditions**: How to combine the conditions in **Select Rows**. **AND** requires all conditions to be true, while **OR** requires at least one condition to be true. * **Sort**: Choose how to sort the selected rows. Choose a **Column** from a list or by ID and a sort **Direction**. #### Select options# * **Connection Timeout**: The number of seconds to try to connect to the database. * **Delay Closing Idle Connection**: The number of seconds to wait before considering idle connections eligible for closing. * **Query Batching**: The way to send queries to the database: * **Single Query**: A single query for all incoming items. * **Independently**: Execute one query per incoming item of the execution. * **Transaction**: Execute all queries in a transaction. If a failure occurs, Postgres rolls back all changes. * **Output Columns**: Choose which columns to output. You can select from a list of available columns or specify IDs using expressions. * **Output Large-Format Numbers As**: The format to output `NUMERIC` and `BIGINT` columns as: * **Numbers**: Use this for standard numbers. * **Text**: Use this if you expect numbers longer than 16 digits. Without this, numbers may be incorrect. ### Update# Use this operation to update rows in a table. Enter these parameters: * **Credential to connect with**: Create or select an existing Postgres credential. * **Operation**: Select **Update**. * **Schema**: Choose the schema that contains the table you want to work on. Select **From list** to choose the schema from the dropdown list or **By Name** to enter the schema name. * **Table**: Choose the table that you want to work on. Select **From list** to choose the table from the dropdown list or **By Name** to enter the table name. * **Mapping Column Mode**: How to map column names to incoming data: * **Map Each Column Manually**: Select the values to use for each column. * **Map Automatically**: Automatically map incoming data to matching column names in Postgres. The incoming data field names must match the column names in Postgres for this to work. If necessary, consider using the edit fields (set) node before this node to adjust the format as needed. #### Update options# * **Connection Timeout**: The number of seconds to try to connect to the database. * **Delay Closing Idle Connection**: The number of seconds to wait before considering idle connections eligible for closing. * **Query Batching**: The way to send queries to the database: * **Single Query**: A single query for all incoming items. * **Independently**: Execute one query per incoming item of the execution. * **Transaction**: Execute all queries in a transaction. If a failure occurs, Postgres rolls back all changes. * **Output Columns**: Choose which columns to output. You can select from a list of available columns or specify IDs using expressions. * **Output Large-Format Numbers As**: The format to output `NUMERIC` and `BIGINT` columns as: * **Numbers**: Use this for standard numbers. * **Text**: Use this if you expect numbers longer than 16 digits. Without this, numbers may be incorrect. * **Replace Empty Strings with NULL**: Whether to replace empty strings with NULL in input. This may be useful when working with data exported from spreadsheet software. ## Templates and examples# n8n provides a trigger node for Postgres. You can find the trigger node docs here. ## Use query parameters# When creating a query to run on a Postgres database, you can use the **Query Parameters** field in the **Options** section to load data into the query. n8n sanitizes data in query parameters, which prevents SQL injection. For example, you want to find a person by their email address. Given the following input data: <table><tbody><tr><td><div><pre><span></span><span> 1</span> <span> 2</span> <span> 3</span> <span> 4</span> <span> 5</span> <span> 6</span> <span> 7</span> <span> 8</span> <span> 9</span> <span>10</span> <span>11</span> <span>12</span></pre></div></td><td><div><pre><span></span><code><span>[</span> <span> </span><span>{</span> <span> </span><span>"email"</span><span>:</span><span> </span><span>"alex@example.com"</span><span>,</span> <span> </span><span>"name"</span><span>:</span><span> </span><span>"Alex"</span><span>,</span> <span> </span><span>"age"</span><span>:</span><span> </span><span>21</span><span> </span> <span> </span><span>},</span> <span> </span><span>{</span> <span> </span><span>"email"</span><span>:</span><span> </span><span>"jamie@example.com"</span><span>,</span> <span> </span><span>"name"</span><span>:</span><span> </span><span>"Jamie"</span><span>,</span> <span> </span><span>"age"</span><span>:</span><span> </span><span>33</span><span> </span> <span> </span><span>}</span> <span>]</span> </code></pre></div></td></tr></tbody></table> You can write a query like: <table><tbody><tr><td><div><pre><span></span><span>1</span></pre></div></td><td><div><pre><span></span><code><span>SELECT</span><span> </span><span>*</span><span> </span><span>FROM</span><span> </span><span>$</span><span>1</span><span>:</span><span>name</span><span> </span><span>WHERE</span><span> </span><span>email</span><span> </span><span>=</span><span> </span><span>$</span><span>2</span><span>;</span> </code></pre></div></td></tr></tbody></table> Then in **Query Parameters**, provide the field values to use. You can provide fixed values or expressions. For this example, use expressions so the node can pull the email address from each input item in turn: <table><tbody><tr><td><div><pre><span></span><span>1</span> <span>2</span></pre></div></td><td><div><pre><span></span><code><span>// users is an example table name</span> <span>{{</span><span> </span><span>[</span><span> </span><span>'users'</span><span>,</span><span> </span><span>$json</span><span>.</span><span>email</span><span> </span><span>]</span><span> </span><span>}}</span><span> </span> </code></pre></div></td></tr></tbody></table> ## Common issues# For common questions or issues and suggested solutions, refer to Common issues. --- ## Page: https://docs.n8n.io/integrations/builtin/app-nodes/n8n-nodes-base.postgres/common-issues/ Here are some common errors and issues with the Postgres node and steps to resolve or troubleshoot them. ## Dynamically populate SQL `IN` groups with parameters# In Postgres, you can use the SQL `IN` comparison construct to make comparisons between groups of values: <table><tbody><tr><td><div><pre><span></span><span>1</span></pre></div></td><td><div><pre><span></span><code><span>SELECT</span><span> </span><span>color</span><span>,</span><span> </span><span>shirt_size</span><span> </span><span>FROM</span><span> </span><span>shirts</span><span> </span><span>WHERE</span><span> </span><span>shirt_size</span><span> </span><span>IN</span><span> </span><span>(</span><span>'small'</span><span>,</span><span> </span><span>'medium'</span><span>,</span><span> </span><span>'large'</span><span>);</span> </code></pre></div></td></tr></tbody></table> While you can use n8n expressions in your query to dynamically populate the values in an `IN` group, combining this with query parameters provides extra protection by automatically sanitizing input. To construct an `IN` group query with query parameters: 1. Set the **Operation** to **Execute Query**. 2. In **Options**, select **Query Parameters**. 3. Use an expression to select an array from the input data. For example, `{{ $json.input_shirt_sizes }}`. 4. In the **Query** parameter, write your query with the `IN` construct with an empty set of parentheses. For example: <table><tbody><tr><td><div><pre><span></span><span>1</span></pre></div></td><td><div><pre><span></span><code><span>SELECT</span><span> </span><span>color</span><span>,</span><span> </span><span>shirt_size</span><span> </span><span>FROM</span><span> </span><span>shirts</span><span> </span><span>WHERE</span><span> </span><span>shirt_size</span><span> </span><span>IN</span><span> </span><span>();</span> </code></pre></div></td></tr></tbody></table> 5. Inside of the `IN` parentheses, use an expression to dynamically create index-based placeholders (like `$1`, `$2`, and `$3`) for the number of items in your query parameter array. You can do this by increasing each array index by one since the placeholder variables are 1 indexed: <table><tbody><tr><td><div><pre><span></span><span>1</span></pre></div></td><td><div><pre><span></span><code><span>SELECT</span><span> </span><span>color</span><span>,</span><span> </span><span>shirt_size</span><span> </span><span>FROM</span><span> </span><span>shirts</span><span> </span><span>WHERE</span><span> </span><span>shirt_size</span><span> </span><span>IN</span><span> </span><span>(</span><span>{{</span><span> </span><span>$</span><span>json</span><span>.</span><span>input_shirt_sizes</span><span>.</span><span>map</span><span>((</span><span>i</span><span>,</span><span> </span><span>pos</span><span>)</span><span> </span><span>=></span><span> </span><span>"$"</span><span> </span><span>+</span><span> </span><span>(</span><span>pos</span><span>+</span><span>1</span><span>)).</span><span>join</span><span>(</span><span>', '</span><span>)</span><span> </span><span>}}</span><span>);</span> </code></pre></div></td></tr></tbody></table> With this technique, n8n automatically creates the correct number of prepared statement placeholders for the `IN` values according to the number of items in your array. ## Working with timestamps and time zones# To avoid complications with how n8n and Postgres interpret timestamp and time zone data, follow these general tips: * **Use UTC when storing and passing dates**: Using UTC helps avoid confusion over timezone conversions when converting dates between different representations and systems. * **Set the execution timezone**: Set the global timezone in n8n using either environment variables (for self-hosted) or in the settings (for n8n Cloud). You can set a workflow-specific timezone in the workflow settings. * **Use ISO 8601 format**: The ISO 8601 format encodes the day of the month, month, year, hour, minutes, and seconds in a standardized string. n8n passes dates between nodes as strings and uses Luxon to parse dates. If you need to cast to ISO 8601 explicitly, you can use the Date & Time node and a custom format set to the string `yyyy-MM-dd'T'HH:mm:ss`. --- ## Page: https://docs.n8n.io/integrations/builtin/app-nodes/n8n-nodes-base.posthog/ Use the PostHog node to automate work in PostHog, and integrate PostHog with other applications. n8n has built-in support for a wide range of PostHog features, including creating aliases, events, and identity, as well as tracking pages. On this page, you'll find a list of operations the PostHog node supports and links to more resources. ## Operations# * Alias * Create an alias * Event * Create an event * Identity * Create * Track * Track a page * Track a screen ## Templates and examples# Browse PostHog integration templates, or search all templates --- ## Page: https://docs.n8n.io/integrations/builtin/app-nodes/n8n-nodes-base.profitwell/ Use the ProfitWell node to automate work in ProfitWell, and integrate ProfitWell with other applications. n8n supports getting your company's account settings and retrieving financial metrics from ProfitWell. On this page, you'll find a list of operations the ProfitWell node supports and links to more resources. ## Operations# * Company * Get your company's ProfitWell account settings * Metric * Retrieve financial metric broken down by day for either the current month or the last ## Templates and examples# Browse ProfitWell integration templates, or search all templates --- ## Page: https://docs.n8n.io/integrations/builtin/app-nodes/n8n-nodes-base.pushbullet/ Use the Pushbullet node to automate work in Pushbullet, and integrate Pushbullet with other applications. n8n has built-in support for a wide range of Pushbullet features, including creating, updating, deleting, and getting a push. On this page, you'll find a list of operations the Pushbullet node supports and links to more resources. ## Operations# * Push * Create a push * Delete a push * Get all pushes * Update a push ## Templates and examples# Browse Pushbullet integration templates, or search all templates ## What to do if your operation isn't supported# If this node doesn't support the operation you want to do, you can use the HTTP Request node to call the service's API. You can use the credential you created for this service in the HTTP Request node: 1. In the HTTP Request node, select **Authentication** > **Predefined Credential Type**. 2. Select the service you want to connect to. 3. Select your credential. Refer to Custom API operations for more information. --- ## Page: https://docs.n8n.io/integrations/builtin/app-nodes/n8n-nodes-base.pushcut/ Use the Pushcut node to automate work in Pushcut, and integrate Pushcut with other applications. n8n supports sending notifications with Pushcut. On this page, you'll find a list of operations the Pushcut node supports and links to more resources. Credentials Refer to Pushcut credentials for guidance on setting up authentication. ## Operations# * Notification * Send a notification ## Templates and examples# Browse Pushcut integration templates, or search all templates --- ## Page: https://docs.n8n.io/integrations/builtin/app-nodes/n8n-nodes-base.pushover/ Use the Pushover node to automate work in Pushover, and integrate Pushover with other applications. n8n supports sending push notifications with Pushover. On this page, you'll find a list of operations the Pushover node supports and links to more resources. This node can be used as an AI tool This node can be used to enhance the capabilities of an AI agent. When used in this way, many parameters can be set automatically, or with information directed by AI - find out more in the AI tool parameters documentation. ## Operations# * Message * Push ## Templates and examples# Browse Pushover integration templates, or search all templates ## What to do if your operation isn't supported# If this node doesn't support the operation you want to do, you can use the HTTP Request node to call the service's API. You can use the credential you created for this service in the HTTP Request node: 1. In the HTTP Request node, select **Authentication** > **Predefined Credential Type**. 2. Select the service you want to connect to. 3. Select your credential. Refer to Custom API operations for more information. --- ## Page: https://docs.n8n.io/integrations/builtin/app-nodes/n8n-nodes-base.questdb/ Use the QuestDB node to automate work in QuestDB, and integrate QuestDB with other applications. n8n supports executing an SQL query and inserting rows in a database with QuestDB. On this page, you'll find a list of operations the QuestDB node supports and links to more resources. ## Operations# * Executes a SQL query. * Insert rows in database. ## Templates and examples# Browse QuestDB integration templates, or search all templates ## Node reference# ### Specify a column's data type# To specify a column's data type, append the column name with `:type`, where `type` is the data type you want for column. For example, if you want to specify the type `int` for the column **id** and type `text` for the column **name**, you can use the following snippet in the **Columns** field: `id:int,name:text`. --- ## Page: https://docs.n8n.io/integrations/builtin/app-nodes/n8n-nodes-base.quickbase/ Use the Quick Base node to automate work in Quick Base, and integrate Quick Base with other applications. n8n has built-in support for a wide range of Quick Base features, including creating, updating, deleting, and getting records, as well as getting fields, and downloading files. On this page, you'll find a list of operations the Quick Base node supports and links to more resources. ## Operations# * Field * Get all fields * File * Delete a file * Download a file * Record * Create a record * Delete a record * Get all records * Update a record * Upsert a record * Report * Get a report * Run a report ## Templates and examples# Browse Quick Base integration templates, or search all templates --- ## Page: https://docs.n8n.io/integrations/builtin/app-nodes/n8n-nodes-base.quickbooks/ Use the QuickBooks node to automate work in QuickBooks, and integrate QuickBooks with other applications. n8n has built-in support for a wide range of QuickBooks features, including creating, updating, deleting, and getting bills, customers, employees, estimates, and invoices. On this page, you'll find a list of operations the QuickBooks node supports and links to more resources. This node can be used as an AI tool This node can be used to enhance the capabilities of an AI agent. When used in this way, many parameters can be set automatically, or with information directed by AI - find out more in the AI tool parameters documentation. ## Operations# * Bill * Create * Delete * Get * Get All * Update * Customer * Create * Get * Get All * Update * Employee * Create * Get * Get All * Update * Estimate * Create * Delete * Get * Get All * Send * Update * Invoice * Create * Delete * Get * Get All * Send * Update * Void * Item * Get * Get All * Payment * Create * Delete * Get * Get All * Send * Update * Void * Purchase * Get * Get All * Transaction * Get Report * Vendor * Create * Get * Get All * Update ## Templates and examples# ## What to do if your operation isn't supported# If this node doesn't support the operation you want to do, you can use the HTTP Request node to call the service's API. You can use the credential you created for this service in the HTTP Request node: 1. In the HTTP Request node, select **Authentication** > **Predefined Credential Type**. 2. Select the service you want to connect to. 3. Select your credential. Refer to Custom API operations for more information. --- ## Page: https://docs.n8n.io/integrations/builtin/app-nodes/n8n-nodes-base.quickchart/ Use the QuickChart node to automate work in QuickChart, and integrate QuickChart with other applications. n8n has built-in support for a wide range of QuickChart chart types, including bar, doughnut, line, pie, and polar charts. On this page, you'll find a list of operations the QuickChart node supports and links to more resources. This node can be used as an AI tool This node can be used to enhance the capabilities of an AI agent. When used in this way, many parameters can be set automatically, or with information directed by AI - find out more in the AI tool parameters documentation. ## Operations# Create a chart by selecting the chart type: * Chart Type * Bar Chart * Doughnut Chart * Line Chart * Pie Chart * Polar Chart ## Templates and examples# Refer to QuickChart's API documentation for more information about the service. --- ## Page: https://docs.n8n.io/integrations/builtin/app-nodes/n8n-nodes-base.rabbitmq/ Use the RabbitMQ node to automate work in RabbitMQ, and integrate RabbitMQ with other applications. n8n has built-in support for a wide range of RabbitMQ features, including accepting, and forwarding messages. On this page, you'll find a list of operations the RabbitMQ node supports and links to more resources. This node can be used as an AI tool This node can be used to enhance the capabilities of an AI agent. When used in this way, many parameters can be set automatically, or with information directed by AI - find out more in the AI tool parameters documentation. ## Operations# * Delete From Queue * Send a Message to RabbitMQ ## Templates and examples# Browse RabbitMQ integration templates, or search all templates --- ## Page: https://docs.n8n.io/integrations/builtin/app-nodes/n8n-nodes-base.raindrop/ Use the Raindrop node to automate work in Raindrop, and integrate Raindrop with other applications. n8n has built-in support for a wide range of Raindrop features, including getting users, deleting tags, and creating, updating, deleting and getting collections and bookmarks. On this page, you'll find a list of operations the Raindrop node supports and links to more resources. ## Operations# * Bookmark * Create * Delete * Get * Get All * Update * Collection * Create * Delete * Get * Get All * Update * Tag * Delete * Get All * User * Get ## Templates and examples# Browse Raindrop integration templates, or search all templates ## What to do if your operation isn't supported# If this node doesn't support the operation you want to do, you can use the HTTP Request node to call the service's API. You can use the credential you created for this service in the HTTP Request node: 1. In the HTTP Request node, select **Authentication** > **Predefined Credential Type**. 2. Select the service you want to connect to. 3. Select your credential. Refer to Custom API operations for more information. --- ## Page: https://docs.n8n.io/integrations/builtin/app-nodes/n8n-nodes-base.reddit/ Use the Reddit node to automate work in Reddit, and integrate Reddit with other applications. n8n has built-in support for a wide range of Reddit features, including getting profiles, and users, retrieving post comments and subreddit, as well as submitting, getting, and deleting posts. On this page, you'll find a list of operations the Reddit node supports and links to more resources. This node can be used as an AI tool This node can be used to enhance the capabilities of an AI agent. When used in this way, many parameters can be set automatically, or with information directed by AI - find out more in the AI tool parameters documentation. ## Operations# * Post * Submit a post to a subreddit * Delete a post from a subreddit * Get a post from a subreddit * Get all posts from a subreddit * Search posts in a subreddit or in all of Reddit. * Post Comment * Create a top-level comment in a post * Retrieve all comments in a post * Remove a comment from a post * Write a reply to a comment in a post * Profile * Get * Subreddit * Retrieve background information about a subreddit. * Retrieve information about subreddits from all of Reddit. * User * Get ## Templates and examples# ## What to do if your operation isn't supported# If this node doesn't support the operation you want to do, you can use the HTTP Request node to call the service's API. You can use the credential you created for this service in the HTTP Request node: 1. In the HTTP Request node, select **Authentication** > **Predefined Credential Type**. 2. Select the service you want to connect to. 3. Select your credential. Refer to Custom API operations for more information. --- ## Page: https://docs.n8n.io/integrations/builtin/app-nodes/n8n-nodes-base.redis/ Use the Redis node to automate work in Redis, and integrate Redis with other applications. n8n has built-in support for a wide range of Redis features, including deleting keys, getting key values, setting key value, and publishing messages to the Redis channel. On this page, you'll find a list of operations the Redis node supports and links to more resources. This node can be used as an AI tool This node can be used to enhance the capabilities of an AI agent. When used in this way, many parameters can be set automatically, or with information directed by AI - find out more in the AI tool parameters documentation. ## Operations# * Delete a key from Redis. * Get the value of a key from Redis. * Returns generic information about the Redis instance. * Atomically increments a key by 1. Creates the key if it doesn't exist. * Returns all the keys matching a pattern. * Set the value of a key in Redis. * Publish message to Redis channel. ## Templates and examples# --- ## Page: https://docs.n8n.io/integrations/builtin/app-nodes/n8n-nodes-base.rocketchat/ Use the Rocket.Chat node to automate work in Rocket.Chat, and integrate Rocket.Chat with other applications. n8n supports posting messages to channels, and sending direct messages, with Rocket.Chat. On this page, you'll find a list of operations the Rocket.Chat node supports and links to more resources. This node can be used as an AI tool This node can be used to enhance the capabilities of an AI agent. When used in this way, many parameters can be set automatically, or with information directed by AI - find out more in the AI tool parameters documentation. ## Operations# * Chat * Post a message to a channel or a direct message ## Templates and examples# ## What to do if your operation isn't supported# If this node doesn't support the operation you want to do, you can use the HTTP Request node to call the service's API. You can use the credential you created for this service in the HTTP Request node: 1. In the HTTP Request node, select **Authentication** > **Predefined Credential Type**. 2. Select the service you want to connect to. 3. Select your credential. Refer to Custom API operations for more information. --- ## Page: https://docs.n8n.io/integrations/builtin/app-nodes/n8n-nodes-base.rundeck/ Use the Rundeck node to automate work in Rundeck, and integrate Rundeck with other applications. n8n has built-in support for executing jobs and getting metadata. On this page, you'll find a list of operations the Rundeck node supports and links to more resources. ## Operations# * **Job** * Execute a job * Get metadata of a job ## Templates and examples# Browse Rundeck integration templates, or search all templates ## What to do if your operation isn't supported# If this node doesn't support the operation you want to do, you can use the HTTP Request node to call the service's API. You can use the credential you created for this service in the HTTP Request node: 1. In the HTTP Request node, select **Authentication** > **Predefined Credential Type**. 2. Select the service you want to connect to. 3. Select your credential. Refer to Custom API operations for more information. ## Find the job ID# 1. Access your Rundeck dashboard. 2. Open the project that contains the job you want to use with n8n. 3. In the sidebar, select **JOBS**. 4. Under **All Jobs**, select the name of the job you want to use with n8n. 5. In the top left corner, under the name of the job, copy the string that's displayed in smaller font below the job name. This is your job ID. 6. Paste this job ID in the **Job Id** field in n8n. --- ## Page: https://docs.n8n.io/integrations/builtin/app-nodes/n8n-nodes-base.s3/ Use the S3 node to automate work in non-AWS S3 storage and integrate S3 with other applications. n8n has built-in support for a wide range of S3 features, including creating, deleting, and getting buckets, files, and folders. For AWS S3, use AWS S3. Use the S3 node for non-AWS S3 solutions like: * MinIO * Wasabi * Digital Ocean spaces On this page, you'll find a list of operations the S3 node supports and links to more resources. Credentials Refer to S3 credentials for guidance on setting up authentication. This node can be used as an AI tool This node can be used to enhance the capabilities of an AI agent. When used in this way, many parameters can be set automatically, or with information directed by AI - find out more in the AI tool parameters documentation. ## Operations# * Bucket * Create a bucket * Delete a bucket * Get all buckets * Search within a bucket * File * Copy a file * Delete a file * Download a file * Get all files * Upload a file * Folder * Create a folder * Delete a folder * Get all folders ## Templates and examples# ## Node reference# ### Setting file permissions in Wasabi# When uploading files to Wasabi, you must set permissions for the files using the **ACL** dropdown and not the toggles.  --- ## Page: https://docs.n8n.io/integrations/builtin/app-nodes/n8n-nodes-base.salesforce/ Use the Salesforce node to automate work in Salesforce, and integrate Salesforce with other applications. n8n has built-in support for a wide range of Salesforce features, including creating, updating, deleting, and getting accounts, attachments, cases, and leads, as well as uploading documents. On this page, you'll find a list of operations the Salesforce node supports and links to more resources. This node can be used as an AI tool This node can be used to enhance the capabilities of an AI agent. When used in this way, many parameters can be set automatically, or with information directed by AI - find out more in the AI tool parameters documentation. ## Operations# * Account * Add note to an account * Create an account * Create a new account, or update the current one if it already exists (upsert) * Get an account * Get all accounts * Returns an overview of account's metadata. * Delete an account * Update an account * Attachment * Create a attachment * Delete a attachment * Get a attachment * Get all attachments * Returns an overview of attachment's metadata. * Update a attachment * Case * Add a comment to a case * Create a case * Get a case * Get all cases * Returns an overview of case's metadata * Delete a case * Update a case * Contact * Add lead to a campaign * Add note to a contact * Create a contact * Create a new contact, or update the current one if it already exists (upsert) * Delete a contact * Get a contact * Returns an overview of contact's metadata * Get all contacts * Update a contact * Custom Object * Create a custom object record * Create a new record, or update the current one if it already exists (upsert) * Get a custom object record * Get all custom object records * Delete a custom object record * Update a custom object record * Document * Upload a document * Flow * Get all flows * Invoke a flow * Lead * Add lead to a campaign * Add note to a lead * Create a lead * Create a new lead, or update the current one if it already exists (upsert) * Delete a lead * Get a lead * Get all leads * Returns an overview of Lead's metadata * Update a lead * Opportunity * Add note to an opportunity * Create an opportunity * Create a new opportunity, or update the current one if it already exists (upsert) * Delete an opportunity * Get an opportunity * Get all opportunities * Returns an overview of opportunity's metadata * Update an opportunity * Search * Execute a SOQL query that returns all the results in a single response * Task * Create a task * Delete a task * Get a task * Get all tasks * Returns an overview of task's metadata * Update a task * User * Get a user * Get all users ## Templates and examples# ## What to do if your operation isn't supported# If this node doesn't support the operation you want to do, you can use the HTTP Request node to call the service's API. You can use the credential you created for this service in the HTTP Request node: 1. In the HTTP Request node, select **Authentication** > **Predefined Credential Type**. 2. Select the service you want to connect to. 3. Select your credential. Refer to Custom API operations for more information. ## Working with Salesforce custom fields# To add custom fields to your request: 1. Select **Additional Fields** > **Add Field**. 2. In the dropdown, select **Custom Fields**. You can then find and add your custom fields. --- ## Page: https://docs.n8n.io/integrations/builtin/app-nodes/n8n-nodes-base.salesmate/ Use the Salesmate node to automate work in Salesmate, and integrate Salesmate with other applications. n8n has built-in support for a wide range of Salesmate features, including creating, updating, deleting, and getting activities, companies, and deals. On this page, you'll find a list of operations the Salesmate node supports and links to more resources. ## Operations# * Activity * Create an activity * Delete an activity * Get an activity * Get all companies * Update an activity * Company * Create a company * Delete a company * Get a company * Get all companies * Update a company * Deal * Create a deal * Delete a deal * Get a deal * Get all deals * Update a deal ## Templates and examples# Browse Salesmate integration templates, or search all templates --- ## Page: https://docs.n8n.io/integrations/builtin/app-nodes/n8n-nodes-base.seatable/ Use the SeaTable node to automate work in SeaTable, and integrate SeaTable with other applications. n8n has built-in support for a wide range of SeaTable features, including creating, updating, deleting, updating, and getting rows. On this page, you'll find a list of operations the SeaTable node supports and links to more resources. Credentials Refer to SeaTable credentials for guidance on setting up authentication. ## Operations# * Row * Create * Delete * Get * Get All * Update ## Templates and examples# Browse SeaTable integration templates, or search all templates --- ## Page: https://docs.n8n.io/integrations/builtin/app-nodes/n8n-nodes-base.securityscorecard/ Use the SecurityScorecard node to automate work in SecurityScorecard, and integrate SecurityScorecard with other applications. n8n has built-in support for a wide range of SecurityScorecard features, including creating, updating, deleting, and getting portfolio, as well as getting a company's data. On this page, you'll find a list of operations the SecurityScorecard node supports and links to more resources. ## Operations# * Company * Get company factor scores and issue counts * Get company's historical factor scores * Get company's historical scores * Get company information and summary of their scorecard * Get company's score improvement plan * Industry * Get Factor Scores * Get Historical Factor Scores * Get Score * Invite * Create an invite for a company/user * Portfolio * Create a portfolio * Delete a portfolio * Get all portfolios * Update a portfolio * Portfolio Company * Add a company to portfolio * Get all companies in a portfolio * Remove a company from portfolio * Report * Download a generated report * Generate a report * Get list of recently generated report ## Templates and examples# Browse SecurityScorecard integration templates, or search all templates --- ## Page: https://docs.n8n.io/integrations/builtin/app-nodes/n8n-nodes-base.segment/ Use the Segment node to automate work in Segment, and integrate Segment with other applications. n8n has built-in support for a wide range of Segment features, including adding users to groups, creating identities, and tracking activities. On this page, you'll find a list of operations the Segment node supports and links to more resources. ## Operations# * Group * Add a user to a group * Identify * Create an identity * Track * Record the actions your users perform. Every action triggers an event, which can also have associated properties. * Record page views on your website, along with optional extra information about the page being viewed. ## Templates and examples# Browse Segment integration templates, or search all templates ## What to do if your operation isn't supported# If this node doesn't support the operation you want to do, you can use the HTTP Request node to call the service's API. You can use the credential you created for this service in the HTTP Request node: 1. In the HTTP Request node, select **Authentication** > **Predefined Credential Type**. 2. Select the service you want to connect to. 3. Select your credential. Refer to Custom API operations for more information. --- ## Page: https://docs.n8n.io/integrations/builtin/app-nodes/n8n-nodes-base.sendgrid/ Use the SendGrid node to automate work in SendGrid, and integrate SendGrid with other applications. n8n has built-in support for a wide range of SendGrid features, including creating, updating, deleting, and getting contacts, and lists, as well as sending emails. On this page, you'll find a list of operations the SendGrid node supports and links to more resources. This node can be used as an AI tool This node can be used to enhance the capabilities of an AI agent. When used in this way, many parameters can be set automatically, or with information directed by AI - find out more in the AI tool parameters documentation. ## Operations# * Contact * Create/update a contact * Delete a contact * Get a contact by ID * Get all contacts * List * Create a list * Delete a list * Get a list * Get all lists * Update a list * Mail * Send an email. ## Templates and examples# ## What to do if your operation isn't supported# If this node doesn't support the operation you want to do, you can use the HTTP Request node to call the service's API. You can use the credential you created for this service in the HTTP Request node: 1. In the HTTP Request node, select **Authentication** > **Predefined Credential Type**. 2. Select the service you want to connect to. 3. Select your credential. Refer to Custom API operations for more information. --- ## Page: https://docs.n8n.io/integrations/builtin/app-nodes/n8n-nodes-base.sendy/ Use the Sendy node to automate work in Sendy, and integrate Sendy with other applications. n8n has built-in support for a wide range of Sendy features, including creating campaigns, and adding, counting, deleting, and getting subscribers. On this page, you'll find a list of operations the Sendy node supports and links to more resources. ## Operations# * Campaign * Create a campaign * Subscriber * Add a subscriber to a list * Count subscribers * Delete a subscriber from a list * Unsubscribe user from a list * Get the status of subscriber ## Templates and examples# Browse Sendy integration templates, or search all templates --- ## Page: https://docs.n8n.io/integrations/builtin/app-nodes/n8n-nodes-base.sentryio/ Use the Sentry.io node to automate work in Sentry.io, and integrate Sentry.io with other applications. n8n has built-in support for a wide range of Sentry.io features, including creating, updating, deleting, and getting, issues, projects, and releases, as well as getting all events. On this page, you'll find a list of operations the Sentry.io node supports and links to more resources. ## Operations# * Event * Get event by ID * Get all events * Issue * Delete an issue * Get issue by ID * Get all issues * Update an issue * Project * Create a new project * Delete a project * Get project by ID * Get all projects * Update a project * Release * Create a release * Delete a release * Get release by version identifier * Get all releases * Update a release * Organization * Create an organization * Get organization by slug * Get all organizations * Update an organization * Team * Create a new team * Delete a team * Get team by slug * Get all teams * Update a team ## Templates and examples# Browse Sentry.io integration templates, or search all templates Refer to Sentry.io's documentation for more information about the service. ## What to do if your operation isn't supported# If this node doesn't support the operation you want to do, you can use the HTTP Request node to call the service's API. You can use the credential you created for this service in the HTTP Request node: 1. In the HTTP Request node, select **Authentication** > **Predefined Credential Type**. 2. Select the service you want to connect to. 3. Select your credential. Refer to Custom API operations for more information. --- ## Page: https://docs.n8n.io/integrations/builtin/app-nodes/n8n-nodes-base.servicenow/ Use the ServiceNow node to automate work in ServiceNow, and integrate ServiceNow with other applications. n8n has built-in support for a wide range of ServiceNow features, including getting business services, departments, configuration items, and dictionary as well as creating, updating, and deleting incidents, users, and table records. On this page, you'll find a list of operations the ServiceNow node supports and links to more resources. ## Operations# * Business Service * Get All * Configuration Items * Get All * Department * Get All * Dictionary * Get All * Incident * Create * Delete * Get * Get All * Update * Table Record * Create * Delete * Get * Get All * Update * User * Create * Delete * Get * Get All * Update * User Group * Get All * User Role * Get All ## Templates and examples# ## What to do if your operation isn't supported# If this node doesn't support the operation you want to do, you can use the HTTP Request node to call the service's API. You can use the credential you created for this service in the HTTP Request node: 1. In the HTTP Request node, select **Authentication** > **Predefined Credential Type**. 2. Select the service you want to connect to. 3. Select your credential. Refer to Custom API operations for more information. --- ## Page: https://docs.n8n.io/integrations/builtin/app-nodes/n8n-nodes-base.sms77/ Use the seven node to automate work in seven, and integrate seven with other applications. n8n has built-in support for a wide range of seven features, including sending SMS, and converting text to voice. On this page, you'll find a list of operations the seven node supports and links to more resources. Credentials Refer to seven credentials for guidance on setting up authentication. ## Operations# * SMS * Send SMS * Voice Call * Converts text to voice and calls a given number ## Templates and examples# Browse seven integration templates, or search all templates --- ## Page: https://docs.n8n.io/integrations/builtin/app-nodes/n8n-nodes-base.shopify/ Use the Shopify node to automate work in Shopify, and integrate Shopify with other applications. n8n has built-in support for a wide range of Shopify features, including creating, updating, deleting, and getting orders and products. On this page, you'll find a list of operations the Shopify node supports and links to more resources. ## Operations# * Order * Create an order * Delete an order * Get an order * Get all orders * Update an order * Product * Create a product * Delete a product * Get a product * Get all products * Update a product ## Templates and examples# ## What to do if your operation isn't supported# If this node doesn't support the operation you want to do, you can use the HTTP Request node to call the service's API. You can use the credential you created for this service in the HTTP Request node: 1. In the HTTP Request node, select **Authentication** > **Predefined Credential Type**. 2. Select the service you want to connect to. 3. Select your credential. Refer to Custom API operations for more information. --- ## Page: https://docs.n8n.io/integrations/builtin/app-nodes/n8n-nodes-base.signl4/ Use the SIGNL4 node to automate work in SIGNL4, and integrate SIGNL4 with other applications. n8n supports sending and resolving alerts with SIGNL4. On this page, you'll find a list of operations the SIGNL4 node supports and links to more resources. Credentials Refer to SIGNL4 credentials for guidance on setting up authentication. ## Operations# * Alert * Send an alert * Resolve an alert ## Templates and examples# **Monitor a file for changes and send an alert** by Ron View template details **Send weather alerts to your mobile phone with OpenWeatherMap and SIGNL4** by Ron View template details **Send TheHive Alerts Using SIGNL4** by Ron View template details Browse SIGNL4 integration templates, or search all templates --- ## Page: https://docs.n8n.io/integrations/builtin/app-nodes/n8n-nodes-base.slack/ Use the Slack node to automate work in Slack, and integrate Slack with other applications. n8n has built-in support for a wide range of Slack features, including creating, archiving, and closing channels, getting users and files, as well as deleting messages. On this page, you'll find a list of operations the Slack node supports and links to more resources. ## Operations# * **Channel** * **Archive** a channel. * **Close** a direct message or multi-person direct message. * **Create** a public or private channel-based conversation. * **Get** information about a channel. * **Get Many**: Get a list of channels in Slack. * **History**: Get a channel's history of messages and events. * **Invite** a user to a channel. * **Join** an existing channel. * **Kick**: Remove a user from a channel. * **Leave** a channel. * **Member**: List the members of a channel. * **Open** or resume a direct message or multi-person direct message. * **Rename** a channel. * **Replies**: Get a thread of messages posted to a channel. * **Sets purpose** of a channel. * **Sets topic** of a channel. * **Unarchive** a channel. * **File** * **Get** a file. * **Get Many**: Get and filter team files. * **Upload**: Create or upload an existing file. * **Message** * **Delete** a message * **Get permalink**: Get a message's permalink. * **Search** for messages * **Send** a message * **Send and Wait for Approval**: Send a message and wait for approval from the recipient before continuing. * **Update** a message * **Reaction** * **Add** a reaction to a message. * **Get** a message's reactions. * **Remove** a reaction from a message. * **Star** * **Add** a star to an item. * **Delete** a star from an item. * **Get Many**: Get a list of an authenticated user's stars. * **User** * **Get** information about a user. * **Get Many**: Get a list of users. * **Get User's Profile**. * **Get User's Status**. * **Update User's Profile**. * **User Group** * **Create** a user group. * **Disable** a user group. * **Enable** a user group. * **Get Many**: Get a list of user groups. * **Update** a user group. ## Templates and examples# Refer to Slack's documentation for more information about the service. ## Required scopes# Once you create a Slack app for your Slack credentials, you must add the appropriate scopes to your Slack app for this node to work. Start with the scopes listed in the Scopes | Slack credentials page. If those aren't enough, use the table below to look up the resource and operation you want to use, then follow the link to Slack's API documentation to find the correct scopes. | **Resource** | **Operation** | **Slack API method** | | --- | --- | --- | | Channel | Archive | conversations.archive | | Channel | Close | conversations.close | | Channel | Create | conversations.create | | Channel | Get | conversations.info | | Channel | Get Many | conversations.list | | Channel | History | conversations.history | | Channel | Invite | conversations.invite | | Channel | Join | conversations.join | | Channel | Kick | conversations.kick | | Channel | Leave | conversations.leave | | Channel | Member | conversations.members | | Channel | Open | conversations.open | | Channel | Rename | conversations.rename | | Channel | Replies | conversations.replies | | Channel | Set Purpose | conversations.setPurpose | | Channel | Set Topic | conversations.setTopic | | Channel | Unarchive | conversations.unarchive | | File | Get | files.info | | File | Get Many | files.list | | File | Upload | files.upload | | Message | Delete | chat.delete | | Message | Get Permalink | chat.getPermalink | | Message | Search | search.messages | | Message | Send | chat.postMessage | | Message | Send and Wait for Approval | chat.postMessage | | Message | Update | chat.update | | Reaction | Add | reactions.add | | Reaction | Get | reactions.get | | Reaction | Remove | reactions.remove | | Star | Add | stars.add | | Star | Delete | stars.remove | | Star | Get Many | stars.list | | User | Get | users.info | | User | Get Many | users.list | | User | Get User's Profile | users.profile.get | | User | Get User's Status | users.getPresence | | User | Update User's Profile | users.profile.set | | User Group | Create | usergroups.create | | User Group | Disable | usergroups.disable | | User Group | Enable | usergroups.enable | | User Group | Get Many | usergroups.list | | User Group | Update | usergroups.update | ## What to do if your operation isn't supported# If this node doesn't support the operation you want to do, you can use the HTTP Request node to call the service's API. You can use the credential you created for this service in the HTTP Request node: 1. In the HTTP Request node, select **Authentication** > **Predefined Credential Type**. 2. Select the service you want to connect to. 3. Select your credential. Refer to Custom API operations for more information. --- ## Page: https://docs.n8n.io/integrations/builtin/app-nodes/n8n-nodes-base.snowflake/ Use the Snowflake node to automate work in Snowflake, and integrate Snowflake with other applications. n8n has built-in support for a wide range of Snowflake features, including executing SQL queries, and inserting rows in a database. On this page, you'll find a list of operations the Snowflake node supports and links to more resources. Credentials Refer to Snowflake credentials for guidance on setting up authentication. ## Operations# * Execute an SQL query. * Insert rows in database. * Update rows in database. ## Templates and examples# **Load data into Snowflake** by n8n Team View template details **Create a table, and insert and update data in the table in Snowflake** by ghagrawal17 View template details **Import Productboard Notes, Companies and Features into Snowflake** by Romain Jouhannet View template details Browse Snowflake integration templates, or search all templates --- ## Page: https://docs.n8n.io/integrations/builtin/app-nodes/n8n-nodes-base.splunk/ Use the Splunk node to automate work in Splunk, and integrate Splunk with other applications. n8n has built-in support for a wide range of Splunk features, including getting fired alerts reports, as well as deleting and getting search configuration. On this page, you'll find a list of operations the Splunk node supports and links to more resources. ## Operations# * Fired Alert * Get a fired alerts report * Search Configuration * Delete a search configuration * Get a search configuration * Get many search configurations * Search Job * Create a search job * Delete a search job * Get a search job * Get many search jobs * Search Result * Get many search results * User * Create a user * Delete a user * Get a user * Get many users * Update a user ## Templates and examples# Browse Splunk integration templates, or search all templates --- ## Page: https://docs.n8n.io/integrations/builtin/app-nodes/n8n-nodes-base.spontit/ Use the Spontit node to automate work in Spontit, and integrate Spontit with other applications. n8n supports creating push notifications with Spontit. On this page, you'll find a list of operations the Spontit node supports and links to more resources. Credentials Refer to Spontit credentials for guidance on setting up authentication. ## Operations# * Push * Create a push notification ## Templates and examples# Browse Spontit integration templates, or search all templates --- ## Page: https://docs.n8n.io/integrations/builtin/app-nodes/n8n-nodes-base.spotify/ Use the Spotify node to automate work in Spotify, and integrate Spotify with other applications. n8n has built-in support for a wide range of Spotify features, including getting album and artist information. On this page, you'll find a list of operations the Spotify node supports and links to more resources. ## Operations# * Album * Get an album by URI or ID. * Get a list of new album releases. * Get an album's tracks by URI or ID. * Search albums by keyword. * Artist * Get an artist by URI or ID. * Get an artist's albums by URI or ID. * Get an artist's related artists by URI or ID. * Get an artist's top tracks by URI or ID. * Search artists by keyword. * Library * Get the user's liked tracks. * My Data * Get your followed artists. * Player * Add a song to your queue. * Get your currently playing track. * Skip to your next track. * Pause your music. * Skip to your previous song. * Get your recently played tracks. * Resume playback on the current active device. * Set volume on the current active device. * Start playing a playlist, artist, or album. * Playlist * Add tracks from a playlist by track and playlist URI or ID. * Create a new playlist. * Get a playlist by URI or ID. * Get a playlist's tracks by URI or ID. * Get a user's playlists. * Remove tracks from a playlist by track and playlist URI or ID. * Search playlists by keyword. * Track * Get a track by its URI or ID. * Get audio features for a track by URI or ID. * Search tracks by keyword ## Templates and examples# ## What to do if your operation isn't supported# If this node doesn't support the operation you want to do, you can use the HTTP Request node to call the service's API. You can use the credential you created for this service in the HTTP Request node: 1. In the HTTP Request node, select **Authentication** > **Predefined Credential Type**. 2. Select the service you want to connect to. 3. Select your credential. Refer to Custom API operations for more information. --- ## Page: https://docs.n8n.io/integrations/builtin/app-nodes/n8n-nodes-base.stackby/ Use the Stackby node to automate work in Stackby, and integrate Stackby with other applications. n8n has built-in support for a wide range of Stackby features, including appending, deleting, listing and reading. On this page, you'll find a list of operations the Stackby node supports and links to more resources. Credentials Refer to Stackby credentials for guidance on setting up authentication. ## Operations# * Append * Delete * List * Read ## Templates and examples# Browse Stackby integration templates, or search all templates --- ## Page: https://docs.n8n.io/integrations/builtin/app-nodes/n8n-nodes-base.storyblok/ Use the Storyblok node to automate work in Storyblok, and integrate Storyblok with other applications. n8n has built-in support for a wide range of Storyblok features, including getting, deleting, and publishing stories. On this page, you'll find a list of operations the Storyblok node supports and links to more resources. ## Operations# ### Content API# * **Story** * Get a story * Get all stories ### Management API# * **Story** * Delete a story * Get a story * Get all stories * Publish a story * Unpublish a story ## Templates and examples# Browse Storyblok integration templates, or search all templates --- ## Page: https://docs.n8n.io/integrations/builtin/app-nodes/n8n-nodes-base.strapi/ Use the Strapi node to automate work in Strapi, and integrate Strapi with other applications. n8n has built-in support for a wide range of Strapi features, including creating and deleting entries. On this page, you'll find a list of operations the Strapi node supports and links to more resources. ## Operations# * Entry * Create * Delete * Get * Get Many * Update ## Templates and examples# Refer to Strapi's documentation for more information about the service. ## What to do if your operation isn't supported# If this node doesn't support the operation you want to do, you can use the HTTP Request node to call the service's API. You can use the credential you created for this service in the HTTP Request node: 1. In the HTTP Request node, select **Authentication** > **Predefined Credential Type**. 2. Select the service you want to connect to. 3. Select your credential. Refer to Custom API operations for more information. --- ## Page: https://docs.n8n.io/integrations/builtin/app-nodes/n8n-nodes-base.strava/ Use the Strava node to automate work in Strava, and integrate Strava with other applications. n8n has built-in support for a wide range of Strava features, including creating new activities, and getting activity information. On this page, you'll find a list of operations the Strava node supports and links to more resources. ## Operations# * Activity * Create a new activity * Get an activity * Get all activities * Get all activity comments * Get all activity kudos * Get all activity laps * Get all activity zones * Update an activity ## Templates and examples# ## What to do if your operation isn't supported# If this node doesn't support the operation you want to do, you can use the HTTP Request node to call the service's API. You can use the credential you created for this service in the HTTP Request node: 1. In the HTTP Request node, select **Authentication** > **Predefined Credential Type**. 2. Select the service you want to connect to. 3. Select your credential. Refer to Custom API operations for more information. --- ## Page: https://docs.n8n.io/integrations/builtin/app-nodes/n8n-nodes-base.stripe/ Use the Stripe node to automate work in Stripe, and integrate Stripe with other applications. n8n has built-in support for a wide range of Stripe features, including getting balance, creating charge, and deleting customers. On this page, you'll find a list of operations the Stripe node supports and links to more resources. ## Operations# * Balance * Get a balance * Charge * Create a charge * Get a charge * Get all charges * Update a charge * Coupon * Create a coupon * Get all coupons * Customer * Create a customer * Delete a customer * Get a customer * Get all customers * Update a customer * Customer Card * Add a customer card * Get a customer card * Remove a customer card * Source * Create a source * Delete a source * Get a source * Token * Create a token ## Templates and examples# ## What to do if your operation isn't supported# If this node doesn't support the operation you want to do, you can use the HTTP Request node to call the service's API. You can use the credential you created for this service in the HTTP Request node: 1. In the HTTP Request node, select **Authentication** > **Predefined Credential Type**. 2. Select the service you want to connect to. 3. Select your credential. Refer to Custom API operations for more information. --- ## Page: https://docs.n8n.io/integrations/builtin/app-nodes/n8n-nodes-base.supabase/ Use the Supabase node to automate work in Supabase, and integrate Supabase with other applications. n8n has built-in support for a wide range of Supabase features, including creating, deleting, and getting rows. On this page, you'll find a list of operations the Supabase node supports and links to more resources. This node can be used as an AI tool This node can be used to enhance the capabilities of an AI agent. When used in this way, many parameters can be set automatically, or with information directed by AI - find out more in the AI tool parameters documentation. ## Operations# * Row * Create a new row * Delete a row * Get a row * Get all rows * Update a row ## Templates and examples# ## What to do if your operation isn't supported# If this node doesn't support the operation you want to do, you can use the HTTP Request node to call the service's API. You can use the credential you created for this service in the HTTP Request node: 1. In the HTTP Request node, select **Authentication** > **Predefined Credential Type**. 2. Select the service you want to connect to. 3. Select your credential. Refer to Custom API operations for more information. ## Common issues# For common errors or issues and suggested resolution steps, refer to Common issues. --- ## Page: https://docs.n8n.io/integrations/builtin/app-nodes/n8n-nodes-base.supabase/common-issues/ Here are some common errors and issues with the Supabase node and steps to resolve or troubleshoot them. To filter rows by Supabase metadata, set the **Select Type** to **String**. From there, you can construct a query in the **Filters (String)** parameter to filter the metadata using the Supabase metadata query language, inspired by the MongoDB selectors format. Access the metadata properties using the Postgres `->>` arrow JSON operator like this (curly brackets denote components to fill in): <table><tbody><tr><td><div><pre><span></span><span>1</span></pre></div></td><td><div><pre><span></span><code>metadata->>{your-property}={comparison-operator}.{comparison-value} </code></pre></div></td></tr></tbody></table> For example to access an `age` property in the metadata and return results greater than or equal to 21, you could enter the following in the **Filters (String)** field: <table><tbody><tr><td><div><pre><span></span><span>1</span></pre></div></td><td><div><pre><span></span><code>metadata->>age=gte.21 </code></pre></div></td></tr></tbody></table> You can combine these operators to construct more complex queries. ## Can't connect to a local Supabase database when using Docker# When you run Supabase in Docker, you need to configure the network so that n8n can connect to Supabase. The solution depends on how you're hosting the two components. ### If only Supabase is in Docker# If only Supabase is running in Docker, the Docker Compose file used by the self-hosting guide already runs Supabase bound to the correct interfaces. When configuring Supabase credentials, the `localhost` address should work without a problem (set the **Host** to `localhost`). ### If Supabase and n8n are running in separate Docker containers# If both n8n and Supabase are running in Docker in separate containers, you can use Docker networking to connect them. Configure Supabase to listen on all interfaces by binding to `0.0.0.0` inside of the container (the official Docker compose configuration already does this this). Add both the Supabase and n8n components to the same user-defined bridge network if you aren't already managing them together in the same Docker Compose file. When configuring Supabase credentials, use the Supabase API gateway container's name (`supabase-kong` by default) as the host address instead of `localhost`. For example, if you use the default configuration, you would set the **Host** to `http://supabase-kong:8000`. ## Records are accessible through Postgres but not Supabase# If queries for records return empty using the Supabase node, but are available through the Postgres node or with a Postgres client, there may be a conflict with Supabase's Row Level Security (RLS) policy. Supabase always enables RLS when you create a table in a public schema with the Table Editor. When RLS is active, the API doesn't return any data with the public `anon` key until you create policies. This is a security measure to ensure that you only expose data you intend to. To access data from a table with RLS enabled as the `anon` role, create a policy to enable the access patterns you intend to use. --- ## Page: https://docs.n8n.io/integrations/builtin/app-nodes/n8n-nodes-base.syncromsp/ Use the SyncroMSP node to automate work in SyncroMSP, and integrate SyncroMSP with other applications. n8n has built-in support for a wide range of SyncroMSP features, including creating and deleting new customers, tickets, and contacts. On this page, you'll find a list of operations the SyncroMSP node supports and links to more resources. ## Operations# * Contact * Create new contact * Delete contact * Retrieve contact * Retrieve all contacts * Update contact * Customer * Create new customer * Delete customer * Retrieve customer * Retrieve all customers * Update customer * RMM * Create new RMM Alert * Delete RMM Alert * Retrieve RMM Alert * Retrieve all RMM Alerts * Mute RMM Alert * Ticket * Create new ticket * Delete ticket * Retrieve ticket * Retrieve all tickets * Update ticket ## Templates and examples# Browse SyncroMSP integration templates, or search all templates --- ## Page: https://docs.n8n.io/integrations/builtin/app-nodes/n8n-nodes-base.taiga/ Use the Taiga node to automate work in Taiga, and integrate Taiga with other applications. n8n has built-in support for a wide range of Taiga features, including creating, updating, deleting, and getting issues. On this page, you'll find a list of operations the Taiga node supports and links to more resources. Credentials Refer to Taiga credentials for guidance on setting up authentication. ## Operations# * **Issue** * Create an issue * Delete an issue * Get an issue * Get all issues * Update an issue ## Templates and examples# Browse Taiga integration templates, or search all templates --- ## Page: https://docs.n8n.io/integrations/builtin/app-nodes/n8n-nodes-base.tapfiliate/ Use the Tapfiliate node to automate work in Tapfiliate, and integrate Tapfiliate with other applications. n8n has built-in support for a wide range of Tapfiliate features, including creating and deleting affiliates, and adding affiliate metadata. On this page, you'll find a list of operations the Tapfiliate node supports and links to more resources. ## Operations# * Affiliate * Create an affiliate * Delete an affiliate * Get an affiliate by ID * Get all affiliates * Affiliate Metadata * Add metadata to affiliate * Remove metadata from affiliate * Update affiliate's metadata * Program Affiliate * Add affiliate to program * Approve an affiliate for a program * Disapprove an affiliate * Get an affiliate in a program * Get all affiliates in program ## Templates and examples# Browse Tapfiliate integration templates, or search all templates --- ## Page: https://docs.n8n.io/integrations/builtin/app-nodes/n8n-nodes-base.telegram/ Use the Telegram node to automate work in Telegram and integrate Telegram with other applications. n8n has built-in support for a wide range of Telegram features, including getting files as well as deleting and editing messages. On this page, you'll find a list of operations the Telegram node supports and links to more resources. ## Operations# * **Chat** operations * **Get** up-to-date information about a chat. * **Get Administrators**: Get a list of all administrators in a chat. * **Get Member**: Get the details of a chat member. * **Leave** a chat. * **Set Description** of a chat. * **Set Title** of a chat. * **Callback** operations * **Answer Query**: Send answers to callback queries sent from inline keyboards. * **Answer Inline Query**: Send answers to callback queries sent from inline queries. * **File** operations * **Get File** from Telegram. * **Message** operations * **Delete Chat Message**. * **Edit Message Text**: Edit the text of an existing message. * **Pin Chat Message** for the chat. * **Send Animation** to the chat. * For use with GIFs or H.264/MPEG-4 AVC videos without sound up to 50 MB in size. * **Send Audio** file to the chat and display it in the music player. * **Send Chat Action**: Tell the user that something is happening on the bot's side. The status is set for 5 seconds or less. * **Send Document** to the chat. * **Send Location**: Send a geolocation to the chat. * **Send Media Group**: Send a group of photos and/or videos. * **Send Message** to the chat. * **Send Photo** to the chat. * **Send Sticker** to the chat. * For use with static .WEBP, animated .TGS, or video .WEBM stickers. * **Send Video** to the chat. * **Unpin Chat Message** from the chat. ## Templates and examples# Browse Telegram node documentation integration templates, or search all templates Refer to Telegram's API documentation for more information about the service. n8n provides a trigger node for Telegram. Refer to the trigger node docs here for more information. ## Common issues# For common errors or issues and suggested resolution steps, refer to Common Issues. --- ## Page: https://docs.n8n.io/integrations/builtin/app-nodes/n8n-nodes-base.telegram/chat-operations/ Use these operations to get information about chats, members, administrators, leave chat, and set chat titles and descriptions. Refer to Telegram for more information on the Telegram node itself. This node can be used as an AI tool This node can be used to enhance the capabilities of an AI agent. When used in this way, many parameters can be set automatically, or with information directed by AI - find out more in the AI tool parameters documentation. ## Get Chat# Use this operation to get up to date information about a chat using the Bot API getChat method. Enter these parameters: * **Credential to connect with**: Create or select an existing Telegram credential. * **Resource**: Select **Chat**. * **Operation**: Select **Get**. * **Chat ID**: Enter the Chat ID or username of the target channel in the format `@channelusername`. * To feed a Chat ID directly into this node, use the Telegram Trigger node. Refer to Common Issues | Get the Chat ID for more information. Refer to the Telegram Bot API getChat documentation for more information. ## Get Administrators# Use this operation to get a list of all administrators in a chat using the Bot API getChatAdministrators method. Enter these parameters: * **Credential to connect with**: Create or select an existing Telegram credential. * **Resource**: Select **Chat**. * **Operation**: Select **Get Administrators**. * **Chat ID**: Enter the Chat ID or username of the target channel in the format `@channelusername`. * To feed a Chat ID directly into this node, use the Telegram Trigger node. Refer to Common Issues | Get the Chat ID for more information. Refer to the Telegram Bot API getChatAdministrators documentation for more information. ## Get Chat Member# Use this operation to get the details of a chat member using the Bot API getChatMember method. Enter these parameters: * **Credential to connect with**: Create or select an existing Telegram credential. * **Resource**: Select **Chat**. * **Operation**: Select **Get Member**. * **Chat ID**: Enter the Chat ID or username of the target channel in the format `@channelusername`. * To feed a Chat ID directly into this node, use the Telegram Trigger node. Refer to Common Issues | Get the Chat ID for more information. * **User ID**: Enter the unique identifier of the user whose information you want to get. Refer to the Telegram Bot API getChatMember documentation for more information. ## Leave Chat# Use this operation to leave a chat using the Bot API leaveChat method. Enter these parameters: * **Credential to connect with**: Create or select an existing Telegram credential. * **Resource**: Select **Chat**. * **Operation**: Select **Leave**. * **Chat ID**: Enter the Chat ID or username of the channel you wish to leave in the format `@channelusername`. * To feed a Chat ID directly into this node, use the Telegram Trigger node. Refer to Common Issues | Get the Chat ID for more information. Refer to the Telegram Bot API leaveChat documentation for more information. ## Set Description# Use this operation to set the description of a chat using the Bot API setChatDescription method. Enter these parameters: * **Credential to connect with**: Create or select an existing Telegram credential. * **Resource**: Select **Chat**. * **Operation**: Select **Set Description**. * **Chat ID**: Enter the Chat ID or username of the channel you wish to leave in the format `@channelusername`. * To feed a Chat ID directly into this node, use the Telegram Trigger node. Refer to Common Issues | Get the Chat ID for more information. * **Description**: Enter the new description you'd like to set the chat to use, maximum of 255 characters. Refer to the Telegram Bot API setChatDescription documentation for more information. ## Set Title# Use this operation to set the title of a chat using the Bot API setChatTitle method. Enter these parameters: * **Credential to connect with**: Create or select an existing Telegram credential. * **Resource**: Select **Chat**. * **Operation**: Select **Set Title**. * **Chat ID**: Enter the Chat ID or username of the channel you wish to leave in the format `@channelusername`. * To feed a Chat ID directly into this node, use the Telegram Trigger node. Refer to Common Issues | Get the Chat ID for more information. * **Title**: Enter the new title you'd like to set the chat to use, maximum of 255 characters. Refer to the Telegram Bot API setChatTitle documentation for more information. --- ## Page: https://docs.n8n.io/integrations/builtin/app-nodes/n8n-nodes-base.telegram/callback-operations/ Use these operations to respond to callback queries sent from the in-line keyboard or in-line queries. Refer to Telegram for more information on the Telegram node itself. This node can be used as an AI tool This node can be used to enhance the capabilities of an AI agent. When used in this way, many parameters can be set automatically, or with information directed by AI - find out more in the AI tool parameters documentation. ## Answer Query# Use this operation to send answers to callback queries sent from inline keyboards using the Bot API answerCallbackQuery method. Enter these parameters: * **Credential to connect with**: Create or select an existing Telegram credential. * **Resource**: Select **Callback**. * **Operation**: Select **Answer Query**. * **Query ID**: Enter the unique identifier of the query you want to answer. * To feed a Query ID directly into this node, use the Telegram Trigger node triggered on the **Callback Query**. * **Results**: Enter a JSON-serialized array of results you want to use as answers to the query. Refer to the Telegram InlineQueryResults documentation for more information on formatting your array. Refer to the Telegram Bot API answerCallbackQuery documentation for more information. ### Answer Query additional fields# Use the **Additional Fields** to further refine the behavior of the node. Select **Add Field** to add any of the following: * **Cache Time**: Enter the maximum amount of time in seconds that the client may cache the result of the callback query. Telegram defaults to `0` seconds for this method. * **Show Alert**: Telegram can display the answer as a notification at the top of the chat screen or as an alert. Choose whether you want to keep the default notification display (turned off) or display the answer as an alert (turned on). * **Text**: If you want the answer to show text, enter up to 200 characters of text here. * **URL**: Enter a URL that will be opened by the user's client. Refer to the **url** parameter instructions at the Telegram Bot API answerCallbackQuery documentation for more information. ## Answer Inline Query# Use this operation to send answers to callback queries sent from inline queries using the Bot API answerInlineQuery method. Enter these parameters: * **Credential to connect with**: Create or select an existing Telegram credential. * **Resource**: Select **Callback**. * **Operation**: Select **Answer Inline Query**. * **Query ID**: Enter the unique identifier of the query you want to answer. * To feed a Query ID directly into this node, use the Telegram Trigger node triggered on the **Inline Query**. * **Results**: Enter a JSON-serialized array of results you want to use as answers to the query. Refer to the Telegram InlineQueryResults documentation for more information on formatting your array. Telegram allows a maximum of 50 results per query. Refer to the Telegram Bot API answerInlineQuery documentation for more information. ### Answer Inline Query additional fields# Use the **Additional Fields** to further refine the behavior of the node. Select **Add Field** to add any of the following: * **Cache Time**: The maximum amount of time in seconds that the client may cache the result of the callback query. Telegram defaults to `300` seconds for this method. * **Show Alert**: Telegram can display the answer as a notification at the top of the chat screen or as an alert. Choose whether you want to keep the default notification display (turned off) or display the answer as an alert (turned on). * **Text**: If you want the answer to show text, enter up to 200 characters of text here. * **URL**: Enter a URL that the user's client will open. --- ## Page: https://docs.n8n.io/integrations/builtin/app-nodes/n8n-nodes-base.telegram/file-operations/ Use this operation to get a file from Telegram. Refer to Telegram for more information on the Telegram node itself. This node can be used as an AI tool This node can be used to enhance the capabilities of an AI agent. When used in this way, many parameters can be set automatically, or with information directed by AI - find out more in the AI tool parameters documentation. ## Get File# Use this operation to get a file from Telegram using the Bot API getFile method. Enter these parameters: * **Credential to connect with**: Create or select an existing Telegram credential. * **Resource**: Select **File**. * **Operation**: Select **Get**. * **File ID**: Enter the ID of the file you want to get. * **Download**: Choose whether you want the node to download the file (turned on) or not (turned off). Refer to the Telegram Bot API getFile documentation for more information. --- ## Page: https://docs.n8n.io/integrations/builtin/app-nodes/n8n-nodes-base.telegram/message-operations/ Use these operations to send, edit, and delete messages in a chat; send files to a chat; and pin/unpin message from a chat. Refer to Telegram for more information on the Telegram node itself. This node can be used as an AI tool This node can be used to enhance the capabilities of an AI agent. When used in this way, many parameters can be set automatically, or with information directed by AI - find out more in the AI tool parameters documentation. s ## Delete Chat Message# Use this operation to delete a message from chat using the Bot API deleteMessage method. Enter these parameters: * **Credential to connect with**: Create or select an existing Telegram credential. * **Resource**: Select **Message**. * **Operation**: Select **Delete Chat Message**. * **Chat ID**: Enter the Chat ID or username of the channel you wish to delete in the format `@channelusername`. * To feed a Chat ID directly into this node, use the Telegram Trigger node. Refer to Common Issues | Get the Chat ID for more information. * **Message ID**: Enter the unique identifier of the message you want to delete. Refer to the Telegram Bot API deleteMessage documentation for more information. ## Edit Message Text# Use this operation to edit the text of an existing message using the Bot API editMessageText method. Enter these parameters: * **Credential to connect with**: Create or select an existing Telegram credential. * **Resource**: Select **Message**. * **Operation**: Select **Edit Message Text**. * **Chat ID**: Enter the Chat ID or username of the channel you wish to leave in the format `@channelusername`. * To feed a Chat ID directly into this node, use the Telegram Trigger node. Refer to Common Issues | Get the Chat ID for more information. * **Message ID**: Enter the unique identifier of the message you want to edit. * **Reply Markup**: Select whether to use the **Inline Keyboard** to display the InlineKeyboardMarkup **None** not to. This sets the `reply_markup` parameter. Refer to the InlineKeyboardMarkup documentation for more information. * **Text**: Enter the text you want to edit the message to. Refer to the Telegram Bot API editMessageText documentation for more information. ### Edit Message Text additional fields# Use the **Additional Fields** to further refine the behavior of the node. Select **Add Field** to add any of the following: * **Disable WebPage Preview**: Select whether you want to enable link previews for links in this message (turned off) or disable link previews for links in this message (turned on). This sets the `link_preview_options` parameter for `is_disabled`. Refer to the LinkPreviewOptions documentation for more information. * **Parse Mode**: Choose whether the message should be parsed using **HTML** (default), **Markdown (Legacy)**, or **MarkdownV2**. This sets the `parse_mode` parameter. ## Pin Chat Message# Use this operation to pin a message for the chat using the Bot API pinChatMessage method. Enter these parameters: * **Credential to connect with**: Create or select an existing Telegram credential. * **Resource**: Select **Message**. * **Operation**: Select **Pin Chat Message**. * **Chat ID**: Enter the Chat ID or username of the channel you wish to pin the message to in the format `@channelusername`. * To feed a Chat ID directly into this node, use the Telegram Trigger node. Refer to Common Issues | Get the Chat ID for more information. * **Message ID**: Enter the unique identifier of the message you want to pin. Refer to the Telegram Bot API pinChatMessage documentation for more information. ### Pin Chat Message additional fields# Use the **Additional Fields** to further refine the behavior of the node. Select **Add Field** to add any of the following: * **Disable Notifications**: By default, Telegram will notify all chat members that the message has been pinned. If you don't want these notifications to go out, turn this control on. Sets the `disable_notification` parameter to `true`. ## Send Animation# Use this operation to send GIFs or H.264/MPEG-4 AVC videos without sound up to 50 MB in size to the chat using the Bot API sendAnimation method. Enter these parameters: * **Credential to connect with**: Create or select an existing Telegram credential. * **Resource**: Select **Message**. * **Operation**: Select **Send Animation**. * **Chat ID**: Enter the Chat ID or username of the channel you wish to send the animation to in the format `@channelusername`. * To feed a Chat ID directly into this node, use the Telegram Trigger node. Refer to Common Issues | Get the Chat ID for more information. * **Binary File**: To send a binary file from the node itself, turn this option on. If you turn this parameter on, you must enter the **Input Binary Field** containing the file you want to send. * **Animation**: If you aren't using the **Binary File**, enter the animation to send here. Pass a `file_id` to send a file that exists on the Telegram servers (recommended) or an HTTP URL for Telegram to get a file from the internet. * **Reply Markup**: Use this parameter to set more interface options. Refer to Reply Markup parameters for more information on these options and how to use them. Refer to the Telegram Bot API sendAnimation documentation for more information. ### Send Animation additional fields# Use the **Additional Fields** to further refine the behavior of the node using optional fields in Telegram's sendAnimation method. Select **Add Field** to add any of the following: * **Caption**: Enter a caption text for the animation, max of 1024 characters. * **Disable Notification**: Choose whether to send the notification silently (turned on) or with a standard notification (turned off). * **Duration**: Enter the animation's duration in seconds. * **Height**: Enter the height of the animation. * **Parse Mode**: Enter the parser to use for any related text. Options include **HTML** (default), **Markdown (Legacy)**, **MarkdownV2**. Refer to Telegram's Formatting options for more information on these options. * **Reply To Message ID**: If the message is a reply, enter the ID of the message it's replying to. * **Message Thread ID**: Enter a unique identifier for the target message thread (topic) of the forum; for forum supergroups only. * **Thumbnail**: Add the thumbnail of the file sent. Ignore this field if thumbnail generation for the file is supported server-side. The thumbnail should meet these specs: * JPEG format * Less than 200 KB in size * Width and height less than 320px. * **Width**: Enter the width of the video clip. ### Send Audio# Use this operation to send an audio file to the chat and display it in the music player using the Bot API sendAudio method. Enter these parameters: * **Credential to connect with**: Create or select an existing Telegram credential. * **Resource**: Select **Message**. * **Operation**: Select **Send Audio**. * **Chat ID**: Enter the Chat ID or username of the channel you wish to send the audio to in the format `@channelusername`. * To feed a Chat ID directly into this node, use the Telegram Trigger node. Refer to Common Issues | Get the Chat ID for more information. * **Binary File**: To send a binary file from the node itself, turn this option on. If you turn this parameter on, you must enter the **Input Binary Field** containing the file you want to send. * **Audio**: If you aren't using the **Binary File**, enter the audio to send here. Pass a `file_id` to send a file that exists on the Telegram servers (recommended) or an HTTP URL for Telegram to get a file from the internet. * **Reply Markup**: Use this parameter to set more interface options. Refer to Reply Markup parameters for more information on these options and how to use them. Refer to the Telegram Bot API sendAudio documentation for more information. ### Send Audio additional fields# Use the **Additional Fields** to further refine the behavior of the node using optional fields in Telegram's sendAudio method. Select **Add Field** to add any of the following: * **Caption**: Enter a caption text for the audio, max of 1024 characters. * **Disable Notification**: Choose whether to send the notification silently (turned on) or with a standard notification (turned off). * **Duration**: Enter the audio's duration in seconds. * **Parse Mode**: Enter the parser to use for any related text. Options include **HTML** (default), **Markdown (Legacy)**, **MarkdownV2**. Refer to Telegram's Formatting options for more information on these options. * **Performer**: Enter the name of the performer. * **Reply To Message ID**: If the message is a reply, enter the ID of the message it's replying to. * **Message Thread ID**: Enter a unique identifier for the target message thread (topic) of the forum; for forum supergroups only. * **Title**: Enter the audio track's name. * **Thumbnail**: Add the thumbnail of the file sent. Ignore this field if thumbnail generation for the file is supported server-side. The thumbnail should meet these specs: * JPEG format * Less than 200 KB in size * Width and height less than 320px. ## Send Chat Action# Use this operation when you need to tell the user that something is happening on the bot's side. The status is set for 5 seconds or less using the Bot API sendChatAction method. Enter these parameters: * **Credential to connect with**: Create or select an existing Telegram credential. * **Resource**: Select **Message**. * **Operation**: Select **Send Chat Action**. * **Chat ID**: Enter the Chat ID or username of the channel you wish to send the chat action to in the format `@channelusername`. * To feed a Chat ID directly into this node, use the Telegram Trigger node. Refer to Common Issues | Get the Chat ID for more information. * **Action**: Select the action you'd like to broadcast the bot as taking. The options here include: **Find Location**, **Typing**, **Recording** audio or video, and **Uploading** file types. Refer to Telegram's Bot API sendChatAction documentation for more information. ## Send Document# Use this operation to send a document to the chat using the Bot API sendDocument method. Enter these parameters: * **Credential to connect with**: Create or select an existing Telegram credential. * **Resource**: Select **Message**. * **Operation**: Select **Send Document**. * **Chat ID**: Enter the Chat ID or username of the channel you wish to send the document to in the format `@channelusername`. * To feed a Chat ID directly into this node, use the Telegram Trigger node. Refer to Common Issues | Get the Chat ID for more information. * **Binary File**: To send a binary file from the node itself, turn this option on. If you turn this parameter on, you must enter the **Input Binary Field** containing the file you want to send. * **Document**: If you aren't using the **Binary File**, enter the document to send here. Pass a `file_id` to send a file that exists on the Telegram servers (recommended) or an HTTP URL for Telegram to get a file from the internet. * **Reply Markup**: Use this parameter to set more interface options. Refer to Reply Markup parameters for more information on these options and how to use them. Refer to Telegram's Bot API sendDocument documentation for more information. ### Send Document additional fields# Use the **Additional Fields** to further refine the behavior of the node using optional fields in Telegram's sendDocument method. Select **Add Field** to add any of the following: * **Caption**: Enter a caption text for the file, max of 1024 characters. * **Disable Notification**: Choose whether to send the notification silently (turned on) or with a standard notification (turned off). * **Parse Mode**: Enter the parser to use for any related text. Options include **HTML** (default), **Markdown (Legacy)**, **MarkdownV2**. Refer to Formatting options for more information on these options. * **Reply To Message ID**: If the message is a reply, enter the ID of the message it's replying to. * **Message Thread ID**: Enter a unique identifier for the target message thread (topic) of the forum; for forum supergroups only. * **Thumbnail**: Add the thumbnail of the file sent. Ignore this field if thumbnail generation for the file is supported server-side. The thumbnail should meet these specs: * JPEG format * Less than 200 KB in size * Width and height less than 320px. ## Send Location# Use this operation to send a geolocation to the chat using the Bot API sendLocation method. Enter these parameters: * **Credential to connect with**: Create or select an existing Telegram credential. * **Resource**: Select **Message**. * **Operation**: Select **Send Location**. * **Chat ID**: Enter the Chat ID or username of the channel you wish to send the location to in the format `@channelusername`. * To feed a Chat ID directly into this node, use the Telegram Trigger node. Refer to Common Issues | Get the Chat ID for more information. * **Latitude**: Enter the latitude of the location. * **Longitude**: Enter the longitude of the location. * **Reply Markup**: Use this parameter to set more interface options. Refer to Reply Markup parameters for more information on these options and how to use them. Refer to Telegram's Bot API sendLocation documentation for more information. ### Send Location additional fields# Use the **Additional Fields** to further refine the behavior of the node using optional fields in Telegram's sendLocation method. Select **Add Field** to add any of the following: * **Disable Notification**: Choose whether to send the notification silently (turned on) or with a standard notification (turned off). * **Reply To Message ID**: If the message is a reply, enter the ID of the message it's replying to. * **Message Thread ID**: Enter a unique identifier for the target message thread (topic) of the forum; for forum supergroups only. Use this operation to send a group of photos and/or videos using the Bot API sendMediaGroup method. Enter these parameters: * **Credential to connect with**: Create or select an existing Telegram credential. * **Resource**: Select **Message**. * **Operation**: Select **Send Media Group**. * **Chat ID**: Enter the Chat ID or username of the channel you wish to send the media group to in the format `@channelusername`. * To feed a Chat ID directly into this node, use the Telegram Trigger node. Refer to Common Issues | Get the Chat ID for more information. * **Media**: Use **Add Media** to add different media types to your media group. For each medium, select: * **Type**: The type of media this is. Choose from **Photo** and **Video**. * **Media File**: Enter the media file to send. Pass a `file_id` to send a file that exists on the Telegram servers (recommended) or an HTTP URL for Telegram to get a file from the internet. * **Additional Fields**: For each media file, you can choose to add these fields: * **Caption**: Enter a caption text for the file, max of 1024 characters. * **Parse Mode**: Enter the parser to use for any related text. Options include **HTML** (default), **Markdown (Legacy)**, **MarkdownV2**. Refer to Formatting options for more information on these options. Refer to Telegram's Bot API sendMediaGroup documentation for more information. ### Send Media Group additional fields# Use the **Additional Fields** to further refine the behavior of the node using optional fields in Telegram's sendMediaGroup method. Select **Add Field** to add any of the following: * **Disable Notification**: Choose whether to send the notification silently (turned on) or with a standard notification (turned off). * **Reply To Message ID**: If the message is a reply, enter the ID of the message it's replying to. * **Message Thread ID**: Enter a unique identifier for the target message thread (topic) of the forum; for forum supergroups only. ## Send Message# Use this operation to send a message to the chat using the Bot API sendMessage method. Enter these parameters: * **Credential to connect with**: Create or select an existing Telegram credential. * **Resource**: Select **Message**. * **Operation**: Select **Send Message**. * **Chat ID**: Enter the Chat ID or username of the channel you wish to send the message to in the format `@channelusername`. * To feed a Chat ID directly into this node, use the Telegram Trigger node. Refer to Common Issues | Get the Chat ID for more information. * **Text**: Enter the text to send, max 4096 characters after entities parsing. Refer to Telegram's Bot API sendMessage documentation for more information. Send Message limits Telegram limits the number of messages you can send to 30 per second. If you expect to hit this limit, refer to Send more than 30 messages per second for a suggested workaround. ### Send Message additional fields# Use the **Additional Fields** to further refine the behavior of the node using optional fields in Telegram's sendMessage method. Select **Add Field** to add any of the following: * **Append n8n Attribution**: Choose whether to include the phrase `This message was sent automatically with n8n` to the end of the message (turned on, default) or not (turned off). * **Disable Notification**: Choose whether to send the notification silently (turned on) or with a standard notification (turned off). * **Disable WebPage Preview**: Select whether you want to enable link previews for links in this message (turned off) or disable link previews for links in this message (turned on). This sets the `link_preview_options` parameter for `is_disabled`. Refer to the LinkPreviewOptions documentation for more information. * **Parse Mode**: Enter the parser to use for any related text. Options include **HTML** (default), **Markdown (Legacy)**, **MarkdownV2**. Refer to Telegram's Formatting options for more information on these options. * **Reply To Message ID**: If the message is a reply, enter the ID of the message it's replying to. * **Message Thread ID**: Enter a unique identifier for the target message thread (topic) of the forum; for forum supergroups only. ## Send Photo# Use this operation to send a photo to the chat using the Bot API sendPhoto method. Enter these parameters: * **Credential to connect with**: Create or select an existing Telegram credential. * **Resource**: Select **Message**. * **Operation**: Select **Send Photo**. * **Chat ID**: Enter the Chat ID or username of the channel you wish to send the photo to in the format `@channelusername`. * To feed a Chat ID directly into this node, use the Telegram Trigger node. Refer to Common Issues | Get the Chat ID for more information. * **Binary File**: To send a binary file from the node itself, turn this option on. If you turn this parameter on, you must enter the **Input Binary Field** containing the file you want to send. * **Photo**: If you aren't using the **Binary File**, enter the photo to send here. Pass a `file_id` to send a file that exists on the Telegram servers (recommended) or an HTTP URL for Telegram to get a file from the internet. * **Reply Markup**: Use this parameter to set more interface options. Refer to Reply Markup parameters for more information on these options and how to use them. Refer to Telegram's Bot API sendPhoto documentation for more information. ### Send Photo additional fields# Use the **Additional Fields** to further refine the behavior of the node using optional fields in Telegram's sendPhoto method. Select **Add Field** to add any of the following: * **Caption**: Enter a caption text for the file, max of 1024 characters. * **Disable Notification**: Choose whether to send the notification silently (turned on) or with a standard notification (turned off). * **Parse Mode**: Enter the parser to use for any related text. Options include **HTML** (default), **Markdown (Legacy)**, **MarkdownV2**. Refer to Telegram's Formatting options for more information on these options. * **Reply To Message ID**: If the message is a reply, enter the ID of the message it's replying to. * **Message Thread ID**: Enter a unique identifier for the target message thread (topic) of the forum; for forum supergroups only. ## Send Sticker# Use this method to send static .WEBP, animated .TGS, or video .WEBM stickers using the Bot API sendSticker method. Enter these parameters: * **Credential to connect with**: Create or select an existing Telegram credential. * **Resource**: Select **Message**. * **Operation**: Select **Send Sticker**. * **Chat ID**: Enter the Chat ID or username of the channel you wish to send the sticker to in the format `@channelusername`. * To feed a Chat ID directly into this node, use the Telegram Trigger node. Refer to Common Issues | Get the Chat ID for more information. * **Binary File**: To send a binary file from the node itself, turn this option on. If you turn this parameter on, you must enter the **Input Binary Field** containing the file you want to send. * **Sticker**: If you aren't using the **Binary File**, enter the photo to send here. Pass a `file_id` to send a file that exists on the Telegram servers (recommended) or an HTTP URL for Telegram to get a file from the internet. * **Reply Markup**: Use this parameter to set more interface options. Refer to Reply Markup parameters for more information on these options and how to use them. Refer to Telegram's Bot API sendSticker documentation for more information. ### Send Sticker additional fields# Use the **Additional Fields** to further refine the behavior of the node using optional fields in Telegram's sendSticker method. Select **Add Field** to add any of the following: * **Disable Notification**: Choose whether to send the notification silently (turned on) or with a standard notification (turned off). * **Reply To Message ID**: If the message is a reply, enter the ID of the message it's replying to. * **Message Thread ID**: Enter a unique identifier for the target message thread (topic) of the forum; for forum supergroups only. ## Send Video# Use this operation to send a video to the chat using the Bot API sendVideo method. Enter these parameters: * **Credential to connect with**: Create or select an existing Telegram credential. * **Resource**: Select **Message**. * **Operation**: Select **Send Video**. * **Chat ID**: Enter the Chat ID or username of the channel you wish to send the video to in the format `@channelusername`. * To feed a Chat ID directly into this node, use the Telegram Trigger node. Refer to Common Issues | Get the Chat ID for more information. * **Binary File**: To send a binary file from the node itself, turn this option on. If you turn this parameter on, you must enter the **Input Binary Field** containing the file you want to send. * **Video**: If you aren't using the **Binary File**, enter the video to send here. Pass a `file_id` to send a file that exists on the Telegram servers (recommended) or an HTTP URL for Telegram to get a file from the internet. * **Reply Markup**: Use this parameter to set more interface options. Refer to Reply Markup parameters for more information on these options and how to use them. Refer to Telegram's Bot API sendVideo documentation for more information. ### Send Video additional fields# Use the **Additional Fields** to further refine the behavior of the node using optional fields in Telegram's sendVideo method. Select **Add Field** to add any of the following: * **Caption**: Enter a caption text for the video, max of 1024 characters. * **Disable Notification**: Choose whether to send the notification silently (turned on) or with a standard notification (turned off). * **Duration**: Enter the video's duration in seconds. * **Height**: Enter the height of the video. * **Parse Mode**: Enter the parser to use for any related text. Options include **HTML** (default), **Markdown (Legacy)**, **MarkdownV2**. Refer to Telegram's Formatting options for more information on these options. * **Reply To Message ID**: If the message is a reply, enter the ID of the message it's replying to. * **Message Thread ID**: Enter a unique identifier for the target message thread (topic) of the forum; for forum supergroups only. * **Thumbnail**: Add the thumbnail of the file sent. Ignore this field if thumbnail generation for the file is supported server-side. The thumbnail should meet these specs: * JPEG format * Less than 200 KB in size * Width and height less than 320px. * **Width**: Enter the width of the video. ## Unpin Chat Message# Use this operation to unpin a message from the chat using the Bot API unpinChatMessage method. Enter these parameters: * **Credential to connect with**: Create or select an existing Telegram credential. * **Resource**: Select **Message**. * **Operation**: Select **Pin Chat Message**. * **Chat ID**: Enter the Chat ID or username of the channel you wish to unpin the message from in the format `@channelusername`. * To feed a Chat ID directly into this node, use the Telegram Trigger node. Refer to Common Issues | Get the Chat ID for more information. * **Message ID**: Enter the unique identifier of the message you want to unpin. Refer to the Telegram Bot API unpinChatMessage documentation for more information. ## Reply Markup parameters# For most of the **Message** **Send** actions (such as Send Animation, Send Audio), use the **Reply Markup** parameter to set more interface options: * **Force Reply**: The Telegram client will act as if the user has selected the bot's message and tapped **Reply**, automatically displaying a reply interface to the user. Refer to Force Reply parameters for further guidance on this option. * **Inline Keyboard**: Display an inline keyboard right next to the message. Refer to Inline Keyboard parameters for further guidance on this option. * **Reply Keyboard**: Display a custom keyboard with reply options. Refer to Reply Keyboard parameters for further guidance on this option. * **Reply Keyboard Remove**: The Telegram client will remove the current custom keyboard and display the default letter-keyboard. Refer to Reply Keyboard parameters for further guidance on this option. Telegram Business accounts Telegram restricts the following options in channels and for messages sent on behalf of a Telegram Business account: * Force Reply * Reply Keyboard * Reply Keyboard Remove ### Force Reply parameters# **Force Reply** is useful if you want to create user-friendly step-by-step interfaces without having to sacrifice privacy mode. If you select **Reply Markup > Force Reply**, choose from these **Force Reply** parameters: * **Force Reply**: Turn on to show the reply interface to the user, as described above. * **Selective**: Turn this on if you want to force reply from these users only: * Users that are `@mentioned` in the text of the message. * The sender of the original message, if this Send Animation message is a reply to a message. Refer to ForceReply for more information. ### Inline Keyboard parameters# If you select **Reply Markup > Inline Keyboard**, define the inline keyboard buttons you want to display using the **Add Button** option. To add more rows to your keyboard, use **Add Keyboard Row**. Refer to InlineKeyboardMarkup and InlineKeyboardButtons for more information. ### Reply Keyboard parameters# If you select **Reply Markup > Reply Keyboard**, use the **Reply Keyboard** section to define the buttons and rows in your Reply Keyboard. Use the **Reply Keyboard Options** to further refine the keyboard's behavior: * **Resize Keyboard**: Choose whether to request the Telegram client to resize the keyboard vertically for optimal fit (turned on) or whether to use the same height as the app's standard keyboard (turned off). * **One Time Keyboard**: Choose whether the Telegram client should hide the keyboard as soon as a user uses it (turned on) or to keep displaying it (turned off). * **Selective**: Turn this on if you want to show the keyboard to these users only: * Users that are `@mentioned` in the text of the message. * The sender of the original message, if this Send Animation message is a reply to a message. Refer to ReplyKeyboardMarkup for more information. ### Reply Keyboard Remove parameters# If you select **Reply Markup > Reply Keyboard Remove**, choose from these **Reply Keyboard Remove** parameters: * **Remove Keyboard**: Choose whether to request the Telegram client to remove the custom keyboard (turned on) or to keep it (turned off). * **Selective**: Turn this on if you want to remove the keyboard for these users only: * Users that are `@mentioned` in the text of the message. * The sender of the original message, if this Send Animation message is a reply to a message. Refer to ReplyKeyboardRemove for more information. --- ## Page: https://docs.n8n.io/integrations/builtin/app-nodes/n8n-nodes-base.telegram/common-issues/ Here are some common errors and issues with the Telegram node and steps to resolve or troubleshoot them. ## Add a bot to a Telegram channel# For a bot to send a message to a channel, you must add the bot to the channel. If you haven't added the bot to the channel, you'll see an error with a description like: `Error: Forbidden: bot is not a participant of the channel`. To add a bot to a channel: 1. In the Telegram app, access the target channel and select the channel name. 2. Label the channel name as **public channel**. 3. Select **Administrators** > **Add Admin**. 4. Search for the bot's username and select it. 5. Select the checkmark on the top-right corner to add the bot to the channel. ## Get the Chat ID# You can only use `@channelusername` on public channels. To interact with a Telegram group, you need that group's Chat ID. There are three ways to get that ID: 1. From the Telegram Trigger: Use the Telegram Trigger node in your workflow to get a Chat ID. This node can trigger on different events and returns a Chat ID on successful execution. 2. From your web browser: Open Telegram in a web browser and open the group chat. The group's Chat ID is the series of digits behind the letter "g." Prefix your group Chat ID with a `-` when you enter it in n8n. 3. Invite Telegram's @RawDataBot to the group: Once you add it, the bot outputs a JSON file that includes a `chat` object. The `id` for that object is the group Chat ID. Then remove the RawDataBot from your group. ## Send more than 30 messages per second# The Telegram API has a limitation of sending only 30 messages per second. Follow these steps to send more than 30 messages: 1. **Loop Over Items node**: Use the Loop Over Items node to get at most 30 chat IDs from your database. 2. **Telegram node**: Connect the Telegram node with the Loop Over Items node. Use the **Expression Editor** to select the Chat IDs from the Loop Over Items node. 3. **Code node**: Connect the Code node with the Telegram node. Use the Code node to wait for a few seconds before fetching the next batch of chat IDs. Connect this node with the Loop Over Items node. You can also use this workflow. ## Remove the n8n attribution from sent messages# If you're using the node to send Telegram messages, the message automatically gets an n8n attribution appended to the end: > This message was sent automatically with n8n To remove this attribution: 1. In the node's **Additional Fields** section, select **Add Field**. 2. Select **Append n8n attribution**. 3. Turn the toggle off. Refer to Send Message additional fields for more information. --- ## Page: https://docs.n8n.io/integrations/builtin/app-nodes/n8n-nodes-base.thehive/ Use the TheHive node to automate work in TheHive, and integrate TheHive with other applications. n8n has built-in support for a wide range of TheHive features, including creating alerts, counting tasks logs, cases, and observables. On this page, you'll find a list of operations the TheHive node supports and links to more resources. TheHive and TheHive 5 n8n provides two nodes for TheHive. Use this node (TheHive) if you want to use TheHive's version 3 or 4 API. If you want to use version 5, use TheHive 5. ## Operations# The available operations depend on your API version. To see the operations list, create your credentials, including selecting your API version. Then return to the node, select the resource you want to use, and n8n displays the available operations for your API version. * Alert * Case * Log * Observable * Task ## Templates and examples# ## What to do if your operation isn't supported# If this node doesn't support the operation you want to do, you can use the HTTP Request node to call the service's API. You can use the credential you created for this service in the HTTP Request node: 1. In the HTTP Request node, select **Authentication** > **Predefined Credential Type**. 2. Select the service you want to connect to. 3. Select your credential. Refer to Custom API operations for more information. n8n provides a trigger node for TheHive. You can find the trigger node docs here. Refer to TheHive's documentation for more information about the service: * Version 3 * Version 4 --- ## Page: https://docs.n8n.io/integrations/builtin/app-nodes/n8n-nodes-base.thehive5/ Use the TheHive 5 node to automate work in TheHive, and integrate TheHive with other applications. n8n has built-in support for a wide range of TheHive features, including creating alerts, counting tasks logs, cases, and observables. On this page, you'll find a list of operations the TheHive node supports and links to more resources. TheHive and TheHive 5 n8n provides two nodes for TheHive. Use this node (TheHive 5) if you want to use TheHive's version 5 API. If you want to use version 3 or 4, use TheHive. ## Operations# * Alert * Create * Delete * Execute Responder * Get * Merge Into Case * Promote to Case * Search * Update * Update Status * Case * Add Attachment * Create * Delete Attachment * Delete Case * Execute Responder * Get * Get Attachment * Get Timeline * Search * Update * Comment * Create * Delete * Search * Update * Observable * Create * Delete * Execute Analyzer * Execute Responder * Get * Search * Update * Page * Create * Delete * Search * Update * Query * Execute Query * Task * Create * Delete * Execute Responder * Get * Search * Update * Task Log * Add Attachment * Create * Delete * Delete Attachment * Execute Responder * Get * Search ## Templates and examples# Browse TheHive 5 integration templates, or search all templates n8n provides a trigger node for TheHive. You can find the trigger node docs here. Refer to TheHive's documentation for more information about the service. --- ## Page: https://docs.n8n.io/integrations/builtin/app-nodes/n8n-nodes-base.timescaledb/ Use the TimescaleDB node to automate work in TimescaleDB, and integrate TimescaleDB with other applications. n8n has built-in support for a wide range of TimescaleDB features, including executing an SQL query, as well as inserting and updating rows in a database. On this page, you'll find a list of operations the TimescaleDB node supports and links to more resources. ## Operations# * Execute an SQL query * Insert rows in database * Update rows in database ## Templates and examples# Browse TimescaleDB integration templates, or search all templates ## Specify a column's data type# To specify a column's data type, append the column name with `:type`, where `type` is the data type you want for the column. For example, if you want to specify the type `int` for the column **id** and type `text` for the column **name**, you can use the following snippet in the **Columns** field: `id:int,name:text`. --- ## Page: https://docs.n8n.io/integrations/builtin/app-nodes/n8n-nodes-base.todoist/ Use the Todoist node to automate work in Todoist, and integrate Todoist with other applications. n8n has built-in support for a wide range of Todoist features, including creating, updating, deleting, and getting tasks. On this page, you'll find a list of operations the Todoist node supports and links to more resources. This node can be used as an AI tool This node can be used to enhance the capabilities of an AI agent. When used in this way, many parameters can be set automatically, or with information directed by AI - find out more in the AI tool parameters documentation. ## Operations# * Task * Create a new task * Close a task * Delete a task * Get a task * Get all tasks * Reopen a task * Update a task ## Templates and examples# ## What to do if your operation isn't supported# If this node doesn't support the operation you want to do, you can use the HTTP Request node to call the service's API. You can use the credential you created for this service in the HTTP Request node: 1. In the HTTP Request node, select **Authentication** > **Predefined Credential Type**. 2. Select the service you want to connect to. 3. Select your credential. Refer to Custom API operations for more information. --- ## Page: https://docs.n8n.io/integrations/builtin/app-nodes/n8n-nodes-base.travisci/ Use the Travis CI node to automate work in Travis CI, and integrate Travis CI with other applications. n8n has built-in support for a wide range of Travis CI features, including cancelling and getting builds. On this page, you'll find a list of operations the Travis CI node supports and links to more resources. Credentials Refer to Travis CI credentials for guidance on setting up authentication. ## Operations# * Build * Cancel a build * Get a build * Get all builds * Restart a build * Trigger a build ## Templates and examples# Browse Travis CI integration templates, or search all templates --- ## Page: https://docs.n8n.io/integrations/builtin/app-nodes/n8n-nodes-base.trello/ Use the Trello node to automate work in Trello, and integrate Trello with other applications. n8n has built-in support for a wide range of Trello features, including creating and updating cards, and adding and removing members. On this page, you'll find a list of operations the Trello node supports and links to more resources. This node can be used as an AI tool This node can be used to enhance the capabilities of an AI agent. When used in this way, many parameters can be set automatically, or with information directed by AI - find out more in the AI tool parameters documentation. ## Operations# * Attachment * Create a new attachment for a card * Delete an attachment * Get the data of an attachment * Returns all attachments for the card * Board * Create a new board * Delete a board * Get the data of a board * Update a board * Board Member * Add * Get All * Invite * Remove * Card * Create a new card * Delete a card * Get the data of a card * Update a card * Card Comment * Create a comment on a card * Delete a comment from a card * Update a comment on a card * Checklist * Create a checklist item * Create a new checklist * Delete a checklist * Delete a checklist item * Get the data of a checklist * Returns all checklists for the card * Get a specific checklist on a card * Get the completed checklist items on a card * Update an item in a checklist on a card * Label * Add a label to a card. * Create a new label * Delete a label * Get the data of a label * Returns all labels for the board * Remove a label from a card. * Update a label. * List * Archive/Unarchive a list * Create a new list * Get the data of a list * Get all the lists * Get all the cards in a list * Update a list ## Templates and examples# ## What to do if your operation isn't supported# If this node doesn't support the operation you want to do, you can use the HTTP Request node to call the service's API. You can use the credential you created for this service in the HTTP Request node: 1. In the HTTP Request node, select **Authentication** > **Predefined Credential Type**. 2. Select the service you want to connect to. 3. Select your credential. Refer to Custom API operations for more information. ## Find the List ID# 1. Open the Trello board that contains the list. 2. If the list doesn't have any cards, add a card to the list. 3. Open the card, add `.json` at the end of the URL, and press enter. 4. In the JSON file, you will see a field called `idList`. 5. Copy the contents of the `idList`field and paste it in the **\*List ID** field in n8n. --- ## Page: https://docs.n8n.io/integrations/builtin/app-nodes/n8n-nodes-base.twake/ Use the Twake node to automate work in Twake, and integrate Twake with other applications. n8n supports sending messages with Twake. On this page, you'll find a list of operations the Twake node supports and links to more resources. ## Operations# * Message * Send a message ## Templates and examples# Browse Twake integration templates, or search all templates ## What to do if your operation isn't supported# If this node doesn't support the operation you want to do, you can use the HTTP Request node to call the service's API. You can use the credential you created for this service in the HTTP Request node: 1. In the HTTP Request node, select **Authentication** > **Predefined Credential Type**. 2. Select the service you want to connect to. 3. Select your credential. Refer to Custom API operations for more information. --- ## Page: https://docs.n8n.io/integrations/builtin/app-nodes/n8n-nodes-base.twilio/ Use the Twilio node to automate work in Twilio, and integrate Twilio with other applications. n8n supports sending MMS/SMS and WhatsApp messages with Twilio. On this page, you'll find a list of operations the Twilio node supports and links to more resources. This node can be used as an AI tool This node can be used to enhance the capabilities of an AI agent. When used in this way, many parameters can be set automatically, or with information directed by AI - find out more in the AI tool parameters documentation. ## Operations# * SMS * Send SMS/MMS/WhatsApp message * Call * Make a phone call using text-to-speech to say a message ## Templates and examples# Refer to Twilio's documentation for more information about the service. ## What to do if your operation isn't supported# If this node doesn't support the operation you want to do, you can use the HTTP Request node to call the service's API. You can use the credential you created for this service in the HTTP Request node: 1. In the HTTP Request node, select **Authentication** > **Predefined Credential Type**. 2. Select the service you want to connect to. 3. Select your credential. Refer to Custom API operations for more information. --- ## Page: https://docs.n8n.io/integrations/builtin/app-nodes/n8n-nodes-base.twist/ Use the Twist node to automate work in Twist, and integrate Twist with other applications. n8n has built-in support for a wide range of Twist features, including creating conversations in a channel, as well as creating and deleting comments on a thread. On this page, you'll find a list of operations the Twist node supports and links to more resources. ## Operations# * Channel * Archive a channel * Initiates a public or private channel-based conversation * Delete a channel * Get information about a channel * Get all channels * Unarchive a channel * Update a channel * Comment * Create a new comment to a thread * Delete a comment * Get information about a comment * Get all comments * Update a comment * Message Conversation * Create a message in a conversation * Delete a message in a conversation * Get a message in a conversation * Get all messages in a conversation * Update a message in a conversation * Thread * Create a new thread in a channel * Delete a thread * Get information about a thread * Get all threads * Update a thread ## Templates and examples# Browse Twist integration templates, or search all templates ## What to do if your operation isn't supported# If this node doesn't support the operation you want to do, you can use the HTTP Request node to call the service's API. You can use the credential you created for this service in the HTTP Request node: 1. In the HTTP Request node, select **Authentication** > **Predefined Credential Type**. 2. Select the service you want to connect to. 3. Select your credential. Refer to Custom API operations for more information. ## Get the User ID# To get the User ID for a user: 1. Open the **Team** tab. 2. Select a user's avatar. 3. Copy the string of characters located after `/u/` in your Twist URL. This string is the User ID. For example, if the URL is `https://twist.com/a/4qw45/people/u/475370` the User ID is `475370`. --- ## Page: https://docs.n8n.io/integrations/builtin/app-nodes/n8n-nodes-base.unleashedsoftware/ Use the Unleashed Software node to automate work in Unleashed Software, and integrate Unleashed Software with other applications. n8n has built-in support for a wide range of Unleashed Software features, including getting sales orders and stock on hand. On this page, you'll find a list of operations the Unleashed Software node supports and links to more resources. ## Operations# * Sales Order * Get all sales orders * Stock On Hand * Get a stock on hand * Get all stocks on hand ## Templates and examples# Browse Unleashed Software integration templates, or search all templates --- ## Page: https://docs.n8n.io/integrations/builtin/app-nodes/n8n-nodes-base.uplead/ Use the UpLead node to automate work in UpLead, and integrate UpLead with other applications. n8n supports several UpLead operations, including getting company information. On this page, you'll find a list of operations the UpLead node supports and links to more resources. Credentials Refer to UpLead credentials for guidance on setting up authentication. ## Operations# * Company * Enrich * Person * Enrich ## Templates and examples# Browse UpLead integration templates, or search all templates --- ## Page: https://docs.n8n.io/integrations/builtin/app-nodes/n8n-nodes-base.uproc/ Use the uProc node to automate work in uProc, and integrate uProc with other applications. n8n has built-in support for a wide range of uProc features, including getting advanced human audio file, communication data, company, finance and product information. On this page, you'll find a list of operations the uProc node supports and links to more resources. ## Operations# ### Audio# * Get advanced human audio file by provided text and language * Get an audio file by provided text and language ### Communication# * Discover if a domain has a social network presence * Discover if an email is valid, hard bounce, soft bounce, spam-trap, free, temporary, and recipient exists * Discover if the email recipient exists, returning email status * Check if an email domain has an SMTP server to receive emails * Discover if the email has a social network presence * Check if an email has a valid format * Check if an email domain belongs to a disposable email service * Check if email belongs to free service provider like Gmail * Check if email is catchall * Discover if an email exists in the Robinson list (only Spain) * Check if email belongs to a system or role-based account * Check if an email is a spam trap * Discover if an IMEI number has a valid format * Check if a LinkedIn profile is a first-degree contact * Discover if mobile phone number exists in network operator, with worldwide coverage * Discover if a mobile phone number has a valid format with worldwide coverage * Discover if a mobile phone number has a valid format (only Spain) * Discover if a mobile phone number has a valid prefix, with worldwide coverage * Discover if a Spanish mobile phone number has a valid prefix * Discover if a mobile number is switched on to call it later, with worldwide coverage * Discover if a mobile number can receive SMS with worldwide coverage * Discover if a phone (landline or mobile) exists in a Robinson list (only Spain) * Discover if a landline or mobile number has a valid prefix * Discover if a landline phone number is valid, with Spain coverage * Allows discovering if landline number has a good international format, depending on the country * Discover if a landline phone number prefix exists, with worldwide coverage * Clean a phone removing non allowed characters * Allows getting country code of a mobile phone number with international format * Allows getting a domain from an email * Discover an email by company website or domain and prospect's first-name and last-name * Check if an email is personal or generic * Get emails list found on the internet by domain or URI * Get an emails list found on the internet by non-free email * Get emails list found inside the website by domain or URI * Get three first web references of an email published on the internet * Allows you to fix the email domain of those misspelled emails * Fix the international prefix of a phone based on the ISO code of a country * Get GDPR compliant emails list by domain for your Email Marketing campaigns in Europe * Discover if mobile exist using real-time HLR query * Get personal email by social network profile * Get portability data about a landline or mobile number, only for Spain * Extract results from a LinkedIn search (employees in a company) * Get members in a LinkedIn group * Get 'Search LinkedIn Contacts' URL * Extract the last 80 connections from your LinkedIn profile * Extract the last 80 invitations sent from your LinkedIn * Get users who comment on a post on LinkedIn * Get users who like a post on LinkedIn * Extract a LinkedIn profile * Extract results from a LinkedIn search (profiles) * Extract last profiles that have published content on LinkedIn by specific keywords * Discover if mobile exist using real-time HLR query, as well as portability and roaming data * Get existence, portability, and roaming of a mobile phone using MNP query * Discover if mobile or landline prefix exists in Spain * Allows normalizing email address, removing non allowed characters * Allows normalizing a mobile phone, removing non-allowed characters * Parse phone number in multiple fields and verify format and prefix validity * Allows getting country prefix number by country code * Discover an email by company website or domain and prospect's first-name and last-name * This tool parses a social URI address and extracts any available indicators * Search all social networks by domain, parses all found URLs, and returns social networks data * Discover if a domain or a website has social activity and returns all social network profiles found * Discover if an email has social activity, and get all social network profiles found * Discover if a mobile phone has social activity, and get all social network profiles found * Get web references for an email published on the internet * Send a custom message invitation to a non connected LinkedIn profile * Send a custom email to a recipient * Send a custom SMS to a recipient with worldwide coverage * Send a custom invitation message if a profile is connected or a custom message otherwise * Visits a profile to show interest and get profile views in return from contact, increasing your LinkedIn network * Send a custom private message to a connected LinkedIn profile * Get an email by contact's LinkedIn profile URI * Discover an email by company's name and prospect's full name * Discover an email by company's website or domain and prospect's full name * Get email by first name, last name, and company * Get parsed and validated phone ### Company# * Discover if a CIF card number is valid * Check if a company is a debtor by TaxID * Check if the ISIN number is valid * Check if the SS number is valid, only for Spain * Identify and classify a prospecting role in detecting the right area and seniority to filter later * Get a company's contact, social, and technology data by domain * Get a company's contact, social, and technology data by email * Get a company's data by CIF * Get a company's data by DUNS * Get a company's data by domain * Get a company's data by email * Get a company's data by IP address * Get a company's data by name * Get a company's data by phone number * Get a company's data by social networks URI (LinkedIn, Twitter) * Get a company's name by company domain * Get professional data of a decision-maker by company name/domain and area * Discover more suitable decision-maker using search engines (Bing) by company name and area * Get professional emails of decision-makers by company domain and area * Discover up to ten decision-makers using search engines (Bing) by company name and area * Get a company's domain by company name * Get employees by company name or domain, area, seniority, and country * Get a company's Facebook profile by name without manually searching on Google or Facebook * Get geocoded company data by IP address * Get a company's LinkedIn profile by name without manually searching on Google or LinkedIn * Allows normalizing a CIF number, removing non-allowed characters * Get a company's phone by company domain * Get a company's sales data by a company's DUNS number * Get a company's sales data by a company's domain name * Get a company's sales data by a company's name * Get a company's sales data by a company's tax ID (CIF) * Get a company's Twitter profile by name without manually searching on Google or Twitter * Get decision maker by search engine * Get decision makers by search engine * Get Facebook URI by company's domain * Get GitHub URI by company's domain * Get Instagram URI by company's domain * Get LinkedIn URI by company's domain * Get Pinterest URI by company's domain * Get Twitter URI by company's domain * Get YouTube URI by company's domain ### Finance# * Check if crypto wallet is valid * Discover if a BIC number has a valid format * Discover if an account number has a valid format * Check if credit card number checksum is valid * Discover if an IBAN account number has a valid format * Discover if an ISO currency code is valid * Check if a TIN exists in Europe * Convert amount between supported currencies and an exchange date * Get credit card type * Get multiple ISO currency codes by a country name * Get all ISO currency by an IP address * Get multiple ISO currency codes by a country ISO code * Get ISO currency code by IP address * Get ISO currency code by a currency ISO code * Get ISO currency code by an ISO country code * Get ISO currency code by a country name * Get related European TIN in Europe * Get IBAN by account number of the country * Get to search data bank information by IBAN account number * Get country VAT by address * Get country VAT by coordinates * Get Swift code lookup * Get VAT by IP address * Get VAT value by country ISO code * Get VAT by phone number, with worldwide coverage * Get VAT by zip code ### Geographical# * Check if a country's ISO code exists * Discover if the distance between two coordinates is equal to another * Discover if the distance (kilometers) between two coordinates is greater than the given input * Discover if the distance (kilometers) between two coordinates is greater or equal to the given input * Discover if the distance(kilometers) between two coordinates is lower than the given input * Check if an address exists by a partial address search * Check if a house number exists by a partial address search * Check if coordinates have a valid format * Discover if a zip code number prefix exists (only for Spain) * Discover if a zip code number has a valid format (only for Spain) * Get cartesian coordinates(X, Y, Z/WGS84) by Latitude and Longitude * Get location by parameters * Get multiple cities by phone prefix (only for Spain) * Get multiple cities by partial initial text (only for Spain) * Get multiple cities by zip code prefix (only for Spain) * Get a city from IP * City search by partial name (only for Spain) * Discover the city name by a local phone number (only for Spain) * Discover the city name by the zip code (only for Spain) * Discover the community name from a zip code (only for Spain) * Discover latitude and longitude coordinates of an IP address * Discover latitude and longitude coordinates of a postal address * Get multiple country names by currency ISO code * Get multiple countries by ISO code * Get multiple country names by initial name * Get country name by currency ISO code * Get country name by IP address * Get country name by its ISO code * Get country by a prefix * Get country name by phone number, with worldwide coverage * Get Aplha2 code by a country prefix or a name * Get decimal coordinates (degrees, minutes, and seconds) by latitude and longitude * Returns straight-line distance (kilometers) between two addresses * Returns straight-line distance (kilometers) between two GPS coordinates (latitude and longitude) * Returns straight-line distance (kilometers) between two IP addresses * Returns straight-line distance (kilometers) between two landline phones, using city and province of every phone * Returns straight-line distance (kilometers) between two zip codes, using city and province of every zip code * Get an exact address by a partial address search * Discover geographical, company, timezone, and reputation data by IPv4 address * Discover the city name, zip code, province, country, latitude, and longitude from an IPv4 or IPv6 address and geocodes it * Parse postal address into separated fields, getting an improved resolution * Discover locale data (currency, language) by IPv4 or IPv6 address * Discover the city name, zip code, province, or country by latitude and longitude * Discover the city name, zip code, province, country, latitude, and longitude from an IPv4 or IPv6 address * Discover the city and the province from a landline phone number (only Spain) * Discover location data by name * Discover the city and the province from a zip code number (only Spain) * Get the most relevant locations by name * Get the most relevant locations by name, category, location, and radius * Get multiple personal names by a prefix * Discover network data by IPv4 or IPv6 address * Allow normalizing an address by removing non allowed characters * Allow normalizing a city by removing non allowed characters * Allow normalizing a country by removing non allowed characters * Allow normalizing a province by removing non allowed characters * Allow normalizing a zip code by removing non allowed characters * Get normalized country * Parse postal address into separated fields, getting a basic resolution * Discover the province name from an IP address * Get the first province by a name prefix (only for Spain) * Discover the province name from a landline phone number (only for Spain) * Discover the province name from a zip code number (only for Spain) * Get a province list by a name prefix (only for Spain) * Get a province list by a phone prefix (only for Spain) * Get a province list by a zip code prefix (only for Spain) * Discover reputation by IPv4 or IPv6 address * Returns driving routing time, distance, fuel consumption, and cost between two addresses * Returns driving routing time, distance, fuel consumption, and cost between two GPS coordinates * Returns driving routing time, distance, fuel consumption, and cost between two IP addresses * Returns driving routing time, distance, fuel consumption, and cost between two landline phones, using city and province of every phone (only for Spain) * Returns driving routing time, distance, fuel consumption, and cost between two zip codes, using city and province of every zip code * Discover date-time data by IPv4 or IPv6 address * Get USNG coordinates by latitude and longitude * Get UTM coordinates by latitude and longitude * Discover the zip code if you have an IP address * Get the first zip code by prefix, only for Spain * Get multiple zip codes by prefix, with worldwide coverage * Get time data by coordinates * Get time data by postal address ### Image# * Get QR code decoded content by an image URL * It allows discovering all geographical and technical EXIF metadata present in a photographic JPEG image * Get an encoded barcode by number and a required standard * Get QR code encoded by a text * Generate a new image by URL and text * Discover logo (favicon) used in a domain * Generate a screenshot by URL provided using Chrome browser * Get OCR text from image ### Internet# * Check if a domain exists * Check if a domain has a DNS record * Check if a domain has the given IP address assigned * Check if a domain has an MX record * Check if a domain has a valid SSL certificate * Check if a domain has a valid format * Check if a domain accepts all emails, existing or not * Check if a domain is a free service domain provider * Check if a domain is temporary or not * Discover if a computer is switched on * Discover if service in a port is available * Check if an URL contains a string or regular expression * Check if an URL exists * Check that an URL has a valid format * Get full SSL certificate data by a domain (or website) and monitor your certificate status * Get feed entries by domain * Get last feed entry by domain * Get text data from web, PDF or image allowing to filter some elements by regular expressions or field names * Decode URL to recover original * Get valid, existing, and default URL when accessing a domain using a web browser * Get long version of shortened URL * Discover device features by a user agent * Get the network name of and IP address * Get the domain record by its type * Encode URL to avoid problems * Copy file from one URL to another URL * Fix an IP address to the right format * Get the IPv4 address linked with a domain * Convert a number to an IP address * Get ISP known name of email domain name * Convert an IP address to numeric notation * Scan a host and returns the most commonly open ports * Obtains a list with multiple results from a website * Obtains the content of a website * Decode URL into multiple fields * Generate a PDF file by URL (provided using Chrome browser) * Get the root domain of any web address, removing non needed characters * Generates shareable URIs to use on social networks and email using a content URI and a text * Get data from the existing table in an HTML page or a PDF file * Discover client and server technologies used in a domain * Discover client and server technologies used in web pages * Analyze URL's health status about SSL, broken links, conflictive HTTP links with SSL, and more * Get website visits and rank of any domain * Get a domain's WHOIS data by fields * Get WHOIS data fields by IP address provided ### Personal# * Check if age is between two numbers * Check if date returns an age between 20 and 29 * Check if date returns an age between 40 and 49 * Check if age is greater than another * Check if birth date returns an age greater than 64 * Check if birth date belongs to an adult (18 years for Spain) * Check if age is lower than another * Check if age is lower or equal than another * Check if ages are equal * Discover if a date is between two dates * Discover if a date is greater * Discover if a date is greater or equal * Discover if a date belongs to a leap year * Discover if a date is lower * Discover if a date is lower or equal * Discover if a date has a valid format * Discover if a gender value is valid * Discover if an NIE card number is valid * Discover if a NIF card number is valid * Check if a personal name exists in the INE data source (only for Spain) * Check if a name contains accepted characters * Discover if a NIF exists in the Robinson list (only for Spain) * Check if surname contains accepted characters * Check if a personal surname appears in INE data source (only for Spain) * Discover if a DNI card number is valid * Discover the age of a birth date * Discover the age range of a person by birth date * Get the difference between two dates * Discover the gender of a person by the email * Discover the gender of a person or company by the name * Get LinkedIn employee profile URI by business email * Get LinkedIn employee profile URI by first name, last name, and company * Discover the letter of a DNI card number * Get first personal name matching by prefix and gender from INE data source (only for Spain) * Get LinkedIn URI by email * Get LinkedIn URI by phone * Allow normalizing a DNI number by removing non allowed characters * Allow normalizing an NIE number by removing non allowed characters * Normalize name by removing non allowed characters * Normalize surname * Get parsed date-time * Normalize full name, fixing abbreviations, sorting if necessary, and returning first name, last name, and gender * Get prospect's contact data and the company's location and social data by email * Get contact, location, and social data by email and company name and location * Get personal and social data by social profile * Get personal data by email * Get personal data by first name, last name, company, and location * Get personal data by mobile * Get personal data by social network profile * Generate random fake data * Get first personal surname matching by prefix from INE data source (only for Spain) * Get personal surname matching by prefix from INE data source (only for Spain) * Get Twitter profile by first name, last name, and company * Get XING profile by first name, last name, and company * Add a contact email to a person list ### Product# * Check if an ASIN code exists on the Amazon Marketplace * Check if an ASIN code has a valid format * Check if an EAN code exists on Amazon Marketplace * Check if an EAN barcode has a valid format * Check if an EAN barcode of 13 digits has a valid format * Check if an EAN barcode of 14 digits has a valid format * Check if an EAN barcode of 18 digits has a valid format * Check if an EAN barcode of 8 digits has a valid format * Check if a GTIN barcode has a valid format * Check if a GTIN barcode of 13 digits has a valid format * Check if a GTIN barcode of 14 digits has a valid format * Check if a GTIN barcode of 8 digits has a valid format * Check if VIN Number is valid * Allows checking if an ISBN book exists * Allows checking if an ISBN10/13 code has a valid format * Allows checking if an ISBN10 code has a valid format * Allows checking if an ISBN13 code has a valid format * Check if a UPC exists * Check if a UPC has a valid format * Get ASIN by EAN * Get a book by author's surname * Get all publications by category * Get book data by an editor's name * Get book or publication data by 10 or 13 digits ISBN code * Get book data by title * Get books by author's surname * Get all books by category * Get all books by editor * Get all books by title * Get EAN code by ASIN code * Get product data on a UPC on Amazon Marketplace * Get ISBN10 code by ISBN13 code * Get ISBN13 code by ISBN10 code * Get data By VIN number ### Security# * Check if a Luhn number is valid * Check if a password is strong * Check if a UUID number is valid * Get blacklists for a domain * Get blacklists for an IP address ### Text# * Check if a string only contains alphabets * Check if a string is alphanumeric * Check if a string is boolean * Check if the largest item in a list matches the provided item * Check if IPv4 or IPv6 address has a valid format * Check if IPv4 address has a valid format * Check if IPv6 address has a valid format * Check if the length of a list is between two quantities * Checks if the length of a list equals a specified quantity * Checks if the length of a list is greater than or equal to a certain amount * Check if the length of a list is lower than a certain amount * Check if the list contains a specific item * Check if the list ends with a specific element * Check if a list is sorted in ascending order * Check if the list starts with a specific element * Checks if the smallest element in a list matches the provided element * Check if a string contains only numbers * Check if a string contains a character * Check if a string ends with a character * Check if a string has no content * Check if a string contains random characters * Check if a string contains a value that matches with a regular expression * Check if the length of a string is between two numbers * Check if the length of a string is equal to a number * Check if the length of a string is greater than a number * Check if the length of a string is greater or equal to a number * Check if the length of a string is lower than a number * Check if the length of a string is lower or equal to a number * Check if a string starts with a character * Check if a string contains only lowercase characters * Check if a string contains only uppercase characters * Check if a list consists of unique elements * Check if the supplied values form a valid list of elements * Check if the number of words in a sentence is between two determined quantities * Check if the number of words in a sentence equals a certain amount * Check if the number of words in a sentence is greater than a certain amount * Check if the number of words in a sentence is greater than * Check if the word count is lower * Check if the number of words present in a sentence is less than or equal to a quantity * Convert a string to Base64 encoded value * Discover banned English words in an email body or subject * Get field names by analyzing the field value provided * Get HTML code from Markdown * Get Markdown text from HTML * Get text without HTML * Get spin string * Format a string using a format pattern * Generate random string using a regular expression as a pattern * Return the largest item in a list * Return the smallest item in a list * Convert to lowercase * Convert a string to MD5 encoded value * Merge two strings * Normalize a string depending on the field name * Analyze string and return all emails, phones, zip codes, and links * Convert a string to an SHA encoded value * Analyze an English text with emojis and detect sentiment * Returns an ascending sorted list * Split a value into two parts and join them using a separator from the original string * Split a value into two parts using a separator from the original string * Get the length of a string * Lookup string between multiple values by fuzzy logic and regex patterns * Clean abuse words from a string * Replace the first value found in a string with another * Replace all values found in a string with another * Translate a text into any language * Return a single list with no repeating elements * Convert all letters to uppercase * Count total words in a text ## Templates and examples# ## What to do if your operation isn't supported# If this node doesn't support the operation you want to do, you can use the HTTP Request node to call the service's API. You can use the credential you created for this service in the HTTP Request node: 1. In the HTTP Request node, select **Authentication** > **Predefined Credential Type**. 2. Select the service you want to connect to. 3. Select your credential. Refer to Custom API operations for more information. --- ## Page: https://docs.n8n.io/integrations/builtin/app-nodes/n8n-nodes-base.uptimerobot/ Use the UptimeRobot node to automate work in UptimeRobot, and integrate UptimeRobot with other applications. n8n has built-in support for a wide range of UptimeRobot features, including creating and deleting alerts, as well as getting account details. On this page, you'll find a list of operations the UptimeRobot node supports and links to more resources. ## Operations# * Account * Get account details * Alert Contact * Create an alert contact * Delete an alert contact * Get an alert contact * Get all alert contacts * Update an alert contact * Maintenance Window * Create a maintenance window * Delete a maintenance window * Get a maintenance window * Get all a maintenance windows * Update a maintenance window * Monitor * Create a monitor * Delete a monitor * Get a monitor * Get all monitors * Reset a monitor * Update a monitor * Public Status Page * Create a public status page * Delete a public status page * Get a public status page * Get all a public status pages ## Templates and examples# Browse UptimeRobot integration templates, or search all templates --- ## Page: https://docs.n8n.io/integrations/builtin/app-nodes/n8n-nodes-base.urlscanio/ Use the urlscan.io node to automate work in urlscan.io, and integrate urlscan.io with other applications. n8n has built-in support for a wide range of urlscan.io features, including getting and performing scans. On this page, you'll find a list of operations the urlscan.io node supports and links to more resources. This node can be used as an AI tool This node can be used to enhance the capabilities of an AI agent. When used in this way, many parameters can be set automatically, or with information directed by AI - find out more in the AI tool parameters documentation. ## Operations# * Scan * Get * Get All * Perform ## Templates and examples# Browse urlscan.io integration templates, or search all templates ## What to do if your operation isn't supported# If this node doesn't support the operation you want to do, you can use the HTTP Request node to call the service's API. You can use the credential you created for this service in the HTTP Request node: 1. In the HTTP Request node, select **Authentication** > **Predefined Credential Type**. 2. Select the service you want to connect to. 3. Select your credential. Refer to Custom API operations for more information. --- ## Page: https://docs.n8n.io/integrations/builtin/app-nodes/n8n-nodes-base.venafitlsprotectcloud/ Use the Venafi TLS Protect Cloud node to automate work in Venafi TLS Protect Cloud, and integrate Venafi TLS Protect Cloud with other applications. n8n has built-in support for a wide range of Venafi TLS Protect Cloud features, including deleting and downloading certificates, as well as creating certificates requests. On this page, you'll find a list of operations the Venafi TLS Protect Cloud node supports and links to more resources. ## Operations# * Certificate * Delete * Download * Get * Get Many * Renew * Certificate Request * Create * Get * Get Many ## Templates and examples# Browse Venafi TLS Protect Cloud integration templates, or search all templates Refer to Venafi's REST API documentation for more information on this service. n8n also provides: * A trigger node for Venafi TLS Protect Cloud. * A node for Venafi TLS Protect Datacenter. ## What to do if your operation isn't supported# If this node doesn't support the operation you want to do, you can use the HTTP Request node to call the service's API. You can use the credential you created for this service in the HTTP Request node: 1. In the HTTP Request node, select **Authentication** > **Predefined Credential Type**. 2. Select the service you want to connect to. 3. Select your credential. Refer to Custom API operations for more information. --- ## Page: https://docs.n8n.io/integrations/builtin/app-nodes/n8n-nodes-base.venafitlsprotectdatacenter/ Use the Venafi TLS Protect Datacenter node to automate work in Venafi TLS Protect Datacenter, and integrate Venafi TLS Protect Datacenter with other applications. n8n has built-in support for a wide range of Venafi TLS Protect Datacenter features, including creating, deleting, and getting certificates. On this page, you'll find a list of operations the Venafi TLS Protect Datacenter node supports and links to more resources. ## Operations# * Certificate * Create * Delete * Download * Get * Get Many * Renew * Policy * Get ## Templates and examples# Browse Venafi TLS Protect Datacenter integration templates, or search all templates n8n also provides: * A node and trigger node for Venafi TLS Protect Cloud. ## What to do if your operation isn't supported# If this node doesn't support the operation you want to do, you can use the HTTP Request node to call the service's API. You can use the credential you created for this service in the HTTP Request node: 1. In the HTTP Request node, select **Authentication** > **Predefined Credential Type**. 2. Select the service you want to connect to. 3. Select your credential. Refer to Custom API operations for more information. --- ## Page: https://docs.n8n.io/integrations/builtin/app-nodes/n8n-nodes-base.vero/ Use the Vero node to automate work in Vero and integrate Vero with other applications. n8n has built-in support for a wide range of Vero features, including creating and deleting users. On this page, you'll find a list of operations the Vero node supports and links to more resources. Credentials Refer to Vero credentials for guidance on setting up authentication. ## Operations# * User * Create or update a user profile * Change a users identifier * Unsubscribe a user. * Resubscribe a user. * Delete a user. * Adds a tag to a users profile. * Removes a tag from a users profile. * Event * Track an event for a specific customer ## Templates and examples# Browse Vero integration templates, or search all templates --- ## Page: https://docs.n8n.io/integrations/builtin/app-nodes/n8n-nodes-base.vonage/ Use the Vonage node to automate work in Vonage, and integrate Vonage with other applications. n8n supports sending SMS with Vonage. On this page, you'll find a list of operations the Vonage node supports and links to more resources. Credentials Refer to Vonage credentials for guidance on setting up authentication. ## Operations# * SMS * Send ## Templates and examples# **Receive messages from a topic via Kafka and send an SMS** by ghagrawal17 View template details **Receive messages from a queue via RabbitMQ and send an SMS** by ghagrawal17 View template details **Get data from Hacker News and send to Airtable or via SMS** by isa024787bel View template details Browse Vonage integration templates, or search all templates --- ## Page: https://docs.n8n.io/integrations/builtin/app-nodes/n8n-nodes-base.webflow/ Use the Webflow node to automate work in Webflow, and integrate Webflow with other applications. n8n has built-in support for a wide range of Webflow features, including creating, updating, deleting, and getting items. On this page, you'll find a list of operations the Webflow node supports and links to more resources. This node can be used as an AI tool This node can be used to enhance the capabilities of an AI agent. When used in this way, many parameters can be set automatically, or with information directed by AI - find out more in the AI tool parameters documentation. ## Operations# * Item * Create * Delete * Get * Get All * Update ## Templates and examples# ## What to do if your operation isn't supported# If this node doesn't support the operation you want to do, you can use the HTTP Request node to call the service's API. You can use the credential you created for this service in the HTTP Request node: 1. In the HTTP Request node, select **Authentication** > **Predefined Credential Type**. 2. Select the service you want to connect to. 3. Select your credential. Refer to Custom API operations for more information. --- ## Page: https://docs.n8n.io/integrations/builtin/app-nodes/n8n-nodes-base.wekan/ Use the Wekan node to automate work in Wekan, and integrate Wekan with other applications. n8n has built-in support for a wide range of Wekan features, including creating, updating, deleting, and getting boards and cards. On this page, you'll find a list of operations the Wekan node supports and links to more resources. ## Operations# * Board * Create a new board * Delete a board * Get the data of a board * Get all user boards * Card * Create a new card * Delete a card * Get a card * Get all cards * Update a card * Card Comment * Create a comment on a card * Delete a comment from a card * Get a card comment * Get all card comments * Checklist * Create a new checklist * Delete a checklist * Get the data of a checklist * Returns all checklists for the card * Checklist Item * Delete a checklist item * Get a checklist item * Update a checklist item * List * Create a new list * Delete a list * Get the data of a list * Get all board lists ## Templates and examples# Browse Wekan integration templates, or search all templates ## What to do if your operation isn't supported# If this node doesn't support the operation you want to do, you can use the HTTP Request node to call the service's API. You can use the credential you created for this service in the HTTP Request node: 1. In the HTTP Request node, select **Authentication** > **Predefined Credential Type**. 2. Select the service you want to connect to. 3. Select your credential. Refer to Custom API operations for more information. ## Load all the parameters for the node# To load all the parameters, for example, Author ID, you need to give admin permissions to the user. Refer to the Wekan documentation to learn how to change permissions. --- ## Page: https://docs.n8n.io/integrations/builtin/app-nodes/n8n-nodes-base.whatsapp/ Use the WhatsApp Business Cloud node to automate work in WhatsApp Business, and integrate WhatsApp Business with other applications. n8n has built-in support for a wide range of WhatsApp Business features, including sending messages, and uploading, downloading, and deleting media. On this page, you'll find a list of operations the WhatsApp Business Cloud node supports and links to more resources. ## Operations# * Message * Send * Send Template * Media * Upload * Download * Delete ## Templates and examples# Refer to WhatsApp Business Platform's Cloud API documentation for details about the operations. ## Common issues# For common errors or issues and suggested resolution steps, refer to Common Issues. ## What to do if your operation isn't supported# If this node doesn't support the operation you want to do, you can use the HTTP Request node to call the service's API. You can use the credential you created for this service in the HTTP Request node: 1. In the HTTP Request node, select **Authentication** > **Predefined Credential Type**. 2. Select the service you want to connect to. 3. Select your credential. Refer to Custom API operations for more information. --- ## Page: https://docs.n8n.io/integrations/builtin/app-nodes/n8n-nodes-base.whatsapp/common-issues/ Here are some common errors and issues with the WhatsApp Business Cloud node and steps to resolve or troubleshoot them. ## Bad request - please check your parameters# This error occurs when WhatsApp Business Cloud rejects your request because of a problem with its parameters. It's common to see this when using the **Send Template** operation if the data you send doesn't match the format of your template. To resolve this issue, review the parameters in your message template. Pay attention to each parameter's data type and the order they're defined in the template. Check the data that n8n is mapping to the template parameters. If you're using expressions to set parameter values, check the input data to make sure each item resolves to a valid value. You may want to use the Edit Fields (Set) node or set a fallback value to ensure you send a value with the correct format. ## Working with non-text media# The WhatsApp Business Cloud node can work with non-text messages and media like images, audio, documents, and more. If your operation includes a **Input Data Field Name** or **Property Name** parameter, set this to the field name itself rather than referencing the data in an expression. For example, if you are trying to send a message with an "Image" **MessageType** and **Take Image From** set to "n8n", set **Input Data Field Name** to a field name like `data` instead of an expression like `{{ $json.input.data }}`. --- ## Page: https://docs.n8n.io/integrations/builtin/app-nodes/n8n-nodes-base.wise/ Use the Wise node to automate work in Wise, and integrate Wise with other applications. n8n has built-in support for a wide range of Wise features, including getting profiles, exchange rates, and recipients. On this page, you'll find a list of operations the Wise node supports and links to more resources. Credentials Refer to Wise credentials for guidance on setting up authentication. ## Operations# * Account * Retrieve balances for all account currencies of this user. * Retrieve currencies in the borderless account of this user. * Retrieve the statement for the borderless account of this user. * Exchange Rate * Get * Profile * Get * Get All * Recipient * Get All * Quote * Create * Get * Transfer * Create * Delete * Execute * Get * Get All ## Templates and examples# Browse Wise integration templates, or search all templates --- ## Page: https://docs.n8n.io/integrations/builtin/app-nodes/n8n-nodes-base.woocommerce/ Use the WooCommerce node to automate work in WooCommerce, and integrate WooCommerce with other applications. n8n has built-in support for a wide range of WooCommerce features, including creating and deleting customers, orders, and products. On this page, you'll find a list of operations the WooCommerce node supports and links to more resources. This node can be used as an AI tool This node can be used to enhance the capabilities of an AI agent. When used in this way, many parameters can be set automatically, or with information directed by AI - find out more in the AI tool parameters documentation. ## Operations# * Customer * Create a customer * Delete a customer * Retrieve a customer * Retrieve all customers * Update a customer * Order * Create a order * Delete a order * Get a order * Get all orders * Update an order * Product * Create a product * Delete a product * Get a product * Get all products * Update a product ## Templates and examples# ## What to do if your operation isn't supported# If this node doesn't support the operation you want to do, you can use the HTTP Request node to call the service's API. You can use the credential you created for this service in the HTTP Request node: 1. In the HTTP Request node, select **Authentication** > **Predefined Credential Type**. 2. Select the service you want to connect to. 3. Select your credential. Refer to Custom API operations for more information. --- ## Page: https://docs.n8n.io/integrations/builtin/app-nodes/n8n-nodes-base.wordpress/ Use the WordPress node to automate work in WordPress, and integrate WordPress with other applications. n8n has built-in support for a wide range of WordPress features, including creating, updating, and getting posts and users. On this page, you'll find a list of operations the WordPress node supports and links to more resources. This node can be used as an AI tool This node can be used to enhance the capabilities of an AI agent. When used in this way, many parameters can be set automatically, or with information directed by AI - find out more in the AI tool parameters documentation. ## Operations# * Post * Create a post * Get a post * Get all posts * Update a post * Pages * Create a page * Get a page * Get all pages * Update a page * User * Create a user * Get a user * Get all users * Update a user ## Templates and examples# ## What to do if your operation isn't supported# If this node doesn't support the operation you want to do, you can use the HTTP Request node to call the service's API. You can use the credential you created for this service in the HTTP Request node: 1. In the HTTP Request node, select **Authentication** > **Predefined Credential Type**. 2. Select the service you want to connect to. 3. Select your credential. Refer to Custom API operations for more information. --- ## Page: https://docs.n8n.io/integrations/builtin/app-nodes/n8n-nodes-base.twitter/ Use the X node to automate work in X and integrate X with other applications. n8n has built-in support for a wide range of X features, including creating direct messages and deleting, searching, liking, and retweeting a tweet. On this page, you'll find a list of operations the X node supports and links to more resources. Credentials Refer to X credentials for guidance on setting up authentication. This node can be used as an AI tool This node can be used to enhance the capabilities of an AI agent. When used in this way, many parameters can be set automatically, or with information directed by AI - find out more in the AI tool parameters documentation. ## Operations# * Direct Message * Create a direct message * Tweet * Create or reply a tweet * Delete a tweet * Search tweets * Like a tweet * Retweet a tweet ## Templates and examples# --- ## Page: https://docs.n8n.io/integrations/builtin/app-nodes/n8n-nodes-base.xero/ Use the Xero node to automate work in Xero, and integrate Xero with other applications. n8n has built-in support for a wide range of Xero features, including creating, updating, and getting contacts and invoices. On this page, you'll find a list of operations the Xero node supports and links to more resources. Credentials Refer to Xero credentials for guidance on setting up authentication. ## Operations# * Contact * Create a contact * Get a contact * Get all contacts * Update a contact * Invoice * Create a invoice * Get a invoice * Get all invoices * Update a invoice ## Templates and examples# Browse Xero integration templates, or search all templates Refer to Xero's API documentation for more information about the service. ## What to do if your operation isn't supported# If this node doesn't support the operation you want to do, you can use the HTTP Request node to call the service's API. You can use the credential you created for this service in the HTTP Request node: 1. In the HTTP Request node, select **Authentication** > **Predefined Credential Type**. 2. Select the service you want to connect to. 3. Select your credential. Refer to Custom API operations for more information. --- ## Page: https://docs.n8n.io/integrations/builtin/app-nodes/n8n-nodes-base.yourls/ Use the Yourls node to automate work in Yourls, and integrate Yourls with other applications. n8n has built-in support for a wide range of Yourls features, including expanding and shortening URLs. On this page, you'll find a list of operations the Yourls node supports and links to more resources. Credentials Refer to Yourls credentials for guidance on setting up authentication. ## Operations# * URL * Expand a URL * Shorten a URL * Get stats about one short URL ## Templates and examples# Browse Yourls integration templates, or search all templates --- ## Page: https://docs.n8n.io/integrations/builtin/app-nodes/n8n-nodes-base.youtube/ Use the YouTube node to automate work in YouTube, and integrate YouTube with other applications. n8n has built-in support for a wide range of YouTube features, including retrieving and updating channels, as well as creating and deleting playlists. On this page, you'll find a list of operations the YouTube node supports and links to more resources. This node can be used as an AI tool This node can be used to enhance the capabilities of an AI agent. When used in this way, many parameters can be set automatically, or with information directed by AI - find out more in the AI tool parameters documentation. ## Operations# * Channel * Retrieve a channel * Retrieve all channels * Update a channel * Upload a channel banner * Playlist * Create a playlist * Delete a playlist * Get a playlist * Retrieve all playlists * Update a playlist * Playlist Item * Add an item to a playlist * Delete a item from a playlist * Get a playlist's item * Retrieve all playlist items * Video * Delete a video * Get a video * Retrieve all videos * Rate a video * Update a video * Upload a video * Video Category * Retrieve all video categories ## Templates and examples# ## What to do if your operation isn't supported# If this node doesn't support the operation you want to do, you can use the HTTP Request node to call the service's API. You can use the credential you created for this service in the HTTP Request node: 1. In the HTTP Request node, select **Authentication** > **Predefined Credential Type**. 2. Select the service you want to connect to. 3. Select your credential. Refer to Custom API operations for more information. --- ## Page: https://docs.n8n.io/integrations/builtin/app-nodes/n8n-nodes-base.zammad/ Use the Zammad node to automate work in Zammad, and integrate Zammad with other applications. n8n has built-in support for a wide range of Zammad features, including creating, retrieving, and deleting groups and organizations. On this page, you'll find a list of operations the Zammad node supports and links to more resources. ## Operations# * Group * Create * Delete * Get * Get many * Update * Organization * Create * Delete * Get * Get many * Update * Ticket * Create * Delete * Get * Get many * User * Create * Delete * Get * Get many * Get self * Update ## Templates and examples# --- ## Page: https://docs.n8n.io/integrations/builtin/app-nodes/n8n-nodes-base.zendesk/ Use the Zendesk node to automate work in Zendesk, and integrate Zendesk with other applications. n8n has built-in support for a wide range of Zendesk features, including creating, and deleting tickets, users, and organizations. On this page, you'll find a list of operations the Zendesk node supports and links to more resources. This node can be used as an AI tool This node can be used to enhance the capabilities of an AI agent. When used in this way, many parameters can be set automatically, or with information directed by AI - find out more in the AI tool parameters documentation. ## Operations# * Ticket * Create a ticket * Delete a ticket * Get a ticket * Get all tickets * Recover a suspended ticket * Update a ticket * Ticket Field * Get a ticket field * Get all system and custom ticket fields * User * Create a user * Delete a user * Get a user * Get all users * Get a user's organizations * Get data related to the user * Search users * Update a user * Organization * Create an organization * Delete an organization * Count organizations * Get an organization * Get all organizations * Get data related to the organization * Update a organization ## Templates and examples# ## What to do if your operation isn't supported# If this node doesn't support the operation you want to do, you can use the HTTP Request node to call the service's API. You can use the credential you created for this service in the HTTP Request node: 1. In the HTTP Request node, select **Authentication** > **Predefined Credential Type**. 2. Select the service you want to connect to. 3. Select your credential. Refer to Custom API operations for more information. --- ## Page: https://docs.n8n.io/integrations/builtin/app-nodes/n8n-nodes-base.zohocrm/ Use the Zoho CRM node to automate work in Zoho CRM, and integrate Zoho CRM with other applications. n8n has built-in support for a wide range of Zoho CRM features, including creating and deleting accounts, contacts, and deals. On this page, you'll find a list of operations the Zoho CRM node supports and links to more resources. This node can be used as an AI tool This node can be used to enhance the capabilities of an AI agent. When used in this way, many parameters can be set automatically, or with information directed by AI - find out more in the AI tool parameters documentation. ## Operations# * Account * Create an account * Create a new record, or update the current one if it already exists (upsert) * Delete an account * Get an account * Get all accounts * Update an account * Contact * Create a contact * Create a new record, or update the current one if it already exists (upsert) * Delete a contact * Get a contact * Get all contacts * Update a contact * Deal * Create a deal * Create a new record, or update the current one if it already exists (upsert) * Delete a contact * Get a contact * Get all contacts * Update a contact * Invoice * Create an invoice * Create a new record, or update the current one if it already exists (upsert) * Delete an invoice * Get an invoice * Get all invoices * Update an invoice * Lead * Create a lead * Create a new record, or update the current one if it already exists (upsert) * Delete a lead * Get a lead * Get all leads * Get lead fields * Update a lead * Product * Create a product * Create a new record, or update the current one if it already exists (upsert) * Delete a product * Get a product * Get all products * Update a product * Purchase Order * Create a purchase order * Create a new record, or update the current one if it already exists (upsert) * Delete a purchase order * Get a purchase order * Get all purchase orders * Update a purchase order * Quote * Create a quote * Create a new record, or update the current one if it already exists (upsert) * Delete a quote * Get a quote * Get all quotes * Update a quote * Sales Order * Create a sales order * Create a new record, or update the current one if it already exists (upsert) * Delete a sales order * Get a sales order * Get all sales orders * Update a sales order * Vendor * Create a vendor * Create a new record, or update the current one if it already exists (upsert) * Delete a vendor * Get a vendor * Get all vendors * Update a vendor ## Templates and examples# Browse Zoho CRM integration templates, or search all templates ## What to do if your operation isn't supported# If this node doesn't support the operation you want to do, you can use the HTTP Request node to call the service's API. You can use the credential you created for this service in the HTTP Request node: 1. In the HTTP Request node, select **Authentication** > **Predefined Credential Type**. 2. Select the service you want to connect to. 3. Select your credential. Refer to Custom API operations for more information. --- ## Page: https://docs.n8n.io/integrations/builtin/app-nodes/n8n-nodes-base.zoom/ Use the Zoom node to automate work in Zoom, and integrate Zoom with other applications. n8n has built-in support for a wide range of Zoom features, including creating, retrieving, deleting, and updating meetings. On this page, you'll find a list of operations the Zoom node supports and links to more resources. Credentials Refer to Zoom credentials for guidance on setting up authentication. This node can be used as an AI tool This node can be used to enhance the capabilities of an AI agent. When used in this way, many parameters can be set automatically, or with information directed by AI - find out more in the AI tool parameters documentation. ## Operations# * Meeting * Create a meeting * Delete a meeting * Retrieve a meeting * Retrieve all meetings * Update a meeting ## Templates and examples# ## What to do if your operation isn't supported# If this node doesn't support the operation you want to do, you can use the HTTP Request node to call the service's API. You can use the credential you created for this service in the HTTP Request node: 1. In the HTTP Request node, select **Authentication** > **Predefined Credential Type**. 2. Select the service you want to connect to. 3. Select your credential. Refer to Custom API operations for more information. --- ## Page: https://docs.n8n.io/integrations/builtin/app-nodes/n8n-nodes-base.zulip/ Use the Zulip node to automate work in Zulip, and integrate Zulip with other applications. n8n has built-in support for a wide range of Zulip features, including creating, deleting, and getting users and streams, as well as sending messages. On this page, you'll find a list of operations the Zulip node supports and links to more resources. ## Operations# * Message * Delete a message * Get a message * Send a private message * Send a message to stream * Update a message * Upload a file * Stream * Create a stream. * Delete a stream. * Get all streams. * Get subscribed streams. * Update a stream. * User * Create a user. * Deactivate a user. * Get a user. * Get all users. * Update a user. ## Templates and examples# Browse Zulip integration templates, or search all templates --- ## Page: https://docs.n8n.io/integrations/builtin/trigger-nodes/ Change cookie settings Made with Material for MkDocs Insiders --- ## Page: https://docs.n8n.io/integrations/builtin/trigger-nodes/n8n-nodes-base.activecampaigntrigger/ ActiveCampaign is a cloud software platform for small-to-mid-sized business. The company offers software for customer experience automation, which combines the email marketing, marketing automation, sales automation, and CRM categories. Credentials You can find authentication information for this node here. Examples and templates For usage examples and templates to help you get started, refer to n8n's ActiveCampaign Trigger integrations page. --- ## Page: https://docs.n8n.io/integrations/builtin/trigger-nodes/n8n-nodes-base.acuityschedulingtrigger/ n8n Docs * Using n8n * Getting started Getting started * Learning path * Choose your n8n * Quickstarts * A very quick quickstart * A longer introduction * Video courses * Text courses * Level one * Navigating the editor UI * Building a mini-workflow * Automating a (real-world) use case * Designing the workflow * Building the workflow Building the workflow * Getting data from the data warehouse * Inserting data into airtable * Filtering orders * Setting values for processing orders * Calculating booked orders * Notifying the team * Scheduling the workflow * Activating and examining the workflow * Exporting and importing workflows * Test your knowledge * Level two * Understanding the data structure * Processing different data types * Merging and splitting data * Dealing with errors in workflows * Automating a business workflow Automating a business workflow * Use case * Workflow 1 * Workflow 2 * Workflow 3 * Test your knowledge * Using the app Using the app * Understand workflows * Create and run * Components * Nodes * Connections * Sticky Notes * Executions * Manual, partial, and production executions * Workflow-level executions * All executions * Custom executions data * Debug executions * Tags * Export and import * Templates * Sharing * Settings * Workflow history * Workflow ID * Manage credentials * Create and edit * Credential sharing * Manage users and access * Cloud setup * Manage users * Account types * Role-based access control * Role types * Projects * Best practices * 2FA * LDAP * SAML * Set up SAML * Okta Workforce Identity SAML setup * Troubleshooting * Manage users with SAML * Keyboard shortcuts * Key concepts Key concepts * Flow logic * Splitting with conditionals * Merging data * Looping * Waiting * Sub-workflows * Error handling * Execution order in multi-branch workflows * Data * Data structure * Data flow within nodes * Transforming data * Process data using code * Data mapping * Data mapping in the UI * Data mapping in the expressions editor * Data item linking * Item linking concepts * Item linking in the Code node * Item linking errors * Item linking for node creators * Data pinning * Data editing * Data filtering * Data mocking * Binary data * Schema preview * Glossary * n8n Cloud n8n Cloud * Overview * Access the Cloud admin dashboard * Update your n8n Cloud version * Set the timezone * Cloud IP addresses * Cloud data management * Change ownership or username * Concurrency * AI Assistant * Enterprise features Enterprise features * Source control and environments * Understand * Environments * Git in n8n * Branch patterns * Set up * Using * Push and pull * Copy work between environments * Manage variables * Tutorial: Create environments with source control * External secrets * Log streaming * License key * Releases Releases * Release notes Release notes * 1.x * 0.x * v1.0 migration guide * Help and community Help and community * Where to get help * Contributing * Licenses and privacy Licenses and privacy * Privacy and security * Privacy * Security * Incident response * What you can do * Sustainable use license * Integrations * Built-in nodes Built-in nodes * Node types * Core nodes * Activation Trigger * Aggregate * AI Transform * Code * Keyboard shortcuts * Common issues * Compare Datasets * Compression * Chat Trigger * Common issues * Convert to File * Crypto * Date & Time * Debug Helper * Edit Fields (Set) * Edit Image * Email Trigger (IMAP) * Error Trigger * Execute Command * Common issues * Execute Sub-workflow * Execute Sub-workflow Trigger * Execution Data * Extract From File * Filter * FTP * Git * GraphQL * HTML * HTTP Request * Common issues * If * JWT * LDAP * Limit * Local File Trigger * Loop Over Items (Split in Batches) * Manual Trigger * Markdown * MCP Server Trigger * Merge * n8n * n8n Form * n8n Form Trigger * n8n Trigger * No Operation, do nothing * Read/Write Files from Disk * Remove Duplicates * Templates and examples * Rename Keys * Respond to Webhook * RSS Read * RSS Feed Trigger * Schedule Trigger * Common issues * Send Email * Sort * Split Out * SSE Trigger * SSH * Stop And Error * Summarize * Switch * TOTP * Wait * Webhook * Workflow development * Common issues * Workflow Trigger * XML * Actions * Action Network * ActiveCampaign * Adalo * Affinity * Agile CRM * Airtable * Common issues * Airtop * AMQP Sender * APITemplate.io * Asana * Automizy * Autopilot * AWS Certificate Manager * AWS Comprehend * AWS DynamoDB * AWS Elastic Load Balancing * AWS Lambda * AWS Rekognition * AWS S3 * AWS SES * AWS SNS * AWS SQS * AWS Textract * AWS Transcribe * Azure Storage * BambooHR * Bannerbear * Baserow * Beeminder * Bitly * Bitwarden * Box * Brandfetch * Brevo * Bubble * Chargebee * CircleCI * Webex by Cisco * Clearbit * ClickUp * Clockify * Cloudflare * Cockpit * Coda * CoinGecko * Contentful * ConvertKit * Copper * Cortex * CrateDB * crowd.dev * Customer.io * DeepL * Demio * DHL * Discord * Common issues * Discourse * Disqus * Drift * Dropbox * Dropcontact * E-goi * Elasticsearch * Elastic Security * Emelia * ERPNext * Facebook Graph API * FileMaker * Flow * Freshdesk * Freshservice * Freshworks CRM * GetResponse * Ghost * GitHub * GitLab * Gmail * Draft operations * Label operations * Message operations * Thread operations * Common issues * Gong * Google Ads * Google Analytics * Google BigQuery * Google Books * Google Business Profile * Google Calendar * Calendar operations * Event operations * Google Chat * Google Cloud Firestore * Google Cloud Natural Language * Google Cloud Realtime Database * Google Cloud Storage * Google Contacts * Google Docs * Google Drive * File operations * File and folder operations * Folder operations * Shared drive operations * Common issues * Google Perspective * Google Sheets * Document operations * Sheet within Document operations * Common issues * Google Slides * Google Tasks * Google Translate * Google Workspace Admin * Gotify * GoToWebinar * Grafana * Grist * Hacker News * HaloPSA * Harvest * Help Scout * HighLevel * Home Assistant * HubSpot * Humantic AI * Hunter * Intercom * Invoice Ninja * Iterable * Jenkins * Jira Software * Kafka * Keap * Kitemaker * KoboToolbox * Lemlist * Line * Linear * LingvaNex * LinkedIn * LoneScale * Magento 2 * Mailcheck * Mailchimp * MailerLite * Mailgun * Mailjet * Mandrill * marketstack * Matrix * Mattermost * Mautic * Medium * MessageBird * Metabase * Microsoft Dynamics CRM * Microsoft Entra ID * Microsoft Excel 365 * Microsoft Graph Security * Microsoft OneDrive * Microsoft Outlook * Microsoft SQL * Microsoft Teams * Microsoft To Do * Mindee * MISP * Mocean * monday.com * MongoDB * Monica CRM * MQTT * MSG91 * MySQL * Common issues * Customer Datastore (n8n Training) * Customer Messenger (n8n Training) * NASA * Netlify * Netscaler ADC * Nextcloud * NocoDB * Notion * Common issues * npm * Odoo * Okta * One Simple API * Onfleet * OpenAI * Assistant operations * Audio operations * File operations * Image operations * Text operations * Common issues * OpenThesaurus * OpenWeatherMap * Oura * Paddle * PagerDuty * PayPal * Peekalink * PhantomBuster * Philips Hue * Pipedrive * Plivo * PostBin * Postgres * Common issues * PostHog * ProfitWell * Pushbullet * Pushcut * Pushover * QuestDB * Quick Base * QuickBooks Online * QuickChart * RabbitMQ * Raindrop * Reddit * Redis * Rocket.Chat * Rundeck * S3 * Salesforce * Salesmate * SeaTable * SecurityScorecard * Segment * SendGrid * Sendy * Sentry.io * ServiceNow * seven * Shopify * SIGNL4 * Slack * Snowflake * Splunk * Spontit * Spotify * Stackby * Storyblok * Strapi * Strava * Stripe * Supabase * Common issues * SyncroMSP * Taiga * Tapfiliate * Telegram * Chat operations * Callback operations * File operations * Message operations * Common issues * TheHive * TheHive 5 * TimescaleDB * Todoist * Travis CI * Trello * Twake * Twilio * Twist * Unleashed Software * UpLead * uProc * UptimeRobot * urlscan.io * Venafi TLS Protect Cloud * Venafi TLS Protect Datacenter * Vero * Vonage * Webflow * Wekan * WhatsApp Business Cloud * Common issues * Wise * WooCommerce * WordPress * X (Formerly Twitter) * Xero * Yourls * YouTube * Zammad * Zendesk * Zoho CRM * Zoom * Zulip * Triggers * ActiveCampaign Trigger * Acuity Scheduling Trigger * Affinity Trigger * Airtable Trigger * AMQP Trigger * Asana Trigger * Autopilot Trigger * AWS SNS Trigger * Bitbucket Trigger * Box Trigger * Brevo Trigger * Calendly Trigger * Cal Trigger * Chargebee Trigger * ClickUp Trigger * Clockify Trigger * ConvertKit Trigger * Copper Trigger * crowd.dev Trigger * Customer.io Trigger * Emelia Trigger * Eventbrite Trigger * Facebook Lead Ads Trigger * Facebook Trigger * Ad Account * Application * Certificate Transparency * Group * Instagram * Link * Page * Permissions * User * WhatsApp Business Account * Workplace Security * Figma Trigger (Beta) * Flow Trigger * Form.io Trigger * Formstack Trigger * GetResponse Trigger * GitHub Trigger * GitLab Trigger * Gmail Trigger * Poll Mode options * Common issues * Google Calendar Trigger * Google Drive Trigger * Common issues * Google Business Profile Trigger * Google Sheets Trigger * Common issues * Gumroad Trigger * Help Scout Trigger * Hubspot Trigger * Invoice Ninja Trigger * Jira Trigger * JotForm Trigger * Kafka Trigger * Keap Trigger * KoboToolbox Trigger * Lemlist Trigger * Linear Trigger * LoneScale Trigger * Mailchimp Trigger * MailerLite Trigger * Mailjet Trigger * Mautic Trigger * Microsoft OneDrive Trigger * Microsoft Outlook Trigger * MQTT Trigger * Netlify Trigger * Notion Trigger * Onfleet Trigger * PayPal Trigger * Pipedrive Trigger * Postgres Trigger * Postmark Trigger * Pushcut Trigger * RabbitMQ Trigger * Redis Trigger * Salesforce Trigger * SeaTable Trigger * Shopify Trigger * Slack Trigger * Strava Trigger * Stripe Trigger * SurveyMonkey Trigger * Taiga Trigger * Telegram Trigger * Common issues * TheHive 5 Trigger * TheHive Trigger * Toggl Trigger * Trello Trigger * Twilio Trigger * Typeform Trigger * Venafi TLS Protect Cloud Trigger * Webex by Cisco Trigger * Webflow Trigger * WhatsApp Trigger * Wise Trigger * WooCommerce Trigger * Workable Trigger * Wufoo Trigger * Zendesk Trigger * Cluster nodes * Root nodes * AI Agent * Conversational Agent * OpenAI Functions Agent * Plan and Execute Agent * ReAct Agent * SQL Agent * Tools Agent * Common issues * Basic LLM Chain * Question and Answer Chain * Common issues * Summarization Chain * Information Extractor * Text Classifier * Sentiment Analysis * LangChain Code * Simple Vector Store * Milvus Vector Store * MongoDB Atlas Vector Store * PGVector Vector Store * Pinecone Vector Store * Qdrant Vector Store * Supabase Vector Store * Zep Vector Store * Sub-nodes * Default Data Loader * GitHub Document Loader * Embeddings AWS Bedrock * Embeddings Azure OpenAI * Embeddings Cohere * Embeddings Google Gemini * Embeddings Google PaLM * Embeddings Google Vertex * Embeddings HuggingFace Inference * Embeddings Mistral Cloud * Embeddings Ollama * Embeddings OpenAI * Anthropic Chat Model * AWS Bedrock Chat Model * Azure OpenAI Chat Model * DeepSeek Chat Model * Google Gemini Chat Model * Google Vertex Chat Model * Groq Chat Model * Mistral Cloud Chat Model * Ollama Chat Model * Common issues * OpenAI Chat Model * Common issues * OpenRouter Chat Model * Cohere Model * Ollama Model * Common issues * Hugging Face Inference Model * Chat Memory Manager * Simple Memory * Common issues * Motorhead * MongoDB Chat Memory * Redis Chat Memory * Postgres Chat Memory * Xata * Zep * Auto-fixing Output Parser * Item List Output Parser * Structured Output Parser * Common issues * Contextual Compression Retriever * MultiQuery Retriever * Vector Store Retriever * Workflow Retriever * Character Text Splitter * Recursive Character Text Splitter * Token Splitter * Calculator * Custom Code Tool * HTTP Request Tool * MCP Client Tool * SerpApi (Google Search) * Think Tool * Vector Store Question Answer Tool * Wikipedia * Wolfram|Alpha * Custom n8n Workflow Tool * Credentials * Action Network credentials * ActiveCampaign credentials * Acuity Scheduling credentials * Adalo credentials * Affinity credentials * Agile CRM credentials * Airtable credentials * Airtop credentials * AlienVault credentials * AMQP credentials * Anthropic credentials * APITemplate.io credentials * Asana credentials * Auth0 Management credentials * Automizy credentials * Autopilot credentials * AWS credentials * Azure OpenAI credentials * Azure Storage credentials * BambooHR credentials * Bannerbear credentials * Baserow credentials * Beeminder credentials * Bitbucket credentials * Bitly credentials * Bitwarden credentials * Box credentials * Brandfetch credentials * Brevo credentials * Bubble credentials * Cal.com credentials * Calendly credentials * Carbon Black credentials * Chargebee credentials * CircleCI credentials * Cisco Meraki credentials * Cisco Secure Endpoint credentials * Cisco Umbrella credentials * Clearbit credentials * ClickUp credentials * Clockify credentials * Cloudflare credentials * Cockpit credentials * Coda credentials * Cohere credentials * Contentful credentials * ConvertAPI credentials * ConvertKit credentials * Copper credentials * Cortex credentials * CrateDB credentials * crowd.dev credentials * CrowdStrike credentials * Customer.io credentials * Datadog credentials * DeepL credentials * DeepSeek credentials * Demio credentials * DFIR-IRIS credentials * DHL credentials * Discord credentials * Discourse credentials * Disqus credentials * Drift credentials * Dropbox credentials * Dropcontact credentials * Dynatrace credentials * E-goi credentials * Elasticsearch credentials * Elastic Security credentials * Emelia credentials * ERPNext credentials * Eventbrite credentials * F5 Big-IP credentials * Facebook App credentials * Facebook Graph API credentials * Facebook Lead Ads credentials * Figma credentials * FileMaker credentials * Filescan credentials * Flow credentials * Form.io Trigger credentials * Formstack Trigger credentials * Fortinet FortiGate credentials * Freshdesk credentials * Freshservice credentials * Freshworks CRM credentials * FTP credentials * GetResponse credentials * Ghost credentials * Git credentials * GitHub credentials * GitLab credentials * Gong credentials * Google * Google OAuth2 single service * Google OAuth2 generic * Google Service Account * Google Gemini(PaLM) credentials * Gotify credentials * GoToWebinar credentials * Grafana credentials * Grist credentials * Groq credentials * Gumroad credentials * HaloPSA credentials * Harvest credentials * Help Scout credentials * HighLevel credentials * Home Assistant credentials * HTTP Request credentials * HubSpot credentials * Hugging Face credentials * Humantic AI credentials * Hunter credentials * Hybrid Analysis credentials * IMAP * Gmail * Outlook.com * Yahoo * Imperva WAF credentials * Intercom credentials * Invoice Ninja credentials * Iterable credentials * Jenkins credentials * Jira credentials * JotForm credentials * JWT credentials * Kafka credentials * Keap credentials * Kibana credentials * Kitemaker credentials * KoboToolbox credentials * LDAP credentials * Lemlist credentials * Line credentials * Linear credentials * LingvaNex credentials * LinkedIn credentials * LoneScale credentials * Magento 2 credentials * Mailcheck credentials * Mailchimp credentials * MailerLite credentials * Mailgun credentials * Mailjet credentials * Malcore credentials * Mandrill credentials * Marketstack credentials * Matrix credentials * Mattermost credentials * Mautic credentials * Medium credentials * MessageBird credentials * Metabase credentials * Microsoft credentials * Microsoft Azure Monitor credentials * Microsoft Entra ID credentials * Microsoft SQL credentials * Milvus credentials * Mindee credentials * Miro credentials * MISP credentials * Mist credentials * Mistral Cloud credentials * Mocean credentials * monday.com credentials * MongoDB credentials * Monica CRM credentials * Motorhead credentials * MQTT credentials * MSG91 credentials * MySQL credentials * NASA credentials * Netlify credentials * Netscaler ADC credentials * Nextcloud credentials * NocoDB credentials * Notion credentials * npm credentials * Odoo credentials * Okta credentials * Ollama credentials * One Simple API credentials * Onfleet credentials * OpenAI credentials * OpenCTI credentials * OpenRouter credentials * OpenWeatherMap credentials * Oura credentials * Paddle credentials * PagerDuty credentials * PayPal credentials * Peekalink credentials * PhantomBuster credentials * Philips Hue credentials * Pinecone credentials * Pipedrive credentials * Plivo credentials * Postgres credentials * PostHog credentials * Postmark credentials * ProfitWell credentials * Pushbullet credentials * Pushcut credentials * Pushover credentials * QRadar credentials * Qdrant credentials * Qualys credentials * QuestDB credentials * Quick Base credentials * QuickBooks credentials * RabbitMQ credentials * Raindrop credentials * Rapid7 InsightVM credentials * Recorded Future credentials * Reddit credentials * Redis credentials * Rocket.Chat credentials * Rundeck credentials * S3 credentials * Salesforce credentials * Salesmate credentials * SeaTable credentials * SecurityScorecard credentials * Segment credentials * Sekoia credentials * Send Email * Gmail * Outlook.com * Yahoo * SendGrid credentials * Sendy credentials * Sentry.io credentials * Serp credentials * ServiceNow credentials * seven credentials * Shopify credentials * Shuffler credentials * SIGNL4 credentials * Slack credentials * Snowflake credentials * SolarWinds IPAM credentials * SolarWinds Observability SaaS credentials * Splunk credentials * Spontit credentials * Spotify credentials * SSH credentials * Stackby credentials * Storyblok credentials * Strapi credentials * Strava credentials * Stripe credentials * Supabase credentials * SurveyMonkey credentials * SyncroMSP credentials * Sysdig credentials * Taiga credentials * Tapfiliate credentials * Telegram credentials * TheHive credentials * TheHive 5 credentials * TimescaleDB credentials * Todoist credentials * Toggl credentials * TOTP credentials * Travis CI credentials * Trellix ePO credentials * Trello credentials * Twake credentials * Twilio credentials * Twist credentials * Typeform credentials * Unleashed Software credentials * UpLead credentials * uProc credentials * UptimeRobot credentials * urlscan.io credentials * Venafi TLS Protect Cloud credentials * Venafi TLS Protect Datacenter credentials * Vero credentials * VirusTotal credentials * Vonage credentials * Webex by Cisco credentials * Webflow credentials * Webhook credentials * Wekan credentials * WhatsApp Business Cloud credentials * Wise credentials * Wolfram|Alpha credentials * WooCommerce credentials * WordPress credentials * Workable credentials * Wufoo credentials * X (formerly Twitter) credentials * Xata credentials * Xero credentials * Yourls credentials * Zabbix credentials * Zammad credentials * Zendesk credentials * Zep credentials * Zoho credentials * Zoom credentials * Zscaler ZIA credentials * Zulip credentials * Custom API actions for existing nodes * Handle rate limits * Community nodes Community nodes * Installation and management * GUI installation * Manual installation * Risks * Blocklist * Using community nodes * Troubleshooting * Building community nodes * Creating nodes Creating nodes * Overview * Plan your node * Choose a node type * Choose a node building style * Node UI design * Choose node file structure * Build your node * Set up your development environment * Tutorial: Build a declarative-style node * Tutorial: Build a programmatic-style node * Reference * Node UI elements * Code standards * Versioning * Choose node file structure * Base files * Structure * Standard parameters * Declarative-style parameters * Programmatic-style parameters * Programmatic-style execute method * Codex files * Credentials files * HTTP request helpers * Item linking * Test your node * Run your node locally * Node linter * Troubleshooting * Deploy your node * Submit community nodes * Install private nodes * Hosting n8n * Community vs Enterprise * Installation Installation * npm * Docker * Server setups * Digital Ocean * Heroku * Hetzner * Amazon Web Services * Azure * Google Cloud * Docker Compose * Updating * Configuration Configuration * Environment variables * Binary data * Credentials * Database * Deployment * Endpoints * Executions * External data storage * External hooks * External secrets * Logs * License * Nodes * Queue mode * Security * Source control * Task runners * Timezone and localization * User management and 2FA * Workflows * Configuration methods * Configuration examples * Isolate n8n * Configure the Base URL * Configure custom SSL certificate authorities * Set a custom encryption key * Configure workflow timeouts * Specify custom nodes location * Enable modules in Code node * Set the timezone * Specify user folder path * Configure webhook URLs with reverse proxy * Enable Prometheus metrics * Supported databases and settings * Task runners * User management * Logging and monitoring Logging and monitoring * Logging * Monitoring * Security audit * Scaling and performance Scaling and performance * Overview * Performance and benchmarking * Configuring queue mode * Concurrency control * Execution data * Binary data * External storage for binary data * Memory-related errors * Securing n8n Securing n8n * Overview * Set up SSL * Set up SSO * Security audit * Disable the API * Opt out of data collection * Blocking nodes * Hardening task runners * Starter Kits Starter Kits * AI Starter Kit * Architecture Architecture * Overview * Database structure * Using the CLI Using the CLI * CLI commands * Code in n8n * Expressions * Using the Code node * AI coding * Built in methods and variables Built in methods and variables * Overview * Current node input * Output of other nodes * Date and time * JMESPath * HTTP node * LangChain Code node * n8n metadata * Convenience methods * Data transformation functions * Arrays * Booleans * Dates * Numbers * Objects * Strings * Custom variables Custom variables * Create custom variables * Cookbook Cookbook * Handling dates * Query JSON with JMESPath * Built-in methods and variables examples * execution * getWorkflowStaticData * Retrieve linked items from earlier in the workflow * (node-name).all * vars * Expressions * Check incoming data * Common issues * Code node * Get number of items returned by last node * Get the binary data buffer * Output to the browser console * HTTP Request node * Pagination * Advanced AI * Tutorial: Build an AI workflow in n8n * LangChain in n8n LangChain in n8n * Overview * Langchain concepts in n8n * LangChain learning resources * Use LangSmith with n8n * Examples and concepts Examples and concepts * Introduction * What is a chain? * What is an agent? * Agents vs chains example * What is memory? * What is a tool? * Use Google Sheets as a data source * Call an API to fetch data * Set a human fallback for AI workflows * Let AI specify tool parameters * What is a vector database? * Populate a Pinecone vector database from a website * API * Authentication * Pagination * Using the API playground * API reference * Embed * Prerequisites * Deployment * Configuration * Workflow management * Workflows templates * White labelling 1. Integrations 2. Built-in nodes 3. Triggers Acuity Scheduling is a cloud-based appointment scheduling software solution that enables business owners to manage their appointments online. It has the capability to automatically sync calendars according to users' time zones and can send regular alerts and reminders to users regarding their appointment schedules. Credentials You can find authentication information for this node here. --- ## Page: https://docs.n8n.io/integrations/builtin/trigger-nodes/n8n-nodes-base.affinitytrigger/ * Using n8n * Integrations * Hosting n8n * Code in n8n * Advanced AI * API * Embed * n8n home ↗ * Forum ↗ * Blog ↗ n8n Docs * Using n8n * Getting started Getting started * Learning path * Choose your n8n * Quickstarts * A very quick quickstart * A longer introduction * Video courses * Text courses * Level one * Navigating the editor UI * Building a mini-workflow * Automating a (real-world) use case * Designing the workflow * Building the workflow Building the workflow * Getting data from the data warehouse * Inserting data into airtable * Filtering orders * Setting values for processing orders * Calculating booked orders * Notifying the team * Scheduling the workflow * Activating and examining the workflow * Exporting and importing workflows * Test your knowledge * Level two * Understanding the data structure * Processing different data types * Merging and splitting data * Dealing with errors in workflows * Automating a business workflow Automating a business workflow * Use case * Workflow 1 * Workflow 2 * Workflow 3 * Test your knowledge * Using the app Using the app * Understand workflows * Create and run * Components * Nodes * Connections * Sticky Notes * Executions * Manual, partial, and production executions * Workflow-level executions * All executions * Custom executions data * Debug executions * Tags * Export and import * Templates * Sharing * Settings * Workflow history * Workflow ID * Manage credentials * Create and edit * Credential sharing * Manage users and access * Cloud setup * Manage users * Account types * Role-based access control * Role types * Projects * Best practices * 2FA * LDAP * SAML * Set up SAML * Okta Workforce Identity SAML setup * Troubleshooting * Manage users with SAML * Keyboard shortcuts * Key concepts Key concepts * Flow logic * Splitting with conditionals * Merging data * Looping * Waiting * Sub-workflows * Error handling * Execution order in multi-branch workflows * Data * Data structure * Data flow within nodes * Transforming data * Process data using code * Data mapping * Data mapping in the UI * Data mapping in the expressions editor * Data item linking * Item linking concepts * Item linking in the Code node * Item linking errors * Item linking for node creators * Data pinning * Data editing * Data filtering * Data mocking * Binary data * Schema preview * Glossary * n8n Cloud n8n Cloud * Overview * Access the Cloud admin dashboard * Update your n8n Cloud version * Set the timezone * Cloud IP addresses * Cloud data management * Change ownership or username * Concurrency * AI Assistant * Enterprise features Enterprise features * Source control and environments * Understand * Environments * Git in n8n * Branch patterns * Set up * Using * Push and pull * Copy work between environments * Manage variables * Tutorial: Create environments with source control * External secrets * Log streaming * License key * Releases Releases * Release notes Release notes * 1.x * 0.x * v1.0 migration guide * Help and community Help and community * Where to get help * Contributing * Licenses and privacy Licenses and privacy * Privacy and security * Privacy * Security * Incident response * What you can do * Sustainable use license * Integrations * Built-in nodes Built-in nodes * Node types * Core nodes * Activation Trigger * Aggregate * AI Transform * Code * Keyboard shortcuts * Common issues * Compare Datasets * Compression * Chat Trigger * Common issues * Convert to File * Crypto * Date & Time * Debug Helper * Edit Fields (Set) * Edit Image * Email Trigger (IMAP) * Error Trigger * Execute Command * Common issues * Execute Sub-workflow * Execute Sub-workflow Trigger * Execution Data * Extract From File * Filter * FTP * Git * GraphQL * HTML * HTTP Request * Common issues * If * JWT * LDAP * Limit * Local File Trigger * Loop Over Items (Split in Batches) * Manual Trigger * Markdown * MCP Server Trigger * Merge * n8n * n8n Form * n8n Form Trigger * n8n Trigger * No Operation, do nothing * Read/Write Files from Disk * Remove Duplicates * Templates and examples * Rename Keys * Respond to Webhook * RSS Read * RSS Feed Trigger * Schedule Trigger * Common issues * Send Email * Sort * Split Out * SSE Trigger * SSH * Stop And Error * Summarize * Switch * TOTP * Wait * Webhook * Workflow development * Common issues * Workflow Trigger * XML * Actions * Action Network * ActiveCampaign * Adalo * Affinity * Agile CRM * Airtable * Common issues * Airtop * AMQP Sender * APITemplate.io * Asana * Automizy * Autopilot * AWS Certificate Manager * AWS Comprehend * AWS DynamoDB * AWS Elastic Load Balancing * AWS Lambda * AWS Rekognition * AWS S3 * AWS SES * AWS SNS * AWS SQS * AWS Textract * AWS Transcribe * Azure Storage * BambooHR * Bannerbear * Baserow * Beeminder * Bitly * Bitwarden * Box * Brandfetch * Brevo * Bubble * Chargebee * CircleCI * Webex by Cisco * Clearbit * ClickUp * Clockify * Cloudflare * Cockpit * Coda * CoinGecko * Contentful * ConvertKit * Copper * Cortex * CrateDB * crowd.dev * Customer.io * DeepL * Demio * DHL * Discord * Common issues * Discourse * Disqus * Drift * Dropbox * Dropcontact * E-goi * Elasticsearch * Elastic Security * Emelia * ERPNext * Facebook Graph API * FileMaker * Flow * Freshdesk * Freshservice * Freshworks CRM * GetResponse * Ghost * GitHub * GitLab * Gmail * Draft operations * Label operations * Message operations * Thread operations * Common issues * Gong * Google Ads * Google Analytics * Google BigQuery * Google Books * Google Business Profile * Google Calendar * Calendar operations * Event operations * Google Chat * Google Cloud Firestore * Google Cloud Natural Language * Google Cloud Realtime Database * Google Cloud Storage * Google Contacts * Google Docs * Google Drive * File operations * File and folder operations * Folder operations * Shared drive operations * Common issues * Google Perspective * Google Sheets * Document operations * Sheet within Document operations * Common issues * Google Slides * Google Tasks * Google Translate * Google Workspace Admin * Gotify * GoToWebinar * Grafana * Grist * Hacker News * HaloPSA * Harvest * Help Scout * HighLevel * Home Assistant * HubSpot * Humantic AI * Hunter * Intercom * Invoice Ninja * Iterable * Jenkins * Jira Software * Kafka * Keap * Kitemaker * KoboToolbox * Lemlist * Line * Linear * LingvaNex * LinkedIn * LoneScale * Magento 2 * Mailcheck * Mailchimp * MailerLite * Mailgun * Mailjet * Mandrill * marketstack * Matrix * Mattermost * Mautic * Medium * MessageBird * Metabase * Microsoft Dynamics CRM * Microsoft Entra ID * Microsoft Excel 365 * Microsoft Graph Security * Microsoft OneDrive * Microsoft Outlook * Microsoft SQL * Microsoft Teams * Microsoft To Do * Mindee * MISP * Mocean * monday.com * MongoDB * Monica CRM * MQTT * MSG91 * MySQL * Common issues * Customer Datastore (n8n Training) * Customer Messenger (n8n Training) * NASA * Netlify * Netscaler ADC * Nextcloud * NocoDB * Notion * Common issues * npm * Odoo * Okta * One Simple API * Onfleet * OpenAI * Assistant operations * Audio operations * File operations * Image operations * Text operations * Common issues * OpenThesaurus * OpenWeatherMap * Oura * Paddle * PagerDuty * PayPal * Peekalink * PhantomBuster * Philips Hue * Pipedrive * Plivo * PostBin * Postgres * Common issues * PostHog * ProfitWell * Pushbullet * Pushcut * Pushover * QuestDB * Quick Base * QuickBooks Online * QuickChart * RabbitMQ * Raindrop * Reddit * Redis * Rocket.Chat * Rundeck * S3 * Salesforce * Salesmate * SeaTable * SecurityScorecard * Segment * SendGrid * Sendy * Sentry.io * ServiceNow * seven * Shopify * SIGNL4 * Slack * Snowflake * Splunk * Spontit * Spotify * Stackby * Storyblok * Strapi * Strava * Stripe * Supabase * Common issues * SyncroMSP * Taiga * Tapfiliate * Telegram * Chat operations * Callback operations * File operations * Message operations * Common issues * TheHive * TheHive 5 * TimescaleDB * Todoist * Travis CI * Trello * Twake * Twilio * Twist * Unleashed Software * UpLead * uProc * UptimeRobot * urlscan.io * Venafi TLS Protect Cloud * Venafi TLS Protect Datacenter * Vero * Vonage * Webflow * Wekan * WhatsApp Business Cloud * Common issues * Wise * WooCommerce * WordPress * X (Formerly Twitter) * Xero * Yourls * YouTube * Zammad * Zendesk * Zoho CRM * Zoom * Zulip * Triggers * ActiveCampaign Trigger * Acuity Scheduling Trigger * Affinity Trigger * Airtable Trigger * AMQP Trigger * Asana Trigger * Autopilot Trigger * AWS SNS Trigger * Bitbucket Trigger * Box Trigger * Brevo Trigger * Calendly Trigger * Cal Trigger * Chargebee Trigger * ClickUp Trigger * Clockify Trigger * ConvertKit Trigger * Copper Trigger * crowd.dev Trigger * Customer.io Trigger * Emelia Trigger * Eventbrite Trigger * Facebook Lead Ads Trigger * Facebook Trigger * Ad Account * Application * Certificate Transparency * Group * Instagram * Link * Page * Permissions * User * WhatsApp Business Account * Workplace Security * Figma Trigger (Beta) * Flow Trigger * Form.io Trigger * Formstack Trigger * GetResponse Trigger * GitHub Trigger * GitLab Trigger * Gmail Trigger * Poll Mode options * Common issues * Google Calendar Trigger * Google Drive Trigger * Common issues * Google Business Profile Trigger * Google Sheets Trigger * Common issues * Gumroad Trigger * Help Scout Trigger * Hubspot Trigger * Invoice Ninja Trigger * Jira Trigger * JotForm Trigger * Kafka Trigger * Keap Trigger * KoboToolbox Trigger * Lemlist Trigger * Linear Trigger * LoneScale Trigger * Mailchimp Trigger * MailerLite Trigger * Mailjet Trigger * Mautic Trigger * Microsoft OneDrive Trigger * Microsoft Outlook Trigger * MQTT Trigger * Netlify Trigger * Notion Trigger * Onfleet Trigger * PayPal Trigger * Pipedrive Trigger * Postgres Trigger * Postmark Trigger * Pushcut Trigger * RabbitMQ Trigger * Redis Trigger * Salesforce Trigger * SeaTable Trigger * Shopify Trigger * Slack Trigger * Strava Trigger * Stripe Trigger * SurveyMonkey Trigger * Taiga Trigger * Telegram Trigger * Common issues * TheHive 5 Trigger * TheHive Trigger * Toggl Trigger * Trello Trigger * Twilio Trigger * Typeform Trigger * Venafi TLS Protect Cloud Trigger * Webex by Cisco Trigger * Webflow Trigger * WhatsApp Trigger * Wise Trigger * WooCommerce Trigger * Workable Trigger * Wufoo Trigger * Zendesk Trigger * Cluster nodes * Root nodes * AI Agent * Conversational Agent * OpenAI Functions Agent * Plan and Execute Agent * ReAct Agent * SQL Agent * Tools Agent * Common issues * Basic LLM Chain * Question and Answer Chain * Common issues * Summarization Chain * Information Extractor * Text Classifier * Sentiment Analysis * LangChain Code * Simple Vector Store * Milvus Vector Store * MongoDB Atlas Vector Store * PGVector Vector Store * Pinecone Vector Store * Qdrant Vector Store * Supabase Vector Store * Zep Vector Store * Sub-nodes * Default Data Loader * GitHub Document Loader * Embeddings AWS Bedrock * Embeddings Azure OpenAI * Embeddings Cohere * Embeddings Google Gemini * Embeddings Google PaLM * Embeddings Google Vertex * Embeddings HuggingFace Inference * Embeddings Mistral Cloud * Embeddings Ollama * Embeddings OpenAI * Anthropic Chat Model * AWS Bedrock Chat Model * Azure OpenAI Chat Model * DeepSeek Chat Model * Google Gemini Chat Model * Google Vertex Chat Model * Groq Chat Model * Mistral Cloud Chat Model * Ollama Chat Model * Common issues * OpenAI Chat Model * Common issues * OpenRouter Chat Model * Cohere Model * Ollama Model * Common issues * Hugging Face Inference Model * Chat Memory Manager * Simple Memory * Common issues * Motorhead * MongoDB Chat Memory * Redis Chat Memory * Postgres Chat Memory * Xata * Zep * Auto-fixing Output Parser * Item List Output Parser * Structured Output Parser * Common issues * Contextual Compression Retriever * MultiQuery Retriever * Vector Store Retriever * Workflow Retriever * Character Text Splitter * Recursive Character Text Splitter * Token Splitter * Calculator * Custom Code Tool * HTTP Request Tool * MCP Client Tool * SerpApi (Google Search) * Think Tool * Vector Store Question Answer Tool * Wikipedia * Wolfram|Alpha * Custom n8n Workflow Tool * Credentials * Action Network credentials * ActiveCampaign credentials * Acuity Scheduling credentials * Adalo credentials * Affinity credentials * Agile CRM credentials * Airtable credentials * Airtop credentials * AlienVault credentials * AMQP credentials * Anthropic credentials * APITemplate.io credentials * Asana credentials * Auth0 Management credentials * Automizy credentials * Autopilot credentials * AWS credentials * Azure OpenAI credentials * Azure Storage credentials * BambooHR credentials * Bannerbear credentials * Baserow credentials * Beeminder credentials * Bitbucket credentials * Bitly credentials * Bitwarden credentials * Box credentials * Brandfetch credentials * Brevo credentials * Bubble credentials * Cal.com credentials * Calendly credentials * Carbon Black credentials * Chargebee credentials * CircleCI credentials * Cisco Meraki credentials * Cisco Secure Endpoint credentials * Cisco Umbrella credentials * Clearbit credentials * ClickUp credentials * Clockify credentials * Cloudflare credentials * Cockpit credentials * Coda credentials * Cohere credentials * Contentful credentials * ConvertAPI credentials * ConvertKit credentials * Copper credentials * Cortex credentials * CrateDB credentials * crowd.dev credentials * CrowdStrike credentials * Customer.io credentials * Datadog credentials * DeepL credentials * DeepSeek credentials * Demio credentials * DFIR-IRIS credentials * DHL credentials * Discord credentials * Discourse credentials * Disqus credentials * Drift credentials * Dropbox credentials * Dropcontact credentials * Dynatrace credentials * E-goi credentials * Elasticsearch credentials * Elastic Security credentials * Emelia credentials * ERPNext credentials * Eventbrite credentials * F5 Big-IP credentials * Facebook App credentials * Facebook Graph API credentials * Facebook Lead Ads credentials * Figma credentials * FileMaker credentials * Filescan credentials * Flow credentials * Form.io Trigger credentials * Formstack Trigger credentials * Fortinet FortiGate credentials * Freshdesk credentials * Freshservice credentials * Freshworks CRM credentials * FTP credentials * GetResponse credentials * Ghost credentials * Git credentials * GitHub credentials * GitLab credentials * Gong credentials * Google * Google OAuth2 single service * Google OAuth2 generic * Google Service Account * Google Gemini(PaLM) credentials * Gotify credentials * GoToWebinar credentials * Grafana credentials * Grist credentials * Groq credentials * Gumroad credentials * HaloPSA credentials * Harvest credentials * Help Scout credentials * HighLevel credentials * Home Assistant credentials * HTTP Request credentials * HubSpot credentials * Hugging Face credentials * Humantic AI credentials * Hunter credentials * Hybrid Analysis credentials * IMAP * Gmail * Outlook.com * Yahoo * Imperva WAF credentials * Intercom credentials * Invoice Ninja credentials * Iterable credentials * Jenkins credentials * Jira credentials * JotForm credentials * JWT credentials * Kafka credentials * Keap credentials * Kibana credentials * Kitemaker credentials * KoboToolbox credentials * LDAP credentials * Lemlist credentials * Line credentials * Linear credentials * LingvaNex credentials * LinkedIn credentials * LoneScale credentials * Magento 2 credentials * Mailcheck credentials * Mailchimp credentials * MailerLite credentials * Mailgun credentials * Mailjet credentials * Malcore credentials * Mandrill credentials * Marketstack credentials * Matrix credentials * Mattermost credentials * Mautic credentials * Medium credentials * MessageBird credentials * Metabase credentials * Microsoft credentials * Microsoft Azure Monitor credentials * Microsoft Entra ID credentials * Microsoft SQL credentials * Milvus credentials * Mindee credentials * Miro credentials * MISP credentials * Mist credentials * Mistral Cloud credentials * Mocean credentials * monday.com credentials * MongoDB credentials * Monica CRM credentials * Motorhead credentials * MQTT credentials * MSG91 credentials * MySQL credentials * NASA credentials * Netlify credentials * Netscaler ADC credentials * Nextcloud credentials * NocoDB credentials * Notion credentials * npm credentials * Odoo credentials * Okta credentials * Ollama credentials * One Simple API credentials * Onfleet credentials * OpenAI credentials * OpenCTI credentials * OpenRouter credentials * OpenWeatherMap credentials * Oura credentials * Paddle credentials * PagerDuty credentials * PayPal credentials * Peekalink credentials * PhantomBuster credentials * Philips Hue credentials * Pinecone credentials * Pipedrive credentials * Plivo credentials * Postgres credentials * PostHog credentials * Postmark credentials * ProfitWell credentials * Pushbullet credentials * Pushcut credentials * Pushover credentials * QRadar credentials * Qdrant credentials * Qualys credentials * QuestDB credentials * Quick Base credentials * QuickBooks credentials * RabbitMQ credentials * Raindrop credentials * Rapid7 InsightVM credentials * Recorded Future credentials * Reddit credentials * Redis credentials * Rocket.Chat credentials * Rundeck credentials * S3 credentials * Salesforce credentials * Salesmate credentials * SeaTable credentials * SecurityScorecard credentials * Segment credentials * Sekoia credentials * Send Email * Gmail * Outlook.com * Yahoo * SendGrid credentials * Sendy credentials * Sentry.io credentials * Serp credentials * ServiceNow credentials * seven credentials * Shopify credentials * Shuffler credentials * SIGNL4 credentials * Slack credentials * Snowflake credentials * SolarWinds IPAM credentials * SolarWinds Observability SaaS credentials * Splunk credentials * Spontit credentials * Spotify credentials * SSH credentials * Stackby credentials * Storyblok credentials * Strapi credentials * Strava credentials * Stripe credentials * Supabase credentials * SurveyMonkey credentials * SyncroMSP credentials * Sysdig credentials * Taiga credentials * Tapfiliate credentials * Telegram credentials * TheHive credentials * TheHive 5 credentials * TimescaleDB credentials * Todoist credentials * Toggl credentials * TOTP credentials * Travis CI credentials * Trellix ePO credentials * Trello credentials * Twake credentials * Twilio credentials * Twist credentials * Typeform credentials * Unleashed Software credentials * UpLead credentials * uProc credentials * UptimeRobot credentials * urlscan.io credentials * Venafi TLS Protect Cloud credentials * Venafi TLS Protect Datacenter credentials * Vero credentials * VirusTotal credentials * Vonage credentials * Webex by Cisco credentials * Webflow credentials * Webhook credentials * Wekan credentials * WhatsApp Business Cloud credentials * Wise credentials * Wolfram|Alpha credentials * WooCommerce credentials * WordPress credentials * Workable credentials * Wufoo credentials * X (formerly Twitter) credentials * Xata credentials * Xero credentials * Yourls credentials * Zabbix credentials * Zammad credentials * Zendesk credentials * Zep credentials * Zoho credentials * Zoom credentials * Zscaler ZIA credentials * Zulip credentials * Custom API actions for existing nodes * Handle rate limits * Community nodes Community nodes * Installation and management * GUI installation * Manual installation * Risks * Blocklist * Using community nodes * Troubleshooting * Building community nodes * Creating nodes Creating nodes * Overview * Plan your node * Choose a node type * Choose a node building style * Node UI design * Choose node file structure * Build your node * Set up your development environment * Tutorial: Build a declarative-style node * Tutorial: Build a programmatic-style node * Reference * Node UI elements * Code standards * Versioning * Choose node file structure * Base files * Structure * Standard parameters * Declarative-style parameters * Programmatic-style parameters * Programmatic-style execute method * Codex files * Credentials files * HTTP request helpers * Item linking * Test your node * Run your node locally * Node linter * Troubleshooting * Deploy your node * Submit community nodes * Install private nodes * Hosting n8n * Community vs Enterprise * Installation Installation * npm * Docker * Server setups * Digital Ocean * Heroku * Hetzner * Amazon Web Services * Azure * Google Cloud * Docker Compose * Updating * Configuration Configuration * Environment variables * Binary data * Credentials * Database * Deployment * Endpoints * Executions * External data storage * External hooks * External secrets * Logs * License * Nodes * Queue mode * Security * Source control * Task runners * Timezone and localization * User management and 2FA * Workflows * Configuration methods * Configuration examples * Isolate n8n * Configure the Base URL * Configure custom SSL certificate authorities * Set a custom encryption key * Configure workflow timeouts * Specify custom nodes location * Enable modules in Code node * Set the timezone * Specify user folder path * Configure webhook URLs with reverse proxy * Enable Prometheus metrics * Supported databases and settings * Task runners * User management * Logging and monitoring Logging and monitoring * Logging * Monitoring * Security audit * Scaling and performance Scaling and performance * Overview * Performance and benchmarking * Configuring queue mode * Concurrency control * Execution data * Binary data * External storage for binary data * Memory-related errors * Securing n8n Securing n8n * Overview * Set up SSL * Set up SSO * Security audit * Disable the API * Opt out of data collection * Blocking nodes * Hardening task runners * Starter Kits Starter Kits * AI Starter Kit * Architecture Architecture * Overview * Database structure * Using the CLI Using the CLI * CLI commands * Code in n8n * Expressions * Using the Code node * AI coding * Built in methods and variables Built in methods and variables * Overview * Current node input * Output of other nodes * Date and time * JMESPath * HTTP node * LangChain Code node * n8n metadata * Convenience methods * Data transformation functions * Arrays * Booleans * Dates * Numbers * Objects * Strings * Custom variables Custom variables * Create custom variables * Cookbook Cookbook * Handling dates * Query JSON with JMESPath * Built-in methods and variables examples * execution * getWorkflowStaticData * Retrieve linked items from earlier in the workflow * (node-name).all * vars * Expressions * Check incoming data * Common issues * Code node * Get number of items returned by last node * Get the binary data buffer * Output to the browser console * HTTP Request node * Pagination * Advanced AI * Tutorial: Build an AI workflow in n8n * LangChain in n8n LangChain in n8n * Overview * Langchain concepts in n8n * LangChain learning resources * Use LangSmith with n8n * Examples and concepts Examples and concepts * Introduction * What is a chain? * What is an agent? * Agents vs chains example * What is memory? * What is a tool? * Use Google Sheets as a data source * Call an API to fetch data * Set a human fallback for AI workflows * Let AI specify tool parameters * What is a vector database? * Populate a Pinecone vector database from a website * API * Authentication * Pagination * Using the API playground * API reference * Embed * Prerequisites * Deployment * Configuration * Workflow management * Workflows templates * White labelling 1. Integrations 2. Built-in nodes 3. Triggers Affinity is a powerful relationship intelligence platform enabling teams to leverage their network to close the next big deal. Credentials You can find authentication information for this node here. --- ## Page: https://docs.n8n.io/integrations/builtin/trigger-nodes/n8n-nodes-base.airtabletrigger/ Airtable is a spreadsheet-database hybrid, with the features of a database but applied to a spreadsheet. The fields in an Airtable table are similar to cells in a spreadsheet, but have types such as 'checkbox', 'phone number', and 'drop-down list', and can reference file attachments like images. On this page, you'll find a list of events the Airtable Trigger node can respond to and links to more resources. Credentials You can find authentication information for this node here. ## Events# * **New Airtable event** n8n provides an app node for Airtable. You can find the node docs here. View example workflows and related content on n8n's website. Refer to Airtable's documentation for details about their API. ## Node parameters# Use these parameters to configure your node. ### Poll Times# n8n's Airtable node uses polling for check for updates on configured Airtable resources. The **Poll Times** parameter configures the querying frequency: * Every Minute * Every Hour * Every Day * Every Week * Every Month * Every X: Check for updates every given number of minutes or hours. * Custom: Customize the polling interval by providing a cron expression. Use the **Add Poll Time** button to add more polling intervals. ### Base# The Airtable base you want to check for updates on. You can provide your base's URL or base ID. ### Table# The Airtable table within the Airtable base that you want to check for updates on. You can provide the table's URL or table ID. ### Trigger Field# A created or last modified field in your table. The Airtable Trigger node uses this to determine what updates occurred since the previous check. ### Download Attachments# Whether to download attachments from the table. When enabled, the **Download Fields** parameter defines the attachment fields. ### Download Fields# When you enable the **Download Attachments** toggle, this field defines which table fields to download. Field names are case sensitive. Use a comma to separate multiple field names. ### Additional Fields# Use the **Add Field** button to add the following parameters: * **Fields**: A comma-separated list of fields to include in the output. If you don't specify anything here, the output will contain only the **Trigger Field**. * **Formula**: An Airtable formula to further filter the results. You can use this to add further constraints to the events that trigger the workflow. Note that formula values aren't taken into account for manual executions, only for production polling. * **View ID**: The name or ID of a table view. When defined, only returns records available in the given view. --- ## Page: https://docs.n8n.io/integrations/builtin/trigger-nodes/n8n-nodes-base.amqptrigger/ AMQP is an open standard application layer protocol for message-oriented middleware. The defining features of AMQP are message orientation, queuing, routing, reliability and security. This node supports AMQP 1.0 compatible message brokers. Credentials You can find authentication information for this node here. Examples and templates For usage examples and templates to help you get started, refer to n8n's AMQP integrations page. --- ## Page: https://docs.n8n.io/integrations/builtin/trigger-nodes/n8n-nodes-base.asanatrigger/ n8n Docs * Using n8n * Getting started Getting started * Learning path * Choose your n8n * Quickstarts * A very quick quickstart * A longer introduction * Video courses * Text courses * Level one * Navigating the editor UI * Building a mini-workflow * Automating a (real-world) use case * Designing the workflow * Building the workflow Building the workflow * Getting data from the data warehouse * Inserting data into airtable * Filtering orders * Setting values for processing orders * Calculating booked orders * Notifying the team * Scheduling the workflow * Activating and examining the workflow * Exporting and importing workflows * Test your knowledge * Level two * Understanding the data structure * Processing different data types * Merging and splitting data * Dealing with errors in workflows * Automating a business workflow Automating a business workflow * Use case * Workflow 1 * Workflow 2 * Workflow 3 * Test your knowledge * Using the app Using the app * Understand workflows * Create and run * Components * Nodes * Connections * Sticky Notes * Executions * Manual, partial, and production executions * Workflow-level executions * All executions * Custom executions data * Debug executions * Tags * Export and import * Templates * Sharing * Settings * Workflow history * Workflow ID * Manage credentials * Create and edit * Credential sharing * Manage users and access * Cloud setup * Manage users * Account types * Role-based access control * Role types * Projects * Best practices * 2FA * LDAP * SAML * Set up SAML * Okta Workforce Identity SAML setup * Troubleshooting * Manage users with SAML * Keyboard shortcuts * Key concepts Key concepts * Flow logic * Splitting with conditionals * Merging data * Looping * Waiting * Sub-workflows * Error handling * Execution order in multi-branch workflows * Data * Data structure * Data flow within nodes * Transforming data * Process data using code * Data mapping * Data mapping in the UI * Data mapping in the expressions editor * Data item linking * Item linking concepts * Item linking in the Code node * Item linking errors * Item linking for node creators * Data pinning * Data editing * Data filtering * Data mocking * Binary data * Schema preview * Glossary * n8n Cloud n8n Cloud * Overview * Access the Cloud admin dashboard * Update your n8n Cloud version * Set the timezone * Cloud IP addresses * Cloud data management * Change ownership or username * Concurrency * AI Assistant * Enterprise features Enterprise features * Source control and environments * Understand * Environments * Git in n8n * Branch patterns * Set up * Using * Push and pull * Copy work between environments * Manage variables * Tutorial: Create environments with source control * External secrets * Log streaming * License key * Releases Releases * Release notes Release notes * 1.x * 0.x * v1.0 migration guide * Help and community Help and community * Where to get help * Contributing * Licenses and privacy Licenses and privacy * Privacy and security * Privacy * Security * Incident response * What you can do * Sustainable use license * Integrations * Built-in nodes Built-in nodes * Node types * Core nodes * Activation Trigger * Aggregate * AI Transform * Code * Keyboard shortcuts * Common issues * Compare Datasets * Compression * Chat Trigger * Common issues * Convert to File * Crypto * Date & Time * Debug Helper * Edit Fields (Set) * Edit Image * Email Trigger (IMAP) * Error Trigger * Execute Command * Common issues * Execute Sub-workflow * Execute Sub-workflow Trigger * Execution Data * Extract From File * Filter * FTP * Git * GraphQL * HTML * HTTP Request * Common issues * If * JWT * LDAP * Limit * Local File Trigger * Loop Over Items (Split in Batches) * Manual Trigger * Markdown * MCP Server Trigger * Merge * n8n * n8n Form * n8n Form Trigger * n8n Trigger * No Operation, do nothing * Read/Write Files from Disk * Remove Duplicates * Templates and examples * Rename Keys * Respond to Webhook * RSS Read * RSS Feed Trigger * Schedule Trigger * Common issues * Send Email * Sort * Split Out * SSE Trigger * SSH * Stop And Error * Summarize * Switch * TOTP * Wait * Webhook * Workflow development * Common issues * Workflow Trigger * XML * Actions * Action Network * ActiveCampaign * Adalo * Affinity * Agile CRM * Airtable * Common issues * Airtop * AMQP Sender * APITemplate.io * Asana * Automizy * Autopilot * AWS Certificate Manager * AWS Comprehend * AWS DynamoDB * AWS Elastic Load Balancing * AWS Lambda * AWS Rekognition * AWS S3 * AWS SES * AWS SNS * AWS SQS * AWS Textract * AWS Transcribe * Azure Storage * BambooHR * Bannerbear * Baserow * Beeminder * Bitly * Bitwarden * Box * Brandfetch * Brevo * Bubble * Chargebee * CircleCI * Webex by Cisco * Clearbit * ClickUp * Clockify * Cloudflare * Cockpit * Coda * CoinGecko * Contentful * ConvertKit * Copper * Cortex * CrateDB * crowd.dev * Customer.io * DeepL * Demio * DHL * Discord * Common issues * Discourse * Disqus * Drift * Dropbox * Dropcontact * E-goi * Elasticsearch * Elastic Security * Emelia * ERPNext * Facebook Graph API * FileMaker * Flow * Freshdesk * Freshservice * Freshworks CRM * GetResponse * Ghost * GitHub * GitLab * Gmail * Draft operations * Label operations * Message operations * Thread operations * Common issues * Gong * Google Ads * Google Analytics * Google BigQuery * Google Books * Google Business Profile * Google Calendar * Calendar operations * Event operations * Google Chat * Google Cloud Firestore * Google Cloud Natural Language * Google Cloud Realtime Database * Google Cloud Storage * Google Contacts * Google Docs * Google Drive * File operations * File and folder operations * Folder operations * Shared drive operations * Common issues * Google Perspective * Google Sheets * Document operations * Sheet within Document operations * Common issues * Google Slides * Google Tasks * Google Translate * Google Workspace Admin * Gotify * GoToWebinar * Grafana * Grist * Hacker News * HaloPSA * Harvest * Help Scout * HighLevel * Home Assistant * HubSpot * Humantic AI * Hunter * Intercom * Invoice Ninja * Iterable * Jenkins * Jira Software * Kafka * Keap * Kitemaker * KoboToolbox * Lemlist * Line * Linear * LingvaNex * LinkedIn * LoneScale * Magento 2 * Mailcheck * Mailchimp * MailerLite * Mailgun * Mailjet * Mandrill * marketstack * Matrix * Mattermost * Mautic * Medium * MessageBird * Metabase * Microsoft Dynamics CRM * Microsoft Entra ID * Microsoft Excel 365 * Microsoft Graph Security * Microsoft OneDrive * Microsoft Outlook * Microsoft SQL * Microsoft Teams * Microsoft To Do * Mindee * MISP * Mocean * monday.com * MongoDB * Monica CRM * MQTT * MSG91 * MySQL * Common issues * Customer Datastore (n8n Training) * Customer Messenger (n8n Training) * NASA * Netlify * Netscaler ADC * Nextcloud * NocoDB * Notion * Common issues * npm * Odoo * Okta * One Simple API * Onfleet * OpenAI * Assistant operations * Audio operations * File operations * Image operations * Text operations * Common issues * OpenThesaurus * OpenWeatherMap * Oura * Paddle * PagerDuty * PayPal * Peekalink * PhantomBuster * Philips Hue * Pipedrive * Plivo * PostBin * Postgres * Common issues * PostHog * ProfitWell * Pushbullet * Pushcut * Pushover * QuestDB * Quick Base * QuickBooks Online * QuickChart * RabbitMQ * Raindrop * Reddit * Redis * Rocket.Chat * Rundeck * S3 * Salesforce * Salesmate * SeaTable * SecurityScorecard * Segment * SendGrid * Sendy * Sentry.io * ServiceNow * seven * Shopify * SIGNL4 * Slack * Snowflake * Splunk * Spontit * Spotify * Stackby * Storyblok * Strapi * Strava * Stripe * Supabase * Common issues * SyncroMSP * Taiga * Tapfiliate * Telegram * Chat operations * Callback operations * File operations * Message operations * Common issues * TheHive * TheHive 5 * TimescaleDB * Todoist * Travis CI * Trello * Twake * Twilio * Twist * Unleashed Software * UpLead * uProc * UptimeRobot * urlscan.io * Venafi TLS Protect Cloud * Venafi TLS Protect Datacenter * Vero * Vonage * Webflow * Wekan * WhatsApp Business Cloud * Common issues * Wise * WooCommerce * WordPress * X (Formerly Twitter) * Xero * Yourls * YouTube * Zammad * Zendesk * Zoho CRM * Zoom * Zulip * Triggers * ActiveCampaign Trigger * Acuity Scheduling Trigger * Affinity Trigger * Airtable Trigger * AMQP Trigger * Asana Trigger * Autopilot Trigger * AWS SNS Trigger * Bitbucket Trigger * Box Trigger * Brevo Trigger * Calendly Trigger * Cal Trigger * Chargebee Trigger * ClickUp Trigger * Clockify Trigger * ConvertKit Trigger * Copper Trigger * crowd.dev Trigger * Customer.io Trigger * Emelia Trigger * Eventbrite Trigger * Facebook Lead Ads Trigger * Facebook Trigger * Ad Account * Application * Certificate Transparency * Group * Instagram * Link * Page * Permissions * User * WhatsApp Business Account * Workplace Security * Figma Trigger (Beta) * Flow Trigger * Form.io Trigger * Formstack Trigger * GetResponse Trigger * GitHub Trigger * GitLab Trigger * Gmail Trigger * Poll Mode options * Common issues * Google Calendar Trigger * Google Drive Trigger * Common issues * Google Business Profile Trigger * Google Sheets Trigger * Common issues * Gumroad Trigger * Help Scout Trigger * Hubspot Trigger * Invoice Ninja Trigger * Jira Trigger * JotForm Trigger * Kafka Trigger * Keap Trigger * KoboToolbox Trigger * Lemlist Trigger * Linear Trigger * LoneScale Trigger * Mailchimp Trigger * MailerLite Trigger * Mailjet Trigger * Mautic Trigger * Microsoft OneDrive Trigger * Microsoft Outlook Trigger * MQTT Trigger * Netlify Trigger * Notion Trigger * Onfleet Trigger * PayPal Trigger * Pipedrive Trigger * Postgres Trigger * Postmark Trigger * Pushcut Trigger * RabbitMQ Trigger * Redis Trigger * Salesforce Trigger * SeaTable Trigger * Shopify Trigger * Slack Trigger * Strava Trigger * Stripe Trigger * SurveyMonkey Trigger * Taiga Trigger * Telegram Trigger * Common issues * TheHive 5 Trigger * TheHive Trigger * Toggl Trigger * Trello Trigger * Twilio Trigger * Typeform Trigger * Venafi TLS Protect Cloud Trigger * Webex by Cisco Trigger * Webflow Trigger * WhatsApp Trigger * Wise Trigger * WooCommerce Trigger * Workable Trigger * Wufoo Trigger * Zendesk Trigger * Cluster nodes * Root nodes * AI Agent * Conversational Agent * OpenAI Functions Agent * Plan and Execute Agent * ReAct Agent * SQL Agent * Tools Agent * Common issues * Basic LLM Chain * Question and Answer Chain * Common issues * Summarization Chain * Information Extractor * Text Classifier * Sentiment Analysis * LangChain Code * Simple Vector Store * Milvus Vector Store * MongoDB Atlas Vector Store * PGVector Vector Store * Pinecone Vector Store * Qdrant Vector Store * Supabase Vector Store * Zep Vector Store * Sub-nodes * Default Data Loader * GitHub Document Loader * Embeddings AWS Bedrock * Embeddings Azure OpenAI * Embeddings Cohere * Embeddings Google Gemini * Embeddings Google PaLM * Embeddings Google Vertex * Embeddings HuggingFace Inference * Embeddings Mistral Cloud * Embeddings Ollama * Embeddings OpenAI * Anthropic Chat Model * AWS Bedrock Chat Model * Azure OpenAI Chat Model * DeepSeek Chat Model * Google Gemini Chat Model * Google Vertex Chat Model * Groq Chat Model * Mistral Cloud Chat Model * Ollama Chat Model * Common issues * OpenAI Chat Model * Common issues * OpenRouter Chat Model * Cohere Model * Ollama Model * Common issues * Hugging Face Inference Model * Chat Memory Manager * Simple Memory * Common issues * Motorhead * MongoDB Chat Memory * Redis Chat Memory * Postgres Chat Memory * Xata * Zep * Auto-fixing Output Parser * Item List Output Parser * Structured Output Parser * Common issues * Contextual Compression Retriever * MultiQuery Retriever * Vector Store Retriever * Workflow Retriever * Character Text Splitter * Recursive Character Text Splitter * Token Splitter * Calculator * Custom Code Tool * HTTP Request Tool * MCP Client Tool * SerpApi (Google Search) * Think Tool * Vector Store Question Answer Tool * Wikipedia * Wolfram|Alpha * Custom n8n Workflow Tool * Credentials * Action Network credentials * ActiveCampaign credentials * Acuity Scheduling credentials * Adalo credentials * Affinity credentials * Agile CRM credentials * Airtable credentials * Airtop credentials * AlienVault credentials * AMQP credentials * Anthropic credentials * APITemplate.io credentials * Asana credentials * Auth0 Management credentials * Automizy credentials * Autopilot credentials * AWS credentials * Azure OpenAI credentials * Azure Storage credentials * BambooHR credentials * Bannerbear credentials * Baserow credentials * Beeminder credentials * Bitbucket credentials * Bitly credentials * Bitwarden credentials * Box credentials * Brandfetch credentials * Brevo credentials * Bubble credentials * Cal.com credentials * Calendly credentials * Carbon Black credentials * Chargebee credentials * CircleCI credentials * Cisco Meraki credentials * Cisco Secure Endpoint credentials * Cisco Umbrella credentials * Clearbit credentials * ClickUp credentials * Clockify credentials * Cloudflare credentials * Cockpit credentials * Coda credentials * Cohere credentials * Contentful credentials * ConvertAPI credentials * ConvertKit credentials * Copper credentials * Cortex credentials * CrateDB credentials * crowd.dev credentials * CrowdStrike credentials * Customer.io credentials * Datadog credentials * DeepL credentials * DeepSeek credentials * Demio credentials * DFIR-IRIS credentials * DHL credentials * Discord credentials * Discourse credentials * Disqus credentials * Drift credentials * Dropbox credentials * Dropcontact credentials * Dynatrace credentials * E-goi credentials * Elasticsearch credentials * Elastic Security credentials * Emelia credentials * ERPNext credentials * Eventbrite credentials * F5 Big-IP credentials * Facebook App credentials * Facebook Graph API credentials * Facebook Lead Ads credentials * Figma credentials * FileMaker credentials * Filescan credentials * Flow credentials * Form.io Trigger credentials * Formstack Trigger credentials * Fortinet FortiGate credentials * Freshdesk credentials * Freshservice credentials * Freshworks CRM credentials * FTP credentials * GetResponse credentials * Ghost credentials * Git credentials * GitHub credentials * GitLab credentials * Gong credentials * Google * Google OAuth2 single service * Google OAuth2 generic * Google Service Account * Google Gemini(PaLM) credentials * Gotify credentials * GoToWebinar credentials * Grafana credentials * Grist credentials * Groq credentials * Gumroad credentials * HaloPSA credentials * Harvest credentials * Help Scout credentials * HighLevel credentials * Home Assistant credentials * HTTP Request credentials * HubSpot credentials * Hugging Face credentials * Humantic AI credentials * Hunter credentials * Hybrid Analysis credentials * IMAP * Gmail * Outlook.com * Yahoo * Imperva WAF credentials * Intercom credentials * Invoice Ninja credentials * Iterable credentials * Jenkins credentials * Jira credentials * JotForm credentials * JWT credentials * Kafka credentials * Keap credentials * Kibana credentials * Kitemaker credentials * KoboToolbox credentials * LDAP credentials * Lemlist credentials * Line credentials * Linear credentials * LingvaNex credentials * LinkedIn credentials * LoneScale credentials * Magento 2 credentials * Mailcheck credentials * Mailchimp credentials * MailerLite credentials * Mailgun credentials * Mailjet credentials * Malcore credentials * Mandrill credentials * Marketstack credentials * Matrix credentials * Mattermost credentials * Mautic credentials * Medium credentials * MessageBird credentials * Metabase credentials * Microsoft credentials * Microsoft Azure Monitor credentials * Microsoft Entra ID credentials * Microsoft SQL credentials * Milvus credentials * Mindee credentials * Miro credentials * MISP credentials * Mist credentials * Mistral Cloud credentials * Mocean credentials * monday.com credentials * MongoDB credentials * Monica CRM credentials * Motorhead credentials * MQTT credentials * MSG91 credentials * MySQL credentials * NASA credentials * Netlify credentials * Netscaler ADC credentials * Nextcloud credentials * NocoDB credentials * Notion credentials * npm credentials * Odoo credentials * Okta credentials * Ollama credentials * One Simple API credentials * Onfleet credentials * OpenAI credentials * OpenCTI credentials * OpenRouter credentials * OpenWeatherMap credentials * Oura credentials * Paddle credentials * PagerDuty credentials * PayPal credentials * Peekalink credentials * PhantomBuster credentials * Philips Hue credentials * Pinecone credentials * Pipedrive credentials * Plivo credentials * Postgres credentials * PostHog credentials * Postmark credentials * ProfitWell credentials * Pushbullet credentials * Pushcut credentials * Pushover credentials * QRadar credentials * Qdrant credentials * Qualys credentials * QuestDB credentials * Quick Base credentials * QuickBooks credentials * RabbitMQ credentials * Raindrop credentials * Rapid7 InsightVM credentials * Recorded Future credentials * Reddit credentials * Redis credentials * Rocket.Chat credentials * Rundeck credentials * S3 credentials * Salesforce credentials * Salesmate credentials * SeaTable credentials * SecurityScorecard credentials * Segment credentials * Sekoia credentials * Send Email * Gmail * Outlook.com * Yahoo * SendGrid credentials * Sendy credentials * Sentry.io credentials * Serp credentials * ServiceNow credentials * seven credentials * Shopify credentials * Shuffler credentials * SIGNL4 credentials * Slack credentials * Snowflake credentials * SolarWinds IPAM credentials * SolarWinds Observability SaaS credentials * Splunk credentials * Spontit credentials * Spotify credentials * SSH credentials * Stackby credentials * Storyblok credentials * Strapi credentials * Strava credentials * Stripe credentials * Supabase credentials * SurveyMonkey credentials * SyncroMSP credentials * Sysdig credentials * Taiga credentials * Tapfiliate credentials * Telegram credentials * TheHive credentials * TheHive 5 credentials * TimescaleDB credentials * Todoist credentials * Toggl credentials * TOTP credentials * Travis CI credentials * Trellix ePO credentials * Trello credentials * Twake credentials * Twilio credentials * Twist credentials * Typeform credentials * Unleashed Software credentials * UpLead credentials * uProc credentials * UptimeRobot credentials * urlscan.io credentials * Venafi TLS Protect Cloud credentials * Venafi TLS Protect Datacenter credentials * Vero credentials * VirusTotal credentials * Vonage credentials * Webex by Cisco credentials * Webflow credentials * Webhook credentials * Wekan credentials * WhatsApp Business Cloud credentials * Wise credentials * Wolfram|Alpha credentials * WooCommerce credentials * WordPress credentials * Workable credentials * Wufoo credentials * X (formerly Twitter) credentials * Xata credentials * Xero credentials * Yourls credentials * Zabbix credentials * Zammad credentials * Zendesk credentials * Zep credentials * Zoho credentials * Zoom credentials * Zscaler ZIA credentials * Zulip credentials * Custom API actions for existing nodes * Handle rate limits * Community nodes Community nodes * Installation and management * GUI installation * Manual installation * Risks * Blocklist * Using community nodes * Troubleshooting * Building community nodes * Creating nodes Creating nodes * Overview * Plan your node * Choose a node type * Choose a node building style * Node UI design * Choose node file structure * Build your node * Set up your development environment * Tutorial: Build a declarative-style node * Tutorial: Build a programmatic-style node * Reference * Node UI elements * Code standards * Versioning * Choose node file structure * Base files * Structure * Standard parameters * Declarative-style parameters * Programmatic-style parameters * Programmatic-style execute method * Codex files * Credentials files * HTTP request helpers * Item linking * Test your node * Run your node locally * Node linter * Troubleshooting * Deploy your node * Submit community nodes * Install private nodes * Hosting n8n * Community vs Enterprise * Installation Installation * npm * Docker * Server setups * Digital Ocean * Heroku * Hetzner * Amazon Web Services * Azure * Google Cloud * Docker Compose * Updating * Configuration Configuration * Environment variables * Binary data * Credentials * Database * Deployment * Endpoints * Executions * External data storage * External hooks * External secrets * Logs * License * Nodes * Queue mode * Security * Source control * Task runners * Timezone and localization * User management and 2FA * Workflows * Configuration methods * Configuration examples * Isolate n8n * Configure the Base URL * Configure custom SSL certificate authorities * Set a custom encryption key * Configure workflow timeouts * Specify custom nodes location * Enable modules in Code node * Set the timezone * Specify user folder path * Configure webhook URLs with reverse proxy * Enable Prometheus metrics * Supported databases and settings * Task runners * User management * Logging and monitoring Logging and monitoring * Logging * Monitoring * Security audit * Scaling and performance Scaling and performance * Overview * Performance and benchmarking * Configuring queue mode * Concurrency control * Execution data * Binary data * External storage for binary data * Memory-related errors * Securing n8n Securing n8n * Overview * Set up SSL * Set up SSO * Security audit * Disable the API * Opt out of data collection * Blocking nodes * Hardening task runners * Starter Kits Starter Kits * AI Starter Kit * Architecture Architecture * Overview * Database structure * Using the CLI Using the CLI * CLI commands * Code in n8n * Expressions * Using the Code node * AI coding * Built in methods and variables Built in methods and variables * Overview * Current node input * Output of other nodes * Date and time * JMESPath * HTTP node * LangChain Code node * n8n metadata * Convenience methods * Data transformation functions * Arrays * Booleans * Dates * Numbers * Objects * Strings * Custom variables Custom variables * Create custom variables * Cookbook Cookbook * Handling dates * Query JSON with JMESPath * Built-in methods and variables examples * execution * getWorkflowStaticData * Retrieve linked items from earlier in the workflow * (node-name).all * vars * Expressions * Check incoming data * Common issues * Code node * Get number of items returned by last node * Get the binary data buffer * Output to the browser console * HTTP Request node * Pagination * Advanced AI * Tutorial: Build an AI workflow in n8n * LangChain in n8n LangChain in n8n * Overview * Langchain concepts in n8n * LangChain learning resources * Use LangSmith with n8n * Examples and concepts Examples and concepts * Introduction * What is a chain? * What is an agent? * Agents vs chains example * What is memory? * What is a tool? * Use Google Sheets as a data source * Call an API to fetch data * Set a human fallback for AI workflows * Let AI specify tool parameters * What is a vector database? * Populate a Pinecone vector database from a website * API * Authentication * Pagination * Using the API playground * API reference * Embed * Prerequisites * Deployment * Configuration * Workflow management * Workflows templates * White labelling --- ## Page: https://docs.n8n.io/integrations/builtin/trigger-nodes/n8n-nodes-base.autopilottrigger/ n8n Docs * Using n8n * Getting started Getting started * Learning path * Choose your n8n * Quickstarts * A very quick quickstart * A longer introduction * Video courses * Text courses * Level one * Navigating the editor UI * Building a mini-workflow * Automating a (real-world) use case * Designing the workflow * Building the workflow Building the workflow * Getting data from the data warehouse * Inserting data into airtable * Filtering orders * Setting values for processing orders * Calculating booked orders * Notifying the team * Scheduling the workflow * Activating and examining the workflow * Exporting and importing workflows * Test your knowledge * Level two * Understanding the data structure * Processing different data types * Merging and splitting data * Dealing with errors in workflows * Automating a business workflow Automating a business workflow * Use case * Workflow 1 * Workflow 2 * Workflow 3 * Test your knowledge * Using the app Using the app * Understand workflows * Create and run * Components * Nodes * Connections * Sticky Notes * Executions * Manual, partial, and production executions * Workflow-level executions * All executions * Custom executions data * Debug executions * Tags * Export and import * Templates * Sharing * Settings * Workflow history * Workflow ID * Manage credentials * Create and edit * Credential sharing * Manage users and access * Cloud setup * Manage users * Account types * Role-based access control * Role types * Projects * Best practices * 2FA * LDAP * SAML * Set up SAML * Okta Workforce Identity SAML setup * Troubleshooting * Manage users with SAML * Keyboard shortcuts * Key concepts Key concepts * Flow logic * Splitting with conditionals * Merging data * Looping * Waiting * Sub-workflows * Error handling * Execution order in multi-branch workflows * Data * Data structure * Data flow within nodes * Transforming data * Process data using code * Data mapping * Data mapping in the UI * Data mapping in the expressions editor * Data item linking * Item linking concepts * Item linking in the Code node * Item linking errors * Item linking for node creators * Data pinning * Data editing * Data filtering * Data mocking * Binary data * Schema preview * Glossary * n8n Cloud n8n Cloud * Overview * Access the Cloud admin dashboard * Update your n8n Cloud version * Set the timezone * Cloud IP addresses * Cloud data management * Change ownership or username * Concurrency * AI Assistant * Enterprise features Enterprise features * Source control and environments * Understand * Environments * Git in n8n * Branch patterns * Set up * Using * Push and pull * Copy work between environments * Manage variables * Tutorial: Create environments with source control * External secrets * Log streaming * License key * Releases Releases * Release notes Release notes * 1.x * 0.x * v1.0 migration guide * Help and community Help and community * Where to get help * Contributing * Licenses and privacy Licenses and privacy * Privacy and security * Privacy * Security * Incident response * What you can do * Sustainable use license * Integrations * Built-in nodes Built-in nodes * Node types * Core nodes * Activation Trigger * Aggregate * AI Transform * Code * Keyboard shortcuts * Common issues * Compare Datasets * Compression * Chat Trigger * Common issues * Convert to File * Crypto * Date & Time * Debug Helper * Edit Fields (Set) * Edit Image * Email Trigger (IMAP) * Error Trigger * Execute Command * Common issues * Execute Sub-workflow * Execute Sub-workflow Trigger * Execution Data * Extract From File * Filter * FTP * Git * GraphQL * HTML * HTTP Request * Common issues * If * JWT * LDAP * Limit * Local File Trigger * Loop Over Items (Split in Batches) * Manual Trigger * Markdown * MCP Server Trigger * Merge * n8n * n8n Form * n8n Form Trigger * n8n Trigger * No Operation, do nothing * Read/Write Files from Disk * Remove Duplicates * Templates and examples * Rename Keys * Respond to Webhook * RSS Read * RSS Feed Trigger * Schedule Trigger * Common issues * Send Email * Sort * Split Out * SSE Trigger * SSH * Stop And Error * Summarize * Switch * TOTP * Wait * Webhook * Workflow development * Common issues * Workflow Trigger * XML * Actions * Action Network * ActiveCampaign * Adalo * Affinity * Agile CRM * Airtable * Common issues * Airtop * AMQP Sender * APITemplate.io * Asana * Automizy * Autopilot * AWS Certificate Manager * AWS Comprehend * AWS DynamoDB * AWS Elastic Load Balancing * AWS Lambda * AWS Rekognition * AWS S3 * AWS SES * AWS SNS * AWS SQS * AWS Textract * AWS Transcribe * Azure Storage * BambooHR * Bannerbear * Baserow * Beeminder * Bitly * Bitwarden * Box * Brandfetch * Brevo * Bubble * Chargebee * CircleCI * Webex by Cisco * Clearbit * ClickUp * Clockify * Cloudflare * Cockpit * Coda * CoinGecko * Contentful * ConvertKit * Copper * Cortex * CrateDB * crowd.dev * Customer.io * DeepL * Demio * DHL * Discord * Common issues * Discourse * Disqus * Drift * Dropbox * Dropcontact * E-goi * Elasticsearch * Elastic Security * Emelia * ERPNext * Facebook Graph API * FileMaker * Flow * Freshdesk * Freshservice * Freshworks CRM * GetResponse * Ghost * GitHub * GitLab * Gmail * Draft operations * Label operations * Message operations * Thread operations * Common issues * Gong * Google Ads * Google Analytics * Google BigQuery * Google Books * Google Business Profile * Google Calendar * Calendar operations * Event operations * Google Chat * Google Cloud Firestore * Google Cloud Natural Language * Google Cloud Realtime Database * Google Cloud Storage * Google Contacts * Google Docs * Google Drive * File operations * File and folder operations * Folder operations * Shared drive operations * Common issues * Google Perspective * Google Sheets * Document operations * Sheet within Document operations * Common issues * Google Slides * Google Tasks * Google Translate * Google Workspace Admin * Gotify * GoToWebinar * Grafana * Grist * Hacker News * HaloPSA * Harvest * Help Scout * HighLevel * Home Assistant * HubSpot * Humantic AI * Hunter * Intercom * Invoice Ninja * Iterable * Jenkins * Jira Software * Kafka * Keap * Kitemaker * KoboToolbox * Lemlist * Line * Linear * LingvaNex * LinkedIn * LoneScale * Magento 2 * Mailcheck * Mailchimp * MailerLite * Mailgun * Mailjet * Mandrill * marketstack * Matrix * Mattermost * Mautic * Medium * MessageBird * Metabase * Microsoft Dynamics CRM * Microsoft Entra ID * Microsoft Excel 365 * Microsoft Graph Security * Microsoft OneDrive * Microsoft Outlook * Microsoft SQL * Microsoft Teams * Microsoft To Do * Mindee * MISP * Mocean * monday.com * MongoDB * Monica CRM * MQTT * MSG91 * MySQL * Common issues * Customer Datastore (n8n Training) * Customer Messenger (n8n Training) * NASA * Netlify * Netscaler ADC * Nextcloud * NocoDB * Notion * Common issues * npm * Odoo * Okta * One Simple API * Onfleet * OpenAI * Assistant operations * Audio operations * File operations * Image operations * Text operations * Common issues * OpenThesaurus * OpenWeatherMap * Oura * Paddle * PagerDuty * PayPal * Peekalink * PhantomBuster * Philips Hue * Pipedrive * Plivo * PostBin * Postgres * Common issues * PostHog * ProfitWell * Pushbullet * Pushcut * Pushover * QuestDB * Quick Base * QuickBooks Online * QuickChart * RabbitMQ * Raindrop * Reddit * Redis * Rocket.Chat * Rundeck * S3 * Salesforce * Salesmate * SeaTable * SecurityScorecard * Segment * SendGrid * Sendy * Sentry.io * ServiceNow * seven * Shopify * SIGNL4 * Slack * Snowflake * Splunk * Spontit * Spotify * Stackby * Storyblok * Strapi * Strava * Stripe * Supabase * Common issues * SyncroMSP * Taiga * Tapfiliate * Telegram * Chat operations * Callback operations * File operations * Message operations * Common issues * TheHive * TheHive 5 * TimescaleDB * Todoist * Travis CI * Trello * Twake * Twilio * Twist * Unleashed Software * UpLead * uProc * UptimeRobot * urlscan.io * Venafi TLS Protect Cloud * Venafi TLS Protect Datacenter * Vero * Vonage * Webflow * Wekan * WhatsApp Business Cloud * Common issues * Wise * WooCommerce * WordPress * X (Formerly Twitter) * Xero * Yourls * YouTube * Zammad * Zendesk * Zoho CRM * Zoom * Zulip * Triggers * ActiveCampaign Trigger * Acuity Scheduling Trigger * Affinity Trigger * Airtable Trigger * AMQP Trigger * Asana Trigger * Autopilot Trigger Autopilot Trigger Table of contents * Events * AWS SNS Trigger * Bitbucket Trigger * Box Trigger * Brevo Trigger * Calendly Trigger * Cal Trigger * Chargebee Trigger * ClickUp Trigger * Clockify Trigger * ConvertKit Trigger * Copper Trigger * crowd.dev Trigger * Customer.io Trigger * Emelia Trigger * Eventbrite Trigger * Facebook Lead Ads Trigger * Facebook Trigger * Ad Account * Application * Certificate Transparency * Group * Instagram * Link * Page * Permissions * User * WhatsApp Business Account * Workplace Security * Figma Trigger (Beta) * Flow Trigger * Form.io Trigger * Formstack Trigger * GetResponse Trigger * GitHub Trigger * GitLab Trigger * Gmail Trigger * Poll Mode options * Common issues * Google Calendar Trigger * Google Drive Trigger * Common issues * Google Business Profile Trigger * Google Sheets Trigger * Common issues * Gumroad Trigger * Help Scout Trigger * Hubspot Trigger * Invoice Ninja Trigger * Jira Trigger * JotForm Trigger * Kafka Trigger * Keap Trigger * KoboToolbox Trigger * Lemlist Trigger * Linear Trigger * LoneScale Trigger * Mailchimp Trigger * MailerLite Trigger * Mailjet Trigger * Mautic Trigger * Microsoft OneDrive Trigger * Microsoft Outlook Trigger * MQTT Trigger * Netlify Trigger * Notion Trigger * Onfleet Trigger * PayPal Trigger * Pipedrive Trigger * Postgres Trigger * Postmark Trigger * Pushcut Trigger * RabbitMQ Trigger * Redis Trigger * Salesforce Trigger * SeaTable Trigger * Shopify Trigger * Slack Trigger * Strava Trigger * Stripe Trigger * SurveyMonkey Trigger * Taiga Trigger * Telegram Trigger * Common issues * TheHive 5 Trigger * TheHive Trigger * Toggl Trigger * Trello Trigger * Twilio Trigger * Typeform Trigger * Venafi TLS Protect Cloud Trigger * Webex by Cisco Trigger * Webflow Trigger * WhatsApp Trigger * Wise Trigger * WooCommerce Trigger * Workable Trigger * Wufoo Trigger * Zendesk Trigger * Cluster nodes * Root nodes * AI Agent * Conversational Agent * OpenAI Functions Agent * Plan and Execute Agent * ReAct Agent * SQL Agent * Tools Agent * Common issues * Basic LLM Chain * Question and Answer Chain * Common issues * Summarization Chain * Information Extractor * Text Classifier * Sentiment Analysis * LangChain Code * Simple Vector Store * Milvus Vector Store * MongoDB Atlas Vector Store * PGVector Vector Store * Pinecone Vector Store * Qdrant Vector Store * Supabase Vector Store * Zep Vector Store * Sub-nodes * Default Data Loader * GitHub Document Loader * Embeddings AWS Bedrock * Embeddings Azure OpenAI * Embeddings Cohere * Embeddings Google Gemini * Embeddings Google PaLM * Embeddings Google Vertex * Embeddings HuggingFace Inference * Embeddings Mistral Cloud * Embeddings Ollama * Embeddings OpenAI * Anthropic Chat Model * AWS Bedrock Chat Model * Azure OpenAI Chat Model * DeepSeek Chat Model * Google Gemini Chat Model * Google Vertex Chat Model * Groq Chat Model * Mistral Cloud Chat Model * Ollama Chat Model * Common issues * OpenAI Chat Model * Common issues * OpenRouter Chat Model * Cohere Model * Ollama Model * Common issues * Hugging Face Inference Model * Chat Memory Manager * Simple Memory * Common issues * Motorhead * MongoDB Chat Memory * Redis Chat Memory * Postgres Chat Memory * Xata * Zep * Auto-fixing Output Parser * Item List Output Parser * Structured Output Parser * Common issues * Contextual Compression Retriever * MultiQuery Retriever * Vector Store Retriever * Workflow Retriever * Character Text Splitter * Recursive Character Text Splitter * Token Splitter * Calculator * Custom Code Tool * HTTP Request Tool * MCP Client Tool * SerpApi (Google Search) * Think Tool * Vector Store Question Answer Tool * Wikipedia * Wolfram|Alpha * Custom n8n Workflow Tool * Credentials * Action Network credentials * ActiveCampaign credentials * Acuity Scheduling credentials * Adalo credentials * Affinity credentials * Agile CRM credentials * Airtable credentials * Airtop credentials * AlienVault credentials * AMQP credentials * Anthropic credentials * APITemplate.io credentials * Asana credentials * Auth0 Management credentials * Automizy credentials * Autopilot credentials * AWS credentials * Azure OpenAI credentials * Azure Storage credentials * BambooHR credentials * Bannerbear credentials * Baserow credentials * Beeminder credentials * Bitbucket credentials * Bitly credentials * Bitwarden credentials * Box credentials * Brandfetch credentials * Brevo credentials * Bubble credentials * Cal.com credentials * Calendly credentials * Carbon Black credentials * Chargebee credentials * CircleCI credentials * Cisco Meraki credentials * Cisco Secure Endpoint credentials * Cisco Umbrella credentials * Clearbit credentials * ClickUp credentials * Clockify credentials * Cloudflare credentials * Cockpit credentials * Coda credentials * Cohere credentials * Contentful credentials * ConvertAPI credentials * ConvertKit credentials * Copper credentials * Cortex credentials * CrateDB credentials * crowd.dev credentials * CrowdStrike credentials * Customer.io credentials * Datadog credentials * DeepL credentials * DeepSeek credentials * Demio credentials * DFIR-IRIS credentials * DHL credentials * Discord credentials * Discourse credentials * Disqus credentials * Drift credentials * Dropbox credentials * Dropcontact credentials * Dynatrace credentials * E-goi credentials * Elasticsearch credentials * Elastic Security credentials * Emelia credentials * ERPNext credentials * Eventbrite credentials * F5 Big-IP credentials * Facebook App credentials * Facebook Graph API credentials * Facebook Lead Ads credentials * Figma credentials * FileMaker credentials * Filescan credentials * Flow credentials * Form.io Trigger credentials * Formstack Trigger credentials * Fortinet FortiGate credentials * Freshdesk credentials * Freshservice credentials * Freshworks CRM credentials * FTP credentials * GetResponse credentials * Ghost credentials * Git credentials * GitHub credentials * GitLab credentials * Gong credentials * Google * Google OAuth2 single service * Google OAuth2 generic * Google Service Account * Google Gemini(PaLM) credentials * Gotify credentials * GoToWebinar credentials * Grafana credentials * Grist credentials * Groq credentials * Gumroad credentials * HaloPSA credentials * Harvest credentials * Help Scout credentials * HighLevel credentials * Home Assistant credentials * HTTP Request credentials * HubSpot credentials * Hugging Face credentials * Humantic AI credentials * Hunter credentials * Hybrid Analysis credentials * IMAP * Gmail * Outlook.com * Yahoo * Imperva WAF credentials * Intercom credentials * Invoice Ninja credentials * Iterable credentials * Jenkins credentials * Jira credentials * JotForm credentials * JWT credentials * Kafka credentials * Keap credentials * Kibana credentials * Kitemaker credentials * KoboToolbox credentials * LDAP credentials * Lemlist credentials * Line credentials * Linear credentials * LingvaNex credentials * LinkedIn credentials * LoneScale credentials * Magento 2 credentials * Mailcheck credentials * Mailchimp credentials * MailerLite credentials * Mailgun credentials * Mailjet credentials * Malcore credentials * Mandrill credentials * Marketstack credentials * Matrix credentials * Mattermost credentials * Mautic credentials * Medium credentials * MessageBird credentials * Metabase credentials * Microsoft credentials * Microsoft Azure Monitor credentials * Microsoft Entra ID credentials * Microsoft SQL credentials * Milvus credentials * Mindee credentials * Miro credentials * MISP credentials * Mist credentials * Mistral Cloud credentials * Mocean credentials * monday.com credentials * MongoDB credentials * Monica CRM credentials * Motorhead credentials * MQTT credentials * MSG91 credentials * MySQL credentials * NASA credentials * Netlify credentials * Netscaler ADC credentials * Nextcloud credentials * NocoDB credentials * Notion credentials * npm credentials * Odoo credentials * Okta credentials * Ollama credentials * One Simple API credentials * Onfleet credentials * OpenAI credentials * OpenCTI credentials * OpenRouter credentials * OpenWeatherMap credentials * Oura credentials * Paddle credentials * PagerDuty credentials * PayPal credentials * Peekalink credentials * PhantomBuster credentials * Philips Hue credentials * Pinecone credentials * Pipedrive credentials * Plivo credentials * Postgres credentials * PostHog credentials * Postmark credentials * ProfitWell credentials * Pushbullet credentials * Pushcut credentials * Pushover credentials * QRadar credentials * Qdrant credentials * Qualys credentials * QuestDB credentials * Quick Base credentials * QuickBooks credentials * RabbitMQ credentials * Raindrop credentials * Rapid7 InsightVM credentials * Recorded Future credentials * Reddit credentials * Redis credentials * Rocket.Chat credentials * Rundeck credentials * S3 credentials * Salesforce credentials * Salesmate credentials * SeaTable credentials * SecurityScorecard credentials * Segment credentials * Sekoia credentials * Send Email * Gmail * Outlook.com * Yahoo * SendGrid credentials * Sendy credentials * Sentry.io credentials * Serp credentials * ServiceNow credentials * seven credentials * Shopify credentials * Shuffler credentials * SIGNL4 credentials * Slack credentials * Snowflake credentials * SolarWinds IPAM credentials * SolarWinds Observability SaaS credentials * Splunk credentials * Spontit credentials * Spotify credentials * SSH credentials * Stackby credentials * Storyblok credentials * Strapi credentials * Strava credentials * Stripe credentials * Supabase credentials * SurveyMonkey credentials * SyncroMSP credentials * Sysdig credentials * Taiga credentials * Tapfiliate credentials * Telegram credentials * TheHive credentials * TheHive 5 credentials * TimescaleDB credentials * Todoist credentials * Toggl credentials * TOTP credentials * Travis CI credentials * Trellix ePO credentials * Trello credentials * Twake credentials * Twilio credentials * Twist credentials * Typeform credentials * Unleashed Software credentials * UpLead credentials * uProc credentials * UptimeRobot credentials * urlscan.io credentials * Venafi TLS Protect Cloud credentials * Venafi TLS Protect Datacenter credentials * Vero credentials * VirusTotal credentials * Vonage credentials * Webex by Cisco credentials * Webflow credentials * Webhook credentials * Wekan credentials * WhatsApp Business Cloud credentials * Wise credentials * Wolfram|Alpha credentials * WooCommerce credentials * WordPress credentials * Workable credentials * Wufoo credentials * X (formerly Twitter) credentials * Xata credentials * Xero credentials * Yourls credentials * Zabbix credentials * Zammad credentials * Zendesk credentials * Zep credentials * Zoho credentials * Zoom credentials * Zscaler ZIA credentials * Zulip credentials * Custom API actions for existing nodes * Handle rate limits * Community nodes Community nodes * Installation and management * GUI installation * Manual installation * Risks * Blocklist * Using community nodes * Troubleshooting * Building community nodes * Creating nodes Creating nodes * Overview * Plan your node * Choose a node type * Choose a node building style * Node UI design * Choose node file structure * Build your node * Set up your development environment * Tutorial: Build a declarative-style node * Tutorial: Build a programmatic-style node * Reference * Node UI elements * Code standards * Versioning * Choose node file structure * Base files * Structure * Standard parameters * Declarative-style parameters * Programmatic-style parameters * Programmatic-style execute method * Codex files * Credentials files * HTTP request helpers * Item linking * Test your node * Run your node locally * Node linter * Troubleshooting * Deploy your node * Submit community nodes * Install private nodes * Hosting n8n * Community vs Enterprise * Installation Installation * npm * Docker * Server setups * Digital Ocean * Heroku * Hetzner * Amazon Web Services * Azure * Google Cloud * Docker Compose * Updating * Configuration Configuration * Environment variables * Binary data * Credentials * Database * Deployment * Endpoints * Executions * External data storage * External hooks * External secrets * Logs * License * Nodes * Queue mode * Security * Source control * Task runners * Timezone and localization * User management and 2FA * Workflows * Configuration methods * Configuration examples * Isolate n8n * Configure the Base URL * Configure custom SSL certificate authorities * Set a custom encryption key * Configure workflow timeouts * Specify custom nodes location * Enable modules in Code node * Set the timezone * Specify user folder path * Configure webhook URLs with reverse proxy * Enable Prometheus metrics * Supported databases and settings * Task runners * User management * Logging and monitoring Logging and monitoring * Logging * Monitoring * Security audit * Scaling and performance Scaling and performance * Overview * Performance and benchmarking * Configuring queue mode * Concurrency control * Execution data * Binary data * External storage for binary data * Memory-related errors * Securing n8n Securing n8n * Overview * Set up SSL * Set up SSO * Security audit * Disable the API * Opt out of data collection * Blocking nodes * Hardening task runners * Starter Kits Starter Kits * AI Starter Kit * Architecture Architecture * Overview * Database structure * Using the CLI Using the CLI * CLI commands * Code in n8n * Expressions * Using the Code node * AI coding * Built in methods and variables Built in methods and variables * Overview * Current node input * Output of other nodes * Date and time * JMESPath * HTTP node * LangChain Code node * n8n metadata * Convenience methods * Data transformation functions * Arrays * Booleans * Dates * Numbers * Objects * Strings * Custom variables Custom variables * Create custom variables * Cookbook Cookbook * Handling dates * Query JSON with JMESPath * Built-in methods and variables examples * execution * getWorkflowStaticData * Retrieve linked items from earlier in the workflow * (node-name).all * vars * Expressions * Check incoming data * Common issues * Code node * Get number of items returned by last node * Get the binary data buffer * Output to the browser console * HTTP Request node * Pagination * Advanced AI * Tutorial: Build an AI workflow in n8n * LangChain in n8n LangChain in n8n * Overview * Langchain concepts in n8n * LangChain learning resources * Use LangSmith with n8n * Examples and concepts Examples and concepts * Introduction * What is a chain? * What is an agent? * Agents vs chains example * What is memory? * What is a tool? * Use Google Sheets as a data source * Call an API to fetch data * Set a human fallback for AI workflows * Let AI specify tool parameters * What is a vector database? * Populate a Pinecone vector database from a website * API * Authentication * Pagination * Using the API playground * API reference * Embed * Prerequisites * Deployment * Configuration * Workflow management * Workflows templates * White labelling 1. Integrations 2. Built-in nodes 3. Triggers Autopilot is a visual marketing software that allows you to automate and personalize your marketing across the entire customer journey. Credentials You can find authentication information for this node here. ## Events# * Contact added * Contact added to a list * Contact entered to a segment * Contact left a segment * Contact removed from a list * Contact unsubscribed * Contact updated --- ## Page: https://docs.n8n.io/integrations/builtin/trigger-nodes/n8n-nodes-base.awssnstrigger/ n8n Docs * Using n8n * Getting started Getting started * Learning path * Choose your n8n * Quickstarts * A very quick quickstart * A longer introduction * Video courses * Text courses * Level one * Navigating the editor UI * Building a mini-workflow * Automating a (real-world) use case * Designing the workflow * Building the workflow Building the workflow * Getting data from the data warehouse * Inserting data into airtable * Filtering orders * Setting values for processing orders * Calculating booked orders * Notifying the team * Scheduling the workflow * Activating and examining the workflow * Exporting and importing workflows * Test your knowledge * Level two * Understanding the data structure * Processing different data types * Merging and splitting data * Dealing with errors in workflows * Automating a business workflow Automating a business workflow * Use case * Workflow 1 * Workflow 2 * Workflow 3 * Test your knowledge * Using the app Using the app * Understand workflows * Create and run * Components * Nodes * Connections * Sticky Notes * Executions * Manual, partial, and production executions * Workflow-level executions * All executions * Custom executions data * Debug executions * Tags * Export and import * Templates * Sharing * Settings * Workflow history * Workflow ID * Manage credentials * Create and edit * Credential sharing * Manage users and access * Cloud setup * Manage users * Account types * Role-based access control * Role types * Projects * Best practices * 2FA * LDAP * SAML * Set up SAML * Okta Workforce Identity SAML setup * Troubleshooting * Manage users with SAML * Keyboard shortcuts * Key concepts Key concepts * Flow logic * Splitting with conditionals * Merging data * Looping * Waiting * Sub-workflows * Error handling * Execution order in multi-branch workflows * Data * Data structure * Data flow within nodes * Transforming data * Process data using code * Data mapping * Data mapping in the UI * Data mapping in the expressions editor * Data item linking * Item linking concepts * Item linking in the Code node * Item linking errors * Item linking for node creators * Data pinning * Data editing * Data filtering * Data mocking * Binary data * Schema preview * Glossary * n8n Cloud n8n Cloud * Overview * Access the Cloud admin dashboard * Update your n8n Cloud version * Set the timezone * Cloud IP addresses * Cloud data management * Change ownership or username * Concurrency * AI Assistant * Enterprise features Enterprise features * Source control and environments * Understand * Environments * Git in n8n * Branch patterns * Set up * Using * Push and pull * Copy work between environments * Manage variables * Tutorial: Create environments with source control * External secrets * Log streaming * License key * Releases Releases * Release notes Release notes * 1.x * 0.x * v1.0 migration guide * Help and community Help and community * Where to get help * Contributing * Licenses and privacy Licenses and privacy * Privacy and security * Privacy * Security * Incident response * What you can do * Sustainable use license * Integrations * Built-in nodes Built-in nodes * Node types * Core nodes * Activation Trigger * Aggregate * AI Transform * Code * Keyboard shortcuts * Common issues * Compare Datasets * Compression * Chat Trigger * Common issues * Convert to File * Crypto * Date & Time * Debug Helper * Edit Fields (Set) * Edit Image * Email Trigger (IMAP) * Error Trigger * Execute Command * Common issues * Execute Sub-workflow * Execute Sub-workflow Trigger * Execution Data * Extract From File * Filter * FTP * Git * GraphQL * HTML * HTTP Request * Common issues * If * JWT * LDAP * Limit * Local File Trigger * Loop Over Items (Split in Batches) * Manual Trigger * Markdown * MCP Server Trigger * Merge * n8n * n8n Form * n8n Form Trigger * n8n Trigger * No Operation, do nothing * Read/Write Files from Disk * Remove Duplicates * Templates and examples * Rename Keys * Respond to Webhook * RSS Read * RSS Feed Trigger * Schedule Trigger * Common issues * Send Email * Sort * Split Out * SSE Trigger * SSH * Stop And Error * Summarize * Switch * TOTP * Wait * Webhook * Workflow development * Common issues * Workflow Trigger * XML * Actions * Action Network * ActiveCampaign * Adalo * Affinity * Agile CRM * Airtable * Common issues * Airtop * AMQP Sender * APITemplate.io * Asana * Automizy * Autopilot * AWS Certificate Manager * AWS Comprehend * AWS DynamoDB * AWS Elastic Load Balancing * AWS Lambda * AWS Rekognition * AWS S3 * AWS SES * AWS SNS * AWS SQS * AWS Textract * AWS Transcribe * Azure Storage * BambooHR * Bannerbear * Baserow * Beeminder * Bitly * Bitwarden * Box * Brandfetch * Brevo * Bubble * Chargebee * CircleCI * Webex by Cisco * Clearbit * ClickUp * Clockify * Cloudflare * Cockpit * Coda * CoinGecko * Contentful * ConvertKit * Copper * Cortex * CrateDB * crowd.dev * Customer.io * DeepL * Demio * DHL * Discord * Common issues * Discourse * Disqus * Drift * Dropbox * Dropcontact * E-goi * Elasticsearch * Elastic Security * Emelia * ERPNext * Facebook Graph API * FileMaker * Flow * Freshdesk * Freshservice * Freshworks CRM * GetResponse * Ghost * GitHub * GitLab * Gmail * Draft operations * Label operations * Message operations * Thread operations * Common issues * Gong * Google Ads * Google Analytics * Google BigQuery * Google Books * Google Business Profile * Google Calendar * Calendar operations * Event operations * Google Chat * Google Cloud Firestore * Google Cloud Natural Language * Google Cloud Realtime Database * Google Cloud Storage * Google Contacts * Google Docs * Google Drive * File operations * File and folder operations * Folder operations * Shared drive operations * Common issues * Google Perspective * Google Sheets * Document operations * Sheet within Document operations * Common issues * Google Slides * Google Tasks * Google Translate * Google Workspace Admin * Gotify * GoToWebinar * Grafana * Grist * Hacker News * HaloPSA * Harvest * Help Scout * HighLevel * Home Assistant * HubSpot * Humantic AI * Hunter * Intercom * Invoice Ninja * Iterable * Jenkins * Jira Software * Kafka * Keap * Kitemaker * KoboToolbox * Lemlist * Line * Linear * LingvaNex * LinkedIn * LoneScale * Magento 2 * Mailcheck * Mailchimp * MailerLite * Mailgun * Mailjet * Mandrill * marketstack * Matrix * Mattermost * Mautic * Medium * MessageBird * Metabase * Microsoft Dynamics CRM * Microsoft Entra ID * Microsoft Excel 365 * Microsoft Graph Security * Microsoft OneDrive * Microsoft Outlook * Microsoft SQL * Microsoft Teams * Microsoft To Do * Mindee * MISP * Mocean * monday.com * MongoDB * Monica CRM * MQTT * MSG91 * MySQL * Common issues * Customer Datastore (n8n Training) * Customer Messenger (n8n Training) * NASA * Netlify * Netscaler ADC * Nextcloud * NocoDB * Notion * Common issues * npm * Odoo * Okta * One Simple API * Onfleet * OpenAI * Assistant operations * Audio operations * File operations * Image operations * Text operations * Common issues * OpenThesaurus * OpenWeatherMap * Oura * Paddle * PagerDuty * PayPal * Peekalink * PhantomBuster * Philips Hue * Pipedrive * Plivo * PostBin * Postgres * Common issues * PostHog * ProfitWell * Pushbullet * Pushcut * Pushover * QuestDB * Quick Base * QuickBooks Online * QuickChart * RabbitMQ * Raindrop * Reddit * Redis * Rocket.Chat * Rundeck * S3 * Salesforce * Salesmate * SeaTable * SecurityScorecard * Segment * SendGrid * Sendy * Sentry.io * ServiceNow * seven * Shopify * SIGNL4 * Slack * Snowflake * Splunk * Spontit * Spotify * Stackby * Storyblok * Strapi * Strava * Stripe * Supabase * Common issues * SyncroMSP * Taiga * Tapfiliate * Telegram * Chat operations * Callback operations * File operations * Message operations * Common issues * TheHive * TheHive 5 * TimescaleDB * Todoist * Travis CI * Trello * Twake * Twilio * Twist * Unleashed Software * UpLead * uProc * UptimeRobot * urlscan.io * Venafi TLS Protect Cloud * Venafi TLS Protect Datacenter * Vero * Vonage * Webflow * Wekan * WhatsApp Business Cloud * Common issues * Wise * WooCommerce * WordPress * X (Formerly Twitter) * Xero * Yourls * YouTube * Zammad * Zendesk * Zoho CRM * Zoom * Zulip * Triggers * ActiveCampaign Trigger * Acuity Scheduling Trigger * Affinity Trigger * Airtable Trigger * AMQP Trigger * Asana Trigger * Autopilot Trigger * AWS SNS Trigger * Bitbucket Trigger * Box Trigger * Brevo Trigger * Calendly Trigger * Cal Trigger * Chargebee Trigger * ClickUp Trigger * Clockify Trigger * ConvertKit Trigger * Copper Trigger * crowd.dev Trigger * Customer.io Trigger * Emelia Trigger * Eventbrite Trigger * Facebook Lead Ads Trigger * Facebook Trigger * Ad Account * Application * Certificate Transparency * Group * Instagram * Link * Page * Permissions * User * WhatsApp Business Account * Workplace Security * Figma Trigger (Beta) * Flow Trigger * Form.io Trigger * Formstack Trigger * GetResponse Trigger * GitHub Trigger * GitLab Trigger * Gmail Trigger * Poll Mode options * Common issues * Google Calendar Trigger * Google Drive Trigger * Common issues * Google Business Profile Trigger * Google Sheets Trigger * Common issues * Gumroad Trigger * Help Scout Trigger * Hubspot Trigger * Invoice Ninja Trigger * Jira Trigger * JotForm Trigger * Kafka Trigger * Keap Trigger * KoboToolbox Trigger * Lemlist Trigger * Linear Trigger * LoneScale Trigger * Mailchimp Trigger * MailerLite Trigger * Mailjet Trigger * Mautic Trigger * Microsoft OneDrive Trigger * Microsoft Outlook Trigger * MQTT Trigger * Netlify Trigger * Notion Trigger * Onfleet Trigger * PayPal Trigger * Pipedrive Trigger * Postgres Trigger * Postmark Trigger * Pushcut Trigger * RabbitMQ Trigger * Redis Trigger * Salesforce Trigger * SeaTable Trigger * Shopify Trigger * Slack Trigger * Strava Trigger * Stripe Trigger * SurveyMonkey Trigger * Taiga Trigger * Telegram Trigger * Common issues * TheHive 5 Trigger * TheHive Trigger * Toggl Trigger * Trello Trigger * Twilio Trigger * Typeform Trigger * Venafi TLS Protect Cloud Trigger * Webex by Cisco Trigger * Webflow Trigger * WhatsApp Trigger * Wise Trigger * WooCommerce Trigger * Workable Trigger * Wufoo Trigger * Zendesk Trigger * Cluster nodes * Root nodes * AI Agent * Conversational Agent * OpenAI Functions Agent * Plan and Execute Agent * ReAct Agent * SQL Agent * Tools Agent * Common issues * Basic LLM Chain * Question and Answer Chain * Common issues * Summarization Chain * Information Extractor * Text Classifier * Sentiment Analysis * LangChain Code * Simple Vector Store * Milvus Vector Store * MongoDB Atlas Vector Store * PGVector Vector Store * Pinecone Vector Store * Qdrant Vector Store * Supabase Vector Store * Zep Vector Store * Sub-nodes * Default Data Loader * GitHub Document Loader * Embeddings AWS Bedrock * Embeddings Azure OpenAI * Embeddings Cohere * Embeddings Google Gemini * Embeddings Google PaLM * Embeddings Google Vertex * Embeddings HuggingFace Inference * Embeddings Mistral Cloud * Embeddings Ollama * Embeddings OpenAI * Anthropic Chat Model * AWS Bedrock Chat Model * Azure OpenAI Chat Model * DeepSeek Chat Model * Google Gemini Chat Model * Google Vertex Chat Model * Groq Chat Model * Mistral Cloud Chat Model * Ollama Chat Model * Common issues * OpenAI Chat Model * Common issues * OpenRouter Chat Model * Cohere Model * Ollama Model * Common issues * Hugging Face Inference Model * Chat Memory Manager * Simple Memory * Common issues * Motorhead * MongoDB Chat Memory * Redis Chat Memory * Postgres Chat Memory * Xata * Zep * Auto-fixing Output Parser * Item List Output Parser * Structured Output Parser * Common issues * Contextual Compression Retriever * MultiQuery Retriever * Vector Store Retriever * Workflow Retriever * Character Text Splitter * Recursive Character Text Splitter * Token Splitter * Calculator * Custom Code Tool * HTTP Request Tool * MCP Client Tool * SerpApi (Google Search) * Think Tool * Vector Store Question Answer Tool * Wikipedia * Wolfram|Alpha * Custom n8n Workflow Tool * Credentials * Action Network credentials * ActiveCampaign credentials * Acuity Scheduling credentials * Adalo credentials * Affinity credentials * Agile CRM credentials * Airtable credentials * Airtop credentials * AlienVault credentials * AMQP credentials * Anthropic credentials * APITemplate.io credentials * Asana credentials * Auth0 Management credentials * Automizy credentials * Autopilot credentials * AWS credentials * Azure OpenAI credentials * Azure Storage credentials * BambooHR credentials * Bannerbear credentials * Baserow credentials * Beeminder credentials * Bitbucket credentials * Bitly credentials * Bitwarden credentials * Box credentials * Brandfetch credentials * Brevo credentials * Bubble credentials * Cal.com credentials * Calendly credentials * Carbon Black credentials * Chargebee credentials * CircleCI credentials * Cisco Meraki credentials * Cisco Secure Endpoint credentials * Cisco Umbrella credentials * Clearbit credentials * ClickUp credentials * Clockify credentials * Cloudflare credentials * Cockpit credentials * Coda credentials * Cohere credentials * Contentful credentials * ConvertAPI credentials * ConvertKit credentials * Copper credentials * Cortex credentials * CrateDB credentials * crowd.dev credentials * CrowdStrike credentials * Customer.io credentials * Datadog credentials * DeepL credentials * DeepSeek credentials * Demio credentials * DFIR-IRIS credentials * DHL credentials * Discord credentials * Discourse credentials * Disqus credentials * Drift credentials * Dropbox credentials * Dropcontact credentials * Dynatrace credentials * E-goi credentials * Elasticsearch credentials * Elastic Security credentials * Emelia credentials * ERPNext credentials * Eventbrite credentials * F5 Big-IP credentials * Facebook App credentials * Facebook Graph API credentials * Facebook Lead Ads credentials * Figma credentials * FileMaker credentials * Filescan credentials * Flow credentials * Form.io Trigger credentials * Formstack Trigger credentials * Fortinet FortiGate credentials * Freshdesk credentials * Freshservice credentials * Freshworks CRM credentials * FTP credentials * GetResponse credentials * Ghost credentials * Git credentials * GitHub credentials * GitLab credentials * Gong credentials * Google * Google OAuth2 single service * Google OAuth2 generic * Google Service Account * Google Gemini(PaLM) credentials * Gotify credentials * GoToWebinar credentials * Grafana credentials * Grist credentials * Groq credentials * Gumroad credentials * HaloPSA credentials * Harvest credentials * Help Scout credentials * HighLevel credentials * Home Assistant credentials * HTTP Request credentials * HubSpot credentials * Hugging Face credentials * Humantic AI credentials * Hunter credentials * Hybrid Analysis credentials * IMAP * Gmail * Outlook.com * Yahoo * Imperva WAF credentials * Intercom credentials * Invoice Ninja credentials * Iterable credentials * Jenkins credentials * Jira credentials * JotForm credentials * JWT credentials * Kafka credentials * Keap credentials * Kibana credentials * Kitemaker credentials * KoboToolbox credentials * LDAP credentials * Lemlist credentials * Line credentials * Linear credentials * LingvaNex credentials * LinkedIn credentials * LoneScale credentials * Magento 2 credentials * Mailcheck credentials * Mailchimp credentials * MailerLite credentials * Mailgun credentials * Mailjet credentials * Malcore credentials * Mandrill credentials * Marketstack credentials * Matrix credentials * Mattermost credentials * Mautic credentials * Medium credentials * MessageBird credentials * Metabase credentials * Microsoft credentials * Microsoft Azure Monitor credentials * Microsoft Entra ID credentials * Microsoft SQL credentials * Milvus credentials * Mindee credentials * Miro credentials * MISP credentials * Mist credentials * Mistral Cloud credentials * Mocean credentials * monday.com credentials * MongoDB credentials * Monica CRM credentials * Motorhead credentials * MQTT credentials * MSG91 credentials * MySQL credentials * NASA credentials * Netlify credentials * Netscaler ADC credentials * Nextcloud credentials * NocoDB credentials * Notion credentials * npm credentials * Odoo credentials * Okta credentials * Ollama credentials * One Simple API credentials * Onfleet credentials * OpenAI credentials * OpenCTI credentials * OpenRouter credentials * OpenWeatherMap credentials * Oura credentials * Paddle credentials * PagerDuty credentials * PayPal credentials * Peekalink credentials * PhantomBuster credentials * Philips Hue credentials * Pinecone credentials * Pipedrive credentials * Plivo credentials * Postgres credentials * PostHog credentials * Postmark credentials * ProfitWell credentials * Pushbullet credentials * Pushcut credentials * Pushover credentials * QRadar credentials * Qdrant credentials * Qualys credentials * QuestDB credentials * Quick Base credentials * QuickBooks credentials * RabbitMQ credentials * Raindrop credentials * Rapid7 InsightVM credentials * Recorded Future credentials * Reddit credentials * Redis credentials * Rocket.Chat credentials * Rundeck credentials * S3 credentials * Salesforce credentials * Salesmate credentials * SeaTable credentials * SecurityScorecard credentials * Segment credentials * Sekoia credentials * Send Email * Gmail * Outlook.com * Yahoo * SendGrid credentials * Sendy credentials * Sentry.io credentials * Serp credentials * ServiceNow credentials * seven credentials * Shopify credentials * Shuffler credentials * SIGNL4 credentials * Slack credentials * Snowflake credentials * SolarWinds IPAM credentials * SolarWinds Observability SaaS credentials * Splunk credentials * Spontit credentials * Spotify credentials * SSH credentials * Stackby credentials * Storyblok credentials * Strapi credentials * Strava credentials * Stripe credentials * Supabase credentials * SurveyMonkey credentials * SyncroMSP credentials * Sysdig credentials * Taiga credentials * Tapfiliate credentials * Telegram credentials * TheHive credentials * TheHive 5 credentials * TimescaleDB credentials * Todoist credentials * Toggl credentials * TOTP credentials * Travis CI credentials * Trellix ePO credentials * Trello credentials * Twake credentials * Twilio credentials * Twist credentials * Typeform credentials * Unleashed Software credentials * UpLead credentials * uProc credentials * UptimeRobot credentials * urlscan.io credentials * Venafi TLS Protect Cloud credentials * Venafi TLS Protect Datacenter credentials * Vero credentials * VirusTotal credentials * Vonage credentials * Webex by Cisco credentials * Webflow credentials * Webhook credentials * Wekan credentials * WhatsApp Business Cloud credentials * Wise credentials * Wolfram|Alpha credentials * WooCommerce credentials * WordPress credentials * Workable credentials * Wufoo credentials * X (formerly Twitter) credentials * Xata credentials * Xero credentials * Yourls credentials * Zabbix credentials * Zammad credentials * Zendesk credentials * Zep credentials * Zoho credentials * Zoom credentials * Zscaler ZIA credentials * Zulip credentials * Custom API actions for existing nodes * Handle rate limits * Community nodes Community nodes * Installation and management * GUI installation * Manual installation * Risks * Blocklist * Using community nodes * Troubleshooting * Building community nodes * Creating nodes Creating nodes * Overview * Plan your node * Choose a node type * Choose a node building style * Node UI design * Choose node file structure * Build your node * Set up your development environment * Tutorial: Build a declarative-style node * Tutorial: Build a programmatic-style node * Reference * Node UI elements * Code standards * Versioning * Choose node file structure * Base files * Structure * Standard parameters * Declarative-style parameters * Programmatic-style parameters * Programmatic-style execute method * Codex files * Credentials files * HTTP request helpers * Item linking * Test your node * Run your node locally * Node linter * Troubleshooting * Deploy your node * Submit community nodes * Install private nodes * Hosting n8n * Community vs Enterprise * Installation Installation * npm * Docker * Server setups * Digital Ocean * Heroku * Hetzner * Amazon Web Services * Azure * Google Cloud * Docker Compose * Updating * Configuration Configuration * Environment variables * Binary data * Credentials * Database * Deployment * Endpoints * Executions * External data storage * External hooks * External secrets * Logs * License * Nodes * Queue mode * Security * Source control * Task runners * Timezone and localization * User management and 2FA * Workflows * Configuration methods * Configuration examples * Isolate n8n * Configure the Base URL * Configure custom SSL certificate authorities * Set a custom encryption key * Configure workflow timeouts * Specify custom nodes location * Enable modules in Code node * Set the timezone * Specify user folder path * Configure webhook URLs with reverse proxy * Enable Prometheus metrics * Supported databases and settings * Task runners * User management * Logging and monitoring Logging and monitoring * Logging * Monitoring * Security audit * Scaling and performance Scaling and performance * Overview * Performance and benchmarking * Configuring queue mode * Concurrency control * Execution data * Binary data * External storage for binary data * Memory-related errors * Securing n8n Securing n8n * Overview * Set up SSL * Set up SSO * Security audit * Disable the API * Opt out of data collection * Blocking nodes * Hardening task runners * Starter Kits Starter Kits * AI Starter Kit * Architecture Architecture * Overview * Database structure * Using the CLI Using the CLI * CLI commands * Code in n8n * Expressions * Using the Code node * AI coding * Built in methods and variables Built in methods and variables * Overview * Current node input * Output of other nodes * Date and time * JMESPath * HTTP node * LangChain Code node * n8n metadata * Convenience methods * Data transformation functions * Arrays * Booleans * Dates * Numbers * Objects * Strings * Custom variables Custom variables * Create custom variables * Cookbook Cookbook * Handling dates * Query JSON with JMESPath * Built-in methods and variables examples * execution * getWorkflowStaticData * Retrieve linked items from earlier in the workflow * (node-name).all * vars * Expressions * Check incoming data * Common issues * Code node * Get number of items returned by last node * Get the binary data buffer * Output to the browser console * HTTP Request node * Pagination * Advanced AI * Tutorial: Build an AI workflow in n8n * LangChain in n8n LangChain in n8n * Overview * Langchain concepts in n8n * LangChain learning resources * Use LangSmith with n8n * Examples and concepts Examples and concepts * Introduction * What is a chain? * What is an agent? * Agents vs chains example * What is memory? * What is a tool? * Use Google Sheets as a data source * Call an API to fetch data * Set a human fallback for AI workflows * Let AI specify tool parameters * What is a vector database? * Populate a Pinecone vector database from a website * API * Authentication * Pagination * Using the API playground * API reference * Embed * Prerequisites * Deployment * Configuration * Workflow management * Workflows templates * White labelling 1. Integrations 2. Built-in nodes 3. Triggers AWS SNS is a notification service provided as part of Amazon Web Services. It provides a low-cost infrastructure for the mass delivery of messages, predominantly to mobile users. Credentials You can find authentication information for this node here. --- ## Page: https://docs.n8n.io/integrations/builtin/trigger-nodes/n8n-nodes-base.bitbuckettrigger/ n8n Docs * Using n8n * Getting started Getting started * Learning path * Choose your n8n * Quickstarts * A very quick quickstart * A longer introduction * Video courses * Text courses * Level one * Navigating the editor UI * Building a mini-workflow * Automating a (real-world) use case * Designing the workflow * Building the workflow Building the workflow * Getting data from the data warehouse * Inserting data into airtable * Filtering orders * Setting values for processing orders * Calculating booked orders * Notifying the team * Scheduling the workflow * Activating and examining the workflow * Exporting and importing workflows * Test your knowledge * Level two * Understanding the data structure * Processing different data types * Merging and splitting data * Dealing with errors in workflows * Automating a business workflow Automating a business workflow * Use case * Workflow 1 * Workflow 2 * Workflow 3 * Test your knowledge * Using the app Using the app * Understand workflows * Create and run * Components * Nodes * Connections * Sticky Notes * Executions * Manual, partial, and production executions * Workflow-level executions * All executions * Custom executions data * Debug executions * Tags * Export and import * Templates * Sharing * Settings * Workflow history * Workflow ID * Manage credentials * Create and edit * Credential sharing * Manage users and access * Cloud setup * Manage users * Account types * Role-based access control * Role types * Projects * Best practices * 2FA * LDAP * SAML * Set up SAML * Okta Workforce Identity SAML setup * Troubleshooting * Manage users with SAML * Keyboard shortcuts * Key concepts Key concepts * Flow logic * Splitting with conditionals * Merging data * Looping * Waiting * Sub-workflows * Error handling * Execution order in multi-branch workflows * Data * Data structure * Data flow within nodes * Transforming data * Process data using code * Data mapping * Data mapping in the UI * Data mapping in the expressions editor * Data item linking * Item linking concepts * Item linking in the Code node * Item linking errors * Item linking for node creators * Data pinning * Data editing * Data filtering * Data mocking * Binary data * Schema preview * Glossary * n8n Cloud n8n Cloud * Overview * Access the Cloud admin dashboard * Update your n8n Cloud version * Set the timezone * Cloud IP addresses * Cloud data management * Change ownership or username * Concurrency * AI Assistant * Enterprise features Enterprise features * Source control and environments * Understand * Environments * Git in n8n * Branch patterns * Set up * Using * Push and pull * Copy work between environments * Manage variables * Tutorial: Create environments with source control * External secrets * Log streaming * License key * Releases Releases * Release notes Release notes * 1.x * 0.x * v1.0 migration guide * Help and community Help and community * Where to get help * Contributing * Licenses and privacy Licenses and privacy * Privacy and security * Privacy * Security * Incident response * What you can do * Sustainable use license * Integrations * Built-in nodes Built-in nodes * Node types * Core nodes * Activation Trigger * Aggregate * AI Transform * Code * Keyboard shortcuts * Common issues * Compare Datasets * Compression * Chat Trigger * Common issues * Convert to File * Crypto * Date & Time * Debug Helper * Edit Fields (Set) * Edit Image * Email Trigger (IMAP) * Error Trigger * Execute Command * Common issues * Execute Sub-workflow * Execute Sub-workflow Trigger * Execution Data * Extract From File * Filter * FTP * Git * GraphQL * HTML * HTTP Request * Common issues * If * JWT * LDAP * Limit * Local File Trigger * Loop Over Items (Split in Batches) * Manual Trigger * Markdown * MCP Server Trigger * Merge * n8n * n8n Form * n8n Form Trigger * n8n Trigger * No Operation, do nothing * Read/Write Files from Disk * Remove Duplicates * Templates and examples * Rename Keys * Respond to Webhook * RSS Read * RSS Feed Trigger * Schedule Trigger * Common issues * Send Email * Sort * Split Out * SSE Trigger * SSH * Stop And Error * Summarize * Switch * TOTP * Wait * Webhook * Workflow development * Common issues * Workflow Trigger * XML * Actions * Action Network * ActiveCampaign * Adalo * Affinity * Agile CRM * Airtable * Common issues * Airtop * AMQP Sender * APITemplate.io * Asana * Automizy * Autopilot * AWS Certificate Manager * AWS Comprehend * AWS DynamoDB * AWS Elastic Load Balancing * AWS Lambda * AWS Rekognition * AWS S3 * AWS SES * AWS SNS * AWS SQS * AWS Textract * AWS Transcribe * Azure Storage * BambooHR * Bannerbear * Baserow * Beeminder * Bitly * Bitwarden * Box * Brandfetch * Brevo * Bubble * Chargebee * CircleCI * Webex by Cisco * Clearbit * ClickUp * Clockify * Cloudflare * Cockpit * Coda * CoinGecko * Contentful * ConvertKit * Copper * Cortex * CrateDB * crowd.dev * Customer.io * DeepL * Demio * DHL * Discord * Common issues * Discourse * Disqus * Drift * Dropbox * Dropcontact * E-goi * Elasticsearch * Elastic Security * Emelia * ERPNext * Facebook Graph API * FileMaker * Flow * Freshdesk * Freshservice * Freshworks CRM * GetResponse * Ghost * GitHub * GitLab * Gmail * Draft operations * Label operations * Message operations * Thread operations * Common issues * Gong * Google Ads * Google Analytics * Google BigQuery * Google Books * Google Business Profile * Google Calendar * Calendar operations * Event operations * Google Chat * Google Cloud Firestore * Google Cloud Natural Language * Google Cloud Realtime Database * Google Cloud Storage * Google Contacts * Google Docs * Google Drive * File operations * File and folder operations * Folder operations * Shared drive operations * Common issues * Google Perspective * Google Sheets * Document operations * Sheet within Document operations * Common issues * Google Slides * Google Tasks * Google Translate * Google Workspace Admin * Gotify * GoToWebinar * Grafana * Grist * Hacker News * HaloPSA * Harvest * Help Scout * HighLevel * Home Assistant * HubSpot * Humantic AI * Hunter * Intercom * Invoice Ninja * Iterable * Jenkins * Jira Software * Kafka * Keap * Kitemaker * KoboToolbox * Lemlist * Line * Linear * LingvaNex * LinkedIn * LoneScale * Magento 2 * Mailcheck * Mailchimp * MailerLite * Mailgun * Mailjet * Mandrill * marketstack * Matrix * Mattermost * Mautic * Medium * MessageBird * Metabase * Microsoft Dynamics CRM * Microsoft Entra ID * Microsoft Excel 365 * Microsoft Graph Security * Microsoft OneDrive * Microsoft Outlook * Microsoft SQL * Microsoft Teams * Microsoft To Do * Mindee * MISP * Mocean * monday.com * MongoDB * Monica CRM * MQTT * MSG91 * MySQL * Common issues * Customer Datastore (n8n Training) * Customer Messenger (n8n Training) * NASA * Netlify * Netscaler ADC * Nextcloud * NocoDB * Notion * Common issues * npm * Odoo * Okta * One Simple API * Onfleet * OpenAI * Assistant operations * Audio operations * File operations * Image operations * Text operations * Common issues * OpenThesaurus * OpenWeatherMap * Oura * Paddle * PagerDuty * PayPal * Peekalink * PhantomBuster * Philips Hue * Pipedrive * Plivo * PostBin * Postgres * Common issues * PostHog * ProfitWell * Pushbullet * Pushcut * Pushover * QuestDB * Quick Base * QuickBooks Online * QuickChart * RabbitMQ * Raindrop * Reddit * Redis * Rocket.Chat * Rundeck * S3 * Salesforce * Salesmate * SeaTable * SecurityScorecard * Segment * SendGrid * Sendy * Sentry.io * ServiceNow * seven * Shopify * SIGNL4 * Slack * Snowflake * Splunk * Spontit * Spotify * Stackby * Storyblok * Strapi * Strava * Stripe * Supabase * Common issues * SyncroMSP * Taiga * Tapfiliate * Telegram * Chat operations * Callback operations * File operations * Message operations * Common issues * TheHive * TheHive 5 * TimescaleDB * Todoist * Travis CI * Trello * Twake * Twilio * Twist * Unleashed Software * UpLead * uProc * UptimeRobot * urlscan.io * Venafi TLS Protect Cloud * Venafi TLS Protect Datacenter * Vero * Vonage * Webflow * Wekan * WhatsApp Business Cloud * Common issues * Wise * WooCommerce * WordPress * X (Formerly Twitter) * Xero * Yourls * YouTube * Zammad * Zendesk * Zoho CRM * Zoom * Zulip * Triggers * ActiveCampaign Trigger * Acuity Scheduling Trigger * Affinity Trigger * Airtable Trigger * AMQP Trigger * Asana Trigger * Autopilot Trigger * AWS SNS Trigger * Bitbucket Trigger * Box Trigger * Brevo Trigger * Calendly Trigger * Cal Trigger * Chargebee Trigger * ClickUp Trigger * Clockify Trigger * ConvertKit Trigger * Copper Trigger * crowd.dev Trigger * Customer.io Trigger * Emelia Trigger * Eventbrite Trigger * Facebook Lead Ads Trigger * Facebook Trigger * Ad Account * Application * Certificate Transparency * Group * Instagram * Link * Page * Permissions * User * WhatsApp Business Account * Workplace Security * Figma Trigger (Beta) * Flow Trigger * Form.io Trigger * Formstack Trigger * GetResponse Trigger * GitHub Trigger * GitLab Trigger * Gmail Trigger * Poll Mode options * Common issues * Google Calendar Trigger * Google Drive Trigger * Common issues * Google Business Profile Trigger * Google Sheets Trigger * Common issues * Gumroad Trigger * Help Scout Trigger * Hubspot Trigger * Invoice Ninja Trigger * Jira Trigger * JotForm Trigger * Kafka Trigger * Keap Trigger * KoboToolbox Trigger * Lemlist Trigger * Linear Trigger * LoneScale Trigger * Mailchimp Trigger * MailerLite Trigger * Mailjet Trigger * Mautic Trigger * Microsoft OneDrive Trigger * Microsoft Outlook Trigger * MQTT Trigger * Netlify Trigger * Notion Trigger * Onfleet Trigger * PayPal Trigger * Pipedrive Trigger * Postgres Trigger * Postmark Trigger * Pushcut Trigger * RabbitMQ Trigger * Redis Trigger * Salesforce Trigger * SeaTable Trigger * Shopify Trigger * Slack Trigger * Strava Trigger * Stripe Trigger * SurveyMonkey Trigger * Taiga Trigger * Telegram Trigger * Common issues * TheHive 5 Trigger * TheHive Trigger * Toggl Trigger * Trello Trigger * Twilio Trigger * Typeform Trigger * Venafi TLS Protect Cloud Trigger * Webex by Cisco Trigger * Webflow Trigger * WhatsApp Trigger * Wise Trigger * WooCommerce Trigger * Workable Trigger * Wufoo Trigger * Zendesk Trigger * Cluster nodes * Root nodes * AI Agent * Conversational Agent * OpenAI Functions Agent * Plan and Execute Agent * ReAct Agent * SQL Agent * Tools Agent * Common issues * Basic LLM Chain * Question and Answer Chain * Common issues * Summarization Chain * Information Extractor * Text Classifier * Sentiment Analysis * LangChain Code * Simple Vector Store * Milvus Vector Store * MongoDB Atlas Vector Store * PGVector Vector Store * Pinecone Vector Store * Qdrant Vector Store * Supabase Vector Store * Zep Vector Store * Sub-nodes * Default Data Loader * GitHub Document Loader * Embeddings AWS Bedrock * Embeddings Azure OpenAI * Embeddings Cohere * Embeddings Google Gemini * Embeddings Google PaLM * Embeddings Google Vertex * Embeddings HuggingFace Inference * Embeddings Mistral Cloud * Embeddings Ollama * Embeddings OpenAI * Anthropic Chat Model * AWS Bedrock Chat Model * Azure OpenAI Chat Model * DeepSeek Chat Model * Google Gemini Chat Model * Google Vertex Chat Model * Groq Chat Model * Mistral Cloud Chat Model * Ollama Chat Model * Common issues * OpenAI Chat Model * Common issues * OpenRouter Chat Model * Cohere Model * Ollama Model * Common issues * Hugging Face Inference Model * Chat Memory Manager * Simple Memory * Common issues * Motorhead * MongoDB Chat Memory * Redis Chat Memory * Postgres Chat Memory * Xata * Zep * Auto-fixing Output Parser * Item List Output Parser * Structured Output Parser * Common issues * Contextual Compression Retriever * MultiQuery Retriever * Vector Store Retriever * Workflow Retriever * Character Text Splitter * Recursive Character Text Splitter * Token Splitter * Calculator * Custom Code Tool * HTTP Request Tool * MCP Client Tool * SerpApi (Google Search) * Think Tool * Vector Store Question Answer Tool * Wikipedia * Wolfram|Alpha * Custom n8n Workflow Tool * Credentials * Action Network credentials * ActiveCampaign credentials * Acuity Scheduling credentials * Adalo credentials * Affinity credentials * Agile CRM credentials * Airtable credentials * Airtop credentials * AlienVault credentials * AMQP credentials * Anthropic credentials * APITemplate.io credentials * Asana credentials * Auth0 Management credentials * Automizy credentials * Autopilot credentials * AWS credentials * Azure OpenAI credentials * Azure Storage credentials * BambooHR credentials * Bannerbear credentials * Baserow credentials * Beeminder credentials * Bitbucket credentials * Bitly credentials * Bitwarden credentials * Box credentials * Brandfetch credentials * Brevo credentials * Bubble credentials * Cal.com credentials * Calendly credentials * Carbon Black credentials * Chargebee credentials * CircleCI credentials * Cisco Meraki credentials * Cisco Secure Endpoint credentials * Cisco Umbrella credentials * Clearbit credentials * ClickUp credentials * Clockify credentials * Cloudflare credentials * Cockpit credentials * Coda credentials * Cohere credentials * Contentful credentials * ConvertAPI credentials * ConvertKit credentials * Copper credentials * Cortex credentials * CrateDB credentials * crowd.dev credentials * CrowdStrike credentials * Customer.io credentials * Datadog credentials * DeepL credentials * DeepSeek credentials * Demio credentials * DFIR-IRIS credentials * DHL credentials * Discord credentials * Discourse credentials * Disqus credentials * Drift credentials * Dropbox credentials * Dropcontact credentials * Dynatrace credentials * E-goi credentials * Elasticsearch credentials * Elastic Security credentials * Emelia credentials * ERPNext credentials * Eventbrite credentials * F5 Big-IP credentials * Facebook App credentials * Facebook Graph API credentials * Facebook Lead Ads credentials * Figma credentials * FileMaker credentials * Filescan credentials * Flow credentials * Form.io Trigger credentials * Formstack Trigger credentials * Fortinet FortiGate credentials * Freshdesk credentials * Freshservice credentials * Freshworks CRM credentials * FTP credentials * GetResponse credentials * Ghost credentials * Git credentials * GitHub credentials * GitLab credentials * Gong credentials * Google * Google OAuth2 single service * Google OAuth2 generic * Google Service Account * Google Gemini(PaLM) credentials * Gotify credentials * GoToWebinar credentials * Grafana credentials * Grist credentials * Groq credentials * Gumroad credentials * HaloPSA credentials * Harvest credentials * Help Scout credentials * HighLevel credentials * Home Assistant credentials * HTTP Request credentials * HubSpot credentials * Hugging Face credentials * Humantic AI credentials * Hunter credentials * Hybrid Analysis credentials * IMAP * Gmail * Outlook.com * Yahoo * Imperva WAF credentials * Intercom credentials * Invoice Ninja credentials * Iterable credentials * Jenkins credentials * Jira credentials * JotForm credentials * JWT credentials * Kafka credentials * Keap credentials * Kibana credentials * Kitemaker credentials * KoboToolbox credentials * LDAP credentials * Lemlist credentials * Line credentials * Linear credentials * LingvaNex credentials * LinkedIn credentials * LoneScale credentials * Magento 2 credentials * Mailcheck credentials * Mailchimp credentials * MailerLite credentials * Mailgun credentials * Mailjet credentials * Malcore credentials * Mandrill credentials * Marketstack credentials * Matrix credentials * Mattermost credentials * Mautic credentials * Medium credentials * MessageBird credentials * Metabase credentials * Microsoft credentials * Microsoft Azure Monitor credentials * Microsoft Entra ID credentials * Microsoft SQL credentials * Milvus credentials * Mindee credentials * Miro credentials * MISP credentials * Mist credentials * Mistral Cloud credentials * Mocean credentials * monday.com credentials * MongoDB credentials * Monica CRM credentials * Motorhead credentials * MQTT credentials * MSG91 credentials * MySQL credentials * NASA credentials * Netlify credentials * Netscaler ADC credentials * Nextcloud credentials * NocoDB credentials * Notion credentials * npm credentials * Odoo credentials * Okta credentials * Ollama credentials * One Simple API credentials * Onfleet credentials * OpenAI credentials * OpenCTI credentials * OpenRouter credentials * OpenWeatherMap credentials * Oura credentials * Paddle credentials * PagerDuty credentials * PayPal credentials * Peekalink credentials * PhantomBuster credentials * Philips Hue credentials * Pinecone credentials * Pipedrive credentials * Plivo credentials * Postgres credentials * PostHog credentials * Postmark credentials * ProfitWell credentials * Pushbullet credentials * Pushcut credentials * Pushover credentials * QRadar credentials * Qdrant credentials * Qualys credentials * QuestDB credentials * Quick Base credentials * QuickBooks credentials * RabbitMQ credentials * Raindrop credentials * Rapid7 InsightVM credentials * Recorded Future credentials * Reddit credentials * Redis credentials * Rocket.Chat credentials * Rundeck credentials * S3 credentials * Salesforce credentials * Salesmate credentials * SeaTable credentials * SecurityScorecard credentials * Segment credentials * Sekoia credentials * Send Email * Gmail * Outlook.com * Yahoo * SendGrid credentials * Sendy credentials * Sentry.io credentials * Serp credentials * ServiceNow credentials * seven credentials * Shopify credentials * Shuffler credentials * SIGNL4 credentials * Slack credentials * Snowflake credentials * SolarWinds IPAM credentials * SolarWinds Observability SaaS credentials * Splunk credentials * Spontit credentials * Spotify credentials * SSH credentials * Stackby credentials * Storyblok credentials * Strapi credentials * Strava credentials * Stripe credentials * Supabase credentials * SurveyMonkey credentials * SyncroMSP credentials * Sysdig credentials * Taiga credentials * Tapfiliate credentials * Telegram credentials * TheHive credentials * TheHive 5 credentials * TimescaleDB credentials * Todoist credentials * Toggl credentials * TOTP credentials * Travis CI credentials * Trellix ePO credentials * Trello credentials * Twake credentials * Twilio credentials * Twist credentials * Typeform credentials * Unleashed Software credentials * UpLead credentials * uProc credentials * UptimeRobot credentials * urlscan.io credentials * Venafi TLS Protect Cloud credentials * Venafi TLS Protect Datacenter credentials * Vero credentials * VirusTotal credentials * Vonage credentials * Webex by Cisco credentials * Webflow credentials * Webhook credentials * Wekan credentials * WhatsApp Business Cloud credentials * Wise credentials * Wolfram|Alpha credentials * WooCommerce credentials * WordPress credentials * Workable credentials * Wufoo credentials * X (formerly Twitter) credentials * Xata credentials * Xero credentials * Yourls credentials * Zabbix credentials * Zammad credentials * Zendesk credentials * Zep credentials * Zoho credentials * Zoom credentials * Zscaler ZIA credentials * Zulip credentials * Custom API actions for existing nodes * Handle rate limits * Community nodes Community nodes * Installation and management * GUI installation * Manual installation * Risks * Blocklist * Using community nodes * Troubleshooting * Building community nodes * Creating nodes Creating nodes * Overview * Plan your node * Choose a node type * Choose a node building style * Node UI design * Choose node file structure * Build your node * Set up your development environment * Tutorial: Build a declarative-style node * Tutorial: Build a programmatic-style node * Reference * Node UI elements * Code standards * Versioning * Choose node file structure * Base files * Structure * Standard parameters * Declarative-style parameters * Programmatic-style parameters * Programmatic-style execute method * Codex files * Credentials files * HTTP request helpers * Item linking * Test your node * Run your node locally * Node linter * Troubleshooting * Deploy your node * Submit community nodes * Install private nodes * Hosting n8n * Community vs Enterprise * Installation Installation * npm * Docker * Server setups * Digital Ocean * Heroku * Hetzner * Amazon Web Services * Azure * Google Cloud * Docker Compose * Updating * Configuration Configuration * Environment variables * Binary data * Credentials * Database * Deployment * Endpoints * Executions * External data storage * External hooks * External secrets * Logs * License * Nodes * Queue mode * Security * Source control * Task runners * Timezone and localization * User management and 2FA * Workflows * Configuration methods * Configuration examples * Isolate n8n * Configure the Base URL * Configure custom SSL certificate authorities * Set a custom encryption key * Configure workflow timeouts * Specify custom nodes location * Enable modules in Code node * Set the timezone * Specify user folder path * Configure webhook URLs with reverse proxy * Enable Prometheus metrics * Supported databases and settings * Task runners * User management * Logging and monitoring Logging and monitoring * Logging * Monitoring * Security audit * Scaling and performance Scaling and performance * Overview * Performance and benchmarking * Configuring queue mode * Concurrency control * Execution data * Binary data * External storage for binary data * Memory-related errors * Securing n8n Securing n8n * Overview * Set up SSL * Set up SSO * Security audit * Disable the API * Opt out of data collection * Blocking nodes * Hardening task runners * Starter Kits Starter Kits * AI Starter Kit * Architecture Architecture * Overview * Database structure * Using the CLI Using the CLI * CLI commands * Code in n8n * Expressions * Using the Code node * AI coding * Built in methods and variables Built in methods and variables * Overview * Current node input * Output of other nodes * Date and time * JMESPath * HTTP node * LangChain Code node * n8n metadata * Convenience methods * Data transformation functions * Arrays * Booleans * Dates * Numbers * Objects * Strings * Custom variables Custom variables * Create custom variables * Cookbook Cookbook * Handling dates * Query JSON with JMESPath * Built-in methods and variables examples * execution * getWorkflowStaticData * Retrieve linked items from earlier in the workflow * (node-name).all * vars * Expressions * Check incoming data * Common issues * Code node * Get number of items returned by last node * Get the binary data buffer * Output to the browser console * HTTP Request node * Pagination * Advanced AI * Tutorial: Build an AI workflow in n8n * LangChain in n8n LangChain in n8n * Overview * Langchain concepts in n8n * LangChain learning resources * Use LangSmith with n8n * Examples and concepts Examples and concepts * Introduction * What is a chain? * What is an agent? * Agents vs chains example * What is memory? * What is a tool? * Use Google Sheets as a data source * Call an API to fetch data * Set a human fallback for AI workflows * Let AI specify tool parameters * What is a vector database? * Populate a Pinecone vector database from a website * API * Authentication * Pagination * Using the API playground * API reference * Embed * Prerequisites * Deployment * Configuration * Workflow management * Workflows templates * White labelling 1. Integrations 2. Built-in nodes 3. Triggers Bitbucket is a web-based version control repository hosting service owned by Atlassian, for source code and development projects that use either Mercurial or Git revision control systems. Credentials You can find authentication information for this node here. --- ## Page: https://docs.n8n.io/integrations/builtin/trigger-nodes/n8n-nodes-base.boxtrigger/ Box is a cloud computing company which provides file sharing, collaborating, and other tools for working with files uploaded to its servers. Credentials You can find authentication information for this node here. Examples and templates For usage examples and templates to help you get started, refer to n8n's Box Trigger integrations page. ## Find your Box Target ID# To get your Target ID in Box: 1. Open the file/folder that you would like to monitor. 2. Copy the string of characters after `folder/` in your URL. This is the target ID. For example, if the URL is `https://app.box.com/folder/12345`, then `12345` is the target ID. 3. Paste it in the **Target ID** field in n8n. --- ## Page: https://docs.n8n.io/integrations/builtin/trigger-nodes/n8n-nodes-base.brevotrigger/ 1. Integrations 2. Built-in nodes 3. Triggers Brevo is a digital marketing platform to help users grow their business. Credentials You can find authentication information for this node here. Examples and templates For usage examples and templates to help you get started, refer to n8n's Brevo Trigger integrations page. --- ## Page: https://docs.n8n.io/integrations/builtin/trigger-nodes/n8n-nodes-base.calendlytrigger/ 1. Integrations 2. Built-in nodes 3. Triggers Calendly is an automated scheduling software that's designed to help find meeting times. Credentials You can find authentication information for this node here. Examples and templates For usage examples and templates to help you get started, refer to n8n's Calendly Trigger integrations page. --- ## Page: https://docs.n8n.io/integrations/builtin/trigger-nodes/n8n-nodes-base.caltrigger/ 1. Integrations 2. Built-in nodes 3. Triggers Cal is the event-juggling scheduler for everyone. Focus on meeting, not making meetings. Credentials You can find authentication information for this node here. Examples and templates For usage examples and templates to help you get started, refer to n8n's Cal Trigger integrations page. --- ## Page: https://docs.n8n.io/integrations/builtin/trigger-nodes/n8n-nodes-base.chargebeetrigger/ Chargebee is a billing platform for subscription based SaaS and eCommerce businesses. Chargebee integrates with payment gateways to let you automate recurring payment collection along with invoicing, taxes, accounting, email notifications, SaaS Metrics and customer management. Credentials You can find authentication information for this node here. ## Add webhook URL in Chargebee# To add a Webhook URL in Chargebee: 1. Open your Chargebee dashboard. 2. Go to **Settings** > **Configure Chargebee**. 3. Scroll down and select **Webhooks**. 4. Select the **Add Webhook** button. 5. Enter the **Webhook Name** and the **Webhook URL**. 6. Select **Create**. --- ## Page: https://docs.n8n.io/integrations/builtin/trigger-nodes/n8n-nodes-base.clickuptrigger/ n8n Docs * Using n8n * Getting started Getting started * Learning path * Choose your n8n * Quickstarts * A very quick quickstart * A longer introduction * Video courses * Text courses * Level one * Navigating the editor UI * Building a mini-workflow * Automating a (real-world) use case * Designing the workflow * Building the workflow Building the workflow * Getting data from the data warehouse * Inserting data into airtable * Filtering orders * Setting values for processing orders * Calculating booked orders * Notifying the team * Scheduling the workflow * Activating and examining the workflow * Exporting and importing workflows * Test your knowledge * Level two * Understanding the data structure * Processing different data types * Merging and splitting data * Dealing with errors in workflows * Automating a business workflow Automating a business workflow * Use case * Workflow 1 * Workflow 2 * Workflow 3 * Test your knowledge * Using the app Using the app * Understand workflows * Create and run * Components * Nodes * Connections * Sticky Notes * Executions * Manual, partial, and production executions * Workflow-level executions * All executions * Custom executions data * Debug executions * Tags * Export and import * Templates * Sharing * Settings * Workflow history * Workflow ID * Manage credentials * Create and edit * Credential sharing * Manage users and access * Cloud setup * Manage users * Account types * Role-based access control * Role types * Projects * Best practices * 2FA * LDAP * SAML * Set up SAML * Okta Workforce Identity SAML setup * Troubleshooting * Manage users with SAML * Keyboard shortcuts * Key concepts Key concepts * Flow logic * Splitting with conditionals * Merging data * Looping * Waiting * Sub-workflows * Error handling * Execution order in multi-branch workflows * Data * Data structure * Data flow within nodes * Transforming data * Process data using code * Data mapping * Data mapping in the UI * Data mapping in the expressions editor * Data item linking * Item linking concepts * Item linking in the Code node * Item linking errors * Item linking for node creators * Data pinning * Data editing * Data filtering * Data mocking * Binary data * Schema preview * Glossary * n8n Cloud n8n Cloud * Overview * Access the Cloud admin dashboard * Update your n8n Cloud version * Set the timezone * Cloud IP addresses * Cloud data management * Change ownership or username * Concurrency * AI Assistant * Enterprise features Enterprise features * Source control and environments * Understand * Environments * Git in n8n * Branch patterns * Set up * Using * Push and pull * Copy work between environments * Manage variables * Tutorial: Create environments with source control * External secrets * Log streaming * License key * Releases Releases * Release notes Release notes * 1.x * 0.x * v1.0 migration guide * Help and community Help and community * Where to get help * Contributing * Licenses and privacy Licenses and privacy * Privacy and security * Privacy * Security * Incident response * What you can do * Sustainable use license * Integrations * Built-in nodes Built-in nodes * Node types * Core nodes * Activation Trigger * Aggregate * AI Transform * Code * Keyboard shortcuts * Common issues * Compare Datasets * Compression * Chat Trigger * Common issues * Convert to File * Crypto * Date & Time * Debug Helper * Edit Fields (Set) * Edit Image * Email Trigger (IMAP) * Error Trigger * Execute Command * Common issues * Execute Sub-workflow * Execute Sub-workflow Trigger * Execution Data * Extract From File * Filter * FTP * Git * GraphQL * HTML * HTTP Request * Common issues * If * JWT * LDAP * Limit * Local File Trigger * Loop Over Items (Split in Batches) * Manual Trigger * Markdown * MCP Server Trigger * Merge * n8n * n8n Form * n8n Form Trigger * n8n Trigger * No Operation, do nothing * Read/Write Files from Disk * Remove Duplicates * Templates and examples * Rename Keys * Respond to Webhook * RSS Read * RSS Feed Trigger * Schedule Trigger * Common issues * Send Email * Sort * Split Out * SSE Trigger * SSH * Stop And Error * Summarize * Switch * TOTP * Wait * Webhook * Workflow development * Common issues * Workflow Trigger * XML * Actions * Action Network * ActiveCampaign * Adalo * Affinity * Agile CRM * Airtable * Common issues * Airtop * AMQP Sender * APITemplate.io * Asana * Automizy * Autopilot * AWS Certificate Manager * AWS Comprehend * AWS DynamoDB * AWS Elastic Load Balancing * AWS Lambda * AWS Rekognition * AWS S3 * AWS SES * AWS SNS * AWS SQS * AWS Textract * AWS Transcribe * Azure Storage * BambooHR * Bannerbear * Baserow * Beeminder * Bitly * Bitwarden * Box * Brandfetch * Brevo * Bubble * Chargebee * CircleCI * Webex by Cisco * Clearbit * ClickUp * Clockify * Cloudflare * Cockpit * Coda * CoinGecko * Contentful * ConvertKit * Copper * Cortex * CrateDB * crowd.dev * Customer.io * DeepL * Demio * DHL * Discord * Common issues * Discourse * Disqus * Drift * Dropbox * Dropcontact * E-goi * Elasticsearch * Elastic Security * Emelia * ERPNext * Facebook Graph API * FileMaker * Flow * Freshdesk * Freshservice * Freshworks CRM * GetResponse * Ghost * GitHub * GitLab * Gmail * Draft operations * Label operations * Message operations * Thread operations * Common issues * Gong * Google Ads * Google Analytics * Google BigQuery * Google Books * Google Business Profile * Google Calendar * Calendar operations * Event operations * Google Chat * Google Cloud Firestore * Google Cloud Natural Language * Google Cloud Realtime Database * Google Cloud Storage * Google Contacts * Google Docs * Google Drive * File operations * File and folder operations * Folder operations * Shared drive operations * Common issues * Google Perspective * Google Sheets * Document operations * Sheet within Document operations * Common issues * Google Slides * Google Tasks * Google Translate * Google Workspace Admin * Gotify * GoToWebinar * Grafana * Grist * Hacker News * HaloPSA * Harvest * Help Scout * HighLevel * Home Assistant * HubSpot * Humantic AI * Hunter * Intercom * Invoice Ninja * Iterable * Jenkins * Jira Software * Kafka * Keap * Kitemaker * KoboToolbox * Lemlist * Line * Linear * LingvaNex * LinkedIn * LoneScale * Magento 2 * Mailcheck * Mailchimp * MailerLite * Mailgun * Mailjet * Mandrill * marketstack * Matrix * Mattermost * Mautic * Medium * MessageBird * Metabase * Microsoft Dynamics CRM * Microsoft Entra ID * Microsoft Excel 365 * Microsoft Graph Security * Microsoft OneDrive * Microsoft Outlook * Microsoft SQL * Microsoft Teams * Microsoft To Do * Mindee * MISP * Mocean * monday.com * MongoDB * Monica CRM * MQTT * MSG91 * MySQL * Common issues * Customer Datastore (n8n Training) * Customer Messenger (n8n Training) * NASA * Netlify * Netscaler ADC * Nextcloud * NocoDB * Notion * Common issues * npm * Odoo * Okta * One Simple API * Onfleet * OpenAI * Assistant operations * Audio operations * File operations * Image operations * Text operations * Common issues * OpenThesaurus * OpenWeatherMap * Oura * Paddle * PagerDuty * PayPal * Peekalink * PhantomBuster * Philips Hue * Pipedrive * Plivo * PostBin * Postgres * Common issues * PostHog * ProfitWell * Pushbullet * Pushcut * Pushover * QuestDB * Quick Base * QuickBooks Online * QuickChart * RabbitMQ * Raindrop * Reddit * Redis * Rocket.Chat * Rundeck * S3 * Salesforce * Salesmate * SeaTable * SecurityScorecard * Segment * SendGrid * Sendy * Sentry.io * ServiceNow * seven * Shopify * SIGNL4 * Slack * Snowflake * Splunk * Spontit * Spotify * Stackby * Storyblok * Strapi * Strava * Stripe * Supabase * Common issues * SyncroMSP * Taiga * Tapfiliate * Telegram * Chat operations * Callback operations * File operations * Message operations * Common issues * TheHive * TheHive 5 * TimescaleDB * Todoist * Travis CI * Trello * Twake * Twilio * Twist * Unleashed Software * UpLead * uProc * UptimeRobot * urlscan.io * Venafi TLS Protect Cloud * Venafi TLS Protect Datacenter * Vero * Vonage * Webflow * Wekan * WhatsApp Business Cloud * Common issues * Wise * WooCommerce * WordPress * X (Formerly Twitter) * Xero * Yourls * YouTube * Zammad * Zendesk * Zoho CRM * Zoom * Zulip * Triggers * ActiveCampaign Trigger * Acuity Scheduling Trigger * Affinity Trigger * Airtable Trigger * AMQP Trigger * Asana Trigger * Autopilot Trigger * AWS SNS Trigger * Bitbucket Trigger * Box Trigger * Brevo Trigger * Calendly Trigger * Cal Trigger * Chargebee Trigger * ClickUp Trigger * Clockify Trigger * ConvertKit Trigger * Copper Trigger * crowd.dev Trigger * Customer.io Trigger * Emelia Trigger * Eventbrite Trigger * Facebook Lead Ads Trigger * Facebook Trigger * Ad Account * Application * Certificate Transparency * Group * Instagram * Link * Page * Permissions * User * WhatsApp Business Account * Workplace Security * Figma Trigger (Beta) * Flow Trigger * Form.io Trigger * Formstack Trigger * GetResponse Trigger * GitHub Trigger * GitLab Trigger * Gmail Trigger * Poll Mode options * Common issues * Google Calendar Trigger * Google Drive Trigger * Common issues * Google Business Profile Trigger * Google Sheets Trigger * Common issues * Gumroad Trigger * Help Scout Trigger * Hubspot Trigger * Invoice Ninja Trigger * Jira Trigger * JotForm Trigger * Kafka Trigger * Keap Trigger * KoboToolbox Trigger * Lemlist Trigger * Linear Trigger * LoneScale Trigger * Mailchimp Trigger * MailerLite Trigger * Mailjet Trigger * Mautic Trigger * Microsoft OneDrive Trigger * Microsoft Outlook Trigger * MQTT Trigger * Netlify Trigger * Notion Trigger * Onfleet Trigger * PayPal Trigger * Pipedrive Trigger * Postgres Trigger * Postmark Trigger * Pushcut Trigger * RabbitMQ Trigger * Redis Trigger * Salesforce Trigger * SeaTable Trigger * Shopify Trigger * Slack Trigger * Strava Trigger * Stripe Trigger * SurveyMonkey Trigger * Taiga Trigger * Telegram Trigger * Common issues * TheHive 5 Trigger * TheHive Trigger * Toggl Trigger * Trello Trigger * Twilio Trigger * Typeform Trigger * Venafi TLS Protect Cloud Trigger * Webex by Cisco Trigger * Webflow Trigger * WhatsApp Trigger * Wise Trigger * WooCommerce Trigger * Workable Trigger * Wufoo Trigger * Zendesk Trigger * Cluster nodes * Root nodes * AI Agent * Conversational Agent * OpenAI Functions Agent * Plan and Execute Agent * ReAct Agent * SQL Agent * Tools Agent * Common issues * Basic LLM Chain * Question and Answer Chain * Common issues * Summarization Chain * Information Extractor * Text Classifier * Sentiment Analysis * LangChain Code * Simple Vector Store * Milvus Vector Store * MongoDB Atlas Vector Store * PGVector Vector Store * Pinecone Vector Store * Qdrant Vector Store * Supabase Vector Store * Zep Vector Store * Sub-nodes * Default Data Loader * GitHub Document Loader * Embeddings AWS Bedrock * Embeddings Azure OpenAI * Embeddings Cohere * Embeddings Google Gemini * Embeddings Google PaLM * Embeddings Google Vertex * Embeddings HuggingFace Inference * Embeddings Mistral Cloud * Embeddings Ollama * Embeddings OpenAI * Anthropic Chat Model * AWS Bedrock Chat Model * Azure OpenAI Chat Model * DeepSeek Chat Model * Google Gemini Chat Model * Google Vertex Chat Model * Groq Chat Model * Mistral Cloud Chat Model * Ollama Chat Model * Common issues * OpenAI Chat Model * Common issues * OpenRouter Chat Model * Cohere Model * Ollama Model * Common issues * Hugging Face Inference Model * Chat Memory Manager * Simple Memory * Common issues * Motorhead * MongoDB Chat Memory * Redis Chat Memory * Postgres Chat Memory * Xata * Zep * Auto-fixing Output Parser * Item List Output Parser * Structured Output Parser * Common issues * Contextual Compression Retriever * MultiQuery Retriever * Vector Store Retriever * Workflow Retriever * Character Text Splitter * Recursive Character Text Splitter * Token Splitter * Calculator * Custom Code Tool * HTTP Request Tool * MCP Client Tool * SerpApi (Google Search) * Think Tool * Vector Store Question Answer Tool * Wikipedia * Wolfram|Alpha * Custom n8n Workflow Tool * Credentials * Action Network credentials * ActiveCampaign credentials * Acuity Scheduling credentials * Adalo credentials * Affinity credentials * Agile CRM credentials * Airtable credentials * Airtop credentials * AlienVault credentials * AMQP credentials * Anthropic credentials * APITemplate.io credentials * Asana credentials * Auth0 Management credentials * Automizy credentials * Autopilot credentials * AWS credentials * Azure OpenAI credentials * Azure Storage credentials * BambooHR credentials * Bannerbear credentials * Baserow credentials * Beeminder credentials * Bitbucket credentials * Bitly credentials * Bitwarden credentials * Box credentials * Brandfetch credentials * Brevo credentials * Bubble credentials * Cal.com credentials * Calendly credentials * Carbon Black credentials * Chargebee credentials * CircleCI credentials * Cisco Meraki credentials * Cisco Secure Endpoint credentials * Cisco Umbrella credentials * Clearbit credentials * ClickUp credentials * Clockify credentials * Cloudflare credentials * Cockpit credentials * Coda credentials * Cohere credentials * Contentful credentials * ConvertAPI credentials * ConvertKit credentials * Copper credentials * Cortex credentials * CrateDB credentials * crowd.dev credentials * CrowdStrike credentials * Customer.io credentials * Datadog credentials * DeepL credentials * DeepSeek credentials * Demio credentials * DFIR-IRIS credentials * DHL credentials * Discord credentials * Discourse credentials * Disqus credentials * Drift credentials * Dropbox credentials * Dropcontact credentials * Dynatrace credentials * E-goi credentials * Elasticsearch credentials * Elastic Security credentials * Emelia credentials * ERPNext credentials * Eventbrite credentials * F5 Big-IP credentials * Facebook App credentials * Facebook Graph API credentials * Facebook Lead Ads credentials * Figma credentials * FileMaker credentials * Filescan credentials * Flow credentials * Form.io Trigger credentials * Formstack Trigger credentials * Fortinet FortiGate credentials * Freshdesk credentials * Freshservice credentials * Freshworks CRM credentials * FTP credentials * GetResponse credentials * Ghost credentials * Git credentials * GitHub credentials * GitLab credentials * Gong credentials * Google * Google OAuth2 single service * Google OAuth2 generic * Google Service Account * Google Gemini(PaLM) credentials * Gotify credentials * GoToWebinar credentials * Grafana credentials * Grist credentials * Groq credentials * Gumroad credentials * HaloPSA credentials * Harvest credentials * Help Scout credentials * HighLevel credentials * Home Assistant credentials * HTTP Request credentials * HubSpot credentials * Hugging Face credentials * Humantic AI credentials * Hunter credentials * Hybrid Analysis credentials * IMAP * Gmail * Outlook.com * Yahoo * Imperva WAF credentials * Intercom credentials * Invoice Ninja credentials * Iterable credentials * Jenkins credentials * Jira credentials * JotForm credentials * JWT credentials * Kafka credentials * Keap credentials * Kibana credentials * Kitemaker credentials * KoboToolbox credentials * LDAP credentials * Lemlist credentials * Line credentials * Linear credentials * LingvaNex credentials * LinkedIn credentials * LoneScale credentials * Magento 2 credentials * Mailcheck credentials * Mailchimp credentials * MailerLite credentials * Mailgun credentials * Mailjet credentials * Malcore credentials * Mandrill credentials * Marketstack credentials * Matrix credentials * Mattermost credentials * Mautic credentials * Medium credentials * MessageBird credentials * Metabase credentials * Microsoft credentials * Microsoft Azure Monitor credentials * Microsoft Entra ID credentials * Microsoft SQL credentials * Milvus credentials * Mindee credentials * Miro credentials * MISP credentials * Mist credentials * Mistral Cloud credentials * Mocean credentials * monday.com credentials * MongoDB credentials * Monica CRM credentials * Motorhead credentials * MQTT credentials * MSG91 credentials * MySQL credentials * NASA credentials * Netlify credentials * Netscaler ADC credentials * Nextcloud credentials * NocoDB credentials * Notion credentials * npm credentials * Odoo credentials * Okta credentials * Ollama credentials * One Simple API credentials * Onfleet credentials * OpenAI credentials * OpenCTI credentials * OpenRouter credentials * OpenWeatherMap credentials * Oura credentials * Paddle credentials * PagerDuty credentials * PayPal credentials * Peekalink credentials * PhantomBuster credentials * Philips Hue credentials * Pinecone credentials * Pipedrive credentials * Plivo credentials * Postgres credentials * PostHog credentials * Postmark credentials * ProfitWell credentials * Pushbullet credentials * Pushcut credentials * Pushover credentials * QRadar credentials * Qdrant credentials * Qualys credentials * QuestDB credentials * Quick Base credentials * QuickBooks credentials * RabbitMQ credentials * Raindrop credentials * Rapid7 InsightVM credentials * Recorded Future credentials * Reddit credentials * Redis credentials * Rocket.Chat credentials * Rundeck credentials * S3 credentials * Salesforce credentials * Salesmate credentials * SeaTable credentials * SecurityScorecard credentials * Segment credentials * Sekoia credentials * Send Email * Gmail * Outlook.com * Yahoo * SendGrid credentials * Sendy credentials * Sentry.io credentials * Serp credentials * ServiceNow credentials * seven credentials * Shopify credentials * Shuffler credentials * SIGNL4 credentials * Slack credentials * Snowflake credentials * SolarWinds IPAM credentials * SolarWinds Observability SaaS credentials * Splunk credentials * Spontit credentials * Spotify credentials * SSH credentials * Stackby credentials * Storyblok credentials * Strapi credentials * Strava credentials * Stripe credentials * Supabase credentials * SurveyMonkey credentials * SyncroMSP credentials * Sysdig credentials * Taiga credentials * Tapfiliate credentials * Telegram credentials * TheHive credentials * TheHive 5 credentials * TimescaleDB credentials * Todoist credentials * Toggl credentials * TOTP credentials * Travis CI credentials * Trellix ePO credentials * Trello credentials * Twake credentials * Twilio credentials * Twist credentials * Typeform credentials * Unleashed Software credentials * UpLead credentials * uProc credentials * UptimeRobot credentials * urlscan.io credentials * Venafi TLS Protect Cloud credentials * Venafi TLS Protect Datacenter credentials * Vero credentials * VirusTotal credentials * Vonage credentials * Webex by Cisco credentials * Webflow credentials * Webhook credentials * Wekan credentials * WhatsApp Business Cloud credentials * Wise credentials * Wolfram|Alpha credentials * WooCommerce credentials * WordPress credentials * Workable credentials * Wufoo credentials * X (formerly Twitter) credentials * Xata credentials * Xero credentials * Yourls credentials * Zabbix credentials * Zammad credentials * Zendesk credentials * Zep credentials * Zoho credentials * Zoom credentials * Zscaler ZIA credentials * Zulip credentials * Custom API actions for existing nodes * Handle rate limits * Community nodes Community nodes * Installation and management * GUI installation * Manual installation * Risks * Blocklist * Using community nodes * Troubleshooting * Building community nodes * Creating nodes Creating nodes * Overview * Plan your node * Choose a node type * Choose a node building style * Node UI design * Choose node file structure * Build your node * Set up your development environment * Tutorial: Build a declarative-style node * Tutorial: Build a programmatic-style node * Reference * Node UI elements * Code standards * Versioning * Choose node file structure * Base files * Structure * Standard parameters * Declarative-style parameters * Programmatic-style parameters * Programmatic-style execute method * Codex files * Credentials files * HTTP request helpers * Item linking * Test your node * Run your node locally * Node linter * Troubleshooting * Deploy your node * Submit community nodes * Install private nodes * Hosting n8n * Community vs Enterprise * Installation Installation * npm * Docker * Server setups * Digital Ocean * Heroku * Hetzner * Amazon Web Services * Azure * Google Cloud * Docker Compose * Updating * Configuration Configuration * Environment variables * Binary data * Credentials * Database * Deployment * Endpoints * Executions * External data storage * External hooks * External secrets * Logs * License * Nodes * Queue mode * Security * Source control * Task runners * Timezone and localization * User management and 2FA * Workflows * Configuration methods * Configuration examples * Isolate n8n * Configure the Base URL * Configure custom SSL certificate authorities * Set a custom encryption key * Configure workflow timeouts * Specify custom nodes location * Enable modules in Code node * Set the timezone * Specify user folder path * Configure webhook URLs with reverse proxy * Enable Prometheus metrics * Supported databases and settings * Task runners * User management * Logging and monitoring Logging and monitoring * Logging * Monitoring * Security audit * Scaling and performance Scaling and performance * Overview * Performance and benchmarking * Configuring queue mode * Concurrency control * Execution data * Binary data * External storage for binary data * Memory-related errors * Securing n8n Securing n8n * Overview * Set up SSL * Set up SSO * Security audit * Disable the API * Opt out of data collection * Blocking nodes * Hardening task runners * Starter Kits Starter Kits * AI Starter Kit * Architecture Architecture * Overview * Database structure * Using the CLI Using the CLI * CLI commands * Code in n8n * Expressions * Using the Code node * AI coding * Built in methods and variables Built in methods and variables * Overview * Current node input * Output of other nodes * Date and time * JMESPath * HTTP node * LangChain Code node * n8n metadata * Convenience methods * Data transformation functions * Arrays * Booleans * Dates * Numbers * Objects * Strings * Custom variables Custom variables * Create custom variables * Cookbook Cookbook * Handling dates * Query JSON with JMESPath * Built-in methods and variables examples * execution * getWorkflowStaticData * Retrieve linked items from earlier in the workflow * (node-name).all * vars * Expressions * Check incoming data * Common issues * Code node * Get number of items returned by last node * Get the binary data buffer * Output to the browser console * HTTP Request node * Pagination * Advanced AI * Tutorial: Build an AI workflow in n8n * LangChain in n8n LangChain in n8n * Overview * Langchain concepts in n8n * LangChain learning resources * Use LangSmith with n8n * Examples and concepts Examples and concepts * Introduction * What is a chain? * What is an agent? * Agents vs chains example * What is memory? * What is a tool? * Use Google Sheets as a data source * Call an API to fetch data * Set a human fallback for AI workflows * Let AI specify tool parameters * What is a vector database? * Populate a Pinecone vector database from a website * API * Authentication * Pagination * Using the API playground * API reference * Embed * Prerequisites * Deployment * Configuration * Workflow management * Workflows templates * White labelling 1. Integrations 2. Built-in nodes 3. Triggers ClickUp is a cloud-based collaboration and project management tool suitable for businesses of all sizes and industries. Features include communication and collaboration tools, task assignments and statuses, alerts and a task toolbar. Credentials You can find authentication information for this node here. --- ## Page: https://docs.n8n.io/integrations/builtin/trigger-nodes/n8n-nodes-base.clockifytrigger/ n8n Docs * Using n8n * Getting started Getting started * Learning path * Choose your n8n * Quickstarts * A very quick quickstart * A longer introduction * Video courses * Text courses * Level one * Navigating the editor UI * Building a mini-workflow * Automating a (real-world) use case * Designing the workflow * Building the workflow Building the workflow * Getting data from the data warehouse * Inserting data into airtable * Filtering orders * Setting values for processing orders * Calculating booked orders * Notifying the team * Scheduling the workflow * Activating and examining the workflow * Exporting and importing workflows * Test your knowledge * Level two * Understanding the data structure * Processing different data types * Merging and splitting data * Dealing with errors in workflows * Automating a business workflow Automating a business workflow * Use case * Workflow 1 * Workflow 2 * Workflow 3 * Test your knowledge * Using the app Using the app * Understand workflows * Create and run * Components * Nodes * Connections * Sticky Notes * Executions * Manual, partial, and production executions * Workflow-level executions * All executions * Custom executions data * Debug executions * Tags * Export and import * Templates * Sharing * Settings * Workflow history * Workflow ID * Manage credentials * Create and edit * Credential sharing * Manage users and access * Cloud setup * Manage users * Account types * Role-based access control * Role types * Projects * Best practices * 2FA * LDAP * SAML * Set up SAML * Okta Workforce Identity SAML setup * Troubleshooting * Manage users with SAML * Keyboard shortcuts * Key concepts Key concepts * Flow logic * Splitting with conditionals * Merging data * Looping * Waiting * Sub-workflows * Error handling * Execution order in multi-branch workflows * Data * Data structure * Data flow within nodes * Transforming data * Process data using code * Data mapping * Data mapping in the UI * Data mapping in the expressions editor * Data item linking * Item linking concepts * Item linking in the Code node * Item linking errors * Item linking for node creators * Data pinning * Data editing * Data filtering * Data mocking * Binary data * Schema preview * Glossary * n8n Cloud n8n Cloud * Overview * Access the Cloud admin dashboard * Update your n8n Cloud version * Set the timezone * Cloud IP addresses * Cloud data management * Change ownership or username * Concurrency * AI Assistant * Enterprise features Enterprise features * Source control and environments * Understand * Environments * Git in n8n * Branch patterns * Set up * Using * Push and pull * Copy work between environments * Manage variables * Tutorial: Create environments with source control * External secrets * Log streaming * License key * Releases Releases * Release notes Release notes * 1.x * 0.x * v1.0 migration guide * Help and community Help and community * Where to get help * Contributing * Licenses and privacy Licenses and privacy * Privacy and security * Privacy * Security * Incident response * What you can do * Sustainable use license * Integrations * Built-in nodes Built-in nodes * Node types * Core nodes * Activation Trigger * Aggregate * AI Transform * Code * Keyboard shortcuts * Common issues * Compare Datasets * Compression * Chat Trigger * Common issues * Convert to File * Crypto * Date & Time * Debug Helper * Edit Fields (Set) * Edit Image * Email Trigger (IMAP) * Error Trigger * Execute Command * Common issues * Execute Sub-workflow * Execute Sub-workflow Trigger * Execution Data * Extract From File * Filter * FTP * Git * GraphQL * HTML * HTTP Request * Common issues * If * JWT * LDAP * Limit * Local File Trigger * Loop Over Items (Split in Batches) * Manual Trigger * Markdown * MCP Server Trigger * Merge * n8n * n8n Form * n8n Form Trigger * n8n Trigger * No Operation, do nothing * Read/Write Files from Disk * Remove Duplicates * Templates and examples * Rename Keys * Respond to Webhook * RSS Read * RSS Feed Trigger * Schedule Trigger * Common issues * Send Email * Sort * Split Out * SSE Trigger * SSH * Stop And Error * Summarize * Switch * TOTP * Wait * Webhook * Workflow development * Common issues * Workflow Trigger * XML * Actions * Action Network * ActiveCampaign * Adalo * Affinity * Agile CRM * Airtable * Common issues * Airtop * AMQP Sender * APITemplate.io * Asana * Automizy * Autopilot * AWS Certificate Manager * AWS Comprehend * AWS DynamoDB * AWS Elastic Load Balancing * AWS Lambda * AWS Rekognition * AWS S3 * AWS SES * AWS SNS * AWS SQS * AWS Textract * AWS Transcribe * Azure Storage * BambooHR * Bannerbear * Baserow * Beeminder * Bitly * Bitwarden * Box * Brandfetch * Brevo * Bubble * Chargebee * CircleCI * Webex by Cisco * Clearbit * ClickUp * Clockify * Cloudflare * Cockpit * Coda * CoinGecko * Contentful * ConvertKit * Copper * Cortex * CrateDB * crowd.dev * Customer.io * DeepL * Demio * DHL * Discord * Common issues * Discourse * Disqus * Drift * Dropbox * Dropcontact * E-goi * Elasticsearch * Elastic Security * Emelia * ERPNext * Facebook Graph API * FileMaker * Flow * Freshdesk * Freshservice * Freshworks CRM * GetResponse * Ghost * GitHub * GitLab * Gmail * Draft operations * Label operations * Message operations * Thread operations * Common issues * Gong * Google Ads * Google Analytics * Google BigQuery * Google Books * Google Business Profile * Google Calendar * Calendar operations * Event operations * Google Chat * Google Cloud Firestore * Google Cloud Natural Language * Google Cloud Realtime Database * Google Cloud Storage * Google Contacts * Google Docs * Google Drive * File operations * File and folder operations * Folder operations * Shared drive operations * Common issues * Google Perspective * Google Sheets * Document operations * Sheet within Document operations * Common issues * Google Slides * Google Tasks * Google Translate * Google Workspace Admin * Gotify * GoToWebinar * Grafana * Grist * Hacker News * HaloPSA * Harvest * Help Scout * HighLevel * Home Assistant * HubSpot * Humantic AI * Hunter * Intercom * Invoice Ninja * Iterable * Jenkins * Jira Software * Kafka * Keap * Kitemaker * KoboToolbox * Lemlist * Line * Linear * LingvaNex * LinkedIn * LoneScale * Magento 2 * Mailcheck * Mailchimp * MailerLite * Mailgun * Mailjet * Mandrill * marketstack * Matrix * Mattermost * Mautic * Medium * MessageBird * Metabase * Microsoft Dynamics CRM * Microsoft Entra ID * Microsoft Excel 365 * Microsoft Graph Security * Microsoft OneDrive * Microsoft Outlook * Microsoft SQL * Microsoft Teams * Microsoft To Do * Mindee * MISP * Mocean * monday.com * MongoDB * Monica CRM * MQTT * MSG91 * MySQL * Common issues * Customer Datastore (n8n Training) * Customer Messenger (n8n Training) * NASA * Netlify * Netscaler ADC * Nextcloud * NocoDB * Notion * Common issues * npm * Odoo * Okta * One Simple API * Onfleet * OpenAI * Assistant operations * Audio operations * File operations * Image operations * Text operations * Common issues * OpenThesaurus * OpenWeatherMap * Oura * Paddle * PagerDuty * PayPal * Peekalink * PhantomBuster * Philips Hue * Pipedrive * Plivo * PostBin * Postgres * Common issues * PostHog * ProfitWell * Pushbullet * Pushcut * Pushover * QuestDB * Quick Base * QuickBooks Online * QuickChart * RabbitMQ * Raindrop * Reddit * Redis * Rocket.Chat * Rundeck * S3 * Salesforce * Salesmate * SeaTable * SecurityScorecard * Segment * SendGrid * Sendy * Sentry.io * ServiceNow * seven * Shopify * SIGNL4 * Slack * Snowflake * Splunk * Spontit * Spotify * Stackby * Storyblok * Strapi * Strava * Stripe * Supabase * Common issues * SyncroMSP * Taiga * Tapfiliate * Telegram * Chat operations * Callback operations * File operations * Message operations * Common issues * TheHive * TheHive 5 * TimescaleDB * Todoist * Travis CI * Trello * Twake * Twilio * Twist * Unleashed Software * UpLead * uProc * UptimeRobot * urlscan.io * Venafi TLS Protect Cloud * Venafi TLS Protect Datacenter * Vero * Vonage * Webflow * Wekan * WhatsApp Business Cloud * Common issues * Wise * WooCommerce * WordPress * X (Formerly Twitter) * Xero * Yourls * YouTube * Zammad * Zendesk * Zoho CRM * Zoom * Zulip * Triggers * ActiveCampaign Trigger * Acuity Scheduling Trigger * Affinity Trigger * Airtable Trigger * AMQP Trigger * Asana Trigger * Autopilot Trigger * AWS SNS Trigger * Bitbucket Trigger * Box Trigger * Brevo Trigger * Calendly Trigger * Cal Trigger * Chargebee Trigger * ClickUp Trigger * Clockify Trigger * ConvertKit Trigger * Copper Trigger * crowd.dev Trigger * Customer.io Trigger * Emelia Trigger * Eventbrite Trigger * Facebook Lead Ads Trigger * Facebook Trigger * Ad Account * Application * Certificate Transparency * Group * Instagram * Link * Page * Permissions * User * WhatsApp Business Account * Workplace Security * Figma Trigger (Beta) * Flow Trigger * Form.io Trigger * Formstack Trigger * GetResponse Trigger * GitHub Trigger * GitLab Trigger * Gmail Trigger * Poll Mode options * Common issues * Google Calendar Trigger * Google Drive Trigger * Common issues * Google Business Profile Trigger * Google Sheets Trigger * Common issues * Gumroad Trigger * Help Scout Trigger * Hubspot Trigger * Invoice Ninja Trigger * Jira Trigger * JotForm Trigger * Kafka Trigger * Keap Trigger * KoboToolbox Trigger * Lemlist Trigger * Linear Trigger * LoneScale Trigger * Mailchimp Trigger * MailerLite Trigger * Mailjet Trigger * Mautic Trigger * Microsoft OneDrive Trigger * Microsoft Outlook Trigger * MQTT Trigger * Netlify Trigger * Notion Trigger * Onfleet Trigger * PayPal Trigger * Pipedrive Trigger * Postgres Trigger * Postmark Trigger * Pushcut Trigger * RabbitMQ Trigger * Redis Trigger * Salesforce Trigger * SeaTable Trigger * Shopify Trigger * Slack Trigger * Strava Trigger * Stripe Trigger * SurveyMonkey Trigger * Taiga Trigger * Telegram Trigger * Common issues * TheHive 5 Trigger * TheHive Trigger * Toggl Trigger * Trello Trigger * Twilio Trigger * Typeform Trigger * Venafi TLS Protect Cloud Trigger * Webex by Cisco Trigger * Webflow Trigger * WhatsApp Trigger * Wise Trigger * WooCommerce Trigger * Workable Trigger * Wufoo Trigger * Zendesk Trigger * Cluster nodes * Root nodes * AI Agent * Conversational Agent * OpenAI Functions Agent * Plan and Execute Agent * ReAct Agent * SQL Agent * Tools Agent * Common issues * Basic LLM Chain * Question and Answer Chain * Common issues * Summarization Chain * Information Extractor * Text Classifier * Sentiment Analysis * LangChain Code * Simple Vector Store * Milvus Vector Store * MongoDB Atlas Vector Store * PGVector Vector Store * Pinecone Vector Store * Qdrant Vector Store * Supabase Vector Store * Zep Vector Store * Sub-nodes * Default Data Loader * GitHub Document Loader * Embeddings AWS Bedrock * Embeddings Azure OpenAI * Embeddings Cohere * Embeddings Google Gemini * Embeddings Google PaLM * Embeddings Google Vertex * Embeddings HuggingFace Inference * Embeddings Mistral Cloud * Embeddings Ollama * Embeddings OpenAI * Anthropic Chat Model * AWS Bedrock Chat Model * Azure OpenAI Chat Model * DeepSeek Chat Model * Google Gemini Chat Model * Google Vertex Chat Model * Groq Chat Model * Mistral Cloud Chat Model * Ollama Chat Model * Common issues * OpenAI Chat Model * Common issues * OpenRouter Chat Model * Cohere Model * Ollama Model * Common issues * Hugging Face Inference Model * Chat Memory Manager * Simple Memory * Common issues * Motorhead * MongoDB Chat Memory * Redis Chat Memory * Postgres Chat Memory * Xata * Zep * Auto-fixing Output Parser * Item List Output Parser * Structured Output Parser * Common issues * Contextual Compression Retriever * MultiQuery Retriever * Vector Store Retriever * Workflow Retriever * Character Text Splitter * Recursive Character Text Splitter * Token Splitter * Calculator * Custom Code Tool * HTTP Request Tool * MCP Client Tool * SerpApi (Google Search) * Think Tool * Vector Store Question Answer Tool * Wikipedia * Wolfram|Alpha * Custom n8n Workflow Tool * Credentials * Action Network credentials * ActiveCampaign credentials * Acuity Scheduling credentials * Adalo credentials * Affinity credentials * Agile CRM credentials * Airtable credentials * Airtop credentials * AlienVault credentials * AMQP credentials * Anthropic credentials * APITemplate.io credentials * Asana credentials * Auth0 Management credentials * Automizy credentials * Autopilot credentials * AWS credentials * Azure OpenAI credentials * Azure Storage credentials * BambooHR credentials * Bannerbear credentials * Baserow credentials * Beeminder credentials * Bitbucket credentials * Bitly credentials * Bitwarden credentials * Box credentials * Brandfetch credentials * Brevo credentials * Bubble credentials * Cal.com credentials * Calendly credentials * Carbon Black credentials * Chargebee credentials * CircleCI credentials * Cisco Meraki credentials * Cisco Secure Endpoint credentials * Cisco Umbrella credentials * Clearbit credentials * ClickUp credentials * Clockify credentials * Cloudflare credentials * Cockpit credentials * Coda credentials * Cohere credentials * Contentful credentials * ConvertAPI credentials * ConvertKit credentials * Copper credentials * Cortex credentials * CrateDB credentials * crowd.dev credentials * CrowdStrike credentials * Customer.io credentials * Datadog credentials * DeepL credentials * DeepSeek credentials * Demio credentials * DFIR-IRIS credentials * DHL credentials * Discord credentials * Discourse credentials * Disqus credentials * Drift credentials * Dropbox credentials * Dropcontact credentials * Dynatrace credentials * E-goi credentials * Elasticsearch credentials * Elastic Security credentials * Emelia credentials * ERPNext credentials * Eventbrite credentials * F5 Big-IP credentials * Facebook App credentials * Facebook Graph API credentials * Facebook Lead Ads credentials * Figma credentials * FileMaker credentials * Filescan credentials * Flow credentials * Form.io Trigger credentials * Formstack Trigger credentials * Fortinet FortiGate credentials * Freshdesk credentials * Freshservice credentials * Freshworks CRM credentials * FTP credentials * GetResponse credentials * Ghost credentials * Git credentials * GitHub credentials * GitLab credentials * Gong credentials * Google * Google OAuth2 single service * Google OAuth2 generic * Google Service Account * Google Gemini(PaLM) credentials * Gotify credentials * GoToWebinar credentials * Grafana credentials * Grist credentials * Groq credentials * Gumroad credentials * HaloPSA credentials * Harvest credentials * Help Scout credentials * HighLevel credentials * Home Assistant credentials * HTTP Request credentials * HubSpot credentials * Hugging Face credentials * Humantic AI credentials * Hunter credentials * Hybrid Analysis credentials * IMAP * Gmail * Outlook.com * Yahoo * Imperva WAF credentials * Intercom credentials * Invoice Ninja credentials * Iterable credentials * Jenkins credentials * Jira credentials * JotForm credentials * JWT credentials * Kafka credentials * Keap credentials * Kibana credentials * Kitemaker credentials * KoboToolbox credentials * LDAP credentials * Lemlist credentials * Line credentials * Linear credentials * LingvaNex credentials * LinkedIn credentials * LoneScale credentials * Magento 2 credentials * Mailcheck credentials * Mailchimp credentials * MailerLite credentials * Mailgun credentials * Mailjet credentials * Malcore credentials * Mandrill credentials * Marketstack credentials * Matrix credentials * Mattermost credentials * Mautic credentials * Medium credentials * MessageBird credentials * Metabase credentials * Microsoft credentials * Microsoft Azure Monitor credentials * Microsoft Entra ID credentials * Microsoft SQL credentials * Milvus credentials * Mindee credentials * Miro credentials * MISP credentials * Mist credentials * Mistral Cloud credentials * Mocean credentials * monday.com credentials * MongoDB credentials * Monica CRM credentials * Motorhead credentials * MQTT credentials * MSG91 credentials * MySQL credentials * NASA credentials * Netlify credentials * Netscaler ADC credentials * Nextcloud credentials * NocoDB credentials * Notion credentials * npm credentials * Odoo credentials * Okta credentials * Ollama credentials * One Simple API credentials * Onfleet credentials * OpenAI credentials * OpenCTI credentials * OpenRouter credentials * OpenWeatherMap credentials * Oura credentials * Paddle credentials * PagerDuty credentials * PayPal credentials * Peekalink credentials * PhantomBuster credentials * Philips Hue credentials * Pinecone credentials * Pipedrive credentials * Plivo credentials * Postgres credentials * PostHog credentials * Postmark credentials * ProfitWell credentials * Pushbullet credentials * Pushcut credentials * Pushover credentials * QRadar credentials * Qdrant credentials * Qualys credentials * QuestDB credentials * Quick Base credentials * QuickBooks credentials * RabbitMQ credentials * Raindrop credentials * Rapid7 InsightVM credentials * Recorded Future credentials * Reddit credentials * Redis credentials * Rocket.Chat credentials * Rundeck credentials * S3 credentials * Salesforce credentials * Salesmate credentials * SeaTable credentials * SecurityScorecard credentials * Segment credentials * Sekoia credentials * Send Email * Gmail * Outlook.com * Yahoo * SendGrid credentials * Sendy credentials * Sentry.io credentials * Serp credentials * ServiceNow credentials * seven credentials * Shopify credentials * Shuffler credentials * SIGNL4 credentials * Slack credentials * Snowflake credentials * SolarWinds IPAM credentials * SolarWinds Observability SaaS credentials * Splunk credentials * Spontit credentials * Spotify credentials * SSH credentials * Stackby credentials * Storyblok credentials * Strapi credentials * Strava credentials * Stripe credentials * Supabase credentials * SurveyMonkey credentials * SyncroMSP credentials * Sysdig credentials * Taiga credentials * Tapfiliate credentials * Telegram credentials * TheHive credentials * TheHive 5 credentials * TimescaleDB credentials * Todoist credentials * Toggl credentials * TOTP credentials * Travis CI credentials * Trellix ePO credentials * Trello credentials * Twake credentials * Twilio credentials * Twist credentials * Typeform credentials * Unleashed Software credentials * UpLead credentials * uProc credentials * UptimeRobot credentials * urlscan.io credentials * Venafi TLS Protect Cloud credentials * Venafi TLS Protect Datacenter credentials * Vero credentials * VirusTotal credentials * Vonage credentials * Webex by Cisco credentials * Webflow credentials * Webhook credentials * Wekan credentials * WhatsApp Business Cloud credentials * Wise credentials * Wolfram|Alpha credentials * WooCommerce credentials * WordPress credentials * Workable credentials * Wufoo credentials * X (formerly Twitter) credentials * Xata credentials * Xero credentials * Yourls credentials * Zabbix credentials * Zammad credentials * Zendesk credentials * Zep credentials * Zoho credentials * Zoom credentials * Zscaler ZIA credentials * Zulip credentials * Custom API actions for existing nodes * Handle rate limits * Community nodes Community nodes * Installation and management * GUI installation * Manual installation * Risks * Blocklist * Using community nodes * Troubleshooting * Building community nodes * Creating nodes Creating nodes * Overview * Plan your node * Choose a node type * Choose a node building style * Node UI design * Choose node file structure * Build your node * Set up your development environment * Tutorial: Build a declarative-style node * Tutorial: Build a programmatic-style node * Reference * Node UI elements * Code standards * Versioning * Choose node file structure * Base files * Structure * Standard parameters * Declarative-style parameters * Programmatic-style parameters * Programmatic-style execute method * Codex files * Credentials files * HTTP request helpers * Item linking * Test your node * Run your node locally * Node linter * Troubleshooting * Deploy your node * Submit community nodes * Install private nodes * Hosting n8n * Community vs Enterprise * Installation Installation * npm * Docker * Server setups * Digital Ocean * Heroku * Hetzner * Amazon Web Services * Azure * Google Cloud * Docker Compose * Updating * Configuration Configuration * Environment variables * Binary data * Credentials * Database * Deployment * Endpoints * Executions * External data storage * External hooks * External secrets * Logs * License * Nodes * Queue mode * Security * Source control * Task runners * Timezone and localization * User management and 2FA * Workflows * Configuration methods * Configuration examples * Isolate n8n * Configure the Base URL * Configure custom SSL certificate authorities * Set a custom encryption key * Configure workflow timeouts * Specify custom nodes location * Enable modules in Code node * Set the timezone * Specify user folder path * Configure webhook URLs with reverse proxy * Enable Prometheus metrics * Supported databases and settings * Task runners * User management * Logging and monitoring Logging and monitoring * Logging * Monitoring * Security audit * Scaling and performance Scaling and performance * Overview * Performance and benchmarking * Configuring queue mode * Concurrency control * Execution data * Binary data * External storage for binary data * Memory-related errors * Securing n8n Securing n8n * Overview * Set up SSL * Set up SSO * Security audit * Disable the API * Opt out of data collection * Blocking nodes * Hardening task runners * Starter Kits Starter Kits * AI Starter Kit * Architecture Architecture * Overview * Database structure * Using the CLI Using the CLI * CLI commands * Code in n8n * Expressions * Using the Code node * AI coding * Built in methods and variables Built in methods and variables * Overview * Current node input * Output of other nodes * Date and time * JMESPath * HTTP node * LangChain Code node * n8n metadata * Convenience methods * Data transformation functions * Arrays * Booleans * Dates * Numbers * Objects * Strings * Custom variables Custom variables * Create custom variables * Cookbook Cookbook * Handling dates * Query JSON with JMESPath * Built-in methods and variables examples * execution * getWorkflowStaticData * Retrieve linked items from earlier in the workflow * (node-name).all * vars * Expressions * Check incoming data * Common issues * Code node * Get number of items returned by last node * Get the binary data buffer * Output to the browser console * HTTP Request node * Pagination * Advanced AI * Tutorial: Build an AI workflow in n8n * LangChain in n8n LangChain in n8n * Overview * Langchain concepts in n8n * LangChain learning resources * Use LangSmith with n8n * Examples and concepts Examples and concepts * Introduction * What is a chain? * What is an agent? * Agents vs chains example * What is memory? * What is a tool? * Use Google Sheets as a data source * Call an API to fetch data * Set a human fallback for AI workflows * Let AI specify tool parameters * What is a vector database? * Populate a Pinecone vector database from a website * API * Authentication * Pagination * Using the API playground * API reference * Embed * Prerequisites * Deployment * Configuration * Workflow management * Workflows templates * White labelling 1. Integrations 2. Built-in nodes 3. Triggers Clockify is a free time tracker and timesheet app for tracking work hours across projects. Credentials You can find authentication information for this node here. This node uses the workflow timezone setting to specify the range of time entries starting time. Configure the timezone in your Workflow Settings if you want this trigger node to retrieve the right time entries. --- ## Page: https://docs.n8n.io/integrations/builtin/trigger-nodes/n8n-nodes-base.convertkittrigger/ ConvertKit is a fully featured email marketing platform. Use ConvertKit to build an email list, send email broadcasts, automate sequences, create segments, and build landing pages. Credentials You can find authentication information for this node here. Examples and templates For usage examples and templates to help you get started, refer to n8n's ConvertKit Trigger integrations page. --- ## Page: https://docs.n8n.io/integrations/builtin/trigger-nodes/n8n-nodes-base.coppertrigger/ n8n Docs * Using n8n * Getting started Getting started * Learning path * Choose your n8n * Quickstarts * A very quick quickstart * A longer introduction * Video courses * Text courses * Level one * Navigating the editor UI * Building a mini-workflow * Automating a (real-world) use case * Designing the workflow * Building the workflow Building the workflow * Getting data from the data warehouse * Inserting data into airtable * Filtering orders * Setting values for processing orders * Calculating booked orders * Notifying the team * Scheduling the workflow * Activating and examining the workflow * Exporting and importing workflows * Test your knowledge * Level two * Understanding the data structure * Processing different data types * Merging and splitting data * Dealing with errors in workflows * Automating a business workflow Automating a business workflow * Use case * Workflow 1 * Workflow 2 * Workflow 3 * Test your knowledge * Using the app Using the app * Understand workflows * Create and run * Components * Nodes * Connections * Sticky Notes * Executions * Manual, partial, and production executions * Workflow-level executions * All executions * Custom executions data * Debug executions * Tags * Export and import * Templates * Sharing * Settings * Workflow history * Workflow ID * Manage credentials * Create and edit * Credential sharing * Manage users and access * Cloud setup * Manage users * Account types * Role-based access control * Role types * Projects * Best practices * 2FA * LDAP * SAML * Set up SAML * Okta Workforce Identity SAML setup * Troubleshooting * Manage users with SAML * Keyboard shortcuts * Key concepts Key concepts * Flow logic * Splitting with conditionals * Merging data * Looping * Waiting * Sub-workflows * Error handling * Execution order in multi-branch workflows * Data * Data structure * Data flow within nodes * Transforming data * Process data using code * Data mapping * Data mapping in the UI * Data mapping in the expressions editor * Data item linking * Item linking concepts * Item linking in the Code node * Item linking errors * Item linking for node creators * Data pinning * Data editing * Data filtering * Data mocking * Binary data * Schema preview * Glossary * n8n Cloud n8n Cloud * Overview * Access the Cloud admin dashboard * Update your n8n Cloud version * Set the timezone * Cloud IP addresses * Cloud data management * Change ownership or username * Concurrency * AI Assistant * Enterprise features Enterprise features * Source control and environments * Understand * Environments * Git in n8n * Branch patterns * Set up * Using * Push and pull * Copy work between environments * Manage variables * Tutorial: Create environments with source control * External secrets * Log streaming * License key * Releases Releases * Release notes Release notes * 1.x * 0.x * v1.0 migration guide * Help and community Help and community * Where to get help * Contributing * Licenses and privacy Licenses and privacy * Privacy and security * Privacy * Security * Incident response * What you can do * Sustainable use license * Integrations * Built-in nodes Built-in nodes * Node types * Core nodes * Activation Trigger * Aggregate * AI Transform * Code * Keyboard shortcuts * Common issues * Compare Datasets * Compression * Chat Trigger * Common issues * Convert to File * Crypto * Date & Time * Debug Helper * Edit Fields (Set) * Edit Image * Email Trigger (IMAP) * Error Trigger * Execute Command * Common issues * Execute Sub-workflow * Execute Sub-workflow Trigger * Execution Data * Extract From File * Filter * FTP * Git * GraphQL * HTML * HTTP Request * Common issues * If * JWT * LDAP * Limit * Local File Trigger * Loop Over Items (Split in Batches) * Manual Trigger * Markdown * MCP Server Trigger * Merge * n8n * n8n Form * n8n Form Trigger * n8n Trigger * No Operation, do nothing * Read/Write Files from Disk * Remove Duplicates * Templates and examples * Rename Keys * Respond to Webhook * RSS Read * RSS Feed Trigger * Schedule Trigger * Common issues * Send Email * Sort * Split Out * SSE Trigger * SSH * Stop And Error * Summarize * Switch * TOTP * Wait * Webhook * Workflow development * Common issues * Workflow Trigger * XML * Actions * Action Network * ActiveCampaign * Adalo * Affinity * Agile CRM * Airtable * Common issues * Airtop * AMQP Sender * APITemplate.io * Asana * Automizy * Autopilot * AWS Certificate Manager * AWS Comprehend * AWS DynamoDB * AWS Elastic Load Balancing * AWS Lambda * AWS Rekognition * AWS S3 * AWS SES * AWS SNS * AWS SQS * AWS Textract * AWS Transcribe * Azure Storage * BambooHR * Bannerbear * Baserow * Beeminder * Bitly * Bitwarden * Box * Brandfetch * Brevo * Bubble * Chargebee * CircleCI * Webex by Cisco * Clearbit * ClickUp * Clockify * Cloudflare * Cockpit * Coda * CoinGecko * Contentful * ConvertKit * Copper * Cortex * CrateDB * crowd.dev * Customer.io * DeepL * Demio * DHL * Discord * Common issues * Discourse * Disqus * Drift * Dropbox * Dropcontact * E-goi * Elasticsearch * Elastic Security * Emelia * ERPNext * Facebook Graph API * FileMaker * Flow * Freshdesk * Freshservice * Freshworks CRM * GetResponse * Ghost * GitHub * GitLab * Gmail * Draft operations * Label operations * Message operations * Thread operations * Common issues * Gong * Google Ads * Google Analytics * Google BigQuery * Google Books * Google Business Profile * Google Calendar * Calendar operations * Event operations * Google Chat * Google Cloud Firestore * Google Cloud Natural Language * Google Cloud Realtime Database * Google Cloud Storage * Google Contacts * Google Docs * Google Drive * File operations * File and folder operations * Folder operations * Shared drive operations * Common issues * Google Perspective * Google Sheets * Document operations * Sheet within Document operations * Common issues * Google Slides * Google Tasks * Google Translate * Google Workspace Admin * Gotify * GoToWebinar * Grafana * Grist * Hacker News * HaloPSA * Harvest * Help Scout * HighLevel * Home Assistant * HubSpot * Humantic AI * Hunter * Intercom * Invoice Ninja * Iterable * Jenkins * Jira Software * Kafka * Keap * Kitemaker * KoboToolbox * Lemlist * Line * Linear * LingvaNex * LinkedIn * LoneScale * Magento 2 * Mailcheck * Mailchimp * MailerLite * Mailgun * Mailjet * Mandrill * marketstack * Matrix * Mattermost * Mautic * Medium * MessageBird * Metabase * Microsoft Dynamics CRM * Microsoft Entra ID * Microsoft Excel 365 * Microsoft Graph Security * Microsoft OneDrive * Microsoft Outlook * Microsoft SQL * Microsoft Teams * Microsoft To Do * Mindee * MISP * Mocean * monday.com * MongoDB * Monica CRM * MQTT * MSG91 * MySQL * Common issues * Customer Datastore (n8n Training) * Customer Messenger (n8n Training) * NASA * Netlify * Netscaler ADC * Nextcloud * NocoDB * Notion * Common issues * npm * Odoo * Okta * One Simple API * Onfleet * OpenAI * Assistant operations * Audio operations * File operations * Image operations * Text operations * Common issues * OpenThesaurus * OpenWeatherMap * Oura * Paddle * PagerDuty * PayPal * Peekalink * PhantomBuster * Philips Hue * Pipedrive * Plivo * PostBin * Postgres * Common issues * PostHog * ProfitWell * Pushbullet * Pushcut * Pushover * QuestDB * Quick Base * QuickBooks Online * QuickChart * RabbitMQ * Raindrop * Reddit * Redis * Rocket.Chat * Rundeck * S3 * Salesforce * Salesmate * SeaTable * SecurityScorecard * Segment * SendGrid * Sendy * Sentry.io * ServiceNow * seven * Shopify * SIGNL4 * Slack * Snowflake * Splunk * Spontit * Spotify * Stackby * Storyblok * Strapi * Strava * Stripe * Supabase * Common issues * SyncroMSP * Taiga * Tapfiliate * Telegram * Chat operations * Callback operations * File operations * Message operations * Common issues * TheHive * TheHive 5 * TimescaleDB * Todoist * Travis CI * Trello * Twake * Twilio * Twist * Unleashed Software * UpLead * uProc * UptimeRobot * urlscan.io * Venafi TLS Protect Cloud * Venafi TLS Protect Datacenter * Vero * Vonage * Webflow * Wekan * WhatsApp Business Cloud * Common issues * Wise * WooCommerce * WordPress * X (Formerly Twitter) * Xero * Yourls * YouTube * Zammad * Zendesk * Zoho CRM * Zoom * Zulip * Triggers * ActiveCampaign Trigger * Acuity Scheduling Trigger * Affinity Trigger * Airtable Trigger * AMQP Trigger * Asana Trigger * Autopilot Trigger * AWS SNS Trigger * Bitbucket Trigger * Box Trigger * Brevo Trigger * Calendly Trigger * Cal Trigger * Chargebee Trigger * ClickUp Trigger * Clockify Trigger * ConvertKit Trigger * Copper Trigger * crowd.dev Trigger * Customer.io Trigger * Emelia Trigger * Eventbrite Trigger * Facebook Lead Ads Trigger * Facebook Trigger * Ad Account * Application * Certificate Transparency * Group * Instagram * Link * Page * Permissions * User * WhatsApp Business Account * Workplace Security * Figma Trigger (Beta) * Flow Trigger * Form.io Trigger * Formstack Trigger * GetResponse Trigger * GitHub Trigger * GitLab Trigger * Gmail Trigger * Poll Mode options * Common issues * Google Calendar Trigger * Google Drive Trigger * Common issues * Google Business Profile Trigger * Google Sheets Trigger * Common issues * Gumroad Trigger * Help Scout Trigger * Hubspot Trigger * Invoice Ninja Trigger * Jira Trigger * JotForm Trigger * Kafka Trigger * Keap Trigger * KoboToolbox Trigger * Lemlist Trigger * Linear Trigger * LoneScale Trigger * Mailchimp Trigger * MailerLite Trigger * Mailjet Trigger * Mautic Trigger * Microsoft OneDrive Trigger * Microsoft Outlook Trigger * MQTT Trigger * Netlify Trigger * Notion Trigger * Onfleet Trigger * PayPal Trigger * Pipedrive Trigger * Postgres Trigger * Postmark Trigger * Pushcut Trigger * RabbitMQ Trigger * Redis Trigger * Salesforce Trigger * SeaTable Trigger * Shopify Trigger * Slack Trigger * Strava Trigger * Stripe Trigger * SurveyMonkey Trigger * Taiga Trigger * Telegram Trigger * Common issues * TheHive 5 Trigger * TheHive Trigger * Toggl Trigger * Trello Trigger * Twilio Trigger * Typeform Trigger * Venafi TLS Protect Cloud Trigger * Webex by Cisco Trigger * Webflow Trigger * WhatsApp Trigger * Wise Trigger * WooCommerce Trigger * Workable Trigger * Wufoo Trigger * Zendesk Trigger * Cluster nodes * Root nodes * AI Agent * Conversational Agent * OpenAI Functions Agent * Plan and Execute Agent * ReAct Agent * SQL Agent * Tools Agent * Common issues * Basic LLM Chain * Question and Answer Chain * Common issues * Summarization Chain * Information Extractor * Text Classifier * Sentiment Analysis * LangChain Code * Simple Vector Store * Milvus Vector Store * MongoDB Atlas Vector Store * PGVector Vector Store * Pinecone Vector Store * Qdrant Vector Store * Supabase Vector Store * Zep Vector Store * Sub-nodes * Default Data Loader * GitHub Document Loader * Embeddings AWS Bedrock * Embeddings Azure OpenAI * Embeddings Cohere * Embeddings Google Gemini * Embeddings Google PaLM * Embeddings Google Vertex * Embeddings HuggingFace Inference * Embeddings Mistral Cloud * Embeddings Ollama * Embeddings OpenAI * Anthropic Chat Model * AWS Bedrock Chat Model * Azure OpenAI Chat Model * DeepSeek Chat Model * Google Gemini Chat Model * Google Vertex Chat Model * Groq Chat Model * Mistral Cloud Chat Model * Ollama Chat Model * Common issues * OpenAI Chat Model * Common issues * OpenRouter Chat Model * Cohere Model * Ollama Model * Common issues * Hugging Face Inference Model * Chat Memory Manager * Simple Memory * Common issues * Motorhead * MongoDB Chat Memory * Redis Chat Memory * Postgres Chat Memory * Xata * Zep * Auto-fixing Output Parser * Item List Output Parser * Structured Output Parser * Common issues * Contextual Compression Retriever * MultiQuery Retriever * Vector Store Retriever * Workflow Retriever * Character Text Splitter * Recursive Character Text Splitter * Token Splitter * Calculator * Custom Code Tool * HTTP Request Tool * MCP Client Tool * SerpApi (Google Search) * Think Tool * Vector Store Question Answer Tool * Wikipedia * Wolfram|Alpha * Custom n8n Workflow Tool * Credentials * Action Network credentials * ActiveCampaign credentials * Acuity Scheduling credentials * Adalo credentials * Affinity credentials * Agile CRM credentials * Airtable credentials * Airtop credentials * AlienVault credentials * AMQP credentials * Anthropic credentials * APITemplate.io credentials * Asana credentials * Auth0 Management credentials * Automizy credentials * Autopilot credentials * AWS credentials * Azure OpenAI credentials * Azure Storage credentials * BambooHR credentials * Bannerbear credentials * Baserow credentials * Beeminder credentials * Bitbucket credentials * Bitly credentials * Bitwarden credentials * Box credentials * Brandfetch credentials * Brevo credentials * Bubble credentials * Cal.com credentials * Calendly credentials * Carbon Black credentials * Chargebee credentials * CircleCI credentials * Cisco Meraki credentials * Cisco Secure Endpoint credentials * Cisco Umbrella credentials * Clearbit credentials * ClickUp credentials * Clockify credentials * Cloudflare credentials * Cockpit credentials * Coda credentials * Cohere credentials * Contentful credentials * ConvertAPI credentials * ConvertKit credentials * Copper credentials * Cortex credentials * CrateDB credentials * crowd.dev credentials * CrowdStrike credentials * Customer.io credentials * Datadog credentials * DeepL credentials * DeepSeek credentials * Demio credentials * DFIR-IRIS credentials * DHL credentials * Discord credentials * Discourse credentials * Disqus credentials * Drift credentials * Dropbox credentials * Dropcontact credentials * Dynatrace credentials * E-goi credentials * Elasticsearch credentials * Elastic Security credentials * Emelia credentials * ERPNext credentials * Eventbrite credentials * F5 Big-IP credentials * Facebook App credentials * Facebook Graph API credentials * Facebook Lead Ads credentials * Figma credentials * FileMaker credentials * Filescan credentials * Flow credentials * Form.io Trigger credentials * Formstack Trigger credentials * Fortinet FortiGate credentials * Freshdesk credentials * Freshservice credentials * Freshworks CRM credentials * FTP credentials * GetResponse credentials * Ghost credentials * Git credentials * GitHub credentials * GitLab credentials * Gong credentials * Google * Google OAuth2 single service * Google OAuth2 generic * Google Service Account * Google Gemini(PaLM) credentials * Gotify credentials * GoToWebinar credentials * Grafana credentials * Grist credentials * Groq credentials * Gumroad credentials * HaloPSA credentials * Harvest credentials * Help Scout credentials * HighLevel credentials * Home Assistant credentials * HTTP Request credentials * HubSpot credentials * Hugging Face credentials * Humantic AI credentials * Hunter credentials * Hybrid Analysis credentials * IMAP * Gmail * Outlook.com * Yahoo * Imperva WAF credentials * Intercom credentials * Invoice Ninja credentials * Iterable credentials * Jenkins credentials * Jira credentials * JotForm credentials * JWT credentials * Kafka credentials * Keap credentials * Kibana credentials * Kitemaker credentials * KoboToolbox credentials * LDAP credentials * Lemlist credentials * Line credentials * Linear credentials * LingvaNex credentials * LinkedIn credentials * LoneScale credentials * Magento 2 credentials * Mailcheck credentials * Mailchimp credentials * MailerLite credentials * Mailgun credentials * Mailjet credentials * Malcore credentials * Mandrill credentials * Marketstack credentials * Matrix credentials * Mattermost credentials * Mautic credentials * Medium credentials * MessageBird credentials * Metabase credentials * Microsoft credentials * Microsoft Azure Monitor credentials * Microsoft Entra ID credentials * Microsoft SQL credentials * Milvus credentials * Mindee credentials * Miro credentials * MISP credentials * Mist credentials * Mistral Cloud credentials * Mocean credentials * monday.com credentials * MongoDB credentials * Monica CRM credentials * Motorhead credentials * MQTT credentials * MSG91 credentials * MySQL credentials * NASA credentials * Netlify credentials * Netscaler ADC credentials * Nextcloud credentials * NocoDB credentials * Notion credentials * npm credentials * Odoo credentials * Okta credentials * Ollama credentials * One Simple API credentials * Onfleet credentials * OpenAI credentials * OpenCTI credentials * OpenRouter credentials * OpenWeatherMap credentials * Oura credentials * Paddle credentials * PagerDuty credentials * PayPal credentials * Peekalink credentials * PhantomBuster credentials * Philips Hue credentials * Pinecone credentials * Pipedrive credentials * Plivo credentials * Postgres credentials * PostHog credentials * Postmark credentials * ProfitWell credentials * Pushbullet credentials * Pushcut credentials * Pushover credentials * QRadar credentials * Qdrant credentials * Qualys credentials * QuestDB credentials * Quick Base credentials * QuickBooks credentials * RabbitMQ credentials * Raindrop credentials * Rapid7 InsightVM credentials * Recorded Future credentials * Reddit credentials * Redis credentials * Rocket.Chat credentials * Rundeck credentials * S3 credentials * Salesforce credentials * Salesmate credentials * SeaTable credentials * SecurityScorecard credentials * Segment credentials * Sekoia credentials * Send Email * Gmail * Outlook.com * Yahoo * SendGrid credentials * Sendy credentials * Sentry.io credentials * Serp credentials * ServiceNow credentials * seven credentials * Shopify credentials * Shuffler credentials * SIGNL4 credentials * Slack credentials * Snowflake credentials * SolarWinds IPAM credentials * SolarWinds Observability SaaS credentials * Splunk credentials * Spontit credentials * Spotify credentials * SSH credentials * Stackby credentials * Storyblok credentials * Strapi credentials * Strava credentials * Stripe credentials * Supabase credentials * SurveyMonkey credentials * SyncroMSP credentials * Sysdig credentials * Taiga credentials * Tapfiliate credentials * Telegram credentials * TheHive credentials * TheHive 5 credentials * TimescaleDB credentials * Todoist credentials * Toggl credentials * TOTP credentials * Travis CI credentials * Trellix ePO credentials * Trello credentials * Twake credentials * Twilio credentials * Twist credentials * Typeform credentials * Unleashed Software credentials * UpLead credentials * uProc credentials * UptimeRobot credentials * urlscan.io credentials * Venafi TLS Protect Cloud credentials * Venafi TLS Protect Datacenter credentials * Vero credentials * VirusTotal credentials * Vonage credentials * Webex by Cisco credentials * Webflow credentials * Webhook credentials * Wekan credentials * WhatsApp Business Cloud credentials * Wise credentials * Wolfram|Alpha credentials * WooCommerce credentials * WordPress credentials * Workable credentials * Wufoo credentials * X (formerly Twitter) credentials * Xata credentials * Xero credentials * Yourls credentials * Zabbix credentials * Zammad credentials * Zendesk credentials * Zep credentials * Zoho credentials * Zoom credentials * Zscaler ZIA credentials * Zulip credentials * Custom API actions for existing nodes * Handle rate limits * Community nodes Community nodes * Installation and management * GUI installation * Manual installation * Risks * Blocklist * Using community nodes * Troubleshooting * Building community nodes * Creating nodes Creating nodes * Overview * Plan your node * Choose a node type * Choose a node building style * Node UI design * Choose node file structure * Build your node * Set up your development environment * Tutorial: Build a declarative-style node * Tutorial: Build a programmatic-style node * Reference * Node UI elements * Code standards * Versioning * Choose node file structure * Base files * Structure * Standard parameters * Declarative-style parameters * Programmatic-style parameters * Programmatic-style execute method * Codex files * Credentials files * HTTP request helpers * Item linking * Test your node * Run your node locally * Node linter * Troubleshooting * Deploy your node * Submit community nodes * Install private nodes * Hosting n8n * Community vs Enterprise * Installation Installation * npm * Docker * Server setups * Digital Ocean * Heroku * Hetzner * Amazon Web Services * Azure * Google Cloud * Docker Compose * Updating * Configuration Configuration * Environment variables * Binary data * Credentials * Database * Deployment * Endpoints * Executions * External data storage * External hooks * External secrets * Logs * License * Nodes * Queue mode * Security * Source control * Task runners * Timezone and localization * User management and 2FA * Workflows * Configuration methods * Configuration examples * Isolate n8n * Configure the Base URL * Configure custom SSL certificate authorities * Set a custom encryption key * Configure workflow timeouts * Specify custom nodes location * Enable modules in Code node * Set the timezone * Specify user folder path * Configure webhook URLs with reverse proxy * Enable Prometheus metrics * Supported databases and settings * Task runners * User management * Logging and monitoring Logging and monitoring * Logging * Monitoring * Security audit * Scaling and performance Scaling and performance * Overview * Performance and benchmarking * Configuring queue mode * Concurrency control * Execution data * Binary data * External storage for binary data * Memory-related errors * Securing n8n Securing n8n * Overview * Set up SSL * Set up SSO * Security audit * Disable the API * Opt out of data collection * Blocking nodes * Hardening task runners * Starter Kits Starter Kits * AI Starter Kit * Architecture Architecture * Overview * Database structure * Using the CLI Using the CLI * CLI commands * Code in n8n * Expressions * Using the Code node * AI coding * Built in methods and variables Built in methods and variables * Overview * Current node input * Output of other nodes * Date and time * JMESPath * HTTP node * LangChain Code node * n8n metadata * Convenience methods * Data transformation functions * Arrays * Booleans * Dates * Numbers * Objects * Strings * Custom variables Custom variables * Create custom variables * Cookbook Cookbook * Handling dates * Query JSON with JMESPath * Built-in methods and variables examples * execution * getWorkflowStaticData * Retrieve linked items from earlier in the workflow * (node-name).all * vars * Expressions * Check incoming data * Common issues * Code node * Get number of items returned by last node * Get the binary data buffer * Output to the browser console * HTTP Request node * Pagination * Advanced AI * Tutorial: Build an AI workflow in n8n * LangChain in n8n LangChain in n8n * Overview * Langchain concepts in n8n * LangChain learning resources * Use LangSmith with n8n * Examples and concepts Examples and concepts * Introduction * What is a chain? * What is an agent? * Agents vs chains example * What is memory? * What is a tool? * Use Google Sheets as a data source * Call an API to fetch data * Set a human fallback for AI workflows * Let AI specify tool parameters * What is a vector database? * Populate a Pinecone vector database from a website * API * Authentication * Pagination * Using the API playground * API reference * Embed * Prerequisites * Deployment * Configuration * Workflow management * Workflows templates * White labelling 1. Integrations 2. Built-in nodes 3. Triggers Copper is a CRM that focuses on strong integration with Google Workspace. It's mainly targeted towards small and medium-sized businesses. Credentials You can find authentication information for this node here. --- ## Page: https://docs.n8n.io/integrations/builtin/trigger-nodes/n8n-nodes-base.crowddevtrigger/ Use the crowd.dev Trigger node to respond to events in crowd.dev and integrate crowd.dev with other applications. n8n has built-in support for a wide range of crowd.dev events, including new activities and new members. On this page, you'll find a list of events the crowd.dev Trigger node can respond to and links to more resources. Credentials You can find authentication information for this node here. ## Events# * New Activity * New Member n8n provides an app node for crowd.dev. You can find the node docs here. View example workflows and related content on n8n's website. Refer to crowd.dev's documentation for more information about the service. --- ## Page: https://docs.n8n.io/integrations/builtin/trigger-nodes/n8n-nodes-base.customeriotrigger/ Customer.io enables users to send newsletters to selected segments of customers using their website data. You can send targeted emails, push notifications, and SMS to lower churn, create stronger relationships, and drive subscriptions. Credentials You can find authentication information for this node here. Examples and templates For usage examples and templates to help you get started, refer to n8n's Customer.io Trigger integrations page. --- ## Page: https://docs.n8n.io/integrations/builtin/trigger-nodes/n8n-nodes-base.emeliatrigger/ 1. Integrations 2. Built-in nodes 3. Triggers Emelia is a cold-mailing tool. Credentials You can find authentication information for this node here. Examples and templates For usage examples and templates to help you get started, refer to n8n's Emelia Trigger integrations page. ## Events# * Email Bounced * Email Opened * Email Replied * Email Sent * Link Clicked * Unsubscribed Contact --- ## Page: https://docs.n8n.io/integrations/builtin/trigger-nodes/n8n-nodes-base.eventbritetrigger/ * Using n8n * Integrations * Hosting n8n * Code in n8n * Advanced AI * API * Embed * n8n home ↗ * Forum ↗ * Blog ↗ n8n Docs * Using n8n * Getting started Getting started * Learning path * Choose your n8n * Quickstarts * A very quick quickstart * A longer introduction * Video courses * Text courses * Level one * Navigating the editor UI * Building a mini-workflow * Automating a (real-world) use case * Designing the workflow * Building the workflow Building the workflow * Getting data from the data warehouse * Inserting data into airtable * Filtering orders * Setting values for processing orders * Calculating booked orders * Notifying the team * Scheduling the workflow * Activating and examining the workflow * Exporting and importing workflows * Test your knowledge * Level two * Understanding the data structure * Processing different data types * Merging and splitting data * Dealing with errors in workflows * Automating a business workflow Automating a business workflow * Use case * Workflow 1 * Workflow 2 * Workflow 3 * Test your knowledge * Using the app Using the app * Understand workflows * Create and run * Components * Nodes * Connections * Sticky Notes * Executions * Manual, partial, and production executions * Workflow-level executions * All executions * Custom executions data * Debug executions * Tags * Export and import * Templates * Sharing * Settings * Workflow history * Workflow ID * Manage credentials * Create and edit * Credential sharing * Manage users and access * Cloud setup * Manage users * Account types * Role-based access control * Role types * Projects * Best practices * 2FA * LDAP * SAML * Set up SAML * Okta Workforce Identity SAML setup * Troubleshooting * Manage users with SAML * Keyboard shortcuts * Key concepts Key concepts * Flow logic * Splitting with conditionals * Merging data * Looping * Waiting * Sub-workflows * Error handling * Execution order in multi-branch workflows * Data * Data structure * Data flow within nodes * Transforming data * Process data using code * Data mapping * Data mapping in the UI * Data mapping in the expressions editor * Data item linking * Item linking concepts * Item linking in the Code node * Item linking errors * Item linking for node creators * Data pinning * Data editing * Data filtering * Data mocking * Binary data * Schema preview * Glossary * n8n Cloud n8n Cloud * Overview * Access the Cloud admin dashboard * Update your n8n Cloud version * Set the timezone * Cloud IP addresses * Cloud data management * Change ownership or username * Concurrency * AI Assistant * Enterprise features Enterprise features * Source control and environments * Understand * Environments * Git in n8n * Branch patterns * Set up * Using * Push and pull * Copy work between environments * Manage variables * Tutorial: Create environments with source control * External secrets * Log streaming * License key * Releases Releases * Release notes Release notes * 1.x * 0.x * v1.0 migration guide * Help and community Help and community * Where to get help * Contributing * Licenses and privacy Licenses and privacy * Privacy and security * Privacy * Security * Incident response * What you can do * Sustainable use license * Integrations * Built-in nodes Built-in nodes * Node types * Core nodes * Activation Trigger * Aggregate * AI Transform * Code * Keyboard shortcuts * Common issues * Compare Datasets * Compression * Chat Trigger * Common issues * Convert to File * Crypto * Date & Time * Debug Helper * Edit Fields (Set) * Edit Image * Email Trigger (IMAP) * Error Trigger * Execute Command * Common issues * Execute Sub-workflow * Execute Sub-workflow Trigger * Execution Data * Extract From File * Filter * FTP * Git * GraphQL * HTML * HTTP Request * Common issues * If * JWT * LDAP * Limit * Local File Trigger * Loop Over Items (Split in Batches) * Manual Trigger * Markdown * MCP Server Trigger * Merge * n8n * n8n Form * n8n Form Trigger * n8n Trigger * No Operation, do nothing * Read/Write Files from Disk * Remove Duplicates * Templates and examples * Rename Keys * Respond to Webhook * RSS Read * RSS Feed Trigger * Schedule Trigger * Common issues * Send Email * Sort * Split Out * SSE Trigger * SSH * Stop And Error * Summarize * Switch * TOTP * Wait * Webhook * Workflow development * Common issues * Workflow Trigger * XML * Actions * Action Network * ActiveCampaign * Adalo * Affinity * Agile CRM * Airtable * Common issues * Airtop * AMQP Sender * APITemplate.io * Asana * Automizy * Autopilot * AWS Certificate Manager * AWS Comprehend * AWS DynamoDB * AWS Elastic Load Balancing * AWS Lambda * AWS Rekognition * AWS S3 * AWS SES * AWS SNS * AWS SQS * AWS Textract * AWS Transcribe * Azure Storage * BambooHR * Bannerbear * Baserow * Beeminder * Bitly * Bitwarden * Box * Brandfetch * Brevo * Bubble * Chargebee * CircleCI * Webex by Cisco * Clearbit * ClickUp * Clockify * Cloudflare * Cockpit * Coda * CoinGecko * Contentful * ConvertKit * Copper * Cortex * CrateDB * crowd.dev * Customer.io * DeepL * Demio * DHL * Discord * Common issues * Discourse * Disqus * Drift * Dropbox * Dropcontact * E-goi * Elasticsearch * Elastic Security * Emelia * ERPNext * Facebook Graph API * FileMaker * Flow * Freshdesk * Freshservice * Freshworks CRM * GetResponse * Ghost * GitHub * GitLab * Gmail * Draft operations * Label operations * Message operations * Thread operations * Common issues * Gong * Google Ads * Google Analytics * Google BigQuery * Google Books * Google Business Profile * Google Calendar * Calendar operations * Event operations * Google Chat * Google Cloud Firestore * Google Cloud Natural Language * Google Cloud Realtime Database * Google Cloud Storage * Google Contacts * Google Docs * Google Drive * File operations * File and folder operations * Folder operations * Shared drive operations * Common issues * Google Perspective * Google Sheets * Document operations * Sheet within Document operations * Common issues * Google Slides * Google Tasks * Google Translate * Google Workspace Admin * Gotify * GoToWebinar * Grafana * Grist * Hacker News * HaloPSA * Harvest * Help Scout * HighLevel * Home Assistant * HubSpot * Humantic AI * Hunter * Intercom * Invoice Ninja * Iterable * Jenkins * Jira Software * Kafka * Keap * Kitemaker * KoboToolbox * Lemlist * Line * Linear * LingvaNex * LinkedIn * LoneScale * Magento 2 * Mailcheck * Mailchimp * MailerLite * Mailgun * Mailjet * Mandrill * marketstack * Matrix * Mattermost * Mautic * Medium * MessageBird * Metabase * Microsoft Dynamics CRM * Microsoft Entra ID * Microsoft Excel 365 * Microsoft Graph Security * Microsoft OneDrive * Microsoft Outlook * Microsoft SQL * Microsoft Teams * Microsoft To Do * Mindee * MISP * Mocean * monday.com * MongoDB * Monica CRM * MQTT * MSG91 * MySQL * Common issues * Customer Datastore (n8n Training) * Customer Messenger (n8n Training) * NASA * Netlify * Netscaler ADC * Nextcloud * NocoDB * Notion * Common issues * npm * Odoo * Okta * One Simple API * Onfleet * OpenAI * Assistant operations * Audio operations * File operations * Image operations * Text operations * Common issues * OpenThesaurus * OpenWeatherMap * Oura * Paddle * PagerDuty * PayPal * Peekalink * PhantomBuster * Philips Hue * Pipedrive * Plivo * PostBin * Postgres * Common issues * PostHog * ProfitWell * Pushbullet * Pushcut * Pushover * QuestDB * Quick Base * QuickBooks Online * QuickChart * RabbitMQ * Raindrop * Reddit * Redis * Rocket.Chat * Rundeck * S3 * Salesforce * Salesmate * SeaTable * SecurityScorecard * Segment * SendGrid * Sendy * Sentry.io * ServiceNow * seven * Shopify * SIGNL4 * Slack * Snowflake * Splunk * Spontit * Spotify * Stackby * Storyblok * Strapi * Strava * Stripe * Supabase * Common issues * SyncroMSP * Taiga * Tapfiliate * Telegram * Chat operations * Callback operations * File operations * Message operations * Common issues * TheHive * TheHive 5 * TimescaleDB * Todoist * Travis CI * Trello * Twake * Twilio * Twist * Unleashed Software * UpLead * uProc * UptimeRobot * urlscan.io * Venafi TLS Protect Cloud * Venafi TLS Protect Datacenter * Vero * Vonage * Webflow * Wekan * WhatsApp Business Cloud * Common issues * Wise * WooCommerce * WordPress * X (Formerly Twitter) * Xero * Yourls * YouTube * Zammad * Zendesk * Zoho CRM * Zoom * Zulip * Triggers * ActiveCampaign Trigger * Acuity Scheduling Trigger * Affinity Trigger * Airtable Trigger * AMQP Trigger * Asana Trigger * Autopilot Trigger * AWS SNS Trigger * Bitbucket Trigger * Box Trigger * Brevo Trigger * Calendly Trigger * Cal Trigger * Chargebee Trigger * ClickUp Trigger * Clockify Trigger * ConvertKit Trigger * Copper Trigger * crowd.dev Trigger * Customer.io Trigger * Emelia Trigger * Eventbrite Trigger * Facebook Lead Ads Trigger * Facebook Trigger * Ad Account * Application * Certificate Transparency * Group * Instagram * Link * Page * Permissions * User * WhatsApp Business Account * Workplace Security * Figma Trigger (Beta) * Flow Trigger * Form.io Trigger * Formstack Trigger * GetResponse Trigger * GitHub Trigger * GitLab Trigger * Gmail Trigger * Poll Mode options * Common issues * Google Calendar Trigger * Google Drive Trigger * Common issues * Google Business Profile Trigger * Google Sheets Trigger * Common issues * Gumroad Trigger * Help Scout Trigger * Hubspot Trigger * Invoice Ninja Trigger * Jira Trigger * JotForm Trigger * Kafka Trigger * Keap Trigger * KoboToolbox Trigger * Lemlist Trigger * Linear Trigger * LoneScale Trigger * Mailchimp Trigger * MailerLite Trigger * Mailjet Trigger * Mautic Trigger * Microsoft OneDrive Trigger * Microsoft Outlook Trigger * MQTT Trigger * Netlify Trigger * Notion Trigger * Onfleet Trigger * PayPal Trigger * Pipedrive Trigger * Postgres Trigger * Postmark Trigger * Pushcut Trigger * RabbitMQ Trigger * Redis Trigger * Salesforce Trigger * SeaTable Trigger * Shopify Trigger * Slack Trigger * Strava Trigger * Stripe Trigger * SurveyMonkey Trigger * Taiga Trigger * Telegram Trigger * Common issues * TheHive 5 Trigger * TheHive Trigger * Toggl Trigger * Trello Trigger * Twilio Trigger * Typeform Trigger * Venafi TLS Protect Cloud Trigger * Webex by Cisco Trigger * Webflow Trigger * WhatsApp Trigger * Wise Trigger * WooCommerce Trigger * Workable Trigger * Wufoo Trigger * Zendesk Trigger * Cluster nodes * Root nodes * AI Agent * Conversational Agent * OpenAI Functions Agent * Plan and Execute Agent * ReAct Agent * SQL Agent * Tools Agent * Common issues * Basic LLM Chain * Question and Answer Chain * Common issues * Summarization Chain * Information Extractor * Text Classifier * Sentiment Analysis * LangChain Code * Simple Vector Store * Milvus Vector Store * MongoDB Atlas Vector Store * PGVector Vector Store * Pinecone Vector Store * Qdrant Vector Store * Supabase Vector Store * Zep Vector Store * Sub-nodes * Default Data Loader * GitHub Document Loader * Embeddings AWS Bedrock * Embeddings Azure OpenAI * Embeddings Cohere * Embeddings Google Gemini * Embeddings Google PaLM * Embeddings Google Vertex * Embeddings HuggingFace Inference * Embeddings Mistral Cloud * Embeddings Ollama * Embeddings OpenAI * Anthropic Chat Model * AWS Bedrock Chat Model * Azure OpenAI Chat Model * DeepSeek Chat Model * Google Gemini Chat Model * Google Vertex Chat Model * Groq Chat Model * Mistral Cloud Chat Model * Ollama Chat Model * Common issues * OpenAI Chat Model * Common issues * OpenRouter Chat Model * Cohere Model * Ollama Model * Common issues * Hugging Face Inference Model * Chat Memory Manager * Simple Memory * Common issues * Motorhead * MongoDB Chat Memory * Redis Chat Memory * Postgres Chat Memory * Xata * Zep * Auto-fixing Output Parser * Item List Output Parser * Structured Output Parser * Common issues * Contextual Compression Retriever * MultiQuery Retriever * Vector Store Retriever * Workflow Retriever * Character Text Splitter * Recursive Character Text Splitter * Token Splitter * Calculator * Custom Code Tool * HTTP Request Tool * MCP Client Tool * SerpApi (Google Search) * Think Tool * Vector Store Question Answer Tool * Wikipedia * Wolfram|Alpha * Custom n8n Workflow Tool * Credentials * Action Network credentials * ActiveCampaign credentials * Acuity Scheduling credentials * Adalo credentials * Affinity credentials * Agile CRM credentials * Airtable credentials * Airtop credentials * AlienVault credentials * AMQP credentials * Anthropic credentials * APITemplate.io credentials * Asana credentials * Auth0 Management credentials * Automizy credentials * Autopilot credentials * AWS credentials * Azure OpenAI credentials * Azure Storage credentials * BambooHR credentials * Bannerbear credentials * Baserow credentials * Beeminder credentials * Bitbucket credentials * Bitly credentials * Bitwarden credentials * Box credentials * Brandfetch credentials * Brevo credentials * Bubble credentials * Cal.com credentials * Calendly credentials * Carbon Black credentials * Chargebee credentials * CircleCI credentials * Cisco Meraki credentials * Cisco Secure Endpoint credentials * Cisco Umbrella credentials * Clearbit credentials * ClickUp credentials * Clockify credentials * Cloudflare credentials * Cockpit credentials * Coda credentials * Cohere credentials * Contentful credentials * ConvertAPI credentials * ConvertKit credentials * Copper credentials * Cortex credentials * CrateDB credentials * crowd.dev credentials * CrowdStrike credentials * Customer.io credentials * Datadog credentials * DeepL credentials * DeepSeek credentials * Demio credentials * DFIR-IRIS credentials * DHL credentials * Discord credentials * Discourse credentials * Disqus credentials * Drift credentials * Dropbox credentials * Dropcontact credentials * Dynatrace credentials * E-goi credentials * Elasticsearch credentials * Elastic Security credentials * Emelia credentials * ERPNext credentials * Eventbrite credentials * F5 Big-IP credentials * Facebook App credentials * Facebook Graph API credentials * Facebook Lead Ads credentials * Figma credentials * FileMaker credentials * Filescan credentials * Flow credentials * Form.io Trigger credentials * Formstack Trigger credentials * Fortinet FortiGate credentials * Freshdesk credentials * Freshservice credentials * Freshworks CRM credentials * FTP credentials * GetResponse credentials * Ghost credentials * Git credentials * GitHub credentials * GitLab credentials * Gong credentials * Google * Google OAuth2 single service * Google OAuth2 generic * Google Service Account * Google Gemini(PaLM) credentials * Gotify credentials * GoToWebinar credentials * Grafana credentials * Grist credentials * Groq credentials * Gumroad credentials * HaloPSA credentials * Harvest credentials * Help Scout credentials * HighLevel credentials * Home Assistant credentials * HTTP Request credentials * HubSpot credentials * Hugging Face credentials * Humantic AI credentials * Hunter credentials * Hybrid Analysis credentials * IMAP * Gmail * Outlook.com * Yahoo * Imperva WAF credentials * Intercom credentials * Invoice Ninja credentials * Iterable credentials * Jenkins credentials * Jira credentials * JotForm credentials * JWT credentials * Kafka credentials * Keap credentials * Kibana credentials * Kitemaker credentials * KoboToolbox credentials * LDAP credentials * Lemlist credentials * Line credentials * Linear credentials * LingvaNex credentials * LinkedIn credentials * LoneScale credentials * Magento 2 credentials * Mailcheck credentials * Mailchimp credentials * MailerLite credentials * Mailgun credentials * Mailjet credentials * Malcore credentials * Mandrill credentials * Marketstack credentials * Matrix credentials * Mattermost credentials * Mautic credentials * Medium credentials * MessageBird credentials * Metabase credentials * Microsoft credentials * Microsoft Azure Monitor credentials * Microsoft Entra ID credentials * Microsoft SQL credentials * Milvus credentials * Mindee credentials * Miro credentials * MISP credentials * Mist credentials * Mistral Cloud credentials * Mocean credentials * monday.com credentials * MongoDB credentials * Monica CRM credentials * Motorhead credentials * MQTT credentials * MSG91 credentials * MySQL credentials * NASA credentials * Netlify credentials * Netscaler ADC credentials * Nextcloud credentials * NocoDB credentials * Notion credentials * npm credentials * Odoo credentials * Okta credentials * Ollama credentials * One Simple API credentials * Onfleet credentials * OpenAI credentials * OpenCTI credentials * OpenRouter credentials * OpenWeatherMap credentials * Oura credentials * Paddle credentials * PagerDuty credentials * PayPal credentials * Peekalink credentials * PhantomBuster credentials * Philips Hue credentials * Pinecone credentials * Pipedrive credentials * Plivo credentials * Postgres credentials * PostHog credentials * Postmark credentials * ProfitWell credentials * Pushbullet credentials * Pushcut credentials * Pushover credentials * QRadar credentials * Qdrant credentials * Qualys credentials * QuestDB credentials * Quick Base credentials * QuickBooks credentials * RabbitMQ credentials * Raindrop credentials * Rapid7 InsightVM credentials * Recorded Future credentials * Reddit credentials * Redis credentials * Rocket.Chat credentials * Rundeck credentials * S3 credentials * Salesforce credentials * Salesmate credentials * SeaTable credentials * SecurityScorecard credentials * Segment credentials * Sekoia credentials * Send Email * Gmail * Outlook.com * Yahoo * SendGrid credentials * Sendy credentials * Sentry.io credentials * Serp credentials * ServiceNow credentials * seven credentials * Shopify credentials * Shuffler credentials * SIGNL4 credentials * Slack credentials * Snowflake credentials * SolarWinds IPAM credentials * SolarWinds Observability SaaS credentials * Splunk credentials * Spontit credentials * Spotify credentials * SSH credentials * Stackby credentials * Storyblok credentials * Strapi credentials * Strava credentials * Stripe credentials * Supabase credentials * SurveyMonkey credentials * SyncroMSP credentials * Sysdig credentials * Taiga credentials * Tapfiliate credentials * Telegram credentials * TheHive credentials * TheHive 5 credentials * TimescaleDB credentials * Todoist credentials * Toggl credentials * TOTP credentials * Travis CI credentials * Trellix ePO credentials * Trello credentials * Twake credentials * Twilio credentials * Twist credentials * Typeform credentials * Unleashed Software credentials * UpLead credentials * uProc credentials * UptimeRobot credentials * urlscan.io credentials * Venafi TLS Protect Cloud credentials * Venafi TLS Protect Datacenter credentials * Vero credentials * VirusTotal credentials * Vonage credentials * Webex by Cisco credentials * Webflow credentials * Webhook credentials * Wekan credentials * WhatsApp Business Cloud credentials * Wise credentials * Wolfram|Alpha credentials * WooCommerce credentials * WordPress credentials * Workable credentials * Wufoo credentials * X (formerly Twitter) credentials * Xata credentials * Xero credentials * Yourls credentials * Zabbix credentials * Zammad credentials * Zendesk credentials * Zep credentials * Zoho credentials * Zoom credentials * Zscaler ZIA credentials * Zulip credentials * Custom API actions for existing nodes * Handle rate limits * Community nodes Community nodes * Installation and management * GUI installation * Manual installation * Risks * Blocklist * Using community nodes * Troubleshooting * Building community nodes * Creating nodes Creating nodes * Overview * Plan your node * Choose a node type * Choose a node building style * Node UI design * Choose node file structure * Build your node * Set up your development environment * Tutorial: Build a declarative-style node * Tutorial: Build a programmatic-style node * Reference * Node UI elements * Code standards * Versioning * Choose node file structure * Base files * Structure * Standard parameters * Declarative-style parameters * Programmatic-style parameters * Programmatic-style execute method * Codex files * Credentials files * HTTP request helpers * Item linking * Test your node * Run your node locally * Node linter * Troubleshooting * Deploy your node * Submit community nodes * Install private nodes * Hosting n8n * Community vs Enterprise * Installation Installation * npm * Docker * Server setups * Digital Ocean * Heroku * Hetzner * Amazon Web Services * Azure * Google Cloud * Docker Compose * Updating * Configuration Configuration * Environment variables * Binary data * Credentials * Database * Deployment * Endpoints * Executions * External data storage * External hooks * External secrets * Logs * License * Nodes * Queue mode * Security * Source control * Task runners * Timezone and localization * User management and 2FA * Workflows * Configuration methods * Configuration examples * Isolate n8n * Configure the Base URL * Configure custom SSL certificate authorities * Set a custom encryption key * Configure workflow timeouts * Specify custom nodes location * Enable modules in Code node * Set the timezone * Specify user folder path * Configure webhook URLs with reverse proxy * Enable Prometheus metrics * Supported databases and settings * Task runners * User management * Logging and monitoring Logging and monitoring * Logging * Monitoring * Security audit * Scaling and performance Scaling and performance * Overview * Performance and benchmarking * Configuring queue mode * Concurrency control * Execution data * Binary data * External storage for binary data * Memory-related errors * Securing n8n Securing n8n * Overview * Set up SSL * Set up SSO * Security audit * Disable the API * Opt out of data collection * Blocking nodes * Hardening task runners * Starter Kits Starter Kits * AI Starter Kit * Architecture Architecture * Overview * Database structure * Using the CLI Using the CLI * CLI commands * Code in n8n * Expressions * Using the Code node * AI coding * Built in methods and variables Built in methods and variables * Overview * Current node input * Output of other nodes * Date and time * JMESPath * HTTP node * LangChain Code node * n8n metadata * Convenience methods * Data transformation functions * Arrays * Booleans * Dates * Numbers * Objects * Strings * Custom variables Custom variables * Create custom variables * Cookbook Cookbook * Handling dates * Query JSON with JMESPath * Built-in methods and variables examples * execution * getWorkflowStaticData * Retrieve linked items from earlier in the workflow * (node-name).all * vars * Expressions * Check incoming data * Common issues * Code node * Get number of items returned by last node * Get the binary data buffer * Output to the browser console * HTTP Request node * Pagination * Advanced AI * Tutorial: Build an AI workflow in n8n * LangChain in n8n LangChain in n8n * Overview * Langchain concepts in n8n * LangChain learning resources * Use LangSmith with n8n * Examples and concepts Examples and concepts * Introduction * What is a chain? * What is an agent? * Agents vs chains example * What is memory? * What is a tool? * Use Google Sheets as a data source * Call an API to fetch data * Set a human fallback for AI workflows * Let AI specify tool parameters * What is a vector database? * Populate a Pinecone vector database from a website * API * Authentication * Pagination * Using the API playground * API reference * Embed * Prerequisites * Deployment * Configuration * Workflow management * Workflows templates * White labelling --- ## Page: https://docs.n8n.io/integrations/builtin/trigger-nodes/n8n-nodes-base.facebookleadadstrigger/ Use the Facebook Lead Ads Trigger node to respond to events in Facebook Lead Ads and integrate Facebook Lead Ads with other applications. n8n has built-in support for responding to new leads. On this page, you'll find a list of events the Facebook Lead Ads Trigger node can respond to, and links to more resources. Credentials You can find authentication information for this node here. ## Events# * New lead View example workflows and related content on n8n's website. Refer to Facebook Lead Ads' documentation for details about their API. ## Common issues# Here are some common errors and issues with the Facebook Lead Ads Trigger node and steps to resolve or troubleshoot them. ### Workflow only works in testing or production# Facebook Lead Ads only allows you to register a single webhook per app. This means that every time you switch from using the testing URL to the production URL (and vice versa), Facebook Lead Ads overwrites the registered webhook URL. You may have trouble with this if you try to test a workflow that's also active in production. Facebook Lead Ads will only send events to one of the two webhook URLs, so the other will never receive event notifications. To work around this, you can disable your workflow when testing: Halts production traffic This workaround temporarily disables your production workflow for testing. Your workflow will no longer receive production traffic while it's deactivated. 1. Go to your workflow page. 2. Toggle the **Active** switch in the top panel to disable the workflow temporarily. 3. Test your workflow using the test webhook URL. 4. When you finish testing, toggle the **Inactive** toggle to enable the workflow again. The production webhook URL should resume working. --- ## Page: https://docs.n8n.io/integrations/builtin/trigger-nodes/n8n-nodes-base.facebooktrigger/ Facebook is a social networking site to connect and share with family and friends online. Use the Facebook Trigger node to trigger a workflow when events occur in Facebook. Credentials You can find authentication information for this node here. ## Objects# * **Ad Account**: Get updates for certain ads changes. * **Application**: Get updates sent to the application. * **Certificate Transparency**: Get updates when new security certificates are generated for your subscribed domains, including new certificates and potential phishing attempts. * Activity and events in a **Group** * **Instagram**: Get updates when someone comments on the Media objects of your app users; @mentions your app users; or when Stories of your app users expire. * **Link**: Get updates about the links for rich previews by an external provider * **Page** updates * **Permissions**: Updates when granting or revoking permissions * **User** profile updates * **WhatsApp Business Account** Use WhatsApp Trigger n8n recommends using the WhatsApp Trigger node with the WhatsApp credentials instead of the Facebook Trigger node for these events. The WhatsApp Trigger node has more events to listen to. * **Workplace Security** For each **Object**, use the **Field Names or IDs** dropdown to select more details on what data to receive. Refer to the linked pages for more details. View example workflows and related content on n8n's website. Refer to Meta's Graph API documentation for details about their API. --- ## Page: https://docs.n8n.io/integrations/builtin/trigger-nodes/n8n-nodes-base.facebooktrigger/ad-account/ Use this object to receive updates on certain ads changes in an Ad Account. Refer to Facebook Trigger for more information on the trigger itself. Credentials You can find authentication information for this node here. ## Trigger configuration# To configure the trigger with this Object: 1. Select the **Credential to connect with**. Select an existing or create a new Facebook App credential. 2. Enter the **APP ID** of the app connected to your credential. Refer to the Facebook App credential documentation for more information. 3. Select **Ad Account** as the **Object**. 4. **Field Names or IDs**: By default, the node will trigger on all the available Ad Account events using the `*` wildcard filter. If you'd like to limit the events, use the `X` to remove the star and use the dropdown or an expression to select the updates you're interested in. Options include: * **In Process Ad Objects**: Notifies you when a campaign, ad set, or ad exits the `IN_PROCESS` status. Refer to Meta's Post-processing for Ad Creation and Edits for more information. * **With Issues Ad Objects**: Notifies you when a campaign, ad set, or ad under the ad account receives the `WITH_ISSUES` status. 5. In **Options**, turn on the toggle to **Include Values**. This Object type fails without the option enabled. Refer to Webhooks for Ad Accounts and Meta's Ad Account Graph API reference for more information. --- ## Page: https://docs.n8n.io/integrations/builtin/trigger-nodes/n8n-nodes-base.facebooktrigger/application/ Use this object to receive updates sent to a specific app. Refer to Facebook Trigger for more information on the trigger itself. Credentials You can find authentication information for this node here. ## Trigger configuration# To configure the trigger with this Object: 1. Select the **Credential to connect with**. Select an existing or create a new Facebook App credential. 2. Enter the **APP ID** of the app connected to your credential. Refer to the Facebook App credential documentation for more information. 3. Select **Application** as the **Object**. 4. **Field Names or IDs**: By default, the node will trigger on all the available events using the `*` wildcard filter. If you'd like to limit the events, use the `X` to remove the star and use the dropdown or an expression to select the updates you're interested in. Options include: * **Add Account** * **Ads Rules Engine** * **Async Requests** * **Async Sessions** * **Group Install** * **Oe Reseller Onboarding Request Created** * **Plugin Comment** * **Plugin Comment Reply** 5. In **Options**, turn on the toggle to **Include Values**. This Object type fails without the option enabled. Refer to Meta's Application Graph API reference for more information. --- ## Page: https://docs.n8n.io/integrations/builtin/trigger-nodes/n8n-nodes-base.facebooktrigger/certificate-transparency/ Use this object to receive updates about newly issued certificates for any domains that you have subscribed for certificate alerts or phishing alerts. Refer to Facebook Trigger for more information on the trigger itself. Credentials You can find authentication information for this node here. ## Trigger configuration# To configure the trigger with this Object: 1. Select the **Credential to connect with**. Select an existing or create a new Facebook App credential. 2. Enter the **APP ID** of the app connected to your credential. Refer to the Facebook App credential documentation for more information. 3. Select **Certificate Transparency** as the **Object**. 4. **Field Names or IDs**: By default, the node will trigger on all the available events using the `*` wildcard filter. If you'd like to limit the events, use the `X` to remove the star and use the dropdown or an expression to select the updates you're interested in. Options include: * **Certificate**: Notifies you when someone issues a new certificate for your subscribed domains. You'll need to subscribe your domain for certificate alerts. * **Phishing**: Notifies you when someone issues a new certificate that may be phishing one of your legitimate subscribed domains. 5. In **Options**, turn on the toggle to **Include Values**. This Object type fails without the option enabled. For these alerts, you'll need to subscribe your domain to the relevant alerts: * Refer to Certificate Alerts for Certificate Alerts subscriptions. * Refer to Phishing Alerts for Phishing Alerts subscriptions. Refer to Webhooks for Certificate Transparency and Meta's Certificate Transparency Graph API reference for more information. --- ## Page: https://docs.n8n.io/integrations/builtin/trigger-nodes/n8n-nodes-base.facebooktrigger/group/ Use this object to receive updates about activities and events in a group. Refer to Facebook Trigger for more information on the trigger itself. Credentials You can find authentication information for this node here. ## Trigger configuration# To configure the trigger with this Object: 1. Select the **Credential to connect with**. Select an existing or create a new Facebook App credential. 2. Enter the **APP ID** of the app connected to your credential. Refer to the Facebook App credential documentation for more information. 3. Select **Group** as the **Object**. 4. **Field Names or IDs**: By default, the node will trigger on all the available events using the `*` wildcard filter. If you'd like to limit the events, use the `X` to remove the star and use the dropdown or an expression to select the updates you're interested in. 5. In **Options**, turn on the toggle to **Include Values**. This Object type fails without the option enabled. Refer to Meta's Groups Workplace API reference for more information. --- ## Page: https://docs.n8n.io/integrations/builtin/trigger-nodes/n8n-nodes-base.facebooktrigger/instagram/ Use this object to receive updates when someone comments on the Media objects of your app users; @mentions your app users; or when Stories of your app users expire. Refer to Facebook Trigger for more information on the trigger itself. Credentials You can find authentication information for this node here. ## Trigger configuration# To configure the trigger with this Object: 1. Select the **Credential to connect with**. Select an existing or create a new Facebook App credential. 2. Enter the **APP ID** of the app connected to your credential. Refer to the Facebook App credential documentation for more information. 3. Select **Instagram** as the **Object**. 4. **Field Names or IDs**: By default, the node will trigger on all the available events using the `*` wildcard filter. If you'd like to limit the events, use the `X` to remove the star and use the dropdown or an expression to select the updates you're interested in. Options include: * **Comments**: Notifies you when anyone comments on an IG Media owned by your app's Instagram user. * **Messaging Handover** * **Mentions**: Notifies you whenever an Instagram user @mentions an Instagram Business or Creator Account in a comment or caption. * **Messages**: Notifies you when anyone messages your app's Instagram user. * **Messaging Seen**: Notifies you when someone sees a message sent by your app's Instagram user. * **Standby** * **Story Insights**: Notifies you one hour after a story expires with metrics describing interactions on a story. 5. In **Options**, turn on the toggle to **Include Values**. This Object type fails without the option enabled. Refer to Webhooks for Instagram and Meta's Instagram Graph API reference for more information. --- ## Page: https://docs.n8n.io/integrations/builtin/trigger-nodes/n8n-nodes-base.facebooktrigger/link/ Use this object to receive updates about links for rich previews by an external provider. Refer to Facebook Trigger for more information on the trigger itself. Credentials You can find authentication information for this node here. ## Trigger configuration# To configure the trigger with this Object: 1. Select the **Credential to connect with**. Select an existing or create a new Facebook App credential. 2. Enter the **APP ID** of the app connected to your credential. Refer to the Facebook App credential documentation for more information. 3. Select **Link** as the **Object**. 4. **Field Names or IDs**: By default, the node will trigger on all the available events using the `*` wildcard filter. If you'd like to limit the events, use the `X` to remove the star and use the dropdown or an expression to select the updates you're interested in. 5. In **Options**, turn on the toggle to **Include Values**. This Object type fails without the option enabled. Refer to Meta's Links Workplace API reference for more information. --- ## Page: https://docs.n8n.io/integrations/builtin/trigger-nodes/n8n-nodes-base.facebooktrigger/page/ Use this object to receive updates when updates to your page profile fields or profile settings occur or someone mentions your page. Refer to Facebook Trigger for more information on the trigger itself. Credentials You can find authentication information for this node here. ## Prerequisites# This Object requires some configuration in your app and page before you can use the trigger: 1. At least one page admin needs to grant the `manage_pages` permission to your app. 2. The page admin needs to have at least moderator privileges. If they don't, they won't receive all content. 3. You'll also need to add the app to your page, and you may need to go to the Graph API explorer and execute this call with your app token: <table><tbody><tr><td><div><pre><span></span><span>1</span></pre></div></td><td><div><pre><span></span><code>{page-id}/subscribed_apps?subscribed_fields=feed </code></pre></div></td></tr></tbody></table> ## Trigger configuration# To configure the trigger with this Object: 1. Select the **Credential to connect with**. Select an existing or create a new Facebook App credential. 2. Enter the **APP ID** of the app connected to your credential. Refer to the Facebook App credential documentation for more information. 3. Select **Page** as the **Object**. 4. **Field Names or IDs**: By default, the node will trigger on all the available events using the `*` wildcard filter. If you'd like to limit the events, use the `X` to remove the star and use the dropdown or an expression to select the updates you're interested in. Options include individual profile fields, as well as: * **Feed**: Describes most changes to a page's feed, including posts, likes, shares, and so on. * **Leadgen**: Notifies you when a page's lead generation settings change. * **Live Videos**: Notifies you when a page's live video status changes. * **Mention**: Notifies you when new mentions in pages, comments, and so on occur. * **Merchant Review**: Notifies you when a page's merchant review settings change. * **Page Change Proposal**: Notifies you when Facebook suggests proposed changes for your Facebook Page. * **Page Upcoming Change**: Notifies you about upcoming changes that will occur on your Facebook Page. Facebook has suggested these changes and they may have a deadline to accept or reject before automatically taking effect. * **Product Review**: Notifies you when a page's product review settings change. * **Ratings**: Notifies you when a page's ratings change, including new ratings or when a user comments on or reacts to a rating. * **Videos**: Notifies you when the encoding status of a video on a page changes. 5. In **Options**, turn on the toggle to **Include Values**. This Object type fails without the option enabled. Refer to Webhooks for Pages and Meta's Page Graph API reference for more information. --- ## Page: https://docs.n8n.io/integrations/builtin/trigger-nodes/n8n-nodes-base.facebooktrigger/permissions/ Use this object to receive updates when a user grants or revokes a permission for your app. Refer to Facebook Trigger for more information on the trigger itself. Credentials You can find authentication information for this node here. ## Trigger configuration# To configure the trigger with this Object: 1. Select the **Credential to connect with**. Select an existing or create a new Facebook App credential. 2. Enter the **APP ID** of the app connected to your credential. Refer to the Facebook App credential documentation for more information. 3. Select **Permissions** as the **Object**. 4. **Field Names or IDs**: By default, the node will trigger on all the available events using the `*` wildcard filter. If you'd like to limit the events, use the `X` to remove the star and use the dropdown or an expression to select the updates you're interested in. 5. In **Options**, choose whether to turn on the toggle to **Include Values**. When turned on, the node includes the new values for the changes. Refer to Meta's Permissions Graph API reference for more information. --- ## Page: https://docs.n8n.io/integrations/builtin/trigger-nodes/n8n-nodes-base.facebooktrigger/user/ Use this object to receive updates when changes to a user's profile occur. Refer to Facebook Trigger for more information on the trigger itself. Credentials You can find authentication information for this node here. ## Trigger configuration# To configure the trigger with this Object: 1. Select the **Credential to connect with**. Select an existing or create a new Facebook App credential. 2. Enter the **APP ID** of the app connected to your credential. Refer to the Facebook App credential documentation for more information. 3. Select **User** as the **Object**. 4. **Field Names or IDs**: By default, the node will trigger on all the available events using the `*` wildcard filter. If you'd like to limit the events, use the `X` to remove the star and use the dropdown or an expression to select the updates you're interested in. 5. In **Options**, choose whether to turn on the toggle to **Include Values**. When turned on, the node includes the new values for the changes. Refer to Meta's User Graph API reference for more information. --- ## Page: https://docs.n8n.io/integrations/builtin/trigger-nodes/n8n-nodes-base.facebooktrigger/whatsapp/ Use this object to receive updates when your WhatsApp Business Account (WABA) changes. Refer to Facebook Trigger for more information on the trigger itself. Credentials You can find authentication information for this node here. ## Prerequisites# This Object requires some configuration in your app and WhatsApp account before you can use the trigger: 1. Subscribe your app under your WhatsApp business account. You must subscribe an app owned by your business. Apps shared with your business can't receive webhook notifications. 2. If you are working as a Solution Partner, make sure your app has completed App Review and requested the `whatsapp_business_management` permission. ## Trigger configuration# To configure the trigger with this Object: 1. Select the **Credential to connect with**. Select an existing or create a new Facebook App credential. 2. Enter the **APP ID** of the app connected to your credential. Refer to the Facebook App credential documentation for more information. 3. Select **WhatsApp Business Account** as the **Object**. 4. **Field Names or IDs**: By default, the node will trigger on all the available events using the `*` wildcard filter. If you'd like to limit the events, use the `X` to remove the star and use the dropdown or an expression to select the updates you're interested in. Options include: * **Message Template Status Update** * **Phone Number Name Update** * **Phone Number Quality Update** * **Account Review Update** * **Account Update** 5. In **Options**, turn on the toggle to **Include Values**. This Object type fails without the option enabled. Refer to Webhooks for WhatsApp Business Accounts and Meta's WhatsApp Business Account Graph API reference for more information. --- ## Page: https://docs.n8n.io/integrations/builtin/trigger-nodes/n8n-nodes-base.facebooktrigger/workplace-security/ Use this object to receive updates when Workplace security events occur, like adding or removing admins, users joining or leaving a Workplace, and more. Refer to Facebook Trigger for more information on the trigger itself. Credentials You can find authentication information for this node here. ## Trigger configuration# To configure the trigger with this Object: 1. Select the **Credential to connect with**. Select an existing or create a new Facebook App credential. 2. Enter the **APP ID** of the app connected to your credential. Refer to the Facebook App credential documentation for more information. 3. Select **Workplace Security** as the **Object**. 4. **Field Names or IDs**: By default, the node will trigger on all the available events using the `*` wildcard filter. If you'd like to limit the events, use the `X` to remove the star and use the dropdown or an expression to select the updates you're interested in. 5. In **Options**, turn on the toggle to **Include Values**. This Object type fails without the option enabled. Refer to Meta's Security Workplace API reference for more information. --- ## Page: https://docs.n8n.io/integrations/builtin/trigger-nodes/n8n-nodes-base.figmatrigger/ * Using n8n * Integrations * Hosting n8n * Code in n8n * Advanced AI * API * Embed * n8n home ↗ * Forum ↗ * Blog ↗ 1. Integrations 2. Built-in nodes 3. Triggers Figma is a prototyping tool which is primarily web-based, with more offline features enabled by desktop applications for macOS and Windows. Supported Figma Plans Figma doesn't support webhooks on the free "Starter" plan. Your team needs to be on the "Professional" plan to use this node. Credentials You can find authentication information for this node here. ## Events# * **File Commented**: Triggers when someone comments on a file. * **File Deleted**: Triggers when someone deletes an individual file, but not when someone deletes an entire folder with all files. * **File Updated**: Triggers when someone saves or deletes a file. A save occurs when someone closes a file within 30 seconds after making changes. * **File Version Updated**: Triggers when someone creates a named version in the version history of a file. * **Library Publish**: Triggers when someone publishes a library file. --- ## Page: https://docs.n8n.io/integrations/builtin/trigger-nodes/n8n-nodes-base.flowtrigger/ Flow is modern task and project management software for teams. It brings together tasks, projects, timelines, and conversations, and integrates with a lot of tools. Credentials You can find authentication information for this node here. Examples and templates For usage examples and templates to help you get started, refer to n8n's Flow Trigger integrations page. --- ## Page: https://docs.n8n.io/integrations/builtin/trigger-nodes/n8n-nodes-base.formiotrigger/ n8n Docs * Using n8n * Getting started Getting started * Learning path * Choose your n8n * Quickstarts * A very quick quickstart * A longer introduction * Video courses * Text courses * Level one * Navigating the editor UI * Building a mini-workflow * Automating a (real-world) use case * Designing the workflow * Building the workflow Building the workflow * Getting data from the data warehouse * Inserting data into airtable * Filtering orders * Setting values for processing orders * Calculating booked orders * Notifying the team * Scheduling the workflow * Activating and examining the workflow * Exporting and importing workflows * Test your knowledge * Level two * Understanding the data structure * Processing different data types * Merging and splitting data * Dealing with errors in workflows * Automating a business workflow Automating a business workflow * Use case * Workflow 1 * Workflow 2 * Workflow 3 * Test your knowledge * Using the app Using the app * Understand workflows * Create and run * Components * Nodes * Connections * Sticky Notes * Executions * Manual, partial, and production executions * Workflow-level executions * All executions * Custom executions data * Debug executions * Tags * Export and import * Templates * Sharing * Settings * Workflow history * Workflow ID * Manage credentials * Create and edit * Credential sharing * Manage users and access * Cloud setup * Manage users * Account types * Role-based access control * Role types * Projects * Best practices * 2FA * LDAP * SAML * Set up SAML * Okta Workforce Identity SAML setup * Troubleshooting * Manage users with SAML * Keyboard shortcuts * Key concepts Key concepts * Flow logic * Splitting with conditionals * Merging data * Looping * Waiting * Sub-workflows * Error handling * Execution order in multi-branch workflows * Data * Data structure * Data flow within nodes * Transforming data * Process data using code * Data mapping * Data mapping in the UI * Data mapping in the expressions editor * Data item linking * Item linking concepts * Item linking in the Code node * Item linking errors * Item linking for node creators * Data pinning * Data editing * Data filtering * Data mocking * Binary data * Schema preview * Glossary * n8n Cloud n8n Cloud * Overview * Access the Cloud admin dashboard * Update your n8n Cloud version * Set the timezone * Cloud IP addresses * Cloud data management * Change ownership or username * Concurrency * AI Assistant * Enterprise features Enterprise features * Source control and environments * Understand * Environments * Git in n8n * Branch patterns * Set up * Using * Push and pull * Copy work between environments * Manage variables * Tutorial: Create environments with source control * External secrets * Log streaming * License key * Releases Releases * Release notes Release notes * 1.x * 0.x * v1.0 migration guide * Help and community Help and community * Where to get help * Contributing * Licenses and privacy Licenses and privacy * Privacy and security * Privacy * Security * Incident response * What you can do * Sustainable use license * Integrations * Built-in nodes Built-in nodes * Node types * Core nodes * Activation Trigger * Aggregate * AI Transform * Code * Keyboard shortcuts * Common issues * Compare Datasets * Compression * Chat Trigger * Common issues * Convert to File * Crypto * Date & Time * Debug Helper * Edit Fields (Set) * Edit Image * Email Trigger (IMAP) * Error Trigger * Execute Command * Common issues * Execute Sub-workflow * Execute Sub-workflow Trigger * Execution Data * Extract From File * Filter * FTP * Git * GraphQL * HTML * HTTP Request * Common issues * If * JWT * LDAP * Limit * Local File Trigger * Loop Over Items (Split in Batches) * Manual Trigger * Markdown * MCP Server Trigger * Merge * n8n * n8n Form * n8n Form Trigger * n8n Trigger * No Operation, do nothing * Read/Write Files from Disk * Remove Duplicates * Templates and examples * Rename Keys * Respond to Webhook * RSS Read * RSS Feed Trigger * Schedule Trigger * Common issues * Send Email * Sort * Split Out * SSE Trigger * SSH * Stop And Error * Summarize * Switch * TOTP * Wait * Webhook * Workflow development * Common issues * Workflow Trigger * XML * Actions * Action Network * ActiveCampaign * Adalo * Affinity * Agile CRM * Airtable * Common issues * Airtop * AMQP Sender * APITemplate.io * Asana * Automizy * Autopilot * AWS Certificate Manager * AWS Comprehend * AWS DynamoDB * AWS Elastic Load Balancing * AWS Lambda * AWS Rekognition * AWS S3 * AWS SES * AWS SNS * AWS SQS * AWS Textract * AWS Transcribe * Azure Storage * BambooHR * Bannerbear * Baserow * Beeminder * Bitly * Bitwarden * Box * Brandfetch * Brevo * Bubble * Chargebee * CircleCI * Webex by Cisco * Clearbit * ClickUp * Clockify * Cloudflare * Cockpit * Coda * CoinGecko * Contentful * ConvertKit * Copper * Cortex * CrateDB * crowd.dev * Customer.io * DeepL * Demio * DHL * Discord * Common issues * Discourse * Disqus * Drift * Dropbox * Dropcontact * E-goi * Elasticsearch * Elastic Security * Emelia * ERPNext * Facebook Graph API * FileMaker * Flow * Freshdesk * Freshservice * Freshworks CRM * GetResponse * Ghost * GitHub * GitLab * Gmail * Draft operations * Label operations * Message operations * Thread operations * Common issues * Gong * Google Ads * Google Analytics * Google BigQuery * Google Books * Google Business Profile * Google Calendar * Calendar operations * Event operations * Google Chat * Google Cloud Firestore * Google Cloud Natural Language * Google Cloud Realtime Database * Google Cloud Storage * Google Contacts * Google Docs * Google Drive * File operations * File and folder operations * Folder operations * Shared drive operations * Common issues * Google Perspective * Google Sheets * Document operations * Sheet within Document operations * Common issues * Google Slides * Google Tasks * Google Translate * Google Workspace Admin * Gotify * GoToWebinar * Grafana * Grist * Hacker News * HaloPSA * Harvest * Help Scout * HighLevel * Home Assistant * HubSpot * Humantic AI * Hunter * Intercom * Invoice Ninja * Iterable * Jenkins * Jira Software * Kafka * Keap * Kitemaker * KoboToolbox * Lemlist * Line * Linear * LingvaNex * LinkedIn * LoneScale * Magento 2 * Mailcheck * Mailchimp * MailerLite * Mailgun * Mailjet * Mandrill * marketstack * Matrix * Mattermost * Mautic * Medium * MessageBird * Metabase * Microsoft Dynamics CRM * Microsoft Entra ID * Microsoft Excel 365 * Microsoft Graph Security * Microsoft OneDrive * Microsoft Outlook * Microsoft SQL * Microsoft Teams * Microsoft To Do * Mindee * MISP * Mocean * monday.com * MongoDB * Monica CRM * MQTT * MSG91 * MySQL * Common issues * Customer Datastore (n8n Training) * Customer Messenger (n8n Training) * NASA * Netlify * Netscaler ADC * Nextcloud * NocoDB * Notion * Common issues * npm * Odoo * Okta * One Simple API * Onfleet * OpenAI * Assistant operations * Audio operations * File operations * Image operations * Text operations * Common issues * OpenThesaurus * OpenWeatherMap * Oura * Paddle * PagerDuty * PayPal * Peekalink * PhantomBuster * Philips Hue * Pipedrive * Plivo * PostBin * Postgres * Common issues * PostHog * ProfitWell * Pushbullet * Pushcut * Pushover * QuestDB * Quick Base * QuickBooks Online * QuickChart * RabbitMQ * Raindrop * Reddit * Redis * Rocket.Chat * Rundeck * S3 * Salesforce * Salesmate * SeaTable * SecurityScorecard * Segment * SendGrid * Sendy * Sentry.io * ServiceNow * seven * Shopify * SIGNL4 * Slack * Snowflake * Splunk * Spontit * Spotify * Stackby * Storyblok * Strapi * Strava * Stripe * Supabase * Common issues * SyncroMSP * Taiga * Tapfiliate * Telegram * Chat operations * Callback operations * File operations * Message operations * Common issues * TheHive * TheHive 5 * TimescaleDB * Todoist * Travis CI * Trello * Twake * Twilio * Twist * Unleashed Software * UpLead * uProc * UptimeRobot * urlscan.io * Venafi TLS Protect Cloud * Venafi TLS Protect Datacenter * Vero * Vonage * Webflow * Wekan * WhatsApp Business Cloud * Common issues * Wise * WooCommerce * WordPress * X (Formerly Twitter) * Xero * Yourls * YouTube * Zammad * Zendesk * Zoho CRM * Zoom * Zulip * Triggers * ActiveCampaign Trigger * Acuity Scheduling Trigger * Affinity Trigger * Airtable Trigger * AMQP Trigger * Asana Trigger * Autopilot Trigger * AWS SNS Trigger * Bitbucket Trigger * Box Trigger * Brevo Trigger * Calendly Trigger * Cal Trigger * Chargebee Trigger * ClickUp Trigger * Clockify Trigger * ConvertKit Trigger * Copper Trigger * crowd.dev Trigger * Customer.io Trigger * Emelia Trigger * Eventbrite Trigger * Facebook Lead Ads Trigger * Facebook Trigger * Ad Account * Application * Certificate Transparency * Group * Instagram * Link * Page * Permissions * User * WhatsApp Business Account * Workplace Security * Figma Trigger (Beta) * Flow Trigger * Form.io Trigger * Formstack Trigger * GetResponse Trigger * GitHub Trigger * GitLab Trigger * Gmail Trigger * Poll Mode options * Common issues * Google Calendar Trigger * Google Drive Trigger * Common issues * Google Business Profile Trigger * Google Sheets Trigger * Common issues * Gumroad Trigger * Help Scout Trigger * Hubspot Trigger * Invoice Ninja Trigger * Jira Trigger * JotForm Trigger * Kafka Trigger * Keap Trigger * KoboToolbox Trigger * Lemlist Trigger * Linear Trigger * LoneScale Trigger * Mailchimp Trigger * MailerLite Trigger * Mailjet Trigger * Mautic Trigger * Microsoft OneDrive Trigger * Microsoft Outlook Trigger * MQTT Trigger * Netlify Trigger * Notion Trigger * Onfleet Trigger * PayPal Trigger * Pipedrive Trigger * Postgres Trigger * Postmark Trigger * Pushcut Trigger * RabbitMQ Trigger * Redis Trigger * Salesforce Trigger * SeaTable Trigger * Shopify Trigger * Slack Trigger * Strava Trigger * Stripe Trigger * SurveyMonkey Trigger * Taiga Trigger * Telegram Trigger * Common issues * TheHive 5 Trigger * TheHive Trigger * Toggl Trigger * Trello Trigger * Twilio Trigger * Typeform Trigger * Venafi TLS Protect Cloud Trigger * Webex by Cisco Trigger * Webflow Trigger * WhatsApp Trigger * Wise Trigger * WooCommerce Trigger * Workable Trigger * Wufoo Trigger * Zendesk Trigger * Cluster nodes * Root nodes * AI Agent * Conversational Agent * OpenAI Functions Agent * Plan and Execute Agent * ReAct Agent * SQL Agent * Tools Agent * Common issues * Basic LLM Chain * Question and Answer Chain * Common issues * Summarization Chain * Information Extractor * Text Classifier * Sentiment Analysis * LangChain Code * Simple Vector Store * Milvus Vector Store * MongoDB Atlas Vector Store * PGVector Vector Store * Pinecone Vector Store * Qdrant Vector Store * Supabase Vector Store * Zep Vector Store * Sub-nodes * Default Data Loader * GitHub Document Loader * Embeddings AWS Bedrock * Embeddings Azure OpenAI * Embeddings Cohere * Embeddings Google Gemini * Embeddings Google PaLM * Embeddings Google Vertex * Embeddings HuggingFace Inference * Embeddings Mistral Cloud * Embeddings Ollama * Embeddings OpenAI * Anthropic Chat Model * AWS Bedrock Chat Model * Azure OpenAI Chat Model * DeepSeek Chat Model * Google Gemini Chat Model * Google Vertex Chat Model * Groq Chat Model * Mistral Cloud Chat Model * Ollama Chat Model * Common issues * OpenAI Chat Model * Common issues * OpenRouter Chat Model * Cohere Model * Ollama Model * Common issues * Hugging Face Inference Model * Chat Memory Manager * Simple Memory * Common issues * Motorhead * MongoDB Chat Memory * Redis Chat Memory * Postgres Chat Memory * Xata * Zep * Auto-fixing Output Parser * Item List Output Parser * Structured Output Parser * Common issues * Contextual Compression Retriever * MultiQuery Retriever * Vector Store Retriever * Workflow Retriever * Character Text Splitter * Recursive Character Text Splitter * Token Splitter * Calculator * Custom Code Tool * HTTP Request Tool * MCP Client Tool * SerpApi (Google Search) * Think Tool * Vector Store Question Answer Tool * Wikipedia * Wolfram|Alpha * Custom n8n Workflow Tool * Credentials * Action Network credentials * ActiveCampaign credentials * Acuity Scheduling credentials * Adalo credentials * Affinity credentials * Agile CRM credentials * Airtable credentials * Airtop credentials * AlienVault credentials * AMQP credentials * Anthropic credentials * APITemplate.io credentials * Asana credentials * Auth0 Management credentials * Automizy credentials * Autopilot credentials * AWS credentials * Azure OpenAI credentials * Azure Storage credentials * BambooHR credentials * Bannerbear credentials * Baserow credentials * Beeminder credentials * Bitbucket credentials * Bitly credentials * Bitwarden credentials * Box credentials * Brandfetch credentials * Brevo credentials * Bubble credentials * Cal.com credentials * Calendly credentials * Carbon Black credentials * Chargebee credentials * CircleCI credentials * Cisco Meraki credentials * Cisco Secure Endpoint credentials * Cisco Umbrella credentials * Clearbit credentials * ClickUp credentials * Clockify credentials * Cloudflare credentials * Cockpit credentials * Coda credentials * Cohere credentials * Contentful credentials * ConvertAPI credentials * ConvertKit credentials * Copper credentials * Cortex credentials * CrateDB credentials * crowd.dev credentials * CrowdStrike credentials * Customer.io credentials * Datadog credentials * DeepL credentials * DeepSeek credentials * Demio credentials * DFIR-IRIS credentials * DHL credentials * Discord credentials * Discourse credentials * Disqus credentials * Drift credentials * Dropbox credentials * Dropcontact credentials * Dynatrace credentials * E-goi credentials * Elasticsearch credentials * Elastic Security credentials * Emelia credentials * ERPNext credentials * Eventbrite credentials * F5 Big-IP credentials * Facebook App credentials * Facebook Graph API credentials * Facebook Lead Ads credentials * Figma credentials * FileMaker credentials * Filescan credentials * Flow credentials * Form.io Trigger credentials * Formstack Trigger credentials * Fortinet FortiGate credentials * Freshdesk credentials * Freshservice credentials * Freshworks CRM credentials * FTP credentials * GetResponse credentials * Ghost credentials * Git credentials * GitHub credentials * GitLab credentials * Gong credentials * Google * Google OAuth2 single service * Google OAuth2 generic * Google Service Account * Google Gemini(PaLM) credentials * Gotify credentials * GoToWebinar credentials * Grafana credentials * Grist credentials * Groq credentials * Gumroad credentials * HaloPSA credentials * Harvest credentials * Help Scout credentials * HighLevel credentials * Home Assistant credentials * HTTP Request credentials * HubSpot credentials * Hugging Face credentials * Humantic AI credentials * Hunter credentials * Hybrid Analysis credentials * IMAP * Gmail * Outlook.com * Yahoo * Imperva WAF credentials * Intercom credentials * Invoice Ninja credentials * Iterable credentials * Jenkins credentials * Jira credentials * JotForm credentials * JWT credentials * Kafka credentials * Keap credentials * Kibana credentials * Kitemaker credentials * KoboToolbox credentials * LDAP credentials * Lemlist credentials * Line credentials * Linear credentials * LingvaNex credentials * LinkedIn credentials * LoneScale credentials * Magento 2 credentials * Mailcheck credentials * Mailchimp credentials * MailerLite credentials * Mailgun credentials * Mailjet credentials * Malcore credentials * Mandrill credentials * Marketstack credentials * Matrix credentials * Mattermost credentials * Mautic credentials * Medium credentials * MessageBird credentials * Metabase credentials * Microsoft credentials * Microsoft Azure Monitor credentials * Microsoft Entra ID credentials * Microsoft SQL credentials * Milvus credentials * Mindee credentials * Miro credentials * MISP credentials * Mist credentials * Mistral Cloud credentials * Mocean credentials * monday.com credentials * MongoDB credentials * Monica CRM credentials * Motorhead credentials * MQTT credentials * MSG91 credentials * MySQL credentials * NASA credentials * Netlify credentials * Netscaler ADC credentials * Nextcloud credentials * NocoDB credentials * Notion credentials * npm credentials * Odoo credentials * Okta credentials * Ollama credentials * One Simple API credentials * Onfleet credentials * OpenAI credentials * OpenCTI credentials * OpenRouter credentials * OpenWeatherMap credentials * Oura credentials * Paddle credentials * PagerDuty credentials * PayPal credentials * Peekalink credentials * PhantomBuster credentials * Philips Hue credentials * Pinecone credentials * Pipedrive credentials * Plivo credentials * Postgres credentials * PostHog credentials * Postmark credentials * ProfitWell credentials * Pushbullet credentials * Pushcut credentials * Pushover credentials * QRadar credentials * Qdrant credentials * Qualys credentials * QuestDB credentials * Quick Base credentials * QuickBooks credentials * RabbitMQ credentials * Raindrop credentials * Rapid7 InsightVM credentials * Recorded Future credentials * Reddit credentials * Redis credentials * Rocket.Chat credentials * Rundeck credentials * S3 credentials * Salesforce credentials * Salesmate credentials * SeaTable credentials * SecurityScorecard credentials * Segment credentials * Sekoia credentials * Send Email * Gmail * Outlook.com * Yahoo * SendGrid credentials * Sendy credentials * Sentry.io credentials * Serp credentials * ServiceNow credentials * seven credentials * Shopify credentials * Shuffler credentials * SIGNL4 credentials * Slack credentials * Snowflake credentials * SolarWinds IPAM credentials * SolarWinds Observability SaaS credentials * Splunk credentials * Spontit credentials * Spotify credentials * SSH credentials * Stackby credentials * Storyblok credentials * Strapi credentials * Strava credentials * Stripe credentials * Supabase credentials * SurveyMonkey credentials * SyncroMSP credentials * Sysdig credentials * Taiga credentials * Tapfiliate credentials * Telegram credentials * TheHive credentials * TheHive 5 credentials * TimescaleDB credentials * Todoist credentials * Toggl credentials * TOTP credentials * Travis CI credentials * Trellix ePO credentials * Trello credentials * Twake credentials * Twilio credentials * Twist credentials * Typeform credentials * Unleashed Software credentials * UpLead credentials * uProc credentials * UptimeRobot credentials * urlscan.io credentials * Venafi TLS Protect Cloud credentials * Venafi TLS Protect Datacenter credentials * Vero credentials * VirusTotal credentials * Vonage credentials * Webex by Cisco credentials * Webflow credentials * Webhook credentials * Wekan credentials * WhatsApp Business Cloud credentials * Wise credentials * Wolfram|Alpha credentials * WooCommerce credentials * WordPress credentials * Workable credentials * Wufoo credentials * X (formerly Twitter) credentials * Xata credentials * Xero credentials * Yourls credentials * Zabbix credentials * Zammad credentials * Zendesk credentials * Zep credentials * Zoho credentials * Zoom credentials * Zscaler ZIA credentials * Zulip credentials * Custom API actions for existing nodes * Handle rate limits * Community nodes Community nodes * Installation and management * GUI installation * Manual installation * Risks * Blocklist * Using community nodes * Troubleshooting * Building community nodes * Creating nodes Creating nodes * Overview * Plan your node * Choose a node type * Choose a node building style * Node UI design * Choose node file structure * Build your node * Set up your development environment * Tutorial: Build a declarative-style node * Tutorial: Build a programmatic-style node * Reference * Node UI elements * Code standards * Versioning * Choose node file structure * Base files * Structure * Standard parameters * Declarative-style parameters * Programmatic-style parameters * Programmatic-style execute method * Codex files * Credentials files * HTTP request helpers * Item linking * Test your node * Run your node locally * Node linter * Troubleshooting * Deploy your node * Submit community nodes * Install private nodes * Hosting n8n * Community vs Enterprise * Installation Installation * npm * Docker * Server setups * Digital Ocean * Heroku * Hetzner * Amazon Web Services * Azure * Google Cloud * Docker Compose * Updating * Configuration Configuration * Environment variables * Binary data * Credentials * Database * Deployment * Endpoints * Executions * External data storage * External hooks * External secrets * Logs * License * Nodes * Queue mode * Security * Source control * Task runners * Timezone and localization * User management and 2FA * Workflows * Configuration methods * Configuration examples * Isolate n8n * Configure the Base URL * Configure custom SSL certificate authorities * Set a custom encryption key * Configure workflow timeouts * Specify custom nodes location * Enable modules in Code node * Set the timezone * Specify user folder path * Configure webhook URLs with reverse proxy * Enable Prometheus metrics * Supported databases and settings * Task runners * User management * Logging and monitoring Logging and monitoring * Logging * Monitoring * Security audit * Scaling and performance Scaling and performance * Overview * Performance and benchmarking * Configuring queue mode * Concurrency control * Execution data * Binary data * External storage for binary data * Memory-related errors * Securing n8n Securing n8n * Overview * Set up SSL * Set up SSO * Security audit * Disable the API * Opt out of data collection * Blocking nodes * Hardening task runners * Starter Kits Starter Kits * AI Starter Kit * Architecture Architecture * Overview * Database structure * Using the CLI Using the CLI * CLI commands * Code in n8n * Expressions * Using the Code node * AI coding * Built in methods and variables Built in methods and variables * Overview * Current node input * Output of other nodes * Date and time * JMESPath * HTTP node * LangChain Code node * n8n metadata * Convenience methods * Data transformation functions * Arrays * Booleans * Dates * Numbers * Objects * Strings * Custom variables Custom variables * Create custom variables * Cookbook Cookbook * Handling dates * Query JSON with JMESPath * Built-in methods and variables examples * execution * getWorkflowStaticData * Retrieve linked items from earlier in the workflow * (node-name).all * vars * Expressions * Check incoming data * Common issues * Code node * Get number of items returned by last node * Get the binary data buffer * Output to the browser console * HTTP Request node * Pagination * Advanced AI * Tutorial: Build an AI workflow in n8n * LangChain in n8n LangChain in n8n * Overview * Langchain concepts in n8n * LangChain learning resources * Use LangSmith with n8n * Examples and concepts Examples and concepts * Introduction * What is a chain? * What is an agent? * Agents vs chains example * What is memory? * What is a tool? * Use Google Sheets as a data source * Call an API to fetch data * Set a human fallback for AI workflows * Let AI specify tool parameters * What is a vector database? * Populate a Pinecone vector database from a website * API * Authentication * Pagination * Using the API playground * API reference * Embed * Prerequisites * Deployment * Configuration * Workflow management * Workflows templates * White labelling 1. Integrations 2. Built-in nodes 3. Triggers Form.io is an enterprise class combined form and API data management platform for building complex form-based business process applications. Credentials You can find authentication information for this node here. --- ## Page: https://docs.n8n.io/integrations/builtin/trigger-nodes/n8n-nodes-base.formstacktrigger/ n8n Docs * Using n8n * Getting started Getting started * Learning path * Choose your n8n * Quickstarts * A very quick quickstart * A longer introduction * Video courses * Text courses * Level one * Navigating the editor UI * Building a mini-workflow * Automating a (real-world) use case * Designing the workflow * Building the workflow Building the workflow * Getting data from the data warehouse * Inserting data into airtable * Filtering orders * Setting values for processing orders * Calculating booked orders * Notifying the team * Scheduling the workflow * Activating and examining the workflow * Exporting and importing workflows * Test your knowledge * Level two * Understanding the data structure * Processing different data types * Merging and splitting data * Dealing with errors in workflows * Automating a business workflow Automating a business workflow * Use case * Workflow 1 * Workflow 2 * Workflow 3 * Test your knowledge * Using the app Using the app * Understand workflows * Create and run * Components * Nodes * Connections * Sticky Notes * Executions * Manual, partial, and production executions * Workflow-level executions * All executions * Custom executions data * Debug executions * Tags * Export and import * Templates * Sharing * Settings * Workflow history * Workflow ID * Manage credentials * Create and edit * Credential sharing * Manage users and access * Cloud setup * Manage users * Account types * Role-based access control * Role types * Projects * Best practices * 2FA * LDAP * SAML * Set up SAML * Okta Workforce Identity SAML setup * Troubleshooting * Manage users with SAML * Keyboard shortcuts * Key concepts Key concepts * Flow logic * Splitting with conditionals * Merging data * Looping * Waiting * Sub-workflows * Error handling * Execution order in multi-branch workflows * Data * Data structure * Data flow within nodes * Transforming data * Process data using code * Data mapping * Data mapping in the UI * Data mapping in the expressions editor * Data item linking * Item linking concepts * Item linking in the Code node * Item linking errors * Item linking for node creators * Data pinning * Data editing * Data filtering * Data mocking * Binary data * Schema preview * Glossary * n8n Cloud n8n Cloud * Overview * Access the Cloud admin dashboard * Update your n8n Cloud version * Set the timezone * Cloud IP addresses * Cloud data management * Change ownership or username * Concurrency * AI Assistant * Enterprise features Enterprise features * Source control and environments * Understand * Environments * Git in n8n * Branch patterns * Set up * Using * Push and pull * Copy work between environments * Manage variables * Tutorial: Create environments with source control * External secrets * Log streaming * License key * Releases Releases * Release notes Release notes * 1.x * 0.x * v1.0 migration guide * Help and community Help and community * Where to get help * Contributing * Licenses and privacy Licenses and privacy * Privacy and security * Privacy * Security * Incident response * What you can do * Sustainable use license * Integrations * Built-in nodes Built-in nodes * Node types * Core nodes * Activation Trigger * Aggregate * AI Transform * Code * Keyboard shortcuts * Common issues * Compare Datasets * Compression * Chat Trigger * Common issues * Convert to File * Crypto * Date & Time * Debug Helper * Edit Fields (Set) * Edit Image * Email Trigger (IMAP) * Error Trigger * Execute Command * Common issues * Execute Sub-workflow * Execute Sub-workflow Trigger * Execution Data * Extract From File * Filter * FTP * Git * GraphQL * HTML * HTTP Request * Common issues * If * JWT * LDAP * Limit * Local File Trigger * Loop Over Items (Split in Batches) * Manual Trigger * Markdown * MCP Server Trigger * Merge * n8n * n8n Form * n8n Form Trigger * n8n Trigger * No Operation, do nothing * Read/Write Files from Disk * Remove Duplicates * Templates and examples * Rename Keys * Respond to Webhook * RSS Read * RSS Feed Trigger * Schedule Trigger * Common issues * Send Email * Sort * Split Out * SSE Trigger * SSH * Stop And Error * Summarize * Switch * TOTP * Wait * Webhook * Workflow development * Common issues * Workflow Trigger * XML * Actions * Action Network * ActiveCampaign * Adalo * Affinity * Agile CRM * Airtable * Common issues * Airtop * AMQP Sender * APITemplate.io * Asana * Automizy * Autopilot * AWS Certificate Manager * AWS Comprehend * AWS DynamoDB * AWS Elastic Load Balancing * AWS Lambda * AWS Rekognition * AWS S3 * AWS SES * AWS SNS * AWS SQS * AWS Textract * AWS Transcribe * Azure Storage * BambooHR * Bannerbear * Baserow * Beeminder * Bitly * Bitwarden * Box * Brandfetch * Brevo * Bubble * Chargebee * CircleCI * Webex by Cisco * Clearbit * ClickUp * Clockify * Cloudflare * Cockpit * Coda * CoinGecko * Contentful * ConvertKit * Copper * Cortex * CrateDB * crowd.dev * Customer.io * DeepL * Demio * DHL * Discord * Common issues * Discourse * Disqus * Drift * Dropbox * Dropcontact * E-goi * Elasticsearch * Elastic Security * Emelia * ERPNext * Facebook Graph API * FileMaker * Flow * Freshdesk * Freshservice * Freshworks CRM * GetResponse * Ghost * GitHub * GitLab * Gmail * Draft operations * Label operations * Message operations * Thread operations * Common issues * Gong * Google Ads * Google Analytics * Google BigQuery * Google Books * Google Business Profile * Google Calendar * Calendar operations * Event operations * Google Chat * Google Cloud Firestore * Google Cloud Natural Language * Google Cloud Realtime Database * Google Cloud Storage * Google Contacts * Google Docs * Google Drive * File operations * File and folder operations * Folder operations * Shared drive operations * Common issues * Google Perspective * Google Sheets * Document operations * Sheet within Document operations * Common issues * Google Slides * Google Tasks * Google Translate * Google Workspace Admin * Gotify * GoToWebinar * Grafana * Grist * Hacker News * HaloPSA * Harvest * Help Scout * HighLevel * Home Assistant * HubSpot * Humantic AI * Hunter * Intercom * Invoice Ninja * Iterable * Jenkins * Jira Software * Kafka * Keap * Kitemaker * KoboToolbox * Lemlist * Line * Linear * LingvaNex * LinkedIn * LoneScale * Magento 2 * Mailcheck * Mailchimp * MailerLite * Mailgun * Mailjet * Mandrill * marketstack * Matrix * Mattermost * Mautic * Medium * MessageBird * Metabase * Microsoft Dynamics CRM * Microsoft Entra ID * Microsoft Excel 365 * Microsoft Graph Security * Microsoft OneDrive * Microsoft Outlook * Microsoft SQL * Microsoft Teams * Microsoft To Do * Mindee * MISP * Mocean * monday.com * MongoDB * Monica CRM * MQTT * MSG91 * MySQL * Common issues * Customer Datastore (n8n Training) * Customer Messenger (n8n Training) * NASA * Netlify * Netscaler ADC * Nextcloud * NocoDB * Notion * Common issues * npm * Odoo * Okta * One Simple API * Onfleet * OpenAI * Assistant operations * Audio operations * File operations * Image operations * Text operations * Common issues * OpenThesaurus * OpenWeatherMap * Oura * Paddle * PagerDuty * PayPal * Peekalink * PhantomBuster * Philips Hue * Pipedrive * Plivo * PostBin * Postgres * Common issues * PostHog * ProfitWell * Pushbullet * Pushcut * Pushover * QuestDB * Quick Base * QuickBooks Online * QuickChart * RabbitMQ * Raindrop * Reddit * Redis * Rocket.Chat * Rundeck * S3 * Salesforce * Salesmate * SeaTable * SecurityScorecard * Segment * SendGrid * Sendy * Sentry.io * ServiceNow * seven * Shopify * SIGNL4 * Slack * Snowflake * Splunk * Spontit * Spotify * Stackby * Storyblok * Strapi * Strava * Stripe * Supabase * Common issues * SyncroMSP * Taiga * Tapfiliate * Telegram * Chat operations * Callback operations * File operations * Message operations * Common issues * TheHive * TheHive 5 * TimescaleDB * Todoist * Travis CI * Trello * Twake * Twilio * Twist * Unleashed Software * UpLead * uProc * UptimeRobot * urlscan.io * Venafi TLS Protect Cloud * Venafi TLS Protect Datacenter * Vero * Vonage * Webflow * Wekan * WhatsApp Business Cloud * Common issues * Wise * WooCommerce * WordPress * X (Formerly Twitter) * Xero * Yourls * YouTube * Zammad * Zendesk * Zoho CRM * Zoom * Zulip * Triggers * ActiveCampaign Trigger * Acuity Scheduling Trigger * Affinity Trigger * Airtable Trigger * AMQP Trigger * Asana Trigger * Autopilot Trigger * AWS SNS Trigger * Bitbucket Trigger * Box Trigger * Brevo Trigger * Calendly Trigger * Cal Trigger * Chargebee Trigger * ClickUp Trigger * Clockify Trigger * ConvertKit Trigger * Copper Trigger * crowd.dev Trigger * Customer.io Trigger * Emelia Trigger * Eventbrite Trigger * Facebook Lead Ads Trigger * Facebook Trigger * Ad Account * Application * Certificate Transparency * Group * Instagram * Link * Page * Permissions * User * WhatsApp Business Account * Workplace Security * Figma Trigger (Beta) * Flow Trigger * Form.io Trigger * Formstack Trigger * GetResponse Trigger * GitHub Trigger * GitLab Trigger * Gmail Trigger * Poll Mode options * Common issues * Google Calendar Trigger * Google Drive Trigger * Common issues * Google Business Profile Trigger * Google Sheets Trigger * Common issues * Gumroad Trigger * Help Scout Trigger * Hubspot Trigger * Invoice Ninja Trigger * Jira Trigger * JotForm Trigger * Kafka Trigger * Keap Trigger * KoboToolbox Trigger * Lemlist Trigger * Linear Trigger * LoneScale Trigger * Mailchimp Trigger * MailerLite Trigger * Mailjet Trigger * Mautic Trigger * Microsoft OneDrive Trigger * Microsoft Outlook Trigger * MQTT Trigger * Netlify Trigger * Notion Trigger * Onfleet Trigger * PayPal Trigger * Pipedrive Trigger * Postgres Trigger * Postmark Trigger * Pushcut Trigger * RabbitMQ Trigger * Redis Trigger * Salesforce Trigger * SeaTable Trigger * Shopify Trigger * Slack Trigger * Strava Trigger * Stripe Trigger * SurveyMonkey Trigger * Taiga Trigger * Telegram Trigger * Common issues * TheHive 5 Trigger * TheHive Trigger * Toggl Trigger * Trello Trigger * Twilio Trigger * Typeform Trigger * Venafi TLS Protect Cloud Trigger * Webex by Cisco Trigger * Webflow Trigger * WhatsApp Trigger * Wise Trigger * WooCommerce Trigger * Workable Trigger * Wufoo Trigger * Zendesk Trigger * Cluster nodes * Root nodes * AI Agent * Conversational Agent * OpenAI Functions Agent * Plan and Execute Agent * ReAct Agent * SQL Agent * Tools Agent * Common issues * Basic LLM Chain * Question and Answer Chain * Common issues * Summarization Chain * Information Extractor * Text Classifier * Sentiment Analysis * LangChain Code * Simple Vector Store * Milvus Vector Store * MongoDB Atlas Vector Store * PGVector Vector Store * Pinecone Vector Store * Qdrant Vector Store * Supabase Vector Store * Zep Vector Store * Sub-nodes * Default Data Loader * GitHub Document Loader * Embeddings AWS Bedrock * Embeddings Azure OpenAI * Embeddings Cohere * Embeddings Google Gemini * Embeddings Google PaLM * Embeddings Google Vertex * Embeddings HuggingFace Inference * Embeddings Mistral Cloud * Embeddings Ollama * Embeddings OpenAI * Anthropic Chat Model * AWS Bedrock Chat Model * Azure OpenAI Chat Model * DeepSeek Chat Model * Google Gemini Chat Model * Google Vertex Chat Model * Groq Chat Model * Mistral Cloud Chat Model * Ollama Chat Model * Common issues * OpenAI Chat Model * Common issues * OpenRouter Chat Model * Cohere Model * Ollama Model * Common issues * Hugging Face Inference Model * Chat Memory Manager * Simple Memory * Common issues * Motorhead * MongoDB Chat Memory * Redis Chat Memory * Postgres Chat Memory * Xata * Zep * Auto-fixing Output Parser * Item List Output Parser * Structured Output Parser * Common issues * Contextual Compression Retriever * MultiQuery Retriever * Vector Store Retriever * Workflow Retriever * Character Text Splitter * Recursive Character Text Splitter * Token Splitter * Calculator * Custom Code Tool * HTTP Request Tool * MCP Client Tool * SerpApi (Google Search) * Think Tool * Vector Store Question Answer Tool * Wikipedia * Wolfram|Alpha * Custom n8n Workflow Tool * Credentials * Action Network credentials * ActiveCampaign credentials * Acuity Scheduling credentials * Adalo credentials * Affinity credentials * Agile CRM credentials * Airtable credentials * Airtop credentials * AlienVault credentials * AMQP credentials * Anthropic credentials * APITemplate.io credentials * Asana credentials * Auth0 Management credentials * Automizy credentials * Autopilot credentials * AWS credentials * Azure OpenAI credentials * Azure Storage credentials * BambooHR credentials * Bannerbear credentials * Baserow credentials * Beeminder credentials * Bitbucket credentials * Bitly credentials * Bitwarden credentials * Box credentials * Brandfetch credentials * Brevo credentials * Bubble credentials * Cal.com credentials * Calendly credentials * Carbon Black credentials * Chargebee credentials * CircleCI credentials * Cisco Meraki credentials * Cisco Secure Endpoint credentials * Cisco Umbrella credentials * Clearbit credentials * ClickUp credentials * Clockify credentials * Cloudflare credentials * Cockpit credentials * Coda credentials * Cohere credentials * Contentful credentials * ConvertAPI credentials * ConvertKit credentials * Copper credentials * Cortex credentials * CrateDB credentials * crowd.dev credentials * CrowdStrike credentials * Customer.io credentials * Datadog credentials * DeepL credentials * DeepSeek credentials * Demio credentials * DFIR-IRIS credentials * DHL credentials * Discord credentials * Discourse credentials * Disqus credentials * Drift credentials * Dropbox credentials * Dropcontact credentials * Dynatrace credentials * E-goi credentials * Elasticsearch credentials * Elastic Security credentials * Emelia credentials * ERPNext credentials * Eventbrite credentials * F5 Big-IP credentials * Facebook App credentials * Facebook Graph API credentials * Facebook Lead Ads credentials * Figma credentials * FileMaker credentials * Filescan credentials * Flow credentials * Form.io Trigger credentials * Formstack Trigger credentials * Fortinet FortiGate credentials * Freshdesk credentials * Freshservice credentials * Freshworks CRM credentials * FTP credentials * GetResponse credentials * Ghost credentials * Git credentials * GitHub credentials * GitLab credentials * Gong credentials * Google * Google OAuth2 single service * Google OAuth2 generic * Google Service Account * Google Gemini(PaLM) credentials * Gotify credentials * GoToWebinar credentials * Grafana credentials * Grist credentials * Groq credentials * Gumroad credentials * HaloPSA credentials * Harvest credentials * Help Scout credentials * HighLevel credentials * Home Assistant credentials * HTTP Request credentials * HubSpot credentials * Hugging Face credentials * Humantic AI credentials * Hunter credentials * Hybrid Analysis credentials * IMAP * Gmail * Outlook.com * Yahoo * Imperva WAF credentials * Intercom credentials * Invoice Ninja credentials * Iterable credentials * Jenkins credentials * Jira credentials * JotForm credentials * JWT credentials * Kafka credentials * Keap credentials * Kibana credentials * Kitemaker credentials * KoboToolbox credentials * LDAP credentials * Lemlist credentials * Line credentials * Linear credentials * LingvaNex credentials * LinkedIn credentials * LoneScale credentials * Magento 2 credentials * Mailcheck credentials * Mailchimp credentials * MailerLite credentials * Mailgun credentials * Mailjet credentials * Malcore credentials * Mandrill credentials * Marketstack credentials * Matrix credentials * Mattermost credentials * Mautic credentials * Medium credentials * MessageBird credentials * Metabase credentials * Microsoft credentials * Microsoft Azure Monitor credentials * Microsoft Entra ID credentials * Microsoft SQL credentials * Milvus credentials * Mindee credentials * Miro credentials * MISP credentials * Mist credentials * Mistral Cloud credentials * Mocean credentials * monday.com credentials * MongoDB credentials * Monica CRM credentials * Motorhead credentials * MQTT credentials * MSG91 credentials * MySQL credentials * NASA credentials * Netlify credentials * Netscaler ADC credentials * Nextcloud credentials * NocoDB credentials * Notion credentials * npm credentials * Odoo credentials * Okta credentials * Ollama credentials * One Simple API credentials * Onfleet credentials * OpenAI credentials * OpenCTI credentials * OpenRouter credentials * OpenWeatherMap credentials * Oura credentials * Paddle credentials * PagerDuty credentials * PayPal credentials * Peekalink credentials * PhantomBuster credentials * Philips Hue credentials * Pinecone credentials * Pipedrive credentials * Plivo credentials * Postgres credentials * PostHog credentials * Postmark credentials * ProfitWell credentials * Pushbullet credentials * Pushcut credentials * Pushover credentials * QRadar credentials * Qdrant credentials * Qualys credentials * QuestDB credentials * Quick Base credentials * QuickBooks credentials * RabbitMQ credentials * Raindrop credentials * Rapid7 InsightVM credentials * Recorded Future credentials * Reddit credentials * Redis credentials * Rocket.Chat credentials * Rundeck credentials * S3 credentials * Salesforce credentials * Salesmate credentials * SeaTable credentials * SecurityScorecard credentials * Segment credentials * Sekoia credentials * Send Email * Gmail * Outlook.com * Yahoo * SendGrid credentials * Sendy credentials * Sentry.io credentials * Serp credentials * ServiceNow credentials * seven credentials * Shopify credentials * Shuffler credentials * SIGNL4 credentials * Slack credentials * Snowflake credentials * SolarWinds IPAM credentials * SolarWinds Observability SaaS credentials * Splunk credentials * Spontit credentials * Spotify credentials * SSH credentials * Stackby credentials * Storyblok credentials * Strapi credentials * Strava credentials * Stripe credentials * Supabase credentials * SurveyMonkey credentials * SyncroMSP credentials * Sysdig credentials * Taiga credentials * Tapfiliate credentials * Telegram credentials * TheHive credentials * TheHive 5 credentials * TimescaleDB credentials * Todoist credentials * Toggl credentials * TOTP credentials * Travis CI credentials * Trellix ePO credentials * Trello credentials * Twake credentials * Twilio credentials * Twist credentials * Typeform credentials * Unleashed Software credentials * UpLead credentials * uProc credentials * UptimeRobot credentials * urlscan.io credentials * Venafi TLS Protect Cloud credentials * Venafi TLS Protect Datacenter credentials * Vero credentials * VirusTotal credentials * Vonage credentials * Webex by Cisco credentials * Webflow credentials * Webhook credentials * Wekan credentials * WhatsApp Business Cloud credentials * Wise credentials * Wolfram|Alpha credentials * WooCommerce credentials * WordPress credentials * Workable credentials * Wufoo credentials * X (formerly Twitter) credentials * Xata credentials * Xero credentials * Yourls credentials * Zabbix credentials * Zammad credentials * Zendesk credentials * Zep credentials * Zoho credentials * Zoom credentials * Zscaler ZIA credentials * Zulip credentials * Custom API actions for existing nodes * Handle rate limits * Community nodes Community nodes * Installation and management * GUI installation * Manual installation * Risks * Blocklist * Using community nodes * Troubleshooting * Building community nodes * Creating nodes Creating nodes * Overview * Plan your node * Choose a node type * Choose a node building style * Node UI design * Choose node file structure * Build your node * Set up your development environment * Tutorial: Build a declarative-style node * Tutorial: Build a programmatic-style node * Reference * Node UI elements * Code standards * Versioning * Choose node file structure * Base files * Structure * Standard parameters * Declarative-style parameters * Programmatic-style parameters * Programmatic-style execute method * Codex files * Credentials files * HTTP request helpers * Item linking * Test your node * Run your node locally * Node linter * Troubleshooting * Deploy your node * Submit community nodes * Install private nodes * Hosting n8n * Community vs Enterprise * Installation Installation * npm * Docker * Server setups * Digital Ocean * Heroku * Hetzner * Amazon Web Services * Azure * Google Cloud * Docker Compose * Updating * Configuration Configuration * Environment variables * Binary data * Credentials * Database * Deployment * Endpoints * Executions * External data storage * External hooks * External secrets * Logs * License * Nodes * Queue mode * Security * Source control * Task runners * Timezone and localization * User management and 2FA * Workflows * Configuration methods * Configuration examples * Isolate n8n * Configure the Base URL * Configure custom SSL certificate authorities * Set a custom encryption key * Configure workflow timeouts * Specify custom nodes location * Enable modules in Code node * Set the timezone * Specify user folder path * Configure webhook URLs with reverse proxy * Enable Prometheus metrics * Supported databases and settings * Task runners * User management * Logging and monitoring Logging and monitoring * Logging * Monitoring * Security audit * Scaling and performance Scaling and performance * Overview * Performance and benchmarking * Configuring queue mode * Concurrency control * Execution data * Binary data * External storage for binary data * Memory-related errors * Securing n8n Securing n8n * Overview * Set up SSL * Set up SSO * Security audit * Disable the API * Opt out of data collection * Blocking nodes * Hardening task runners * Starter Kits Starter Kits * AI Starter Kit * Architecture Architecture * Overview * Database structure * Using the CLI Using the CLI * CLI commands * Code in n8n * Expressions * Using the Code node * AI coding * Built in methods and variables Built in methods and variables * Overview * Current node input * Output of other nodes * Date and time * JMESPath * HTTP node * LangChain Code node * n8n metadata * Convenience methods * Data transformation functions * Arrays * Booleans * Dates * Numbers * Objects * Strings * Custom variables Custom variables * Create custom variables * Cookbook Cookbook * Handling dates * Query JSON with JMESPath * Built-in methods and variables examples * execution * getWorkflowStaticData * Retrieve linked items from earlier in the workflow * (node-name).all * vars * Expressions * Check incoming data * Common issues * Code node * Get number of items returned by last node * Get the binary data buffer * Output to the browser console * HTTP Request node * Pagination * Advanced AI * Tutorial: Build an AI workflow in n8n * LangChain in n8n LangChain in n8n * Overview * Langchain concepts in n8n * LangChain learning resources * Use LangSmith with n8n * Examples and concepts Examples and concepts * Introduction * What is a chain? * What is an agent? * Agents vs chains example * What is memory? * What is a tool? * Use Google Sheets as a data source * Call an API to fetch data * Set a human fallback for AI workflows * Let AI specify tool parameters * What is a vector database? * Populate a Pinecone vector database from a website * API * Authentication * Pagination * Using the API playground * API reference * Embed * Prerequisites * Deployment * Configuration * Workflow management * Workflows templates * White labelling 1. Integrations 2. Built-in nodes 3. Triggers Formstack is a workplace productivity platform that helps organizations streamline digital work through no-code online forms, documents, and signatures. Credentials You can find authentication information for this node here. --- ## Page: https://docs.n8n.io/integrations/builtin/trigger-nodes/n8n-nodes-base.getresponsetrigger/ n8n Docs * Using n8n * Getting started Getting started * Learning path * Choose your n8n * Quickstarts * A very quick quickstart * A longer introduction * Video courses * Text courses * Level one * Navigating the editor UI * Building a mini-workflow * Automating a (real-world) use case * Designing the workflow * Building the workflow Building the workflow * Getting data from the data warehouse * Inserting data into airtable * Filtering orders * Setting values for processing orders * Calculating booked orders * Notifying the team * Scheduling the workflow * Activating and examining the workflow * Exporting and importing workflows * Test your knowledge * Level two * Understanding the data structure * Processing different data types * Merging and splitting data * Dealing with errors in workflows * Automating a business workflow Automating a business workflow * Use case * Workflow 1 * Workflow 2 * Workflow 3 * Test your knowledge * Using the app Using the app * Understand workflows * Create and run * Components * Nodes * Connections * Sticky Notes * Executions * Manual, partial, and production executions * Workflow-level executions * All executions * Custom executions data * Debug executions * Tags * Export and import * Templates * Sharing * Settings * Workflow history * Workflow ID * Manage credentials * Create and edit * Credential sharing * Manage users and access * Cloud setup * Manage users * Account types * Role-based access control * Role types * Projects * Best practices * 2FA * LDAP * SAML * Set up SAML * Okta Workforce Identity SAML setup * Troubleshooting * Manage users with SAML * Keyboard shortcuts * Key concepts Key concepts * Flow logic * Splitting with conditionals * Merging data * Looping * Waiting * Sub-workflows * Error handling * Execution order in multi-branch workflows * Data * Data structure * Data flow within nodes * Transforming data * Process data using code * Data mapping * Data mapping in the UI * Data mapping in the expressions editor * Data item linking * Item linking concepts * Item linking in the Code node * Item linking errors * Item linking for node creators * Data pinning * Data editing * Data filtering * Data mocking * Binary data * Schema preview * Glossary * n8n Cloud n8n Cloud * Overview * Access the Cloud admin dashboard * Update your n8n Cloud version * Set the timezone * Cloud IP addresses * Cloud data management * Change ownership or username * Concurrency * AI Assistant * Enterprise features Enterprise features * Source control and environments * Understand * Environments * Git in n8n * Branch patterns * Set up * Using * Push and pull * Copy work between environments * Manage variables * Tutorial: Create environments with source control * External secrets * Log streaming * License key * Releases Releases * Release notes Release notes * 1.x * 0.x * v1.0 migration guide * Help and community Help and community * Where to get help * Contributing * Licenses and privacy Licenses and privacy * Privacy and security * Privacy * Security * Incident response * What you can do * Sustainable use license * Integrations * Built-in nodes Built-in nodes * Node types * Core nodes * Activation Trigger * Aggregate * AI Transform * Code * Keyboard shortcuts * Common issues * Compare Datasets * Compression * Chat Trigger * Common issues * Convert to File * Crypto * Date & Time * Debug Helper * Edit Fields (Set) * Edit Image * Email Trigger (IMAP) * Error Trigger * Execute Command * Common issues * Execute Sub-workflow * Execute Sub-workflow Trigger * Execution Data * Extract From File * Filter * FTP * Git * GraphQL * HTML * HTTP Request * Common issues * If * JWT * LDAP * Limit * Local File Trigger * Loop Over Items (Split in Batches) * Manual Trigger * Markdown * MCP Server Trigger * Merge * n8n * n8n Form * n8n Form Trigger * n8n Trigger * No Operation, do nothing * Read/Write Files from Disk * Remove Duplicates * Templates and examples * Rename Keys * Respond to Webhook * RSS Read * RSS Feed Trigger * Schedule Trigger * Common issues * Send Email * Sort * Split Out * SSE Trigger * SSH * Stop And Error * Summarize * Switch * TOTP * Wait * Webhook * Workflow development * Common issues * Workflow Trigger * XML * Actions * Action Network * ActiveCampaign * Adalo * Affinity * Agile CRM * Airtable * Common issues * Airtop * AMQP Sender * APITemplate.io * Asana * Automizy * Autopilot * AWS Certificate Manager * AWS Comprehend * AWS DynamoDB * AWS Elastic Load Balancing * AWS Lambda * AWS Rekognition * AWS S3 * AWS SES * AWS SNS * AWS SQS * AWS Textract * AWS Transcribe * Azure Storage * BambooHR * Bannerbear * Baserow * Beeminder * Bitly * Bitwarden * Box * Brandfetch * Brevo * Bubble * Chargebee * CircleCI * Webex by Cisco * Clearbit * ClickUp * Clockify * Cloudflare * Cockpit * Coda * CoinGecko * Contentful * ConvertKit * Copper * Cortex * CrateDB * crowd.dev * Customer.io * DeepL * Demio * DHL * Discord * Common issues * Discourse * Disqus * Drift * Dropbox * Dropcontact * E-goi * Elasticsearch * Elastic Security * Emelia * ERPNext * Facebook Graph API * FileMaker * Flow * Freshdesk * Freshservice * Freshworks CRM * GetResponse * Ghost * GitHub * GitLab * Gmail * Draft operations * Label operations * Message operations * Thread operations * Common issues * Gong * Google Ads * Google Analytics * Google BigQuery * Google Books * Google Business Profile * Google Calendar * Calendar operations * Event operations * Google Chat * Google Cloud Firestore * Google Cloud Natural Language * Google Cloud Realtime Database * Google Cloud Storage * Google Contacts * Google Docs * Google Drive * File operations * File and folder operations * Folder operations * Shared drive operations * Common issues * Google Perspective * Google Sheets * Document operations * Sheet within Document operations * Common issues * Google Slides * Google Tasks * Google Translate * Google Workspace Admin * Gotify * GoToWebinar * Grafana * Grist * Hacker News * HaloPSA * Harvest * Help Scout * HighLevel * Home Assistant * HubSpot * Humantic AI * Hunter * Intercom * Invoice Ninja * Iterable * Jenkins * Jira Software * Kafka * Keap * Kitemaker * KoboToolbox * Lemlist * Line * Linear * LingvaNex * LinkedIn * LoneScale * Magento 2 * Mailcheck * Mailchimp * MailerLite * Mailgun * Mailjet * Mandrill * marketstack * Matrix * Mattermost * Mautic * Medium * MessageBird * Metabase * Microsoft Dynamics CRM * Microsoft Entra ID * Microsoft Excel 365 * Microsoft Graph Security * Microsoft OneDrive * Microsoft Outlook * Microsoft SQL * Microsoft Teams * Microsoft To Do * Mindee * MISP * Mocean * monday.com * MongoDB * Monica CRM * MQTT * MSG91 * MySQL * Common issues * Customer Datastore (n8n Training) * Customer Messenger (n8n Training) * NASA * Netlify * Netscaler ADC * Nextcloud * NocoDB * Notion * Common issues * npm * Odoo * Okta * One Simple API * Onfleet * OpenAI * Assistant operations * Audio operations * File operations * Image operations * Text operations * Common issues * OpenThesaurus * OpenWeatherMap * Oura * Paddle * PagerDuty * PayPal * Peekalink * PhantomBuster * Philips Hue * Pipedrive * Plivo * PostBin * Postgres * Common issues * PostHog * ProfitWell * Pushbullet * Pushcut * Pushover * QuestDB * Quick Base * QuickBooks Online * QuickChart * RabbitMQ * Raindrop * Reddit * Redis * Rocket.Chat * Rundeck * S3 * Salesforce * Salesmate * SeaTable * SecurityScorecard * Segment * SendGrid * Sendy * Sentry.io * ServiceNow * seven * Shopify * SIGNL4 * Slack * Snowflake * Splunk * Spontit * Spotify * Stackby * Storyblok * Strapi * Strava * Stripe * Supabase * Common issues * SyncroMSP * Taiga * Tapfiliate * Telegram * Chat operations * Callback operations * File operations * Message operations * Common issues * TheHive * TheHive 5 * TimescaleDB * Todoist * Travis CI * Trello * Twake * Twilio * Twist * Unleashed Software * UpLead * uProc * UptimeRobot * urlscan.io * Venafi TLS Protect Cloud * Venafi TLS Protect Datacenter * Vero * Vonage * Webflow * Wekan * WhatsApp Business Cloud * Common issues * Wise * WooCommerce * WordPress * X (Formerly Twitter) * Xero * Yourls * YouTube * Zammad * Zendesk * Zoho CRM * Zoom * Zulip * Triggers * ActiveCampaign Trigger * Acuity Scheduling Trigger * Affinity Trigger * Airtable Trigger * AMQP Trigger * Asana Trigger * Autopilot Trigger * AWS SNS Trigger * Bitbucket Trigger * Box Trigger * Brevo Trigger * Calendly Trigger * Cal Trigger * Chargebee Trigger * ClickUp Trigger * Clockify Trigger * ConvertKit Trigger * Copper Trigger * crowd.dev Trigger * Customer.io Trigger * Emelia Trigger * Eventbrite Trigger * Facebook Lead Ads Trigger * Facebook Trigger * Ad Account * Application * Certificate Transparency * Group * Instagram * Link * Page * Permissions * User * WhatsApp Business Account * Workplace Security * Figma Trigger (Beta) * Flow Trigger * Form.io Trigger * Formstack Trigger * GetResponse Trigger GetResponse Trigger Table of contents * Events * GitHub Trigger * GitLab Trigger * Gmail Trigger * Poll Mode options * Common issues * Google Calendar Trigger * Google Drive Trigger * Common issues * Google Business Profile Trigger * Google Sheets Trigger * Common issues * Gumroad Trigger * Help Scout Trigger * Hubspot Trigger * Invoice Ninja Trigger * Jira Trigger * JotForm Trigger * Kafka Trigger * Keap Trigger * KoboToolbox Trigger * Lemlist Trigger * Linear Trigger * LoneScale Trigger * Mailchimp Trigger * MailerLite Trigger * Mailjet Trigger * Mautic Trigger * Microsoft OneDrive Trigger * Microsoft Outlook Trigger * MQTT Trigger * Netlify Trigger * Notion Trigger * Onfleet Trigger * PayPal Trigger * Pipedrive Trigger * Postgres Trigger * Postmark Trigger * Pushcut Trigger * RabbitMQ Trigger * Redis Trigger * Salesforce Trigger * SeaTable Trigger * Shopify Trigger * Slack Trigger * Strava Trigger * Stripe Trigger * SurveyMonkey Trigger * Taiga Trigger * Telegram Trigger * Common issues * TheHive 5 Trigger * TheHive Trigger * Toggl Trigger * Trello Trigger * Twilio Trigger * Typeform Trigger * Venafi TLS Protect Cloud Trigger * Webex by Cisco Trigger * Webflow Trigger * WhatsApp Trigger * Wise Trigger * WooCommerce Trigger * Workable Trigger * Wufoo Trigger * Zendesk Trigger * Cluster nodes * Root nodes * AI Agent * Conversational Agent * OpenAI Functions Agent * Plan and Execute Agent * ReAct Agent * SQL Agent * Tools Agent * Common issues * Basic LLM Chain * Question and Answer Chain * Common issues * Summarization Chain * Information Extractor * Text Classifier * Sentiment Analysis * LangChain Code * Simple Vector Store * Milvus Vector Store * MongoDB Atlas Vector Store * PGVector Vector Store * Pinecone Vector Store * Qdrant Vector Store * Supabase Vector Store * Zep Vector Store * Sub-nodes * Default Data Loader * GitHub Document Loader * Embeddings AWS Bedrock * Embeddings Azure OpenAI * Embeddings Cohere * Embeddings Google Gemini * Embeddings Google PaLM * Embeddings Google Vertex * Embeddings HuggingFace Inference * Embeddings Mistral Cloud * Embeddings Ollama * Embeddings OpenAI * Anthropic Chat Model * AWS Bedrock Chat Model * Azure OpenAI Chat Model * DeepSeek Chat Model * Google Gemini Chat Model * Google Vertex Chat Model * Groq Chat Model * Mistral Cloud Chat Model * Ollama Chat Model * Common issues * OpenAI Chat Model * Common issues * OpenRouter Chat Model * Cohere Model * Ollama Model * Common issues * Hugging Face Inference Model * Chat Memory Manager * Simple Memory * Common issues * Motorhead * MongoDB Chat Memory * Redis Chat Memory * Postgres Chat Memory * Xata * Zep * Auto-fixing Output Parser * Item List Output Parser * Structured Output Parser * Common issues * Contextual Compression Retriever * MultiQuery Retriever * Vector Store Retriever * Workflow Retriever * Character Text Splitter * Recursive Character Text Splitter * Token Splitter * Calculator * Custom Code Tool * HTTP Request Tool * MCP Client Tool * SerpApi (Google Search) * Think Tool * Vector Store Question Answer Tool * Wikipedia * Wolfram|Alpha * Custom n8n Workflow Tool * Credentials * Action Network credentials * ActiveCampaign credentials * Acuity Scheduling credentials * Adalo credentials * Affinity credentials * Agile CRM credentials * Airtable credentials * Airtop credentials * AlienVault credentials * AMQP credentials * Anthropic credentials * APITemplate.io credentials * Asana credentials * Auth0 Management credentials * Automizy credentials * Autopilot credentials * AWS credentials * Azure OpenAI credentials * Azure Storage credentials * BambooHR credentials * Bannerbear credentials * Baserow credentials * Beeminder credentials * Bitbucket credentials * Bitly credentials * Bitwarden credentials * Box credentials * Brandfetch credentials * Brevo credentials * Bubble credentials * Cal.com credentials * Calendly credentials * Carbon Black credentials * Chargebee credentials * CircleCI credentials * Cisco Meraki credentials * Cisco Secure Endpoint credentials * Cisco Umbrella credentials * Clearbit credentials * ClickUp credentials * Clockify credentials * Cloudflare credentials * Cockpit credentials * Coda credentials * Cohere credentials * Contentful credentials * ConvertAPI credentials * ConvertKit credentials * Copper credentials * Cortex credentials * CrateDB credentials * crowd.dev credentials * CrowdStrike credentials * Customer.io credentials * Datadog credentials * DeepL credentials * DeepSeek credentials * Demio credentials * DFIR-IRIS credentials * DHL credentials * Discord credentials * Discourse credentials * Disqus credentials * Drift credentials * Dropbox credentials * Dropcontact credentials * Dynatrace credentials * E-goi credentials * Elasticsearch credentials * Elastic Security credentials * Emelia credentials * ERPNext credentials * Eventbrite credentials * F5 Big-IP credentials * Facebook App credentials * Facebook Graph API credentials * Facebook Lead Ads credentials * Figma credentials * FileMaker credentials * Filescan credentials * Flow credentials * Form.io Trigger credentials * Formstack Trigger credentials * Fortinet FortiGate credentials * Freshdesk credentials * Freshservice credentials * Freshworks CRM credentials * FTP credentials * GetResponse credentials * Ghost credentials * Git credentials * GitHub credentials * GitLab credentials * Gong credentials * Google * Google OAuth2 single service * Google OAuth2 generic * Google Service Account * Google Gemini(PaLM) credentials * Gotify credentials * GoToWebinar credentials * Grafana credentials * Grist credentials * Groq credentials * Gumroad credentials * HaloPSA credentials * Harvest credentials * Help Scout credentials * HighLevel credentials * Home Assistant credentials * HTTP Request credentials * HubSpot credentials * Hugging Face credentials * Humantic AI credentials * Hunter credentials * Hybrid Analysis credentials * IMAP * Gmail * Outlook.com * Yahoo * Imperva WAF credentials * Intercom credentials * Invoice Ninja credentials * Iterable credentials * Jenkins credentials * Jira credentials * JotForm credentials * JWT credentials * Kafka credentials * Keap credentials * Kibana credentials * Kitemaker credentials * KoboToolbox credentials * LDAP credentials * Lemlist credentials * Line credentials * Linear credentials * LingvaNex credentials * LinkedIn credentials * LoneScale credentials * Magento 2 credentials * Mailcheck credentials * Mailchimp credentials * MailerLite credentials * Mailgun credentials * Mailjet credentials * Malcore credentials * Mandrill credentials * Marketstack credentials * Matrix credentials * Mattermost credentials * Mautic credentials * Medium credentials * MessageBird credentials * Metabase credentials * Microsoft credentials * Microsoft Azure Monitor credentials * Microsoft Entra ID credentials * Microsoft SQL credentials * Milvus credentials * Mindee credentials * Miro credentials * MISP credentials * Mist credentials * Mistral Cloud credentials * Mocean credentials * monday.com credentials * MongoDB credentials * Monica CRM credentials * Motorhead credentials * MQTT credentials * MSG91 credentials * MySQL credentials * NASA credentials * Netlify credentials * Netscaler ADC credentials * Nextcloud credentials * NocoDB credentials * Notion credentials * npm credentials * Odoo credentials * Okta credentials * Ollama credentials * One Simple API credentials * Onfleet credentials * OpenAI credentials * OpenCTI credentials * OpenRouter credentials * OpenWeatherMap credentials * Oura credentials * Paddle credentials * PagerDuty credentials * PayPal credentials * Peekalink credentials * PhantomBuster credentials * Philips Hue credentials * Pinecone credentials * Pipedrive credentials * Plivo credentials * Postgres credentials * PostHog credentials * Postmark credentials * ProfitWell credentials * Pushbullet credentials * Pushcut credentials * Pushover credentials * QRadar credentials * Qdrant credentials * Qualys credentials * QuestDB credentials * Quick Base credentials * QuickBooks credentials * RabbitMQ credentials * Raindrop credentials * Rapid7 InsightVM credentials * Recorded Future credentials * Reddit credentials * Redis credentials * Rocket.Chat credentials * Rundeck credentials * S3 credentials * Salesforce credentials * Salesmate credentials * SeaTable credentials * SecurityScorecard credentials * Segment credentials * Sekoia credentials * Send Email * Gmail * Outlook.com * Yahoo * SendGrid credentials * Sendy credentials * Sentry.io credentials * Serp credentials * ServiceNow credentials * seven credentials * Shopify credentials * Shuffler credentials * SIGNL4 credentials * Slack credentials * Snowflake credentials * SolarWinds IPAM credentials * SolarWinds Observability SaaS credentials * Splunk credentials * Spontit credentials * Spotify credentials * SSH credentials * Stackby credentials * Storyblok credentials * Strapi credentials * Strava credentials * Stripe credentials * Supabase credentials * SurveyMonkey credentials * SyncroMSP credentials * Sysdig credentials * Taiga credentials * Tapfiliate credentials * Telegram credentials * TheHive credentials * TheHive 5 credentials * TimescaleDB credentials * Todoist credentials * Toggl credentials * TOTP credentials * Travis CI credentials * Trellix ePO credentials * Trello credentials * Twake credentials * Twilio credentials * Twist credentials * Typeform credentials * Unleashed Software credentials * UpLead credentials * uProc credentials * UptimeRobot credentials * urlscan.io credentials * Venafi TLS Protect Cloud credentials * Venafi TLS Protect Datacenter credentials * Vero credentials * VirusTotal credentials * Vonage credentials * Webex by Cisco credentials * Webflow credentials * Webhook credentials * Wekan credentials * WhatsApp Business Cloud credentials * Wise credentials * Wolfram|Alpha credentials * WooCommerce credentials * WordPress credentials * Workable credentials * Wufoo credentials * X (formerly Twitter) credentials * Xata credentials * Xero credentials * Yourls credentials * Zabbix credentials * Zammad credentials * Zendesk credentials * Zep credentials * Zoho credentials * Zoom credentials * Zscaler ZIA credentials * Zulip credentials * Custom API actions for existing nodes * Handle rate limits * Community nodes Community nodes * Installation and management * GUI installation * Manual installation * Risks * Blocklist * Using community nodes * Troubleshooting * Building community nodes * Creating nodes Creating nodes * Overview * Plan your node * Choose a node type * Choose a node building style * Node UI design * Choose node file structure * Build your node * Set up your development environment * Tutorial: Build a declarative-style node * Tutorial: Build a programmatic-style node * Reference * Node UI elements * Code standards * Versioning * Choose node file structure * Base files * Structure * Standard parameters * Declarative-style parameters * Programmatic-style parameters * Programmatic-style execute method * Codex files * Credentials files * HTTP request helpers * Item linking * Test your node * Run your node locally * Node linter * Troubleshooting * Deploy your node * Submit community nodes * Install private nodes * Hosting n8n * Community vs Enterprise * Installation Installation * npm * Docker * Server setups * Digital Ocean * Heroku * Hetzner * Amazon Web Services * Azure * Google Cloud * Docker Compose * Updating * Configuration Configuration * Environment variables * Binary data * Credentials * Database * Deployment * Endpoints * Executions * External data storage * External hooks * External secrets * Logs * License * Nodes * Queue mode * Security * Source control * Task runners * Timezone and localization * User management and 2FA * Workflows * Configuration methods * Configuration examples * Isolate n8n * Configure the Base URL * Configure custom SSL certificate authorities * Set a custom encryption key * Configure workflow timeouts * Specify custom nodes location * Enable modules in Code node * Set the timezone * Specify user folder path * Configure webhook URLs with reverse proxy * Enable Prometheus metrics * Supported databases and settings * Task runners * User management * Logging and monitoring Logging and monitoring * Logging * Monitoring * Security audit * Scaling and performance Scaling and performance * Overview * Performance and benchmarking * Configuring queue mode * Concurrency control * Execution data * Binary data * External storage for binary data * Memory-related errors * Securing n8n Securing n8n * Overview * Set up SSL * Set up SSO * Security audit * Disable the API * Opt out of data collection * Blocking nodes * Hardening task runners * Starter Kits Starter Kits * AI Starter Kit * Architecture Architecture * Overview * Database structure * Using the CLI Using the CLI * CLI commands * Code in n8n * Expressions * Using the Code node * AI coding * Built in methods and variables Built in methods and variables * Overview * Current node input * Output of other nodes * Date and time * JMESPath * HTTP node * LangChain Code node * n8n metadata * Convenience methods * Data transformation functions * Arrays * Booleans * Dates * Numbers * Objects * Strings * Custom variables Custom variables * Create custom variables * Cookbook Cookbook * Handling dates * Query JSON with JMESPath * Built-in methods and variables examples * execution * getWorkflowStaticData * Retrieve linked items from earlier in the workflow * (node-name).all * vars * Expressions * Check incoming data * Common issues * Code node * Get number of items returned by last node * Get the binary data buffer * Output to the browser console * HTTP Request node * Pagination * Advanced AI * Tutorial: Build an AI workflow in n8n * LangChain in n8n LangChain in n8n * Overview * Langchain concepts in n8n * LangChain learning resources * Use LangSmith with n8n * Examples and concepts Examples and concepts * Introduction * What is a chain? * What is an agent? * Agents vs chains example * What is memory? * What is a tool? * Use Google Sheets as a data source * Call an API to fetch data * Set a human fallback for AI workflows * Let AI specify tool parameters * What is a vector database? * Populate a Pinecone vector database from a website * API * Authentication * Pagination * Using the API playground * API reference * Embed * Prerequisites * Deployment * Configuration * Workflow management * Workflows templates * White labelling 1. Integrations 2. Built-in nodes 3. Triggers GetResponse is an online platform that offers email marketing software, landing page creator, webinar hosting, and much more. Credentials You can find authentication information for this node here. ## Events# * Receive notifications when a customer is subscribed to a list * Receive notifications when a customer is unsubscribed from a list * Receive notifications when an email is opened * Receive notifications when an email is clicked * Receive notifications when a survey is submitted --- ## Page: https://docs.n8n.io/integrations/builtin/trigger-nodes/n8n-nodes-base.githubtrigger/ GitHub provides hosting for software development and version control using Git. It offers the distributed version control and source code management (SCM) functionality of Git, access control and several collaboration features such as bug tracking, feature requests, task management, and wikis for every project. Credentials You can find authentication information for this node here. Examples and templates For usage examples and templates to help you get started, refer to n8n's GitHub Trigger integrations page. --- ## Page: https://docs.n8n.io/integrations/builtin/trigger-nodes/n8n-nodes-base.gitlabtrigger/ n8n Docs * Using n8n * Getting started Getting started * Learning path * Choose your n8n * Quickstarts * A very quick quickstart * A longer introduction * Video courses * Text courses * Level one * Navigating the editor UI * Building a mini-workflow * Automating a (real-world) use case * Designing the workflow * Building the workflow Building the workflow * Getting data from the data warehouse * Inserting data into airtable * Filtering orders * Setting values for processing orders * Calculating booked orders * Notifying the team * Scheduling the workflow * Activating and examining the workflow * Exporting and importing workflows * Test your knowledge * Level two * Understanding the data structure * Processing different data types * Merging and splitting data * Dealing with errors in workflows * Automating a business workflow Automating a business workflow * Use case * Workflow 1 * Workflow 2 * Workflow 3 * Test your knowledge * Using the app Using the app * Understand workflows * Create and run * Components * Nodes * Connections * Sticky Notes * Executions * Manual, partial, and production executions * Workflow-level executions * All executions * Custom executions data * Debug executions * Tags * Export and import * Templates * Sharing * Settings * Workflow history * Workflow ID * Manage credentials * Create and edit * Credential sharing * Manage users and access * Cloud setup * Manage users * Account types * Role-based access control * Role types * Projects * Best practices * 2FA * LDAP * SAML * Set up SAML * Okta Workforce Identity SAML setup * Troubleshooting * Manage users with SAML * Keyboard shortcuts * Key concepts Key concepts * Flow logic * Splitting with conditionals * Merging data * Looping * Waiting * Sub-workflows * Error handling * Execution order in multi-branch workflows * Data * Data structure * Data flow within nodes * Transforming data * Process data using code * Data mapping * Data mapping in the UI * Data mapping in the expressions editor * Data item linking * Item linking concepts * Item linking in the Code node * Item linking errors * Item linking for node creators * Data pinning * Data editing * Data filtering * Data mocking * Binary data * Schema preview * Glossary * n8n Cloud n8n Cloud * Overview * Access the Cloud admin dashboard * Update your n8n Cloud version * Set the timezone * Cloud IP addresses * Cloud data management * Change ownership or username * Concurrency * AI Assistant * Enterprise features Enterprise features * Source control and environments * Understand * Environments * Git in n8n * Branch patterns * Set up * Using * Push and pull * Copy work between environments * Manage variables * Tutorial: Create environments with source control * External secrets * Log streaming * License key * Releases Releases * Release notes Release notes * 1.x * 0.x * v1.0 migration guide * Help and community Help and community * Where to get help * Contributing * Licenses and privacy Licenses and privacy * Privacy and security * Privacy * Security * Incident response * What you can do * Sustainable use license * Integrations * Built-in nodes Built-in nodes * Node types * Core nodes * Activation Trigger * Aggregate * AI Transform * Code * Keyboard shortcuts * Common issues * Compare Datasets * Compression * Chat Trigger * Common issues * Convert to File * Crypto * Date & Time * Debug Helper * Edit Fields (Set) * Edit Image * Email Trigger (IMAP) * Error Trigger * Execute Command * Common issues * Execute Sub-workflow * Execute Sub-workflow Trigger * Execution Data * Extract From File * Filter * FTP * Git * GraphQL * HTML * HTTP Request * Common issues * If * JWT * LDAP * Limit * Local File Trigger * Loop Over Items (Split in Batches) * Manual Trigger * Markdown * MCP Server Trigger * Merge * n8n * n8n Form * n8n Form Trigger * n8n Trigger * No Operation, do nothing * Read/Write Files from Disk * Remove Duplicates * Templates and examples * Rename Keys * Respond to Webhook * RSS Read * RSS Feed Trigger * Schedule Trigger * Common issues * Send Email * Sort * Split Out * SSE Trigger * SSH * Stop And Error * Summarize * Switch * TOTP * Wait * Webhook * Workflow development * Common issues * Workflow Trigger * XML * Actions * Action Network * ActiveCampaign * Adalo * Affinity * Agile CRM * Airtable * Common issues * Airtop * AMQP Sender * APITemplate.io * Asana * Automizy * Autopilot * AWS Certificate Manager * AWS Comprehend * AWS DynamoDB * AWS Elastic Load Balancing * AWS Lambda * AWS Rekognition * AWS S3 * AWS SES * AWS SNS * AWS SQS * AWS Textract * AWS Transcribe * Azure Storage * BambooHR * Bannerbear * Baserow * Beeminder * Bitly * Bitwarden * Box * Brandfetch * Brevo * Bubble * Chargebee * CircleCI * Webex by Cisco * Clearbit * ClickUp * Clockify * Cloudflare * Cockpit * Coda * CoinGecko * Contentful * ConvertKit * Copper * Cortex * CrateDB * crowd.dev * Customer.io * DeepL * Demio * DHL * Discord * Common issues * Discourse * Disqus * Drift * Dropbox * Dropcontact * E-goi * Elasticsearch * Elastic Security * Emelia * ERPNext * Facebook Graph API * FileMaker * Flow * Freshdesk * Freshservice * Freshworks CRM * GetResponse * Ghost * GitHub * GitLab * Gmail * Draft operations * Label operations * Message operations * Thread operations * Common issues * Gong * Google Ads * Google Analytics * Google BigQuery * Google Books * Google Business Profile * Google Calendar * Calendar operations * Event operations * Google Chat * Google Cloud Firestore * Google Cloud Natural Language * Google Cloud Realtime Database * Google Cloud Storage * Google Contacts * Google Docs * Google Drive * File operations * File and folder operations * Folder operations * Shared drive operations * Common issues * Google Perspective * Google Sheets * Document operations * Sheet within Document operations * Common issues * Google Slides * Google Tasks * Google Translate * Google Workspace Admin * Gotify * GoToWebinar * Grafana * Grist * Hacker News * HaloPSA * Harvest * Help Scout * HighLevel * Home Assistant * HubSpot * Humantic AI * Hunter * Intercom * Invoice Ninja * Iterable * Jenkins * Jira Software * Kafka * Keap * Kitemaker * KoboToolbox * Lemlist * Line * Linear * LingvaNex * LinkedIn * LoneScale * Magento 2 * Mailcheck * Mailchimp * MailerLite * Mailgun * Mailjet * Mandrill * marketstack * Matrix * Mattermost * Mautic * Medium * MessageBird * Metabase * Microsoft Dynamics CRM * Microsoft Entra ID * Microsoft Excel 365 * Microsoft Graph Security * Microsoft OneDrive * Microsoft Outlook * Microsoft SQL * Microsoft Teams * Microsoft To Do * Mindee * MISP * Mocean * monday.com * MongoDB * Monica CRM * MQTT * MSG91 * MySQL * Common issues * Customer Datastore (n8n Training) * Customer Messenger (n8n Training) * NASA * Netlify * Netscaler ADC * Nextcloud * NocoDB * Notion * Common issues * npm * Odoo * Okta * One Simple API * Onfleet * OpenAI * Assistant operations * Audio operations * File operations * Image operations * Text operations * Common issues * OpenThesaurus * OpenWeatherMap * Oura * Paddle * PagerDuty * PayPal * Peekalink * PhantomBuster * Philips Hue * Pipedrive * Plivo * PostBin * Postgres * Common issues * PostHog * ProfitWell * Pushbullet * Pushcut * Pushover * QuestDB * Quick Base * QuickBooks Online * QuickChart * RabbitMQ * Raindrop * Reddit * Redis * Rocket.Chat * Rundeck * S3 * Salesforce * Salesmate * SeaTable * SecurityScorecard * Segment * SendGrid * Sendy * Sentry.io * ServiceNow * seven * Shopify * SIGNL4 * Slack * Snowflake * Splunk * Spontit * Spotify * Stackby * Storyblok * Strapi * Strava * Stripe * Supabase * Common issues * SyncroMSP * Taiga * Tapfiliate * Telegram * Chat operations * Callback operations * File operations * Message operations * Common issues * TheHive * TheHive 5 * TimescaleDB * Todoist * Travis CI * Trello * Twake * Twilio * Twist * Unleashed Software * UpLead * uProc * UptimeRobot * urlscan.io * Venafi TLS Protect Cloud * Venafi TLS Protect Datacenter * Vero * Vonage * Webflow * Wekan * WhatsApp Business Cloud * Common issues * Wise * WooCommerce * WordPress * X (Formerly Twitter) * Xero * Yourls * YouTube * Zammad * Zendesk * Zoho CRM * Zoom * Zulip * Triggers * ActiveCampaign Trigger * Acuity Scheduling Trigger * Affinity Trigger * Airtable Trigger * AMQP Trigger * Asana Trigger * Autopilot Trigger * AWS SNS Trigger * Bitbucket Trigger * Box Trigger * Brevo Trigger * Calendly Trigger * Cal Trigger * Chargebee Trigger * ClickUp Trigger * Clockify Trigger * ConvertKit Trigger * Copper Trigger * crowd.dev Trigger * Customer.io Trigger * Emelia Trigger * Eventbrite Trigger * Facebook Lead Ads Trigger * Facebook Trigger * Ad Account * Application * Certificate Transparency * Group * Instagram * Link * Page * Permissions * User * WhatsApp Business Account * Workplace Security * Figma Trigger (Beta) * Flow Trigger * Form.io Trigger * Formstack Trigger * GetResponse Trigger * GitHub Trigger * GitLab Trigger * Gmail Trigger * Poll Mode options * Common issues * Google Calendar Trigger * Google Drive Trigger * Common issues * Google Business Profile Trigger * Google Sheets Trigger * Common issues * Gumroad Trigger * Help Scout Trigger * Hubspot Trigger * Invoice Ninja Trigger * Jira Trigger * JotForm Trigger * Kafka Trigger * Keap Trigger * KoboToolbox Trigger * Lemlist Trigger * Linear Trigger * LoneScale Trigger * Mailchimp Trigger * MailerLite Trigger * Mailjet Trigger * Mautic Trigger * Microsoft OneDrive Trigger * Microsoft Outlook Trigger * MQTT Trigger * Netlify Trigger * Notion Trigger * Onfleet Trigger * PayPal Trigger * Pipedrive Trigger * Postgres Trigger * Postmark Trigger * Pushcut Trigger * RabbitMQ Trigger * Redis Trigger * Salesforce Trigger * SeaTable Trigger * Shopify Trigger * Slack Trigger * Strava Trigger * Stripe Trigger * SurveyMonkey Trigger * Taiga Trigger * Telegram Trigger * Common issues * TheHive 5 Trigger * TheHive Trigger * Toggl Trigger * Trello Trigger * Twilio Trigger * Typeform Trigger * Venafi TLS Protect Cloud Trigger * Webex by Cisco Trigger * Webflow Trigger * WhatsApp Trigger * Wise Trigger * WooCommerce Trigger * Workable Trigger * Wufoo Trigger * Zendesk Trigger * Cluster nodes * Root nodes * AI Agent * Conversational Agent * OpenAI Functions Agent * Plan and Execute Agent * ReAct Agent * SQL Agent * Tools Agent * Common issues * Basic LLM Chain * Question and Answer Chain * Common issues * Summarization Chain * Information Extractor * Text Classifier * Sentiment Analysis * LangChain Code * Simple Vector Store * Milvus Vector Store * MongoDB Atlas Vector Store * PGVector Vector Store * Pinecone Vector Store * Qdrant Vector Store * Supabase Vector Store * Zep Vector Store * Sub-nodes * Default Data Loader * GitHub Document Loader * Embeddings AWS Bedrock * Embeddings Azure OpenAI * Embeddings Cohere * Embeddings Google Gemini * Embeddings Google PaLM * Embeddings Google Vertex * Embeddings HuggingFace Inference * Embeddings Mistral Cloud * Embeddings Ollama * Embeddings OpenAI * Anthropic Chat Model * AWS Bedrock Chat Model * Azure OpenAI Chat Model * DeepSeek Chat Model * Google Gemini Chat Model * Google Vertex Chat Model * Groq Chat Model * Mistral Cloud Chat Model * Ollama Chat Model * Common issues * OpenAI Chat Model * Common issues * OpenRouter Chat Model * Cohere Model * Ollama Model * Common issues * Hugging Face Inference Model * Chat Memory Manager * Simple Memory * Common issues * Motorhead * MongoDB Chat Memory * Redis Chat Memory * Postgres Chat Memory * Xata * Zep * Auto-fixing Output Parser * Item List Output Parser * Structured Output Parser * Common issues * Contextual Compression Retriever * MultiQuery Retriever * Vector Store Retriever * Workflow Retriever * Character Text Splitter * Recursive Character Text Splitter * Token Splitter * Calculator * Custom Code Tool * HTTP Request Tool * MCP Client Tool * SerpApi (Google Search) * Think Tool * Vector Store Question Answer Tool * Wikipedia * Wolfram|Alpha * Custom n8n Workflow Tool * Credentials * Action Network credentials * ActiveCampaign credentials * Acuity Scheduling credentials * Adalo credentials * Affinity credentials * Agile CRM credentials * Airtable credentials * Airtop credentials * AlienVault credentials * AMQP credentials * Anthropic credentials * APITemplate.io credentials * Asana credentials * Auth0 Management credentials * Automizy credentials * Autopilot credentials * AWS credentials * Azure OpenAI credentials * Azure Storage credentials * BambooHR credentials * Bannerbear credentials * Baserow credentials * Beeminder credentials * Bitbucket credentials * Bitly credentials * Bitwarden credentials * Box credentials * Brandfetch credentials * Brevo credentials * Bubble credentials * Cal.com credentials * Calendly credentials * Carbon Black credentials * Chargebee credentials * CircleCI credentials * Cisco Meraki credentials * Cisco Secure Endpoint credentials * Cisco Umbrella credentials * Clearbit credentials * ClickUp credentials * Clockify credentials * Cloudflare credentials * Cockpit credentials * Coda credentials * Cohere credentials * Contentful credentials * ConvertAPI credentials * ConvertKit credentials * Copper credentials * Cortex credentials * CrateDB credentials * crowd.dev credentials * CrowdStrike credentials * Customer.io credentials * Datadog credentials * DeepL credentials * DeepSeek credentials * Demio credentials * DFIR-IRIS credentials * DHL credentials * Discord credentials * Discourse credentials * Disqus credentials * Drift credentials * Dropbox credentials * Dropcontact credentials * Dynatrace credentials * E-goi credentials * Elasticsearch credentials * Elastic Security credentials * Emelia credentials * ERPNext credentials * Eventbrite credentials * F5 Big-IP credentials * Facebook App credentials * Facebook Graph API credentials * Facebook Lead Ads credentials * Figma credentials * FileMaker credentials * Filescan credentials * Flow credentials * Form.io Trigger credentials * Formstack Trigger credentials * Fortinet FortiGate credentials * Freshdesk credentials * Freshservice credentials * Freshworks CRM credentials * FTP credentials * GetResponse credentials * Ghost credentials * Git credentials * GitHub credentials * GitLab credentials * Gong credentials * Google * Google OAuth2 single service * Google OAuth2 generic * Google Service Account * Google Gemini(PaLM) credentials * Gotify credentials * GoToWebinar credentials * Grafana credentials * Grist credentials * Groq credentials * Gumroad credentials * HaloPSA credentials * Harvest credentials * Help Scout credentials * HighLevel credentials * Home Assistant credentials * HTTP Request credentials * HubSpot credentials * Hugging Face credentials * Humantic AI credentials * Hunter credentials * Hybrid Analysis credentials * IMAP * Gmail * Outlook.com * Yahoo * Imperva WAF credentials * Intercom credentials * Invoice Ninja credentials * Iterable credentials * Jenkins credentials * Jira credentials * JotForm credentials * JWT credentials * Kafka credentials * Keap credentials * Kibana credentials * Kitemaker credentials * KoboToolbox credentials * LDAP credentials * Lemlist credentials * Line credentials * Linear credentials * LingvaNex credentials * LinkedIn credentials * LoneScale credentials * Magento 2 credentials * Mailcheck credentials * Mailchimp credentials * MailerLite credentials * Mailgun credentials * Mailjet credentials * Malcore credentials * Mandrill credentials * Marketstack credentials * Matrix credentials * Mattermost credentials * Mautic credentials * Medium credentials * MessageBird credentials * Metabase credentials * Microsoft credentials * Microsoft Azure Monitor credentials * Microsoft Entra ID credentials * Microsoft SQL credentials * Milvus credentials * Mindee credentials * Miro credentials * MISP credentials * Mist credentials * Mistral Cloud credentials * Mocean credentials * monday.com credentials * MongoDB credentials * Monica CRM credentials * Motorhead credentials * MQTT credentials * MSG91 credentials * MySQL credentials * NASA credentials * Netlify credentials * Netscaler ADC credentials * Nextcloud credentials * NocoDB credentials * Notion credentials * npm credentials * Odoo credentials * Okta credentials * Ollama credentials * One Simple API credentials * Onfleet credentials * OpenAI credentials * OpenCTI credentials * OpenRouter credentials * OpenWeatherMap credentials * Oura credentials * Paddle credentials * PagerDuty credentials * PayPal credentials * Peekalink credentials * PhantomBuster credentials * Philips Hue credentials * Pinecone credentials * Pipedrive credentials * Plivo credentials * Postgres credentials * PostHog credentials * Postmark credentials * ProfitWell credentials * Pushbullet credentials * Pushcut credentials * Pushover credentials * QRadar credentials * Qdrant credentials * Qualys credentials * QuestDB credentials * Quick Base credentials * QuickBooks credentials * RabbitMQ credentials * Raindrop credentials * Rapid7 InsightVM credentials * Recorded Future credentials * Reddit credentials * Redis credentials * Rocket.Chat credentials * Rundeck credentials * S3 credentials * Salesforce credentials * Salesmate credentials * SeaTable credentials * SecurityScorecard credentials * Segment credentials * Sekoia credentials * Send Email * Gmail * Outlook.com * Yahoo * SendGrid credentials * Sendy credentials * Sentry.io credentials * Serp credentials * ServiceNow credentials * seven credentials * Shopify credentials * Shuffler credentials * SIGNL4 credentials * Slack credentials * Snowflake credentials * SolarWinds IPAM credentials * SolarWinds Observability SaaS credentials * Splunk credentials * Spontit credentials * Spotify credentials * SSH credentials * Stackby credentials * Storyblok credentials * Strapi credentials * Strava credentials * Stripe credentials * Supabase credentials * SurveyMonkey credentials * SyncroMSP credentials * Sysdig credentials * Taiga credentials * Tapfiliate credentials * Telegram credentials * TheHive credentials * TheHive 5 credentials * TimescaleDB credentials * Todoist credentials * Toggl credentials * TOTP credentials * Travis CI credentials * Trellix ePO credentials * Trello credentials * Twake credentials * Twilio credentials * Twist credentials * Typeform credentials * Unleashed Software credentials * UpLead credentials * uProc credentials * UptimeRobot credentials * urlscan.io credentials * Venafi TLS Protect Cloud credentials * Venafi TLS Protect Datacenter credentials * Vero credentials * VirusTotal credentials * Vonage credentials * Webex by Cisco credentials * Webflow credentials * Webhook credentials * Wekan credentials * WhatsApp Business Cloud credentials * Wise credentials * Wolfram|Alpha credentials * WooCommerce credentials * WordPress credentials * Workable credentials * Wufoo credentials * X (formerly Twitter) credentials * Xata credentials * Xero credentials * Yourls credentials * Zabbix credentials * Zammad credentials * Zendesk credentials * Zep credentials * Zoho credentials * Zoom credentials * Zscaler ZIA credentials * Zulip credentials * Custom API actions for existing nodes * Handle rate limits * Community nodes Community nodes * Installation and management * GUI installation * Manual installation * Risks * Blocklist * Using community nodes * Troubleshooting * Building community nodes * Creating nodes Creating nodes * Overview * Plan your node * Choose a node type * Choose a node building style * Node UI design * Choose node file structure * Build your node * Set up your development environment * Tutorial: Build a declarative-style node * Tutorial: Build a programmatic-style node * Reference * Node UI elements * Code standards * Versioning * Choose node file structure * Base files * Structure * Standard parameters * Declarative-style parameters * Programmatic-style parameters * Programmatic-style execute method * Codex files * Credentials files * HTTP request helpers * Item linking * Test your node * Run your node locally * Node linter * Troubleshooting * Deploy your node * Submit community nodes * Install private nodes * Hosting n8n * Community vs Enterprise * Installation Installation * npm * Docker * Server setups * Digital Ocean * Heroku * Hetzner * Amazon Web Services * Azure * Google Cloud * Docker Compose * Updating * Configuration Configuration * Environment variables * Binary data * Credentials * Database * Deployment * Endpoints * Executions * External data storage * External hooks * External secrets * Logs * License * Nodes * Queue mode * Security * Source control * Task runners * Timezone and localization * User management and 2FA * Workflows * Configuration methods * Configuration examples * Isolate n8n * Configure the Base URL * Configure custom SSL certificate authorities * Set a custom encryption key * Configure workflow timeouts * Specify custom nodes location * Enable modules in Code node * Set the timezone * Specify user folder path * Configure webhook URLs with reverse proxy * Enable Prometheus metrics * Supported databases and settings * Task runners * User management * Logging and monitoring Logging and monitoring * Logging * Monitoring * Security audit * Scaling and performance Scaling and performance * Overview * Performance and benchmarking * Configuring queue mode * Concurrency control * Execution data * Binary data * External storage for binary data * Memory-related errors * Securing n8n Securing n8n * Overview * Set up SSL * Set up SSO * Security audit * Disable the API * Opt out of data collection * Blocking nodes * Hardening task runners * Starter Kits Starter Kits * AI Starter Kit * Architecture Architecture * Overview * Database structure * Using the CLI Using the CLI * CLI commands * Code in n8n * Expressions * Using the Code node * AI coding * Built in methods and variables Built in methods and variables * Overview * Current node input * Output of other nodes * Date and time * JMESPath * HTTP node * LangChain Code node * n8n metadata * Convenience methods * Data transformation functions * Arrays * Booleans * Dates * Numbers * Objects * Strings * Custom variables Custom variables * Create custom variables * Cookbook Cookbook * Handling dates * Query JSON with JMESPath * Built-in methods and variables examples * execution * getWorkflowStaticData * Retrieve linked items from earlier in the workflow * (node-name).all * vars * Expressions * Check incoming data * Common issues * Code node * Get number of items returned by last node * Get the binary data buffer * Output to the browser console * HTTP Request node * Pagination * Advanced AI * Tutorial: Build an AI workflow in n8n * LangChain in n8n LangChain in n8n * Overview * Langchain concepts in n8n * LangChain learning resources * Use LangSmith with n8n * Examples and concepts Examples and concepts * Introduction * What is a chain? * What is an agent? * Agents vs chains example * What is memory? * What is a tool? * Use Google Sheets as a data source * Call an API to fetch data * Set a human fallback for AI workflows * Let AI specify tool parameters * What is a vector database? * Populate a Pinecone vector database from a website * API * Authentication * Pagination * Using the API playground * API reference * Embed * Prerequisites * Deployment * Configuration * Workflow management * Workflows templates * White labelling 1. Integrations 2. Built-in nodes 3. Triggers GitLab is a web-based DevOps lifecycle tool that provides a Git-repository manager providing wiki, issue-tracking, and continuous integration/continuous installation pipeline features. Credentials You can find authentication information for this node here. --- ## Page: https://docs.n8n.io/integrations/builtin/trigger-nodes/n8n-nodes-base.gmailtrigger/ Gmail is an email service developed by Google. The Gmail Trigger node can start a workflow based on events in Gmail. Credentials You can find authentication information for this node here. ## Events# * **Message Received**: The node triggers for new messages at the selected **Poll Time**. ## Node parameters# Configure the node with these parameters: * **Credential to connect with**: Select or create a new Google credential to use for the trigger. Refer to Google credentials for more information on setting up a new credential. * **Poll Times**: Select a poll **Mode** to set how often to trigger the poll. Your **Mode** selection will add or remove relevant fields. Refer to Poll Mode options to configure the parameters for each mode type. * **Simplify**: Choose whether to return a simplified version of the response (turned on, default) or the raw data (turned off). * The simplified version returns email message IDs, labels, and email headers, including: From, To, CC, BCC, and Subject. ## Node filters# Use these filters to further refine the node's behavior: * **Include Spam and Trash**: Select whether the node should trigger on new messages in the Spam and Trash folders (turned on) or not (turned off). * **Label Names or IDs**: Only trigger on messages with the selected labels added to them. Select the Label names you want to apply or enter an expression to specify IDs. The dropdown populates based on the **Credential** you selected. * **Search**: Enter Gmail search refine filters, like `from:`, to trigger the node on the filtered conditions only. Refer to Refine searches in Gmail for more information. * **Read Status**: Choose whether to receive **Unread and read emails**, **Unread emails only** (default), or **Read emails only**. * **Sender**: Enter an email or a part of a sender name to trigger only on messages from that sender. n8n provides an app node for Gmail. You can find the node docs here. View example workflows and related content on n8n's website. Refer to Google's Gmail API documentation for details about their API. ## Common issues# For common questions or issues and suggested solutions, refer to Common issues. --- ## Page: https://docs.n8n.io/integrations/builtin/trigger-nodes/n8n-nodes-base.gmailtrigger/poll-mode-options/ Use the Gmail Trigger node's **Poll Time** parameter to set how often to trigger the poll. Your **Mode** selection will add or remove relevant fields. ## Poll mode options# Refer to the sections below for details on using each **Mode**. ### Every Hour mode# Enter the **Minute** of the hour to trigger the poll, from `0` to `59`. ### Every Day mode# * Enter the **Hour** of the day to trigger the poll in 24-hour format, from `0` to `23`. * Enter the **Minute** of the hour to trigger the poll, from `0` to `59`. ### Every Week mode# * Enter the **Hour** of the day to trigger the poll in 24-hour format, from `0` to `23`. * Enter the **Minute** of the hour to trigger the poll, from `0` to `59`. * Select the **Weekday** to trigger the poll. ### Every Month mode# * Enter the **Hour** of the day to trigger the poll in 24-hour format, from `0` to `23`. * Enter the **Minute** of the hour to trigger the poll, from `0` to `59`. * Enter the **Day of the Month** to trigger the poll, from `0` to `31`. ### Every X mode# * Enter the **Value** of measurement for how often to trigger the poll in either minutes or hours. * Select the **Unit** for the value. Supported units are **Minutes** and **Hours**. ### Custom mode# Enter a custom **Cron Expression** to trigger the poll. Use these values and ranges: * Seconds: `0` - `59` * Minutes: `0` - `59` * Hours: `0` - `23` * Day of Month: `1` - `31` * Months: `0` - `11` (Jan - Dec) * Day of Week: `0` - `6` (Sun - Sat) To generate a Cron expression, you can use crontab guru. Paste the Cron expression that you generated using crontab guru in the **Cron Expression** field in n8n. #### Examples# If you want to trigger your workflow every day at 04:08:30, enter the following in the **Cron Expression** field. <table><tbody><tr><td><div><pre><span></span><span>1</span></pre></div></td><td><div><pre><span></span><code>30 8 4 * * * </code></pre></div></td></tr></tbody></table> If you want to trigger your workflow every day at 04:08, enter the following in the **Cron Expression** field. <table><tbody><tr><td><div><pre><span></span><span>1</span></pre></div></td><td><div><pre><span></span><code>8 4 * * * </code></pre></div></td></tr></tbody></table> #### Why there are six asterisks in the Cron expression# The sixth asterisk in the Cron expression represents seconds. Setting this is optional. The node will execute even if you don't set the value for seconds. | \* | \* | \* | \* | \* | \* | | --- | --- | --- | --- | --- | --- | | second | minute | hour | day of month | month | day of week | --- ## Page: https://docs.n8n.io/integrations/builtin/trigger-nodes/n8n-nodes-base.gmailtrigger/common-issues/ Here are some common errors and issues with the Gmail Trigger node and steps to resolve or troubleshoot them. The full text of the error looks like this: <table><tbody><tr><td><div><pre><span></span><span>1</span></pre></div></td><td><div><pre><span></span><code>401 - {"error":"unauthorized_client","error_description":"Client is unauthorized to retrieve access tokens using this method, or client not authorized for any of the scopes requested."} </code></pre></div></td></tr></tbody></table> This error occurs when there's an issue with the credential you're using and its scopes or permissions. To resolve: 1. For OAuth2 credentials, make sure you've enabled the Gmail API in **APIs & Services > Library**. Refer to Google OAuth2 Single Service - Enable APIs for more information. 2. For Service Account credentials: 1. Enable domain-wide delegation. 2. Make sure you add the Gmail API as part of the domain-wide delegation configuration. --- ## Page: https://docs.n8n.io/integrations/builtin/trigger-nodes/n8n-nodes-base.googlecalendartrigger/ Google Calendar is a time-management and scheduling calendar service developed by Google. Credentials You can find authentication information for this node here. Examples and templates For usage examples and templates to help you get started, refer to n8n's Google Calendar Trigger integrations page. ## Events# * **Event Cancelled** * **Event Created** * **Event Ended** * **Event Started** * **Event Updated** **AI Agent : Google calendar assistant using OpenAI** by Dataki View template details **Actioning Your Meeting Next Steps using Transcripts and AI** by Jimleuk View template details **Scrape recent news about a company before a call** by Milorad Filipović View template details Browse Google Calendar Trigger integration templates, or search all templates ## Related resources# n8n provides an app node for Google Calendar. You can find the node docs here. View example workflows and related content on n8n's website. Refer to Google Calendar's documentation for details about their API. --- ## Page: https://docs.n8n.io/integrations/builtin/trigger-nodes/n8n-nodes-base.googledrivetrigger/ Google Drive is a file storage and synchronization service developed by Google. It allows users to store files on their servers, synchronize files across devices, and share files. Credentials You can find authentication information for this node here. Manual Executions vs. Activation On manual executions this node will return the last event matching its search criteria. If no event matches the criteria (for example because you are watching for files to be created but no files have been created so far), an error is thrown. Once saved and activated, the node will regularly check for any matching events and will trigger your workflow for each event found. ## Common issues# For common questions or issues and suggested solutions, refer to Common issues. --- ## Page: https://docs.n8n.io/integrations/builtin/trigger-nodes/n8n-nodes-base.googledrivetrigger/common-issues/ Here are some common errors and issues with the Google Drive Trigger node and steps to resolve or troubleshoot them. The full text of the error looks like this: <table><tbody><tr><td><div><pre><span></span><span>1</span></pre></div></td><td><div><pre><span></span><code>401 - {"error":"unauthorized_client","error_description":"Client is unauthorized to retrieve access tokens using this method, or client not authorized for any of the scopes requested."} </code></pre></div></td></tr></tbody></table> This error occurs when there's an issue with the credential you're using and its scopes or permissions. To resolve: 1. For OAuth2 credentials, make sure you've enabled the Google Drive API in **APIs & Services > Library**. Refer to Google OAuth2 Single Service - Enable APIs for more information. 2. For Service Account credentials: 1. Enable domain-wide delegation. 2. Make sure you add the Google Drive API as part of the domain-wide delegation configuration. ## Handling more than one file change# The Google Drive Trigger node polls Google Drive for changes at a set interval (once every minute by default). If multiple changes to the **Watch For** criteria occur during the polling interval, a single Google Drive Trigger event occurs containing the changes as items. To handle this, your workflow must account for times when the data might contain more than one item. You can use an if node or a switch node to change your workflow's behavior depending on whether the data from the Google Drive Trigger node contains a single item or multiple items. --- ## Page: https://docs.n8n.io/integrations/builtin/trigger-nodes/n8n-nodes-base.googlebusinessprofiletrigger/ Use the Google Business Profile Trigger node to respond to events in Google Business Profile and integrate Google Business Profile with other applications. n8n has built-in support for responding to new reviews. On this page, you'll find a list of events the Google Business Profile Trigger node can respond to and links to more resources. Credentials You can find authentication information for this node here. ## Events# * Review Added n8n provides an app node for Google Business Profile. You can find the node docs here. View example workflows and related content on n8n's website. Refer to Google Business Profile's documentation for details about their API. --- ## Page: https://docs.n8n.io/integrations/builtin/trigger-nodes/n8n-nodes-base.googlesheetstrigger/ Google Sheets is a web-based spreadsheet program that's part of Google's office software suite within its Google Drive service. Credentials You can find authentication information for this node here. ## Events# * Row added * Row updated * Row added or updated Refer to Google Sheet's API documentation for more information about the service. n8n provides an app node for Google Sheets. You can find the node docs here. View example workflows and related content on n8n's website. ## Common issues# For common questions or issues and suggested solutions, refer to Common issues. --- ## Page: https://docs.n8n.io/integrations/builtin/trigger-nodes/n8n-nodes-base.googlesheetstrigger/common-issues/ Here are some common errors and issues with the Google Sheets Trigger node and steps to resolve or troubleshoot them. ## Stuck waiting for trigger event# When testing the Google Sheets Trigger node with the **Test step** or or **Test workflow** buttons, the execution may appear stuck and unable to stop listening for events. If this occurs, you may need to exit the workflow and open it again to reset the canvas. Stuck listening events often occur due to issues with your network configuration outside of n8n. Specifically, this behavior often occurs when you run n8n behind a reverse proxy without configuring websocket proxying. To resolve this issue, check your reverse proxy configuration (Nginx, Caddy, Apache HTTP Server, Traefik, etc.) to enable websocket support. ## Date and time columns are rendering as numbers# Google Sheets can render dates and times a few different ways. The **serial number** format, popularized by Lotus 1-2-3 and used my types of spreadsheet software, represents dates as a decimal number. The whole number component (the part left of the decimal) represents the number of days since December 30, 1899. The decimal portion (the part right of the decimal) represents time as a portion of a 24-hour period (for example, `.5` represents noon). To use a different format for date and time values, adjust the format in your Google Sheet Trigger node. This is available when **Trigger On** is set to **Row Added**: 1. Open the Google Sheet Trigger node on your canvas. 2. Select **Add option**. 3. Select **DateTime Render**. 4. Change **DateTime Render** to **Formatted String**. The Google Sheets Trigger node will now format date, time, datetime, and duration fields as strings according to their number format. The number format depends on the spreadsheet's locale settings. You can change the local by opening the spreadsheet and selecting **File > Settings**. In the **General** tab, set **Locale** to your preferred locale. Select **Save settings** to adjust the value. --- ## Page: https://docs.n8n.io/integrations/builtin/trigger-nodes/n8n-nodes-base.gumroadtrigger/ 1. Integrations 2. Built-in nodes 3. Triggers Gumroad is an online platform that enables creators to sell products directly to consumers. Credentials You can find authentication information for this node here. Examples and templates For usage examples and templates to help you get started, refer to n8n's Gumroad Trigger integrations page. --- ## Page: https://docs.n8n.io/integrations/builtin/trigger-nodes/n8n-nodes-base.helpscouttrigger/ n8n Docs * Using n8n * Getting started Getting started * Learning path * Choose your n8n * Quickstarts * A very quick quickstart * A longer introduction * Video courses * Text courses * Level one * Navigating the editor UI * Building a mini-workflow * Automating a (real-world) use case * Designing the workflow * Building the workflow Building the workflow * Getting data from the data warehouse * Inserting data into airtable * Filtering orders * Setting values for processing orders * Calculating booked orders * Notifying the team * Scheduling the workflow * Activating and examining the workflow * Exporting and importing workflows * Test your knowledge * Level two * Understanding the data structure * Processing different data types * Merging and splitting data * Dealing with errors in workflows * Automating a business workflow Automating a business workflow * Use case * Workflow 1 * Workflow 2 * Workflow 3 * Test your knowledge * Using the app Using the app * Understand workflows * Create and run * Components * Nodes * Connections * Sticky Notes * Executions * Manual, partial, and production executions * Workflow-level executions * All executions * Custom executions data * Debug executions * Tags * Export and import * Templates * Sharing * Settings * Workflow history * Workflow ID * Manage credentials * Create and edit * Credential sharing * Manage users and access * Cloud setup * Manage users * Account types * Role-based access control * Role types * Projects * Best practices * 2FA * LDAP * SAML * Set up SAML * Okta Workforce Identity SAML setup * Troubleshooting * Manage users with SAML * Keyboard shortcuts * Key concepts Key concepts * Flow logic * Splitting with conditionals * Merging data * Looping * Waiting * Sub-workflows * Error handling * Execution order in multi-branch workflows * Data * Data structure * Data flow within nodes * Transforming data * Process data using code * Data mapping * Data mapping in the UI * Data mapping in the expressions editor * Data item linking * Item linking concepts * Item linking in the Code node * Item linking errors * Item linking for node creators * Data pinning * Data editing * Data filtering * Data mocking * Binary data * Schema preview * Glossary * n8n Cloud n8n Cloud * Overview * Access the Cloud admin dashboard * Update your n8n Cloud version * Set the timezone * Cloud IP addresses * Cloud data management * Change ownership or username * Concurrency * AI Assistant * Enterprise features Enterprise features * Source control and environments * Understand * Environments * Git in n8n * Branch patterns * Set up * Using * Push and pull * Copy work between environments * Manage variables * Tutorial: Create environments with source control * External secrets * Log streaming * License key * Releases Releases * Release notes Release notes * 1.x * 0.x * v1.0 migration guide * Help and community Help and community * Where to get help * Contributing * Licenses and privacy Licenses and privacy * Privacy and security * Privacy * Security * Incident response * What you can do * Sustainable use license * Integrations * Built-in nodes Built-in nodes * Node types * Core nodes * Activation Trigger * Aggregate * AI Transform * Code * Keyboard shortcuts * Common issues * Compare Datasets * Compression * Chat Trigger * Common issues * Convert to File * Crypto * Date & Time * Debug Helper * Edit Fields (Set) * Edit Image * Email Trigger (IMAP) * Error Trigger * Execute Command * Common issues * Execute Sub-workflow * Execute Sub-workflow Trigger * Execution Data * Extract From File * Filter * FTP * Git * GraphQL * HTML * HTTP Request * Common issues * If * JWT * LDAP * Limit * Local File Trigger * Loop Over Items (Split in Batches) * Manual Trigger * Markdown * MCP Server Trigger * Merge * n8n * n8n Form * n8n Form Trigger * n8n Trigger * No Operation, do nothing * Read/Write Files from Disk * Remove Duplicates * Templates and examples * Rename Keys * Respond to Webhook * RSS Read * RSS Feed Trigger * Schedule Trigger * Common issues * Send Email * Sort * Split Out * SSE Trigger * SSH * Stop And Error * Summarize * Switch * TOTP * Wait * Webhook * Workflow development * Common issues * Workflow Trigger * XML * Actions * Action Network * ActiveCampaign * Adalo * Affinity * Agile CRM * Airtable * Common issues * Airtop * AMQP Sender * APITemplate.io * Asana * Automizy * Autopilot * AWS Certificate Manager * AWS Comprehend * AWS DynamoDB * AWS Elastic Load Balancing * AWS Lambda * AWS Rekognition * AWS S3 * AWS SES * AWS SNS * AWS SQS * AWS Textract * AWS Transcribe * Azure Storage * BambooHR * Bannerbear * Baserow * Beeminder * Bitly * Bitwarden * Box * Brandfetch * Brevo * Bubble * Chargebee * CircleCI * Webex by Cisco * Clearbit * ClickUp * Clockify * Cloudflare * Cockpit * Coda * CoinGecko * Contentful * ConvertKit * Copper * Cortex * CrateDB * crowd.dev * Customer.io * DeepL * Demio * DHL * Discord * Common issues * Discourse * Disqus * Drift * Dropbox * Dropcontact * E-goi * Elasticsearch * Elastic Security * Emelia * ERPNext * Facebook Graph API * FileMaker * Flow * Freshdesk * Freshservice * Freshworks CRM * GetResponse * Ghost * GitHub * GitLab * Gmail * Draft operations * Label operations * Message operations * Thread operations * Common issues * Gong * Google Ads * Google Analytics * Google BigQuery * Google Books * Google Business Profile * Google Calendar * Calendar operations * Event operations * Google Chat * Google Cloud Firestore * Google Cloud Natural Language * Google Cloud Realtime Database * Google Cloud Storage * Google Contacts * Google Docs * Google Drive * File operations * File and folder operations * Folder operations * Shared drive operations * Common issues * Google Perspective * Google Sheets * Document operations * Sheet within Document operations * Common issues * Google Slides * Google Tasks * Google Translate * Google Workspace Admin * Gotify * GoToWebinar * Grafana * Grist * Hacker News * HaloPSA * Harvest * Help Scout * HighLevel * Home Assistant * HubSpot * Humantic AI * Hunter * Intercom * Invoice Ninja * Iterable * Jenkins * Jira Software * Kafka * Keap * Kitemaker * KoboToolbox * Lemlist * Line * Linear * LingvaNex * LinkedIn * LoneScale * Magento 2 * Mailcheck * Mailchimp * MailerLite * Mailgun * Mailjet * Mandrill * marketstack * Matrix * Mattermost * Mautic * Medium * MessageBird * Metabase * Microsoft Dynamics CRM * Microsoft Entra ID * Microsoft Excel 365 * Microsoft Graph Security * Microsoft OneDrive * Microsoft Outlook * Microsoft SQL * Microsoft Teams * Microsoft To Do * Mindee * MISP * Mocean * monday.com * MongoDB * Monica CRM * MQTT * MSG91 * MySQL * Common issues * Customer Datastore (n8n Training) * Customer Messenger (n8n Training) * NASA * Netlify * Netscaler ADC * Nextcloud * NocoDB * Notion * Common issues * npm * Odoo * Okta * One Simple API * Onfleet * OpenAI * Assistant operations * Audio operations * File operations * Image operations * Text operations * Common issues * OpenThesaurus * OpenWeatherMap * Oura * Paddle * PagerDuty * PayPal * Peekalink * PhantomBuster * Philips Hue * Pipedrive * Plivo * PostBin * Postgres * Common issues * PostHog * ProfitWell * Pushbullet * Pushcut * Pushover * QuestDB * Quick Base * QuickBooks Online * QuickChart * RabbitMQ * Raindrop * Reddit * Redis * Rocket.Chat * Rundeck * S3 * Salesforce * Salesmate * SeaTable * SecurityScorecard * Segment * SendGrid * Sendy * Sentry.io * ServiceNow * seven * Shopify * SIGNL4 * Slack * Snowflake * Splunk * Spontit * Spotify * Stackby * Storyblok * Strapi * Strava * Stripe * Supabase * Common issues * SyncroMSP * Taiga * Tapfiliate * Telegram * Chat operations * Callback operations * File operations * Message operations * Common issues * TheHive * TheHive 5 * TimescaleDB * Todoist * Travis CI * Trello * Twake * Twilio * Twist * Unleashed Software * UpLead * uProc * UptimeRobot * urlscan.io * Venafi TLS Protect Cloud * Venafi TLS Protect Datacenter * Vero * Vonage * Webflow * Wekan * WhatsApp Business Cloud * Common issues * Wise * WooCommerce * WordPress * X (Formerly Twitter) * Xero * Yourls * YouTube * Zammad * Zendesk * Zoho CRM * Zoom * Zulip * Triggers * ActiveCampaign Trigger * Acuity Scheduling Trigger * Affinity Trigger * Airtable Trigger * AMQP Trigger * Asana Trigger * Autopilot Trigger * AWS SNS Trigger * Bitbucket Trigger * Box Trigger * Brevo Trigger * Calendly Trigger * Cal Trigger * Chargebee Trigger * ClickUp Trigger * Clockify Trigger * ConvertKit Trigger * Copper Trigger * crowd.dev Trigger * Customer.io Trigger * Emelia Trigger * Eventbrite Trigger * Facebook Lead Ads Trigger * Facebook Trigger * Ad Account * Application * Certificate Transparency * Group * Instagram * Link * Page * Permissions * User * WhatsApp Business Account * Workplace Security * Figma Trigger (Beta) * Flow Trigger * Form.io Trigger * Formstack Trigger * GetResponse Trigger * GitHub Trigger * GitLab Trigger * Gmail Trigger * Poll Mode options * Common issues * Google Calendar Trigger * Google Drive Trigger * Common issues * Google Business Profile Trigger * Google Sheets Trigger * Common issues * Gumroad Trigger * Help Scout Trigger * Hubspot Trigger * Invoice Ninja Trigger * Jira Trigger * JotForm Trigger * Kafka Trigger * Keap Trigger * KoboToolbox Trigger * Lemlist Trigger * Linear Trigger * LoneScale Trigger * Mailchimp Trigger * MailerLite Trigger * Mailjet Trigger * Mautic Trigger * Microsoft OneDrive Trigger * Microsoft Outlook Trigger * MQTT Trigger * Netlify Trigger * Notion Trigger * Onfleet Trigger * PayPal Trigger * Pipedrive Trigger * Postgres Trigger * Postmark Trigger * Pushcut Trigger * RabbitMQ Trigger * Redis Trigger * Salesforce Trigger * SeaTable Trigger * Shopify Trigger * Slack Trigger * Strava Trigger * Stripe Trigger * SurveyMonkey Trigger * Taiga Trigger * Telegram Trigger * Common issues * TheHive 5 Trigger * TheHive Trigger * Toggl Trigger * Trello Trigger * Twilio Trigger * Typeform Trigger * Venafi TLS Protect Cloud Trigger * Webex by Cisco Trigger * Webflow Trigger * WhatsApp Trigger * Wise Trigger * WooCommerce Trigger * Workable Trigger * Wufoo Trigger * Zendesk Trigger * Cluster nodes * Root nodes * AI Agent * Conversational Agent * OpenAI Functions Agent * Plan and Execute Agent * ReAct Agent * SQL Agent * Tools Agent * Common issues * Basic LLM Chain * Question and Answer Chain * Common issues * Summarization Chain * Information Extractor * Text Classifier * Sentiment Analysis * LangChain Code * Simple Vector Store * Milvus Vector Store * MongoDB Atlas Vector Store * PGVector Vector Store * Pinecone Vector Store * Qdrant Vector Store * Supabase Vector Store * Zep Vector Store * Sub-nodes * Default Data Loader * GitHub Document Loader * Embeddings AWS Bedrock * Embeddings Azure OpenAI * Embeddings Cohere * Embeddings Google Gemini * Embeddings Google PaLM * Embeddings Google Vertex * Embeddings HuggingFace Inference * Embeddings Mistral Cloud * Embeddings Ollama * Embeddings OpenAI * Anthropic Chat Model * AWS Bedrock Chat Model * Azure OpenAI Chat Model * DeepSeek Chat Model * Google Gemini Chat Model * Google Vertex Chat Model * Groq Chat Model * Mistral Cloud Chat Model * Ollama Chat Model * Common issues * OpenAI Chat Model * Common issues * OpenRouter Chat Model * Cohere Model * Ollama Model * Common issues * Hugging Face Inference Model * Chat Memory Manager * Simple Memory * Common issues * Motorhead * MongoDB Chat Memory * Redis Chat Memory * Postgres Chat Memory * Xata * Zep * Auto-fixing Output Parser * Item List Output Parser * Structured Output Parser * Common issues * Contextual Compression Retriever * MultiQuery Retriever * Vector Store Retriever * Workflow Retriever * Character Text Splitter * Recursive Character Text Splitter * Token Splitter * Calculator * Custom Code Tool * HTTP Request Tool * MCP Client Tool * SerpApi (Google Search) * Think Tool * Vector Store Question Answer Tool * Wikipedia * Wolfram|Alpha * Custom n8n Workflow Tool * Credentials * Action Network credentials * ActiveCampaign credentials * Acuity Scheduling credentials * Adalo credentials * Affinity credentials * Agile CRM credentials * Airtable credentials * Airtop credentials * AlienVault credentials * AMQP credentials * Anthropic credentials * APITemplate.io credentials * Asana credentials * Auth0 Management credentials * Automizy credentials * Autopilot credentials * AWS credentials * Azure OpenAI credentials * Azure Storage credentials * BambooHR credentials * Bannerbear credentials * Baserow credentials * Beeminder credentials * Bitbucket credentials * Bitly credentials * Bitwarden credentials * Box credentials * Brandfetch credentials * Brevo credentials * Bubble credentials * Cal.com credentials * Calendly credentials * Carbon Black credentials * Chargebee credentials * CircleCI credentials * Cisco Meraki credentials * Cisco Secure Endpoint credentials * Cisco Umbrella credentials * Clearbit credentials * ClickUp credentials * Clockify credentials * Cloudflare credentials * Cockpit credentials * Coda credentials * Cohere credentials * Contentful credentials * ConvertAPI credentials * ConvertKit credentials * Copper credentials * Cortex credentials * CrateDB credentials * crowd.dev credentials * CrowdStrike credentials * Customer.io credentials * Datadog credentials * DeepL credentials * DeepSeek credentials * Demio credentials * DFIR-IRIS credentials * DHL credentials * Discord credentials * Discourse credentials * Disqus credentials * Drift credentials * Dropbox credentials * Dropcontact credentials * Dynatrace credentials * E-goi credentials * Elasticsearch credentials * Elastic Security credentials * Emelia credentials * ERPNext credentials * Eventbrite credentials * F5 Big-IP credentials * Facebook App credentials * Facebook Graph API credentials * Facebook Lead Ads credentials * Figma credentials * FileMaker credentials * Filescan credentials * Flow credentials * Form.io Trigger credentials * Formstack Trigger credentials * Fortinet FortiGate credentials * Freshdesk credentials * Freshservice credentials * Freshworks CRM credentials * FTP credentials * GetResponse credentials * Ghost credentials * Git credentials * GitHub credentials * GitLab credentials * Gong credentials * Google * Google OAuth2 single service * Google OAuth2 generic * Google Service Account * Google Gemini(PaLM) credentials * Gotify credentials * GoToWebinar credentials * Grafana credentials * Grist credentials * Groq credentials * Gumroad credentials * HaloPSA credentials * Harvest credentials * Help Scout credentials * HighLevel credentials * Home Assistant credentials * HTTP Request credentials * HubSpot credentials * Hugging Face credentials * Humantic AI credentials * Hunter credentials * Hybrid Analysis credentials * IMAP * Gmail * Outlook.com * Yahoo * Imperva WAF credentials * Intercom credentials * Invoice Ninja credentials * Iterable credentials * Jenkins credentials * Jira credentials * JotForm credentials * JWT credentials * Kafka credentials * Keap credentials * Kibana credentials * Kitemaker credentials * KoboToolbox credentials * LDAP credentials * Lemlist credentials * Line credentials * Linear credentials * LingvaNex credentials * LinkedIn credentials * LoneScale credentials * Magento 2 credentials * Mailcheck credentials * Mailchimp credentials * MailerLite credentials * Mailgun credentials * Mailjet credentials * Malcore credentials * Mandrill credentials * Marketstack credentials * Matrix credentials * Mattermost credentials * Mautic credentials * Medium credentials * MessageBird credentials * Metabase credentials * Microsoft credentials * Microsoft Azure Monitor credentials * Microsoft Entra ID credentials * Microsoft SQL credentials * Milvus credentials * Mindee credentials * Miro credentials * MISP credentials * Mist credentials * Mistral Cloud credentials * Mocean credentials * monday.com credentials * MongoDB credentials * Monica CRM credentials * Motorhead credentials * MQTT credentials * MSG91 credentials * MySQL credentials * NASA credentials * Netlify credentials * Netscaler ADC credentials * Nextcloud credentials * NocoDB credentials * Notion credentials * npm credentials * Odoo credentials * Okta credentials * Ollama credentials * One Simple API credentials * Onfleet credentials * OpenAI credentials * OpenCTI credentials * OpenRouter credentials * OpenWeatherMap credentials * Oura credentials * Paddle credentials * PagerDuty credentials * PayPal credentials * Peekalink credentials * PhantomBuster credentials * Philips Hue credentials * Pinecone credentials * Pipedrive credentials * Plivo credentials * Postgres credentials * PostHog credentials * Postmark credentials * ProfitWell credentials * Pushbullet credentials * Pushcut credentials * Pushover credentials * QRadar credentials * Qdrant credentials * Qualys credentials * QuestDB credentials * Quick Base credentials * QuickBooks credentials * RabbitMQ credentials * Raindrop credentials * Rapid7 InsightVM credentials * Recorded Future credentials * Reddit credentials * Redis credentials * Rocket.Chat credentials * Rundeck credentials * S3 credentials * Salesforce credentials * Salesmate credentials * SeaTable credentials * SecurityScorecard credentials * Segment credentials * Sekoia credentials * Send Email * Gmail * Outlook.com * Yahoo * SendGrid credentials * Sendy credentials * Sentry.io credentials * Serp credentials * ServiceNow credentials * seven credentials * Shopify credentials * Shuffler credentials * SIGNL4 credentials * Slack credentials * Snowflake credentials * SolarWinds IPAM credentials * SolarWinds Observability SaaS credentials * Splunk credentials * Spontit credentials * Spotify credentials * SSH credentials * Stackby credentials * Storyblok credentials * Strapi credentials * Strava credentials * Stripe credentials * Supabase credentials * SurveyMonkey credentials * SyncroMSP credentials * Sysdig credentials * Taiga credentials * Tapfiliate credentials * Telegram credentials * TheHive credentials * TheHive 5 credentials * TimescaleDB credentials * Todoist credentials * Toggl credentials * TOTP credentials * Travis CI credentials * Trellix ePO credentials * Trello credentials * Twake credentials * Twilio credentials * Twist credentials * Typeform credentials * Unleashed Software credentials * UpLead credentials * uProc credentials * UptimeRobot credentials * urlscan.io credentials * Venafi TLS Protect Cloud credentials * Venafi TLS Protect Datacenter credentials * Vero credentials * VirusTotal credentials * Vonage credentials * Webex by Cisco credentials * Webflow credentials * Webhook credentials * Wekan credentials * WhatsApp Business Cloud credentials * Wise credentials * Wolfram|Alpha credentials * WooCommerce credentials * WordPress credentials * Workable credentials * Wufoo credentials * X (formerly Twitter) credentials * Xata credentials * Xero credentials * Yourls credentials * Zabbix credentials * Zammad credentials * Zendesk credentials * Zep credentials * Zoho credentials * Zoom credentials * Zscaler ZIA credentials * Zulip credentials * Custom API actions for existing nodes * Handle rate limits * Community nodes Community nodes * Installation and management * GUI installation * Manual installation * Risks * Blocklist * Using community nodes * Troubleshooting * Building community nodes * Creating nodes Creating nodes * Overview * Plan your node * Choose a node type * Choose a node building style * Node UI design * Choose node file structure * Build your node * Set up your development environment * Tutorial: Build a declarative-style node * Tutorial: Build a programmatic-style node * Reference * Node UI elements * Code standards * Versioning * Choose node file structure * Base files * Structure * Standard parameters * Declarative-style parameters * Programmatic-style parameters * Programmatic-style execute method * Codex files * Credentials files * HTTP request helpers * Item linking * Test your node * Run your node locally * Node linter * Troubleshooting * Deploy your node * Submit community nodes * Install private nodes * Hosting n8n * Community vs Enterprise * Installation Installation * npm * Docker * Server setups * Digital Ocean * Heroku * Hetzner * Amazon Web Services * Azure * Google Cloud * Docker Compose * Updating * Configuration Configuration * Environment variables * Binary data * Credentials * Database * Deployment * Endpoints * Executions * External data storage * External hooks * External secrets * Logs * License * Nodes * Queue mode * Security * Source control * Task runners * Timezone and localization * User management and 2FA * Workflows * Configuration methods * Configuration examples * Isolate n8n * Configure the Base URL * Configure custom SSL certificate authorities * Set a custom encryption key * Configure workflow timeouts * Specify custom nodes location * Enable modules in Code node * Set the timezone * Specify user folder path * Configure webhook URLs with reverse proxy * Enable Prometheus metrics * Supported databases and settings * Task runners * User management * Logging and monitoring Logging and monitoring * Logging * Monitoring * Security audit * Scaling and performance Scaling and performance * Overview * Performance and benchmarking * Configuring queue mode * Concurrency control * Execution data * Binary data * External storage for binary data * Memory-related errors * Securing n8n Securing n8n * Overview * Set up SSL * Set up SSO * Security audit * Disable the API * Opt out of data collection * Blocking nodes * Hardening task runners * Starter Kits Starter Kits * AI Starter Kit * Architecture Architecture * Overview * Database structure * Using the CLI Using the CLI * CLI commands * Code in n8n * Expressions * Using the Code node * AI coding * Built in methods and variables Built in methods and variables * Overview * Current node input * Output of other nodes * Date and time * JMESPath * HTTP node * LangChain Code node * n8n metadata * Convenience methods * Data transformation functions * Arrays * Booleans * Dates * Numbers * Objects * Strings * Custom variables Custom variables * Create custom variables * Cookbook Cookbook * Handling dates * Query JSON with JMESPath * Built-in methods and variables examples * execution * getWorkflowStaticData * Retrieve linked items from earlier in the workflow * (node-name).all * vars * Expressions * Check incoming data * Common issues * Code node * Get number of items returned by last node * Get the binary data buffer * Output to the browser console * HTTP Request node * Pagination * Advanced AI * Tutorial: Build an AI workflow in n8n * LangChain in n8n LangChain in n8n * Overview * Langchain concepts in n8n * LangChain learning resources * Use LangSmith with n8n * Examples and concepts Examples and concepts * Introduction * What is a chain? * What is an agent? * Agents vs chains example * What is memory? * What is a tool? * Use Google Sheets as a data source * Call an API to fetch data * Set a human fallback for AI workflows * Let AI specify tool parameters * What is a vector database? * Populate a Pinecone vector database from a website * API * Authentication * Pagination * Using the API playground * API reference * Embed * Prerequisites * Deployment * Configuration * Workflow management * Workflows templates * White labelling 1. Integrations 2. Built-in nodes 3. Triggers Help Scout is a help desk software that provides an email-based customer support platform, knowledge base tool, and an embeddable search/contact widget for customer service professionals. Credentials You can find authentication information for this node here. --- ## Page: https://docs.n8n.io/integrations/builtin/trigger-nodes/n8n-nodes-base.hubspottrigger/ HubSpot provides tools for social media marketing, content management, web analytics, landing pages, customer support, and search engine optimization. Webhooks If you activate a second trigger, the previous trigger stops working. This is because the trigger registers a new webhook with HubSpot when activated. HubSpot only allows one webhook at a time. Credentials You can find authentication information for this node here. ## Events# * Company * Created * Deleted * Property changed * Contact * Created * Deleted * Privacy deleted * Property changed * Conversation * Created * Deleted * New message * Privacy deletion * Property changed * Deal * Created * Deleted * Property changed * Ticket * Created * Deleted * Property changed n8n provides an app node for HubSpot. You can find the node docs here. View example workflows and related content on n8n's website. Refer to HubSpot's documentation for details about their API. --- ## Page: https://docs.n8n.io/integrations/builtin/trigger-nodes/n8n-nodes-base.invoiceninjatrigger/ n8n Docs * Using n8n * Getting started Getting started * Learning path * Choose your n8n * Quickstarts * A very quick quickstart * A longer introduction * Video courses * Text courses * Level one * Navigating the editor UI * Building a mini-workflow * Automating a (real-world) use case * Designing the workflow * Building the workflow Building the workflow * Getting data from the data warehouse * Inserting data into airtable * Filtering orders * Setting values for processing orders * Calculating booked orders * Notifying the team * Scheduling the workflow * Activating and examining the workflow * Exporting and importing workflows * Test your knowledge * Level two * Understanding the data structure * Processing different data types * Merging and splitting data * Dealing with errors in workflows * Automating a business workflow Automating a business workflow * Use case * Workflow 1 * Workflow 2 * Workflow 3 * Test your knowledge * Using the app Using the app * Understand workflows * Create and run * Components * Nodes * Connections * Sticky Notes * Executions * Manual, partial, and production executions * Workflow-level executions * All executions * Custom executions data * Debug executions * Tags * Export and import * Templates * Sharing * Settings * Workflow history * Workflow ID * Manage credentials * Create and edit * Credential sharing * Manage users and access * Cloud setup * Manage users * Account types * Role-based access control * Role types * Projects * Best practices * 2FA * LDAP * SAML * Set up SAML * Okta Workforce Identity SAML setup * Troubleshooting * Manage users with SAML * Keyboard shortcuts * Key concepts Key concepts * Flow logic * Splitting with conditionals * Merging data * Looping * Waiting * Sub-workflows * Error handling * Execution order in multi-branch workflows * Data * Data structure * Data flow within nodes * Transforming data * Process data using code * Data mapping * Data mapping in the UI * Data mapping in the expressions editor * Data item linking * Item linking concepts * Item linking in the Code node * Item linking errors * Item linking for node creators * Data pinning * Data editing * Data filtering * Data mocking * Binary data * Schema preview * Glossary * n8n Cloud n8n Cloud * Overview * Access the Cloud admin dashboard * Update your n8n Cloud version * Set the timezone * Cloud IP addresses * Cloud data management * Change ownership or username * Concurrency * AI Assistant * Enterprise features Enterprise features * Source control and environments * Understand * Environments * Git in n8n * Branch patterns * Set up * Using * Push and pull * Copy work between environments * Manage variables * Tutorial: Create environments with source control * External secrets * Log streaming * License key * Releases Releases * Release notes Release notes * 1.x * 0.x * v1.0 migration guide * Help and community Help and community * Where to get help * Contributing * Licenses and privacy Licenses and privacy * Privacy and security * Privacy * Security * Incident response * What you can do * Sustainable use license * Integrations * Built-in nodes Built-in nodes * Node types * Core nodes * Activation Trigger * Aggregate * AI Transform * Code * Keyboard shortcuts * Common issues * Compare Datasets * Compression * Chat Trigger * Common issues * Convert to File * Crypto * Date & Time * Debug Helper * Edit Fields (Set) * Edit Image * Email Trigger (IMAP) * Error Trigger * Execute Command * Common issues * Execute Sub-workflow * Execute Sub-workflow Trigger * Execution Data * Extract From File * Filter * FTP * Git * GraphQL * HTML * HTTP Request * Common issues * If * JWT * LDAP * Limit * Local File Trigger * Loop Over Items (Split in Batches) * Manual Trigger * Markdown * MCP Server Trigger * Merge * n8n * n8n Form * n8n Form Trigger * n8n Trigger * No Operation, do nothing * Read/Write Files from Disk * Remove Duplicates * Templates and examples * Rename Keys * Respond to Webhook * RSS Read * RSS Feed Trigger * Schedule Trigger * Common issues * Send Email * Sort * Split Out * SSE Trigger * SSH * Stop And Error * Summarize * Switch * TOTP * Wait * Webhook * Workflow development * Common issues * Workflow Trigger * XML * Actions * Action Network * ActiveCampaign * Adalo * Affinity * Agile CRM * Airtable * Common issues * Airtop * AMQP Sender * APITemplate.io * Asana * Automizy * Autopilot * AWS Certificate Manager * AWS Comprehend * AWS DynamoDB * AWS Elastic Load Balancing * AWS Lambda * AWS Rekognition * AWS S3 * AWS SES * AWS SNS * AWS SQS * AWS Textract * AWS Transcribe * Azure Storage * BambooHR * Bannerbear * Baserow * Beeminder * Bitly * Bitwarden * Box * Brandfetch * Brevo * Bubble * Chargebee * CircleCI * Webex by Cisco * Clearbit * ClickUp * Clockify * Cloudflare * Cockpit * Coda * CoinGecko * Contentful * ConvertKit * Copper * Cortex * CrateDB * crowd.dev * Customer.io * DeepL * Demio * DHL * Discord * Common issues * Discourse * Disqus * Drift * Dropbox * Dropcontact * E-goi * Elasticsearch * Elastic Security * Emelia * ERPNext * Facebook Graph API * FileMaker * Flow * Freshdesk * Freshservice * Freshworks CRM * GetResponse * Ghost * GitHub * GitLab * Gmail * Draft operations * Label operations * Message operations * Thread operations * Common issues * Gong * Google Ads * Google Analytics * Google BigQuery * Google Books * Google Business Profile * Google Calendar * Calendar operations * Event operations * Google Chat * Google Cloud Firestore * Google Cloud Natural Language * Google Cloud Realtime Database * Google Cloud Storage * Google Contacts * Google Docs * Google Drive * File operations * File and folder operations * Folder operations * Shared drive operations * Common issues * Google Perspective * Google Sheets * Document operations * Sheet within Document operations * Common issues * Google Slides * Google Tasks * Google Translate * Google Workspace Admin * Gotify * GoToWebinar * Grafana * Grist * Hacker News * HaloPSA * Harvest * Help Scout * HighLevel * Home Assistant * HubSpot * Humantic AI * Hunter * Intercom * Invoice Ninja * Iterable * Jenkins * Jira Software * Kafka * Keap * Kitemaker * KoboToolbox * Lemlist * Line * Linear * LingvaNex * LinkedIn * LoneScale * Magento 2 * Mailcheck * Mailchimp * MailerLite * Mailgun * Mailjet * Mandrill * marketstack * Matrix * Mattermost * Mautic * Medium * MessageBird * Metabase * Microsoft Dynamics CRM * Microsoft Entra ID * Microsoft Excel 365 * Microsoft Graph Security * Microsoft OneDrive * Microsoft Outlook * Microsoft SQL * Microsoft Teams * Microsoft To Do * Mindee * MISP * Mocean * monday.com * MongoDB * Monica CRM * MQTT * MSG91 * MySQL * Common issues * Customer Datastore (n8n Training) * Customer Messenger (n8n Training) * NASA * Netlify * Netscaler ADC * Nextcloud * NocoDB * Notion * Common issues * npm * Odoo * Okta * One Simple API * Onfleet * OpenAI * Assistant operations * Audio operations * File operations * Image operations * Text operations * Common issues * OpenThesaurus * OpenWeatherMap * Oura * Paddle * PagerDuty * PayPal * Peekalink * PhantomBuster * Philips Hue * Pipedrive * Plivo * PostBin * Postgres * Common issues * PostHog * ProfitWell * Pushbullet * Pushcut * Pushover * QuestDB * Quick Base * QuickBooks Online * QuickChart * RabbitMQ * Raindrop * Reddit * Redis * Rocket.Chat * Rundeck * S3 * Salesforce * Salesmate * SeaTable * SecurityScorecard * Segment * SendGrid * Sendy * Sentry.io * ServiceNow * seven * Shopify * SIGNL4 * Slack * Snowflake * Splunk * Spontit * Spotify * Stackby * Storyblok * Strapi * Strava * Stripe * Supabase * Common issues * SyncroMSP * Taiga * Tapfiliate * Telegram * Chat operations * Callback operations * File operations * Message operations * Common issues * TheHive * TheHive 5 * TimescaleDB * Todoist * Travis CI * Trello * Twake * Twilio * Twist * Unleashed Software * UpLead * uProc * UptimeRobot * urlscan.io * Venafi TLS Protect Cloud * Venafi TLS Protect Datacenter * Vero * Vonage * Webflow * Wekan * WhatsApp Business Cloud * Common issues * Wise * WooCommerce * WordPress * X (Formerly Twitter) * Xero * Yourls * YouTube * Zammad * Zendesk * Zoho CRM * Zoom * Zulip * Triggers * ActiveCampaign Trigger * Acuity Scheduling Trigger * Affinity Trigger * Airtable Trigger * AMQP Trigger * Asana Trigger * Autopilot Trigger * AWS SNS Trigger * Bitbucket Trigger * Box Trigger * Brevo Trigger * Calendly Trigger * Cal Trigger * Chargebee Trigger * ClickUp Trigger * Clockify Trigger * ConvertKit Trigger * Copper Trigger * crowd.dev Trigger * Customer.io Trigger * Emelia Trigger * Eventbrite Trigger * Facebook Lead Ads Trigger * Facebook Trigger * Ad Account * Application * Certificate Transparency * Group * Instagram * Link * Page * Permissions * User * WhatsApp Business Account * Workplace Security * Figma Trigger (Beta) * Flow Trigger * Form.io Trigger * Formstack Trigger * GetResponse Trigger * GitHub Trigger * GitLab Trigger * Gmail Trigger * Poll Mode options * Common issues * Google Calendar Trigger * Google Drive Trigger * Common issues * Google Business Profile Trigger * Google Sheets Trigger * Common issues * Gumroad Trigger * Help Scout Trigger * Hubspot Trigger * Invoice Ninja Trigger * Jira Trigger * JotForm Trigger * Kafka Trigger * Keap Trigger * KoboToolbox Trigger * Lemlist Trigger * Linear Trigger * LoneScale Trigger * Mailchimp Trigger * MailerLite Trigger * Mailjet Trigger * Mautic Trigger * Microsoft OneDrive Trigger * Microsoft Outlook Trigger * MQTT Trigger * Netlify Trigger * Notion Trigger * Onfleet Trigger * PayPal Trigger * Pipedrive Trigger * Postgres Trigger * Postmark Trigger * Pushcut Trigger * RabbitMQ Trigger * Redis Trigger * Salesforce Trigger * SeaTable Trigger * Shopify Trigger * Slack Trigger * Strava Trigger * Stripe Trigger * SurveyMonkey Trigger * Taiga Trigger * Telegram Trigger * Common issues * TheHive 5 Trigger * TheHive Trigger * Toggl Trigger * Trello Trigger * Twilio Trigger * Typeform Trigger * Venafi TLS Protect Cloud Trigger * Webex by Cisco Trigger * Webflow Trigger * WhatsApp Trigger * Wise Trigger * WooCommerce Trigger * Workable Trigger * Wufoo Trigger * Zendesk Trigger * Cluster nodes * Root nodes * AI Agent * Conversational Agent * OpenAI Functions Agent * Plan and Execute Agent * ReAct Agent * SQL Agent * Tools Agent * Common issues * Basic LLM Chain * Question and Answer Chain * Common issues * Summarization Chain * Information Extractor * Text Classifier * Sentiment Analysis * LangChain Code * Simple Vector Store * Milvus Vector Store * MongoDB Atlas Vector Store * PGVector Vector Store * Pinecone Vector Store * Qdrant Vector Store * Supabase Vector Store * Zep Vector Store * Sub-nodes * Default Data Loader * GitHub Document Loader * Embeddings AWS Bedrock * Embeddings Azure OpenAI * Embeddings Cohere * Embeddings Google Gemini * Embeddings Google PaLM * Embeddings Google Vertex * Embeddings HuggingFace Inference * Embeddings Mistral Cloud * Embeddings Ollama * Embeddings OpenAI * Anthropic Chat Model * AWS Bedrock Chat Model * Azure OpenAI Chat Model * DeepSeek Chat Model * Google Gemini Chat Model * Google Vertex Chat Model * Groq Chat Model * Mistral Cloud Chat Model * Ollama Chat Model * Common issues * OpenAI Chat Model * Common issues * OpenRouter Chat Model * Cohere Model * Ollama Model * Common issues * Hugging Face Inference Model * Chat Memory Manager * Simple Memory * Common issues * Motorhead * MongoDB Chat Memory * Redis Chat Memory * Postgres Chat Memory * Xata * Zep * Auto-fixing Output Parser * Item List Output Parser * Structured Output Parser * Common issues * Contextual Compression Retriever * MultiQuery Retriever * Vector Store Retriever * Workflow Retriever * Character Text Splitter * Recursive Character Text Splitter * Token Splitter * Calculator * Custom Code Tool * HTTP Request Tool * MCP Client Tool * SerpApi (Google Search) * Think Tool * Vector Store Question Answer Tool * Wikipedia * Wolfram|Alpha * Custom n8n Workflow Tool * Credentials * Action Network credentials * ActiveCampaign credentials * Acuity Scheduling credentials * Adalo credentials * Affinity credentials * Agile CRM credentials * Airtable credentials * Airtop credentials * AlienVault credentials * AMQP credentials * Anthropic credentials * APITemplate.io credentials * Asana credentials * Auth0 Management credentials * Automizy credentials * Autopilot credentials * AWS credentials * Azure OpenAI credentials * Azure Storage credentials * BambooHR credentials * Bannerbear credentials * Baserow credentials * Beeminder credentials * Bitbucket credentials * Bitly credentials * Bitwarden credentials * Box credentials * Brandfetch credentials * Brevo credentials * Bubble credentials * Cal.com credentials * Calendly credentials * Carbon Black credentials * Chargebee credentials * CircleCI credentials * Cisco Meraki credentials * Cisco Secure Endpoint credentials * Cisco Umbrella credentials * Clearbit credentials * ClickUp credentials * Clockify credentials * Cloudflare credentials * Cockpit credentials * Coda credentials * Cohere credentials * Contentful credentials * ConvertAPI credentials * ConvertKit credentials * Copper credentials * Cortex credentials * CrateDB credentials * crowd.dev credentials * CrowdStrike credentials * Customer.io credentials * Datadog credentials * DeepL credentials * DeepSeek credentials * Demio credentials * DFIR-IRIS credentials * DHL credentials * Discord credentials * Discourse credentials * Disqus credentials * Drift credentials * Dropbox credentials * Dropcontact credentials * Dynatrace credentials * E-goi credentials * Elasticsearch credentials * Elastic Security credentials * Emelia credentials * ERPNext credentials * Eventbrite credentials * F5 Big-IP credentials * Facebook App credentials * Facebook Graph API credentials * Facebook Lead Ads credentials * Figma credentials * FileMaker credentials * Filescan credentials * Flow credentials * Form.io Trigger credentials * Formstack Trigger credentials * Fortinet FortiGate credentials * Freshdesk credentials * Freshservice credentials * Freshworks CRM credentials * FTP credentials * GetResponse credentials * Ghost credentials * Git credentials * GitHub credentials * GitLab credentials * Gong credentials * Google * Google OAuth2 single service * Google OAuth2 generic * Google Service Account * Google Gemini(PaLM) credentials * Gotify credentials * GoToWebinar credentials * Grafana credentials * Grist credentials * Groq credentials * Gumroad credentials * HaloPSA credentials * Harvest credentials * Help Scout credentials * HighLevel credentials * Home Assistant credentials * HTTP Request credentials * HubSpot credentials * Hugging Face credentials * Humantic AI credentials * Hunter credentials * Hybrid Analysis credentials * IMAP * Gmail * Outlook.com * Yahoo * Imperva WAF credentials * Intercom credentials * Invoice Ninja credentials * Iterable credentials * Jenkins credentials * Jira credentials * JotForm credentials * JWT credentials * Kafka credentials * Keap credentials * Kibana credentials * Kitemaker credentials * KoboToolbox credentials * LDAP credentials * Lemlist credentials * Line credentials * Linear credentials * LingvaNex credentials * LinkedIn credentials * LoneScale credentials * Magento 2 credentials * Mailcheck credentials * Mailchimp credentials * MailerLite credentials * Mailgun credentials * Mailjet credentials * Malcore credentials * Mandrill credentials * Marketstack credentials * Matrix credentials * Mattermost credentials * Mautic credentials * Medium credentials * MessageBird credentials * Metabase credentials * Microsoft credentials * Microsoft Azure Monitor credentials * Microsoft Entra ID credentials * Microsoft SQL credentials * Milvus credentials * Mindee credentials * Miro credentials * MISP credentials * Mist credentials * Mistral Cloud credentials * Mocean credentials * monday.com credentials * MongoDB credentials * Monica CRM credentials * Motorhead credentials * MQTT credentials * MSG91 credentials * MySQL credentials * NASA credentials * Netlify credentials * Netscaler ADC credentials * Nextcloud credentials * NocoDB credentials * Notion credentials * npm credentials * Odoo credentials * Okta credentials * Ollama credentials * One Simple API credentials * Onfleet credentials * OpenAI credentials * OpenCTI credentials * OpenRouter credentials * OpenWeatherMap credentials * Oura credentials * Paddle credentials * PagerDuty credentials * PayPal credentials * Peekalink credentials * PhantomBuster credentials * Philips Hue credentials * Pinecone credentials * Pipedrive credentials * Plivo credentials * Postgres credentials * PostHog credentials * Postmark credentials * ProfitWell credentials * Pushbullet credentials * Pushcut credentials * Pushover credentials * QRadar credentials * Qdrant credentials * Qualys credentials * QuestDB credentials * Quick Base credentials * QuickBooks credentials * RabbitMQ credentials * Raindrop credentials * Rapid7 InsightVM credentials * Recorded Future credentials * Reddit credentials * Redis credentials * Rocket.Chat credentials * Rundeck credentials * S3 credentials * Salesforce credentials * Salesmate credentials * SeaTable credentials * SecurityScorecard credentials * Segment credentials * Sekoia credentials * Send Email * Gmail * Outlook.com * Yahoo * SendGrid credentials * Sendy credentials * Sentry.io credentials * Serp credentials * ServiceNow credentials * seven credentials * Shopify credentials * Shuffler credentials * SIGNL4 credentials * Slack credentials * Snowflake credentials * SolarWinds IPAM credentials * SolarWinds Observability SaaS credentials * Splunk credentials * Spontit credentials * Spotify credentials * SSH credentials * Stackby credentials * Storyblok credentials * Strapi credentials * Strava credentials * Stripe credentials * Supabase credentials * SurveyMonkey credentials * SyncroMSP credentials * Sysdig credentials * Taiga credentials * Tapfiliate credentials * Telegram credentials * TheHive credentials * TheHive 5 credentials * TimescaleDB credentials * Todoist credentials * Toggl credentials * TOTP credentials * Travis CI credentials * Trellix ePO credentials * Trello credentials * Twake credentials * Twilio credentials * Twist credentials * Typeform credentials * Unleashed Software credentials * UpLead credentials * uProc credentials * UptimeRobot credentials * urlscan.io credentials * Venafi TLS Protect Cloud credentials * Venafi TLS Protect Datacenter credentials * Vero credentials * VirusTotal credentials * Vonage credentials * Webex by Cisco credentials * Webflow credentials * Webhook credentials * Wekan credentials * WhatsApp Business Cloud credentials * Wise credentials * Wolfram|Alpha credentials * WooCommerce credentials * WordPress credentials * Workable credentials * Wufoo credentials * X (formerly Twitter) credentials * Xata credentials * Xero credentials * Yourls credentials * Zabbix credentials * Zammad credentials * Zendesk credentials * Zep credentials * Zoho credentials * Zoom credentials * Zscaler ZIA credentials * Zulip credentials * Custom API actions for existing nodes * Handle rate limits * Community nodes Community nodes * Installation and management * GUI installation * Manual installation * Risks * Blocklist * Using community nodes * Troubleshooting * Building community nodes * Creating nodes Creating nodes * Overview * Plan your node * Choose a node type * Choose a node building style * Node UI design * Choose node file structure * Build your node * Set up your development environment * Tutorial: Build a declarative-style node * Tutorial: Build a programmatic-style node * Reference * Node UI elements * Code standards * Versioning * Choose node file structure * Base files * Structure * Standard parameters * Declarative-style parameters * Programmatic-style parameters * Programmatic-style execute method * Codex files * Credentials files * HTTP request helpers * Item linking * Test your node * Run your node locally * Node linter * Troubleshooting * Deploy your node * Submit community nodes * Install private nodes * Hosting n8n * Community vs Enterprise * Installation Installation * npm * Docker * Server setups * Digital Ocean * Heroku * Hetzner * Amazon Web Services * Azure * Google Cloud * Docker Compose * Updating * Configuration Configuration * Environment variables * Binary data * Credentials * Database * Deployment * Endpoints * Executions * External data storage * External hooks * External secrets * Logs * License * Nodes * Queue mode * Security * Source control * Task runners * Timezone and localization * User management and 2FA * Workflows * Configuration methods * Configuration examples * Isolate n8n * Configure the Base URL * Configure custom SSL certificate authorities * Set a custom encryption key * Configure workflow timeouts * Specify custom nodes location * Enable modules in Code node * Set the timezone * Specify user folder path * Configure webhook URLs with reverse proxy * Enable Prometheus metrics * Supported databases and settings * Task runners * User management * Logging and monitoring Logging and monitoring * Logging * Monitoring * Security audit * Scaling and performance Scaling and performance * Overview * Performance and benchmarking * Configuring queue mode * Concurrency control * Execution data * Binary data * External storage for binary data * Memory-related errors * Securing n8n Securing n8n * Overview * Set up SSL * Set up SSO * Security audit * Disable the API * Opt out of data collection * Blocking nodes * Hardening task runners * Starter Kits Starter Kits * AI Starter Kit * Architecture Architecture * Overview * Database structure * Using the CLI Using the CLI * CLI commands * Code in n8n * Expressions * Using the Code node * AI coding * Built in methods and variables Built in methods and variables * Overview * Current node input * Output of other nodes * Date and time * JMESPath * HTTP node * LangChain Code node * n8n metadata * Convenience methods * Data transformation functions * Arrays * Booleans * Dates * Numbers * Objects * Strings * Custom variables Custom variables * Create custom variables * Cookbook Cookbook * Handling dates * Query JSON with JMESPath * Built-in methods and variables examples * execution * getWorkflowStaticData * Retrieve linked items from earlier in the workflow * (node-name).all * vars * Expressions * Check incoming data * Common issues * Code node * Get number of items returned by last node * Get the binary data buffer * Output to the browser console * HTTP Request node * Pagination * Advanced AI * Tutorial: Build an AI workflow in n8n * LangChain in n8n LangChain in n8n * Overview * Langchain concepts in n8n * LangChain learning resources * Use LangSmith with n8n * Examples and concepts Examples and concepts * Introduction * What is a chain? * What is an agent? * Agents vs chains example * What is memory? * What is a tool? * Use Google Sheets as a data source * Call an API to fetch data * Set a human fallback for AI workflows * Let AI specify tool parameters * What is a vector database? * Populate a Pinecone vector database from a website * API * Authentication * Pagination * Using the API playground * API reference * Embed * Prerequisites * Deployment * Configuration * Workflow management * Workflows templates * White labelling 1. Integrations 2. Built-in nodes 3. Triggers Invoice Ninja is a free open-source online invoicing app for freelancers & businesses. It offers invoicing, payments, expense tracking, & time-tasks. Credentials You can find authentication information for this node here. --- ## Page: https://docs.n8n.io/integrations/builtin/trigger-nodes/n8n-nodes-base.jiratrigger/ 1. Integrations 2. Built-in nodes 3. Triggers Jira is a proprietary issue tracking product developed by Atlassian that allows bug tracking and agile project management. Credentials You can find authentication information for this node here. Examples and templates For usage examples and templates to help you get started, refer to n8n's Jira trigger integrations page. --- ## Page: https://docs.n8n.io/integrations/builtin/trigger-nodes/n8n-nodes-base.jotformtrigger/ n8n Docs * Using n8n * Getting started Getting started * Learning path * Choose your n8n * Quickstarts * A very quick quickstart * A longer introduction * Video courses * Text courses * Level one * Navigating the editor UI * Building a mini-workflow * Automating a (real-world) use case * Designing the workflow * Building the workflow Building the workflow * Getting data from the data warehouse * Inserting data into airtable * Filtering orders * Setting values for processing orders * Calculating booked orders * Notifying the team * Scheduling the workflow * Activating and examining the workflow * Exporting and importing workflows * Test your knowledge * Level two * Understanding the data structure * Processing different data types * Merging and splitting data * Dealing with errors in workflows * Automating a business workflow Automating a business workflow * Use case * Workflow 1 * Workflow 2 * Workflow 3 * Test your knowledge * Using the app Using the app * Understand workflows * Create and run * Components * Nodes * Connections * Sticky Notes * Executions * Manual, partial, and production executions * Workflow-level executions * All executions * Custom executions data * Debug executions * Tags * Export and import * Templates * Sharing * Settings * Workflow history * Workflow ID * Manage credentials * Create and edit * Credential sharing * Manage users and access * Cloud setup * Manage users * Account types * Role-based access control * Role types * Projects * Best practices * 2FA * LDAP * SAML * Set up SAML * Okta Workforce Identity SAML setup * Troubleshooting * Manage users with SAML * Keyboard shortcuts * Key concepts Key concepts * Flow logic * Splitting with conditionals * Merging data * Looping * Waiting * Sub-workflows * Error handling * Execution order in multi-branch workflows * Data * Data structure * Data flow within nodes * Transforming data * Process data using code * Data mapping * Data mapping in the UI * Data mapping in the expressions editor * Data item linking * Item linking concepts * Item linking in the Code node * Item linking errors * Item linking for node creators * Data pinning * Data editing * Data filtering * Data mocking * Binary data * Schema preview * Glossary * n8n Cloud n8n Cloud * Overview * Access the Cloud admin dashboard * Update your n8n Cloud version * Set the timezone * Cloud IP addresses * Cloud data management * Change ownership or username * Concurrency * AI Assistant * Enterprise features Enterprise features * Source control and environments * Understand * Environments * Git in n8n * Branch patterns * Set up * Using * Push and pull * Copy work between environments * Manage variables * Tutorial: Create environments with source control * External secrets * Log streaming * License key * Releases Releases * Release notes Release notes * 1.x * 0.x * v1.0 migration guide * Help and community Help and community * Where to get help * Contributing * Licenses and privacy Licenses and privacy * Privacy and security * Privacy * Security * Incident response * What you can do * Sustainable use license * Integrations * Built-in nodes Built-in nodes * Node types * Core nodes * Activation Trigger * Aggregate * AI Transform * Code * Keyboard shortcuts * Common issues * Compare Datasets * Compression * Chat Trigger * Common issues * Convert to File * Crypto * Date & Time * Debug Helper * Edit Fields (Set) * Edit Image * Email Trigger (IMAP) * Error Trigger * Execute Command * Common issues * Execute Sub-workflow * Execute Sub-workflow Trigger * Execution Data * Extract From File * Filter * FTP * Git * GraphQL * HTML * HTTP Request * Common issues * If * JWT * LDAP * Limit * Local File Trigger * Loop Over Items (Split in Batches) * Manual Trigger * Markdown * MCP Server Trigger * Merge * n8n * n8n Form * n8n Form Trigger * n8n Trigger * No Operation, do nothing * Read/Write Files from Disk * Remove Duplicates * Templates and examples * Rename Keys * Respond to Webhook * RSS Read * RSS Feed Trigger * Schedule Trigger * Common issues * Send Email * Sort * Split Out * SSE Trigger * SSH * Stop And Error * Summarize * Switch * TOTP * Wait * Webhook * Workflow development * Common issues * Workflow Trigger * XML * Actions * Action Network * ActiveCampaign * Adalo * Affinity * Agile CRM * Airtable * Common issues * Airtop * AMQP Sender * APITemplate.io * Asana * Automizy * Autopilot * AWS Certificate Manager * AWS Comprehend * AWS DynamoDB * AWS Elastic Load Balancing * AWS Lambda * AWS Rekognition * AWS S3 * AWS SES * AWS SNS * AWS SQS * AWS Textract * AWS Transcribe * Azure Storage * BambooHR * Bannerbear * Baserow * Beeminder * Bitly * Bitwarden * Box * Brandfetch * Brevo * Bubble * Chargebee * CircleCI * Webex by Cisco * Clearbit * ClickUp * Clockify * Cloudflare * Cockpit * Coda * CoinGecko * Contentful * ConvertKit * Copper * Cortex * CrateDB * crowd.dev * Customer.io * DeepL * Demio * DHL * Discord * Common issues * Discourse * Disqus * Drift * Dropbox * Dropcontact * E-goi * Elasticsearch * Elastic Security * Emelia * ERPNext * Facebook Graph API * FileMaker * Flow * Freshdesk * Freshservice * Freshworks CRM * GetResponse * Ghost * GitHub * GitLab * Gmail * Draft operations * Label operations * Message operations * Thread operations * Common issues * Gong * Google Ads * Google Analytics * Google BigQuery * Google Books * Google Business Profile * Google Calendar * Calendar operations * Event operations * Google Chat * Google Cloud Firestore * Google Cloud Natural Language * Google Cloud Realtime Database * Google Cloud Storage * Google Contacts * Google Docs * Google Drive * File operations * File and folder operations * Folder operations * Shared drive operations * Common issues * Google Perspective * Google Sheets * Document operations * Sheet within Document operations * Common issues * Google Slides * Google Tasks * Google Translate * Google Workspace Admin * Gotify * GoToWebinar * Grafana * Grist * Hacker News * HaloPSA * Harvest * Help Scout * HighLevel * Home Assistant * HubSpot * Humantic AI * Hunter * Intercom * Invoice Ninja * Iterable * Jenkins * Jira Software * Kafka * Keap * Kitemaker * KoboToolbox * Lemlist * Line * Linear * LingvaNex * LinkedIn * LoneScale * Magento 2 * Mailcheck * Mailchimp * MailerLite * Mailgun * Mailjet * Mandrill * marketstack * Matrix * Mattermost * Mautic * Medium * MessageBird * Metabase * Microsoft Dynamics CRM * Microsoft Entra ID * Microsoft Excel 365 * Microsoft Graph Security * Microsoft OneDrive * Microsoft Outlook * Microsoft SQL * Microsoft Teams * Microsoft To Do * Mindee * MISP * Mocean * monday.com * MongoDB * Monica CRM * MQTT * MSG91 * MySQL * Common issues * Customer Datastore (n8n Training) * Customer Messenger (n8n Training) * NASA * Netlify * Netscaler ADC * Nextcloud * NocoDB * Notion * Common issues * npm * Odoo * Okta * One Simple API * Onfleet * OpenAI * Assistant operations * Audio operations * File operations * Image operations * Text operations * Common issues * OpenThesaurus * OpenWeatherMap * Oura * Paddle * PagerDuty * PayPal * Peekalink * PhantomBuster * Philips Hue * Pipedrive * Plivo * PostBin * Postgres * Common issues * PostHog * ProfitWell * Pushbullet * Pushcut * Pushover * QuestDB * Quick Base * QuickBooks Online * QuickChart * RabbitMQ * Raindrop * Reddit * Redis * Rocket.Chat * Rundeck * S3 * Salesforce * Salesmate * SeaTable * SecurityScorecard * Segment * SendGrid * Sendy * Sentry.io * ServiceNow * seven * Shopify * SIGNL4 * Slack * Snowflake * Splunk * Spontit * Spotify * Stackby * Storyblok * Strapi * Strava * Stripe * Supabase * Common issues * SyncroMSP * Taiga * Tapfiliate * Telegram * Chat operations * Callback operations * File operations * Message operations * Common issues * TheHive * TheHive 5 * TimescaleDB * Todoist * Travis CI * Trello * Twake * Twilio * Twist * Unleashed Software * UpLead * uProc * UptimeRobot * urlscan.io * Venafi TLS Protect Cloud * Venafi TLS Protect Datacenter * Vero * Vonage * Webflow * Wekan * WhatsApp Business Cloud * Common issues * Wise * WooCommerce * WordPress * X (Formerly Twitter) * Xero * Yourls * YouTube * Zammad * Zendesk * Zoho CRM * Zoom * Zulip * Triggers * ActiveCampaign Trigger * Acuity Scheduling Trigger * Affinity Trigger * Airtable Trigger * AMQP Trigger * Asana Trigger * Autopilot Trigger * AWS SNS Trigger * Bitbucket Trigger * Box Trigger * Brevo Trigger * Calendly Trigger * Cal Trigger * Chargebee Trigger * ClickUp Trigger * Clockify Trigger * ConvertKit Trigger * Copper Trigger * crowd.dev Trigger * Customer.io Trigger * Emelia Trigger * Eventbrite Trigger * Facebook Lead Ads Trigger * Facebook Trigger * Ad Account * Application * Certificate Transparency * Group * Instagram * Link * Page * Permissions * User * WhatsApp Business Account * Workplace Security * Figma Trigger (Beta) * Flow Trigger * Form.io Trigger * Formstack Trigger * GetResponse Trigger * GitHub Trigger * GitLab Trigger * Gmail Trigger * Poll Mode options * Common issues * Google Calendar Trigger * Google Drive Trigger * Common issues * Google Business Profile Trigger * Google Sheets Trigger * Common issues * Gumroad Trigger * Help Scout Trigger * Hubspot Trigger * Invoice Ninja Trigger * Jira Trigger * JotForm Trigger * Kafka Trigger * Keap Trigger * KoboToolbox Trigger * Lemlist Trigger * Linear Trigger * LoneScale Trigger * Mailchimp Trigger * MailerLite Trigger * Mailjet Trigger * Mautic Trigger * Microsoft OneDrive Trigger * Microsoft Outlook Trigger * MQTT Trigger * Netlify Trigger * Notion Trigger * Onfleet Trigger * PayPal Trigger * Pipedrive Trigger * Postgres Trigger * Postmark Trigger * Pushcut Trigger * RabbitMQ Trigger * Redis Trigger * Salesforce Trigger * SeaTable Trigger * Shopify Trigger * Slack Trigger * Strava Trigger * Stripe Trigger * SurveyMonkey Trigger * Taiga Trigger * Telegram Trigger * Common issues * TheHive 5 Trigger * TheHive Trigger * Toggl Trigger * Trello Trigger * Twilio Trigger * Typeform Trigger * Venafi TLS Protect Cloud Trigger * Webex by Cisco Trigger * Webflow Trigger * WhatsApp Trigger * Wise Trigger * WooCommerce Trigger * Workable Trigger * Wufoo Trigger * Zendesk Trigger * Cluster nodes * Root nodes * AI Agent * Conversational Agent * OpenAI Functions Agent * Plan and Execute Agent * ReAct Agent * SQL Agent * Tools Agent * Common issues * Basic LLM Chain * Question and Answer Chain * Common issues * Summarization Chain * Information Extractor * Text Classifier * Sentiment Analysis * LangChain Code * Simple Vector Store * Milvus Vector Store * MongoDB Atlas Vector Store * PGVector Vector Store * Pinecone Vector Store * Qdrant Vector Store * Supabase Vector Store * Zep Vector Store * Sub-nodes * Default Data Loader * GitHub Document Loader * Embeddings AWS Bedrock * Embeddings Azure OpenAI * Embeddings Cohere * Embeddings Google Gemini * Embeddings Google PaLM * Embeddings Google Vertex * Embeddings HuggingFace Inference * Embeddings Mistral Cloud * Embeddings Ollama * Embeddings OpenAI * Anthropic Chat Model * AWS Bedrock Chat Model * Azure OpenAI Chat Model * DeepSeek Chat Model * Google Gemini Chat Model * Google Vertex Chat Model * Groq Chat Model * Mistral Cloud Chat Model * Ollama Chat Model * Common issues * OpenAI Chat Model * Common issues * OpenRouter Chat Model * Cohere Model * Ollama Model * Common issues * Hugging Face Inference Model * Chat Memory Manager * Simple Memory * Common issues * Motorhead * MongoDB Chat Memory * Redis Chat Memory * Postgres Chat Memory * Xata * Zep * Auto-fixing Output Parser * Item List Output Parser * Structured Output Parser * Common issues * Contextual Compression Retriever * MultiQuery Retriever * Vector Store Retriever * Workflow Retriever * Character Text Splitter * Recursive Character Text Splitter * Token Splitter * Calculator * Custom Code Tool * HTTP Request Tool * MCP Client Tool * SerpApi (Google Search) * Think Tool * Vector Store Question Answer Tool * Wikipedia * Wolfram|Alpha * Custom n8n Workflow Tool * Credentials * Action Network credentials * ActiveCampaign credentials * Acuity Scheduling credentials * Adalo credentials * Affinity credentials * Agile CRM credentials * Airtable credentials * Airtop credentials * AlienVault credentials * AMQP credentials * Anthropic credentials * APITemplate.io credentials * Asana credentials * Auth0 Management credentials * Automizy credentials * Autopilot credentials * AWS credentials * Azure OpenAI credentials * Azure Storage credentials * BambooHR credentials * Bannerbear credentials * Baserow credentials * Beeminder credentials * Bitbucket credentials * Bitly credentials * Bitwarden credentials * Box credentials * Brandfetch credentials * Brevo credentials * Bubble credentials * Cal.com credentials * Calendly credentials * Carbon Black credentials * Chargebee credentials * CircleCI credentials * Cisco Meraki credentials * Cisco Secure Endpoint credentials * Cisco Umbrella credentials * Clearbit credentials * ClickUp credentials * Clockify credentials * Cloudflare credentials * Cockpit credentials * Coda credentials * Cohere credentials * Contentful credentials * ConvertAPI credentials * ConvertKit credentials * Copper credentials * Cortex credentials * CrateDB credentials * crowd.dev credentials * CrowdStrike credentials * Customer.io credentials * Datadog credentials * DeepL credentials * DeepSeek credentials * Demio credentials * DFIR-IRIS credentials * DHL credentials * Discord credentials * Discourse credentials * Disqus credentials * Drift credentials * Dropbox credentials * Dropcontact credentials * Dynatrace credentials * E-goi credentials * Elasticsearch credentials * Elastic Security credentials * Emelia credentials * ERPNext credentials * Eventbrite credentials * F5 Big-IP credentials * Facebook App credentials * Facebook Graph API credentials * Facebook Lead Ads credentials * Figma credentials * FileMaker credentials * Filescan credentials * Flow credentials * Form.io Trigger credentials * Formstack Trigger credentials * Fortinet FortiGate credentials * Freshdesk credentials * Freshservice credentials * Freshworks CRM credentials * FTP credentials * GetResponse credentials * Ghost credentials * Git credentials * GitHub credentials * GitLab credentials * Gong credentials * Google * Google OAuth2 single service * Google OAuth2 generic * Google Service Account * Google Gemini(PaLM) credentials * Gotify credentials * GoToWebinar credentials * Grafana credentials * Grist credentials * Groq credentials * Gumroad credentials * HaloPSA credentials * Harvest credentials * Help Scout credentials * HighLevel credentials * Home Assistant credentials * HTTP Request credentials * HubSpot credentials * Hugging Face credentials * Humantic AI credentials * Hunter credentials * Hybrid Analysis credentials * IMAP * Gmail * Outlook.com * Yahoo * Imperva WAF credentials * Intercom credentials * Invoice Ninja credentials * Iterable credentials * Jenkins credentials * Jira credentials * JotForm credentials * JWT credentials * Kafka credentials * Keap credentials * Kibana credentials * Kitemaker credentials * KoboToolbox credentials * LDAP credentials * Lemlist credentials * Line credentials * Linear credentials * LingvaNex credentials * LinkedIn credentials * LoneScale credentials * Magento 2 credentials * Mailcheck credentials * Mailchimp credentials * MailerLite credentials * Mailgun credentials * Mailjet credentials * Malcore credentials * Mandrill credentials * Marketstack credentials * Matrix credentials * Mattermost credentials * Mautic credentials * Medium credentials * MessageBird credentials * Metabase credentials * Microsoft credentials * Microsoft Azure Monitor credentials * Microsoft Entra ID credentials * Microsoft SQL credentials * Milvus credentials * Mindee credentials * Miro credentials * MISP credentials * Mist credentials * Mistral Cloud credentials * Mocean credentials * monday.com credentials * MongoDB credentials * Monica CRM credentials * Motorhead credentials * MQTT credentials * MSG91 credentials * MySQL credentials * NASA credentials * Netlify credentials * Netscaler ADC credentials * Nextcloud credentials * NocoDB credentials * Notion credentials * npm credentials * Odoo credentials * Okta credentials * Ollama credentials * One Simple API credentials * Onfleet credentials * OpenAI credentials * OpenCTI credentials * OpenRouter credentials * OpenWeatherMap credentials * Oura credentials * Paddle credentials * PagerDuty credentials * PayPal credentials * Peekalink credentials * PhantomBuster credentials * Philips Hue credentials * Pinecone credentials * Pipedrive credentials * Plivo credentials * Postgres credentials * PostHog credentials * Postmark credentials * ProfitWell credentials * Pushbullet credentials * Pushcut credentials * Pushover credentials * QRadar credentials * Qdrant credentials * Qualys credentials * QuestDB credentials * Quick Base credentials * QuickBooks credentials * RabbitMQ credentials * Raindrop credentials * Rapid7 InsightVM credentials * Recorded Future credentials * Reddit credentials * Redis credentials * Rocket.Chat credentials * Rundeck credentials * S3 credentials * Salesforce credentials * Salesmate credentials * SeaTable credentials * SecurityScorecard credentials * Segment credentials * Sekoia credentials * Send Email * Gmail * Outlook.com * Yahoo * SendGrid credentials * Sendy credentials * Sentry.io credentials * Serp credentials * ServiceNow credentials * seven credentials * Shopify credentials * Shuffler credentials * SIGNL4 credentials * Slack credentials * Snowflake credentials * SolarWinds IPAM credentials * SolarWinds Observability SaaS credentials * Splunk credentials * Spontit credentials * Spotify credentials * SSH credentials * Stackby credentials * Storyblok credentials * Strapi credentials * Strava credentials * Stripe credentials * Supabase credentials * SurveyMonkey credentials * SyncroMSP credentials * Sysdig credentials * Taiga credentials * Tapfiliate credentials * Telegram credentials * TheHive credentials * TheHive 5 credentials * TimescaleDB credentials * Todoist credentials * Toggl credentials * TOTP credentials * Travis CI credentials * Trellix ePO credentials * Trello credentials * Twake credentials * Twilio credentials * Twist credentials * Typeform credentials * Unleashed Software credentials * UpLead credentials * uProc credentials * UptimeRobot credentials * urlscan.io credentials * Venafi TLS Protect Cloud credentials * Venafi TLS Protect Datacenter credentials * Vero credentials * VirusTotal credentials * Vonage credentials * Webex by Cisco credentials * Webflow credentials * Webhook credentials * Wekan credentials * WhatsApp Business Cloud credentials * Wise credentials * Wolfram|Alpha credentials * WooCommerce credentials * WordPress credentials * Workable credentials * Wufoo credentials * X (formerly Twitter) credentials * Xata credentials * Xero credentials * Yourls credentials * Zabbix credentials * Zammad credentials * Zendesk credentials * Zep credentials * Zoho credentials * Zoom credentials * Zscaler ZIA credentials * Zulip credentials * Custom API actions for existing nodes * Handle rate limits * Community nodes Community nodes * Installation and management * GUI installation * Manual installation * Risks * Blocklist * Using community nodes * Troubleshooting * Building community nodes * Creating nodes Creating nodes * Overview * Plan your node * Choose a node type * Choose a node building style * Node UI design * Choose node file structure * Build your node * Set up your development environment * Tutorial: Build a declarative-style node * Tutorial: Build a programmatic-style node * Reference * Node UI elements * Code standards * Versioning * Choose node file structure * Base files * Structure * Standard parameters * Declarative-style parameters * Programmatic-style parameters * Programmatic-style execute method * Codex files * Credentials files * HTTP request helpers * Item linking * Test your node * Run your node locally * Node linter * Troubleshooting * Deploy your node * Submit community nodes * Install private nodes * Hosting n8n * Community vs Enterprise * Installation Installation * npm * Docker * Server setups * Digital Ocean * Heroku * Hetzner * Amazon Web Services * Azure * Google Cloud * Docker Compose * Updating * Configuration Configuration * Environment variables * Binary data * Credentials * Database * Deployment * Endpoints * Executions * External data storage * External hooks * External secrets * Logs * License * Nodes * Queue mode * Security * Source control * Task runners * Timezone and localization * User management and 2FA * Workflows * Configuration methods * Configuration examples * Isolate n8n * Configure the Base URL * Configure custom SSL certificate authorities * Set a custom encryption key * Configure workflow timeouts * Specify custom nodes location * Enable modules in Code node * Set the timezone * Specify user folder path * Configure webhook URLs with reverse proxy * Enable Prometheus metrics * Supported databases and settings * Task runners * User management * Logging and monitoring Logging and monitoring * Logging * Monitoring * Security audit * Scaling and performance Scaling and performance * Overview * Performance and benchmarking * Configuring queue mode * Concurrency control * Execution data * Binary data * External storage for binary data * Memory-related errors * Securing n8n Securing n8n * Overview * Set up SSL * Set up SSO * Security audit * Disable the API * Opt out of data collection * Blocking nodes * Hardening task runners * Starter Kits Starter Kits * AI Starter Kit * Architecture Architecture * Overview * Database structure * Using the CLI Using the CLI * CLI commands * Code in n8n * Expressions * Using the Code node * AI coding * Built in methods and variables Built in methods and variables * Overview * Current node input * Output of other nodes * Date and time * JMESPath * HTTP node * LangChain Code node * n8n metadata * Convenience methods * Data transformation functions * Arrays * Booleans * Dates * Numbers * Objects * Strings * Custom variables Custom variables * Create custom variables * Cookbook Cookbook * Handling dates * Query JSON with JMESPath * Built-in methods and variables examples * execution * getWorkflowStaticData * Retrieve linked items from earlier in the workflow * (node-name).all * vars * Expressions * Check incoming data * Common issues * Code node * Get number of items returned by last node * Get the binary data buffer * Output to the browser console * HTTP Request node * Pagination * Advanced AI * Tutorial: Build an AI workflow in n8n * LangChain in n8n LangChain in n8n * Overview * Langchain concepts in n8n * LangChain learning resources * Use LangSmith with n8n * Examples and concepts Examples and concepts * Introduction * What is a chain? * What is an agent? * Agents vs chains example * What is memory? * What is a tool? * Use Google Sheets as a data source * Call an API to fetch data * Set a human fallback for AI workflows * Let AI specify tool parameters * What is a vector database? * Populate a Pinecone vector database from a website * API * Authentication * Pagination * Using the API playground * API reference * Embed * Prerequisites * Deployment * Configuration * Workflow management * Workflows templates * White labelling 1. Integrations 2. Built-in nodes 3. Triggers JotForm is an online form building service. JotForm's software creates forms with a drag and drop creation tool and an option to encrypt user data. Credentials You can find authentication information for this node here. --- ## Page: https://docs.n8n.io/integrations/builtin/trigger-nodes/n8n-nodes-base.kafkatrigger/ n8n Docs * Using n8n * Getting started Getting started * Learning path * Choose your n8n * Quickstarts * A very quick quickstart * A longer introduction * Video courses * Text courses * Level one * Navigating the editor UI * Building a mini-workflow * Automating a (real-world) use case * Designing the workflow * Building the workflow Building the workflow * Getting data from the data warehouse * Inserting data into airtable * Filtering orders * Setting values for processing orders * Calculating booked orders * Notifying the team * Scheduling the workflow * Activating and examining the workflow * Exporting and importing workflows * Test your knowledge * Level two * Understanding the data structure * Processing different data types * Merging and splitting data * Dealing with errors in workflows * Automating a business workflow Automating a business workflow * Use case * Workflow 1 * Workflow 2 * Workflow 3 * Test your knowledge * Using the app Using the app * Understand workflows * Create and run * Components * Nodes * Connections * Sticky Notes * Executions * Manual, partial, and production executions * Workflow-level executions * All executions * Custom executions data * Debug executions * Tags * Export and import * Templates * Sharing * Settings * Workflow history * Workflow ID * Manage credentials * Create and edit * Credential sharing * Manage users and access * Cloud setup * Manage users * Account types * Role-based access control * Role types * Projects * Best practices * 2FA * LDAP * SAML * Set up SAML * Okta Workforce Identity SAML setup * Troubleshooting * Manage users with SAML * Keyboard shortcuts * Key concepts Key concepts * Flow logic * Splitting with conditionals * Merging data * Looping * Waiting * Sub-workflows * Error handling * Execution order in multi-branch workflows * Data * Data structure * Data flow within nodes * Transforming data * Process data using code * Data mapping * Data mapping in the UI * Data mapping in the expressions editor * Data item linking * Item linking concepts * Item linking in the Code node * Item linking errors * Item linking for node creators * Data pinning * Data editing * Data filtering * Data mocking * Binary data * Schema preview * Glossary * n8n Cloud n8n Cloud * Overview * Access the Cloud admin dashboard * Update your n8n Cloud version * Set the timezone * Cloud IP addresses * Cloud data management * Change ownership or username * Concurrency * AI Assistant * Enterprise features Enterprise features * Source control and environments * Understand * Environments * Git in n8n * Branch patterns * Set up * Using * Push and pull * Copy work between environments * Manage variables * Tutorial: Create environments with source control * External secrets * Log streaming * License key * Releases Releases * Release notes Release notes * 1.x * 0.x * v1.0 migration guide * Help and community Help and community * Where to get help * Contributing * Licenses and privacy Licenses and privacy * Privacy and security * Privacy * Security * Incident response * What you can do * Sustainable use license * Integrations * Built-in nodes Built-in nodes * Node types * Core nodes * Activation Trigger * Aggregate * AI Transform * Code * Keyboard shortcuts * Common issues * Compare Datasets * Compression * Chat Trigger * Common issues * Convert to File * Crypto * Date & Time * Debug Helper * Edit Fields (Set) * Edit Image * Email Trigger (IMAP) * Error Trigger * Execute Command * Common issues * Execute Sub-workflow * Execute Sub-workflow Trigger * Execution Data * Extract From File * Filter * FTP * Git * GraphQL * HTML * HTTP Request * Common issues * If * JWT * LDAP * Limit * Local File Trigger * Loop Over Items (Split in Batches) * Manual Trigger * Markdown * MCP Server Trigger * Merge * n8n * n8n Form * n8n Form Trigger * n8n Trigger * No Operation, do nothing * Read/Write Files from Disk * Remove Duplicates * Templates and examples * Rename Keys * Respond to Webhook * RSS Read * RSS Feed Trigger * Schedule Trigger * Common issues * Send Email * Sort * Split Out * SSE Trigger * SSH * Stop And Error * Summarize * Switch * TOTP * Wait * Webhook * Workflow development * Common issues * Workflow Trigger * XML * Actions * Action Network * ActiveCampaign * Adalo * Affinity * Agile CRM * Airtable * Common issues * Airtop * AMQP Sender * APITemplate.io * Asana * Automizy * Autopilot * AWS Certificate Manager * AWS Comprehend * AWS DynamoDB * AWS Elastic Load Balancing * AWS Lambda * AWS Rekognition * AWS S3 * AWS SES * AWS SNS * AWS SQS * AWS Textract * AWS Transcribe * Azure Storage * BambooHR * Bannerbear * Baserow * Beeminder * Bitly * Bitwarden * Box * Brandfetch * Brevo * Bubble * Chargebee * CircleCI * Webex by Cisco * Clearbit * ClickUp * Clockify * Cloudflare * Cockpit * Coda * CoinGecko * Contentful * ConvertKit * Copper * Cortex * CrateDB * crowd.dev * Customer.io * DeepL * Demio * DHL * Discord * Common issues * Discourse * Disqus * Drift * Dropbox * Dropcontact * E-goi * Elasticsearch * Elastic Security * Emelia * ERPNext * Facebook Graph API * FileMaker * Flow * Freshdesk * Freshservice * Freshworks CRM * GetResponse * Ghost * GitHub * GitLab * Gmail * Draft operations * Label operations * Message operations * Thread operations * Common issues * Gong * Google Ads * Google Analytics * Google BigQuery * Google Books * Google Business Profile * Google Calendar * Calendar operations * Event operations * Google Chat * Google Cloud Firestore * Google Cloud Natural Language * Google Cloud Realtime Database * Google Cloud Storage * Google Contacts * Google Docs * Google Drive * File operations * File and folder operations * Folder operations * Shared drive operations * Common issues * Google Perspective * Google Sheets * Document operations * Sheet within Document operations * Common issues * Google Slides * Google Tasks * Google Translate * Google Workspace Admin * Gotify * GoToWebinar * Grafana * Grist * Hacker News * HaloPSA * Harvest * Help Scout * HighLevel * Home Assistant * HubSpot * Humantic AI * Hunter * Intercom * Invoice Ninja * Iterable * Jenkins * Jira Software * Kafka * Keap * Kitemaker * KoboToolbox * Lemlist * Line * Linear * LingvaNex * LinkedIn * LoneScale * Magento 2 * Mailcheck * Mailchimp * MailerLite * Mailgun * Mailjet * Mandrill * marketstack * Matrix * Mattermost * Mautic * Medium * MessageBird * Metabase * Microsoft Dynamics CRM * Microsoft Entra ID * Microsoft Excel 365 * Microsoft Graph Security * Microsoft OneDrive * Microsoft Outlook * Microsoft SQL * Microsoft Teams * Microsoft To Do * Mindee * MISP * Mocean * monday.com * MongoDB * Monica CRM * MQTT * MSG91 * MySQL * Common issues * Customer Datastore (n8n Training) * Customer Messenger (n8n Training) * NASA * Netlify * Netscaler ADC * Nextcloud * NocoDB * Notion * Common issues * npm * Odoo * Okta * One Simple API * Onfleet * OpenAI * Assistant operations * Audio operations * File operations * Image operations * Text operations * Common issues * OpenThesaurus * OpenWeatherMap * Oura * Paddle * PagerDuty * PayPal * Peekalink * PhantomBuster * Philips Hue * Pipedrive * Plivo * PostBin * Postgres * Common issues * PostHog * ProfitWell * Pushbullet * Pushcut * Pushover * QuestDB * Quick Base * QuickBooks Online * QuickChart * RabbitMQ * Raindrop * Reddit * Redis * Rocket.Chat * Rundeck * S3 * Salesforce * Salesmate * SeaTable * SecurityScorecard * Segment * SendGrid * Sendy * Sentry.io * ServiceNow * seven * Shopify * SIGNL4 * Slack * Snowflake * Splunk * Spontit * Spotify * Stackby * Storyblok * Strapi * Strava * Stripe * Supabase * Common issues * SyncroMSP * Taiga * Tapfiliate * Telegram * Chat operations * Callback operations * File operations * Message operations * Common issues * TheHive * TheHive 5 * TimescaleDB * Todoist * Travis CI * Trello * Twake * Twilio * Twist * Unleashed Software * UpLead * uProc * UptimeRobot * urlscan.io * Venafi TLS Protect Cloud * Venafi TLS Protect Datacenter * Vero * Vonage * Webflow * Wekan * WhatsApp Business Cloud * Common issues * Wise * WooCommerce * WordPress * X (Formerly Twitter) * Xero * Yourls * YouTube * Zammad * Zendesk * Zoho CRM * Zoom * Zulip * Triggers * ActiveCampaign Trigger * Acuity Scheduling Trigger * Affinity Trigger * Airtable Trigger * AMQP Trigger * Asana Trigger * Autopilot Trigger * AWS SNS Trigger * Bitbucket Trigger * Box Trigger * Brevo Trigger * Calendly Trigger * Cal Trigger * Chargebee Trigger * ClickUp Trigger * Clockify Trigger * ConvertKit Trigger * Copper Trigger * crowd.dev Trigger * Customer.io Trigger * Emelia Trigger * Eventbrite Trigger * Facebook Lead Ads Trigger * Facebook Trigger * Ad Account * Application * Certificate Transparency * Group * Instagram * Link * Page * Permissions * User * WhatsApp Business Account * Workplace Security * Figma Trigger (Beta) * Flow Trigger * Form.io Trigger * Formstack Trigger * GetResponse Trigger * GitHub Trigger * GitLab Trigger * Gmail Trigger * Poll Mode options * Common issues * Google Calendar Trigger * Google Drive Trigger * Common issues * Google Business Profile Trigger * Google Sheets Trigger * Common issues * Gumroad Trigger * Help Scout Trigger * Hubspot Trigger * Invoice Ninja Trigger * Jira Trigger * JotForm Trigger * Kafka Trigger * Keap Trigger * KoboToolbox Trigger * Lemlist Trigger * Linear Trigger * LoneScale Trigger * Mailchimp Trigger * MailerLite Trigger * Mailjet Trigger * Mautic Trigger * Microsoft OneDrive Trigger * Microsoft Outlook Trigger * MQTT Trigger * Netlify Trigger * Notion Trigger * Onfleet Trigger * PayPal Trigger * Pipedrive Trigger * Postgres Trigger * Postmark Trigger * Pushcut Trigger * RabbitMQ Trigger * Redis Trigger * Salesforce Trigger * SeaTable Trigger * Shopify Trigger * Slack Trigger * Strava Trigger * Stripe Trigger * SurveyMonkey Trigger * Taiga Trigger * Telegram Trigger * Common issues * TheHive 5 Trigger * TheHive Trigger * Toggl Trigger * Trello Trigger * Twilio Trigger * Typeform Trigger * Venafi TLS Protect Cloud Trigger * Webex by Cisco Trigger * Webflow Trigger * WhatsApp Trigger * Wise Trigger * WooCommerce Trigger * Workable Trigger * Wufoo Trigger * Zendesk Trigger * Cluster nodes * Root nodes * AI Agent * Conversational Agent * OpenAI Functions Agent * Plan and Execute Agent * ReAct Agent * SQL Agent * Tools Agent * Common issues * Basic LLM Chain * Question and Answer Chain * Common issues * Summarization Chain * Information Extractor * Text Classifier * Sentiment Analysis * LangChain Code * Simple Vector Store * Milvus Vector Store * MongoDB Atlas Vector Store * PGVector Vector Store * Pinecone Vector Store * Qdrant Vector Store * Supabase Vector Store * Zep Vector Store * Sub-nodes * Default Data Loader * GitHub Document Loader * Embeddings AWS Bedrock * Embeddings Azure OpenAI * Embeddings Cohere * Embeddings Google Gemini * Embeddings Google PaLM * Embeddings Google Vertex * Embeddings HuggingFace Inference * Embeddings Mistral Cloud * Embeddings Ollama * Embeddings OpenAI * Anthropic Chat Model * AWS Bedrock Chat Model * Azure OpenAI Chat Model * DeepSeek Chat Model * Google Gemini Chat Model * Google Vertex Chat Model * Groq Chat Model * Mistral Cloud Chat Model * Ollama Chat Model * Common issues * OpenAI Chat Model * Common issues * OpenRouter Chat Model * Cohere Model * Ollama Model * Common issues * Hugging Face Inference Model * Chat Memory Manager * Simple Memory * Common issues * Motorhead * MongoDB Chat Memory * Redis Chat Memory * Postgres Chat Memory * Xata * Zep * Auto-fixing Output Parser * Item List Output Parser * Structured Output Parser * Common issues * Contextual Compression Retriever * MultiQuery Retriever * Vector Store Retriever * Workflow Retriever * Character Text Splitter * Recursive Character Text Splitter * Token Splitter * Calculator * Custom Code Tool * HTTP Request Tool * MCP Client Tool * SerpApi (Google Search) * Think Tool * Vector Store Question Answer Tool * Wikipedia * Wolfram|Alpha * Custom n8n Workflow Tool * Credentials * Action Network credentials * ActiveCampaign credentials * Acuity Scheduling credentials * Adalo credentials * Affinity credentials * Agile CRM credentials * Airtable credentials * Airtop credentials * AlienVault credentials * AMQP credentials * Anthropic credentials * APITemplate.io credentials * Asana credentials * Auth0 Management credentials * Automizy credentials * Autopilot credentials * AWS credentials * Azure OpenAI credentials * Azure Storage credentials * BambooHR credentials * Bannerbear credentials * Baserow credentials * Beeminder credentials * Bitbucket credentials * Bitly credentials * Bitwarden credentials * Box credentials * Brandfetch credentials * Brevo credentials * Bubble credentials * Cal.com credentials * Calendly credentials * Carbon Black credentials * Chargebee credentials * CircleCI credentials * Cisco Meraki credentials * Cisco Secure Endpoint credentials * Cisco Umbrella credentials * Clearbit credentials * ClickUp credentials * Clockify credentials * Cloudflare credentials * Cockpit credentials * Coda credentials * Cohere credentials * Contentful credentials * ConvertAPI credentials * ConvertKit credentials * Copper credentials * Cortex credentials * CrateDB credentials * crowd.dev credentials * CrowdStrike credentials * Customer.io credentials * Datadog credentials * DeepL credentials * DeepSeek credentials * Demio credentials * DFIR-IRIS credentials * DHL credentials * Discord credentials * Discourse credentials * Disqus credentials * Drift credentials * Dropbox credentials * Dropcontact credentials * Dynatrace credentials * E-goi credentials * Elasticsearch credentials * Elastic Security credentials * Emelia credentials * ERPNext credentials * Eventbrite credentials * F5 Big-IP credentials * Facebook App credentials * Facebook Graph API credentials * Facebook Lead Ads credentials * Figma credentials * FileMaker credentials * Filescan credentials * Flow credentials * Form.io Trigger credentials * Formstack Trigger credentials * Fortinet FortiGate credentials * Freshdesk credentials * Freshservice credentials * Freshworks CRM credentials * FTP credentials * GetResponse credentials * Ghost credentials * Git credentials * GitHub credentials * GitLab credentials * Gong credentials * Google * Google OAuth2 single service * Google OAuth2 generic * Google Service Account * Google Gemini(PaLM) credentials * Gotify credentials * GoToWebinar credentials * Grafana credentials * Grist credentials * Groq credentials * Gumroad credentials * HaloPSA credentials * Harvest credentials * Help Scout credentials * HighLevel credentials * Home Assistant credentials * HTTP Request credentials * HubSpot credentials * Hugging Face credentials * Humantic AI credentials * Hunter credentials * Hybrid Analysis credentials * IMAP * Gmail * Outlook.com * Yahoo * Imperva WAF credentials * Intercom credentials * Invoice Ninja credentials * Iterable credentials * Jenkins credentials * Jira credentials * JotForm credentials * JWT credentials * Kafka credentials * Keap credentials * Kibana credentials * Kitemaker credentials * KoboToolbox credentials * LDAP credentials * Lemlist credentials * Line credentials * Linear credentials * LingvaNex credentials * LinkedIn credentials * LoneScale credentials * Magento 2 credentials * Mailcheck credentials * Mailchimp credentials * MailerLite credentials * Mailgun credentials * Mailjet credentials * Malcore credentials * Mandrill credentials * Marketstack credentials * Matrix credentials * Mattermost credentials * Mautic credentials * Medium credentials * MessageBird credentials * Metabase credentials * Microsoft credentials * Microsoft Azure Monitor credentials * Microsoft Entra ID credentials * Microsoft SQL credentials * Milvus credentials * Mindee credentials * Miro credentials * MISP credentials * Mist credentials * Mistral Cloud credentials * Mocean credentials * monday.com credentials * MongoDB credentials * Monica CRM credentials * Motorhead credentials * MQTT credentials * MSG91 credentials * MySQL credentials * NASA credentials * Netlify credentials * Netscaler ADC credentials * Nextcloud credentials * NocoDB credentials * Notion credentials * npm credentials * Odoo credentials * Okta credentials * Ollama credentials * One Simple API credentials * Onfleet credentials * OpenAI credentials * OpenCTI credentials * OpenRouter credentials * OpenWeatherMap credentials * Oura credentials * Paddle credentials * PagerDuty credentials * PayPal credentials * Peekalink credentials * PhantomBuster credentials * Philips Hue credentials * Pinecone credentials * Pipedrive credentials * Plivo credentials * Postgres credentials * PostHog credentials * Postmark credentials * ProfitWell credentials * Pushbullet credentials * Pushcut credentials * Pushover credentials * QRadar credentials * Qdrant credentials * Qualys credentials * QuestDB credentials * Quick Base credentials * QuickBooks credentials * RabbitMQ credentials * Raindrop credentials * Rapid7 InsightVM credentials * Recorded Future credentials * Reddit credentials * Redis credentials * Rocket.Chat credentials * Rundeck credentials * S3 credentials * Salesforce credentials * Salesmate credentials * SeaTable credentials * SecurityScorecard credentials * Segment credentials * Sekoia credentials * Send Email * Gmail * Outlook.com * Yahoo * SendGrid credentials * Sendy credentials * Sentry.io credentials * Serp credentials * ServiceNow credentials * seven credentials * Shopify credentials * Shuffler credentials * SIGNL4 credentials * Slack credentials * Snowflake credentials * SolarWinds IPAM credentials * SolarWinds Observability SaaS credentials * Splunk credentials * Spontit credentials * Spotify credentials * SSH credentials * Stackby credentials * Storyblok credentials * Strapi credentials * Strava credentials * Stripe credentials * Supabase credentials * SurveyMonkey credentials * SyncroMSP credentials * Sysdig credentials * Taiga credentials * Tapfiliate credentials * Telegram credentials * TheHive credentials * TheHive 5 credentials * TimescaleDB credentials * Todoist credentials * Toggl credentials * TOTP credentials * Travis CI credentials * Trellix ePO credentials * Trello credentials * Twake credentials * Twilio credentials * Twist credentials * Typeform credentials * Unleashed Software credentials * UpLead credentials * uProc credentials * UptimeRobot credentials * urlscan.io credentials * Venafi TLS Protect Cloud credentials * Venafi TLS Protect Datacenter credentials * Vero credentials * VirusTotal credentials * Vonage credentials * Webex by Cisco credentials * Webflow credentials * Webhook credentials * Wekan credentials * WhatsApp Business Cloud credentials * Wise credentials * Wolfram|Alpha credentials * WooCommerce credentials * WordPress credentials * Workable credentials * Wufoo credentials * X (formerly Twitter) credentials * Xata credentials * Xero credentials * Yourls credentials * Zabbix credentials * Zammad credentials * Zendesk credentials * Zep credentials * Zoho credentials * Zoom credentials * Zscaler ZIA credentials * Zulip credentials * Custom API actions for existing nodes * Handle rate limits * Community nodes Community nodes * Installation and management * GUI installation * Manual installation * Risks * Blocklist * Using community nodes * Troubleshooting * Building community nodes * Creating nodes Creating nodes * Overview * Plan your node * Choose a node type * Choose a node building style * Node UI design * Choose node file structure * Build your node * Set up your development environment * Tutorial: Build a declarative-style node * Tutorial: Build a programmatic-style node * Reference * Node UI elements * Code standards * Versioning * Choose node file structure * Base files * Structure * Standard parameters * Declarative-style parameters * Programmatic-style parameters * Programmatic-style execute method * Codex files * Credentials files * HTTP request helpers * Item linking * Test your node * Run your node locally * Node linter * Troubleshooting * Deploy your node * Submit community nodes * Install private nodes * Hosting n8n * Community vs Enterprise * Installation Installation * npm * Docker * Server setups * Digital Ocean * Heroku * Hetzner * Amazon Web Services * Azure * Google Cloud * Docker Compose * Updating * Configuration Configuration * Environment variables * Binary data * Credentials * Database * Deployment * Endpoints * Executions * External data storage * External hooks * External secrets * Logs * License * Nodes * Queue mode * Security * Source control * Task runners * Timezone and localization * User management and 2FA * Workflows * Configuration methods * Configuration examples * Isolate n8n * Configure the Base URL * Configure custom SSL certificate authorities * Set a custom encryption key * Configure workflow timeouts * Specify custom nodes location * Enable modules in Code node * Set the timezone * Specify user folder path * Configure webhook URLs with reverse proxy * Enable Prometheus metrics * Supported databases and settings * Task runners * User management * Logging and monitoring Logging and monitoring * Logging * Monitoring * Security audit * Scaling and performance Scaling and performance * Overview * Performance and benchmarking * Configuring queue mode * Concurrency control * Execution data * Binary data * External storage for binary data * Memory-related errors * Securing n8n Securing n8n * Overview * Set up SSL * Set up SSO * Security audit * Disable the API * Opt out of data collection * Blocking nodes * Hardening task runners * Starter Kits Starter Kits * AI Starter Kit * Architecture Architecture * Overview * Database structure * Using the CLI Using the CLI * CLI commands * Code in n8n * Expressions * Using the Code node * AI coding * Built in methods and variables Built in methods and variables * Overview * Current node input * Output of other nodes * Date and time * JMESPath * HTTP node * LangChain Code node * n8n metadata * Convenience methods * Data transformation functions * Arrays * Booleans * Dates * Numbers * Objects * Strings * Custom variables Custom variables * Create custom variables * Cookbook Cookbook * Handling dates * Query JSON with JMESPath * Built-in methods and variables examples * execution * getWorkflowStaticData * Retrieve linked items from earlier in the workflow * (node-name).all * vars * Expressions * Check incoming data * Common issues * Code node * Get number of items returned by last node * Get the binary data buffer * Output to the browser console * HTTP Request node * Pagination * Advanced AI * Tutorial: Build an AI workflow in n8n * LangChain in n8n LangChain in n8n * Overview * Langchain concepts in n8n * LangChain learning resources * Use LangSmith with n8n * Examples and concepts Examples and concepts * Introduction * What is a chain? * What is an agent? * Agents vs chains example * What is memory? * What is a tool? * Use Google Sheets as a data source * Call an API to fetch data * Set a human fallback for AI workflows * Let AI specify tool parameters * What is a vector database? * Populate a Pinecone vector database from a website * API * Authentication * Pagination * Using the API playground * API reference * Embed * Prerequisites * Deployment * Configuration * Workflow management * Workflows templates * White labelling 1. Integrations 2. Built-in nodes 3. Triggers Kafka is an open-source distributed event streaming platform that one can use for high-performance data pipelines, streaming analytics, data integration, and mission-critical applications. Credentials You can find authentication information for this node here. --- ## Page: https://docs.n8n.io/integrations/builtin/trigger-nodes/n8n-nodes-base.keaptrigger/ Keap is an e-mail marketing and sales platform for small businesses, including products to manage and optimize the customer lifecycle, customer relationship management, marketing automation, lead capture, and e-commerce. Credentials You can find authentication information for this node here. Examples and templates For usage examples and templates to help you get started, refer to n8n's Keap Trigger integrations page. --- ## Page: https://docs.n8n.io/integrations/builtin/trigger-nodes/n8n-nodes-base.kobotoolboxtrigger/ KoboToolbox is a field survey and data collection tool to design interactive forms to be completed offline from mobile devices. It's available both as a free cloud solution or as a self-hosted version. Credentials You can find authentication information for this node here. This node starts a workflow upon new submissions of a specified form. The trigger node handles the creation/deletion of the hook, so you don't need to do any setup in KoboToolbox. It works the same way as the Get Submission operation in the KoboToolbox node, including supporting the same reformatting options. --- ## Page: https://docs.n8n.io/integrations/builtin/trigger-nodes/n8n-nodes-base.lemlisttrigger/ * Using n8n * Integrations * Hosting n8n * Code in n8n * Advanced AI * API * Embed * n8n home ↗ * Forum ↗ * Blog ↗ 1. Integrations 2. Built-in nodes 3. Triggers Lemlist is an email outreach platform that allows you to automatically generate personalized images and videos and send personalized cold emails. Credentials You can find authentication information for this node here. ## Events# * \* * Aircall Created * Aircall Done * Aircall Ended * Aircall Interested * Aircall Not Interested * Api Done * Api Failed * Api Interested * Api Not Interested * Attracted * Connection Issue * Contacted * Custom Domain Errors * Emails Bounced * Emails Clicked * Emails Failed * Emails Interested * Emails Not Interested * Emails Opened * Emails Replied * Emails Send Failed * Emails Sent * Emails Unsubscribed * Hooked * Interested * Lemwarm Paused * LinkedIn Interested * LinkedIn Invite Accepted * LinkedIn Invite Done * LinkedIn Invite Failed * LinkedIn Not Interested * LinkedIn Replied * LinkedIn Send Failed * LinkedIn Sent * LinkedIn Visit Done * LinkedIn Visit Failed * LinkedIn Voice Note Done * LinkedIn Voice Note Failed * Manual Interested * Manual Not Interested * Not Interested * Opportunities Done * Paused * Resumed * Send Limit Reached * Skipped * Warmed --- ## Page: https://docs.n8n.io/integrations/builtin/trigger-nodes/n8n-nodes-base.lineartrigger/ 1. Integrations 2. Built-in nodes 3. Triggers Linear is a SaaS issue tracking tool. Credentials You can find authentication information for this node here. Examples and templates For usage examples and templates to help you get started, refer to n8n's Linear Trigger integrations page. ## Events# * Comment Reaction * Cycle * Issue * Issue Comment * Issue Label * Project --- ## Page: https://docs.n8n.io/integrations/builtin/trigger-nodes/n8n-nodes-base.lonescaletrigger/ Use the LoneScale Trigger node to respond to workflow events in LoneScale and integrate LoneScale with other applications. On this page, you'll find a list of operations the LoneScale node supports, and links to more resources. Credentials You can find authentication information for this node here. Examples and templates For usage examples and templates to help you get started, refer to n8n's LoneScale Trigger integrations page. ## Events# * On new LoneScale event ## Related resources# n8n provides an app node for LoneScale. You can find the node docs here. View example workflows and related content on n8n's website. --- ## Page: https://docs.n8n.io/integrations/builtin/trigger-nodes/n8n-nodes-base.mailchimptrigger/ n8n Docs * Using n8n * Getting started Getting started * Learning path * Choose your n8n * Quickstarts * A very quick quickstart * A longer introduction * Video courses * Text courses * Level one * Navigating the editor UI * Building a mini-workflow * Automating a (real-world) use case * Designing the workflow * Building the workflow Building the workflow * Getting data from the data warehouse * Inserting data into airtable * Filtering orders * Setting values for processing orders * Calculating booked orders * Notifying the team * Scheduling the workflow * Activating and examining the workflow * Exporting and importing workflows * Test your knowledge * Level two * Understanding the data structure * Processing different data types * Merging and splitting data * Dealing with errors in workflows * Automating a business workflow Automating a business workflow * Use case * Workflow 1 * Workflow 2 * Workflow 3 * Test your knowledge * Using the app Using the app * Understand workflows * Create and run * Components * Nodes * Connections * Sticky Notes * Executions * Manual, partial, and production executions * Workflow-level executions * All executions * Custom executions data * Debug executions * Tags * Export and import * Templates * Sharing * Settings * Workflow history * Workflow ID * Manage credentials * Create and edit * Credential sharing * Manage users and access * Cloud setup * Manage users * Account types * Role-based access control * Role types * Projects * Best practices * 2FA * LDAP * SAML * Set up SAML * Okta Workforce Identity SAML setup * Troubleshooting * Manage users with SAML * Keyboard shortcuts * Key concepts Key concepts * Flow logic * Splitting with conditionals * Merging data * Looping * Waiting * Sub-workflows * Error handling * Execution order in multi-branch workflows * Data * Data structure * Data flow within nodes * Transforming data * Process data using code * Data mapping * Data mapping in the UI * Data mapping in the expressions editor * Data item linking * Item linking concepts * Item linking in the Code node * Item linking errors * Item linking for node creators * Data pinning * Data editing * Data filtering * Data mocking * Binary data * Schema preview * Glossary * n8n Cloud n8n Cloud * Overview * Access the Cloud admin dashboard * Update your n8n Cloud version * Set the timezone * Cloud IP addresses * Cloud data management * Change ownership or username * Concurrency * AI Assistant * Enterprise features Enterprise features * Source control and environments * Understand * Environments * Git in n8n * Branch patterns * Set up * Using * Push and pull * Copy work between environments * Manage variables * Tutorial: Create environments with source control * External secrets * Log streaming * License key * Releases Releases * Release notes Release notes * 1.x * 0.x * v1.0 migration guide * Help and community Help and community * Where to get help * Contributing * Licenses and privacy Licenses and privacy * Privacy and security * Privacy * Security * Incident response * What you can do * Sustainable use license * Integrations * Built-in nodes Built-in nodes * Node types * Core nodes * Activation Trigger * Aggregate * AI Transform * Code * Keyboard shortcuts * Common issues * Compare Datasets * Compression * Chat Trigger * Common issues * Convert to File * Crypto * Date & Time * Debug Helper * Edit Fields (Set) * Edit Image * Email Trigger (IMAP) * Error Trigger * Execute Command * Common issues * Execute Sub-workflow * Execute Sub-workflow Trigger * Execution Data * Extract From File * Filter * FTP * Git * GraphQL * HTML * HTTP Request * Common issues * If * JWT * LDAP * Limit * Local File Trigger * Loop Over Items (Split in Batches) * Manual Trigger * Markdown * MCP Server Trigger * Merge * n8n * n8n Form * n8n Form Trigger * n8n Trigger * No Operation, do nothing * Read/Write Files from Disk * Remove Duplicates * Templates and examples * Rename Keys * Respond to Webhook * RSS Read * RSS Feed Trigger * Schedule Trigger * Common issues * Send Email * Sort * Split Out * SSE Trigger * SSH * Stop And Error * Summarize * Switch * TOTP * Wait * Webhook * Workflow development * Common issues * Workflow Trigger * XML * Actions * Action Network * ActiveCampaign * Adalo * Affinity * Agile CRM * Airtable * Common issues * Airtop * AMQP Sender * APITemplate.io * Asana * Automizy * Autopilot * AWS Certificate Manager * AWS Comprehend * AWS DynamoDB * AWS Elastic Load Balancing * AWS Lambda * AWS Rekognition * AWS S3 * AWS SES * AWS SNS * AWS SQS * AWS Textract * AWS Transcribe * Azure Storage * BambooHR * Bannerbear * Baserow * Beeminder * Bitly * Bitwarden * Box * Brandfetch * Brevo * Bubble * Chargebee * CircleCI * Webex by Cisco * Clearbit * ClickUp * Clockify * Cloudflare * Cockpit * Coda * CoinGecko * Contentful * ConvertKit * Copper * Cortex * CrateDB * crowd.dev * Customer.io * DeepL * Demio * DHL * Discord * Common issues * Discourse * Disqus * Drift * Dropbox * Dropcontact * E-goi * Elasticsearch * Elastic Security * Emelia * ERPNext * Facebook Graph API * FileMaker * Flow * Freshdesk * Freshservice * Freshworks CRM * GetResponse * Ghost * GitHub * GitLab * Gmail * Draft operations * Label operations * Message operations * Thread operations * Common issues * Gong * Google Ads * Google Analytics * Google BigQuery * Google Books * Google Business Profile * Google Calendar * Calendar operations * Event operations * Google Chat * Google Cloud Firestore * Google Cloud Natural Language * Google Cloud Realtime Database * Google Cloud Storage * Google Contacts * Google Docs * Google Drive * File operations * File and folder operations * Folder operations * Shared drive operations * Common issues * Google Perspective * Google Sheets * Document operations * Sheet within Document operations * Common issues * Google Slides * Google Tasks * Google Translate * Google Workspace Admin * Gotify * GoToWebinar * Grafana * Grist * Hacker News * HaloPSA * Harvest * Help Scout * HighLevel * Home Assistant * HubSpot * Humantic AI * Hunter * Intercom * Invoice Ninja * Iterable * Jenkins * Jira Software * Kafka * Keap * Kitemaker * KoboToolbox * Lemlist * Line * Linear * LingvaNex * LinkedIn * LoneScale * Magento 2 * Mailcheck * Mailchimp * MailerLite * Mailgun * Mailjet * Mandrill * marketstack * Matrix * Mattermost * Mautic * Medium * MessageBird * Metabase * Microsoft Dynamics CRM * Microsoft Entra ID * Microsoft Excel 365 * Microsoft Graph Security * Microsoft OneDrive * Microsoft Outlook * Microsoft SQL * Microsoft Teams * Microsoft To Do * Mindee * MISP * Mocean * monday.com * MongoDB * Monica CRM * MQTT * MSG91 * MySQL * Common issues * Customer Datastore (n8n Training) * Customer Messenger (n8n Training) * NASA * Netlify * Netscaler ADC * Nextcloud * NocoDB * Notion * Common issues * npm * Odoo * Okta * One Simple API * Onfleet * OpenAI * Assistant operations * Audio operations * File operations * Image operations * Text operations * Common issues * OpenThesaurus * OpenWeatherMap * Oura * Paddle * PagerDuty * PayPal * Peekalink * PhantomBuster * Philips Hue * Pipedrive * Plivo * PostBin * Postgres * Common issues * PostHog * ProfitWell * Pushbullet * Pushcut * Pushover * QuestDB * Quick Base * QuickBooks Online * QuickChart * RabbitMQ * Raindrop * Reddit * Redis * Rocket.Chat * Rundeck * S3 * Salesforce * Salesmate * SeaTable * SecurityScorecard * Segment * SendGrid * Sendy * Sentry.io * ServiceNow * seven * Shopify * SIGNL4 * Slack * Snowflake * Splunk * Spontit * Spotify * Stackby * Storyblok * Strapi * Strava * Stripe * Supabase * Common issues * SyncroMSP * Taiga * Tapfiliate * Telegram * Chat operations * Callback operations * File operations * Message operations * Common issues * TheHive * TheHive 5 * TimescaleDB * Todoist * Travis CI * Trello * Twake * Twilio * Twist * Unleashed Software * UpLead * uProc * UptimeRobot * urlscan.io * Venafi TLS Protect Cloud * Venafi TLS Protect Datacenter * Vero * Vonage * Webflow * Wekan * WhatsApp Business Cloud * Common issues * Wise * WooCommerce * WordPress * X (Formerly Twitter) * Xero * Yourls * YouTube * Zammad * Zendesk * Zoho CRM * Zoom * Zulip * Triggers * ActiveCampaign Trigger * Acuity Scheduling Trigger * Affinity Trigger * Airtable Trigger * AMQP Trigger * Asana Trigger * Autopilot Trigger * AWS SNS Trigger * Bitbucket Trigger * Box Trigger * Brevo Trigger * Calendly Trigger * Cal Trigger * Chargebee Trigger * ClickUp Trigger * Clockify Trigger * ConvertKit Trigger * Copper Trigger * crowd.dev Trigger * Customer.io Trigger * Emelia Trigger * Eventbrite Trigger * Facebook Lead Ads Trigger * Facebook Trigger * Ad Account * Application * Certificate Transparency * Group * Instagram * Link * Page * Permissions * User * WhatsApp Business Account * Workplace Security * Figma Trigger (Beta) * Flow Trigger * Form.io Trigger * Formstack Trigger * GetResponse Trigger * GitHub Trigger * GitLab Trigger * Gmail Trigger * Poll Mode options * Common issues * Google Calendar Trigger * Google Drive Trigger * Common issues * Google Business Profile Trigger * Google Sheets Trigger * Common issues * Gumroad Trigger * Help Scout Trigger * Hubspot Trigger * Invoice Ninja Trigger * Jira Trigger * JotForm Trigger * Kafka Trigger * Keap Trigger * KoboToolbox Trigger * Lemlist Trigger * Linear Trigger * LoneScale Trigger * Mailchimp Trigger * MailerLite Trigger * Mailjet Trigger * Mautic Trigger * Microsoft OneDrive Trigger * Microsoft Outlook Trigger * MQTT Trigger * Netlify Trigger * Notion Trigger * Onfleet Trigger * PayPal Trigger * Pipedrive Trigger * Postgres Trigger * Postmark Trigger * Pushcut Trigger * RabbitMQ Trigger * Redis Trigger * Salesforce Trigger * SeaTable Trigger * Shopify Trigger * Slack Trigger * Strava Trigger * Stripe Trigger * SurveyMonkey Trigger * Taiga Trigger * Telegram Trigger * Common issues * TheHive 5 Trigger * TheHive Trigger * Toggl Trigger * Trello Trigger * Twilio Trigger * Typeform Trigger * Venafi TLS Protect Cloud Trigger * Webex by Cisco Trigger * Webflow Trigger * WhatsApp Trigger * Wise Trigger * WooCommerce Trigger * Workable Trigger * Wufoo Trigger * Zendesk Trigger * Cluster nodes * Root nodes * AI Agent * Conversational Agent * OpenAI Functions Agent * Plan and Execute Agent * ReAct Agent * SQL Agent * Tools Agent * Common issues * Basic LLM Chain * Question and Answer Chain * Common issues * Summarization Chain * Information Extractor * Text Classifier * Sentiment Analysis * LangChain Code * Simple Vector Store * Milvus Vector Store * MongoDB Atlas Vector Store * PGVector Vector Store * Pinecone Vector Store * Qdrant Vector Store * Supabase Vector Store * Zep Vector Store * Sub-nodes * Default Data Loader * GitHub Document Loader * Embeddings AWS Bedrock * Embeddings Azure OpenAI * Embeddings Cohere * Embeddings Google Gemini * Embeddings Google PaLM * Embeddings Google Vertex * Embeddings HuggingFace Inference * Embeddings Mistral Cloud * Embeddings Ollama * Embeddings OpenAI * Anthropic Chat Model * AWS Bedrock Chat Model * Azure OpenAI Chat Model * DeepSeek Chat Model * Google Gemini Chat Model * Google Vertex Chat Model * Groq Chat Model * Mistral Cloud Chat Model * Ollama Chat Model * Common issues * OpenAI Chat Model * Common issues * OpenRouter Chat Model * Cohere Model * Ollama Model * Common issues * Hugging Face Inference Model * Chat Memory Manager * Simple Memory * Common issues * Motorhead * MongoDB Chat Memory * Redis Chat Memory * Postgres Chat Memory * Xata * Zep * Auto-fixing Output Parser * Item List Output Parser * Structured Output Parser * Common issues * Contextual Compression Retriever * MultiQuery Retriever * Vector Store Retriever * Workflow Retriever * Character Text Splitter * Recursive Character Text Splitter * Token Splitter * Calculator * Custom Code Tool * HTTP Request Tool * MCP Client Tool * SerpApi (Google Search) * Think Tool * Vector Store Question Answer Tool * Wikipedia * Wolfram|Alpha * Custom n8n Workflow Tool * Credentials * Action Network credentials * ActiveCampaign credentials * Acuity Scheduling credentials * Adalo credentials * Affinity credentials * Agile CRM credentials * Airtable credentials * Airtop credentials * AlienVault credentials * AMQP credentials * Anthropic credentials * APITemplate.io credentials * Asana credentials * Auth0 Management credentials * Automizy credentials * Autopilot credentials * AWS credentials * Azure OpenAI credentials * Azure Storage credentials * BambooHR credentials * Bannerbear credentials * Baserow credentials * Beeminder credentials * Bitbucket credentials * Bitly credentials * Bitwarden credentials * Box credentials * Brandfetch credentials * Brevo credentials * Bubble credentials * Cal.com credentials * Calendly credentials * Carbon Black credentials * Chargebee credentials * CircleCI credentials * Cisco Meraki credentials * Cisco Secure Endpoint credentials * Cisco Umbrella credentials * Clearbit credentials * ClickUp credentials * Clockify credentials * Cloudflare credentials * Cockpit credentials * Coda credentials * Cohere credentials * Contentful credentials * ConvertAPI credentials * ConvertKit credentials * Copper credentials * Cortex credentials * CrateDB credentials * crowd.dev credentials * CrowdStrike credentials * Customer.io credentials * Datadog credentials * DeepL credentials * DeepSeek credentials * Demio credentials * DFIR-IRIS credentials * DHL credentials * Discord credentials * Discourse credentials * Disqus credentials * Drift credentials * Dropbox credentials * Dropcontact credentials * Dynatrace credentials * E-goi credentials * Elasticsearch credentials * Elastic Security credentials * Emelia credentials * ERPNext credentials * Eventbrite credentials * F5 Big-IP credentials * Facebook App credentials * Facebook Graph API credentials * Facebook Lead Ads credentials * Figma credentials * FileMaker credentials * Filescan credentials * Flow credentials * Form.io Trigger credentials * Formstack Trigger credentials * Fortinet FortiGate credentials * Freshdesk credentials * Freshservice credentials * Freshworks CRM credentials * FTP credentials * GetResponse credentials * Ghost credentials * Git credentials * GitHub credentials * GitLab credentials * Gong credentials * Google * Google OAuth2 single service * Google OAuth2 generic * Google Service Account * Google Gemini(PaLM) credentials * Gotify credentials * GoToWebinar credentials * Grafana credentials * Grist credentials * Groq credentials * Gumroad credentials * HaloPSA credentials * Harvest credentials * Help Scout credentials * HighLevel credentials * Home Assistant credentials * HTTP Request credentials * HubSpot credentials * Hugging Face credentials * Humantic AI credentials * Hunter credentials * Hybrid Analysis credentials * IMAP * Gmail * Outlook.com * Yahoo * Imperva WAF credentials * Intercom credentials * Invoice Ninja credentials * Iterable credentials * Jenkins credentials * Jira credentials * JotForm credentials * JWT credentials * Kafka credentials * Keap credentials * Kibana credentials * Kitemaker credentials * KoboToolbox credentials * LDAP credentials * Lemlist credentials * Line credentials * Linear credentials * LingvaNex credentials * LinkedIn credentials * LoneScale credentials * Magento 2 credentials * Mailcheck credentials * Mailchimp credentials * MailerLite credentials * Mailgun credentials * Mailjet credentials * Malcore credentials * Mandrill credentials * Marketstack credentials * Matrix credentials * Mattermost credentials * Mautic credentials * Medium credentials * MessageBird credentials * Metabase credentials * Microsoft credentials * Microsoft Azure Monitor credentials * Microsoft Entra ID credentials * Microsoft SQL credentials * Milvus credentials * Mindee credentials * Miro credentials * MISP credentials * Mist credentials * Mistral Cloud credentials * Mocean credentials * monday.com credentials * MongoDB credentials * Monica CRM credentials * Motorhead credentials * MQTT credentials * MSG91 credentials * MySQL credentials * NASA credentials * Netlify credentials * Netscaler ADC credentials * Nextcloud credentials * NocoDB credentials * Notion credentials * npm credentials * Odoo credentials * Okta credentials * Ollama credentials * One Simple API credentials * Onfleet credentials * OpenAI credentials * OpenCTI credentials * OpenRouter credentials * OpenWeatherMap credentials * Oura credentials * Paddle credentials * PagerDuty credentials * PayPal credentials * Peekalink credentials * PhantomBuster credentials * Philips Hue credentials * Pinecone credentials * Pipedrive credentials * Plivo credentials * Postgres credentials * PostHog credentials * Postmark credentials * ProfitWell credentials * Pushbullet credentials * Pushcut credentials * Pushover credentials * QRadar credentials * Qdrant credentials * Qualys credentials * QuestDB credentials * Quick Base credentials * QuickBooks credentials * RabbitMQ credentials * Raindrop credentials * Rapid7 InsightVM credentials * Recorded Future credentials * Reddit credentials * Redis credentials * Rocket.Chat credentials * Rundeck credentials * S3 credentials * Salesforce credentials * Salesmate credentials * SeaTable credentials * SecurityScorecard credentials * Segment credentials * Sekoia credentials * Send Email * Gmail * Outlook.com * Yahoo * SendGrid credentials * Sendy credentials * Sentry.io credentials * Serp credentials * ServiceNow credentials * seven credentials * Shopify credentials * Shuffler credentials * SIGNL4 credentials * Slack credentials * Snowflake credentials * SolarWinds IPAM credentials * SolarWinds Observability SaaS credentials * Splunk credentials * Spontit credentials * Spotify credentials * SSH credentials * Stackby credentials * Storyblok credentials * Strapi credentials * Strava credentials * Stripe credentials * Supabase credentials * SurveyMonkey credentials * SyncroMSP credentials * Sysdig credentials * Taiga credentials * Tapfiliate credentials * Telegram credentials * TheHive credentials * TheHive 5 credentials * TimescaleDB credentials * Todoist credentials * Toggl credentials * TOTP credentials * Travis CI credentials * Trellix ePO credentials * Trello credentials * Twake credentials * Twilio credentials * Twist credentials * Typeform credentials * Unleashed Software credentials * UpLead credentials * uProc credentials * UptimeRobot credentials * urlscan.io credentials * Venafi TLS Protect Cloud credentials * Venafi TLS Protect Datacenter credentials * Vero credentials * VirusTotal credentials * Vonage credentials * Webex by Cisco credentials * Webflow credentials * Webhook credentials * Wekan credentials * WhatsApp Business Cloud credentials * Wise credentials * Wolfram|Alpha credentials * WooCommerce credentials * WordPress credentials * Workable credentials * Wufoo credentials * X (formerly Twitter) credentials * Xata credentials * Xero credentials * Yourls credentials * Zabbix credentials * Zammad credentials * Zendesk credentials * Zep credentials * Zoho credentials * Zoom credentials * Zscaler ZIA credentials * Zulip credentials * Custom API actions for existing nodes * Handle rate limits * Community nodes Community nodes * Installation and management * GUI installation * Manual installation * Risks * Blocklist * Using community nodes * Troubleshooting * Building community nodes * Creating nodes Creating nodes * Overview * Plan your node * Choose a node type * Choose a node building style * Node UI design * Choose node file structure * Build your node * Set up your development environment * Tutorial: Build a declarative-style node * Tutorial: Build a programmatic-style node * Reference * Node UI elements * Code standards * Versioning * Choose node file structure * Base files * Structure * Standard parameters * Declarative-style parameters * Programmatic-style parameters * Programmatic-style execute method * Codex files * Credentials files * HTTP request helpers * Item linking * Test your node * Run your node locally * Node linter * Troubleshooting * Deploy your node * Submit community nodes * Install private nodes * Hosting n8n * Community vs Enterprise * Installation Installation * npm * Docker * Server setups * Digital Ocean * Heroku * Hetzner * Amazon Web Services * Azure * Google Cloud * Docker Compose * Updating * Configuration Configuration * Environment variables * Binary data * Credentials * Database * Deployment * Endpoints * Executions * External data storage * External hooks * External secrets * Logs * License * Nodes * Queue mode * Security * Source control * Task runners * Timezone and localization * User management and 2FA * Workflows * Configuration methods * Configuration examples * Isolate n8n * Configure the Base URL * Configure custom SSL certificate authorities * Set a custom encryption key * Configure workflow timeouts * Specify custom nodes location * Enable modules in Code node * Set the timezone * Specify user folder path * Configure webhook URLs with reverse proxy * Enable Prometheus metrics * Supported databases and settings * Task runners * User management * Logging and monitoring Logging and monitoring * Logging * Monitoring * Security audit * Scaling and performance Scaling and performance * Overview * Performance and benchmarking * Configuring queue mode * Concurrency control * Execution data * Binary data * External storage for binary data * Memory-related errors * Securing n8n Securing n8n * Overview * Set up SSL * Set up SSO * Security audit * Disable the API * Opt out of data collection * Blocking nodes * Hardening task runners * Starter Kits Starter Kits * AI Starter Kit * Architecture Architecture * Overview * Database structure * Using the CLI Using the CLI * CLI commands * Code in n8n * Expressions * Using the Code node * AI coding * Built in methods and variables Built in methods and variables * Overview * Current node input * Output of other nodes * Date and time * JMESPath * HTTP node * LangChain Code node * n8n metadata * Convenience methods * Data transformation functions * Arrays * Booleans * Dates * Numbers * Objects * Strings * Custom variables Custom variables * Create custom variables * Cookbook Cookbook * Handling dates * Query JSON with JMESPath * Built-in methods and variables examples * execution * getWorkflowStaticData * Retrieve linked items from earlier in the workflow * (node-name).all * vars * Expressions * Check incoming data * Common issues * Code node * Get number of items returned by last node * Get the binary data buffer * Output to the browser console * HTTP Request node * Pagination * Advanced AI * Tutorial: Build an AI workflow in n8n * LangChain in n8n LangChain in n8n * Overview * Langchain concepts in n8n * LangChain learning resources * Use LangSmith with n8n * Examples and concepts Examples and concepts * Introduction * What is a chain? * What is an agent? * Agents vs chains example * What is memory? * What is a tool? * Use Google Sheets as a data source * Call an API to fetch data * Set a human fallback for AI workflows * Let AI specify tool parameters * What is a vector database? * Populate a Pinecone vector database from a website * API * Authentication * Pagination * Using the API playground * API reference * Embed * Prerequisites * Deployment * Configuration * Workflow management * Workflows templates * White labelling 1. Integrations 2. Built-in nodes 3. Triggers Mailchimp is an integrated marketing platform that allows business owners to automate their email campaigns and track user engagement. Credentials You can find authentication information for this node here. --- ## Page: https://docs.n8n.io/integrations/builtin/trigger-nodes/n8n-nodes-base.mailerlitetrigger/ MailerLite is an email marketing solution that provides you with a user-friendly content editor, simplified subscriber management, and campaign reports with the most important statistics. On this page, you'll find a list of events the MailerLite Trigger node can respond to and links to more resources. Credentials You can find authentication information for this node here. ## Events# * Campaign Sent * Subscriber Added to Group * Subscriber Automation Completed * Subscriber Automation Triggered * Subscriber Bounced * Subscriber Created * Subscriber Complained * Subscriber Removed from Group * Subscriber Unsubscribe * Subscriber Updated --- ## Page: https://docs.n8n.io/integrations/builtin/trigger-nodes/n8n-nodes-base.mailjettrigger/ n8n Docs * Using n8n * Getting started Getting started * Learning path * Choose your n8n * Quickstarts * A very quick quickstart * A longer introduction * Video courses * Text courses * Level one * Navigating the editor UI * Building a mini-workflow * Automating a (real-world) use case * Designing the workflow * Building the workflow Building the workflow * Getting data from the data warehouse * Inserting data into airtable * Filtering orders * Setting values for processing orders * Calculating booked orders * Notifying the team * Scheduling the workflow * Activating and examining the workflow * Exporting and importing workflows * Test your knowledge * Level two * Understanding the data structure * Processing different data types * Merging and splitting data * Dealing with errors in workflows * Automating a business workflow Automating a business workflow * Use case * Workflow 1 * Workflow 2 * Workflow 3 * Test your knowledge * Using the app Using the app * Understand workflows * Create and run * Components * Nodes * Connections * Sticky Notes * Executions * Manual, partial, and production executions * Workflow-level executions * All executions * Custom executions data * Debug executions * Tags * Export and import * Templates * Sharing * Settings * Workflow history * Workflow ID * Manage credentials * Create and edit * Credential sharing * Manage users and access * Cloud setup * Manage users * Account types * Role-based access control * Role types * Projects * Best practices * 2FA * LDAP * SAML * Set up SAML * Okta Workforce Identity SAML setup * Troubleshooting * Manage users with SAML * Keyboard shortcuts * Key concepts Key concepts * Flow logic * Splitting with conditionals * Merging data * Looping * Waiting * Sub-workflows * Error handling * Execution order in multi-branch workflows * Data * Data structure * Data flow within nodes * Transforming data * Process data using code * Data mapping * Data mapping in the UI * Data mapping in the expressions editor * Data item linking * Item linking concepts * Item linking in the Code node * Item linking errors * Item linking for node creators * Data pinning * Data editing * Data filtering * Data mocking * Binary data * Schema preview * Glossary * n8n Cloud n8n Cloud * Overview * Access the Cloud admin dashboard * Update your n8n Cloud version * Set the timezone * Cloud IP addresses * Cloud data management * Change ownership or username * Concurrency * AI Assistant * Enterprise features Enterprise features * Source control and environments * Understand * Environments * Git in n8n * Branch patterns * Set up * Using * Push and pull * Copy work between environments * Manage variables * Tutorial: Create environments with source control * External secrets * Log streaming * License key * Releases Releases * Release notes Release notes * 1.x * 0.x * v1.0 migration guide * Help and community Help and community * Where to get help * Contributing * Licenses and privacy Licenses and privacy * Privacy and security * Privacy * Security * Incident response * What you can do * Sustainable use license * Integrations * Built-in nodes Built-in nodes * Node types * Core nodes * Activation Trigger * Aggregate * AI Transform * Code * Keyboard shortcuts * Common issues * Compare Datasets * Compression * Chat Trigger * Common issues * Convert to File * Crypto * Date & Time * Debug Helper * Edit Fields (Set) * Edit Image * Email Trigger (IMAP) * Error Trigger * Execute Command * Common issues * Execute Sub-workflow * Execute Sub-workflow Trigger * Execution Data * Extract From File * Filter * FTP * Git * GraphQL * HTML * HTTP Request * Common issues * If * JWT * LDAP * Limit * Local File Trigger * Loop Over Items (Split in Batches) * Manual Trigger * Markdown * MCP Server Trigger * Merge * n8n * n8n Form * n8n Form Trigger * n8n Trigger * No Operation, do nothing * Read/Write Files from Disk * Remove Duplicates * Templates and examples * Rename Keys * Respond to Webhook * RSS Read * RSS Feed Trigger * Schedule Trigger * Common issues * Send Email * Sort * Split Out * SSE Trigger * SSH * Stop And Error * Summarize * Switch * TOTP * Wait * Webhook * Workflow development * Common issues * Workflow Trigger * XML * Actions * Action Network * ActiveCampaign * Adalo * Affinity * Agile CRM * Airtable * Common issues * Airtop * AMQP Sender * APITemplate.io * Asana * Automizy * Autopilot * AWS Certificate Manager * AWS Comprehend * AWS DynamoDB * AWS Elastic Load Balancing * AWS Lambda * AWS Rekognition * AWS S3 * AWS SES * AWS SNS * AWS SQS * AWS Textract * AWS Transcribe * Azure Storage * BambooHR * Bannerbear * Baserow * Beeminder * Bitly * Bitwarden * Box * Brandfetch * Brevo * Bubble * Chargebee * CircleCI * Webex by Cisco * Clearbit * ClickUp * Clockify * Cloudflare * Cockpit * Coda * CoinGecko * Contentful * ConvertKit * Copper * Cortex * CrateDB * crowd.dev * Customer.io * DeepL * Demio * DHL * Discord * Common issues * Discourse * Disqus * Drift * Dropbox * Dropcontact * E-goi * Elasticsearch * Elastic Security * Emelia * ERPNext * Facebook Graph API * FileMaker * Flow * Freshdesk * Freshservice * Freshworks CRM * GetResponse * Ghost * GitHub * GitLab * Gmail * Draft operations * Label operations * Message operations * Thread operations * Common issues * Gong * Google Ads * Google Analytics * Google BigQuery * Google Books * Google Business Profile * Google Calendar * Calendar operations * Event operations * Google Chat * Google Cloud Firestore * Google Cloud Natural Language * Google Cloud Realtime Database * Google Cloud Storage * Google Contacts * Google Docs * Google Drive * File operations * File and folder operations * Folder operations * Shared drive operations * Common issues * Google Perspective * Google Sheets * Document operations * Sheet within Document operations * Common issues * Google Slides * Google Tasks * Google Translate * Google Workspace Admin * Gotify * GoToWebinar * Grafana * Grist * Hacker News * HaloPSA * Harvest * Help Scout * HighLevel * Home Assistant * HubSpot * Humantic AI * Hunter * Intercom * Invoice Ninja * Iterable * Jenkins * Jira Software * Kafka * Keap * Kitemaker * KoboToolbox * Lemlist * Line * Linear * LingvaNex * LinkedIn * LoneScale * Magento 2 * Mailcheck * Mailchimp * MailerLite * Mailgun * Mailjet * Mandrill * marketstack * Matrix * Mattermost * Mautic * Medium * MessageBird * Metabase * Microsoft Dynamics CRM * Microsoft Entra ID * Microsoft Excel 365 * Microsoft Graph Security * Microsoft OneDrive * Microsoft Outlook * Microsoft SQL * Microsoft Teams * Microsoft To Do * Mindee * MISP * Mocean * monday.com * MongoDB * Monica CRM * MQTT * MSG91 * MySQL * Common issues * Customer Datastore (n8n Training) * Customer Messenger (n8n Training) * NASA * Netlify * Netscaler ADC * Nextcloud * NocoDB * Notion * Common issues * npm * Odoo * Okta * One Simple API * Onfleet * OpenAI * Assistant operations * Audio operations * File operations * Image operations * Text operations * Common issues * OpenThesaurus * OpenWeatherMap * Oura * Paddle * PagerDuty * PayPal * Peekalink * PhantomBuster * Philips Hue * Pipedrive * Plivo * PostBin * Postgres * Common issues * PostHog * ProfitWell * Pushbullet * Pushcut * Pushover * QuestDB * Quick Base * QuickBooks Online * QuickChart * RabbitMQ * Raindrop * Reddit * Redis * Rocket.Chat * Rundeck * S3 * Salesforce * Salesmate * SeaTable * SecurityScorecard * Segment * SendGrid * Sendy * Sentry.io * ServiceNow * seven * Shopify * SIGNL4 * Slack * Snowflake * Splunk * Spontit * Spotify * Stackby * Storyblok * Strapi * Strava * Stripe * Supabase * Common issues * SyncroMSP * Taiga * Tapfiliate * Telegram * Chat operations * Callback operations * File operations * Message operations * Common issues * TheHive * TheHive 5 * TimescaleDB * Todoist * Travis CI * Trello * Twake * Twilio * Twist * Unleashed Software * UpLead * uProc * UptimeRobot * urlscan.io * Venafi TLS Protect Cloud * Venafi TLS Protect Datacenter * Vero * Vonage * Webflow * Wekan * WhatsApp Business Cloud * Common issues * Wise * WooCommerce * WordPress * X (Formerly Twitter) * Xero * Yourls * YouTube * Zammad * Zendesk * Zoho CRM * Zoom * Zulip * Triggers * ActiveCampaign Trigger * Acuity Scheduling Trigger * Affinity Trigger * Airtable Trigger * AMQP Trigger * Asana Trigger * Autopilot Trigger * AWS SNS Trigger * Bitbucket Trigger * Box Trigger * Brevo Trigger * Calendly Trigger * Cal Trigger * Chargebee Trigger * ClickUp Trigger * Clockify Trigger * ConvertKit Trigger * Copper Trigger * crowd.dev Trigger * Customer.io Trigger * Emelia Trigger * Eventbrite Trigger * Facebook Lead Ads Trigger * Facebook Trigger * Ad Account * Application * Certificate Transparency * Group * Instagram * Link * Page * Permissions * User * WhatsApp Business Account * Workplace Security * Figma Trigger (Beta) * Flow Trigger * Form.io Trigger * Formstack Trigger * GetResponse Trigger * GitHub Trigger * GitLab Trigger * Gmail Trigger * Poll Mode options * Common issues * Google Calendar Trigger * Google Drive Trigger * Common issues * Google Business Profile Trigger * Google Sheets Trigger * Common issues * Gumroad Trigger * Help Scout Trigger * Hubspot Trigger * Invoice Ninja Trigger * Jira Trigger * JotForm Trigger * Kafka Trigger * Keap Trigger * KoboToolbox Trigger * Lemlist Trigger * Linear Trigger * LoneScale Trigger * Mailchimp Trigger * MailerLite Trigger * Mailjet Trigger * Mautic Trigger * Microsoft OneDrive Trigger * Microsoft Outlook Trigger * MQTT Trigger * Netlify Trigger * Notion Trigger * Onfleet Trigger * PayPal Trigger * Pipedrive Trigger * Postgres Trigger * Postmark Trigger * Pushcut Trigger * RabbitMQ Trigger * Redis Trigger * Salesforce Trigger * SeaTable Trigger * Shopify Trigger * Slack Trigger * Strava Trigger * Stripe Trigger * SurveyMonkey Trigger * Taiga Trigger * Telegram Trigger * Common issues * TheHive 5 Trigger * TheHive Trigger * Toggl Trigger * Trello Trigger * Twilio Trigger * Typeform Trigger * Venafi TLS Protect Cloud Trigger * Webex by Cisco Trigger * Webflow Trigger * WhatsApp Trigger * Wise Trigger * WooCommerce Trigger * Workable Trigger * Wufoo Trigger * Zendesk Trigger * Cluster nodes * Root nodes * AI Agent * Conversational Agent * OpenAI Functions Agent * Plan and Execute Agent * ReAct Agent * SQL Agent * Tools Agent * Common issues * Basic LLM Chain * Question and Answer Chain * Common issues * Summarization Chain * Information Extractor * Text Classifier * Sentiment Analysis * LangChain Code * Simple Vector Store * Milvus Vector Store * MongoDB Atlas Vector Store * PGVector Vector Store * Pinecone Vector Store * Qdrant Vector Store * Supabase Vector Store * Zep Vector Store * Sub-nodes * Default Data Loader * GitHub Document Loader * Embeddings AWS Bedrock * Embeddings Azure OpenAI * Embeddings Cohere * Embeddings Google Gemini * Embeddings Google PaLM * Embeddings Google Vertex * Embeddings HuggingFace Inference * Embeddings Mistral Cloud * Embeddings Ollama * Embeddings OpenAI * Anthropic Chat Model * AWS Bedrock Chat Model * Azure OpenAI Chat Model * DeepSeek Chat Model * Google Gemini Chat Model * Google Vertex Chat Model * Groq Chat Model * Mistral Cloud Chat Model * Ollama Chat Model * Common issues * OpenAI Chat Model * Common issues * OpenRouter Chat Model * Cohere Model * Ollama Model * Common issues * Hugging Face Inference Model * Chat Memory Manager * Simple Memory * Common issues * Motorhead * MongoDB Chat Memory * Redis Chat Memory * Postgres Chat Memory * Xata * Zep * Auto-fixing Output Parser * Item List Output Parser * Structured Output Parser * Common issues * Contextual Compression Retriever * MultiQuery Retriever * Vector Store Retriever * Workflow Retriever * Character Text Splitter * Recursive Character Text Splitter * Token Splitter * Calculator * Custom Code Tool * HTTP Request Tool * MCP Client Tool * SerpApi (Google Search) * Think Tool * Vector Store Question Answer Tool * Wikipedia * Wolfram|Alpha * Custom n8n Workflow Tool * Credentials * Action Network credentials * ActiveCampaign credentials * Acuity Scheduling credentials * Adalo credentials * Affinity credentials * Agile CRM credentials * Airtable credentials * Airtop credentials * AlienVault credentials * AMQP credentials * Anthropic credentials * APITemplate.io credentials * Asana credentials * Auth0 Management credentials * Automizy credentials * Autopilot credentials * AWS credentials * Azure OpenAI credentials * Azure Storage credentials * BambooHR credentials * Bannerbear credentials * Baserow credentials * Beeminder credentials * Bitbucket credentials * Bitly credentials * Bitwarden credentials * Box credentials * Brandfetch credentials * Brevo credentials * Bubble credentials * Cal.com credentials * Calendly credentials * Carbon Black credentials * Chargebee credentials * CircleCI credentials * Cisco Meraki credentials * Cisco Secure Endpoint credentials * Cisco Umbrella credentials * Clearbit credentials * ClickUp credentials * Clockify credentials * Cloudflare credentials * Cockpit credentials * Coda credentials * Cohere credentials * Contentful credentials * ConvertAPI credentials * ConvertKit credentials * Copper credentials * Cortex credentials * CrateDB credentials * crowd.dev credentials * CrowdStrike credentials * Customer.io credentials * Datadog credentials * DeepL credentials * DeepSeek credentials * Demio credentials * DFIR-IRIS credentials * DHL credentials * Discord credentials * Discourse credentials * Disqus credentials * Drift credentials * Dropbox credentials * Dropcontact credentials * Dynatrace credentials * E-goi credentials * Elasticsearch credentials * Elastic Security credentials * Emelia credentials * ERPNext credentials * Eventbrite credentials * F5 Big-IP credentials * Facebook App credentials * Facebook Graph API credentials * Facebook Lead Ads credentials * Figma credentials * FileMaker credentials * Filescan credentials * Flow credentials * Form.io Trigger credentials * Formstack Trigger credentials * Fortinet FortiGate credentials * Freshdesk credentials * Freshservice credentials * Freshworks CRM credentials * FTP credentials * GetResponse credentials * Ghost credentials * Git credentials * GitHub credentials * GitLab credentials * Gong credentials * Google * Google OAuth2 single service * Google OAuth2 generic * Google Service Account * Google Gemini(PaLM) credentials * Gotify credentials * GoToWebinar credentials * Grafana credentials * Grist credentials * Groq credentials * Gumroad credentials * HaloPSA credentials * Harvest credentials * Help Scout credentials * HighLevel credentials * Home Assistant credentials * HTTP Request credentials * HubSpot credentials * Hugging Face credentials * Humantic AI credentials * Hunter credentials * Hybrid Analysis credentials * IMAP * Gmail * Outlook.com * Yahoo * Imperva WAF credentials * Intercom credentials * Invoice Ninja credentials * Iterable credentials * Jenkins credentials * Jira credentials * JotForm credentials * JWT credentials * Kafka credentials * Keap credentials * Kibana credentials * Kitemaker credentials * KoboToolbox credentials * LDAP credentials * Lemlist credentials * Line credentials * Linear credentials * LingvaNex credentials * LinkedIn credentials * LoneScale credentials * Magento 2 credentials * Mailcheck credentials * Mailchimp credentials * MailerLite credentials * Mailgun credentials * Mailjet credentials * Malcore credentials * Mandrill credentials * Marketstack credentials * Matrix credentials * Mattermost credentials * Mautic credentials * Medium credentials * MessageBird credentials * Metabase credentials * Microsoft credentials * Microsoft Azure Monitor credentials * Microsoft Entra ID credentials * Microsoft SQL credentials * Milvus credentials * Mindee credentials * Miro credentials * MISP credentials * Mist credentials * Mistral Cloud credentials * Mocean credentials * monday.com credentials * MongoDB credentials * Monica CRM credentials * Motorhead credentials * MQTT credentials * MSG91 credentials * MySQL credentials * NASA credentials * Netlify credentials * Netscaler ADC credentials * Nextcloud credentials * NocoDB credentials * Notion credentials * npm credentials * Odoo credentials * Okta credentials * Ollama credentials * One Simple API credentials * Onfleet credentials * OpenAI credentials * OpenCTI credentials * OpenRouter credentials * OpenWeatherMap credentials * Oura credentials * Paddle credentials * PagerDuty credentials * PayPal credentials * Peekalink credentials * PhantomBuster credentials * Philips Hue credentials * Pinecone credentials * Pipedrive credentials * Plivo credentials * Postgres credentials * PostHog credentials * Postmark credentials * ProfitWell credentials * Pushbullet credentials * Pushcut credentials * Pushover credentials * QRadar credentials * Qdrant credentials * Qualys credentials * QuestDB credentials * Quick Base credentials * QuickBooks credentials * RabbitMQ credentials * Raindrop credentials * Rapid7 InsightVM credentials * Recorded Future credentials * Reddit credentials * Redis credentials * Rocket.Chat credentials * Rundeck credentials * S3 credentials * Salesforce credentials * Salesmate credentials * SeaTable credentials * SecurityScorecard credentials * Segment credentials * Sekoia credentials * Send Email * Gmail * Outlook.com * Yahoo * SendGrid credentials * Sendy credentials * Sentry.io credentials * Serp credentials * ServiceNow credentials * seven credentials * Shopify credentials * Shuffler credentials * SIGNL4 credentials * Slack credentials * Snowflake credentials * SolarWinds IPAM credentials * SolarWinds Observability SaaS credentials * Splunk credentials * Spontit credentials * Spotify credentials * SSH credentials * Stackby credentials * Storyblok credentials * Strapi credentials * Strava credentials * Stripe credentials * Supabase credentials * SurveyMonkey credentials * SyncroMSP credentials * Sysdig credentials * Taiga credentials * Tapfiliate credentials * Telegram credentials * TheHive credentials * TheHive 5 credentials * TimescaleDB credentials * Todoist credentials * Toggl credentials * TOTP credentials * Travis CI credentials * Trellix ePO credentials * Trello credentials * Twake credentials * Twilio credentials * Twist credentials * Typeform credentials * Unleashed Software credentials * UpLead credentials * uProc credentials * UptimeRobot credentials * urlscan.io credentials * Venafi TLS Protect Cloud credentials * Venafi TLS Protect Datacenter credentials * Vero credentials * VirusTotal credentials * Vonage credentials * Webex by Cisco credentials * Webflow credentials * Webhook credentials * Wekan credentials * WhatsApp Business Cloud credentials * Wise credentials * Wolfram|Alpha credentials * WooCommerce credentials * WordPress credentials * Workable credentials * Wufoo credentials * X (formerly Twitter) credentials * Xata credentials * Xero credentials * Yourls credentials * Zabbix credentials * Zammad credentials * Zendesk credentials * Zep credentials * Zoho credentials * Zoom credentials * Zscaler ZIA credentials * Zulip credentials * Custom API actions for existing nodes * Handle rate limits * Community nodes Community nodes * Installation and management * GUI installation * Manual installation * Risks * Blocklist * Using community nodes * Troubleshooting * Building community nodes * Creating nodes Creating nodes * Overview * Plan your node * Choose a node type * Choose a node building style * Node UI design * Choose node file structure * Build your node * Set up your development environment * Tutorial: Build a declarative-style node * Tutorial: Build a programmatic-style node * Reference * Node UI elements * Code standards * Versioning * Choose node file structure * Base files * Structure * Standard parameters * Declarative-style parameters * Programmatic-style parameters * Programmatic-style execute method * Codex files * Credentials files * HTTP request helpers * Item linking * Test your node * Run your node locally * Node linter * Troubleshooting * Deploy your node * Submit community nodes * Install private nodes * Hosting n8n * Community vs Enterprise * Installation Installation * npm * Docker * Server setups * Digital Ocean * Heroku * Hetzner * Amazon Web Services * Azure * Google Cloud * Docker Compose * Updating * Configuration Configuration * Environment variables * Binary data * Credentials * Database * Deployment * Endpoints * Executions * External data storage * External hooks * External secrets * Logs * License * Nodes * Queue mode * Security * Source control * Task runners * Timezone and localization * User management and 2FA * Workflows * Configuration methods * Configuration examples * Isolate n8n * Configure the Base URL * Configure custom SSL certificate authorities * Set a custom encryption key * Configure workflow timeouts * Specify custom nodes location * Enable modules in Code node * Set the timezone * Specify user folder path * Configure webhook URLs with reverse proxy * Enable Prometheus metrics * Supported databases and settings * Task runners * User management * Logging and monitoring Logging and monitoring * Logging * Monitoring * Security audit * Scaling and performance Scaling and performance * Overview * Performance and benchmarking * Configuring queue mode * Concurrency control * Execution data * Binary data * External storage for binary data * Memory-related errors * Securing n8n Securing n8n * Overview * Set up SSL * Set up SSO * Security audit * Disable the API * Opt out of data collection * Blocking nodes * Hardening task runners * Starter Kits Starter Kits * AI Starter Kit * Architecture Architecture * Overview * Database structure * Using the CLI Using the CLI * CLI commands * Code in n8n * Expressions * Using the Code node * AI coding * Built in methods and variables Built in methods and variables * Overview * Current node input * Output of other nodes * Date and time * JMESPath * HTTP node * LangChain Code node * n8n metadata * Convenience methods * Data transformation functions * Arrays * Booleans * Dates * Numbers * Objects * Strings * Custom variables Custom variables * Create custom variables * Cookbook Cookbook * Handling dates * Query JSON with JMESPath * Built-in methods and variables examples * execution * getWorkflowStaticData * Retrieve linked items from earlier in the workflow * (node-name).all * vars * Expressions * Check incoming data * Common issues * Code node * Get number of items returned by last node * Get the binary data buffer * Output to the browser console * HTTP Request node * Pagination * Advanced AI * Tutorial: Build an AI workflow in n8n * LangChain in n8n LangChain in n8n * Overview * Langchain concepts in n8n * LangChain learning resources * Use LangSmith with n8n * Examples and concepts Examples and concepts * Introduction * What is a chain? * What is an agent? * Agents vs chains example * What is memory? * What is a tool? * Use Google Sheets as a data source * Call an API to fetch data * Set a human fallback for AI workflows * Let AI specify tool parameters * What is a vector database? * Populate a Pinecone vector database from a website * API * Authentication * Pagination * Using the API playground * API reference * Embed * Prerequisites * Deployment * Configuration * Workflow management * Workflows templates * White labelling 1. Integrations 2. Built-in nodes 3. Triggers Mailjet is a cloud-based email sending and tracking system. The platform allows professionals to send both marketing emails and transactional emails. It includes tools for designing emails, sending massive volumes and tracking these messages. Credentials You can find authentication information for this node here. --- ## Page: https://docs.n8n.io/integrations/builtin/trigger-nodes/n8n-nodes-base.mautictrigger/ Mautic is an open-source marketing automation software that helps online businesses automate their repetitive marketing tasks such as lead generation, contact scoring, contact segmentation, and marketing campaigns. Credentials You can find authentication information for this node here. Examples and templates For usage examples and templates to help you get started, refer to n8n's Mautic Trigger integrations page. ## Related resources# n8n provides an app node for Mautic. You can find the node docs here. View example workflows and related content on n8n's website. --- ## Page: https://docs.n8n.io/integrations/builtin/trigger-nodes/n8n-nodes-base.microsoftonedrivetrigger/ Use the Microsoft OneDrive Trigger node to respond to events in Microsoft OneDrive and integrate Microsoft OneDrive with other applications. n8n has built-in support for file and folder events in OneDrive. On this page, you'll find a list of events the Microsoft OneDrive Trigger node can respond to and links to more resources. Credentials You can find authentication information for this node here. ## Events# * On File Created * On File Updated * On Folder Created * On Folder Updates n8n provides an app node for Microsoft OneDrive. You can find the node docs here. View example workflows and related content on n8n's website. Refer to Microsoft's OneDrive API documentation for more information about the service. --- ## Page: https://docs.n8n.io/integrations/builtin/trigger-nodes/n8n-nodes-base.microsoftoutlooktrigger/ Use the Microsoft Outlook Trigger node to respond to events in Microsoft Outlook and integrate Microsoft Outlook with other applications. On this page, you'll find a list of events the Microsoft Outlook Trigger node can respond to, and links to more resources. Credentials You can find authentication information for this node here. ## Events# * Message Received ## Related resources# n8n provides an app node for Microsoft Outlook. You can find the node docs here. View example workflows and related content on n8n's website. --- ## Page: https://docs.n8n.io/integrations/builtin/trigger-nodes/n8n-nodes-base.mqtttrigger/ n8n Docs * Using n8n * Getting started Getting started * Learning path * Choose your n8n * Quickstarts * A very quick quickstart * A longer introduction * Video courses * Text courses * Level one * Navigating the editor UI * Building a mini-workflow * Automating a (real-world) use case * Designing the workflow * Building the workflow Building the workflow * Getting data from the data warehouse * Inserting data into airtable * Filtering orders * Setting values for processing orders * Calculating booked orders * Notifying the team * Scheduling the workflow * Activating and examining the workflow * Exporting and importing workflows * Test your knowledge * Level two * Understanding the data structure * Processing different data types * Merging and splitting data * Dealing with errors in workflows * Automating a business workflow Automating a business workflow * Use case * Workflow 1 * Workflow 2 * Workflow 3 * Test your knowledge * Using the app Using the app * Understand workflows * Create and run * Components * Nodes * Connections * Sticky Notes * Executions * Manual, partial, and production executions * Workflow-level executions * All executions * Custom executions data * Debug executions * Tags * Export and import * Templates * Sharing * Settings * Workflow history * Workflow ID * Manage credentials * Create and edit * Credential sharing * Manage users and access * Cloud setup * Manage users * Account types * Role-based access control * Role types * Projects * Best practices * 2FA * LDAP * SAML * Set up SAML * Okta Workforce Identity SAML setup * Troubleshooting * Manage users with SAML * Keyboard shortcuts * Key concepts Key concepts * Flow logic * Splitting with conditionals * Merging data * Looping * Waiting * Sub-workflows * Error handling * Execution order in multi-branch workflows * Data * Data structure * Data flow within nodes * Transforming data * Process data using code * Data mapping * Data mapping in the UI * Data mapping in the expressions editor * Data item linking * Item linking concepts * Item linking in the Code node * Item linking errors * Item linking for node creators * Data pinning * Data editing * Data filtering * Data mocking * Binary data * Schema preview * Glossary * n8n Cloud n8n Cloud * Overview * Access the Cloud admin dashboard * Update your n8n Cloud version * Set the timezone * Cloud IP addresses * Cloud data management * Change ownership or username * Concurrency * AI Assistant * Enterprise features Enterprise features * Source control and environments * Understand * Environments * Git in n8n * Branch patterns * Set up * Using * Push and pull * Copy work between environments * Manage variables * Tutorial: Create environments with source control * External secrets * Log streaming * License key * Releases Releases * Release notes Release notes * 1.x * 0.x * v1.0 migration guide * Help and community Help and community * Where to get help * Contributing * Licenses and privacy Licenses and privacy * Privacy and security * Privacy * Security * Incident response * What you can do * Sustainable use license * Integrations * Built-in nodes Built-in nodes * Node types * Core nodes * Activation Trigger * Aggregate * AI Transform * Code * Keyboard shortcuts * Common issues * Compare Datasets * Compression * Chat Trigger * Common issues * Convert to File * Crypto * Date & Time * Debug Helper * Edit Fields (Set) * Edit Image * Email Trigger (IMAP) * Error Trigger * Execute Command * Common issues * Execute Sub-workflow * Execute Sub-workflow Trigger * Execution Data * Extract From File * Filter * FTP * Git * GraphQL * HTML * HTTP Request * Common issues * If * JWT * LDAP * Limit * Local File Trigger * Loop Over Items (Split in Batches) * Manual Trigger * Markdown * MCP Server Trigger * Merge * n8n * n8n Form * n8n Form Trigger * n8n Trigger * No Operation, do nothing * Read/Write Files from Disk * Remove Duplicates * Templates and examples * Rename Keys * Respond to Webhook * RSS Read * RSS Feed Trigger * Schedule Trigger * Common issues * Send Email * Sort * Split Out * SSE Trigger * SSH * Stop And Error * Summarize * Switch * TOTP * Wait * Webhook * Workflow development * Common issues * Workflow Trigger * XML * Actions * Action Network * ActiveCampaign * Adalo * Affinity * Agile CRM * Airtable * Common issues * Airtop * AMQP Sender * APITemplate.io * Asana * Automizy * Autopilot * AWS Certificate Manager * AWS Comprehend * AWS DynamoDB * AWS Elastic Load Balancing * AWS Lambda * AWS Rekognition * AWS S3 * AWS SES * AWS SNS * AWS SQS * AWS Textract * AWS Transcribe * Azure Storage * BambooHR * Bannerbear * Baserow * Beeminder * Bitly * Bitwarden * Box * Brandfetch * Brevo * Bubble * Chargebee * CircleCI * Webex by Cisco * Clearbit * ClickUp * Clockify * Cloudflare * Cockpit * Coda * CoinGecko * Contentful * ConvertKit * Copper * Cortex * CrateDB * crowd.dev * Customer.io * DeepL * Demio * DHL * Discord * Common issues * Discourse * Disqus * Drift * Dropbox * Dropcontact * E-goi * Elasticsearch * Elastic Security * Emelia * ERPNext * Facebook Graph API * FileMaker * Flow * Freshdesk * Freshservice * Freshworks CRM * GetResponse * Ghost * GitHub * GitLab * Gmail * Draft operations * Label operations * Message operations * Thread operations * Common issues * Gong * Google Ads * Google Analytics * Google BigQuery * Google Books * Google Business Profile * Google Calendar * Calendar operations * Event operations * Google Chat * Google Cloud Firestore * Google Cloud Natural Language * Google Cloud Realtime Database * Google Cloud Storage * Google Contacts * Google Docs * Google Drive * File operations * File and folder operations * Folder operations * Shared drive operations * Common issues * Google Perspective * Google Sheets * Document operations * Sheet within Document operations * Common issues * Google Slides * Google Tasks * Google Translate * Google Workspace Admin * Gotify * GoToWebinar * Grafana * Grist * Hacker News * HaloPSA * Harvest * Help Scout * HighLevel * Home Assistant * HubSpot * Humantic AI * Hunter * Intercom * Invoice Ninja * Iterable * Jenkins * Jira Software * Kafka * Keap * Kitemaker * KoboToolbox * Lemlist * Line * Linear * LingvaNex * LinkedIn * LoneScale * Magento 2 * Mailcheck * Mailchimp * MailerLite * Mailgun * Mailjet * Mandrill * marketstack * Matrix * Mattermost * Mautic * Medium * MessageBird * Metabase * Microsoft Dynamics CRM * Microsoft Entra ID * Microsoft Excel 365 * Microsoft Graph Security * Microsoft OneDrive * Microsoft Outlook * Microsoft SQL * Microsoft Teams * Microsoft To Do * Mindee * MISP * Mocean * monday.com * MongoDB * Monica CRM * MQTT * MSG91 * MySQL * Common issues * Customer Datastore (n8n Training) * Customer Messenger (n8n Training) * NASA * Netlify * Netscaler ADC * Nextcloud * NocoDB * Notion * Common issues * npm * Odoo * Okta * One Simple API * Onfleet * OpenAI * Assistant operations * Audio operations * File operations * Image operations * Text operations * Common issues * OpenThesaurus * OpenWeatherMap * Oura * Paddle * PagerDuty * PayPal * Peekalink * PhantomBuster * Philips Hue * Pipedrive * Plivo * PostBin * Postgres * Common issues * PostHog * ProfitWell * Pushbullet * Pushcut * Pushover * QuestDB * Quick Base * QuickBooks Online * QuickChart * RabbitMQ * Raindrop * Reddit * Redis * Rocket.Chat * Rundeck * S3 * Salesforce * Salesmate * SeaTable * SecurityScorecard * Segment * SendGrid * Sendy * Sentry.io * ServiceNow * seven * Shopify * SIGNL4 * Slack * Snowflake * Splunk * Spontit * Spotify * Stackby * Storyblok * Strapi * Strava * Stripe * Supabase * Common issues * SyncroMSP * Taiga * Tapfiliate * Telegram * Chat operations * Callback operations * File operations * Message operations * Common issues * TheHive * TheHive 5 * TimescaleDB * Todoist * Travis CI * Trello * Twake * Twilio * Twist * Unleashed Software * UpLead * uProc * UptimeRobot * urlscan.io * Venafi TLS Protect Cloud * Venafi TLS Protect Datacenter * Vero * Vonage * Webflow * Wekan * WhatsApp Business Cloud * Common issues * Wise * WooCommerce * WordPress * X (Formerly Twitter) * Xero * Yourls * YouTube * Zammad * Zendesk * Zoho CRM * Zoom * Zulip * Triggers * ActiveCampaign Trigger * Acuity Scheduling Trigger * Affinity Trigger * Airtable Trigger * AMQP Trigger * Asana Trigger * Autopilot Trigger * AWS SNS Trigger * Bitbucket Trigger * Box Trigger * Brevo Trigger * Calendly Trigger * Cal Trigger * Chargebee Trigger * ClickUp Trigger * Clockify Trigger * ConvertKit Trigger * Copper Trigger * crowd.dev Trigger * Customer.io Trigger * Emelia Trigger * Eventbrite Trigger * Facebook Lead Ads Trigger * Facebook Trigger * Ad Account * Application * Certificate Transparency * Group * Instagram * Link * Page * Permissions * User * WhatsApp Business Account * Workplace Security * Figma Trigger (Beta) * Flow Trigger * Form.io Trigger * Formstack Trigger * GetResponse Trigger * GitHub Trigger * GitLab Trigger * Gmail Trigger * Poll Mode options * Common issues * Google Calendar Trigger * Google Drive Trigger * Common issues * Google Business Profile Trigger * Google Sheets Trigger * Common issues * Gumroad Trigger * Help Scout Trigger * Hubspot Trigger * Invoice Ninja Trigger * Jira Trigger * JotForm Trigger * Kafka Trigger * Keap Trigger * KoboToolbox Trigger * Lemlist Trigger * Linear Trigger * LoneScale Trigger * Mailchimp Trigger * MailerLite Trigger * Mailjet Trigger * Mautic Trigger * Microsoft OneDrive Trigger * Microsoft Outlook Trigger * MQTT Trigger * Netlify Trigger * Notion Trigger * Onfleet Trigger * PayPal Trigger * Pipedrive Trigger * Postgres Trigger * Postmark Trigger * Pushcut Trigger * RabbitMQ Trigger * Redis Trigger * Salesforce Trigger * SeaTable Trigger * Shopify Trigger * Slack Trigger * Strava Trigger * Stripe Trigger * SurveyMonkey Trigger * Taiga Trigger * Telegram Trigger * Common issues * TheHive 5 Trigger * TheHive Trigger * Toggl Trigger * Trello Trigger * Twilio Trigger * Typeform Trigger * Venafi TLS Protect Cloud Trigger * Webex by Cisco Trigger * Webflow Trigger * WhatsApp Trigger * Wise Trigger * WooCommerce Trigger * Workable Trigger * Wufoo Trigger * Zendesk Trigger * Cluster nodes * Root nodes * AI Agent * Conversational Agent * OpenAI Functions Agent * Plan and Execute Agent * ReAct Agent * SQL Agent * Tools Agent * Common issues * Basic LLM Chain * Question and Answer Chain * Common issues * Summarization Chain * Information Extractor * Text Classifier * Sentiment Analysis * LangChain Code * Simple Vector Store * Milvus Vector Store * MongoDB Atlas Vector Store * PGVector Vector Store * Pinecone Vector Store * Qdrant Vector Store * Supabase Vector Store * Zep Vector Store * Sub-nodes * Default Data Loader * GitHub Document Loader * Embeddings AWS Bedrock * Embeddings Azure OpenAI * Embeddings Cohere * Embeddings Google Gemini * Embeddings Google PaLM * Embeddings Google Vertex * Embeddings HuggingFace Inference * Embeddings Mistral Cloud * Embeddings Ollama * Embeddings OpenAI * Anthropic Chat Model * AWS Bedrock Chat Model * Azure OpenAI Chat Model * DeepSeek Chat Model * Google Gemini Chat Model * Google Vertex Chat Model * Groq Chat Model * Mistral Cloud Chat Model * Ollama Chat Model * Common issues * OpenAI Chat Model * Common issues * OpenRouter Chat Model * Cohere Model * Ollama Model * Common issues * Hugging Face Inference Model * Chat Memory Manager * Simple Memory * Common issues * Motorhead * MongoDB Chat Memory * Redis Chat Memory * Postgres Chat Memory * Xata * Zep * Auto-fixing Output Parser * Item List Output Parser * Structured Output Parser * Common issues * Contextual Compression Retriever * MultiQuery Retriever * Vector Store Retriever * Workflow Retriever * Character Text Splitter * Recursive Character Text Splitter * Token Splitter * Calculator * Custom Code Tool * HTTP Request Tool * MCP Client Tool * SerpApi (Google Search) * Think Tool * Vector Store Question Answer Tool * Wikipedia * Wolfram|Alpha * Custom n8n Workflow Tool * Credentials * Action Network credentials * ActiveCampaign credentials * Acuity Scheduling credentials * Adalo credentials * Affinity credentials * Agile CRM credentials * Airtable credentials * Airtop credentials * AlienVault credentials * AMQP credentials * Anthropic credentials * APITemplate.io credentials * Asana credentials * Auth0 Management credentials * Automizy credentials * Autopilot credentials * AWS credentials * Azure OpenAI credentials * Azure Storage credentials * BambooHR credentials * Bannerbear credentials * Baserow credentials * Beeminder credentials * Bitbucket credentials * Bitly credentials * Bitwarden credentials * Box credentials * Brandfetch credentials * Brevo credentials * Bubble credentials * Cal.com credentials * Calendly credentials * Carbon Black credentials * Chargebee credentials * CircleCI credentials * Cisco Meraki credentials * Cisco Secure Endpoint credentials * Cisco Umbrella credentials * Clearbit credentials * ClickUp credentials * Clockify credentials * Cloudflare credentials * Cockpit credentials * Coda credentials * Cohere credentials * Contentful credentials * ConvertAPI credentials * ConvertKit credentials * Copper credentials * Cortex credentials * CrateDB credentials * crowd.dev credentials * CrowdStrike credentials * Customer.io credentials * Datadog credentials * DeepL credentials * DeepSeek credentials * Demio credentials * DFIR-IRIS credentials * DHL credentials * Discord credentials * Discourse credentials * Disqus credentials * Drift credentials * Dropbox credentials * Dropcontact credentials * Dynatrace credentials * E-goi credentials * Elasticsearch credentials * Elastic Security credentials * Emelia credentials * ERPNext credentials * Eventbrite credentials * F5 Big-IP credentials * Facebook App credentials * Facebook Graph API credentials * Facebook Lead Ads credentials * Figma credentials * FileMaker credentials * Filescan credentials * Flow credentials * Form.io Trigger credentials * Formstack Trigger credentials * Fortinet FortiGate credentials * Freshdesk credentials * Freshservice credentials * Freshworks CRM credentials * FTP credentials * GetResponse credentials * Ghost credentials * Git credentials * GitHub credentials * GitLab credentials * Gong credentials * Google * Google OAuth2 single service * Google OAuth2 generic * Google Service Account * Google Gemini(PaLM) credentials * Gotify credentials * GoToWebinar credentials * Grafana credentials * Grist credentials * Groq credentials * Gumroad credentials * HaloPSA credentials * Harvest credentials * Help Scout credentials * HighLevel credentials * Home Assistant credentials * HTTP Request credentials * HubSpot credentials * Hugging Face credentials * Humantic AI credentials * Hunter credentials * Hybrid Analysis credentials * IMAP * Gmail * Outlook.com * Yahoo * Imperva WAF credentials * Intercom credentials * Invoice Ninja credentials * Iterable credentials * Jenkins credentials * Jira credentials * JotForm credentials * JWT credentials * Kafka credentials * Keap credentials * Kibana credentials * Kitemaker credentials * KoboToolbox credentials * LDAP credentials * Lemlist credentials * Line credentials * Linear credentials * LingvaNex credentials * LinkedIn credentials * LoneScale credentials * Magento 2 credentials * Mailcheck credentials * Mailchimp credentials * MailerLite credentials * Mailgun credentials * Mailjet credentials * Malcore credentials * Mandrill credentials * Marketstack credentials * Matrix credentials * Mattermost credentials * Mautic credentials * Medium credentials * MessageBird credentials * Metabase credentials * Microsoft credentials * Microsoft Azure Monitor credentials * Microsoft Entra ID credentials * Microsoft SQL credentials * Milvus credentials * Mindee credentials * Miro credentials * MISP credentials * Mist credentials * Mistral Cloud credentials * Mocean credentials * monday.com credentials * MongoDB credentials * Monica CRM credentials * Motorhead credentials * MQTT credentials * MSG91 credentials * MySQL credentials * NASA credentials * Netlify credentials * Netscaler ADC credentials * Nextcloud credentials * NocoDB credentials * Notion credentials * npm credentials * Odoo credentials * Okta credentials * Ollama credentials * One Simple API credentials * Onfleet credentials * OpenAI credentials * OpenCTI credentials * OpenRouter credentials * OpenWeatherMap credentials * Oura credentials * Paddle credentials * PagerDuty credentials * PayPal credentials * Peekalink credentials * PhantomBuster credentials * Philips Hue credentials * Pinecone credentials * Pipedrive credentials * Plivo credentials * Postgres credentials * PostHog credentials * Postmark credentials * ProfitWell credentials * Pushbullet credentials * Pushcut credentials * Pushover credentials * QRadar credentials * Qdrant credentials * Qualys credentials * QuestDB credentials * Quick Base credentials * QuickBooks credentials * RabbitMQ credentials * Raindrop credentials * Rapid7 InsightVM credentials * Recorded Future credentials * Reddit credentials * Redis credentials * Rocket.Chat credentials * Rundeck credentials * S3 credentials * Salesforce credentials * Salesmate credentials * SeaTable credentials * SecurityScorecard credentials * Segment credentials * Sekoia credentials * Send Email * Gmail * Outlook.com * Yahoo * SendGrid credentials * Sendy credentials * Sentry.io credentials * Serp credentials * ServiceNow credentials * seven credentials * Shopify credentials * Shuffler credentials * SIGNL4 credentials * Slack credentials * Snowflake credentials * SolarWinds IPAM credentials * SolarWinds Observability SaaS credentials * Splunk credentials * Spontit credentials * Spotify credentials * SSH credentials * Stackby credentials * Storyblok credentials * Strapi credentials * Strava credentials * Stripe credentials * Supabase credentials * SurveyMonkey credentials * SyncroMSP credentials * Sysdig credentials * Taiga credentials * Tapfiliate credentials * Telegram credentials * TheHive credentials * TheHive 5 credentials * TimescaleDB credentials * Todoist credentials * Toggl credentials * TOTP credentials * Travis CI credentials * Trellix ePO credentials * Trello credentials * Twake credentials * Twilio credentials * Twist credentials * Typeform credentials * Unleashed Software credentials * UpLead credentials * uProc credentials * UptimeRobot credentials * urlscan.io credentials * Venafi TLS Protect Cloud credentials * Venafi TLS Protect Datacenter credentials * Vero credentials * VirusTotal credentials * Vonage credentials * Webex by Cisco credentials * Webflow credentials * Webhook credentials * Wekan credentials * WhatsApp Business Cloud credentials * Wise credentials * Wolfram|Alpha credentials * WooCommerce credentials * WordPress credentials * Workable credentials * Wufoo credentials * X (formerly Twitter) credentials * Xata credentials * Xero credentials * Yourls credentials * Zabbix credentials * Zammad credentials * Zendesk credentials * Zep credentials * Zoho credentials * Zoom credentials * Zscaler ZIA credentials * Zulip credentials * Custom API actions for existing nodes * Handle rate limits * Community nodes Community nodes * Installation and management * GUI installation * Manual installation * Risks * Blocklist * Using community nodes * Troubleshooting * Building community nodes * Creating nodes Creating nodes * Overview * Plan your node * Choose a node type * Choose a node building style * Node UI design * Choose node file structure * Build your node * Set up your development environment * Tutorial: Build a declarative-style node * Tutorial: Build a programmatic-style node * Reference * Node UI elements * Code standards * Versioning * Choose node file structure * Base files * Structure * Standard parameters * Declarative-style parameters * Programmatic-style parameters * Programmatic-style execute method * Codex files * Credentials files * HTTP request helpers * Item linking * Test your node * Run your node locally * Node linter * Troubleshooting * Deploy your node * Submit community nodes * Install private nodes * Hosting n8n * Community vs Enterprise * Installation Installation * npm * Docker * Server setups * Digital Ocean * Heroku * Hetzner * Amazon Web Services * Azure * Google Cloud * Docker Compose * Updating * Configuration Configuration * Environment variables * Binary data * Credentials * Database * Deployment * Endpoints * Executions * External data storage * External hooks * External secrets * Logs * License * Nodes * Queue mode * Security * Source control * Task runners * Timezone and localization * User management and 2FA * Workflows * Configuration methods * Configuration examples * Isolate n8n * Configure the Base URL * Configure custom SSL certificate authorities * Set a custom encryption key * Configure workflow timeouts * Specify custom nodes location * Enable modules in Code node * Set the timezone * Specify user folder path * Configure webhook URLs with reverse proxy * Enable Prometheus metrics * Supported databases and settings * Task runners * User management * Logging and monitoring Logging and monitoring * Logging * Monitoring * Security audit * Scaling and performance Scaling and performance * Overview * Performance and benchmarking * Configuring queue mode * Concurrency control * Execution data * Binary data * External storage for binary data * Memory-related errors * Securing n8n Securing n8n * Overview * Set up SSL * Set up SSO * Security audit * Disable the API * Opt out of data collection * Blocking nodes * Hardening task runners * Starter Kits Starter Kits * AI Starter Kit * Architecture Architecture * Overview * Database structure * Using the CLI Using the CLI * CLI commands * Code in n8n * Expressions * Using the Code node * AI coding * Built in methods and variables Built in methods and variables * Overview * Current node input * Output of other nodes * Date and time * JMESPath * HTTP node * LangChain Code node * n8n metadata * Convenience methods * Data transformation functions * Arrays * Booleans * Dates * Numbers * Objects * Strings * Custom variables Custom variables * Create custom variables * Cookbook Cookbook * Handling dates * Query JSON with JMESPath * Built-in methods and variables examples * execution * getWorkflowStaticData * Retrieve linked items from earlier in the workflow * (node-name).all * vars * Expressions * Check incoming data * Common issues * Code node * Get number of items returned by last node * Get the binary data buffer * Output to the browser console * HTTP Request node * Pagination * Advanced AI * Tutorial: Build an AI workflow in n8n * LangChain in n8n LangChain in n8n * Overview * Langchain concepts in n8n * LangChain learning resources * Use LangSmith with n8n * Examples and concepts Examples and concepts * Introduction * What is a chain? * What is an agent? * Agents vs chains example * What is memory? * What is a tool? * Use Google Sheets as a data source * Call an API to fetch data * Set a human fallback for AI workflows * Let AI specify tool parameters * What is a vector database? * Populate a Pinecone vector database from a website * API * Authentication * Pagination * Using the API playground * API reference * Embed * Prerequisites * Deployment * Configuration * Workflow management * Workflows templates * White labelling 1. Integrations 2. Built-in nodes 3. Triggers MQTT is an open OASIS and ISO standard lightweight, publish-subscribe network protocol that transports messages between devices. Credentials You can find authentication information for this node here. Examples and templates For usage examples and templates to help you get started, refer to n8n's MQTT Trigger integrations page. --- ## Page: https://docs.n8n.io/integrations/builtin/trigger-nodes/n8n-nodes-base.netlifytrigger/ n8n Docs * Using n8n * Getting started Getting started * Learning path * Choose your n8n * Quickstarts * A very quick quickstart * A longer introduction * Video courses * Text courses * Level one * Navigating the editor UI * Building a mini-workflow * Automating a (real-world) use case * Designing the workflow * Building the workflow Building the workflow * Getting data from the data warehouse * Inserting data into airtable * Filtering orders * Setting values for processing orders * Calculating booked orders * Notifying the team * Scheduling the workflow * Activating and examining the workflow * Exporting and importing workflows * Test your knowledge * Level two * Understanding the data structure * Processing different data types * Merging and splitting data * Dealing with errors in workflows * Automating a business workflow Automating a business workflow * Use case * Workflow 1 * Workflow 2 * Workflow 3 * Test your knowledge * Using the app Using the app * Understand workflows * Create and run * Components * Nodes * Connections * Sticky Notes * Executions * Manual, partial, and production executions * Workflow-level executions * All executions * Custom executions data * Debug executions * Tags * Export and import * Templates * Sharing * Settings * Workflow history * Workflow ID * Manage credentials * Create and edit * Credential sharing * Manage users and access * Cloud setup * Manage users * Account types * Role-based access control * Role types * Projects * Best practices * 2FA * LDAP * SAML * Set up SAML * Okta Workforce Identity SAML setup * Troubleshooting * Manage users with SAML * Keyboard shortcuts * Key concepts Key concepts * Flow logic * Splitting with conditionals * Merging data * Looping * Waiting * Sub-workflows * Error handling * Execution order in multi-branch workflows * Data * Data structure * Data flow within nodes * Transforming data * Process data using code * Data mapping * Data mapping in the UI * Data mapping in the expressions editor * Data item linking * Item linking concepts * Item linking in the Code node * Item linking errors * Item linking for node creators * Data pinning * Data editing * Data filtering * Data mocking * Binary data * Schema preview * Glossary * n8n Cloud n8n Cloud * Overview * Access the Cloud admin dashboard * Update your n8n Cloud version * Set the timezone * Cloud IP addresses * Cloud data management * Change ownership or username * Concurrency * AI Assistant * Enterprise features Enterprise features * Source control and environments * Understand * Environments * Git in n8n * Branch patterns * Set up * Using * Push and pull * Copy work between environments * Manage variables * Tutorial: Create environments with source control * External secrets * Log streaming * License key * Releases Releases * Release notes Release notes * 1.x * 0.x * v1.0 migration guide * Help and community Help and community * Where to get help * Contributing * Licenses and privacy Licenses and privacy * Privacy and security * Privacy * Security * Incident response * What you can do * Sustainable use license * Integrations * Built-in nodes Built-in nodes * Node types * Core nodes * Activation Trigger * Aggregate * AI Transform * Code * Keyboard shortcuts * Common issues * Compare Datasets * Compression * Chat Trigger * Common issues * Convert to File * Crypto * Date & Time * Debug Helper * Edit Fields (Set) * Edit Image * Email Trigger (IMAP) * Error Trigger * Execute Command * Common issues * Execute Sub-workflow * Execute Sub-workflow Trigger * Execution Data * Extract From File * Filter * FTP * Git * GraphQL * HTML * HTTP Request * Common issues * If * JWT * LDAP * Limit * Local File Trigger * Loop Over Items (Split in Batches) * Manual Trigger * Markdown * MCP Server Trigger * Merge * n8n * n8n Form * n8n Form Trigger * n8n Trigger * No Operation, do nothing * Read/Write Files from Disk * Remove Duplicates * Templates and examples * Rename Keys * Respond to Webhook * RSS Read * RSS Feed Trigger * Schedule Trigger * Common issues * Send Email * Sort * Split Out * SSE Trigger * SSH * Stop And Error * Summarize * Switch * TOTP * Wait * Webhook * Workflow development * Common issues * Workflow Trigger * XML * Actions * Action Network * ActiveCampaign * Adalo * Affinity * Agile CRM * Airtable * Common issues * Airtop * AMQP Sender * APITemplate.io * Asana * Automizy * Autopilot * AWS Certificate Manager * AWS Comprehend * AWS DynamoDB * AWS Elastic Load Balancing * AWS Lambda * AWS Rekognition * AWS S3 * AWS SES * AWS SNS * AWS SQS * AWS Textract * AWS Transcribe * Azure Storage * BambooHR * Bannerbear * Baserow * Beeminder * Bitly * Bitwarden * Box * Brandfetch * Brevo * Bubble * Chargebee * CircleCI * Webex by Cisco * Clearbit * ClickUp * Clockify * Cloudflare * Cockpit * Coda * CoinGecko * Contentful * ConvertKit * Copper * Cortex * CrateDB * crowd.dev * Customer.io * DeepL * Demio * DHL * Discord * Common issues * Discourse * Disqus * Drift * Dropbox * Dropcontact * E-goi * Elasticsearch * Elastic Security * Emelia * ERPNext * Facebook Graph API * FileMaker * Flow * Freshdesk * Freshservice * Freshworks CRM * GetResponse * Ghost * GitHub * GitLab * Gmail * Draft operations * Label operations * Message operations * Thread operations * Common issues * Gong * Google Ads * Google Analytics * Google BigQuery * Google Books * Google Business Profile * Google Calendar * Calendar operations * Event operations * Google Chat * Google Cloud Firestore * Google Cloud Natural Language * Google Cloud Realtime Database * Google Cloud Storage * Google Contacts * Google Docs * Google Drive * File operations * File and folder operations * Folder operations * Shared drive operations * Common issues * Google Perspective * Google Sheets * Document operations * Sheet within Document operations * Common issues * Google Slides * Google Tasks * Google Translate * Google Workspace Admin * Gotify * GoToWebinar * Grafana * Grist * Hacker News * HaloPSA * Harvest * Help Scout * HighLevel * Home Assistant * HubSpot * Humantic AI * Hunter * Intercom * Invoice Ninja * Iterable * Jenkins * Jira Software * Kafka * Keap * Kitemaker * KoboToolbox * Lemlist * Line * Linear * LingvaNex * LinkedIn * LoneScale * Magento 2 * Mailcheck * Mailchimp * MailerLite * Mailgun * Mailjet * Mandrill * marketstack * Matrix * Mattermost * Mautic * Medium * MessageBird * Metabase * Microsoft Dynamics CRM * Microsoft Entra ID * Microsoft Excel 365 * Microsoft Graph Security * Microsoft OneDrive * Microsoft Outlook * Microsoft SQL * Microsoft Teams * Microsoft To Do * Mindee * MISP * Mocean * monday.com * MongoDB * Monica CRM * MQTT * MSG91 * MySQL * Common issues * Customer Datastore (n8n Training) * Customer Messenger (n8n Training) * NASA * Netlify * Netscaler ADC * Nextcloud * NocoDB * Notion * Common issues * npm * Odoo * Okta * One Simple API * Onfleet * OpenAI * Assistant operations * Audio operations * File operations * Image operations * Text operations * Common issues * OpenThesaurus * OpenWeatherMap * Oura * Paddle * PagerDuty * PayPal * Peekalink * PhantomBuster * Philips Hue * Pipedrive * Plivo * PostBin * Postgres * Common issues * PostHog * ProfitWell * Pushbullet * Pushcut * Pushover * QuestDB * Quick Base * QuickBooks Online * QuickChart * RabbitMQ * Raindrop * Reddit * Redis * Rocket.Chat * Rundeck * S3 * Salesforce * Salesmate * SeaTable * SecurityScorecard * Segment * SendGrid * Sendy * Sentry.io * ServiceNow * seven * Shopify * SIGNL4 * Slack * Snowflake * Splunk * Spontit * Spotify * Stackby * Storyblok * Strapi * Strava * Stripe * Supabase * Common issues * SyncroMSP * Taiga * Tapfiliate * Telegram * Chat operations * Callback operations * File operations * Message operations * Common issues * TheHive * TheHive 5 * TimescaleDB * Todoist * Travis CI * Trello * Twake * Twilio * Twist * Unleashed Software * UpLead * uProc * UptimeRobot * urlscan.io * Venafi TLS Protect Cloud * Venafi TLS Protect Datacenter * Vero * Vonage * Webflow * Wekan * WhatsApp Business Cloud * Common issues * Wise * WooCommerce * WordPress * X (Formerly Twitter) * Xero * Yourls * YouTube * Zammad * Zendesk * Zoho CRM * Zoom * Zulip * Triggers * ActiveCampaign Trigger * Acuity Scheduling Trigger * Affinity Trigger * Airtable Trigger * AMQP Trigger * Asana Trigger * Autopilot Trigger * AWS SNS Trigger * Bitbucket Trigger * Box Trigger * Brevo Trigger * Calendly Trigger * Cal Trigger * Chargebee Trigger * ClickUp Trigger * Clockify Trigger * ConvertKit Trigger * Copper Trigger * crowd.dev Trigger * Customer.io Trigger * Emelia Trigger * Eventbrite Trigger * Facebook Lead Ads Trigger * Facebook Trigger * Ad Account * Application * Certificate Transparency * Group * Instagram * Link * Page * Permissions * User * WhatsApp Business Account * Workplace Security * Figma Trigger (Beta) * Flow Trigger * Form.io Trigger * Formstack Trigger * GetResponse Trigger * GitHub Trigger * GitLab Trigger * Gmail Trigger * Poll Mode options * Common issues * Google Calendar Trigger * Google Drive Trigger * Common issues * Google Business Profile Trigger * Google Sheets Trigger * Common issues * Gumroad Trigger * Help Scout Trigger * Hubspot Trigger * Invoice Ninja Trigger * Jira Trigger * JotForm Trigger * Kafka Trigger * Keap Trigger * KoboToolbox Trigger * Lemlist Trigger * Linear Trigger * LoneScale Trigger * Mailchimp Trigger * MailerLite Trigger * Mailjet Trigger * Mautic Trigger * Microsoft OneDrive Trigger * Microsoft Outlook Trigger * MQTT Trigger * Netlify Trigger Netlify Trigger Table of contents * Related resources * Notion Trigger * Onfleet Trigger * PayPal Trigger * Pipedrive Trigger * Postgres Trigger * Postmark Trigger * Pushcut Trigger * RabbitMQ Trigger * Redis Trigger * Salesforce Trigger * SeaTable Trigger * Shopify Trigger * Slack Trigger * Strava Trigger * Stripe Trigger * SurveyMonkey Trigger * Taiga Trigger * Telegram Trigger * Common issues * TheHive 5 Trigger * TheHive Trigger * Toggl Trigger * Trello Trigger * Twilio Trigger * Typeform Trigger * Venafi TLS Protect Cloud Trigger * Webex by Cisco Trigger * Webflow Trigger * WhatsApp Trigger * Wise Trigger * WooCommerce Trigger * Workable Trigger * Wufoo Trigger * Zendesk Trigger * Cluster nodes * Root nodes * AI Agent * Conversational Agent * OpenAI Functions Agent * Plan and Execute Agent * ReAct Agent * SQL Agent * Tools Agent * Common issues * Basic LLM Chain * Question and Answer Chain * Common issues * Summarization Chain * Information Extractor * Text Classifier * Sentiment Analysis * LangChain Code * Simple Vector Store * Milvus Vector Store * MongoDB Atlas Vector Store * PGVector Vector Store * Pinecone Vector Store * Qdrant Vector Store * Supabase Vector Store * Zep Vector Store * Sub-nodes * Default Data Loader * GitHub Document Loader * Embeddings AWS Bedrock * Embeddings Azure OpenAI * Embeddings Cohere * Embeddings Google Gemini * Embeddings Google PaLM * Embeddings Google Vertex * Embeddings HuggingFace Inference * Embeddings Mistral Cloud * Embeddings Ollama * Embeddings OpenAI * Anthropic Chat Model * AWS Bedrock Chat Model * Azure OpenAI Chat Model * DeepSeek Chat Model * Google Gemini Chat Model * Google Vertex Chat Model * Groq Chat Model * Mistral Cloud Chat Model * Ollama Chat Model * Common issues * OpenAI Chat Model * Common issues * OpenRouter Chat Model * Cohere Model * Ollama Model * Common issues * Hugging Face Inference Model * Chat Memory Manager * Simple Memory * Common issues * Motorhead * MongoDB Chat Memory * Redis Chat Memory * Postgres Chat Memory * Xata * Zep * Auto-fixing Output Parser * Item List Output Parser * Structured Output Parser * Common issues * Contextual Compression Retriever * MultiQuery Retriever * Vector Store Retriever * Workflow Retriever * Character Text Splitter * Recursive Character Text Splitter * Token Splitter * Calculator * Custom Code Tool * HTTP Request Tool * MCP Client Tool * SerpApi (Google Search) * Think Tool * Vector Store Question Answer Tool * Wikipedia * Wolfram|Alpha * Custom n8n Workflow Tool * Credentials * Action Network credentials * ActiveCampaign credentials * Acuity Scheduling credentials * Adalo credentials * Affinity credentials * Agile CRM credentials * Airtable credentials * Airtop credentials * AlienVault credentials * AMQP credentials * Anthropic credentials * APITemplate.io credentials * Asana credentials * Auth0 Management credentials * Automizy credentials * Autopilot credentials * AWS credentials * Azure OpenAI credentials * Azure Storage credentials * BambooHR credentials * Bannerbear credentials * Baserow credentials * Beeminder credentials * Bitbucket credentials * Bitly credentials * Bitwarden credentials * Box credentials * Brandfetch credentials * Brevo credentials * Bubble credentials * Cal.com credentials * Calendly credentials * Carbon Black credentials * Chargebee credentials * CircleCI credentials * Cisco Meraki credentials * Cisco Secure Endpoint credentials * Cisco Umbrella credentials * Clearbit credentials * ClickUp credentials * Clockify credentials * Cloudflare credentials * Cockpit credentials * Coda credentials * Cohere credentials * Contentful credentials * ConvertAPI credentials * ConvertKit credentials * Copper credentials * Cortex credentials * CrateDB credentials * crowd.dev credentials * CrowdStrike credentials * Customer.io credentials * Datadog credentials * DeepL credentials * DeepSeek credentials * Demio credentials * DFIR-IRIS credentials * DHL credentials * Discord credentials * Discourse credentials * Disqus credentials * Drift credentials * Dropbox credentials * Dropcontact credentials * Dynatrace credentials * E-goi credentials * Elasticsearch credentials * Elastic Security credentials * Emelia credentials * ERPNext credentials * Eventbrite credentials * F5 Big-IP credentials * Facebook App credentials * Facebook Graph API credentials * Facebook Lead Ads credentials * Figma credentials * FileMaker credentials * Filescan credentials * Flow credentials * Form.io Trigger credentials * Formstack Trigger credentials * Fortinet FortiGate credentials * Freshdesk credentials * Freshservice credentials * Freshworks CRM credentials * FTP credentials * GetResponse credentials * Ghost credentials * Git credentials * GitHub credentials * GitLab credentials * Gong credentials * Google * Google OAuth2 single service * Google OAuth2 generic * Google Service Account * Google Gemini(PaLM) credentials * Gotify credentials * GoToWebinar credentials * Grafana credentials * Grist credentials * Groq credentials * Gumroad credentials * HaloPSA credentials * Harvest credentials * Help Scout credentials * HighLevel credentials * Home Assistant credentials * HTTP Request credentials * HubSpot credentials * Hugging Face credentials * Humantic AI credentials * Hunter credentials * Hybrid Analysis credentials * IMAP * Gmail * Outlook.com * Yahoo * Imperva WAF credentials * Intercom credentials * Invoice Ninja credentials * Iterable credentials * Jenkins credentials * Jira credentials * JotForm credentials * JWT credentials * Kafka credentials * Keap credentials * Kibana credentials * Kitemaker credentials * KoboToolbox credentials * LDAP credentials * Lemlist credentials * Line credentials * Linear credentials * LingvaNex credentials * LinkedIn credentials * LoneScale credentials * Magento 2 credentials * Mailcheck credentials * Mailchimp credentials * MailerLite credentials * Mailgun credentials * Mailjet credentials * Malcore credentials * Mandrill credentials * Marketstack credentials * Matrix credentials * Mattermost credentials * Mautic credentials * Medium credentials * MessageBird credentials * Metabase credentials * Microsoft credentials * Microsoft Azure Monitor credentials * Microsoft Entra ID credentials * Microsoft SQL credentials * Milvus credentials * Mindee credentials * Miro credentials * MISP credentials * Mist credentials * Mistral Cloud credentials * Mocean credentials * monday.com credentials * MongoDB credentials * Monica CRM credentials * Motorhead credentials * MQTT credentials * MSG91 credentials * MySQL credentials * NASA credentials * Netlify credentials * Netscaler ADC credentials * Nextcloud credentials * NocoDB credentials * Notion credentials * npm credentials * Odoo credentials * Okta credentials * Ollama credentials * One Simple API credentials * Onfleet credentials * OpenAI credentials * OpenCTI credentials * OpenRouter credentials * OpenWeatherMap credentials * Oura credentials * Paddle credentials * PagerDuty credentials * PayPal credentials * Peekalink credentials * PhantomBuster credentials * Philips Hue credentials * Pinecone credentials * Pipedrive credentials * Plivo credentials * Postgres credentials * PostHog credentials * Postmark credentials * ProfitWell credentials * Pushbullet credentials * Pushcut credentials * Pushover credentials * QRadar credentials * Qdrant credentials * Qualys credentials * QuestDB credentials * Quick Base credentials * QuickBooks credentials * RabbitMQ credentials * Raindrop credentials * Rapid7 InsightVM credentials * Recorded Future credentials * Reddit credentials * Redis credentials * Rocket.Chat credentials * Rundeck credentials * S3 credentials * Salesforce credentials * Salesmate credentials * SeaTable credentials * SecurityScorecard credentials * Segment credentials * Sekoia credentials * Send Email * Gmail * Outlook.com * Yahoo * SendGrid credentials * Sendy credentials * Sentry.io credentials * Serp credentials * ServiceNow credentials * seven credentials * Shopify credentials * Shuffler credentials * SIGNL4 credentials * Slack credentials * Snowflake credentials * SolarWinds IPAM credentials * SolarWinds Observability SaaS credentials * Splunk credentials * Spontit credentials * Spotify credentials * SSH credentials * Stackby credentials * Storyblok credentials * Strapi credentials * Strava credentials * Stripe credentials * Supabase credentials * SurveyMonkey credentials * SyncroMSP credentials * Sysdig credentials * Taiga credentials * Tapfiliate credentials * Telegram credentials * TheHive credentials * TheHive 5 credentials * TimescaleDB credentials * Todoist credentials * Toggl credentials * TOTP credentials * Travis CI credentials * Trellix ePO credentials * Trello credentials * Twake credentials * Twilio credentials * Twist credentials * Typeform credentials * Unleashed Software credentials * UpLead credentials * uProc credentials * UptimeRobot credentials * urlscan.io credentials * Venafi TLS Protect Cloud credentials * Venafi TLS Protect Datacenter credentials * Vero credentials * VirusTotal credentials * Vonage credentials * Webex by Cisco credentials * Webflow credentials * Webhook credentials * Wekan credentials * WhatsApp Business Cloud credentials * Wise credentials * Wolfram|Alpha credentials * WooCommerce credentials * WordPress credentials * Workable credentials * Wufoo credentials * X (formerly Twitter) credentials * Xata credentials * Xero credentials * Yourls credentials * Zabbix credentials * Zammad credentials * Zendesk credentials * Zep credentials * Zoho credentials * Zoom credentials * Zscaler ZIA credentials * Zulip credentials * Custom API actions for existing nodes * Handle rate limits * Community nodes Community nodes * Installation and management * GUI installation * Manual installation * Risks * Blocklist * Using community nodes * Troubleshooting * Building community nodes * Creating nodes Creating nodes * Overview * Plan your node * Choose a node type * Choose a node building style * Node UI design * Choose node file structure * Build your node * Set up your development environment * Tutorial: Build a declarative-style node * Tutorial: Build a programmatic-style node * Reference * Node UI elements * Code standards * Versioning * Choose node file structure * Base files * Structure * Standard parameters * Declarative-style parameters * Programmatic-style parameters * Programmatic-style execute method * Codex files * Credentials files * HTTP request helpers * Item linking * Test your node * Run your node locally * Node linter * Troubleshooting * Deploy your node * Submit community nodes * Install private nodes * Hosting n8n * Community vs Enterprise * Installation Installation * npm * Docker * Server setups * Digital Ocean * Heroku * Hetzner * Amazon Web Services * Azure * Google Cloud * Docker Compose * Updating * Configuration Configuration * Environment variables * Binary data * Credentials * Database * Deployment * Endpoints * Executions * External data storage * External hooks * External secrets * Logs * License * Nodes * Queue mode * Security * Source control * Task runners * Timezone and localization * User management and 2FA * Workflows * Configuration methods * Configuration examples * Isolate n8n * Configure the Base URL * Configure custom SSL certificate authorities * Set a custom encryption key * Configure workflow timeouts * Specify custom nodes location * Enable modules in Code node * Set the timezone * Specify user folder path * Configure webhook URLs with reverse proxy * Enable Prometheus metrics * Supported databases and settings * Task runners * User management * Logging and monitoring Logging and monitoring * Logging * Monitoring * Security audit * Scaling and performance Scaling and performance * Overview * Performance and benchmarking * Configuring queue mode * Concurrency control * Execution data * Binary data * External storage for binary data * Memory-related errors * Securing n8n Securing n8n * Overview * Set up SSL * Set up SSO * Security audit * Disable the API * Opt out of data collection * Blocking nodes * Hardening task runners * Starter Kits Starter Kits * AI Starter Kit * Architecture Architecture * Overview * Database structure * Using the CLI Using the CLI * CLI commands * Code in n8n * Expressions * Using the Code node * AI coding * Built in methods and variables Built in methods and variables * Overview * Current node input * Output of other nodes * Date and time * JMESPath * HTTP node * LangChain Code node * n8n metadata * Convenience methods * Data transformation functions * Arrays * Booleans * Dates * Numbers * Objects * Strings * Custom variables Custom variables * Create custom variables * Cookbook Cookbook * Handling dates * Query JSON with JMESPath * Built-in methods and variables examples * execution * getWorkflowStaticData * Retrieve linked items from earlier in the workflow * (node-name).all * vars * Expressions * Check incoming data * Common issues * Code node * Get number of items returned by last node * Get the binary data buffer * Output to the browser console * HTTP Request node * Pagination * Advanced AI * Tutorial: Build an AI workflow in n8n * LangChain in n8n LangChain in n8n * Overview * Langchain concepts in n8n * LangChain learning resources * Use LangSmith with n8n * Examples and concepts Examples and concepts * Introduction * What is a chain? * What is an agent? * Agents vs chains example * What is memory? * What is a tool? * Use Google Sheets as a data source * Call an API to fetch data * Set a human fallback for AI workflows * Let AI specify tool parameters * What is a vector database? * Populate a Pinecone vector database from a website * API * Authentication * Pagination * Using the API playground * API reference * Embed * Prerequisites * Deployment * Configuration * Workflow management * Workflows templates * White labelling Table of contents * Related resources --- ## Page: https://docs.n8n.io/integrations/builtin/trigger-nodes/n8n-nodes-base.notiontrigger/ Notion is an all-in-one workspace for your notes, tasks, wikis, and databases. Credentials You can find authentication information for this node here. Examples and templates For usage examples and templates to help you get started, refer to n8n's Notion Trigger integrations page. ## Events# * Page added to database * Page updated in database ## Related resources# n8n provides an app node for Notion. You can find the node docs here. View example workflows and related content on n8n's website. Refer to Notion's documentation for details about their API. --- ## Page: https://docs.n8n.io/integrations/builtin/trigger-nodes/n8n-nodes-base.onfleettrigger/ 1. Integrations 2. Built-in nodes 3. Triggers Onfleet is a logistics platform offering a last-mile delivery solution. Credentials You can find authentication information for this node here. Examples and templates For usage examples and templates to help you get started, refer to n8n's Onfleet Trigger integrations page. ## Events# Trigger a workflow on: * SMS recipient opt out * SMS recipient response missed * Task arrival * Task assigned * Task cloned * Task completed * Task created * Task delayed * Task ETA * Task failed * Task started * Task unassigned * Task updated * Worker created * Worker deleted * Worker duty --- ## Page: https://docs.n8n.io/integrations/builtin/trigger-nodes/n8n-nodes-base.paypaltrigger/ 1. Integrations 2. Built-in nodes 3. Triggers PayPal is a digital payment service that supports online fund transfers that customers can use when shopping online. Credentials You can find authentication information for this node here. Examples and templates For usage examples and templates to help you get started, refer to n8n's PayPal Trigger integrations page. --- ## Page: https://docs.n8n.io/integrations/builtin/trigger-nodes/n8n-nodes-base.pipedrivetrigger/ n8n Docs * Using n8n * Getting started Getting started * Learning path * Choose your n8n * Quickstarts * A very quick quickstart * A longer introduction * Video courses * Text courses * Level one * Navigating the editor UI * Building a mini-workflow * Automating a (real-world) use case * Designing the workflow * Building the workflow Building the workflow * Getting data from the data warehouse * Inserting data into airtable * Filtering orders * Setting values for processing orders * Calculating booked orders * Notifying the team * Scheduling the workflow * Activating and examining the workflow * Exporting and importing workflows * Test your knowledge * Level two * Understanding the data structure * Processing different data types * Merging and splitting data * Dealing with errors in workflows * Automating a business workflow Automating a business workflow * Use case * Workflow 1 * Workflow 2 * Workflow 3 * Test your knowledge * Using the app Using the app * Understand workflows * Create and run * Components * Nodes * Connections * Sticky Notes * Executions * Manual, partial, and production executions * Workflow-level executions * All executions * Custom executions data * Debug executions * Tags * Export and import * Templates * Sharing * Settings * Workflow history * Workflow ID * Manage credentials * Create and edit * Credential sharing * Manage users and access * Cloud setup * Manage users * Account types * Role-based access control * Role types * Projects * Best practices * 2FA * LDAP * SAML * Set up SAML * Okta Workforce Identity SAML setup * Troubleshooting * Manage users with SAML * Keyboard shortcuts * Key concepts Key concepts * Flow logic * Splitting with conditionals * Merging data * Looping * Waiting * Sub-workflows * Error handling * Execution order in multi-branch workflows * Data * Data structure * Data flow within nodes * Transforming data * Process data using code * Data mapping * Data mapping in the UI * Data mapping in the expressions editor * Data item linking * Item linking concepts * Item linking in the Code node * Item linking errors * Item linking for node creators * Data pinning * Data editing * Data filtering * Data mocking * Binary data * Schema preview * Glossary * n8n Cloud n8n Cloud * Overview * Access the Cloud admin dashboard * Update your n8n Cloud version * Set the timezone * Cloud IP addresses * Cloud data management * Change ownership or username * Concurrency * AI Assistant * Enterprise features Enterprise features * Source control and environments * Understand * Environments * Git in n8n * Branch patterns * Set up * Using * Push and pull * Copy work between environments * Manage variables * Tutorial: Create environments with source control * External secrets * Log streaming * License key * Releases Releases * Release notes Release notes * 1.x * 0.x * v1.0 migration guide * Help and community Help and community * Where to get help * Contributing * Licenses and privacy Licenses and privacy * Privacy and security * Privacy * Security * Incident response * What you can do * Sustainable use license * Integrations * Built-in nodes Built-in nodes * Node types * Core nodes * Activation Trigger * Aggregate * AI Transform * Code * Keyboard shortcuts * Common issues * Compare Datasets * Compression * Chat Trigger * Common issues * Convert to File * Crypto * Date & Time * Debug Helper * Edit Fields (Set) * Edit Image * Email Trigger (IMAP) * Error Trigger * Execute Command * Common issues * Execute Sub-workflow * Execute Sub-workflow Trigger * Execution Data * Extract From File * Filter * FTP * Git * GraphQL * HTML * HTTP Request * Common issues * If * JWT * LDAP * Limit * Local File Trigger * Loop Over Items (Split in Batches) * Manual Trigger * Markdown * MCP Server Trigger * Merge * n8n * n8n Form * n8n Form Trigger * n8n Trigger * No Operation, do nothing * Read/Write Files from Disk * Remove Duplicates * Templates and examples * Rename Keys * Respond to Webhook * RSS Read * RSS Feed Trigger * Schedule Trigger * Common issues * Send Email * Sort * Split Out * SSE Trigger * SSH * Stop And Error * Summarize * Switch * TOTP * Wait * Webhook * Workflow development * Common issues * Workflow Trigger * XML * Actions * Action Network * ActiveCampaign * Adalo * Affinity * Agile CRM * Airtable * Common issues * Airtop * AMQP Sender * APITemplate.io * Asana * Automizy * Autopilot * AWS Certificate Manager * AWS Comprehend * AWS DynamoDB * AWS Elastic Load Balancing * AWS Lambda * AWS Rekognition * AWS S3 * AWS SES * AWS SNS * AWS SQS * AWS Textract * AWS Transcribe * Azure Storage * BambooHR * Bannerbear * Baserow * Beeminder * Bitly * Bitwarden * Box * Brandfetch * Brevo * Bubble * Chargebee * CircleCI * Webex by Cisco * Clearbit * ClickUp * Clockify * Cloudflare * Cockpit * Coda * CoinGecko * Contentful * ConvertKit * Copper * Cortex * CrateDB * crowd.dev * Customer.io * DeepL * Demio * DHL * Discord * Common issues * Discourse * Disqus * Drift * Dropbox * Dropcontact * E-goi * Elasticsearch * Elastic Security * Emelia * ERPNext * Facebook Graph API * FileMaker * Flow * Freshdesk * Freshservice * Freshworks CRM * GetResponse * Ghost * GitHub * GitLab * Gmail * Draft operations * Label operations * Message operations * Thread operations * Common issues * Gong * Google Ads * Google Analytics * Google BigQuery * Google Books * Google Business Profile * Google Calendar * Calendar operations * Event operations * Google Chat * Google Cloud Firestore * Google Cloud Natural Language * Google Cloud Realtime Database * Google Cloud Storage * Google Contacts * Google Docs * Google Drive * File operations * File and folder operations * Folder operations * Shared drive operations * Common issues * Google Perspective * Google Sheets * Document operations * Sheet within Document operations * Common issues * Google Slides * Google Tasks * Google Translate * Google Workspace Admin * Gotify * GoToWebinar * Grafana * Grist * Hacker News * HaloPSA * Harvest * Help Scout * HighLevel * Home Assistant * HubSpot * Humantic AI * Hunter * Intercom * Invoice Ninja * Iterable * Jenkins * Jira Software * Kafka * Keap * Kitemaker * KoboToolbox * Lemlist * Line * Linear * LingvaNex * LinkedIn * LoneScale * Magento 2 * Mailcheck * Mailchimp * MailerLite * Mailgun * Mailjet * Mandrill * marketstack * Matrix * Mattermost * Mautic * Medium * MessageBird * Metabase * Microsoft Dynamics CRM * Microsoft Entra ID * Microsoft Excel 365 * Microsoft Graph Security * Microsoft OneDrive * Microsoft Outlook * Microsoft SQL * Microsoft Teams * Microsoft To Do * Mindee * MISP * Mocean * monday.com * MongoDB * Monica CRM * MQTT * MSG91 * MySQL * Common issues * Customer Datastore (n8n Training) * Customer Messenger (n8n Training) * NASA * Netlify * Netscaler ADC * Nextcloud * NocoDB * Notion * Common issues * npm * Odoo * Okta * One Simple API * Onfleet * OpenAI * Assistant operations * Audio operations * File operations * Image operations * Text operations * Common issues * OpenThesaurus * OpenWeatherMap * Oura * Paddle * PagerDuty * PayPal * Peekalink * PhantomBuster * Philips Hue * Pipedrive * Plivo * PostBin * Postgres * Common issues * PostHog * ProfitWell * Pushbullet * Pushcut * Pushover * QuestDB * Quick Base * QuickBooks Online * QuickChart * RabbitMQ * Raindrop * Reddit * Redis * Rocket.Chat * Rundeck * S3 * Salesforce * Salesmate * SeaTable * SecurityScorecard * Segment * SendGrid * Sendy * Sentry.io * ServiceNow * seven * Shopify * SIGNL4 * Slack * Snowflake * Splunk * Spontit * Spotify * Stackby * Storyblok * Strapi * Strava * Stripe * Supabase * Common issues * SyncroMSP * Taiga * Tapfiliate * Telegram * Chat operations * Callback operations * File operations * Message operations * Common issues * TheHive * TheHive 5 * TimescaleDB * Todoist * Travis CI * Trello * Twake * Twilio * Twist * Unleashed Software * UpLead * uProc * UptimeRobot * urlscan.io * Venafi TLS Protect Cloud * Venafi TLS Protect Datacenter * Vero * Vonage * Webflow * Wekan * WhatsApp Business Cloud * Common issues * Wise * WooCommerce * WordPress * X (Formerly Twitter) * Xero * Yourls * YouTube * Zammad * Zendesk * Zoho CRM * Zoom * Zulip * Triggers * ActiveCampaign Trigger * Acuity Scheduling Trigger * Affinity Trigger * Airtable Trigger * AMQP Trigger * Asana Trigger * Autopilot Trigger * AWS SNS Trigger * Bitbucket Trigger * Box Trigger * Brevo Trigger * Calendly Trigger * Cal Trigger * Chargebee Trigger * ClickUp Trigger * Clockify Trigger * ConvertKit Trigger * Copper Trigger * crowd.dev Trigger * Customer.io Trigger * Emelia Trigger * Eventbrite Trigger * Facebook Lead Ads Trigger * Facebook Trigger * Ad Account * Application * Certificate Transparency * Group * Instagram * Link * Page * Permissions * User * WhatsApp Business Account * Workplace Security * Figma Trigger (Beta) * Flow Trigger * Form.io Trigger * Formstack Trigger * GetResponse Trigger * GitHub Trigger * GitLab Trigger * Gmail Trigger * Poll Mode options * Common issues * Google Calendar Trigger * Google Drive Trigger * Common issues * Google Business Profile Trigger * Google Sheets Trigger * Common issues * Gumroad Trigger * Help Scout Trigger * Hubspot Trigger * Invoice Ninja Trigger * Jira Trigger * JotForm Trigger * Kafka Trigger * Keap Trigger * KoboToolbox Trigger * Lemlist Trigger * Linear Trigger * LoneScale Trigger * Mailchimp Trigger * MailerLite Trigger * Mailjet Trigger * Mautic Trigger * Microsoft OneDrive Trigger * Microsoft Outlook Trigger * MQTT Trigger * Netlify Trigger * Notion Trigger * Onfleet Trigger * PayPal Trigger * Pipedrive Trigger * Postgres Trigger * Postmark Trigger * Pushcut Trigger * RabbitMQ Trigger * Redis Trigger * Salesforce Trigger * SeaTable Trigger * Shopify Trigger * Slack Trigger * Strava Trigger * Stripe Trigger * SurveyMonkey Trigger * Taiga Trigger * Telegram Trigger * Common issues * TheHive 5 Trigger * TheHive Trigger * Toggl Trigger * Trello Trigger * Twilio Trigger * Typeform Trigger * Venafi TLS Protect Cloud Trigger * Webex by Cisco Trigger * Webflow Trigger * WhatsApp Trigger * Wise Trigger * WooCommerce Trigger * Workable Trigger * Wufoo Trigger * Zendesk Trigger * Cluster nodes * Root nodes * AI Agent * Conversational Agent * OpenAI Functions Agent * Plan and Execute Agent * ReAct Agent * SQL Agent * Tools Agent * Common issues * Basic LLM Chain * Question and Answer Chain * Common issues * Summarization Chain * Information Extractor * Text Classifier * Sentiment Analysis * LangChain Code * Simple Vector Store * Milvus Vector Store * MongoDB Atlas Vector Store * PGVector Vector Store * Pinecone Vector Store * Qdrant Vector Store * Supabase Vector Store * Zep Vector Store * Sub-nodes * Default Data Loader * GitHub Document Loader * Embeddings AWS Bedrock * Embeddings Azure OpenAI * Embeddings Cohere * Embeddings Google Gemini * Embeddings Google PaLM * Embeddings Google Vertex * Embeddings HuggingFace Inference * Embeddings Mistral Cloud * Embeddings Ollama * Embeddings OpenAI * Anthropic Chat Model * AWS Bedrock Chat Model * Azure OpenAI Chat Model * DeepSeek Chat Model * Google Gemini Chat Model * Google Vertex Chat Model * Groq Chat Model * Mistral Cloud Chat Model * Ollama Chat Model * Common issues * OpenAI Chat Model * Common issues * OpenRouter Chat Model * Cohere Model * Ollama Model * Common issues * Hugging Face Inference Model * Chat Memory Manager * Simple Memory * Common issues * Motorhead * MongoDB Chat Memory * Redis Chat Memory * Postgres Chat Memory * Xata * Zep * Auto-fixing Output Parser * Item List Output Parser * Structured Output Parser * Common issues * Contextual Compression Retriever * MultiQuery Retriever * Vector Store Retriever * Workflow Retriever * Character Text Splitter * Recursive Character Text Splitter * Token Splitter * Calculator * Custom Code Tool * HTTP Request Tool * MCP Client Tool * SerpApi (Google Search) * Think Tool * Vector Store Question Answer Tool * Wikipedia * Wolfram|Alpha * Custom n8n Workflow Tool * Credentials * Action Network credentials * ActiveCampaign credentials * Acuity Scheduling credentials * Adalo credentials * Affinity credentials * Agile CRM credentials * Airtable credentials * Airtop credentials * AlienVault credentials * AMQP credentials * Anthropic credentials * APITemplate.io credentials * Asana credentials * Auth0 Management credentials * Automizy credentials * Autopilot credentials * AWS credentials * Azure OpenAI credentials * Azure Storage credentials * BambooHR credentials * Bannerbear credentials * Baserow credentials * Beeminder credentials * Bitbucket credentials * Bitly credentials * Bitwarden credentials * Box credentials * Brandfetch credentials * Brevo credentials * Bubble credentials * Cal.com credentials * Calendly credentials * Carbon Black credentials * Chargebee credentials * CircleCI credentials * Cisco Meraki credentials * Cisco Secure Endpoint credentials * Cisco Umbrella credentials * Clearbit credentials * ClickUp credentials * Clockify credentials * Cloudflare credentials * Cockpit credentials * Coda credentials * Cohere credentials * Contentful credentials * ConvertAPI credentials * ConvertKit credentials * Copper credentials * Cortex credentials * CrateDB credentials * crowd.dev credentials * CrowdStrike credentials * Customer.io credentials * Datadog credentials * DeepL credentials * DeepSeek credentials * Demio credentials * DFIR-IRIS credentials * DHL credentials * Discord credentials * Discourse credentials * Disqus credentials * Drift credentials * Dropbox credentials * Dropcontact credentials * Dynatrace credentials * E-goi credentials * Elasticsearch credentials * Elastic Security credentials * Emelia credentials * ERPNext credentials * Eventbrite credentials * F5 Big-IP credentials * Facebook App credentials * Facebook Graph API credentials * Facebook Lead Ads credentials * Figma credentials * FileMaker credentials * Filescan credentials * Flow credentials * Form.io Trigger credentials * Formstack Trigger credentials * Fortinet FortiGate credentials * Freshdesk credentials * Freshservice credentials * Freshworks CRM credentials * FTP credentials * GetResponse credentials * Ghost credentials * Git credentials * GitHub credentials * GitLab credentials * Gong credentials * Google * Google OAuth2 single service * Google OAuth2 generic * Google Service Account * Google Gemini(PaLM) credentials * Gotify credentials * GoToWebinar credentials * Grafana credentials * Grist credentials * Groq credentials * Gumroad credentials * HaloPSA credentials * Harvest credentials * Help Scout credentials * HighLevel credentials * Home Assistant credentials * HTTP Request credentials * HubSpot credentials * Hugging Face credentials * Humantic AI credentials * Hunter credentials * Hybrid Analysis credentials * IMAP * Gmail * Outlook.com * Yahoo * Imperva WAF credentials * Intercom credentials * Invoice Ninja credentials * Iterable credentials * Jenkins credentials * Jira credentials * JotForm credentials * JWT credentials * Kafka credentials * Keap credentials * Kibana credentials * Kitemaker credentials * KoboToolbox credentials * LDAP credentials * Lemlist credentials * Line credentials * Linear credentials * LingvaNex credentials * LinkedIn credentials * LoneScale credentials * Magento 2 credentials * Mailcheck credentials * Mailchimp credentials * MailerLite credentials * Mailgun credentials * Mailjet credentials * Malcore credentials * Mandrill credentials * Marketstack credentials * Matrix credentials * Mattermost credentials * Mautic credentials * Medium credentials * MessageBird credentials * Metabase credentials * Microsoft credentials * Microsoft Azure Monitor credentials * Microsoft Entra ID credentials * Microsoft SQL credentials * Milvus credentials * Mindee credentials * Miro credentials * MISP credentials * Mist credentials * Mistral Cloud credentials * Mocean credentials * monday.com credentials * MongoDB credentials * Monica CRM credentials * Motorhead credentials * MQTT credentials * MSG91 credentials * MySQL credentials * NASA credentials * Netlify credentials * Netscaler ADC credentials * Nextcloud credentials * NocoDB credentials * Notion credentials * npm credentials * Odoo credentials * Okta credentials * Ollama credentials * One Simple API credentials * Onfleet credentials * OpenAI credentials * OpenCTI credentials * OpenRouter credentials * OpenWeatherMap credentials * Oura credentials * Paddle credentials * PagerDuty credentials * PayPal credentials * Peekalink credentials * PhantomBuster credentials * Philips Hue credentials * Pinecone credentials * Pipedrive credentials * Plivo credentials * Postgres credentials * PostHog credentials * Postmark credentials * ProfitWell credentials * Pushbullet credentials * Pushcut credentials * Pushover credentials * QRadar credentials * Qdrant credentials * Qualys credentials * QuestDB credentials * Quick Base credentials * QuickBooks credentials * RabbitMQ credentials * Raindrop credentials * Rapid7 InsightVM credentials * Recorded Future credentials * Reddit credentials * Redis credentials * Rocket.Chat credentials * Rundeck credentials * S3 credentials * Salesforce credentials * Salesmate credentials * SeaTable credentials * SecurityScorecard credentials * Segment credentials * Sekoia credentials * Send Email * Gmail * Outlook.com * Yahoo * SendGrid credentials * Sendy credentials * Sentry.io credentials * Serp credentials * ServiceNow credentials * seven credentials * Shopify credentials * Shuffler credentials * SIGNL4 credentials * Slack credentials * Snowflake credentials * SolarWinds IPAM credentials * SolarWinds Observability SaaS credentials * Splunk credentials * Spontit credentials * Spotify credentials * SSH credentials * Stackby credentials * Storyblok credentials * Strapi credentials * Strava credentials * Stripe credentials * Supabase credentials * SurveyMonkey credentials * SyncroMSP credentials * Sysdig credentials * Taiga credentials * Tapfiliate credentials * Telegram credentials * TheHive credentials * TheHive 5 credentials * TimescaleDB credentials * Todoist credentials * Toggl credentials * TOTP credentials * Travis CI credentials * Trellix ePO credentials * Trello credentials * Twake credentials * Twilio credentials * Twist credentials * Typeform credentials * Unleashed Software credentials * UpLead credentials * uProc credentials * UptimeRobot credentials * urlscan.io credentials * Venafi TLS Protect Cloud credentials * Venafi TLS Protect Datacenter credentials * Vero credentials * VirusTotal credentials * Vonage credentials * Webex by Cisco credentials * Webflow credentials * Webhook credentials * Wekan credentials * WhatsApp Business Cloud credentials * Wise credentials * Wolfram|Alpha credentials * WooCommerce credentials * WordPress credentials * Workable credentials * Wufoo credentials * X (formerly Twitter) credentials * Xata credentials * Xero credentials * Yourls credentials * Zabbix credentials * Zammad credentials * Zendesk credentials * Zep credentials * Zoho credentials * Zoom credentials * Zscaler ZIA credentials * Zulip credentials * Custom API actions for existing nodes * Handle rate limits * Community nodes Community nodes * Installation and management * GUI installation * Manual installation * Risks * Blocklist * Using community nodes * Troubleshooting * Building community nodes * Creating nodes Creating nodes * Overview * Plan your node * Choose a node type * Choose a node building style * Node UI design * Choose node file structure * Build your node * Set up your development environment * Tutorial: Build a declarative-style node * Tutorial: Build a programmatic-style node * Reference * Node UI elements * Code standards * Versioning * Choose node file structure * Base files * Structure * Standard parameters * Declarative-style parameters * Programmatic-style parameters * Programmatic-style execute method * Codex files * Credentials files * HTTP request helpers * Item linking * Test your node * Run your node locally * Node linter * Troubleshooting * Deploy your node * Submit community nodes * Install private nodes * Hosting n8n * Community vs Enterprise * Installation Installation * npm * Docker * Server setups * Digital Ocean * Heroku * Hetzner * Amazon Web Services * Azure * Google Cloud * Docker Compose * Updating * Configuration Configuration * Environment variables * Binary data * Credentials * Database * Deployment * Endpoints * Executions * External data storage * External hooks * External secrets * Logs * License * Nodes * Queue mode * Security * Source control * Task runners * Timezone and localization * User management and 2FA * Workflows * Configuration methods * Configuration examples * Isolate n8n * Configure the Base URL * Configure custom SSL certificate authorities * Set a custom encryption key * Configure workflow timeouts * Specify custom nodes location * Enable modules in Code node * Set the timezone * Specify user folder path * Configure webhook URLs with reverse proxy * Enable Prometheus metrics * Supported databases and settings * Task runners * User management * Logging and monitoring Logging and monitoring * Logging * Monitoring * Security audit * Scaling and performance Scaling and performance * Overview * Performance and benchmarking * Configuring queue mode * Concurrency control * Execution data * Binary data * External storage for binary data * Memory-related errors * Securing n8n Securing n8n * Overview * Set up SSL * Set up SSO * Security audit * Disable the API * Opt out of data collection * Blocking nodes * Hardening task runners * Starter Kits Starter Kits * AI Starter Kit * Architecture Architecture * Overview * Database structure * Using the CLI Using the CLI * CLI commands * Code in n8n * Expressions * Using the Code node * AI coding * Built in methods and variables Built in methods and variables * Overview * Current node input * Output of other nodes * Date and time * JMESPath * HTTP node * LangChain Code node * n8n metadata * Convenience methods * Data transformation functions * Arrays * Booleans * Dates * Numbers * Objects * Strings * Custom variables Custom variables * Create custom variables * Cookbook Cookbook * Handling dates * Query JSON with JMESPath * Built-in methods and variables examples * execution * getWorkflowStaticData * Retrieve linked items from earlier in the workflow * (node-name).all * vars * Expressions * Check incoming data * Common issues * Code node * Get number of items returned by last node * Get the binary data buffer * Output to the browser console * HTTP Request node * Pagination * Advanced AI * Tutorial: Build an AI workflow in n8n * LangChain in n8n LangChain in n8n * Overview * Langchain concepts in n8n * LangChain learning resources * Use LangSmith with n8n * Examples and concepts Examples and concepts * Introduction * What is a chain? * What is an agent? * Agents vs chains example * What is memory? * What is a tool? * Use Google Sheets as a data source * Call an API to fetch data * Set a human fallback for AI workflows * Let AI specify tool parameters * What is a vector database? * Populate a Pinecone vector database from a website * API * Authentication * Pagination * Using the API playground * API reference * Embed * Prerequisites * Deployment * Configuration * Workflow management * Workflows templates * White labelling 1. Integrations 2. Built-in nodes 3. Triggers Pipedrive is a cloud-based sales software company that aims to improve the productivity of businesses through the use of their software. Credentials You can find authentication information for this node here. --- ## Page: https://docs.n8n.io/integrations/builtin/trigger-nodes/n8n-nodes-base.postgrestrigger/ Use the Postgres Trigger node to respond to events in Postgres and integrate Postgres with other applications. n8n has built-in support responding to insert, update, and delete events. Credentials You can find authentication information for this node here. ## Events# You can configure how the node listens for events. * Select **Listen and Create Trigger Rule**, then choose the events to listen for: * Insert * Update * Delete * Select **Listen to Channel**, then enter a channel name that the node should monitor. n8n provides an app node for Postgres. You can find the node docs here. View example workflows and related content on n8n's website. --- ## Page: https://docs.n8n.io/integrations/builtin/trigger-nodes/n8n-nodes-base.postmarktrigger/ n8n Docs * Using n8n * Getting started Getting started * Learning path * Choose your n8n * Quickstarts * A very quick quickstart * A longer introduction * Video courses * Text courses * Level one * Navigating the editor UI * Building a mini-workflow * Automating a (real-world) use case * Designing the workflow * Building the workflow Building the workflow * Getting data from the data warehouse * Inserting data into airtable * Filtering orders * Setting values for processing orders * Calculating booked orders * Notifying the team * Scheduling the workflow * Activating and examining the workflow * Exporting and importing workflows * Test your knowledge * Level two * Understanding the data structure * Processing different data types * Merging and splitting data * Dealing with errors in workflows * Automating a business workflow Automating a business workflow * Use case * Workflow 1 * Workflow 2 * Workflow 3 * Test your knowledge * Using the app Using the app * Understand workflows * Create and run * Components * Nodes * Connections * Sticky Notes * Executions * Manual, partial, and production executions * Workflow-level executions * All executions * Custom executions data * Debug executions * Tags * Export and import * Templates * Sharing * Settings * Workflow history * Workflow ID * Manage credentials * Create and edit * Credential sharing * Manage users and access * Cloud setup * Manage users * Account types * Role-based access control * Role types * Projects * Best practices * 2FA * LDAP * SAML * Set up SAML * Okta Workforce Identity SAML setup * Troubleshooting * Manage users with SAML * Keyboard shortcuts * Key concepts Key concepts * Flow logic * Splitting with conditionals * Merging data * Looping * Waiting * Sub-workflows * Error handling * Execution order in multi-branch workflows * Data * Data structure * Data flow within nodes * Transforming data * Process data using code * Data mapping * Data mapping in the UI * Data mapping in the expressions editor * Data item linking * Item linking concepts * Item linking in the Code node * Item linking errors * Item linking for node creators * Data pinning * Data editing * Data filtering * Data mocking * Binary data * Schema preview * Glossary * n8n Cloud n8n Cloud * Overview * Access the Cloud admin dashboard * Update your n8n Cloud version * Set the timezone * Cloud IP addresses * Cloud data management * Change ownership or username * Concurrency * AI Assistant * Enterprise features Enterprise features * Source control and environments * Understand * Environments * Git in n8n * Branch patterns * Set up * Using * Push and pull * Copy work between environments * Manage variables * Tutorial: Create environments with source control * External secrets * Log streaming * License key * Releases Releases * Release notes Release notes * 1.x * 0.x * v1.0 migration guide * Help and community Help and community * Where to get help * Contributing * Licenses and privacy Licenses and privacy * Privacy and security * Privacy * Security * Incident response * What you can do * Sustainable use license * Integrations * Built-in nodes Built-in nodes * Node types * Core nodes * Activation Trigger * Aggregate * AI Transform * Code * Keyboard shortcuts * Common issues * Compare Datasets * Compression * Chat Trigger * Common issues * Convert to File * Crypto * Date & Time * Debug Helper * Edit Fields (Set) * Edit Image * Email Trigger (IMAP) * Error Trigger * Execute Command * Common issues * Execute Sub-workflow * Execute Sub-workflow Trigger * Execution Data * Extract From File * Filter * FTP * Git * GraphQL * HTML * HTTP Request * Common issues * If * JWT * LDAP * Limit * Local File Trigger * Loop Over Items (Split in Batches) * Manual Trigger * Markdown * MCP Server Trigger * Merge * n8n * n8n Form * n8n Form Trigger * n8n Trigger * No Operation, do nothing * Read/Write Files from Disk * Remove Duplicates * Templates and examples * Rename Keys * Respond to Webhook * RSS Read * RSS Feed Trigger * Schedule Trigger * Common issues * Send Email * Sort * Split Out * SSE Trigger * SSH * Stop And Error * Summarize * Switch * TOTP * Wait * Webhook * Workflow development * Common issues * Workflow Trigger * XML * Actions * Action Network * ActiveCampaign * Adalo * Affinity * Agile CRM * Airtable * Common issues * Airtop * AMQP Sender * APITemplate.io * Asana * Automizy * Autopilot * AWS Certificate Manager * AWS Comprehend * AWS DynamoDB * AWS Elastic Load Balancing * AWS Lambda * AWS Rekognition * AWS S3 * AWS SES * AWS SNS * AWS SQS * AWS Textract * AWS Transcribe * Azure Storage * BambooHR * Bannerbear * Baserow * Beeminder * Bitly * Bitwarden * Box * Brandfetch * Brevo * Bubble * Chargebee * CircleCI * Webex by Cisco * Clearbit * ClickUp * Clockify * Cloudflare * Cockpit * Coda * CoinGecko * Contentful * ConvertKit * Copper * Cortex * CrateDB * crowd.dev * Customer.io * DeepL * Demio * DHL * Discord * Common issues * Discourse * Disqus * Drift * Dropbox * Dropcontact * E-goi * Elasticsearch * Elastic Security * Emelia * ERPNext * Facebook Graph API * FileMaker * Flow * Freshdesk * Freshservice * Freshworks CRM * GetResponse * Ghost * GitHub * GitLab * Gmail * Draft operations * Label operations * Message operations * Thread operations * Common issues * Gong * Google Ads * Google Analytics * Google BigQuery * Google Books * Google Business Profile * Google Calendar * Calendar operations * Event operations * Google Chat * Google Cloud Firestore * Google Cloud Natural Language * Google Cloud Realtime Database * Google Cloud Storage * Google Contacts * Google Docs * Google Drive * File operations * File and folder operations * Folder operations * Shared drive operations * Common issues * Google Perspective * Google Sheets * Document operations * Sheet within Document operations * Common issues * Google Slides * Google Tasks * Google Translate * Google Workspace Admin * Gotify * GoToWebinar * Grafana * Grist * Hacker News * HaloPSA * Harvest * Help Scout * HighLevel * Home Assistant * HubSpot * Humantic AI * Hunter * Intercom * Invoice Ninja * Iterable * Jenkins * Jira Software * Kafka * Keap * Kitemaker * KoboToolbox * Lemlist * Line * Linear * LingvaNex * LinkedIn * LoneScale * Magento 2 * Mailcheck * Mailchimp * MailerLite * Mailgun * Mailjet * Mandrill * marketstack * Matrix * Mattermost * Mautic * Medium * MessageBird * Metabase * Microsoft Dynamics CRM * Microsoft Entra ID * Microsoft Excel 365 * Microsoft Graph Security * Microsoft OneDrive * Microsoft Outlook * Microsoft SQL * Microsoft Teams * Microsoft To Do * Mindee * MISP * Mocean * monday.com * MongoDB * Monica CRM * MQTT * MSG91 * MySQL * Common issues * Customer Datastore (n8n Training) * Customer Messenger (n8n Training) * NASA * Netlify * Netscaler ADC * Nextcloud * NocoDB * Notion * Common issues * npm * Odoo * Okta * One Simple API * Onfleet * OpenAI * Assistant operations * Audio operations * File operations * Image operations * Text operations * Common issues * OpenThesaurus * OpenWeatherMap * Oura * Paddle * PagerDuty * PayPal * Peekalink * PhantomBuster * Philips Hue * Pipedrive * Plivo * PostBin * Postgres * Common issues * PostHog * ProfitWell * Pushbullet * Pushcut * Pushover * QuestDB * Quick Base * QuickBooks Online * QuickChart * RabbitMQ * Raindrop * Reddit * Redis * Rocket.Chat * Rundeck * S3 * Salesforce * Salesmate * SeaTable * SecurityScorecard * Segment * SendGrid * Sendy * Sentry.io * ServiceNow * seven * Shopify * SIGNL4 * Slack * Snowflake * Splunk * Spontit * Spotify * Stackby * Storyblok * Strapi * Strava * Stripe * Supabase * Common issues * SyncroMSP * Taiga * Tapfiliate * Telegram * Chat operations * Callback operations * File operations * Message operations * Common issues * TheHive * TheHive 5 * TimescaleDB * Todoist * Travis CI * Trello * Twake * Twilio * Twist * Unleashed Software * UpLead * uProc * UptimeRobot * urlscan.io * Venafi TLS Protect Cloud * Venafi TLS Protect Datacenter * Vero * Vonage * Webflow * Wekan * WhatsApp Business Cloud * Common issues * Wise * WooCommerce * WordPress * X (Formerly Twitter) * Xero * Yourls * YouTube * Zammad * Zendesk * Zoho CRM * Zoom * Zulip * Triggers * ActiveCampaign Trigger * Acuity Scheduling Trigger * Affinity Trigger * Airtable Trigger * AMQP Trigger * Asana Trigger * Autopilot Trigger * AWS SNS Trigger * Bitbucket Trigger * Box Trigger * Brevo Trigger * Calendly Trigger * Cal Trigger * Chargebee Trigger * ClickUp Trigger * Clockify Trigger * ConvertKit Trigger * Copper Trigger * crowd.dev Trigger * Customer.io Trigger * Emelia Trigger * Eventbrite Trigger * Facebook Lead Ads Trigger * Facebook Trigger * Ad Account * Application * Certificate Transparency * Group * Instagram * Link * Page * Permissions * User * WhatsApp Business Account * Workplace Security * Figma Trigger (Beta) * Flow Trigger * Form.io Trigger * Formstack Trigger * GetResponse Trigger * GitHub Trigger * GitLab Trigger * Gmail Trigger * Poll Mode options * Common issues * Google Calendar Trigger * Google Drive Trigger * Common issues * Google Business Profile Trigger * Google Sheets Trigger * Common issues * Gumroad Trigger * Help Scout Trigger * Hubspot Trigger * Invoice Ninja Trigger * Jira Trigger * JotForm Trigger * Kafka Trigger * Keap Trigger * KoboToolbox Trigger * Lemlist Trigger * Linear Trigger * LoneScale Trigger * Mailchimp Trigger * MailerLite Trigger * Mailjet Trigger * Mautic Trigger * Microsoft OneDrive Trigger * Microsoft Outlook Trigger * MQTT Trigger * Netlify Trigger * Notion Trigger * Onfleet Trigger * PayPal Trigger * Pipedrive Trigger * Postgres Trigger * Postmark Trigger * Pushcut Trigger * RabbitMQ Trigger * Redis Trigger * Salesforce Trigger * SeaTable Trigger * Shopify Trigger * Slack Trigger * Strava Trigger * Stripe Trigger * SurveyMonkey Trigger * Taiga Trigger * Telegram Trigger * Common issues * TheHive 5 Trigger * TheHive Trigger * Toggl Trigger * Trello Trigger * Twilio Trigger * Typeform Trigger * Venafi TLS Protect Cloud Trigger * Webex by Cisco Trigger * Webflow Trigger * WhatsApp Trigger * Wise Trigger * WooCommerce Trigger * Workable Trigger * Wufoo Trigger * Zendesk Trigger * Cluster nodes * Root nodes * AI Agent * Conversational Agent * OpenAI Functions Agent * Plan and Execute Agent * ReAct Agent * SQL Agent * Tools Agent * Common issues * Basic LLM Chain * Question and Answer Chain * Common issues * Summarization Chain * Information Extractor * Text Classifier * Sentiment Analysis * LangChain Code * Simple Vector Store * Milvus Vector Store * MongoDB Atlas Vector Store * PGVector Vector Store * Pinecone Vector Store * Qdrant Vector Store * Supabase Vector Store * Zep Vector Store * Sub-nodes * Default Data Loader * GitHub Document Loader * Embeddings AWS Bedrock * Embeddings Azure OpenAI * Embeddings Cohere * Embeddings Google Gemini * Embeddings Google PaLM * Embeddings Google Vertex * Embeddings HuggingFace Inference * Embeddings Mistral Cloud * Embeddings Ollama * Embeddings OpenAI * Anthropic Chat Model * AWS Bedrock Chat Model * Azure OpenAI Chat Model * DeepSeek Chat Model * Google Gemini Chat Model * Google Vertex Chat Model * Groq Chat Model * Mistral Cloud Chat Model * Ollama Chat Model * Common issues * OpenAI Chat Model * Common issues * OpenRouter Chat Model * Cohere Model * Ollama Model * Common issues * Hugging Face Inference Model * Chat Memory Manager * Simple Memory * Common issues * Motorhead * MongoDB Chat Memory * Redis Chat Memory * Postgres Chat Memory * Xata * Zep * Auto-fixing Output Parser * Item List Output Parser * Structured Output Parser * Common issues * Contextual Compression Retriever * MultiQuery Retriever * Vector Store Retriever * Workflow Retriever * Character Text Splitter * Recursive Character Text Splitter * Token Splitter * Calculator * Custom Code Tool * HTTP Request Tool * MCP Client Tool * SerpApi (Google Search) * Think Tool * Vector Store Question Answer Tool * Wikipedia * Wolfram|Alpha * Custom n8n Workflow Tool * Credentials * Action Network credentials * ActiveCampaign credentials * Acuity Scheduling credentials * Adalo credentials * Affinity credentials * Agile CRM credentials * Airtable credentials * Airtop credentials * AlienVault credentials * AMQP credentials * Anthropic credentials * APITemplate.io credentials * Asana credentials * Auth0 Management credentials * Automizy credentials * Autopilot credentials * AWS credentials * Azure OpenAI credentials * Azure Storage credentials * BambooHR credentials * Bannerbear credentials * Baserow credentials * Beeminder credentials * Bitbucket credentials * Bitly credentials * Bitwarden credentials * Box credentials * Brandfetch credentials * Brevo credentials * Bubble credentials * Cal.com credentials * Calendly credentials * Carbon Black credentials * Chargebee credentials * CircleCI credentials * Cisco Meraki credentials * Cisco Secure Endpoint credentials * Cisco Umbrella credentials * Clearbit credentials * ClickUp credentials * Clockify credentials * Cloudflare credentials * Cockpit credentials * Coda credentials * Cohere credentials * Contentful credentials * ConvertAPI credentials * ConvertKit credentials * Copper credentials * Cortex credentials * CrateDB credentials * crowd.dev credentials * CrowdStrike credentials * Customer.io credentials * Datadog credentials * DeepL credentials * DeepSeek credentials * Demio credentials * DFIR-IRIS credentials * DHL credentials * Discord credentials * Discourse credentials * Disqus credentials * Drift credentials * Dropbox credentials * Dropcontact credentials * Dynatrace credentials * E-goi credentials * Elasticsearch credentials * Elastic Security credentials * Emelia credentials * ERPNext credentials * Eventbrite credentials * F5 Big-IP credentials * Facebook App credentials * Facebook Graph API credentials * Facebook Lead Ads credentials * Figma credentials * FileMaker credentials * Filescan credentials * Flow credentials * Form.io Trigger credentials * Formstack Trigger credentials * Fortinet FortiGate credentials * Freshdesk credentials * Freshservice credentials * Freshworks CRM credentials * FTP credentials * GetResponse credentials * Ghost credentials * Git credentials * GitHub credentials * GitLab credentials * Gong credentials * Google * Google OAuth2 single service * Google OAuth2 generic * Google Service Account * Google Gemini(PaLM) credentials * Gotify credentials * GoToWebinar credentials * Grafana credentials * Grist credentials * Groq credentials * Gumroad credentials * HaloPSA credentials * Harvest credentials * Help Scout credentials * HighLevel credentials * Home Assistant credentials * HTTP Request credentials * HubSpot credentials * Hugging Face credentials * Humantic AI credentials * Hunter credentials * Hybrid Analysis credentials * IMAP * Gmail * Outlook.com * Yahoo * Imperva WAF credentials * Intercom credentials * Invoice Ninja credentials * Iterable credentials * Jenkins credentials * Jira credentials * JotForm credentials * JWT credentials * Kafka credentials * Keap credentials * Kibana credentials * Kitemaker credentials * KoboToolbox credentials * LDAP credentials * Lemlist credentials * Line credentials * Linear credentials * LingvaNex credentials * LinkedIn credentials * LoneScale credentials * Magento 2 credentials * Mailcheck credentials * Mailchimp credentials * MailerLite credentials * Mailgun credentials * Mailjet credentials * Malcore credentials * Mandrill credentials * Marketstack credentials * Matrix credentials * Mattermost credentials * Mautic credentials * Medium credentials * MessageBird credentials * Metabase credentials * Microsoft credentials * Microsoft Azure Monitor credentials * Microsoft Entra ID credentials * Microsoft SQL credentials * Milvus credentials * Mindee credentials * Miro credentials * MISP credentials * Mist credentials * Mistral Cloud credentials * Mocean credentials * monday.com credentials * MongoDB credentials * Monica CRM credentials * Motorhead credentials * MQTT credentials * MSG91 credentials * MySQL credentials * NASA credentials * Netlify credentials * Netscaler ADC credentials * Nextcloud credentials * NocoDB credentials * Notion credentials * npm credentials * Odoo credentials * Okta credentials * Ollama credentials * One Simple API credentials * Onfleet credentials * OpenAI credentials * OpenCTI credentials * OpenRouter credentials * OpenWeatherMap credentials * Oura credentials * Paddle credentials * PagerDuty credentials * PayPal credentials * Peekalink credentials * PhantomBuster credentials * Philips Hue credentials * Pinecone credentials * Pipedrive credentials * Plivo credentials * Postgres credentials * PostHog credentials * Postmark credentials * ProfitWell credentials * Pushbullet credentials * Pushcut credentials * Pushover credentials * QRadar credentials * Qdrant credentials * Qualys credentials * QuestDB credentials * Quick Base credentials * QuickBooks credentials * RabbitMQ credentials * Raindrop credentials * Rapid7 InsightVM credentials * Recorded Future credentials * Reddit credentials * Redis credentials * Rocket.Chat credentials * Rundeck credentials * S3 credentials * Salesforce credentials * Salesmate credentials * SeaTable credentials * SecurityScorecard credentials * Segment credentials * Sekoia credentials * Send Email * Gmail * Outlook.com * Yahoo * SendGrid credentials * Sendy credentials * Sentry.io credentials * Serp credentials * ServiceNow credentials * seven credentials * Shopify credentials * Shuffler credentials * SIGNL4 credentials * Slack credentials * Snowflake credentials * SolarWinds IPAM credentials * SolarWinds Observability SaaS credentials * Splunk credentials * Spontit credentials * Spotify credentials * SSH credentials * Stackby credentials * Storyblok credentials * Strapi credentials * Strava credentials * Stripe credentials * Supabase credentials * SurveyMonkey credentials * SyncroMSP credentials * Sysdig credentials * Taiga credentials * Tapfiliate credentials * Telegram credentials * TheHive credentials * TheHive 5 credentials * TimescaleDB credentials * Todoist credentials * Toggl credentials * TOTP credentials * Travis CI credentials * Trellix ePO credentials * Trello credentials * Twake credentials * Twilio credentials * Twist credentials * Typeform credentials * Unleashed Software credentials * UpLead credentials * uProc credentials * UptimeRobot credentials * urlscan.io credentials * Venafi TLS Protect Cloud credentials * Venafi TLS Protect Datacenter credentials * Vero credentials * VirusTotal credentials * Vonage credentials * Webex by Cisco credentials * Webflow credentials * Webhook credentials * Wekan credentials * WhatsApp Business Cloud credentials * Wise credentials * Wolfram|Alpha credentials * WooCommerce credentials * WordPress credentials * Workable credentials * Wufoo credentials * X (formerly Twitter) credentials * Xata credentials * Xero credentials * Yourls credentials * Zabbix credentials * Zammad credentials * Zendesk credentials * Zep credentials * Zoho credentials * Zoom credentials * Zscaler ZIA credentials * Zulip credentials * Custom API actions for existing nodes * Handle rate limits * Community nodes Community nodes * Installation and management * GUI installation * Manual installation * Risks * Blocklist * Using community nodes * Troubleshooting * Building community nodes * Creating nodes Creating nodes * Overview * Plan your node * Choose a node type * Choose a node building style * Node UI design * Choose node file structure * Build your node * Set up your development environment * Tutorial: Build a declarative-style node * Tutorial: Build a programmatic-style node * Reference * Node UI elements * Code standards * Versioning * Choose node file structure * Base files * Structure * Standard parameters * Declarative-style parameters * Programmatic-style parameters * Programmatic-style execute method * Codex files * Credentials files * HTTP request helpers * Item linking * Test your node * Run your node locally * Node linter * Troubleshooting * Deploy your node * Submit community nodes * Install private nodes * Hosting n8n * Community vs Enterprise * Installation Installation * npm * Docker * Server setups * Digital Ocean * Heroku * Hetzner * Amazon Web Services * Azure * Google Cloud * Docker Compose * Updating * Configuration Configuration * Environment variables * Binary data * Credentials * Database * Deployment * Endpoints * Executions * External data storage * External hooks * External secrets * Logs * License * Nodes * Queue mode * Security * Source control * Task runners * Timezone and localization * User management and 2FA * Workflows * Configuration methods * Configuration examples * Isolate n8n * Configure the Base URL * Configure custom SSL certificate authorities * Set a custom encryption key * Configure workflow timeouts * Specify custom nodes location * Enable modules in Code node * Set the timezone * Specify user folder path * Configure webhook URLs with reverse proxy * Enable Prometheus metrics * Supported databases and settings * Task runners * User management * Logging and monitoring Logging and monitoring * Logging * Monitoring * Security audit * Scaling and performance Scaling and performance * Overview * Performance and benchmarking * Configuring queue mode * Concurrency control * Execution data * Binary data * External storage for binary data * Memory-related errors * Securing n8n Securing n8n * Overview * Set up SSL * Set up SSO * Security audit * Disable the API * Opt out of data collection * Blocking nodes * Hardening task runners * Starter Kits Starter Kits * AI Starter Kit * Architecture Architecture * Overview * Database structure * Using the CLI Using the CLI * CLI commands * Code in n8n * Expressions * Using the Code node * AI coding * Built in methods and variables Built in methods and variables * Overview * Current node input * Output of other nodes * Date and time * JMESPath * HTTP node * LangChain Code node * n8n metadata * Convenience methods * Data transformation functions * Arrays * Booleans * Dates * Numbers * Objects * Strings * Custom variables Custom variables * Create custom variables * Cookbook Cookbook * Handling dates * Query JSON with JMESPath * Built-in methods and variables examples * execution * getWorkflowStaticData * Retrieve linked items from earlier in the workflow * (node-name).all * vars * Expressions * Check incoming data * Common issues * Code node * Get number of items returned by last node * Get the binary data buffer * Output to the browser console * HTTP Request node * Pagination * Advanced AI * Tutorial: Build an AI workflow in n8n * LangChain in n8n LangChain in n8n * Overview * Langchain concepts in n8n * LangChain learning resources * Use LangSmith with n8n * Examples and concepts Examples and concepts * Introduction * What is a chain? * What is an agent? * Agents vs chains example * What is memory? * What is a tool? * Use Google Sheets as a data source * Call an API to fetch data * Set a human fallback for AI workflows * Let AI specify tool parameters * What is a vector database? * Populate a Pinecone vector database from a website * API * Authentication * Pagination * Using the API playground * API reference * Embed * Prerequisites * Deployment * Configuration * Workflow management * Workflows templates * White labelling 1. Integrations 2. Built-in nodes 3. Triggers Postmark helps deliver and track application email. You can track statistics such as the number of emails sent or processed, opens, bounces and, spam complaints. Credentials You can find authentication information for this node here. --- ## Page: https://docs.n8n.io/integrations/builtin/trigger-nodes/n8n-nodes-base.pushcuttrigger/ Pushcut is an app for iOS that lets you create smart notifications to kick off shortcuts, URLs, and online automation. Credentials You can find authentication information for this node here. ## Configure a Pushcut action# Follow these steps to configure your Pushcut Trigger node with your Pushcut app. 1. In your Pushcut app, select a notification from the **Notifications** screen. 2. Select the **Add Action** button. 3. Enter an action name in the **Label** field. 4. Select the **Server** tab. 5. Select the **Integration** tab. 6. Select **Integration Trigger**. 7. In n8n, enter a name for the action and select **Test step**. 8. Select this action under the **Select Integration Trigger** screen in your Pushcut app. 9. Select **Done** in the top right to save the action. --- ## Page: https://docs.n8n.io/integrations/builtin/trigger-nodes/n8n-nodes-base.rabbitmqtrigger/ n8n Docs * Using n8n * Getting started Getting started * Learning path * Choose your n8n * Quickstarts * A very quick quickstart * A longer introduction * Video courses * Text courses * Level one * Navigating the editor UI * Building a mini-workflow * Automating a (real-world) use case * Designing the workflow * Building the workflow Building the workflow * Getting data from the data warehouse * Inserting data into airtable * Filtering orders * Setting values for processing orders * Calculating booked orders * Notifying the team * Scheduling the workflow * Activating and examining the workflow * Exporting and importing workflows * Test your knowledge * Level two * Understanding the data structure * Processing different data types * Merging and splitting data * Dealing with errors in workflows * Automating a business workflow Automating a business workflow * Use case * Workflow 1 * Workflow 2 * Workflow 3 * Test your knowledge * Using the app Using the app * Understand workflows * Create and run * Components * Nodes * Connections * Sticky Notes * Executions * Manual, partial, and production executions * Workflow-level executions * All executions * Custom executions data * Debug executions * Tags * Export and import * Templates * Sharing * Settings * Workflow history * Workflow ID * Manage credentials * Create and edit * Credential sharing * Manage users and access * Cloud setup * Manage users * Account types * Role-based access control * Role types * Projects * Best practices * 2FA * LDAP * SAML * Set up SAML * Okta Workforce Identity SAML setup * Troubleshooting * Manage users with SAML * Keyboard shortcuts * Key concepts Key concepts * Flow logic * Splitting with conditionals * Merging data * Looping * Waiting * Sub-workflows * Error handling * Execution order in multi-branch workflows * Data * Data structure * Data flow within nodes * Transforming data * Process data using code * Data mapping * Data mapping in the UI * Data mapping in the expressions editor * Data item linking * Item linking concepts * Item linking in the Code node * Item linking errors * Item linking for node creators * Data pinning * Data editing * Data filtering * Data mocking * Binary data * Schema preview * Glossary * n8n Cloud n8n Cloud * Overview * Access the Cloud admin dashboard * Update your n8n Cloud version * Set the timezone * Cloud IP addresses * Cloud data management * Change ownership or username * Concurrency * AI Assistant * Enterprise features Enterprise features * Source control and environments * Understand * Environments * Git in n8n * Branch patterns * Set up * Using * Push and pull * Copy work between environments * Manage variables * Tutorial: Create environments with source control * External secrets * Log streaming * License key * Releases Releases * Release notes Release notes * 1.x * 0.x * v1.0 migration guide * Help and community Help and community * Where to get help * Contributing * Licenses and privacy Licenses and privacy * Privacy and security * Privacy * Security * Incident response * What you can do * Sustainable use license * Integrations * Built-in nodes Built-in nodes * Node types * Core nodes * Activation Trigger * Aggregate * AI Transform * Code * Keyboard shortcuts * Common issues * Compare Datasets * Compression * Chat Trigger * Common issues * Convert to File * Crypto * Date & Time * Debug Helper * Edit Fields (Set) * Edit Image * Email Trigger (IMAP) * Error Trigger * Execute Command * Common issues * Execute Sub-workflow * Execute Sub-workflow Trigger * Execution Data * Extract From File * Filter * FTP * Git * GraphQL * HTML * HTTP Request * Common issues * If * JWT * LDAP * Limit * Local File Trigger * Loop Over Items (Split in Batches) * Manual Trigger * Markdown * MCP Server Trigger * Merge * n8n * n8n Form * n8n Form Trigger * n8n Trigger * No Operation, do nothing * Read/Write Files from Disk * Remove Duplicates * Templates and examples * Rename Keys * Respond to Webhook * RSS Read * RSS Feed Trigger * Schedule Trigger * Common issues * Send Email * Sort * Split Out * SSE Trigger * SSH * Stop And Error * Summarize * Switch * TOTP * Wait * Webhook * Workflow development * Common issues * Workflow Trigger * XML * Actions * Action Network * ActiveCampaign * Adalo * Affinity * Agile CRM * Airtable * Common issues * Airtop * AMQP Sender * APITemplate.io * Asana * Automizy * Autopilot * AWS Certificate Manager * AWS Comprehend * AWS DynamoDB * AWS Elastic Load Balancing * AWS Lambda * AWS Rekognition * AWS S3 * AWS SES * AWS SNS * AWS SQS * AWS Textract * AWS Transcribe * Azure Storage * BambooHR * Bannerbear * Baserow * Beeminder * Bitly * Bitwarden * Box * Brandfetch * Brevo * Bubble * Chargebee * CircleCI * Webex by Cisco * Clearbit * ClickUp * Clockify * Cloudflare * Cockpit * Coda * CoinGecko * Contentful * ConvertKit * Copper * Cortex * CrateDB * crowd.dev * Customer.io * DeepL * Demio * DHL * Discord * Common issues * Discourse * Disqus * Drift * Dropbox * Dropcontact * E-goi * Elasticsearch * Elastic Security * Emelia * ERPNext * Facebook Graph API * FileMaker * Flow * Freshdesk * Freshservice * Freshworks CRM * GetResponse * Ghost * GitHub * GitLab * Gmail * Draft operations * Label operations * Message operations * Thread operations * Common issues * Gong * Google Ads * Google Analytics * Google BigQuery * Google Books * Google Business Profile * Google Calendar * Calendar operations * Event operations * Google Chat * Google Cloud Firestore * Google Cloud Natural Language * Google Cloud Realtime Database * Google Cloud Storage * Google Contacts * Google Docs * Google Drive * File operations * File and folder operations * Folder operations * Shared drive operations * Common issues * Google Perspective * Google Sheets * Document operations * Sheet within Document operations * Common issues * Google Slides * Google Tasks * Google Translate * Google Workspace Admin * Gotify * GoToWebinar * Grafana * Grist * Hacker News * HaloPSA * Harvest * Help Scout * HighLevel * Home Assistant * HubSpot * Humantic AI * Hunter * Intercom * Invoice Ninja * Iterable * Jenkins * Jira Software * Kafka * Keap * Kitemaker * KoboToolbox * Lemlist * Line * Linear * LingvaNex * LinkedIn * LoneScale * Magento 2 * Mailcheck * Mailchimp * MailerLite * Mailgun * Mailjet * Mandrill * marketstack * Matrix * Mattermost * Mautic * Medium * MessageBird * Metabase * Microsoft Dynamics CRM * Microsoft Entra ID * Microsoft Excel 365 * Microsoft Graph Security * Microsoft OneDrive * Microsoft Outlook * Microsoft SQL * Microsoft Teams * Microsoft To Do * Mindee * MISP * Mocean * monday.com * MongoDB * Monica CRM * MQTT * MSG91 * MySQL * Common issues * Customer Datastore (n8n Training) * Customer Messenger (n8n Training) * NASA * Netlify * Netscaler ADC * Nextcloud * NocoDB * Notion * Common issues * npm * Odoo * Okta * One Simple API * Onfleet * OpenAI * Assistant operations * Audio operations * File operations * Image operations * Text operations * Common issues * OpenThesaurus * OpenWeatherMap * Oura * Paddle * PagerDuty * PayPal * Peekalink * PhantomBuster * Philips Hue * Pipedrive * Plivo * PostBin * Postgres * Common issues * PostHog * ProfitWell * Pushbullet * Pushcut * Pushover * QuestDB * Quick Base * QuickBooks Online * QuickChart * RabbitMQ * Raindrop * Reddit * Redis * Rocket.Chat * Rundeck * S3 * Salesforce * Salesmate * SeaTable * SecurityScorecard * Segment * SendGrid * Sendy * Sentry.io * ServiceNow * seven * Shopify * SIGNL4 * Slack * Snowflake * Splunk * Spontit * Spotify * Stackby * Storyblok * Strapi * Strava * Stripe * Supabase * Common issues * SyncroMSP * Taiga * Tapfiliate * Telegram * Chat operations * Callback operations * File operations * Message operations * Common issues * TheHive * TheHive 5 * TimescaleDB * Todoist * Travis CI * Trello * Twake * Twilio * Twist * Unleashed Software * UpLead * uProc * UptimeRobot * urlscan.io * Venafi TLS Protect Cloud * Venafi TLS Protect Datacenter * Vero * Vonage * Webflow * Wekan * WhatsApp Business Cloud * Common issues * Wise * WooCommerce * WordPress * X (Formerly Twitter) * Xero * Yourls * YouTube * Zammad * Zendesk * Zoho CRM * Zoom * Zulip * Triggers * ActiveCampaign Trigger * Acuity Scheduling Trigger * Affinity Trigger * Airtable Trigger * AMQP Trigger * Asana Trigger * Autopilot Trigger * AWS SNS Trigger * Bitbucket Trigger * Box Trigger * Brevo Trigger * Calendly Trigger * Cal Trigger * Chargebee Trigger * ClickUp Trigger * Clockify Trigger * ConvertKit Trigger * Copper Trigger * crowd.dev Trigger * Customer.io Trigger * Emelia Trigger * Eventbrite Trigger * Facebook Lead Ads Trigger * Facebook Trigger * Ad Account * Application * Certificate Transparency * Group * Instagram * Link * Page * Permissions * User * WhatsApp Business Account * Workplace Security * Figma Trigger (Beta) * Flow Trigger * Form.io Trigger * Formstack Trigger * GetResponse Trigger * GitHub Trigger * GitLab Trigger * Gmail Trigger * Poll Mode options * Common issues * Google Calendar Trigger * Google Drive Trigger * Common issues * Google Business Profile Trigger * Google Sheets Trigger * Common issues * Gumroad Trigger * Help Scout Trigger * Hubspot Trigger * Invoice Ninja Trigger * Jira Trigger * JotForm Trigger * Kafka Trigger * Keap Trigger * KoboToolbox Trigger * Lemlist Trigger * Linear Trigger * LoneScale Trigger * Mailchimp Trigger * MailerLite Trigger * Mailjet Trigger * Mautic Trigger * Microsoft OneDrive Trigger * Microsoft Outlook Trigger * MQTT Trigger * Netlify Trigger * Notion Trigger * Onfleet Trigger * PayPal Trigger * Pipedrive Trigger * Postgres Trigger * Postmark Trigger * Pushcut Trigger * RabbitMQ Trigger RabbitMQ Trigger Table of contents * Related resources * Redis Trigger * Salesforce Trigger * SeaTable Trigger * Shopify Trigger * Slack Trigger * Strava Trigger * Stripe Trigger * SurveyMonkey Trigger * Taiga Trigger * Telegram Trigger * Common issues * TheHive 5 Trigger * TheHive Trigger * Toggl Trigger * Trello Trigger * Twilio Trigger * Typeform Trigger * Venafi TLS Protect Cloud Trigger * Webex by Cisco Trigger * Webflow Trigger * WhatsApp Trigger * Wise Trigger * WooCommerce Trigger * Workable Trigger * Wufoo Trigger * Zendesk Trigger * Cluster nodes * Root nodes * AI Agent * Conversational Agent * OpenAI Functions Agent * Plan and Execute Agent * ReAct Agent * SQL Agent * Tools Agent * Common issues * Basic LLM Chain * Question and Answer Chain * Common issues * Summarization Chain * Information Extractor * Text Classifier * Sentiment Analysis * LangChain Code * Simple Vector Store * Milvus Vector Store * MongoDB Atlas Vector Store * PGVector Vector Store * Pinecone Vector Store * Qdrant Vector Store * Supabase Vector Store * Zep Vector Store * Sub-nodes * Default Data Loader * GitHub Document Loader * Embeddings AWS Bedrock * Embeddings Azure OpenAI * Embeddings Cohere * Embeddings Google Gemini * Embeddings Google PaLM * Embeddings Google Vertex * Embeddings HuggingFace Inference * Embeddings Mistral Cloud * Embeddings Ollama * Embeddings OpenAI * Anthropic Chat Model * AWS Bedrock Chat Model * Azure OpenAI Chat Model * DeepSeek Chat Model * Google Gemini Chat Model * Google Vertex Chat Model * Groq Chat Model * Mistral Cloud Chat Model * Ollama Chat Model * Common issues * OpenAI Chat Model * Common issues * OpenRouter Chat Model * Cohere Model * Ollama Model * Common issues * Hugging Face Inference Model * Chat Memory Manager * Simple Memory * Common issues * Motorhead * MongoDB Chat Memory * Redis Chat Memory * Postgres Chat Memory * Xata * Zep * Auto-fixing Output Parser * Item List Output Parser * Structured Output Parser * Common issues * Contextual Compression Retriever * MultiQuery Retriever * Vector Store Retriever * Workflow Retriever * Character Text Splitter * Recursive Character Text Splitter * Token Splitter * Calculator * Custom Code Tool * HTTP Request Tool * MCP Client Tool * SerpApi (Google Search) * Think Tool * Vector Store Question Answer Tool * Wikipedia * Wolfram|Alpha * Custom n8n Workflow Tool * Credentials * Action Network credentials * ActiveCampaign credentials * Acuity Scheduling credentials * Adalo credentials * Affinity credentials * Agile CRM credentials * Airtable credentials * Airtop credentials * AlienVault credentials * AMQP credentials * Anthropic credentials * APITemplate.io credentials * Asana credentials * Auth0 Management credentials * Automizy credentials * Autopilot credentials * AWS credentials * Azure OpenAI credentials * Azure Storage credentials * BambooHR credentials * Bannerbear credentials * Baserow credentials * Beeminder credentials * Bitbucket credentials * Bitly credentials * Bitwarden credentials * Box credentials * Brandfetch credentials * Brevo credentials * Bubble credentials * Cal.com credentials * Calendly credentials * Carbon Black credentials * Chargebee credentials * CircleCI credentials * Cisco Meraki credentials * Cisco Secure Endpoint credentials * Cisco Umbrella credentials * Clearbit credentials * ClickUp credentials * Clockify credentials * Cloudflare credentials * Cockpit credentials * Coda credentials * Cohere credentials * Contentful credentials * ConvertAPI credentials * ConvertKit credentials * Copper credentials * Cortex credentials * CrateDB credentials * crowd.dev credentials * CrowdStrike credentials * Customer.io credentials * Datadog credentials * DeepL credentials * DeepSeek credentials * Demio credentials * DFIR-IRIS credentials * DHL credentials * Discord credentials * Discourse credentials * Disqus credentials * Drift credentials * Dropbox credentials * Dropcontact credentials * Dynatrace credentials * E-goi credentials * Elasticsearch credentials * Elastic Security credentials * Emelia credentials * ERPNext credentials * Eventbrite credentials * F5 Big-IP credentials * Facebook App credentials * Facebook Graph API credentials * Facebook Lead Ads credentials * Figma credentials * FileMaker credentials * Filescan credentials * Flow credentials * Form.io Trigger credentials * Formstack Trigger credentials * Fortinet FortiGate credentials * Freshdesk credentials * Freshservice credentials * Freshworks CRM credentials * FTP credentials * GetResponse credentials * Ghost credentials * Git credentials * GitHub credentials * GitLab credentials * Gong credentials * Google * Google OAuth2 single service * Google OAuth2 generic * Google Service Account * Google Gemini(PaLM) credentials * Gotify credentials * GoToWebinar credentials * Grafana credentials * Grist credentials * Groq credentials * Gumroad credentials * HaloPSA credentials * Harvest credentials * Help Scout credentials * HighLevel credentials * Home Assistant credentials * HTTP Request credentials * HubSpot credentials * Hugging Face credentials * Humantic AI credentials * Hunter credentials * Hybrid Analysis credentials * IMAP * Gmail * Outlook.com * Yahoo * Imperva WAF credentials * Intercom credentials * Invoice Ninja credentials * Iterable credentials * Jenkins credentials * Jira credentials * JotForm credentials * JWT credentials * Kafka credentials * Keap credentials * Kibana credentials * Kitemaker credentials * KoboToolbox credentials * LDAP credentials * Lemlist credentials * Line credentials * Linear credentials * LingvaNex credentials * LinkedIn credentials * LoneScale credentials * Magento 2 credentials * Mailcheck credentials * Mailchimp credentials * MailerLite credentials * Mailgun credentials * Mailjet credentials * Malcore credentials * Mandrill credentials * Marketstack credentials * Matrix credentials * Mattermost credentials * Mautic credentials * Medium credentials * MessageBird credentials * Metabase credentials * Microsoft credentials * Microsoft Azure Monitor credentials * Microsoft Entra ID credentials * Microsoft SQL credentials * Milvus credentials * Mindee credentials * Miro credentials * MISP credentials * Mist credentials * Mistral Cloud credentials * Mocean credentials * monday.com credentials * MongoDB credentials * Monica CRM credentials * Motorhead credentials * MQTT credentials * MSG91 credentials * MySQL credentials * NASA credentials * Netlify credentials * Netscaler ADC credentials * Nextcloud credentials * NocoDB credentials * Notion credentials * npm credentials * Odoo credentials * Okta credentials * Ollama credentials * One Simple API credentials * Onfleet credentials * OpenAI credentials * OpenCTI credentials * OpenRouter credentials * OpenWeatherMap credentials * Oura credentials * Paddle credentials * PagerDuty credentials * PayPal credentials * Peekalink credentials * PhantomBuster credentials * Philips Hue credentials * Pinecone credentials * Pipedrive credentials * Plivo credentials * Postgres credentials * PostHog credentials * Postmark credentials * ProfitWell credentials * Pushbullet credentials * Pushcut credentials * Pushover credentials * QRadar credentials * Qdrant credentials * Qualys credentials * QuestDB credentials * Quick Base credentials * QuickBooks credentials * RabbitMQ credentials * Raindrop credentials * Rapid7 InsightVM credentials * Recorded Future credentials * Reddit credentials * Redis credentials * Rocket.Chat credentials * Rundeck credentials * S3 credentials * Salesforce credentials * Salesmate credentials * SeaTable credentials * SecurityScorecard credentials * Segment credentials * Sekoia credentials * Send Email * Gmail * Outlook.com * Yahoo * SendGrid credentials * Sendy credentials * Sentry.io credentials * Serp credentials * ServiceNow credentials * seven credentials * Shopify credentials * Shuffler credentials * SIGNL4 credentials * Slack credentials * Snowflake credentials * SolarWinds IPAM credentials * SolarWinds Observability SaaS credentials * Splunk credentials * Spontit credentials * Spotify credentials * SSH credentials * Stackby credentials * Storyblok credentials * Strapi credentials * Strava credentials * Stripe credentials * Supabase credentials * SurveyMonkey credentials * SyncroMSP credentials * Sysdig credentials * Taiga credentials * Tapfiliate credentials * Telegram credentials * TheHive credentials * TheHive 5 credentials * TimescaleDB credentials * Todoist credentials * Toggl credentials * TOTP credentials * Travis CI credentials * Trellix ePO credentials * Trello credentials * Twake credentials * Twilio credentials * Twist credentials * Typeform credentials * Unleashed Software credentials * UpLead credentials * uProc credentials * UptimeRobot credentials * urlscan.io credentials * Venafi TLS Protect Cloud credentials * Venafi TLS Protect Datacenter credentials * Vero credentials * VirusTotal credentials * Vonage credentials * Webex by Cisco credentials * Webflow credentials * Webhook credentials * Wekan credentials * WhatsApp Business Cloud credentials * Wise credentials * Wolfram|Alpha credentials * WooCommerce credentials * WordPress credentials * Workable credentials * Wufoo credentials * X (formerly Twitter) credentials * Xata credentials * Xero credentials * Yourls credentials * Zabbix credentials * Zammad credentials * Zendesk credentials * Zep credentials * Zoho credentials * Zoom credentials * Zscaler ZIA credentials * Zulip credentials * Custom API actions for existing nodes * Handle rate limits * Community nodes Community nodes * Installation and management * GUI installation * Manual installation * Risks * Blocklist * Using community nodes * Troubleshooting * Building community nodes * Creating nodes Creating nodes * Overview * Plan your node * Choose a node type * Choose a node building style * Node UI design * Choose node file structure * Build your node * Set up your development environment * Tutorial: Build a declarative-style node * Tutorial: Build a programmatic-style node * Reference * Node UI elements * Code standards * Versioning * Choose node file structure * Base files * Structure * Standard parameters * Declarative-style parameters * Programmatic-style parameters * Programmatic-style execute method * Codex files * Credentials files * HTTP request helpers * Item linking * Test your node * Run your node locally * Node linter * Troubleshooting * Deploy your node * Submit community nodes * Install private nodes * Hosting n8n * Community vs Enterprise * Installation Installation * npm * Docker * Server setups * Digital Ocean * Heroku * Hetzner * Amazon Web Services * Azure * Google Cloud * Docker Compose * Updating * Configuration Configuration * Environment variables * Binary data * Credentials * Database * Deployment * Endpoints * Executions * External data storage * External hooks * External secrets * Logs * License * Nodes * Queue mode * Security * Source control * Task runners * Timezone and localization * User management and 2FA * Workflows * Configuration methods * Configuration examples * Isolate n8n * Configure the Base URL * Configure custom SSL certificate authorities * Set a custom encryption key * Configure workflow timeouts * Specify custom nodes location * Enable modules in Code node * Set the timezone * Specify user folder path * Configure webhook URLs with reverse proxy * Enable Prometheus metrics * Supported databases and settings * Task runners * User management * Logging and monitoring Logging and monitoring * Logging * Monitoring * Security audit * Scaling and performance Scaling and performance * Overview * Performance and benchmarking * Configuring queue mode * Concurrency control * Execution data * Binary data * External storage for binary data * Memory-related errors * Securing n8n Securing n8n * Overview * Set up SSL * Set up SSO * Security audit * Disable the API * Opt out of data collection * Blocking nodes * Hardening task runners * Starter Kits Starter Kits * AI Starter Kit * Architecture Architecture * Overview * Database structure * Using the CLI Using the CLI * CLI commands * Code in n8n * Expressions * Using the Code node * AI coding * Built in methods and variables Built in methods and variables * Overview * Current node input * Output of other nodes * Date and time * JMESPath * HTTP node * LangChain Code node * n8n metadata * Convenience methods * Data transformation functions * Arrays * Booleans * Dates * Numbers * Objects * Strings * Custom variables Custom variables * Create custom variables * Cookbook Cookbook * Handling dates * Query JSON with JMESPath * Built-in methods and variables examples * execution * getWorkflowStaticData * Retrieve linked items from earlier in the workflow * (node-name).all * vars * Expressions * Check incoming data * Common issues * Code node * Get number of items returned by last node * Get the binary data buffer * Output to the browser console * HTTP Request node * Pagination * Advanced AI * Tutorial: Build an AI workflow in n8n * LangChain in n8n LangChain in n8n * Overview * Langchain concepts in n8n * LangChain learning resources * Use LangSmith with n8n * Examples and concepts Examples and concepts * Introduction * What is a chain? * What is an agent? * Agents vs chains example * What is memory? * What is a tool? * Use Google Sheets as a data source * Call an API to fetch data * Set a human fallback for AI workflows * Let AI specify tool parameters * What is a vector database? * Populate a Pinecone vector database from a website * API * Authentication * Pagination * Using the API playground * API reference * Embed * Prerequisites * Deployment * Configuration * Workflow management * Workflows templates * White labelling Table of contents * Related resources --- ## Page: https://docs.n8n.io/integrations/builtin/trigger-nodes/n8n-nodes-base.redistrigger/ Redis is an open-source, in-memory data structure store, used as a database, cache and message broker. Use the Redis Trigger node to subscribe to a Redis channel. The workflow starts whenever the channel receives a new message. Credentials You can find authentication information for this node here. Examples and templates For usage examples and templates to help you get started, refer to n8n's Redis Trigger integrations page. --- ## Page: https://docs.n8n.io/integrations/builtin/trigger-nodes/n8n-nodes-base.salesforcetrigger/ Use the Salesforce Trigger node to respond to events in Salesforce and integrate Salesforce with other applications. n8n has built-in support for a wide range of Salesforce events. On this page, you'll find a list of events the Salesforce Trigger node can respond to, and links to more resources. Credentials You can find authentication information for this node here. ## Events# * On Account Created * On Account Updated * On Attachment Created * On Attachment Updated * On Case Created * On Case Updated * On Contact Created * On Contact Updated * On Custom Object Created * On Custom Object Updated * On Lead Created * On Lead Updated * On Opportunity Created * On Opportunity Updated * On Task Created * On Task Updated * On User Created * On User Updated n8n provides an app node for Salesforce. You can find the node docs here. View example workflows and related content on n8n's website. --- ## Page: https://docs.n8n.io/integrations/builtin/trigger-nodes/n8n-nodes-base.seatabletrigger/ 1. Integrations 2. Built-in nodes 3. Triggers SeaTable is a collaborative database application with a spreadsheet interface. Credentials You can find authentication information for this node here. Examples and templates For usage examples and templates to help you get started, refer to n8n's SeaTable Trigger integrations page. --- ## Page: https://docs.n8n.io/integrations/builtin/trigger-nodes/n8n-nodes-base.shopifytrigger/ 1. Integrations 2. Built-in nodes 3. Triggers Shopify is an e-commerce platform that allows users to set up an online store and sell their products. Credentials You can find authentication information for this node here. Examples and templates For usage examples and templates to help you get started, refer to n8n's Shopify Trigger integrations page. --- ## Page: https://docs.n8n.io/integrations/builtin/trigger-nodes/n8n-nodes-base.slacktrigger/ Use the Slack Trigger node to respond to events in Slack and integrate Slack with other applications. n8n has built-in support for a wide range of Slack events, including new messages, reactions, and new channels. On this page, you'll find a list of events the Slack Trigger node can respond to and links to more resources. Credentials You can find authentication information for this node here. Examples and templates For usage examples and templates to help you get started, refer to n8n's Slack integrations page. ## Events# * **Any Event**: The node triggers on any event in Slack. * **Bot / App Mention**: The node triggers when your bot or app is mentioned in a channel the app is in. * **File Made Public**: The node triggers when a file is made public. * **File Shared**: The node triggers when a file is shared in a channel the app is in. * **New Message Posted to Channel**: The node triggers when a new message is posted to a channel the app is in. * **New Public Channel Created**: The node triggers when a new public channel is created. * **New User**: The node triggers when a new user is added to Slack. * **Reaction Added**: The node triggers when a reaction is added to a message the app is added to. ## Parameters# Once you've set the events to trigger on, use the remaining parameters to further define the node's behavior: * **Watch Whole Workspace**: Whether the node should watch for the selected **Events** in all channels in the workspace (turned on) or not (turned off, default). Caution This will use one execution for every event in any channel your bot or app is in. Use with caution! * **Channel to Watch**: Select the channel your node should watch for the selected **Events**. This parameter only appears if you don't turn on **Watch Whole Workspace**. You can select a channel: * **From list**: The node uses your credential to look up a list of channels in the workspace so you can select the channel you want. * **By ID**: Enter the ID of a channel you want to watch. Slack displays the channel ID at the bottom of the channel details with a one-click copy button. * **By URL**: Enter the URL of the channel you want to watch, formatted as `https://app.slack.com/client/<channel-address>`. * **Download Files**: Whether to download files and use them in the node's output (turned on) or not (turned off, default). Use this parameter with the **File Made Public** and **File Shared** events. ## Options# You can further refine the node's behavior when you **Add Option**s: * **Resolve IDs**: Whether to resolve the IDs to their respective names and return them (turned on) or not (turned off, default). * **Usernames or IDs to ignore**: Select usernames or enter a comma-separated string of encoded user IDs to ignore events from. Choose from the list, or specify IDs using an expression. n8n provides an app node for Slack. You can find the node docs here. View example workflows and related content on n8n's website. Refer to Slack's documentation for details about their API. ## Required scopes# To use this node, you need to create an application in Slack and enable event subscriptions. Refer to Slack credentials | Slack Trigger configuration for more information. You must add the appropriate scopes to your Slack app for this trigger node to work. The node requires scopes for the conversations.list and users.list methods at minimum. Check out the Scopes | Slack credentials list for a more complete list of scopes. ## Common issues# Here are some common errors and issues with the Slack Trigger node and steps to resolve or troubleshoot them. ### Workflow only works in testing or production# Slack only allows you to register a single webhook per app. This means that you can't switch from using the testing URL to the production URL (and vice versa) without reconfiguring the registered webhook URL. You may have trouble with this if you try to test a workflow that's also active in production. Slack will only send events to one of the two webhook URLs, so the other will never receive event notifications. To work around this, you can disable your workflow when testing: Halts production traffic This temporarily disables your production workflow for testing. Your workflow will no longer receive production traffic while it's deactivated. 1. Go to your workflow page. 2. Toggle the **Active** switch in the top panel to disable the workflow temporarily. 3. Edit the **Request URL** in your the Slack Trigger configuration to use the testing webhook URL instead of the production webhook URL. 4. Test your workflow using the test webhook URL. 5. When you finish testing, edit the **Request URL** in your the Slack Trigger configuration to use the production webhook URL instead of the testing webhook URL. 6. Toggle the **Inactive** toggle to enable the workflow again. The production webhook URL should resume working. ### Token expired# Slack offers **token rotation** that you can turn on for bot and user tokens. This makes every tokens expire after 12 hours. While this may be useful for testing, n8n credentials using tokens with this enabled will fail after expiry. If you want to use your Slack credentials in production, this feature must be **off**. To check if your Slack app has token rotation turned on, refer to the Slack API Documentation | Token Rotation. If your app uses token rotation Please note, if your Slack app uses token rotation, you can't turn it off again. You need to create a new Slack app with token rotation disabled instead. --- ## Page: https://docs.n8n.io/integrations/builtin/trigger-nodes/n8n-nodes-base.stravatrigger/ n8n Docs * Using n8n * Getting started Getting started * Learning path * Choose your n8n * Quickstarts * A very quick quickstart * A longer introduction * Video courses * Text courses * Level one * Navigating the editor UI * Building a mini-workflow * Automating a (real-world) use case * Designing the workflow * Building the workflow Building the workflow * Getting data from the data warehouse * Inserting data into airtable * Filtering orders * Setting values for processing orders * Calculating booked orders * Notifying the team * Scheduling the workflow * Activating and examining the workflow * Exporting and importing workflows * Test your knowledge * Level two * Understanding the data structure * Processing different data types * Merging and splitting data * Dealing with errors in workflows * Automating a business workflow Automating a business workflow * Use case * Workflow 1 * Workflow 2 * Workflow 3 * Test your knowledge * Using the app Using the app * Understand workflows * Create and run * Components * Nodes * Connections * Sticky Notes * Executions * Manual, partial, and production executions * Workflow-level executions * All executions * Custom executions data * Debug executions * Tags * Export and import * Templates * Sharing * Settings * Workflow history * Workflow ID * Manage credentials * Create and edit * Credential sharing * Manage users and access * Cloud setup * Manage users * Account types * Role-based access control * Role types * Projects * Best practices * 2FA * LDAP * SAML * Set up SAML * Okta Workforce Identity SAML setup * Troubleshooting * Manage users with SAML * Keyboard shortcuts * Key concepts Key concepts * Flow logic * Splitting with conditionals * Merging data * Looping * Waiting * Sub-workflows * Error handling * Execution order in multi-branch workflows * Data * Data structure * Data flow within nodes * Transforming data * Process data using code * Data mapping * Data mapping in the UI * Data mapping in the expressions editor * Data item linking * Item linking concepts * Item linking in the Code node * Item linking errors * Item linking for node creators * Data pinning * Data editing * Data filtering * Data mocking * Binary data * Schema preview * Glossary * n8n Cloud n8n Cloud * Overview * Access the Cloud admin dashboard * Update your n8n Cloud version * Set the timezone * Cloud IP addresses * Cloud data management * Change ownership or username * Concurrency * AI Assistant * Enterprise features Enterprise features * Source control and environments * Understand * Environments * Git in n8n * Branch patterns * Set up * Using * Push and pull * Copy work between environments * Manage variables * Tutorial: Create environments with source control * External secrets * Log streaming * License key * Releases Releases * Release notes Release notes * 1.x * 0.x * v1.0 migration guide * Help and community Help and community * Where to get help * Contributing * Licenses and privacy Licenses and privacy * Privacy and security * Privacy * Security * Incident response * What you can do * Sustainable use license * Integrations * Built-in nodes Built-in nodes * Node types * Core nodes * Activation Trigger * Aggregate * AI Transform * Code * Keyboard shortcuts * Common issues * Compare Datasets * Compression * Chat Trigger * Common issues * Convert to File * Crypto * Date & Time * Debug Helper * Edit Fields (Set) * Edit Image * Email Trigger (IMAP) * Error Trigger * Execute Command * Common issues * Execute Sub-workflow * Execute Sub-workflow Trigger * Execution Data * Extract From File * Filter * FTP * Git * GraphQL * HTML * HTTP Request * Common issues * If * JWT * LDAP * Limit * Local File Trigger * Loop Over Items (Split in Batches) * Manual Trigger * Markdown * MCP Server Trigger * Merge * n8n * n8n Form * n8n Form Trigger * n8n Trigger * No Operation, do nothing * Read/Write Files from Disk * Remove Duplicates * Templates and examples * Rename Keys * Respond to Webhook * RSS Read * RSS Feed Trigger * Schedule Trigger * Common issues * Send Email * Sort * Split Out * SSE Trigger * SSH * Stop And Error * Summarize * Switch * TOTP * Wait * Webhook * Workflow development * Common issues * Workflow Trigger * XML * Actions * Action Network * ActiveCampaign * Adalo * Affinity * Agile CRM * Airtable * Common issues * Airtop * AMQP Sender * APITemplate.io * Asana * Automizy * Autopilot * AWS Certificate Manager * AWS Comprehend * AWS DynamoDB * AWS Elastic Load Balancing * AWS Lambda * AWS Rekognition * AWS S3 * AWS SES * AWS SNS * AWS SQS * AWS Textract * AWS Transcribe * Azure Storage * BambooHR * Bannerbear * Baserow * Beeminder * Bitly * Bitwarden * Box * Brandfetch * Brevo * Bubble * Chargebee * CircleCI * Webex by Cisco * Clearbit * ClickUp * Clockify * Cloudflare * Cockpit * Coda * CoinGecko * Contentful * ConvertKit * Copper * Cortex * CrateDB * crowd.dev * Customer.io * DeepL * Demio * DHL * Discord * Common issues * Discourse * Disqus * Drift * Dropbox * Dropcontact * E-goi * Elasticsearch * Elastic Security * Emelia * ERPNext * Facebook Graph API * FileMaker * Flow * Freshdesk * Freshservice * Freshworks CRM * GetResponse * Ghost * GitHub * GitLab * Gmail * Draft operations * Label operations * Message operations * Thread operations * Common issues * Gong * Google Ads * Google Analytics * Google BigQuery * Google Books * Google Business Profile * Google Calendar * Calendar operations * Event operations * Google Chat * Google Cloud Firestore * Google Cloud Natural Language * Google Cloud Realtime Database * Google Cloud Storage * Google Contacts * Google Docs * Google Drive * File operations * File and folder operations * Folder operations * Shared drive operations * Common issues * Google Perspective * Google Sheets * Document operations * Sheet within Document operations * Common issues * Google Slides * Google Tasks * Google Translate * Google Workspace Admin * Gotify * GoToWebinar * Grafana * Grist * Hacker News * HaloPSA * Harvest * Help Scout * HighLevel * Home Assistant * HubSpot * Humantic AI * Hunter * Intercom * Invoice Ninja * Iterable * Jenkins * Jira Software * Kafka * Keap * Kitemaker * KoboToolbox * Lemlist * Line * Linear * LingvaNex * LinkedIn * LoneScale * Magento 2 * Mailcheck * Mailchimp * MailerLite * Mailgun * Mailjet * Mandrill * marketstack * Matrix * Mattermost * Mautic * Medium * MessageBird * Metabase * Microsoft Dynamics CRM * Microsoft Entra ID * Microsoft Excel 365 * Microsoft Graph Security * Microsoft OneDrive * Microsoft Outlook * Microsoft SQL * Microsoft Teams * Microsoft To Do * Mindee * MISP * Mocean * monday.com * MongoDB * Monica CRM * MQTT * MSG91 * MySQL * Common issues * Customer Datastore (n8n Training) * Customer Messenger (n8n Training) * NASA * Netlify * Netscaler ADC * Nextcloud * NocoDB * Notion * Common issues * npm * Odoo * Okta * One Simple API * Onfleet * OpenAI * Assistant operations * Audio operations * File operations * Image operations * Text operations * Common issues * OpenThesaurus * OpenWeatherMap * Oura * Paddle * PagerDuty * PayPal * Peekalink * PhantomBuster * Philips Hue * Pipedrive * Plivo * PostBin * Postgres * Common issues * PostHog * ProfitWell * Pushbullet * Pushcut * Pushover * QuestDB * Quick Base * QuickBooks Online * QuickChart * RabbitMQ * Raindrop * Reddit * Redis * Rocket.Chat * Rundeck * S3 * Salesforce * Salesmate * SeaTable * SecurityScorecard * Segment * SendGrid * Sendy * Sentry.io * ServiceNow * seven * Shopify * SIGNL4 * Slack * Snowflake * Splunk * Spontit * Spotify * Stackby * Storyblok * Strapi * Strava * Stripe * Supabase * Common issues * SyncroMSP * Taiga * Tapfiliate * Telegram * Chat operations * Callback operations * File operations * Message operations * Common issues * TheHive * TheHive 5 * TimescaleDB * Todoist * Travis CI * Trello * Twake * Twilio * Twist * Unleashed Software * UpLead * uProc * UptimeRobot * urlscan.io * Venafi TLS Protect Cloud * Venafi TLS Protect Datacenter * Vero * Vonage * Webflow * Wekan * WhatsApp Business Cloud * Common issues * Wise * WooCommerce * WordPress * X (Formerly Twitter) * Xero * Yourls * YouTube * Zammad * Zendesk * Zoho CRM * Zoom * Zulip * Triggers * ActiveCampaign Trigger * Acuity Scheduling Trigger * Affinity Trigger * Airtable Trigger * AMQP Trigger * Asana Trigger * Autopilot Trigger * AWS SNS Trigger * Bitbucket Trigger * Box Trigger * Brevo Trigger * Calendly Trigger * Cal Trigger * Chargebee Trigger * ClickUp Trigger * Clockify Trigger * ConvertKit Trigger * Copper Trigger * crowd.dev Trigger * Customer.io Trigger * Emelia Trigger * Eventbrite Trigger * Facebook Lead Ads Trigger * Facebook Trigger * Ad Account * Application * Certificate Transparency * Group * Instagram * Link * Page * Permissions * User * WhatsApp Business Account * Workplace Security * Figma Trigger (Beta) * Flow Trigger * Form.io Trigger * Formstack Trigger * GetResponse Trigger * GitHub Trigger * GitLab Trigger * Gmail Trigger * Poll Mode options * Common issues * Google Calendar Trigger * Google Drive Trigger * Common issues * Google Business Profile Trigger * Google Sheets Trigger * Common issues * Gumroad Trigger * Help Scout Trigger * Hubspot Trigger * Invoice Ninja Trigger * Jira Trigger * JotForm Trigger * Kafka Trigger * Keap Trigger * KoboToolbox Trigger * Lemlist Trigger * Linear Trigger * LoneScale Trigger * Mailchimp Trigger * MailerLite Trigger * Mailjet Trigger * Mautic Trigger * Microsoft OneDrive Trigger * Microsoft Outlook Trigger * MQTT Trigger * Netlify Trigger * Notion Trigger * Onfleet Trigger * PayPal Trigger * Pipedrive Trigger * Postgres Trigger * Postmark Trigger * Pushcut Trigger * RabbitMQ Trigger * Redis Trigger * Salesforce Trigger * SeaTable Trigger * Shopify Trigger * Slack Trigger * Strava Trigger Strava Trigger Table of contents * Events * Stripe Trigger * SurveyMonkey Trigger * Taiga Trigger * Telegram Trigger * Common issues * TheHive 5 Trigger * TheHive Trigger * Toggl Trigger * Trello Trigger * Twilio Trigger * Typeform Trigger * Venafi TLS Protect Cloud Trigger * Webex by Cisco Trigger * Webflow Trigger * WhatsApp Trigger * Wise Trigger * WooCommerce Trigger * Workable Trigger * Wufoo Trigger * Zendesk Trigger * Cluster nodes * Root nodes * AI Agent * Conversational Agent * OpenAI Functions Agent * Plan and Execute Agent * ReAct Agent * SQL Agent * Tools Agent * Common issues * Basic LLM Chain * Question and Answer Chain * Common issues * Summarization Chain * Information Extractor * Text Classifier * Sentiment Analysis * LangChain Code * Simple Vector Store * Milvus Vector Store * MongoDB Atlas Vector Store * PGVector Vector Store * Pinecone Vector Store * Qdrant Vector Store * Supabase Vector Store * Zep Vector Store * Sub-nodes * Default Data Loader * GitHub Document Loader * Embeddings AWS Bedrock * Embeddings Azure OpenAI * Embeddings Cohere * Embeddings Google Gemini * Embeddings Google PaLM * Embeddings Google Vertex * Embeddings HuggingFace Inference * Embeddings Mistral Cloud * Embeddings Ollama * Embeddings OpenAI * Anthropic Chat Model * AWS Bedrock Chat Model * Azure OpenAI Chat Model * DeepSeek Chat Model * Google Gemini Chat Model * Google Vertex Chat Model * Groq Chat Model * Mistral Cloud Chat Model * Ollama Chat Model * Common issues * OpenAI Chat Model * Common issues * OpenRouter Chat Model * Cohere Model * Ollama Model * Common issues * Hugging Face Inference Model * Chat Memory Manager * Simple Memory * Common issues * Motorhead * MongoDB Chat Memory * Redis Chat Memory * Postgres Chat Memory * Xata * Zep * Auto-fixing Output Parser * Item List Output Parser * Structured Output Parser * Common issues * Contextual Compression Retriever * MultiQuery Retriever * Vector Store Retriever * Workflow Retriever * Character Text Splitter * Recursive Character Text Splitter * Token Splitter * Calculator * Custom Code Tool * HTTP Request Tool * MCP Client Tool * SerpApi (Google Search) * Think Tool * Vector Store Question Answer Tool * Wikipedia * Wolfram|Alpha * Custom n8n Workflow Tool * Credentials * Action Network credentials * ActiveCampaign credentials * Acuity Scheduling credentials * Adalo credentials * Affinity credentials * Agile CRM credentials * Airtable credentials * Airtop credentials * AlienVault credentials * AMQP credentials * Anthropic credentials * APITemplate.io credentials * Asana credentials * Auth0 Management credentials * Automizy credentials * Autopilot credentials * AWS credentials * Azure OpenAI credentials * Azure Storage credentials * BambooHR credentials * Bannerbear credentials * Baserow credentials * Beeminder credentials * Bitbucket credentials * Bitly credentials * Bitwarden credentials * Box credentials * Brandfetch credentials * Brevo credentials * Bubble credentials * Cal.com credentials * Calendly credentials * Carbon Black credentials * Chargebee credentials * CircleCI credentials * Cisco Meraki credentials * Cisco Secure Endpoint credentials * Cisco Umbrella credentials * Clearbit credentials * ClickUp credentials * Clockify credentials * Cloudflare credentials * Cockpit credentials * Coda credentials * Cohere credentials * Contentful credentials * ConvertAPI credentials * ConvertKit credentials * Copper credentials * Cortex credentials * CrateDB credentials * crowd.dev credentials * CrowdStrike credentials * Customer.io credentials * Datadog credentials * DeepL credentials * DeepSeek credentials * Demio credentials * DFIR-IRIS credentials * DHL credentials * Discord credentials * Discourse credentials * Disqus credentials * Drift credentials * Dropbox credentials * Dropcontact credentials * Dynatrace credentials * E-goi credentials * Elasticsearch credentials * Elastic Security credentials * Emelia credentials * ERPNext credentials * Eventbrite credentials * F5 Big-IP credentials * Facebook App credentials * Facebook Graph API credentials * Facebook Lead Ads credentials * Figma credentials * FileMaker credentials * Filescan credentials * Flow credentials * Form.io Trigger credentials * Formstack Trigger credentials * Fortinet FortiGate credentials * Freshdesk credentials * Freshservice credentials * Freshworks CRM credentials * FTP credentials * GetResponse credentials * Ghost credentials * Git credentials * GitHub credentials * GitLab credentials * Gong credentials * Google * Google OAuth2 single service * Google OAuth2 generic * Google Service Account * Google Gemini(PaLM) credentials * Gotify credentials * GoToWebinar credentials * Grafana credentials * Grist credentials * Groq credentials * Gumroad credentials * HaloPSA credentials * Harvest credentials * Help Scout credentials * HighLevel credentials * Home Assistant credentials * HTTP Request credentials * HubSpot credentials * Hugging Face credentials * Humantic AI credentials * Hunter credentials * Hybrid Analysis credentials * IMAP * Gmail * Outlook.com * Yahoo * Imperva WAF credentials * Intercom credentials * Invoice Ninja credentials * Iterable credentials * Jenkins credentials * Jira credentials * JotForm credentials * JWT credentials * Kafka credentials * Keap credentials * Kibana credentials * Kitemaker credentials * KoboToolbox credentials * LDAP credentials * Lemlist credentials * Line credentials * Linear credentials * LingvaNex credentials * LinkedIn credentials * LoneScale credentials * Magento 2 credentials * Mailcheck credentials * Mailchimp credentials * MailerLite credentials * Mailgun credentials * Mailjet credentials * Malcore credentials * Mandrill credentials * Marketstack credentials * Matrix credentials * Mattermost credentials * Mautic credentials * Medium credentials * MessageBird credentials * Metabase credentials * Microsoft credentials * Microsoft Azure Monitor credentials * Microsoft Entra ID credentials * Microsoft SQL credentials * Milvus credentials * Mindee credentials * Miro credentials * MISP credentials * Mist credentials * Mistral Cloud credentials * Mocean credentials * monday.com credentials * MongoDB credentials * Monica CRM credentials * Motorhead credentials * MQTT credentials * MSG91 credentials * MySQL credentials * NASA credentials * Netlify credentials * Netscaler ADC credentials * Nextcloud credentials * NocoDB credentials * Notion credentials * npm credentials * Odoo credentials * Okta credentials * Ollama credentials * One Simple API credentials * Onfleet credentials * OpenAI credentials * OpenCTI credentials * OpenRouter credentials * OpenWeatherMap credentials * Oura credentials * Paddle credentials * PagerDuty credentials * PayPal credentials * Peekalink credentials * PhantomBuster credentials * Philips Hue credentials * Pinecone credentials * Pipedrive credentials * Plivo credentials * Postgres credentials * PostHog credentials * Postmark credentials * ProfitWell credentials * Pushbullet credentials * Pushcut credentials * Pushover credentials * QRadar credentials * Qdrant credentials * Qualys credentials * QuestDB credentials * Quick Base credentials * QuickBooks credentials * RabbitMQ credentials * Raindrop credentials * Rapid7 InsightVM credentials * Recorded Future credentials * Reddit credentials * Redis credentials * Rocket.Chat credentials * Rundeck credentials * S3 credentials * Salesforce credentials * Salesmate credentials * SeaTable credentials * SecurityScorecard credentials * Segment credentials * Sekoia credentials * Send Email * Gmail * Outlook.com * Yahoo * SendGrid credentials * Sendy credentials * Sentry.io credentials * Serp credentials * ServiceNow credentials * seven credentials * Shopify credentials * Shuffler credentials * SIGNL4 credentials * Slack credentials * Snowflake credentials * SolarWinds IPAM credentials * SolarWinds Observability SaaS credentials * Splunk credentials * Spontit credentials * Spotify credentials * SSH credentials * Stackby credentials * Storyblok credentials * Strapi credentials * Strava credentials * Stripe credentials * Supabase credentials * SurveyMonkey credentials * SyncroMSP credentials * Sysdig credentials * Taiga credentials * Tapfiliate credentials * Telegram credentials * TheHive credentials * TheHive 5 credentials * TimescaleDB credentials * Todoist credentials * Toggl credentials * TOTP credentials * Travis CI credentials * Trellix ePO credentials * Trello credentials * Twake credentials * Twilio credentials * Twist credentials * Typeform credentials * Unleashed Software credentials * UpLead credentials * uProc credentials * UptimeRobot credentials * urlscan.io credentials * Venafi TLS Protect Cloud credentials * Venafi TLS Protect Datacenter credentials * Vero credentials * VirusTotal credentials * Vonage credentials * Webex by Cisco credentials * Webflow credentials * Webhook credentials * Wekan credentials * WhatsApp Business Cloud credentials * Wise credentials * Wolfram|Alpha credentials * WooCommerce credentials * WordPress credentials * Workable credentials * Wufoo credentials * X (formerly Twitter) credentials * Xata credentials * Xero credentials * Yourls credentials * Zabbix credentials * Zammad credentials * Zendesk credentials * Zep credentials * Zoho credentials * Zoom credentials * Zscaler ZIA credentials * Zulip credentials * Custom API actions for existing nodes * Handle rate limits * Community nodes Community nodes * Installation and management * GUI installation * Manual installation * Risks * Blocklist * Using community nodes * Troubleshooting * Building community nodes * Creating nodes Creating nodes * Overview * Plan your node * Choose a node type * Choose a node building style * Node UI design * Choose node file structure * Build your node * Set up your development environment * Tutorial: Build a declarative-style node * Tutorial: Build a programmatic-style node * Reference * Node UI elements * Code standards * Versioning * Choose node file structure * Base files * Structure * Standard parameters * Declarative-style parameters * Programmatic-style parameters * Programmatic-style execute method * Codex files * Credentials files * HTTP request helpers * Item linking * Test your node * Run your node locally * Node linter * Troubleshooting * Deploy your node * Submit community nodes * Install private nodes * Hosting n8n * Community vs Enterprise * Installation Installation * npm * Docker * Server setups * Digital Ocean * Heroku * Hetzner * Amazon Web Services * Azure * Google Cloud * Docker Compose * Updating * Configuration Configuration * Environment variables * Binary data * Credentials * Database * Deployment * Endpoints * Executions * External data storage * External hooks * External secrets * Logs * License * Nodes * Queue mode * Security * Source control * Task runners * Timezone and localization * User management and 2FA * Workflows * Configuration methods * Configuration examples * Isolate n8n * Configure the Base URL * Configure custom SSL certificate authorities * Set a custom encryption key * Configure workflow timeouts * Specify custom nodes location * Enable modules in Code node * Set the timezone * Specify user folder path * Configure webhook URLs with reverse proxy * Enable Prometheus metrics * Supported databases and settings * Task runners * User management * Logging and monitoring Logging and monitoring * Logging * Monitoring * Security audit * Scaling and performance Scaling and performance * Overview * Performance and benchmarking * Configuring queue mode * Concurrency control * Execution data * Binary data * External storage for binary data * Memory-related errors * Securing n8n Securing n8n * Overview * Set up SSL * Set up SSO * Security audit * Disable the API * Opt out of data collection * Blocking nodes * Hardening task runners * Starter Kits Starter Kits * AI Starter Kit * Architecture Architecture * Overview * Database structure * Using the CLI Using the CLI * CLI commands * Code in n8n * Expressions * Using the Code node * AI coding * Built in methods and variables Built in methods and variables * Overview * Current node input * Output of other nodes * Date and time * JMESPath * HTTP node * LangChain Code node * n8n metadata * Convenience methods * Data transformation functions * Arrays * Booleans * Dates * Numbers * Objects * Strings * Custom variables Custom variables * Create custom variables * Cookbook Cookbook * Handling dates * Query JSON with JMESPath * Built-in methods and variables examples * execution * getWorkflowStaticData * Retrieve linked items from earlier in the workflow * (node-name).all * vars * Expressions * Check incoming data * Common issues * Code node * Get number of items returned by last node * Get the binary data buffer * Output to the browser console * HTTP Request node * Pagination * Advanced AI * Tutorial: Build an AI workflow in n8n * LangChain in n8n LangChain in n8n * Overview * Langchain concepts in n8n * LangChain learning resources * Use LangSmith with n8n * Examples and concepts Examples and concepts * Introduction * What is a chain? * What is an agent? * Agents vs chains example * What is memory? * What is a tool? * Use Google Sheets as a data source * Call an API to fetch data * Set a human fallback for AI workflows * Let AI specify tool parameters * What is a vector database? * Populate a Pinecone vector database from a website * API * Authentication * Pagination * Using the API playground * API reference * Embed * Prerequisites * Deployment * Configuration * Workflow management * Workflows templates * White labelling 1. Integrations 2. Built-in nodes 3. Triggers Strava is an internet service for tracking human exercise which incorporates social network features. Credentials You can find authentication information for this node here. ## Events# * **\[All\]** * \[All\] * Created * Deleted * Updated * **Activity** * \[All\] * Created * Deleted * Updated * **Athlete** * \[All\] * Created * Deleted * Updated --- ## Page: https://docs.n8n.io/integrations/builtin/trigger-nodes/n8n-nodes-base.stripetrigger/ 1. Integrations 2. Built-in nodes 3. Triggers Stripe is a suite of payment APIs that powers commerce for online businesses. Credentials You can find authentication information for this node here. Examples and templates For usage examples and templates to help you get started, refer to n8n's Stripe Trigger integrations page. --- ## Page: https://docs.n8n.io/integrations/builtin/trigger-nodes/n8n-nodes-base.surveymonkeytrigger/ 1. Integrations 2. Built-in nodes 3. Triggers SurveyMonkey is an online cloud-based SaaS survey platform that also provides a suite of paid back-end programs. Credentials You can find authentication information for this node here. Examples and templates For usage examples and templates to help you get started, refer to n8n's SurveyMonkey Trigger integrations page. --- ## Page: https://docs.n8n.io/integrations/builtin/trigger-nodes/n8n-nodes-base.taigatrigger/ n8n Docs * Using n8n * Getting started Getting started * Learning path * Choose your n8n * Quickstarts * A very quick quickstart * A longer introduction * Video courses * Text courses * Level one * Navigating the editor UI * Building a mini-workflow * Automating a (real-world) use case * Designing the workflow * Building the workflow Building the workflow * Getting data from the data warehouse * Inserting data into airtable * Filtering orders * Setting values for processing orders * Calculating booked orders * Notifying the team * Scheduling the workflow * Activating and examining the workflow * Exporting and importing workflows * Test your knowledge * Level two * Understanding the data structure * Processing different data types * Merging and splitting data * Dealing with errors in workflows * Automating a business workflow Automating a business workflow * Use case * Workflow 1 * Workflow 2 * Workflow 3 * Test your knowledge * Using the app Using the app * Understand workflows * Create and run * Components * Nodes * Connections * Sticky Notes * Executions * Manual, partial, and production executions * Workflow-level executions * All executions * Custom executions data * Debug executions * Tags * Export and import * Templates * Sharing * Settings * Workflow history * Workflow ID * Manage credentials * Create and edit * Credential sharing * Manage users and access * Cloud setup * Manage users * Account types * Role-based access control * Role types * Projects * Best practices * 2FA * LDAP * SAML * Set up SAML * Okta Workforce Identity SAML setup * Troubleshooting * Manage users with SAML * Keyboard shortcuts * Key concepts Key concepts * Flow logic * Splitting with conditionals * Merging data * Looping * Waiting * Sub-workflows * Error handling * Execution order in multi-branch workflows * Data * Data structure * Data flow within nodes * Transforming data * Process data using code * Data mapping * Data mapping in the UI * Data mapping in the expressions editor * Data item linking * Item linking concepts * Item linking in the Code node * Item linking errors * Item linking for node creators * Data pinning * Data editing * Data filtering * Data mocking * Binary data * Schema preview * Glossary * n8n Cloud n8n Cloud * Overview * Access the Cloud admin dashboard * Update your n8n Cloud version * Set the timezone * Cloud IP addresses * Cloud data management * Change ownership or username * Concurrency * AI Assistant * Enterprise features Enterprise features * Source control and environments * Understand * Environments * Git in n8n * Branch patterns * Set up * Using * Push and pull * Copy work between environments * Manage variables * Tutorial: Create environments with source control * External secrets * Log streaming * License key * Releases Releases * Release notes Release notes * 1.x * 0.x * v1.0 migration guide * Help and community Help and community * Where to get help * Contributing * Licenses and privacy Licenses and privacy * Privacy and security * Privacy * Security * Incident response * What you can do * Sustainable use license * Integrations * Built-in nodes Built-in nodes * Node types * Core nodes * Activation Trigger * Aggregate * AI Transform * Code * Keyboard shortcuts * Common issues * Compare Datasets * Compression * Chat Trigger * Common issues * Convert to File * Crypto * Date & Time * Debug Helper * Edit Fields (Set) * Edit Image * Email Trigger (IMAP) * Error Trigger * Execute Command * Common issues * Execute Sub-workflow * Execute Sub-workflow Trigger * Execution Data * Extract From File * Filter * FTP * Git * GraphQL * HTML * HTTP Request * Common issues * If * JWT * LDAP * Limit * Local File Trigger * Loop Over Items (Split in Batches) * Manual Trigger * Markdown * MCP Server Trigger * Merge * n8n * n8n Form * n8n Form Trigger * n8n Trigger * No Operation, do nothing * Read/Write Files from Disk * Remove Duplicates * Templates and examples * Rename Keys * Respond to Webhook * RSS Read * RSS Feed Trigger * Schedule Trigger * Common issues * Send Email * Sort * Split Out * SSE Trigger * SSH * Stop And Error * Summarize * Switch * TOTP * Wait * Webhook * Workflow development * Common issues * Workflow Trigger * XML * Actions * Action Network * ActiveCampaign * Adalo * Affinity * Agile CRM * Airtable * Common issues * Airtop * AMQP Sender * APITemplate.io * Asana * Automizy * Autopilot * AWS Certificate Manager * AWS Comprehend * AWS DynamoDB * AWS Elastic Load Balancing * AWS Lambda * AWS Rekognition * AWS S3 * AWS SES * AWS SNS * AWS SQS * AWS Textract * AWS Transcribe * Azure Storage * BambooHR * Bannerbear * Baserow * Beeminder * Bitly * Bitwarden * Box * Brandfetch * Brevo * Bubble * Chargebee * CircleCI * Webex by Cisco * Clearbit * ClickUp * Clockify * Cloudflare * Cockpit * Coda * CoinGecko * Contentful * ConvertKit * Copper * Cortex * CrateDB * crowd.dev * Customer.io * DeepL * Demio * DHL * Discord * Common issues * Discourse * Disqus * Drift * Dropbox * Dropcontact * E-goi * Elasticsearch * Elastic Security * Emelia * ERPNext * Facebook Graph API * FileMaker * Flow * Freshdesk * Freshservice * Freshworks CRM * GetResponse * Ghost * GitHub * GitLab * Gmail * Draft operations * Label operations * Message operations * Thread operations * Common issues * Gong * Google Ads * Google Analytics * Google BigQuery * Google Books * Google Business Profile * Google Calendar * Calendar operations * Event operations * Google Chat * Google Cloud Firestore * Google Cloud Natural Language * Google Cloud Realtime Database * Google Cloud Storage * Google Contacts * Google Docs * Google Drive * File operations * File and folder operations * Folder operations * Shared drive operations * Common issues * Google Perspective * Google Sheets * Document operations * Sheet within Document operations * Common issues * Google Slides * Google Tasks * Google Translate * Google Workspace Admin * Gotify * GoToWebinar * Grafana * Grist * Hacker News * HaloPSA * Harvest * Help Scout * HighLevel * Home Assistant * HubSpot * Humantic AI * Hunter * Intercom * Invoice Ninja * Iterable * Jenkins * Jira Software * Kafka * Keap * Kitemaker * KoboToolbox * Lemlist * Line * Linear * LingvaNex * LinkedIn * LoneScale * Magento 2 * Mailcheck * Mailchimp * MailerLite * Mailgun * Mailjet * Mandrill * marketstack * Matrix * Mattermost * Mautic * Medium * MessageBird * Metabase * Microsoft Dynamics CRM * Microsoft Entra ID * Microsoft Excel 365 * Microsoft Graph Security * Microsoft OneDrive * Microsoft Outlook * Microsoft SQL * Microsoft Teams * Microsoft To Do * Mindee * MISP * Mocean * monday.com * MongoDB * Monica CRM * MQTT * MSG91 * MySQL * Common issues * Customer Datastore (n8n Training) * Customer Messenger (n8n Training) * NASA * Netlify * Netscaler ADC * Nextcloud * NocoDB * Notion * Common issues * npm * Odoo * Okta * One Simple API * Onfleet * OpenAI * Assistant operations * Audio operations * File operations * Image operations * Text operations * Common issues * OpenThesaurus * OpenWeatherMap * Oura * Paddle * PagerDuty * PayPal * Peekalink * PhantomBuster * Philips Hue * Pipedrive * Plivo * PostBin * Postgres * Common issues * PostHog * ProfitWell * Pushbullet * Pushcut * Pushover * QuestDB * Quick Base * QuickBooks Online * QuickChart * RabbitMQ * Raindrop * Reddit * Redis * Rocket.Chat * Rundeck * S3 * Salesforce * Salesmate * SeaTable * SecurityScorecard * Segment * SendGrid * Sendy * Sentry.io * ServiceNow * seven * Shopify * SIGNL4 * Slack * Snowflake * Splunk * Spontit * Spotify * Stackby * Storyblok * Strapi * Strava * Stripe * Supabase * Common issues * SyncroMSP * Taiga * Tapfiliate * Telegram * Chat operations * Callback operations * File operations * Message operations * Common issues * TheHive * TheHive 5 * TimescaleDB * Todoist * Travis CI * Trello * Twake * Twilio * Twist * Unleashed Software * UpLead * uProc * UptimeRobot * urlscan.io * Venafi TLS Protect Cloud * Venafi TLS Protect Datacenter * Vero * Vonage * Webflow * Wekan * WhatsApp Business Cloud * Common issues * Wise * WooCommerce * WordPress * X (Formerly Twitter) * Xero * Yourls * YouTube * Zammad * Zendesk * Zoho CRM * Zoom * Zulip * Triggers * ActiveCampaign Trigger * Acuity Scheduling Trigger * Affinity Trigger * Airtable Trigger * AMQP Trigger * Asana Trigger * Autopilot Trigger * AWS SNS Trigger * Bitbucket Trigger * Box Trigger * Brevo Trigger * Calendly Trigger * Cal Trigger * Chargebee Trigger * ClickUp Trigger * Clockify Trigger * ConvertKit Trigger * Copper Trigger * crowd.dev Trigger * Customer.io Trigger * Emelia Trigger * Eventbrite Trigger * Facebook Lead Ads Trigger * Facebook Trigger * Ad Account * Application * Certificate Transparency * Group * Instagram * Link * Page * Permissions * User * WhatsApp Business Account * Workplace Security * Figma Trigger (Beta) * Flow Trigger * Form.io Trigger * Formstack Trigger * GetResponse Trigger * GitHub Trigger * GitLab Trigger * Gmail Trigger * Poll Mode options * Common issues * Google Calendar Trigger * Google Drive Trigger * Common issues * Google Business Profile Trigger * Google Sheets Trigger * Common issues * Gumroad Trigger * Help Scout Trigger * Hubspot Trigger * Invoice Ninja Trigger * Jira Trigger * JotForm Trigger * Kafka Trigger * Keap Trigger * KoboToolbox Trigger * Lemlist Trigger * Linear Trigger * LoneScale Trigger * Mailchimp Trigger * MailerLite Trigger * Mailjet Trigger * Mautic Trigger * Microsoft OneDrive Trigger * Microsoft Outlook Trigger * MQTT Trigger * Netlify Trigger * Notion Trigger * Onfleet Trigger * PayPal Trigger * Pipedrive Trigger * Postgres Trigger * Postmark Trigger * Pushcut Trigger * RabbitMQ Trigger * Redis Trigger * Salesforce Trigger * SeaTable Trigger * Shopify Trigger * Slack Trigger * Strava Trigger * Stripe Trigger * SurveyMonkey Trigger * Taiga Trigger * Telegram Trigger * Common issues * TheHive 5 Trigger * TheHive Trigger * Toggl Trigger * Trello Trigger * Twilio Trigger * Typeform Trigger * Venafi TLS Protect Cloud Trigger * Webex by Cisco Trigger * Webflow Trigger * WhatsApp Trigger * Wise Trigger * WooCommerce Trigger * Workable Trigger * Wufoo Trigger * Zendesk Trigger * Cluster nodes * Root nodes * AI Agent * Conversational Agent * OpenAI Functions Agent * Plan and Execute Agent * ReAct Agent * SQL Agent * Tools Agent * Common issues * Basic LLM Chain * Question and Answer Chain * Common issues * Summarization Chain * Information Extractor * Text Classifier * Sentiment Analysis * LangChain Code * Simple Vector Store * Milvus Vector Store * MongoDB Atlas Vector Store * PGVector Vector Store * Pinecone Vector Store * Qdrant Vector Store * Supabase Vector Store * Zep Vector Store * Sub-nodes * Default Data Loader * GitHub Document Loader * Embeddings AWS Bedrock * Embeddings Azure OpenAI * Embeddings Cohere * Embeddings Google Gemini * Embeddings Google PaLM * Embeddings Google Vertex * Embeddings HuggingFace Inference * Embeddings Mistral Cloud * Embeddings Ollama * Embeddings OpenAI * Anthropic Chat Model * AWS Bedrock Chat Model * Azure OpenAI Chat Model * DeepSeek Chat Model * Google Gemini Chat Model * Google Vertex Chat Model * Groq Chat Model * Mistral Cloud Chat Model * Ollama Chat Model * Common issues * OpenAI Chat Model * Common issues * OpenRouter Chat Model * Cohere Model * Ollama Model * Common issues * Hugging Face Inference Model * Chat Memory Manager * Simple Memory * Common issues * Motorhead * MongoDB Chat Memory * Redis Chat Memory * Postgres Chat Memory * Xata * Zep * Auto-fixing Output Parser * Item List Output Parser * Structured Output Parser * Common issues * Contextual Compression Retriever * MultiQuery Retriever * Vector Store Retriever * Workflow Retriever * Character Text Splitter * Recursive Character Text Splitter * Token Splitter * Calculator * Custom Code Tool * HTTP Request Tool * MCP Client Tool * SerpApi (Google Search) * Think Tool * Vector Store Question Answer Tool * Wikipedia * Wolfram|Alpha * Custom n8n Workflow Tool * Credentials * Action Network credentials * ActiveCampaign credentials * Acuity Scheduling credentials * Adalo credentials * Affinity credentials * Agile CRM credentials * Airtable credentials * Airtop credentials * AlienVault credentials * AMQP credentials * Anthropic credentials * APITemplate.io credentials * Asana credentials * Auth0 Management credentials * Automizy credentials * Autopilot credentials * AWS credentials * Azure OpenAI credentials * Azure Storage credentials * BambooHR credentials * Bannerbear credentials * Baserow credentials * Beeminder credentials * Bitbucket credentials * Bitly credentials * Bitwarden credentials * Box credentials * Brandfetch credentials * Brevo credentials * Bubble credentials * Cal.com credentials * Calendly credentials * Carbon Black credentials * Chargebee credentials * CircleCI credentials * Cisco Meraki credentials * Cisco Secure Endpoint credentials * Cisco Umbrella credentials * Clearbit credentials * ClickUp credentials * Clockify credentials * Cloudflare credentials * Cockpit credentials * Coda credentials * Cohere credentials * Contentful credentials * ConvertAPI credentials * ConvertKit credentials * Copper credentials * Cortex credentials * CrateDB credentials * crowd.dev credentials * CrowdStrike credentials * Customer.io credentials * Datadog credentials * DeepL credentials * DeepSeek credentials * Demio credentials * DFIR-IRIS credentials * DHL credentials * Discord credentials * Discourse credentials * Disqus credentials * Drift credentials * Dropbox credentials * Dropcontact credentials * Dynatrace credentials * E-goi credentials * Elasticsearch credentials * Elastic Security credentials * Emelia credentials * ERPNext credentials * Eventbrite credentials * F5 Big-IP credentials * Facebook App credentials * Facebook Graph API credentials * Facebook Lead Ads credentials * Figma credentials * FileMaker credentials * Filescan credentials * Flow credentials * Form.io Trigger credentials * Formstack Trigger credentials * Fortinet FortiGate credentials * Freshdesk credentials * Freshservice credentials * Freshworks CRM credentials * FTP credentials * GetResponse credentials * Ghost credentials * Git credentials * GitHub credentials * GitLab credentials * Gong credentials * Google * Google OAuth2 single service * Google OAuth2 generic * Google Service Account * Google Gemini(PaLM) credentials * Gotify credentials * GoToWebinar credentials * Grafana credentials * Grist credentials * Groq credentials * Gumroad credentials * HaloPSA credentials * Harvest credentials * Help Scout credentials * HighLevel credentials * Home Assistant credentials * HTTP Request credentials * HubSpot credentials * Hugging Face credentials * Humantic AI credentials * Hunter credentials * Hybrid Analysis credentials * IMAP * Gmail * Outlook.com * Yahoo * Imperva WAF credentials * Intercom credentials * Invoice Ninja credentials * Iterable credentials * Jenkins credentials * Jira credentials * JotForm credentials * JWT credentials * Kafka credentials * Keap credentials * Kibana credentials * Kitemaker credentials * KoboToolbox credentials * LDAP credentials * Lemlist credentials * Line credentials * Linear credentials * LingvaNex credentials * LinkedIn credentials * LoneScale credentials * Magento 2 credentials * Mailcheck credentials * Mailchimp credentials * MailerLite credentials * Mailgun credentials * Mailjet credentials * Malcore credentials * Mandrill credentials * Marketstack credentials * Matrix credentials * Mattermost credentials * Mautic credentials * Medium credentials * MessageBird credentials * Metabase credentials * Microsoft credentials * Microsoft Azure Monitor credentials * Microsoft Entra ID credentials * Microsoft SQL credentials * Milvus credentials * Mindee credentials * Miro credentials * MISP credentials * Mist credentials * Mistral Cloud credentials * Mocean credentials * monday.com credentials * MongoDB credentials * Monica CRM credentials * Motorhead credentials * MQTT credentials * MSG91 credentials * MySQL credentials * NASA credentials * Netlify credentials * Netscaler ADC credentials * Nextcloud credentials * NocoDB credentials * Notion credentials * npm credentials * Odoo credentials * Okta credentials * Ollama credentials * One Simple API credentials * Onfleet credentials * OpenAI credentials * OpenCTI credentials * OpenRouter credentials * OpenWeatherMap credentials * Oura credentials * Paddle credentials * PagerDuty credentials * PayPal credentials * Peekalink credentials * PhantomBuster credentials * Philips Hue credentials * Pinecone credentials * Pipedrive credentials * Plivo credentials * Postgres credentials * PostHog credentials * Postmark credentials * ProfitWell credentials * Pushbullet credentials * Pushcut credentials * Pushover credentials * QRadar credentials * Qdrant credentials * Qualys credentials * QuestDB credentials * Quick Base credentials * QuickBooks credentials * RabbitMQ credentials * Raindrop credentials * Rapid7 InsightVM credentials * Recorded Future credentials * Reddit credentials * Redis credentials * Rocket.Chat credentials * Rundeck credentials * S3 credentials * Salesforce credentials * Salesmate credentials * SeaTable credentials * SecurityScorecard credentials * Segment credentials * Sekoia credentials * Send Email * Gmail * Outlook.com * Yahoo * SendGrid credentials * Sendy credentials * Sentry.io credentials * Serp credentials * ServiceNow credentials * seven credentials * Shopify credentials * Shuffler credentials * SIGNL4 credentials * Slack credentials * Snowflake credentials * SolarWinds IPAM credentials * SolarWinds Observability SaaS credentials * Splunk credentials * Spontit credentials * Spotify credentials * SSH credentials * Stackby credentials * Storyblok credentials * Strapi credentials * Strava credentials * Stripe credentials * Supabase credentials * SurveyMonkey credentials * SyncroMSP credentials * Sysdig credentials * Taiga credentials * Tapfiliate credentials * Telegram credentials * TheHive credentials * TheHive 5 credentials * TimescaleDB credentials * Todoist credentials * Toggl credentials * TOTP credentials * Travis CI credentials * Trellix ePO credentials * Trello credentials * Twake credentials * Twilio credentials * Twist credentials * Typeform credentials * Unleashed Software credentials * UpLead credentials * uProc credentials * UptimeRobot credentials * urlscan.io credentials * Venafi TLS Protect Cloud credentials * Venafi TLS Protect Datacenter credentials * Vero credentials * VirusTotal credentials * Vonage credentials * Webex by Cisco credentials * Webflow credentials * Webhook credentials * Wekan credentials * WhatsApp Business Cloud credentials * Wise credentials * Wolfram|Alpha credentials * WooCommerce credentials * WordPress credentials * Workable credentials * Wufoo credentials * X (formerly Twitter) credentials * Xata credentials * Xero credentials * Yourls credentials * Zabbix credentials * Zammad credentials * Zendesk credentials * Zep credentials * Zoho credentials * Zoom credentials * Zscaler ZIA credentials * Zulip credentials * Custom API actions for existing nodes * Handle rate limits * Community nodes Community nodes * Installation and management * GUI installation * Manual installation * Risks * Blocklist * Using community nodes * Troubleshooting * Building community nodes * Creating nodes Creating nodes * Overview * Plan your node * Choose a node type * Choose a node building style * Node UI design * Choose node file structure * Build your node * Set up your development environment * Tutorial: Build a declarative-style node * Tutorial: Build a programmatic-style node * Reference * Node UI elements * Code standards * Versioning * Choose node file structure * Base files * Structure * Standard parameters * Declarative-style parameters * Programmatic-style parameters * Programmatic-style execute method * Codex files * Credentials files * HTTP request helpers * Item linking * Test your node * Run your node locally * Node linter * Troubleshooting * Deploy your node * Submit community nodes * Install private nodes * Hosting n8n * Community vs Enterprise * Installation Installation * npm * Docker * Server setups * Digital Ocean * Heroku * Hetzner * Amazon Web Services * Azure * Google Cloud * Docker Compose * Updating * Configuration Configuration * Environment variables * Binary data * Credentials * Database * Deployment * Endpoints * Executions * External data storage * External hooks * External secrets * Logs * License * Nodes * Queue mode * Security * Source control * Task runners * Timezone and localization * User management and 2FA * Workflows * Configuration methods * Configuration examples * Isolate n8n * Configure the Base URL * Configure custom SSL certificate authorities * Set a custom encryption key * Configure workflow timeouts * Specify custom nodes location * Enable modules in Code node * Set the timezone * Specify user folder path * Configure webhook URLs with reverse proxy * Enable Prometheus metrics * Supported databases and settings * Task runners * User management * Logging and monitoring Logging and monitoring * Logging * Monitoring * Security audit * Scaling and performance Scaling and performance * Overview * Performance and benchmarking * Configuring queue mode * Concurrency control * Execution data * Binary data * External storage for binary data * Memory-related errors * Securing n8n Securing n8n * Overview * Set up SSL * Set up SSO * Security audit * Disable the API * Opt out of data collection * Blocking nodes * Hardening task runners * Starter Kits Starter Kits * AI Starter Kit * Architecture Architecture * Overview * Database structure * Using the CLI Using the CLI * CLI commands * Code in n8n * Expressions * Using the Code node * AI coding * Built in methods and variables Built in methods and variables * Overview * Current node input * Output of other nodes * Date and time * JMESPath * HTTP node * LangChain Code node * n8n metadata * Convenience methods * Data transformation functions * Arrays * Booleans * Dates * Numbers * Objects * Strings * Custom variables Custom variables * Create custom variables * Cookbook Cookbook * Handling dates * Query JSON with JMESPath * Built-in methods and variables examples * execution * getWorkflowStaticData * Retrieve linked items from earlier in the workflow * (node-name).all * vars * Expressions * Check incoming data * Common issues * Code node * Get number of items returned by last node * Get the binary data buffer * Output to the browser console * HTTP Request node * Pagination * Advanced AI * Tutorial: Build an AI workflow in n8n * LangChain in n8n LangChain in n8n * Overview * Langchain concepts in n8n * LangChain learning resources * Use LangSmith with n8n * Examples and concepts Examples and concepts * Introduction * What is a chain? * What is an agent? * Agents vs chains example * What is memory? * What is a tool? * Use Google Sheets as a data source * Call an API to fetch data * Set a human fallback for AI workflows * Let AI specify tool parameters * What is a vector database? * Populate a Pinecone vector database from a website * API * Authentication * Pagination * Using the API playground * API reference * Embed * Prerequisites * Deployment * Configuration * Workflow management * Workflows templates * White labelling 1. Integrations 2. Built-in nodes 3. Triggers Taiga is a free and open-source project management platform for startups, agile developers, and designers. Credentials You can find authentication information for this node here. --- ## Page: https://docs.n8n.io/integrations/builtin/trigger-nodes/n8n-nodes-base.telegramtrigger/ Telegram is a cloud-based instant messaging and voice over IP service. Users can send messages and exchange photos, videos, stickers, audio, and files of any type. On this page, you'll find a list of events the Telegram Trigger node can respond to and links to more resources. Credentials You can find authentication information for this node here. ## Events# * **`*`**: All updates except "Chat Member", "Message Reaction", and "Message Reaction Count" (default behavior of Telegram API as they produces a lot of calls of updates). * **Business Connection**: Trigger when the bot is connected to or disconnected from a business account, or a user edited an existing connection with the bot. * **Business Message**: Trigger on a new message from a connected business account. * **Callback Query**: Trigger on new incoming callback query. * **Channel Post**: Trigger on new incoming channel post of any kind — including text, photo, sticker, and so on. * **Chat Boost**: Trigger when a chat boost is added or changed. The bot must be an administrator in the chat to receive these updates. * **Chat Join Request**: Trigger when a request to join the chat is sent. The bot must have the `can_invite_users` administrator right in the chat to receive these updates. * **Chat Member**: Trigger when a chat member's status is updated. The bot must be an administrator in the chat. * **Chosen Inline Result**: Trigger when the result of an inline query chosen by a user is sent. Please see Telegram's API documentation on feedback collection for details on how to enable these updates for your bot. * **Deleted Business Messages**: Trigger when messages are deleted from a connected business account. * **Edited Business Message**: Trigger on new version of a message from a connected business account. * **Edited Channel Post**: Trigger on new version of a channel post that is known to the bot is edited. * **Edited Message**: Trigger on new version of a channel post that is known to the bot is edited. * **Inline Query**: Trigger on new incoming inline query. * **Message**: Trigger on new incoming message of any kind — text, photo, sticker, and so on. * **Message Reaction**: Trigger when a reaction to a message is changed by a user. The bot must be an administrator in the chat. The update isn't received for reactions set by bots. * **Message Reaction Count**: Trigger when reactions to a message with anonymous reactions are changed. The bot must be an administrator in the chat. The updates are grouped and can be sent with delay up to a few minutes. * **My Chat Member**: Trigger when the bot's chat member status is updated in a chat. For private chats, this update is received only when the bot is blocked or unblocked by the user. * **Poll**: Trigger on new poll state. Bots only receive updates about stopped polls and polls which are sent by the bot. * **Poll Answer**: Trigger when user changes their answer in a non-anonymous poll. Bots only receive new votes in polls that were sent by the bot itself. * **Pre-Checkout Query**: Trigger on new incoming pre-checkout query. Contains full information about checkout. * **Purchased Paid Media**: Trigger when a user purchases paid media with a non-empty payload sent by the bot in a non-channel chat. * **Removed Chat Boost**: Trigger when a boost is removed from a chat. The bot must be an administrator in the chat to receive these updates. * **Shipping Query**: Trigger on new incoming shipping query. Only for invoices with flexible price. Some **events may require additional permissions**, see Telegram's API documentation for more information. n8n provides an app node for Telegram. You can find the node docs here. View example workflows and related content on n8n's website. Refer to Telegram's API documentation for details about their API. ## Common issues# For common questions or issues and suggested solutions, refer to Common issues. --- ## Page: https://docs.n8n.io/integrations/builtin/trigger-nodes/n8n-nodes-base.telegramtrigger/common-issues/ Here are some common errors and issues with the Telegram Trigger node and steps to resolve or troubleshoot them. ## Stuck waiting for trigger event# When testing the Telegram Trigger node with the **Test step** or or **Test workflow** buttons, the execution may appear stuck and unable to stop listening for events. If this occurs, you may need to exit the workflow and open it again to reset the canvas. Stuck listening events often occur due to issues with your network configuration outside of n8n. Specifically, this behavior often occurs when you run n8n behind a reverse proxy without configuring websocket proxying. To resolve this issue, check your reverse proxy configuration (Nginx, Caddy, Apache HTTP Server, Traefik, etc.) to enable websocket support. ## Bad request: bad webhook: An HTTPS URL must be provided for webhook# This error occurs when you run n8n behind a reverse proxy and there is a problem with your instance's webhook URL. When running n8n behind a reverse proxy, you must configure the `WEBHOOK_URL` environment variable with the public URL where your n8n instance is running. For Telegram, this URL must use HTTPS. To fix this issue, configure TLS/SSL termination in your reverse proxy. Afterward, update your `WEBHOOK_URL` environment variable to use the HTTPS address. ## Workflow only works in testing or production# Telegram only allows you to register a single webhook per app. This means that every time you switch from using the testing URL to the production URL (and vice versa), Telegram overwrites the registered webhook URL. You may have trouble with this if you try to test a workflow that's also active in production. The Telegram bot will only send events to one of the two webhook URLs, so the other will never receive event notifications. To work around this, you can either disable your workflow when testing or create separate Telegram bots for testing and production. To create a separate telegram bot for testing, repeat the process you completed to create your first bot. Reference Telegram's bot documentation and the Telegram bot API reference for more information. To disable your workflow when testing, try the following: Halts production traffic This workaround temporarily disables your production workflow for testing. Your workflow will no longer receive production traffic while it's deactivated. 1. Go to your workflow page. 2. Toggle the **Active** switch in the top panel to disable the workflow temporarily. 3. Test your workflow using the test webhook URL. 4. When you finish testing, toggle the **Inactive** toggle to enable the workflow again. The production webhook URL should resume working. --- ## Page: https://docs.n8n.io/integrations/builtin/trigger-nodes/n8n-nodes-base.thehive5trigger/ Use the TheHive 5 Trigger node to respond to events in TheHive and integrate TheHive with other applications. n8n has built-in support for a wide range of TheHive events, including alerts, cases, comments, pages, and tasks. On this page, you'll find a list of events the TheHive5 Trigger node can respond to and links to more resources. TheHive and TheHive 5 n8n provides two nodes for TheHive. Use this node (TheHive 5 Trigger) if you want to use TheHive's version 5 API. If you want to use version 3 or 4, use TheHive Trigger. ## Events# * Alert * Created * Deleted * Updated * Case * Created * Deleted * Updated * Comment * Created * Deleted * Updated * Observable * Created * Deleted * Updated * Page * Created * Deleted * Updated * Task * Created * Deleted * Updated * Task log * Created * Deleted * Updated n8n provides an app node for TheHive 5. You can find the node docs here. Refer to TheHive's documentation for more information about the service. ## Configure a webhook in TheHive# To configure the webhook for your TheHive instance: 1. Copy the testing and production webhook URLs from TheHive Trigger node. 2. Add the following lines to the `application.conf` file. This is TheHive configuration file: <table><tbody><tr><td><div><pre><span></span><span> 1</span> <span> 2</span> <span> 3</span> <span> 4</span> <span> 5</span> <span> 6</span> <span> 7</span> <span> 8</span> <span> 9</span> <span>10</span> <span>11</span> <span>12</span> <span>13</span> <span>14</span> <span>15</span> <span>16</span> <span>17</span> <span>18</span></pre></div></td><td><div><pre><span></span><code>notification.webhook.endpoints = [ { name: TESTING_WEBHOOK_NAME url: TESTING_WEBHOOK_URL version: 0 wsConfig: {} includedTheHiveOrganisations: ["ORGANIZATION_NAME"] excludedTheHiveOrganisations: [] }, { name: PRODUCTION_WEBHOOK_NAME url: PRODUCTION_WEBHOOK_URL version: 0 wsConfig: {} includedTheHiveOrganisations: ["ORGANIZATION_NAME"] excludedTheHiveOrganisations: [] } ] </code></pre></div></td></tr></tbody></table> 3. Replace `TESTING_WEBHOOK_URL` and `PRODUCTION_WEBHOOK_URL` with the URLs you copied in the previous step. 4. Replace `TESTING_WEBHOOK_NAME` and `PRODUCTION_WEBHOOK_NAME` with your preferred endpoint names. 5. Replace `ORGANIZATION_NAME` with your organization name. 6. Execute the following cURL command to enable notifications: <table><tbody><tr><td><div><pre><span></span><span> 1</span> <span> 2</span> <span> 3</span> <span> 4</span> <span> 5</span> <span> 6</span> <span> 7</span> <span> 8</span> <span> 9</span> <span>10</span> <span>11</span> <span>12</span> <span>13</span> <span>14</span> <span>15</span></pre></div></td><td><div><pre><span></span><code>curl<span> </span>-XPUT<span> </span>-uTHEHIVE_USERNAME:THEHIVE_PASSWORD<span> </span>-H<span> </span><span>'Content-type: application/json'</span><span> </span>THEHIVE_URL/api/config/organisation/notification<span> </span>-d<span> </span><span>'</span> <span>{</span> <span> "value": [</span> <span> {</span> <span> "delegate": false,</span> <span> "trigger": { "name": "AnyEvent"},</span> <span> "notifier": { "name": "webhook", "endpoint": "TESTING_WEBHOOK_NAME" }</span> <span> },</span> <span> {</span> <span> "delegate": false,</span> <span> "trigger": { "name": "AnyEvent"},</span> <span> "notifier": { "name": "webhook", "endpoint": "PRODUCTION_WEBHOOK_NAME" }</span> <span> }</span> <span> ]</span> <span>}'</span> </code></pre></div></td></tr></tbody></table> --- ## Page: https://docs.n8n.io/integrations/builtin/trigger-nodes/n8n-nodes-base.thehivetrigger/ On this page, you'll find a list of events the TheHive Trigger node can respond to and links to more resources. TheHive and TheHive 5 n8n provides two nodes for TheHive. Use this node (TheHive Trigger) if you want to use TheHive's version 3 or 4 API. If you want to use version 5, use TheHive 5 Trigger. ## Events# * Alert * Created * Deleted * Updated * Case * Created * Deleted * Updated * Log * Created * Deleted * Updated * Observable * Created * Deleted * Updated * Task * Created * Deleted * Updated n8n provides an app node for TheHive. You can find the node docs here. View example workflows and related content on n8n's website. Refer to TheHive's documentation for more information about the service: * Version 3 * Version 4 ## Configure a webhook in TheHive# To configure the webhook for your TheHive instance: 1. Copy the testing and production webhook URLs from TheHive Trigger node. 2. Add the following lines to the `application.conf` file. This is TheHive configuration file: <table><tbody><tr><td><div><pre><span></span><span> 1</span> <span> 2</span> <span> 3</span> <span> 4</span> <span> 5</span> <span> 6</span> <span> 7</span> <span> 8</span> <span> 9</span> <span>10</span> <span>11</span> <span>12</span> <span>13</span> <span>14</span> <span>15</span> <span>16</span> <span>17</span> <span>18</span></pre></div></td><td><div><pre><span></span><code>notification.webhook.endpoints = [ { name: TESTING_WEBHOOK_NAME url: TESTING_WEBHOOK_URL version: 0 wsConfig: {} includedTheHiveOrganisations: ["ORGANIZATION_NAME"] excludedTheHiveOrganisations: [] }, { name: PRODUCTION_WEBHOOK_NAME url: PRODUCTION_WEBHOOK_URL version: 0 wsConfig: {} includedTheHiveOrganisations: ["ORGANIZATION_NAME"] excludedTheHiveOrganisations: [] } ] </code></pre></div></td></tr></tbody></table> 3. Replace `TESTING_WEBHOOK_URL` and `PRODUCTION_WEBHOOK_URL` with the URLs you copied in the previous step. 4. Replace `TESTING_WEBHOOK_NAME` and `PRODUCTION_WEBHOOK_NAME` with your preferred endpoint names. 5. Replace `ORGANIZATION_NAME` with your organization name. 6. Execute the following cURL command to enable notifications: <table><tbody><tr><td><div><pre><span></span><span> 1</span> <span> 2</span> <span> 3</span> <span> 4</span> <span> 5</span> <span> 6</span> <span> 7</span> <span> 8</span> <span> 9</span> <span>10</span> <span>11</span> <span>12</span> <span>13</span> <span>14</span> <span>15</span></pre></div></td><td><div><pre><span></span><code>curl<span> </span>-XPUT<span> </span>-uTHEHIVE_USERNAME:THEHIVE_PASSWORD<span> </span>-H<span> </span><span>'Content-type: application/json'</span><span> </span>THEHIVE_URL/api/config/organisation/notification<span> </span>-d<span> </span><span>'</span> <span>{</span> <span> "value": [</span> <span> {</span> <span> "delegate": false,</span> <span> "trigger": { "name": "AnyEvent"},</span> <span> "notifier": { "name": "webhook", "endpoint": "TESTING_WEBHOOK_NAME" }</span> <span> },</span> <span> {</span> <span> "delegate": false,</span> <span> "trigger": { "name": "AnyEvent"},</span> <span> "notifier": { "name": "webhook", "endpoint": "PRODUCTION_WEBHOOK_NAME" }</span> <span> }</span> <span> ]</span> <span>}'</span> </code></pre></div></td></tr></tbody></table> --- ## Page: https://docs.n8n.io/integrations/builtin/trigger-nodes/n8n-nodes-base.toggltrigger/ n8n Docs * Using n8n * Getting started Getting started * Learning path * Choose your n8n * Quickstarts * A very quick quickstart * A longer introduction * Video courses * Text courses * Level one * Navigating the editor UI * Building a mini-workflow * Automating a (real-world) use case * Designing the workflow * Building the workflow Building the workflow * Getting data from the data warehouse * Inserting data into airtable * Filtering orders * Setting values for processing orders * Calculating booked orders * Notifying the team * Scheduling the workflow * Activating and examining the workflow * Exporting and importing workflows * Test your knowledge * Level two * Understanding the data structure * Processing different data types * Merging and splitting data * Dealing with errors in workflows * Automating a business workflow Automating a business workflow * Use case * Workflow 1 * Workflow 2 * Workflow 3 * Test your knowledge * Using the app Using the app * Understand workflows * Create and run * Components * Nodes * Connections * Sticky Notes * Executions * Manual, partial, and production executions * Workflow-level executions * All executions * Custom executions data * Debug executions * Tags * Export and import * Templates * Sharing * Settings * Workflow history * Workflow ID * Manage credentials * Create and edit * Credential sharing * Manage users and access * Cloud setup * Manage users * Account types * Role-based access control * Role types * Projects * Best practices * 2FA * LDAP * SAML * Set up SAML * Okta Workforce Identity SAML setup * Troubleshooting * Manage users with SAML * Keyboard shortcuts * Key concepts Key concepts * Flow logic * Splitting with conditionals * Merging data * Looping * Waiting * Sub-workflows * Error handling * Execution order in multi-branch workflows * Data * Data structure * Data flow within nodes * Transforming data * Process data using code * Data mapping * Data mapping in the UI * Data mapping in the expressions editor * Data item linking * Item linking concepts * Item linking in the Code node * Item linking errors * Item linking for node creators * Data pinning * Data editing * Data filtering * Data mocking * Binary data * Schema preview * Glossary * n8n Cloud n8n Cloud * Overview * Access the Cloud admin dashboard * Update your n8n Cloud version * Set the timezone * Cloud IP addresses * Cloud data management * Change ownership or username * Concurrency * AI Assistant * Enterprise features Enterprise features * Source control and environments * Understand * Environments * Git in n8n * Branch patterns * Set up * Using * Push and pull * Copy work between environments * Manage variables * Tutorial: Create environments with source control * External secrets * Log streaming * License key * Releases Releases * Release notes Release notes * 1.x * 0.x * v1.0 migration guide * Help and community Help and community * Where to get help * Contributing * Licenses and privacy Licenses and privacy * Privacy and security * Privacy * Security * Incident response * What you can do * Sustainable use license * Integrations * Built-in nodes Built-in nodes * Node types * Core nodes * Activation Trigger * Aggregate * AI Transform * Code * Keyboard shortcuts * Common issues * Compare Datasets * Compression * Chat Trigger * Common issues * Convert to File * Crypto * Date & Time * Debug Helper * Edit Fields (Set) * Edit Image * Email Trigger (IMAP) * Error Trigger * Execute Command * Common issues * Execute Sub-workflow * Execute Sub-workflow Trigger * Execution Data * Extract From File * Filter * FTP * Git * GraphQL * HTML * HTTP Request * Common issues * If * JWT * LDAP * Limit * Local File Trigger * Loop Over Items (Split in Batches) * Manual Trigger * Markdown * MCP Server Trigger * Merge * n8n * n8n Form * n8n Form Trigger * n8n Trigger * No Operation, do nothing * Read/Write Files from Disk * Remove Duplicates * Templates and examples * Rename Keys * Respond to Webhook * RSS Read * RSS Feed Trigger * Schedule Trigger * Common issues * Send Email * Sort * Split Out * SSE Trigger * SSH * Stop And Error * Summarize * Switch * TOTP * Wait * Webhook * Workflow development * Common issues * Workflow Trigger * XML * Actions * Action Network * ActiveCampaign * Adalo * Affinity * Agile CRM * Airtable * Common issues * Airtop * AMQP Sender * APITemplate.io * Asana * Automizy * Autopilot * AWS Certificate Manager * AWS Comprehend * AWS DynamoDB * AWS Elastic Load Balancing * AWS Lambda * AWS Rekognition * AWS S3 * AWS SES * AWS SNS * AWS SQS * AWS Textract * AWS Transcribe * Azure Storage * BambooHR * Bannerbear * Baserow * Beeminder * Bitly * Bitwarden * Box * Brandfetch * Brevo * Bubble * Chargebee * CircleCI * Webex by Cisco * Clearbit * ClickUp * Clockify * Cloudflare * Cockpit * Coda * CoinGecko * Contentful * ConvertKit * Copper * Cortex * CrateDB * crowd.dev * Customer.io * DeepL * Demio * DHL * Discord * Common issues * Discourse * Disqus * Drift * Dropbox * Dropcontact * E-goi * Elasticsearch * Elastic Security * Emelia * ERPNext * Facebook Graph API * FileMaker * Flow * Freshdesk * Freshservice * Freshworks CRM * GetResponse * Ghost * GitHub * GitLab * Gmail * Draft operations * Label operations * Message operations * Thread operations * Common issues * Gong * Google Ads * Google Analytics * Google BigQuery * Google Books * Google Business Profile * Google Calendar * Calendar operations * Event operations * Google Chat * Google Cloud Firestore * Google Cloud Natural Language * Google Cloud Realtime Database * Google Cloud Storage * Google Contacts * Google Docs * Google Drive * File operations * File and folder operations * Folder operations * Shared drive operations * Common issues * Google Perspective * Google Sheets * Document operations * Sheet within Document operations * Common issues * Google Slides * Google Tasks * Google Translate * Google Workspace Admin * Gotify * GoToWebinar * Grafana * Grist * Hacker News * HaloPSA * Harvest * Help Scout * HighLevel * Home Assistant * HubSpot * Humantic AI * Hunter * Intercom * Invoice Ninja * Iterable * Jenkins * Jira Software * Kafka * Keap * Kitemaker * KoboToolbox * Lemlist * Line * Linear * LingvaNex * LinkedIn * LoneScale * Magento 2 * Mailcheck * Mailchimp * MailerLite * Mailgun * Mailjet * Mandrill * marketstack * Matrix * Mattermost * Mautic * Medium * MessageBird * Metabase * Microsoft Dynamics CRM * Microsoft Entra ID * Microsoft Excel 365 * Microsoft Graph Security * Microsoft OneDrive * Microsoft Outlook * Microsoft SQL * Microsoft Teams * Microsoft To Do * Mindee * MISP * Mocean * monday.com * MongoDB * Monica CRM * MQTT * MSG91 * MySQL * Common issues * Customer Datastore (n8n Training) * Customer Messenger (n8n Training) * NASA * Netlify * Netscaler ADC * Nextcloud * NocoDB * Notion * Common issues * npm * Odoo * Okta * One Simple API * Onfleet * OpenAI * Assistant operations * Audio operations * File operations * Image operations * Text operations * Common issues * OpenThesaurus * OpenWeatherMap * Oura * Paddle * PagerDuty * PayPal * Peekalink * PhantomBuster * Philips Hue * Pipedrive * Plivo * PostBin * Postgres * Common issues * PostHog * ProfitWell * Pushbullet * Pushcut * Pushover * QuestDB * Quick Base * QuickBooks Online * QuickChart * RabbitMQ * Raindrop * Reddit * Redis * Rocket.Chat * Rundeck * S3 * Salesforce * Salesmate * SeaTable * SecurityScorecard * Segment * SendGrid * Sendy * Sentry.io * ServiceNow * seven * Shopify * SIGNL4 * Slack * Snowflake * Splunk * Spontit * Spotify * Stackby * Storyblok * Strapi * Strava * Stripe * Supabase * Common issues * SyncroMSP * Taiga * Tapfiliate * Telegram * Chat operations * Callback operations * File operations * Message operations * Common issues * TheHive * TheHive 5 * TimescaleDB * Todoist * Travis CI * Trello * Twake * Twilio * Twist * Unleashed Software * UpLead * uProc * UptimeRobot * urlscan.io * Venafi TLS Protect Cloud * Venafi TLS Protect Datacenter * Vero * Vonage * Webflow * Wekan * WhatsApp Business Cloud * Common issues * Wise * WooCommerce * WordPress * X (Formerly Twitter) * Xero * Yourls * YouTube * Zammad * Zendesk * Zoho CRM * Zoom * Zulip * Triggers * ActiveCampaign Trigger * Acuity Scheduling Trigger * Affinity Trigger * Airtable Trigger * AMQP Trigger * Asana Trigger * Autopilot Trigger * AWS SNS Trigger * Bitbucket Trigger * Box Trigger * Brevo Trigger * Calendly Trigger * Cal Trigger * Chargebee Trigger * ClickUp Trigger * Clockify Trigger * ConvertKit Trigger * Copper Trigger * crowd.dev Trigger * Customer.io Trigger * Emelia Trigger * Eventbrite Trigger * Facebook Lead Ads Trigger * Facebook Trigger * Ad Account * Application * Certificate Transparency * Group * Instagram * Link * Page * Permissions * User * WhatsApp Business Account * Workplace Security * Figma Trigger (Beta) * Flow Trigger * Form.io Trigger * Formstack Trigger * GetResponse Trigger * GitHub Trigger * GitLab Trigger * Gmail Trigger * Poll Mode options * Common issues * Google Calendar Trigger * Google Drive Trigger * Common issues * Google Business Profile Trigger * Google Sheets Trigger * Common issues * Gumroad Trigger * Help Scout Trigger * Hubspot Trigger * Invoice Ninja Trigger * Jira Trigger * JotForm Trigger * Kafka Trigger * Keap Trigger * KoboToolbox Trigger * Lemlist Trigger * Linear Trigger * LoneScale Trigger * Mailchimp Trigger * MailerLite Trigger * Mailjet Trigger * Mautic Trigger * Microsoft OneDrive Trigger * Microsoft Outlook Trigger * MQTT Trigger * Netlify Trigger * Notion Trigger * Onfleet Trigger * PayPal Trigger * Pipedrive Trigger * Postgres Trigger * Postmark Trigger * Pushcut Trigger * RabbitMQ Trigger * Redis Trigger * Salesforce Trigger * SeaTable Trigger * Shopify Trigger * Slack Trigger * Strava Trigger * Stripe Trigger * SurveyMonkey Trigger * Taiga Trigger * Telegram Trigger * Common issues * TheHive 5 Trigger * TheHive Trigger * Toggl Trigger * Trello Trigger * Twilio Trigger * Typeform Trigger * Venafi TLS Protect Cloud Trigger * Webex by Cisco Trigger * Webflow Trigger * WhatsApp Trigger * Wise Trigger * WooCommerce Trigger * Workable Trigger * Wufoo Trigger * Zendesk Trigger * Cluster nodes * Root nodes * AI Agent * Conversational Agent * OpenAI Functions Agent * Plan and Execute Agent * ReAct Agent * SQL Agent * Tools Agent * Common issues * Basic LLM Chain * Question and Answer Chain * Common issues * Summarization Chain * Information Extractor * Text Classifier * Sentiment Analysis * LangChain Code * Simple Vector Store * Milvus Vector Store * MongoDB Atlas Vector Store * PGVector Vector Store * Pinecone Vector Store * Qdrant Vector Store * Supabase Vector Store * Zep Vector Store * Sub-nodes * Default Data Loader * GitHub Document Loader * Embeddings AWS Bedrock * Embeddings Azure OpenAI * Embeddings Cohere * Embeddings Google Gemini * Embeddings Google PaLM * Embeddings Google Vertex * Embeddings HuggingFace Inference * Embeddings Mistral Cloud * Embeddings Ollama * Embeddings OpenAI * Anthropic Chat Model * AWS Bedrock Chat Model * Azure OpenAI Chat Model * DeepSeek Chat Model * Google Gemini Chat Model * Google Vertex Chat Model * Groq Chat Model * Mistral Cloud Chat Model * Ollama Chat Model * Common issues * OpenAI Chat Model * Common issues * OpenRouter Chat Model * Cohere Model * Ollama Model * Common issues * Hugging Face Inference Model * Chat Memory Manager * Simple Memory * Common issues * Motorhead * MongoDB Chat Memory * Redis Chat Memory * Postgres Chat Memory * Xata * Zep * Auto-fixing Output Parser * Item List Output Parser * Structured Output Parser * Common issues * Contextual Compression Retriever * MultiQuery Retriever * Vector Store Retriever * Workflow Retriever * Character Text Splitter * Recursive Character Text Splitter * Token Splitter * Calculator * Custom Code Tool * HTTP Request Tool * MCP Client Tool * SerpApi (Google Search) * Think Tool * Vector Store Question Answer Tool * Wikipedia * Wolfram|Alpha * Custom n8n Workflow Tool * Credentials * Action Network credentials * ActiveCampaign credentials * Acuity Scheduling credentials * Adalo credentials * Affinity credentials * Agile CRM credentials * Airtable credentials * Airtop credentials * AlienVault credentials * AMQP credentials * Anthropic credentials * APITemplate.io credentials * Asana credentials * Auth0 Management credentials * Automizy credentials * Autopilot credentials * AWS credentials * Azure OpenAI credentials * Azure Storage credentials * BambooHR credentials * Bannerbear credentials * Baserow credentials * Beeminder credentials * Bitbucket credentials * Bitly credentials * Bitwarden credentials * Box credentials * Brandfetch credentials * Brevo credentials * Bubble credentials * Cal.com credentials * Calendly credentials * Carbon Black credentials * Chargebee credentials * CircleCI credentials * Cisco Meraki credentials * Cisco Secure Endpoint credentials * Cisco Umbrella credentials * Clearbit credentials * ClickUp credentials * Clockify credentials * Cloudflare credentials * Cockpit credentials * Coda credentials * Cohere credentials * Contentful credentials * ConvertAPI credentials * ConvertKit credentials * Copper credentials * Cortex credentials * CrateDB credentials * crowd.dev credentials * CrowdStrike credentials * Customer.io credentials * Datadog credentials * DeepL credentials * DeepSeek credentials * Demio credentials * DFIR-IRIS credentials * DHL credentials * Discord credentials * Discourse credentials * Disqus credentials * Drift credentials * Dropbox credentials * Dropcontact credentials * Dynatrace credentials * E-goi credentials * Elasticsearch credentials * Elastic Security credentials * Emelia credentials * ERPNext credentials * Eventbrite credentials * F5 Big-IP credentials * Facebook App credentials * Facebook Graph API credentials * Facebook Lead Ads credentials * Figma credentials * FileMaker credentials * Filescan credentials * Flow credentials * Form.io Trigger credentials * Formstack Trigger credentials * Fortinet FortiGate credentials * Freshdesk credentials * Freshservice credentials * Freshworks CRM credentials * FTP credentials * GetResponse credentials * Ghost credentials * Git credentials * GitHub credentials * GitLab credentials * Gong credentials * Google * Google OAuth2 single service * Google OAuth2 generic * Google Service Account * Google Gemini(PaLM) credentials * Gotify credentials * GoToWebinar credentials * Grafana credentials * Grist credentials * Groq credentials * Gumroad credentials * HaloPSA credentials * Harvest credentials * Help Scout credentials * HighLevel credentials * Home Assistant credentials * HTTP Request credentials * HubSpot credentials * Hugging Face credentials * Humantic AI credentials * Hunter credentials * Hybrid Analysis credentials * IMAP * Gmail * Outlook.com * Yahoo * Imperva WAF credentials * Intercom credentials * Invoice Ninja credentials * Iterable credentials * Jenkins credentials * Jira credentials * JotForm credentials * JWT credentials * Kafka credentials * Keap credentials * Kibana credentials * Kitemaker credentials * KoboToolbox credentials * LDAP credentials * Lemlist credentials * Line credentials * Linear credentials * LingvaNex credentials * LinkedIn credentials * LoneScale credentials * Magento 2 credentials * Mailcheck credentials * Mailchimp credentials * MailerLite credentials * Mailgun credentials * Mailjet credentials * Malcore credentials * Mandrill credentials * Marketstack credentials * Matrix credentials * Mattermost credentials * Mautic credentials * Medium credentials * MessageBird credentials * Metabase credentials * Microsoft credentials * Microsoft Azure Monitor credentials * Microsoft Entra ID credentials * Microsoft SQL credentials * Milvus credentials * Mindee credentials * Miro credentials * MISP credentials * Mist credentials * Mistral Cloud credentials * Mocean credentials * monday.com credentials * MongoDB credentials * Monica CRM credentials * Motorhead credentials * MQTT credentials * MSG91 credentials * MySQL credentials * NASA credentials * Netlify credentials * Netscaler ADC credentials * Nextcloud credentials * NocoDB credentials * Notion credentials * npm credentials * Odoo credentials * Okta credentials * Ollama credentials * One Simple API credentials * Onfleet credentials * OpenAI credentials * OpenCTI credentials * OpenRouter credentials * OpenWeatherMap credentials * Oura credentials * Paddle credentials * PagerDuty credentials * PayPal credentials * Peekalink credentials * PhantomBuster credentials * Philips Hue credentials * Pinecone credentials * Pipedrive credentials * Plivo credentials * Postgres credentials * PostHog credentials * Postmark credentials * ProfitWell credentials * Pushbullet credentials * Pushcut credentials * Pushover credentials * QRadar credentials * Qdrant credentials * Qualys credentials * QuestDB credentials * Quick Base credentials * QuickBooks credentials * RabbitMQ credentials * Raindrop credentials * Rapid7 InsightVM credentials * Recorded Future credentials * Reddit credentials * Redis credentials * Rocket.Chat credentials * Rundeck credentials * S3 credentials * Salesforce credentials * Salesmate credentials * SeaTable credentials * SecurityScorecard credentials * Segment credentials * Sekoia credentials * Send Email * Gmail * Outlook.com * Yahoo * SendGrid credentials * Sendy credentials * Sentry.io credentials * Serp credentials * ServiceNow credentials * seven credentials * Shopify credentials * Shuffler credentials * SIGNL4 credentials * Slack credentials * Snowflake credentials * SolarWinds IPAM credentials * SolarWinds Observability SaaS credentials * Splunk credentials * Spontit credentials * Spotify credentials * SSH credentials * Stackby credentials * Storyblok credentials * Strapi credentials * Strava credentials * Stripe credentials * Supabase credentials * SurveyMonkey credentials * SyncroMSP credentials * Sysdig credentials * Taiga credentials * Tapfiliate credentials * Telegram credentials * TheHive credentials * TheHive 5 credentials * TimescaleDB credentials * Todoist credentials * Toggl credentials * TOTP credentials * Travis CI credentials * Trellix ePO credentials * Trello credentials * Twake credentials * Twilio credentials * Twist credentials * Typeform credentials * Unleashed Software credentials * UpLead credentials * uProc credentials * UptimeRobot credentials * urlscan.io credentials * Venafi TLS Protect Cloud credentials * Venafi TLS Protect Datacenter credentials * Vero credentials * VirusTotal credentials * Vonage credentials * Webex by Cisco credentials * Webflow credentials * Webhook credentials * Wekan credentials * WhatsApp Business Cloud credentials * Wise credentials * Wolfram|Alpha credentials * WooCommerce credentials * WordPress credentials * Workable credentials * Wufoo credentials * X (formerly Twitter) credentials * Xata credentials * Xero credentials * Yourls credentials * Zabbix credentials * Zammad credentials * Zendesk credentials * Zep credentials * Zoho credentials * Zoom credentials * Zscaler ZIA credentials * Zulip credentials * Custom API actions for existing nodes * Handle rate limits * Community nodes Community nodes * Installation and management * GUI installation * Manual installation * Risks * Blocklist * Using community nodes * Troubleshooting * Building community nodes * Creating nodes Creating nodes * Overview * Plan your node * Choose a node type * Choose a node building style * Node UI design * Choose node file structure * Build your node * Set up your development environment * Tutorial: Build a declarative-style node * Tutorial: Build a programmatic-style node * Reference * Node UI elements * Code standards * Versioning * Choose node file structure * Base files * Structure * Standard parameters * Declarative-style parameters * Programmatic-style parameters * Programmatic-style execute method * Codex files * Credentials files * HTTP request helpers * Item linking * Test your node * Run your node locally * Node linter * Troubleshooting * Deploy your node * Submit community nodes * Install private nodes * Hosting n8n * Community vs Enterprise * Installation Installation * npm * Docker * Server setups * Digital Ocean * Heroku * Hetzner * Amazon Web Services * Azure * Google Cloud * Docker Compose * Updating * Configuration Configuration * Environment variables * Binary data * Credentials * Database * Deployment * Endpoints * Executions * External data storage * External hooks * External secrets * Logs * License * Nodes * Queue mode * Security * Source control * Task runners * Timezone and localization * User management and 2FA * Workflows * Configuration methods * Configuration examples * Isolate n8n * Configure the Base URL * Configure custom SSL certificate authorities * Set a custom encryption key * Configure workflow timeouts * Specify custom nodes location * Enable modules in Code node * Set the timezone * Specify user folder path * Configure webhook URLs with reverse proxy * Enable Prometheus metrics * Supported databases and settings * Task runners * User management * Logging and monitoring Logging and monitoring * Logging * Monitoring * Security audit * Scaling and performance Scaling and performance * Overview * Performance and benchmarking * Configuring queue mode * Concurrency control * Execution data * Binary data * External storage for binary data * Memory-related errors * Securing n8n Securing n8n * Overview * Set up SSL * Set up SSO * Security audit * Disable the API * Opt out of data collection * Blocking nodes * Hardening task runners * Starter Kits Starter Kits * AI Starter Kit * Architecture Architecture * Overview * Database structure * Using the CLI Using the CLI * CLI commands * Code in n8n * Expressions * Using the Code node * AI coding * Built in methods and variables Built in methods and variables * Overview * Current node input * Output of other nodes * Date and time * JMESPath * HTTP node * LangChain Code node * n8n metadata * Convenience methods * Data transformation functions * Arrays * Booleans * Dates * Numbers * Objects * Strings * Custom variables Custom variables * Create custom variables * Cookbook Cookbook * Handling dates * Query JSON with JMESPath * Built-in methods and variables examples * execution * getWorkflowStaticData * Retrieve linked items from earlier in the workflow * (node-name).all * vars * Expressions * Check incoming data * Common issues * Code node * Get number of items returned by last node * Get the binary data buffer * Output to the browser console * HTTP Request node * Pagination * Advanced AI * Tutorial: Build an AI workflow in n8n * LangChain in n8n LangChain in n8n * Overview * Langchain concepts in n8n * LangChain learning resources * Use LangSmith with n8n * Examples and concepts Examples and concepts * Introduction * What is a chain? * What is an agent? * Agents vs chains example * What is memory? * What is a tool? * Use Google Sheets as a data source * Call an API to fetch data * Set a human fallback for AI workflows * Let AI specify tool parameters * What is a vector database? * Populate a Pinecone vector database from a website * API * Authentication * Pagination * Using the API playground * API reference * Embed * Prerequisites * Deployment * Configuration * Workflow management * Workflows templates * White labelling 1. Integrations 2. Built-in nodes 3. Triggers Toggl is a time tracking app that offers online time tracking and reporting services through their website along with mobile and desktop applications. Credentials You can find authentication information for this node here. --- ## Page: https://docs.n8n.io/integrations/builtin/trigger-nodes/n8n-nodes-base.trellotrigger/ Trello is a web-based Kanban-style list-making application which is a subsidiary of Atlassian. Users can create their task boards with different columns and move the tasks between them. Credentials You can find authentication information for this node here. ## Find the Model ID# The model ID is the ID of any model in Trello. Depending on the use-case, it could be the User ID, List ID, and so on. For this specific example, the List ID would be the Model ID: 1. Open the Trello board that contains the list. 2. If the list doesn't have any cards, add a card to the list. 3. Open the card, add `.json` at the end of the URL, and press enter. 4. In the JSON file, you will see a field called `idList`. 5. Copy `idList`and paste it in the **Model ID** field in n8n. --- ## Page: https://docs.n8n.io/integrations/builtin/trigger-nodes/n8n-nodes-base.twiliotrigger/ Use the Twilio Trigger node to respond to events in Twilio and integrate Twilio with other applications. n8n has built-in support for a wide range of Twilio events, including new SMS and calls. On this page, you'll find a list of events the Twilio Trigger node can respond to and links to more resources. Credentials You can find authentication information for this node here. Examples and templates For usage examples and templates to help you get started, refer to n8n's Twilio integrations page. ## Events# * On New SMS * On New Call New Call Delay It can take Twilio up to thirty minutes to generate a summary for a completed call. n8n provides an app node for Twilio. You can find the node docs here. View example workflows and related content on n8n's website. Refer to Twilio's documentation for details about their API. --- ## Page: https://docs.n8n.io/integrations/builtin/trigger-nodes/n8n-nodes-base.typeformtrigger/ n8n Docs * Using n8n * Getting started Getting started * Learning path * Choose your n8n * Quickstarts * A very quick quickstart * A longer introduction * Video courses * Text courses * Level one * Navigating the editor UI * Building a mini-workflow * Automating a (real-world) use case * Designing the workflow * Building the workflow Building the workflow * Getting data from the data warehouse * Inserting data into airtable * Filtering orders * Setting values for processing orders * Calculating booked orders * Notifying the team * Scheduling the workflow * Activating and examining the workflow * Exporting and importing workflows * Test your knowledge * Level two * Understanding the data structure * Processing different data types * Merging and splitting data * Dealing with errors in workflows * Automating a business workflow Automating a business workflow * Use case * Workflow 1 * Workflow 2 * Workflow 3 * Test your knowledge * Using the app Using the app * Understand workflows * Create and run * Components * Nodes * Connections * Sticky Notes * Executions * Manual, partial, and production executions * Workflow-level executions * All executions * Custom executions data * Debug executions * Tags * Export and import * Templates * Sharing * Settings * Workflow history * Workflow ID * Manage credentials * Create and edit * Credential sharing * Manage users and access * Cloud setup * Manage users * Account types * Role-based access control * Role types * Projects * Best practices * 2FA * LDAP * SAML * Set up SAML * Okta Workforce Identity SAML setup * Troubleshooting * Manage users with SAML * Keyboard shortcuts * Key concepts Key concepts * Flow logic * Splitting with conditionals * Merging data * Looping * Waiting * Sub-workflows * Error handling * Execution order in multi-branch workflows * Data * Data structure * Data flow within nodes * Transforming data * Process data using code * Data mapping * Data mapping in the UI * Data mapping in the expressions editor * Data item linking * Item linking concepts * Item linking in the Code node * Item linking errors * Item linking for node creators * Data pinning * Data editing * Data filtering * Data mocking * Binary data * Schema preview * Glossary * n8n Cloud n8n Cloud * Overview * Access the Cloud admin dashboard * Update your n8n Cloud version * Set the timezone * Cloud IP addresses * Cloud data management * Change ownership or username * Concurrency * AI Assistant * Enterprise features Enterprise features * Source control and environments * Understand * Environments * Git in n8n * Branch patterns * Set up * Using * Push and pull * Copy work between environments * Manage variables * Tutorial: Create environments with source control * External secrets * Log streaming * License key * Releases Releases * Release notes Release notes * 1.x * 0.x * v1.0 migration guide * Help and community Help and community * Where to get help * Contributing * Licenses and privacy Licenses and privacy * Privacy and security * Privacy * Security * Incident response * What you can do * Sustainable use license * Integrations * Built-in nodes Built-in nodes * Node types * Core nodes * Activation Trigger * Aggregate * AI Transform * Code * Keyboard shortcuts * Common issues * Compare Datasets * Compression * Chat Trigger * Common issues * Convert to File * Crypto * Date & Time * Debug Helper * Edit Fields (Set) * Edit Image * Email Trigger (IMAP) * Error Trigger * Execute Command * Common issues * Execute Sub-workflow * Execute Sub-workflow Trigger * Execution Data * Extract From File * Filter * FTP * Git * GraphQL * HTML * HTTP Request * Common issues * If * JWT * LDAP * Limit * Local File Trigger * Loop Over Items (Split in Batches) * Manual Trigger * Markdown * MCP Server Trigger * Merge * n8n * n8n Form * n8n Form Trigger * n8n Trigger * No Operation, do nothing * Read/Write Files from Disk * Remove Duplicates * Templates and examples * Rename Keys * Respond to Webhook * RSS Read * RSS Feed Trigger * Schedule Trigger * Common issues * Send Email * Sort * Split Out * SSE Trigger * SSH * Stop And Error * Summarize * Switch * TOTP * Wait * Webhook * Workflow development * Common issues * Workflow Trigger * XML * Actions * Action Network * ActiveCampaign * Adalo * Affinity * Agile CRM * Airtable * Common issues * Airtop * AMQP Sender * APITemplate.io * Asana * Automizy * Autopilot * AWS Certificate Manager * AWS Comprehend * AWS DynamoDB * AWS Elastic Load Balancing * AWS Lambda * AWS Rekognition * AWS S3 * AWS SES * AWS SNS * AWS SQS * AWS Textract * AWS Transcribe * Azure Storage * BambooHR * Bannerbear * Baserow * Beeminder * Bitly * Bitwarden * Box * Brandfetch * Brevo * Bubble * Chargebee * CircleCI * Webex by Cisco * Clearbit * ClickUp * Clockify * Cloudflare * Cockpit * Coda * CoinGecko * Contentful * ConvertKit * Copper * Cortex * CrateDB * crowd.dev * Customer.io * DeepL * Demio * DHL * Discord * Common issues * Discourse * Disqus * Drift * Dropbox * Dropcontact * E-goi * Elasticsearch * Elastic Security * Emelia * ERPNext * Facebook Graph API * FileMaker * Flow * Freshdesk * Freshservice * Freshworks CRM * GetResponse * Ghost * GitHub * GitLab * Gmail * Draft operations * Label operations * Message operations * Thread operations * Common issues * Gong * Google Ads * Google Analytics * Google BigQuery * Google Books * Google Business Profile * Google Calendar * Calendar operations * Event operations * Google Chat * Google Cloud Firestore * Google Cloud Natural Language * Google Cloud Realtime Database * Google Cloud Storage * Google Contacts * Google Docs * Google Drive * File operations * File and folder operations * Folder operations * Shared drive operations * Common issues * Google Perspective * Google Sheets * Document operations * Sheet within Document operations * Common issues * Google Slides * Google Tasks * Google Translate * Google Workspace Admin * Gotify * GoToWebinar * Grafana * Grist * Hacker News * HaloPSA * Harvest * Help Scout * HighLevel * Home Assistant * HubSpot * Humantic AI * Hunter * Intercom * Invoice Ninja * Iterable * Jenkins * Jira Software * Kafka * Keap * Kitemaker * KoboToolbox * Lemlist * Line * Linear * LingvaNex * LinkedIn * LoneScale * Magento 2 * Mailcheck * Mailchimp * MailerLite * Mailgun * Mailjet * Mandrill * marketstack * Matrix * Mattermost * Mautic * Medium * MessageBird * Metabase * Microsoft Dynamics CRM * Microsoft Entra ID * Microsoft Excel 365 * Microsoft Graph Security * Microsoft OneDrive * Microsoft Outlook * Microsoft SQL * Microsoft Teams * Microsoft To Do * Mindee * MISP * Mocean * monday.com * MongoDB * Monica CRM * MQTT * MSG91 * MySQL * Common issues * Customer Datastore (n8n Training) * Customer Messenger (n8n Training) * NASA * Netlify * Netscaler ADC * Nextcloud * NocoDB * Notion * Common issues * npm * Odoo * Okta * One Simple API * Onfleet * OpenAI * Assistant operations * Audio operations * File operations * Image operations * Text operations * Common issues * OpenThesaurus * OpenWeatherMap * Oura * Paddle * PagerDuty * PayPal * Peekalink * PhantomBuster * Philips Hue * Pipedrive * Plivo * PostBin * Postgres * Common issues * PostHog * ProfitWell * Pushbullet * Pushcut * Pushover * QuestDB * Quick Base * QuickBooks Online * QuickChart * RabbitMQ * Raindrop * Reddit * Redis * Rocket.Chat * Rundeck * S3 * Salesforce * Salesmate * SeaTable * SecurityScorecard * Segment * SendGrid * Sendy * Sentry.io * ServiceNow * seven * Shopify * SIGNL4 * Slack * Snowflake * Splunk * Spontit * Spotify * Stackby * Storyblok * Strapi * Strava * Stripe * Supabase * Common issues * SyncroMSP * Taiga * Tapfiliate * Telegram * Chat operations * Callback operations * File operations * Message operations * Common issues * TheHive * TheHive 5 * TimescaleDB * Todoist * Travis CI * Trello * Twake * Twilio * Twist * Unleashed Software * UpLead * uProc * UptimeRobot * urlscan.io * Venafi TLS Protect Cloud * Venafi TLS Protect Datacenter * Vero * Vonage * Webflow * Wekan * WhatsApp Business Cloud * Common issues * Wise * WooCommerce * WordPress * X (Formerly Twitter) * Xero * Yourls * YouTube * Zammad * Zendesk * Zoho CRM * Zoom * Zulip * Triggers * ActiveCampaign Trigger * Acuity Scheduling Trigger * Affinity Trigger * Airtable Trigger * AMQP Trigger * Asana Trigger * Autopilot Trigger * AWS SNS Trigger * Bitbucket Trigger * Box Trigger * Brevo Trigger * Calendly Trigger * Cal Trigger * Chargebee Trigger * ClickUp Trigger * Clockify Trigger * ConvertKit Trigger * Copper Trigger * crowd.dev Trigger * Customer.io Trigger * Emelia Trigger * Eventbrite Trigger * Facebook Lead Ads Trigger * Facebook Trigger * Ad Account * Application * Certificate Transparency * Group * Instagram * Link * Page * Permissions * User * WhatsApp Business Account * Workplace Security * Figma Trigger (Beta) * Flow Trigger * Form.io Trigger * Formstack Trigger * GetResponse Trigger * GitHub Trigger * GitLab Trigger * Gmail Trigger * Poll Mode options * Common issues * Google Calendar Trigger * Google Drive Trigger * Common issues * Google Business Profile Trigger * Google Sheets Trigger * Common issues * Gumroad Trigger * Help Scout Trigger * Hubspot Trigger * Invoice Ninja Trigger * Jira Trigger * JotForm Trigger * Kafka Trigger * Keap Trigger * KoboToolbox Trigger * Lemlist Trigger * Linear Trigger * LoneScale Trigger * Mailchimp Trigger * MailerLite Trigger * Mailjet Trigger * Mautic Trigger * Microsoft OneDrive Trigger * Microsoft Outlook Trigger * MQTT Trigger * Netlify Trigger * Notion Trigger * Onfleet Trigger * PayPal Trigger * Pipedrive Trigger * Postgres Trigger * Postmark Trigger * Pushcut Trigger * RabbitMQ Trigger * Redis Trigger * Salesforce Trigger * SeaTable Trigger * Shopify Trigger * Slack Trigger * Strava Trigger * Stripe Trigger * SurveyMonkey Trigger * Taiga Trigger * Telegram Trigger * Common issues * TheHive 5 Trigger * TheHive Trigger * Toggl Trigger * Trello Trigger * Twilio Trigger * Typeform Trigger * Venafi TLS Protect Cloud Trigger * Webex by Cisco Trigger * Webflow Trigger * WhatsApp Trigger * Wise Trigger * WooCommerce Trigger * Workable Trigger * Wufoo Trigger * Zendesk Trigger * Cluster nodes * Root nodes * AI Agent * Conversational Agent * OpenAI Functions Agent * Plan and Execute Agent * ReAct Agent * SQL Agent * Tools Agent * Common issues * Basic LLM Chain * Question and Answer Chain * Common issues * Summarization Chain * Information Extractor * Text Classifier * Sentiment Analysis * LangChain Code * Simple Vector Store * Milvus Vector Store * MongoDB Atlas Vector Store * PGVector Vector Store * Pinecone Vector Store * Qdrant Vector Store * Supabase Vector Store * Zep Vector Store * Sub-nodes * Default Data Loader * GitHub Document Loader * Embeddings AWS Bedrock * Embeddings Azure OpenAI * Embeddings Cohere * Embeddings Google Gemini * Embeddings Google PaLM * Embeddings Google Vertex * Embeddings HuggingFace Inference * Embeddings Mistral Cloud * Embeddings Ollama * Embeddings OpenAI * Anthropic Chat Model * AWS Bedrock Chat Model * Azure OpenAI Chat Model * DeepSeek Chat Model * Google Gemini Chat Model * Google Vertex Chat Model * Groq Chat Model * Mistral Cloud Chat Model * Ollama Chat Model * Common issues * OpenAI Chat Model * Common issues * OpenRouter Chat Model * Cohere Model * Ollama Model * Common issues * Hugging Face Inference Model * Chat Memory Manager * Simple Memory * Common issues * Motorhead * MongoDB Chat Memory * Redis Chat Memory * Postgres Chat Memory * Xata * Zep * Auto-fixing Output Parser * Item List Output Parser * Structured Output Parser * Common issues * Contextual Compression Retriever * MultiQuery Retriever * Vector Store Retriever * Workflow Retriever * Character Text Splitter * Recursive Character Text Splitter * Token Splitter * Calculator * Custom Code Tool * HTTP Request Tool * MCP Client Tool * SerpApi (Google Search) * Think Tool * Vector Store Question Answer Tool * Wikipedia * Wolfram|Alpha * Custom n8n Workflow Tool * Credentials * Action Network credentials * ActiveCampaign credentials * Acuity Scheduling credentials * Adalo credentials * Affinity credentials * Agile CRM credentials * Airtable credentials * Airtop credentials * AlienVault credentials * AMQP credentials * Anthropic credentials * APITemplate.io credentials * Asana credentials * Auth0 Management credentials * Automizy credentials * Autopilot credentials * AWS credentials * Azure OpenAI credentials * Azure Storage credentials * BambooHR credentials * Bannerbear credentials * Baserow credentials * Beeminder credentials * Bitbucket credentials * Bitly credentials * Bitwarden credentials * Box credentials * Brandfetch credentials * Brevo credentials * Bubble credentials * Cal.com credentials * Calendly credentials * Carbon Black credentials * Chargebee credentials * CircleCI credentials * Cisco Meraki credentials * Cisco Secure Endpoint credentials * Cisco Umbrella credentials * Clearbit credentials * ClickUp credentials * Clockify credentials * Cloudflare credentials * Cockpit credentials * Coda credentials * Cohere credentials * Contentful credentials * ConvertAPI credentials * ConvertKit credentials * Copper credentials * Cortex credentials * CrateDB credentials * crowd.dev credentials * CrowdStrike credentials * Customer.io credentials * Datadog credentials * DeepL credentials * DeepSeek credentials * Demio credentials * DFIR-IRIS credentials * DHL credentials * Discord credentials * Discourse credentials * Disqus credentials * Drift credentials * Dropbox credentials * Dropcontact credentials * Dynatrace credentials * E-goi credentials * Elasticsearch credentials * Elastic Security credentials * Emelia credentials * ERPNext credentials * Eventbrite credentials * F5 Big-IP credentials * Facebook App credentials * Facebook Graph API credentials * Facebook Lead Ads credentials * Figma credentials * FileMaker credentials * Filescan credentials * Flow credentials * Form.io Trigger credentials * Formstack Trigger credentials * Fortinet FortiGate credentials * Freshdesk credentials * Freshservice credentials * Freshworks CRM credentials * FTP credentials * GetResponse credentials * Ghost credentials * Git credentials * GitHub credentials * GitLab credentials * Gong credentials * Google * Google OAuth2 single service * Google OAuth2 generic * Google Service Account * Google Gemini(PaLM) credentials * Gotify credentials * GoToWebinar credentials * Grafana credentials * Grist credentials * Groq credentials * Gumroad credentials * HaloPSA credentials * Harvest credentials * Help Scout credentials * HighLevel credentials * Home Assistant credentials * HTTP Request credentials * HubSpot credentials * Hugging Face credentials * Humantic AI credentials * Hunter credentials * Hybrid Analysis credentials * IMAP * Gmail * Outlook.com * Yahoo * Imperva WAF credentials * Intercom credentials * Invoice Ninja credentials * Iterable credentials * Jenkins credentials * Jira credentials * JotForm credentials * JWT credentials * Kafka credentials * Keap credentials * Kibana credentials * Kitemaker credentials * KoboToolbox credentials * LDAP credentials * Lemlist credentials * Line credentials * Linear credentials * LingvaNex credentials * LinkedIn credentials * LoneScale credentials * Magento 2 credentials * Mailcheck credentials * Mailchimp credentials * MailerLite credentials * Mailgun credentials * Mailjet credentials * Malcore credentials * Mandrill credentials * Marketstack credentials * Matrix credentials * Mattermost credentials * Mautic credentials * Medium credentials * MessageBird credentials * Metabase credentials * Microsoft credentials * Microsoft Azure Monitor credentials * Microsoft Entra ID credentials * Microsoft SQL credentials * Milvus credentials * Mindee credentials * Miro credentials * MISP credentials * Mist credentials * Mistral Cloud credentials * Mocean credentials * monday.com credentials * MongoDB credentials * Monica CRM credentials * Motorhead credentials * MQTT credentials * MSG91 credentials * MySQL credentials * NASA credentials * Netlify credentials * Netscaler ADC credentials * Nextcloud credentials * NocoDB credentials * Notion credentials * npm credentials * Odoo credentials * Okta credentials * Ollama credentials * One Simple API credentials * Onfleet credentials * OpenAI credentials * OpenCTI credentials * OpenRouter credentials * OpenWeatherMap credentials * Oura credentials * Paddle credentials * PagerDuty credentials * PayPal credentials * Peekalink credentials * PhantomBuster credentials * Philips Hue credentials * Pinecone credentials * Pipedrive credentials * Plivo credentials * Postgres credentials * PostHog credentials * Postmark credentials * ProfitWell credentials * Pushbullet credentials * Pushcut credentials * Pushover credentials * QRadar credentials * Qdrant credentials * Qualys credentials * QuestDB credentials * Quick Base credentials * QuickBooks credentials * RabbitMQ credentials * Raindrop credentials * Rapid7 InsightVM credentials * Recorded Future credentials * Reddit credentials * Redis credentials * Rocket.Chat credentials * Rundeck credentials * S3 credentials * Salesforce credentials * Salesmate credentials * SeaTable credentials * SecurityScorecard credentials * Segment credentials * Sekoia credentials * Send Email * Gmail * Outlook.com * Yahoo * SendGrid credentials * Sendy credentials * Sentry.io credentials * Serp credentials * ServiceNow credentials * seven credentials * Shopify credentials * Shuffler credentials * SIGNL4 credentials * Slack credentials * Snowflake credentials * SolarWinds IPAM credentials * SolarWinds Observability SaaS credentials * Splunk credentials * Spontit credentials * Spotify credentials * SSH credentials * Stackby credentials * Storyblok credentials * Strapi credentials * Strava credentials * Stripe credentials * Supabase credentials * SurveyMonkey credentials * SyncroMSP credentials * Sysdig credentials * Taiga credentials * Tapfiliate credentials * Telegram credentials * TheHive credentials * TheHive 5 credentials * TimescaleDB credentials * Todoist credentials * Toggl credentials * TOTP credentials * Travis CI credentials * Trellix ePO credentials * Trello credentials * Twake credentials * Twilio credentials * Twist credentials * Typeform credentials * Unleashed Software credentials * UpLead credentials * uProc credentials * UptimeRobot credentials * urlscan.io credentials * Venafi TLS Protect Cloud credentials * Venafi TLS Protect Datacenter credentials * Vero credentials * VirusTotal credentials * Vonage credentials * Webex by Cisco credentials * Webflow credentials * Webhook credentials * Wekan credentials * WhatsApp Business Cloud credentials * Wise credentials * Wolfram|Alpha credentials * WooCommerce credentials * WordPress credentials * Workable credentials * Wufoo credentials * X (formerly Twitter) credentials * Xata credentials * Xero credentials * Yourls credentials * Zabbix credentials * Zammad credentials * Zendesk credentials * Zep credentials * Zoho credentials * Zoom credentials * Zscaler ZIA credentials * Zulip credentials * Custom API actions for existing nodes * Handle rate limits * Community nodes Community nodes * Installation and management * GUI installation * Manual installation * Risks * Blocklist * Using community nodes * Troubleshooting * Building community nodes * Creating nodes Creating nodes * Overview * Plan your node * Choose a node type * Choose a node building style * Node UI design * Choose node file structure * Build your node * Set up your development environment * Tutorial: Build a declarative-style node * Tutorial: Build a programmatic-style node * Reference * Node UI elements * Code standards * Versioning * Choose node file structure * Base files * Structure * Standard parameters * Declarative-style parameters * Programmatic-style parameters * Programmatic-style execute method * Codex files * Credentials files * HTTP request helpers * Item linking * Test your node * Run your node locally * Node linter * Troubleshooting * Deploy your node * Submit community nodes * Install private nodes * Hosting n8n * Community vs Enterprise * Installation Installation * npm * Docker * Server setups * Digital Ocean * Heroku * Hetzner * Amazon Web Services * Azure * Google Cloud * Docker Compose * Updating * Configuration Configuration * Environment variables * Binary data * Credentials * Database * Deployment * Endpoints * Executions * External data storage * External hooks * External secrets * Logs * License * Nodes * Queue mode * Security * Source control * Task runners * Timezone and localization * User management and 2FA * Workflows * Configuration methods * Configuration examples * Isolate n8n * Configure the Base URL * Configure custom SSL certificate authorities * Set a custom encryption key * Configure workflow timeouts * Specify custom nodes location * Enable modules in Code node * Set the timezone * Specify user folder path * Configure webhook URLs with reverse proxy * Enable Prometheus metrics * Supported databases and settings * Task runners * User management * Logging and monitoring Logging and monitoring * Logging * Monitoring * Security audit * Scaling and performance Scaling and performance * Overview * Performance and benchmarking * Configuring queue mode * Concurrency control * Execution data * Binary data * External storage for binary data * Memory-related errors * Securing n8n Securing n8n * Overview * Set up SSL * Set up SSO * Security audit * Disable the API * Opt out of data collection * Blocking nodes * Hardening task runners * Starter Kits Starter Kits * AI Starter Kit * Architecture Architecture * Overview * Database structure * Using the CLI Using the CLI * CLI commands * Code in n8n * Expressions * Using the Code node * AI coding * Built in methods and variables Built in methods and variables * Overview * Current node input * Output of other nodes * Date and time * JMESPath * HTTP node * LangChain Code node * n8n metadata * Convenience methods * Data transformation functions * Arrays * Booleans * Dates * Numbers * Objects * Strings * Custom variables Custom variables * Create custom variables * Cookbook Cookbook * Handling dates * Query JSON with JMESPath * Built-in methods and variables examples * execution * getWorkflowStaticData * Retrieve linked items from earlier in the workflow * (node-name).all * vars * Expressions * Check incoming data * Common issues * Code node * Get number of items returned by last node * Get the binary data buffer * Output to the browser console * HTTP Request node * Pagination * Advanced AI * Tutorial: Build an AI workflow in n8n * LangChain in n8n LangChain in n8n * Overview * Langchain concepts in n8n * LangChain learning resources * Use LangSmith with n8n * Examples and concepts Examples and concepts * Introduction * What is a chain? * What is an agent? * Agents vs chains example * What is memory? * What is a tool? * Use Google Sheets as a data source * Call an API to fetch data * Set a human fallback for AI workflows * Let AI specify tool parameters * What is a vector database? * Populate a Pinecone vector database from a website * API * Authentication * Pagination * Using the API playground * API reference * Embed * Prerequisites * Deployment * Configuration * Workflow management * Workflows templates * White labelling 1. Integrations 2. Built-in nodes 3. Triggers Typeform is an online software as a service company that specializes in online form building and online surveys. Its main software creates dynamic forms based on user needs. Credentials You can find authentication information for this node here. --- ## Page: https://docs.n8n.io/integrations/builtin/trigger-nodes/n8n-nodes-base.venafitlsprotectcloudtrigger/ Venafi is a cybersecurity company providing services for machine identity management. They offer solutions to manage and protect identities for a wide range of machine types, delivering global visibility, lifecycle automation, and actionable intelligence. Use the n8n Venafi TLS Protect Cloud Trigger node to start a workflow in n8n in response to events in the cloud-based Venafi TLS Protect service. Credentials You can find authentication information for this node here. Examples and templates For usage examples and templates to help you get started, refer to n8n's Venafi TLS Protect Cloud Trigger integrations page. --- ## Page: https://docs.n8n.io/integrations/builtin/trigger-nodes/n8n-nodes-base.ciscowebextrigger/ Webex by Cisco is a web conferencing and videoconferencing application. Credentials You can find authentication information for this node here. --- ## Page: https://docs.n8n.io/integrations/builtin/trigger-nodes/n8n-nodes-base.webflowtrigger/ 1. Integrations 2. Built-in nodes 3. Triggers Webflow is an application that allows you to build responsive websites with browser-based visual editing software. Credentials You can find authentication information for this node here. Examples and templates For usage examples and templates to help you get started, refer to n8n's Webflow Trigger integrations page. --- ## Page: https://docs.n8n.io/integrations/builtin/trigger-nodes/n8n-nodes-base.whatsapptrigger/ Use the WhatsApp Trigger node to respond to events in WhatsApp and integrate WhatsApp with other applications. n8n has built-in support for a wide range of WhatsApp events, including account, message, and phone number events. On this page, you'll find a list of events the WhatsApp Trigger node can respond to, and links to more resources. Credentials You can find authentication information for this node here. Examples and templates For usage examples and templates to help you get started, refer to n8n's WhatsApp integrations page. ## Events# * Account Review Update * Account Update * Business Capability Update * Message Template Quality Update * Message Template Status Update * Messages * Phone Number Name Update * Phone Number Quality Update * Security * Template Category Update n8n provides an app node for WhatsApp. You can find the node docs here. View example workflows and related content on n8n's website. Refer to WhatsApp's documentation for details about their API. ## Common issues# Here are some common errors and issues with the WhatsApp Trigger node and steps to resolve or troubleshoot them. ### Workflow only works in testing or production# WhatsApp only allows you to register a single webhook per app. This means that every time you switch from using the testing URL to the production URL (and vice versa), WhatsApp overwrites the registered webhook URL. You may have trouble with this if you try to test a workflow that's also active in production. WhatsApp will only send events to one of the two webhook URLs, so the other will never receive event notifications. To work around this, you can disable your workflow when testing: Halts production traffic This workaround temporarily disables your production workflow for testing. Your workflow will no longer receive production traffic while it's deactivated. 1. Go to your workflow page. 2. Toggle the **Active** switch in the top panel to disable the workflow temporarily. 3. Test your workflow using the test webhook URL. 4. When you finish testing, toggle the **Inactive** toggle to enable the workflow again. The production webhook URL should resume working. --- ## Page: https://docs.n8n.io/integrations/builtin/trigger-nodes/n8n-nodes-base.wisetrigger/ Wise allows you to transfer money abroad with low-cost money transfers, receive money with international account details, and track transactions on your phone. Credentials You can find authentication information for this node here. Examples and templates For usage examples and templates to help you get started, refer to n8n's Wise Trigger integrations page. ## Events# * Triggered every time a balance account is credited * Triggered every time a balance account is credited or debited * Triggered every time a transfer's list of active cases is updated * Triggered every time a transfer's status is updated --- ## Page: https://docs.n8n.io/integrations/builtin/trigger-nodes/n8n-nodes-base.woocommercetrigger/ n8n Docs * Using n8n * Getting started Getting started * Learning path * Choose your n8n * Quickstarts * A very quick quickstart * A longer introduction * Video courses * Text courses * Level one * Navigating the editor UI * Building a mini-workflow * Automating a (real-world) use case * Designing the workflow * Building the workflow Building the workflow * Getting data from the data warehouse * Inserting data into airtable * Filtering orders * Setting values for processing orders * Calculating booked orders * Notifying the team * Scheduling the workflow * Activating and examining the workflow * Exporting and importing workflows * Test your knowledge * Level two * Understanding the data structure * Processing different data types * Merging and splitting data * Dealing with errors in workflows * Automating a business workflow Automating a business workflow * Use case * Workflow 1 * Workflow 2 * Workflow 3 * Test your knowledge * Using the app Using the app * Understand workflows * Create and run * Components * Nodes * Connections * Sticky Notes * Executions * Manual, partial, and production executions * Workflow-level executions * All executions * Custom executions data * Debug executions * Tags * Export and import * Templates * Sharing * Settings * Workflow history * Workflow ID * Manage credentials * Create and edit * Credential sharing * Manage users and access * Cloud setup * Manage users * Account types * Role-based access control * Role types * Projects * Best practices * 2FA * LDAP * SAML * Set up SAML * Okta Workforce Identity SAML setup * Troubleshooting * Manage users with SAML * Keyboard shortcuts * Key concepts Key concepts * Flow logic * Splitting with conditionals * Merging data * Looping * Waiting * Sub-workflows * Error handling * Execution order in multi-branch workflows * Data * Data structure * Data flow within nodes * Transforming data * Process data using code * Data mapping * Data mapping in the UI * Data mapping in the expressions editor * Data item linking * Item linking concepts * Item linking in the Code node * Item linking errors * Item linking for node creators * Data pinning * Data editing * Data filtering * Data mocking * Binary data * Schema preview * Glossary * n8n Cloud n8n Cloud * Overview * Access the Cloud admin dashboard * Update your n8n Cloud version * Set the timezone * Cloud IP addresses * Cloud data management * Change ownership or username * Concurrency * AI Assistant * Enterprise features Enterprise features * Source control and environments * Understand * Environments * Git in n8n * Branch patterns * Set up * Using * Push and pull * Copy work between environments * Manage variables * Tutorial: Create environments with source control * External secrets * Log streaming * License key * Releases Releases * Release notes Release notes * 1.x * 0.x * v1.0 migration guide * Help and community Help and community * Where to get help * Contributing * Licenses and privacy Licenses and privacy * Privacy and security * Privacy * Security * Incident response * What you can do * Sustainable use license * Integrations * Built-in nodes Built-in nodes * Node types * Core nodes * Activation Trigger * Aggregate * AI Transform * Code * Keyboard shortcuts * Common issues * Compare Datasets * Compression * Chat Trigger * Common issues * Convert to File * Crypto * Date & Time * Debug Helper * Edit Fields (Set) * Edit Image * Email Trigger (IMAP) * Error Trigger * Execute Command * Common issues * Execute Sub-workflow * Execute Sub-workflow Trigger * Execution Data * Extract From File * Filter * FTP * Git * GraphQL * HTML * HTTP Request * Common issues * If * JWT * LDAP * Limit * Local File Trigger * Loop Over Items (Split in Batches) * Manual Trigger * Markdown * MCP Server Trigger * Merge * n8n * n8n Form * n8n Form Trigger * n8n Trigger * No Operation, do nothing * Read/Write Files from Disk * Remove Duplicates * Templates and examples * Rename Keys * Respond to Webhook * RSS Read * RSS Feed Trigger * Schedule Trigger * Common issues * Send Email * Sort * Split Out * SSE Trigger * SSH * Stop And Error * Summarize * Switch * TOTP * Wait * Webhook * Workflow development * Common issues * Workflow Trigger * XML * Actions * Action Network * ActiveCampaign * Adalo * Affinity * Agile CRM * Airtable * Common issues * Airtop * AMQP Sender * APITemplate.io * Asana * Automizy * Autopilot * AWS Certificate Manager * AWS Comprehend * AWS DynamoDB * AWS Elastic Load Balancing * AWS Lambda * AWS Rekognition * AWS S3 * AWS SES * AWS SNS * AWS SQS * AWS Textract * AWS Transcribe * Azure Storage * BambooHR * Bannerbear * Baserow * Beeminder * Bitly * Bitwarden * Box * Brandfetch * Brevo * Bubble * Chargebee * CircleCI * Webex by Cisco * Clearbit * ClickUp * Clockify * Cloudflare * Cockpit * Coda * CoinGecko * Contentful * ConvertKit * Copper * Cortex * CrateDB * crowd.dev * Customer.io * DeepL * Demio * DHL * Discord * Common issues * Discourse * Disqus * Drift * Dropbox * Dropcontact * E-goi * Elasticsearch * Elastic Security * Emelia * ERPNext * Facebook Graph API * FileMaker * Flow * Freshdesk * Freshservice * Freshworks CRM * GetResponse * Ghost * GitHub * GitLab * Gmail * Draft operations * Label operations * Message operations * Thread operations * Common issues * Gong * Google Ads * Google Analytics * Google BigQuery * Google Books * Google Business Profile * Google Calendar * Calendar operations * Event operations * Google Chat * Google Cloud Firestore * Google Cloud Natural Language * Google Cloud Realtime Database * Google Cloud Storage * Google Contacts * Google Docs * Google Drive * File operations * File and folder operations * Folder operations * Shared drive operations * Common issues * Google Perspective * Google Sheets * Document operations * Sheet within Document operations * Common issues * Google Slides * Google Tasks * Google Translate * Google Workspace Admin * Gotify * GoToWebinar * Grafana * Grist * Hacker News * HaloPSA * Harvest * Help Scout * HighLevel * Home Assistant * HubSpot * Humantic AI * Hunter * Intercom * Invoice Ninja * Iterable * Jenkins * Jira Software * Kafka * Keap * Kitemaker * KoboToolbox * Lemlist * Line * Linear * LingvaNex * LinkedIn * LoneScale * Magento 2 * Mailcheck * Mailchimp * MailerLite * Mailgun * Mailjet * Mandrill * marketstack * Matrix * Mattermost * Mautic * Medium * MessageBird * Metabase * Microsoft Dynamics CRM * Microsoft Entra ID * Microsoft Excel 365 * Microsoft Graph Security * Microsoft OneDrive * Microsoft Outlook * Microsoft SQL * Microsoft Teams * Microsoft To Do * Mindee * MISP * Mocean * monday.com * MongoDB * Monica CRM * MQTT * MSG91 * MySQL * Common issues * Customer Datastore (n8n Training) * Customer Messenger (n8n Training) * NASA * Netlify * Netscaler ADC * Nextcloud * NocoDB * Notion * Common issues * npm * Odoo * Okta * One Simple API * Onfleet * OpenAI * Assistant operations * Audio operations * File operations * Image operations * Text operations * Common issues * OpenThesaurus * OpenWeatherMap * Oura * Paddle * PagerDuty * PayPal * Peekalink * PhantomBuster * Philips Hue * Pipedrive * Plivo * PostBin * Postgres * Common issues * PostHog * ProfitWell * Pushbullet * Pushcut * Pushover * QuestDB * Quick Base * QuickBooks Online * QuickChart * RabbitMQ * Raindrop * Reddit * Redis * Rocket.Chat * Rundeck * S3 * Salesforce * Salesmate * SeaTable * SecurityScorecard * Segment * SendGrid * Sendy * Sentry.io * ServiceNow * seven * Shopify * SIGNL4 * Slack * Snowflake * Splunk * Spontit * Spotify * Stackby * Storyblok * Strapi * Strava * Stripe * Supabase * Common issues * SyncroMSP * Taiga * Tapfiliate * Telegram * Chat operations * Callback operations * File operations * Message operations * Common issues * TheHive * TheHive 5 * TimescaleDB * Todoist * Travis CI * Trello * Twake * Twilio * Twist * Unleashed Software * UpLead * uProc * UptimeRobot * urlscan.io * Venafi TLS Protect Cloud * Venafi TLS Protect Datacenter * Vero * Vonage * Webflow * Wekan * WhatsApp Business Cloud * Common issues * Wise * WooCommerce * WordPress * X (Formerly Twitter) * Xero * Yourls * YouTube * Zammad * Zendesk * Zoho CRM * Zoom * Zulip * Triggers * ActiveCampaign Trigger * Acuity Scheduling Trigger * Affinity Trigger * Airtable Trigger * AMQP Trigger * Asana Trigger * Autopilot Trigger * AWS SNS Trigger * Bitbucket Trigger * Box Trigger * Brevo Trigger * Calendly Trigger * Cal Trigger * Chargebee Trigger * ClickUp Trigger * Clockify Trigger * ConvertKit Trigger * Copper Trigger * crowd.dev Trigger * Customer.io Trigger * Emelia Trigger * Eventbrite Trigger * Facebook Lead Ads Trigger * Facebook Trigger * Ad Account * Application * Certificate Transparency * Group * Instagram * Link * Page * Permissions * User * WhatsApp Business Account * Workplace Security * Figma Trigger (Beta) * Flow Trigger * Form.io Trigger * Formstack Trigger * GetResponse Trigger * GitHub Trigger * GitLab Trigger * Gmail Trigger * Poll Mode options * Common issues * Google Calendar Trigger * Google Drive Trigger * Common issues * Google Business Profile Trigger * Google Sheets Trigger * Common issues * Gumroad Trigger * Help Scout Trigger * Hubspot Trigger * Invoice Ninja Trigger * Jira Trigger * JotForm Trigger * Kafka Trigger * Keap Trigger * KoboToolbox Trigger * Lemlist Trigger * Linear Trigger * LoneScale Trigger * Mailchimp Trigger * MailerLite Trigger * Mailjet Trigger * Mautic Trigger * Microsoft OneDrive Trigger * Microsoft Outlook Trigger * MQTT Trigger * Netlify Trigger * Notion Trigger * Onfleet Trigger * PayPal Trigger * Pipedrive Trigger * Postgres Trigger * Postmark Trigger * Pushcut Trigger * RabbitMQ Trigger * Redis Trigger * Salesforce Trigger * SeaTable Trigger * Shopify Trigger * Slack Trigger * Strava Trigger * Stripe Trigger * SurveyMonkey Trigger * Taiga Trigger * Telegram Trigger * Common issues * TheHive 5 Trigger * TheHive Trigger * Toggl Trigger * Trello Trigger * Twilio Trigger * Typeform Trigger * Venafi TLS Protect Cloud Trigger * Webex by Cisco Trigger * Webflow Trigger * WhatsApp Trigger * Wise Trigger * WooCommerce Trigger WooCommerce Trigger Table of contents * Events * Workable Trigger * Wufoo Trigger * Zendesk Trigger * Cluster nodes * Root nodes * AI Agent * Conversational Agent * OpenAI Functions Agent * Plan and Execute Agent * ReAct Agent * SQL Agent * Tools Agent * Common issues * Basic LLM Chain * Question and Answer Chain * Common issues * Summarization Chain * Information Extractor * Text Classifier * Sentiment Analysis * LangChain Code * Simple Vector Store * Milvus Vector Store * MongoDB Atlas Vector Store * PGVector Vector Store * Pinecone Vector Store * Qdrant Vector Store * Supabase Vector Store * Zep Vector Store * Sub-nodes * Default Data Loader * GitHub Document Loader * Embeddings AWS Bedrock * Embeddings Azure OpenAI * Embeddings Cohere * Embeddings Google Gemini * Embeddings Google PaLM * Embeddings Google Vertex * Embeddings HuggingFace Inference * Embeddings Mistral Cloud * Embeddings Ollama * Embeddings OpenAI * Anthropic Chat Model * AWS Bedrock Chat Model * Azure OpenAI Chat Model * DeepSeek Chat Model * Google Gemini Chat Model * Google Vertex Chat Model * Groq Chat Model * Mistral Cloud Chat Model * Ollama Chat Model * Common issues * OpenAI Chat Model * Common issues * OpenRouter Chat Model * Cohere Model * Ollama Model * Common issues * Hugging Face Inference Model * Chat Memory Manager * Simple Memory * Common issues * Motorhead * MongoDB Chat Memory * Redis Chat Memory * Postgres Chat Memory * Xata * Zep * Auto-fixing Output Parser * Item List Output Parser * Structured Output Parser * Common issues * Contextual Compression Retriever * MultiQuery Retriever * Vector Store Retriever * Workflow Retriever * Character Text Splitter * Recursive Character Text Splitter * Token Splitter * Calculator * Custom Code Tool * HTTP Request Tool * MCP Client Tool * SerpApi (Google Search) * Think Tool * Vector Store Question Answer Tool * Wikipedia * Wolfram|Alpha * Custom n8n Workflow Tool * Credentials * Action Network credentials * ActiveCampaign credentials * Acuity Scheduling credentials * Adalo credentials * Affinity credentials * Agile CRM credentials * Airtable credentials * Airtop credentials * AlienVault credentials * AMQP credentials * Anthropic credentials * APITemplate.io credentials * Asana credentials * Auth0 Management credentials * Automizy credentials * Autopilot credentials * AWS credentials * Azure OpenAI credentials * Azure Storage credentials * BambooHR credentials * Bannerbear credentials * Baserow credentials * Beeminder credentials * Bitbucket credentials * Bitly credentials * Bitwarden credentials * Box credentials * Brandfetch credentials * Brevo credentials * Bubble credentials * Cal.com credentials * Calendly credentials * Carbon Black credentials * Chargebee credentials * CircleCI credentials * Cisco Meraki credentials * Cisco Secure Endpoint credentials * Cisco Umbrella credentials * Clearbit credentials * ClickUp credentials * Clockify credentials * Cloudflare credentials * Cockpit credentials * Coda credentials * Cohere credentials * Contentful credentials * ConvertAPI credentials * ConvertKit credentials * Copper credentials * Cortex credentials * CrateDB credentials * crowd.dev credentials * CrowdStrike credentials * Customer.io credentials * Datadog credentials * DeepL credentials * DeepSeek credentials * Demio credentials * DFIR-IRIS credentials * DHL credentials * Discord credentials * Discourse credentials * Disqus credentials * Drift credentials * Dropbox credentials * Dropcontact credentials * Dynatrace credentials * E-goi credentials * Elasticsearch credentials * Elastic Security credentials * Emelia credentials * ERPNext credentials * Eventbrite credentials * F5 Big-IP credentials * Facebook App credentials * Facebook Graph API credentials * Facebook Lead Ads credentials * Figma credentials * FileMaker credentials * Filescan credentials * Flow credentials * Form.io Trigger credentials * Formstack Trigger credentials * Fortinet FortiGate credentials * Freshdesk credentials * Freshservice credentials * Freshworks CRM credentials * FTP credentials * GetResponse credentials * Ghost credentials * Git credentials * GitHub credentials * GitLab credentials * Gong credentials * Google * Google OAuth2 single service * Google OAuth2 generic * Google Service Account * Google Gemini(PaLM) credentials * Gotify credentials * GoToWebinar credentials * Grafana credentials * Grist credentials * Groq credentials * Gumroad credentials * HaloPSA credentials * Harvest credentials * Help Scout credentials * HighLevel credentials * Home Assistant credentials * HTTP Request credentials * HubSpot credentials * Hugging Face credentials * Humantic AI credentials * Hunter credentials * Hybrid Analysis credentials * IMAP * Gmail * Outlook.com * Yahoo * Imperva WAF credentials * Intercom credentials * Invoice Ninja credentials * Iterable credentials * Jenkins credentials * Jira credentials * JotForm credentials * JWT credentials * Kafka credentials * Keap credentials * Kibana credentials * Kitemaker credentials * KoboToolbox credentials * LDAP credentials * Lemlist credentials * Line credentials * Linear credentials * LingvaNex credentials * LinkedIn credentials * LoneScale credentials * Magento 2 credentials * Mailcheck credentials * Mailchimp credentials * MailerLite credentials * Mailgun credentials * Mailjet credentials * Malcore credentials * Mandrill credentials * Marketstack credentials * Matrix credentials * Mattermost credentials * Mautic credentials * Medium credentials * MessageBird credentials * Metabase credentials * Microsoft credentials * Microsoft Azure Monitor credentials * Microsoft Entra ID credentials * Microsoft SQL credentials * Milvus credentials * Mindee credentials * Miro credentials * MISP credentials * Mist credentials * Mistral Cloud credentials * Mocean credentials * monday.com credentials * MongoDB credentials * Monica CRM credentials * Motorhead credentials * MQTT credentials * MSG91 credentials * MySQL credentials * NASA credentials * Netlify credentials * Netscaler ADC credentials * Nextcloud credentials * NocoDB credentials * Notion credentials * npm credentials * Odoo credentials * Okta credentials * Ollama credentials * One Simple API credentials * Onfleet credentials * OpenAI credentials * OpenCTI credentials * OpenRouter credentials * OpenWeatherMap credentials * Oura credentials * Paddle credentials * PagerDuty credentials * PayPal credentials * Peekalink credentials * PhantomBuster credentials * Philips Hue credentials * Pinecone credentials * Pipedrive credentials * Plivo credentials * Postgres credentials * PostHog credentials * Postmark credentials * ProfitWell credentials * Pushbullet credentials * Pushcut credentials * Pushover credentials * QRadar credentials * Qdrant credentials * Qualys credentials * QuestDB credentials * Quick Base credentials * QuickBooks credentials * RabbitMQ credentials * Raindrop credentials * Rapid7 InsightVM credentials * Recorded Future credentials * Reddit credentials * Redis credentials * Rocket.Chat credentials * Rundeck credentials * S3 credentials * Salesforce credentials * Salesmate credentials * SeaTable credentials * SecurityScorecard credentials * Segment credentials * Sekoia credentials * Send Email * Gmail * Outlook.com * Yahoo * SendGrid credentials * Sendy credentials * Sentry.io credentials * Serp credentials * ServiceNow credentials * seven credentials * Shopify credentials * Shuffler credentials * SIGNL4 credentials * Slack credentials * Snowflake credentials * SolarWinds IPAM credentials * SolarWinds Observability SaaS credentials * Splunk credentials * Spontit credentials * Spotify credentials * SSH credentials * Stackby credentials * Storyblok credentials * Strapi credentials * Strava credentials * Stripe credentials * Supabase credentials * SurveyMonkey credentials * SyncroMSP credentials * Sysdig credentials * Taiga credentials * Tapfiliate credentials * Telegram credentials * TheHive credentials * TheHive 5 credentials * TimescaleDB credentials * Todoist credentials * Toggl credentials * TOTP credentials * Travis CI credentials * Trellix ePO credentials * Trello credentials * Twake credentials * Twilio credentials * Twist credentials * Typeform credentials * Unleashed Software credentials * UpLead credentials * uProc credentials * UptimeRobot credentials * urlscan.io credentials * Venafi TLS Protect Cloud credentials * Venafi TLS Protect Datacenter credentials * Vero credentials * VirusTotal credentials * Vonage credentials * Webex by Cisco credentials * Webflow credentials * Webhook credentials * Wekan credentials * WhatsApp Business Cloud credentials * Wise credentials * Wolfram|Alpha credentials * WooCommerce credentials * WordPress credentials * Workable credentials * Wufoo credentials * X (formerly Twitter) credentials * Xata credentials * Xero credentials * Yourls credentials * Zabbix credentials * Zammad credentials * Zendesk credentials * Zep credentials * Zoho credentials * Zoom credentials * Zscaler ZIA credentials * Zulip credentials * Custom API actions for existing nodes * Handle rate limits * Community nodes Community nodes * Installation and management * GUI installation * Manual installation * Risks * Blocklist * Using community nodes * Troubleshooting * Building community nodes * Creating nodes Creating nodes * Overview * Plan your node * Choose a node type * Choose a node building style * Node UI design * Choose node file structure * Build your node * Set up your development environment * Tutorial: Build a declarative-style node * Tutorial: Build a programmatic-style node * Reference * Node UI elements * Code standards * Versioning * Choose node file structure * Base files * Structure * Standard parameters * Declarative-style parameters * Programmatic-style parameters * Programmatic-style execute method * Codex files * Credentials files * HTTP request helpers * Item linking * Test your node * Run your node locally * Node linter * Troubleshooting * Deploy your node * Submit community nodes * Install private nodes * Hosting n8n * Community vs Enterprise * Installation Installation * npm * Docker * Server setups * Digital Ocean * Heroku * Hetzner * Amazon Web Services * Azure * Google Cloud * Docker Compose * Updating * Configuration Configuration * Environment variables * Binary data * Credentials * Database * Deployment * Endpoints * Executions * External data storage * External hooks * External secrets * Logs * License * Nodes * Queue mode * Security * Source control * Task runners * Timezone and localization * User management and 2FA * Workflows * Configuration methods * Configuration examples * Isolate n8n * Configure the Base URL * Configure custom SSL certificate authorities * Set a custom encryption key * Configure workflow timeouts * Specify custom nodes location * Enable modules in Code node * Set the timezone * Specify user folder path * Configure webhook URLs with reverse proxy * Enable Prometheus metrics * Supported databases and settings * Task runners * User management * Logging and monitoring Logging and monitoring * Logging * Monitoring * Security audit * Scaling and performance Scaling and performance * Overview * Performance and benchmarking * Configuring queue mode * Concurrency control * Execution data * Binary data * External storage for binary data * Memory-related errors * Securing n8n Securing n8n * Overview * Set up SSL * Set up SSO * Security audit * Disable the API * Opt out of data collection * Blocking nodes * Hardening task runners * Starter Kits Starter Kits * AI Starter Kit * Architecture Architecture * Overview * Database structure * Using the CLI Using the CLI * CLI commands * Code in n8n * Expressions * Using the Code node * AI coding * Built in methods and variables Built in methods and variables * Overview * Current node input * Output of other nodes * Date and time * JMESPath * HTTP node * LangChain Code node * n8n metadata * Convenience methods * Data transformation functions * Arrays * Booleans * Dates * Numbers * Objects * Strings * Custom variables Custom variables * Create custom variables * Cookbook Cookbook * Handling dates * Query JSON with JMESPath * Built-in methods and variables examples * execution * getWorkflowStaticData * Retrieve linked items from earlier in the workflow * (node-name).all * vars * Expressions * Check incoming data * Common issues * Code node * Get number of items returned by last node * Get the binary data buffer * Output to the browser console * HTTP Request node * Pagination * Advanced AI * Tutorial: Build an AI workflow in n8n * LangChain in n8n LangChain in n8n * Overview * Langchain concepts in n8n * LangChain learning resources * Use LangSmith with n8n * Examples and concepts Examples and concepts * Introduction * What is a chain? * What is an agent? * Agents vs chains example * What is memory? * What is a tool? * Use Google Sheets as a data source * Call an API to fetch data * Set a human fallback for AI workflows * Let AI specify tool parameters * What is a vector database? * Populate a Pinecone vector database from a website * API * Authentication * Pagination * Using the API playground * API reference * Embed * Prerequisites * Deployment * Configuration * Workflow management * Workflows templates * White labelling 1. Integrations 2. Built-in nodes 3. Triggers WooCommerce is a customizable, open-source e-commerce plugin for WordPress. Credentials You can find authentication information for this node here. ## Events# * coupon.created * coupon.updated * coupon.deleted * customer.created * customer.updated * customer.deleted * order.created * order.updated * order.deleted * product.created * product.updated * product.deleted --- ## Page: https://docs.n8n.io/integrations/builtin/trigger-nodes/n8n-nodes-base.workabletrigger/ Use the Workable Trigger node to respond to events in the Workable recruiting platform and integrate Workable with other applications. n8n has built-in support for a wide range of Workable events, including candidate created and moved. On this page, you'll find a list of events the Workable Trigger node can respond to and links to more resources. Credentials You can find authentication information for this node here. ## Events# * **Candidate Created** * **Candidate Moved** View example workflows and related content on n8n's website. Refer to Workable's API documentation for details about using the service. --- ## Page: https://docs.n8n.io/integrations/builtin/trigger-nodes/n8n-nodes-base.wufootrigger/ 1. Integrations 2. Built-in nodes 3. Triggers Wufoo is an online form builder that helps you create custom HTML forms without writing code. Credentials You can find authentication information for this node here. Examples and templates For usage examples and templates to help you get started, refer to n8n's Wufoo Trigger integrations page. --- ## Page: https://docs.n8n.io/integrations/builtin/trigger-nodes/n8n-nodes-base.zendesktrigger/ Zendesk is a support ticketing system, designed to help track, prioritize, and solve customer support interactions. More than just a help desk, Zendesk Support helps nurture customer relationships with personalized, responsive support across any channel. Credentials You can find authentication information for this node here. Examples and templates For usage examples and templates to help you get started, refer to n8n's Zendesk Trigger integrations page. --- ## Page: https://docs.n8n.io/integrations/builtin/cluster-nodes/ Cluster nodes are node groups that work together to provide functionality in an n8n workflow. Instead of using a single node, you use a root node and one or more sub-nodes that extend the functionality of the node.  ## Root nodes# Each cluster starts with one root node. ## Sub-nodes# Each root node can have one or more sub-nodes attached to it. --- ## Page: https://docs.n8n.io/integrations/builtin/cluster-nodes/root-nodes/ * Using n8n * Integrations * Hosting n8n * Code in n8n * Advanced AI * API * Embed * n8n home ↗ * Forum ↗ * Blog ↗ 1. Integrations 2. Built-in nodes 3. Cluster nodes 4. Root nodes Root nodes are the foundational nodes within a group of cluster nodes. Cluster nodes are node groups that work together to provide functionality in an n8n workflow. Instead of using a single node, you use a root node and one or more sub-nodes that extend the functionality of the node.  ## AI glossary# * **completion**: Completions are the responses generated by a model like GPT. * **hallucinations**: Hallucination in AI is when an LLM (large language model) mistakenly perceives patterns or objects that don't exist. * **vector database**: A vector database stores mathematical representations of information. Use with embeddings and retrievers to create a database that your AI can access when answering questions. * **vector store**: A vector store, or vector database, stores mathematical representations of information. Use with embeddings and retrievers to create a database that your AI can access when answering questions. --- ## Page: https://docs.n8n.io/integrations/builtin/cluster-nodes/root-nodes/n8n-nodes-langchain.agent/ An AI agent is an autonomous system that receives data, makes rational decisions, and acts within its environment to achieve specific goals. The AI agent's environment is everything the agent can access that isn't the agent itself. This agent uses external tools and APIs to perform actions and retrieve information. It can understand the capabilities of different tools and determine which tool to use depending on the task. Connect a tool You must connect at least one tool sub-node to an AI Agent node. Agent type Prior to version 1.82.0, the AI Agent had a setting for working as different agent types. This has now been removed and all AI Agent nodes work as a `Tools Agent` which was the recommended and most frequently used setting. If you're working with older versions of the AI Agent in workflows or templates, as long as they were set to 'Tools Agent', they should continue to behave as intended with the updated node. ## Templates and examples# Refer to LangChain's documentation on agents for more information about the service. New to AI Agents? Read the n8n blog introduction to AI agents. View n8n's Advanced AI documentation. ## Common issues# For common errors or issues and suggested resolution steps, refer to Common Issues. ## AI glossary# * **completion**: Completions are the responses generated by a model like GPT. * **hallucinations**: Hallucination in AI is when an LLM (large language model) mistakenly perceives patterns or objects that don't exist. * **vector database**: A vector database stores mathematical representations of information. Use with embeddings and retrievers to create a database that your AI can access when answering questions. * **vector store**: A vector store, or vector database, stores mathematical representations of information. Use with embeddings and retrievers to create a database that your AI can access when answering questions. --- ## Page: https://docs.n8n.io/integrations/builtin/cluster-nodes/root-nodes/n8n-nodes-langchain.agent/conversational-agent/ The Conversational Agent has human-like conversations. It can maintain context, understand user intent, and provide relevant answers. This agent is typically used for building chatbots, virtual assistants, and customer support systems. The Conversational Agent describes tools in the system prompt and parses JSON responses for tool calls. If your preferred AI model doesn't support tool calling or you're handling simpler interactions, this agent is a good general option. It's more flexible but may be less accurate than the Tools Agent. Refer to AI Agent for more information on the AI Agent node itself. You can use this agent with the Chat Trigger node. Attach a memory sub-node so that users can have an ongoing conversation with multiple queries. Memory doesn't persist between sessions. ## Node parameters# Configure the Conversational Agent using the following parameters. ### Prompt# Select how you want the node to construct the prompt (also known as the user's query or input from the chat). Choose from: * **Take from previous node automatically**: If you select this option, the node expects an input from a previous node called `chatInput`. * **Define below**: If you select this option, provide either static text or an expression for dynamic content to serve as the prompt in the **Prompt (User Message)** field. ### Require Specific Output Format# This parameter controls whether you want the node to require a specific output format. When turned on, n8n prompts you to connect one of these output parsers to the node: * Auto-fixing Output Parser * Item List Output Parser * Structured Output Parser ## Node options# Refine the Conversational Agent node's behavior using these options: ### Human Message# Tell the agent about the tools it can use and add context to the user's input. You must include these expressions and variable: * `{tools}`: A LangChain expression that provides a string of the tools you've connected to the Agent. Provide some context or explanation about who should use the tools and how they should use them. * `{format_instructions}`: A LangChain expression that provides the schema or format from the output parser node you've connected. Since the instructions themselves are context, you don't need to provide context for this expression. * `{{input}}`: A LangChain variable containing the user's prompt. This variable populates with the value of the **Prompt** parameter. Provide some context that this is the user's input. Here's an example of how you might use these strings: Example: <table><tbody><tr><td><div><pre><span></span><span> 1</span> <span> 2</span> <span> 3</span> <span> 4</span> <span> 5</span> <span> 6</span> <span> 7</span> <span> 8</span> <span> 9</span> <span>10</span> <span>11</span> <span>12</span> <span>13</span></pre></div></td><td><div><pre><span></span><code>TOOLS ------ Assistant can ask the user to use tools to look up information that may be helpful in answering the user's original question. The tools the human can use are: {tools} {format_instructions} USER'S INPUT -------------------- Here is the user's input (remember to respond with a markdown code snippet of a JSON blob with a single action, and NOTHING else): {{input}} </code></pre></div></td></tr></tbody></table> ### System Message# If you'd like to send a message to the agent before the conversation starts, enter the message you'd like to send. Use this option to guide the agent's decision-making. ### Max Iterations# Enter the number of times the model should run to try and generate a good answer from the user's prompt. Defaults to `10`. ### Return Intermediate Steps# Select whether to include intermediate steps the agent took in the final output (turned on) or not (turned off). This could be useful for further refining the agent's behavior based on the steps it took. ## Templates and examples# Refer to the main AI Agent node's Templates and examples section. ## Common issues# For common questions or issues and suggested solutions, refer to Common issues. ## AI glossary# * **completion**: Completions are the responses generated by a model like GPT. * **hallucinations**: Hallucination in AI is when an LLM (large language model) mistakenly perceives patterns or objects that don't exist. * **vector database**: A vector database stores mathematical representations of information. Use with embeddings and retrievers to create a database that your AI can access when answering questions. * **vector store**: A vector store, or vector database, stores mathematical representations of information. Use with embeddings and retrievers to create a database that your AI can access when answering questions. --- ## Page: https://docs.n8n.io/integrations/builtin/cluster-nodes/root-nodes/n8n-nodes-langchain.agent/openai-functions-agent/ Use the OpenAI Functions Agent node to use an OpenAI functions model. These are models that detect when a function should be called and respond with the inputs that should be passed to the function. Refer to AI Agent for more information on the AI Agent node itself. You can use this agent with the Chat Trigger node. Attach a memory sub-node so that users can have an ongoing conversation with multiple queries. Memory doesn't persist between sessions. ## Node parameters# Configure the OpenAI Functions Agent using the following parameters. ### Prompt# Select how you want the node to construct the prompt (also known as the user's query or input from the chat). Choose from: * **Take from previous node automatically**: If you select this option, the node expects an input from a previous node called `chatInput`. * **Define below**: If you select this option, provide either static text or an expression for dynamic content to serve as the prompt in the **Prompt (User Message)** field. ### Require Specific Output Format# This parameter controls whether you want the node to require a specific output format. When turned on, n8n prompts you to connect one of these output parsers to the node: * Auto-fixing Output Parser * Item List Output Parser * Structured Output Parser ## Node options# Refine the OpenAI Functions Agent node's behavior using these options: ### System Message# If you'd like to send a message to the agent before the conversation starts, enter the message you'd like to send. Use this option to guide the agent's decision-making. ### Max Iterations# Enter the number of times the model should run to try and generate a good answer from the user's prompt. Defaults to `10`. ### Return Intermediate Steps# Select whether to include intermediate steps the agent took in the final output (turned on) or not (turned off). This could be useful for further refining the agent's behavior based on the steps it took. ## Templates and examples# Refer to the main AI Agent node's Templates and examples section. ## Common issues# For common questions or issues and suggested solutions, refer to Common issues. ## AI glossary# * **completion**: Completions are the responses generated by a model like GPT. * **hallucinations**: Hallucination in AI is when an LLM (large language model) mistakenly perceives patterns or objects that don't exist. * **vector database**: A vector database stores mathematical representations of information. Use with embeddings and retrievers to create a database that your AI can access when answering questions. * **vector store**: A vector store, or vector database, stores mathematical representations of information. Use with embeddings and retrievers to create a database that your AI can access when answering questions. --- ## Page: https://docs.n8n.io/integrations/builtin/cluster-nodes/root-nodes/n8n-nodes-langchain.agent/plan-execute-agent/ The Plan and Execute Agent is like the ReAct agent but with a focus on planning. It first creates a high-level plan to solve the given task and then executes the plan step by step. This agent is most useful for tasks that require a structured approach and careful planning. Refer to AI Agent for more information on the AI Agent node itself. ## Node parameters# Configure the Plan and Execute Agent using the following parameters. ### Prompt# Select how you want the node to construct the prompt (also known as the user's query or input from the chat). Choose from: * **Take from previous node automatically**: If you select this option, the node expects an input from a previous node called `chatInput`. * **Define below**: If you select this option, provide either static text or an expression for dynamic content to serve as the prompt in the **Prompt (User Message)** field. ### Require Specific Output Format# This parameter controls whether you want the node to require a specific output format. When turned on, n8n prompts you to connect one of these output parsers to the node: * Auto-fixing Output Parser * Item List Output Parser * Structured Output Parser ## Node options# Refine the Plan and Execute Agent node's behavior using these options: ### Human Message Template# Enter a message that n8n will send to the agent during each step execution. Available LangChain expressions: * `{previous_steps}`: Contains information about the previous steps the agent's already completed. * `{current_step}`: Contains information about the current step. * `{agent_scratchpad}`: Information to remember for the next iteration. ## Templates and examples# Refer to the main AI Agent node's Templates and examples section. ## Common issues# For common questions or issues and suggested solutions, refer to Common issues. ## AI glossary# * **completion**: Completions are the responses generated by a model like GPT. * **hallucinations**: Hallucination in AI is when an LLM (large language model) mistakenly perceives patterns or objects that don't exist. * **vector database**: A vector database stores mathematical representations of information. Use with embeddings and retrievers to create a database that your AI can access when answering questions. * **vector store**: A vector store, or vector database, stores mathematical representations of information. Use with embeddings and retrievers to create a database that your AI can access when answering questions. --- ## Page: https://docs.n8n.io/integrations/builtin/cluster-nodes/root-nodes/n8n-nodes-langchain.agent/react-agent/ The ReAct Agent node implements ReAct logic. ReAct (reasoning and acting) brings together the reasoning powers of chain-of-thought prompting and action plan generation. The ReAct Agent reasons about a given task, determines the necessary actions, and then executes them. It follows the cycle of reasoning and acting until it completes the task. The ReAct agent can break down complex tasks into smaller sub-tasks, prioritise them, and execute them one after the other. Refer to AI Agent for more information on the AI Agent node itself. No memory The ReAct agent doesn't support memory sub-nodes. This means it can't recall previous prompts or simulate an ongoing conversation. ## Node parameters# Configure the ReAct Agent using the following parameters. ### Prompt# Select how you want the node to construct the prompt (also known as the user's query or input from the chat). Choose from: * **Take from previous node automatically**: If you select this option, the node expects an input from a previous node called `chatInput`. * **Define below**: If you select this option, provide either static text or an expression for dynamic content to serve as the prompt in the **Prompt (User Message)** field. ### Require Specific Output Format# This parameter controls whether you want the node to require a specific output format. When turned on, n8n prompts you to connect one of these output parsers to the node: * Auto-fixing Output Parser * Item List Output Parser * Structured Output Parser ## Node options# Use the options to create a message to send to the agent at the start of the conversation. The message type depends on the model you're using: * **Chat models**: These models have the concept of three components interacting (AI, system, and human). They can receive system messages and human messages (prompts). * **Instruct models**: These models don't have the concept of separate AI, system, and human components. They receive one body of text, the instruct message. ### Human Message Template# Use this option to extend the user prompt. This is a way for the agent to pass information from one iteration to the next. Available LangChain expressions: * `{input}`: Contains the user prompt. * `{agent_scratchpad}`: Information to remember for the next iteration. ### Prefix Message# Enter text to prefix the tools list at the start of the conversation. You don't need to add the list of tools. LangChain automatically adds the tools list. ### Suffix Message for Chat Model# Add text to append after the tools list at the start of the conversation when the agent uses a chat model. You don't need to add the list of tools. LangChain automatically adds the tools list. ### Suffix Message for Regular Model# Add text to append after the tools list at the start of the conversation when the agent uses a regular/instruct model. You don't need to add the list of tools. LangChain automatically adds the tools list. ### Return Intermediate Steps# Select whether to include intermediate steps the agent took in the final output (turned on) or not (turned off). This could be useful for further refining the agent's behavior based on the steps it took. Refer to LangChain's ReAct Agents documentation for more information. ## Templates and examples# Refer to the main AI Agent node's Templates and examples section. ## Common issues# For common questions or issues and suggested solutions, refer to Common issues. ## AI glossary# * **completion**: Completions are the responses generated by a model like GPT. * **hallucinations**: Hallucination in AI is when an LLM (large language model) mistakenly perceives patterns or objects that don't exist. * **vector database**: A vector database stores mathematical representations of information. Use with embeddings and retrievers to create a database that your AI can access when answering questions. * **vector store**: A vector store, or vector database, stores mathematical representations of information. Use with embeddings and retrievers to create a database that your AI can access when answering questions. --- ## Page: https://docs.n8n.io/integrations/builtin/cluster-nodes/root-nodes/n8n-nodes-langchain.agent/sql-agent/ The SQL Agent uses a SQL database as a data source. It can understand natural language questions, convert them into SQL queries, execute the queries, and present the results in a user-friendly format. This agent is valuable for building natural language interfaces to databases. Refer to AI Agent for more information on the AI Agent node itself. ## Node parameters# Configure the SQL Agent using the following parameters. ### Data Source# Choose the database to use as a data source for the node. Options include: * **MySQL**: Select this option to use a MySQL database. * Also select the **Credential for MySQL**. * **SQLite**: Select this option to use a SQLite database. * You must add a Read/Write File From Disk node before the Agent to read your SQLite file. * Also enter the **Input Binary Field** name of your SQLite file coming from the Read/Write File From Disk node. * **Postgres**: Select this option to use a Postgres database. * Also select the **Credential for Postgres**. Postgres and MySQL Agents If you are using Postgres or MySQL, this agent doesn't support the credential tunnel options. ### Prompt# Select how you want the node to construct the prompt (also known as the user's query or input from the chat). Choose from: * **Take from previous node automatically**: If you select this option, the node expects an input from a previous node called `chatInput`. * **Define below**: If you select this option, provide either static text or an expression for dynamic content to serve as the prompt in the **Prompt (User Message)** field. ## Node options# Refine the SQL Agent node's behavior using these options: ### Ignored Tables# If you'd like the node to ignore any tables from the database, enter a comma-separated list of tables you'd like it to ignore. If left empty, the agent doesn't ignore any tables. ### Include Sample Rows# Enter the number of sample rows to include in the prompt to the agent. Default is `3`. Sample rows help the agent understand the schema of the database, but they also increase the number of tokens used. ### Included Tables# If you'd only like to include specific tables from the database, enter a comma-separated list of tables to include. If left empty, the agent includes all tables. ### Prefix Prompt# Enter a message you'd like to send to the agent before the **Prompt** text. This initial message can provide more context and guidance to the agent about what it can and can't do, and how to format the response. n8n fills this field with an example. ### Suffix Prompt# Enter a message you'd like to send to the agent after the **Prompt** text. Available LangChain expressions: * `{chatHistory}`: A history of messages in this conversation, useful for maintaining context. * `{input}`: Contains the user prompt. * `{agent_scratchpad}`: Information to remember for the next iteration. n8n fills this field with an example. ### Limit# Enter the maximum number of results to return. Default is `10`. ## Templates and examples# Refer to the main AI Agent node's Templates and examples section. ## Common issues# For common questions or issues and suggested solutions, refer to Common issues. ## AI glossary# * **completion**: Completions are the responses generated by a model like GPT. * **hallucinations**: Hallucination in AI is when an LLM (large language model) mistakenly perceives patterns or objects that don't exist. * **vector database**: A vector database stores mathematical representations of information. Use with embeddings and retrievers to create a database that your AI can access when answering questions. * **vector store**: A vector store, or vector database, stores mathematical representations of information. Use with embeddings and retrievers to create a database that your AI can access when answering questions. --- ## Page: https://docs.n8n.io/integrations/builtin/cluster-nodes/root-nodes/n8n-nodes-langchain.agent/tools-agent/ The Tools Agent uses external tools and APIs to perform actions and retrieve information. It can understand the capabilities of different tools and determine which tool to use depending on the task. This agent helps integrate LLMs with various external services and databases. This agent has an enhanced ability to work with tools and can ensure a standard output format. The Tools Agent implements Langchain's tool calling interface. This interface describes available tools and their schemas. The agent also has improved output parsing capabilities, as it passes the parser to the model as a formatting tool. Refer to AI Agent for more information on the AI Agent node itself. You can use this agent with the Chat Trigger node. Attach a memory sub-node so that users can have an ongoing conversation with multiple queries. Memory doesn't persist between sessions. This agent supports the following chat models: * OpenAI Chat Model * Groq Chat Model * Mistral Cloud Chat Model * Anthropic Chat Model * Azure OpenAI Chat Model The Tools Agent can use the following tools... * Call n8n Workflow * Code * HTTP Request * Action Network * ActiveCampaign * Affinity * Agile CRM * Airtable * APITemplate.io * Asana * AWS Lambda * AWS S3 * AWS SES * AWS Textract * AWS Transcribe * Baserow * Bubble * Calculator * ClickUp * CoinGecko * Compression * Crypto * DeepL * DHL * Discord * Dropbox * Elasticsearch * ERPNext * Facebook Graph API * FileMaker * Ghost * Git * GitHub * GitLab * Gmail * Google Analytics * Google BigQuery * Google Calendar * Google Chat * Google Cloud Firestore * Google Cloud Realtime Database * Google Contacts * Google Docs * Google Drive * Google Sheets * Google Slides * Google Tasks * Google Translate * Google Workspace Admin * Gotify * Grafana * GraphQL * Hacker News * Home Assistant * HubSpot * Jenkins * Jira Software * JWT * Kafka * LDAP * Line * LinkedIn * Mailcheck * Mailgun * Mattermost * Mautic * Medium * Microsoft Excel 365 * Microsoft OneDrive * Microsoft Outlook * Microsoft SQL * Microsoft Teams * Microsoft To Do * Monday.com * MongoDB * MQTT * MySQL * NASA * Nextcloud * NocoDB * Notion * Odoo * OpenWeatherMap * Pipedrive * Postgres * Pushover * QuickBooks Online * QuickChart * RabbitMQ * Reddit * Redis * RocketChat * S3 * Salesforce * Send Email * SendGrid * SerpApi (Google Search) * Shopify * Slack * Spotify * Stripe * Supabase * Telegram * Todoist * TOTP * Trello * Twilio * urlscan.io * Vector Store * Webflow * Wikipedia * Wolfram|Alpha * WooCommerce * Wordpress * X (Formerly Twitter) * YouTube * Zendesk * Zoho CRM * Zoom ## Node parameters# Configure the Tools Agent using the following parameters. ### Prompt# Select how you want the node to construct the prompt (also known as the user's query or input from the chat). Choose from: * **Take from previous node automatically**: If you select this option, the node expects an input from a previous node called `chatInput`. * **Define below**: If you select this option, provide either static text or an expression for dynamic content to serve as the prompt in the **Prompt (User Message)** field. ### Require Specific Output Format# This parameter controls whether you want the node to require a specific output format. When turned on, n8n prompts you to connect one of these output parsers to the node: * Auto-fixing Output Parser * Item List Output Parser * Structured Output Parser ## Node options# Refine the Tools Agent node's behavior using these options: ### System Message# If you'd like to send a message to the agent before the conversation starts, enter the message you'd like to send. Use this option to guide the agent's decision-making. ### Max Iterations# Enter the number of times the model should run to try and generate a good answer from the user's prompt. Defaults to `10`. ### Return Intermediate Steps# Select whether to include intermediate steps the agent took in the final output (turned on) or not (turned off). This could be useful for further refining the agent's behavior based on the steps it took. ### Automatically Passthrough Binary Images# Use this option to control whether binary images should be automatically passed through to the agent as image type messages (turned on) or not (turned off). ## Templates and examples# Refer to the main AI Agent node's Templates and examples section. ## Dynamic parameters for tools with `$fromAI()`# To learn how to dynamically populate parameters for app node tools, refer to Let AI specify tool parameters with `$fromAI()`. ## Common issues# For common questions or issues and suggested solutions, refer to Common issues. ## AI glossary# * **completion**: Completions are the responses generated by a model like GPT. * **hallucinations**: Hallucination in AI is when an LLM (large language model) mistakenly perceives patterns or objects that don't exist. * **vector database**: A vector database stores mathematical representations of information. Use with embeddings and retrievers to create a database that your AI can access when answering questions. * **vector store**: A vector store, or vector database, stores mathematical representations of information. Use with embeddings and retrievers to create a database that your AI can access when answering questions. --- ## Page: https://docs.n8n.io/integrations/builtin/cluster-nodes/root-nodes/n8n-nodes-langchain.agent/common-issues/ Here are some common errors and issues with the AI Agent node and steps to resolve or troubleshoot them. ## Internal error: 400 Invalid value for 'content'# A full error message might look like this: <table><tbody><tr><td><div><pre><span></span><span>1</span> <span>2</span> <span>3</span></pre></div></td><td><div><pre><span></span><code>Internal error Error: 400 Invalid value for 'content': expected a string, got null. <stack-trace> </code></pre></div></td></tr></tbody></table> This error can occur if the **Prompt** input contains a null value. You might see this in one of two scenarios: 1. When you've set the **Prompt** to **Define below** and have an expression in your **Text** that isn't generating a value. * To resolve, make sure your expressions reference valid fields and that they resolve to valid input rather than null. 2. When you've set the **Prompt** to **Connected Chat Trigger Node** and the incoming data has null values. * To resolve, remove any null values from the `chatInput` field of the input node. ## Error in sub-node Simple Memory# This error displays when n8n runs into an issue with the Simple Memory sub-node. It most often occurs when your workflow or the workflow template you copied uses an older version of the Simple memory node (previously known as "Window Buffer Memory"). Try removing the Simple Memory node from your workflow and re-adding it, which will guarantee you're using the latest version of the node. ## A Chat Model sub-node must be connected error# This error displays when n8n tries to execute the node without having a Chat Model connected. To resolve this, click the + Chat Model button at the bottom of your screen when the node is open, or click the Chat Model + connector when the node is closed. n8n will then open a selection of possible Chat Models to pick from. ## No prompt specified error# This error occurs when the agent expects to get the prompt from the previous node automatically. Typically, this happens when you're using the Chat Trigger Node. To resolve this issue, find the **Prompt** parameter of the AI Agent node and change it from **Connected Chat Trigger Node** to **Define below**. This allows you to manually build your prompt by referencing output data from other nodes or by adding static text. --- ## Page: https://docs.n8n.io/integrations/builtin/cluster-nodes/root-nodes/n8n-nodes-langchain.chainllm/ Use the Basic LLM Chain node to set the prompt that the model will use along with setting an optional parser for the response. On this page, you'll find the node parameters for the Basic LLM Chain node and links to more resources. ## Node parameters# ### Prompt# Select how you want the node to construct the prompt (also known as the user's query or input from the chat). Choose from: * **Take from previous node automatically**: If you select this option, the node expects an input from a previous node called `chatInput`. * **Define below**: If you select this option, provide either static text or an expression for dynamic content to serve as the prompt in the **Prompt (User Message)** field. ### Require Specific Output Format# This parameter controls whether you want the node to require a specific output format. When turned on, n8n prompts you to connect one of these output parsers to the node: * Auto-fixing Output Parser * Item List Output Parser * Structured Output Parser ## Chat Messages# Use **Chat Messages** when you're using a chat model to set a message. n8n ignores these options if you don't connect a chat model. Select the **Type Name or ID** you want the node to use: #### AI# Enter a sample expected response in the **Message** field. The model will try to respond in the same way in its messages. #### System# Enter a system **Message** to include with the user input to help guide the model in what it should do. Use this option for things like defining tone, for example: `Always respond talking like a pirate`. #### User# Enter a sample user input. Using this with the AI option can help improve the output of the agent. Using both together provides a sample of an input and expected response (the **AI Message**) for the model to follow. Select one of these input types: * **Text**: Enter a sample user input as a text **Message**. * **Image (Binary)**: Select a binary input from a previous node. Enter the **Image Data Field Name** to identify which binary field from the previous node contains the image data. * **Image (URL)**: Use this option to feed an image in from a URL. Enter the **Image URL**. For both the **Image** types, select the **Image Details** to control how the model processes the image and generates its textual understanding. Choose from: * **Auto**: The model uses the auto setting, which looks at the image input size and decide if it should use the Low or High setting. * **Low**: The model receives a low-resolution 512px x 512px version of the image and represents the image with a budget of 65 tokens. This allows the API to return faster responses and consume fewer input tokens. Use this option for use cases that don't require high detail. * **High**: The model can access the low-resolution image and then creates detailed crops of input images as 512px squares based on the input image size. Each of the detailed crops uses twice the token budget (65 tokens) for a total of 129 tokens. Use this option for use cases that require high detail. ## Templates and examples# Refer to LangChain's documentation on Basic LLM Chains for more information about the service. View n8n's Advanced AI documentation. ## AI glossary# * **completion**: Completions are the responses generated by a model like GPT. * **hallucinations**: Hallucination in AI is when an LLM (large language model) mistakenly perceives patterns or objects that don't exist. * **vector database**: A vector database stores mathematical representations of information. Use with embeddings and retrievers to create a database that your AI can access when answering questions. * **vector store**: A vector store, or vector database, stores mathematical representations of information. Use with embeddings and retrievers to create a database that your AI can access when answering questions. ## Common issues# Here are some common errors and issues with the Basic LLM Chain node and steps to resolve or troubleshoot them. ### No prompt specified error# This error displays when the **Prompt** is empty or invalid. You might see this error in one of two scenarios: 1. When you've set the **Prompt** to **Define below** and haven't entered anything in the **Text** field. * To resolve, enter a valid prompt in the **Text** field. 2. When you've set the **Prompt** to **Connected Chat Trigger Node** and the incoming data has no field called `chatInput`. * The node expects the `chatInput` field. If your previous node doesn't have this field, add an Edit Fields (Set) node to edit an incoming field name to `chatInput`. --- ## Page: https://docs.n8n.io/integrations/builtin/cluster-nodes/root-nodes/n8n-nodes-langchain.chainretrievalqa/ Use the Question and Answer Chain node to use a vector store as a retriever. On this page, you'll find the node parameters for the Question and Answer Chain node, and links to more resources. ## Node parameters# ### Query# The question you want to ask. ## Templates and examples# Refer to LangChain's documentation on retrieval chains for examples of how LangChain can use a vector store as a retriever. View n8n's Advanced AI documentation. ## Common issues# For common errors or issues and suggested resolution steps, refer to Common Issues. ## AI glossary# * **completion**: Completions are the responses generated by a model like GPT. * **hallucinations**: Hallucination in AI is when an LLM (large language model) mistakenly perceives patterns or objects that don't exist. * **vector database**: A vector database stores mathematical representations of information. Use with embeddings and retrievers to create a database that your AI can access when answering questions. * **vector store**: A vector store, or vector database, stores mathematical representations of information. Use with embeddings and retrievers to create a database that your AI can access when answering questions. --- ## Page: https://docs.n8n.io/integrations/builtin/cluster-nodes/root-nodes/n8n-nodes-langchain.chainretrievalqa/common-issues/ Here are some common errors and issues with the Question and Answer Chain node and steps to resolve or troubleshoot them. ## No prompt specified error# This error displays when the **Prompt** is empty or invalid. You might see this in one of two scenarios: 1. When you've set the **Prompt** to **Define below** and have an expression in your **Text** that isn't generating a value. * To resolve, enter a valid prompt in the **Text** field. * Make sure any expressions reference valid fields and that they resolve to valid input rather than null. 2. When you've set the **Prompt** to **Connected Chat Trigger Node** and the incoming data has null values. * To resolve, make sure your input contains a `chatInput` field. Add an Edit Fields (Set) node to edit an incoming field name to `chatInput`. * Remove any null values from the `chatInput` field of the input node. ## A Retriever sub-node must be connected error# This error displays when n8n tries to execute the node without having a Retriever connected. To resolve this, click the + Retriever button at the bottom of your screen when the node is open, or click the Retriever + connector when the node isn't open. n8n will then open a selection of possible Retrievers to pick from. ## Can't produce longer responses# If you need to generate longer responses than the Question and Answer Chain node produces by default, you can try one or more of the following techniques: * **Connect a more verbose model**: Some AI models produce more terse results than others. Swapping your model for one with a larger context window and more verbose output can increase the word length of your responses. * **Increase the maximum number of tokens**: Many model nodes (for example the OpenAI Chat Model) include a **Maximum Number of Tokens** option. You can set this to increase the maximum number of tokens the model can use to produce a response. * **Build larger responses in stages**: For more detailed answers, you may want to construct replies in stages using a variety of AI nodes. You can use AI split up a single question into multiple prompts and create responses for each. You can then compose a final reply by combining the responses again. Though the details are different, you can find a good example of the general idea in this template for writing a WordPress post with AI. --- ## Page: https://docs.n8n.io/integrations/builtin/cluster-nodes/root-nodes/n8n-nodes-langchain.chainsummarization/ Use the Summarization Chain node to summarize multiple documents. On this page, you'll find the node parameters for the Summarization Chain node, and links to more resources. ## Node parameters# Choose the type of data you need to summarize in **Data to Summarize**. The data type you choose determines the other node parameters. * **Use Node Input (JSON)** and **Use Node Input (Binary)**: summarize the data coming into the node from the workflow. * You can configure the **Chunking Strategy**: choose what strategy to use to define the data chunk sizes. * If you choose **Simple (Define Below)** you can then set **Characters Per Chunk** and **Chunk Overlap (Characters)**. * Choose **Advanced** if you want to connect a splitter sub-node that provides more configuration options. * **Use Document Loader**: summarize data provided by a document loader sub-node. ## Node Options# You can configure the summarization method and prompts. Select **Add Option** > **Summarization Method and Prompts**. Options in **Summarization Method**: * **Map Reduce**: this is the recommended option. Learn more about Map Reduce in the LangChain documentation. * **Refine**: learn more about Refine in the LangChain documentation. * **Stuff**: learn more about Stuff in the LangChain documentation. You can customize the **Individual Summary Prompts** and the **Final Prompt to Combine**. There are examples in the node. You must include the `"{text}"` placeholder. ## Templates and examples# Refer to LangChain's documentation on summarization for more information about the service. View n8n's Advanced AI documentation. ## AI glossary# * **completion**: Completions are the responses generated by a model like GPT. * **hallucinations**: Hallucination in AI is when an LLM (large language model) mistakenly perceives patterns or objects that don't exist. * **vector database**: A vector database stores mathematical representations of information. Use with embeddings and retrievers to create a database that your AI can access when answering questions. * **vector store**: A vector store, or vector database, stores mathematical representations of information. Use with embeddings and retrievers to create a database that your AI can access when answering questions. --- ## Page: https://docs.n8n.io/integrations/builtin/cluster-nodes/root-nodes/n8n-nodes-langchain.information-extractor/ Use the Information Extractor node to extract structured information from incoming data. On this page, you'll find the node parameters for the Information Extractor node, and links to more resources. ## Node parameters# * **Text** defines the input text to extract information from. This is usually an expression that references a field from the input items. For example, this could be `{{ $json.chatInput }}` if the input is a chat trigger, or `{{ $json.text }}` if a previous node is Extract from PDF. * Use **Schema Type** to choose how you want to describe the desired output data format. You can choose between: * **From Attribute Description**: This option allows you to define the schema by specifying the list of attributes and their descriptions. * **Generate From JSON Example**: Input an example JSON object to automatically generate the schema. The node uses the object property types and names. It ignores the actual values. * **Define Below**: Manually input the JSON schema. Read the JSON Schema guides and examples for help creating a valid JSON schema. ## Node options# * **System Prompt Template**: Use this option to change the system prompt that's used for the information extraction. n8n automatically appends format specification instructions to the prompt. View n8n's Advanced AI documentation. ## AI glossary# * **completion**: Completions are the responses generated by a model like GPT. * **hallucinations**: Hallucination in AI is when an LLM (large language model) mistakenly perceives patterns or objects that don't exist. * **vector database**: A vector database stores mathematical representations of information. Use with embeddings and retrievers to create a database that your AI can access when answering questions. * **vector store**: A vector store, or vector database, stores mathematical representations of information. Use with embeddings and retrievers to create a database that your AI can access when answering questions. --- ## Page: https://docs.n8n.io/integrations/builtin/cluster-nodes/root-nodes/n8n-nodes-langchain.text-classifier/ Use the Text Classifier node to classify (categorize) incoming data. Using the categories provided in the parameters (see below), each item is passed to the model to determine its category. On this page, you'll find the node parameters for the Text Classifier node, and links to more resources. ## Node parameters# * **Input Prompt** defines the input to classify. This is usually an expression that references a field from the input items. For example, this could be `{{ $json.chatInput }}` if the input is a chat trigger. By default it references the `text` field. * **Categories**: Add the categories that you want to classify your input as. Categories have a name and a description. Use the description to tell the model what the category means. This is important if the meaning isn't obvious. You can add as many categories as you like. ## Node options# * **Allow Multiple Classes To Be True**: You can configure the classifier to always output a single class per item (turned off), or allow the model to select multiple classes (turned on). * **When No Clear Match**: Define what happens if the model can't find a good match for an item. There are two options: * **Discard Item** (the default): If the node doesn't detect any of the categories, it drops the item. * **Output on Extra, 'Other' Branch**: Creates a separate output branch called **Other**. When the node doesn't detect any of the categories, it outputs items in this branch. * **System Prompt Template**: Use this option to change the system prompt that's used for the classification. It uses the `{categories}` placeholder for the categories. * **Enable Auto-Fixing**: When enabled, the node automatically fixes model outputs to ensure they match the expected format. Do this by sending the schema parsing error to the LLM and asking it to fix it. View n8n's Advanced AI documentation. ## AI glossary# * **completion**: Completions are the responses generated by a model like GPT. * **hallucinations**: Hallucination in AI is when an LLM (large language model) mistakenly perceives patterns or objects that don't exist. * **vector database**: A vector database stores mathematical representations of information. Use with embeddings and retrievers to create a database that your AI can access when answering questions. * **vector store**: A vector store, or vector database, stores mathematical representations of information. Use with embeddings and retrievers to create a database that your AI can access when answering questions. --- ## Page: https://docs.n8n.io/integrations/builtin/cluster-nodes/root-nodes/n8n-nodes-langchain.sentimentanalysis/ Use the Sentiment Analysis node to analyze the sentiment of incoming text data. The language model uses the **Sentiment Categories** in the node options to determine each item's sentiment. ## Node parameters# * **Text to Analyze** defines the input text for sentiment analysis. This is an expression that references a field from the input items. For example, this could be `{{ $json.chatInput }}` if the input is from a chat or message source. By default, it expects a `text` field. ## Node options# * **Sentiment Categories**: Define the categories that you want to classify your input as. * By default, these are `Positive, Neutral, Negative`. You can customize these categories to fit your specific use case, such as `Very Positive, Positive, Neutral, Negative, Very Negative` for more granular analysis. * **Include Detailed Results**: When turned on, this option includes sentiment strength and confidence scores in the output. Note that these scores are estimates generated by the language model and are rough indicators rather than precise measurements. * **System Prompt Template**: Use this option to change the system prompt that's used for the sentiment analysis. It uses the `{categories}` placeholder for the categories. * **Enable Auto-Fixing**: When enabled, the node automatically fixes model outputs to ensure they match the expected format. Do this by sending the schema parsing error to the LLM and asking it to fix it. ## Usage Notes# ### Model Temperature Setting# It's strongly advised to set the temperature of the connected language model to 0 or a value close to 0. This helps ensure that the results are as deterministic as possible, providing more consistent and reliable sentiment analysis across multiple runs. ### Language Considerations# The node's performance may vary depending on the language of the input text. For best results, ensure your chosen language model supports the input language. ### Processing Large Volumes# When analyzing large amounts of text, consider splitting the input into smaller chunks to optimize processing time and resource usage. ### Iterative Refinement# For complex sentiment analysis tasks, you may need to iteratively refine the system prompt and categories to achieve the desired results. ## Example Usage# ### Basic Sentiment Analysis# 1. Connect a data source (for example, RSS Feed, HTTP Request) to the Sentiment Analysis node. 2. Set the "Text to Analyze" field to the relevant item property (for example, `{{ $json.content }}` for blog post content). 3. Keep the default sentiment categories. 4. Connect the node's outputs to separate paths for processing positive, neutral, and negative sentiments differently. ### Custom Category Analysis# 1. Change the **Sentiment Categories** to `Excited, Happy, Neutral, Disappointed, Angry`. 2. Adjust your workflow to handle these five output categories. 3. Use this setup to analyze customer feedback with more nuanced emotional categories. View n8n's Advanced AI documentation. ## AI glossary# * **completion**: Completions are the responses generated by a model like GPT. * **hallucinations**: Hallucination in AI is when an LLM (large language model) mistakenly perceives patterns or objects that don't exist. * **vector database**: A vector database stores mathematical representations of information. Use with embeddings and retrievers to create a database that your AI can access when answering questions. * **vector store**: A vector store, or vector database, stores mathematical representations of information. Use with embeddings and retrievers to create a database that your AI can access when answering questions. --- ## Page: https://docs.n8n.io/integrations/builtin/cluster-nodes/root-nodes/n8n-nodes-langchain.code/ Use the LangChain Code node to import LangChain. This means if there is functionality you need that n8n hasn't created a node for, you can still use it. By configuring the LangChain Code node connectors you can use it as a normal node, root node or sub-node. On this page, you'll find the node parameters, guidance on configuring the node, and links to more resources. Not available on Cloud This node is only available on self-hosted n8n. ## Node parameters# ### Add Code# Add your custom code. Choose either **Execute** or **Supply Data** mode. You can only use one mode. Unlike the Code node, the LangChain Code node doesn't support Python. * **Execute**: use the LangChain Code node like n8n's own Code node. This takes input data from the workflow, processes it, and returns it as the node output. This mode requires a main input and output. You must create these connections in **Inputs** and **Outputs**. * **Supply Data**: use the LangChain Code node as a sub-node, sending data to a root node. This uses an output other than main. By default, you can't load built-in or external modules in this node. Self-hosted users can enable built-in and external modules. ### Inputs# Choose the input types. The main input is the normal connector found in all n8n workflows. If you have a main input and output set in the node, **Execute** code is required. ### Outputs# Choose the output types. The main output is the normal connector found in all n8n workflows. If you have a main input and output set in the node, **Execute** code is required. ## Node inputs and outputs configuration# By configuring the LangChain Code node connectors (inputs and outputs) you can use it as an app node, root node or sub-node.  | Node type | Inputs | Outputs | Code mode | | --- | --- | --- | --- | | App node. Similar to the Code node. | Main | Main | Execute | | Root node | Main; at least one other type | Main | Execute | | Sub-node | \- | A type other than main. Must match the input type you want to connect to. | Supply Data | | Sub-node with sub-nodes | A type other than main | A type other than main. Must match the input type you want to connect to. | Supply Data | ## Built-in methods# n8n provides these methods to make it easier to perform common tasks in the LangChain Code node. | Method | Description | | --- | --- | | `this.addInputData(inputName, data)` | Populate the data of a specified non-main input. Useful for mocking data. * `inputName` is the input connection type, and must be one of: `ai_agent`, `ai_chain`, `ai_document`, `ai_embedding`, `ai_languageModel`, `ai_memory`, `ai_outputParser`, `ai_retriever`, `ai_textSplitter`, `ai_tool`, `ai_vectorRetriever`, `ai_vectorStore` * `data` contains the data you want to add. Refer to Data structure for information on the data structure expected by n8n. | | `this.addOutputData(outputName, data)` | Populate the data of a specified non-main output. Useful for mocking data. * `outputName` is the input connection type, and must be one of: `ai_agent`, `ai_chain`, `ai_document`, `ai_embedding`, `ai_languageModel`, `ai_memory`, `ai_outputParser`, `ai_retriever`, `ai_textSplitter`, `ai_tool`, `ai_vectorRetriever`, `ai_vectorStore` * `data` contains the data you want to add. Refer to Data structure for information on the data structure expected by n8n. | | `this.getInputConnectionData(inputName, itemIndex, inputIndex?)` | Get data from a specified non-main input. * `inputName` is the input connection type, and must be one of: `ai_agent`, `ai_chain`, `ai_document`, `ai_embedding`, `ai_languageModel`, `ai_memory`, `ai_outputParser`, `ai_retriever`, `ai_textSplitter`, `ai_tool`, `ai_vectorRetriever`, `ai_vectorStore` * `itemIndex` should always be `0` (this parameter will be used in upcoming functionality) * Use `inputIndex` if there is more than one node connected to the specified input. | | `this.getInputData(inputIndex?, inputName?)` | Get data from the main input. | | `this.getNode()` | Get the current node. | | `this.getNodeOutputs()` | Get the outputs of the current node. | | `this.getExecutionCancelSignal()` | Use this to stop the execution of a function when the workflow stops. In most cases n8n handles this, but you may need to use it if building your own chains or agents. It replaces the Cancelling a running LLMChain code that you'd use if building a LangChain application normally. | ## Templates and examples# View n8n's Advanced AI documentation. ## AI glossary# * **completion**: Completions are the responses generated by a model like GPT. * **hallucinations**: Hallucination in AI is when an LLM (large language model) mistakenly perceives patterns or objects that don't exist. * **vector database**: A vector database stores mathematical representations of information. Use with embeddings and retrievers to create a database that your AI can access when answering questions. * **vector store**: A vector store, or vector database, stores mathematical representations of information. Use with embeddings and retrievers to create a database that your AI can access when answering questions. --- ## Page: https://docs.n8n.io/integrations/builtin/cluster-nodes/root-nodes/n8n-nodes-langchain.vectorstoreinmemory/ Use the Simple Vector Store node to store and retrieve embeddings in n8n's in-app memory. On this page, you'll find the node parameters for the Simple Vector Store node, and links to more resources. Parameter resolution in sub-nodes Sub-nodes behave differently to other nodes when processing multiple items using an expression. Most nodes, including root nodes, take any number of items as input, process these items, and output the results. You can use expressions to refer to input items, and the node resolves the expression for each item in turn. For example, given an input of five `name` values, the expression `{{ $json.name }}` resolves to each name in turn. In sub-nodes, the expression always resolves to the first item. For example, given an input of five `name` values, the expression `{{ $json.name }}` always resolves to the first name. This node is different from AI memory nodes The simple vector storage described here is different to the AI memory nodes such as Simple Memory. This node creates a vector database in the app memory. For development use only This node stores data in memory only and isn't recommended for production use. All data is lost when n8n restarts and may also be purged in low-memory conditions. ## Node usage patterns# You can use the Simple Vector Store node in the following patterns. ### Use as a regular node to insert and retrieve documents# You can use the Simple Vector Store as a regular node to insert or get documents. This pattern places the Simple Vector Store in the regular connection flow without using an agent. You can see an example of in step 2 of this template. ### Connect directly to an AI agent as a tool# You can connect the Simple Vector Store node directly to the tool connector of an AI agent to use a vector store as a resource when answering queries. Here, the connection would be: AI agent (tools connector) -> Simple Vector Store node. ### Use a retriever to fetch documents# You can use the Vector Store Retriever node with the Simple Vector Store node to fetch documents from the Simple Vector Store node. This is often used with the Question and Answer Chain node to fetch documents from the vector store that match the given chat input. An example of the connection flow (the linked example uses Pinecone, but the pattern is the same) would be: Question and Answer Chain (Retriever connector) -> Vector Store Retriever (Vector Store connector) -> Simple Vector Store. ### Use the Vector Store Question Answer Tool to answer questions# Another pattern uses the Vector Store Question Answer Tool to summarize results and answer questions from the Simple Vector Store node. Rather than connecting the Simple Vector Store directly as a tool, this pattern uses a tool specifically designed to summarizes data in the vector store. The connections flow in this case would look like this: AI agent (tools connector) -> Vector Store Question Answer Tool (Vector Store connector) -> Simple Vector store. ## Memory Management# The Simple Vector Store implements memory management to prevent excessive memory usage: * Automatically cleans up old vector stores when memory pressure increases * Removes inactive stores that haven't been accessed for a configurable amount of time * Each workflow gets its own isolated storage space identified by the workflow ID and memory key ### Configuration Options# You can control memory usage with these environment variables: | Variable | Type | Default | Description | | --- | --- | --- | --- | | `N8N_VECTOR_STORE_MAX_MEMORY` | Number | \-1 | Maximum memory in MB allowed for all vector stores combined (-1 to disable limits). | | `N8N_VECTOR_STORE_TTL_HOURS` | Number | \-1 | Hours of inactivity after which a store gets removed (-1 to disable TTL). | On n8n Cloud, these values are preset to 100MB (about 8,000 documents, depending on document size and metadata) and 7 days respectively. For self-hosted instances, both values default to -1(no memory limits or time-based cleanup). ## Node parameters# ### Operation Mode# This Vector Store node has four modes: **Get Many**, **Insert Documents**, **Retrieve Documents (As Vector Store for Chain/Tool)**, and **Retrieve Documents (As Tool for AI Agent)**. The mode you select determines the operations you can perform with the node and what inputs and outputs are available. #### Get Many# In this mode, you can retrieve multiple documents from your vector database by providing a prompt. The prompt will be embedded and used for similarity search. The node will return the documents that are most similar to the prompt with their similarity score. This is useful if you want to retrieve a list of similar documents and pass them to an agent as additional context. #### Insert Documents# Use Insert Documents mode to insert new documents into your vector database. #### Retrieve Documents (As Vector Store for Chain/Tool)# Use Retrieve Documents (As Vector Store for Chain/Tool) mode with a vector-store retriever to retrieve documents from a vector database and provide them to the retriever connected to a chain. In this mode you must connect the node to a retriever node or root node. #### Retrieve Documents (As Tool for AI Agent)# Use Retrieve Documents (As Tool for AI Agent) mode to use the vector store as a tool resource when answering queries. When formulating responses, the agent uses the vector store when the vector store name and description match the question details. ### Get Many parameters# * **Memory Key**: Enter the key to use to store the vector memory in the workflow data. n8n prefixes the key with the workflow ID to avoid collisions. * **Prompt**: Enter the search query. * **Limit**: Enter how many results to retrieve from the vector store. For example, set this to `10` to get the ten best results. ### Insert Documents parameters# * **Memory Key**: Enter the key to use to store the vector memory in the workflow data. n8n prefixes the key with the workflow ID to avoid collisions. * **Clear Store**: Use this parameter to control whether to wipe the vector store for the given memory key for this workflow before inserting data (turned on). ### Retrieve Documents (As Vector Store for Chain/Tool) parameters# * **Memory Key**: Enter the key to use to store the vector memory in the workflow data. n8n prefixes the key with the workflow ID to avoid collisions. ### Retrieve Documents (As Tool for AI Agent) parameters# * **Name**: The name of the vector store. * **Description**: Explain to the LLM what this tool does. A good, specific description allows LLMs to produce expected results more often. * **Memory Key**: Enter the key to use to store the vector memory in the workflow data. n8n prefixes the key with the workflow ID to avoid collisions. * **Limit**: Enter how many results to retrieve from the vector store. For example, set this to `10` to get the ten best results. ## Templates and examples# Refer to LangChains's Memory Vector Store documentation for more information about the service. View n8n's Advanced AI documentation. ## AI glossary# * **completion**: Completions are the responses generated by a model like GPT. * **hallucinations**: Hallucination in AI is when an LLM (large language model) mistakenly perceives patterns or objects that don't exist. * **vector database**: A vector database stores mathematical representations of information. Use with embeddings and retrievers to create a database that your AI can access when answering questions. * **vector store**: A vector store, or vector database, stores mathematical representations of information. Use with embeddings and retrievers to create a database that your AI can access when answering questions. --- ## Page: https://docs.n8n.io/integrations/builtin/cluster-nodes/root-nodes/n8n-nodes-langchain.vectorstoremilvus/ Use the Milvus node to interact with your Milvus database as vector store. You can insert documents into a vector database, get documents from a vector database, retrieve documents to provide them to a retriever connected to a chain, or connect directly to an agent as a tool. On this page, you'll find the node parameters for the Milvus node, and links to more resources. Credentials You can find authentication information for this node here. Parameter resolution in sub-nodes Sub-nodes behave differently to other nodes when processing multiple items using an expression. Most nodes, including root nodes, take any number of items as input, process these items, and output the results. You can use expressions to refer to input items, and the node resolves the expression for each item in turn. For example, given an input of five `name` values, the expression `{{ $json.name }}` resolves to each name in turn. In sub-nodes, the expression always resolves to the first item. For example, given an input of five `name` values, the expression `{{ $json.name }}` always resolves to the first name. ## Node usage patterns# You can use the Milvus Vector Store node in the following patterns. ### Use as a regular node to insert and retrieve documents# You can use the Milvus Vector Store as a regular node to insert, or get documents. This pattern places the Milvus Vector Store in the regular connection flow without using an agent. You can see an example of this in scenario 1 of this template, by replacing the Pinecone Vector store node with the Milvus Vector Store node. ### Connect directly to an AI agent as a tool# You can connect the Milvus Vector Store node directly to the tool connector of an AI agent to use a vector store as a resource when answering queries. Here, the connection would be: AI agent (tools connector) -> Milvus Vector Store node. ### Use a retriever to fetch documents# You can use the Vector Store Retriever node with the Milvus Vector Store node to fetch documents from the Milvus Vector Store node. This is often used with the Question and Answer Chain node to fetch documents from the vector store that match the given chat input. An example of the connection flow would be: Question and Answer Chain (Retriever connector) -> Vector Store Retriever (Vector Store connector) -> Milvus Vector Store. In this example, the Pinecone Vector Store node should be replaced with the Milvus Vector Store node. ### Use the Vector Store Question Answer Tool to answer questions# Another pattern uses the Vector Store Question Answer Tool to summarize results and answer questions from the Milvus Vector Store node. Rather than connecting the Milvus Vector Store directly as a tool, this pattern uses a tool specifically designed to summarizes data in the vector store. The connections flow in this case would look like this: AI agent (tools connector) -> Vector Store Question Answer Tool (Vector Store connector) -> Milvus Vector store. In this example, the Pinecone Vector Store node should be replaced with the Milvus Vector Store node. ## Node parameters# ### Operation Mode# This Vector Store node has four modes: **Get Many**, **Insert Documents**, **Retrieve Documents (As Vector Store for Chain/Tool)**, and **Retrieve Documents (As Tool for AI Agent)**. The mode you select determines the operations you can perform with the node and what inputs and outputs are available. #### Get Many# In this mode, you can retrieve multiple documents from your vector database by providing a prompt. The prompt will be embedded and used for similarity search. The node will return the documents that are most similar to the prompt with their similarity score. This is useful if you want to retrieve a list of similar documents and pass them to an agent as additional context. #### Insert Documents# Use Insert Documents mode to insert new documents into your vector database. #### Retrieve Documents (As Vector Store for Chain/Tool)# Use Retrieve Documents (As Vector Store for Chain/Tool) mode with a vector-store retriever to retrieve documents from a vector database and provide them to the retriever connected to a chain. In this mode you must connect the node to a retriever node or root node. #### Retrieve Documents (As Tool for AI Agent)# Use Retrieve Documents (As Tool for AI Agent) mode to use the vector store as a tool resource when answering queries. When formulating responses, the agent uses the vector store when the vector store name and description match the question details. ### Get Many parameters# * **Milvus Collection**: Select or enter the Milvus Collection to use. * **Prompt**: Enter your search query. * **Limit**: Enter how many results to retrieve from the vector store. For example, set this to `10` to get the ten best results. ### Insert Documents parameters# * **Milvus Collection**: Select or enter the Milvus Collection to use. * **Clear Collection**: Specify whether to clear the collection before inserting new documents. ### Retrieve Documents (As Vector Store for Chain/Tool) parameters# * **Milvus collection**: Select or enter the Milvus Collection to use. ### Retrieve Documents (As Tool for AI Agent) parameters# * **Name**: The name of the vector store. * **Description**: Explain to the LLM what this tool does. A good, specific description allows LLMs to produce expected results more often. * **Milvus Collection**: Select or enter the Milvus Collection to use. * **Limit**: Enter how many results to retrieve from the vector store. For example, set this to `10` to get the ten best results. ## Node options# ### Metadata Filter# Available in **Get Many** mode. When searching for data, use this to match with metadata associated with the document. This is an `AND` query. If you specify more than one metadata filter field, all of them must match. When inserting data, the metadata is set using the document loader. Refer to Default Data Loader for more information on loading documents. ### Clear Collection# Available in **Insert Documents** mode. Deletes all data from the collection before inserting the new data. Refer to LangChain's Milvus documentation for more information about the service. View n8n's Advanced AI documentation. --- ## Page: https://docs.n8n.io/integrations/builtin/cluster-nodes/root-nodes/n8n-nodes-langchain.vectorstoremongodbatlas/ MongoDB Atlas Vector Search is a feature of MongoDB Atlas that enables users to store and query vector embeddings. Use this node to interact with Vector Search indexes in your MongoDB Atlas collections. You can insert documents, retrieve documents, and use the vector store in chains or as a tool for agents. On this page, you'll find the node parameters for the MongoDB Atlas Vector Store node, and links to more resources. Credentials You can find authentication information for this node here. Parameter resolution in sub-nodes Sub-nodes behave differently to other nodes when processing multiple items using an expression. Most nodes, including root nodes, take any number of items as input, process these items, and output the results. You can use expressions to refer to input items, and the node resolves the expression for each item in turn. For example, given an input of five `name` values, the expression `{{ $json.name }}` resolves to each name in turn. In sub-nodes, the expression always resolves to the first item. For example, given an input of five `name` values, the expression `{{ $json.name }}` always resolves to the first name. ## Prerequisites# Before using this node, create a Vector Search index in your MongoDB Atlas collection. Follow these steps to create one: 1. Log in to the MongoDB Atlas dashboard. 2. Select your organization and project. 3. Find "Search & Vector Search" section. 4. Select your cluster and click "Go to search". 5. Click "Create Search Index". 6. Choose "Vector Search" mode and use the visual or JSON editors. For example: <table><tbody><tr><td><div><pre><span></span><span> 1</span> <span> 2</span> <span> 3</span> <span> 4</span> <span> 5</span> <span> 6</span> <span> 7</span> <span> 8</span> <span> 9</span> <span>10</span></pre></div></td><td><div><pre><span></span><code><span>{</span> <span> </span><span>"fields"</span><span>:</span><span> </span><span>[</span> <span> </span><span>{</span> <span> </span><span>"type"</span><span>:</span><span> </span><span>"vector"</span><span>,</span> <span> </span><span>"path"</span><span>:</span><span> </span><span>"<field-name>"</span><span>,</span> <span> </span><span>"numDimensions"</span><span>:</span><span> </span><span>1536</span><span>,</span><span> </span><span>// any other value</span> <span> </span><span>"similarity"</span><span>:</span><span> </span><span>"<similarity-function>"</span> <span> </span><span>}</span> <span> </span><span>]</span> <span>}</span> </code></pre></div></td></tr></tbody></table> 7. Adjust the "dimensions" value according to your embedding model (For example, `1536` for OpenAI's `text-embedding-small-3`). 8. Name your index and create. Make sure to note the following values which are required when configuring the node: * Collection name * Vector index name * Field names for embeddings and metadata ## Node usage patterns# You can use the MongoDB Atlas Vector Store node in the following patterns: ### Use as a regular node to insert and retrieve documents# You can use the MongoDB Atlas Vector Store as a regular node to insert or get documents. This pattern places the MongoDB Atlas Vector Store in the regular connection flow without using an agent. You can see an example of this in scenario 1 of this template (the template uses the Supabase Vector Store, but the pattern is the same). ### Connect directly to an AI agent as a tool# You can connect the MongoDB Atlas Vector Store node directly to the tool connector of an AI agent to use the vector store as a resource when answering queries. Here, the connection would be: AI agent (tools connector) -> MongoDB Atlas Vector Store node. ### Use a retriever to fetch documents# You can use the Vector Store Retriever node with the MongoDB Atlas Vector Store node to fetch documents from the MongoDB Atlas Vector Store node. This is often used with the Question and Answer Chain node to fetch documents from the vector store that match the given chat input. An example of the connection flow (the linked example uses Pinecone, but the pattern is the same) would be: Question and Answer Chain (Retriever connector) -> Vector Store Retriever (Vector Store connector) -> MongoDB Atlas Vector Store. ### Use the Vector Store Question Answer Tool to answer questions# Another pattern uses the Vector Store Question Answer Tool to summarize results and answer questions from the MongoDB Atlas Vector Store node. Rather than connecting the MongoDB Atlas Vector Store directly as a tool, this pattern uses a tool specifically designed to summarize data in the vector store. The connections flow (the linked example uses the In-Memory Vector Store, but the pattern is the same) in this case would look like this: AI agent (tools connector) -> Vector Store Question Answer Tool (Vector Store connector) -> In-Memory Vector store. ## Node parameters# ### Operation Mode# This Vector Store node has four modes: **Get Many**, **Insert Documents**, **Retrieve Documents (As Vector Store for Chain/Tool)**, and **Retrieve Documents (As Tool for AI Agent)**. The mode you select determines the operations you can perform with the node and what inputs and outputs are available. #### Get Many# In this mode, you can retrieve multiple documents from your vector database by providing a prompt. The prompt will be embedded and used for similarity search. The node will return the documents that are most similar to the prompt with their similarity score. This is useful if you want to retrieve a list of similar documents and pass them to an agent as additional context. #### Insert Documents# Use Insert Documents mode to insert new documents into your vector database. #### Retrieve Documents (As Vector Store for Chain/Tool)# Use Retrieve Documents (As Vector Store for Chain/Tool) mode with a vector-store retriever to retrieve documents from a vector database and provide them to the retriever connected to a chain. In this mode you must connect the node to a retriever node or root node. #### Retrieve Documents (As Tool for AI Agent)# Use Retrieve Documents (As Tool for AI Agent) mode to use the vector store as a tool resource when answering queries. When formulating responses, the agent uses the vector store when the vector store name and description match the question details. ### Get Many parameters# * **Mongo Collection**: Enter the name of the MongoDB collection to use. * **Vector Index Name**: Enter the name of the Vector Search index in your MongoDB Atlas collection. * **Embedding Field**: Enter the field name in your documents that contains the vector embeddings. * **Metadata Field**: Enter the field name in your documents that contains the text metadata. ### Insert Documents parameters# * **Mongo Collection**: Enter the name of the MongoDB collection to use. * **Vector Index Name**: Enter the name of the Vector Search index in your MongoDB Atlas collection. * **Embedding Field**: Enter the field name in your documents that contains the vector embeddings. * **Metadata Field**: Enter the field name in your documents that contains the text metadata. ### Retrieve Documents parameters (As Vector Store for Chain/Tool)# * **Mongo Collection**: Enter the name of the MongoDB collection to use. * **Vector Index Name**: Enter the name of the Vector Search index in your MongoDB Atlas collection. * **Embedding Field**: Enter the field name in your documents that contains the vector embeddings. * **Metadata Field**: Enter the field name in your documents that contains the text metadata. ### Retrieve Documents (As Tool for AI Agent) parameters# * **Name**: The name of the vector store. * **Description**: Explain to the LLM what this tool does. A good, specific description allows LLMs to produce expected results more often. * **Mongo Collection**: Enter the name of the MongoDB collection to use. * **Vector Index Name**: Enter the name of the Vector Search index in your MongoDB Atlas collection. * **Limit**: Enter how many results to retrieve from the vector store. For example, set this to `10` to get the ten best results. ## Node options# ### Options# * **Metadata Filter**: Filters results based on metadata. ## Templates and examples# Refer to: * LangChain's MongoDB Atlas Vector Search documentation for more information about the service. * MongoDB Atlas Vector Search documentation for more information about MongoDB Atlas Vector Search. View n8n's Advanced AI documentation. ## Self-hosted AI Starter Kit# New to working with AI and using self-hosted n8n? Try n8n's self-hosted AI Starter Kit to get started with a proof-of-concept or demo playground using Ollama, Qdrant, and PostgreSQL. --- ## Page: https://docs.n8n.io/integrations/builtin/cluster-nodes/root-nodes/n8n-nodes-langchain.vectorstorepgvector/ PGVector is an extension of Postgresql. Use this node to interact with the PGVector tables in your Postgresql database. You can insert documents into a vector table, get documents from a vector table, retrieve documents to provide them to a retriever connected to a chain, or connect directly to an agent as a tool. On this page, you'll find the node parameters for the PGVector node, and links to more resources. Credentials You can find authentication information for this node here. Parameter resolution in sub-nodes Sub-nodes behave differently to other nodes when processing multiple items using an expression. Most nodes, including root nodes, take any number of items as input, process these items, and output the results. You can use expressions to refer to input items, and the node resolves the expression for each item in turn. For example, given an input of five `name` values, the expression `{{ $json.name }}` resolves to each name in turn. In sub-nodes, the expression always resolves to the first item. For example, given an input of five `name` values, the expression `{{ $json.name }}` always resolves to the first name. ## Node usage patterns# You can use the PGVector Vector Store node in the following patterns. ### Use as a regular node to insert and retrieve documents# You can use the PGVector Vector Store as a regular node to insert or get documents. This pattern places the PGVector Vector Store in the regular connection flow without using an agent. You can see an example of this in scenario 1 of this template (the template uses the Supabase Vector Store, but the pattern is the same). ### Connect directly to an AI agent as a tool# You can connect the PGVector Vector Store node directly to the tool connector of an AI agent to use a vector store as a resource when answering queries. Here, the connection would be: AI agent (tools connector) -> PGVector Vector Store node. ### Use a retriever to fetch documents# You can use the Vector Store Retriever node with the PGVector Vector Store node to fetch documents from the PGVector Vector Store node. This is often used with the Question and Answer Chain node to fetch documents from the vector store that match the given chat input. An example of the connection flow (the linked example uses Pinecone, but the pattern is the same) would be: Question and Answer Chain (Retriever connector) -> Vector Store Retriever (Vector Store connector) -> PGVector Vector Store. ### Use the Vector Store Question Answer Tool to answer questions# Another pattern uses the Vector Store Question Answer Tool to summarize results and answer questions from the PGVector Vector Store node. Rather than connecting the PGVector Vector Store directly as a tool, this pattern uses a tool specifically designed to summarizes data in the vector store. The connections flow (the linked example uses the Simple Vector Store, but the pattern is the same) in this case would look like this: AI agent (tools connector) -> Vector Store Question Answer Tool (Vector Store connector) -> Simple Vector store. ## Node parameters# ### Operation Mode# This Vector Store node has four modes: **Get Many**, **Insert Documents**, **Retrieve Documents (As Vector Store for Chain/Tool)**, and **Retrieve Documents (As Tool for AI Agent)**. The mode you select determines the operations you can perform with the node and what inputs and outputs are available. #### Get Many# In this mode, you can retrieve multiple documents from your vector database by providing a prompt. The prompt will be embedded and used for similarity search. The node will return the documents that are most similar to the prompt with their similarity score. This is useful if you want to retrieve a list of similar documents and pass them to an agent as additional context. #### Insert Documents# Use Insert Documents mode to insert new documents into your vector database. #### Retrieve Documents (As Vector Store for Chain/Tool)# Use Retrieve Documents (As Vector Store for Chain/Tool) mode with a vector-store retriever to retrieve documents from a vector database and provide them to the retriever connected to a chain. In this mode you must connect the node to a retriever node or root node. #### Retrieve Documents (As Tool for AI Agent)# Use Retrieve Documents (As Tool for AI Agent) mode to use the vector store as a tool resource when answering queries. When formulating responses, the agent uses the vector store when the vector store name and description match the question details. ### Get Many parameters# * **Table name**: Enter the name of the table you want to query. * **Prompt**: Enter your search query. * **Limit**: Enter a number to set how many results to retrieve from the vector store. For example, set this to `10` to get the ten best results. ### Insert Documents parameters# * **Table name**: Enter the name of the table you want to query. ### Retrieve Documents parameters (As Vector Store for Chain/Tool)# * **Table name**: Enter the name of the table you want to query. ### Retrieve Documents (As Tool for AI Agent) parameters# * **Name**: The name of the vector store. * **Description**: Explain to the LLM what this tool does. A good, specific description allows LLMs to produce expected results more often. * **Table Name**: Enter the PGVector table to use. * **Limit**: Enter how many results to retrieve from the vector store. For example, set this to `10` to get the ten best results. ## Node options# ### Collection# A way to separate datasets in PGVector. This creates a separate table and column to keep track of which collection a vector belongs to. * **Use Collection**: Select whether to use a collection (turned on) or not (turned off). * **Collection Name**: Enter the name of the collection you want to use. * **Collection Table Name**: Enter the name of the table to store collection information in. ### Column Names# The following options specify the names of the columns to store the vectors and corresponding information in: * **ID Column Name** * **Vector Column Name** * **Content Column Name** * **Metadata Column Name** ### Metadata Filter# Available in **Get Many** mode. When searching for data, use this to match with metadata associated with the document. This is an `AND` query. If you specify more than one metadata filter field, all of them must match. When inserting data, the metadata is set using the document loader. Refer to Default Data Loader for more information on loading documents. ## Templates and examples# Browse PGVector Vector Store integration templates, or search all templates Refer to LangChain's PGVector documentation for more information about the service. View n8n's Advanced AI documentation. ## Self-hosted AI Starter Kit# New to working with AI and using self-hosted n8n? Try n8n's self-hosted AI Starter Kit to get started with a proof-of-concept or demo playground using Ollama, Qdrant, and PostgreSQL. --- ## Page: https://docs.n8n.io/integrations/builtin/cluster-nodes/root-nodes/n8n-nodes-langchain.vectorstorepinecone/ Use the Pinecone node to interact with your Pinecone database as vector store. You can insert documents into a vector database, get documents from a vector database, retrieve documents to provide them to a retriever connected to a chain, or connect directly to an agent as a tool. On this page, you'll find the node parameters for the Pinecone node, and links to more resources. Credentials You can find authentication information for this node here. Parameter resolution in sub-nodes Sub-nodes behave differently to other nodes when processing multiple items using an expression. Most nodes, including root nodes, take any number of items as input, process these items, and output the results. You can use expressions to refer to input items, and the node resolves the expression for each item in turn. For example, given an input of five `name` values, the expression `{{ $json.name }}` resolves to each name in turn. In sub-nodes, the expression always resolves to the first item. For example, given an input of five `name` values, the expression `{{ $json.name }}` always resolves to the first name. ## Node usage patterns# You can use the Pinecone Vector Store node in the following patterns. ### Use as a regular node to insert, update, and retrieve documents# You can use the Pinecone Vector Store as a regular node to insert, update, or get documents. This pattern places the Pinecone Vector Store in the regular connection flow without using an agent. You can see an example of this in scenario 1 of this template. ### Connect directly to an AI agent as a tool# You can connect the Pinecone Vector Store node directly to the tool connector of an AI agent to use a vector store as a resource when answering queries. Here, the connection would be: AI agent (tools connector) -> Pinecone Vector Store node. ### Use a retriever to fetch documents# You can use the Vector Store Retriever node with the Pinecone Vector Store node to fetch documents from the Pinecone Vector Store node. This is often used with the Question and Answer Chain node to fetch documents from the vector store that match the given chat input. An example of the connection flow would be: Question and Answer Chain (Retriever connector) -> Vector Store Retriever (Vector Store connector) -> Pinecone Vector Store. ### Use the Vector Store Question Answer Tool to answer questions# Another pattern uses the Vector Store Question Answer Tool to summarize results and answer questions from the Pinecone Vector Store node. Rather than connecting the Pinecone Vector Store directly as a tool, this pattern uses a tool specifically designed to summarizes data in the vector store. The connections flow in this case would look like this: AI agent (tools connector) -> Vector Store Question Answer Tool (Vector Store connector) -> Pinecone Vector store. ## Node parameters# ### Operation Mode# This Vector Store node has five modes: **Get Many**, **Insert Documents**, **Retrieve Documents (As Vector Store for Chain/Tool)**, **Retrieve Documents (As Tool for AI Agent)**, and **Update Documents**. The mode you select determines the operations you can perform with the node and what inputs and outputs are available. #### Get Many# In this mode, you can retrieve multiple documents from your vector database by providing a prompt. The prompt will be embedded and used for similarity search. The node will return the documents that are most similar to the prompt with their similarity score. This is useful if you want to retrieve a list of similar documents and pass them to an agent as additional context. #### Insert Documents# Use Insert Documents mode to insert new documents into your vector database. #### Retrieve Documents (As Vector Store for Chain/Tool)# Use Retrieve Documents (As Vector Store for Chain/Tool) mode with a vector-store retriever to retrieve documents from a vector database and provide them to the retriever connected to a chain. In this mode you must connect the node to a retriever node or root node. #### Retrieve Documents (As Tool for AI Agent)# Use Retrieve Documents (As Tool for AI Agent) mode to use the vector store as a tool resource when answering queries. When formulating responses, the agent uses the vector store when the vector store name and description match the question details. #### Update Documents# Use Update Documents mode to update documents in a vector database by ID. Fill in the **ID** with the ID of the embedding entry to update. ### Get Many parameters# * **Pinecone Index**: Select or enter the Pinecone Index to use. * **Prompt**: Enter your search query. * **Limit**: Enter how many results to retrieve from the vector store. For example, set this to `10` to get the ten best results. ### Insert Documents parameters# * **Pinecone Index**: Select or enter the Pinecone Index to use. ### Retrieve Documents (As Vector Store for Chain/Tool) parameters# * **Pinecone Index**: Select or enter the Pinecone Index to use. ### Retrieve Documents (As Tool for AI Agent) parameters# * **Name**: The name of the vector store. * **Description**: Explain to the LLM what this tool does. A good, specific description allows LLMs to produce expected results more often. * **Pinecone Index**: Select or enter the Pinecone Index to use. * **Limit**: Enter how many results to retrieve from the vector store. For example, set this to `10` to get the ten best results. ## Node options# ### Pinecone Namespace# Another segregation option for how to store your data within the index. ### Metadata Filter# Available in **Get Many** mode. When searching for data, use this to match with metadata associated with the document. This is an `AND` query. If you specify more than one metadata filter field, all of them must match. When inserting data, the metadata is set using the document loader. Refer to Default Data Loader for more information on loading documents. ### Clear Namespace# Available in **Insert Documents** mode. Deletes all data from the namespace before inserting the new data. ## Templates and examples# Refer to LangChain's Pinecone documentation for more information about the service. View n8n's Advanced AI documentation. ### Find your Pinecone index and namespace# Your Pinecone index and namespace are available in your Pinecone account.  ## AI glossary# * **completion**: Completions are the responses generated by a model like GPT. * **hallucinations**: Hallucination in AI is when an LLM (large language model) mistakenly perceives patterns or objects that don't exist. * **vector database**: A vector database stores mathematical representations of information. Use with embeddings and retrievers to create a database that your AI can access when answering questions. * **vector store**: A vector store, or vector database, stores mathematical representations of information. Use with embeddings and retrievers to create a database that your AI can access when answering questions. --- ## Page: https://docs.n8n.io/integrations/builtin/cluster-nodes/root-nodes/n8n-nodes-langchain.vectorstoreqdrant/ Use the Qdrant node to interact with your Qdrant collection as a vector store. You can insert documents into a vector database, get documents from a vector database, retrieve documents to provide them to a retriever connected to a chain or connect it directly to an agent to use as a tool. On this page, you'll find the node parameters for the Qdrant node, and links to more resources. Credentials You can find authentication information for this node here. Parameter resolution in sub-nodes Sub-nodes behave differently to other nodes when processing multiple items using an expression. Most nodes, including root nodes, take any number of items as input, process these items, and output the results. You can use expressions to refer to input items, and the node resolves the expression for each item in turn. For example, given an input of five `name` values, the expression `{{ $json.name }}` resolves to each name in turn. In sub-nodes, the expression always resolves to the first item. For example, given an input of five `name` values, the expression `{{ $json.name }}` always resolves to the first name. ## Node usage patterns# You can use the Qdrant Vector Store node in the following patterns. ### Use as a regular node to insert and retrieve documents# You can use the Qdrant Vector Store as a regular node to insert or get documents. This pattern places the Qdrant Vector Store in the regular connection flow without using an agent. You can see an example of this in the first part of this template. ### Connect directly to an AI agent as a tool# You can connect the Qdrant Vector Store node directly to the tool connector of an AI agent to use a vector store as a resource when answering queries. Here, the connection would be: AI agent (tools connector) -> Qdrant Vector Store node. ### Use a retriever to fetch documents# You can use the Vector Store Retriever node with the Qdrant Vector Store node to fetch documents from the Qdrant Vector Store node. This is often used with the Question and Answer Chain node to fetch documents from the vector store that match the given chat input. An example of the connection flow would be: Question and Answer Chain (Retriever connector) -> Vector Store Retriever (Vector Store connector) -> Qdrant Vector Store. ### Use the Vector Store Question Answer Tool to answer questions# Another pattern uses the Vector Store Question Answer Tool to summarize results and answer questions from the Qdrant Vector Store node. Rather than connecting the Qdrant Vector Store directly as a tool, this pattern uses a tool specifically designed to summarizes data in the vector store. The connections flow in this case would look like this: AI agent (tools connector) -> Vector Store Question Answer Tool (Vector Store connector) -> Qdrant Vector store. ## Node parameters# ### Operation Mode# This Vector Store node has four modes: **Get Many**, **Insert Documents**, **Retrieve Documents (As Vector Store for Chain/Tool)**, and **Retrieve Documents (As Tool for AI Agent)**. The mode you select determines the operations you can perform with the node and what inputs and outputs are available. #### Get Many# In this mode, you can retrieve multiple documents from your vector database by providing a prompt. The prompt will be embedded and used for similarity search. The node will return the documents that are most similar to the prompt with their similarity score. This is useful if you want to retrieve a list of similar documents and pass them to an agent as additional context. #### Insert Documents# Use Insert Documents mode to insert new documents into your vector database. #### Retrieve Documents (As Vector Store for Chain/Tool)# Use Retrieve Documents (As Vector Store for Chain/Tool) mode with a vector-store retriever to retrieve documents from a vector database and provide them to the retriever connected to a chain. In this mode you must connect the node to a retriever node or root node. #### Retrieve Documents (As Tool for AI Agent)# Use Retrieve Documents (As Tool for AI Agent) mode to use the vector store as a tool resource when answering queries. When formulating responses, the agent uses the vector store when the vector store name and description match the question details. ### Get Many parameters# * **Qdrant collection name**: Enter the name of the Qdrant collection to use. * **Prompt**: Enter the search query. * **Limit**: Enter how many results to retrieve from the vector store. For example, set this to `10` to get the ten best results. This Operation Mode includes one **Node option**, the Metadata Filter. ### Insert Documents parameters# * **Qdrant collection name**: Enter the name of the Qdrant collection to use. This Operation Mode includes one **Node option**: * **Collection Config**: Enter JSON options for creating a Qdrant collection creation configuration. Refer to the Qdrant Collections documentation for more information. ### Retrieve Documents (As Vector Store for Chain/Tool) parameters# * **Qdrant Collection**: Enter the name of the Qdrant collection to use. This Operation Mode includes one **Node option**, the Metadata Filter. ### Retrieve Documents (As Tool for AI Agent) parameters# * **Name**: The name of the vector store. * **Description**: Explain to the LLM what this tool does. A good, specific description allows LLMs to produce expected results more often. * **Qdrant Collection**: Enter the name of the Qdrant collection to use. * **Limit**: Enter how many results to retrieve from the vector store. For example, set this to `10` to get the ten best results. ## Node options# ### Metadata Filter# Available in **Get Many** mode. When searching for data, use this to match with metadata associated with the document. This is an `AND` query. If you specify more than one metadata filter field, all of them must match. When inserting data, the metadata is set using the document loader. Refer to Default Data Loader for more information on loading documents. ## Templates and examples# Refer to LangChain's Qdrant documentation for more information about the service. View n8n's Advanced AI documentation. ## Self-hosted AI Starter Kit# New to working with AI and using self-hosted n8n? Try n8n's self-hosted AI Starter Kit to get started with a proof-of-concept or demo playground using Ollama, Qdrant, and PostgreSQL. --- ## Page: https://docs.n8n.io/integrations/builtin/cluster-nodes/root-nodes/n8n-nodes-langchain.vectorstoresupabase/ Use the Supabase Vector Store to interact with your Supabase database as vector store. You can insert documents into a vector database, get documents from a vector database, retrieve documents to provide them to a retriever connected to a chain, or connect it directly to an agent to use as a tool. On this page, you'll find the node parameters for the Supabase node, and links to more resources. Credentials You can find authentication information for this node here. Parameter resolution in sub-nodes Sub-nodes behave differently to other nodes when processing multiple items using an expression. Most nodes, including root nodes, take any number of items as input, process these items, and output the results. You can use expressions to refer to input items, and the node resolves the expression for each item in turn. For example, given an input of five `name` values, the expression `{{ $json.name }}` resolves to each name in turn. In sub-nodes, the expression always resolves to the first item. For example, given an input of five `name` values, the expression `{{ $json.name }}` always resolves to the first name. Supabase provides a quickstart for setting up your vector store. If you use settings other than the defaults in the quickstart, this may affect parameter settings in n8n. Make sure you understand what you're doing. ## Node usage patterns# You can use the Supabase Vector Store node in the following patterns. ### Use as a regular node to insert, update, and retrieve documents# You can use the Supabase Vector Store as a regular node to insert, update, or get documents. This pattern places the Supabase Vector Store in the regular connection flow without using an agent. You can see an example of this in scenario 1 of this template. ### Connect directly to an AI agent as a tool# You can connect the Supabase Vector Store node directly to the tool connector of an AI agent to use a vector store as a resource when answering queries. Here, the connection would be: AI agent (tools connector) -> Supabase Vector Store node. ### Use a retriever to fetch documents# You can use the Vector Store Retriever node with the Supabase Vector Store node to fetch documents from the Supabase Vector Store node. This is often used with the Question and Answer Chain node to fetch documents from the vector store that match the given chat input. An example of the connection flow (the example uses Pinecone, but the pattern in the same) would be: Question and Answer Chain (Retriever connector) -> Vector Store Retriever (Vector Store connector) -> Supabase Vector Store. ### Use the Vector Store Question Answer Tool to answer questions# Another pattern uses the Vector Store Question Answer Tool to summarize results and answer questions from the Supabase Vector Store node. Rather than connecting the Supabase Vector Store directly as a tool, this pattern uses a tool specifically designed to summarizes data in the vector store. The connections flow in this case would look like this: AI agent (tools connector) -> Vector Store Question Answer Tool (Vector Store connector) -> Supabase Vector store. ## Node parameters# ### Operation Mode# This Vector Store node has five modes: **Get Many**, **Insert Documents**, **Retrieve Documents (As Vector Store for Chain/Tool)**, **Retrieve Documents (As Tool for AI Agent)**, and **Update Documents**. The mode you select determines the operations you can perform with the node and what inputs and outputs are available. #### Get Many# In this mode, you can retrieve multiple documents from your vector database by providing a prompt. The prompt will be embedded and used for similarity search. The node will return the documents that are most similar to the prompt with their similarity score. This is useful if you want to retrieve a list of similar documents and pass them to an agent as additional context. #### Insert Documents# Use Insert Documents mode to insert new documents into your vector database. #### Retrieve Documents (As Vector Store for Chain/Tool)# Use Retrieve Documents (As Vector Store for Chain/Tool) mode with a vector-store retriever to retrieve documents from a vector database and provide them to the retriever connected to a chain. In this mode you must connect the node to a retriever node or root node. #### Retrieve Documents (As Tool for AI Agent)# Use Retrieve Documents (As Tool for AI Agent) mode to use the vector store as a tool resource when answering queries. When formulating responses, the agent uses the vector store when the vector store name and description match the question details. #### Update Documents# Use Update Documents mode to update documents in a vector database by ID. Fill in the **ID** with the ID of the embedding entry to update. ### Get Many parameters# * **Table Name**: Enter the Supabase table to use. * **Prompt**: Enter the search query. * **Limit**: Enter how many results to retrieve from the vector store. For example, set this to `10` to get the ten best results. ### Insert Documents parameters# * **Table Name**: Enter the Supabase table to use. ### Retrieve Documents (As Vector Store for Chain/Tool) parameters# * **Table Name**: Enter the Supabase table to use. ### Retrieve Documents (As Tool for AI Agent) parameters# * **Name**: The name of the vector store. * **Description**: Explain to the LLM what this tool does. A good, specific description allows LLMs to produce expected results more often. * **Table Name**: Enter the Supabase table to use. * **Limit**: Enter how many results to retrieve from the vector store. For example, set this to `10` to get the ten best results. ### Update Documents# * **Table Name**: Enter the Supabase table to use. * **ID**: The ID of an embedding entry. ## Node options# ### Query Name# The name of the matching function you set up in Supabase. If you follow the Supabase quickstart, this will be `match_documents`. ### Metadata Filter# Available in **Get Many** mode. When searching for data, use this to match with metadata associated with the document. This is an `AND` query. If you specify more than one metadata filter field, all of them must match. When inserting data, the metadata is set using the document loader. Refer to Default Data Loader for more information on loading documents. ## Templates and examples# Refer to LangChain's Supabase documentation for more information about the service. View n8n's Advanced AI documentation. ## AI glossary# * **completion**: Completions are the responses generated by a model like GPT. * **hallucinations**: Hallucination in AI is when an LLM (large language model) mistakenly perceives patterns or objects that don't exist. * **vector database**: A vector database stores mathematical representations of information. Use with embeddings and retrievers to create a database that your AI can access when answering questions. * **vector store**: A vector store, or vector database, stores mathematical representations of information. Use with embeddings and retrievers to create a database that your AI can access when answering questions. --- ## Page: https://docs.n8n.io/integrations/builtin/cluster-nodes/root-nodes/n8n-nodes-langchain.vectorstorezep/ Use the Zep Vector Store to interact with Zep vector databases. You can insert documents into a vector database, get documents from a vector database, retrieve documents to provide them to a retriever connected to a chain, or connect it directly to an agent to use as a tool. On this page, you'll find the node parameters for the Zep Vector Store node, and links to more resources. Credentials You can find authentication information for this node here. Parameter resolution in sub-nodes Sub-nodes behave differently to other nodes when processing multiple items using an expression. Most nodes, including root nodes, take any number of items as input, process these items, and output the results. You can use expressions to refer to input items, and the node resolves the expression for each item in turn. For example, given an input of five `name` values, the expression `{{ $json.name }}` resolves to each name in turn. In sub-nodes, the expression always resolves to the first item. For example, given an input of five `name` values, the expression `{{ $json.name }}` always resolves to the first name. ## Node usage patterns# You can use the Zep Vector Store node in the following patterns. ### Use as a regular node to insert, update, and retrieve documents# You can use the Zep Vector Store as a regular node to insert or get documents. This pattern places the Zep Vector Store in the regular connection flow without using an agent. You can see an example of this in scenario 1 of this template (the example uses Supabase, but the pattern is the same). ### Connect directly to an AI agent as a tool# You can connect the Zep Vector Store node directly to the tool connector of an AI agent to use a vector store as a resource when answering queries. Here, the connection would be: AI agent (tools connector) -> Zep Vector Store node. ### Use a retriever to fetch documents# You can use the Vector Store Retriever node with the Zep Vector Store node to fetch documents from the Zep Vector Store node. This is often used with the Question and Answer Chain node to fetch documents from the vector store that match the given chat input. An example of the connection flow (the example uses Pinecone, but the pattern in the same) would be: Question and Answer Chain (Retriever connector) -> Vector Store Retriever (Vector Store connector) -> Zep Vector Store. ### Use the Vector Store Question Answer Tool to answer questions# Another pattern uses the Vector Store Question Answer Tool to summarize results and answer questions from the Zep Vector Store node. Rather than connecting the Zep Vector Store directly as a tool, this pattern uses a tool specifically designed to summarizes data in the vector store. The connections flow (this example uses Supabase, but the pattern is the same) in this case would look like this: AI agent (tools connector) -> Vector Store Question Answer Tool (Vector Store connector) -> Zep Vector store. ## Node parameters# ### Operation Mode# This Vector Store node has four modes: **Get Many**, **Insert Documents**, **Retrieve Documents (As Vector Store for Chain/Tool)**, and **Retrieve Documents (As Tool for AI Agent)**. The mode you select determines the operations you can perform with the node and what inputs and outputs are available. #### Get Many# In this mode, you can retrieve multiple documents from your vector database by providing a prompt. The prompt will be embedded and used for similarity search. The node will return the documents that are most similar to the prompt with their similarity score. This is useful if you want to retrieve a list of similar documents and pass them to an agent as additional context. #### Insert Documents# Use Insert Documents mode to insert new documents into your vector database. #### Retrieve Documents (As Vector Store for Chain/Tool)# Use Retrieve Documents (As Vector Store for Chain/Tool) mode with a vector-store retriever to retrieve documents from a vector database and provide them to the retriever connected to a chain. In this mode you must connect the node to a retriever node or root node. #### Retrieve Documents (As Tool for AI Agent)# Use Retrieve Documents (As Tool for AI Agent) mode to use the vector store as a tool resource when answering queries. When formulating responses, the agent uses the vector store when the vector store name and description match the question details. ### Insert Documents parameters# * **Collection Name**: Enter the collection name to store the data in. ### Get Many parameters# * **Collection Name**: Enter the collection name to retrieve the data from. * **Prompt**: Enter the search query. * **Limit**: Enter how many results to retrieve from the vector store. For example, set this to `10` to get the ten best results. ### Retrieve Documents (As Vector Store for Chain/Tool) parameters# * **Collection Name**: Enter the collection name to retrieve the data from. ### Retrieve Documents (As Tool for AI Agent) parameters# * **Name**: The name of the vector store. * **Description**: Explain to the LLM what this tool does. A good, specific description allows LLMs to produce expected results more often. * **Collection Name**: Enter the collection name to retrieve the data from. * **Limit**: Enter how many results to retrieve from the vector store. For example, set this to `10` to get the ten best results. ## Node options# ### Embedding Dimensions# Must be the same when embedding the data and when querying it. This sets the size of the array of floats used to represent the semantic meaning of a text document. Read more about Zep embeddings in Zep's embeddings documentation. ### Is Auto Embedded# Available in the **Insert Documents** Operation Mode, enabled by default. Disable this to configure your embeddings in Zep instead of in n8n. ### Metadata Filter# Available in **Get Many** mode. When searching for data, use this to match with metadata associated with the document. This is an `AND` query. If you specify more than one metadata filter field, all of them must match. When inserting data, the metadata is set using the document loader. Refer to Default Data Loader for more information on loading documents. ## Templates and examples# Refer to LangChain's Zep documentation for more information about the service. View n8n's Advanced AI documentation. ## AI glossary# * **completion**: Completions are the responses generated by a model like GPT. * **hallucinations**: Hallucination in AI is when an LLM (large language model) mistakenly perceives patterns or objects that don't exist. * **vector database**: A vector database stores mathematical representations of information. Use with embeddings and retrievers to create a database that your AI can access when answering questions. * **vector store**: A vector store, or vector database, stores mathematical representations of information. Use with embeddings and retrievers to create a database that your AI can access when answering questions. --- ## Page: https://docs.n8n.io/integrations/builtin/cluster-nodes/sub-nodes/ Sub nodes attach to root nodes within a group of cluster nodes. They configure the overall functionality of the cluster. Cluster nodes are node groups that work together to provide functionality in an n8n workflow. Instead of using a single node, you use a root node and one or more sub-nodes that extend the functionality of the node.  ## AI glossary# * **completion**: Completions are the responses generated by a model like GPT. * **hallucinations**: Hallucination in AI is when an LLM (large language model) mistakenly perceives patterns or objects that don't exist. * **vector database**: A vector database stores mathematical representations of information. Use with embeddings and retrievers to create a database that your AI can access when answering questions. * **vector store**: A vector store, or vector database, stores mathematical representations of information. Use with embeddings and retrievers to create a database that your AI can access when answering questions. --- ## Page: https://docs.n8n.io/integrations/builtin/cluster-nodes/sub-nodes/n8n-nodes-langchain.documentdefaultdataloader/ Use the Default Data Loader node to load binary data files or JSON data for vector stores or summarization. On this page, you'll find a list of parameters the Default Data Loader node supports, and links to more resources. Parameter resolution in sub-nodes Sub-nodes behave differently to other nodes when processing multiple items using an expression. Most nodes, including root nodes, take any number of items as input, process these items, and output the results. You can use expressions to refer to input items, and the node resolves the expression for each item in turn. For example, given an input of five `name` values, the expression `{{ $json.name }}` resolves to each name in turn. In sub-nodes, the expression always resolves to the first item. For example, given an input of five `name` values, the expression `{{ $json.name }}` always resolves to the first name. ## Node parameters# * **Type of Data**: Select **Binary** or **JSON**. * **Data Format**: Displays when you set **Type of Data** to **Binary**. Select the file MIME type for your binary data. Set to **Automatically Detect by MIME Type** if you want n8n to set the data format for you. If you set a specific data format and the incoming file MIME type doesn't match it, the node errors. If you use **Automatically Detect by MIME Type**, the node falls back to text format if it can't match the file MIME type to a supported data format. * **Mode**: Displays when you set **Type of Data** to **JSON**. Choose from: * **Load All Input Data**: Use all the node's input data. * **Load Specific Data**: Use expressions to define the data you want to load. You can add text as well as expressions. This means you can create a custom document from a mix of text and expressions. ## Node options# * **Metadata**: Set the metadata that should accompany the document in the vector store. This is what you match to using the **Metadata Filter** option when retrieving data using the vector store nodes. ## Templates and examples# Refer to LangChain's documentation on document loaders for more information about the service. View n8n's Advanced AI documentation. ## AI glossary# * **completion**: Completions are the responses generated by a model like GPT. * **hallucinations**: Hallucination in AI is when an LLM (large language model) mistakenly perceives patterns or objects that don't exist. * **vector database**: A vector database stores mathematical representations of information. Use with embeddings and retrievers to create a database that your AI can access when answering questions. * **vector store**: A vector store, or vector database, stores mathematical representations of information. Use with embeddings and retrievers to create a database that your AI can access when answering questions. --- ## Page: https://docs.n8n.io/integrations/builtin/cluster-nodes/sub-nodes/n8n-nodes-langchain.documentgithubloader/ Use the GitHub Document Loader node to load data from a GitHub repository for vector stores or summarization. On this page, you'll find the node parameters for the GitHub Document Loader node, and links to more resources. Credentials You can find authentication information for this node here. This node doesn't support OAuth for authentication. Parameter resolution in sub-nodes Sub-nodes behave differently to other nodes when processing multiple items using an expression. Most nodes, including root nodes, take any number of items as input, process these items, and output the results. You can use expressions to refer to input items, and the node resolves the expression for each item in turn. For example, given an input of five `name` values, the expression `{{ $json.name }}` resolves to each name in turn. In sub-nodes, the expression always resolves to the first item. For example, given an input of five `name` values, the expression `{{ $json.name }}` always resolves to the first name. ## Node parameters# * **Repository Link**: Enter the URL of your GitHub repository. * **Branch**: Enter the branch name to use. ## Node options# * **Recursive**: Select whether to include sub-folders and files (turned on) or not (turned off). * **Ignore Paths**: Enter directories to ignore. ## Templates and examples# Refer to LangChain's documentation on document loaders for more information about the service. View n8n's Advanced AI documentation. ## AI glossary# * **completion**: Completions are the responses generated by a model like GPT. * **hallucinations**: Hallucination in AI is when an LLM (large language model) mistakenly perceives patterns or objects that don't exist. * **vector database**: A vector database stores mathematical representations of information. Use with embeddings and retrievers to create a database that your AI can access when answering questions. * **vector store**: A vector store, or vector database, stores mathematical representations of information. Use with embeddings and retrievers to create a database that your AI can access when answering questions. --- ## Page: https://docs.n8n.io/integrations/builtin/cluster-nodes/sub-nodes/n8n-nodes-langchain.embeddingsawsbedrock/ Use the Embeddings AWS Bedrock node to generate embeddings for a given text. On this page, you'll find the node parameters for the Embeddings AWS Bedrock node, and links to more resources. Credentials You can find authentication information for this node here. Parameter resolution in sub-nodes Sub-nodes behave differently to other nodes when processing multiple items using an expression. Most nodes, including root nodes, take any number of items as input, process these items, and output the results. You can use expressions to refer to input items, and the node resolves the expression for each item in turn. For example, given an input of five `name` values, the expression `{{ $json.name }}` resolves to each name in turn. In sub-nodes, the expression always resolves to the first item. For example, given an input of five `name` values, the expression `{{ $json.name }}` always resolves to the first name. ## Node parameters# * **Model**: Select the model to use to generate the embedding. Learn more about available models in the Amazon Bedrock documentation. ## Templates and examples# Refer to LangChains's AWS Bedrock embeddings documentation and the AWS Bedrock documentation for more information about AWS Bedrock. View n8n's Advanced AI documentation. ## AI glossary# * **completion**: Completions are the responses generated by a model like GPT. * **hallucinations**: Hallucination in AI is when an LLM (large language model) mistakenly perceives patterns or objects that don't exist. * **vector database**: A vector database stores mathematical representations of information. Use with embeddings and retrievers to create a database that your AI can access when answering questions. * **vector store**: A vector store, or vector database, stores mathematical representations of information. Use with embeddings and retrievers to create a database that your AI can access when answering questions. --- ## Page: https://docs.n8n.io/integrations/builtin/cluster-nodes/sub-nodes/n8n-nodes-langchain.embeddingsazureopenai/ Use the Embeddings Azure OpenAI node to generate embeddings for a given text. On this page, you'll find the node parameters for the Embeddings Azure OpenAI node, and links to more resources. Credentials You can find authentication information for this node here. Parameter resolution in sub-nodes Sub-nodes behave differently to other nodes when processing multiple items using an expression. Most nodes, including root nodes, take any number of items as input, process these items, and output the results. You can use expressions to refer to input items, and the node resolves the expression for each item in turn. For example, given an input of five `name` values, the expression `{{ $json.name }}` resolves to each name in turn. In sub-nodes, the expression always resolves to the first item. For example, given an input of five `name` values, the expression `{{ $json.name }}` always resolves to the first name. ## Node options# * **Model (Deployment) Name**: Select the model (deployment) to use for generating embeddings. * **Batch Size**: Enter the maximum number of documents to send in each request. * **Strip New Lines**: Select whether to remove new line characters from input text (turned on) or not (turned off). n8n enables this by default. * **Timeout**: Enter the maximum amount of time a request can take in seconds. Set to `-1` for no timeout. ## Templates and examples# Refer to LangChains's OpenAI embeddings documentation for more information about the service. View n8n's Advanced AI documentation. ## AI glossary# * **completion**: Completions are the responses generated by a model like GPT. * **hallucinations**: Hallucination in AI is when an LLM (large language model) mistakenly perceives patterns or objects that don't exist. * **vector database**: A vector database stores mathematical representations of information. Use with embeddings and retrievers to create a database that your AI can access when answering questions. * **vector store**: A vector store, or vector database, stores mathematical representations of information. Use with embeddings and retrievers to create a database that your AI can access when answering questions. --- ## Page: https://docs.n8n.io/integrations/builtin/cluster-nodes/sub-nodes/n8n-nodes-langchain.embeddingscohere/ Use the Embeddings Cohere node to generate embeddings for a given text. On this page, you'll find the node parameters for the Embeddings Cohere node, and links to more resources. Credentials You can find authentication information for this node here. Parameter resolution in sub-nodes Sub-nodes behave differently to other nodes when processing multiple items using an expression. Most nodes, including root nodes, take any number of items as input, process these items, and output the results. You can use expressions to refer to input items, and the node resolves the expression for each item in turn. For example, given an input of five `name` values, the expression `{{ $json.name }}` resolves to each name in turn. In sub-nodes, the expression always resolves to the first item. For example, given an input of five `name` values, the expression `{{ $json.name }}` always resolves to the first name. ## Node parameters# * **Model**: Select the model to use to generate the embedding. Choose from: * **Embed-English-v2.0(4096 Dimensions)** * **Embed-English-Light-v2.0(1024 Dimensions)** * **Embed-Multilingual-v2.0(768 Dimensions)** Learn more about available models in Cohere's models documentation. ## Templates and examples# Refer to Langchain's Cohere embeddings documentation for more information about the service. View n8n's Advanced AI documentation. ## AI glossary# * **completion**: Completions are the responses generated by a model like GPT. * **hallucinations**: Hallucination in AI is when an LLM (large language model) mistakenly perceives patterns or objects that don't exist. * **vector database**: A vector database stores mathematical representations of information. Use with embeddings and retrievers to create a database that your AI can access when answering questions. * **vector store**: A vector store, or vector database, stores mathematical representations of information. Use with embeddings and retrievers to create a database that your AI can access when answering questions. --- ## Page: https://docs.n8n.io/integrations/builtin/cluster-nodes/sub-nodes/n8n-nodes-langchain.embeddingsgooglegemini/ Use the Embeddings Google Gemini node to generate embeddings for a given text. On this page, you'll find the node parameters for the Embeddings Google Gemini node, and links to more resources. Credentials You can find authentication information for this node here. Parameter resolution in sub-nodes Sub-nodes behave differently to other nodes when processing multiple items using an expression. Most nodes, including root nodes, take any number of items as input, process these items, and output the results. You can use expressions to refer to input items, and the node resolves the expression for each item in turn. For example, given an input of five `name` values, the expression `{{ $json.name }}` resolves to each name in turn. In sub-nodes, the expression always resolves to the first item. For example, given an input of five `name` values, the expression `{{ $json.name }}` always resolves to the first name. ## Node parameters# * **Model**: Select the model to use to generate the embedding. Learn more about available models in Google Gemini's models documentation. ## Templates and examples# Refer to Langchain's Google Generative AI embeddings documentation for more information about the service. View n8n's Advanced AI documentation. ## AI glossary# * **completion**: Completions are the responses generated by a model like GPT. * **hallucinations**: Hallucination in AI is when an LLM (large language model) mistakenly perceives patterns or objects that don't exist. * **vector database**: A vector database stores mathematical representations of information. Use with embeddings and retrievers to create a database that your AI can access when answering questions. * **vector store**: A vector store, or vector database, stores mathematical representations of information. Use with embeddings and retrievers to create a database that your AI can access when answering questions. --- ## Page: https://docs.n8n.io/integrations/builtin/cluster-nodes/sub-nodes/n8n-nodes-langchain.embeddingsgooglepalm/ Use the Embeddings Google PaLM node to generate embeddings for a given text. On this page, you'll find the node parameters for the Embeddings Google PaLM node, and links to more resources. Credentials You can find authentication information for this node here. Parameter resolution in sub-nodes Sub-nodes behave differently to other nodes when processing multiple items using an expression. Most nodes, including root nodes, take any number of items as input, process these items, and output the results. You can use expressions to refer to input items, and the node resolves the expression for each item in turn. For example, given an input of five `name` values, the expression `{{ $json.name }}` resolves to each name in turn. In sub-nodes, the expression always resolves to the first item. For example, given an input of five `name` values, the expression `{{ $json.name }}` always resolves to the first name. ## Node parameters# * **Model**: Select the model to use to generate the embedding. n8n dynamically loads models from the Google PaLM API and you'll only see the models available to your account. ## Templates and examples# Refer to Langchain's Google PaLM embeddings documentation for more information about the service. View n8n's Advanced AI documentation. ## AI glossary# * **completion**: Completions are the responses generated by a model like GPT. * **hallucinations**: Hallucination in AI is when an LLM (large language model) mistakenly perceives patterns or objects that don't exist. * **vector database**: A vector database stores mathematical representations of information. Use with embeddings and retrievers to create a database that your AI can access when answering questions. * **vector store**: A vector store, or vector database, stores mathematical representations of information. Use with embeddings and retrievers to create a database that your AI can access when answering questions. --- ## Page: https://docs.n8n.io/integrations/builtin/cluster-nodes/sub-nodes/n8n-nodes-langchain.embeddingsgooglevertex/ Use the Embeddings Google Vertex node to generate embeddings for a given text. On this page, you'll find the node parameters for the Embeddings Google Vertex node, and links to more resources. Credentials You can find authentication information for this node here. Parameter resolution in sub-nodes Sub-nodes behave differently to other nodes when processing multiple items using an expression. Most nodes, including root nodes, take any number of items as input, process these items, and output the results. You can use expressions to refer to input items, and the node resolves the expression for each item in turn. For example, given an input of five `name` values, the expression `{{ $json.name }}` resolves to each name in turn. In sub-nodes, the expression always resolves to the first item. For example, given an input of five `name` values, the expression `{{ $json.name }}` always resolves to the first name. ## Node parameters# * **Model**: Select the model to use to generate the embedding. Learn more about available embedding models in Google VertexAI embeddings API documentation. ## Templates and examples# Refer to LangChain's Google Generative AI embeddings documentation for more information about the service. View n8n's Advanced AI documentation. ## AI glossary# * **completion**: Completions are the responses generated by a model like GPT. * **hallucinations**: Hallucination in AI is when an LLM (large language model) mistakenly perceives patterns or objects that don't exist. * **vector database**: A vector database stores mathematical representations of information. Use with embeddings and retrievers to create a database that your AI can access when answering questions. * **vector store**: A vector store, or vector database, stores mathematical representations of information. Use with embeddings and retrievers to create a database that your AI can access when answering questions. --- ## Page: https://docs.n8n.io/integrations/builtin/cluster-nodes/sub-nodes/n8n-nodes-langchain.embeddingshuggingfaceinference/ Use the Embeddings HuggingFace Inference node to generate embeddings for a given text. On this page, you'll find the node parameters for the Embeddings HuggingFace Inference, and links to more resources. Credentials You can find authentication information for this node here. Parameter resolution in sub-nodes Sub-nodes behave differently to other nodes when processing multiple items using an expression. Most nodes, including root nodes, take any number of items as input, process these items, and output the results. You can use expressions to refer to input items, and the node resolves the expression for each item in turn. For example, given an input of five `name` values, the expression `{{ $json.name }}` resolves to each name in turn. In sub-nodes, the expression always resolves to the first item. For example, given an input of five `name` values, the expression `{{ $json.name }}` always resolves to the first name. ## Node parameters# * **Model**: Select the model to use to generate the embedding. Refer to the Hugging Face models documentation for available models. ## Node options# * **Custom Inference Endpoint**: Enter the URL of your deployed model, hosted by HuggingFace. If you set this, n8n ignores the **Model Name**. Refer to HuggingFace's guide to inference for more information. ## Templates and examples# Refer to Langchain's HuggingFace Inference embeddings documentation for more information about the service. View n8n's Advanced AI documentation. ## AI glossary# * **completion**: Completions are the responses generated by a model like GPT. * **hallucinations**: Hallucination in AI is when an LLM (large language model) mistakenly perceives patterns or objects that don't exist. * **vector database**: A vector database stores mathematical representations of information. Use with embeddings and retrievers to create a database that your AI can access when answering questions. * **vector store**: A vector store, or vector database, stores mathematical representations of information. Use with embeddings and retrievers to create a database that your AI can access when answering questions. --- ## Page: https://docs.n8n.io/integrations/builtin/cluster-nodes/sub-nodes/n8n-nodes-langchain.embeddingsmistralcloud/ Use the Embeddings Mistral Cloud node to generate embeddings for a given text. On this page, you'll find the node parameters for the Embeddings Mistral Cloud node, and links to more resources. Credentials You can find authentication information for this node here. Parameter resolution in sub-nodes Sub-nodes behave differently to other nodes when processing multiple items using an expression. Most nodes, including root nodes, take any number of items as input, process these items, and output the results. You can use expressions to refer to input items, and the node resolves the expression for each item in turn. For example, given an input of five `name` values, the expression `{{ $json.name }}` resolves to each name in turn. In sub-nodes, the expression always resolves to the first item. For example, given an input of five `name` values, the expression `{{ $json.name }}` always resolves to the first name. ## Node parameters# * **Model**: Select the model to use to generate the embedding. Learn more about available models in Mistral's models documentation. ## Node options# * **Batch Size**: Enter the maximum number of documents to send in each request. * **Strip New Lines**: Select whether to remove new line characters from input text (turned on) or not (turned off). n8n enables this by default. ## Templates and examples# Refer to Langchain's Mistral embeddings documentation for more information about the service. View n8n's Advanced AI documentation. ## AI glossary# * **completion**: Completions are the responses generated by a model like GPT. * **hallucinations**: Hallucination in AI is when an LLM (large language model) mistakenly perceives patterns or objects that don't exist. * **vector database**: A vector database stores mathematical representations of information. Use with embeddings and retrievers to create a database that your AI can access when answering questions. * **vector store**: A vector store, or vector database, stores mathematical representations of information. Use with embeddings and retrievers to create a database that your AI can access when answering questions. --- ## Page: https://docs.n8n.io/integrations/builtin/cluster-nodes/sub-nodes/n8n-nodes-langchain.embeddingsollama/ Use the Embeddings Ollama node to generate embeddings for a given text. On this page, you'll find the node parameters for the Embeddings Ollama node, and links to more resources. Credentials You can find authentication information for this node here. Parameter resolution in sub-nodes Sub-nodes behave differently to other nodes when processing multiple items using an expression. Most nodes, including root nodes, take any number of items as input, process these items, and output the results. You can use expressions to refer to input items, and the node resolves the expression for each item in turn. For example, given an input of five `name` values, the expression `{{ $json.name }}` resolves to each name in turn. In sub-nodes, the expression always resolves to the first item. For example, given an input of five `name` values, the expression `{{ $json.name }}` always resolves to the first name. ## Node parameters# * **Model**: Select the model to use to generate the embedding. Choose from: * all-minilm (384 Dimensions) * nomic-embed-text (768 Dimensions) Learn more about available models in Ollama's models documentation. ## Templates and examples# Browse Embeddings Ollama integration templates, or search all templates Refer to Langchain's Ollama embeddings documentation for more information about the service. View n8n's Advanced AI documentation. ## AI glossary# * **completion**: Completions are the responses generated by a model like GPT. * **hallucinations**: Hallucination in AI is when an LLM (large language model) mistakenly perceives patterns or objects that don't exist. * **vector database**: A vector database stores mathematical representations of information. Use with embeddings and retrievers to create a database that your AI can access when answering questions. * **vector store**: A vector store, or vector database, stores mathematical representations of information. Use with embeddings and retrievers to create a database that your AI can access when answering questions. --- ## Page: https://docs.n8n.io/integrations/builtin/cluster-nodes/sub-nodes/n8n-nodes-langchain.embeddingsopenai/ Use the Embeddings OpenAI node to generate embeddings for a given text. On this page, you'll find the node parameters for the Embeddings OpenAI node, and links to more resources. Credentials You can find authentication information for this node here. Parameter resolution in sub-nodes Sub-nodes behave differently to other nodes when processing multiple items using an expression. Most nodes, including root nodes, take any number of items as input, process these items, and output the results. You can use expressions to refer to input items, and the node resolves the expression for each item in turn. For example, given an input of five `name` values, the expression `{{ $json.name }}` resolves to each name in turn. In sub-nodes, the expression always resolves to the first item. For example, given an input of five `name` values, the expression `{{ $json.name }}` always resolves to the first name. ## Node options# * **Model**: Select the model to use for generating embeddings. * **Base URL**: Enter the URL to send the request to. Use this if you are using a self-hosted OpenAI-like model. * **Batch Size**: Enter the maximum number of documents to send in each request. * **Strip New Lines**: Select whether to remove new line characters from input text (turned on) or not (turned off). n8n enables this by default. * **Timeout**: Enter the maximum amount of time a request can take in seconds. Set to `-1` for no timeout. ## Templates and examples# Refer to LangChains's OpenAI embeddings documentation for more information about the service. View n8n's Advanced AI documentation. ## AI glossary# * **completion**: Completions are the responses generated by a model like GPT. * **hallucinations**: Hallucination in AI is when an LLM (large language model) mistakenly perceives patterns or objects that don't exist. * **vector database**: A vector database stores mathematical representations of information. Use with embeddings and retrievers to create a database that your AI can access when answering questions. * **vector store**: A vector store, or vector database, stores mathematical representations of information. Use with embeddings and retrievers to create a database that your AI can access when answering questions. --- ## Page: https://docs.n8n.io/integrations/builtin/cluster-nodes/sub-nodes/n8n-nodes-langchain.lmchatanthropic/ Use the Anthropic Chat Model node to use Anthropic's Claude family of chat models with conversational agents. On this page, you'll find the node parameters for the Anthropic Chat Model node, and links to more resources. Credentials You can find authentication information for this node here. Parameter resolution in sub-nodes Sub-nodes behave differently to other nodes when processing multiple items using an expression. Most nodes, including root nodes, take any number of items as input, process these items, and output the results. You can use expressions to refer to input items, and the node resolves the expression for each item in turn. For example, given an input of five `name` values, the expression `{{ $json.name }}` resolves to each name in turn. In sub-nodes, the expression always resolves to the first item. For example, given an input of five `name` values, the expression `{{ $json.name }}` always resolves to the first name. ## Node parameters# * **Model**: Select the model that generates the completion. Choose from: * **Claude** * **Claude Instant** Learn more in the Anthropic model documentation. ## Node options# * **Maximum Number of Tokens**: Enter the maximum number of tokens used, which sets the completion length. * **Sampling Temperature**: Use this option to control the randomness of the sampling process. A higher temperature creates more diverse sampling, but increases the risk of hallucinations. * **Top K**: Enter the number of token choices the model uses to generate the next token. * **Top P**: Use this option to set the probability the completion should use. Use a lower value to ignore less probable options. ## Templates and examples# Refer to LangChains's Anthropic documentation for more information about the service. View n8n's Advanced AI documentation. ## AI glossary# * **completion**: Completions are the responses generated by a model like GPT. * **hallucinations**: Hallucination in AI is when an LLM (large language model) mistakenly perceives patterns or objects that don't exist. * **vector database**: A vector database stores mathematical representations of information. Use with embeddings and retrievers to create a database that your AI can access when answering questions. * **vector store**: A vector store, or vector database, stores mathematical representations of information. Use with embeddings and retrievers to create a database that your AI can access when answering questions. --- ## Page: https://docs.n8n.io/integrations/builtin/cluster-nodes/sub-nodes/n8n-nodes-langchain.lmchatawsbedrock/ The AWS Bedrock Chat Model node allows you use LLM models utilising AWS Bedrock platform. On this page, you'll find the node parameters for the AWS Bedrock Chat Model node, and links to more resources. Credentials You can find authentication information for this node here. Parameter resolution in sub-nodes Sub-nodes behave differently to other nodes when processing multiple items using an expression. Most nodes, including root nodes, take any number of items as input, process these items, and output the results. You can use expressions to refer to input items, and the node resolves the expression for each item in turn. For example, given an input of five `name` values, the expression `{{ $json.name }}` resolves to each name in turn. In sub-nodes, the expression always resolves to the first item. For example, given an input of five `name` values, the expression `{{ $json.name }}` always resolves to the first name. ## Node parameters# * **Model**: Select the model that generates the completion. Learn more about available models in the Amazon Bedrock model documentation. ## Node options# * **Maximum Number of Tokens**: Enter the maximum number of tokens used, which sets the completion length. * **Sampling Temperature**: Use this option to control the randomness of the sampling process. A higher temperature creates more diverse sampling, but increases the risk of hallucinations. ## Templates and examples# Refer to LangChains's AWS Bedrock Chat Model documentation for more information about the service. View n8n's Advanced AI documentation. ## AI glossary# * **completion**: Completions are the responses generated by a model like GPT. * **hallucinations**: Hallucination in AI is when an LLM (large language model) mistakenly perceives patterns or objects that don't exist. * **vector database**: A vector database stores mathematical representations of information. Use with embeddings and retrievers to create a database that your AI can access when answering questions. * **vector store**: A vector store, or vector database, stores mathematical representations of information. Use with embeddings and retrievers to create a database that your AI can access when answering questions. --- ## Page: https://docs.n8n.io/integrations/builtin/cluster-nodes/sub-nodes/n8n-nodes-langchain.lmchatazureopenai/ Use the Azure OpenAI Chat Model node to use OpenAI's chat models with conversational agents. On this page, you'll find the node parameters for the Azure OpenAI Chat Model node, and links to more resources. Credentials You can find authentication information for this node here. Parameter resolution in sub-nodes Sub-nodes behave differently to other nodes when processing multiple items using an expression. Most nodes, including root nodes, take any number of items as input, process these items, and output the results. You can use expressions to refer to input items, and the node resolves the expression for each item in turn. For example, given an input of five `name` values, the expression `{{ $json.name }}` resolves to each name in turn. In sub-nodes, the expression always resolves to the first item. For example, given an input of five `name` values, the expression `{{ $json.name }}` always resolves to the first name. ## Node parameters# * **Model**: Select the model to use to generate the completion. ## Node options# * **Frequency Penalty**: Use this option to control the chances of the model repeating itself. Higher values reduce the chance of the model repeating itself. * **Maximum Number of Tokens**: Enter the maximum number of tokens used, which sets the completion length. * **Response Format**: Choose **Text** or **JSON**. **JSON** ensures the model returns valid JSON. * **Presence Penalty**: Use this option to control the chances of the model talking about new topics. Higher values increase the chance of the model talking about new topics. * **Sampling Temperature**: Use this option to control the randomness of the sampling process. A higher temperature creates more diverse sampling, but increases the risk of hallucinations. * **Timeout**: Enter the maximum request time in milliseconds. * **Max Retries**: Enter the maximum number of times to retry a request. * **Top P**: Use this option to set the probability the completion should use. Use a lower value to ignore less probable options. ## Templates and examples# Refer to LangChains's Azure OpenAI documentation for more information about the service. View n8n's Advanced AI documentation. ## AI glossary# * **completion**: Completions are the responses generated by a model like GPT. * **hallucinations**: Hallucination in AI is when an LLM (large language model) mistakenly perceives patterns or objects that don't exist. * **vector database**: A vector database stores mathematical representations of information. Use with embeddings and retrievers to create a database that your AI can access when answering questions. * **vector store**: A vector store, or vector database, stores mathematical representations of information. Use with embeddings and retrievers to create a database that your AI can access when answering questions. --- ## Page: https://docs.n8n.io/integrations/builtin/cluster-nodes/sub-nodes/n8n-nodes-langchain.lmchatdeepseek/ Use the DeepSeek Chat Model node to use DeepSeek's chat models with conversational agents. On this page, you'll find the node parameters for the DeepSeek Chat Model node and links to more resources. Credentials You can find authentication information for this node here. Parameter resolution in sub-nodes Sub-nodes behave differently to other nodes when processing multiple items using an expression. Most nodes, including root nodes, take any number of items as input, process these items, and output the results. You can use expressions to refer to input items, and the node resolves the expression for each item in turn. For example, given an input of five `name` values, the expression `{{ $json.name }}` resolves to each name in turn. In sub-nodes, the expression always resolves to the first item. For example, given an input of five `name` values, the expression `{{ $json.name }}` always resolves to the first name. ## Node parameters# ### Model# Select the model to use to generate the completion. n8n dynamically loads models from DeepSeek and you'll only see the models available to your account. ## Node options# Use these options to further refine the node's behavior. ### Base URL# Enter a URL here to override the default URL for the API. ### Frequency Penalty# Use this option to control the chances of the model repeating itself. Higher values reduce the chance of the model repeating itself. ### Maximum Number of Tokens# Enter the maximum number of tokens used, which sets the completion length. ### Response Format# Choose **Text** or **JSON**. **JSON** ensures the model returns valid JSON. ### Presence Penalty# Use this option to control the chances of the model talking about new topics. Higher values increase the chance of the model talking about new topics. ### Sampling Temperature# Use this option to control the randomness of the sampling process. A higher temperature creates more diverse sampling, but increases the risk of hallucinations. ### Timeout# Enter the maximum request time in milliseconds. ### Max Retries# Enter the maximum number of times to retry a request. ### Top P# Use this option to set the probability the completion should use. Use a lower value to ignore less probable options. ## Templates and examples# As DeepSeek is API-compatible with OpenAI, you can refer to LangChains's OpenAI documentation for more information about the service. View n8n's Advanced AI documentation. ## AI glossary# * **completion**: Completions are the responses generated by a model like GPT. * **hallucinations**: Hallucination in AI is when an LLM (large language model) mistakenly perceives patterns or objects that don't exist. * **vector database**: A vector database stores mathematical representations of information. Use with embeddings and retrievers to create a database that your AI can access when answering questions. * **vector store**: A vector store, or vector database, stores mathematical representations of information. Use with embeddings and retrievers to create a database that your AI can access when answering questions. --- ## Page: https://docs.n8n.io/integrations/builtin/cluster-nodes/sub-nodes/n8n-nodes-langchain.lmchatgooglegemini/ Use the Google Gemini Chat Model node to use Google's Gemini chat models with conversational agents. On this page, you'll find the node parameters for the Google Gemini Chat Model node, and links to more resources. Credentials You can find authentication information for this node here. Parameter resolution in sub-nodes Sub-nodes behave differently to other nodes when processing multiple items using an expression. Most nodes, including root nodes, take any number of items as input, process these items, and output the results. You can use expressions to refer to input items, and the node resolves the expression for each item in turn. For example, given an input of five `name` values, the expression `{{ $json.name }}` resolves to each name in turn. In sub-nodes, the expression always resolves to the first item. For example, given an input of five `name` values, the expression `{{ $json.name }}` always resolves to the first name. ## Node parameters# * **Model**: Select the model to use to generate the completion. n8n dynamically loads models from the Google Gemini API and you'll only see the models available to your account. ## Node options# * **Maximum Number of Tokens**: Enter the maximum number of tokens used, which sets the completion length. * **Sampling Temperature**: Use this option to control the randomness of the sampling process. A higher temperature creates more diverse sampling, but increases the risk of hallucinations. * **Top K**: Enter the number of token choices the model uses to generate the next token. * **Top P**: Use this option to set the probability the completion should use. Use a lower value to ignore less probable options. * **Safety Settings**: Gemini supports adjustable safety settings. Refer to Google's Gemini API safety settings for information on the available filters and levels. ## Templates and examples# Refer to LangChain's Google Gemini documentation for more information about the service. View n8n's Advanced AI documentation. ## AI glossary# * **completion**: Completions are the responses generated by a model like GPT. * **hallucinations**: Hallucination in AI is when an LLM (large language model) mistakenly perceives patterns or objects that don't exist. * **vector database**: A vector database stores mathematical representations of information. Use with embeddings and retrievers to create a database that your AI can access when answering questions. * **vector store**: A vector store, or vector database, stores mathematical representations of information. Use with embeddings and retrievers to create a database that your AI can access when answering questions. --- ## Page: https://docs.n8n.io/integrations/builtin/cluster-nodes/sub-nodes/n8n-nodes-langchain.lmchatgooglevertex/ Use the Google Vertex AI Chat Model node to use Google's Vertex AI chat models with conversational agents. On this page, you'll find the node parameters for the Google Vertex AI Chat Model node, and links to more resources. Credentials You can find authentication information for this node here. Parameter resolution in sub-nodes Sub-nodes behave differently to other nodes when processing multiple items using an expression. Most nodes, including root nodes, take any number of items as input, process these items, and output the results. You can use expressions to refer to input items, and the node resolves the expression for each item in turn. For example, given an input of five `name` values, the expression `{{ $json.name }}` resolves to each name in turn. In sub-nodes, the expression always resolves to the first item. For example, given an input of five `name` values, the expression `{{ $json.name }}` always resolves to the first name. ## Node parameters# * **Project ID**: Select the project ID from your Google Cloud account to use. n8n dynamically loads projects from the Google Cloud account, but you can also enter it manually. * **Model Name**: Select the name of the model to use to generate the completion, for example `gemini-1.5-flash-001`, `gemini-1.5-pro-001`, etc. Refer to Google models for a list of available models. ## Node options# * **Maximum Number of Tokens**: Enter the maximum number of tokens used, which sets the completion length. * **Sampling Temperature**: Use this option to control the randomness of the sampling process. A higher temperature creates more diverse sampling, but increases the risk of hallucinations. * **Top K**: Enter the number of token choices the model uses to generate the next token. * **Top P**: Use this option to set the probability the completion should use. Use a lower value to ignore less probable options. * **Safety Settings**: Gemini supports adjustable safety settings. Refer to Google's Gemini API safety settings for information on the available filters and levels. ## Templates and examples# Browse Google Vertex Chat Model integration templates, or search all templates Refer to LangChain's Google Vertex AI documentation for more information about the service. View n8n's Advanced AI documentation. ## AI glossary# * **completion**: Completions are the responses generated by a model like GPT. * **hallucinations**: Hallucination in AI is when an LLM (large language model) mistakenly perceives patterns or objects that don't exist. * **vector database**: A vector database stores mathematical representations of information. Use with embeddings and retrievers to create a database that your AI can access when answering questions. * **vector store**: A vector store, or vector database, stores mathematical representations of information. Use with embeddings and retrievers to create a database that your AI can access when answering questions. --- ## Page: https://docs.n8n.io/integrations/builtin/cluster-nodes/sub-nodes/n8n-nodes-langchain.lmchatgroq/ Use the Groq Chat Model node to access Groq's large language models for conversational AI and text generation tasks. On this page, you'll find the node parameters for the Groq Chat Model node, and links to more resources. Credentials You can find authentication information for this node here. Parameter resolution in sub-nodes Sub-nodes behave differently to other nodes when processing multiple items using an expression. Most nodes, including root nodes, take any number of items as input, process these items, and output the results. You can use expressions to refer to input items, and the node resolves the expression for each item in turn. For example, given an input of five `name` values, the expression `{{ $json.name }}` resolves to each name in turn. In sub-nodes, the expression always resolves to the first item. For example, given an input of five `name` values, the expression `{{ $json.name }}` always resolves to the first name. ## Node parameters# * **Model**: Select the model which will generate the completion. n8n dynamically loads available models from the Groq API. Learn more in the Groq model documentation. ## Node options# * **Maximum Number of Tokens**: Enter the maximum number of tokens used, which sets the completion length. * **Sampling Temperature**: Use this option to control the randomness of the sampling process. A higher temperature creates more diverse sampling, but increases the risk of hallucinations. ## Templates and examples# Refer to Groq's API documentation for more information about the service. View n8n's Advanced AI documentation. ## AI glossary# * **completion**: Completions are the responses generated by a model like GPT. * **hallucinations**: Hallucination in AI is when an LLM (large language model) mistakenly perceives patterns or objects that don't exist. * **vector database**: A vector database stores mathematical representations of information. Use with embeddings and retrievers to create a database that your AI can access when answering questions. * **vector store**: A vector store, or vector database, stores mathematical representations of information. Use with embeddings and retrievers to create a database that your AI can access when answering questions. --- ## Page: https://docs.n8n.io/integrations/builtin/cluster-nodes/sub-nodes/n8n-nodes-langchain.lmchatmistralcloud/ Use the Mistral Cloud Chat Model node to combine Mistral Cloud's chat models with conversational agents. On this page, you'll find the node parameters for the Mistral Cloud Chat Model node, and links to more resources. Credentials You can find authentication information for this node here. Parameter resolution in sub-nodes Sub-nodes behave differently to other nodes when processing multiple items using an expression. Most nodes, including root nodes, take any number of items as input, process these items, and output the results. You can use expressions to refer to input items, and the node resolves the expression for each item in turn. For example, given an input of five `name` values, the expression `{{ $json.name }}` resolves to each name in turn. In sub-nodes, the expression always resolves to the first item. For example, given an input of five `name` values, the expression `{{ $json.name }}` always resolves to the first name. ## Node parameters# * **Model**: Select the model to use to generate the completion. n8n dynamically loads models from Mistral Cloud and you'll only see the models available to your account. ## Node options# * **Maximum Number of Tokens**: Enter the maximum number of tokens used, which sets the completion length. * **Sampling Temperature**: Use this option to control the randomness of the sampling process. A higher temperature creates more diverse sampling, but increases the risk of hallucinations. * **Timeout**: Enter the maximum request time in milliseconds. * **Max Retries**: Enter the maximum number of times to retry a request. * **Top P**: Use this option to set the probability the completion should use. Use a lower value to ignore less probable options. * **Enable Safe Mode**: Enable safe mode by injecting a safety prompt at the beginning of the completion. This helps prevent the model from generating offensive content. * **Random Seed**: Enter a seed to use for random sampling. If set, different calls will generate deterministic results. ## Templates and examples# Refer to LangChains's Mistral documentation for more information about the service. View n8n's Advanced AI documentation. ## AI glossary# * **completion**: Completions are the responses generated by a model like GPT. * **hallucinations**: Hallucination in AI is when an LLM (large language model) mistakenly perceives patterns or objects that don't exist. * **vector database**: A vector database stores mathematical representations of information. Use with embeddings and retrievers to create a database that your AI can access when answering questions. * **vector store**: A vector store, or vector database, stores mathematical representations of information. Use with embeddings and retrievers to create a database that your AI can access when answering questions. --- ## Page: https://docs.n8n.io/integrations/builtin/cluster-nodes/sub-nodes/n8n-nodes-langchain.lmchatollama/ The Ollama Chat Model node allows you use local Llama 2 models with conversational agents. On this page, you'll find the node parameters for the Ollama Chat Model node, and links to more resources. Credentials You can find authentication information for this node here. Parameter resolution in sub-nodes Sub-nodes behave differently to other nodes when processing multiple items using an expression. Most nodes, including root nodes, take any number of items as input, process these items, and output the results. You can use expressions to refer to input items, and the node resolves the expression for each item in turn. For example, given an input of five `name` values, the expression `{{ $json.name }}` resolves to each name in turn. In sub-nodes, the expression always resolves to the first item. For example, given an input of five `name` values, the expression `{{ $json.name }}` always resolves to the first name. ## Node parameters# * **Model**: Select the model that generates the completion. Choose from: * **Llama2** * **Llama2 13B** * **Llama2 70B** * **Llama2 Uncensored** Refer to the Ollama Models Library documentation for more information about available models. ## Node options# * **Sampling Temperature**: Use this option to control the randomness of the sampling process. A higher temperature creates more diverse sampling, but increases the risk of hallucinations. * **Top K**: Enter the number of token choices the model uses to generate the next token. * **Top P**: Use this option to set the probability the completion should use. Use a lower value to ignore less probable options. ## Templates and examples# Refer to LangChains's Ollama Chat Model documentation for more information about the service. View n8n's Advanced AI documentation. ## Common issues# For common questions or issues and suggested solutions, refer to Common issues. ## AI glossary# * **completion**: Completions are the responses generated by a model like GPT. * **hallucinations**: Hallucination in AI is when an LLM (large language model) mistakenly perceives patterns or objects that don't exist. * **vector database**: A vector database stores mathematical representations of information. Use with embeddings and retrievers to create a database that your AI can access when answering questions. * **vector store**: A vector store, or vector database, stores mathematical representations of information. Use with embeddings and retrievers to create a database that your AI can access when answering questions. ## Self-hosted AI Starter Kit# New to working with AI and using self-hosted n8n? Try n8n's self-hosted AI Starter Kit to get started with a proof-of-concept or demo playground using Ollama, Qdrant, and PostgreSQL. --- ## Page: https://docs.n8n.io/integrations/builtin/cluster-nodes/sub-nodes/n8n-nodes-langchain.lmchatollama/common-issues/ Here are some common errors and issues with the Ollama Chat Model node and steps to resolve or troubleshoot them. ## Processing parameters# The Ollama Chat Model node is a sub-node. Sub-nodes behave differently than other nodes when processing multiple items using expressions. Most nodes, including root nodes, take any number of items as input, process these items, and output the results. You can use expressions to refer to input items, and the node resolves the expression for each item in turn. For example, given an input of five name values, the expression `{{ $json.name }}` resolves to each name in turn. In sub-nodes, the expression always resolves to the first item. For example, given an input of five name values, the expression `{{ $json.name }}` always resolves to the first name. ## Can't connect to a remote Ollama instance# The Ollama Chat Model node is only designed to connect to a locally hosted Ollama instance. It doesn't include the authentication features you'd need to connect to a remotely hosted Ollama instance. To use the Ollama Chat Model, follow the Ollama credentials instructions to set up Ollama locally and configure the instance URL in n8n. ## Can't connect to a local Ollama instance when using Docker# The Ollama Chat Model node connects to a locally hosted Ollama instance using the base URL defined by Ollama credentials. When you run either n8n or Ollama in Docker, you need to configure the network so that n8n can connect to Ollama. Ollama typically listens for connections on `localhost`, the local network address. In Docker, by default, each container has its own `localhost` which is only accessible from within the container. If either n8n or Ollama are running in containers, they won't be able to connect over `localhost`. The solution depends on how you're hosting the two components. ### If only Ollama is in Docker# If only Ollama is running in Docker, configure Ollama to listen on all interfaces by binding to `0.0.0.0` inside of the container (the official images are already configured this way). When running the container, publish the ports with the `-p` flag. By default, Ollama runs on port 11434, so your Docker command should look like this: <table><tbody><tr><td><div><pre><span></span><span>1</span></pre></div></td><td><div><pre><span></span><code>docker<span> </span>run<span> </span>-d<span> </span>-v<span> </span>ollama:/root/.ollama<span> </span>-p<span> </span><span>11434</span>:11434<span> </span>--name<span> </span>ollama<span> </span>ollama/ollama </code></pre></div></td></tr></tbody></table> When configuring Ollama credentials, the `localhost` address should work without a problem (set the **base URL** to `http://localhost:11434`). ### If only n8n is in Docker# If only n8n is running in Docker, configure Ollama to listen on all interfaces by binding to `0.0.0.0` on the host. If you are running n8n in Docker on **Linux**, use the `--add-host` flag to map `host.docker.internal` to `host-gateway` when you start the container. For example: <table><tbody><tr><td><div><pre><span></span><span>1</span></pre></div></td><td><div><pre><span></span><code>docker<span> </span>run<span> </span>-it<span> </span>--rm<span> </span>--add-host<span> </span>host.docker.internal:host-gateway<span> </span>--name<span> </span>n8n<span> </span>-p<span> </span><span>5678</span>:5678<span> </span>-v<span> </span>n8n_data:/home/node/.n8n<span> </span>docker.n8n.io/n8nio/n8n </code></pre></div></td></tr></tbody></table> If you are using Docker Desktop, this is automatically configured for you. When configuring Ollama credentials, use `host.docker.internal` as the host address instead of `localhost`. For example, to bind to the default port 11434, you could set the base URL to `http://host.docker.internal:11434`. ### If Ollama and n8n are running in separate Docker containers# If both n8n and Ollama are running in Docker in separate containers, you can use Docker networking to connect them. Configure Ollama to listen on all interfaces by binding to `0.0.0.0` inside of the container (the official images are already configured this way). When configuring Ollama credentials, use the Ollama container's name as the host address instead of `localhost`. For example, if you call the Ollama container `my-ollama` and it listens on the default port 11434, you would set the base URL to `http://my-ollama:11434`. ### If Ollama and n8n are running in the same Docker container# If Ollama and n8n are running in the same Docker container, the `localhost` address doesn't need any special configuration. You can configure Ollama to listen on localhost and configure the base URL in the Ollama credentials in n8n to use localhost: `http://localhost:11434`. ## Error: connect ECONNREFUSED ::1:11434# This error occurs when your computer has IPv6 enabled, but Ollama is listening to an IPv4 address. To fix this, change the base URL in your Ollama credentials to connect to `127.0.0.1`, the IPv4-specific local address, instead of the `localhost` alias that can resolve to either IPv4 or IPv6: `http://127.0.0.1:11434`. --- ## Page: https://docs.n8n.io/integrations/builtin/cluster-nodes/sub-nodes/n8n-nodes-langchain.lmchatopenai/ Use the OpenAI Chat Model node to use OpenAI's chat models with conversational agents. On this page, you'll find the node parameters for the OpenAI Chat Model node and links to more resources. Credentials You can find authentication information for this node here. Parameter resolution in sub-nodes Sub-nodes behave differently to other nodes when processing multiple items using an expression. Most nodes, including root nodes, take any number of items as input, process these items, and output the results. You can use expressions to refer to input items, and the node resolves the expression for each item in turn. For example, given an input of five `name` values, the expression `{{ $json.name }}` resolves to each name in turn. In sub-nodes, the expression always resolves to the first item. For example, given an input of five `name` values, the expression `{{ $json.name }}` always resolves to the first name. ## Node parameters# ### Model# Select the model to use to generate the completion. n8n dynamically loads models from OpenAI and you'll only see the models available to your account. ## Node options# Use these options to further refine the node's behavior. ### Base URL# Enter a URL here to override the default URL for the API. ### Frequency Penalty# Use this option to control the chances of the model repeating itself. Higher values reduce the chance of the model repeating itself. ### Maximum Number of Tokens# Enter the maximum number of tokens used, which sets the completion length. ### Response Format# Choose **Text** or **JSON**. **JSON** ensures the model returns valid JSON. ### Presence Penalty# Use this option to control the chances of the model talking about new topics. Higher values increase the chance of the model talking about new topics. ### Sampling Temperature# Use this option to control the randomness of the sampling process. A higher temperature creates more diverse sampling, but increases the risk of hallucinations. ### Timeout# Enter the maximum request time in milliseconds. ### Max Retries# Enter the maximum number of times to retry a request. ### Top P# Use this option to set the probability the completion should use. Use a lower value to ignore less probable options. ## Templates and examples# Refer to LangChains's OpenAI documentation for more information about the service. View n8n's Advanced AI documentation. ## Common issues# For common questions or issues and suggested solutions, refer to Common issues. ## AI glossary# * **completion**: Completions are the responses generated by a model like GPT. * **hallucinations**: Hallucination in AI is when an LLM (large language model) mistakenly perceives patterns or objects that don't exist. * **vector database**: A vector database stores mathematical representations of information. Use with embeddings and retrievers to create a database that your AI can access when answering questions. * **vector store**: A vector store, or vector database, stores mathematical representations of information. Use with embeddings and retrievers to create a database that your AI can access when answering questions. --- ## Page: https://docs.n8n.io/integrations/builtin/cluster-nodes/sub-nodes/n8n-nodes-langchain.lmchatopenai/common-issues/ Here are some common errors and issues with the OpenAI Chat Model node and steps to resolve or troubleshoot them. ## Processing parameters# The OpenAI Chat Model node is a sub-node. Sub-nodes behave differently than other nodes when processing multiple items using expressions. Most nodes, including root nodes, take any number of items as input, process these items, and output the results. You can use expressions to refer to input items, and the node resolves the expression for each item in turn. For example, given an input of five name values, the expression `{{ $json.name }}` resolves to each name in turn. In sub-nodes, the expression always resolves to the first item. For example, given an input of five name values, the expression `{{ $json.name }}` always resolves to the first name. ## The service is receiving too many requests from you# This error displays when you've exceeded OpenAI's rate limits. There are two ways to work around this issue: 1. Split your data up into smaller chunks using the Loop Over Items node and add a Wait node at the end for a time amount that will help. Copy the code below and paste it into a workflow to use as a template. <table><tbody><tr><td><div><pre><span></span><span> 1</span> <span> 2</span> <span> 3</span> <span> 4</span> <span> 5</span> <span> 6</span> <span> 7</span> <span> 8</span> <span> 9</span> <span> 10</span> <span> 11</span> <span> 12</span> <span> 13</span> <span> 14</span> <span> 15</span> <span> 16</span> <span> 17</span> <span> 18</span> <span> 19</span> <span> 20</span> <span> 21</span> <span> 22</span> <span> 23</span> <span> 24</span> <span> 25</span> <span> 26</span> <span> 27</span> <span> 28</span> <span> 29</span> <span> 30</span> <span> 31</span> <span> 32</span> <span> 33</span> <span> 34</span> <span> 35</span> <span> 36</span> <span> 37</span> <span> 38</span> <span> 39</span> <span> 40</span> <span> 41</span> <span> 42</span> <span> 43</span> <span> 44</span> <span> 45</span> <span> 46</span> <span> 47</span> <span> 48</span> <span> 49</span> <span> 50</span> <span> 51</span> <span> 52</span> <span> 53</span> <span> 54</span> <span> 55</span> <span> 56</span> <span> 57</span> <span> 58</span> <span> 59</span> <span> 60</span> <span> 61</span> <span> 62</span> <span> 63</span> <span> 64</span> <span> 65</span> <span> 66</span> <span> 67</span> <span> 68</span> <span> 69</span> <span> 70</span> <span> 71</span> <span> 72</span> <span> 73</span> <span> 74</span> <span> 75</span> <span> 76</span> <span> 77</span> <span> 78</span> <span> 79</span> <span> 80</span> <span> 81</span> <span> 82</span> <span> 83</span> <span> 84</span> <span> 85</span> <span> 86</span> <span> 87</span> <span> 88</span> <span> 89</span> <span> 90</span> <span> 91</span> <span> 92</span> <span> 93</span> <span> 94</span> <span> 95</span> <span> 96</span> <span> 97</span> <span> 98</span> <span> 99</span> <span>100</span> <span>101</span> <span>102</span> <span>103</span> <span>104</span> <span>105</span> <span>106</span></pre></div></td><td><div><pre><span></span><code>{ "nodes": [ { "parameters": {}, "id": "35d05920-ad75-402a-be3c-3277bff7cc67", "name": "When clicking ‘Test workflow’", "type": "n8n-nodes-base.manualTrigger", "typeVersion": 1, "position": [ 880, 400 ] }, { "parameters": { "batchSize": 500, "options": {} }, "id": "ae9baa80-4cf9-4848-8953-22e1b7187bf6", "name": "Loop Over Items", "type": "n8n-nodes-base.splitInBatches", "typeVersion": 3, "position": [ 1120, 420 ] }, { "parameters": { "resource": "chat", "options": {}, "requestOptions": {} }, "id": "a519f271-82dc-4f60-8cfd-533dec580acc", "name": "OpenAI", "type": "n8n-nodes-base.openAi", "typeVersion": 1, "position": [ 1380, 440 ] }, { "parameters": { "unit": "minutes" }, "id": "562d9da3-2142-49bc-9b8f-71b0af42b449", "name": "Wait", "type": "n8n-nodes-base.wait", "typeVersion": 1, "position": [ 1620, 440 ], "webhookId": "714ab157-96d1-448f-b7f5-677882b92b13" } ], "connections": { "When clicking ‘Test workflow’": { "main": [ [ { "node": "Loop Over Items", "type": "main", "index": 0 } ] ] }, "Loop Over Items": { "main": [ null, [ { "node": "OpenAI", "type": "main", "index": 0 } ] ] }, "OpenAI": { "main": [ [ { "node": "Wait", "type": "main", "index": 0 } ] ] }, "Wait": { "main": [ [ { "node": "Loop Over Items", "type": "main", "index": 0 } ] ] } }, "pinData": {} } </code></pre></div></td></tr></tbody></table> 2. Use the HTTP Request node with the built-in batch-limit option against the OpenAI API instead of using the OpenAI node. ## Insufficient quota# Quota issues There are a number of OpenAI issues surrounding quotas, including failures when quotas have been recently topped up. To avoid these issues, ensure that there is credit in the account and issue a new API key from the API keys screen. This error displays when your OpenAI account doesn't have enough credits or capacity to fulfill your request. This may mean that your OpenAI trial period has ended, that your account needs more credit, or that you've gone over a usage limit. To troubleshoot this error, on your OpenAI settings page: * Select the correct organization for your API key in the first selector in the upper-left corner. * Select the correct project for your API key in the second selector in the upper-left corner. * Check the organization-level billing overview page to ensure that the organization has enough credit. Double-check that you select the correct organization for this page. * Check the organization-level usage limits page. Double-check that you select the correct organization for this page and scroll to the **Usage limits** section to verify that you haven't exceeded your organization's usage limits. * Check your OpenAI project's usage limits. Double-check that you select the correct project in the second selector in the upper-left corner. Select **Project** > **Limits** to view or change the project limits. * Check that the OpenAI API is operating as expected. Balance waiting period After topping up your balance, there may be a delay before your OpenAI account reflects the new balance. In n8n: * check that the OpenAI credentials use a valid OpenAI API key for the account you've added money to * ensure that you connect the OpenAI node to the correct OpenAI credentials If you find yourself frequently running out of account credits, consider turning on auto recharge in your OpenAI billing settings to automatically reload your account with credits when your balance reaches $0. ## Bad request - please check your parameters# This error displays when the request results in an error but n8n wasn't able to interpret the error message from OpenAI. To begin troubleshooting, try running the same operation using the HTTP Request node, which should provide a more detailed error message. --- ## Page: https://docs.n8n.io/integrations/builtin/cluster-nodes/sub-nodes/n8n-nodes-langchain.lmchatopenrouter/ Use the OpenRouter Chat Model node to use OpenRouter's chat models with conversational agents. On this page, you'll find the node parameters for the OpenRouter Chat Model node and links to more resources. Credentials You can find authentication information for this node here. Parameter resolution in sub-nodes Sub-nodes behave differently to other nodes when processing multiple items using an expression. Most nodes, including root nodes, take any number of items as input, process these items, and output the results. You can use expressions to refer to input items, and the node resolves the expression for each item in turn. For example, given an input of five `name` values, the expression `{{ $json.name }}` resolves to each name in turn. In sub-nodes, the expression always resolves to the first item. For example, given an input of five `name` values, the expression `{{ $json.name }}` always resolves to the first name. ## Node parameters# ### Model# Select the model to use to generate the completion. n8n dynamically loads models from OpenRouter and you'll only see the models available to your account. ## Node options# Use these options to further refine the node's behavior. ### Base URL# Enter a URL here to override the default URL for the API. ### Frequency Penalty# Use this option to control the chances of the model repeating itself. Higher values reduce the chance of the model repeating itself. ### Maximum Number of Tokens# Enter the maximum number of tokens used, which sets the completion length. ### Response Format# Choose **Text** or **JSON**. **JSON** ensures the model returns valid JSON. ### Presence Penalty# Use this option to control the chances of the model talking about new topics. Higher values increase the chance of the model talking about new topics. ### Sampling Temperature# Use this option to control the randomness of the sampling process. A higher temperature creates more diverse sampling, but increases the risk of hallucinations. ### Timeout# Enter the maximum request time in milliseconds. ### Max Retries# Enter the maximum number of times to retry a request. ### Top P# Use this option to set the probability the completion should use. Use a lower value to ignore less probable options. ## Templates and examples# As OpenRouter is API-compatible with OpenAI, you can refer to LangChains's OpenAI documentation for more information about the service. View n8n's Advanced AI documentation. ## AI glossary# * **completion**: Completions are the responses generated by a model like GPT. * **hallucinations**: Hallucination in AI is when an LLM (large language model) mistakenly perceives patterns or objects that don't exist. * **vector database**: A vector database stores mathematical representations of information. Use with embeddings and retrievers to create a database that your AI can access when answering questions. * **vector store**: A vector store, or vector database, stores mathematical representations of information. Use with embeddings and retrievers to create a database that your AI can access when answering questions. --- ## Page: https://docs.n8n.io/integrations/builtin/cluster-nodes/sub-nodes/n8n-nodes-langchain.lmcohere/ Use the Cohere Model node to use Cohere's models. On this page, you'll find the node parameters for the Cohere Model node, and links to more resources. Credentials You can find authentication information for this node here. Parameter resolution in sub-nodes Sub-nodes behave differently to other nodes when processing multiple items using an expression. Most nodes, including root nodes, take any number of items as input, process these items, and output the results. You can use expressions to refer to input items, and the node resolves the expression for each item in turn. For example, given an input of five `name` values, the expression `{{ $json.name }}` resolves to each name in turn. In sub-nodes, the expression always resolves to the first item. For example, given an input of five `name` values, the expression `{{ $json.name }}` always resolves to the first name. ## Node Options# * **Maximum Number of Tokens**: Enter the maximum number of tokens used, which sets the completion length. * **Sampling Temperature**: Use this option to control the randomness of the sampling process. A higher temperature creates more diverse sampling, but increases the risk of hallucinations. ## Templates and examples# Refer to LangChains's Cohere documentation for more information about the service. View n8n's Advanced AI documentation. ## AI glossary# * **completion**: Completions are the responses generated by a model like GPT. * **hallucinations**: Hallucination in AI is when an LLM (large language model) mistakenly perceives patterns or objects that don't exist. * **vector database**: A vector database stores mathematical representations of information. Use with embeddings and retrievers to create a database that your AI can access when answering questions. * **vector store**: A vector store, or vector database, stores mathematical representations of information. Use with embeddings and retrievers to create a database that your AI can access when answering questions. --- ## Page: https://docs.n8n.io/integrations/builtin/cluster-nodes/sub-nodes/n8n-nodes-langchain.lmollama/ The Ollama Model node allows you use local Llama 2 models. On this page, you'll find the node parameters for the Ollama Model node, and links to more resources. Credentials You can find authentication information for this node here. Parameter resolution in sub-nodes Sub-nodes behave differently to other nodes when processing multiple items using an expression. Most nodes, including root nodes, take any number of items as input, process these items, and output the results. You can use expressions to refer to input items, and the node resolves the expression for each item in turn. For example, given an input of five `name` values, the expression `{{ $json.name }}` resolves to each name in turn. In sub-nodes, the expression always resolves to the first item. For example, given an input of five `name` values, the expression `{{ $json.name }}` always resolves to the first name. ## Node parameters# * **Model**: Select the model that generates the completion. Choose from: * **Llama2** * **Llama2 13B** * **Llama2 70B** * **Llama2 Uncensored** Refer to the Ollama Models Library documentation for more information about available models. ## Node options# * **Sampling Temperature**: Use this option to control the randomness of the sampling process. A higher temperature creates more diverse sampling, but increases the risk of hallucinations. * **Top K**: Enter the number of token choices the model uses to generate the next token. * **Top P**: Use this option to set the probability the completion should use. Use a lower value to ignore less probable options. ## Templates and examples# Refer to LangChains's Ollama documentation for more information about the service. View n8n's Advanced AI documentation. ## Common issues# For common questions or issues and suggested solutions, refer to Common issues. ## AI glossary# * **completion**: Completions are the responses generated by a model like GPT. * **hallucinations**: Hallucination in AI is when an LLM (large language model) mistakenly perceives patterns or objects that don't exist. * **vector database**: A vector database stores mathematical representations of information. Use with embeddings and retrievers to create a database that your AI can access when answering questions. * **vector store**: A vector store, or vector database, stores mathematical representations of information. Use with embeddings and retrievers to create a database that your AI can access when answering questions. ## Self-hosted AI Starter Kit# New to working with AI and using self-hosted n8n? Try n8n's self-hosted AI Starter Kit to get started with a proof-of-concept or demo playground using Ollama, Qdrant, and PostgreSQL. --- ## Page: https://docs.n8n.io/integrations/builtin/cluster-nodes/sub-nodes/n8n-nodes-langchain.lmollama/common-issues/ Here are some common errors and issues with the Ollama Model node and steps to resolve or troubleshoot them. ## Processing parameters# The Ollama Model node is a sub-node. Sub-nodes behave differently than other nodes when processing multiple items using expressions. Most nodes, including root nodes, take any number of items as input, process these items, and output the results. You can use expressions to refer to input items, and the node resolves the expression for each item in turn. For example, given an input of five name values, the expression `{{ $json.name }}` resolves to each name in turn. In sub-nodes, the expression always resolves to the first item. For example, given an input of five name values, the expression `{{ $json.name }}` always resolves to the first name. ## Can't connect to a remote Ollama instance# The Ollama Model node is only designed to connect to a locally hosted Ollama instance. It doesn't include the authentication features you'd need to connect to a remotely hosted Ollama instance. To use the Ollama Model, follow the Ollama credentials instructions to set up Ollama locally and configure the instance URL in n8n. ## Can't connect to a local Ollama instance when using Docker# The Ollama Model node connects to a locally hosted Ollama instance using the base URL defined by Ollama credentials. When you run either n8n or Ollama in Docker, you need to configure the network so that n8n can connect to Ollama. Ollama typically listens for connections on `localhost`, the local network address. In Docker, by default, each container has its own `localhost` which is only accessible from within the container. If either n8n or Ollama are running in containers, they won't be able to connect over `localhost`. The solution depends on how you're hosting the two components. ### If only Ollama is in Docker# If only Ollama is running in Docker, configure Ollama to listen on all interfaces by binding to `0.0.0.0` inside of the container (the official images are already configured this way). When running the container, publish the ports with the `-p` flag. By default, Ollama runs on port 11434, so your Docker command should look like this: <table><tbody><tr><td><div><pre><span></span><span>1</span></pre></div></td><td><div><pre><span></span><code>docker<span> </span>run<span> </span>-d<span> </span>-v<span> </span>ollama:/root/.ollama<span> </span>-p<span> </span><span>11434</span>:11434<span> </span>--name<span> </span>ollama<span> </span>ollama/ollama </code></pre></div></td></tr></tbody></table> When configuring Ollama credentials, the `localhost` address should work without a problem (set the **base URL** to `http://localhost:11434`). ### If only n8n is in Docker# If only n8n is running in Docker, configure Ollama to listen on all interfaces by binding to `0.0.0.0` on the host. If you are running n8n in Docker on **Linux**, use the `--add-host` flag to map `host.docker.internal` to `host-gateway` when you start the container. For example: <table><tbody><tr><td><div><pre><span></span><span>1</span></pre></div></td><td><div><pre><span></span><code>docker<span> </span>run<span> </span>-it<span> </span>--rm<span> </span>--add-host<span> </span>host.docker.internal:host-gateway<span> </span>--name<span> </span>n8n<span> </span>-p<span> </span><span>5678</span>:5678<span> </span>-v<span> </span>n8n_data:/home/node/.n8n<span> </span>docker.n8n.io/n8nio/n8n </code></pre></div></td></tr></tbody></table> If you are using Docker Desktop, this is automatically configured for you. When configuring Ollama credentials, use `host.docker.internal` as the host address instead of `localhost`. For example, to bind to the default port 11434, you could set the base URL to `http://host.docker.internal:11434`. ### If Ollama and n8n are running in separate Docker containers# If both n8n and Ollama are running in Docker in separate containers, you can use Docker networking to connect them. Configure Ollama to listen on all interfaces by binding to `0.0.0.0` inside of the container (the official images are already configured this way). When configuring Ollama credentials, use the Ollama container's name as the host address instead of `localhost`. For example, if you call the Ollama container `my-ollama` and it listens on the default port 11434, you would set the base URL to `http://my-ollama:11434`. ### If Ollama and n8n are running in the same Docker container# If Ollama and n8n are running in the same Docker container, the `localhost` address doesn't need any special configuration. You can configure Ollama to listen on localhost and configure the base URL in the Ollama credentials in n8n to use localhost: `http://localhost:11434`. ## Error: connect ECONNREFUSED ::1:11434# This error occurs when your computer has IPv6 enabled, but Ollama is listening to an IPv4 address. To fix this, change the base URL in your Ollama credentials to connect to `127.0.0.1`, the IPv4-specific local address, instead of the `localhost` alias that can resolve to either IPv4 or IPv6: `http://127.0.0.1:11434`. --- ## Page: https://docs.n8n.io/integrations/builtin/cluster-nodes/sub-nodes/n8n-nodes-langchain.lmopenhuggingfaceinference/ Use the Hugging Face Inference Model node to use Hugging Face's models. On this page, you'll find the node parameters for the Hugging Face Inference Model node, and links to more resources. Credentials You can find authentication information for this node here. Parameter resolution in sub-nodes Sub-nodes behave differently to other nodes when processing multiple items using an expression. Most nodes, including root nodes, take any number of items as input, process these items, and output the results. You can use expressions to refer to input items, and the node resolves the expression for each item in turn. For example, given an input of five `name` values, the expression `{{ $json.name }}` resolves to each name in turn. In sub-nodes, the expression always resolves to the first item. For example, given an input of five `name` values, the expression `{{ $json.name }}` always resolves to the first name. ## Node parameters# * **Model**: Select the model to use to generate the completion. ## Node options# * **Custom Inference Endpoint**: Enter a custom inference endpoint URL. * **Frequency Penalty**: Use this option to control the chances of the model repeating itself. Higher values reduce the chance of the model repeating itself. * **Maximum Number of Tokens**: Enter the maximum number of tokens used, which sets the completion length. * **Presence Penalty**: Use this option to control the chances of the model talking about new topics. Higher values increase the chance of the model talking about new topics. * **Sampling Temperature**: Use this option to control the randomness of the sampling process. A higher temperature creates more diverse sampling, but increases the risk of hallucinations. * **Top K**: Enter the number of token choices the model uses to generate the next token. * **Top P**: Use this option to set the probability the completion should use. Use a lower value to ignore less probable options. ## Templates and examples# Browse Hugging Face Inference Model integration templates, or search all templates Refer to LangChains's Hugging Face Inference Model documentation for more information about the service. View n8n's Advanced AI documentation. ## AI glossary# * **completion**: Completions are the responses generated by a model like GPT. * **hallucinations**: Hallucination in AI is when an LLM (large language model) mistakenly perceives patterns or objects that don't exist. * **vector database**: A vector database stores mathematical representations of information. Use with embeddings and retrievers to create a database that your AI can access when answering questions. * **vector store**: A vector store, or vector database, stores mathematical representations of information. Use with embeddings and retrievers to create a database that your AI can access when answering questions. --- ## Page: https://docs.n8n.io/integrations/builtin/cluster-nodes/sub-nodes/n8n-nodes-langchain.memorymanager/ The Chat Memory Manager node manages chat message memories within your workflows. Use this node to load, insert, and delete chat messages in an in-memory vector store. This node is useful when you: * Can't add a memory node directly. * Need to do more complex memory management, beyond what the memory nodes offer. For example, you can add this node to check the memory size of the Agent node's response, and reduce it if needed. * Want to inject messages to the AI that look like user messages, to give the AI more context. On this page, you'll find a list of operations that the Chat Memory Manager node supports, along with links to more resources. Parameter resolution in sub-nodes Sub-nodes behave differently to other nodes when processing multiple items using an expression. Most nodes, including root nodes, take any number of items as input, process these items, and output the results. You can use expressions to refer to input items, and the node resolves the expression for each item in turn. For example, given an input of five `name` values, the expression `{{ $json.name }}` resolves to each name in turn. In sub-nodes, the expression always resolves to the first item. For example, given an input of five `name` values, the expression `{{ $json.name }}` always resolves to the first name. ## Node parameters# * **Operation Mode**: Choose between **Get Many Messages**, **Insert Messages**, and **Delete Messages** operations. * **Insert Mode**: Available in **Insert Messages** mode. Choose from: * **Insert Messages**: Insert messages alongside existing messages. * **Override All Messages**: Replace current memory. * **Delete Mode**: available in **Delete Messages** mode. Choose from: * **Last N**: Delete the last N messages. * **All Messages**: Delete messages from memory. * **Chat Messages**: available in **Insert Messages** mode. Define the chat messages to insert into the memory, including: * **Type Name or ID**: Set the message type. Select one of: * **AI**: Use this for messages from the AI. * **System**: Add a message containing instructions for the AI. * **User**: Use this for messages from the user. This message type is sometimes called the 'human' message in other AI tools and guides. * **Message**: Enter the message contents. * **Hide Message in Chat**: Select whether n8n should display the message to the user in the chat UI (turned off) or not (turned on). * **Messages Count**: Available in **Delete Messages** mode when you select **Last N**. Enter the number of latest messages to delete. * **Simplify Output**: Available in **Get Many Messages** mode. Turn on to simplify the output to include only the sender (AI, user, or system) and the text. ## Templates and examples# Refer to LangChain's Memory documentation for more information about the service. View n8n's Advanced AI documentation. ## AI glossary# * **completion**: Completions are the responses generated by a model like GPT. * **hallucinations**: Hallucination in AI is when an LLM (large language model) mistakenly perceives patterns or objects that don't exist. * **vector database**: A vector database stores mathematical representations of information. Use with embeddings and retrievers to create a database that your AI can access when answering questions. * **vector store**: A vector store, or vector database, stores mathematical representations of information. Use with embeddings and retrievers to create a database that your AI can access when answering questions. --- ## Page: https://docs.n8n.io/integrations/builtin/cluster-nodes/sub-nodes/n8n-nodes-langchain.memorybufferwindow/ Use the Simple Memory node to persist chat history in your workflow. On this page, you'll find a list of operations the Simple Memory node supports, and links to more resources. Don't use this node if running n8n in queue mode If your n8n instance uses queue mode, this node doesn't work in an active production workflow. This is because n8n can't guarantee that every call to Simple Memory will go to the same worker. Parameter resolution in sub-nodes Sub-nodes behave differently to other nodes when processing multiple items using an expression. Most nodes, including root nodes, take any number of items as input, process these items, and output the results. You can use expressions to refer to input items, and the node resolves the expression for each item in turn. For example, given an input of five `name` values, the expression `{{ $json.name }}` resolves to each name in turn. In sub-nodes, the expression always resolves to the first item. For example, given an input of five `name` values, the expression `{{ $json.name }}` always resolves to the first name. ## Node parameters# Configure these parameters to configure the node: * **Session Key**: Enter the key to use to store the memory in the workflow data. * **Context Window Length**: Enter the number of previous interactions to consider for context. ## Templates and examples# Browse Simple Memory node documentation integration templates, or search all templates Refer to LangChain's Buffer Window Memory documentation for more information about the service. View n8n's Advanced AI documentation. ## Common issues# For common questions or issues and suggested solutions, refer to Common issues. ## AI glossary# * **completion**: Completions are the responses generated by a model like GPT. * **hallucinations**: Hallucination in AI is when an LLM (large language model) mistakenly perceives patterns or objects that don't exist. * **vector database**: A vector database stores mathematical representations of information. Use with embeddings and retrievers to create a database that your AI can access when answering questions. * **vector store**: A vector store, or vector database, stores mathematical representations of information. Use with embeddings and retrievers to create a database that your AI can access when answering questions. --- ## Page: https://docs.n8n.io/integrations/builtin/cluster-nodes/sub-nodes/n8n-nodes-langchain.memorybufferwindow/common-issues/ Here are some common errors and issues with the Simple Memory node and steps to resolve or troubleshoot them. ## Single memory instance# If you add more than one Simple Memory node to your workflow, all nodes access the same memory instance by default. Be careful when doing destructive actions that override existing memory contents, such as the override all messages operation in the Chat Memory Manager node. If you want more than one memory instance in your workflow, set different session IDs in different memory nodes. ## Managing the Session ID# In most cases, the `sessionId` is automatically retrieved from the **On Chat Message** trigger. But you may run into an error with the phrase `No sessionId`. If you have this error, first check the output of your Chat trigger to ensure it includes a `sessionId`. If you're not using the **On Chat Message** trigger, you'll need to manage sessions manually. For testing purposes, you can use a static key like `my_test_session`. If you use this approach, be sure to set up proper session management before activating the workflow to avoid potential issues in a live environment. --- ## Page: https://docs.n8n.io/integrations/builtin/cluster-nodes/sub-nodes/n8n-nodes-langchain.memorymotorhead/ Use the Motorhead node to use Motorhead as a memory server. On this page, you'll find a list of operations the Motorhead node supports, and links to more resources. Credentials You can find authentication information for this node here. ## Node parameters# * **Session ID**: Enter the ID to use to store the memory in the workflow data. ## Node reference# Parameter resolution in sub-nodes Sub-nodes behave differently to other nodes when processing multiple items using an expression. Most nodes, including root nodes, take any number of items as input, process these items, and output the results. You can use expressions to refer to input items, and the node resolves the expression for each item in turn. For example, given an input of five `name` values, the expression `{{ $json.name }}` resolves to each name in turn. In sub-nodes, the expression always resolves to the first item. For example, given an input of five `name` values, the expression `{{ $json.name }}` always resolves to the first name. ## Templates and examples# Browse Motorhead integration templates, or search all templates Refer to LangChain's Motorhead documentation for more information about the service. View n8n's Advanced AI documentation. ## Single memory instance# If you add more than one Motorhead node to your workflow, all nodes access the same memory instance by default. Be careful when doing destructive actions that override existing memory contents, such as the override all messages operation in the Chat Memory Manager node. If you want more than one memory instance in your workflow, set different session IDs in different memory nodes. ## AI glossary# * **completion**: Completions are the responses generated by a model like GPT. * **hallucinations**: Hallucination in AI is when an LLM (large language model) mistakenly perceives patterns or objects that don't exist. * **vector database**: A vector database stores mathematical representations of information. Use with embeddings and retrievers to create a database that your AI can access when answering questions. * **vector store**: A vector store, or vector database, stores mathematical representations of information. Use with embeddings and retrievers to create a database that your AI can access when answering questions. --- ## Page: https://docs.n8n.io/integrations/builtin/cluster-nodes/sub-nodes/n8n-nodes-langchain.memorymongochat/ Use the MongoDB Chat Memory node to use MongoDB as a memory server for storing chat history. On this page, you'll find a list of operations the MongoDB Chat Memory node supports, and links to more resources. Credentials You can find authentication information for this node here. Parameter resolution in sub-nodes Sub-nodes behave differently to other nodes when processing multiple items using an expression. Most nodes, including root nodes, take any number of items as input, process these items, and output the results. You can use expressions to refer to input items, and the node resolves the expression for each item in turn. For example, given an input of five `name` values, the expression `{{ $json.name }}` resolves to each name in turn. In sub-nodes, the expression always resolves to the first item. For example, given an input of five `name` values, the expression `{{ $json.name }}` always resolves to the first name. ## Node parameters# * **Session Key**: Enter the key to use to store the memory in the workflow data. * **Collection Name**: Enter the name of the collection to store the chat history in. The system will create the collection if it doesn't exist. * **Database Name**: Enter the name of the database to store the chat history in. If not provided, the database from credentials will be used. * **Context Window Length**: Enter the number of previous interactions to consider for context. Refer to LangChain's MongoDB Chat Message History documentation for more information about the service. View n8n's Advanced AI documentation. ## Single memory instance# If you add more than one MongoDB Chat Memory node to your workflow, all nodes access the same memory instance by default. Be careful when doing destructive actions that override existing memory contents, such as the override all messages operation in the Chat Memory Manager node. If you want more than one memory instance in your workflow, set different session IDs in different memory nodes. ## AI glossary# * **completion**: Completions are the responses generated by a model like GPT. * **hallucinations**: Hallucination in AI is when an LLM (large language model) mistakenly perceives patterns or objects that don't exist. * **vector database**: A vector database stores mathematical representations of information. Use with embeddings and retrievers to create a database that your AI can access when answering questions. * **vector store**: A vector store, or vector database, stores mathematical representations of information. Use with embeddings and retrievers to create a database that your AI can access when answering questions. --- ## Page: https://docs.n8n.io/integrations/builtin/cluster-nodes/sub-nodes/n8n-nodes-langchain.memoryredischat/ Use the Redis Chat Memory node to use Redis as a memory server. On this page, you'll find a list of operations the Redis Chat Memory node supports, and links to more resources. Credentials You can find authentication information for this node here. Parameter resolution in sub-nodes Sub-nodes behave differently to other nodes when processing multiple items using an expression. Most nodes, including root nodes, take any number of items as input, process these items, and output the results. You can use expressions to refer to input items, and the node resolves the expression for each item in turn. For example, given an input of five `name` values, the expression `{{ $json.name }}` resolves to each name in turn. In sub-nodes, the expression always resolves to the first item. For example, given an input of five `name` values, the expression `{{ $json.name }}` always resolves to the first name. ## Node parameters# * **Session Key**: Enter the key to use to store the memory in the workflow data. * **Session Time To Live**: Use this parameter to make the session expire after a given number of seconds. * **Context Window Length**: Enter the number of previous interactions to consider for context. ## Templates and examples# Refer to LangChain's Redis Chat Memory documentation for more information about the service. View n8n's Advanced AI documentation. ## Single memory instance# If you add more than one Redis Chat Memory node to your workflow, all nodes access the same memory instance by default. Be careful when doing destructive actions that override existing memory contents, such as the override all messages operation in the Chat Memory Manager node. If you want more than one memory instance in your workflow, set different session IDs in different memory nodes. ## AI glossary# * **completion**: Completions are the responses generated by a model like GPT. * **hallucinations**: Hallucination in AI is when an LLM (large language model) mistakenly perceives patterns or objects that don't exist. * **vector database**: A vector database stores mathematical representations of information. Use with embeddings and retrievers to create a database that your AI can access when answering questions. * **vector store**: A vector store, or vector database, stores mathematical representations of information. Use with embeddings and retrievers to create a database that your AI can access when answering questions. --- ## Page: https://docs.n8n.io/integrations/builtin/cluster-nodes/sub-nodes/n8n-nodes-langchain.memorypostgreschat/ Use the Postgres Chat Memory node to use Postgres as a memory server for storing chat history. On this page, you'll find a list of operations the Postgres Chat Memory node supports, and links to more resources. Credentials You can find authentication information for this node here. Parameter resolution in sub-nodes Sub-nodes behave differently to other nodes when processing multiple items using an expression. Most nodes, including root nodes, take any number of items as input, process these items, and output the results. You can use expressions to refer to input items, and the node resolves the expression for each item in turn. For example, given an input of five `name` values, the expression `{{ $json.name }}` resolves to each name in turn. In sub-nodes, the expression always resolves to the first item. For example, given an input of five `name` values, the expression `{{ $json.name }}` always resolves to the first name. ## Node parameters# * **Session Key**: Enter the key to use to store the memory in the workflow data. * **Table Name**: Enter the name of the table to store the chat history in. The system will create the table if doesn't exist. * **Context Window Length**: Enter the number of previous interactions to consider for context. Refer to LangChain's Postgres Chat Message History documentation for more information about the service. View n8n's Advanced AI documentation. ## Single memory instance# If you add more than one Postgres Chat Memory node to your workflow, all nodes access the same memory instance by default. Be careful when doing destructive actions that override existing memory contents, such as the override all messages operation in the Chat Memory Manager node. If you want more than one memory instance in your workflow, set different session IDs in different memory nodes. ## AI glossary# * **completion**: Completions are the responses generated by a model like GPT. * **hallucinations**: Hallucination in AI is when an LLM (large language model) mistakenly perceives patterns or objects that don't exist. * **vector database**: A vector database stores mathematical representations of information. Use with embeddings and retrievers to create a database that your AI can access when answering questions. * **vector store**: A vector store, or vector database, stores mathematical representations of information. Use with embeddings and retrievers to create a database that your AI can access when answering questions. --- ## Page: https://docs.n8n.io/integrations/builtin/cluster-nodes/sub-nodes/n8n-nodes-langchain.memoryxata/ Use the Xata node to use Xata as a memory server. On this page, you'll find a list of operations the Xata node supports, and links to more resources. Credentials You can find authentication information for this node here. Parameter resolution in sub-nodes Sub-nodes behave differently to other nodes when processing multiple items using an expression. Most nodes, including root nodes, take any number of items as input, process these items, and output the results. You can use expressions to refer to input items, and the node resolves the expression for each item in turn. For example, given an input of five `name` values, the expression `{{ $json.name }}` resolves to each name in turn. In sub-nodes, the expression always resolves to the first item. For example, given an input of five `name` values, the expression `{{ $json.name }}` always resolves to the first name. ## Node parameters# * **Session ID**: Enter the ID to use to store the memory in the workflow data. * **Context Window Length**: Enter the number of previous interactions to consider for context. ## Templates and examples# Refer to LangChain's Xata documentation for more information about the service. View n8n's Advanced AI documentation. ## Single memory instance# If you add more than one Xata node to your workflow, all nodes access the same memory instance by default. Be careful when doing destructive actions that override existing memory contents, such as the override all messages operation in the Chat Memory Manager node. If you want more than one memory instance in your workflow, set different session IDs in different memory nodes. ## AI glossary# * **completion**: Completions are the responses generated by a model like GPT. * **hallucinations**: Hallucination in AI is when an LLM (large language model) mistakenly perceives patterns or objects that don't exist. * **vector database**: A vector database stores mathematical representations of information. Use with embeddings and retrievers to create a database that your AI can access when answering questions. * **vector store**: A vector store, or vector database, stores mathematical representations of information. Use with embeddings and retrievers to create a database that your AI can access when answering questions. --- ## Page: https://docs.n8n.io/integrations/builtin/cluster-nodes/sub-nodes/n8n-nodes-langchain.memoryzep/ Use the Zep node to use Zep as a memory server. On this page, you'll find a list of operations the Zep node supports, and links to more resources. Credentials You can find authentication information for this node here. Parameter resolution in sub-nodes Sub-nodes behave differently to other nodes when processing multiple items using an expression. Most nodes, including root nodes, take any number of items as input, process these items, and output the results. You can use expressions to refer to input items, and the node resolves the expression for each item in turn. For example, given an input of five `name` values, the expression `{{ $json.name }}` resolves to each name in turn. In sub-nodes, the expression always resolves to the first item. For example, given an input of five `name` values, the expression `{{ $json.name }}` always resolves to the first name. ## Node parameters# * **Session ID**: Enter the ID to use to store the memory in the workflow data. ## Templates and examples# Browse Zep integration templates, or search all templates Refer to LangChain's Zep documentation for more information about the service. View n8n's Advanced AI documentation. ## Single memory instance# If you add more than one Zep node to your workflow, all nodes access the same memory instance by default. Be careful when doing destructive actions that override existing memory contents, such as the override all messages operation in the Chat Memory Manager node. If you want more than one memory instance in your workflow, set different session IDs in different memory nodes. ## AI glossary# * **completion**: Completions are the responses generated by a model like GPT. * **hallucinations**: Hallucination in AI is when an LLM (large language model) mistakenly perceives patterns or objects that don't exist. * **vector database**: A vector database stores mathematical representations of information. Use with embeddings and retrievers to create a database that your AI can access when answering questions. * **vector store**: A vector store, or vector database, stores mathematical representations of information. Use with embeddings and retrievers to create a database that your AI can access when answering questions. --- ## Page: https://docs.n8n.io/integrations/builtin/cluster-nodes/sub-nodes/n8n-nodes-langchain.outputparserautofixing/ The Auto-fixing Output Parser node wraps another output parser. If the first one fails, it calls out to another LLM to fix any errors. Parameter resolution in sub-nodes Sub-nodes behave differently to other nodes when processing multiple items using an expression. Most nodes, including root nodes, take any number of items as input, process these items, and output the results. You can use expressions to refer to input items, and the node resolves the expression for each item in turn. For example, given an input of five `name` values, the expression `{{ $json.name }}` resolves to each name in turn. In sub-nodes, the expression always resolves to the first item. For example, given an input of five `name` values, the expression `{{ $json.name }}` always resolves to the first name. ## Templates and examples# Refer to LangChain's output parser documentation for more information about the service. View n8n's Advanced AI documentation. ## AI glossary# * **completion**: Completions are the responses generated by a model like GPT. * **hallucinations**: Hallucination in AI is when an LLM (large language model) mistakenly perceives patterns or objects that don't exist. * **vector database**: A vector database stores mathematical representations of information. Use with embeddings and retrievers to create a database that your AI can access when answering questions. * **vector store**: A vector store, or vector database, stores mathematical representations of information. Use with embeddings and retrievers to create a database that your AI can access when answering questions. --- ## Page: https://docs.n8n.io/integrations/builtin/cluster-nodes/sub-nodes/n8n-nodes-langchain.outputparseritemlist/ Use the Item List Output Parser node to return a list of items with a specific length and separator. Parameter resolution in sub-nodes Sub-nodes behave differently to other nodes when processing multiple items using an expression. Most nodes, including root nodes, take any number of items as input, process these items, and output the results. You can use expressions to refer to input items, and the node resolves the expression for each item in turn. For example, given an input of five `name` values, the expression `{{ $json.name }}` resolves to each name in turn. In sub-nodes, the expression always resolves to the first item. For example, given an input of five `name` values, the expression `{{ $json.name }}` always resolves to the first name. ## Node options# * **Number of Items**: Enter the maximum items to return. Set to `-1` for unlimited items. * **Separator**: Select the separator used to split the results into separate items. Defaults to a new line. ## Templates and examples# Browse Item List Output Parser integration templates, or search all templates Refer to LangChain's output parser documentation for more information about the service. View n8n's Advanced AI documentation. ## AI glossary# * **completion**: Completions are the responses generated by a model like GPT. * **hallucinations**: Hallucination in AI is when an LLM (large language model) mistakenly perceives patterns or objects that don't exist. * **vector database**: A vector database stores mathematical representations of information. Use with embeddings and retrievers to create a database that your AI can access when answering questions. * **vector store**: A vector store, or vector database, stores mathematical representations of information. Use with embeddings and retrievers to create a database that your AI can access when answering questions. --- ## Page: https://docs.n8n.io/integrations/builtin/cluster-nodes/sub-nodes/n8n-nodes-langchain.outputparserstructured/ Use the Structured Output Parser node to return fields based on a JSON Schema. On this page, you'll find the node parameters for the Structured Output Parser node, and links to more resources. Parameter resolution in sub-nodes Sub-nodes behave differently to other nodes when processing multiple items using an expression. Most nodes, including root nodes, take any number of items as input, process these items, and output the results. You can use expressions to refer to input items, and the node resolves the expression for each item in turn. For example, given an input of five `name` values, the expression `{{ $json.name }}` resolves to each name in turn. In sub-nodes, the expression always resolves to the first item. For example, given an input of five `name` values, the expression `{{ $json.name }}` always resolves to the first name. ## Node parameters# * **Schema Type**: Define the output structure and validation. You have two options to provide the schema: 1. **Generate from JSON Example**: Input an example JSON object to automatically generate the schema. The node uses the object property types and names. It ignores the actual values. 2. **Define Below**: Manually input the JSON schema. Read the JSON Schema guides and examples for help creating a valid JSON schema. ## Templates and examples# Refer to LangChain's output parser documentation for more information about the service. View n8n's Advanced AI documentation. ## Common issues# For common questions or issues and suggested solutions, refer to Common issues. ## AI glossary# * **completion**: Completions are the responses generated by a model like GPT. * **hallucinations**: Hallucination in AI is when an LLM (large language model) mistakenly perceives patterns or objects that don't exist. * **vector database**: A vector database stores mathematical representations of information. Use with embeddings and retrievers to create a database that your AI can access when answering questions. * **vector store**: A vector store, or vector database, stores mathematical representations of information. Use with embeddings and retrievers to create a database that your AI can access when answering questions. --- ## Page: https://docs.n8n.io/integrations/builtin/cluster-nodes/sub-nodes/n8n-nodes-langchain.outputparserstructured/common-issues/ Here are some common errors and issues with the Structured Output Parser node and steps to resolve or troubleshoot them. ## Processing parameters# The Structured Output Parser node is a sub-node. Sub-nodes behave differently than other nodes when processing multiple items using expressions. Most nodes, including root nodes, take any number of items as input, process these items, and output the results. You can use expressions to refer to input items, and the node resolves the expression for each item in turn. For example, given an input of five name values, the expression `{{ $json.name }}` resolves to each name in turn. In sub-nodes, the expression always resolves to the first item. For example, given an input of five name values, the expression `{{ $json.name }}` always resolves to the first name. ## Adding the structured output parser node to AI nodes# You can attach output parser nodes to select AI root nodes. To add the Structured Output Parser to a node, enable the **Require Specific Output Format** option in the AI root node you wish to format. Once the option is enabled, a new **output parser** attachment point is displayed. Click the **output parser** attachment point to add the Structured Output Parser node to the node. The Structured Output Parser node structures the final output from AI agents. It's not intended to structure intermediary output to pass to other AI tools or stages. To request a specific format for intermediary output, include the response structure in the **System Message** for the **AI Agent**. The message can include either a schema or example response for the agent to use as a template for its results. ## Structuring output from agents# Structured output parsing is often not reliable when working with agents. If your workflow uses agents, n8n recommends using a separate LLM-chain to receive the data from the agent and parse it. This leads to better, more consistent results than parsing directly in the agent workflow. --- ## Page: https://docs.n8n.io/integrations/builtin/cluster-nodes/sub-nodes/n8n-nodes-langchain.retrievercontextualcompression/ The Contextual Compression Retriever node improves the answers returned from vector store document similarity searches by taking into account the context from the query. Parameter resolution in sub-nodes Sub-nodes behave differently to other nodes when processing multiple items using an expression. Most nodes, including root nodes, take any number of items as input, process these items, and output the results. You can use expressions to refer to input items, and the node resolves the expression for each item in turn. For example, given an input of five `name` values, the expression `{{ $json.name }}` resolves to each name in turn. In sub-nodes, the expression always resolves to the first item. For example, given an input of five `name` values, the expression `{{ $json.name }}` always resolves to the first name. ## Templates and examples# Refer to LangChain's contextual compression retriever documentation for more information about the service. View n8n's Advanced AI documentation. ## AI glossary# * **completion**: Completions are the responses generated by a model like GPT. * **hallucinations**: Hallucination in AI is when an LLM (large language model) mistakenly perceives patterns or objects that don't exist. * **vector database**: A vector database stores mathematical representations of information. Use with embeddings and retrievers to create a database that your AI can access when answering questions. * **vector store**: A vector store, or vector database, stores mathematical representations of information. Use with embeddings and retrievers to create a database that your AI can access when answering questions. --- ## Page: https://docs.n8n.io/integrations/builtin/cluster-nodes/sub-nodes/n8n-nodes-langchain.retrievermultiquery/ The MultiQuery Retriever node automates the process of prompt tuning by using an LLM to generate multiple queries from different perspectives for a given user input query. On this page, you'll find the node parameters for the MultiQuery Retriever node, and links to more resources. Parameter resolution in sub-nodes Sub-nodes behave differently to other nodes when processing multiple items using an expression. Most nodes, including root nodes, take any number of items as input, process these items, and output the results. You can use expressions to refer to input items, and the node resolves the expression for each item in turn. For example, given an input of five `name` values, the expression `{{ $json.name }}` resolves to each name in turn. In sub-nodes, the expression always resolves to the first item. For example, given an input of five `name` values, the expression `{{ $json.name }}` always resolves to the first name. ## Node options# * **Query Count**: Enter how many different versions of the query to generate. ## Templates and examples# Refer to LangChain's retriever conceptual documentation and LangChain's multiquery retriever API documentation for more information about the service. View n8n's Advanced AI documentation. ## AI glossary# * **completion**: Completions are the responses generated by a model like GPT. * **hallucinations**: Hallucination in AI is when an LLM (large language model) mistakenly perceives patterns or objects that don't exist. * **vector database**: A vector database stores mathematical representations of information. Use with embeddings and retrievers to create a database that your AI can access when answering questions. * **vector store**: A vector store, or vector database, stores mathematical representations of information. Use with embeddings and retrievers to create a database that your AI can access when answering questions. --- ## Page: https://docs.n8n.io/integrations/builtin/cluster-nodes/sub-nodes/n8n-nodes-langchain.retrievervectorstore/ Use the Vector Store Retriever node to retrieve documents from a vector store. On this page, you'll find the node parameters for the Vector Store Retriever node, and links to more resources. Parameter resolution in sub-nodes Sub-nodes behave differently to other nodes when processing multiple items using an expression. Most nodes, including root nodes, take any number of items as input, process these items, and output the results. You can use expressions to refer to input items, and the node resolves the expression for each item in turn. For example, given an input of five `name` values, the expression `{{ $json.name }}` resolves to each name in turn. In sub-nodes, the expression always resolves to the first item. For example, given an input of five `name` values, the expression `{{ $json.name }}` always resolves to the first name. ## Node parameters# * **Limit**: Enter the maximum number of results to return. ## Templates and examples# Refer to LangChain's vector store retriever documentation for more information about the service. View n8n's Advanced AI documentation. ## AI glossary# * **completion**: Completions are the responses generated by a model like GPT. * **hallucinations**: Hallucination in AI is when an LLM (large language model) mistakenly perceives patterns or objects that don't exist. * **vector database**: A vector database stores mathematical representations of information. Use with embeddings and retrievers to create a database that your AI can access when answering questions. * **vector store**: A vector store, or vector database, stores mathematical representations of information. Use with embeddings and retrievers to create a database that your AI can access when answering questions. --- ## Page: https://docs.n8n.io/integrations/builtin/cluster-nodes/sub-nodes/n8n-nodes-langchain.retrieverworkflow/ Use the Workflow Retriever node to retrieve data from an n8n workflow for use in a Retrieval QA Chain or another Retriever node. On this page, you'll find the node parameters for the Workflow Retriever node, and links to more resources. Parameter resolution in sub-nodes Sub-nodes behave differently to other nodes when processing multiple items using an expression. Most nodes, including root nodes, take any number of items as input, process these items, and output the results. You can use expressions to refer to input items, and the node resolves the expression for each item in turn. For example, given an input of five `name` values, the expression `{{ $json.name }}` resolves to each name in turn. In sub-nodes, the expression always resolves to the first item. For example, given an input of five `name` values, the expression `{{ $json.name }}` always resolves to the first name. ## Node parameters# ### Source# Tell n8n which workflow to call. You can choose either: * **Database** and enter a workflow ID. * **Parameter** and copy in a complete workflow JSON. ### Workflow values# Set values to pass to the workflow you're calling. These values appear in the output data of the trigger node in the workflow you call. You can access these values in expressions in the workflow. For example, if you have: * **Workflow Values** with a **Name** of `myCustomValue` * A workflow with an Execute Sub-workflow Trigger node as its trigger The expression to access the value of `myCustomValue` is `{{ $('Execute Sub-workflow Trigger').item.json.myCustomValue }}`. ## Templates and examples# Refer to LangChain's general retriever documentation for more information about the service. View n8n's Advanced AI documentation. ## AI glossary# * **completion**: Completions are the responses generated by a model like GPT. * **hallucinations**: Hallucination in AI is when an LLM (large language model) mistakenly perceives patterns or objects that don't exist. * **vector database**: A vector database stores mathematical representations of information. Use with embeddings and retrievers to create a database that your AI can access when answering questions. * **vector store**: A vector store, or vector database, stores mathematical representations of information. Use with embeddings and retrievers to create a database that your AI can access when answering questions. --- ## Page: https://docs.n8n.io/integrations/builtin/cluster-nodes/sub-nodes/n8n-nodes-langchain.textsplittercharactertextsplitter/ Use the Character Text Splitter node to split document data based on characters. On this page, you'll find the node parameters for the Character Text Splitter node, and links to more resources. Parameter resolution in sub-nodes Sub-nodes behave differently to other nodes when processing multiple items using an expression. Most nodes, including root nodes, take any number of items as input, process these items, and output the results. You can use expressions to refer to input items, and the node resolves the expression for each item in turn. For example, given an input of five `name` values, the expression `{{ $json.name }}` resolves to each name in turn. In sub-nodes, the expression always resolves to the first item. For example, given an input of five `name` values, the expression `{{ $json.name }}` always resolves to the first name. ## Node parameters# * **Separator**: Select the separator used to split the document into separate items. * **Chunk Size**: Enter the number of characters in each chunk. * **Chunk Overlap**: Enter how much overlap to have between chunks. ## Templates and examples# Refer to LangChain's text splitter documentation and LangChain's API documentation for character text splitting for more information about the service. View n8n's Advanced AI documentation. ## AI glossary# * **completion**: Completions are the responses generated by a model like GPT. * **hallucinations**: Hallucination in AI is when an LLM (large language model) mistakenly perceives patterns or objects that don't exist. * **vector database**: A vector database stores mathematical representations of information. Use with embeddings and retrievers to create a database that your AI can access when answering questions. * **vector store**: A vector store, or vector database, stores mathematical representations of information. Use with embeddings and retrievers to create a database that your AI can access when answering questions. --- ## Page: https://docs.n8n.io/integrations/builtin/cluster-nodes/sub-nodes/n8n-nodes-langchain.textsplitterrecursivecharactertextsplitter/ The Recursive Character Text Splitter node splits document data recursively to keep all paragraphs, sentences then words together as long as possible. On this page, you'll find the node parameters for the Recursive Character Text Splitter node, and links to more resources. Parameter resolution in sub-nodes Sub-nodes behave differently to other nodes when processing multiple items using an expression. Most nodes, including root nodes, take any number of items as input, process these items, and output the results. You can use expressions to refer to input items, and the node resolves the expression for each item in turn. For example, given an input of five `name` values, the expression `{{ $json.name }}` resolves to each name in turn. In sub-nodes, the expression always resolves to the first item. For example, given an input of five `name` values, the expression `{{ $json.name }}` always resolves to the first name. ## Node parameters# * **Chunk Size**: Enter the number of characters in each chunk. * **Chunk Overlap**: Enter how much overlap to have between chunks. ## Templates and examples# Refer to LangChain's text splitter documentation and LangChain's recursively split by character documentation for more information about the service. View n8n's Advanced AI documentation. ## AI glossary# * **completion**: Completions are the responses generated by a model like GPT. * **hallucinations**: Hallucination in AI is when an LLM (large language model) mistakenly perceives patterns or objects that don't exist. * **vector database**: A vector database stores mathematical representations of information. Use with embeddings and retrievers to create a database that your AI can access when answering questions. * **vector store**: A vector store, or vector database, stores mathematical representations of information. Use with embeddings and retrievers to create a database that your AI can access when answering questions. --- ## Page: https://docs.n8n.io/integrations/builtin/cluster-nodes/sub-nodes/n8n-nodes-langchain.textsplittertokensplitter/ The Token Splitter node splits a raw text string by first converting the text into BPE tokens, then splits these tokens into chunks and converts the tokens within a single chunk back into text. On this page, you'll find the node parameters for the Token Splitter node, and links to more resources. Parameter resolution in sub-nodes Sub-nodes behave differently to other nodes when processing multiple items using an expression. Most nodes, including root nodes, take any number of items as input, process these items, and output the results. You can use expressions to refer to input items, and the node resolves the expression for each item in turn. For example, given an input of five `name` values, the expression `{{ $json.name }}` resolves to each name in turn. In sub-nodes, the expression always resolves to the first item. For example, given an input of five `name` values, the expression `{{ $json.name }}` always resolves to the first name. ## Node parameters# * **Chunk Size**: Enter the number of characters in each chunk. * **Chunk Overlap**: Enter how much overlap to have between chunks. ## Templates and examples# Refer to LangChain's token documentation and LangChain's text splitter documentation for more information about the service. View n8n's Advanced AI documentation. ## AI glossary# * **completion**: Completions are the responses generated by a model like GPT. * **hallucinations**: Hallucination in AI is when an LLM (large language model) mistakenly perceives patterns or objects that don't exist. * **vector database**: A vector database stores mathematical representations of information. Use with embeddings and retrievers to create a database that your AI can access when answering questions. * **vector store**: A vector store, or vector database, stores mathematical representations of information. Use with embeddings and retrievers to create a database that your AI can access when answering questions. --- ## Page: https://docs.n8n.io/integrations/builtin/cluster-nodes/sub-nodes/n8n-nodes-langchain.toolcalculator/ The Calculator node is a tool that allows an agent to run mathematical calculations. Parameter resolution in sub-nodes Sub-nodes behave differently to other nodes when processing multiple items using an expression. Most nodes, including root nodes, take any number of items as input, process these items, and output the results. You can use expressions to refer to input items, and the node resolves the expression for each item in turn. For example, given an input of five `name` values, the expression `{{ $json.name }}` resolves to each name in turn. In sub-nodes, the expression always resolves to the first item. For example, given an input of five `name` values, the expression `{{ $json.name }}` always resolves to the first name. ## Templates and examples# Refer to LangChain's documentation on tools for more information about tools in LangChain. View n8n's Advanced AI documentation. ## AI glossary# * **completion**: Completions are the responses generated by a model like GPT. * **hallucinations**: Hallucination in AI is when an LLM (large language model) mistakenly perceives patterns or objects that don't exist. * **vector database**: A vector database stores mathematical representations of information. Use with embeddings and retrievers to create a database that your AI can access when answering questions. * **vector store**: A vector store, or vector database, stores mathematical representations of information. Use with embeddings and retrievers to create a database that your AI can access when answering questions. --- ## Page: https://docs.n8n.io/integrations/builtin/cluster-nodes/sub-nodes/n8n-nodes-langchain.toolcode/ Use the Custom Code Tool node to write code that an agent can run. On this page, you'll find the node parameters for the Custom Code Tool node and links to more resources. Parameter resolution in sub-nodes Sub-nodes behave differently to other nodes when processing multiple items using an expression. Most nodes, including root nodes, take any number of items as input, process these items, and output the results. You can use expressions to refer to input items, and the node resolves the expression for each item in turn. For example, given an input of five `name` values, the expression `{{ $json.name }}` resolves to each name in turn. In sub-nodes, the expression always resolves to the first item. For example, given an input of five `name` values, the expression `{{ $json.name }}` always resolves to the first name. ## Node parameters# ### Name# Give your custom code a name. It can't contain whitespace. ### Description# Give your custom code a description. This tells the agent when to use this tool. For example: > Call this tool to get a random color. The input should be a string with comma separated names of colors to exclude. ### Language# You can use JavaScript or Python. ### JavaScript / Python box# Write the code here. You can access the tool input using `query`. For example, to take the input string and lowercase it: <table><tbody><tr><td><div><pre><span></span><span>1</span> <span>2</span></pre></div></td><td><div><pre><span></span><code><span>let</span><span> </span><span>myString</span><span> </span><span>=</span><span> </span><span>query</span><span>;</span> <span>return</span><span> </span><span>myString</span><span>.</span><span>toLowerCase</span><span>();</span> </code></pre></div></td></tr></tbody></table> ## Templates and examples# Refer to LangChain's documentation on tools for more information about tools in LangChain. View n8n's Advanced AI documentation. ## AI glossary# * **completion**: Completions are the responses generated by a model like GPT. * **hallucinations**: Hallucination in AI is when an LLM (large language model) mistakenly perceives patterns or objects that don't exist. * **vector database**: A vector database stores mathematical representations of information. Use with embeddings and retrievers to create a database that your AI can access when answering questions. * **vector store**: A vector store, or vector database, stores mathematical representations of information. Use with embeddings and retrievers to create a database that your AI can access when answering questions. --- ## Page: https://docs.n8n.io/integrations/builtin/cluster-nodes/sub-nodes/n8n-nodes-langchain.toolhttprequest/ The HTTP Request tool works just like the HTTP Request node, but it's designed to be used with an AI agent as a tool to collect information from a website or API. On this page, you'll find a list of operations the HTTP Request node supports and links to more resources. Parameter resolution in sub-nodes Sub-nodes behave differently to other nodes when processing multiple items using an expression. Most nodes, including root nodes, take any number of items as input, process these items, and output the results. You can use expressions to refer to input items, and the node resolves the expression for each item in turn. For example, given an input of five `name` values, the expression `{{ $json.name }}` resolves to each name in turn. In sub-nodes, the expression always resolves to the first item. For example, given an input of five `name` values, the expression `{{ $json.name }}` always resolves to the first name. ## Templates and examples# Refer to LangChain's documentation on tools for more information about tools in LangChain. View n8n's Advanced AI documentation. ## AI glossary# * **completion**: Completions are the responses generated by a model like GPT. * **hallucinations**: Hallucination in AI is when an LLM (large language model) mistakenly perceives patterns or objects that don't exist. * **vector database**: A vector database stores mathematical representations of information. Use with embeddings and retrievers to create a database that your AI can access when answering questions. * **vector store**: A vector store, or vector database, stores mathematical representations of information. Use with embeddings and retrievers to create a database that your AI can access when answering questions. --- ## Page: https://docs.n8n.io/integrations/builtin/cluster-nodes/sub-nodes/n8n-nodes-langchain.toolmcp/ The MCP Client Tool node is a Model Context Protocol (MCP) client, allowing you to use the tools exposed by an external MCP server. You can connect the MCP Client Tool node to your models to call external tools with n8n agents. Credentials The MCP Client Tool node supports both Bearer and generic header authentication methods. ## Node parameters# Configure the node with the following parameters. * **SSE Endpoint**: The SSE endpoint for the MCP server you want to connect to. * **Authentication**: The authentication method for authentication to your MCP server. The MCP tool supports bearer and generic header authentication. Select **None** to attempt to connect without authentication. * **Tools to Include**: Choose which tools you want to expose to the AI Agent: * **All**: Expose all the tools given by the MCP server. * **Selected**: Activates a **Tools to Include** parameter where you can select the tools you want to expose to the AI Agent. * **All Except**: Activates a **Tools to Exclude** parameter where you can select the tools you want to avoid sharing with the AI Agent. The AI Agent will have access to all MCP server's tools that aren't selected. ## Templates and examples# n8n also has an MCP Server Trigger node that allows you to expose n8n tools to external AI Agents. Refer to the MCP documentation and MCP specification for more details about the protocol, servers, and clients. Refer to LangChain's documentation on tools for more information about tools in LangChain. View n8n's Advanced AI documentation. ## AI glossary# * **completion**: Completions are the responses generated by a model like GPT. * **hallucinations**: Hallucination in AI is when an LLM (large language model) mistakenly perceives patterns or objects that don't exist. * **vector database**: A vector database stores mathematical representations of information. Use with embeddings and retrievers to create a database that your AI can access when answering questions. * **vector store**: A vector store, or vector database, stores mathematical representations of information. Use with embeddings and retrievers to create a database that your AI can access when answering questions. --- ## Page: https://docs.n8n.io/integrations/builtin/cluster-nodes/sub-nodes/n8n-nodes-langchain.toolserpapi/ The SerpAPI node allows an agent in your workflow to call Google's Search API. On this page, you'll find the node parameters for the SerpAPI node, and links to more resources. Credentials You can find authentication information for this node here. Parameter resolution in sub-nodes Sub-nodes behave differently to other nodes when processing multiple items using an expression. Most nodes, including root nodes, take any number of items as input, process these items, and output the results. You can use expressions to refer to input items, and the node resolves the expression for each item in turn. For example, given an input of five `name` values, the expression `{{ $json.name }}` resolves to each name in turn. In sub-nodes, the expression always resolves to the first item. For example, given an input of five `name` values, the expression `{{ $json.name }}` always resolves to the first name. ## Node options# * **Country**: Enter the country code you'd like to use. Refer to Google GL Parameter: Supported Google Countries for supported countries and country codes. * **Device**: Select the device to use to get the search results. * **Explicit Array**: Choose whether to force SerpApi to fetch the Google results even if a cached version is already present (turned on) or not (turned off). * **Google Domain**: Enter the Google Domain to use. Refer to Supported Google Domains for supported domains. * **Language**: Enter the language code you'd like to use. Refer to Google HL Parameter: Supported Google Languages for supported languages and language codes. ## Templates and examples# Refer to Serp's documentation for more information about the service. You can also view LangChain's documentation on their Serp integration. View n8n's Advanced AI documentation. ## AI glossary# * **completion**: Completions are the responses generated by a model like GPT. * **hallucinations**: Hallucination in AI is when an LLM (large language model) mistakenly perceives patterns or objects that don't exist. * **vector database**: A vector database stores mathematical representations of information. Use with embeddings and retrievers to create a database that your AI can access when answering questions. * **vector store**: A vector store, or vector database, stores mathematical representations of information. Use with embeddings and retrievers to create a database that your AI can access when answering questions. --- ## Page: https://docs.n8n.io/integrations/builtin/cluster-nodes/sub-nodes/n8n-nodes-langchain.toolthink/ The Think Tool node is a tool that invites an agent to do some thinking before answering. Essentially, it allows the agent to reflect on the question by talking to itself before providing an answer. In particular, this is useful for complex queries that require a thoughtful response. Parameter resolution in sub-nodes Sub-nodes behave differently to other nodes when processing multiple items using an expression. Most nodes, including root nodes, take any number of items as input, process these items, and output the results. You can use expressions to refer to input items, and the node resolves the expression for each item in turn. For example, given an input of five `name` values, the expression `{{ $json.name }}` resolves to each name in turn. In sub-nodes, the expression always resolves to the first item. For example, given an input of five `name` values, the expression `{{ $json.name }}` always resolves to the first name. ## Templates and examples# Browse Think Tool integration templates, or search all templates ### Prompting example# As an example, say you ask the agent: > _Jack is looking at Anne. Anne is looking at George. Jack is married, George is not, and we don't know if Anne is married. Is a married person looking at an unmarried person?_ The agent will do its thinking with the tool: > _We have the following information: 1. Jack is looking at Anne. 2. Anne is looking at George. 3. Jack is married. 4. George is not married. 5. We don't know if Anne is married or not._ > > _We need to determine if a married person is looking at an unmarried person. Let's consider both cases for Anne:_ > > _Case 1: Anne is married._ > > * _If Anne is married, then she (married) is looking at George (unmarried). In this case, a married person (Anne) is looking at an unmarried person (George)._ > > _Case 2: Anne is unmarried._ > > * _If Anne is unmarried, then Jack (married) is looking at Anne (unmarried). In this case, a married person (Jack) is looking at an unmarried person (Anne)._ > > _In both scenarios, we find that a married person is looking at an unmarried person. Therefore, the answer to the question is yes._ and then afterward provide the answer: > _Yes, a married person is looking at an unmarried person. In both possible scenarios regarding Anne's marital status, we find that a married individual (either Jack or Anne) is looking at an unmarried individual (either George or Anne)._ Refer to LangChain's documentation on tools for more information about tools in LangChain. View n8n's Advanced AI documentation. ## AI glossary# * **completion**: Completions are the responses generated by a model like GPT. * **hallucinations**: Hallucination in AI is when an LLM (large language model) mistakenly perceives patterns or objects that don't exist. * **vector database**: A vector database stores mathematical representations of information. Use with embeddings and retrievers to create a database that your AI can access when answering questions. * **vector store**: A vector store, or vector database, stores mathematical representations of information. Use with embeddings and retrievers to create a database that your AI can access when answering questions. --- ## Page: https://docs.n8n.io/integrations/builtin/cluster-nodes/sub-nodes/n8n-nodes-langchain.toolvectorstore/ The Vector Store Question Answer node is a tool that allows an agent to summarize results and answer questions based on chunks from a vector store. On this page, you'll find the node parameters for the Vector Store Question Answer node, and links to more resources. Parameter resolution in sub-nodes Sub-nodes behave differently to other nodes when processing multiple items using an expression. Most nodes, including root nodes, take any number of items as input, process these items, and output the results. You can use expressions to refer to input items, and the node resolves the expression for each item in turn. For example, given an input of five `name` values, the expression `{{ $json.name }}` resolves to each name in turn. In sub-nodes, the expression always resolves to the first item. For example, given an input of five `name` values, the expression `{{ $json.name }}` always resolves to the first name. ## Node parameters# ### Data Name# Enter the name of the data in the vector store. ### Description of Data# Enter a description of the data in the vector store. n8n uses the **Data Name** and **Description of Data** parameters to populate the tool description for AI agents using the following format: > Useful for when you need to answer questions about \[Data Name\]. Whenever you need information about \[Description of Data\], you should ALWAYS use this. Input should be a fully formed question. ### Limit# The maximum number of results to return. View example workflows and related content on n8n's website. Refer to LangChain's documentation on tools for more information about tools in LangChain. View n8n's Advanced AI documentation. ## AI glossary# * **completion**: Completions are the responses generated by a model like GPT. * **hallucinations**: Hallucination in AI is when an LLM (large language model) mistakenly perceives patterns or objects that don't exist. * **vector database**: A vector database stores mathematical representations of information. Use with embeddings and retrievers to create a database that your AI can access when answering questions. * **vector store**: A vector store, or vector database, stores mathematical representations of information. Use with embeddings and retrievers to create a database that your AI can access when answering questions. --- ## Page: https://docs.n8n.io/integrations/builtin/cluster-nodes/sub-nodes/n8n-nodes-langchain.toolwikipedia/ The Wikipedia node is a tool that allows an agent to search and return information from Wikipedia. Parameter resolution in sub-nodes Sub-nodes behave differently to other nodes when processing multiple items using an expression. Most nodes, including root nodes, take any number of items as input, process these items, and output the results. You can use expressions to refer to input items, and the node resolves the expression for each item in turn. For example, given an input of five `name` values, the expression `{{ $json.name }}` resolves to each name in turn. In sub-nodes, the expression always resolves to the first item. For example, given an input of five `name` values, the expression `{{ $json.name }}` always resolves to the first name. ## Templates and examples# Refer to LangChain's documentation on tools for more information about tools in LangChain. View n8n's Advanced AI documentation. ## AI glossary# * **completion**: Completions are the responses generated by a model like GPT. * **hallucinations**: Hallucination in AI is when an LLM (large language model) mistakenly perceives patterns or objects that don't exist. * **vector database**: A vector database stores mathematical representations of information. Use with embeddings and retrievers to create a database that your AI can access when answering questions. * **vector store**: A vector store, or vector database, stores mathematical representations of information. Use with embeddings and retrievers to create a database that your AI can access when answering questions. --- ## Page: https://docs.n8n.io/integrations/builtin/cluster-nodes/sub-nodes/n8n-nodes-langchain.toolwolframalpha/ Use the Wolfram|Alpha tool node to connect your agents and chains to Wolfram|Alpha's computational intelligence engine. Credentials You can find authentication information for this node here. Parameter resolution in sub-nodes Sub-nodes behave differently to other nodes when processing multiple items using an expression. Most nodes, including root nodes, take any number of items as input, process these items, and output the results. You can use expressions to refer to input items, and the node resolves the expression for each item in turn. For example, given an input of five `name` values, the expression `{{ $json.name }}` resolves to each name in turn. In sub-nodes, the expression always resolves to the first item. For example, given an input of five `name` values, the expression `{{ $json.name }}` always resolves to the first name. ## Templates and examples# Browse Wolfram|Alpha integration templates, or search all templates Refer to Wolfram|Alpha's documentation for more information about the service. You can also view LangChain's documentation on their WolframAlpha Tool. View n8n's Advanced AI documentation. ## AI glossary# * **completion**: Completions are the responses generated by a model like GPT. * **hallucinations**: Hallucination in AI is when an LLM (large language model) mistakenly perceives patterns or objects that don't exist. * **vector database**: A vector database stores mathematical representations of information. Use with embeddings and retrievers to create a database that your AI can access when answering questions. * **vector store**: A vector store, or vector database, stores mathematical representations of information. Use with embeddings and retrievers to create a database that your AI can access when answering questions. --- ## Page: https://docs.n8n.io/integrations/builtin/cluster-nodes/sub-nodes/n8n-nodes-langchain.toolworkflow/ The Workflow Tool node is a tool that allows an agent to run another n8n workflow and fetch its output data. On this page, you'll find the node parameters for the Workflow Tool node, and links to more resources. Parameter resolution in sub-nodes Sub-nodes behave differently to other nodes when processing multiple items using an expression. Most nodes, including root nodes, take any number of items as input, process these items, and output the results. You can use expressions to refer to input items, and the node resolves the expression for each item in turn. For example, given an input of five `name` values, the expression `{{ $json.name }}` resolves to each name in turn. In sub-nodes, the expression always resolves to the first item. For example, given an input of five `name` values, the expression `{{ $json.name }}` always resolves to the first name. ## Node parameters# ### Name# Enter a name for your custom code. It can't contain whitespace or special characters. ### Description# Enter a custom code a description. This tells the agent when to use this tool. For example: > Call this tool to get a random color. The input should be a string with comma separated names of colors to exclude. ### Source# Tell n8n which workflow to call. You can choose either: * **Database** and enter a workflow ID. * **Parameter** and copy in a complete workflow JSON. ### Workflow Values# Set values to pass to the workflow you're calling. These values appear in the output data of the trigger node in the workflow you call. You can access these values in expressions in the workflow. For example, if you have: * **Workflow Values** with a **Name** of `myCustomValue` * A workflow with an Execute Sub-workflow Trigger node as its trigger The expression to access the value of `myCustomValue` is `{{ $('Execute Sub-workflow Trigger').item.json.myCustomValue }}`. ### Specify input schema# Agent support The structured input schema requires with a Tools Agent or OpenAI Functions Agent. Enable this option to define the input schema for the workflow you're calling. This is useful when you want to make sure the input data the LLM provides is in the correct format. **Schema Type**: Define the input structure and validation. You have two options to provide the schema: 1. **Generate from JSON Example**: Input an example JSON object to automatically generate the schema. The node uses the object property types and names. It ignores the actual values. 2. **Define Below**: Manually input the JSON schema. Read the JSON Schema guides and examples for help creating a valid JSON schema. ## Templates and examples# Browse Custom n8n Workflow Tool integration templates, or search all templates Refer to LangChain's documentation on tools for more information about tools in LangChain. View n8n's Advanced AI documentation. ## AI glossary# * **completion**: Completions are the responses generated by a model like GPT. * **hallucinations**: Hallucination in AI is when an LLM (large language model) mistakenly perceives patterns or objects that don't exist. * **vector database**: A vector database stores mathematical representations of information. Use with embeddings and retrievers to create a database that your AI can access when answering questions. * **vector store**: A vector store, or vector database, stores mathematical representations of information. Use with embeddings and retrievers to create a database that your AI can access when answering questions. --- ## Page: https://docs.n8n.io/integrations/builtin/credentials/ This section contains step-by-step information about authenticating the different nodes in n8n. To learn more about creating, managing, and sharing credentials, refer to Manage credentials. --- ## Page: https://docs.n8n.io/integrations/builtin/credentials/actionnetwork/ You can use these credentials to authenticate the following nodes: * Action Network ## Supported authentication methods# * API key Refer to Action Network's API documentation for more information about working with the service. ## Using API key# To configure this credential, you'll need an Action Network account with API key access enabled and: * An **API Key** To get an API key: 1. Log in to your Action Network account. 2. From the **Start Organizing** menu, select **Details >** **API & Sync**. 3. Select the list you want to generate an API key for. 4. Generate an API key for that list. 5. Copy the **API Key** and enter it in your n8n credential. Refer to the Action Network API Authentication instructions for more information. ## Request API access# Each user account and group on the Action Network has a separate API key to access that user or group's data. You must explicitly request API access from Action Network, which you can do in one of two ways: 1. If you're already a paying customer, contact them to request partner access. Partner access includes API key access. 2. If you're a developer, request a developer account. Once your account request is granted, you'll have API key access. --- ## Page: https://docs.n8n.io/integrations/builtin/credentials/activecampaign/ You can use these credentials to authenticate the following nodes: * ActiveCampaign * Active Campaign Trigger ## Supported authentication methods# * API key Refer to ActiveCampaign's API documentation for more information about working with the service. ## Using API key# To configure this credential, you'll need an ActiveCampaign account and: * An **API URL** * An **API Key** To get both and set up the credential: 1. In ActiveCampaign, select **Settings** (the gear cog icon) from the left menu. 2. Select **Developer**. 3. Copy the **API URL** and enter it in your n8n credential. 4. Copy the **API Key** and enter it in your n8n credential. Refer to How to obtain your ActiveCampaign API URL and Key for more information or for instructions on resetting your API key. --- ## Page: https://docs.n8n.io/integrations/builtin/credentials/acuityscheduling/ You can use these credentials to authenticate the following nodes: * Acuity Scheduling Trigger ## Prerequisites# Create an Acuity Scheduling account. ## Supported authentication methods# * API key * OAuth2 Refer to Acuity's API documentation for more information about working with the service. ## Using API key# To configure this credential, you'll need: * A numeric **User ID** * An **API Key** Refer to the Acuity API Quick Start authentication instructions to generate an API key and view your User ID. ## Using OAuth2# Note for n8n Cloud users Cloud users don't need to provide connection details. Select **Connect my account** to connect through your browser. If you need to set this up from scratch, complete the Acuity OAuth2 Account Registration page. Use the **Client ID** and **Client Secret** provided from that registration. --- ## Page: https://docs.n8n.io/integrations/builtin/credentials/adalo/ You can use these credentials to authenticate the following nodes: * Adalo API access You need a Team or Business plan to use the Adalo APIs. ## Supported authentication methods# * API key Refer to Adalo's API collections documentation for more information about working with the service. ## Using API key# To configure this credential, you'll need an Adalo account and: * An **API Key** * An **App ID** To get these, create an Adalo app: 1. From the app dropdown in the top navigation, select **CREATE NEW APP**. 2. Select the App Layout type that makes sense for you and select **Next**. * If you're new to using the product, Adalo recommend using **Mobile Only**. 3. Select a template to get started with or select **Blank**, then select **Next**. 4. Enter an **App Name**, like `n8n integration`. 5. If applicable, select the **Team** for the app. 6. Select branding colors. 7. Select **Create**. The app editor opens. 8. In the left menu, select **Settings** (the gear cog icon). 9. Select **App Access**. 10. In the **API Key** section, select **Generate Key**. * If you don't have the correct plan level, you'll see a prompt to upgrade instead. 11. Copy the key and enter it as the **API Key** in your n8n credential. 12. The URL includes the **App ID** after `https://app.adalo.com/apps/`. For example, if the URL for your app is `https://app.adalo.com/apps/b78bdfcf-48dc-4550-a474-dd52c19fc371/app-settings`, `b78bdfcf-48dc-4550-a474-dd52c19fc371` is the App ID. Copy this value and enter it in your n8n credential. Refer to Creating an app for more information on creating apps in Adalo. Refer to The Adalo API for more information on generating API keys. --- ## Page: https://docs.n8n.io/integrations/builtin/credentials/affinity/ You can use these credentials to authenticate the following nodes: * Affinity * Affinity Trigger ## Prerequisites# Create an Affinity account at the Scale, Advanced, or Enterprise subscription tiers. ## Supported authentication methods# * API key ## Related resources# Refer to Affinity's API documentation for more information about working with the service. ## Using API key# To configure this credential, you'll need: * An **API Key**: Refer to How to obtain your Affinity API key documentation to get your API key. --- ## Page: https://docs.n8n.io/integrations/builtin/credentials/agilecrm/ You can use these credentials to authenticate the following nodes: * Agile CRM ## Prerequisites# Create an Agile CRM account. ## Supported authentication methods# * API key Refer to Agile CRM's API documentation for more information about working with the service. ## Using API key# To configure this credential, you'll need: * An **Email Address** registered with AgileCRM * A REST **API Key**: Access your Agile CRM API key through **Admin Settings > Developers & API >** **REST API key**. * An Agile CRM **Subdomain** (for example, `n8n`) --- ## Page: https://docs.n8n.io/integrations/builtin/credentials/airtable/ You can use these credentials to authenticate the following nodes: * Airtable * Airtable Trigger ## Prerequisites# Create an Airtable account. ## Supported authentication methods# * Personal Access Token (PAT) * OAuth2 API Key deprecation n8n used to offer an API key authentication method with Airtable. Airtable fully deprecated these keys as of February 2024. If you were using an Airtable API credential, replace it with an Airtable Personal Access Token or Airtable OAuth2 credential. n8n recommends using Personal Access Token instead. Refer to Airtable's API documentation for more information about the service. ## Using personal access token# To configure this credential, you'll need: * A Personal **Access Token** (PAT) To create your PAT: 1. Go to the Airtable Builder Hub Personal access tokens page. 2. Select **\+ Create new token**. Airtable opens the **Create personal access token** page. 3. Enter a **Name** for your token, like `n8n credential`. 4. Add **Scopes** to your token. Refer to Airtable's Scopes guide for more information. n8n recommends using these scopes: * `data.records:read` * `data.records:write` * `schema.bases:read` 5. Select the **Access** for your token. Choose from a single base, multiple bases (even bases from different workspaces), all of the current and future bases in a workspace you own, or all of the bases from any workspace that you own including bases/workspace added in the future. 6. Select **Create token**. 7. Airtable opens a modal with your token displayed. Copy this token and enter it in your n8n credential as the **Access Token**. Refer to Airtable's Find/create PATs documentation for more information. ## Using OAuth2# To configure this credential, you'll need: * An **OAuth Redirect URL** * A **Client ID** * A **Client Secret** To generate all this information, register a new Airtable integration: 1. Open your Airtable Builder Hub **OAuth integrations** page. 2. Select the **Register new OAuth integration** button. 3. Enter a name for your OAuth integration. 4. Copy the **OAuth Redirect URL** from your n8n credential. 5. Paste that redirect URL in Airtable as the **OAuth redirect URL**. 6. Select **Register integration**. 7. On the following page, copy the **Client ID** from Airtable and paste it into the **Client ID** in your n8n credential. 8. In Airtable, select **Generate client secret**. 9. Copy the client secret and paste it into the **Client Secret** in your n8n credential. 10. Select the following scopes in Airtable: * `data.records:read` * `data.records:write` * `schema.bases:read` 11. Select **Save changes** in Airtable. 12. In your n8n credential, select the **Connect my account**. A **Grant access** modal opens. 13. Follow the instructions and select the base you want to work on (or all bases). 14. Select **Grant access** to complete the connection. Refer to the Airtable Register a new integration documentation for steps on registering a new Oauth integration. --- ## Page: https://docs.n8n.io/integrations/builtin/credentials/airtop/ You can use these credentials to authenticate the following nodes: * Airtop ## Prerequisites# Create an Airtop account. ## Supported authentication methods# * API key Refer to Airtop's API documentation for more information about the service. ## Using API key# To configure this credential, you'll need an Airtop account and an **API key**. To generate a new key: 1. Log in to the Airtop Portal. 2. Go to API Keys. 3. Select the **\+ Create new key** button. 4. Enter a name for the API key. 5. Select the generated key to copy the key. 6. Enter this as the **API Key** in your n8n credential. Refer to Airtop's Support for assistance if you have any issues creating your API key. --- ## Page: https://docs.n8n.io/integrations/builtin/credentials/alienvault/ You can use these credentials to authenticate when using the HTTP Request node to make a Custom API call. ## Prerequisites# Create an AlienVault account. ## Supported authentication methods# * API key Refer to AlienVault's documentation for more information about the service. This is a credential-only node. Refer to Custom API operations to learn more. View example workflows and related content on n8n's website. ## Using API key# To configure this credential, you'll need: * An **OTX Key**: Once you have an AlienVault account, the **OTX Key** displays in your **Settings**. --- ## Page: https://docs.n8n.io/integrations/builtin/credentials/amqp/ You can use these credentials to authenticate the following nodes: * AMQP Sender * AMQP Trigger ## Prerequisites# Install an AMQP 1.0-compatible message broker like ActiveMQ. Refer to AMQP Products for a list of options. ## Supported authentication methods# * AMQP connection Advanced Message Queuing Protocol (AMQP) is an open standard application layer protocol for message-oriented middleware. The defining features of AMQP are message orientation, queuing, routing, reliability and security. Refer to the OASIS AMQP Version 1.0 Standard for more information. Refer to your provider's documentation for more information about the service. Refer to ActiveMQ's API documentation as one example. ## Using AMQP connection# To configure this credential, you'll need: * A **Hostname**: Enter the hostname of your AMQP message broker. * A **Port**: Enter the port number the connection should use. * A **User**: Enter the name of the user to establish the connection as. * For example, the default username in ActiveMQ is `admin`. * A **Password**: Enter the user's password. * For example, the default password in ActiveMQ is `admin`. * _Optional:_ **Transport Type**: Enter either `tcp` or `tls`. Refer to your provider's documentation for more detailed instructions. --- ## Page: https://docs.n8n.io/integrations/builtin/credentials/anthropic/ You can use these credentials to authenticate the following nodes: * Anthropic Chat Model ## Supported authentication methods# * API key Refer to Anthropic's documentation for more information about the service. View n8n's Advanced AI documentation. ## Using API key# To configure this credential, you'll need an Anthropic Console account with access to Claude. Then: 1. In the Anthropic Console, open **Settings >** **API Keys**. 2. Select **\+ Create Key**. 3. Give your key a **Name**, like `n8n-integration`. 4. Select **Copy Key** to copy the key. 5. Enter this as the **API Key** in your n8n credential. Refer to Anthropic's Intro to Claude and Quickstart for more information. --- ## Page: https://docs.n8n.io/integrations/builtin/credentials/apitemplateio/ You can use these credentials to authenticate the following nodes: * APITemplate.io ## Prerequisites# Create an APITemplate.io account. ## Supported authentication methods# * API key ## Related resources# Refer to APITemplate.io's API documentation for more information about the service. ## Using API key# To configure this credential, you'll need: * An **API Key**: Once you've created an APITemplate.io account, go to **API Integration** to copy the **API Key**. --- ## Page: https://docs.n8n.io/integrations/builtin/credentials/asana/ You can use these credentials to authenticate the following nodes: * Asana * Asana Trigger ## Supported authentication methods# * Access token * OAuth2 Refer to Asana's Developer Guides for more information about working with the service. ## Using Access token# To configure this credential, you'll need an Asana account and: * A Personal **Access Token** (PAT) To get your PAT: 1. Open the Asana developer console. 2. In the **Personal access tokens** section, select **Create new token**. 3. Enter a **Token name**, like `n8n integration`. 4. Check the box to agree to the **Asana API terms**. 5. Select **Create token**. 6. Copy the token and enter it as the **Access Token** in your n8n credential. Refer to the Asana Quick start guide for more information. ## Using OAuth2# To configure this credential, you'll need an Asana account. Note for n8n Cloud users Cloud users don't need to provide connection details. Select **Connect my account** to connect through your browser. If you're self-hosting n8n, you'll need to register an application to set up OAuth: 1. Open the Asana developer console. 2. In the **My apps** section, select **Create new app**. 3. Enter an **App name** for your application, like `n8n integration`. 4. Select a purpose for your app. 5. Check the box to agree to the **Asana API terms**. 6. Select **Create app**. The page opens to the app's **Basic Information**. 7. Select **OAuth** from the left menu. 8. In n8n, copy the **OAuth Redirect URL**. 9. In Asana, select **Add redirect URL** and enter the URL you copied from n8n. 10. Copy the **Client ID** from Asana and enter it in your n8n credential. 11. Copy the **Client Secret** from Asana and enter it in your n8n credential. Refer to the Asana OAuth register an application documentation for more information. --- ## Page: https://docs.n8n.io/integrations/builtin/credentials/auth0management/ You can use these credentials to authenticate when using the HTTP Request node to make a Custom API call. ## Prerequisites# Create an Auth0 account. ## Supported authentication methods# * API client secret Refer to Auth0 Management's documentation for more information about the service. This is a credential-only node. Refer to Custom API operations to learn more. View example workflows and related content on n8n's website. ## Using API client secret# To configure this credential, you'll need: * An Auth0 **Domain** * A **Client ID** * A **Client Secret** Refer to the Auth0 Management API Get Access Tokens documentation for instructions on obtaining the Client ID and Client Secret from the application's **Settings** tab. --- ## Page: https://docs.n8n.io/integrations/builtin/credentials/automizy/ You can use these credentials to authenticate the following nodes: * Automizy ## Prerequisites# Create an Automizy account. ## Supported authentication methods# * API token ## Related resources# Refer to Automizy's API documentation for more information about the service. ## Using API token# To configure this credential, you'll need: * An **API Token**: Create new or access existing API tokens from your **Automizy dashboard** **\> Settings > API Token**. --- ## Page: https://docs.n8n.io/integrations/builtin/credentials/autopilot/ You can use these credentials to authenticate the following nodes: * Autopilot * Autopilot Trigger Autopilot branding change Autopilot has become Ortto. The Autopilot credentials and nodes are only compatible with Autopilot, not the new Ortto API. ## Prerequisites# Create an Autopilot account. ## Supported authentication methods# * API key Refer to Autopilot's API documentation for more information about the service. ## Using API key# To configure this credential, you'll need: * An **API Key**: Generate an API key in **Settings > Autopilot API**. Refer to Autopilot API authentication for more information. --- ## Page: https://docs.n8n.io/integrations/builtin/credentials/aws/ You can use these credentials to authenticate the following nodes: * AWS Bedrock Chat Model * AWS Certificate Manager * AWS DynamoDB * AWS Elastic Load Balancing * AWS Lambda * AWS Rekognition * AWS S3 * AWS SES * AWS SNS * AWS SNS Trigger * AWS SQS * AWS Textract * AWS Transcribe * Embeddings AWS Bedrock ## Supported authentication methods# * API access key Refer to AWS's Identity and Access Management documentation for more information about the service. ## Using API access key# To configure this credential, you'll need an AWS account and: * Your AWS **Region** * The **Access Key ID**: Generated when you create an access key. * The **Secret Access Key**: Generated when you create an access key. To create an access key and set up the credential: 1. In your n8n credential, select your AWS **Region**. 2. Log in to the IAM console. 3. In the navigation bar on the upper right, select your user name and then select **Security credentials**. 4. In the **Access keys** section, select **Create access key**. 5. On the **Access key best practices & alternatives page**, choose your use case. If it doesn't prompt you to create an access key, select **Other**. 6. Select **Next**. 7. Set a **description** tag value for the access key to make it easier to identify, for example `n8n integration`. 8. Select **Create access key**. 9. Reveal the **Access Key ID** and **Secret Access Key** and enter them in n8n. 10. To use a **Temporary security credential**, turn that option on and add a **Session token**. Refer to the AWS Temporary security credential documentation for more information on working with temporary security credentials. 11. If you use Amazon Virtual Private Cloud (VPC) to host n8n, you can establish a connection between your VPC and some apps. Use **Custom Endpoints** to enter relevant custom endpoint(s) for this connection. This setup works with these apps: * Rekognition * Lambda * SNS * SES * SQS * S3 You can also generate access keys through the AWS CLI and AWS API. Refer to the AWS Managing Access Keys documentation for instructions on generating access keys using these methods. --- ## Page: https://docs.n8n.io/integrations/builtin/credentials/azureopenai/ You can use these credentials to authenticate the following nodes: * Chat Azure OpenAI * Embeddings Azure OpenAI ## Prerequisites# * Create an Azure subscription. * Access to Azure OpenAI within that subscription. You may need to request access if your organization doesn't yet have it. ## Supported authentication methods# * API key Refer to Azure OpenAI's API documentation for more information about the service. ## Using API key# To configure this credential, you'll need: * A **Resource Name**: the **Name** you give the resource * An **API key**: **Key 1** works well. This can be accessed before deployment in **Keys and Endpoint**. * The **API Version** the credentials should use. See the Azure OpenAI API preview lifecycle documentation for more information about API versioning in Azure OpenAI. To get the information above, create and deploy an Azure OpenAI Service resource. Model name for Azure OpenAI nodes Once you deploy the resource, use the **Deployment name** as the model name for the Azure OpenAI nodes where you're using this credential. --- ## Page: https://docs.n8n.io/integrations/builtin/credentials/azurestorage/ You can use these credentials to authenticate the following nodes: * Azure Storage ## Prerequisites# * Create an Azure subscription. * Create an Azure storage account. ## Supported authentication methods# * OAuth2 * Shared Key Refer to Azure Storage's API documentation for more information about the service. ## Using OAuth2# Note for n8n Cloud users Cloud users don't need to provide connection details. Select **Connect my account** to connect through your browser. For self-hosted users, there are two main steps to configure OAuth2 from scratch: 1. Register an application with the Microsoft Identity Platform. 2. Generate a client secret for that application. Follow the detailed instructions for each step below. For more detail on the Microsoft OAuth2 web flow, refer to Microsoft authentication and authorization basics. ### Register an application# Register an application with the Microsoft Identity Platform: 1. Open the Microsoft Application Registration Portal. 2. Select **Register an application**. 3. Enter a **Name** for your app. 4. In **Supported account types**, select **Accounts in any organizational directory (Any Azure AD directory - Multi-tenant) and personal Microsoft accounts (for example, Skype, Xbox)**. 5. In **Register an application**: 1. Copy the **OAuth Callback URL** from your n8n credential. 2. Paste it into the **Redirect URI (optional)** field. 3. Select **Select a platform** > **Web**. 6. Select **Register** to finish creating your application. 7. Copy the **Application (client) ID** and paste it into n8n as the **Client ID**. Refer to Register an application with the Microsoft Identity Platform for more information. ### Generate a client secret# With your application created, generate a client secret for it: 1. On your Microsoft application page, select **Certificates & secrets** in the left navigation. 2. In **Client secrets**, select **\+ New client secret**. 3. Enter a **Description** for your client secret, such as `n8n credential`. 4. Select **Add**. 5. Copy the **Secret** in the **Value** column. 6. Paste it into n8n as the **Client Secret**. 7. Select **Connect my account** in n8n to finish setting up the connection. 8. Log in to your Microsoft account and allow the app to access your info. Refer to Microsoft's Add credentials for more information on adding a client secret. To configure this credential, you'll need: * An **Account**: The name of your Azure Storage account. * A **Key**: A shared key for your Azure Storage account. Select **Security + networking** and then **Access keys**. You can use either of the two account keys for this purpose. Refer to Manage storage account access keys | Microsoft for more detailed steps. ## Common issues# Here are the known common errors and issues with Azure Storage credentials. ### Need admin approval# When attempting to add credentials for a Microsoft360 or Microsoft Entra account, users may see a message when following the procedure that this action requires admin approval. This message will appear when the account attempting to grant permissions for the credential is managed by a Microsoft Entra. In order to issue the credential, the administrator account needs to grant permission to the user (or "tenant") for that application. The procedure for this is covered in the Microsoft Entra documentation. --- ## Page: https://docs.n8n.io/integrations/builtin/credentials/bamboohr/ You can use these credentials to authenticate the following node: * BambooHR ## Prerequisites# Create a BambooHR account. ## Supported authentication methods# * API key Refer to BambooHR's API documentation for more information about the service. ## Using API Key# To configure this credential, you'll need: * Your BambooHR **Subdomain**: the part between `https://` and `.bamboohr.com` * A BambooHR **API Key**: Refer to the Authentication section of BambooHR's Getting Started API documentation for instructions on generating an API key. --- ## Page: https://docs.n8n.io/integrations/builtin/credentials/bannerbear/ You can use these credentials to authenticate the following nodes: * Bannerbear ## Prerequisites# Create a Bannerbear account. ## Supported authentication methods# * API key Refer to Bannerbear's API documentation for more information about the service. ## Using API key# To configure this credential, you'll need: * A **Project API Key**: To generate an API key, first create a Bannerbear project. Go to **Settings > API Key** to view the API key. Refer to the Bannerbear API Authentication documentation for more detailed steps. --- ## Page: https://docs.n8n.io/integrations/builtin/credentials/baserow/ You can use these credentials to authenticate the following node: * Baserow ## Prerequisites# Create a Baserow account on any hosted Baserow instance or a self-hosted instance. ## Supported authentication methods# * Basic auth Refer to Baserow's documentation for more information about the service. Refer to Baserow's auto-generated API documentation for more information about the API specifically. ## Using basic auth# To configure this credential, you'll need: * Your Baserow **Host** * A **Username** and **Password** to log in with Follow these steps: 1. Enter the **Host** for the Baserow instance: * For a Baserow-hosted instance: leave as `https://api.baserow.io`. * For a self-hosted instance: set to your self-hosted instance API URL. 2. Enter the **Username** for the user account n8n should use. 3. Enter the **Password** for that user account. Refer to Baserow's API Authentication documentation for information on creating user accounts. --- ## Page: https://docs.n8n.io/integrations/builtin/credentials/beeminder/ You can use these credentials to authenticate the following node: * Beeminder ## Prerequisites# Create a Beeminder account. ## Supported authentication methods# * API user token Refer to Beeminder's API documentation for more information about the service. ## Using API user token# To configure this credential, you'll need: * A **User** name: Should match the user who the Auth Token is generated for. * A personal **Auth Token** for that user. Generate this using either method below: * In the GUI: From the Apps & API option within **Account Settings** * In the API: From hitting the `auth_token` API endpoint --- ## Page: https://docs.n8n.io/integrations/builtin/credentials/bitbucket/ You can use these credentials to authenticate the following nodes: * Bitbucket Trigger ## Prerequisites# Create a Bitbucket account. ## Supported authentication methods# * API username and app password Refer to Bitbucket's API documentation for more information about the service. ## Using API username/app password# To configure this credential, you'll need: * A **Username**: Visible in your Bitbucket profile settings **Personal settings > Account settings**. * An **App Password**: Refer to the Bitbucket instructions to Create an app password. ## App password permissions# Bitbucket API credentials will only work if the user account you generated the app password for has the appropriate privilege scopes for the selected app password permissions. The n8n credentials dialog will throw an error if the user account lacks the appropriate permissions for the selected scope, like `Your credentials lack one or more required privilege scopes`. See the Bitbucket App password permissions documentation for more information on working with these permissions. --- ## Page: https://docs.n8n.io/integrations/builtin/credentials/bitly/ You can use these credentials to authenticate the following node: * Bitly ## Prerequisites# Create a Bitly account. ## Supported authentication methods# * API token * OAuth2 Refer to Bitly's API documentation for more information about the service. ## Using API token# To configure this credential, you'll need: * An **Access Token**: Once logged in, visit Settings > Developer Settings > API to generate an Access Token. ## Using OAuth2# Note for n8n Cloud users Cloud users don't need to provide connection details. Select **Connect my account** to connect through your browser. If you need to configure OAuth2 from scratch or need more detail on what's happening in the OAuth web flow, refer to the Bitly API Authentication documentation for more information. --- ## Page: https://docs.n8n.io/integrations/builtin/credentials/bitwarden/ You can use these credentials to authenticate the following node: * Bitwarden ## Prerequisites# Create a Bitwarden Teams organization or Enterprise organization account. (Bitwarden only makes the Bitwarden Public API available for these organization plans.) ## Supported authentication methods# * API key Refer to Bitwarden's Public API documentation for more information about the service. ## Using API key# To configure this credential, you'll need: * A **Client ID**: Provided when you generate an API key * A **Client Secret**: Provided when you generate an API key * The **Environment**: * Choose **Cloud-hosted** if you don't self-host Bitwarden. No further configuration required. * Choose **Self-hosted** if you host Bitwarden on your own server. Enter your **Self-hosted domain** in the appropriate field. The Client ID and Client Secret must be for an **Organization API Key**, not a Personal API Key. Refer to the Bitwarden Public API Authentication documentation for instructions on generating an Organization API Key. --- ## Page: https://docs.n8n.io/integrations/builtin/credentials/box/ You can use these credentials to authenticate the following nodes: * Box * Box Trigger ## Prerequisites# Create a Box account. ## Supported authentication methods# * OAuth2 Refer to Box's API documentation for more information about the service. ## Using OAuth2# Note for n8n Cloud users Cloud users don't need to provide connection details. Select **Connect my account** to connect through your browser. If you need to configure OAuth2 from scratch or need more detail on what's happening in the OAuth web flow, you'll need to create a Custom App. Refer to the Box OAuth2 Setup documentation for more information. --- ## Page: https://docs.n8n.io/integrations/builtin/credentials/brandfetch/ You can use these credentials to authenticate the following node: * Brandfetch ## Prerequisites# Create a Brandfetch developer developer account. ## Supported authentication methods# * API key ## Related resources# Refer to Brandfetch's API documentation for more information about the service. ## Using API key# To configure this credential, you'll need: * An **API Key**: Refer to the Brandfetch Create an Account documentation to generate an API key. --- ## Page: https://docs.n8n.io/integrations/builtin/credentials/brevo/ You can use these credentials to authenticate the following nodes: * Brevo node * Brevo Trigger node ## Prerequisites# Create a Brevo developer account. ## Supported authentication methods# * API key ## Related resources# Refer to Brevo's API documentation for more information about authenticating with the service. ## API key# To configure this credential, you'll need: * An **API Key**: Refer to the Brevo API Quick Start documentation for instructions on creating a new API key. --- ## Page: https://docs.n8n.io/integrations/builtin/credentials/bubble/ You can use these credentials to authenticate the following nodes: * Bubble API access You need a paid plan to access the Bubble APIs. ## Supported authentication methods# * API key Refer to Bubble's API documentation for more information about the service. ## Using API key# To configure this credential, you'll need a paid Bubble account and: * An **API Token** * An **App Name** * Your **Domain**, if you're using a custom domain To set it up, you'll need to create an app: 1. Go to the **Apps** page in Bubble. 2. Select **Create an app**. 3. Enter a **Name** for your app, like `n8n-integration`. 4. Select **Get started**. The app's details open. 5. In the left navigation, select **Settings** (the gear cog icon). 6. Select the **API** tab. 7. In the **Public API Endpoints** section, check the box to **Enable Data API**. 8. The page displays the **Data API root URL**, for example: `https://n8n-integration.bubbleapps.io/version-test/api/1.1/obj`. 9. Copy the part of the URL after `https://` and before `.bubbleapps.io` and enter it in n8n as the **App Name**. In the above example, you'd enter `n8n-integration`. 10. Select **Generate a new API token**. 11. Enter an **API Token Label**, like `n8n integration`. 12. Copy the **Private key** and enter it as the **API Token** in your n8n credential. * Refer to Data API | Authentication for more information on generating API tokens. 13. In n8n, select the **Environment** that best matches your app: * Select **Development** for an app that you haven't deployed, accessed at `https://appname.bubbleapps.io/version-test` or `https://www.mydomain.com/version-test`. * Select **Live** for an app that you've deployed, accessed at `https://appname.bubbleapps.io` or `https://www.mydomain.com`. 14. In n8n, select your **Hosting**: * If you haven't set up a custom domain, select **Bubble Hosting**. * If you've set up a custom domain, select **Self Hosted** and enter your custom **Domain**. Refer to Bubble's Creating and managing apps documentation for more information. --- ## Page: https://docs.n8n.io/integrations/builtin/credentials/cal/ You can use these credentials to authenticate the following nodes: * Cal.com Trigger ## Prerequisites# Create a Cal.com account. ## Supported authentication methods# * API key Refer to Cal.com's API documentation for more information about the service. ## Using API key# To configure this credential, you'll need: * An **API Key**: Refer to the Cal API Quick Start documentation for information on how to generate a new API key. * A **Host**: If you're using the cloud version of Cal.com, leave the Host as `https://api.cal.com`. If you're self-hosting Cal.com, enter the **Host** for your Cal.com instance. --- ## Page: https://docs.n8n.io/integrations/builtin/credentials/calendly/ You can use these credentials to authenticate the following nodes: * Calendly Trigger Supported Calendly plans The Calendly Trigger node relies on Calendly webhooks. Calendly only offers access to webhooks in their paid plans. ## Supported authentication methods# * API access token * OAuth2 Refer to Calendly's API documentation for more information about the service. ## Using API access token# To configure this credential, you'll need a Calendly account and: * An API Key or **Personal Access Token** To get your access token: 1. Go to the Calendly **Integrations & apps** page. 2. Select **API & Webhooks**. 3. In **Your Personal Access Tokens**, select **Generate new token**. 4. Enter a **Name** for your access token, like `n8n integration`. 5. Select **Create token**. 6. Select **Copy token** and enter it in your n8n credential. Refer to Calendly's API authentication documentation for more information. ## Using OAuth2# To configure this credential, you'll need a Calendly developer account and: * A **Client ID** * A **Client Secret** To get both, create a new OAuth app in Calendly: 1. Log in to Calendly's developer portal and go to **My apps**. 2. Select **Create new app**. 3. Enter a **Name of app**, like `n8n integration`. 4. In **Kind of app**, select **Web**. 5. In **Environment type**, select the environment that corresponds to your usage, either **Sandbox** or **Production**. * Calendly recommends starting with **Sandbox** for development and creating a second application for **Production** when you're ready to go live. 6. Copy the **OAuth Redirect URL** from n8n and enter it as a **Redirect URI** in the OAuth app. 7. Select **Save & Continue**. The app details display. 8. Copy the **Client ID** and enter this as your n8n **Client ID**. 9. Copy the **Client secret** and enter this as your n8n **Client Secret**. 10. Select **Connect my account** in n8n and follow the on-screen prompts to finish authorizing the credential. Refer to Registering your application with Calendly for more information. --- ## Page: https://docs.n8n.io/integrations/builtin/credentials/carbonblack/ You can use these credentials to authenticate when using the HTTP Request node to make a Custom API call. ## Prerequisites# * Create a Carbon Black subscription. * Create a Carbon Black developer account. ## Authentication methods# * API key Refer to Carbon Black's documentation for more information about the service. This is a credential-only node. Refer to Custom API operations to learn more. View example workflows and related content on n8n's website. ## Using API key# To configure this credential, you'll need: * A **URL**: This URL is determined by the environment/product URL you use. You can find it by looking at the web address of your Carbon Black Cloud console. Refer to Carbon Black's URL Parts documentation for more information. * An **Access Token**: Refer to the Carbon Black Create an API key documentation to create an API key. Add the **API Secret Key** as the **Access Token** in n8n. --- ## Page: https://docs.n8n.io/integrations/builtin/credentials/chargebee/ You can use these credentials to authenticate the following nodes: * Chargebee * Chargebee Trigger ## Prerequisites# Create a Chargebee account. ## Supported authentication methods# * API key Refer to Chargebee's API documentation for more information about the service. ## Using API key# To configure this credential, you'll need: * An **Account Name**: This is your Chargebee Site Name or subdomain, for example if `https://n8n.chargebee.com` is the full site name, the Account Name is `n8n`. * An **API Key**: Refer to the Chargebee Creating an API key documentation for steps on how to generate an API key. Refer to their more general API authentication documentation for further clarification. --- ## Page: https://docs.n8n.io/integrations/builtin/credentials/circleci/ You can use these credentials to authenticate the following nodes: * CircleCI ## Prerequisites# Create a CircleCI account. ## Supported authentication methods# * Personal API token ## Related resources# Refer to CircleCI's API documentation for more information about the service. ## Using personal API token# To configure this credential, you'll need: * A **Personal API Token**: Refer to the CircleCI Creating a Personal API token documentation for instructions on creating your token. --- ## Page: https://docs.n8n.io/integrations/builtin/credentials/ciscomeraki/ You can use these credentials to authenticate when using the HTTP Request node to make a Custom API call. ## Prerequisites# * Create a Cisco DevNet developer account. * Access to a Cisco Meraki account. ## Authentication methods# * API key Refer to Cisco Meraki's API documentation for more information about the service. This is a credential-only node. Refer to Custom API operations to learn more. View example workflows and related content on n8n's website. ## Using API key# To configure this credential, you'll need: * An **API Key**: Refer to the Cisco Meraki Obtaining your Meraki API Key documentation for instructions on getting your API Key. --- ## Page: https://docs.n8n.io/integrations/builtin/credentials/ciscosecureendpoint/ You can use these credentials to authenticate when using the HTTP Request node to make a Custom API call. ## Prerequisites# * Create a Cisco DevNet developer account. * Access to a Cisco Secure Endpoint license. ## Authentication methods# * OAuth2 Refer to Cisco Secure Endpoint's documentation for more information about the service. This is a credential-only node. Refer to Custom API operations to learn more. View example workflows and related content on n8n's website. ## Using OAuth2# To configure this credential, you'll need: * The **Region** for your Cisco Secure Endpoint. Options are: * Asia Pacific, Japan, and China * Europe * North America * A **Client ID**: Provided when you register a SecureX API Client * A **Client Secret**: Provided when you register a SecureX API Client To get a Client ID and Client Secret, you'll need to Register a SecureX API Client. Refer to Cisco Secure Endpoint's authentication documentation for detailed instructions. Use the SecureX **Client Password** as the **Client Secret** within the n8n credential. --- ## Page: https://docs.n8n.io/integrations/builtin/credentials/ciscoumbrella/ You can use these credentials to authenticate when using the HTTP Request node to make a Custom API call. ## Prerequisites# * Create a Cisco DevNet developer account. * A Cisco Umbrella user account with **Full Admin** role. ## Authentication methods# * API key Refer to Cisco Umbrella's API documentation for more information about the service. This is a credential-only node. Refer to Custom API operations to learn more. View example workflows and related content on n8n's website. ## Using API key# To configure this credential, you'll need: * An **API Key** * A **Secret**: Provided when you generate an API key Refer to the Cisco Umbrella Manage API Keys documentation for instructions on creating an Umbrella API key. --- ## Page: https://docs.n8n.io/integrations/builtin/credentials/clearbit/ You can use these credentials to authenticate the following node: * Clearbit ## Prerequisites# Create a Clearbit account. ## Supported authentication methods# * API key ## Related resources# Refer to Clearbit's API documentation for more information about authenticating with the service. ## Using API key# To configure this credential, you'll need: * An **API Key**: Refer to Clearbit's API Authentication documentation for more information on creating and viewing API keys. --- ## Page: https://docs.n8n.io/integrations/builtin/credentials/clickup/ You can use these credentials to authenticate the following nodes: * ClickUp * ClickUp Trigger ## Supported authentication methods# * API access token * OAuth2 Refer to ClickUp's documentation for more information about the service. ## Using API access token# To configure this credential, you'll need a ClickUp account and: * A Personal API **Access Token** To get your personal API token: 1. If you're using ClickUp 2.0, select your avatar in the lower-left corner and select **Apps**. If you're using ClickUp 3.0, select your avatar in the upper-right corner, select **Settings**, and scroll down to select **Apps** in the sidebar. 2. Under **API Token**, select **Generate**. 3. Copy your **Personal API token** and enter it in your n8n credential as the **Access Token**. Refer to ClickUp's Personal Token documentation for more information. ## Using OAuth2# Note for n8n Cloud users Cloud users don't need to provide connection details. Select **Connect my account** to connect through your browser. If you're self-hosting n8n, you'll need to create an OAuth app: 1. In ClickUp, select your avatar and select **Integrations**. 2. Select **ClickUp API**. 3. Select **Create an App**. 4. Enter a **Name** for your app. 5. In n8n, copy the **OAuth Redirect URL**. Enter this as your ClickUp app's **Redirect URL**. 6. Once you create your app, copy the **client\_id** and **secret** and enter them in your n8n credential. 7. Select **Connect my account** and follow the on-screen prompts to finish connecting the credential. Refer to the ClickUp Oauth flow documentation for more information. --- ## Page: https://docs.n8n.io/integrations/builtin/credentials/clockify/ You can use these credentials to authenticate the following nodes: * Clockify * Clockify Trigger ## Prerequisites# Create a Clockify account. ## Supported authentication methods# * API key ## Related resources# Refer to Clockify's API documentation for more information about the service. ## Using API key# To configure this credential, you'll need: * An **API Key**: Access your API key from your Clockify Profile Settings. --- ## Page: https://docs.n8n.io/integrations/builtin/credentials/cloudflare/ You can use these credentials to authenticate the following nodes: * Cloudflare node ## Prerequisites# * Create a Cloudflare account. * Add a domain. ## Supported authentication methods# * API key ## Related resources# Refer to Cloudflare's API documentation for more information about the service. ## Using API key# To configure this credential, you'll need: * An **API Key**: Follow the Cloudflare documentation to create an API token. --- ## Page: https://docs.n8n.io/integrations/builtin/credentials/cockpit/ You can use these credentials to authenticate the following nodes: * Cockpit ## Prerequisites# * Create a Cockpit account. * Set up a self-hosted instance of Cockpit. ## Supported authentication methods# * API access token Refer to Cockpit's API documentation for more information about the service. ## Using API access token# To configure this credential, you'll need: * Your **Cockpit URL**: The URL you use to access your Cockpit instance * An **Access Token**: Refer to the Cockpit Managing tokens documentation for instructions on creating an API token. Use the **API token** as the n8n **Access Token**. --- ## Page: https://docs.n8n.io/integrations/builtin/credentials/coda/ You can use these credentials to authenticate the following nodes: * Coda ## Prerequisites# Create a Coda account. ## Supported authentication methods# * API access token ## Related resources# Refer to Coda's API documentation for more information about the service. ## Using API access token# To configure this credential, you'll need: * An API **Access Token**: Generate an API access token in your Coda **Account settings**. --- ## Page: https://docs.n8n.io/integrations/builtin/credentials/cohere/ You can use these credentials to authenticate the following nodes: * Cohere * Embeddings Cohere ## Prerequisites# Create a Cohere account. You'll need an account with the following access: * For the Trial API, you need User or Owner permissions. * For Production API, you need Owner permissions. Refer to Cohere Teams and Roles documentation for more information. ## Supported authentication methods# * API key Refer to Cohere's documentation for more information about the service. View n8n's Advanced AI documentation. ## Using API key# To configure this credential, you'll need: * An **API Key**: To generate a Cohere API key, go to the API Keys section of your Cohere dashboard. --- ## Page: https://docs.n8n.io/integrations/builtin/credentials/contentful/ You can use these credentials to authenticate the following nodes: * Contentful ## Prerequisites# * Create a Contentful account. * Create a Contentful space. ## Supported authentication methods# * API access token Refer to Contentful's API documentation for more information about the service. ## Using API access token# To configure this credential, you'll need: * Your Contentful **Space ID**: The Space ID displays as you generate the tokens; You can also refer to the Contentful Find space ID documentation to view the Space ID. * A **Content Delivery API Access Token**: Required if you want to use the Content Delivery API. Leave blank if you don't intend to use this API. * A **Content Preview API Access Token**: Required if you want to use the Content Preview API. Leave blank if you don't intend to use this API. View and generate access tokens in Contentful in **Settings > API keys**. Contentful generates tokens for both Content Delivery API and Content Preview API as part of a single key. Refer to Contentful Creating and managing API keys for detailed instructions. --- ## Page: https://docs.n8n.io/integrations/builtin/credentials/convertapi/ You can use these credentials to authenticate when using the HTTP Request node to make a Custom API call. ## Supported authentication methods# * API Token Refer to ConvertAPI's API documentation for more information about the service. This is a credential-only node. Refer to Custom API operations to learn more. View example workflows and related content on n8n's website. ## Using API Token# To configure this credential, you'll need a ConvertAPI account and: * An **API Token** to authenticate requests to the service. Refer to ConvertAPI's API documentation for more information about authenticating to the service. --- ## Page: https://docs.n8n.io/integrations/builtin/credentials/convertkit/ You can use these credentials to authenticate the following nodes: * ConvertKit * ConvertKit Trigger ## Prerequisites# Create a ConvertKit account. ## Supported authentication methods# * API key ## Related resources# Refer to ConvertKit's API documentation for more information about the service. ## Using API key# To configure this credential, you'll need: * An **API Secret**: Access your ConvertKit API key in **Account Settings > Advanced**. Add this key as the **API Secret** in n8n. --- ## Page: https://docs.n8n.io/integrations/builtin/credentials/copper/ You can use these credentials to authenticate the following nodes: * Copper * Copper Trigger ## Prerequisites# Create a Copper account at the **Professional** or **Business** plan level. ## Supported authentication methods# * API key Refer to Copper's API documentation for more information about the service. ## Using API key# To configure this credential, you'll need: * An **API Key**: Refer to the Copper Generating an API key documentation for information on generating an API key. * An **Email** address: Use the API key creator's email address --- ## Page: https://docs.n8n.io/integrations/builtin/credentials/cortex/ You can use these credentials to authenticate the following nodes: * Cortex ## Prerequisites# Install Cortex on your server. ## Supported authentication methods# * API key Refer to Cortex's API documentation for more information about the service. ## Using API key# To configure this credential, you'll need: * An **API Key**: Refer to the Cortex API Authentication documentation for detailed instructions on generating API keys. * The URL/Server Address for your **Cortex Instance** (defaults to `http://<your_server_address>:9001/`) --- ## Page: https://docs.n8n.io/integrations/builtin/credentials/cratedb/ You can use these credentials to authenticate the following nodes: * CrateDB ## Prerequisites# An available instance of CrateDB. ## Supported authentication methods# * account connection Refer to CrateDB's documentation for more information about the service. ## Using account connection# To configure this credential, you'll need: * Your **Host** name * Your **Database** name * A **User** name * A user **Password** * To set the **SSL** parameter. Refer to the CrateDB Secured Communications (SSL/TLS) documentation for more information. The options n8n supports are: * Allow * Disable * Require * A **Port** number Refer to the Connect to a CrateDB cluster documentation for detailed instructions on these fields and their default values. --- ## Page: https://docs.n8n.io/integrations/builtin/credentials/crowddev/ You can use these credentials to authenticate the following nodes: * crowd.dev * crowd.dev Trigger ## Prerequisites# Create a working instance of crowd.dev. ## Supported authentication methods# * API key Refer to crowd.dev's documentation for more information about the service, and their API documentation for working with the API. ## Using API key# To configure this credential, you'll need: * A **URL**: * If your crowd.dev instance is hosted on crowd.dev, keep the default of `https://app.crowd.dev`. * If your crowd.dev instance is self-hosted, use the URL you use to access your crowd.dev instance. * Your crowd.dev **Tenant ID**: Displayed in the **Settings** section of the crowd.dev app * An API **Token**: Displayed in the **Settings** section of the crowd.dev app Refer to the crowd.dev API documentation for more detailed instructions. --- ## Page: https://docs.n8n.io/integrations/builtin/credentials/crowdstrike/ You can use these credentials to authenticate when using the HTTP Request node to make a Custom API call. ## Prerequisites# Create a CrowdStrike account. ## Authentication methods# * OAuth2 Refer to CrowdStrike's documentation for more information about the service. Their documentation is behind a log in, so you must log in to your account on their website to access the API documentation. This is a credential-only node. Refer to Custom API operations to learn more. View example workflows and related content on n8n's website. ## Using OAuth2# To configure this credential, you'll need: * The **URL** of your CrowdStrike instance * A **Client ID**: Generated by creating a new API Client in Crowdstrike in **Support > API Clients and Keys**. * A **Client Secret**: Generated by creating a new API Client in Crowdstrike in **Support > API Clients and Keys**. A broad outline of the appropriate steps is available publicly at the CrowdStrike blog: Getting Access to the CrowdStrike API. CrowdStrike's full documentation is behind a log in, so you must log in to your account to access the full API documentation. --- ## Page: https://docs.n8n.io/integrations/builtin/credentials/customerio/ You can use these credentials to authenticate the following nodes with Customer.io. * Customer.io * Customer.io Trigger ## Prerequisites# Create a Customer.io account. ## Supported authentication methods# * API Key Refer to Customer.io's summary API documentation for more information about the service. For detailed API reference documentation for each API, refer to the Track API documentation and the App API documentation. ## Using API key# To configure this credential, you'll need: * A **Tracking API Key**: For use with the Track API at `https://track.customer.io/api/v1/`. See the FAQs below for more details. * Your **Region**: Customer.io uses different API subdomains depending on the region you select. Options include: * **Global region**: Keeps the default URLs for both APIs; for use in all non-EU countries/regions. * **EU region**: Adjusts the Track API subdomain to `track-eu` and the App API subdomain to `api-eu`; only use this if you are in the EU. * A **Tracking Site ID**: Required with your **Tracking API Key** * An **App API Key**: For use with the App API at `https://api.customer.io/v1/api/`. See the FAQs below for more details. Refer to the Customer.io Finding and managing your API credentials documentation for instructions on creating both Tracking API and App API keys. ## Why you need a Tracking API Key and an App API Key# Customer.io has two different API endpoints and generates and stores the keys for each slightly differently: * The Track API at `https://track.customer.io/api/v1/` * The App API at `https://api.customer.io/v1/api/` The Track API requires a Tracking Site ID; the App API doesn't. Based on the operation you want to perform, n8n uses the correct API key and its corresponding endpoint. --- ## Page: https://docs.n8n.io/integrations/builtin/credentials/datadog/ You can use these credentials to authenticate when using the HTTP Request node to make a Custom API call. ## Prerequisites# Create a Datadog account. Refer to Datadog's API documentation for more information about authenticating with the service. This is a credential-only node. Refer to Custom API operations to learn more. View example workflows and related content on n8n's website. ## Using API Key# To configure this credential, you'll need: * Your Datadog instance **Host** * An **API Key** * An **App Key** Refer to Authentication on Datadog's website for more information. --- ## Page: https://docs.n8n.io/integrations/builtin/credentials/deepl/ You can use these credentials to authenticate the following nodes: * DeepL ## Prerequisites# Create a DeepL developer account. n8n works with both Free and Pro API Plans. ## Supported authentication methods# * API key Refer to DeepL's API documentation for more information about the service. ## Using API key# To configure this credential, you'll need: * An **API Key**: Refer to DeepL's Authentication documentation for more information on getting your API key. * To identify which **API Plan** you're on. DeepL has different API endpoints for each plan, so be sure you select the correct one: * Pro Plan * Free Plan --- ## Page: https://docs.n8n.io/integrations/builtin/credentials/deepseek/ You can use these credentials to authenticate the following nodes: * Chat DeepSeek ## Prerequisites# Create a DeepSeek account. ## Supported authentication methods# * API key Refer to DeepSeek's API documentation for more information about the service. ## Using API key# To configure this credential, you'll need: * An **API Key** To generate your API Key: 1. Login to your DeepSeek account or create an account. 2. Open your API keys page. 3. Select **Create new secret key** to create an API key, optionally naming the key. 4. Copy your key and add it as the **API Key** in n8n. Refer to the Your First API Call page for more information. --- ## Page: https://docs.n8n.io/integrations/builtin/credentials/demio/ You can use these credentials to authenticate the following nodes: * Demio ## Prerequisites# Create a Demio account. ## Supported authentication methods# * API key Refer to Demio's API documentation for more information about the service. ## Using API key# To configure this credential, you'll need: * An **API Key** * An **API Secret** You must have Owner status in Demio to generate API keys and secrets. To view and generate API keys and secrets, go to **Account Settings > API**. Refer to the Demio Account Owner Settings documentation for more detailed steps. --- ## Page: https://docs.n8n.io/integrations/builtin/credentials/dfiriris/ You can use these credentials to authenticate when using the HTTP Request node to make a Custom API call. ## Prerequisites# An accessible instance of DFIR-IRIS. Refer to DFIR-IRIS's API documentation for more information about authenticating with the service. This is a credential-only node. Refer to Custom API operations to learn more. View example workflows and related content on n8n's website. ## Using API Key# To configure this credential, you'll need: * An **API Key**: Refer to DFIR-IRIS's API documentation for instructions on getting your API key. * The **Base URL** of your DFIR-IRIS instance. --- ## Page: https://docs.n8n.io/integrations/builtin/credentials/dhl/ You can use these credentials to authenticate the following nodes: * DHL ## Supported authentication methods# * API key Refer to DHL's Developer documentation for more information about the service. ## Using API key# To configure this credential, you'll need a DHL Developer account and: * An **API Key** To get an API key, create an app: 1. In the DHL Developer portal, select the user icon to open your User Apps. 2. Select **\+ Create App**. 3. Enter an **App name**, like `n8n integration`. 4. Enter a **Machine name**, like `n8n_integration`. 5. In **SELECT APIs**, select **Shipment Tracking - Unified**. The API is added to the **Add API to app** section. 6. In the **Add API to app** section, select the **+** next to the **Shipment Tracking - Unified** API. 7. Select **Create App**. The **Apps** page opens, displaying the app you just created. 8. Select the app you just created to view its details. 9. Select **Show key** next to **API Key**. 10. Copy the **API Key** and enter it in your n8n credential. Refer to How to create an app? for more information. --- ## Page: https://docs.n8n.io/integrations/builtin/credentials/discord/ You can use these credentials to authenticate the following nodes: * Discord ## Prerequisites# * Create a Discord account. * For Bot and OAuth2 credentials: * Set up your local developer environment. * Create an application and a bot user. * For webhook credentials, create a webhook. ## Supported authentication methods# * Bot * OAuth2 * Webhook Not sure which method to use? Refer to Choose an authentication method for more guidance. Refer to Discord's Developer documentation for more information about the service. ## Using bot# Use this method if you want to add the bot to your Discord server using a bot token rather than OAuth2. To configure this credential, you'll need: * A **Bot Token**: Generated once you create an application with a bot. To create an application with a bot and generate the **Bot Token**: 1. If you don't have one already, create an app in the developer portal. 2. Enter a **Name** for your app. 3. Select **Create**. 4. Select **Bot** from the left menu. 5. Under **Token**, select **Reset Token** to generate a new bot token. 6. Copy the token and add it to your n8n credential. 7. In **Bot > Privileged Gateway Intents**, add any privileged intents you want your bot to have. Refer to Configuring your bot for more information on privileged intents. * n8n recommends activating **SERVER MEMBERS INTENT: Required for your bot to receive events listed under GUILD\_MEMBERS**. 8. In **Installation > Installation Contexts**, select the installation contexts you want your bot to use: * Select **Guild Install** for server-installed apps. (Most common for n8n users.) * Select **User Install** for user-installed apps. (Less common for n8n users, but may be useful for testing.) * Refer to Discord's Choosing installation contexts documentation for more information about these installation contexts. 9. In **Installation > Install Link**, select **Discord Provided Link** if it's not already selected. 10. Still on the **Installation** page, in the **Default Install Settings** section, select `applications.commands` and `bot` scopes. Refer to Discord's Scopes documentation for more information about these and other scopes. 11. Add permissions on the **Bot > Bot Permissions** page. Refer to Discord's Permissions documentation for more information. n8n recommends selecting these permissions for the Discord node: * Manage Roles * Manage Channels * Read Messages/View Channels * Send Messages * Create Public Threads * Create Private Threads * Send Messages in Threads * Send TTS Messages * Manage Messages * Manage Threads * Embed Links * Attach Files * Read Message History * Add Reactions 12. Add the app to your server or test server: 1. Go to **Installation > Install Link** and copy the link listed there. 2. Paste the link in your browser and hit Enter. 3. Select **Add to server** in the installation prompt. 4. Once your app's added to your server, you'll see it in the member list. These steps outline the basic functionality needed to set up your n8n credential. Refer to the Discord Creating an App guide for more information on creating an app, especially: * Fetching your credentials for getting your app's credentials into your local developer environment. * Handling interactivity for information on setting up public endpoints for interactive `/slash` commands. ## Using OAuth2# Use this method if you want to add the bot to Discord servers using the OAuth2 flow, which simplifies the process for those installing your app. To configure this credential, you'll need: * A **Client ID** * A **Client Secret** * Choose whether to send **Authentication** in the **Header** or **Body** * A **Bot Token** For details on creating an application with a bot and generating the token, follow the same steps as in Using bot above. Then: 1. Copy the **Bot Token** you generate and add it into the n8n credential. 2. Open the **OAuth2** page in your Discord application to access your **Client ID** and generate a **Client Secret**. Add these to your n8n credential. 3. From n8n, copy the **OAuth Redirect URL** and add it into the Discord application in **OAuth2 > Redirects**. Be sure you save these changes. ## Using webhook# To configure this credential, you'll need: * A **Webhook URL**: Generated once you create a webhook. To get a Webhook URL, you create a webhook and copy the URL that gets generated: 1. Open your Discord **Server Settings** and open the **Integrations** tab. 2. Select **Create Webhook** to create a new webhook. 3. Give your webhook a **Name** that makes sense. 4. Select the **avatar** next to the **Name** to edit or upload a new avatar. 5. In the **CHANNEL** dropdown, select the channel the webhook should post to. 6. Select **Copy Webhook URL** to copy the Webhook URL. Enter this URL in your n8n credential. Refer to the Discord Making a Webhook documentation for more information. ## Choose an authentication method# The simplest installation is a **webhook**. You create and add webhooks to a single channel on a Discord server. Webhooks can post messages to a channel. They don't require a bot user or authentication. But they can't listen or respond to user requests or commands. If you need a straightforward way to send messages to a channel without the need for interaction or feedback, use a webhook. A **bot** is an interactive step up from a webhook. You add bots to the Discord server (referred to as a `guild` in the Discord API documentation) or to user accounts. Bots added to the server can interact with users on all the server's channels. They can manage channels, send and retrieve messages, retrieve the list of all users, and change their roles. If you need to build an interactive, complex, or multi-step workflow, use a bot. **OAuth2** is basically a **bot** that uses an OAuth2 flow rather than just the bot token. As with bots, you add these to the Discord server or to user accounts. These credentials offer the same functionalities as bots, but they can simplify the installation of the bot on your server. --- ## Page: https://docs.n8n.io/integrations/builtin/credentials/discourse/ You can use these credentials to authenticate the following nodes: * Discourse ## Prerequisites# * Host an instance of Discourse * Create an account on your hosted instance and make sure that you are an admin ## Supported authentication methods# * API key Refer to Discourse's API documentation for more information about the service. ## Using API key# To configure this credential, you'll need: * The **URL** of your Discourse instance, for example `https://community.n8n.io` * An **API Key**: Create an API key through the Discourse admin panel. Refer to the Discourse create and configure an API key documentation for instructions on creating an API key and specifying a username. * A **Username**: Use your own name, `system`, or another user. Refer to the Authentication section of the Discourse API documentation for examples. --- ## Page: https://docs.n8n.io/integrations/builtin/credentials/disqus/ You can use these credentials to authenticate the following nodes: * Disqus ## Prerequisites# * Create a Disqus account. * Register an API application. ## Supported authentication methods# * API access token ## Related resources# Refer to Disqus's API documentation for more information about the service. ## Using API access token# To configure this credential, you'll need: * An **Access Token**: Once you've registered an API application, copy the **API Key** and add it to n8n as the **Access Token**. --- ## Page: https://docs.n8n.io/integrations/builtin/credentials/drift/ You can use these credentials to authenticate the following nodes: * Drift ## Prerequisites# * Create a Drift account. * Create a Drift app. ## Supported authentication methods# * API personal access token * OAuth2 Refer to Drift's API documentation for more information about the service. ## Using API personal access token# To configure this credential, you'll need: * A **Personal Access Token**: To get a token, create a Drift app. Install the app to generate an OAuth Access token. Add this to the n8n credential as your **Personal Access Token**. ## Using OAuth2# Note for n8n Cloud users Cloud users don't need to provide connection details. Select **Connect my account** to connect through your browser. If you need to configure OAuth2 from scratch or need more detail on what's happening in the OAuth web flow, refer to the instructions in the Drift Authentication and Scopes documentation to set up OAuth for your app. --- ## Page: https://docs.n8n.io/integrations/builtin/credentials/dropbox/ You can use these credentials to authenticate the following nodes: * Dropbox ## Supported authentication methods# * API access token: Dropbox recommends this method for testing with your user account and granting a limited number of users access. * OAuth2: Dropbox recommends this method for production or for testing with more than 50 users. App reuse You can transition an app from the API access token to OAuth2 by creating a new credential in n8n for OAuth2 using the same app. Refer to Dropbox's Developer documentation for more information about the service. ## Using access token# To configure this credential, you'll need a Dropbox developer account and: * An **Access Token**: Generated once you create a Dropbox app. * An **App Access Type** To set up the credential, create a Dropbox app: 1. Open the App Console within the Dropbox developer portal. 2. Select **Create app**. 3. In **Choose an API**, select **Scoped access**. 4. In **Choose the type of access you need**, choose whichever option best fits your use of the Dropbox node: * **App Folder** grants access to a single folder created specifically for your app. * **Full Dropbox** grants access to all files and folders in your user's Dropbox. * Refer to the DBX Platform developer guide for more information. 5. In **Name your app**, enter a name for your app, like `n8n integration`. 6. Check the box to agree to the **Dropbox API Terms and Conditions**. 7. Select **Create app**. The app's **Settings** open. 8. In the **OAuth 2** section, in **Generated access token**, select **Generate**. 9. Copy the access token and enter it as the **Access Token** in your n8n credential. 10. In n8n, select the same **App Access Type** you selected for your app. Refer to the Dropbox App Console Settings documentation for more information. User limits On the **Settings** tab, you can add other users to your app, even with the access token method. Once your app links 50 Dropbox users, you will have two weeks to apply for and receive production status approval before Dropbox freezes your app from linking more users. ## Using OAuth2# Note for n8n Cloud users Cloud users don't need to provide connection details. Select **Connect my account** to connect through your browser. Cloud users need to select the **App Access Type**: * **App Folder** grants access to a single folder created specifically for your app. * **Full Dropbox** grants access to all files and folders in your user's Dropbox. * Refer to the DBX Platform developer guide for more information. If you're self-hosting n8n, you'll need to configure OAuth2 manually: 1. Open the App Console within the Dropbox developer portal. 2. Select **Create app**. 3. In **Choose an API**, select **Scoped access**. 4. In **Choose the type of access you need**, choose whichever option best fits your use of the Dropbox node: * **App Folder** grants access to a single folder created specifically for your app. * **Full Dropbox** grants access to all files and folders in your user's Dropbox. * Refer to the DBX Platform developer guide for more information. 5. In **Name your app**, enter a name for your app, like `n8n integration`. 6. Check the box to agree to the **Dropbox API Terms and Conditions**. 7. Select **Create app**. The app's **Settings** open. 8. Copy the **App key** and enter it as the **Client ID** in your n8n credential. 9. Copy the **Secret** and enter it as the **Client Secret** in your n8n credential. 10. In n8n, copy the **OAuth Redirect URL** and enter it in the Dropbox **Redirect URIs**. 11. In n8n, select the same **App Access Type** you selected for your app. Refer to the instructions in the Dropbox Implementing OAuth documentation for more information. For internal tools and limited usage, you can keep your app private. But if you'd like your app to be used by more than 50 users or you want to distribute it, you'll need to complete Dropbox's production approval process. Refer to **Production Approval** in the DBX Platform developer guide for more information. User limits On the **Settings** tab, you can add other users to your app. Once your app links 50 Dropbox users, you will have two weeks to apply for and receive production status approval before Dropbox freezes your app from linking more users. --- ## Page: https://docs.n8n.io/integrations/builtin/credentials/dropcontact/ You can use these credentials to authenticate the following nodes: * Dropcontact ## Prerequisites# Create a developer account in Dropcontact. ## Supported authentication methods# * API key ## Related resources# Refer to Dropcontact's API documentation for more information about the service. ## Using API key# To configure this credential, you'll need: * An **API Key**: To view your API key in Dropcontact, go to **API**. Refer to the Dropcontact API key documentation for more information. --- ## Page: https://docs.n8n.io/integrations/builtin/credentials/dynatrace/ You can use these credentials to authenticate when using the HTTP Request node to make a Custom API call. ## Prerequisites# Create a Dynatrace account. Refer to Dynatrace's API documentation for more information about authenticating with the service. This is a credential-only node. Refer to Custom API operations to learn more. View example workflows and related content on n8n's website. ## Using Access Token# To configure this credential, you'll need: * An **Access Token** Refer to Access Tokens on Dynatrace's website for more information. --- ## Page: https://docs.n8n.io/integrations/builtin/credentials/egoi/ You can use these credentials to authenticate the following nodes: * E-goi ## Prerequisites# Create an E-goi account. ## Supported authentication methods# * API key ## Related resources# Refer to E-goi's API documentation for more information about the service. ## Using API key# To configure this credential, you'll need: * An **API Key**: Refer to E-goi's API key documentation for instructions on generating and viewing an API key. --- ## Page: https://docs.n8n.io/integrations/builtin/credentials/elasticsearch/ You can use these credentials to authenticate the following nodes: * Elasticsearch ## Supported authentication methods# * Basic auth Refer to Elasticsearch's documentation for more information about the service. ## Using basic auth# To configure this credential, you'll need an Elasticsearch account with a deployment and: * A **Username** * A **Password** * Your Elasticsearch application's **Base URL** (also known as the Elasticsearch application endpoint) To set up the credential: 1. Enter your Elasticsearch **Username**. 2. Enter your Elasticsearch **Password**. 3. In Elasticsearch, go to **Deployments**. 4. Select your deployment. 5. Select **Manage this deployment**. 6. In the **Applications** section, copy the endpoint of the **Elasticsearch** application. 7. Enter this in n8n as the **Base URL**. 8. By default, n8n connects only if SSL certificate validation succeeds. If you'd like to connect even if SSL certificate validation fails, turn on **Ignore SSL Issues**. Custom endpoint aliases If you add a custom endpoint alias to a deployment, update your n8n credential **Base URL** with the new endpoint. --- ## Page: https://docs.n8n.io/integrations/builtin/credentials/elasticsecurity/ You can use these credentials to authenticate the following nodes: * Elastic Security ## Prerequisites# * Create an Elastic Security account. * Deploy an application. ## Supported authentication methods# * Basic auth * API Key Refer to Elastic Security's documentation for more information about the service. ## Using basic auth# To configure this credential, you'll need: * A **Username**: For the user account you log into Elasticsearch with. * A **Password**: For the user account you log into Elasticsearch with. * Your Elasticsearch application's **Base URL** (also known as the Elasticsearch application endpoint): 1. In Elasticsearch, select the option to **Manage this deployment**. 2. In the **Applications** section, copy the endpoint of the **Elasticsearch** application. 3. Add this in n8n as the **Base URL**. Custom endpoint aliases If you add a custom endpoint alias to a deployment, update your n8n credential **Base URL** with the new endpoint. ## Using API key# To configure this credential, you'll need: * An **API Key**: For the user account you log into Elasticsearch with. Refer to Elasticsearch's Create API key documentation for more information. * Your Elasticsearch application's **Base URL** (also known as the Elasticsearch application endpoint): 1. In Elasticsearch, select the option to **Manage this deployment**. 2. In the **Applications** section, copy the endpoint of the **Elasticsearch** application. 3. Add this in n8n as the **Base URL**. --- ## Page: https://docs.n8n.io/integrations/builtin/credentials/emelia/ You can use these credentials to authenticate the following nodes: * Emelia * Emelia Trigger ## Prerequisites# Create an Emelia account. ## Supported authentication methods# * API key Refer to Emelia's API documentation for more information about the service. ## Using API key# To configure this credential, you'll need: * An **API Key**: To generate an API Key in Emelia, access your **API Keys** by selecting the avatar in the top right (your **Settings**). Refer to the Authentication section of Emelia's API documentation for more information. --- ## Page: https://docs.n8n.io/integrations/builtin/credentials/erpnext/ You can use these credentials to authenticate the following nodes: * ERPNext ## Prerequisites# * Create an ERPNext account. ## Supported authentication methods# * API key Refer to ERPNext's documentation for more information about the service. Refer to ERPNext's developer documentation for more information about working with the framework. ## Using API key# To configure this credential, you'll need: * An **API Key**: Generate this from your own ERPNext user account in **Settings > My Settings > API Access**. * An **API Secret**: Generated with the API key. * Your ERPNext **Environment**: * For **Cloud-hosted**: * Your ERPNext **Subdomain**: Refer to the FAQs * Your **Domain**: Choose between `erpnext.com` and `frappe.cloud`. * For **Self-hosted**: * The fully qualified **Domain** where you host ERPNext * Choose whether to **Ignore SSL Issues**: When selected, n8n will connect even if SSL certificate validation is unavailable. If you are an ERPNext System Manager, you can also generate API keys and secrets for other users. Refer to the ERPNext Adding Users documentation for more information. ## How to find the subdomain of an ERPNext cloud-hosted account# You can find your ERPNext subdomain by reviewing the address bar of your browser. The string between `https://` and either `.erpnext.com` or `frappe.cloud` is your subdomain. For example, if the URL in the address bar is `https://n8n.erpnext.com`, the subdomain is `n8n`. --- ## Page: https://docs.n8n.io/integrations/builtin/credentials/eventbrite/ You can use these credentials to authenticate the following nodes: * Eventbrite Trigger ## Prerequisites# Create an Eventbrite account. ## Supported authentication methods# * API private key * OAuth2 Refer to Eventbrite's API documentation for more information about the service. ## Using API private key# To configure this credential, you'll need: * A **Private Key**: Refer to the Eventbrite API Authentication Get a Private Token documentation for detailed steps to generate a Private Token. Use this private token as the **Private Key** in the n8n credential. ## Using OAuth2# Note for n8n Cloud users Cloud users don't need to provide connection details. Select **Connect my account** to connect through your browser. If you need to configure OAuth2 from scratch or need more detail on what's happening in the OAuth web flow, refer to the instructions in the Eventbrite API authentication For App Partners documentation to set up OAuth. --- ## Page: https://docs.n8n.io/integrations/builtin/credentials/f5bigip/ You can use these credentials to authenticate when using the HTTP Request node to make a Custom API call. ## Prerequisites# Create an F5 Big-IP account. ## Authentication methods# * Account login Refer to F5 Big-IP's API documentation for more information about the service. This is a credential-only node. Refer to Custom API operations to learn more. View example workflows and related content on n8n's website. ## Using account login# To configure this credential, you'll need: * A **Username**: Use the username you use to log in to F5 Big-IP. * A **Password**: Use the user password you use to log in to F5 Big-IP. --- ## Page: https://docs.n8n.io/integrations/builtin/credentials/facebookapp/ You can use these credentials to authenticate the following nodes: * Facebook Trigger ## Supported authentication methods# * App access token Refer to Meta's Graph API documentation for more information about the service. ## Using app access token# To configure this credential, you'll need a Meta for Developers account and: * An app **Access Token** * An optional **App Secret**: Used to verify the integrity and origin of the payload. There are five steps in setting up your credential: 1. Create a Meta app with the Webhooks product. 2. Generate an App Access Token for that app. 3. Configure the Facebook trigger. 4. Optional: Add an app secret. 5. App Review: Only required if your app's users don't have roles on the app itself. If you're creating the app for your own internal purposes, this isn't necessary. Refer to the detailed instructions below for each step. ### Create a Meta app# To create a Meta app: 1. Go to the Meta Developer App Dashboard and select **Create App**. 2. If you have a business portfolio and you're ready to connect the app to it, select the business portfolio. If you don't have a business portfolio or you're not ready to connect the app to the portfolio, select **I don’t want to connect a business portfolio yet** and select **Next**. The **Use cases** page opens. 3. Select **Other**, then select **Next**. 4. Select **Business** and **Next**. 5. Complete the essential information: * Add an **App name**. * Add an **App contact email**. * Here again you can connect to a business portfolio or skip it. 6. Select **Create app**. 7. The **Add products to your app** page opens. 8. Select **App settings > Basic** from the left menu. 9. Enter a **Privacy Policy URL**. (Required to take the app "Live.") 10. Select **Save changes**. 11. At the top of the page, toggle the **App Mode** from **Development** to **Live**. 12. In the left menu, select **Add Product**. 13. The **Add products to your app** page appears. Select **Webhooks**. 14. The **Webhooks** product opens. Refer to Meta's Create an app documentation for more information on creating an app, required fields like the Privacy Policy URL, and adding products. For more information on the app modes and switching to **Live** mode, refer to App Modes and Publish | App Types. ### Generate an App Access Token# Next, create an app access token to be used by your n8n credential and the Webhooks product: 1. In a separate tab or window, open the Graph API explorer. 2. Select the **Meta App** you just created in the **Access Token** section. 3. In **User or Page**, select **Get App Token**. 4. Select **Generate Access Token**. 5. The page prompts you to log in and grant access. Follow the on-screen prompts. App unavailable You may receive a warning that the app isn't available. Once you take an app live, there may be a few minutes' delay before you can generate an access token. 6. Copy the token and enter it in your n8n credential as the **Access Token**. Save this token somewhere else, too, since you'll need it for the Webhooks configuration. 7. Save your n8n credential. Refer to the Meta instructions for Your First Request for more information on generating the token. ### Configure the Facebook Trigger# Now that you have a token, you can configure the Facebook Trigger node: 1. In your Meta app, copy the **App ID** from the top navigation bar. 2. In n8n, open your Facebook Trigger node. 3. Paste the **App ID** into the **APP ID** field. 4. Select **Test step** to shift the trigger into listening mode. 5. Return to the tab or window where your Meta app's **Webhooks** product configuration is open. 6. **Subscribe** to the objects you want to receive Facebook Trigger notifications about. For each subscription: 1. Copy the **Webhook URL** from n8n and enter it as the **Callback URL** in your Meta App. 2. Enter the **Access Token** you copied above as the **Verify token**. 3. Select **Verify and save**. (This step fails if you don't have your n8n trigger listening.) 4. Some webhook subscriptions, like **User**, prompt you to subscribe to individual events. Subscribe to the events you're interested in. 5. You can send some **Test** events from Meta to confirm things are working. If you send a test event, verify its receipt in n8n. Refer to the Facebook Trigger node documentation for more information. ### Optional: Add an App Secret# For added security, Meta recommends adding an **App Secret**. This signs all API calls with the `appsecret_proof` parameter. The app secret proof is a sha256 hash of your access token, using your app secret as the key. To generate an App Secret: 1. In Meta while viewing your app, select **App settings > Basic** from the left menu. 2. Select **Show** next to the **App secret** field. 3. The page prompts you to re-enter your Facebook account credentials. Once you do so, Meta shows the App Secret. 4. Highlight it to select it, copy it, and paste this into your n8n credential as the **App Secret**. 5. **Save** your n8n credential. Refer to the App Secret documentation for more information. ### App review# App Review requires Business Verification. Your app must go through App Review if it will be used by someone who: * Doesn't have a role on the app itself. * Doesn't have a role in the Business that has claimed the app. If your only app users are users who have a role on the app itself, App Review isn't required. As part of the App Review process, you may need to request advanced access for your webhook subscriptions. Refer to Meta's App Review and Advanced Access documentation for more information. ## Common issues# ### Unverified apps limit# Facebook only lets you have a developer or administrator role on a maximum of 15 apps that aren't already linked to a Meta Verified Business Account. Refer to Limitations | Create an app if you're over that limit. --- ## Page: https://docs.n8n.io/integrations/builtin/credentials/facebookgraph/ You can use these credentials to authenticate the following nodes: * Facebook Graph API ## Supported authentication methods# * App access token Refer to Meta's Graph API documentation for more information about the service. ## Using app access token# To configure this credential, you'll need a Meta for Developers account and: * An app **Access Token** There are two steps in setting up your credential: 1. Create a Meta app with the products you need to access. 2. Generate an App Access Token for that app. Refer to the detailed instructions below for each step. ### Create a Meta app# To create a Meta app: 1. Go to the Meta Developer App Dashboard and select **Create App**. 2. If you have a business portfolio and you're ready to connect the app to it, select the business portfolio. If you don't have a business portfolio or you're not ready to connect the app to the portfolio, select **I don’t want to connect a business portfolio yet** and select **Next**. The **Use cases** page opens. 3. Select the **Use case** that aligns with how you wish to use the Facebook Graph API. For example, for products in Meta's **Business** suite (like Messenger, Instagram, WhatsApp, Marketing API, App Events, Audience Network, Commerce API, Fundraisers, Jobs, Threat Exchange, and Webhooks), select **Other**, then select **Next**. 4. Select **Business** and **Next**. 5. Complete the essential information: * Add an **App name**. * Add an **App contact email**. * Here again you can connect to a business portfolio or skip it. 6. Select **Create app**. 7. The **Add products to your app** page opens. 8. Select **App settings > Basic** from the left menu. 9. Enter a **Privacy Policy URL**. (Required to take the app "Live.") 10. Select **Save changes**. 11. At the top of the page, toggle the **App Mode** from **Development** to **Live**. 12. In the left menu, select **Add Product**. 13. The **Add products to your app** page appears. Select the products that make sense for your app and configure them. Refer to Meta's Create an app documentation for more information on creating an app, required fields like the Privacy Policy URL, and adding products. For more information on the app modes and switching to **Live** mode, refer to App Modes and Publish | App Types. ### Generate an App Access Token# Next, create an app access token to use with your n8n credential and the products you selected: 1. In a separate tab or window, open the Graph API explorer. 2. Select the **Meta App** you just created in the **Access Token** section. 3. In **User or Page**, select **Get App Token**. 4. Select **Generate Access Token**. 5. The page prompts you to log in and grant access. Follow the on-screen prompts. App unavailable You may receive a warning that the app isn't available. Once you take an app live, there may be a few minutes' delay before you can generate an access token. 6. Copy the token and enter it in your n8n credential as the **Access Token**. Refer to the Meta instructions for Your First Request for more information on generating the token. --- ## Page: https://docs.n8n.io/integrations/builtin/credentials/facebookleadads/ You can use these credentials to authenticate the following nodes: * Facebook Lead Ads trigger ## Supported authentication methods# * OAuth2 Refer to Facebook Lead Ads' documentation for more information about the service. View example workflows and related content on n8n's website. ## Using OAuth2# To configure this credential, you'll need a Meta for Developers account and: * A **Client ID** * A **Client Secret** To get both, create a Meta app with either the Facebook Login product or the Facebook Login for Business product. To create your app and set up the credential with **Facebook Login for Business**: 1. Go to the Meta Developer App Dashboard and select **Create App**. 2. If you have a business portfolio and you're ready to connect the app to it, select the business portfolio. If you don't have a business portfolio or you're not ready to connect the app to the portfolio, select **I don’t want to connect a business portfolio yet** and select **Next**. The **Use cases** page opens. 3. Select **Other**, then select **Next**. 4. Select **Business** and **Next**. 5. Complete the essential information: * Add an **App name**. * Add an **App contact email**. * Here again you can connect to a business portfolio or skip it. 6. Select **Create app**. The **Add products to your app** page opens. 7. Select **Facebook Login for Business**. The **Settings** page for this product opens. 8. Copy the **OAuth Redirect URL** from your n8n credential. 9. In your Meta app settings in **Client OAuth settings**, paste that URL as the **Valid OAuth Redirect URIs**. 10. Select **App settings > Basic** from the left menu. 11. Copy the **App ID** and enter it as the **Client ID** within your n8n credential. 12. Copy the **App Secret** and enter it as the **Client Secret** within your n8n credential. Your credential should successfully connect now, but you'll need to go through the steps to take your Meta app live before you can use it with the Facebook Lead Ads trigger. Here's a summary of what you'll need to do: 1. In your Meta app, select **App settings > Basic** from the left menu. 2. Enter a **Privacy Policy URL**. (Required to take the app "Live.") 3. Select **Save changes**. 4. At the top of the page, toggle the **App Mode** from **Development** to **Live**. 5. Facebook Login for Business requires Advanced Access for `public_profile`. To add it, go to **App Review > Permissions and Features**. 6. Search for `public_profile` and select **Request advanced access**. 7. Complete the steps for business verification. 8. Use the Lead Ads Testing Tool to trigger some demo form submissions and test your workflow. Refer to Meta's Create an app documentation for more information on creating an app, required fields like the Privacy Policy URL, and adding products. For more information on the app modes and switching to **Live** mode, refer to App Modes and Publish | App Types. --- ## Page: https://docs.n8n.io/integrations/builtin/credentials/figma/ You can use these credentials to authenticate the following nodes: * Figma Trigger (Beta) ## Prerequisites# Create a Figma account. You need an admin or owner level account. ## Supported authentication methods# * API key ## Related resources# Refer to Figma's API documentation for more information about the service. ## Using API key# To configure this credential, you'll need: * A Personal **Access Token** (PAT): Refer to the Figma API Access Tokens documentation for instructions on generating a Personal **Access Token**. --- ## Page: https://docs.n8n.io/integrations/builtin/credentials/filemaker/ You can use these credentials to authenticate the following nodes: * FileMaker ## Prerequisites# * Create a user account on a FileMaker Server with the `fmrest` extended privilege to Access the FileMaker Data API. * Ensure the FileMaker Server can use the FileMaker Data API: 1. Prepare your database for FileMaker Data API access using FileMaker Pro. You can create a database or prepare an existing database. * Refer to Prepare databases for FileMaker Data API access for more information. 2. Write code that calls FileMaker Data API methods to find, create, edit, duplicate, and delete records in a hosted database. * Refer to Write FileMaker Data API calls for more information. 3. Host your solution with FileMaker Data API access enabled. * Refer to Host a FileMaker Data API solution for more information. 4. Test that FileMaker Data API access is working. * Refer to Test the FileMaker Data API solution for more information. 5. Monitor your hosted solution using Admin Console. * Refer to Monitor FileMaker Data API solutions for more information. ## Supported authentication methods# * Database connection Refer to FileMaker's Data API Guide for more information about the service. ## Using database connection# To configure this credential: 1. Enter the **Host** name or IP address of your FileMaker Server. 2. Enter the **Database** name. This should match the database name as it appears in the **Databases** list within FileMaker. 3. Enter the user account **Login** for the account with the `fmrest` extended privilege. Refer to the previous Prerequisites section for more information. 4. Enter the **Password** for that user account. --- ## Page: https://docs.n8n.io/integrations/builtin/credentials/filescan/ You can use these credentials to authenticate when using the HTTP Request node to make a Custom API call. ## Prerequisites# Create a Filescan account. Refer to Filescan's API documentation for more information about authenticating with the service. This is a credential-only node. Refer to Custom API operations to learn more. View example workflows and related content on n8n's website. ## Using API key# To configure this credential, you'll need: * An **API Key**: Generate your API key from your **profile settings** **\> API Key**. Refer to the Filescan FAQ for more information. --- ## Page: https://docs.n8n.io/integrations/builtin/credentials/flow/ You can use these credentials to authenticate the following nodes: * Flow * Flow Trigger ## Prerequisites# Create a Flow account. ## Supported authentication methods# * API key ## Related resources# Refer to Flow's API documentation for more information about the service. ## Using API key# To configure this credential, you'll need: * Your numeric **Organization ID** * An **Access Token** Refer to the Flow API Getting Started documentation for instructions on generating your Access Token and viewing your Organization ID. --- ## Page: https://docs.n8n.io/integrations/builtin/credentials/formiotrigger/ You can use these credentials to authenticate the following nodes: * Form.io Trigger ## Supported authentication methods# * Basic auth Refer to Form.io's API documentation for more information about the service. ## Using basic auth# To configure this credential, you'll need a Form.io account and: * Your **Environment** * Your login **Email address** * Your **Password** To set up the credential: 1. Select your **Environment**: * Choose **Cloud hosted** if you aren't hosting Form.io yourself. * Choose **Self-hosted** if you're hosting Form.io yourself. Then add: * Your **Self-Hosted Domain**. Use only the domain itself. For example, if you view a form at `https://yourserver.com/yourproject/manage/view`, the Self-Hosted Domain is `https://yourserver.com`. 2. Enter the **Email address** you use to log in to Form.io. 3. Enter the **Password** you use to log in to Form.io. --- ## Page: https://docs.n8n.io/integrations/builtin/credentials/formstacktrigger/ You can use these credentials to authenticate the following nodes: * Formstack Trigger ## Prerequisites# Create a Formstack account. ## Supported authentication methods# * API access token * OAuth2 Refer to Formstack's API documentation for more information about the service. ## Using API access token# To configure this credential, you'll need: * An API **Access Token**: To generate an Access Token, create a new application in Formstack using the following details: * **Redirect URI**: For cloud n8n instances, enter `https://oauth.n8n.cloud/oauth2/callback`. * For self-hosted n8n instances, enter the OAuth callback URL for your n8n instance in the format `https://<n8n_url>/rest/oauth2-credential/callback`. For example `https://localhost:5678/rest/oauth2-credential/callback`. * **Platform**: Select **Website**. Once you've created the application, copy the access token either from the applications list or by selecting the application to view its details. Refer to Formstack's API Authorization documentation for more detailed instructions. Access token permissions Formstack ties access tokens to a Formstack user. Access tokens follow Formstack (in-app) user permissions. ## Using OAuth2# To configure this credential, you'll need: * A **Client ID** * A **Client Secret** To generate both of these, create a new application in Formstack using the following details: * **Redirect URI**: Copy the **OAuth Redirect URL** from the n8n credential to enter here. * For self-hosted n8n instances, enter the OAuth callback URL for your n8n instance in the format `https://<n8n_url>/rest/oauth2-credential/callback`. For example `https://localhost:5678/rest/oauth2-credential/callback`. * **Platform**: Select **Website**. Once you've created the application, select it from the applications list to view the **Application Details**. Copy the **Client ID** and **Client Secret** and add them to n8n. Once you've added both, select the **Connect my account** button to begin the OAuth2 flow and authorization process. Refer to Formstack's API Authorization documentation for more detailed instructions. Access token permissions Formstack ties access tokens to a Formstack user. Access tokens follow Formstack (in-app) user permissions. --- ## Page: https://docs.n8n.io/integrations/builtin/credentials/fortigate/ You can use these credentials to authenticate when using the HTTP Request node to make a Custom API call. ## Prerequisites# Create a Fortinet FortiGate account. ## Supported authentication methods# * API access token Refer to Fortinet FortiGate's API documentation for more information about the service. This is a credential-only node. Refer to Custom API operations to learn more. View example workflows and related content on n8n's website. ## Using API access token# To configure this credential, you'll need: * An API **Access Token**: To generate an access token, create a REST API administrator. Refer to the Fortinet FortiGate Using APIs documentation for more information about token-based authentication in FortiGate. --- ## Page: https://docs.n8n.io/integrations/builtin/credentials/freshdesk/ You can use these credentials to authenticate the following nodes: * Freshdesk ## Prerequisites# Create a Freshdesk account. ## Supported authentication methods# * API key Refer to Freshdesk's API documentation for more information about the service. ## Using API key# To configure this credential, you'll need: * An **API Key**: Refer to the Freshdesk API authenticaton documentation for detailed instructions on getting your API key. * A Freshdesk **Domain**: Use the subdomain of your Freshdesk account. This is part of the URL, for example `https://<subdomain>.freshdesk.com`. So if you access Freshdesk through `https://n8n.freshdesk.com`, enter `n8n` as your **Domain**. --- ## Page: https://docs.n8n.io/integrations/builtin/credentials/freshservice/ You can use these credentials to authenticate the following nodes: * Freshservice ## Prerequisites# Create a Freshservice account. ## Supported authentication methods# * API key Refer to Freshservice's API documentation for more information about the service. ## Using API key# To configure this credential, you'll need: * An **API Key**: Refer to the Freshservice API authenticaton documentation for detailed instructions on getting your API key. * Your Freshservice **Domain**: Use the subdomain of your Freshservice account. This is part of the URL, for example `https://<subdomain>.freshservice.com`. So if you access Freshservice through `https://n8n.freshservice.com`, enter `n8n` as your **Domain**. --- ## Page: https://docs.n8n.io/integrations/builtin/credentials/freshworkscrm/ You can use these credentials to authenticate the following nodes: * Freshworks CRM ## Prerequisites# Create a Freshworks CRM account. ## Supported authentication methods# * API key Refer to Freshworks CRM's API documentation for more information about the service. ## Using API key# To configure this credential, you'll need: * An **API Key**: Refer to the Freshworks CRM API authenticaton documentation for detailed instructions on getting your API key. * Your Freshworks CRM **Domain**: Use the subdomain of your Freshworks CRM account. This is part of the URL, for example `https://<subdomain>.myfreshworks.com`. So if you access Freshworks CRM through `https://n8n.myfreshworks.com`, enter `n8n` as your **Domain**. --- ## Page: https://docs.n8n.io/integrations/builtin/credentials/ftp/ You can use these credentials to authenticate the following nodes: * FTP ## Prerequisites# Create an account on a File Transfer Protocol (FTP) server like JSCAPE, OpenSSH, or FileZilla Server. ## Supported authentication methods# * **FTP account**: Use this method if your FTP server doesn't support SSH tunneling or encrypted connections. * **SFTP account**: Use this method if your FTP server supports SSH tunneling and encrypted connections. File Transfer Protocol (FTP) and Secure Shell File Transfer Protocol (SFTP) are protocols for transferring files directly between an FTP/SFTP client and server. ## Using FTP account# Use this method if your FTP server doesn't support SSH tunneling or encrypted connections. To configure this credential, you'll need to: 1. Enter the name or IP address of your FTP server's **Host**. 2. Enter the **Port** number the connection should use. 3. Enter the **Username** the credential should connect as. 4. Enter the user's **Password**. Review your FTP server provider's documentation for instructions on getting the information you need. ## Using SFTP account# Use this method if your FTP server supports SSH tunneling and encrypted connections. To configure this credential, you'll need to: 1. Enter the name or IP address of your FTP server's **Host**. 2. Enter the **Port** number the connection should use. 3. Enter the **Username** the credential should connect as. 4. Enter the user's **Password**. 5. For the **Private Key**, enter a string for either key-based or host-based user authentication * Enter your Private Key in OpenSSH format. This is most often generated using the ssh-keygen `-o` parameter, for example: `ssh-keygen -o -a 100 -t ed25519`. 6. If the **Private Key** is encrypted, enter the **Passphrase** used to decrypt it. * If the **Private Key** doesn't use a passphrase, leave this field blank. Review your FTP server provider's documentation for instructions on getting the information you need. --- ## Page: https://docs.n8n.io/integrations/builtin/credentials/getresponse/ You can use these credentials to authenticate the following nodes: * GetResponse * GetResponse Trigger ## Prerequisites# Create a GetResponse account. ## Supported authentication methods# * API key * OAuth2 Refer to GetResponse's API documentation for more information about the service. ## Using API key# To configure this credential, you'll need: * An **API Key**: To view or generate an API key, go to **Integrations and API > API**. Refer to the GetResponse Help Center for more detailed instructions. ## Using OAuth2# To configure this credential, you'll need: * A **Client ID**: Generated when you register your application. * A **Client Secret**: Generated when you register your application as the **Client Secret Key**. When you register your application, copy the **OAuth Redirect URL** from n8n and add it as the **Redirect URL** in GetResponse. Redirect URL with localhost The Redirect URL should be a URL in your domain, for example: `https://mytemplatemaker.example.com/gr_callback`. GetResponse doesn't accept a localhost callback URL. Refer to the FAQs to configure the credentials for the local environment. ## Configure OAuth2 credentials for a local environment# GetResponse doesn't accept the localhost callback URL. Follow the steps below to configure the OAuth credentials for a local environment: 1. Use ngrok to expose the local server running on port `5678` to the internet. In your terminal, run the following command: <table><tbody><tr><td><div><pre><span></span><span>1</span></pre></div></td><td><div><pre><span></span><code>ngrok<span> </span>http<span> </span><span>5678</span> </code></pre></div></td></tr></tbody></table> 2\. Run the following command in a new terminal. Replace `<YOUR-NGROK-URL>` with the URL that you got from the previous step. <table><tbody><tr><td><div><pre><span></span><span>1</span></pre></div></td><td><div><pre><span></span><code><span>export</span><span> </span><span>WEBHOOK_URL</span><span>=</span><YOUR-NGROK-URL> </code></pre></div></td></tr></tbody></table> 3\. Follow the Using OAuth2 instructions to configure your credentials, using this URL as your **Redirect URL**. --- ## Page: https://docs.n8n.io/integrations/builtin/credentials/ghost/ You can use these credentials to authenticate the following nodes: * Ghost ## Prerequisites# Create a Ghost account. ## Supported authentication methods# * Admin API key * Content API key The keys are generated following the same steps, but the authorization flows and key format are different, so n8n stores the credentials separately. The Content API uses an API key; the Admin API uses an API key to generate a token for authentication. Refer to Ghost's Admin API documentation for more information about the Admin API service. Refer to Ghost's Content API documentation for more information about the Content API service. ## Using Admin API key# To configure this credential, you'll need: * The **URL** of your Ghost admin domain. Your admin domain can be different to your main domain and may include a subdirectory. All Ghost(Pro) blogs have a `*.ghost.io` domain as their admin domain and require https. * An **API Key**: To generate a new API key, create a new Custom Integration. Refer to the Ghost Admin API Token Authentication Key documentation for more detailed instructions. Copy the **Admin API Key** and use this as the **API Key** in the Ghost Admin n8n credential. ## Using Content API key# To configure this credential, you'll need: * The **URL** of your Ghost admin domain. Your admin domain can be different to your main domain and may include a subdirectory. All Ghost(Pro) blogs have a `*.ghost.io` domain as their admin domain and require https. * An **API Key**: To generate a new API key, create a new Custom Integration. Refer to the Ghost Content API Key documentation for more detailed instructions. Copy the **Content API Key** and use this as the **API Key** in the Ghost Content n8n credential. --- ## Page: https://docs.n8n.io/integrations/builtin/credentials/git/ You can use these credentials to authenticate the following nodes: * Git ## Prerequisites# Create an account on GitHub, GitLab, or similar platforms for use with Git. ## Supported authentication methods# * Basic auth ## Related resources# Refer to Git's documentation for more information about the service. ## Using basic auth# To configure this credential, you'll need: * A **Username** for GitHub, GitLab, or a similar platform * A **Password** for GitHub, GitLab, or a similar platform --- ## Page: https://docs.n8n.io/integrations/builtin/credentials/github/ You can use these credentials to authenticate the following nodes: * GitHub * GitHub Trigger * GitHub Document Loader: this node doesn't support OAuth. ## Prerequisites# Create a GitHub account. ## Supported authentication methods# * API access token: Use this method with any GitHub nodes. * OAuth2: Use this method with GitHub and GitHub Trigger nodes only; don't use with GitHub Document Loader. Refer to GitHub's API documentation for more information about the service. ## Using API access token# To configure this credential, you'll need a GitHub account. There are two steps to setting up this credential: 1. Generate a GitHub personal access token. 2. Set up the credential. Refer to the sections below for detailed instructions. ### Generate personal access token# Recommended access token type n8n recommends using a personal access token (classic). GitHub's fine-grained personal access tokens are still in beta and can't access all endpoints. To generate your personal access token: 1. If you haven't done so already, verify your email address with GitHub. Refer to Verifying your email address for more information. 2. Open your GitHub profile Settings. 3. In the left navigation, select **Developer settings**. 4. In the left navigation, under **Personal access tokens**, select **Tokens (classic)**. 5. Select **Generate new token > Generate new token (classic)**. 6. Enter a descriptive name for your token in the **Note** field, like `n8n integration`. 7. Select the **Expiration** you'd like for the token, or select **No expiration**. 8. Select **Scopes** for your token. For most of the n8n GitHub nodes, add the `repo` scope. * A token without assigned scopes can only access public information. * Refer to 9. Select **Generate token**. 10. Copy the token. Refer to Creating a personal access token (classic) for more information. Refer to Scopes for OAuth apps for more information on GitHub scopes. ### Set up the credential# Then, in your n8n credential: 1. If you aren't using GitHub Enterprise Server, don't change the **GitHub server** URL. * If you're using GitHub Enterprise Server, update **GitHub server** to match the URL for your server. 2. Enter your **User** name as it appears in your GitHub profile. 3. Enter the **Access Token** you generated above. ## Using OAuth2# Note for n8n Cloud users Cloud users don't need to provide connection details. Select **Connect my account** to connect through your browser. If you're self-hosting n8n, create a new GitHub OAuth app: 1. Open your GitHub profile Settings. 2. In the left navigation, select **Developer settings**. 3. In the left navigation, select **OAuth apps**. 4. Select **New OAuth App**. * If you haven't created an app before, you may see **Register a new application** instead. Select it. 5. Enter an **Application name**, like `n8n integration`. 6. Enter the **Homepage URL** for your app's website. 7. If you'd like, add the optional **Application description**, which GitHub displays to end-users. 8. From n8n, copy the **OAuth Redirect URL** and paste it into the GitHub **Authorization callback URL**. 9. Select **Register application**. 10. Copy the **Client ID** and **Client Secret** this generates and add them to your n8n credential. Refer to the GitHub Authorizing OAuth apps documentation for more information on the authorization process. --- ## Page: https://docs.n8n.io/integrations/builtin/credentials/gitlab/ You can use these credentials to authenticate the following nodes: * GitLab * GitLab Trigger ## Supported authentication methods# * API access token * OAuth2 (Recommended) Refer to GitLab's API documentation for more information about the service. ## Using API access token# To configure this credential, you'll need a GitLab account and: * The URL of your **GitLab Server** * An **Access Token** To set up the credential: 1. In GitLab, select your avatar, then select **Edit profile**. 2. In the left sidebar, select **Access tokens**. 3. Select **Add new token**. 4. Enter a **Name** for the token, like `n8n integration`. 5. Enter an **expiry date** for the token. If you don't enter an expiry date, GitLab automatically sets it to 365 days later than the current date. * The token expires on that expiry date at midnight UTC. 6. Select the desired **Scopes**. For the GitLab node, use the `api` scope to easily grant access for all the node's functionality. Or refer to Personal access token scopes to select scopes for the functions you want to use. 7. Select **Create personal access token**. 8. Copy the access token this creates and enter it in your n8n credential as the **Access Token**. 9. Enter the URL of your **GitLab Server** in your n8n credential. Refer to GitLab's Create a personal access token documentation for more information. ## Using OAuth2# Note for n8n Cloud users Cloud users don't need to provide connection details. Select **Connect my account** to connect through your browser. If you're self-hosting n8n, you'll need a GitLab account. Then create a new GitLab application: 1. In GitLab, select your avatar, then select **Edit profile**. 2. In the left sidebar, select **Applications**. 3. Select **Add new application**. 4. Enter a **Name** for your application, like `n8n integration`. 5. In n8n, copy the **OAuth Redirect URL**. Enter it as the GitLab **Redirect URI**. 6. Select the desired **Scopes**. For the GitLab node, use the `api` scope to easily grant access for all the node's functionality. Or refer to Personal access token scopes to select scopes for the functions you want to use. 7. Select **Save application**. 8. Copy the **Application ID** and enter it as the **Client ID** in your n8n credential. 9. Copy the **Secret** and enter it as the **Client Secret** in your n8n credential. Refer to GitLab's Configure GitLab as an OAuth 2.0 authentication identity provider documentation for more information. Refer to the GitLab OAuth 2.0 identity provider API documentation for more information on OAuth2 and GitLab. --- ## Page: https://docs.n8n.io/integrations/builtin/credentials/gong/ You can use these credentials to authenticate the following nodes: * Gong ## Supported authentication methods# * API access token * OAuth2 Refer to Gong's API documentation for more information about the service. ## Using API access token# To configure this credential, you'll need a Gong account and: * An **Access Key** * An **Access Key Secret** You can create both of these items on the Gong API Page (you must be a technical administrator in Gong to access this resource). Refer to Gong's API documentation for more information about authenticating to the service. ## Using OAuth2# To configure this credential, you'll need a Gong account, a Gong developer account and: * A **Client ID**: Generated when you create an Oauth app for Gong. * A **Client Secret**: Generated when you create an Oauth app for Gong. If you're self-hosting n8n, you'll need to create an app to configure OAuth2. Refer to Gong's OAuth documentation for more information about setting up OAuth2. --- ## Page: https://docs.n8n.io/integrations/builtin/credentials/google/ This section contains: * OAuth2 single service: Create an OAuth2 credential for a specific service node, such as the Gmail node. * OAuth2 generic: Create an OAuth2 credential for use with custom operations. * Service Account: Create a Service Account credential for some specific service nodes. * Google PaLM and Gemini: Get a Google Gemini/Google PaLM API key. ## OAuth2 and Service Account# There are two authentication methods available for Google services nodes: * OAuth2: Recommended because it's more widely available and easier to set up. * Service Account: Refer to the Google documentation: Understanding service accounts for guidance on when you need a service account. ## Compatible nodes# Once configured, you can use your credentials to authenticate the following nodes. Most nodes are compatible with OAuth2 authentication. Support for Service Account authentication is limited. | Node | OAuth | Service Account | | --- | --- | --- | | Google Ads |  |  | | Gmail |  |  | | Google Analytics |  |  | | Google BigQuery |  |  | | Google Books |  |  | | Google Calendar |  |  | | Google Chat |  |  | | Google Cloud Storage |  |  | | Google Contacts |  |  | | Google Cloud Firestore |  |  | | Google Cloud Natural Language |  |  | | Google Cloud Realtime Database |  |  | | Google Docs |  |  | | Google Drive |  |  | | Google Drive Trigger |  |  | | Google Perspective |  |  | | Google Sheets |  |  | | Google Slides |  |  | | Google Tasks |  |  | | Google Translate |  |  | | Google Workspace Admin |  |  | | YouTube |  |  | Gmail and Service Accounts Google technically supports Service Accounts for use with Gmail, but it requires enabling domain-wide delegation, which Google discourages, and its behavior can be inconsistent. n8n recommends using OAuth2 with the Gmail node. --- ## Page: https://docs.n8n.io/integrations/builtin/credentials/google/oauth-single-service/ This document contains instructions for creating a Google credential for a single service. They're also available as a video. ## Prerequisites# * Create a Google Cloud account. ## Set up OAuth# There are five steps to connecting your n8n credential to Google services: 1. Create a Google Cloud Console project. 2. Enable APIs. 3. Configure your OAuth consent screen. 4. Create your Google OAuth client credentials. 5. Finish your n8n credential. ### Create a Google Cloud Console project# First, create a Google Cloud Console project. If you already have a project, jump to the next section: 1. Log in to your Google Cloud Console using your Google credentials. 2. In the top menu, select the project dropdown in the top navigation and select **New project** or go directly to the New Project page. 3. Enter a **Project name** and select the **Location** for your project. 4. Select **Create**. 5. Check the top navigation and make sure the project dropdown has your project selected. If not, select the project you just created.  Check the project dropdown in the Google Cloud top navigation ### Enable APIs# With your project created, enable the APIs you'll need access to: 1. Access your Google Cloud Console - Library. Make sure you're in the correct project.  Check the project dropdown in the Google Cloud top navigation 2. Go to **APIs & Services > Library**. 3. Search for and select the API(s) you want to enable. For example, for the Gmail node, search for and enable the Gmail API. 4. Some integrations require other APIs or require you to request access: * Google Perspective: Request API Access. * Google Ads: Get a Developer Token. Google Drive API required The following integrations require the Google Drive API, as well as their own API: * Google Docs * Google Sheets * Google Slides 5. Select **ENABLE**. ### Configure your OAuth consent screen# If you haven't used OAuth in your Google Cloud project before, you'll need to configure the OAuth consent screen: 1. Access your Google Cloud Console - Library. Make sure you're in the correct project.  Check the project dropdown in the Google Cloud top navigation 2. Open the left navigation menu and go to **APIs & Services > OAuth consent screen**. 3. For **User Type**, select **Internal** for user access within your organization's Google workspace or **External** for any user with a Google account. Refer to Google's User type documentation for more information on user types. 4. Select **Create**. 5. Enter the essential information: * **App name** * **User support email** * **Email addresses** field in **Developer contact information** 6. In the **Authorized domains** section, add `n8n.cloud` if using n8n's Cloud service. If you're self-hosting, add the domain of your n8n instance. 7. Select **SAVE AND CONTINUE** to go to the **Scopes** page. 8. You don't need to set any scopes. Select **SAVE AND CONTINUE** again to go to the **Summary** page. 9. On the **Summary** page, review the information for accuracy. ### Create your Google OAuth client credentials# Next, create the OAuth client credentials in Google: 1. In the **APIs & Services** section, select **Credentials**. 2. Select **\+ CREATE CREDENTIALS > OAuth client ID**. 3. In the **Application type** dropdown, select **Web application**. 4. Google automatically generates a **Name**. Update the **Name** to something you'll recognize in your console. 5. From your n8n credential, copy the **OAuth Redirect URL**. Paste it into the **Authorized redirect URIs** in Google Console. 6. Select **CREATE**. ### Finish your n8n credential# With the Google project and credentials fully configured, finish the n8n credential: 1. From Google's **OAuth client created** modal, copy the **Client ID**. Enter this in your n8n credential. 2. From the same Google modal, copy the **Client Secret**. Enter this in your n8n credential. 3. In n8n, select **Sign in with Google** to complete your Google authentication. 4. **Save** your new credentials. ## Video# ## Troubleshooting# ### Google hasn't verified this app# If using the OAuth authentication method, you might see the warning **Google hasn't verified this app**. To avoid this, you can create OAuth credentials from the same account you want to authenticate. If you need to use credentials generated by another account (by a developer or another third party), follow the instructions in Google Cloud documentation | Authorization errors: Google hasn't verified this app. For Google Cloud apps with **Publishing status** set to **Testing** and **User type** set to **External**, consent and tokens expire after seven days. Refer to Google Cloud Platform Console Help | Setting up your OAuth consent screen for more information. To resolve this, reconnect the app in the n8n credentials modal. --- ## Page: https://docs.n8n.io/integrations/builtin/credentials/google/oauth-generic/ This document contains instructions for creating a generic OAuth2 Google credential for use with custom operations. ## Prerequisites# * Create a Google Cloud account. ## Set up OAuth# There are five steps to connecting your n8n credential to Google services: 1. Create a Google Cloud Console project. 2. Enable APIs. 3. Configure your OAuth consent screen. 4. Create your Google OAuth client credentials. 5. Finish your n8n credential. ### Create a Google Cloud Console project# First, create a Google Cloud Console project. If you already have a project, jump to the next section: 1. Log in to the Google Cloud Console using your Google credentials. 2. In the top menu, select the project dropdown in the top navigation and select **New project** or go directly to the New Project page. 3. Enter a **Project name** and select the **Location** for your project. 4. Select **Create**. 5. Check the top navigation and make sure the **Select a project** dropdown has your project selected. If not, select the project you just created.  Check the project dropdown in the Google Cloud top navigation ### Enable APIs# With your project created, enable the APIs you'll need access to: 1. Access your Google Cloud Console - Library. Make sure you're in the correct project.  Check the project dropdown in the Google Cloud top navigation 2. Go to **APIs & Services > Library**. 3. Search for and select the API(s) you want to enable. For example, for the Gmail node, search for and enable the Gmail API. 4. Some integrations require other APIs or require you to request access: * Google Perspective: Request API Access. * Google Ads: Get a Developer Token. Google Drive API required The following integrations require the Google Drive API, as well as their own API: * Google Docs * Google Sheets * Google Slides 5. Select **ENABLE**. ### Configure your OAuth consent screen# If you haven't used OAuth in your Google Cloud project before, you'll need to configure the OAuth consent screen: 1. Access your Google Cloud Console - Library. Make sure you're in the correct project.  Check the project dropdown in the Google Cloud top navigation 2. Open the left navigation menu and go to **APIs & Services > OAuth consent screen**. 3. For **User Type**, select **Internal** for user access within your organization's Google workspace or **External** for any user with a Google account. Refer to Google's User type documentation for more information on user types. 4. Select **Create**. 5. Enter the essential information: * **App name** * **User support email** * **Email addresses** field in **Developer contact information** 6. In the **Authorized domains** section, add `n8n.cloud` if using n8n's Cloud service. If you're self-hosting, add the domain of your n8n instance. 7. Select **SAVE AND CONTINUE** to go to the **Scopes** page. 8. You don't need to set any scopes. Select **SAVE AND CONTINUE** again to go to the **Summary** page. 9. On the **Summary** page, review the information for accuracy. ### Create your Google OAuth client credentials# Next, create the OAuth client credentials in Google: 1. In the **APIs & Services** section, select **Credentials**. 2. Select **\+ CREATE CREDENTIALS > OAuth client ID**. 3. In the **Application type** dropdown, select **Web application**. 4. Google automatically generates a **Name**. Update the **Name** to something you'll recognize in your console. 5. From your n8n credential, copy the **OAuth Redirect URL**. Paste it into the **Authorized redirect URIs** in Google Console. 6. Select **CREATE**. ### Finish your n8n credential# With the Google project and credentials fully configured, finish the n8n credential: 1. From Google's **OAuth client created** modal, copy the **Client ID**. Enter this in your n8n credential. 2. From the same Google modal, copy the **Client Secret**. Enter this in your n8n credential. 3. You must provide the scopes for this credential. Refer to Scopes for more information. Enter multiple scopes in a space-separated list, for example: <table><tbody><tr><td><div><pre><span></span><span>1</span></pre></div></td><td><div><pre><span></span><code>https://www.googleapis.com/auth/gmail.labels https://www.googleapis.com/auth/gmail.addons.current.action.compose </code></pre></div></td></tr></tbody></table> 4. In n8n, select **Sign in with Google** to complete your Google authentication. 5. **Save** your new credentials. ## Video# The following video demonstrates the steps described above: ## Scopes# Google services have one or more possible access scopes. A scope limits what a user can do. Refer to OAuth 2.0 Scopes for Google APIs for a list of scopes for all services. n8n doesn't support all scopes. When creating a generic Google OAuth2 API credential, you can enter scopes from the **Supported scopes** list below. If you enter a scope that n8n doesn't already support, it won't work. Supported scopes | Service | Available scopes | | --- | --- | | Gmail | https://www.googleapis.com/auth/gmail.labels https://www.googleapis.com/auth/gmail.addons.current.action.compose https://www.googleapis.com/auth/gmail.addons.current.message.action https://mail.google.com/ https://www.googleapis.com/auth/gmail.modify https://www.googleapis.com/auth/gmail.compose | | Google Ads | https://www.googleapis.com/auth/adwords | | Google Analytics | https://www.googleapis.com/auth/analytics https://www.googleapis.com/auth/analytics.readonly | | Google BigQuery | https://www.googleapis.com/auth/bigquery | | Google Books | https://www.googleapis.com/auth/books | | Google Calendar | https://www.googleapis.com/auth/calendar https://www.googleapis.com/auth/calendar.events | | Google Cloud Natural Language | https://www.googleapis.com/auth/cloud-language https://www.googleapis.com/auth/cloud-platform | | Google Cloud Storage | https://www.googleapis.com/auth/cloud-platform https://www.googleapis.com/auth/cloud-platform.read-only https://www.googleapis.com/auth/devstorage.full\_control https://www.googleapis.com/auth/devstorage.read\_only https://www.googleapis.com/auth/devstorage.read\_write | | Google Contacts | https://www.googleapis.com/auth/contacts | | Google Docs | https://www.googleapis.com/auth/documents https://www.googleapis.com/auth/drive https://www.googleapis.com/auth/drive.file | | Google Drive | https://www.googleapis.com/auth/drive https://www.googleapis.com/auth/drive.appdata https://www.googleapis.com/auth/drive.photos.readonly | | Google Firebase Cloud Firestore | https://www.googleapis.com/auth/datastore https://www.googleapis.com/auth/firebase | | Google Firebase Realtime Database | https://www.googleapis.com/auth/userinfo.email https://www.googleapis.com/auth/firebase.database https://www.googleapis.com/auth/firebase | | Google Perspective | https://www.googleapis.com/auth/userinfo.email | | Google Sheets | https://www.googleapis.com/auth/drive.file https://www.googleapis.com/auth/spreadsheets | | Google Slide | https://www.googleapis.com/auth/drive.file https://www.googleapis.com/auth/presentations | | Google Tasks | https://www.googleapis.com/auth/tasks | | Google Translate | https://www.googleapis.com/auth/cloud-translation | | GSuite Admin | https://www.googleapis.com/auth/admin.directory.group https://www.googleapis.com/auth/admin.directory.user https://www.googleapis.com/auth/admin.directory.domain.readonly https://www.googleapis.com/auth/admin.directory.userschema.readonly | ## Troubleshooting# ### Google hasn't verified this app# If using the OAuth authentication method, you might see the warning **Google hasn't verified this app**. To avoid this, you can create OAuth credentials from the same account you want to authenticate. If you need to use credentials generated by another account (by a developer or another third party), follow the instructions in Google Cloud documentation | Authorization errors: Google hasn't verified this app. For Google Cloud apps with **Publishing status** set to **Testing** and **User type** set to **External**, consent and tokens expire after seven days. Refer to Google Cloud Platform Console Help | Setting up your OAuth consent screen for more information. To resolve this, reconnect the app in the n8n credentials modal. --- ## Page: https://docs.n8n.io/integrations/builtin/credentials/google/service-account/ Using service accounts is more complex than OAuth2. Before you begin: * Check if your node is compatible with Service Account. * Make sure you need to use Service Account. For most use cases, OAuth2 is a better option. * Read the Google documentation on Creating and managing service accounts. ## Prerequisites# * Create a Google Cloud account. ## Set up Service Account# There are four steps to connecting your n8n credential to a Google Service Account: 1. Create a Google Cloud Console project. 2. Enable APIs. 3. Set up Google Cloud Service Account. 4. Finish your n8n credential. ### Create a Google Cloud Console project# First, create a Google Cloud Console project. If you already have a project, jump to the next section: 1. Log in to your Google Cloud Console using your Google credentials. 2. In the top menu, select the project dropdown in the top navigation and select **New project** or go directly to the New Project page. 3. Enter a **Project name** and select the **Location** for your project. 4. Select **Create**. 5. Check the top navigation and make sure the project dropdown has your project selected. If not, select the project you just created.  Check the project dropdown in the Google Cloud top navigation ### Enable APIs# With your project created, enable the APIs you'll need access to: 1. Access your Google Cloud Console - Library. Make sure you're in the correct project.  Check the project dropdown in the Google Cloud top navigation 2. Go to **APIs & Services > Library**. 3. Search for and select the API(s) you want to enable. For example, for the Gmail node, search for and enable the Gmail API. 4. Some integrations require other APIs or require you to request access: * Google Perspective: Request API Access. * Google Ads: Get a Developer Token. Google Drive API required The following integrations require the Google Drive API, as well as their own API: * Google Docs * Google Sheets * Google Slides 5. Select **ENABLE**. ### Set up Google Cloud Service Account# 1. Access your Google Cloud Console - Library. Make sure you're in the correct project.  Check the project dropdown in the Google Cloud top navigation 2. Select the hamburger menu **\> APIs & Services > Credentials**. Google takes you to your **Credentials** page. 3. Select **\+ CREATE CREDENTIALS > Service account**. 4. Enter a name in **Service account name** and an ID in **Service account ID**. Refer to Creating a service account for more information. 5. Select **CREATE AND CONTINUE**. 6. Based on your use-case, you may want to **Select a role** and **Grant users access to this service account** using the corresponding sections. 7. Select **DONE**. 8. Select your newly created service account under the **Service Accounts** section. Open the **KEYS** tab. 9. Select **ADD KEY > Create new key**. 10. In the modal that appears, select **JSON**, then select **CREATE**. Google saves the file to your computer. ### Finish your n8n credential# With the Google project and credentials fully configured, finish the n8n credential: 1. Open the downloaded JSON file. 2. Copy the `client_email` and enter it in your n8n credential as the **Service Account Email**. 3. Copy the `private_key`. Don't include the surrounding `"` marks. Enter this as the **Private Key** in your n8n credential. Older versions of n8n If you're running an n8n version older than 0.156.0, replace all instances of `\n` in the JSON file with new lines. 4. **Optional**: Choose if you want to **Impersonate a User** (turned on). 1. To use this option, you must Enable domain-wide delegation for the service account as a Google Workspace super admin. 2. Enter the **Email** of the user you want to impersonate. 5. If you plan to use this credential with the HTTP Request node, turn on **Set up for use in HTTP Request node**. 1. With this setting turned on, you'll need to add **Scope(s)** for the node. n8n prepopulates some scopes. Refer to OAuth 2.0 Scopes for Google APIs for more information. 6. **Save** your credentials. ## Video# The following video demonstrates the steps described above. ## Troubleshooting# ### Service Account can't access Google Drive files# A Service Account can't access Google Drive files and folders that weren't shared with its associated user email. 1. Access your Google Cloud Console and copy your Service Account email. 2. Access your Google Drive and go to the designated file or folder. 3. Right-click on the file or folder and select **Share**. 4. Paste your Service Account email into **Add People and groups**. 5. Select **Editor** for read-write access or **Viewer** for read-only access. ### Enable domain-wide delegation# To impersonate a user with a service account, you must enable domain-wide delegation for the service account. To delegate domain-wide authority to a service account, you must be a super administrator for the Google Workspace domain. Then: 1. From your Google Workspace domain's Admin console, select the hamburger menu, then select **Security > Access and data control > API Controls**. 2. In the **Domain wide delegation** pane, select **Manage Domain Wide Delegation**. 3. Select **Add new**. 4. In the **Client ID** field, enter the service account's **Client ID**. To get the Client ID: * Open your Google Cloud Console project, then open the Service Accounts page. * Copy the **OAuth 2 Client ID** and use this as the **Client ID** for the **Domain Wide Delegation**. 5. In the **OAuth scopes** field, enter a list of comma-separate scopes to grant your application access. For example, if your application needs domain-wide full access to the Google Drive API and the Google Calendar API, enter: `https://www.googleapis.com/auth/drive, https://www.googleapis.com/auth/calendar`. 6. Select **Authorize**. It can take from 5 minutes up to 24 hours before you can impersonate all users in your Workspace. --- ## Page: https://docs.n8n.io/integrations/builtin/credentials/googleai/ You can use these credentials to authenticate the following nodes: * Embeddings Google Gemini * Google Gemini Chat Model * Embeddings Google PaLM ## Prerequisites# * Create a Google Cloud account. * Create a Google Cloud Platform project. ## Supported authentication methods# * Gemini(PaLM) API key Refer to Google's Gemini API documentation for more information about the service. View n8n's Advanced AI documentation. ## Using Gemini(PaLM) API key# To configure this credential, you'll need: * The API **Host** URL: Both PaLM and Gemini use the default `https://generativelanguage.googleapis.com`. * An **API Key**: Create a key in Google AI Studio. Custom hosts not supported The related nodes don't yet support custom hosts or proxies for the API host and must use 'https://generativelanguage.googleapis.com'. To create an API key: 1. Go to the API Key page in Google AI Studio: https://makersuite.google.com/app/apikey. 2. Select **Create API Key**. 3. You can choose whether to **Create API key in new project** or search for an existing Google Cloud project to **Create API key in existing project**. 4. Copy the generated API key and add it to your n8n credential. --- ## Page: https://docs.n8n.io/integrations/builtin/credentials/gotify/ You can use these credentials to authenticate the following nodes: * Gotify ## Prerequisites# Install Gotify on your server. ## Supported authentication methods# * API token Refer to Gotify's API documentation for more information about the service. ## Using API token# To configure this credential, you'll need: * An **App API Token**: Only required if you'll use this credential to create messages. To generate an App API token, create an application from the **Apps** menu. Refer to Gotify's Push messages documentation for more information. * A **Client API Token**: Required for all actions other than creating messages (such as deleting or retrieving messages). To generate a Client API token, create a client from the **Clients** menu. * The **URL** of the Gotify host --- ## Page: https://docs.n8n.io/integrations/builtin/credentials/gotowebinar/ ## GoTo Webinar credentials# You can use these credentials to authenticate the following nodes: * GoToWebinar ## Prerequisites# Create a GoToWebinar account with Developer Center access. ## Supported authentication methods# * OAuth2 Refer to GoToWebinar's API documentation for more information about authenticating with the service. ## Using OAuth2# To configure this credential, you'll need: * A **Client ID**: Provided once you create an OAuth client * A **Client Secret**: Provided once you create an OAuth client Refer to the Create an OAuth client documentation for detailed instructions on creating an OAuth client. Copy the **OAuth Callback URL** from n8n to use as the **Redirect URI** in your OAuth client. The Client ID and Client secret are provided once you've finished setting up your client. --- ## Page: https://docs.n8n.io/integrations/builtin/credentials/grafana/ You can use these credentials to authenticate the following nodes: * Grafana ## Prerequisites# * Create a Grafana account. ## Supported authentication methods# * API key ## Related resources# Refer to Grafana's API documentation for more information about authenticating with the service. ## Using API key# To configure this credential, you'll need: * An **API Key**: Refer to the Create an API key documentation for detailed instructions on creating an API key. * The **Base URL** for your Grafana instance, for example: `https://n8n.grafana.net`. --- ## Page: https://docs.n8n.io/integrations/builtin/credentials/grist/ You can use these credentials to authenticate the following nodes: * Grist ## Prerequisites# Create a Grist account. ## Supported authentication methods# * API key Refer to Grist's API documentation for more information about the service. ## Using API key# To configure this credential, you'll need: * An **API Key**: Refer to the Grist API authentication documentation for instructions on creating an API key. * To select your Grist **Plan Type**. Options include: * Free * Paid: If selected, provide your Grist **Custom Subdomain**. This is the portion that comes before `.getgrist.com`. For example, if our full Grist domain was `n8n.getgrist.com`, we'd enter `n8n` here. * Self-Hosted: If selected, provide your Grist **Self-Hosted URL**. This should be the full URL. --- ## Page: https://docs.n8n.io/integrations/builtin/credentials/groq/ You can use these credentials to authenticate the following nodes: * Groq Chat Model ## Prerequisites# Create a Groq account. ## Supported authentication methods# * API key Refer to Groq's documentation for more information about the service. View n8n's Advanced AI documentation. ## Using API key# To configure this credential, you'll need: * An **API Key** To get your API key: 1. Go to the API Keys page of your Groq console. 2. Select **Create API Key**. 3. Enter a **display name** for the key, like `n8n integration`, and select **Submit**. 4. Copy the key and paste it into your n8n credential. Refer to Groq's API Keys documentation for more information. Groq API keys Groq binds API keys to the organization, not the user. --- ## Page: https://docs.n8n.io/integrations/builtin/credentials/gumroad/ You can use these credentials to authenticate the following nodes: * Gumroad Trigger ## Prerequisites# Create a Gumroad account. ## Supported authentication methods# * API access token Refer to Gumroad's API documentation for more information about the service. ## Using API access token# To configure this credential, you'll need: * An API **Access Token**: Create an application to generate an access token. Refer to the Gumroad Create an application for the API documentation for detailed instructions on creating a new application and generating an access token. --- ## Page: https://docs.n8n.io/integrations/builtin/credentials/halopsa/ You can use these credentials to authenticate the following nodes: * HaloPSA ## Prerequisites# Create a HaloPSA account. ## Supported authentication methods# * API key Refer to HaloPSA's API documentation for more information about the service. ## Using API key# To configure this credential, you'll need: * To select your **Hosting Type**: * **On Premise Solution**: Choose this option if you're hosting the Halo application on your own server * **Hosted Solution Of Halo**: Choose this option if your application is hosted by Halo. If this option is selected, you'll need to provide your **Tenant**. * The **HaloPSA Authorisation Server URL**: Your Authorisation Server URL is displayed within HaloPSA in **Configuration > Integrations > Halo API** in API Details. * The **Resource Server** URL: Your Resource Server is displayed within HaloPSA in **Configuration > Integrations > Halo API** in API Details. * A **Client ID**: Obtained by registering the application in the Halo API settings. Refer to HaloPSA's Authorisation documentation for detailed instructions. n8n recommends using these settings: * Choose `Client Credentials` as your **Authentication Method**. * Use the `all` permission. * A **Client Secret**: Obtained by registering the application in the Halo API settings. * Your **Tenant** name: If **Hosted Solution of Halo** is selected as the **Hosting Type**, you must provide your tenant name. Your tenant name is displayed within HaloPSA in **Configuration > Integrations > Halo API** in API Details. HaloPSA uses both the application permissions and the agent's permissions to determine API access. --- ## Page: https://docs.n8n.io/integrations/builtin/credentials/harvest/ You can use these credentials to authenticate the following nodes: * Harvest ## Prerequisites# Create a Harvest account. ## Supported authentication methods# * API access token * OAuth2 Refer to Harvest's API documentation for more information about the service. ## Using API Access Token# To configure this credential, you'll need: * A Personal **Access Token**: Refer to the Harvest Personal Access Token Authentication documentation for instructions on creating a personal access token. ## Using OAuth2# Note for n8n Cloud users Cloud users don't need to provide connection details. Select **Connect my account** to connect through your browser. If you need to configure OAuth2 from scratch or need more detail on what's happening in the OAuth web flow, refer to the instructions in the Harvest OAuth2 documentation to set up OAuth. --- ## Page: https://docs.n8n.io/integrations/builtin/credentials/helpscout/ You can use these credentials to authenticate the following nodes: * Help Scout * Help Scout Trigger ## Prerequisites# Create a Help Scout account. ## Supported authentication methods# * OAuth2 Refer to Help Scout's API documentation for more information about the service. ## Using OAuth2# Note for n8n Cloud users Cloud users don't need to provide connection details. Select **Connect my account** to connect through your browser. If you need to configure OAuth2 from scratch or need more detail on what's happening in the OAuth web flow, you'll need to create a Help Scout app. Refer to the instructions in the Help Scout OAuth documentation for more information. --- ## Page: https://docs.n8n.io/integrations/builtin/credentials/highlevel/ You can use these credentials to authenticate the following nodes: * HighLevel node ## Prerequisites# Create a HighLevel developer account. ## Supported authentication methods# * API key: Use with API v1 * OAuth2: Use with API v2 API 1.0 deprecation HighLevel deprecated API v1.0 and no longer maintains it. Use OAuth2 to set up new credentials. Refer to HighLevel's API 2.0 documentation for more information about the service. For existing integrations with the API v1.0, refer to HighLevel's API 1.0 documentation. ## Using API key# To configure this credential, you'll need: * An **API Key**: Refer to the HighLevel API 1.0 Welcome documentation for instructions on getting your API key. ## Using OAuth2# To configure this credential, you'll need: * A **Client ID** * A **Client Secret** To generate both, create an app in **My Apps > Create App**. Use these settings: 1. Set **Distribution Type** to **Sub-Account**. 2. Add these **Scopes**: * `locations.readonly` * `contacts.readonly` * `contacts.write` * `opportunities.readonly` * `opportunities.write` * `users.readonly` 3. Copy the **OAuth Redirect URL** from n8n and add it as a **Redirect URL** in your HighLevel app. 4. Copy the **Client ID** and **Client Secret** from HighLevel and add them to your n8n credential. 5. Add the same scopes added above to your n8n credential in a space-separated list. For example: `locations.readonly contacts.readonly contacts.write opportunities.readonly opportunities.write users.readonly` Refer to HighLevel's API Authorization documentation for more details. Refer to HighLevel's API Scopes documentation for more information about available scopes. --- ## Page: https://docs.n8n.io/integrations/builtin/credentials/homeassistant/ You can use these credentials to authenticate the following nodes: * Home Assistant ## Supported authentication methods# * API access token Refer to Home Assistant's API documentation for more information about the service. ## Using API access token# To configure this credential, you'll need to Install Home Assistant, create a Home Assistant account, and have: * Your **Host** * The **Port** * A Long-Lived **Access Token** To generate an access token and set up the credential: 1. To generate your **Access Token**, log in to Home Assistant and open your User profile. 2. In the **Long-Lived Access Tokens** section, generate a new token. 3. Copy this token and enter it in n8n as your **Access Token**. 4. Enter the URL or IP address of your Home Assistant **Host**, without the `http://` or `https://` protocol, for example `your.awesome.home`. 5. For the **Port**, enter the appropriate port: * If you've made no port changes and access Home Assistant at `http://`, keep the default of `8123`. * If you've made no port changes and access Home Assistant at `https://`, enter `443`. * If you've configured Home Assistant to use a specific port, enter that port. 6. If you've enabled SSL in Home Assistant in the config.yml map key, turn on the **SSL** toggle in n8n. If you're not sure, it's best to turn this setting on if you access your home assistant UI using `https://` instead of `http://`. --- ## Page: https://docs.n8n.io/integrations/builtin/credentials/httprequest/ You can use these credentials to authenticate the following nodes: * HTTP Request * HTTP Request Tool ## Prerequisites# You must use the authentication method required by the app or service you want to query. If you need to secure the authentication with an SSL certificate, refer to Provide an SSL certificate for the information you'll need. ## Supported authentication methods# * Predefined credential type * Basic auth (generic credential type) * Custom auth (generic credential type) * Digest auth (generic credential type) * Header auth (generic credential type) * Bearer auth (generic credential type) * OAuth1 (generic credential type) * OAuth2 (generic credential type) * Query auth (generic credential type) Refer to HTTP authentication for more information relating to generic credential types. Predefined credential types n8n recommends using predefined credential types whenever there's a credential type available for the service you want to connect to. It offers an easier way to set up and manage credentials, compared to configuring generic credentials. You can use Predefined credential types to perform custom operations with some APIs where n8n has a node for the platform. For example, n8n has an Asana node, and supports using your Asana credentials in the HTTP Request node. Refer to Custom operations for more information. ## Using predefined credential type# To use a predefined credential type: 1. Open your HTTP Request node, or add a new one to your workflow. 2. In **Authentication**, select **Predefined Credential Type**. 3. In **Credential Type**, select the API you want to use. 4. In **Credential for `<API name>`**, you can: 1. Select an existing credential for that platform, if available. 2. Select **Create New** to create a new credential. Refer to Custom API operations for more information. ## Using basic auth# Use this generic authentication if your app or service supports basic authentication. To configure this credential, enter: * The **Username** you use to access the app or service your HTTP Request is targeting * The **Password** that goes with that username ## Using digest auth# Use this generic authentication if your app or service supports digest authentication. To configure this credential, enter: * The **Username** you use to access the app or service your HTTP Request is targeting * The **Password** that goes with that username Use this generic authentication if your app or service supports header authentication. To configure this credential, enter: * The header **Name** you need to pass to the app or service your HTTP request is targeting * The **Value** for the header Read more about HTTP headers ## Using bearer auth# Use this generic authentication if your app or service supports bearer authentication. This authentication type is actually just header authentication with the `Name` set to `Authorization` and the `Value` set to `Bearer <token>`. To configure this credential, enter: * The **Bearer Token** you need to pass to the app or service your HTTP request is targeting Read more about bearer authentication. ## Using OAuth1# Use this generic authentication if your app or service supports OAuth1 authentication. To configure this credential, enter: * An **Authorization URL**: Also known as the Resource Owner Authorization URI. This URL typically ends in `/oauth1/authorize`. The temporary credentials are sent here to prompt a user to complete authorization. * An **Access Token URL**: This is the URI used for the initial request for temporary credentials. This URL typically ends in `/oauth1/request` or `/oauth1/token`. * A **Consumer Key**: Also known as the client key, like a username. This specifies the `oauth_consumer_key` to use for the call. * A **Consumer Secret**: Also known as the client secret, like a password. * A **Request Token URL**: This is the URI used to switch from temporary credentials to long-lived credentials after authorization. This URL typically ends in `/oauth1/access`. * Select the **Signature Method** the auth handshake uses. This specifies the `oauth_signature_method` to use for the call. Options include: * **HMAC-SHA1** * **HMAC-SHA256** * **HMAC-SHA512** For most OAuth1 integrations, you'll need to configure an app, service, or integration to generate the values for most of these fields. Use the **OAuth Redirect URL** in n8n as the redirect URL or redirect URI for such a service. Read more about OAuth1 and the OAuth1 authorization flow. ## Using OAuth2# Use this generic authentication if your app or service supports OAuth2 authentication. Requirements to configure this credential depend on the **Grant Type** selected. Refer to OAuth Grant Types for more information on each grant type. For most OAuth2 integrations, you'll need to configure an app, service, or integration. Use the **OAuth Redirect URL** in n8n as the redirect URL or redirect URI for such a service. Read more about OAuth2. Use Authorization Code grant type to exchange an authorization code for an access token. The auth flow uses the redirect URL to return the user to the client. Then the application gets the authorization code from the URL and uses it to request an access token. Refer to Authorization Code Request for more information. To configure this credential, select **Authorization Code** as the **Grant Type**. Then enter: * An **Authorization URL** * An **Access Token URL** * A **Client ID**: The ID or username to log in with. * A **Client Secret**: The secret or password used to log in with. * _Optional:_ Enter one or more **Scope**s for the credential. If unspecified, the credential will request all scopes available to the client. * _Optional:_ Some services require more query parameters. If your service does, add them as **Auth URI Query Parameters**. * An **Authentication** type: Select the option that best suits your use case. Options include: * **Header**: Send the credentials as a basic auth header. * **Body**: Send the credentials in the body of the request. * _Optional:_ Choose whether to **Ignore SSL Issues**. If turned on, n8n will connect even if SSL validation fails. ### Client Credentials grant type# Use the Client Credentials grant type when applications request an access token to access their own resources, not on behalf of a user. Refer to Client Credentials for more information. To configure this credential, select **Client Credentials** as the **Grant Type**. Then enter: * An **Access Token URL**: The URL to hit to begin the OAuth2 flow. Typically this URL ends in `/token`. * A **Client ID**: The ID or username to use to log in to the client. * A **Client Secret**: The secret or password used to log in to the client. * _Optional:_ Enter one or more **Scope**s for the credential. Most services don't support scopes for Client Credentials grant types; only enter scopes here if yours does. * An **Authentication** type: Select the option that best suits your use case. Options include: * **Header**: Send the credentials as a basic auth header. * **Body**: Send the credentials in the body of the request. * _Optional:_ Choose whether to **Ignore SSL Issues**. If turned on, n8n will connect even if SSL validation fails. ### PKCE grant type# Proof Key for Code Exchange (PKCE) grant type is an extension to the Authorization Code flow to prevent CSRF and authorization code injection attacks. To configure this credential, select **PKCE** as the **Grant Type**. Then enter: * An **Authorization URL** * An **Access Token URL** * A **Client ID**: The ID or username to log in with. * A **Client Secret**: The secret or password used to log in with. * _Optional:_ Enter one or more **Scope**s for the credential. If unspecified, the credential will request all scopes available to the client. * _Optional:_ Some services require more query parameters. If your service does, add them as **Auth URI Query Parameters**. * An **Authentication** type: Select the option that best suits your use case. Options include: * **Header**: Send the credentials as a basic auth header. * **Body**: Send the credentials in the body of the request. * _Optional:_ Choose whether to **Ignore SSL Issues**. If turned on, n8n will connect even if SSL validation fails. ## Using query auth# Use this generic authentication if your app or service supports passing authentication as a single key/value query parameter. (For multiple query parameters, use Custom Auth.) To configure this credential, enter: * A query parameter key or **Name** * A query parameter **Value** ## Using custom auth# Use this generic authentication if your app or service supports passing authentication as multiple key/value query parameters or you need more flexibility than the other generic auth options. The **Custom Auth** credential expects JSON data to define your credential. You can use `headers`, `qs`, `body` or a mix. Review the examples below to get started. <table><tbody><tr><td><div><pre><span></span><span>1</span> <span>2</span> <span>3</span> <span>4</span> <span>5</span> <span>6</span></pre></div></td><td><div><pre><span></span><code>{ "headers": { "X-AUTH-USERNAME": "username", "X-AUTH-PASSWORD": "password" } } </code></pre></div></td></tr></tbody></table> ### Body# <table><tbody><tr><td><div><pre><span></span><span>1</span> <span>2</span> <span>3</span> <span>4</span> <span>5</span> <span>6</span></pre></div></td><td><div><pre><span></span><code>{ "body" : { "user": "username", "pass": "password" } } </code></pre></div></td></tr></tbody></table> ### Query string# <table><tbody><tr><td><div><pre><span></span><span>1</span> <span>2</span> <span>3</span> <span>4</span> <span>5</span> <span>6</span></pre></div></td><td><div><pre><span></span><code>{ "qs": { "appid": "123456", "apikey": "my-api-key" } } </code></pre></div></td></tr></tbody></table> ### Sending header and query string# <table><tbody><tr><td><div><pre><span></span><span>1</span> <span>2</span> <span>3</span> <span>4</span> <span>5</span> <span>6</span> <span>7</span> <span>8</span></pre></div></td><td><div><pre><span></span><code>{ "headers": { "api-version": "202404" }, "qs": { "apikey": "my-api-key" } } </code></pre></div></td></tr></tbody></table> ## Provide an SSL certificate# You can send an SSL certificate with your HTTP request. Create the SSL certificate as a separate credential for use by the node: 1. In the HTTP Request node **Settings**, turn on **SSL Certificates**. 2. On the **Parameters** tab, add an existing SSL Certificate credential to **Credential for SSL Certificates** or create a new one. To configure your SSL Certificates credential, you'll need to add: * The Certificate Authority **CA** bundle * The **Certificate** (CRT): May also appear as a Public Key, depending on who your issuing CA was and how they format the cert * The **Private Key** (KEY) * _Optional:_ If the **Private Key** is encrypted, enter a **Passphrase** for the private key. If your SSL certificate is in a single file (such as a `.pfx` file), you'll need to open the file to copy details from it to paste into the appropriate fields: * Enter the Public Key/CRT as the **Certificate** * Enter the **Private Key**/KEY in that field --- ## Page: https://docs.n8n.io/integrations/builtin/credentials/hubspot/ You can use these credentials to authenticate the following nodes: * HubSpot * HubSpot Trigger ## Supported authentication methods# * App token: Use with the HubSpot node. * Developer API key: Use with the HubSpot Trigger node. * OAuth2: Use with the HubSpot node. API key deprecated HubSpot deprecated the regular **API Key** authentication method. The option still appears in n8n, but you should use the authentication methods listed above instead. If you have existing integrations using this API key method, refer to HubSpot's Migrate an API key integration to a private app guide and set up an app token. Refer to HubSpot's API documentation for more information about the service. The HubSpot Trigger node uses the Webhooks API; refer to HubSpot's Webhooks API documentation for more information about that service. ## Using App token# To configure this credential, you'll need a HubSpot account or HubSpot developer account and: * An **App Token** To generate an app token, create a private app in HubSpot: 1. In your HubSpot account, select the **settings icon** in the main navigation bar. 2. In the left sidebar menu, go to **Integrations > Private Apps**. 3. Select **Create private app**. 4. On the **Basic Info** tab, enter your app's **Name**. 5. Hover over the **placeholder logo** and select the upload icon to upload a square image that will serve as the logo for your app. 6. Enter a **Description** for your app. 7. Open the **Scopes** tab and add the appropriate scopes. Refer to Required scopes for HubSpot node for a complete list of scopes you should add. 8. Select **Create app** to finish the process. 9. In the modal, review the info about your app's access token, then select **Continue creating**. 10. Once your app's created, open the **Access token card** and select **Show token** to reveal the token. 11. Copy this token and enter it in your n8n credential. Refer to the HubSpot Private Apps documentation for more information. ## Using Developer API key# To configure this credential, you'll need a HubSpot developer account and: * A **Client ID**: Generated once you create a public app. * A **Client Secret**: Generated once you create a public app. * A **Developer API Key**: Generated from your Developer Apps dashboard. * An **App ID**: Generated once you create a public app. To create the public app and set up the credential: 1. Log into your HubSpot app developer account. 2. Select **Apps** from the main navigation bar. 3. Select **Get HubSpot API key**. You may need to select the option to **Show key**. 4. Copy the key and enter it in n8n as the **Developer API Key**. 5. Still on the HubSpot **Apps** page, select **Create app**. 6. On the **App Info** tab, add an **App name**, **Description**, **Logo**, and any support contact info you want to provide. Anyone encountering the app would see these. 7. Open the **Auth** tab. 8. Copy the **App ID** and enter it in n8n. 9. Copy the **Client ID** and enter it in n8n. 10. Copy the **Client Secret** and enter it in n8n. 11. In the **Scopes** section, select **Add new scope**. 12. Add all the scopes listed in Required scopes for HubSpot Trigger node to your app. 13. Select **Update**. 14. Copy the n8n **OAuth Redirect URL** and enter it as the **Redirect URL** in your HubSpot app. 15. Select **Create app** to finish creating the HubSpot app. Refer to the HubSpot Public Apps documentation for more detailed instructions. ### Required scopes for HubSpot Trigger node# If you're creating an app for use with the HubSpot Trigger node, n8n recommends starting with these scopes: | **Element** | **Object** | **Permission** | **Scope name** | | --- | --- | --- | --- | | n/a | n/a | n/a | `oauth` | | CRM | Companies | Read | `crm.objects.companies.read` | | CRM | Companies schemas | Read | `crm.schemas.companies.read` | | CRM | Contacts | Read | `crm.objects.contacts.read` | | CRM | Contacts schemas | Read | `crm.schemas.contacts.read` | | CRM | Deals | Read | `crm.objects.deals.read` | | CRM | Deals schemas | Read | `crm.schemas.deals.read` | HubSpot old accounts Some HubSpot accounts don't have access to all the scopes. HubSpot is migrating accounts gradually. If you can't find all the scopes in your current HubSpot developer account, try creating a fresh developer account. ## Using OAuth2# Note for n8n Cloud users Cloud users don't need to provide connection details. Select **Connect my account** to connect through your browser. If you're self-hosting n8n, you'll need to configure OAuth2 from scratch by creating a new public app: 1. Log into your HubSpot app developer account. 2. Select **Apps** from the main navigation bar. 3. Select **Create app**. 4. On the **App Info** tab, add an **App name**, **Description**, **Logo**, and any support contact info you want to provide. Anyone encountering the app would see these. 5. Open the **Auth** tab. 6. Copy the **App ID** and enter it in n8n. 7. Copy the **Client ID** and enter it in n8n. 8. Copy the **Client Secret** and enter it in n8n. 9. In the **Scopes** section, select **Add new scope**. 10. Add all the scopes listed in Required scopes for HubSpot node to your app. 11. Select **Update**. 12. Copy the n8n **OAuth Redirect URL** and enter it as the **Redirect URL** in your HubSpot app. 13. Select **Create app** to finish creating the HubSpot app. Refer to the HubSpot Public Apps documentation for more detailed instructions. If you need more detail on what's happening in the OAuth web flow, refer to the HubSpot Working with OAuth documentation. ## Required scopes for HubSpot node# If you're creating an app for use with the HubSpot node, n8n recommends starting with these scopes: | **Element** | **Object** | **Permission** | **Scope name(s)** | | --- | --- | --- | --- | | n/a | n/a | n/a | `oauth` | | n/a | n/a | n/a | `forms` | | n/a | n/a | n/a | `tickets` | | CRM | Companies | Read Write | `crm.objects.companies.read` `crm.objects.companies.write` | | CRM | Companies schemas | Read | `crm.schemas.companies.read` | | CRM | Contacts schemas | Read | `crm.schemas.contacts.read` | | CRM | Contacts | Read Write | `crm.objects.contacts.read` `crm.objects.contacts.write` | | CRM | Deals | Read Write | `crm.objects.deals.read` `crm.objects.deals.write` | | CRM | Deals schemas | Read | `crm.schemas.deals.read` | | CRM | Owners | Read | `crm.objects.owners.read` | | CRM | Lists | Write | `crm.lists.write` | HubSpot old accounts Some HubSpot accounts don't have access to all the scopes. HubSpot is migrating accounts gradually. If you can't find all the scopes in your current HubSpot developer account, try creating a fresh developer account. --- ## Page: https://docs.n8n.io/integrations/builtin/credentials/huggingface/ You can use these credentials to authenticate the following nodes: * Hugging Face Inference * Embeddings Hugging Face Inference ## Supported authentication methods# * API key Refer to Hugging Face's documentation for more information about the service. View n8n's Advanced AI documentation. ## Using API key# To configure this credential, you'll need a Hugging Face account and: * An **API Key**: Hugging Face calls these API tokens. To get your API token: 1. Open your Hugging Face profile and go to the **Tokens** section. 2. Copy the token listed there. It should begin with `hf_`. 3. Enter this API token as your n8n credential **API Key**. Refer to Get your API token for more information. --- ## Page: https://docs.n8n.io/integrations/builtin/credentials/humanticai/ You can use these credentials to authenticate the following nodes: * Humantic AI ## Prerequisites# Create a Humantic AI account. You can also try out an API key as a free trial at the Humantic AI API page. ## Supported authentication methods# * API key ## Related resources# Refer to Humantic AI's API documentation for more information about the service. ## Using API key# To configure this credential, you'll need: * An **API Key**: Get an API key from the Humantic AI API page. --- ## Page: https://docs.n8n.io/integrations/builtin/credentials/hunter/ You can use these credentials to authenticate the following nodes: * Hunter ## Prerequisites# Create a Hunter account. ## Supported authentication methods# * API key ## Related resources# Refer to Hunter's API documentation for more information about the service. ## Using API key# To configure this credential, you'll need: * An **API Key**: Generate an API key from your profile in the dashboard. Refer to the Hunter API Authentication documentation for more information. --- ## Page: https://docs.n8n.io/integrations/builtin/credentials/hybridanalysis/ You can use these credentials to authenticate when using the HTTP Request node to make a Custom API call. ## Prerequisites# Create a Hybrid Analysis account. ## Supported authentication methods# * API key Refer to Hybrid Analysis' API documentation for more information about the service. This is a credential-only node. Refer to Custom API operations to learn more. View example workflows and related content on n8n's website. ## Using API key# To configure this credential, you'll need: * An **API Key**: Refer to the Hybrid Analysis' API documentation for instructions on generating an API key. --- ## Page: https://docs.n8n.io/integrations/builtin/credentials/imap/ You can use these credentials to authenticate the following nodes: * IMAP Email ## Prerequisites# Create an email account on a service with IMAP support. ## Supported authentication methods# * User account Internet Message Access Protocol (IMAP) is a standard protocol for receiving email. Most email providers offer instructions on setting up their service with IMAP; refer to your provider's IMAP instructions. ## Using user account# To configure this credential, you'll need: * A **User** name: The email address you're retrieving email for. * A **Password**: Either the password you use to check email or an app password. Your provider will tell you whether to use your own password or to generate an app password. * A **Host**: The IMAP host address for your email provider, often formatted as `imap.<provider>.com`. Check with your provider. * A **Port** number: The default is port `993`. Use this port unless your provider or email administrator tells you to use something different. Choose whether to use **SSL/TLS** and whether to **Allow Self-Signed Certificates**. ### Provider instructions# Refer to the quickstart guides for these common email providers. #### Gmail# Refer to Gmail. #### Outlook.com# Refer to Outlook.com. #### Yahoo# Refer to Yahoo. ### My provider isn't listed# If your email provider isn't listed here, search for their `IMAP settings` or `IMAP instructions`. --- ## Page: https://docs.n8n.io/integrations/builtin/credentials/imap/gmail/ ## Gmail IMAP credentials# Follow these steps to configure the IMAP credentials with a Gmail account. ## Prerequisites# To follow these instructions, you must first: 1. Enable 2-step Verification on your Gmail account. 2. Generate an app password. ### Enable 2-step Verification# To enable 2-step Verification: 1. Log in to your Google Account. 2. Select **Security** from the left navigation. 3. Under **How you sign in to Google**, select **2-Step Verification**. * If 2-Step Verification is already enabled, skip to the next section. 4. Select **Get started**. 5. Follow the on-screen steps to configure 2-Step Verification. Refer to Turn on 2-step Verification for more information. If you can't turn on 2-step Verification, check with your email administrator. ### Generate an app password# To generate an app password: 1. In your Google account, go to App passwords. 2. Enter an **App name** for your new app password, like `n8n credential`. 3. Select **Create**. 4. Copy the generated app password. You'll use this in your n8n credential. Refer to Google's Sign in with app passwords documentation for more information. ## Set up the credential# To set up the IMAP credential with a Gmail account, use these settings: 1. Enter your Gmail email address as the **User**. 2. Enter the app password you generated above as the **Password**. 3. Enter `imap.gmail.com` as the **Host**. 4. For the **Port**, keep the default port number of `993`. Check with your email administrator if this port doesn't work. 5. Turn on the **SSL/TLS** toggle. 6. Check with your email administrator about whether to **Allow Self-Signed Certificates**. Refer to Add Gmail to another client for more information. You may need to **Enable IMAP** if you're using a personal Google account before June 2024. --- ## Page: https://docs.n8n.io/integrations/builtin/credentials/imap/outlook/ Follow these steps to configure the IMAP credentials with an Outlook.com account. ## Set up the credentials# To set up the IMAP credential with Outlook.com account, use these settings: 1. Enter your Outlook.com email address as the **User**. 2. Enter your Outlook.com password as the **Password**. App password Outlook.com doesn't require you to use an app password, but if you'd like to for security reasons, refer to Use an app password. 3. Enter `outlook.office365.com` as the **Host**. 4. For the **Port**, keep the default port number of `993`. 5. Turn on the **SSL/TLS** toggle. 6. Check with your email administrator about whether to **Allow Self-Signed Certificates**. Refer to Microsoft's POP, IMAP, and SMTP settings for Outlook.com documentation for more information. ## Connection errors# You may receive a connection error if you configured your Outlook.com account as IMAP in multiple email clients. Microsoft is working on a fix for this. For now, try this workaround: 1. Go to account.live.com/activity and sign in using the email address and password of the affected account. 2. Under **Recent activity**, find the **Session Type** event that matches the most recent time you received the connection error. Select it to expand the details. 3. Select **This was me** to approve the IMAP connection. 4. Retest your n8n credential. Refer to What is the Recent activity page? for more information on using this page. The source for these instructions is Outlook.com IMAP connection errors. Refer to that documentation for more information. ## Use an app password# If you'd prefer to use an app password instead of your email account password: 1. Log into the My Account page. 2. If you have a left navigation option for **Security Info**, jump to Security Info app password. If you don't have an option for **Security Info**, continue with these instructions. 3. Go to the Additional security verification page. 4. Select **App passwords** and **Create**. 5. Enter a **Name** for your app password, like `n8n credential`. 6. Use the option to **copy password to clipboard** and enter this as the **Password** in n8n instead of your email account password. Refer to Outlook's Manage app passwords for 2-step verification page for more information. ### Security Info app password# If you have a left navigation option for **Security Info**: 1. Select **Security Info**. The Security Info page opens. 2. Select **\+ Add method**. 3. On the **Add a method** page, select **App password** and then select **Add**. 4. Enter a **Name** for your app password, like `n8n credential`. 5. Copy the **Password** and enter this as the **Password** in n8n instead of your email account password. Refer to Outlook's Create app passwords from the Security info (preview) page for more information. --- ## Page: https://docs.n8n.io/integrations/builtin/credentials/imap/yahoo/ ## Yahoo IMAP credentials# Follow these steps to configure the IMAP credentials with a Yahoo account. ## Prerequisites# To follow these instructions, you must first generate an app password: 1. Log in to your Yahoo account Security page. 2. Select **Generate app password** or **Generate and manage app passwords**. 3. Select **Get Started**. 4. Enter an **App name** for your new app password, like `n8n credential`. 5. Select **Generate password**. 6. Copy the generated app password. You'll use this in your n8n credential. Refer to Yahoo's Generate and manage 3rd-party app passwords for more information. ## Set up the credential# To set up the IMAP credential with a Yahoo Mail account, use these settings: 1. Enter your Yahoo email address as the **User**. 2. Enter the app password you generated above as the **Password**. 3. Enter `imap.mail.yahoo.com` as the **Host**. 4. Keep the default **Port** number of `993`. Check with your email administrator if this port doesn't work. 5. Turn on the **SSL/TLS** toggle. 6. Check with your email administrator about whether to **Allow Self-Signed Certificates**. Refer to Set up IMAP for Yahoo mail account for more information. --- ## Page: https://docs.n8n.io/integrations/builtin/credentials/impervawaf/ You can use these credentials to authenticate when using the HTTP Request node to make a Custom API call. ## Prerequisites# Create an Imperva WAF account. ## Supported authentication methods# * API key Refer to Imperva WAF's documentation for more information about the service. This is a credential-only node. Refer to Custom API operations to learn more. View example workflows and related content on n8n's website. ## Using API key# To configure this credential, you'll need: * An **API ID** * An **API Key** Refer to Imperva WAF's API Key Management documentation for instructions on generating and viewing API Keys and IDs. --- ## Page: https://docs.n8n.io/integrations/builtin/credentials/intercom/ You can use these credentials to authenticate the following nodes: * Intercom ## Prerequisites# * Create an Intercom developer account. * Create an app in your developer hub. ## Supported authentication methods# * API key Refer to Intercom's API documentation for more information about the service. ## Using API key# To configure this credential, you'll need: * An **API Key**: Intercom automatically generates an **Access Token** when you create an app. Use this **Access Token** as your n8n **API Key**. Refer to How to get your Access Token for more detailed instructions. --- ## Page: https://docs.n8n.io/integrations/builtin/credentials/invoiceninja/ You can use these credentials to authenticate the following nodes: * Invoice Ninja * Invoice Ninja Trigger ## Prerequisites# Create an Invoice Ninja account. Only the Pro and Enterprise plans support API integrations. ## Supported authentication methods# * API key Refer to Invoice Ninja's v4 API documentation and v5 API documentation for more information about the APIs. ## Using API key# To configure this credential, you'll need: * A **URL**: If Invoice Ninja hosts your installation, use either of the default URLs mentioned. If you're self-hosting your installation, use the URL of your Invoice Ninja instance. * An **API Token**: Generate an API token in **Settings > Account Management > API Tokens**. * An optional **Secret**, available only for v5 API users --- ## Page: https://docs.n8n.io/integrations/builtin/credentials/iterable/ You can use these credentials to authenticate the following nodes: * Iterable ## Prerequisites# Create an Iterable account. ## Supported authentication methods# * API key ## Related resources# Refer to Iterable's API documentation for more information about the service: * US-based Iterable projects * Europe-based Iterable projects ## Using API key# To configure this credential, you'll need: * An **API Key**: Refer to Iterable's Creating API keys documentation for instructions on creating API keys. --- ## Page: https://docs.n8n.io/integrations/builtin/credentials/jenkins/ You can use these credentials to authenticate the following nodes: * Jenkins ## Prerequisites# Create an account on a Jenkins instance. ## Supported authentication methods# * API token Jenkins doesn't provide public API documentation; API documentation for each page is available from the user interface in the bottom right. Refer to those detailed pages for more information about the service. Refer to Jenkins Remote Access API for information on the API and API wrappers. ## Using API token# To configure this credential, you'll need: * The **Jenkins Username**: For the user whom the token belongs to * A **Personal API Token**: Generate this from the user's **profile details > Configure > Add new token**. Refer to these Stack Overflow instructions for more detail. * The **Jenkins Instance URL** Jenkins rebuilt their API token setup in 2018. If you're working with an older Jenkins instance, be sure you're using a non-legacy API token. Refer to Security Hardening: New API token system in Jenkins 2.129+ for more information. --- ## Page: https://docs.n8n.io/integrations/builtin/credentials/jira/ You can use these credentials to authenticate the following nodes: * Jira * Jira Trigger ## Prerequisites# Create a Jira Software Cloud or Server account. ## Supported authentication methods# * SW Cloud API token: Use this method with Jira Software Cloud. * SW Server account: Use this method with Jira Software Server. Refer to Jira's API documentation for more information about the service. ## Using SW Cloud API token# To configure this credential, you'll need an account on Jira Software Cloud. Then: 1. Log in to your Atlassian profile > **Security > API tokens** page, or jump straight there using this link. 2. Select **Create API Token**. 3. Enter a good **Label** for your token, like `n8n integration`. 4. Select **Create**. 5. Copy the API token. 6. In n8n, enter the **Email** address associated with your Jira account. 7. Paste the API token you copied as your **API Token**. 8. Enter the **Domain** you access Jira on, for example `https://example.atlassian.net`. Refer to Manage API tokens for your Atlassian account for more information. New tokens New tokens may take up to a minute before they work. If your credential verification fails the first time, wait a minute before retrying. ## Using SW Server account# To configure this credential, you'll need an account on Jira Software Server. Then: 1. Enter the **Email** address associated with your Jira account. 2. Enter your Jira account **Password**. 3. Enter the **Domain** you access Jira on. --- ## Page: https://docs.n8n.io/integrations/builtin/credentials/jotform/ You can use these credentials to authenticate the following nodes: * JotForm Trigger ## Supported authentication methods# * API key Refer to JotForm's API documentation for more information about the service. ## Using API key# To configure this credential, you'll need a JotForm account and: * An **API Key** * The **API Domain** To set it up: 1. Go to **Settings >** **API**. 2. Select **Create New Key**. 3. Select the **Name** in JotForm to update the API key name to something meaningful, like `n8n integration`. 4. Copy the **API Key** and enter it in your n8n credential. 5. In n8n, select the **API Domain** that applies to you based on the forms you're using: * **api.jotform.com**: Use this unless the other form types apply to you. * **eu-api.jotform.com**: Select this if you're using JotForm EU Safe Forms. * **hipaa-api.jotform.com**: Select this if you're using JotForm HIPAA forms. Refer to the JotForm API documentation for more information on creating keys and API domains. --- ## Page: https://docs.n8n.io/integrations/builtin/credentials/jwt/ You can use these credentials to authenticate the following nodes: * JWT * Webhook ## Supported authentication methods# * Passphrase: Signed with a secret with HMAC algorithm * Private key (PEM key): For use with Private Key JWT with RSA or ECDSA algorithm Refer to the JSON Web Token spec for more details. For a more verbose introduction, refer to the JWT website Introduction to JSON Web Tokens. Refer to JSON Web Token (JWT) Signing Algorithms Overview for more information on selecting between the two types and the algorithms involved. ## Using Passphrase# To configure this credential: 1. Select the **Key Type** of **Passphrase**. 2. Enter the Passphrase **Secret** 3. Select the **Algorithm** used to sign the assertion. Refer to Available algorithms below for a list of supported algorithms. ## Using private key (PEM key)# To configure this credential: 1. Select the **Key Type** of **PEM Key**. 2. A **Private Key**: Obtained from generating a Key Pair. Refer to Generate RSA Key Pair for an example. 3. A **Public Key**: Obtained from generating a Key Pair. Refer to Generate RSA Key Pair for an example. 4. Select the **Algorithm** used to sign the assertion. Refer to Available algorithms below for a list of supported algorithms. ## Available algorithms# This n8n credential supports the following algorithms: * `HS256` * `HS384` * `HS512` * `RS256` * `RS384` * `RS512` * `ES256` * `ES384` * `ES512` * `PS256` * `PS384` * `PS512` * `none` --- ## Page: https://docs.n8n.io/integrations/builtin/credentials/kafka/ You can use these credentials to authenticate the following nodes: * Kafka * Kafka Trigger ## Supported authentication methods# * Client ID Refer to Kafka's documentation for more information about using the service. If you're new to Kafka, refer to the Apache Kafka Quickstart for initial setup. Refer to Encryption and Authentication using SSL for working with SSL in Kafka. ## Using client ID# To configure this credential, you'll need a running Kafka environment and: * A **Client ID** * A list of relevant **Brokers** * Username/password authentication details if your Kafka environment uses authentication To set it up: 1. Enter the `CLIENT-ID` of the client or consumer group in the **Client ID** field in your credential. 2. Enter a comma-separated list of relevant **Brokers** for the credential to use in the format `<broker-service-name>:<port>`. Use the name you gave the broker when you defined it in the `services` list. For example, `kafka-1:9092,kafka-2:9092` would add the brokers `kafka-1` and `kafka-2` on port `9092`. 3. If your Kafka environment doesn't use SSL, turn off the **SSL** toggle. 4. If you've enabled authentication using SASL in your Kafka environment, turn on the **Authentication** toggle. Then add: 1. The **Username** 2. The **Password** 3. Select the broker's configured **SASL Mechanism**. Refer to SASL configuration for more information. Options include: * `Plain` * `scram-sha-256` * `scram-sha-512` --- ## Page: https://docs.n8n.io/integrations/builtin/credentials/keap/ You can use these credentials to authenticate the following nodes: * Keap * Keap Trigger ## Prerequisites# Create a Keap developer account. ## Supported authentication methods# * OAuth2 Refer to Keap's REST API documentation for more information about the service. ## Using OAuth2# Note for n8n Cloud users Cloud users don't need to provide connection details. Select **Connect my account** to connect through your browser. If you need to configure OAuth2 from scratch or need more detail on what's happening in the OAuth web flow, refer to the instructions in the Getting Started with OAuth2 documentation. --- ## Page: https://docs.n8n.io/integrations/builtin/credentials/kibana/ You can use these credentials to authenticate when using the HTTP Request node to make a Custom API call. ## Prerequisites# * Create an Elasticsearch account. * If you're creating a new account to test with, load some sample data into Kibana. Refer to the Kibana quick start for more information. ## Supported authentication methods# * Basic auth Refer to Kibana's API documentation for more information about the service. This is a credential-only node. Refer to Custom API operations to learn more. View example workflows and related content on n8n's website. ## Using basic auth# To configure this credential, you'll need: * The **URL** you use to access Kibana, for example `http://localhost:5601` * A **Username**: Use the same username that you use to log in to Elastic. * A **Password**: Use the same password that you use to log in to Elastic. --- ## Page: https://docs.n8n.io/integrations/builtin/credentials/kitemaker/ You can use these credentials to authenticate the following nodes: * Kitemaker ## Prerequisites# Create a Kitemaker account. ## Supported authentication methods# * API access token ## Related resources# Refer to Kitemaker's API documentation for more information about the service. ## Using API access token# To configure this credential, you'll need: * A **Personal Access Token**: Generate a personal access token from **Manage > Developer settings**. Refer to API Authentication for more detailed instructions. --- ## Page: https://docs.n8n.io/integrations/builtin/credentials/kobotoolbox/ You can use these credentials to authenticate the following nodes: * KoboToolbox trigger * KoboToolbox ## Prerequisites# Create a KoboToolbox account. ## Supported authentication methods# * API token Refer to KoboToolbox's API documentation for more information about the service. ## Using API token# To configure this credential, you'll need: * An **API Root URL**: Enter the URL of the KoboToolbox server where you created your account. For the Global KoboToolbox Server, use `https://kf.kobotoolbox.org`. For the European Union KoboToolbox Server, use `https://eu.kobotoolbox.org`. * An **API Token**: Displayed in your **Account Settings**. Refer to Getting your API token for more information. --- ## Page: https://docs.n8n.io/integrations/builtin/credentials/ldap/ You can use these credentials to authenticate the following nodes: * LDAP ## Prerequisites# Create a server directory using Lightweight Directory Access Protocol (LDAP). Some common LDAP providers include: * Jumpcloud * Azure ADDS * Okta ## Supported authentication methods# * LDAP server details Refer to your LDAP provider's own documentation for detailed information. For general LDAP information, refer to Basic LDAP concepts for a basic overview and The LDAP Bind Operation for information on how the bind operation and authentication work. ## Using LDAP server details# To configure this credential, you'll need: * The **LDAP Server Address**: Use the IP address or domain of your LDAP server. * The **LDAP Server Port**: Use the number of the port used to connect to the LDAP server. * The **Binding DN**: Use the Binding Distinguished Name (Bind DN) for your LDAP server. This is the user account the credential should log in as. If you're using Active Directory, this may look something like `cn=administrator, cn=Users, dc=n8n, dc=io`. Refer to your LDAP provider's documentation for more information on identifying this DN and the related password. * The **Binding Password**: Use the password for the **Binding DN** user. * Select the **Connection Security**: Options include: * `None` * `TLS` * `STARTTLS` * _Optional:_ Enter a numeric value in seconds to set a **Connection Timeout**. --- ## Page: https://docs.n8n.io/integrations/builtin/credentials/lemlist/ You can use these credentials to authenticate the following nodes: * Lemlist * Lemlist Trigger ## Prerequisites# Create an account on a Lemlist instance. ## Supported authentication methods# * API key ## Related resources# Refer to Lemlist's API documentation for more information about the service. ## Using API key# To configure this credential, you'll need: * An **API Key**: Access your API key in **Settings > Integrations**. Refer to the API Authentication documentation for more information. --- ## Page: https://docs.n8n.io/integrations/builtin/credentials/line/ Deprecated: End of service LINE Notify is discontinuing service as of April 1st 2025 and this node will no longer work after that date. View LINE Notify's end of service announement for more information. You can use these credentials to authenticate the following nodes: * Line ## Supported authentication methods# * Notify OAuth2 Refer to Line Notify's API documentation for more information about the service. ## Using Notify OAuth2# To configure this credential, you'll need a Line account and: * A **Client ID** * A **Client Secret** To generate both, connect Line with Line Notify. Then: 1. Open the Line Notify page to add a new service. 2. Enter a **Service name**. This name displays when someone tries to connect to the service. 3. Enter a **Service description**. 4. Enter a **Service URL** 5. Enter your **Company/Enterprise**. 6. Select your **Country/region**. 7. Enter your name or team name as the **Representative**. 8. Enter a valid **Email address**. Line will verify this email address before the service is fully registered. Use an email address you have ready access to. 9. Copy the **OAuth Redirect URL** from your n8n credential and enter it as the **Callback URL** in Line Notify. 10. Select **Agree and continue** to agree to the terms of service. 11. Verify the information you entered is correct and select **Add**. 12. Check your email and open the Line Notify Registration URL to verify your email address. 13. Once verification is complete, open **My services**. 14. Select the service you just added. 15. Copy the **Client ID** and enter it in your n8n credential. 16. Select the option to **Display** the **Client Secret**. Copy the **Client Secret** and enter it in your n8n credential. 17. In n8n, select **Connect my account** and follow the on-screen prompts to finish the credential. Refer to the Authentication section of Line Notify's API documentation for more information. --- ## Page: https://docs.n8n.io/integrations/builtin/credentials/linear/ You can use these credentials to authenticate the following nodes: * Linear Trigger * Linear ## Prerequisites# Create a Linear account. ## Supported authentication methods# * API key * OAuth2 Refer to Linear's API documentation for more information about the service. ## Using API key# To configure this credential, you'll need: * A personal **API Key**: Create an API key in your **Settings > API**. Refer to the Linear Personal API keys documentation for more information. ## Using OAuth2# To configure this credential, you'll need: * A **Client ID**: Generated when you create a new OAuth2 application. * A **Client Secret**: Generated when you create a new OAuth2 application. * Select the **Actor**: The actor defines how the OAuth2 application should create issues, comments and other changes. Options include: * **User** (Linear's default): The application creates resources as the authorizing user. Use this option if you want each user to do their own authentication. * **Application**: The application creates resources as itself. Use this option if you have only one user (like an admin) authorizing the application. * To use this credential with the Linear Trigger node, you must enable the **Include Admin Scope** toggle. Refer to the Linear OAuth2 Authentication documentation for more detailed instructions and explanations. Use the n8n **OAuth Redirect URL** as the **Redirect callback URL** in your Linear OAuth2 application. --- ## Page: https://docs.n8n.io/integrations/builtin/credentials/lingvanex/ You can use these credentials to authenticate the following nodes: * LingvaNex ## Prerequisites# Create a LingvaNex account. ## Supported authentication methods# * API key ## Related resources# Refer to Lingvanex's Cloud API documentation for more information about the service. ## Using API key# To configure this credential, you'll need: * An **API Key**: Generate an API key from your **Account** page. Refer to Where can I get the authorization key? for more detailed instructions. --- ## Page: https://docs.n8n.io/integrations/builtin/credentials/linkedin/ You can use these credentials to authenticate the following nodes: * LinkedIn ## Prerequisites# * Create a LinkedIn account. * Create a LinkedIn Company Page. ## Supported authentication methods# * **Community Management OAuth2**: Use this method if you're a new LinkedIn user or creating a new LinkedIn app. * **OAuth2**: Use this method for older LinkedIn apps and user accounts. Refer to LinkedIn's Community Management API documentation for more information about the service. This credential works with API version `202404`. Use this method if you're a new LinkedIn user or creating a new LinkedIn app. To configure this credential, you'll need a LinkedIn account, a LinkedIn Company Page, and: * A **Client ID**: Generated after you create a new developer app. * A **Client Secret**: Generated after you create a new developer app. To create a new developer app and set up the credential: 1. Log into LinkedIn and select this link to create a new developer app. 2. Enter an **App name** for your app, like `n8n integration`. 3. For the **LinkedIn Page**, enter a LinkedIn Company Page or use the **Create a new LinkedIn Page** link to create one on-the-fly. Refer to Associate an App with a LinkedIn Page for more information. 4. Add an **App logo**. 5. Check the box to agree to the **Legal agreement**. 6. Select **Create app**. 7. This should open the **Products** tab. Select the products/APIs you want to enable for your app. For the LinkedIn node to work properly, you must include: * **Share on LinkedIn** * **Sign In with LinkedIn using OpenID Connect** 8. Once you've requested access to the products you need, open the **Auth** tab. 9. Copy the **Client ID** and enter it in your n8n credential. 10. Select the icon to **Copy** the **Primary Client Secret**. Enter this in your n8n credential as the **Client Secret**. Refer to Getting Access to LinkedIn APIs for more information on scopes and permissions. ## Using OAuth2# Only use this method for older LinkedIn apps and user accounts. Note for n8n Cloud users Cloud users don't need to provide connection details. Select **Connect my account** to connect through your browser. All users must select: * **Organization Support**: If turned on, the credential requests permission to post as an organization using the `w_organization_social` scope. * To use this option, you must put your app through LinkedIn's Community Management App Review process. * **Legacy**: If turned on, the credential uses legacy scopes for `r_liteprofile` and `r_emailaddress` instead of the newer `profile` and `email` scopes. If you're self-hosting n8n, you'll need to configure OAuth2 from scratch by creating a new developer app: 1. Log into LinkedIn and select this link to create a new developer app. 2. Enter an **App name** for your app, like `n8n integration`. 3. For the **LinkedIn Page**, enter a LinkedIn Company Page or use the **Create a new LinkedIn Page** link to create one on-the-fly. Refer to Associate an App with a LinkedIn Page for more information. 4. Add an **App logo**. 5. Check the box to agree to the **Legal agreement**. 6. Select **Create app**. 7. This should open the **Products** tab. Select the products/APIs you want to enable for your app. For the LinkedIn node to work properly, you must include: * **Share on LinkedIn** * **Sign In with LinkedIn using OpenID Connect** 8. Once you've requested access to the products you need, open the **Auth** tab. 9. Copy the **Client ID** and enter it in your n8n credential. 10. Select the icon to **Copy** the **Primary Client Secret**. Enter this in your n8n credential as the **Client Secret**. Refer to Getting Access to LinkedIn APIs for more information on scopes and permissions. --- ## Page: https://docs.n8n.io/integrations/builtin/credentials/lonescale/ You can use these credentials to authenticate the following nodes: * LoneScale * LoneScale Trigger ## Prerequisites# Create a LoneScale account. ## Supported authentication methods# * API key ## Related resources# Refer to LoneScale's API documentation for more information about the service. ## Using API key# To configure this credential, you'll need: * An **API Key**: Refer to LoneScale's Generate an API key documentation to generate your key. --- ## Page: https://docs.n8n.io/integrations/builtin/credentials/magento2/ You can use these credentials to authenticate the following node: * Magento 2 ## Prerequisites# * Create a Magento account. * Set your store to **Allow OAuth Access Tokens to be used as standalone Bearer tokens**. * Go to **Admin > Stores > Configuration > Services > OAuth > Consumer Settings**. * Set the **Allow OAuth Access Tokens to be used as standalone Bearer tokens** option to **Yes**. * You can also enable this setting from the CLI by running the following command: <table><tbody><tr><td><div><pre><span></span><span>1</span></pre></div></td><td><div><pre><span></span><code>bin/magento config:set oauth/consumer/enable_integration_as_bearer 1 </code></pre></div></td></tr></tbody></table> This step is necessary until n8n updates the Magento 2 credentials to use OAuth. Refer to Integration Tokens for more information. ## Supported authentication methods# * API access token Refer to Magento's API documentation for more information about the service. ## Using API access token# To configure this credential, you'll need: * A **Host**: Enter the address of your Magento store. * An **Access Token**: Get an access token from the **Admin Panel**: 1. Go to **System > Extensions > Integrations**. 2. Add a new Integration. 3. Go to the **API** tab and select the Magento resources you'd like the n8n integration to access. 4. From the **Integrations** page, **Activate** the new integration. 5. Select **Allow** to display your access token so you can copy it and enter it in n8n. --- ## Page: https://docs.n8n.io/integrations/builtin/credentials/mailcheck/ You can use these credentials to authenticate the following nodes: * Mailcheck ## Prerequisites# Create a Mailcheck account. ## Supported authentication methods# * API key ## Related resources# Refer to Mailcheck's API documentation for more information about the service. ## Using API Key# To configure this credential, you'll need: * An **API Key**: Generate an API Key in the API section of your dashboard. Refer to Mailcheck's How to create an API key documentation for detailed instructions. --- ## Page: https://docs.n8n.io/integrations/builtin/credentials/mailchimp/ You can use these credentials to authenticate the following nodes: * Mailchimp * Mailchimp Trigger ## Prerequisites# Create a Mailchimp account. ## Supported authentication methods# * API key * OAuth2 Refer to Selecting an authentication method for guidance on which method to use. Refer to Mailchimp's API documentation for more information about the service. ## Using API key# To configure this credential, you'll need: * An **API Key**: Generate an API key in the API keys section of your Mailchimp account. Refer to Mailchimp's Generate your API key documentation for more detailed instructions. ## Using OAuth2# Note for n8n Cloud users Cloud users don't need to provide connection details. Select **Connect my account** to connect through your browser. If you need to configure OAuth2 from scratch, register an application. Refer to the Mailchimp OAuth2 documentation for more information. ## Selecting an authentication method# Mailchimp suggests using an API key if you're only accessing your own Mailchimp account's data: > Use an API key if you're writing code that tightly couples _your_ application's data to _your_ Mailchimp account's data. If you ever need to access _someone else's_ Mailchimp account's data, you should be using OAuth 2 (source) --- ## Page: https://docs.n8n.io/integrations/builtin/credentials/mailerlite/ You can use these credentials to authenticate the following nodes: * MailerLite * MailerLite Trigger ## Prerequisites# Create a MailerLite account. ## Supported authentication methods# * API key Refer to MailerLite's API documentation for more information about the service. ## Using API key# To configure this credential, you'll need: * An **API Key**: Generate an API key from the **Integrations** menu. Refer to the API Authentication documentation for more detailed instructions. Enable the **Classic API** toggle if the API key is for a MailerLite Classic account instead of the newer MailerLite experience. --- ## Page: https://docs.n8n.io/integrations/builtin/credentials/mailgun/ You can use these credentials to authenticate the following nodes: * Mailgun ## Prerequisites# * Create a Mailgun account. * Add and verify a domain in Mailgun or use the provided sandbox domain for testing. ## Supported authentication methods# * API key Refer to Mailgun's API documentation for more information about the service. ## Using API key# To configure this credential, you'll need: * An **API Domain**: If your Mailgun account is based in Europe, select **api.eu.mailgun.net**; otherwise, select **api.mailgun.net**. Refer to Mailgun Base URLs for more information. * An **Email Domain**: Enter the email sending domain you're working with. If you have multiple sending domains, refer to Working with multiple email domains for more information. * An **API Key**: View your API key in **Settings > API Keys**. Refer to Mailgun's API Authentication documentation for more detailed instructions. ## Working with multiple email domains# If your Mailgun account includes multiple sending domains, create a separate credential for each email domain you're working with. --- ## Page: https://docs.n8n.io/integrations/builtin/credentials/mailjet/ You can use these credentials to authenticate the following nodes: * Mailjet * Mailjet Trigger ## Prerequisites# Create a Mailjet account. ## Supported authentication methods# * Email API key: For use with Mailjet's Email API * SMS token: For use with Mailjet's SMS API Refer to Mailjet's Email API documentation and Mailjet's SMS API documentation for more information about each service. ## Using Email API key# To configure this credential, you'll need: * An **API Key**: View and generate API keys in your Mailjet API Key Management page. * A **Secret Key**: View your API Secret Keys in your Mailjet API Key Management page. * _Optional:_ Select whether to use **Sandbox Mode** for calls made using this credential. When turned on, all API calls use Sandbox mode: the API will still validate the payloads but won't deliver the actual messages. This can be useful to troubleshoot any payload error messages without actually sending messages. Refer to Mailjet's Sandbox Mode documentation for more information. For this credential, you can use either: * Mailjet's primary API key and secret key * A subaccount API key and secret key Refer to Mailjet's How to create a subaccount (or additional API key) documentation for detailed instructions on creating more API keys. Refer to What are subaccounts and how does it help me? page for more information on Mailjet subaccounts and when you might want to use one. ## Using SMS Token# To configure this credential, you'll need: * An access **Token**: Generate a new token from Mailjet's SMS Dashboard. Refer to the SMS API Getting Started guide for more detailed instructions. --- ## Page: https://docs.n8n.io/integrations/builtin/credentials/malcore/ You can use these credentials to authenticate when using the HTTP Request node to make a Custom API call. ## Prerequisites# Create a Malcore account. Refer to Malcore's API documentation for more information about authenticating with the service. This is a credential-only node. Refer to Custom API operations to learn more. View example workflows and related content on n8n's website. ## Using API key# To configure this credential, you'll need: * An **API Key**: Get an API Key from your **Account > API**. Refer to Using the Malcore API for more information. --- ## Page: https://docs.n8n.io/integrations/builtin/credentials/mandrill/ You can use these credentials to authenticate the following nodes: * Mandrill ## Prerequisites# * Create a Mailchimp Transactional email account * Log in to Mandrill with your Mailchimp account. If you already have a Mailchimp account with a Standard plan or higher, enable Transactional Emails within that account to use Mandrill. ## Supported authentication methods# * API key Refer to Mailchimp's Transactional API documentation for more information about the service. ## Using API key# To configure this credential, you'll need: * An **API Key**: Generate an API key from the Mandrill Settings. Refer to Mailchimp's Generate your API key documentation for more detailed instructions. --- ## Page: https://docs.n8n.io/integrations/builtin/credentials/marketstack/ You can use these credentials to authenticate the following nodes: * Marketstack ## Prerequisites# Create a Marketstack account. ## Supported authentication methods# * API key Refer to Marketstack's API documentation for more information about the service. ## Using API key# To configure this credential, you'll need: * An **API Key**: View and generate API keys in your Marketstack account dashboard. * Select whether to **Use HTTPS**: Make this selection based on your Marketstack account plan level: * Free plan: Turn off **Use HTTPS** * All other plans: Turn on **Use HTTPS** --- ## Page: https://docs.n8n.io/integrations/builtin/credentials/matrix/ You can use these credentials to authenticate the following nodes: * Matrix ## Prerequisites# Create an account on a Matrix server. Refer to Creating an account for more information. ## Supported authentication methods# * API access token Refer to the Matrix Specification for more information about the service. Refer to the documentation for the specific client you're using to access the Matrix server. ## Using API access token# To configure this credential, you'll need: * An **Access Token**: This token is tied to the account you use to log into Matrix with. * A **Homeserver URL**: This is the URL of the homeserver you entered when you created your account. n8n prepopulates this with matrix.org's own server; adjust this if you're using a server hosted elsewhere. Instructions for getting these details vary depending on the client you're using to access the server. Both the **Access Token** and the **Homeserver URL** can most commonly be found in **Settings > Help & About > Advanced**, but refer to your client's documentation for more details. --- ## Page: https://docs.n8n.io/integrations/builtin/credentials/mattermost/ You can use these credentials to authenticate the following nodes: * Mattermost ## Supported authentication methods# * API access token Refer to Mattermost's API documentation for more information about the service. ## Using API access token# To configure this credential, you'll need a Mattermost account and: * A personal **Access Token** * Your Mattermost **Base URL**. To set it up: 1. In Mattermost, go to **Profile > Security > Personal Access Tokens**. No Personal Access Tokens option If you don't see the Personal Access Tokens option, refer to the troubleshooting steps in Enable personal access tokens below. 2. Select **Create Token**. 3. Enter a **Token description**, like `n8n integration`. 4. Select **Save**. 5. Copy the **Token ID** and enter it as the **Access Token** in your n8n credential. 6. Enter your Mattermost URL as the **Base URL**. 7. By default, n8n connects only if SSL certificate validation succeeds. To connect even if SSL certificate validation fails, turn on **Ignore SSL Issues**. Refer to the Mattermost Personal access tokens documentation for more information. ## Enable personal access tokens# Not seeing the **Personal Access Tokens** option has two possible causes: * Mattermost doesn't have the personal access tokens integration enabled. * You're trying to generate a personal access token as a non-admin user who doesn't have permission to generate personal access tokens. To identify the root cause and resolve it: 1. Log in to Mattermost as an admin. 2. Go to **System Console > Integrations > Integration Management**. 3. Confirm that **Enable personal access tokens** is set to **true**. If it's not, change. 4. Go to **System Console > User Management > Users**. 5. Search for the user account you want to allow to generate personal access tokens. 6. Select the **Actions** dropdown for the user and select **Manage roles**. 7. Check the box for **Allow this account to generate personal access tokens** and **Save**. Refer to the Mattermost Personal access tokens documentation for more information. --- ## Page: https://docs.n8n.io/integrations/builtin/credentials/mautic/ You can use these credentials to authenticate the following nodes: * Mautic * Mautic Trigger ## Supported authentication methods# * Basic auth * OAuth2 Refer to Mautic's API documentation for more information about the service. ## Using basic auth# API enabled To set up this credential, your Mautic instance must have the API enabled. Refer to Enable the API for instructions. To configure this credential, you'll need an account on a Mautic instance and: * Your **URL** * A **Username** * A **Password** To set it up: 1. In Mautic, go to **Configuration > API Settings**. 2. If **Enable HTTP basic auth?** is set to **No**, change it to **Yes** and save. Refer to the API Settings documentation for more information. 3. In n8n, enter the Base **URL** of your Mautic instance. 4. Enter your Mautic **Username**. 5. Enter your Mautic **Password**. ## Using OAuth2# API enabled To set up this credential, your Mautic instance must have the API enabled. Refer to Enable the API for instructions. To configure this credential, you'll need an account on a Mautic instance and: * A **Client ID**: Generated when you create new API credentials. * A **Client Secret**: Generated when you create new API credentials. * Your **URL** To set it up: 1. In Mautic, go to **Configuration > Settings**. 2. Select **API Credentials**. No API Credentials menu If you don't see the **API Credentials** option under **Configuration > Settings**, be sure to Enable the API. If you've enabled the API and you still don't see the option, try manually clearing the cache. 3. Select the option to **Create new client**. 4. Select **OAuth 2** as the **Authorization Protocol**. 5. Enter a **Name** for your credential, like `n8n integration`. 6. In n8n, copy the **OAuth Callback URL** and enter it as the **Redirect URI** in Mautic. 7. Select **Apply**. 8. Copy the **Client ID** from Mautic and enter it in your n8n credential. 9. Copy the **Client Secret** from Mautic and enter it in your n8n credential. 10. Enter the Base **URL** of your Mautic instance. Refer to What is Mautic's API? for more information. ## Enable the API# To enable the API in your Mautic instance: 1. Go to **Settings > Configuration**. 2. Select **API Settings**. 3. Set **API enabled?** to **Yes**. 4. **Save** your changes. Refer to How to use the Mautic API for more information. --- ## Page: https://docs.n8n.io/integrations/builtin/credentials/medium/ You can use these credentials to authenticate the following nodes: * Medium Medium API no longer supported Medium has stopped supporting the Medium API. These credentials still appear within n8n, but you can't configure new integrations using them. ## Prerequisites# * Create an account on Medium. * For OAuth2, request access to credentials by emailing yourfriends@medium.com. ## Supported authentication methods# * API access token * OAuth2 Refer to Medium's API documentation for more information about the service. ## Using API access token# To configure this credential, you'll need: * An API **Access Token**: Generate a token in **Settings >** **Security and apps** **\> Integration tokens**. Use the integration token this generates as your n8n **Access Token**. Refer to the Medium API Self-issued access tokens documentation for more information. ## Using OAuth2# To configure this credential, you'll need: * A **Client ID** * A **Client Secret** To generate a **Client ID** and **Client Secret**, you'll need access to the **Developers** menu. From there, create a new application to generate the Client ID and Secret. Use these settings for your new application: * Select **OAuth 2** as the **Authorization Protocol** * Copy the **OAuth Callback URL** from n8n and use this as the **Callback URL** in Medium. --- ## Page: https://docs.n8n.io/integrations/builtin/credentials/messagebird/ You can use these credentials to authenticate the following nodes: * MessageBird ## Prerequisites# Create a Bird account. ## Supported authentication methods# * API key ## Related resources# Refer to MessageBird's API documentation for more information about the service. ## Using API key# To configure this credential, you'll need: * An **API Key**: To generate an appropriate key, visit the Access keys page in MessageBird. Refer to the API authorization documentation for detailed instructions. --- ## Page: https://docs.n8n.io/integrations/builtin/credentials/metabase/ You can use these credentials to authenticate the following nodes: * Metabase node ## Prerequisites# Create a Metabase account with access to a Metabase instance. ## Supported authentication methods# * Basic auth Refer to Metabase's API documentation for more information about the service. ## Using basic auth# To configure this credential, you'll need: * A **URL**: Enter the base URL of your Metabase instance. If you're using a custom domain, use that URL. * A **Username**: Enter your Metabase username. * A **Password**: Enter your Metabase password. --- ## Page: https://docs.n8n.io/integrations/builtin/credentials/microsoft/ You can use these credentials to authenticate the following nodes: * Microsoft Dynamics CRM * Microsoft Excel * Microsoft Graph Security * Microsoft OneDrive * Microsoft Outlook * Microsoft Teams * Microsoft To Do ## Prerequisites# * Create a Microsoft Azure account. * Create at least one user account with access to the appropriate service. * If the user account is managed by a corporate Microsoft Entra account, the administrator account has enabled the option “User can consent to apps accessing company data on their behalf” for this user (see the Microsoft Entra documentation). ## Supported authentication methods# * OAuth2 Refer to the linked Microsoft API documentation below for more information about each service's API: * Dynamics CRM: Web API * Excel: Graph API * Graph Security: Graph API * OneDrive: Graph API * Outlook: Graph API and Outlook API * Teams: Graph API * To Do: Graph API ## Using OAuth2# Note for n8n Cloud users Cloud users don't need to provide connection details. Select **Connect my account** to connect through your browser. Some Microsoft services require extra information for OAuth2. Refer to Service-specific settings for more guidance on those services. For self-hosted users, there are two main steps to configure OAuth2 from scratch: 1. Register an application with the Microsoft Identity Platform. 2. Generate a client secret for that application. Follow the detailed instructions for each step below. For more detail on the Microsoft OAuth2 web flow, refer to Microsoft authentication and authorization basics. ### Register an application# Register an application with the Microsoft Identity Platform: 1. Open the Microsoft Application Registration Portal. 2. Select **Register an application**. 3. Enter a **Name** for your app. 4. In **Supported account types**, select **Accounts in any organizational directory (Any Azure AD directory - Multi-tenant) and personal Microsoft accounts (for example, Skype, Xbox)**. 5. In **Register an application**: 1. Copy the **OAuth Callback URL** from your n8n credential. 2. Paste it into the **Redirect URI (optional)** field. 3. Select **Select a platform** > **Web**. 6. Select **Register** to finish creating your application. 7. Copy the **Application (client) ID** and paste it into n8n as the **Client ID**. Refer to Register an application with the Microsoft Identity Platform for more information. ### Generate a client secret# With your application created, generate a client secret for it: 1. On your Microsoft application page, select **Certificates & secrets** in the left navigation. 2. In **Client secrets**, select **\+ New client secret**. 3. Enter a **Description** for your client secret, such as `n8n credential`. 4. Select **Add**. 5. Copy the **Secret** in the **Value** column. 6. Paste it into n8n as the **Client Secret**. 7. If you see other fields in the n8n credential, refer to Service-specific settings below for guidance on completing those fields. 8. Select **Connect my account** in n8n to finish setting up the connection. 9. Log in to your Microsoft account and allow the app to access your info. Refer to Microsoft's Add credentials for more information on adding a client secret. ### Service-specific settings# The following services require extra information for OAuth2: #### Dynamics# Dynamics OAuth2 requires information about your Dynamics domain and region. Follow these extra steps to complete the credential: 1. Enter your Dynamics **Domain**. 2. Select the Dynamics data center **Region** you're within. Refer to the Microsoft Datacenter regions documentation for more information on the region options and corresponding URLs. #### Microsoft (general)# The general Microsoft OAuth2 also requires you to provide a space-separated list of **Scope**s for this credential. Refer to Scopes and permissions in the Microsoft identity platform for a list of possible scopes. #### Outlook# Outlook OAuth2 supports the credential accessing a user's primary email inbox or a shared inbox. By default, the credential will access a user's primary email inbox. To change this behavior: 1. Turn on **Use Shared Inbox**. 2. Enter the target user's UPN or ID as the **User Principal Name**. #### SharePoint# SharePoint OAuth2 requires information about your SharePoint **Subdomain**. To complete the credential, enter the **Subdomain** part of your SharePoint URL. For example, if your SharePoint URL is `https://tenant123.sharepoint.com`, the subdomain is `tenant123`. ## Common issues# Here are the known common errors and issues with Microsoft OAuth2 credentials. ### Need admin approval# When attempting to add credentials for a Microsoft360 or Microsoft Entra account, users may see a message when following the procedure that this action requires admin approval. This message will appear when the account attempting to grant permissions for the credential is managed by a Microsoft Entra. In order to issue the credential, the administrator account needs to grant permission to the user (or "tenant") for that application. The procedure for this is covered in the Microsoft Entra documentation. --- ## Page: https://docs.n8n.io/integrations/builtin/credentials/microsoftazuremonitor/ You can use these credentials to authenticate when using the HTTP Request node to make a Custom API call. ## Prerequisites# * Create a Microsoft Azure account or subscription * An app registered in Microsoft Entra ID ## Supported authentication methods# * OAuth2 Refer to Microsoft Azure Monitor's API documentation for more information about the service. ## Using OAuth2# To configure this credential, you'll need a Microsoft Azure account and: * A **Client ID** * A **Client Secret** * A **Tenant ID** * The **Resource** you plan to access Refer to Microsoft Azure Monitor's API documentation for more information about authenticating to the service. --- ## Page: https://docs.n8n.io/integrations/builtin/credentials/microsoftentra/ You can use these credentials to authenticate the following nodes: * Microsoft Entra ID ## Prerequisites# * Create a Microsoft Entra ID account or subscription. * If the user account is managed by a corporate Microsoft Entra account, the administrator account has enabled the option “User can consent to apps accessing company data on their behalf” for this user (see the Microsoft Entra documentation). Microsoft includes an Entra ID free plan when you create a Microsoft Azure account. ## Supported authentication methods# * OAuth2 Refer to Microsoft Entra ID's documentation for more information about the service. ## Using OAuth2# Note for n8n Cloud users Cloud users don't need to provide connection details. Select **Connect my account** to connect through your browser. For self-hosted users, there are two main steps to configure OAuth2 from scratch: 1. Register an application with the Microsoft Identity Platform. 2. Generate a client secret for that application. Follow the detailed instructions for each step below. For more detail on the Microsoft OAuth2 web flow, refer to Microsoft authentication and authorization basics. ### Register an application# Register an application with the Microsoft Identity Platform: 1. Open the Microsoft Application Registration Portal. 2. Select **Register an application**. 3. Enter a **Name** for your app. 4. In **Supported account types**, select **Accounts in any organizational directory (Any Azure AD directory - Multi-tenant) and personal Microsoft accounts (for example, Skype, Xbox)**. 5. In **Register an application**: 1. Copy the **OAuth Callback URL** from your n8n credential. 2. Paste it into the **Redirect URI (optional)** field. 3. Select **Select a platform** > **Web**. 6. Select **Register** to finish creating your application. 7. Copy the **Application (client) ID** and paste it into n8n as the **Client ID**. Refer to Register an application with the Microsoft Identity Platform for more information. ### Generate a client secret# With your application created, generate a client secret for it: 1. On your Microsoft application page, select **Certificates & secrets** in the left navigation. 2. In **Client secrets**, select **\+ New client secret**. 3. Enter a **Description** for your client secret, such as `n8n credential`. 4. Select **Add**. 5. Copy the **Secret** in the **Value** column. 6. Paste it into n8n as the **Client Secret**. 7. Select **Connect my account** in n8n to finish setting up the connection. 8. Log in to your Microsoft account and allow the app to access your info. Refer to Microsoft's Add credentials for more information on adding a client secret. ## Common issues# Here are the known common errors and issues with Microsoft Entra credentials. ### Need admin approval# When attempting to add credentials for a Microsoft360 or Microsoft Entra account, users may see a message when following the procedure that this action requires admin approval. This message will appear when the account attempting to grant permissions for the credential is managed by a Microsoft Entra. In order to issue the credential, the administrator account needs to grant permission to the user (or "tenant") for that application. The procedure for this is covered in the Microsoft Entra documentation. --- ## Page: https://docs.n8n.io/integrations/builtin/credentials/microsoftsql/ You can use these credentials to authenticate the following nodes: * Microsoft SQL ## Prerequisites# Create a user account on a Microsoft SQL server database. ## Supported authentication methods# * SQL database connection Refer to Microsoft's Connect to SQL Server documentation for more information about connecting to the service. ## Using SQL database connection# To configure this credential, you'll need: * The **Server** name * The **Database** name * Your **User** account/ID * Your **Password** * The **Port** to use for the connection * The **Domain** name * Whether to use **TLS** * Whether to **Ignore SSL Issues** * The **Connect Timeout** * The **Request Timeout** * The **TDS Version** the connection should use To set up the database connection: 1. Enter the SQL Server Host Name as the **Server**. In an existing SQL Server connection, the host name comes before the instance name in the format `HOSTNAME\INSTANCENAME`. Find the host name: * In the **Object Explorer** pane as the top-level object for your database. * In the footer of a query window. * Viewing the current connection **Properties** and looking for **Name** or **Display Name**. * Refer to Find SQL Server Instance Name | When you're connected to SQL Server for more information. You can also find the information in the Error logs. 2. Enter the SQL Server Instance Name as the **Database** name. Find this name using the same steps listed above for finding the host name. * If you don't see an instance name in any of these places, then your database uses the default `MSSQLSERVER` instance name. 3. Enter your **User** account name or ID. 4. Enter your **Password**. 5. For the **Port**: * SQL Server defaults to `1433`. * If you can't connect over port 1433, check the Error logs for the phrase `Server is listening on` to identify the port number you should enter. 6. You only need to enter the **Domain** name if users in multiple domains access your database. Run this SQL query to get the domain name: <table><tbody><tr><td><div><pre><span></span><span>1</span></pre></div></td><td><div><pre><span></span><code><span>SELECT</span><span> </span><span>DEFAULT_DOMAIN</span><span>()[</span><span>DomainName</span><span>];</span> </code></pre></div></td></tr></tbody></table> 7. Select whether to use **TLS**. 8. Select whether to **Ignore SSL Issues**: If turned on, the credential will connect even if SSL certificate validation fails. 9. Enter the number of milliseconds n8n should attempt the initial connection to complete before disconnecting as the **Connect Timeout**. Refer to the SqlConnection.ConnectionTimeout property documentation for more information. * SQL Server stores this timeout as seconds, while n8n stores it as milliseconds. If you're copying your SQL Server defaults, multiple by 100 before entering the number here. 10. Enter the number of milliseconds n8n should wait on a given request before timing out as the **Request Timeout**. This is basically a query timeout parameter. Refer to Troubleshoot query time-out errors for more information. 11. Select the Tabular Data Stream (TDS) protocol to use from the **TDS Version** dropdown. If the server doesn't support the version you select here, the connection uses a negotiated alternate version. Refer to Appendix A: Product Behavior for a more detailed breakdown of the TDS versions' compatibility with different SQL Server versions and .NET frameworks. Options include: * **7\_4 (SQL Server 2012 ~ 2019)**: TDS version 7.4. * **7\_3\_B (SQL Server 2008R2)**: TDS version 7.3.B. * **7\_3\_A (SQL Server 2008)**: TDS version 7.3.A. * **7\_2 (SQL Server 2005)**: TDS version 7.2. * **7\_1 (SQL Server 2000)**: TDS version 7.1. --- ## Page: https://docs.n8n.io/integrations/builtin/credentials/milvus/ You can use these credentials to authenticate the following nodes: * Milvus Vector Store ## Prerequisites# Create and run an Milvus instance. Refer to the Install Milvus for more information. ## Supported authentication methods# * Basic auth Refer to Milvus's Authentication documentation for more information about setting up authentication. View n8n's Advanced AI documentation. ## Using basic auth# To configure this credential, you'll need: * **Base URL**: The base URL of your Milvus instance. The default is `http://localhost:19530`. * **Username**: The username to authenticate to your Milvus instance. The default value is `root`. * **Password**: The password to authenticate to your Milvus instance. The default value is `Milvus`. --- ## Page: https://docs.n8n.io/integrations/builtin/credentials/mindee/ You can use these credentials to authenticate the following nodes: * Mindee ## Prerequisites# Create a Mindee account. ## Supported authentication methods# * Invoice API key: For use with the Invoice OCR API * Receipt API key: For use with the Receipt OCR API Refer to Mindee's Invoice OCR API documentation and Mindee's Receipt OCR API documentation for more information about each service. ## Using invoice API key# To configure this credential, you'll need: * An **API Key**: Refer to the Mindee Create & Manage API Keys documentation for instructions on creating API keys. ## Using receipt API key# To configure this credential, you'll need: * An **API Key**: Refer to the Mindee Create & Manage API Keys documentation for instructions on creating API keys. --- ## Page: https://docs.n8n.io/integrations/builtin/credentials/miro/ You can use these credentials to authenticate when using the HTTP Request node to make a Custom API call. ## Prerequisites# Create a Miro account. ## Supported authentication methods# * OAuth2 Refer to Miro's API documentation for more information about the service. This is a credential-only node. Refer to Custom API operations to learn more. View example workflows and related content on n8n's website. ## Using OAuth2# To configure this credential, you'll need a Miro account and app, as well as: * A **Client ID**: Generated when you create a new OAuth2 application. * A **Client Secret**: Generated when you create a new OAuth2 application. Refer to Miro's API documentation for more information about authenticating to the service. Note for n8n Cloud users Cloud users don't need to provide connection details. Select **Connect my account** to connect through your browser. If you're self-hosting n8n, you'll need to create an app to configure OAuth2. Refer to Miro's OAuth documentation for more information about setting up OAuth2. --- ## Page: https://docs.n8n.io/integrations/builtin/credentials/misp/ You can use these credentials to authenticate the following nodes: * MISP ## Prerequisites# Install and run a MISP instance. ## Supported authentication methods# * API key Refer to MISP's Automation API documentation for more information about the service. ## Using API key# To configure this credential, you'll need: * An **API Key**: In MISP, these are called Automation keys. Get an automation key from **Event Actions > Automation**. Refer to MISP's automation keys documentation for instructions on generating more keys. * A **Base URL**: Your MISP URL. * Select whether to **Allow Unauthorized Certificates**: If turned on, the credential will connect even if SSL certificate validation fails. --- ## Page: https://docs.n8n.io/integrations/builtin/credentials/mist/ You can use these credentials to authenticate when using the HTTP Request node to make a Custom API call. ## Prerequisites# Create a Mist account and organization. Refer to Create a Mist account and Organization for detailed instructions. ## Supported authentication methods# * API token Refer to Mist's documentation for more information about the service. If you're logged in to your Mist account, go to https://api.mist.com/api/v1/docs/Home to view the full API documentation. This is a credential-only node. Refer to Custom API operations to learn more. View example workflows and related content on n8n's website. ## Using API token# To configure this credential, you'll need: * An **API Token**: You can use either a User API token or an Org API token. Refer to How to generate a user API token for instructions on generating a User API token. Refer to Org API token for instructions on generating an Org API token. * Select the **Region** you're in. Options include: * **Europe**: Select this option if your cloud environment is in any of the EMEA regions. * **Global**: Select this option if your cloud environment is in any of the global regions. --- ## Page: https://docs.n8n.io/integrations/builtin/credentials/mistral/ You can use these credentials to authenticate the following nodes: * Mistral Cloud * Embeddings Mistral Cloud ## Prerequisites# * Create a Mistral La Plateforme account. * You must add payment information in **Workspace >** **Billing** and activate payments to enable API keys. Refer to Account setup for more information. ## Supported authentication methods# * API key Refer to Mistral's API documentation for more information about the APIs. View n8n's Advanced AI documentation. ## Using API key# To configure this credential, you'll need: * An **API Key** Once you've added payment information to your Mistral Cloud account: 1. Sign in to your Mistral account. 2. Go to the **API Keys** page. 3. Select **Create new key**. 4. Copy the API key and enter it in your n8n credential. Refer to Account setup for more information. Paid account required Mistral requires you to add payment information and activate payments to use API keys. Refer to the Prerequisites section above for more information. --- ## Page: https://docs.n8n.io/integrations/builtin/credentials/mocean/ You can use these credentials to authenticate the following nodes: * Mocean ## Prerequisites# Create a Mocean account. ## Supported authentication methods# * API key ## Related resources# Refer to Mocean's API documentation for more information about the service. ## Using API key# To configure this credential, you'll need: * An **API Key** * An **API Secret** Both the key and secret are accessible in your Mocean Dashboard. Refer to API Authentication for more information. --- ## Page: https://docs.n8n.io/integrations/builtin/credentials/mondaycom/ You can use these credentials to authenticate the following nodes: * monday.com Minimum required version The monday.com node requires n8n version 1.22.6 or above. ## Supported authentication methods# * API token * OAuth2 Refer to monday.com's API documentation for more information about authenticating with the service. ## Using API token# To configure this credential, you'll need a monday.com account and: * An API **Token V2** To get your token: 1. In your monday.com account, select your profile picture in the top right corner. 2. Select **Developers**. The Developer Center opens in a new tab. 3. In the Developer Center, select **My Access Tokens > Show**. 4. Copy your personal token and enter it in your n8n credential as the **Token V2**. Refer to monday.com API Authentication for more information. ## Using OAuth2# To configure this credential, you'll need a monday.com account and: * A **Client ID** * A **Client Secret** To generate both these fields, register a new monday.com application: 1. In your monday.com account, select your profile picture in the top right corner. 2. Select **Developers**. The Developer Center opens in a new tab. 3. In the Developer Center, select **Build app**. The app details open. 4. Enter a **Name** for your app, like `n8n integration`. 5. Copy the **Client ID** and enter it in your n8n credential. 6. **Show** the **Client Secret**, copy it, and enter it in your n8n credential. 7. In the left menu, select **OAuth**. 8. For **Scopes**, select `boards:write` and `boards:read`. 9. Select **Save Scopes**. 10. Select the **Redirect URLs** tab. 11. Copy the **OAuth Redirect URL** from n8n and enter it as the **Redirect URL**. 12. **Save** your changes in monday.com. 13. In n8n, select **Connect my account** to finish the setup. Refer to Create an app for more information on creating apps. Refer to OAuth and permissions for more information on the available scopes and setting up the Redirect URL. --- ## Page: https://docs.n8n.io/integrations/builtin/credentials/mongodb/ You can use these credentials to authenticate the following nodes: * MongoDB * MongoDB Atlas Vector Store * MongoDB Chat Memory ## Prerequisites# * Create a user account with the appropriate permissions on a MongoDB server. * As a Project Owner, add all the n8n IP addresses to the IP Access List Entries in the project's **Network Access**. Refer to Add IP Access List entries for detailed instructions. If you are setting up MongoDB from scratch, create a cluster and a database. Refer to the MongoDB Atlas documentation for more detailed instructions on these steps. ## Supported authentication methods# * Database connection - Connection string * Database connection - Values Refer to the MongoDBs Atlas documentation for more information about the service. ## Using database connection - Connection string# To configure this credential, you'll need the Prerequisites listed above. Then: 1. Select **Connection String** as the **Configuration Type**. 2. Enter your MongoDB **Connection String**. To get your connection string in MongoDB, go to **Database > Connect**. 1. Select **Drivers**. 2. Copy the code you see in **Add your connection string into your application code**. It will be something like: `mongodb+srv://yourName:yourPassword@clusterName.mongodb.net/?retryWrites=true&w=majority`. 3. Replace the `<password>` and `<username>` in the connection string with the database user's credentials you'll be using. 4. Enter that connection string into n8n. 5. Refer to Connection String for information on finding and formatting your connection string. 3. Enter your **Database** name. This is the name of the database that the user whose details you added to the connection string is logging into. 4. Select whether to **Use TLS**: Turn on to use TLS. You must have your MongoDB database configured to use TLS and have an x.509 certificate generated. Add information for these certificate fields in n8n: * **CA Certificate** * **Public Client Certificate** * **Private Client Key** * **Passphrase** Refer to MongoDB's x.509 documentation for more information on working with x.509 certificates. ## Using database connection - Values# To configure this credential, you'll need the Prerequisites listed above. Then: 1. Select **Values** as the **Configuration Type**. 2. Enter the database **Host** name or address. 3. Enter the **Database** name. 4. Enter the **User** you'd like to log in as. 5. Enter the user's **Password**. 6. Enter the **Port** to connect over. This is the port number your server uses to listen for incoming connections. 7. Select whether to **Use TLS**: Turn on to use TLS. You must have your MongoDB database configured to use TLS and have an x.509 certificate generated. Add information for these certificate fields in n8n: * **CA Certificate** * **Public Client Certificate** * **Private Client Key** * **Passphrase** Refer to MongoDB's x.509 documentation for more information on working with x.509 certificates. --- ## Page: https://docs.n8n.io/integrations/builtin/credentials/monicacrm/ You can use these credentials to authenticate the following nodes: * Monica CRM ## Prerequisites# Sign up for a Monica CRM account or self-host an instance. ## Supported authentication methods# * API token Refer to Monica's API documentation for more information about the service. ## Using API token# To configure this credential, you'll need: * Your **Environment**: * Select **Cloud-Hosted** if you access your Monica instance through Monica. * Select **Self-Hosted** if you have self-hosted Monica on your own server. Provide your **Self-Hosted Domain**. * An **API Token**: Generate a token in **Settings > API**. --- ## Page: https://docs.n8n.io/integrations/builtin/credentials/motorhead/ You can use these credentials to authenticate the following nodes: * Motorhead ## Supported authentication methods# * API key Refer to Motorhead's API documentation for more information about the service. View n8n's Advanced AI documentation. ## Using API key# To configure this credential, you'll need a Motorhead account and: * Your **Host** URL * An **API Key** * A **Client ID** To set it up, you'll generate an API key: 1. If you're self-hosting Motorhead, update the **Host** URL to match your Motorhead URL. 2. In Motorhead, go to **Settings > Organization**. 3. In the **API Keys** section, select **Create**. 4. Enter a **Name** for your API Key, like `n8n integration`. 5. Select **Generate**. 6. Copy the **apiKey** and enter it in your n8n credential. 7. Return to the API key list. 8. Copy the **clientID** for the key and enter it as the **Client ID** in your n8n credential. Refer to Generate an API key for more information. --- ## Page: https://docs.n8n.io/integrations/builtin/credentials/mqtt/ You can use these credentials to authenticate the following nodes: * MQTT * MQTT Trigger ## Prerequisites# Install an MQTT broker. MQTT provides a list of Servers/Brokers at MQTT Software. ## Supported authentication methods# * Broker connection Refer to MQTT's documentation for more information about the MQTT protocol. Refer to your broker provider's documentation for more detailed configuration and details. ## Using broker connection# To configure this credential, you'll need: * Your MQTT broker's **Protocol** * The **Host** * The **Port** * A **Username** and **Password** to authenticate with * If you're using **SSL**, the relevant certificates and keys To set things up: 1. Select the broker's **Protocol**, which determines the URL n8n uses. Options include: * **Mqtt**: Begin the URL with the standard `mqtt:` protocol. * **Mqtts**: Begin the URL with the secure `mqtts:` protocol. * **Ws**: Begin the URL with the WebSocket `ws:` protocol. 2. Enter your broker **Host**. 3. Enter the **Port** number n8n should use to connect to the broker host. 4. Enter the **Username** to log into the broker as. 5. Enter that user's **Password**. 6. If you want to receive QoS 1 and 2 messages while offline, turn off the **Clean Session** toggle. 7. Enter a **Client ID** you'd like the credential to use. If you leave this blank, n8n will generate one for you. You can use a fixed or expression-based Client ID. * Client IDs can be useful to identify and track connection access. n8n recommends using something with `n8n` in it for easier auditing. 8. If your MQTT broker uses SSL, turn the **SSL** toggle on. Once you turn it on: 1. Select whether to use **Passwordless** connection with certificates, which is like the SASL mechanism EXTERNAL. If turned on: 1. Select whether to **Reject Unauthorized Certificate**: If turned off, n8n will connect even if the certificate validation fails. 2. Add an SSL **Client Certificate**. 3. Add an SSL **Client Key** for the Client Certificate. 2. One or more SSL **CA Certificates**. Refer to your MQTT broker provider's documentation for more detailed configuration instructions. --- ## Page: https://docs.n8n.io/integrations/builtin/credentials/msg91/ You can use these credentials to authenticate the following nodes: * MSG91 ## Prerequisites# Create a MSG91 account. ## Supported authentication methods# * API key Refer to MSG91's API documentation for more information about the service. ## Using API key# To configure this credential, you'll need: * An **Authentication Key**: To get your Authentication Key, go to the user menu and select **Authkey**. Refer to MSG91's Where can I find my authentication key? documentation for more information. ## IP Security# MSG91 enables IP Security by default for authkeys. For the n8n credentials to function with this setting enabled, add all the n8n IP addresses as whitelisted IPs in MSG91. You can add them in one of two places, depending on your desired security level: * To allow any/all authkeys in the account to work with n8n, add the n8n IP addresses in the **Company's whitelisted IPs** section of the **Authkey** page. * To allow only specific authkeys to work with n8n, add the n8n IP addresses in the **Whitelisted IPs** section of an authkey's details. --- ## Page: https://docs.n8n.io/integrations/builtin/credentials/mysql/ You can use these credentials to authenticate the following nodes: * MySQL * Agent Agent node users The Agent node doesn't support SSH tunnels. ## Prerequisites# Create a user account on a MySQL server database. ## Supported authentication methods# * Database connection Refer to MySQL's documentation for more information about the service. ## Using database connection# To configure this credential, you'll need: * The server **Host**: The database's host name or IP address. * The **Database** name. * A **User** name. * A **Password** for that user. * The **Port** number used by the MySQL server. * **Connect Timeout**: The number of milliseconds during the initial database connection before a timeout occurs. * **SSL**: If your database is using SSL, turn this on and add details for the SSL certificate. * **SSH Tunnel**: Choose whether to connect over an SSH tunnel. An SSH tunnel lets un-encrypted traffic pass over an encrypted connection and enables authorized remote access to servers protected from outside connections by a firewall. To set up your database connection credential: 1. Enter your database's hostname as the **Host** in your n8n credential. Run this query to confirm the hostname: <table><tbody><tr><td><div><pre><span></span><span>1</span></pre></div></td><td><div><pre><span></span><code>SHOW VARIABLES WHERE Variable_name = 'hostname'; </code></pre></div></td></tr></tbody></table> 2. Enter your database's name as the **Database** in your n8n credential. Run this query to confirm the database name: <table><tbody><tr><td><div><pre><span></span><span>1</span></pre></div></td><td><div><pre><span></span><code>SHOW DATABASES; </code></pre></div></td></tr></tbody></table> 3. Enter the username of a **User** in the database. This user should have appropriate permissions for whatever actions you want n8n to perform. 4. Enter the **Password** for that user. 5. Enter the **Port** number used by the MySQL server (default is `3306`). Run this query to confirm the port number: <table><tbody><tr><td><div><pre><span></span><span>1</span></pre></div></td><td><div><pre><span></span><code>SHOW VARIABLES WHERE Variable_name = 'port'; </code></pre></div></td></tr></tbody></table> 6. Enter the **Connect Timeout** you'd like the node to use. The Connect Timeout is the number of milliseconds during the initial database connection the node should wait before timing out. n8n defaults to `1000` which is the default used by MySQL of 10 seconds. If you want to match your database's `connect_timeout`, run this query to get it, then multiply by 100 before entering it in n8n: <table><tbody><tr><td><div><pre><span></span><span>1</span></pre></div></td><td><div><pre><span></span><code>SHOW VARIABLES WHERE Variable_name = 'connect_timeout'; </code></pre></div></td></tr></tbody></table> 7. If your database uses SSL and you'd like to use **SSL** for the connection, turn this option on in the credential. If you turn it on, enter the information from your MySQL SSL certificate in these fields: 1. Enter the `ca.pem` file contents in the **CA Certificate** field. 2. Enter the `client-key.pem` file contents in the **Client Private Key** field. 3. Enter the `client-cert.pem` file contents in the **Client Certificate** field. 8. If you want to use **SSH Tunnel** for the connection, turn this option on in the credential. Otherwise, skip it. If you turn it on: 1. Select the **SSH Authenticate with** to set the SSH Tunnel type to build: * Select **Password** if you want to connect to SSH using a password. * Select **Private Key** if you want to connect to SSH using an identity file (private key) and a passphrase. 2. Enter the **SSH Host**. n8n uses this host to create the SSH URI formatted as: `[user@]host:port`. 3. Enter the **SSH Port**. n8n uses this port to create the SSH URI formatted as: `[user@]host:port`. 4. Enter the **SSH User** to connect with. n8n uses this user to create the SSH URI formatted as: `[user@]host:port`. 5. If you selected **Password** for **SSH Authenticate with**, add the **SSH Password**. 6. If you selected **Private Key** for **SSH Authenticate with**: 1. Add the contents of the **Private Key** or identity file used for SSH. This is the same as using the `ssh-identity-file` option with the `shell-connect()` command in MySQL. 2. If the **Private Key** was created with a passphrase, enter that **Passphrase**. This is the same as using the `ssh-identity-pass` option with the `shell-connect()` command in MySQL. If the **Private Key** has no passphrase, leave this field blank. Refer to MySQL | Creating SSL and RSA Certificates and Keys for more information on working with SSL certificates in MySQL. Refer to MySQL | Using an SSH Tunnel for more information on working with SSH tunnels in MySQL. --- ## Page: https://docs.n8n.io/integrations/builtin/credentials/nasa/ You can use these credentials to authenticate the following nodes: * NASA ## Supported authentication methods# * API key ## Related resources# Refer to the **Browse APIs** section of the NASA Open APIs for more information about the service. ## Using an API key# To configure this credential, you'll need: * An **API Key** To generate an API key: 1. Go to the NASA Open APIs page. 2. Complete the fields in the **Generate API Key** section. 3. Copy the **API Key** and enter it in your n8n credential. --- ## Page: https://docs.n8n.io/integrations/builtin/credentials/netlify/ You can use these credentials to authenticate the following nodes: * Netlify * Netlify Trigger ## Prerequisites# Create a Netlify account. ## Supported authentication methods# * API access token ## Related resources# Refer to Netlify's API documentation for more information about the service. ## Using API access token# To configure this credential, you'll need: * An **Access Token**: Generate an Access Token in **Applications > Personal Access Tokens**. Refer to Netlify API Authentication for more detailed instructions. --- ## Page: https://docs.n8n.io/integrations/builtin/credentials/netscaleradc/ You can use these credentials to authenticate the following nodes: * Netscaler ADC node ## Prerequisites# Install a NetScaler/Citrix ADC appliance. ## Supported authentication methods# * Basic auth Refer to Netscaler ADC's 14.1 NITRO API documentation for more information about the service. ## Using basic auth# To configure this credential, you'll need: * A **URL**: Enter the URL of your NetScaler/Citrix ADC instance. * A **Username**: Enter your NetScaler/Citrix ADC username. * A **Password**: Enter your NetScaler/Citrix ADC password. Refer to Performing Basic Netscaler ADC Operations for more information. --- ## Page: https://docs.n8n.io/integrations/builtin/credentials/nextcloud/ You can use these credentials to authenticate the following nodes: * Nextcloud ## Supported authentication methods# * Basic auth * OAuth2 Refer to Nextcloud's API documentation for more information about the service. Refer to Nextcloud's user manual for more information on installing and configuring Nextcloud. ## Using basic auth# To configure this credential, you'll need a Nextcloud account and: * Your **Web DAV URL** * Your **User** name * Your **Password** or an app password To set it up: 1. To create your **Web DAV URL**: If Nextcloud is in the root of your domain: Enter the URL you use to access Nextcloud and add `/remote.php/webdav/`. For example, if you access Nextcloud at `https://cloud.n8n.com`, your WebDAV URL is `https://cloud.n8n.com/remote.php/webdav`. * If you have Nextcloud installed in a subdirectory, enter the URL you use to access Nextcloud and add `/<subdirectory>/remote.php/webdav/`. Replace `<subdirectory>` with the subdirectory Nextcloud's installed in. * Refer to Nextcloud's Third-party WebDAV clients documentation for more information on constructing your WebDAV URL. 2. Enter your **User** name. 3. For the **Password**, Nextcloud recommends using an app password rather than your user password. To create an app password: 1. In the Nextcloud Web interface, select your avatar in the top right and select **Personal settings**. 2. In the left menu, choose **Security**. 3. Scroll to the bottom to the **App Password** section and create a new app password. 4. Copy that app password and enter it in n8n as your **Password**. ## Using OAuth2# To configure this credential, you'll need a Nextcloud account and: * An **Authorization URL** and **Access Token URL**: These depend on the URL you use to access Nextcloud. * A **Client ID**: Generated once you add an OAuth2 client application in **Administrator Security Settings**. * A **Client Secret**: Generated once you add an OAuth2 client application in **Administrator Security Settings**. * A **Web DAV URL**: This depends on the URL you use to access Nextcloud. To set it up: 1. In Nextcloud, open your **Administrator Security Settings**. 2. Find the **Add client** section under **OAuth 2.0 clients**. 3. Enter a **Name** for your client, like `n8n integration`. 4. Copy the **OAuth Callback URL** from n8n and enter it as the **Redirection URI**. 5. Then select **Add** in Nextcloud. 6. In n8n, update the **Authorization URL** to replace `https://nextcloud.example.com` with the URL you use to access Nextcloud. For example, if you access Nextcloud at `https://cloud.n8n.com`, the Authorization URL is `https://cloud.n8n.com/apps/oauth2/authorize`. 7. In n8n, update the **Access Token URL** to replace `https://nextcloud.example.com` with the URL you use to access Nextcloud. For example, if you access Nextcloud at `https://cloud.n8n.com`, the Access Token URL is `https://cloud.n8n.com/apps/oauth2/api/v1/token`. Pretty URL configuration The **Authorization URL** and **Access Token URL** assume that you've configured Nextcloud to use Pretty URLs. If you haven't, you must add `/index.php/` between your Nextcloud URL and the `/apps/oauth2` portion, for example: `https://cloud.n8n.com/index.php/apps/oauth2/api/v1/token`. 8. Copy the Nextcloud **Client Identifier** for your OAuth2 client and enter it as the **Client ID** in n8n. 9. Copy the Nextcloud **Secret** and enter it as the **Client Secret** in n8n. 10. In n8n, to create your **Web DAV URL**: If Nextcloud is in the root of your domain, enter the URL you use to access Nextcloud and add `/remote.php/webdav/`. For example, if you access Nextcloud at `https://cloud.n8n.com`, your WebDAV URL is `https://cloud.n8n.com/remote.php/webdav`. * If you have Nextcloud installed in a subdirectory, enter the URL you use to access Nextcloud and add `/<subdirectory>/remote.php/webdav/`. Replace `<subdirectory>` with the subdirectory Nextcloud's installed in. * Refer to Nextcloud's Third-party WebDAV clients documentation for more information on constructing your WebDAV URL. Refer to the Nextcloud OAuth2 Configuration documentation for more detailed instructions. --- ## Page: https://docs.n8n.io/integrations/builtin/credentials/nocodb/ You can use these credentials to authenticate the following nodes: * NocoDB ## Supported authentication methods# * API token (recommended) * User auth token User auth token deprecation NocoDB deprecated user auth tokens in v0.205.1. Use API tokens instead. Refer to NocoDB's API documentation for more information about the service. ## Using API token# To configure this credential, you'll need a NocoDB instance and: * An **API Token** * Your database **Host** To generate an API token: 1. Log into NocoDB and select the **User menu** in the bottom left sidebar. 2. Select **Account Settings**. 3. Open the **Tokens** tab. 4. Select **Add new API token**. 5. Enter a **Name** for your token, like `n8n integration`. 6. Select **Save**. 7. Copy the **API Token** and enter it in your n8n credential. 8. Enter the **Host** of your NocoDB instance in your n8n credential, for example `http://localhost:8080`. Refer to the NocoDB API Tokens documentation for more detailed instructions. ## Using user auth token# Before NocoDB deprecated it, user auth token was a temporary token designed for quick experiments with the API, valid for a session until the user logs out or for 10 hours. User auth token deprecation NocoDB deprecated user auth tokens in v0.205.1. Use API tokens instead. To configure this credential, you'll need a NocoDB instance and: * A **User Token** * Your database **Host** To generate a user auth token: 1. Log into NocoDB and select the **User menu** in the bottom left sidebar. 2. Select **Copy Auth token**. 3. Enter that auth token as the **User Token** in n8n. 4. Enter the **Host** of your NocoDB instance, for example `http://localhost:8080`. Refer to the NocoDB Auth Tokens documentation for more information. --- ## Page: https://docs.n8n.io/integrations/builtin/credentials/notion/ You can use these credentials to authenticate the following nodes: * Notion * Notion Trigger ## Prerequisites# Create a Notion account with admin level access. ## Supported authentication methods# * API integration token: Used for internal integrations. * OAuth2: Used for public integrations. Integration type Not sure which integration type to use? Refer to Internal vs. public integrations below for more information. Refer to Notion's API documentation for more information about the service. ## Using API integration token# To configure this credential, you'll need: * An **Internal Integration Secret**: Generated once you create a Notion integration. To generate an integration secret, create a Notion integration and grab the integration secret from the **Secrets** tab: 1. Go to your Notion integration dashboard. 2. Select the **\+ New integration** button. 3. Enter a **Name** for your integration, for example `n8n integration`. If desired, add a **Logo**. 4. Select **Submit** to create your integration. 5. Open the **Capabilities** tab. Select these capabilities: * `Read content` * `Update content` * `Insert content` * `User information without email addresses` 6. Be sure to **Save changes**. 7. Select the **Secrets** tab. 8. Copy the **Internal Integration Token** and add it as your n8n **Internal Integration Secret**. Refer to the Internal integration auth flow setup documentation for more information about authenticating to the service. For your integration to interact with Notion, you must give your integration page permission to interact with page(s) in your Notion workspace: 1. Visit the page in your Notion workspace. 2. Select the triple dot menu at the top right of a page. 3. In **Connections**, select **Connect to**. 4. Use the search bar to find and select your integration from the dropdown list. Once you share at least one page with the integration, you can start making API requests. If the page isn't shared, any API requests made will respond with an error. Refer to Integration permissions for more information. ## Using OAuth2# To configure this credential, you'll need: * A **Client ID**: Generated once you configure a public integration. * A **Client Secret**: Generated once you configure a public integration. You must create a Notion integration and set it to public distribution: 1. Go to your Notion integration dashboard. 2. Select the **\+ New integration** button. 3. Enter a **Name** for your integration, for example `n8n integration`. If desired, add a **Logo**. 4. Select **Submit** to create your integration. 5. Open the **Capabilities** tab. Select these capabilities: * `Read content` * `Update content` * `Insert content` * `User information without email addresses` 6. Select **Save changes**. 7. Go to the **Distribution** tab. 8. Turn on the **Do you want to make this integration public?** control. 9. Enter your company name and website in the **Organization Information** section. 10. Copy the n8n **OAuth Redirect URL** and add it to as a **Redirect URI** in the Notion integration's **OAuth Domain & URLs** section. 11. Go to the **Secrets** tab. 12. Copy the **Client ID** and **Client Secret** and add them to your n8n credential. Refer to Notion's public integration auth flow setup for more information about authenticating to the service. ## Internal vs. public integrations# **Internal** integrations are: * Specific to a single workspace. * Accessible only to members of that workspace. * Ideal for custom workspace enhancements. Internal integrations use a simpler authentication process (the integration secret) and don't require any security review before publishing. **Public** integrations are: * Usable across multiple, unrelated Notion workspaces. * Accessible by any Notion user, regardless of their workspace. * Ideal for catering to broad use cases. Public integrations use the OAuth 2.0 protocol for authentication. They require a Notion security review before publishing. For a more detailed breakdown of the two integration types, refer to Notion's Internal vs. Public Integrations documentation. --- ## Page: https://docs.n8n.io/integrations/builtin/credentials/npm/ You can use these credentials to authenticate the following nodes: * npm ## Prerequisites# Create an npm account. ## Supported authentication methods# * API access token Refer to npm's external integrations documentation for more information about the service. ## Using API access token# To configure this credential, you'll need: * An **Access Token**: Create an access token by selecting **Access Tokens** from your profile menu. Refer to npm's Creating and viewing access tokens documentation for more detailed instructions. * A **Registry URL**: If you're using a custom npm registry, update the **Registry URL** to that custom registry. Otherwise, keep the public registry value. --- ## Page: https://docs.n8n.io/integrations/builtin/credentials/odoo/ You can use these credentials to authenticate the following nodes: * Odoo ## Supported authentication methods# * API key (Recommended) * Password Refer to Odoo's External API documentation for more information about the service. Refer to the Odoo Getting Started tutorial if you're new to Odoo. ## Using API key# To configure this credential, you'll need a user account on an Odoo database and: * Your **Site URL** * Your **Username** * An **API key** * Your **Database name** To set up the credential with an API key: 1. Enter your Odoo server or site URL as the **Site URL**. 2. Enter your **Username** as it's displayed on your **Change password** screen in Odoo. 3. To use an API key, go to **Your Profile > Preferences > Account Security > Developer API Keys**. * If you don't have this option, you may need to upgrade your Odoo plan. Refer to Required plan type for more information. 4. Select **New API Key**. 5. Enter a **Description** for the key, like `n8n integration`. 6. Select **Generate Key**. 7. Copy the key and enter it as the **Password or API key** in your n8n credential. 8. Enter your Odoo **Database name**, also known as the instance name. Refer to Odoo API Keys for more information. ## Using password# To configure this credential, you'll need a user account on an Odoo database and: * Your **Site URL** * Your **Username** * Your **Password** * Your **Database name** To set up the credential with a password: 1. Enter your Odoo server or site URL as the **Site URL**. 2. Enter your **Username** as it's displayed on your **Change password** screen in Odoo. 3. To use a password, enter your user password in the **Password or API key** field. 4. Enter your Odoo **Database name**, also known as the instance name. Password compatibility If you try a password credential and it doesn't work for a specific node function, try switching to an API key. Odoo requires an API key for certain modules or based on certain settings. ## Required plan type# Required plan type Access to the external API is only available on a **Custom** Odoo plan. (The One App Free or Standard plans won't give you access.) Refer to Odoo Pricing Plans for more information. --- ## Page: https://docs.n8n.io/integrations/builtin/credentials/okta/ You can use these credentials to authenticate the following nodes: * Okta ## Prerequisites# Create an Okta free trial or create an admin account on an existing Okta org. ## Supported authentication methods# * SSWS API Access token Refer to Okta's documentation for more information about the service. ## Using SSWS API access token# To configure this credential, you'll need: * The **URL**: The base URL of your Okta org, also referred to as your unique subdomain. There are two quick ways to access it: 1. In the Admin Console, select your **Profile**, hover over the domain listed below your username, and select the **Copy** icon. Paste this into n8n, but be sure to add `https://` before it. 2. Copy the base URL of your Admin Console URL, for example `https://dev-123456-admin.okta.com`. Paste it into n8n and remove `-admin`, for example: `https://dev-123456.okta.com`. * An **SSWS Access Token**: Create a token by going to **Security > API > Tokens > Create token**. Refer to Create Okta API tokens for more information. --- ## Page: https://docs.n8n.io/integrations/builtin/credentials/ollama/ You can use these credentials to authenticate the following nodes: * Ollama * Chat Ollama * Embeddings Ollama ## Prerequisites# Create and run an Ollama instance with one user. Refer to the Ollama Quick Start for more information. ## Supported authentication methods# * Instance URL Refer to Ollama's API documentation for more information about the service. View n8n's Advanced AI documentation. ## Using instance URL# To configure this credential, you'll need: * The **Base URL** of your Ollama instance. The default **Base URL** is `http://localhost:11434`, but if you've set the `OLLAMA_HOST` environment variable, enter that value. If you have issues connecting to a local n8n server, try `127.0.0.1` instead of `localhost`. Refer to How do I configure Ollama server? for more information. ### Ollama and self-hosted n8n# If you're self-hosting n8n on the same machine as Ollama, you may run into issues if they're running in different containers. For this setup, open a specific port for n8n to communicate with Ollama by setting the `OLLAMA_ORIGINS` variable or adjusting `OLLAMA_HOST` to an address the other container can access. Refer to Ollama's How can I allow additional web origins to access Ollama? for more information. --- ## Page: https://docs.n8n.io/integrations/builtin/credentials/onesimpleapi/ You can use these credentials to authenticate the following nodes: * One Simple API ## Prerequisites# Create a One Simple API account. ## Supported authentication methods# * API token Refer to One Simple API's documentation for more information about the service. ## Using API token# To configure this credential, you'll need: * An **API token**: Create a new API token on the API Tokens page. Be sure you select appropriate permissions for the token. You can also access the API Tokens page by selecting your **Profile > API Tokens**. --- ## Page: https://docs.n8n.io/integrations/builtin/credentials/onfleet/ You can use these credentials to authenticate the following nodes: * Onfleet * Onfleet Trigger ## Prerequisites# Create an Onfleet administrator account. ## Supported authentication methods# * API key Refer to Onfleet's API documentation for more information about the service. ## Using API key# To configure this credential, you'll need: * An **API key**: To create an API key, log into your organization's administrator account. Select **Settings > API & Webhooks**, then select **+** to create a new key. Refer to Onfleet's Creating an API key documentation for more information. --- ## Page: https://docs.n8n.io/integrations/builtin/credentials/openai/ You can use these credentials to authenticate the following nodes: * OpenAI * Chat OpenAI * Embeddings OpenAI * LM OpenAI ## Prerequisites# Create an OpenAI account. ## Supported authentication methods# * API key Refer to OpenAI's API documentation for more information about the service. ## Using API key# To configure this credential, you'll need: * An **API Key** * An **Organization ID**: Required if you belong to multiple organizations; otherwise, leave this blank. To generate your API Key: 1. Login to your OpenAI account or create an account. 2. Open your API keys page. 3. Select **Create new secret key** to create an API key, optionally naming the key. 4. Copy your key and add it as the **API Key** in n8n. Refer to the API Quickstart Account Setup documentation for more information. To find your Organization ID: 1. Go to your Organization Settings page. 2. Copy your Organization ID and add it as the **Organization ID** in n8n. Refer to Setting up your organization for more information. Note that API requests made using an Organization ID will count toward the organization's subscription quota. --- ## Page: https://docs.n8n.io/integrations/builtin/credentials/opencti/ You can use these credentials to authenticate when using the HTTP Request node to make a Custom API call. ## Prerequisites# Create an OpenCTI developer account. ## Authentication methods# * API key Refer to OpenCTI's documentation for more information about the service. This is a credential-only node. Refer to Custom API operations to learn more. View example workflows and related content on n8n's website. ## Using API key# To configure this credential, you'll need: * An **API Key**: To get your API key, go to your **Profile > API access**. Refer to the OpenCTI Integrations Authentication documentation for more information. --- ## Page: https://docs.n8n.io/integrations/builtin/credentials/openrouter/ You can use these credentials to authenticate the following nodes: * Chat OpenRouter ## Prerequisites# Create a OpenRouter account. ## Supported authentication methods# * API key Refer to OpenRouter's API documentation for more information about the service. ## Using API key# To configure this credential, you'll need: * An **API Key** To generate your API Key: 1. Login to your OpenRouter account or create an account. 2. Open your API keys page. 3. Select **Create new secret key** to create an API key, optionally naming the key. 4. Copy your key and add it as the **API Key** in n8n. Refer to the OpenRouter Quick Start page for more information. --- ## Page: https://docs.n8n.io/integrations/builtin/credentials/openweathermap/ You can use these credentials to authenticate the following nodes: * OpenWeatherMap ## Supported authentication methods# * API access token Refer to OpenWeatherMap's API documentation for more information about the service. ## Using API access token# To configure this credential, you'll need an OpenWeatherMap account and: * An **Access Token** To get your **Access Token**: 1. After you verify your email address, OpenWeatherMap includes an **API Key** in your welcome email. 2. Copy that key and enter it in your n8n credential. If you'd prefer to create a new key: 1. To create a new key, go to **Account >** **API Keys**. 2. In the **Create Key** section, enter an **API Key Name**, like `n8n integration`. 3. Select **Generate** to generate your key. 4. Copy the generated key and enter it in your n8n credential. --- ## Page: https://docs.n8n.io/integrations/builtin/credentials/oura/ You can use these credentials to authenticate the following nodes: * Oura ## Prerequisites# Create an Oura account. ## Supported authentication methods# * API access token Refer to Oura's API documentation for more information about the service. ## Using API access token# To configure this credential, you'll need: * A **Personal Access Token**: To generate a personal access token, go to the Personal Access Tokens page and select **Create A New Personal Access Token**. Refer to How to Generate Personal Access Tokens for more information. --- ## Page: https://docs.n8n.io/integrations/builtin/credentials/paddle/ You can use these credentials to authenticate the following nodes: * Paddle ## Prerequisites# Create a Paddle account. ## Supported authentication methods# * API access token (Classic) Paddle Classic API This credential works with Paddle Classic's API. If you joined Paddle after August 2023, you're using the Paddle Billing API and this credential may not work for you. Refer to Paddle Classic's API documentation for more information about the service. ## Using API access token (Classic)# To configure this credential, you'll need: * A **Vendor Auth Code**: Created when you generate an API key. * A **Vendor ID**: Displayed when you generate an API key. * **Use Sandbox Environment API**: When turned on, nodes using this credential will hit the Sandbox API endpoint instead of the live API endpoint. To generate an auth code and view your Vendor ID, go to **Paddle > Developer Tools > Authentication > Generate Auth Code**. Select **Reveal Auth Code** to display the Auth Code. Refer to API Authentication for more information. --- ## Page: https://docs.n8n.io/integrations/builtin/credentials/pagerduty/ You can use these credentials to authenticate the following nodes: * PagerDuty ## Prerequisites# Create a PagerDuty account. ## Supported authentication methods# * API token * OAuth2 Refer to PagerDuty's API documentation for more information about the service. ## Using API token# To configure this credential, you'll need: * A general access **API Token**: To generate an API token, go to **Integrations > Developer Tools > API Access Keys > Create New API Key**. Refer to Generate a General Access REST API key for more information. ## Using OAuth2# Note for n8n Cloud users Cloud users don't need to provide connection details. Select **Connect my account** to connect through your browser. If you need to configure OAuth2 from scratch, register a new Pagerduty app. Use these settings for registering your app: * In the **Category** dropdown list, select **Infrastructure Automation**. * In the **Functionality** section, select **OAuth 2.0**. Once you **Save** your app, open the app details and edit your app configuration to use these settings: * Within the **OAuth 2.0** section, select **Add**. * Copy the **OAuth Callback URL** from n8n and paste it into the **Redirect URL** field. * Copy the **Client ID** and **Client Secret** from PagerDuty and add these to your n8n credentials. * Select **Read/Write** from the **Set Permission Scopes** dropdown list. Refer to the instructions in App functionality for more information on available functionality. Refer to the PagerDuty OAuth Functionality documentation for more information on the OAuth flow. --- ## Page: https://docs.n8n.io/integrations/builtin/credentials/paypal/ You can use these credentials to authenticate the following nodes: * PayPal * PayPal Trigger ## Prerequisites# Create a PayPal developer account. ## Supported authentication methods# * API client and secret Refer to Paypal's API documentation for more information about the service. ## Using API client and secret# To configure this credential, you'll need: * A **Client ID**: Generated when you create an app. * A **Secret**: Generated when you create an app. * An **Environment**: Select **Live** or **Sandbox**. To generate the **Client ID** and **Secret**, log in to your Paypal developer dashboard. Select **Apps & Credentials > Rest API apps > Create app**. Refer to Get client ID and client secret for more information. --- ## Page: https://docs.n8n.io/integrations/builtin/credentials/peekalink/ You can use these credentials to authenticate the following nodes: * Peekalink ## Prerequisites# Create a Peekalink account. ## Supported authentication methods# * API key ## Related resources# Refer to Peekalink's API documentation for more information about the service. ## Using API key# To configure this credential, you'll need: * An **API Key**: To get your API key, access your Peekalink dashboard and copy the key in the **Your API Key** section. Refer to Get your API key for more information. --- ## Page: https://docs.n8n.io/integrations/builtin/credentials/phantombuster/ You can use these credentials to authenticate the following nodes: * PhantomBuster ## Prerequisites# Create a PhantomBuster account. ## Supported authentication methods# * API key ## Related resources# Refer to PhantomBuster's API documentation for more information about the service. ## Using API key# To configure this credential, you'll need: * An **API Key**: To get an API key, go to **Workspace settings** **\> Third party API keys** and select **\+ Add API Key**. Refer to How to find my API key for more information. --- ## Page: https://docs.n8n.io/integrations/builtin/credentials/philipshue/ You can use these credentials to authenticate the following nodes: * Philips Hue ## Prerequisites# Create a Philips Hue account. ## Supported authentication methods# * OAuth2 Refer to Philips Hue's CLIP API documentation for more information about the service. ## Using OAuth2# Note for n8n Cloud users Cloud users don't need to provide connection details. Select **Connect my account** to connect through your browser. If you're using the built-in OAuth connection, you don't need to enter an **APP ID**. If you need to configure OAuth2 from scratch, you'll need a Philips Hue developer account Create a new remote app on the Add new Hue Remote API app page. Use these settings for your app: * Copy the **OAuth Callback URL** from n8n and add it as a **Callback URL**. * Copy the **AppId**, **ClientId**, and **ClientSecret** and enter these in the corresponding fields in n8n. --- ## Page: https://docs.n8n.io/integrations/builtin/credentials/pinecone/ You can use these credentials to authenticate the following nodes: * Pinecone Vector Store ## Supported authentication methods# * API key Refer to Pinecone's documentation for more information about the service. View n8n's Advanced AI documentation. ## Using API key# To configure this credential, you'll need a Pinecone account and: * An **API Key** To get an API key: 1. Open your Pinecone console. 2. Select the project you want to create an API key for. If you don't have any existing projects, create one. Refer to Pinecone's Quickstart for more information. 3. Go to **API Keys**. 4. Copy the API Key displayed there and enter it in your n8n credential. Refer to Pinecone's API Authentication documentation for more information. --- ## Page: https://docs.n8n.io/integrations/builtin/credentials/pipedrive/ You can use these credentials to authenticate the following nodes: * Pipedrive * Pipedrive Trigger ## Supported authentication methods# * API token * OAuth2 Refer to Pipedrive's developer documentation for more information about the service. ## Using API token# To configure this credential, you'll need a Pipedrive account and: * An **API Token** To get your API token: 1. Open your **API Personal Preferences**. 2. Copy **Your personal API token** and enter it in your n8n credential. If you have multiple companies, you'll need to select the correct company first: 1. Select your account name and be sure you're viewing the correct company. 2. Then select **Company Settings**. 3. Select **Personal Preferences**. 4. Select the **API** tab. 5. Copy **Your personal API token** and enter it in your n8n credential. Refer to How to find the API token for more information. ## Using OAuth2# To configure this credential, you'll need a Pipedrive developer sandbox account and: * A **Client ID** * A **Client Secret** To get both, you'll need to register a new app: 1. Select your profile name in the upper right corner. 2. Find the company name of your sandbox account and select **Developer Hub**. 3. Select **Create an app**. 4. Select **Create public app**. The app's **Basic info** tab opens. 5. Enter an **App name** for your app, like `n8n integration`. 6. Copy the **OAuth Redirect URL** from n8n and add it as the app's **Callback URL**. 7. Select **Save**. The app's **OAuth & access scopes** tab opens. 8. Turn on appropriate **Scopes** for your app. Refer to Pipedrive node scopes and Pipedrive Trigger node scopes below for more guidance. 9. Copy the **Client ID** and enter it in your n8n credential. 10. Copy the **Client Secret** and enter it in your n8n credential. Refer to Registering a public app for more information. ### Pipedrive node scopes# The scopes you add to your app depend on which node(s) you want to use it for in n8n and what actions you want to complete with those. Scopes you may need for the Pipedrive node: | **Object** | **Node action** | **UI scope** | **Actual scope** | | --- | --- | --- | --- | | Activity | Get data of an activity Get data of all activities | **Activities: Read only** or **Activities: Full Access** | `activities:read` or `activities:full` | | Activity | Create Delete Update | **Activities: Full Access** | `activities:full` | | Deal | Get data of a deal Get data of all deals Search a deal | **Deals: Read only** or **Deals: Full Access** | `deals:read` or `deals:full` | | Deal | Create Delete Duplicate Update | **Deals: Full Access** | `deals:full` | | Deal Activity | Get all activities of a deal | **Activities: Read only** or **Activities: Full Access** | `activities:read` or `activities:full` | | Deal Product | Get all products in a deal | **Products: Read Only** or **Products: Full Access** | `products:read` or `products:full` | | File | Download Get data of a file | Refer to note below | Refer to note below | | File | Create Delete | Refer to note below | Refer to note below | | Lead | Get data of a lead Get data of all leads | **Leads: Read only** or **Leads: Full access** | `leads:read` or `leads:full` | | Lead | Create Delete Update | **Leads: Full access** | `leads:full` | | Note | Get data of a note Get data of all notes | Refer to note below | Refer to note below | | Note | Create Delete Update | Refer to note below | Refer to note below | | Organization | Get data of an organization Get data of all organizations Search | **Contacts: Read Only** or **Contacts: Full Access** | `contacts:read` or `contacts:full` | | Organization | Create Delete Update | **Contacts: Full Access** | `contacts:full` | | Person | Get data of a person Get data of all persons Search | **Contacts: Read Only** or **Contacts: Full Access** | `contacts:read` or `contacts:full` | | Person | Create Delete Update | **Contacts: Full Access** | `contacts:full` | | Product | Get data of all products | **Products: Read Only** | `products:read` | Files and Notes The scopes for Files and Notes depend on which object they relate to: * Files relate to Deals, Activities, or Contacts. * Notes relate to Deals or Contacts. Refer to those objects' scopes. The Pipedrive node also supports Custom API calls. Add relevant scopes for whatever custom API calls you intend to make. Refer to Scopes and permissions explanations for more information. ### Pipedrive Trigger node scopes# The Pipedrive Trigger node requires the **Webhooks: Full access** (`webhooks:full`) scope. --- ## Page: https://docs.n8n.io/integrations/builtin/credentials/plivo/ You can use these credentials to authenticate the following nodes: * Plivo ## Prerequisites# Create a Plivo account. ## Supported authentication methods# * Basic auth Refer to Plivo's API documentation for more information about the service. ## Using basic auth# To configure this credential, you'll need: * An **Auth ID**: Acts like your username. Copy yours from the **Overview** page of the Plivo console. * An **Auth Token**: Acts like a password. Copy yours from the **Overview** page of the Plivo console. Refer to How can I change my Auth ID or Auth Token? for more detailed instructions. --- ## Page: https://docs.n8n.io/integrations/builtin/credentials/postgres/ You can use these credentials to authenticate the following nodes: * Postgres * Agent * Postgres Chat Memory * PGVector Vector Store Agent node users The Agent node doesn't support SSH tunnels. ## Prerequisites# Create a user account on a Postgres server. ## Supported authentication methods# * Database connection Refer to Postgres's documentation for more information about the service. ## Using database connection# To configure this credential, you'll need: * The **Host** or domain name for the server. * The **Database** name. * A **User** name. * A user **Password**. * **Ignore SSL Issues**: Set whether the credential connects if SSL validation fails. * **SSL**: Choose whether to use SSL in your connection. * The **Port** number to use for the connection. * **SSH Tunnel**: Choose if you want to use SSH to encrypt the network connection with the Postgres server. To set up the database connection: 1. Enter the **Host** or domain name for the Postgres server. You can either run the `/conninfo` command to confirm the host name or run this query: <table><tbody><tr><td><div><pre><span></span><span>1</span></pre></div></td><td><div><pre><span></span><code>SELECT inet_server_addr(); </code></pre></div></td></tr></tbody></table> 2. Enter the **Database** name. Run the `/conninfo` command to confirm the database name. 3. Enter the **User** name of the user you wish to connect as. 4. Enter the user's **Password**. 5. **Ignore SSL Issues**: If you turn this on, the credential will connect even if SSL validation fails. 6. **SSL**: Choose whether to use SSL in your connection. Refer to Postgres SSL Support for more information. Options include: * **Allow**: Sets the `ssl-mode` parameter to `allow`. First try a non-SSL connection; if that fails, try an SSL connection. * **Disable**: Sets the `ssl-mode` parameter to `disable`. Only try a non-SSL connection. * **Require**: Sets the `ssl-mode` parameter to `require`. Only try an SSL connection. If a root CA file is present, verify that a trusted certificate authority (CA) issued the server certificate. 7. Enter the **Port** number to use for the connection. You can either run the `/conninfo` command to confirm the host name or run this query: <table><tbody><tr><td><div><pre><span></span><span>1</span></pre></div></td><td><div><pre><span></span><code>SELECT inet_server_port(); </code></pre></div></td></tr></tbody></table> 8. **SSH Tunnel**: Turn this setting on to connect to the database over SSH. Refer to SSH tunnel limitations for some guidance around using SSH. Once turned on, you'll need: 1. Select **SSH Authenticate with** to set the SSH Tunnel type to build: * Select **Password** if you want to connect to SSH using a password. * Select **Private Key** if you want to connect to SSH using an identity file (private key) and a passphrase. 2. Enter the remote bind address you're connecting to as the **SSH Host**. 3. **SSH Port**: Enter the local port number for the SSH tunnel. 4. **SSH Postgres Port**: Enter the remote end of the tunnel, the port number the database server is using. 5. **SSH User**: Enter the username to log in as. 6. If you selected **Password** for SSH Authenticate with, add the user's **SSH Password**. 7. If you selected **Private Key** for **SSH Authenticate with**: 1. Add the contents of the **Private Key** or identity file used for SSH. 2. If the **Private Key** was created with a passphrase, enter that **Passphrase**. If the **Private Ke**y has no passphrase, leave this field blank. Refer to Secure TCP/IP Connections with SSH Tunnels for more information. ### SSH tunnel limitations# Only use the **SSH Tunnel** setting if: * You're using the credential with the Postgres node (Agent node doesn't support SSH tunnels). * You have an SSH server running on the same machine as the Postgres server. * You have a user account that can log in using `ssh`. --- ## Page: https://docs.n8n.io/integrations/builtin/credentials/posthog/ You can use these credentials to authenticate the following nodes: * PostHog ## Prerequisites# Create a PostHog account or host PostHog on your server. ## Supported authentication methods# * API key Refer to PostHog's API documentation for more information about the service. ## Using API key# To configure this credential, you'll need: * The API **URL**: Enter the correct domain for your API requests: * On US Cloud, use `https://us.i.posthog.com` for public POST-only endpoints or `https://us.posthog.com` for private endpoints. * On EU Cloud, use `https://eu.i.posthog.com` for public POST-only endpoints or `https://eu.posthog.com` for private endpoints. * For self-hosted instances, use your self-hosted domain. * Confirm yours by checking your PostHog instance URL. * An **API Key**: The API key you use depends on whether you're accessing public or private endpoints: * For public POST-only endpoints, use a Project API key from your project's **General** Settings. * For private endpoints, use a Personal API key from your User account's **Personal API Keys** Settings. Refer to How to obtain a personal API key for more information. --- ## Page: https://docs.n8n.io/integrations/builtin/credentials/postmark/ You can use these credentials to authenticate the following nodes: * Postmark Trigger ## Prerequisites# Create a Postmark account on a Postmark server. ## Supported authentication methods# * API token Refer to Postmark's API documentation for more information about the service. ## Using API token# To configure this credential, you'll need: * A **Server API Token**: The Server API token is accessible by Account Owners, Account Admins, and users who have Server Admin privileges on a server. Get yours from the **API Tokens** tab under your Postmark server. Refer to API Authentication for more information. --- ## Page: https://docs.n8n.io/integrations/builtin/credentials/profitwell/ You can use these credentials to authenticate the following nodes: * ProfitWell ## Prerequisites# Create a ProfitWell account. ## Supported authentication methods# * API token ## Related resources# Refer to Profitwell's API documentation for more information about the service. ## Using API token# To configure this credential, you'll need: * An **API Token**: To get an API key or token, go to **Account Settings > Integrations** and select **ProfitWell API**. --- ## Page: https://docs.n8n.io/integrations/builtin/credentials/pushbullet/ You can use these credentials to authenticate the following nodes: * Pushbullet ## Prerequisites# Create a Pushbullet account. ## Supported authentication methods# * OAuth2 Refer to Pushbullet's API documentation for more information about the service. ## Using OAuth2# To configure this credential, you'll need: * A **Client ID**: Generated when you create a Pushbullet app, also known as an OAuth client. * A **Client Secret**: Generated when you create a Pushbullet app, also known as an OAuth client. To generate the **Client ID** and **Client Secret**, go to the create client page. Copy the **OAuth Redirect URL** from n8n and add this as your **redirect\_uri** for the app/client. Use the **client\_id** and **client\_secret** from the OAuth Client in your n8n credential. Refer to Pushbullet's OAuth2 Guide for more information. Pushbullet OAuth test link Pushbullet offers a test link during the client creation process described above. This link isn't compatible with n8n. To verify the authentication works, use the **Connect my account** button in n8n. --- ## Page: https://docs.n8n.io/integrations/builtin/credentials/pushcut/ You can use these credentials to authenticate the following nodes: * Pushcut * Pushcut Trigger ## Prerequisites# Download the Pushcut app. ## Supported authentication methods# * API key ## Related resources# Refer to Pushcut's Guides documentation for more information about the service. ## Using API key# To configure this credential, you'll need: * An **API Key**: To generate an API key, go to **Account > Integrations > Add API Key**. Refer to Create an API key for more information. --- ## Page: https://docs.n8n.io/integrations/builtin/credentials/pushover/ You can use these credentials to authenticate the following nodes: * Pushover ## Prerequisites# Create a Pushover account. ## Supported authentication methods# * API key ## Related resources# Refer to Pushover's API documentation for more information about authenticating with the service. ## Using API Key# To configure this credential, you'll need: * An **API Key**: Generated when you register an application. Refer to Application Registration for more information. --- ## Page: https://docs.n8n.io/integrations/builtin/credentials/qradar/ You can use these credentials to authenticate when using the HTTP Request node to make a Custom API call. ## Prerequisites# Create a Qradar account. ## Supported authentication methods# * API key Refer to QRadar's documentation for more information about the service. This is a credential-only node. Refer to Custom API operations to learn more. View example workflows and related content on n8n's website. ## Using API key# To configure this credential, you'll need: * An **API Key**: Also known as an authorized service token. Use the **Manage Authorized Services** window on the **Admin** tab to create an authentication token. Refer to Creating an authentication token for more information. --- ## Page: https://docs.n8n.io/integrations/builtin/credentials/qdrant/ You can use these credentials to authenticate the following nodes: * Qdrant Vector Store ## Supported authentication methods# * API key Refer to Qdrant's documentation for more information. View n8n's Advanced AI documentation. ## Using API key# To configure this credential, you'll need a Qdrant cluster and: * An **API Key** * Your **Qdrant URL** To set it up: 1. Go to the Cloud Dashboard. 2. Select **Access Management** to display available API keys (or go to the **API Keys** section of the **Cluster detail** page). 3. Select **Create**. 4. Select the cluster you want the key to have access to in the dropdown. 5. Select **OK**. 6. Copy the API Key and enter it in your n8n credential. 7. Enter the URL for your Qdrant cluster in the **Qdrant URL**. Refer to Qdrant Web UI for more information. Refer to Qdrant's authentication documentation for more information on creating and using API keys. --- ## Page: https://docs.n8n.io/integrations/builtin/credentials/qualys/ You can use these credentials to authenticate when using the HTTP Request node to make a Custom API call. ## Prerequisites# Create a Qualys user account with any user role except Contact. ## Supported authentication methods# * Basic auth Refer to Qualys's documentation for more information about the service. This is a credential-only node. Refer to Custom API operations to learn more. View example workflows and related content on n8n's website. ## Using basic auth# To configure this credential, you'll need: * A **Username** * A **Password** * A **Requested With** string: Enter a user description, like a user agent, or keep the default `n8n application`. This sets the required `X-Requested-With` header. --- ## Page: https://docs.n8n.io/integrations/builtin/credentials/questdb/ You can use these credentials to authenticate the following nodes: * QuestDB ## Prerequisites# Create a user account on an instance of QuestDB. ## Supported authentication methods# * Database connection Refer to QuestDB's documentation for more information about the service. ## Using database connection# To configure this credential, you'll need: * The **Host**: Enter the host name or IP address for the server. * The **Database**: Enter the database name, for example `qdb`. * A **User**: Enter the username for the user account as configured in `pg.user` or `pg.readonly.user` property in `server.conf`. Default value is `admin`. * A **Password**: Enter the password for the user account as configured in `pg.password` or `pg.readonly.password` property in `server.conf`. Default value is `quest`. * **SSL**: Select whether the connection should use SSL, which sets the `sslmode` parameter. Options include: * **Allow** * **Disable** * **Require** * The **Port**: Enter the port number to use for the connection. Default is `8812`. Refer to List of supported connection properties for more information. --- ## Page: https://docs.n8n.io/integrations/builtin/credentials/quickbase/ You can use these credentials to authenticate the following nodes: * Quick Base ## Prerequisites# Create a Quick Base account. ## Supported authentication methods# * API key Refer to Quick Base's API documentation for more information about the service. ## Using API key# To configure this credential, you'll need: * A **Hostname**: The string of characters located between `https://` and `/db` in your Quick Base URL. * A **User Token**: To generate a token, select your **Profile > My preferences > My User Information > Manage my user tokens**. Refer to Creating and using user tokens for detailed instructions. --- ## Page: https://docs.n8n.io/integrations/builtin/credentials/quickbooks/ You can use these credentials to authenticate the following nodes: * QuickBooks ## Prerequisites# Create an Intuit developer account. ## Supported authentication methods# * OAuth2 Refer to Intuit's API documentation for more information about the service. ## Using OAuth2# To configure this credential, you'll need: * A **Client ID**: Generated when you create an app. * A **Client Secret**: Generated when you create an app. * An **Environment**: Select whether this credential should access your **Production** or **Sandbox** environment. To generate your **Client ID** and **Client Secret**, create an app. Use these settings when creating your app: * Select appropriate scopes for your app. Refer to Learn about scopes for more information. * Enter the **OAuth Redirect URL** from n8n as a **Redirect URI** in the app's **Development > Keys & OAuth** section. * Copy the **Client ID** and **Client Secret** from the app's **Development > Keys & OAuth** section to enter in n8n. Refer to Get the Client ID and Client Secret for your app for more information. Refer to Intuit's Set up OAuth 2.0 documentation for more information on the entire process. Environment selection If you're creating a new app from scratch, start with the **Sandbox** environment. Production apps need to fulfill all Intuit's requirements. Refer to Intuit's Publish your app documentation for more information. --- ## Page: https://docs.n8n.io/integrations/builtin/credentials/rabbitmq/ You can use these credentials to authenticate the following nodes: * RabbitMQ * RabbitMQ Trigger ## Supported authentication methods# * User connection Refer to RabbitMQ's Connections documentation for more information about the service. ## Using user connection# To configure this credential, you'll need to have a RabbitMQ broker installed and: 1. Enter the **Hostname** for the RabbitMQ broker. 2. Enter the **Port** the connection should use. 3. Enter a **User** the connection should use to log in as. * The default is `guest`. RabbitMQ recommends using a different user in production environments. Refer to Access Control | The Basics for more information. If you're using the `guest` account with a non-localhost connection, refer to `guest` user issues below for troubleshooting tips. 4. Enter the user's **Password**. * The default password for the `guest` user is `guest`. 5. Enter the virtual host the connection should use as the **Vhost**. The default virtual host is `/`. 6. Select whether the connection should use **SSL**. If turned on, also set: * **Passwordless**: Select whether the SSL certificate connection users SASL mechanism EXTERNAL (turned off) or doesn't use a password (turned on). If turned on, you'll also need to enter: * The **Client Certificate**: Paste the text of the SSL client certificate to use. * The **Client Key**: Paste the SSL client key to use. * The **Passphrase**: Paste the SSL passphrase to use. * **CA Certificates**: Paste the text of the SSL CA certificates to use. ## guest user issues# If you use the `guest` user for the credential and you try to access a remote host, you may see a connection error. The RabbitMQ logs show an error like this: <table><tbody><tr><td><div><pre><span></span><span>1</span></pre></div></td><td><div><pre><span></span><code>[error] <0.918.0> PLAIN login refused: user 'guest' can only connect via localhost </code></pre></div></td></tr></tbody></table> This happens because RabbitMQ prohibits the default `guest` user from connecting from remote hosts. It can only connect over the `localhost`. To resolve this error, you can: * Update the `guest` user to allow it remote host access. * Create or use a different user to connect to the remote host. The `guest` user is the only user limited by default. Refer to "guest" user can only connect from localhost for more information. --- ## Page: https://docs.n8n.io/integrations/builtin/credentials/raindrop/ You can use these credentials to authenticate the following nodes: * Raindrop ## Prerequisites# Create a Raindrop account. ## Supported authentication methods# * OAuth2 Refer to Raindrop's API documentation for more information about the service. ## Using OAuth# To configure this credential, you'll need: * A **Client ID** * A **Client Secret** Generate both by creating a Raindrop app. To create an app, go to **Settings >** **Integrations** and select **\+ Create new app** in the **For Developers** section. Use these settings for your app: * Copy the **OAuth Redirect URL** from n8n and add it as a **Redirect URI** in your app. * Copy the **Client ID** and **Client Secret** from the Raindrop app and enter them in your n8n credential. --- ## Page: https://docs.n8n.io/integrations/builtin/credentials/rapid7insightvm/ You can use these credentials to authenticate when using the HTTP Request node to make a Custom API call. ## Prerequisites# Create a Rapid7 InsightVM account. ## Supported authentication methods# * API key Refer to Rapid7 InsightVM's API documentation for more information about the service. This is a credential-only node. Refer to Custom API operations to learn more. View example workflows and related content on n8n's website. ## Using API key# To configure this credential, you'll need a Rapid7 InsightVM account and: * A **URL**: The API endpoint URL where the resource or data you are requesting lives. You can find more information about the expected format in the endpoint section of the Rapid7's API overview. * An **API Key**: Refer to Rapid7's Managing Platform API Keys documentation to create an API key. Refer to Rapid7 InsightVM's API documentation for more information about authenticating to the service. --- ## Page: https://docs.n8n.io/integrations/builtin/credentials/recordedfuture/ You can use these credentials to authenticate when using the HTTP Request node to make a Custom API call. ## Prerequisites# Create a Recorded Future account. ## Supported authentication methods# * API access token Refer to Recorded Future's documentation for more information about the service. The rest of Recorded Future's help center requires a paid account. This is a credential-only node. Refer to Custom API operations to learn more. View example workflows and related content on n8n's website. ## Using API access token# To configure this credential, you'll need: * An API **Access Token** Refer to the Recorded Future APIs documentation for more information on getting your API access token. --- ## Page: https://docs.n8n.io/integrations/builtin/credentials/reddit/ You can use these credentials to authenticate the following nodes: * Reddit ## Prerequisites# Create a Reddit account. ## Supported authentication methods# * OAuth2 Refer to Reddit's developer documentation for more information about the service. ## Using OAuth2# To configure this credential, you'll need: * A **Client ID** * A **Client Secret** Developer program Reddit's developer program is in a closed beta. The instructions below are for regular Reddit users, not members of the developer platform. Generate both by creating a third-party app. Visit the previous link or go to your **profile > Settings > Safety & Privacy > Manage third-party app authorization > are you a developer? create an app**. Use these settings for your app: * Copy the **OAuth Callback URL** from n8n and use it as your app's **redirect uri**. * The app's client ID displays underneath your app name. Copy that and add it as your n8n **Client ID**. * Copy the app's **secret** and add it as your n8n **Client Secret**. --- ## Page: https://docs.n8n.io/integrations/builtin/credentials/redis/ You can use these credentials to authenticate the following nodes: * Redis * Redis Chat Memory ## Supported authentication methods# * Database connection Refer to Redis's developer documentation for more information about the service. ## Using database connection# You'll need a user account on a Redis server and: * A **Password** * The **Host** name * The **Port** number * A **Database Number** * **SSL** To configure this credential: 1. Enter your user account **Password**. 2. Enter the **Host** name of the Redis server. The default is `localhost`. 3. Enter the **Port** number the connection should use. The default is `6379`. * This number should match the `tcp_port` listed when you run the `INFO` command. 4. Enter the **Database Number**. The default is `0`. 5. If the connection should use SSL, turn on the **SSL** toggle. If this toggle is off, the connection uses TCP only. Refer to Connecting to Redis | Generic client for more information. --- ## Page: https://docs.n8n.io/integrations/builtin/credentials/rocketchat/ You can use these credentials to authenticate the following nodes: * Rocket.Chat ## Prerequisites# * Create a Rocket.Chat account. * Your account must have the `create-personal-access-tokens` permission to generate personal access tokens. ## Supported authentication methods# * API access token Refer to Rocket.Chat's API documentation for more information about the service. ## Using API access token# To configure this credential, you'll need: * Your **User ID**: Displayed when you generate an access token. * An **Auth Key**: Your personal access token. To generate an access token, go to your **avatar > Account > Personal Access Tokens**. Copy the token and add it as the n8n **Auth Key**. * Your Rocket.Chat **Domain**: Also known as your default URL or workspace URL. Refer to Personal Access Tokens for more information. --- ## Page: https://docs.n8n.io/integrations/builtin/credentials/rundeck/ You can use these credentials to authenticate the following nodes: * Rundeck ## Prerequisites# Create a user account on a Rundeck server. ## Supported authentication methods# * API token Refer to Rundeck's API documentation for more information about the service. ## Using API token# To configure this credential, you'll need: * Your **URL**: Enter the base URL of your Rundeck server, for example `http://myserver:4440`. Refer to URLs for more information. * A user API **Token**: To generate a user API token, go to your **Profile > User API Tokens**. Refer to User API tokens for more information. --- ## Page: https://docs.n8n.io/integrations/builtin/credentials/s3/ You can use these credentials to authenticate the following nodes: * S3 ## Prerequisites# Create an account on an S3-compatible server. Use the S3 node for generic or non-AWS S3 like: * DigitalOcean Spaces * MinIO * Wasabi ## Supported authentication methods# * S3 endpoint Refer to your S3-compatible provider's documentation for more information on the services. For example, refer to Wasabi's REST API documentation or DigitalOcean's Spaces API Reference Documentation. ## Using S3 endpoint# To configure this credential, you'll need: * An **S3 Endpoint**: Enter the URL endpoint for the S3 storage backend. * A **Region**: Enter the region for your S3 storage. Some providers call this the "region slug." * An **Access Key ID**: Enter the S3 access key your S3 provider uses to access the bucket or space. Some providers call this API keys. * A **Secret Access Key**: Enter the secret access key for the **Access Key ID**. * **Force Path Style**: When turned on, the connection uses path-style addressing for buckets. * **Ignore SSL Issues**: When turned on, n8n will connect even if SSL certificate validation fails. More detailed instructions for DigitalOcean Spaces and Wasabi follow. If you're using a different provider, refer to their documentation for more information. ### Using DigitalOcean Spaces# To configure the credential for use with DigitalOcean spaces: 1. In DigitalOceans, go to the control panel and open **Settings**. Your endpoint should be listed there. Prepend `https://` to that endpoint and enter it as the **S3 Endpoint** in n8n. * Your DigitalOceans endpoint depends on the data center region your bucket's in. 2. For the **Region**, enter the region your bucket's located in, for example, `nyc3`. * If you plan to use this credential to create new Spaces, enter `us-east-1` instead. 3. From your DigitalOceans control panel, go to **API**. 4. Open the **Spaces Keys** tab. 5. Select **Generate New Key**. 6. Enter a **Name** for your key, like `n8n integration` and select the checkmark. 7. Copy the **Key** displayed next to the name and enter this as the **Access Key ID** in n8n. 8. Copy the **Secret** value and enter this as the **Secret Access Key** in n8n. * Refer to Sharing Access to Buckets with Access Keys for more information on generating the key and secret. 9. Keep the **Force Path Style** toggle turned off unless you want to use subdomain/virtual calling format. 10. Decide how you want the n8n credential to handle SSL: * To respect SSL certificate validation, keep the default of **Ignore SSL Issues** turned off. * To connect even if SSL certificate validation fails, turn on **Ignore SSL Issues**. Refer to DigitalOcean's Spaces API Reference Documentation for more information. ### Using Wasabi# To configure the credential for use with Wasabi: 1. For the **S3 Endpoint**, enter the service URL for your bucket's region. Start it with `https://`. * Refer to What are the service URLs for Wasabi's different storage regions? to identify the correct URL. 2. For the **Region**, enter the region slug portion of the service URL. For example, if you entered `https://s3.us-east-2.wasabisys.com` as the **S3 Endpoint**, `us-east-2` is the region. 3. Log into you Wasabi Console as the root user. 4. Open the **Menu** and select **Access Keys**. 5. Select **CREATE NEW ACCESS KEY**. 6. Select whether the key is for the **Root User** or a **Sub-User** and select **CREATE**. 7. Copy the **Access Key** and enter it in n8n as the **Access Key ID**. 8. Copy the **Secret Key** and enter it in n8n as the **Secret Access Key**. * Refer to Creating a Wasabi API Access Key Set for more information on generating the key and secret. 9. Wasabi recommends turning on the **Force Path Style** toggle "because the path-style offers the greatest flexibility in bucket names, avoiding domain name issues." Refer to the Wasabi REST API Introduction for more information. 10. Decide how you want the n8n credential to handle SSL: * To respect SSL certificate validation, keep the default of **Ignore SSL Issues** turned off. * To connect even if SSL certificate validation fails, turn on **Ignore SSL Issues**. --- ## Page: https://docs.n8n.io/integrations/builtin/credentials/salesforce/ You can use these credentials to authenticate the following nodes: * Salesforce * Salesforce trigger ## Supported authentication methods# * JWT * OAuth2 Refer to Salesforce's developer documentation for more information about the service. ## Using JWT# To configure this credential, you'll need a Salesforce account and: * Your **Environment Type** (Production or Sandbox) * A **Client ID**: Generated when you create a connected app. * Your Salesforce **Username** * A **Private Key** for a self-signed digital certificate To set things up, first you'll create a private key and certificate, then a connected app: 1. In n8n, select the **Environment Type** for your connection. Choose the option that best describes your environment from **Production** or **Sandbox**. 2. Enter your Salesforce **Username**. 3. Log in to your org in Salesforce. 4. You'll need a private key and certificate issued by a certification authority. Use your own key/cert or use OpenSSL to create a key and a self-signed digital certificate. Refer to the Salesforce Create a Private Key and Self-Signed Digital Certificate documentation for instructions on creating your own key and certificate. 5. From **Setup** in Salesforce, enter `App Manager` in the Quick Find box, then select **App Manager**. 6. On the App Manager page, select **New Connected App**. 7. Enter the required **Basic Info** for your connected app, including a **Name** and **Contact Email address**. Refer to Salesforce's Configure Basic Connected App Settings documentation for more information. 8. Check the box to **Enable OAuth Settings**. 9. For the **Callback URL**, enter `http://localhost:1717/OauthRedirect`. 10. Check the box to **Use digital signatures**. 11. Select **Choose File** and upload the file that contains your digital certificate, such as `server.crt`. 12. Add these **OAuth scopes**: * **Full access (full)** * **Perform requests at any time (refresh\_token, offline\_access)** 13. Select **Save**, then **Continue**. The **Manage Connected Apps** page should open to the app you just created. 14. In the **API (Enable OAuth Settings)** section, select **Manage Consumer Details**. 15. Copy the **Consumer Key** and add it to your n8n credential as the **Client ID**. 16. Enter the contents of the private key file in n8n as **Private Key**. * Use the multi-line editor in n8n. * Enter the private key in standard PEM key format: <table><tbody><tr><td><div><pre><span></span><span>1</span> <span>2</span> <span>3</span></pre></div></td><td><div><pre><span></span><code>-----BEGIN PRIVATE KEY----- KEY DATA GOES HERE -----END PRIVATE KEY----- </code></pre></div></td></tr></tbody></table> These steps are what's required on the n8n side. Salesforce recommends setting refresh token policies, session policies, and OAuth policies too: 14. In Salesforce, select **Back to Manage Connected Apps**. 15. Select **Manage**. 16. Select **Edit Policies**. 17. Review the **Refresh Token Policy** field. Salesforce recommends using expire refresh token after 90 days. 18. In the **Session Policies** section, Salesforce recommends setting **Timeout Value** to 15 minutes. 19. In the **OAuth Policies** section, select **Admin approved users are pre-authorized for permitted users** for **Permitted Users**, and select **OK**. 20. Select **Save**. 21. Select **Manage Profiles**, select the profiles that are pre-authorized to use this connected app, and select **Save**. 22. Select **Manage Permission Sets** to select the permission sets. Create permission sets if necessary. Refer to Salesforce's Create a Connected App in Your Org documentation for more information. ## Using OAuth2# To configure this credential, you'll need a Salesforce account. Note for n8n Cloud users Cloud users don't need to provide connection details. Select **Connect my account** to connect through your browser. Cloud and hosted users will need to select your **Environment Type**. Choose between **Production** and **Sandbox**. If you're self-hosting n8n, you'll need to configure OAuth2 from scratch by creating a connected app: 1. In n8n, select the **Environment Type** for your connection. Choose the option that best describes your environment from **Production** or **Sandbox**. 2. Enter your Salesforce **Username**. 3. Log in to your org in Salesforce. 4. From **Setup** in Salesforce, enter `App Manager` in the Quick Find box, then select **App Manager**. 5. On the App Manager page, select **New Connected App**. 6. Enter the required **Basic Info** for your connected app, including a **Name** and **Contact Email address**. Refer to Salesforce's Configure Basic Connected App Settings documentation for more information. 7. Check the box to **Enable OAuth Settings**. 8. For the **Callback URL**, enter `http://localhost:1717/OauthRedirect`. 9. Add these **OAuth scopes**: * **Full access (full)** * **Perform requests at any time (refresh\_token, offline\_access)** 10. Make sure the following settings are unchecked: * **Require Proof Key for Code Exchange (PKCE) Extension for Supported Authorization Flows** * **Require Secret for Web Server Flow** * **Require Secret for Refresh Token Flow** 11. Select **Save**, then **Continue**. The **Manage Connected Apps** page should open to the app you just created. 12. In the **API (Enable OAuth Settings)** section, select **Manage Consumer Details**. 13. Copy the **Consumer Key** and add it to your n8n credential as the **Client ID**. 14. Copy the **Consumer Secret** and add it to your n8n credential as the **Client Secret**. These steps are what's required on the n8n side. Salesforce recommends setting refresh token policies and session policies, too: 14. In Salesforce, select **Back to Manage Connected Apps**. 15. Select **Manage**. 16. Select **Edit Policies**. 17. Review the **Refresh Token Policy** field. Salesforce recommends using expire refresh token after 90 days. 18. In the **Session Policies** section, Salesforce recommends setting **Timeout Value** to 15 minutes. Refer to Salesforce's Create a Connected App in Your Org documentation for more information. --- ## Page: https://docs.n8n.io/integrations/builtin/credentials/salesmate/ You can use these credentials to authenticate the following nodes: * Salesmate ## Prerequisites# Create a Salesmate account. ## Supported authentication methods# * API token Refer to Salesmate's API documentation for more information about the service. ## Using API token# To configure this credential, you'll need: * A **Session Token**: An **Access Key**. Generate an access key in **My Account > Access Key**. Refer to Access Rights and Keys for more information. * A **URL**: Your Salesmate domain name/base URL, for example `n8n.salesmate.io`. --- ## Page: https://docs.n8n.io/integrations/builtin/credentials/seatable/ You can use these credentials to authenticate the following nodes: * SeaTable * SeaTable Trigger ## Prerequisites# Create a SeaTable account on either a cloud or self-hosted SeaTable server. ## Supported authentication methods# * API key Refer to SeaTable's API documentation for more information about the service. ## Using API key# To configure this credential, you'll need: * An **Environment**: Select the environment that matches your SeaTable instance: * **Cloud-Hosted** * **Self-Hosted** * An **API Token (of a Base)**: Generate a **Base-Token** in SeaTable from the base options > **Advanced > API Token**. * Use **Read-Write** permission for your token. * Refer to Creating an API token for more information. * A **Timezone**: Select the timezone of your SeaTable server. --- ## Page: https://docs.n8n.io/integrations/builtin/credentials/securityscorecard/ You can use these credentials to authenticate the following nodes: * SecurityScorecard ## Prerequisites# Create a SecurityScorecard account. ## Supported authentication methods# * API key Refer to SecurityScorecard's Developer documentation and API documentation for more information about the service. ## Using API key# To configure this credential, you'll need: * An **API Key**: Generate an API key in one of two ways: * As a user in **My Settings > API**. Refer to Get an API key for more information. * As a bot user: View the bot user and select **create token**. Refer to Authenticate with a bot user for more information. --- ## Page: https://docs.n8n.io/integrations/builtin/credentials/segment/ You can use these credentials to authenticate the following nodes: * Segment ## Prerequisites# Create a Segment account. ## Supported authentication methods# * API key ## Related resources# Refer to Segment's Sources documentation for more information about the service. ## Using API key# To configure this credential, you'll need: * A **Write Key**: To get a Write Key, go to **Sources > Add Source**. Add a **Node.js** source and copy that write key to add to your n8n credential. Refer to Locate your Write Key for more information. --- ## Page: https://docs.n8n.io/integrations/builtin/credentials/sekoia/ You can use these credentials to authenticate when using the HTTP Request node to make a Custom API call. ## Prerequisites# Create a Sekoia SOC platform account. ## Supported authentication methods# * API key Refer to Sekoia's documentation for more information about the service. This is a credential-only node. Refer to Custom API operations to learn more. View example workflows and related content on n8n's website. ## Using API key# To configure this credential, you'll need: * An **API Key**: To generate an API key, select **\+ API Key**. Refer to Create an API key for more information. --- ## Page: https://docs.n8n.io/integrations/builtin/credentials/sendemail/ You can use these credentials to authenticate the following nodes: * Send Email ## Prerequisites# * Create an email account on a service that supports SMTP. * Some email providers require that you enable or set up outgoing SMTP or generate an app password. Refer to your provider's documentation to see if there are other required steps. ## Supported authentication methods# * SMTP account Simple Message Transfer Protocol (SMTP) is a standard protocol for sending and receiving email. Most email providers offer instructions on setting up their service with SMTP. Refer to your provider's SMTP instructions. ## Using SMTP account# To configure this credential, you'll need: * A **User** email address * A **Password**: This may be the user's password or an app password. Refer to the documentation for your email provider. * The **Host**: The SMTP host address for your email provider, often formatted as `smtp.<provider>.com`. Check with your provider. * A **Port** number: The default is port `465`, commonly used for SSL. Other common ports are `587` for TLS or `25` for no encryption. Check with your provider. * **SSL/TLS**: When turned on, SMTP will use SSL/TLS. * **Disable STARTTLS**: When SSL/TLS is disabled, the SMTP server can still try to upgrade the TCP connection using STARTTLS. Turning this on prevents that behaviour. * **Client Host Name**: If needed by your provider, add a client host name. This name identifies the client to the server. ### Provider instructions# Refer to the quickstart guides for these common email providers. #### Gmail# Refer to Gmail. #### Outlook.com# Refer to Outlook.com. #### Yahoo# Refer to Yahoo. ### My provider isn't listed# If your email provider isn't listed here, search for `SMTP settings` to find their instructions. (These instructions may also be included with `IMAP settings` or `POP settings`.) --- ## Page: https://docs.n8n.io/integrations/builtin/credentials/sendemail/gmail/ ## Gmail Send Email credentials# Follow these steps to configure the Send Email credentials with a Gmail account. ## Prerequisites# To follow these instructions, you must first: 1. Enable 2-step Verification on your Gmail account. 2. Generate an app password. ### Enable 2-step Verification# To enable 2-step Verification: 1. Log in to your Google Account. 2. Select **Security** from the left navigation. 3. Under **How you sign in to Google**, select **2-Step Verification**. * If 2-Step Verification is already enabled, skip to the next section. 4. Select **Get started**. 5. Follow the on-screen steps to configure 2-Step Verification. Refer to Turn on 2-step Verification for more information. If you can't turn on 2-step Verification, check with your email administrator. ### Generate an app password# To generate an app password: 1. In your Google account, go to App passwords. 2. Enter an **App name** for your new app password, like `n8n credential`. 3. Select **Create**. 4. Copy the generated app password. You'll use this in your n8n credential. Refer to Google's Sign in with app passwords documentation for more information. ## Set up the credential# To set up the Send Email credential to use Gmail: 1. Enter your Gmail email address as the **User**. 2. Enter the app password you generated above as the **Password**. 3. Enter `smtp.gmail.com` as the **Host**. 4. For the **Port**: * Keep the default `465` for SSL or if you're unsure what to use. * Enter `587` for TLS. 5. Turn on the **SSL/TLS** toggle. Refer to the Outgoing Mail (SMTP) Server settings in Read Gmail messages on other email clients using POP for more information. If the settings above don't work for you, check with your email administrator. --- ## Page: https://docs.n8n.io/integrations/builtin/credentials/sendemail/outlook/ Follow these steps to configure the Send Email credentials with an Outlook.com account. ## Set up the credential# To configure the Send Email credential to use an Outlook.com account: 1. Enter your Outlook.com email address as the **User**. 2. Enter your Outlook.com password as the **Password**. App password Outlook.com doesn't require you to use an app password, but if you'd like to for security reasons, refer to Use an app password. 3. Enter `smtp-mail.outlook.com` as the **Host**. 4. Enter `587` for the **Port**. 5. Turn on the **SSL/TLS** toggle. Refer to Microsoft's POP, IMAP, and SMTP settings for Outlook.com documentation for more information. If the settings above don't work for you, check with your email administrator. ## Use an app password# If you'd prefer to use an app password instead of your email account password: 1. Log into the My Account page. 2. If you have a left navigation option for **Security Info**, jump to Security Info app password. If you don't have an option for **Security Info**, continue with these instructions. 3. Go to the Additional security verification page. 4. Select **App passwords** and **Create**. 5. Enter a **Name** for your app password, like `n8n credential`. 6. Use the option to **copy password to clipboard** and enter this as the **Password** in n8n instead of your email account password. Refer to Outlook's Manage app passwords for 2-step verification page for more information. ### Security Info app password# If you have a left navigation option for **Security Info**: 1. Select **Security Info**. The Security Info page opens. 2. Select **\+ Add method**. 3. On the **Add a method** page, select **App password** and then select **Add**. 4. Enter a **Name** for your app password, like `n8n credential`. 5. Copy the **Password** and enter this as the **Password** in n8n instead of your email account password. Refer to Outlook's Create app passwords from the Security info (preview) page for more information. --- ## Page: https://docs.n8n.io/integrations/builtin/credentials/sendemail/yahoo/ ## Yahoo Send Email credentials# Follow these steps to configure the Send Email credentials with a Yahoo account. ## Prerequisites# To follow these instructions, you must first generate an app password: 1. Log in to your Yahoo account Security page. 2. Select **Generate app password** or **Generate and manage app passwords**. 3. Select **Get Started**. 4. Enter an **App name** for your new app password, like `n8n credential`. 5. Select **Generate password**. 6. Copy the generated app password. You'll use this in your n8n credential. Refer to Yahoo's Generate and manage 3rd-party app passwords for more information. ## Set up the credential# To configure the Send Email credential to use Yahoo Mail: 1. Enter your Yahoo email address as the **User**. 2. Enter the app password you generated above as the **Password**. 3. Enter `smtp.mail.yahoo.com` as the **Host**. 4. For the **Port**: * Keep the default `465` for SSL or if you're unsure what to use. * Enter `587` for TLS. 5. Turn on the **SSL/TLS** toggle. Refer to IMAP server settings for Yahoo Mail for more information. If the settings above don't work for you, check with your email administrator. --- ## Page: https://docs.n8n.io/integrations/builtin/credentials/sendgrid/ You can use these credentials to authenticate the following nodes: * SendGrid ## Supported authentication methods# * API key Refer to SendGrid's API documentation for more information about the service. ## Using API key# To configure this credential, you'll need a SendGrid account and: * An **API Key** To create an API key: 1. In the Twilio SendGrid app, go to **Settings >** **API Keys**. 2. Select **Create API Key**. 3. Enter a **Name** for your API key, like `n8n integration`. 4. Select **Full Access**. 5. Select **Create & View**. 6. Copy the key and enter it in your n8n credential. Refer to Create API Keys for more information. --- ## Page: https://docs.n8n.io/integrations/builtin/credentials/sendy/ You can use these credentials to authenticate the following nodes: * Sendy ## Prerequisites# Host a Sendy application. ## Supported authentication methods# * API key ## Related resources# Refer to Sendy's API documentation for more information about the service. ## Using API Key# To configure this credential, you'll need: * A **URL**: The URL of your Sendy application. * An **API Key**: Get your API key from your user profile > **Settings > Your API Key**. --- ## Page: https://docs.n8n.io/integrations/builtin/credentials/sentryio/ You can use these credentials to authenticate the following nodes: * Sentry.io ## Prerequisites# Create a Sentry.io account. ## Supported authentication methods# * API token * OAuth2 * Server API token: Use for self-hosted Sentry. Refer to Sentry.io's API documentation for more information about the service. ## Using API token# To configure this credential, you'll need: * An API **Token**: Generate a **User Auth Token** in **Account > Settings > User Auth Tokens**. Refer to User Auth Tokens for more information. ## Using OAuth# Note for n8n Cloud users Cloud users don't need to provide connection details. Select **Connect my account** to connect through your browser. If you need to configure OAuth2 from scratch, create an integration with these settings: * Copy the n8n **OAuth Callback URL** and add it as an **Authorized Redirect URI**. * Copy the **Client ID** and **Client Secret** and add them to your n8n credential. Refer to Public integrations for more information on creating the integration. ## Using Server API token# To configure this credential, you'll need: * An API **Token**: Generate a **User Auth Token** in **Account > Settings > User Auth Tokens**. Refer to User Auth Tokens for more information. * The **URL** of your self-hosted Sentry instance. --- ## Page: https://docs.n8n.io/integrations/builtin/credentials/serp/ You can use these credentials to authenticate the following nodes: * Serp ## Prerequisites# Create a SerpApi account. ## Supported authentication methods# * API key ## Related resources# Refer to Serp's API documentation for more information about the service. View n8n's Advanced AI documentation. ## Using API key# To configure this credential, you'll need: * An **API Key** To get your API key: 1. Go to **Your Account >** **API Key**. 2. Copy **Your Private API Key** and enter it as the **API Key** in your n8n credential. --- ## Page: https://docs.n8n.io/integrations/builtin/credentials/servicenow/ You can use these credentials to authenticate the following nodes: * ServiceNow ## Prerequisites# Create a ServiceNow developer account. ## Supported authentication methods# * Basic auth * OAuth2 Refer to ServiceNow's API documentation for more information about the service. ## Using basic auth# To configure this credential, you'll need: * A **User** name: Enter your ServiceNow username. * A **Password**: Enter your ServiceNow password. * A **Subdomain**: The subdomain for your servicenow instance is in your instance URL: `https://<subdomain>.service-now.com/`. For example, if the full URL is `https://dev99890.service-now.com`, then the subdomain is `dev99890`. ## Using OAuth2# To configure this credential, you'll need: * A **Client ID**: Generated once you register a new app. * A **Client Secret**: Generated once you register a new app. * A **Subdomain**: The subdomain for your servicenow instance is in your instance URL: `https://<subdomain>.service-now.com/`. For example, if the full URL is `https://dev99890.service-now.com`, then the subdomain is `dev99890`. To generate your **Client ID** and **Client Secret**, register a new app in **System OAuth > Application Registry > New > Create an OAuth API endpoint for external clients**. Use these settings for your app: * Copy the **Client ID** and add it to your n8n credential. * Enter a **Client Secret** or leave it blank to automatically generate a random secret. Add this secret to your n8n credential. * Copy the n8n **OAuth Redirect URL** and add it as a **Redirect URL**. Refer to How to setup OAuth2 authentication for RESTMessageV2 integrations for more information. --- ## Page: https://docs.n8n.io/integrations/builtin/credentials/sms77/ You can use these credentials to authenticate the following nodes: * seven ## Prerequisites# Create a seven developer account. ## Supported authentication methods# * API key ## Related resources# Refer to seven's API documentation for more information about the service. ## Using API key# To configure this credential, you'll need: * An **API key**: Go to **Account > Developer >** **API Keys** to create an API key. Refer to API First Steps for more information. --- ## Page: https://docs.n8n.io/integrations/builtin/credentials/shopify/ You can use these credentials to authenticate the following nodes with Shopify. * Shopify * Shopify Trigger ## Supported authentication methods# * Access token (recommended): For private apps/single store use. Can be created by regular admins. * OAuth2: For public apps. Must be created by partner accounts. * API key: Deprecated. Refer to Shopify's authentication documentation for more information about the service. ## Using access token# To configure this credential, you'll need a Shopify admin account and: * Your **Shop Subdomain** * An **Access Token**: Generated when you create a custom app. * An **APP Secret Key**: Generated when you create a custom app. To set up the credential, you'll need to create and install a custom app: 1. Enter your **Shop Subdomain**. * Your subdomain is within the URL: `https://<subdomain>.myshopify.com`. For example, if the full URL is `https://n8n.myshopify.com`, the Shop Subdomain is `n8n`. 2. In Shopify, go to **Admin > Settings >** **Apps and sales channels**. 3. Select **Develop apps**. 4. Select **Create a custom app**. Don't see this option? If you don't see this option, your store probably doesn't have custom app development enabled. Refer to Enable custom app development for more information. 5. In the modal window, enter the **App name**. 6. Select an **App developer**. The app developer can be the store owner or any account with the **Develop apps** permission. 7. Select **Create app**. 8. Select **Select scopes**. In the **Admin API access scopes** section, select the API scopes you want for your app. * To use all functionality in the Shopify node, add the `read_orders`, `write_orders`, `read_products`, and `write_products` scopes. * Refer to Shopify API Access Scopes for more information on the available scopes. 9. Select **Save**. 10. Select **Install app**. 11. In the modal window, select **Install app**. 12. Open the app's **API Credentials** section. 13. Copy the **Admin API Access Token**. Enter this in your n8n credential as the **Access Token**. 14. Copy the **API Secret Key**. Enter this in your n8n credential as the **APP Secret Key**. Refer to Creating a custom app and Generate access tokens for custom apps in the Shopify admin for more information on these steps. ## Using OAuth2# To configure this credential, you'll need a Shopify partner account and: * A **Client ID**: Generated when you create a custom app. * A **Client Secret**: Generated when you create a custom app. * Your **Shop Subdomain** To set up the credential, you'll need to create and install a custom app: Custom app development Shopify provides templates for creating new apps. The instructions below only cover the elements necessary to set up your n8n credential. Refer to Shopify's Build dev docs for more information on building apps and working with app templates. 1. Open your Shopify Partner dashboard. 2. Select **Apps** from the left navigation. 3. Select **Create app**. 4. In the **Use Shopify Partners** section, enter an **App name**. 5. Select **Create app**. 6. When the app details open, copy the **Client ID**. Enter this in your n8n credential. 7. Copy the **Client Secret**. Enter this in your n8n credential. 8. In the left menu, select **Configuration**. 9. In n8n, copy the **OAuth Redirect URL** and paste it into the **Allowed redirection URL(s)** in the **URLs** section. 10. In the **URLs** section, enter an **App URL** for your app. The host entered here needs to match the host for the **Allowed redirection URL(s)**, like the base URL for your n8n instance. 11. Select **Save and release**. 12. Select **Overview** from the left menu. At this point, you can choose to **Test your app** by installing it to one of your stores, or **Choose distribution** to distribute it publicly. 13. In n8n, enter the **Shop Subdomain** of the store you installed the app to, either as a test or as a distribution. * Your subdomain is within the URL: `https://<subdomain>.myshopify.com`. For example, if the full URL is `https://n8n.myshopify.com`, the Shop Subdomain is `n8n`. ## Using API key# Method deprecated Shopify no longer generates API keys with passwords. Use the Access token method instead. To configure this credential, you'll need: * An **API Key** * A **Password** * Your **Shop Subdomain**: Your subdomain is within the URL: `https://<subdomain>.myshopify.com`. For example, if the full URL is `https://n8n.myshopify.com`, the Shop Subdomain is `n8n`. * _Optional:_ A **Shared Secret** ## Common issues# Here are some common issues setting up the Shopify credential and steps to resolve or troubleshoot them. ### Enable custom app development# If you don't see the option to **Create a custom app**, no one's enabled custom app development for your store. To enable custom app development, you must log in either as a store owner or as a user with the **Enable app development** permission: 1. In Shopify, go to **Admin > Settings >** **Apps and sales channels**. 2. Select **Develop apps**. 3. Select **Allow custom app development**. 4. Read the warning and information provided and select **Allow custom app development**. ### Forbidden credentials error# If you get a **Couldn't connect with these settings / Forbidden - perhaps check your credentials** warning when you test the credentials, this may be due to your app's access scope dependencies. For example, the `read_orders` scope also requires `read_products` scope. Review the scopes you have assigned and the action you're trying to complete. --- ## Page: https://docs.n8n.io/integrations/builtin/credentials/shuffler/ You can use these credentials to authenticate when using the HTTP Request node to make a Custom API call. ## Prerequisites# Create a Shuffler account on either a cloud or self-hosted instance. ## Supported authentication methods# * API key Refer to Shuffler's documentation for more information about the service. This is a credential-only node. Refer to Custom API operations to learn more. View example workflows and related content on n8n's website. ## Using API key# To configure this credential, you'll need: * An **API Key**: Get your API key from the **Settings** page. --- ## Page: https://docs.n8n.io/integrations/builtin/credentials/signl4/ You can use these credentials to authenticate the following nodes: * SIGNL4 ## Prerequisites# Create a SIGNL4 account. ## Supported authentication methods# * Webhook secret Refer to SIGNL4's Inbound Webhook documentation for more information about the service. ## Using webhook secret# To configure this credential, you'll need: * A **Team Secret**: SIGNL4 includes this secret in the "✅ Sign up complete" email as the last part of the webhook URL. If your webhook URL is `https://connect.signl4.com/webhook/helloworld`, your team secret would be `helloworld`. --- ## Page: https://docs.n8n.io/integrations/builtin/credentials/slack/ You can use these credentials to authenticate the following nodes: * Slack * Slack Trigger ## Supported authentication methods# * API access token: * Required for the Slack Trigger node. * Works with the Slack node, but not recommended. * OAuth2: * Recommended method for the Slack node. * Doesn't work with the Slack Trigger node. Refer to Slack's API documentation for more information about the service. ## Using API access token# To configure this credential, you'll need a Slack account and: * An **Access Token** To generate an access token, create a Slack app: 1. Open your Slack API Apps page. 2. Select **Create New App > From scratch**. 3. Enter an **App Name**. 4. Select the **Workspace** where you'll be developing your app. 5. Select **Create App**. The app details open. 6. In the left menu under **Features**, select **OAuth & Permissions**. 7. In the **Scopes** section, select appropriate scopes for your app. Refer to Scopes for a list of recommended scopes. 8. After you've added scopes, go up to the **OAuth Tokens** section and select **Install to Workspace**. You must be a Slack workspace admin to complete this action. 9. Select **Allow**. 10. Copy the **Bot User OAuth Token** and enter it as the **Access Token** in your n8n credential. 11. If you're using this credential for the Slack Trigger, follow the steps in Slack Trigger configuration to finish setting up your app. Refer to the Slack API Quickstart for more information. ### Slack Trigger configuration# To use your Slack app with the Slack Trigger node: 1. Go to **Features** > **Event Subscriptions**. 2. Turn on the **Enable Events** control. 3. In n8n, copy the **Webhook URL** and enter it as the **Request URL** in your Slack app. Request URL Slack only allows one request URL per app. If you want to test your workflow, you'll need to do one of the following: * Test with your **Test URL** first, then change your Slack app to use the **Production URL** once you've verified everything's working * Use the **Production URL** with execution logging. 4. Once verified, select the bot events to subscribe to. Use the **Trigger on** field in n8n to filter these requests. * To use an event not in the list, add it as a bot event and select **Any Event** in the n8n node. Refer to Quickstart | Configuring the app for event listening for more information. ## Using OAuth2# Note for n8n Cloud users Cloud users don't need to provide connection details. Select **Connect my account** to connect through your browser. If you're self-hosting n8n and need to configure OAuth2 from scratch, you'll need a Slack account and: * A **Client ID** * A **Client Secret** To get both, create a Slack app: 1. Open your Slack API Apps page. 2. Select **Create New App > From scratch**. 3. Enter an **App Name**. 4. Select the **Workspace** where you'll be developing your app. 5. Select **Create App**. The app details open. 6. In **Settings > Basic Information**, open the **App Credentials** section. 7. Copy the **Client ID** and **Client Secret**. Paste these into the corresponding fields in n8n. 8. In the left menu under **Features**, select **OAuth & Permissions**. 9. In the **Redirect URLs** section, select **Add New Redirect URL**. 10. Copy the **OAuth Callback URL** from n8n and enter it as the new Redirect URL in Slack. 11. Select **Add**. 12. Select **Save URLs**. 13. In the **Scopes** section, select appropriate scopes for your app. Refer to Scopes for a list of scopes. 14. After you've added scopes, go up to the **OAuth Tokens** section and select **Install to Workspace**. You must be a Slack workspace admin to complete this action. 15. Select **Allow**. 16. At this point, you should be able to select the OAuth button in your n8n credential to connect. Refer to the Slack API Quickstart for more information. Refer to the Slack Installing with OAuth documentation for more details on the OAuth flow itself. ## Scopes# Scopes determine what permissions an app has. * If you want your app to act on behalf of users who authorize the app, add the required scopes under the **User Token Scopes** section. * If you're building a bot, add the required scopes under the **Bot Token Scopes** section. Here's the list of scopes the OAuth credential requires, which are a good starting point: | **Scope name** | **Notes** | | --- | --- | | `channels:read` | | | `channels:write` | Not available as a bot token scope | | `chat:write` | | | `files:read` | | | `files:write` | | | `groups:read` | | | `im:read` | | | `mpim:read` | | | `reactions:read` | | | `reactions:write` | | | `stars:read` | Not available as a bot token scope | | `stars:write` | Not available as a bot token scope | | `usergroups:read` | | | `usergroups:write` | | | `users.profile:read` | | | `users.profile:write` | Not available as a bot token scope | | `users:read` | | ## Common issues# ### Token expired# Slack offers **token rotation** that you can turn on for bot and user tokens. This makes every tokens expire after 12 hours. While this may be useful for testing, n8n credentials using tokens with this enabled will fail after expiry. If you want to use your Slack credentials in production, this feature must be **off**. To check if your Slack app has token rotation turned on, refer to the Slack API Documentation | Token Rotation. If your app uses token rotation Please note, if your Slack app uses token rotation, you can't turn it off again. You need to create a new Slack app with token rotation disabled instead. --- ## Page: https://docs.n8n.io/integrations/builtin/credentials/snowflake/ You can use these credentials to authenticate the following nodes: * Snowflake ## Prerequisites# Create a Snowflake account. ## Supported authentication methods# * Database connection Refer to Snowflake's API documentation and SQL Command Reference for more information about the service. ## Using database connection# To configure this credential, you'll need: * An **Account** name: Your account name is the string of characters located between `https://` and `snowflakecomputing.com` in your Snowflake URL. For example, if the URL of your Snowflake account is `https://abc.eu-central-1.snowflakecomputing.com` then the name of your account is `abc.eu-central-1`. * A **Database**: Enter the name of the database the credential should connect to. * A **Warehouse**: Enter the name of the default virtual warehouse to use for the session after connecting. n8n uses this warehouse for performing queries, loading data, and so on. * A **Username** * A **Password** * A **Schema**: Enter the schema you want to use after connecting. * A **Role**: Enter the security role you want to use after connecting. * **Client Session Keep Alive**: By default, client connections typically time out three or four hours after the most recent query execution. Turning this setting on sets the `clientSessionKeepAlive` parameter to true: the server will keep the client's connection alive indefinitely, even if the connection doesn't execute any queries. Refer to Session Commands for more information on these settings. --- ## Page: https://docs.n8n.io/integrations/builtin/credentials/solarwindsipam/ You can use these credentials to authenticate when using the HTTP Request node to make a Custom API call. ## Supported authentication methods# * Username & Password Refer to SolarWinds IPAM's API documentation for more information about the service. ## Using Username & Password# To configure this credential, you'll need a SolarWinds IPAM account and: * **URL**: The base URL of your SolarWinds IPAM server * **Username**: The username you use to access SolarWinds IPAM * **Password**: The password you use to access SolarWinds IPAM Refer to SolarWinds IPAM's API documentation for more information about authenticating to the service. --- ## Page: https://docs.n8n.io/integrations/builtin/credentials/solarwindsobservability/ You can use these credentials to authenticate when using the HTTP Request node to make a Custom API call. ## Supported authentication methods# * API Token Refer to SolarWinds Observability SaaS's API documentation for more information about the service. ## Using API Token# To configure this credential, you'll need a SolarWinds Observability SaaS account and: * **URL**: The URL you use to access the SolarWinds Observability SaaS platform * **API Token**: An API token found in the SolarWinds Observability SaaS platform under **Settings > Api Tokens** Refer to SolarWinds Observability SaaS's API documentation for more information about authenticating to the service. --- ## Page: https://docs.n8n.io/integrations/builtin/credentials/splunk/ You can use these credentials to authenticate the following nodes: * Splunk ## Prerequisites# * Download and install Splunk Enterprise. * Enable token authentication in **Settings > Tokens**. ## Supported authentication methods# * API auth token Refer to Splunk's Enterprise API documentation for more information about the service. ## Using API auth token# To configure this credential, you'll need: * An **Auth Token**: Once you've enabled token authentication, create an auth token in **Settings > Tokens**. Refer to Creating authentication tokens for more information. * A **Base URL**: For your Splunk instance. This should include the protocol, domain, and port, for example: `https://localhost:8089`. * **Allow Self-Signed Certificates**: If turned on, n8n will connect even if SSL validation fails. ## Required capabilities# Your Splunk platform account and role must have certain capabilities to create authentication tokens: * `edit_tokens_own`: Required if you want to create tokens for yourself. * `edit_tokens_all`: Required if you want to create tokens for any user on the instance. Refer to Define roles on the Splunk platform with capabilities for more information. --- ## Page: https://docs.n8n.io/integrations/builtin/credentials/spontit/ You can use these credentials to authenticate the following nodes: * Spontit ## Prerequisites# Create a Spontit account. ## Supported authentication methods# * API key ## Related resources# Refer to Spontit's API documentation for more information about the service. ## Using API key# To configure this credential, you'll need: * An **API Key**: Go to **API** to get a new secret key. Enter that key as your **API Key**. * A **Username**: Enter your Spontit username. If you're unsure how to format it, open your **Profile** and copy the username from there. --- ## Page: https://docs.n8n.io/integrations/builtin/credentials/spotify/ You can use these credentials to authenticate the following nodes: * Spotify ## Supported authentication methods# * OAuth2 Refer to Spotify's Web API documentation for more information about the service. ## Using OAuth2# Note for n8n Cloud users Cloud users don't need to provide connection details. Select **Connect my account** to connect through your browser. If you're self-hosting n8n, you'll need a Spotify Developer account so you can create a Spotify app: 1. Open the Spotify developer dashboard. 2. Select **Create an app**. 3. Enter an **App name**, like `n8n integration`. 4. Enter an **App description**. 5. Copy the **OAuth Redirect URL** from n8n and enter it as the **Redirect URI** in your Spotify app. 6. Check the box to agree to the Spotify Terms of Service and Branding Guidelines. 7. Select **Create**. The **App overview** page opens. 8. Copy the **Client ID** and enter it in your n8n credential. 9. Copy the **Client Secret** and enter it in your n8n credential. 10. Select **Connect my account** and follow the on-screen prompts to finish authorizing the credential. Refer to Spotify Apps for more information. --- ## Page: https://docs.n8n.io/integrations/builtin/credentials/ssh/ You can use these credentials to authenticate the following nodes: * SSH ## Prerequisites# * Create a remote server with SSH enabled. * Create a user account that can `ssh` into the server using one of the following: * Their own password * An SSH private key ## Supported authentication methods# * Password: Use this method if you have a user account that can `ssh` into the server using their own password. * Private key: Use this method if you have a user account that uses an SSH key for the server or service. Secure Shell (SSH) protocol is a method for securely sending commands over a network. Refer to Connecting to GitHub with SSH for an example of SSH setup. ## Using password# Use this method if you have a user account that can `ssh` into the server using their own password. To configure this credential, you'll need to: 1. Enter the IP address of the server you're connecting to as the **Host**. 2. Enter the **Port** to use for the connection. SSH uses port `22` by default. 3. Enter the **Username** for a user account with `ssh` access on the server. 4. Enter the **Password** for that user account. ## Using private key# Use this method if you have a user account that uses an SSH key for the server or service. To configure this credential, you'll need to: 1. Enter the IP address of the server you're connecting to as the **Host**. 2. Enter the **Port** to use for the connection. SSH uses port `22` by default. 3. Enter the **Username** of the account that generated the private key. 4. Enter the entire contents of your SSH **Private Key**. 5. If you created a **Passphrase** for the **Private Key**, enter the passphrase. * If you didn't create a passphrase for the key, leave blank. --- ## Page: https://docs.n8n.io/integrations/builtin/credentials/stackby/ You can use these credentials to authenticate the following nodes: * Stackby ## Prerequisites# Create a Stackby account. ## Supported authentication methods# * API key ## Related resources# Refer to Stackby's API documentation for more information about the service. ## Using API key# To configure this credential, you'll need: * An **API Key**: Go to your **Account Settings > API** to create an API Key. Refer to API Key for more information. --- ## Page: https://docs.n8n.io/integrations/builtin/credentials/storyblok/ You can use these credentials to authenticate the following nodes: * Storyblok ## Prerequisites# Create a Storyblok account. ## Supported authentication methods# * Content API key: For read-only access * Management API key: For full CRUD operations Content API support n8n supports Content API v1 only. Refer to Storyblok's Content v1 API documentation and Management API documentation for more information about the services. ## Using Content API key# To configure this credential, you'll need: * A Content **API Key**: Go to your Storyblok workspace's **Settings > Access Tokens** to get an API key. Choose an **Access Level** of either **Public** (`version=published`) or **Preview** (`version-published` and `version=draft`). Enter this access token as your **API Key**. Refer to How to retrieve and generate access tokens for more detailed instructions. Refer to Content v1 API Authentication for more information about supported operations with each Access Level. ## Using Management API key# To configure this credential, you'll need: * A **Personal Access Token**: Go to **My Account** **\> Personal access tokens** to generate a new access token. Enter this access token as your **Personal Access Token**. --- ## Page: https://docs.n8n.io/integrations/builtin/credentials/strapi/ You can use these credentials to authenticate the following nodes: * Strapi ## Prerequisites# Create a Strapi admin account with: * Access to an existing Strapi project. * At least one collection type within that project. * Published data within that collection type. Refer to the Strapi developer Quick Start Guide for more information. ## Supported authentication methods# * API user account: Requires a user account with appropriate content permissions. * API token: Requires an admin account. Refer to Strapi's documentation for more information about the service. ## Using API user account# To configure this credential, you'll need: * A user **Email**: Must be for a user account, not an admin account. Refer to the more detailed instructions below. * A user **Password**: Must be for a user account, not an admin account. Refer to the more detailed instructions below. * The **URL**: Use the public URL of your Strapi server, defined in `./config/server.js` as the `url` parameter. Strapi recommends using an absolute URL. * For Strapi Cloud projects, use the URL of your Cloud project, for example: `https://my-strapi-project-name.strapiapp.com` * The **API Version**: Select the version of the API you want your calls to use. Options include: * **Version 3** * **Version 4** In Strapi, the configuration involves two steps: 1. Configure a role. 2. Create a user account. Refer to the more detailed instructions below for each step. ### Configure a role# For API access, use the Users & Permissions Plugin in **Settings > Users & Permissions Plugin**. Refer to Configuring Users & Permissions Plugin for more information on the plugin. Refer to Configuring end-user roles for more information on roles. For the n8n credential, the user must have a role that grants them API permissions on the collection type. For the role, you can either: * Update the default **Authenticated** role to include the permissions and assign the user to that role. Refer to Configuring role's permissions for more information. * Create a new role to include the permissions and assign the user to that role. Refer to Creating a new role for more information. For either option, once you open the role: 1. Go to the **Permissions** section. 2. Open the section for the relevant collection type. 3. Select the permissions for the collection type that the role should have. Options include: * `create` (POST) * `find` and `findone` (GET) * `update` (PUT) * `delete` (DELETE) 4. Repeat for all relevant collection types. 5. Save the role. Refer to Endpoints for more information on the permission options. ### Create a user account# Now that you have an appropriate role, create an end-user account and assign the role to it: 1. Go to **Content Manager > Collection Types > User**. 2. Select **Add new entry**. 3. Fill in the user details. The n8n credential requires these fields, though your Strapi project may have more custom required fields: * **Username**: Required for all Strapi users. * **Email**: Enter in Strapi and use as the **Email** in the n8n credential. * **Password**: Enter in Strapi and use as the **Password** in the n8n credential. * **Role**: Select the role you set up in the previous step. Refer to Managing end-user accounts for more information. ## Using API token# To configure this credential, you'll need: * An **API Token**: Create an API token from **Settings > Global Settings > API Tokens**. Refer to Strapi's Creating a new API token documentation for more details and information on regenerating API tokens. API tokens permission If you don't see the **API tokens** option in **Global settings**, your account doesn't have the **API tokens > Read** permission. * The **URL**: Use the public URL of your Strapi server, defined in `./config/server.js` as the `url` parameter. Strapi recommends using an absolute URL. * For Strapi Cloud projects, use the URL of your Cloud project, for example: `https://my-strapi-project-name.strapiapp.com` * The **API Version**: Select the version of the API you want your calls to use. Options include: * **Version 3** * **Version 4** --- ## Page: https://docs.n8n.io/integrations/builtin/credentials/strava/ You can use these credentials to authenticate the following nodes: * Strava * Strava Trigger ## Prerequisites# * Create a Strava account. * Create a Strava application in **Settings > API**. Refer to Using OAuth2 for more information. ## Supported authentication methods# * OAuth2 Refer to Strava's API documentation for more information about the service. ## Using OAuth2# To configure this credential, you'll need: * A **Client ID**: Generated when you create a Strava app. * A **Client Secret**: Generated when you create a Strava app. Use these settings for your Strava app: * In n8n, copy the **OAuth Callback URL**. Paste this URL into your Strava app's **Authorization Callback Domain**. * Remove the protocol (`https://` or `http://`) and the relative URL (`/oauth2/callback` or `/rest/oauth2-credential/callback`) from the **Authorization Callback Domain**. For example, if the OAuth Redirect URL was originally `https://oauth.n8n.cloud/oauth2/callback`, the **Authorization Callback Domain** would be `oauth.n8n.cloud`. * Copy the **Client ID** and **Client Secret** from your app and add them to your n8n credential. Refer to Authentication for more information about Strava's OAuth flow. --- ## Page: https://docs.n8n.io/integrations/builtin/credentials/stripe/ You can use these credentials to authenticate the following nodes: * Stripe Trigger * Stripe ## Supported authentication methods# * API key Refer to Stripe's API documentation for more information about the service. ## Using API key# To configure this credential, you'll need a Stripe admin or developer account and: * An API **Secret Key** Before you generate an API key, decide whether to generate it in live mode or test mode. Refer to Test mode and live mode for more information about the two modes. ### Live mode Secret key# To generate a Secret key in live mode: 1. Open the Stripe developer dashboard and select **API Keys**. 2. In the **Standard Keys** section, select **Create secret key**. 3. Enter a **Key name**, like `n8n integration`. 4. Select **Create**. The new API key displays. 5. Copy the key and enter it in your n8n credential as the **Secret Key**. Refer to Stripe's Create a secret API key for more information. ### Test mode Secret key# To use a Secret key in test mode, you must copy the existing one: 1. Go to your Stripe test mode developer dashboard and select **API Keys**. 2. In the **Standard Keys** section, select **Reveal test key** for the **Secret key**. 3. Copy the key and enter it in your n8n credential as the **Secret Key**. Refer to Stripe's Create a secret API key for more information. ## Test mode and live mode# All Stripe API requests happen within either test mode or live mode. Each mode has its own API key. Use test mode to access simulated test data and live mode to access actual account data. Objects in one mode aren’t accessible to the other. Refer to API keys | Test mode versus live mode for more information about what's available in each mode and guidance on when to use each. n8n credentials for both modes If you want to work with both live mode and test mode keys, store each mode's key in a separate n8n credential. ## Key prefixes# Stripes' Secret keys always begin with `sk_`: * Live keys begin with `sk_live_`. * Test keys begin with `sk_test_`. n8n hasn't tested these credentials with Restricted keys (prefixed `rk_`). Publishable keys Don't use the Publishable keys (prefixed `pk_`) with your n8n credential. --- ## Page: https://docs.n8n.io/integrations/builtin/credentials/supabase/ You can use these credentials to authenticate the following nodes: * Supabase * Supabase Vector Store ## Prerequisites# Create a Supabase account. ## Supported authentication methods# * API key Refer to Supabase's API documentation for more information about the service. ## Using access token# To configure this credential, you'll need: * A **Host** * A **Service Role Secret** To generate your API Key: 1. In your Supabase account, go to the **Dashboard** and create or select a project for which you want to create an API key. 2. Go to **Project Settings > API** to see the API Settings for your project. 3. Copy the **URL** from the **Project URL** section and enter it as your n8n **Host**. Refer to API URL and keys for more detailed instruction. 4. Reveal and copy the **Project API key** for the `service_role`. Copy that key and enter it as your n8n **Service Role Secret**. Refer to Understanding API Keys for more information on the `service_role` privileges. --- ## Page: https://docs.n8n.io/integrations/builtin/credentials/surveymonkey/ You can use these credentials to authenticate the following nodes: * SurveyMonkey Trigger ## Prerequisites# * Create a SurveyMonkey account. * Register an app from your **Developer dashboard > My apps**. * Refer to Required app scopes for information on the scopes you must use. ## Supported authentication methods# * API access token * OAuth2 Refer to SurveyMonkey's API documentation for more information about the service. ## Using API access token# To configure this credential, you'll need: * An **Access Token**: Generated once you create an app. * A **Client ID**: Generated once you create an app. * A **Client Secret**: Generated once you create an app. Once you've created your app and assigned appropriate scopes, go to **Settings > Credentials**. Copy the **Access Token**, **Client ID**, and **Secret** and add them to n8n. ## Using OAuth# To configure this credential, you'll need: * A **Client ID**: Generated once you create an app. * A **Client Secret**: Generated once you create an app. Once you've created your app and assigned appropriate scopes: 1. Go to the app's **Settings > Settings**. 2. From n8n, copy the **OAuth Redirect URL**. 3. Overwrite the app's existing **OAuth Redirect URL** with that URL. 4. Select **Submit Changes**. 5. Be sure the **Scopes** section contains the Required app scopes. From the app's **Settings > Credentials**, copy the **Client ID** and **Client Secret** and add them to your n8n credential. You can now select **Connect my account** from n8n. SurveyMonkey Test OAuth Flow This option only works if you keep the default SurveyMonkey **OAuth Redirect URL** and add the n8n OAuth Redirect URL as an **Additional Redirect URL**. ## Required app scopes# Once you create your app, go to **Settings > Scopes**. Select these scopes for your n8n credential to work: * **View Surveys** * **View Collectors** * **View Responses** * **View Response Details** * **Create/Modify Webhooks** * **View Webhooks** Select **Update Scopes** to save them. --- ## Page: https://docs.n8n.io/integrations/builtin/credentials/syncromsp/ You can use these credentials to authenticate the following nodes: * SyncroMSP ## Prerequisites# Create a SyncroMSP account. ## Supported authentication methods# * API key Refer to SyncroMSP's API documentation for more information about the service. ## Using API key# To configure this credential, you'll need: * An **API Key**: Called an **API token** in SyncroMSP. To create an API token, go to your **user menu > Profile/Password > API Tokens** and select the option to **Create New Token**. Select **Custom Permissions** to enter a name for your token and adjust the permissions to match your requirements. * Your **Subdomain**: Enter your SyncroMSP subdomain. This is visible in the URL of your SyncroMSP, located between `https://` and `.syncromsp.com`. If your full URL is `https://n8n-instance.syncromsp.com`, you'd enter `n8n-instance` as the subdomain. Refer to API Tokens for more information on creating new tokens. --- ## Page: https://docs.n8n.io/integrations/builtin/credentials/sysdig/ ## Sysdig Management credentials# You can use these credentials to authenticate when using the HTTP Request node to make a Custom API call. ## Prerequisites# Create a Sysdig account or configure a local instance. ## Supported authentication methods# * Access Key Refer to Sysdig's documentation for more information about the service. This is a credential-only node. Refer to Custom API operations to learn more. ## Using API access key# To configure this credential, you'll need: * An **Access Key** Refer to the Sysdig Agent Access Keys documentation for instructions on obtaining the Access Key from the application. --- ## Page: https://docs.n8n.io/integrations/builtin/credentials/taiga/ You can use these credentials to authenticate the following nodes: * Taiga * Taiga Trigger ## Prerequisites# Create a Taiga account. ## Supported authentication methods# * Basic auth Refer to Taiga's API documentation for more information about the service. ## Using basic auth# To configure this credential, you'll need: * A **Username**: Enter your username or user email address. Refer to Normal login for more information. * A **Password**: Enter your password. * The **Environment**: Choose between **Cloud** or **Self-Hosted**. For **Self-Hosted** instances, you'll also need to add: * The **URL**: Enter your Taiga URL. --- ## Page: https://docs.n8n.io/integrations/builtin/credentials/tapfiliate/ You can use these credentials to authenticate the following nodes: * Tapfiliate ## Prerequisites# Create a Tapfiliate account. ## Supported authentication methods# * API key ## Related resources# Refer to Tapfiliate's API documentation for more information about the service. ## Using API key# To configure this credential, you'll need: * An **API Key**: Get your API Key from your **Profile Settings** **\> API Key**. Refer to Your API key for more information. --- ## Page: https://docs.n8n.io/integrations/builtin/credentials/telegram/ You can use these credentials to authenticate the following nodes: * Telegram * Telegram Trigger ## Prerequisites# Create a Telegram account. ## Supported authentication methods# * API bot access token Refer to Telegram's Bot API documentation for more information about the service. Refer to the Telegram Bot Features documentation for more information on creating and working with bots. ## Using API bot access token# To configure this credential, you'll need: * A bot **Access Token** To generate your access token: 1. Start a chat with the BotFather. 2. Enter the `/newbot` command to create a new bot. 3. The BotFather will ask you for a name and username for your new bot: * The **name** is the bot's name displayed in contact details and elsewhere. You can change the bot name later. * The **username** is a short name used in search, mentions, and t.me links. Use these guidelines when creating your username: * Must be between 5 and 32 characters long. * Not case sensitive. * May only include Latin characters, numbers, and underscores. * Must end in `bot`, like `tetris_bot` or `TetrisBot`. * You can't change the username later. 4. Copy the bot **token** the BotFather generates and add it as the **Access Token** in n8n. Refer to the BotFather Create a new bot documentation for more information. --- ## Page: https://docs.n8n.io/integrations/builtin/credentials/thehive/ You can use these credentials to authenticate the following nodes: * TheHive TheHive and TheHive 5 n8n provides two nodes for TheHive. Use these credentials with TheHive node for TheHive 3 or TheHive 4. If you're using TheHive5 node, use TheHive 5 credentials. ## Prerequisites# Install TheHive on your server. ## Supported authentication methods# * API key Refer to TheHive 3's API documentation and TheHive 4's API documentation for more information about the services. ## Using API key# To configure this credential, you'll need: * An **API Key**: Create an API key from **Organization > Create API Key**. Refer to API Authentication for more information. * Your **URL**: The URL of your TheHive server. * An **API Version**: Choose between: * **TheHive 3 (api v0)** * **TheHive 4 (api v1)** * For TheHive 5, use TheHive 5 credentials instead. * **Ignore SSL Issues**: When turned on, n8n will connect even if SSL certificate validation fails. --- ## Page: https://docs.n8n.io/integrations/builtin/credentials/thehive5/ You can use these credentials to authenticate the following nodes with TheHive 5. * TheHive 5 TheHive and TheHive 5 n8n provides two nodes for TheHive. Use these credentials with TheHive 5 node. If you're using TheHive node for TheHive 3 or TheHive 4, use TheHive credentials. ## Prerequisites# Install TheHive 5 on your server. ## Supported authentication methods# * API key Refer to TheHive's API documentation for more information about the service. ## Using API key# To configure this credential, you'll need: * An **API Key**: Users with `orgAdmin` and `superAdmin` accounts can generate API keys: * `orgAdmin` account: Go to **Organization > Create API Key** for the user you wish to generate a key for. * `superAdmin` account: Go to **Users > Create API Key** for the user you wish to generate a key for. * Refer to API Authentication for more information. * A **URL**: The URL of your TheHive server. * **Ignore SSL Issues**: When turned on, n8n will connect even if SSL certificate validation fails. --- ## Page: https://docs.n8n.io/integrations/builtin/credentials/timescaledb/ You can use these credentials to authenticate the following nodes: * TimescaleDB ## Prerequisites# An available instance of TimescaleDB. ## Supported authentication methods# * Database connection Refer to Timescale's documentation for more information about the service. ## Using database connection# To configure this credential, you'll need: * The **Host**: The fully qualified server name or IP address of your TimescaleDB server. * The **Database**: The name of the database to connect to. * A **User**: The user name you want to log in with. * A **Password**: Enter the password for the database user you are connecting to. * **Ignore SSL Issues**: If turned on, n8n will connect even if SSL certificate validation fails and you won't see the **SSL** selector. * **SSL**: This setting controls the `ssl-mode` connection string for the connection. Options include: * **Allow**: Sets the `ssl-mode` parameter to `allow`. First try a non-SSL connection; if that fails, try an SSL connection. * **Disable**: Sets the `ssl-mode` parameter to `disable`. Only try a non-SSL connection. * **Require**: Sets the `ssl-mode` parameter to `require`, which is the default for TimescaleDB connection strings. Only try an SSL connection. If a root CA file is present, verify that a trusted certificate authority (CA) issued the server certificate. * **Port**: The port number of the TimescaleDB server. Refer to Timescale's connection settings documentation for more information about the non-SSL fields. Refer to Connect with a stricter SSL for more information about the SSL options. --- ## Page: https://docs.n8n.io/integrations/builtin/credentials/todoist/ You can use these credentials to authenticate the following nodes: * Todoist ## Supported authentication methods# * API key * OAuth2 Refer to Todoist's REST API documentation for more information about the service. ## Using API key# To configure this credential, you'll need a Todoist account and: * An **API Key** To get your **API Key**: 1. In Todoist, open your **Integration settings**. 2. Select the **Developer** tab. 3. Copy your **API token** and enter it as the **API Key** in your n8n credential. Refer to Find your API token for more information. ## Using OAuth2# Note for n8n Cloud users Cloud users don't need to provide connection details. Select **Connect my account** to connect through your browser. If you're self-hosting n8n, you'll need a Todoist account and: * A **Client ID** * A **Client Secret** Get both by creating an application: 1. Open the Todoist App Management Console. 2. Select **Create a new app**. 3. Enter an **App name** for your app, like `n8n integration`. 4. Select **Create app**. 5. Copy the n8n **OAuth Redirect URL** and enter it as the **OAuth redirect URL** in Todoist. 6. Copy the **Client ID** from Todoist and enter it in your n8n credential. 7. Copy the **Client Secret** from Todoist and enter it in your n8n credential. 8. Configure the rest of your Todoist app as it makes sense for your use case. Refer to the Todoist Authorization Guide for more information. --- ## Page: https://docs.n8n.io/integrations/builtin/credentials/toggl/ You can use these credentials to authenticate the following nodes: * Toggl Trigger ## Prerequisites# Create a Toggl account. ## Supported authentication methods# * Basic auth ## Related resources# Refer to Toggl's API documentation for more information about the service. ## Using basic auth# To configure this credential, you'll need: * A **Username**: Enter your user email address. * A **Password**: Enter your user password. Refer to Authentication for more information. --- ## Page: https://docs.n8n.io/integrations/builtin/credentials/totp/ You can use these credentials to authenticate the following nodes: * TOTP ## Prerequisites# Generate a TOTP **Secret** and **Label**. ## Supported authentication methods# * Secret and label Time-based One-time Password (TOTP) is an algorithm that generates a one-time password (OTP) using the current time. Refer to Google Authenticator | Key URI format for more information. ## Using secret and label# To configure this credential, you'll need: * A **Secret**: The secret key encoded in the QR code during authenticator setup. It's an arbitrary key value encoded in Base32, for example: `BVDRSBXQB2ZEL5HE`. Refer to Google Authenticator Secret for more information. * A **Label**: The identifier for the account. It contains an account name as a URI-encoded string. You can include prefixes to identify the provider or service managing the account. If you use prefixes, use a literal or url-encoded colon to separate the issuer prefix and the account name, for example: `GitHub:john-doe`. Refer to Google Authenticator Label for more information. --- ## Page: https://docs.n8n.io/integrations/builtin/credentials/travisci/ You can use these credentials to authenticate the following nodes: * Travis CI ## Prerequisites# Create a Travis CI account. ## Supported authentication methods# * API token ## Related resources# Refer to Travis CI's API documentation for more information about the service. ## Using API token# To configure this credential, you'll need: * An **API Token**: Get your API token from **Account Settings >** **API Token** or generate one through the Travis CI command line client . --- ## Page: https://docs.n8n.io/integrations/builtin/credentials/trellixepo/ You can use these credentials to authenticate when using the HTTP Request node to make a Custom API call. ## Prerequisites# Create a Trellix ePolicy Orchestrator account. ## Supported authentication methods# * Basic auth Refer to Trellix ePO's documentation for more information about the service. This is a credential-only node. Refer to Custom API operations to learn more. View example workflows and related content on n8n's website. ## Using basic auth# To configure this credential, you'll need: * A **Username** to connect as. * A **Password** for that user account. n8n uses These fields to build the `-u` parameter in the format of `-u username:pw`. Refer to Web API basics for more information. --- ## Page: https://docs.n8n.io/integrations/builtin/credentials/trello/ You can use these credentials to authenticate the following nodes: * Trello * Trello Trigger ## Supported authentication methods# * API key Refer to Trello's API documentation for more information about the service. ## Using API key# To configure this credential, you'll need a Trello account and: * An **API Key** * An **API Token** To generate both the API Key and API Token, create a Trello Power-Up: 1. Open the Trello Power-Up Admin Portal. 2. Select **New**. 3. Enter a **Name** for your Power-Up, like `n8n integration`. 4. Select the **Workspace** the Power-Up should have access to. 5. Leave the **iframe connector URL** blank. 6. Enter appropriate contact information. 7. Select **Create**. 8. This should open the Power-Up to the **API Key** page. (If it doesn't, open that page.) 9. Select **Generate a new API Key**. 10. Copy the **API key** from Trello and enter it in your n8n credential. 11. In your Trello API key page, enter your n8n base URL as an **Allowed origin**. 12. In **Capabilities** make sure to select the necessary options. 13. Select the **Token** link next to your Trello **API Key**. 14. When prompted, select **Allow** to grant all the permissions asked for. 15. Copy the Trello **Token** and enter it as the n8n **API Token**. Refer to Trello's API Introduction for more information on API keys and tokens. Refer to Trello's Power-Up Admin Portal for more information on creating Power-Ups. --- ## Page: https://docs.n8n.io/integrations/builtin/credentials/twake/ You can use these credentials to authenticate the following nodes: * Twake ## Prerequisites# Create a Twake account. ## Supported authentication methods# * Cloud API key * Server API key Refer to Twake's documentation for more information about the service. ## Using Cloud API key# To configure this credential, you'll need: * A **Workspace Key**: Generated when you install the **n8n** application to your Twake Cloud environment and select **Configure**. Refer to How to connect n8n to Twake for more detailed instructions. ## Using Server API key# To configure this credential, you'll need: * A **Host URL**: The URL of your Twake self-hosted instance. * A **Public ID**: Generated when you create an app. * A **Private API Key**: Generated when you create an app. To generate your **Public ID** and **Private API Key**, create a Twake application: 1. Go to **Workspace Settings > Applications and connectors > Access your applications and connectors > Create an application**. 2. Enter appropriate details. 3. Once you've created your app, view its **API Details**. 4. Copy the **Public identifier** and add it as the n8n **Public ID**. 5. Copy the **Private key** and add it as the n8n **Private API Key**. Refer to API settings for more information. --- ## Page: https://docs.n8n.io/integrations/builtin/credentials/twilio/ You can use these credentials to authenticate the following nodes: * Twilio * Twilio trigger ## Supported authentication methods# * **Auth token**: Twilio recommends this method for local testing only. * **API key**: Twilio recommends this method for production. Refer to Twilio's API documentation for more information about the service. ## Using Auth Token# To configure this credential, you'll need a Twilio account and: * Your Twilio **Account SID** * Your Twilio **Auth Token** To set up the credential: 1. In n8n, select **Auth Token** as the **Auth Type**. 2. In Twilio, go to **Console Dashboard > Account Info**. 3. Copy your **Account SID** and enter this in your n8n credential. This acts as a username. 4. Cop your **Auth Token** and enter this in your n8n credential. This acts as a password. Refer to Auth Tokens and How to Change Them for more information. ## Using API key# To configure this credential, you'll need a Twilio account and: * Your Twilio **Account SID** * An **API Key SID**: Generated when you create an API key. * An **API Key Secret**: Generated when you create an API key. To set up the credential: 1. In n8n, select **API Key** as the **Auth Type**. 2. In Twilio, go to **Console Dashboard > Account Info**. 3. Copy your **Account SID** and enter it in your n8n credential. 4. In Twilio, go to your account's **API keys & tokens** page. 5. Select **Create API Key**. 6. Enter a **Friendly name** for your API key, like `n8n integration`. 7. Select your **Key type**. n8n works with either **Main** or **Standard**. Refer to Selecting an API key type for more information. 8. Select **Create API Key** to finish creating the key. 9. On the **Copy secret key** page, copy the **SID** displayed with the key and enter it in your n8n credential **API Key SID**. 10. On the **Copy secret key** page, copy the **Secret** displayed with the key and enter it in your n8n credential **API Key Secret**. Refer to Create an API key for more detailed instructions. ### Selecting an API key type# When you create a Twilio API key, you must select a key type. The n8n credential works with **Main** and **Standard** key types. Here are more details on the different API key types: * **Main**: This key type gives you the same level of access as using your Account SID and Auth Token in API requests. * **Standard**: This key type gives you access to all the functionality in Twilio's APIs except the API key resources and Account resources. * **Restricted**: This key type is in beta. n8n hasn't tested the credential against this key type; if you try it, let us know if you run into any issues. Refer to Types of API keys for more information on the key types. --- ## Page: https://docs.n8n.io/integrations/builtin/credentials/twist/ You can use these credentials to authenticate the following nodes: * Twist ## Prerequisites# * Create a Twist account. * Create a general integration and configure a valid OAuth Redirect URL. Refer to Using OAuth2 for more information. ## Supported authentication methods# * OAuth2 Refer to Twist's API documentation for more information about authenticating with the service. ## Using OAuth2# To configure this credential, you'll need: * A **Client ID**: Generated once you create a general integration. * A **Client Secret**: Generated once you create a general integration. To generate your Client ID and Client Secret, create a general integration. Use these settings for your integration's **OAuth Authentication**: * Copy the **OAuth Redirect URL** from n8n and enter it as the **OAuth 2 redirect URL** in Twist. OAuth Redirect URL for self-hosted n8n Twist doesn't accept a `localhost` Redirect URL. The Redirect URL should be a URL in your domain, for example: `https://mytemplatemaker.example.com/gr_callback`. If your n8n **OAuth Redirect URL** contains localhost, refer below to Local environment redirect URL for generating a URL that Twist will allow. * Select **Update OAuth settings** to save those changes. * Copy the **Client ID** and **Client Secret** from Twist and enter them in the appropriate fields in n8n. ### Local environment redirect URL# Twist doesn't accept a localhost callback URL. These steps should allow you to configure the OAuth credentials for the local environment: 1. Use ngrok to expose the local server running on port `5678` to the internet. In your terminal, run the following command: <table><tbody><tr><td><div><pre><span></span><span>1</span></pre></div></td><td><div><pre><span></span><code>ngrok<span> </span>http<span> </span><span>5678</span> </code></pre></div></td></tr></tbody></table> 2. Run the following command in a new terminal. Replace `<YOUR-NGROK-URL>` with the URL that you get from the previous step. <table><tbody><tr><td><div><pre><span></span><span>1</span></pre></div></td><td><div><pre><span></span><code><span>export</span><span> </span><span>WEBHOOK_URL</span><span>=</span><YOUR-NGROK-URL> </code></pre></div></td></tr></tbody></table> 3. Use the generated URL as your **OAuth 2 redirect URL** in Twist. --- ## Page: https://docs.n8n.io/integrations/builtin/credentials/typeform/ You can use these credentials to authenticate the following nodes: * Typeform Trigger ## Supported authentication methods# * API token * OAuth2 Refer to Typeform's API documentation for more information about the service. ## Using API token# To configure this credential, you'll need a Typeform account and: * A personal **Access Token** To get your personal access token: 1. Log into your Typeform account. 2. Select your profile avatar in the upper right and go to **Account > Your settings >** **Personal Tokens**. 3. Select **Generate a new token**. 4. Give your token a **Name**, like `n8n integration`. 5. For **Scopes**, select **Custom scopes**. Select these scopes: * Forms: Read * Webhooks: Read, Write 6. Select **Generate token**. 7. Copy the token and enter it in your n8n credential. Refer to Typeform's Personal access token documentation for more information. ## Using OAuth2# To configure this credential, you'll need a Typeform account and: * A **Client ID**: Generated when you register an app. * A **Client Secret**: Generated when you register an app. To get your Client ID and Client Secret, register a new Typeform app: 1. Log into your Typeform account. 2. In the upper left, select the dropdown for your organization and select **Developer apps**. 3. Select **Register a new app**. 4. Enter an **App Name** that makes sense, like `n8n OAuth2 integration`. 5. Enter your n8n base URL as the **App website**, for example `https://n8n-sample.app.n8n.cloud/`. 6. From n8n, copy the **OAuth Redirect URL**. Enter this in Typeform as the **Redirect URI(s)**. 7. Select **Register app**. 8. Copy the **Client Secret** and enter it in your n8n credential. 9. In Typeform, select **Got it** to close the Client Secret modal. 10. The **Developer apps** panel displays your new app. Copy the **Client ID** and enter it in your n8n credential. 11. Once you enter both the **Client ID** and **Client Secret** in n8n, select **Connect my account** and follow the on-screen prompts to finish authorizing the app. Refer to Create applications that integrate with Typeform's APIs for more information. --- ## Page: https://docs.n8n.io/integrations/builtin/credentials/unleashedsoftware/ You can use these credentials to authenticate the following nodes: * Unleashed Software ## Prerequisites# Create an Unleashed Software account. ## Supported authentication methods# * API key Refer to Unleashed's API documentation for more information about the service. ## Using API key# To configure this credential, you'll need: * An **API ID**: Go to **Integrations > Unleashed API Access** to find your **API ID**. * An **API Key**: Go to **Integrations > Unleashed API Access** to find your **API Key**. Refer to Unleashed API Access for more information. Account owner required You must log in as an Unleashed account owner to view the API ID and API Key. --- ## Page: https://docs.n8n.io/integrations/builtin/credentials/uplead/ You can use these credentials to authenticate the following nodes: * UpLead ## Prerequisites# Create an UpLead account. ## Supported authentication methods# * API key ## Related resources# Refer to UpLead's API documentation for more information about the service. ## Using API key# To configure this credential, you'll need: * An **API Key**: Go to your **Account > Profiles** to **Generate New API Key**. Refer to How can I generate an API key? for more information. --- ## Page: https://docs.n8n.io/integrations/builtin/credentials/uproc/ You can use these credentials to authenticate the following nodes: * uProc ## Prerequisites# Create a uProc account. ## Supported authentication methods# * API key Refer to uProc's API documentation for more information about the service. ## Using API Key# To configure this credential, you'll need: * An **Email** address: Enter the email address you use to log in to uProc. This is also displayed in **Settings > Integrations > API Credentials**. * An **API Key**: Go to **Settings > Integrations > API Credentials**. Copy the **API Key (real)** from the **API Credentials** section and enter it in your n8n credential. --- ## Page: https://docs.n8n.io/integrations/builtin/credentials/uptimerobot/ You can use these credentials to authenticate the following nodes: * UptimeRobot ## Prerequisites# Create an UptimeRobot account. ## Supported authentication methods# * API key Refer to UptimeRobot's API documentation for more information about the service. ## Using API key# To configure this credential, you'll need: * An **API Key**: Get your API Key from **My Settings > API Settings**. Create a **Main API Key** and enter this key in your n8n credential. ### API key types# UptimeRobot supports three API key types: * **Account-specific** (also known as **main**): Pulls data for multiple monitors. * **Monitor-specific**: Pulls data for a single monitor. * **Read-only**: Only runs `GET` API calls. To complete all of the operations in the UptimeRobot node, use the **Main** or **Account-specific** API key type. Refer to API authentication for more information. --- ## Page: https://docs.n8n.io/integrations/builtin/credentials/urlscanio/ You can use these credentials to authenticate the following nodes: * urlscan.io ## Prerequisites# Create an urlscan.io account. ## Supported authentication methods# * API key ## Related resources# Refer to urlscan.io's API documentation for more information about the service. ## Using API key# To configure this credential, you'll need: * An **API Key**: Get your API key from **Settings & API > API Keys**. --- ## Page: https://docs.n8n.io/integrations/builtin/credentials/venafitlsprotectcloud/ You can use these credentials to authenticate the following nodes: * Venafi TLS Protect Cloud node * Venafi TLS Protect Cloud Trigger node ## Prerequisites# Create a Venafi TLS Protect Cloud account. ## Supported authentication methods# * API key Refer to Venafi TLS Protect Cloud's API documentation for more information about the service. ## Using API key# To configure this credential, you'll need: * A **Region**: Select the region that matches your business needs. Choose **EU** if you're located in the European Union. Otherwise, choose **US**. * An **API Key**: Go to your **avatar > Preferences > API Keys** to get your API key. You can also use VCert to get your API key. Refer to Obtaining an API Key for more information. --- ## Page: https://docs.n8n.io/integrations/builtin/credentials/venafitlsprotectdatacenter/ You can use these credentials to authenticate the following nodes: * Venafi TLS Protect Datacenter node ## Prerequisites# * Create a Venafi TLS Protect Datacenter account. * Set the expiration and refresh time for tokens. Refer to Setting up token authentication for more information. * Create an API integration in **API > Integrations**. Refer to Integrating other systems with Venafi products for detailed instructions. * Take note of the Client ID for your integration. * Choose the scopes needed for the operations you want to perform within n8n. Refer to the scopes table in Integrating other systems with Venafi products for more details on available scopes. ## Supported authentication methods# * API integration Refer to Venafi's API integration documentation for more information about the service. ## Using API integration# To configure this credential, you'll need: * A **Domain**: Enter your Venafi TLS Protect Datacenter domain. * A **Client ID**: Enter the **Client ID** from your API integration. Refer to the information and links in Prerequisites for more information on creating an API integration. * A **Username**: Enter your username. * A **Password**: Enter your password. * **Allow Self-Signed Certificates**: If turned on, the credential will allow self-signed certificates. --- ## Page: https://docs.n8n.io/integrations/builtin/credentials/vero/ You can use these credentials to authenticate the following nodes: * Vero ## Prerequisites# Create a Vero account. ## Supported authentication methods# * API auth token ## Related resources# Refer to Vero's API documentation for more information about the service. ## Using API auth token# To configure this credential, you'll need: * An **Auth Token**: Get your auth token from your Vero account settings. Refer to API authentication for more information. --- ## Page: https://docs.n8n.io/integrations/builtin/credentials/virustotal/ You can use these credentials to authenticate when using the HTTP Request node to make a Custom API call. ## Prerequisites# Create a VirusTotal account. ## Supported authentication methods# * API key Refer to VirusTotal's documentation for more information about the service. This is a credential-only node. Refer to Custom API operations to learn more. View example workflows and related content on n8n's website. ## Using API key# To configure this credential, you'll need: * An **API Token**: Go to your **user account menu > API key** to get your API key. Enter this as the **API Token** in your n8n credential. Refer to API authentication for more information. --- ## Page: https://docs.n8n.io/integrations/builtin/credentials/vonage/ You can use these credentials to authenticate the following nodes: * Vonage ## Prerequisites# Create a Vonage developer account. ## Supported authentication methods# * API key ## Related resources# Refer to Vonage's SMS API documentation for more information about the service. ## Using API key# To configure this credential, you'll need: * An **API Key** * An **API Secret** Get your **API Key** and **API Secret** from your developer dashboard **user account > Settings > API Settings**. Refer to Retrieve your account information for more information. --- ## Page: https://docs.n8n.io/integrations/builtin/credentials/ciscowebex/ You can use these credentials to authenticate the following nodes: * Webex by Cisco * Webex by Cisco Trigger ## Prerequisites# Create a Webex by Cisco account (this should automatically get you developer account access). ## Supported authentication methods# * OAuth2 Refer to Webex's API documentation for more information about the service. ## Using OAuth2# Note for n8n Cloud users You'll only need to enter the Credentials Name and select the **Connect my account** button in the OAuth credential to connect your Webex by Cisco account to n8n. Should you need to configure OAuth2 from scratch, you'll need to create an integration to use this credential. Refer to the instructions in the Webex Registering your Integration documentation to begin. n8n recommends using the following **Scopes** for your integration: * `spark:rooms_read` * `spark:messages_write` * `spark:messages_read` * `spark:memberships_read` * `spark:memberships_write` * `meeting:recordings_write` * `meeting:recordings_read` * `meeting:preferences_read` * `meeting:schedules_write` * `meeting:schedules_read` --- ## Page: https://docs.n8n.io/integrations/builtin/credentials/webflow/ You can use these credentials to authenticate the following nodes: * Webflow * Webflow Trigger ## Prerequisites# * Create a Webflow account. * Create a site: Required for API access token authentication only. ## Supported authentication methods# * API access token * OAuth2 Refer to Webflow's API documentation for more information about the service. ## Using API access token# To configure this credential, you'll need: * A Site **Access Token**: Access tokens are site-specific. Go to your site's **Site Settings > Apps & integrations > API access** and select **Generate API token**. Refer to Get a Site Token for more information. ## Using OAuth2# Note for n8n Cloud users Cloud users don't need to provide connection details. Select **Connect my account** to connect through your browser. If you need to configure OAuth2 from scratch, register an application in your workspace. Use these settings for your application: * Copy the **OAuth callback URL** from n8n and add it as a **Redirect URI** in your application. * Once you've created your application, copy the **Client ID** and **Client Secret** and enter them in your n8n credential. * If you are using the Webflow Data API V1 (deprecated), enable the **Legacy** toggle. Otherwise, leave this inactive. Refer to OAuth for more information on Webflow's OAuth web flow. --- ## Page: https://docs.n8n.io/integrations/builtin/credentials/webhook/ You can use these credentials to authenticate the following nodes: * Webhook ## Prerequisites# You must use the authentication method required by the app or service you want to query. ## Supported authentication methods# * Basic auth * Header auth * JWT auth * None ## Using basic auth# Use this generic authentication if your app or service supports basic authentication. To configure this credential, enter: * The **Username** you use to access the app or service your HTTP Request is targeting * The **Password** that goes with that username Use this generic authentication if your app or service supports header authentication. To configure this credential, enter: * The header **Name** you need to pass to the app or service your HTTP request is targeting * The **Value** for the header Read more about HTTP headers ## Using JWT auth# **JWT Auth** is a method of authentication that uses JSON Web Tokens (JWT) to digitally sign data. This authentication method uses the **JWT credential** and can use either a **Passphrase** or **PEM Key** as key type. Refer to JWT credential for more information. --- ## Page: https://docs.n8n.io/integrations/builtin/credentials/wekan/ You can use these credentials to authenticate the following nodes: * Wekan ## Prerequisites# Install Wekan on your server. ## Supported authentication methods# * Basic auth ## Related resources# Refer to Wekan's API documentation for more information about authenticating with the service. ## Using basic auth# To configure this credential, you'll need: * A **Username**: Enter your Wekan username. * A **Password**: Enter your Wekan password. * A **URL**: Enter your Wekan domain. --- ## Page: https://docs.n8n.io/integrations/builtin/credentials/whatsapp/ You can use these credentials to authenticate the following nodes: * WhatsApp Business Cloud * WhatsApp Trigger ## Requirements# To create credentials for WhatsApp, you need the following Meta assets: * A Meta developer account: A developer account allows you to create and manage Meta apps, including WhatsApp integrations. Set up a Meta developer account 1. Visit the Facebook Developers site. 2. Click **Getting Started** in the upper-right corner (if the link says **My Apps**, you've already set up a developer account). 3. Agree to terms and conditions. 4. Provide a phone number for verification. 5. Select your occupation or role. * A Meta business portfolio: WhatsApp messaging services require a Meta business portfolio, formerly called a Business Manager account. The UI may still show either option. Set up a Meta business portfolio 1. Visit the Facebook Business site. 2. Select **Create an account**. * If you already have a Facebook Business account and portfolio, but want a new portfolio, open the business portfolio selector in the left-side menu and select **Create a business portfolio**. 3. Enter a **Business portfolio name**. 4. Enter your **name**. 5. Enter a **business email**. 6. Select **Submit** or **Create**. * A Meta business app configured with WhatsApp: Once you have a developer account, you will create a Meta business app. Set up a Meta business app with WhatsApp 1. Visit the Meta for Developers Apps dashboard 2. Select **Create app**. 3. In **Add products to your app**, select **Set up** in the WhatsApp tile. Refer to Add the WhatsApp Product for more detail. 4. This opens the WhatsApp **Quickstart** page. Select your business portfolio. 5. Select **Continue**. 6. In the left-side menu, go to **App settings** > **Basic**. 7. Set the **Privacy Policy URL** and **Terms of Service URL** for the app. 8. Change the **App Mode** to **Live**. ## Supported authentication methods# * API key: Use for the WhatsApp Business Cloud node. * OAuth2: Use for the WhatsApp Trigger node. Refer to WhatsApp's API documentation for more information about the service. Meta classifies users who create WhatsApp business apps as Tech Providers; refer to Meta's Get Started for Tech Providers for more information. ## Using API key# You need WhatsApp API key credentials to use the WhatsApp Business Cloud node. To configure this credential, you'll need: * An API **Access Token** * A **Business Account ID** To generate an access token, follow these steps: 1. Visit the Meta for Developers Apps dashboard. 2. Select your Meta app. 3. In the left-side menu, select **WhatsApp** > **API Setup**. 4. Select **Generate access token** and confirm the access you want to grant. 5. Copy the **Access token** and add it to n8n as the **Access Token**. 6. Copy the **WhatsApp Business Account ID** and add it to n8n as the **Business Account ID**. Refer to Test Business Messaging on WhatsApp for more information on the above steps. Fully verifying and launching your app will take further configuration. Refer to Meta's Get Started for Tech Providers Steps 5 and beyond for more information. Refer to App Review for more information on the Meta App Review process. ## Using OAuth2# You need WhatsApp OAuth2 credentials to use the WhatsApp Trigger node. To configure this credential, you'll need: * A **Client ID** * A **Client Secret** To retrieve these items, follow these steps: 1. Visit the Meta for Developers Apps dashboard. 2. Select your Meta app. 3. In the left-side menu, select **App settings** > **Basic**. 4. Copy the **App ID** and enter it as the **Client ID** within the n8n credential. 5. Copy the **App Secret** and enter it as the **Client Secret** within the n8n credential. Fully verifying and launching your app will take further configuration. Refer to Meta's Get Started for Tech Providers Steps 5 and beyond for more information. Refer to App Review for more information on the Meta App Review process. --- ## Page: https://docs.n8n.io/integrations/builtin/credentials/wise/ You can use these credentials to authenticate the following nodes: * Wise * Wise Trigger ## Prerequisites# Create a Wise account. ## Supported authentication methods# * API token Refer to Wise's API documentation for more information about the service. ## Using API token# To configure this credential, you'll need: * An **API Token**: Go to your **user menu > Settings > API tokens** to generate an API token. Enter the generated API key in your n8n credential. Refer to Getting started with the API for more information. * Your **Environment**: Select the environment that best matches your Wise account environment. * If you're using a Wise test sandbox account, select **Test**. * Otherwise, select **Live**. * **Private Key (Optional)**: For live endpoints requiring Strong Customer Authentication (SCA), generate a public and private key. Enter the private key here. Refer to Add a private key for more information. * If you're using a **Test** environment, you'll only need to enter a Private Key if you've enabled Strong Customer Authentication on the public keys management page. ## Add a private key# Wise protects some live endpoints and operations with Strong Customer Authentication (SCA). Refer to Strong Customer Authentication & 2FA for details. If you make a request to an endpoint that requires SCA, Wise returns a 403 Forbidden HTTP status code. The error returned will look like this: > This request requires Strong Customer Authentication (SCA). Please add a key pair to your account and n8n credentials. See https://api-docs.transferwise.com/#strong-customer-authentication-personal-token To use endpoints requiring SCA, generate an RSA key pair and add the relevant key information to both Wise and n8n: 1. Generate an RSA key pair: <table><tbody><tr><td><div><pre><span></span><span>1</span> <span>2</span></pre></div></td><td><div><pre><span></span><code>$<span> </span>openssl<span> </span>genrsa<span> </span>-out<span> </span>private.pem<span> </span><span>2048</span><span> </span> $<span> </span>openssl<span> </span>rsa<span> </span>-pubout<span> </span>-in<span> </span>private.pem<span> </span>-out<span> </span>public.pem </code></pre></div></td></tr></tbody></table> 2. Add the content of the public key `public.pem` to your Wise **user menu > Settings > API tokens > Manage public keys**. 3. Add the content of the private key `private.pem` in n8n to the **Private Key (Optional)**. Refer to Personal Token SCA for more information. --- ## Page: https://docs.n8n.io/integrations/builtin/credentials/wolframalpha/ ## Wolfram|Alpha credentials# You can use these credentials to authenticate the following nodes: * Wolfram|Alpha ## Supported authentication methods# * API key Refer to Wolfram|Alpha's Simple API documentation for more information about the service. View n8n's Advanced AI documentation. ## Using API key# To configure this credential, you'll need a registered Wolfram ID and: * An **App ID** To get an App ID: 1. Open the Wolfram|Alpha Developer Portal and go to **API Access**. 2. Select **Get an App ID**. 3. Enter a **Name** for your application, like `n8n integration`. 4. Enter a **Description** for your application. 5. Select **Simple API** as the **API**. 6. Select **Submit**. 7. Copy the generated **App ID** and enter it in your n8n credential. Refer to **Getting Started** in the Wolfram|Alpha Simple API documentation for more information. ## Resolve Forbidden connection error# If you enter your App ID and get an error that the credential is **Forbidden**, make sure that you have verified your email address for your Wolfram ID: 1. Go to your Wolfram ID Details. 2. If you don't see the **Verified** label underneath your **Email address**, select the link to **Send a verification email**. 3. You must open the link in that email to verify your email address. It may take several minutes for the verification to populate to the API, but once it does, retrying the n8n credential should succeed. --- ## Page: https://docs.n8n.io/integrations/builtin/credentials/woocommerce/ You can use these credentials to authenticate the following nodes: * WooCommerce * WooCommerce Trigger ## Prerequisites# * Install the WooCommerce plugin on your WordPress website. * In WordPress, go to **Settings > Permalinks** and set your WordPress permalinks to use something other than **Plain**. ## Supported authentication methods# * API key Refer to WooCommerce's REST API documentation for more information about the service. ## Using API key# To configure this credential, you'll need: * A **Consumer Key**: Created when you generate an API key. * A **Consumer Secret**: Created when you generate an API key. * A **WooCommerce URL** To generate an API key and set up your credential: 1. Go to **WooCommerce > Settings > Advanced > Rest API > Add key**. 2. Select **Read/Write** from the **Permissions** dropdown. 3. Copy the generated **Consumer Key** and **Consumer Secret** and enter them into your n8n credentials. 4. Enter your WordPress site URL as the **WooCommerce URL**. 5. By default, n8n passes your credential details in the Authorization header. If you need to pass them as query string parameters instead, turn on **Include Credentials in Query**. Refer to Generate Keys for more information. ## Resolve "Consumer key is missing" error# When you try to connect your credentials, you may receive an error like this: `Consumer key is missing`. This occurs when the server can't parse the Authorization header details when authenticating over SSL. To resolve it, turn on the **Include Credentials in Query** toggle to pass the consumer key/secret as query string parameters instead and retry the credential. --- ## Page: https://docs.n8n.io/integrations/builtin/credentials/wordpress/ You can use these credentials to authenticate the following nodes: * WordPress ## Prerequisites# * Create a WordPress account or deploy WordPress on a server. ## Supported authentication methods# * Basic auth Refer to WordPress's API documentation for more information about the service. ## Using basic auth# To configure this credential, you'll need: * Your WordPress **Username** * A WordPress application **Password** * Your **WordPress URL** * Decide whether to **Ignore SSL Issues** Using this credential involves three steps: 1. Enable two-step authentication. 2. Create an application password. 3. Set up the credential. Refer to the detailed instructions below for each step. ### Enable two-step authentication# To generate an application password, you must first enable Two-Step Authentication in WordPress. If you've already done this, skip to the next section. 1. Open your WordPress profile. 2. Select **Security** from the left menu. 3. Select **Two-Step Authentication**. The **Two-Step Authentication** page opens. 4. If Two-Step Authentication isn't enabled, you must enable it. 5. Choose whether to enable it using an authenticator app or SMS codes and follow the on-screen instructions. Refer to WordPress's Enable Two-Step Authentication for detailed instructions. ### Create an application password# With Two-Step Authentication enabled, you can now generate an application password: 1. From the WordPress **Security >** **Two-Step Authentication** page, select **\+ Add new application password** in the **Application passwords** section. 2. Enter an **Application name**, like `n8n integration`. 3. Select **Generate Password**. 4. Copy the password it generates. You'll use this in your n8n credential. ### Set up the credential# Congratulations! You're now ready to set up your n8n credential: 1. Enter your WordPress **Username** in your n8n credential. 2. Enter the application password you copied above as the **Password** in your n8n credential. 3. Enter the URL of your WordPress site as the **WordPress URL**. 4. Optional: Use the **Ignore SSL Issues** to choose whether you want the n8n credential to connect even if SSL certificate validation fails (turned on) or whether to respect SSL certificate validation (turned off). --- ## Page: https://docs.n8n.io/integrations/builtin/credentials/workable/ You can use these credentials to authenticate the following nodes: * Workable Trigger ## Prerequisites# Create a Workable account. ## Supported authentication methods# * API key Refer to Workable's API documentation for more information about the service. ## Using API key# To configure this credential, you'll need: * A **Subdomain**: Your Workable subdomain is the part of your Workable domain between `https://` and `.workable.com`. So if the full domain is `https://n8n.workable.com`, the subdomain is `n8n`. The subdomain is also displayed on your Workable **Company Profile** page. * An **Access Token**: Go to your **profile >** **Integrations** **\> Apps** and select **Generate API token**. Refer to Generate a new token for more information. Token scopes If you're using this credential with the Workable Trigger node, select the `r_candidates` and `r_jobs` scopes when you generate your token. If you're using this credential in other ways, select scopes that are relevant for your use case. Refer to Supported API scopes for more information on scopes. --- ## Page: https://docs.n8n.io/integrations/builtin/credentials/wufoo/ You can use these credentials to authenticate the following nodes: * Wufoo Trigger ## Prerequisites# Create a Wufoo account. ## Supported authentication methods# * API key Refer to Wufoo's API documentation for more information about the service. ## Using API key# To configure this credential, you'll need: * An **API Key**: Get your API key from the Wufoo Form Manager. To the right of a form, select **More > API Information**. Refer to Using API Information and Webhooks for more information. * A **Subdomain**: Your subdomain is the part of your Wufoo URL that comes after `https://` and before `wufoo.com`. So if the full domain is `https://n8n.wufoo.com`, the subdomain is `n8n`. Admins can view the subdomain in the **Account Manager**. Refer to Your Subdomain for more information. --- ## Page: https://docs.n8n.io/integrations/builtin/credentials/twitter/ You can use these credentials to authenticate the following nodes: * X (formerly Twitter) ## Prerequisites# * Create an X developer account. * Create a Twitter app or use the default project and app created when you sign up for the developer portal. Refer to each supported authentication method below for more details on the app's configuration. ## Supported authentication methods# * OAuth2 Deprecation warning n8n used to support an **OAuth** authentication method, which used X's OAuth 1.0a authentication method. n8n deprecated this method with the release of V2 of the X node in n8n version 0.236.0. Refer to X's API documentation for more information about the service. Refer to X's API authentication documentation for more information about authenticating with the service. Refer to Application-only Authentication for more information about app-only authentication. ## Using OAuth2# Use this method if you're using n8n version 0.236.0 or later. To configure this credential, you'll need: * A **Client ID** * A **Client Secret** To generate your Client ID and Client Secret: 1. In the Twitter developer portal, open your project. 2. On the project's **Overview** tab, find the **Apps** section and select **Add App**. 3. Give your app a **Name** and select **Next**. 4. Go to the **App Settings**. 5. In the **User authentication settings**, select **Set Up**. 6. Set the **App permissions**. Choose **Read and write and Direct message** if you want to use all functions of the n8n X node. 7. In the **Type of app** section, select **Web App, Automated App or Bot**. 8. In n8n, copy the **OAuth Redirect URL**. 9. In your X app, find the **App Info** section and paste that URL in as the **Callback URI / Redirect URL**. 10. Add a **Website URL**. 11. Save your changes. 12. Copy the **Client ID** and **Client Secret** displayed in X and add them to the corresponding fields in your n8n credential. Refer to X's OAuth 2.0 Authentication documentation for more information on working with this authentication method. X rate limits This credential uses the OAuth 2.0 Bearer Token authentication method, so you'll be subject to app rate limits. Refer to X rate limits below for more information. ## X rate limits# X has time-based rate limits per endpoint based on your developer access plan level. X calculates app rate limits and user rate limits independently. Refer to Rate limits for the access plan level rate limits and guidance on avoiding hitting them. Use the guidance below for calculating rate limits: * If you're using the deprecated OAuth method, user rate limits apply. You'll have one limit per time window for each set of users' access tokens. * If you're Using OAuth2, app rate limits apply. You'll have a limit per time window for requests made by your app. X calculates user rate limits and app rate limits independently. Refer to X's Rate limits and authentication methods for more information about these rate limit types. --- ## Page: https://docs.n8n.io/integrations/builtin/credentials/xata/ You can use these credentials to authenticate the following nodes: * Xata ## Prerequisites# Create a Xata database or an account on an existing database. ## Supported authentication methods# * API key Refer to Xata's documentation for more information about the service. View n8n's Advanced AI documentation. ## Using API key# To configure this credential, you'll need: * The **Database Endpoint**: The Workspace API requires that you identify the database you're requesting information from using this format: `https://{workspace-display-name}-{workspace-id}.{region}.xata.sh/db/{dbname}`. Refer to Workspace API for more information. * `{workspace-display-name}`: The workspace display name is an optional identifier you can include in your Database Endpoint. The API ignores it, but including it can make it easier to figure out which workspace this database is in if you're saving multiple credentials. * `{workspace-id}`: The unique ID of the workspace, 6 alphanumeric characters. * `{region}`: The hosting region for the database. This value must match the database region configuration. * `{dbname}`: The name of the database you're interacting with. * A **Branch**: Enter the name of the GitHub branch for your database. * An **API Key**: To generate an API key, go to **Account Settings** and select **\+ Add a key**. Refer to Generate an API Key for more information. --- ## Page: https://docs.n8n.io/integrations/builtin/credentials/xero/ You can use these credentials to authenticate the following nodes: * Xero ## Prerequisites# Create a Xero account. ## Supported authentication methods# * OAuth2 Refer to Zero's API documentation for more information about the service. ## Using OAuth2# To configure this credential, you'll need: * A **Client ID**: Generated when you create a new app for a custom connection. * A **Client Secret**: Generated when you create a new app for a custom connection. To generate your Client ID and Client Secret, create an OAuth2 custom connection app in your Xero developer portal **My Apps**. Use these settings for your app: Xero App Name Xero doesn't support app instances within the Xero Developer Centre that contain `n8n` in their name. * Select **Web app** as the **Integration Type**. * For the **Company or Application URL**, enter the URL of your n8n server or reverse proxy address. For cloud users, for example, this is: `https://your-username.app.n8n.cloud/`. * Copy the **OAuth Redirect URL** from n8n and add it as an **OAuth 2.0 redirect URI** in your app. * Select appropriate **scopes** for your app. Refer to OAuth2 Scopes for more information. * To use all functionality in the Xero node, add the `accounting.contacts` and `accounting.transactions` scopes. Refer to Xero's OAuth Custom Connections documentation for more information. --- ## Page: https://docs.n8n.io/integrations/builtin/credentials/yourls/ You can use these credentials to authenticate the following nodes: * Yourls ## Prerequisites# Install Yourls on your server. ## Supported authentication methods# * API key ## Related resources# Refer to Yourl's documentation for more information about the service. ## Using API key# To configure this credential, you'll need: * A **Signature** token: Go to **Tools > Secure passwordless API call** to get your **Signature** token. Refer to Yourl's Passworldess API documentation for more information. * A **URL**: Enter the URL of your Yourls instance. --- ## Page: https://docs.n8n.io/integrations/builtin/credentials/zabbix/ You can use these credentials to authenticate when using the HTTP Request node to make a Custom API call. ## Prerequisites# Create a Zabbix Cloud account or self-host your own Zabbix server. ## Supported authentication methods# * API key Refer to Zabbix's API documentation for more information about the service. This is a credential-only node. Refer to Custom API operations to learn more. View example workflows and related content on n8n's website. ## Using API key# To configure this credential, you'll need: * an **API Token**: An API key for your Zabbix user. * the **URL**: The URL of your Zabbix server. Don't include `/zabbix` as part of the URL. Refer to Zabbix's API documentation for more information about authenticating to the service. --- ## Page: https://docs.n8n.io/integrations/builtin/credentials/zammad/ You can use these credentials to authenticate the following nodes: * Zammad ## Prerequisites# * Create a hosted Zammad account or set up your own Zammad instance. * For token authentication, enable **API Token Access** in **Settings > System > API**. Refer to Setting up a Zammad for more information. ## Supported authentication methods# * Basic auth * Token auth: Zammad recommends using this authentication method. Refer to Zammad's API Authentication documentation for more information about authenticating with the service. ## Using basic auth# To configure this credential, you'll need: * A **Base URL**: Enter the URL of your Zammad instance. * An **Email** address: Enter the email address you use to log in to Zammad. * A **Password**: Enter your Zammad password. * **Ignore SSL Issues**: When turned on, n8n will connect even if SSL certificate validation fails. ## Using token auth# To configure this credential, you'll need: * A **Base URL**: Enter the URL of your Zammad instance. * An **Access Token**: Once **API Token Access** is enabled for the Zammad instance, any user with the `user_preferences.access_token` permission can generate an **Access Token** by going to your **avatar > Profile > Token Access** and **Create** a new token. * The access token permissions depend on what actions you'd like to complete with this credential. For all functionality within the Zammad node, select: * `admin.group` * `admin.organization` * `admin.user` * `ticket.agent` * `ticket.customer` * **Ignore SSL Issues**: When turned on, n8n will connect even if SSL certificate validation fails. --- ## Page: https://docs.n8n.io/integrations/builtin/credentials/zendesk/ You can use these credentials to authenticate the following nodes: * Zendesk * Zendesk Trigger ## Prerequisites# * Create a Zendesk account. * For API token authentication, enable token access to the API in Admin Center under **Apps and integrations > APIs > Zendesk APIs**. ## Supported authentication methods# * API token * OAuth2 Refer to Zendesk's API documentation for more information about the service. ## Using API token# To configure this credential, you'll need: * Your **Subdomain**: Your Zendesk subdomain is the portion of the URL between `https://` and `.zendesk.com`. For example, if the Zendesk URL is `https://n8n-example.zendesk.com/agent/dashboard`, the subdomain is `n8n-example`. * An **Email** address: Enter the email address you use to log in to Zendesk. * An **API Token**: Generate an API token in **Apps and integrations > APIs > Zendesk API**. Refer to API token for more information. ## Using OAuth2# To configure this credential, you'll need: * A **Client ID**: Generated when you create a new OAuth client. * A **Client Secret**: Generated when you create a new OAuth client. * Your **Subdomain**: Your Zendesk subdomain is the portion of the URL between `https://` and `.zendesk.com`. For example, if the Zendesk URL is `https://n8n-example.zendesk.com/agent/dashboard`, the subdomain is `n8n-example`. To create a new OAuth client, go to **Apps and integrations > APIs > Zendesk API > OAuth Clients**. Use these settings: * Copy the **OAuth Redirect URL** from n8n and enter it as a **Redirect URL** in the OAuth client. * Copy the **Unique identifier** for the Zendesk client and enter this as your n8n **Client ID**. * Copy the **Secret** from Zendesk and enter this as your n8n **Client Secret** Refer to Registering your application with Zendesk for more information. --- ## Page: https://docs.n8n.io/integrations/builtin/credentials/zep/ You can use these credentials to authenticate the following nodes: * Zep * Zep Vector Store ## Supported authentication methods# * API key Refer to Zep's Cloud SDK documentation and Open Source SDK documentation for more information about the service. Refer to Zep's REST API documentation for information about the API. View n8n's Advanced AI documentation. ## Using API key# To configure this credential, you'll need a Zep server with at least one project and: * An **API URL** * An **API Key** Setup depends on whether you're using Zep Cloud or self-hosted Zep Open Source. ### Zep Cloud setup# Follow these instructions if you're using Zep Cloud: 1. In Zep, open the **Project Settings**. 2. In the **Project Keys** section, select **Add Key**. 3. Enter a **Key Name**, like `n8n integration`. 4. Select **Create**. 5. Copy the key and enter it in your n8n integration as the **API Key**. 6. Turn on the **Cloud** toggle. ### Self-hosted Zep Open Source setup# Follow these instructions if you're self-hosting Zep Open Source: 1. Enter the JWT token for your Zep server as the **API Key** in n8n. * If you haven't generated a JWT token for your Zep server before, refer to Zep's Configuring Authentication for instructions. 2. Make sure the **Cloud** toggle is off. 3. Enter the URL for your Zep server as the **API URL**. --- ## Page: https://docs.n8n.io/integrations/builtin/credentials/zoho/ You can use these credentials to authenticate the following nodes: * Zoho CRM ## Prerequisites# Create a Zoho account. ## Supported authentication methods# * OAuth2 Refer to Zoho's CRM API documentation for more information about the service. ## Using OAuth2# To configure this credential, you'll need: * An **Access Token URL**: Zoho provides region-specific access token URLs. Select the region that best fits your Zoho data center: * **AU**: Select this option for Australia data center. * **CN**: Select this option for Canada data center. * **EU**: Select this option for the European Union data center. * **IN**: Select this option for the India data center. * **US**: Select this option for the United States data center. Refer to Multi DC for more information about selecting a data center. Note for n8n Cloud users Cloud users don't need to provide connection details. Select **Connect my account** to connect through your browser. If you need to configure OAuth2 from scratch, register an application with Zoho. Use these settings for your application: * Select **Server-based Applications** as the **Client Type**. * Copy the **OAuth Callback URL** from n8n and enter it in the Zoho **Authorized Redirect URIs** field. * Copy the **Client ID** and **Client Secret** from the application and enter them in your n8n credential. --- ## Page: https://docs.n8n.io/integrations/builtin/credentials/zoom/ You can use these credentials to authenticate the following nodes: * Zoom ## Prerequisites# Create a Zoom account. Your account must have one of the following permissions: * Account owner * Account admin * Zoom for developers role ## Supported authentication methods# * API JWT token * OAuth2 API JWT token deprecation Zoom removed support for JWT access tokens in June 2023. You must use OAuth2 for all new credentials. Refer to Zoom's API documentation for more information about the service. ## Using API JWT token# This authentication method has been fully deprecated by Zoom. Don't create new credentials with it. To configure this credential, you'll need: * A **JWT token**: To create a JWT token, create a new JWT app in the Zoom App Marketplace. ## Using OAuth2# To configure this credential, you'll need: * A **Client ID**: Generated when you create an OAuth app on the Zoom App Marketplace. * A **Client Secret**: Generated when you create an OAuth app. To generate your **Client ID** and **Client Secret**, create an OAuth app. Use these settings for your OAuth app: * Select **User-managed app** for **Select how the app is managed**. * Copy the **OAuth Callback URL** from n8n and enter it as an **OAuth Redirect URL** in Zoom. * If your n8n credential displays a **Whitelist URL**, also enter that URL as a an **OAuth Redirect URL**. * Enter **Scopes** for the scopes you plan to use. For all functionality in the Zoom node, select: * `meeting:read` * `meeting:write` * Refer to OAuth scopes | Meeting scopes for more information on meeting scopes. * Copy the **Client ID** and **Client Secret** provided in the Zoom app and enter them in your n8n credential. --- ## Page: https://docs.n8n.io/integrations/builtin/credentials/zscalerzia/ You can use these credentials to authenticate when using the HTTP Request node to make a Custom API call. ## Prerequisites# Create an admin account on a Zscaler Internet Access (ZIA) cloud instance. ## Supported authentication methods# * Basic auth and API key combo Refer to Zscaler ZIA's documentation for more information about the service. This is a credential-only node. Refer to Custom API operations to learn more. View example workflows and related content on n8n's website. ## Using basic auth and API key combo# To configure this credential, you'll need: * A **Base URL**: Enter the base URL of your Zscaler ZIA cloud name. To get your base URL, log in to the ZIA Admin Portal and go to **Administration > Cloud Service API Security**. The base URL is displayed in both the **Cloud Service API Key** tab and the **OAuth 2.0 Authorization Servers** tab. * A **Username**: Enter your ZIA admin username. * A **Password**: Enter your ZIA admin password. * An **Api Key**: Get an API key by creating one from **Administration > Cloud Service API Security > Cloud Service API Key**. Refer to About Cloud Service API Key for more detailed instructions. --- ## Page: https://docs.n8n.io/integrations/builtin/credentials/zulip/ You can use these credentials to authenticate the following nodes: * Zulip ## Prerequisites# Create a Zulip account. ## Supported authentication methods# * API key Refer to Zulip's API documentation for more information about the service. ## Using API key# To configure this credential, you'll need: * A **URL**: Enter the URL of your Zulip domain. * An **Email** address: Enter the email address you use to log in to Zulip. * An **API Key**: Get your API key in the **Gear cog > Personal Settings > Account & privacy > API Key**. Refer to API Keys for more information. --- ## Page: https://docs.n8n.io/integrations/custom-operations/ ## Custom API operations# One of the most complex parts of setting up API calls is managing authentication. n8n provides credentials support for operations and services beyond those supported by built-in nodes. * Custom operations for existing nodes: n8n supplies hundreds of nodes to create workflows that link multiple products. However, some nodes don't include all the possible operations supported by a product's API. You can work around this by making a custom API call using the HTTP Request node. * Credential-only nodes: n8n includes credential-only nodes. These are integrations where n8n supports setting up credentials for use in the HTTP Request node, but doesn't provide a standalone node. You can find a credential-only node in the nodes panel, as you would for any other integration. ## Predefined credential types# A predefined credential type is a credential that already exists in n8n. You can use predefined credential types instead of generic credentials in the HTTP Request node. For example: you create an Asana credential, for use with the Asana node. Later, you want to perform an operation that isn't supported by the Asana node, using Asana's API. You can use your existing Asana credential in the HTTP Request node to perform the operation, without additional authentication setup. ### Using predefined credential types# To use a predefined credential type: 1. Open your HTTP Request node, or add a new one to your workflow. 2. In **Authentication**, select **Predefined Credential Type**. 3. In **Credential Type**, select the API you want to use. 4. In **Credential for `<API name>`**, you can: 1. Select an existing credential for that platform, if available. 2. Select **Create New** to create a new credential. ### Credential scopes# Some existing credential types have specific scopes: endpoints that they work with. n8n warns you about this when you select the credential type. For example, follow the steps in Using predefined credential types, and select **Google Calendar OAuth2 API** as your **Credential Type**. n8n displays a box listing the two endpoints you can use this credential type with:  --- ## Page: https://docs.n8n.io/integrations/builtin/rate-limits/ API rate limits are restrictions on request frequency. For example, an API may limit the number of requests you can make per minute, or per day. APIs can also limits how much data you can send in one request, or how much data the API sends in a single response. ## Identify rate limit issues# When an n8n node hits a rate limit, it errors. n8n displays the error message in the node output panel. This includes the error message from the service. If n8n received error 429 (too many requests) from the service, the error message is **The service is receiving too many requests from you**. To check the rate limits for the service you're using, refer to the API documentation for the service. ## Handle rate limits for integrations# There are two ways to handle rate limits in n8n's integrations: using the Retry On Fail setting, or using a combination of the Loop Over Items and Wait nodes: * Retry On Fail adds a pause between API request attempts. * With Loop Over Items and Wait you can break you request data into smaller chunks, as well as pausing between requests. ### Enable Retry On Fail# When you enable Retry On Fail, the node automatically tries the request again if it fails the first time. 1. Open the node. 2. Select **Settings**. 3. Enable the **Retry On Fail** toggle. 4. Configure the retry settings: if using this to work around rate limits, set **Wait Between Tries (ms)** to more than the rate limit. For example, if the API you're using allows one request per second, set **Wait Between Tries (ms)** to `1000` to allow a 1 second wait. ### Use Loop Over Items and Wait# Use the Loop Over Items node to batch the input items, and the Wait node to introduce a pause between each request. 1. Add the Loop Over Items node before the node that calls the API. Refer to Loop Over Items for information on how to configure the node. 2. Add the Wait node after the node that calls the API, and connect it back to the Loop Over Items node. Refer to Wait for information on how to configure the node. For example, to handle rate limits when using OpenAI:  ## Handle rate limits in the HTTP Request node# The HTTP Request node has built-in settings for handling rate limits and large amounts of data. ### Batch requests# Use the Batching option to send more than one request, reducing the request size, and introducing a pause between requests. This is the equivalent of using Loop Over Items and Wait. 1. In the HTTP Request node, select **Add Option** > **Batching**. 2. Set **Items per Batch**: this is the number of input items to include in each request. 3. Set **Batch Interval (ms)** to introduce a delay between requests. For example, if the API you're using allows one request per second, set **Wait Between Tries (ms)** to `1000` to allow a 1 second wait. ### Paginate results# APIs paginate their results when they need to send more data than they can handle in a single response. For more information on pagination in the HTTP Request node, refer to HTTP Request node | Pagination. --- ## Page: https://docs.n8n.io/integrations/community-nodes/installation/ 1. Integrations 2. Community nodes 3. Installation and management There are two ways to install community nodes: * Within n8n using the GUI. * Manually from the command line: use this method if your n8n instance doesn't support installation through the in-app GUI. Only available on self-hosted instances Community nodes aren't available on n8n cloud and require self-hosting n8n. --- ## Page: https://docs.n8n.io/integrations/community-nodes/installation/gui-install/ Limited to n8n instance owners Only the n8n instance owner can install and manage community nodes. The instance owner is the person who sets up and manages user management. To install a community node: 1. Go to **Settings** > **Community Nodes**. 2. Select **Install**. 3. Find the node you want to install: 1. Select **Browse**. n8n takes you to an npm search results page, showing all npm packages tagged with the keyword `n8n-community-node-package`. 2. Browse the list of results. You can filter the results or add more keywords. 3. Once you find the package you want, make a note of the package name. If you want to install a specific version, make a note of the version number as well. 4. Return to n8n. 4. Enter the npm package name, and version number if required. For example, consider a community node designed to access a weather API called "Storms." The package name is n8n-node-storms, and it has three major versions. * To install the latest version of a package called n8n-node-weather: enter `n8n-nodes-storms` in **Enter npm package name**. * To install version 2.3: enter `n8n-node-storms@2.3` in **Enter npm package name**. 5. Agree to the risks of using community nodes: select **I understand the risks of installing unverified code from a public source.** 6. Select **Install**. n8n installs the node, and returns to the **Community Nodes** list in **Settings**. Nodes on the blocklist n8n maintains a blocklist of community nodes that it prevents you from installing. Refer to n8n community node blocklist for more information. To uninstall a community node: 1. Go to **Settings** > **Community nodes**. 2. On the node you want to install, select **Options** . 3. Select **Uninstall package**. 4. Select **Uninstall Package** in the confirmation modal. Breaking changes in versions Node developers may introduce breaking changes in new versions of their nodes. A breaking change is an update that breaks previous functionality. Depending on the node versioning approach that a node developer chooses, upgrading to a version with a breaking change could cause all workflows using the node to break. Be careful when upgrading your nodes. If you find that an upgrade causes issues, you can downgrade. ### Upgrade to the latest version# You can upgrade community nodes to the latest version from the node list in **Settings** > **community nodes**. When a new version of a community node is available, n8n displays an **Update** button on the node. Click the button to upgrade to the latest version. ### Upgrade to a specific version# To upgrade to a specific version (a version other than the latest), uninstall the node, then reinstall it, making sure to specify the target version. Follow the Installation instructions for more guidance. If there is a problem with a particular version of a community node, you may want to roll back to a previous version. To do this, uninstall the community node, then reinstall it, targeting a specific node version. Follow the Installation instructions for more guidance. --- ## Page: https://docs.n8n.io/integrations/community-nodes/installation/manual-install/ You can manually install community nodes on self-hosted n8n. You need to manually install community nodes in the following circumstances: * Your n8n instance runs in queue mode. * You want to install private packages. Access your Docker shell: <table><tbody><tr><td><div><pre><span></span><span>1</span></pre></div></td><td><div><pre><span></span><code>docker<span> </span><span>exec</span><span> </span>-it<span> </span>n8n<span> </span>sh </code></pre></div></td></tr></tbody></table> Create `~/.n8n/nodes` if it doesn't already exist, and navigate into it: <table><tbody><tr><td><div><pre><span></span><span>1</span> <span>2</span></pre></div></td><td><div><pre><span></span><code>mkdir<span> </span>~/.n8n/nodes <span>cd</span><span> </span>~/.n8n/nodes </code></pre></div></td></tr></tbody></table> Install the node: <table><tbody><tr><td><div><pre><span></span><span>1</span></pre></div></td><td><div><pre><span></span><code>npm<span> </span>i<span> </span>n8n-nodes-nodeName </code></pre></div></td></tr></tbody></table> Then restart n8n. Access your Docker shell: <table><tbody><tr><td><div><pre><span></span><span>1</span></pre></div></td><td><div><pre><span></span><code>docker<span> </span><span>exec</span><span> </span>-it<span> </span>n8n<span> </span>sh </code></pre></div></td></tr></tbody></table> Run npm uninstall: <table><tbody><tr><td><div><pre><span></span><span>1</span></pre></div></td><td><div><pre><span></span><code>npm<span> </span>uninstall<span> </span>n8n-nodes-nodeName </code></pre></div></td></tr></tbody></table> Breaking changes in versions Node developers may introduce breaking changes in new versions of their nodes. A breaking change is an update that breaks previous functionality. Depending on the node versioning approach that a node developer chooses, upgrading to a version with a breaking change could cause all workflows using the node to break. Be careful when upgrading your nodes. If you find that an upgrade causes issues, you can downgrade. ### Upgrade to the latest version# Access your Docker shell: <table><tbody><tr><td><div><pre><span></span><span>1</span></pre></div></td><td><div><pre><span></span><code>docker<span> </span><span>exec</span><span> </span>-it<span> </span>n8n<span> </span>sh </code></pre></div></td></tr></tbody></table> Run npm update: <table><tbody><tr><td><div><pre><span></span><span>1</span></pre></div></td><td><div><pre><span></span><code>npm<span> </span>update<span> </span>n8n-nodes-nodeName </code></pre></div></td></tr></tbody></table> ### Upgrade or downgrade to a specific version# Access your Docker shell: <table><tbody><tr><td><div><pre><span></span><span>1</span></pre></div></td><td><div><pre><span></span><code>docker<span> </span><span>exec</span><span> </span>-it<span> </span>n8n<span> </span>sh </code></pre></div></td></tr></tbody></table> Run npm uninstall to remove the current version: <table><tbody><tr><td><div><pre><span></span><span>1</span></pre></div></td><td><div><pre><span></span><code>npm<span> </span>uninstall<span> </span>n8n-nodes-nodeName </code></pre></div></td></tr></tbody></table> Run npm install with the version specified: <table><tbody><tr><td><div><pre><span></span><span>1</span> <span>2</span></pre></div></td><td><div><pre><span></span><code><span># Replace 2.1.0 with your version number</span> npm<span> </span>install<span> </span>n8n-nodes-nodeName@2.1.0 </code></pre></div></td></tr></tbody></table> --- ## Page: https://docs.n8n.io/integrations/community-nodes/risks/ * Using n8n * Integrations * Hosting n8n * Code in n8n * Advanced AI * API * Embed * n8n home ↗ * Forum ↗ * Blog ↗ 1. Integrations 2. Community nodes Using community nodes means you are installing unverified code from a public source into your n8n instance. This has some risks. Risks include: * System security: community nodes have full access to the machine that n8n runs on, and can do anything, including malicious actions. * Data security: any community node that you use has access to data in your workflows. * Breaking changes: node developers may introduce breaking changes in new versions of their nodes. A breaking change is an update that breaks previous functionality. Depending on the node versioning approach that a node developer chooses, upgrading to a version with a breaking change could cause all workflows using the node to break. Be careful when upgrading your nodes. You can report bad community nodes to security@n8n.io You can disable community nodes by setting `N8N_COMMUNITY_PACKAGES_ENABLED` to `false`. --- ## Page: https://docs.n8n.io/integrations/community-nodes/blocklist/ ## n8n community node blocklist# n8n maintains a blocklist of community nodes. You can't install any node on this list. n8n may add community nodes to the blocklist for a range of reasons, including: * The node is intentionally malicious * It's low quality (low enough to be harmful) If you are a community node creator whose node is on the blocklist, and you believe this is a mistake, contact hello@n8n.io. --- ## Page: https://docs.n8n.io/integrations/community-nodes/usage/ To use community nodes, you first need to install them. ## Adding community nodes to your workflow# After installing a community node, you can use it like any other node. n8n displays the node in search results in the **Nodes** panel. n8n marks community nodes with a **Package**  icon in the nodes panel. ## Community nodes with duplicate names# It's possible for several community nodes to have the same name. If you use two nodes with the same name in your workflow, they'll look the same, unless they have different icons. --- ## Page: https://docs.n8n.io/integrations/community-nodes/troubleshooting/ ## Troubleshooting and errors# ## Error: Missing packages# n8n installs community nodes directly onto the hard disk. The files must be available at startup for n8n to load them. If the packages aren't available at startup, you get an error warning of missing packages. If running n8n using Docker: depending on your Docker setup, you may lose the packages when you recreate your container or upgrade your n8n version. You must either: * Persist the contents of the `~/.n8n/nodes` directory. This is the best option. If you follow the Docker installation guide, the setup steps include persisting this directory. * Set the `N8N_REINSTALL_MISSING_PACKAGES` environment variable to `true`. The second option might increase startup time and may cause health checks to fail. --- ## Page: https://docs.n8n.io/integrations/community-nodes/build-community-nodes/ Subject to change The standards described in this document are for the first release of the community nodes repository. These may change in future releases. Community nodes are npm packages, hosted in the npm registry. When building a node to submit to the community node repository, use the following resources to make sure your node setup is correct: * View the starter node and n8n's own nodes for some examples. * Refer to the documentation on building your own nodes. * Make sure your node follows the standards for community nodes. ## Standards# To make your node available to the n8n community node repository, you must: * Make sure the package name starts with `n8n-nodes-` or `@<scope>/n8n-nodes-`. For example, `n8n-nodes-weather` or `@weatherPlugins/n8n-nodes-weather`. * Include `n8n-community-node-package` in your package keywords. * Make sure that you add your nodes and credentials to the `package.json` file inside the `n8n` attribute. Refer to the package.json in the starter node for an example. * Check your node using the linter and test it locally to ensure it works. * Submit the package to the npm registry. Refer to npm's documentation on Contributing packages to the registry for more information. --- ## Page: https://docs.n8n.io/integrations/creating-nodes/overview/ 1. Integrations 2. Creating nodes ## Creating nodes# Learn how to build your own custom nodes. This section includes: * Guidance on planning your build, including which style to use. * Tutorials for different node building styles. * Instructions for testing your node, including how to use the n8n node linter and troubleshooting support. * How to share your node with the community, or use it as a private node. * Reference material, including UI elements and information on the individual files that make up a node. ## Prerequisites# This section assumes the following: * Some familiarity with JavaScript and TypeScript. * Ability to manage your own development environment, including git. * Knowledge of npm, including creating and submitting packages. * Familiarity with n8n, including a good understanding of data structures and item linking. --- ## Page: https://docs.n8n.io/integrations/creating-nodes/plan/ 1. Integrations 2. Creating nodes 3. Plan your node This section provides guidance on designing your node, including key technical decisions such as choosing your node building style. When building a node, there are design choices you need to make before you start: * Which node type you need to build. * Which node building style to use. * Your UI design and UX principles * Your node's file structure. --- ## Page: https://docs.n8n.io/integrations/creating-nodes/plan/node-types/ ## Node types: Trigger and Action# There are two node types you can build for n8n: trigger nodes and action nodes. Both types provide integrations with external services. ## Trigger nodes# Trigger nodes start a workflow and supply the initial data. A workflow can contain multiple trigger nodes but with each execution, only one of them will execute, depending on the triggering event. There are three types of trigger nodes in n8n: | Type | Description | Example Nodes | | --- | --- | --- | | Webhook | Nodes for services that support webhooks. These nodes listen for events and trigger workflows in real time. | Zendesk Trigger, Telegram Trigger, Brevo Trigger | | Polling | Nodes for services that don't support webhooks. These nodes periodically check for new data, triggering workflows when they detect updates. | Airtable Trigger, Gmail Trigger, Google Sheet Trigger, RssFeed Read Trigger | | Others | Nodes that handle real-time responses not related to HTTP requests or polling. This includes message queue nodes and time-based triggers. | AMQP Trigger, RabbitMQ Trigger, MQTT Trigger, Schedule Trigger, Email Trigger (IMAP) | ## Action nodes# Action nodes perform operations as part of your workflow. These can include manipulating data, and triggering events in other systems. --- ## Page: https://docs.n8n.io/integrations/creating-nodes/plan/choose-node-method/ n8n has two node-building styles, declarative and programmatic. You should use the declarative style for most nodes. This style: The main difference between the declarative and programmatic styles is how they handle incoming data and build API requests. The programmatic style requires an `execute()` method, which reads incoming data and parameters, then builds a request. The declarative style handles this using the `routing` key in the `operations` object. Refer to Node base file for more information on node parameters and the `execute()` method. To understand the difference between the declarative and programmatic styles, compare the two code snippets below. This example creates a simplified version of the SendGrid integration, called "FriendGrid." The following code snippets aren't complete: they emphasize the differences in the node building styles. <table><tbody><tr><td><div><pre><span></span><span> 1</span> <span> 2</span> <span> 3</span> <span> 4</span> <span> 5</span> <span> 6</span> <span> 7</span> <span> 8</span> <span> 9</span> <span>10</span> <span>11</span> <span>12</span> <span>13</span> <span>14</span> <span>15</span> <span>16</span> <span>17</span> <span>18</span> <span>19</span> <span>20</span> <span>21</span> <span>22</span> <span>23</span> <span>24</span> <span>25</span> <span>26</span> <span>27</span> <span>28</span> <span>29</span> <span>30</span> <span>31</span> <span>32</span> <span>33</span> <span>34</span> <span>35</span> <span>36</span> <span>37</span> <span>38</span> <span>39</span> <span>40</span> <span>41</span> <span>42</span> <span>43</span> <span>44</span> <span>45</span> <span>46</span> <span>47</span> <span>48</span> <span>49</span> <span>50</span> <span>51</span> <span>52</span> <span>53</span> <span>54</span> <span>55</span> <span>56</span> <span>57</span> <span>58</span> <span>59</span> <span>60</span> <span>61</span> <span>62</span> <span>63</span> <span>64</span> <span>65</span> <span>66</span> <span>67</span> <span>68</span> <span>69</span> <span>70</span> <span>71</span> <span>72</span> <span>73</span> <span>74</span> <span>75</span> <span>76</span> <span>77</span> <span>78</span> <span>79</span> <span>80</span> <span>81</span> <span>82</span> <span>83</span> <span>84</span> <span>85</span> <span>86</span> <span>87</span> <span>88</span> <span>89</span> <span>90</span> <span>91</span> <span>92</span> <span>93</span></pre></div></td><td><div><pre><span></span><code><span>import</span><span> </span><span>{</span> <span> </span><span>IExecuteFunctions</span><span>,</span> <span> </span><span>INodeExecutionData</span><span>,</span> <span> </span><span>INodeType</span><span>,</span> <span> </span><span>INodeTypeDescription</span><span>,</span> <span> </span><span>IRequestOptions</span><span>,</span> <span>}</span><span> </span><span>from</span><span> </span><span>'n8n-workflow'</span><span>;</span> <span>// Create the FriendGrid class</span> <span>export</span><span> </span><span>class</span><span> </span><span>FriendGrid</span><span> </span><span>implements</span><span> </span><span>INodeType</span><span> </span><span>{</span> <span> </span><span>description</span><span>:</span><span> </span><span>INodeTypeDescription</span><span> </span><span>=</span><span> </span><span>{</span> <span> </span><span>displayName</span><span>:</span><span> </span><span>'FriendGrid'</span><span>,</span> <span> </span><span>name</span><span>:</span><span> </span><span>'friendGrid'</span><span>,</span> <span> </span><span>.</span><span> </span><span>.</span><span> </span><span>.</span> <span> </span><span>properties</span><span>:</span><span> </span><span>[</span> <span> </span><span>{</span> <span> </span><span>displayName</span><span>:</span><span> </span><span>'Resource'</span><span>,</span> <span> </span><span>.</span><span> </span><span>.</span><span> </span><span>.</span> <span> </span><span>},</span> <span> </span><span>{</span> <span> </span><span>displayName</span><span>:</span><span> </span><span>'Operation'</span><span>,</span> <span> </span><span>name</span><span>:</span><span> </span><span>'operation'</span><span>,</span> <span> </span><span>type</span><span>:</span><span> </span><span>'options'</span><span>,</span> <span> </span><span>displayOptions</span><span>:</span><span> </span><span>{</span> <span> </span><span>show</span><span>:</span><span> </span><span>{</span> <span> </span><span>resource</span><span>:</span><span> </span><span>[</span> <span> </span><span>'contact'</span><span>,</span> <span> </span><span>],</span> <span> </span><span>},</span> <span> </span><span>},</span> <span> </span><span>options</span><span>:</span><span> </span><span>[</span> <span> </span><span>{</span> <span> </span><span>name</span><span>:</span><span> </span><span>'Create'</span><span>,</span> <span> </span><span>value</span><span>:</span><span> </span><span>'create'</span><span>,</span> <span> </span><span>description</span><span>:</span><span> </span><span>'Create a contact'</span><span>,</span> <span> </span><span>},</span> <span> </span><span>],</span> <span> </span><span>default</span><span>:</span><span> </span><span>'create'</span><span>,</span> <span> </span><span>description</span><span>:</span><span> </span><span>'The operation to perform.'</span><span>,</span> <span> </span><span>},</span> <span> </span><span>{</span> <span> </span><span>displayName</span><span>:</span><span> </span><span>'Email'</span><span>,</span> <span> </span><span>name</span><span>:</span><span> </span><span>'email'</span><span>,</span> <span> </span><span>.</span><span> </span><span>.</span><span> </span><span>.</span> <span> </span><span>},</span> <span> </span><span>{</span> <span> </span><span>displayName</span><span>:</span><span> </span><span>'Additional Fields'</span><span>,</span> <span> </span><span>// Sets up optional fields</span> <span> </span><span>},</span> <span> </span><span>],</span> <span>};</span> <span> </span><span>async</span><span> </span><span>execute</span><span>(</span><span>this</span><span>:</span><span> </span><span>IExecuteFunctions</span><span>)</span><span>:</span><span> </span><span>Promise</span><span><</span><span>INodeExecutionData</span><span>[][]</span><span>></span><span> </span><span>{</span> <span> </span><span>let</span><span> </span><span>responseData</span><span>;</span> <span> </span><span>const</span><span> </span><span>resource</span><span> </span><span>=</span><span> </span><span>this</span><span>.</span><span>getNodeParameter</span><span>(</span><span>'resource'</span><span>,</span><span> </span><span>0</span><span>)</span><span> </span><span>as</span><span> </span><span>string</span><span>;</span> <span> </span><span>const</span><span> </span><span>operation</span><span> </span><span>=</span><span> </span><span>this</span><span>.</span><span>getNodeParameter</span><span>(</span><span>'operation'</span><span>,</span><span> </span><span>0</span><span>)</span><span> </span><span>as</span><span> </span><span>string</span><span>;</span> <span> </span><span>//Get credentials the user provided for this node</span> <span> </span><span>const</span><span> </span><span>credentials</span><span> </span><span>=</span><span> </span><span>await</span><span> </span><span>this</span><span>.</span><span>getCredentials</span><span>(</span><span>'friendGridApi'</span><span>)</span><span> </span><span>as</span><span> </span><span>IDataObject</span><span>;</span> <span> </span><span>if</span><span> </span><span>(</span><span>resource</span><span> </span><span>===</span><span> </span><span>'contact'</span><span>)</span><span> </span><span>{</span> <span> </span><span>if</span><span> </span><span>(</span><span>operation</span><span> </span><span>===</span><span> </span><span>'create'</span><span>)</span><span> </span><span>{</span> <span> </span><span>// Get email input</span> <span> </span><span>const</span><span> </span><span>email</span><span> </span><span>=</span><span> </span><span>this</span><span>.</span><span>getNodeParameter</span><span>(</span><span>'email'</span><span>,</span><span> </span><span>0</span><span>)</span><span> </span><span>as</span><span> </span><span>string</span><span>;</span> <span> </span><span>// Get additional fields input</span> <span> </span><span>const</span><span> </span><span>additionalFields</span><span> </span><span>=</span><span> </span><span>this</span><span>.</span><span>getNodeParameter</span><span>(</span><span>'additionalFields'</span><span>,</span><span> </span><span>0</span><span>)</span><span> </span><span>as</span><span> </span><span>IDataObject</span><span>;</span> <span> </span><span>const</span><span> </span><span>data</span><span>:</span><span> </span><span>IDataObject</span><span> </span><span>=</span><span> </span><span>{</span> <span> </span><span>email</span><span>,</span> <span> </span><span>};</span> <span> </span><span>Object</span><span>.</span><span>assign</span><span>(</span><span>data</span><span>,</span><span> </span><span>additionalFields</span><span>);</span> <span> </span><span>// Make HTTP request as defined in https://sendgrid.com/docs/api-reference/</span> <span> </span><span>const</span><span> </span><span>options</span><span>:</span><span> </span><span>IRequestOptions</span><span> </span><span>=</span><span> </span><span>{</span> <span> </span><span>headers</span><span>:</span><span> </span><span>{</span> <span> </span><span>'Accept'</span><span>:</span><span> </span><span>'application/json'</span><span>,</span> <span> </span><span>'Authorization'</span><span>:</span><span> </span><span>`Bearer </span><span>${</span><span>credentials</span><span>.</span><span>apiKey</span><span>}</span><span>`</span><span>,</span> <span> </span><span>},</span> <span> </span><span>method</span><span>:</span><span> </span><span>'PUT'</span><span>,</span> <span> </span><span>body</span><span>:</span><span> </span><span>{</span> <span> </span><span>contacts</span><span>:</span><span> </span><span>[</span> <span> </span><span>data</span><span>,</span> <span> </span><span>],</span> <span> </span><span>},</span> <span> </span><span>url</span><span>:</span><span> </span><span>`https://api.sendgrid.com/v3/marketing/contacts`</span><span>,</span> <span> </span><span>json</span><span>:</span><span> </span><span>true</span><span>,</span> <span> </span><span>};</span> <span> </span><span>responseData</span><span> </span><span>=</span><span> </span><span>await</span><span> </span><span>this</span><span>.</span><span>helpers</span><span>.</span><span>httpRequest</span><span>(</span><span>options</span><span>);</span> <span> </span><span>}</span> <span> </span><span>}</span> <span> </span><span>// Map data to n8n data</span> <span> </span><span>return</span><span> </span><span>[</span><span>this</span><span>.</span><span>helpers</span><span>.</span><span>returnJsonArray</span><span>(</span><span>responseData</span><span>)];</span> <span> </span><span>}</span> <span>}</span> </code></pre></div></td></tr></tbody></table> <table><tbody><tr><td><div><pre><span></span><span> 1</span> <span> 2</span> <span> 3</span> <span> 4</span> <span> 5</span> <span> 6</span> <span> 7</span> <span> 8</span> <span> 9</span> <span>10</span> <span>11</span> <span>12</span> <span>13</span> <span>14</span> <span>15</span> <span>16</span> <span>17</span> <span>18</span> <span>19</span> <span>20</span> <span>21</span> <span>22</span> <span>23</span> <span>24</span> <span>25</span> <span>26</span> <span>27</span> <span>28</span> <span>29</span> <span>30</span> <span>31</span> <span>32</span> <span>33</span> <span>34</span> <span>35</span> <span>36</span> <span>37</span> <span>38</span> <span>39</span> <span>40</span> <span>41</span> <span>42</span> <span>43</span> <span>44</span> <span>45</span> <span>46</span> <span>47</span> <span>48</span> <span>49</span> <span>50</span> <span>51</span> <span>52</span> <span>53</span> <span>54</span> <span>55</span> <span>56</span> <span>57</span> <span>58</span> <span>59</span> <span>60</span> <span>61</span> <span>62</span> <span>63</span> <span>64</span> <span>65</span> <span>66</span> <span>67</span> <span>68</span> <span>69</span> <span>70</span> <span>71</span> <span>72</span> <span>73</span> <span>74</span></pre></div></td><td><div><pre><span></span><code><span>import</span><span> </span><span>{</span><span> </span><span>INodeType</span><span>,</span><span> </span><span>INodeTypeDescription</span><span> </span><span>}</span><span> </span><span>from</span><span> </span><span>'n8n-workflow'</span><span>;</span> <span>// Create the FriendGrid class</span> <span>export</span><span> </span><span>class</span><span> </span><span>FriendGrid</span><span> </span><span>implements</span><span> </span><span>INodeType</span><span> </span><span>{</span> <span> </span><span>description</span><span>:</span><span> </span><span>INodeTypeDescription</span><span> </span><span>=</span><span> </span><span>{</span> <span> </span><span>displayName</span><span>:</span><span> </span><span>'FriendGrid'</span><span>,</span> <span> </span><span>name</span><span>:</span><span> </span><span>'friendGrid'</span><span>,</span> <span> </span><span>.</span><span> </span><span>.</span><span> </span><span>.</span> <span> </span><span>// Set up the basic request configuration</span> <span> </span><span>requestDefaults</span><span>:</span><span> </span><span>{</span> <span> </span><span>baseURL</span><span>:</span><span> </span><span>'https://api.sendgrid.com/v3/marketing'</span> <span> </span><span>},</span> <span> </span><span>properties</span><span>:</span><span> </span><span>[</span> <span> </span><span>{</span> <span> </span><span>displayName</span><span>:</span><span> </span><span>'Resource'</span><span>,</span> <span> </span><span>.</span><span> </span><span>.</span><span> </span><span>.</span> <span> </span><span>},</span> <span> </span><span>{</span> <span> </span><span>displayName</span><span>:</span><span> </span><span>'Operation'</span><span>,</span> <span> </span><span>name</span><span>:</span><span> </span><span>'operation'</span><span>,</span> <span> </span><span>type</span><span>:</span><span> </span><span>'options'</span><span>,</span> <span> </span><span>displayOptions</span><span>:</span><span> </span><span>{</span> <span> </span><span>show</span><span>:</span><span> </span><span>{</span> <span> </span><span>resource</span><span>:</span><span> </span><span>[</span> <span> </span><span>'contact'</span><span>,</span> <span> </span><span>],</span> <span> </span><span>},</span> <span> </span><span>},</span> <span> </span><span>options</span><span>:</span><span> </span><span>[</span> <span> </span><span>{</span> <span> </span><span>name</span><span>:</span><span> </span><span>'Create'</span><span>,</span> <span> </span><span>value</span><span>:</span><span> </span><span>'create'</span><span>,</span> <span> </span><span>description</span><span>:</span><span> </span><span>'Create a contact'</span><span>,</span> <span> </span><span>// Add the routing object</span> <span> </span><span>routing</span><span>:</span><span> </span><span>{</span> <span> </span><span>request</span><span>:</span><span> </span><span>{</span> <span> </span><span>method</span><span>:</span><span> </span><span>'POST'</span><span>,</span> <span> </span><span>url</span><span>:</span><span> </span><span>'=/contacts'</span><span>,</span> <span> </span><span>send</span><span>:</span><span> </span><span>{</span> <span> </span><span>type</span><span>:</span><span> </span><span>'body'</span><span>,</span> <span> </span><span>properties</span><span>:</span><span> </span><span>{</span> <span> </span><span>email</span><span>:</span><span> </span><span>{{</span><span>$parameter</span><span>[</span><span>"email"</span><span>]}}</span> <span> </span><span>}</span> <span> </span><span>}</span> <span> </span><span>}</span> <span> </span><span>},</span> <span> </span><span>// Handle the response to contact creation</span> <span> </span><span>output</span><span>:</span><span> </span><span>{</span> <span> </span><span>postReceive</span><span>:</span><span> </span><span>[</span> <span> </span><span>{</span> <span> </span><span>type</span><span>:</span><span> </span><span>'set'</span><span>,</span> <span> </span><span>properties</span><span>:</span><span> </span><span>{</span> <span> </span><span>value</span><span>:</span><span> </span><span>'={{ { "success": $response } }}'</span> <span> </span><span>}</span> <span> </span><span>}</span> <span> </span><span>]</span> <span> </span><span>}</span> <span> </span><span>},</span> <span> </span><span>],</span> <span> </span><span>default</span><span>:</span><span> </span><span>'create'</span><span>,</span> <span> </span><span>description</span><span>:</span><span> </span><span>'The operation to perform.'</span><span>,</span> <span> </span><span>},</span> <span> </span><span>{</span> <span> </span><span>displayName</span><span>:</span><span> </span><span>'Email'</span><span>,</span> <span> </span><span>.</span><span> </span><span>.</span><span> </span><span>.</span> <span> </span><span>},</span> <span> </span><span>{</span> <span> </span><span>displayName</span><span>:</span><span> </span><span>'Additional Fields'</span><span>,</span> <span> </span><span>// Sets up optional fields</span> <span> </span><span>},</span> <span> </span><span>],</span> <span> </span><span>}</span> <span> </span><span>// No execute method needed</span> <span>}</span> </code></pre></div></td></tr></tbody></table> --- ## Page: https://docs.n8n.io/integrations/creating-nodes/plan/node-ui-design/ ## Design your node's user interface# Most nodes are a GUI (graphical user interface) representation of an API. Designing the interface means finding a user-friendly way to represent API endpoints and parameters. Directly translating an entire API into form fields in a node may not result in a good user experience. This document provides design guidance and standards to follow. These guidelines are the same as those used by n8n. This helps provide a smooth and consistent user experience for users mixing community and built-in nodes. ## Design guidance# All node's use n8n's node UI elements, so you don't need to consider style details such as colors, borders, and so on. However, it's still useful to go through a basic design process: * Review the documentation for the API you're integrating. Ask yourself: * What can you leave out? * What can you simplify? * Which parts of the API are confusing? How can you help users understand them? * Use a wireframe tool to try out your field layout. If you find your node has a lot of fields and is getting confusing, consider n8n's guidance on showing and hiding fields. ## Standards# ### UI text style# | Element | Style | | --- | --- | | Drop-down value | Title case | | Hint | Sentence case | | Info box | Sentence case. Don't use a period (`.`) for one-sentence information. Always use a period if there's more than one sentence. This field can include links, which should open in a new tab. | | Node name | Title case | | Parameter name | Title case | | Subtitle | Title case | | Tooltip | Sentence case. Don't use a period (`.`) for one-sentence tooltips. Always use a period if there's more than one sentence. This field can include links, which should open in a new tab. | ### UI text terminology# * Use the same terminology as the service the node connects to. For example, a Notion node should refer to Notion blocks, not Notion paragraphs, because Notion calls these elements blocks. There are exceptions to this rule, usually to avoid technical terms (for example, refer to the guidance on name and description for upsert operations). * Sometimes a service has different terms for something in its API and in its GUI. Use the GUI language in your node, as this is what most users are familiar with. If you think some users may need to refer to the service's API docs, consider including this information in a hint. * Don't use technical jargon when there are simpler alternatives. * Be consistent when naming things. For example, choose one of `directory` or `folder` then stick to it. ### Node naming conventions# | Convention | Correct | Incorrect | | --- | --- | --- | | If a node is a trigger node, the displayed name should have 'Trigger' at the end, with a space before. | Shopify Trigger | ShopifyTrigger, Shopify trigger | | Don't include 'node' in the name. | Asana | Asana Node, Asana node | ### Showing and hiding fields# Fields can either be: * Displayed when the node opens: use this for resources and operations, and required fields. * Hidden in the **Optional fields** section until a user clicks on that section: use this for optional fields. Progressively disclose complexity: hide a field until any earlier fields it depends on have values. For example, if you have a **Filter by date** toggle, and a **Date to filter by** datepicker, don't display **Date to filter by** until the user enables **Filter by date**. ### Conventions by field type# #### Credentials# n8n automatically displays credential fields as the top fields in the node. #### Resources and operations# APIs usually involve doing something to data. For example, "get all tasks." In this example, "task" is the resource, and "get all" is the operation. When your node has this resource and operation pattern, your first field should be **Resource**, and your second field should be **Operation**. #### Required fields# Order fields by: * Most important to least important. * Scope: from broad to narrow. For example, you have fields for **Document**, **Page**, and **Text to insert**, put them in that order. #### Optional fields# * Order fields alphabetically. To group similar things together, you can rename them. For example, rename **Email** and **Secondary Email** to **Email (primary)** and **Email (secondary)**. * If an optional field has a default value that the node uses when the value isn't set, load the field with that value. Explain this in the field description. For example, **Defaults to false**. * Connected fields: if one optional fields is dependent on another, bundle them together. They should both be under a single option that shows both fields when selected. * If you have a lot of optional fields, consider grouping them by theme. #### Help# There are five types of help built in to the GUI: * Info boxes: yellow boxes that appear between fields. Refer to UI elements | Notice for more information. * Use info boxes for essential information. Don't over-use them. By making them rare, they stand out more and grab the user's attention. * Parameter hints: lines of text displayed beneath a user input field. Use this when there's something the user needs to know, but an info box would be excessive. * Node hints: provide help in the input panel, output panel, or node details view. Refer to UI elements | Hints for more information. * Tooltips: callouts that appear when the user hovers over the tooltip icon . Use tooltips for extra information that the user might need. * You don't have to provide a tooltip for every field. Only add one if it contains useful information. * When writing tooltips, think about what the user needs. Don't just copy-paste API parameter descriptions. If the description doesn't make sense, or has errors, improve it. * Placeholder text: n8n can display placeholder text in a field where the user hasn't entered a value. This can help the user know what's expected in that field. Info boxes, hints, and tooltips can contain links to more information. #### Errors# Make it clear which fields are required. Add validation rules to fields if possible. For example, check for valid email patterns if the field expects an email. When displaying errors, make sure only the main error message displays in the red error title. More information should go in **Details**. #### Toggles# * Tooltips for binary states should start with something like **Whether to . . .** . * You may need a list rather than a toggle: * Use toggles when it's clear what happens in a false state. For example, **Simplify Output?**. The alternative (don't simplify output) is clear. * Use a dropdown list with named options when you need more clarity. For example, **Append?**. What happens if you don't append is unclear (it could be that nothing happens, or information is overwritten, or discarded). #### Lists# * Set default values for lists whenever possible. The default should be the most-used option. * Sort list options alphabetically. * You can include list option descriptions. Only add descriptions if they provide useful information. * If there is an option like **All**, use the word **All**, not shorthand like **\***. #### Trigger node inputs# When a trigger node has a parameter for specifying which events to trigger on: * Name the parameter **Trigger on**. * Don't include a tooltip. #### Subtitles# Set subtitles based on the values of the main parameters. For example: <table><tbody><tr><td><div><pre><span></span><span>1</span></pre></div></td><td><div><pre><span></span><code><span>subtitle</span><span>:</span><span> </span><span>'={{$parameter["operation"] + ": " + $parameter["resource"]}}'</span><span>,</span> </code></pre></div></td></tr></tbody></table> #### IDs# When performing an operation on a specific record, such as "update a task comment" you need a way to specify which record you want to change. * Wherever possible, provide two ways to specify a record: * By choosing from a pre-populated list. You can generate this list using the `loadOptions` parameter. Refer to Base files for more information. * By entering an ID. * Name the field `<Record name> name or ID`. For example, **Workspace Name or ID**. Add a tooltip saying "Choose a name from the list, or specify an ID using an expression." Link to n8n's Expressions documentation. * Build your node so that it can handle users providing more information than required. For example: * If you need a relative path, handle the user pasting in the absolute path. * If the user needs to get an ID from a URL, handle the user pasting in the entire URL. #### Dates and timestamps# n8n uses ISO timestamp strings for dates and times. Make sure that any date or timestamp field you add supports all ISO 8601 formats. #### JSON# You should support two ways of specifying the content of a text input that expects JSON: * Typing JSON directly into the text input: you need to parse the resulting string into a JSON object. * Using an expression that returns JSON. #### Node icons# ### Common patterns and exceptions# This section provides guidance on handling common design patterns, including some edge cases and exceptions to the main standards. #### Simplify responses# APIs can return a lot of data that isn't useful. Consider adding a toggle that allows users to choose to simplify the response data: * Name: **Simplify Response** * Description: **Whether to return a simplified version of the response instead of the raw data** #### Upsert operations# This should always be a separate operation with: * Name: **Create or Update** * Description: **Create a new record, or update the current one if it already exists (upsert)** #### Boolean operators# n8n doesn't have good support for combining boolean operators, such as AND and OR, in the GUI. Whenever possible, provide options for all ANDs or all ORs. For example, you have a field called **Must match** to test if values match. Include options to test for **Any** and **All**, as separate options. #### Source keys or binary properties# Binary data is file data, such as spreadsheets or images. In n8n, you need a named key to reference the data. Don't use the terms "binary data" or "binary property" for this field. Instead, use a more descriptive name: **Input data field name** / **Output data field name**. --- ## Page: https://docs.n8n.io/integrations/creating-nodes/build/reference/node-file-structure/ Following best practices and standards in your node structure makes your node easier to maintain. It's helpful if other people need to work with the code. The file and directory structure of your node depends on: * Your node's complexity. * Whether you use node versioning. * How many nodes you include in the npm package. ## Required files and directories# Your node must include: * A `package.json` file at the root of the project. This is required for any npm module. * A `nodes` directory, containing the code for your node: * This directory must contain the base file, in the format `<node-name>.node.ts`. For example, `MyNode.node.ts`. * n8n recommends including a codex file, containing metadata for your node. The codex filename must match the node base filename. For example, given a node base file named `MyNode.node.ts`, the codex name is `MyNode.node.json`. * The `nodes` directory can contain other files and subdirectories, including directories for versions, and node code split across more than one file to create a modular structure. * A `credentials` directory, containing your credentials code. This code lives in a single credentials file. The filename format is `<node-name>.credentials.ts`. For example, `MyNode.credentials.ts`. ## Modular structure# You can choose whether to place all your node's functionality in one file, or split it out into a base file and other modules, which the base file then imports. Unless your node is very simple, it's a best practice to split it out. A basic pattern is to separate out operations. Refer to the HttpBin starter node for an example of this. For more complex nodes, n8n recommends a directory structure. Refer to the Airtable node or Microsoft Outlook node as examples. * `actions`: a directory containing sub-directories that represent resources. * Each sub-directory should contain two types of files: * An index file with resource description (named either `<resourceName>.resource.ts` or `index.ts`) * Files for operations `<operationName>.operation.ts`. These files should have two exports: `description` of the operation and an `execute` function. * `methods`: an optional directory dynamic parameters' functions. * `transport`: a directory containing the communication implementation. ## Versioning# If your node has more than one version, and you're using full versioning, this makes the file structure more complex. You need a directory for each version, along with a base file that sets the default version. Refer to Node versioning for more information on working with versions, including types of versioning. ## Decide how many nodes to include in a package# There are two possible setups when building a node: * One node in one npm package. * More than one node in a single npm package. n8n supports both approaches. If you include more than one node, each node should have its own directory in the `nodes` directory. ## A best-practice example for programmatic nodes# n8n's built-in Airtable node implements a modular structure and versioning, following recommended patterns. --- ## Page: https://docs.n8n.io/integrations/creating-nodes/build/ 1. Integrations 2. Creating nodes 3. Build your node This section provides tutorials on building nodes. It covers: * Tutorial: Build a declarative-style node * Reference material on file structure, parameter definitions for base, codex, and credentials files, node UI elements, and more. Coming soon: * More tutorials * Revised guidance on standards --- ## Page: https://docs.n8n.io/integrations/creating-nodes/build/node-development-environment/ This document lists the essential dependencies for developing a node, as well as guidance on setting up your editor. ## Requirements# To build and test a node, you need: * Node.js and npm. Minimum version Node 18.17.0. You can find instructions on how to install both using nvm (Node Version Manager) for Linux, Mac, and WSL (Windows Subsystem for Linux) here. For Windows users, refer to Microsoft's guide to Install NodeJS on Windows. * A local instance of n8n. You can install n8n with `npm install n8n -g`, then follow the steps in Run your node locally to test your node. You should also have git installed. This allows you to clone and use the n8n-node-starter. ## Editor setup# n8n recommends using VS Code as your editor. Install these extensions: * ESLint * EditorConfig * Prettier By using VS Code and these extensions, you get access to the n8n node linter's warnings as you code. --- ## Page: https://docs.n8n.io/integrations/creating-nodes/build/declarative-style-node/ This tutorial walks through building a declarative-style node. Before you begin, make sure this is the node style you need. Refer to Choose your node building approach for more information. ## Prerequisites# You need the following installed on your development machine: * git * Node.js and npm. Minimum version Node 18.17.0. You can find instructions on how to install both using nvm (Node Version Manager) for Linux, Mac, and WSL here. For Windows users, refer to Microsoft's guide to Install NodeJS on Windows. You need some understanding of: * JavaScript/TypeScript * REST APIs * git ## Build your node# In this section, you'll clone n8n's node starter repository, and build a node that integrates the NASA API. You'll create a node that uses two of NASA's services: APOD (Astronomy Picture of the Day) and Mars Rover Photos. To keep the code examples short, the node won't implement every available option for the Mars Rover Photos endpoint. Existing node n8n has a built-in NASA node. To avoid clashing with the existing node, you'll give your version a different name. ### Step 1: Set up the project# n8n provides a starter repository for node development. Using the starter ensures you have all necessary dependencies. It also provides a linter. Clone the repository and navigate into the directory: 1. Generate a new repository from the template repository. 2. Clone your new repository: <table><tbody><tr><td><div><pre><span></span><span>1</span> <span>2</span></pre></div></td><td><div><pre><span></span><code>git<span> </span>clone<span> </span>https://github.com/<your-organization>/<your-repo-name>.git<span> </span>n8n-nodes-nasa-pics <span>cd</span><span> </span>n8n-nodes-nasa-pics </code></pre></div></td></tr></tbody></table> The starter contains example nodes and credentials. Delete the following directories and files: * `nodes/ExampleNode` * `nodes/HTTPBin` * `credentials/ExampleCredentials.credentials.ts` * `credentials/HttpBinApi.credentials.ts` Now create the following directories and files: `nodes/NasaPics` `nodes/NasaPics/NasaPics.node.json` `nodes/NasaPics/NasaPics.node.ts` `credentials/NasaPicsApi.credentials.ts` These are the key files required for any node. Refer to Node file structure for more information on required files and recommended organization. Now install the project dependencies: <table><tbody><tr><td><div><pre><span></span><span>1</span></pre></div></td><td><div><pre><span></span><code>npm<span> </span>i </code></pre></div></td></tr></tbody></table> ### Step 2: Add an icon# Save the NASA SVG logo from here as `nasapics.svg` in `nodes/NasaPics/`. n8n recommends using an SVG for your node icon, but you can also use PNG. If using PNG, the icon resolution should be 60x60px. Node icons should have a square or near-square aspect ratio. Don't reference Font Awesome If you want to use a Font Awesome icon in your node, download and embed the image. ### Step 3: Create the node# Every node must have a base file. Refer to Node base file for detailed information about base file parameters. In this example, the file is `NasaPics.node.ts`. To keep this tutorial short, you'll place all the node functionality in this one file. When building more complex nodes, you should consider splitting out your functionality into modules. Refer to Node file structure for more information. #### Step 3.1: Imports# Start by adding the import statements: <table><tbody><tr><td><div><pre><span></span><span>1</span></pre></div></td><td><div><pre><span></span><code><span>import</span><span> </span><span>{</span><span> </span><span>INodeType</span><span>,</span><span> </span><span>INodeTypeDescription</span><span> </span><span>}</span><span> </span><span>from</span><span> </span><span>'n8n-workflow'</span><span>;</span> </code></pre></div></td></tr></tbody></table> #### Step 3.2: Create the main class# The node must export an interface that implements INodeType. This interface must include a `description` interface, which in turn contains the `properties` array. Class names and file names Make sure the class name and the file name match. For example, given a class `NasaPics`, the filename must be `NasaPics.node.ts`. <table><tbody><tr><td><div><pre><span></span><span>1</span> <span>2</span> <span>3</span> <span>4</span> <span>5</span> <span>6</span> <span>7</span> <span>8</span></pre></div></td><td><div><pre><span></span><code><span>export</span><span> </span><span>class</span><span> </span><span>NasaPics</span><span> </span><span>implements</span><span> </span><span>INodeType</span><span> </span><span>{</span> <span> </span><span>description</span><span>:</span><span> </span><span>INodeTypeDescription</span><span> </span><span>=</span><span> </span><span>{</span> <span> </span><span>// Basic node details will go here</span> <span> </span><span>properties</span><span>:</span><span> </span><span>[</span> <span> </span><span>// Resources and operations will go here</span> <span> </span><span>]</span> <span> </span><span>};</span> <span>}</span> </code></pre></div></td></tr></tbody></table> #### Step 3.3: Add node details# All nodes need some basic parameters, such as their display name, icon, and the basic information for making a request using the node. Add the following to the `description`: <table><tbody><tr><td><div><pre><span></span><span> 1</span> <span> 2</span> <span> 3</span> <span> 4</span> <span> 5</span> <span> 6</span> <span> 7</span> <span> 8</span> <span> 9</span> <span>10</span> <span>11</span> <span>12</span> <span>13</span> <span>14</span> <span>15</span> <span>16</span> <span>17</span> <span>18</span> <span>19</span> <span>20</span> <span>21</span> <span>22</span> <span>23</span> <span>24</span> <span>25</span></pre></div></td><td><div><pre><span></span><code><span>displayName</span><span>:</span><span> </span><span>'NASA Pics'</span><span>,</span> <span>name</span><span>:</span><span> </span><span>'NasaPics'</span><span>,</span> <span>icon</span><span>:</span><span> </span><span>'file:nasapics.svg'</span><span>,</span> <span>group</span><span>:</span><span> </span><span>[</span><span>'transform'</span><span>],</span> <span>version</span><span>:</span><span> </span><span>1</span><span>,</span> <span>subtitle</span><span>:</span><span> </span><span>'={{$parameter["operation"] + ": " + $parameter["resource"]}}'</span><span>,</span> <span>description</span><span>:</span><span> </span><span>'Get data from NASAs API'</span><span>,</span> <span>defaults</span><span>:</span><span> </span><span>{</span> <span> </span><span>name</span><span>:</span><span> </span><span>'NASA Pics'</span><span>,</span> <span>},</span> <span>inputs</span><span>:</span><span> </span><span>[</span><span>'main'</span><span>],</span> <span>outputs</span><span>:</span><span> </span><span>[</span><span>'main'</span><span>],</span> <span>credentials</span><span>:</span><span> </span><span>[</span> <span> </span><span>{</span> <span> </span><span>name</span><span>:</span><span> </span><span>'NasaPicsApi'</span><span>,</span> <span> </span><span>required</span><span>:</span><span> </span><span>true</span><span>,</span> <span> </span><span>},</span> <span>],</span> <span>requestDefaults</span><span>:</span><span> </span><span>{</span> <span> </span><span>baseURL</span><span>:</span><span> </span><span>'https://api.nasa.gov'</span><span>,</span> <span> </span><span>headers</span><span>:</span><span> </span><span>{</span> <span> </span><span>Accept</span><span>:</span><span> </span><span>'application/json'</span><span>,</span> <span> </span><span>'Content-Type'</span><span>:</span><span> </span><span>'application/json'</span><span>,</span> <span> </span><span>},</span> <span>},</span> </code></pre></div></td></tr></tbody></table> n8n uses some of the properties set in `description` to render the node in the Editor UI. These properties are `displayName`, `icon`, `description`, and `subtitle`. #### Step 3.4: Add resources# The resource object defines the API resource that the node uses. In this tutorial, you're creating a node to access two of NASA's API endpoints: `planetary/apod` and `mars-photos`. This means you need to define two resource options in `NasaPics.node.ts`. Update the `properties` array with the resource object: <table><tbody><tr><td><div><pre><span></span><span> 1</span> <span> 2</span> <span> 3</span> <span> 4</span> <span> 5</span> <span> 6</span> <span> 7</span> <span> 8</span> <span> 9</span> <span>10</span> <span>11</span> <span>12</span> <span>13</span> <span>14</span> <span>15</span> <span>16</span> <span>17</span> <span>18</span> <span>19</span> <span>20</span> <span>21</span></pre></div></td><td><div><pre><span></span><code><span>properties</span><span>:</span><span> </span><span>[</span> <span> </span><span>{</span> <span> </span><span>displayName</span><span>:</span><span> </span><span>'Resource'</span><span>,</span> <span> </span><span>name</span><span>:</span><span> </span><span>'resource'</span><span>,</span> <span> </span><span>type</span><span>:</span><span> </span><span>'options'</span><span>,</span> <span> </span><span>noDataExpression</span><span>:</span><span> </span><span>true</span><span>,</span> <span> </span><span>options</span><span>:</span><span> </span><span>[</span> <span> </span><span>{</span> <span> </span><span>name</span><span>:</span><span> </span><span>'Astronomy Picture of the Day'</span><span>,</span> <span> </span><span>value</span><span>:</span><span> </span><span>'astronomyPictureOfTheDay'</span><span>,</span> <span> </span><span>},</span> <span> </span><span>{</span> <span> </span><span>name</span><span>:</span><span> </span><span>'Mars Rover Photos'</span><span>,</span> <span> </span><span>value</span><span>:</span><span> </span><span>'marsRoverPhotos'</span><span>,</span> <span> </span><span>},</span> <span> </span><span>],</span> <span> </span><span>default</span><span>:</span><span> </span><span>'astronomyPictureOfTheDay'</span><span>,</span> <span> </span><span>},</span> <span> </span><span>// Operations will go here</span> <span>]</span> </code></pre></div></td></tr></tbody></table> `type` controls which UI element n8n displays for the resource, and tells n8n what type of data to expect from the user. `options` results in n8n adding a dropdown that allows users to choose one option. Refer to Node UI elements for more information. #### Step 3.5: Add operations# The operations object defines the available operations on a resource. In a declarative-style node, the operations object includes `routing` (within the `options` array). This sets up the details of the API call. Add the following to the `properties` array, after the `resource` object: <table><tbody><tr><td><div><pre><span></span><span> 1</span> <span> 2</span> <span> 3</span> <span> 4</span> <span> 5</span> <span> 6</span> <span> 7</span> <span> 8</span> <span> 9</span> <span> 10</span> <span> 11</span> <span> 12</span> <span> 13</span> <span> 14</span> <span> 15</span> <span> 16</span> <span> 17</span> <span> 18</span> <span> 19</span> <span> 20</span> <span> 21</span> <span> 22</span> <span> 23</span> <span> 24</span> <span> 25</span> <span> 26</span> <span> 27</span> <span> 28</span> <span> 29</span> <span> 30</span> <span> 31</span> <span> 32</span> <span> 33</span> <span> 34</span> <span> 35</span> <span> 36</span> <span> 37</span> <span> 38</span> <span> 39</span> <span> 40</span> <span> 41</span> <span> 42</span> <span> 43</span> <span> 44</span> <span> 45</span> <span> 46</span> <span> 47</span> <span> 48</span> <span> 49</span> <span> 50</span> <span> 51</span> <span> 52</span> <span> 53</span> <span> 54</span> <span> 55</span> <span> 56</span> <span> 57</span> <span> 58</span> <span> 59</span> <span> 60</span> <span> 61</span> <span> 62</span> <span> 63</span> <span> 64</span> <span> 65</span> <span> 66</span> <span> 67</span> <span> 68</span> <span> 69</span> <span> 70</span> <span> 71</span> <span> 72</span> <span> 73</span> <span> 74</span> <span> 75</span> <span> 76</span> <span> 77</span> <span> 78</span> <span> 79</span> <span> 80</span> <span> 81</span> <span> 82</span> <span> 83</span> <span> 84</span> <span> 85</span> <span> 86</span> <span> 87</span> <span> 88</span> <span> 89</span> <span> 90</span> <span> 91</span> <span> 92</span> <span> 93</span> <span> 94</span> <span> 95</span> <span> 96</span> <span> 97</span> <span> 98</span> <span> 99</span> <span>100</span> <span>101</span> <span>102</span> <span>103</span> <span>104</span> <span>105</span></pre></div></td><td><div><pre><span></span><code><span>{</span> <span> </span><span>displayName</span><span>:</span><span> </span><span>'Operation'</span><span>,</span> <span> </span><span>name</span><span>:</span><span> </span><span>'operation'</span><span>,</span> <span> </span><span>type</span><span>:</span><span> </span><span>'options'</span><span>,</span> <span> </span><span>noDataExpression</span><span>:</span><span> </span><span>true</span><span>,</span> <span> </span><span>displayOptions</span><span>:</span><span> </span><span>{</span> <span> </span><span>show</span><span>:</span><span> </span><span>{</span> <span> </span><span>resource</span><span>:</span><span> </span><span>[</span> <span> </span><span>'astronomyPictureOfTheDay'</span><span>,</span> <span> </span><span>],</span> <span> </span><span>},</span> <span> </span><span>},</span> <span> </span><span>options</span><span>:</span><span> </span><span>[</span> <span> </span><span>{</span> <span> </span><span>name</span><span>:</span><span> </span><span>'Get'</span><span>,</span> <span> </span><span>value</span><span>:</span><span> </span><span>'get'</span><span>,</span> <span> </span><span>action</span><span>:</span><span> </span><span>'Get the APOD'</span><span>,</span> <span> </span><span>description</span><span>:</span><span> </span><span>'Get the Astronomy Picture of the day'</span><span>,</span> <span> </span><span>routing</span><span>:</span><span> </span><span>{</span> <span> </span><span>request</span><span>:</span><span> </span><span>{</span> <span> </span><span>method</span><span>:</span><span> </span><span>'GET'</span><span>,</span> <span> </span><span>url</span><span>:</span><span> </span><span>'/planetary/apod'</span><span>,</span> <span> </span><span>},</span> <span> </span><span>},</span> <span> </span><span>},</span> <span> </span><span>],</span> <span> </span><span>default</span><span>:</span><span> </span><span>'get'</span><span>,</span> <span>},</span> <span>{</span> <span> </span><span>displayName</span><span>:</span><span> </span><span>'Operation'</span><span>,</span> <span> </span><span>name</span><span>:</span><span> </span><span>'operation'</span><span>,</span> <span> </span><span>type</span><span>:</span><span> </span><span>'options'</span><span>,</span> <span> </span><span>noDataExpression</span><span>:</span><span> </span><span>true</span><span>,</span> <span> </span><span>displayOptions</span><span>:</span><span> </span><span>{</span> <span> </span><span>show</span><span>:</span><span> </span><span>{</span> <span> </span><span>resource</span><span>:</span><span> </span><span>[</span> <span> </span><span>'marsRoverPhotos'</span><span>,</span> <span> </span><span>],</span> <span> </span><span>},</span> <span> </span><span>},</span> <span> </span><span>options</span><span>:</span><span> </span><span>[</span> <span> </span><span>{</span> <span> </span><span>name</span><span>:</span><span> </span><span>'Get'</span><span>,</span> <span> </span><span>value</span><span>:</span><span> </span><span>'get'</span><span>,</span> <span> </span><span>action</span><span>:</span><span> </span><span>'Get Mars Rover photos'</span><span>,</span> <span> </span><span>description</span><span>:</span><span> </span><span>'Get photos from the Mars Rover'</span><span>,</span> <span> </span><span>routing</span><span>:</span><span> </span><span>{</span> <span> </span><span>request</span><span>:</span><span> </span><span>{</span> <span> </span><span>method</span><span>:</span><span> </span><span>'GET'</span><span>,</span> <span> </span><span>},</span> <span> </span><span>},</span> <span> </span><span>},</span> <span> </span><span>],</span> <span> </span><span>default</span><span>:</span><span> </span><span>'get'</span><span>,</span> <span>},</span> <span>{</span> <span> </span><span>displayName</span><span>:</span><span> </span><span>'Rover name'</span><span>,</span> <span> </span><span>description</span><span>:</span><span> </span><span>'Choose which Mars Rover to get a photo from'</span><span>,</span> <span> </span><span>required</span><span>:</span><span> </span><span>true</span><span>,</span> <span> </span><span>name</span><span>:</span><span> </span><span>'roverName'</span><span>,</span> <span> </span><span>type</span><span>:</span><span> </span><span>'options'</span><span>,</span> <span> </span><span>options</span><span>:</span><span> </span><span>[</span> <span> </span><span>{</span><span>name</span><span>:</span><span> </span><span>'Curiosity'</span><span>,</span><span> </span><span>value</span><span>:</span><span> </span><span>'curiosity'</span><span>},</span> <span> </span><span>{</span><span>name</span><span>:</span><span> </span><span>'Opportunity'</span><span>,</span><span> </span><span>value</span><span>:</span><span> </span><span>'opportunity'</span><span>},</span> <span> </span><span>{</span><span>name</span><span>:</span><span> </span><span>'Perseverance'</span><span>,</span><span> </span><span>value</span><span>:</span><span> </span><span>'perseverance'</span><span>},</span> <span> </span><span>{</span><span>name</span><span>:</span><span> </span><span>'Spirit'</span><span>,</span><span> </span><span>value</span><span>:</span><span> </span><span>'spirit'</span><span>},</span> <span> </span><span>],</span> <span> </span><span>routing</span><span>:</span><span> </span><span>{</span> <span> </span><span>request</span><span>:</span><span> </span><span>{</span> <span> </span><span>url</span><span>:</span><span> </span><span>'=/mars-photos/api/v1/rovers/{{$value}}/photos'</span><span>,</span> <span> </span><span>},</span> <span> </span><span>},</span> <span> </span><span>default</span><span>:</span><span> </span><span>'curiosity'</span><span>,</span> <span> </span><span>displayOptions</span><span>:</span><span> </span><span>{</span> <span> </span><span>show</span><span>:</span><span> </span><span>{</span> <span> </span><span>resource</span><span>:</span><span> </span><span>[</span> <span> </span><span>'marsRoverPhotos'</span><span>,</span> <span> </span><span>],</span> <span> </span><span>},</span> <span> </span><span>},</span> <span>},</span> <span>{</span> <span> </span><span>displayName</span><span>:</span><span> </span><span>'Date'</span><span>,</span> <span> </span><span>description</span><span>:</span><span> </span><span>'Earth date'</span><span>,</span> <span> </span><span>required</span><span>:</span><span> </span><span>true</span><span>,</span> <span> </span><span>name</span><span>:</span><span> </span><span>'marsRoverDate'</span><span>,</span> <span> </span><span>type</span><span>:</span><span> </span><span>'dateTime'</span><span>,</span> <span> </span><span>default</span><span>:</span><span>''</span><span>,</span> <span> </span><span>displayOptions</span><span>:</span><span> </span><span>{</span> <span> </span><span>show</span><span>:</span><span> </span><span>{</span> <span> </span><span>resource</span><span>:</span><span> </span><span>[</span> <span> </span><span>'marsRoverPhotos'</span><span>,</span> <span> </span><span>],</span> <span> </span><span>},</span> <span> </span><span>},</span> <span> </span><span>routing</span><span>:</span><span> </span><span>{</span> <span> </span><span>request</span><span>:</span><span> </span><span>{</span> <span> </span><span>// You've already set up the URL. qs appends the value of the field as a query string</span> <span> </span><span>qs</span><span>:</span><span> </span><span>{</span> <span> </span><span>earth_date</span><span>:</span><span> </span><span>'={{ new Date($value).toISOString().substr(0,10) }}'</span><span>,</span> <span> </span><span>},</span> <span> </span><span>},</span> <span> </span><span>},</span> <span>},</span> <span>// Optional/additional fields will go here</span> </code></pre></div></td></tr></tbody></table> This code creates two operations: one to get today's APOD image, and another to send a get request for photos from one of the Mars Rovers. The object named `roverName` requires the user to choose which Rover they want photos from. The `routing` object in the Mars Rover operation references this to create the URL for the API call. #### Step 3.6: Optional fields# Most APIs, including the NASA API that you're using in this example, have optional fields you can use to refine your query. To avoid overwhelming users, n8n displays these under **Additional Fields** in the UI. For this tutorial, you'll add one additional field, to allow users to pick a date to use with the APOD endpoint. Add the following to the properties array: <table><tbody><tr><td><div><pre><span></span><span> 1</span> <span> 2</span> <span> 3</span> <span> 4</span> <span> 5</span> <span> 6</span> <span> 7</span> <span> 8</span> <span> 9</span> <span>10</span> <span>11</span> <span>12</span> <span>13</span> <span>14</span> <span>15</span> <span>16</span> <span>17</span> <span>18</span> <span>19</span> <span>20</span> <span>21</span> <span>22</span> <span>23</span> <span>24</span> <span>25</span> <span>26</span> <span>27</span> <span>28</span> <span>29</span> <span>30</span> <span>31</span> <span>32</span> <span>33</span></pre></div></td><td><div><pre><span></span><code><span>{</span> <span> </span><span>displayName</span><span>:</span><span> </span><span>'Additional Fields'</span><span>,</span> <span> </span><span>name</span><span>:</span><span> </span><span>'additionalFields'</span><span>,</span> <span> </span><span>type</span><span>:</span><span> </span><span>'collection'</span><span>,</span> <span> </span><span>default</span><span>:</span><span> </span><span>{},</span> <span> </span><span>placeholder</span><span>:</span><span> </span><span>'Add Field'</span><span>,</span> <span> </span><span>displayOptions</span><span>:</span><span> </span><span>{</span> <span> </span><span>show</span><span>:</span><span> </span><span>{</span> <span> </span><span>resource</span><span>:</span><span> </span><span>[</span> <span> </span><span>'astronomyPictureOfTheDay'</span><span>,</span> <span> </span><span>],</span> <span> </span><span>operation</span><span>:</span><span> </span><span>[</span> <span> </span><span>'get'</span><span>,</span> <span> </span><span>],</span> <span> </span><span>},</span> <span> </span><span>},</span> <span> </span><span>options</span><span>:</span><span> </span><span>[</span> <span> </span><span>{</span> <span> </span><span>displayName</span><span>:</span><span> </span><span>'Date'</span><span>,</span> <span> </span><span>name</span><span>:</span><span> </span><span>'apodDate'</span><span>,</span> <span> </span><span>type</span><span>:</span><span> </span><span>'dateTime'</span><span>,</span> <span> </span><span>default</span><span>:</span><span> </span><span>''</span><span>,</span> <span> </span><span>routing</span><span>:</span><span> </span><span>{</span> <span> </span><span>request</span><span>:</span><span> </span><span>{</span> <span> </span><span>// You've already set up the URL. qs appends the value of the field as a query string</span> <span> </span><span>qs</span><span>:</span><span> </span><span>{</span> <span> </span><span>date</span><span>:</span><span> </span><span>'={{ new Date($value).toISOString().substr(0,10) }}'</span><span>,</span> <span> </span><span>},</span> <span> </span><span>},</span> <span> </span><span>},</span> <span> </span><span>},</span> <span> </span><span>],</span><span> </span> <span>}</span> </code></pre></div></td></tr></tbody></table> ### Step 4: Set up authentication# The NASA API requires users to authenticate with an API key. Add the following to `nasaPicsApi.credentials.ts`: <table><tbody><tr><td><div><pre><span></span><span> 1</span> <span> 2</span> <span> 3</span> <span> 4</span> <span> 5</span> <span> 6</span> <span> 7</span> <span> 8</span> <span> 9</span> <span>10</span> <span>11</span> <span>12</span> <span>13</span> <span>14</span> <span>15</span> <span>16</span> <span>17</span> <span>18</span> <span>19</span> <span>20</span> <span>21</span> <span>22</span> <span>23</span> <span>24</span> <span>25</span> <span>26</span> <span>27</span> <span>28</span> <span>29</span></pre></div></td><td><div><pre><span></span><code><span>import</span><span> </span><span>{</span> <span> </span><span>IAuthenticateGeneric</span><span>,</span> <span> </span><span>ICredentialType</span><span>,</span> <span> </span><span>INodeProperties</span><span>,</span> <span>}</span><span> </span><span>from</span><span> </span><span>'n8n-workflow'</span><span>;</span> <span>export</span><span> </span><span>class</span><span> </span><span>NasaPicsApi</span><span> </span><span>implements</span><span> </span><span>ICredentialType</span><span> </span><span>{</span> <span> </span><span>name</span><span> </span><span>=</span><span> </span><span>'NasaPicsApi'</span><span>;</span> <span> </span><span>displayName</span><span> </span><span>=</span><span> </span><span>'NASA Pics API'</span><span>;</span> <span> </span><span>// Uses the link to this tutorial as an example</span> <span> </span><span>// Replace with your own docs links when building your own nodes</span> <span> </span><span>documentationUrl</span><span> </span><span>=</span><span> </span><span>'https://docs.n8n.io/integrations/creating-nodes/build/declarative-style-node/'</span><span>;</span> <span> </span><span>properties</span><span>:</span><span> </span><span>INodeProperties</span><span>[]</span><span> </span><span>=</span><span> </span><span>[</span> <span> </span><span>{</span> <span> </span><span>displayName</span><span>:</span><span> </span><span>'API Key'</span><span>,</span> <span> </span><span>name</span><span>:</span><span> </span><span>'apiKey'</span><span>,</span> <span> </span><span>type</span><span>:</span><span> </span><span>'string'</span><span>,</span> <span> </span><span>default</span><span>:</span><span> </span><span>''</span><span>,</span> <span> </span><span>},</span> <span> </span><span>];</span> <span> </span><span>authenticate</span><span> </span><span>=</span><span> </span><span>{</span> <span> </span><span>type</span><span>:</span><span> </span><span>'generic'</span><span>,</span> <span> </span><span>properties</span><span>:</span><span> </span><span>{</span> <span> </span><span>qs</span><span>:</span><span> </span><span>{</span> <span> </span><span>'api_key'</span><span>:</span><span> </span><span>'={{$credentials.apiKey}}'</span> <span> </span><span>}</span> <span> </span><span>},</span> <span> </span><span>}</span><span> </span><span>as</span><span> </span><span>IAuthenticateGeneric</span><span>;</span> <span>}</span> </code></pre></div></td></tr></tbody></table> For more information about credentials files and options, refer to Credentials file. ### Step 5: Add node metadata# Metadata about your node goes in the JSON file at the root of your node. n8n refers to this as the codex file. In this example, the file is `NasaPics.node.json`. Add the following code to the JSON file: <table><tbody><tr><td><div><pre><span></span><span> 1</span> <span> 2</span> <span> 3</span> <span> 4</span> <span> 5</span> <span> 6</span> <span> 7</span> <span> 8</span> <span> 9</span> <span>10</span> <span>11</span> <span>12</span> <span>13</span> <span>14</span> <span>15</span> <span>16</span> <span>17</span> <span>18</span> <span>19</span> <span>20</span></pre></div></td><td><div><pre><span></span><code><span>{</span> <span> </span><span>"node"</span><span>:</span><span> </span><span>"n8n-nodes-base.NasaPics"</span><span>,</span> <span> </span><span>"nodeVersion"</span><span>:</span><span> </span><span>"1.0"</span><span>,</span> <span> </span><span>"codexVersion"</span><span>:</span><span> </span><span>"1.0"</span><span>,</span> <span> </span><span>"categories"</span><span>:</span><span> </span><span>[</span> <span> </span><span>"Miscellaneous"</span> <span> </span><span>],</span> <span> </span><span>"resources"</span><span>:</span><span> </span><span>{</span> <span> </span><span>"credentialDocumentation"</span><span>:</span><span> </span><span>[</span> <span> </span><span>{</span> <span> </span><span>"url"</span><span>:</span><span> </span><span>""</span> <span> </span><span>}</span> <span> </span><span>],</span> <span> </span><span>"primaryDocumentation"</span><span>:</span><span> </span><span>[</span> <span> </span><span>{</span> <span> </span><span>"url"</span><span>:</span><span> </span><span>""</span> <span> </span><span>}</span> <span> </span><span>]</span> <span> </span><span>}</span> <span>}</span> </code></pre></div></td></tr></tbody></table> For more information on these parameters, refer to Node codex files. ### Step 6: Update the npm package details# Your npm package details are in the `package.json` at the root of the project. It's essential to include the `n8n` object with links to the credentials and base node file. Update this file to include the following information: <table><tbody><tr><td><div><pre><span></span><span> 1</span> <span> 2</span> <span> 3</span> <span> 4</span> <span> 5</span> <span> 6</span> <span> 7</span> <span> 8</span> <span> 9</span> <span>10</span> <span>11</span> <span>12</span> <span>13</span> <span>14</span> <span>15</span> <span>16</span> <span>17</span> <span>18</span> <span>19</span> <span>20</span> <span>21</span> <span>22</span> <span>23</span> <span>24</span> <span>25</span> <span>26</span> <span>27</span> <span>28</span> <span>29</span> <span>30</span> <span>31</span> <span>32</span> <span>33</span> <span>34</span> <span>35</span> <span>36</span> <span>37</span> <span>38</span> <span>39</span> <span>40</span> <span>41</span> <span>42</span> <span>43</span> <span>44</span> <span>45</span></pre></div></td><td><div><pre><span></span><code><span>{</span> <span> </span><span>// All node names must start with "n8n-nodes-"</span> <span> </span><span>"name"</span><span>:</span><span> </span><span>"n8n-nodes-nasapics"</span><span>,</span> <span> </span><span>"version"</span><span>:</span><span> </span><span>"0.1.0"</span><span>,</span> <span> </span><span>"description"</span><span>:</span><span> </span><span>"n8n node to call NASA's APOD and Mars Rover Photo services."</span><span>,</span> <span> </span><span>"keywords"</span><span>:</span><span> </span><span>[</span> <span> </span><span>// This keyword is required for community nodes</span> <span> </span><span>"n8n-community-node-package"</span> <span> </span><span>],</span> <span> </span><span>"license"</span><span>:</span><span> </span><span>"MIT"</span><span>,</span> <span> </span><span>"homepage"</span><span>:</span><span> </span><span>"https://n8n.io"</span><span>,</span> <span> </span><span>"author"</span><span>:</span><span> </span><span>{</span> <span> </span><span>"name"</span><span>:</span><span> </span><span>"Test"</span><span>,</span> <span> </span><span>"email"</span><span>:</span><span> </span><span>"test@example.com"</span> <span> </span><span>},</span> <span> </span><span>"repository"</span><span>:</span><span> </span><span>{</span> <span> </span><span>"type"</span><span>:</span><span> </span><span>"git"</span><span>,</span> <span> </span><span>// Change the git remote to your own repository</span> <span> </span><span>// Add the new URL here</span> <span> </span><span>"url"</span><span>:</span><span> </span><span>"git+<your-repo-url>"</span> <span> </span><span>},</span> <span> </span><span>"main"</span><span>:</span><span> </span><span>"index.js"</span><span>,</span> <span> </span><span>"scripts"</span><span>:</span><span> </span><span>{</span> <span> </span><span>// don't change</span> <span> </span><span>},</span> <span> </span><span>"files"</span><span>:</span><span> </span><span>[</span> <span> </span><span>"dist"</span> <span> </span><span>],</span> <span> </span><span>// Link the credentials and node</span> <span> </span><span>"n8n"</span><span>:</span><span> </span><span>{</span> <span> </span><span>"n8nNodesApiVersion"</span><span>:</span><span> </span><span>1</span><span>,</span> <span> </span><span>"credentials"</span><span>:</span><span> </span><span>[</span> <span> </span><span>"dist/credentials/NasaPicsApi.credentials.js"</span> <span> </span><span>],</span> <span> </span><span>"nodes"</span><span>:</span><span> </span><span>[</span> <span> </span><span>"dist/nodes/NasaPics/NasaPics.node.js"</span> <span> </span><span>]</span> <span> </span><span>},</span> <span> </span><span>"devDependencies"</span><span>:</span><span> </span><span>{</span> <span> </span><span>// don't change</span> <span> </span><span>},</span> <span> </span><span>"peerDependencies"</span><span>:</span><span> </span><span>{</span> <span> </span><span>// don't change</span> <span> </span><span>}</span> <span>}</span> </code></pre></div></td></tr></tbody></table> You need to update the `package.json` to include your own information, such as your name and repository URL. For more information on npm `package.json` files, refer to npm's package.json documentation. ## Test your node# You can test your node as you build it by running it in a local n8n instance. 1. Install n8n using npm: <table><tbody><tr><td><div><pre><span></span><span>1</span></pre></div></td><td><div><pre><span></span><code>npm<span> </span>install<span> </span>n8n<span> </span>-g </code></pre></div></td></tr></tbody></table> 2. When you are ready to test your node, publish it locally: <table><tbody><tr><td><div><pre><span></span><span>1</span> <span>2</span> <span>3</span></pre></div></td><td><div><pre><span></span><code><span># In your node directory</span> npm<span> </span>run<span> </span>build npm<span> </span>link </code></pre></div></td></tr></tbody></table> 3. Install the node into your local n8n instance: <table><tbody><tr><td><div><pre><span></span><span>1</span> <span>2</span> <span>3</span></pre></div></td><td><div><pre><span></span><code><span># In the nodes directory within your n8n installation</span> <span># node-package-name is the name from the package.json</span> npm<span> </span>link<span> </span><node-package-name> </code></pre></div></td></tr></tbody></table> Check your directory Make sure you run `npm link <node-name>` in the nodes directory within your n8n installation. This can be: * `~/.n8n/custom/` * `~/.n8n/<your-custom-name>`: if your n8n installation set a different name using `N8N_CUSTOM_EXTENSIONS`. 4. Start n8n: <table><tbody><tr><td><div><pre><span></span><span>1</span></pre></div></td><td><div><pre><span></span><code>n8n start </code></pre></div></td></tr></tbody></table> 5. Open n8n in your browser. You should see your nodes when you search for them in the nodes panel. Node names Make sure you search using the node name, not the package name. For example, if your npm package name is `n8n-nodes-weather-nodes`, and the package contains nodes named `rain`, `sun`, `snow`, you should search for `rain`, not `weather-nodes`. ### Troubleshooting# * There's no `custom` directory in `~/.n8n` local installation. You have to create `custom` directory manually and run `npm init` <table><tbody><tr><td><div><pre><span></span><span>1</span> <span>2</span> <span>3</span> <span>4</span></pre></div></td><td><div><pre><span></span><code><span># In ~/.n8n directory run</span> mkdir<span> </span>custom<span> </span> <span>cd</span><span> </span>custom<span> </span> npm<span> </span>init </code></pre></div></td></tr></tbody></table> ## Next steps# * Deploy your node. * View an example of a declarative node: n8n's Brevo node. Note that the main node is declarative, while the trigger node is in programmatic style. * Learn about node versioning. --- ## Page: https://docs.n8n.io/integrations/creating-nodes/build/programmatic-style-node/ This tutorial walks through building a programmatic-style node. Before you begin, make sure this is the node style you need. Refer to Choose your node building approach for more information. ## Prerequisites# You need the following installed on your development machine: * git * Node.js and npm. Minimum version Node 18.17.0. You can find instructions on how to install both using nvm (Node Version Manager) for Linux, Mac, and WSL here. For Windows users, refer to Microsoft's guide to Install NodeJS on Windows. You need some understanding of: * JavaScript/TypeScript * REST APIs * git * Expressions in n8n ## Build your node# In this section, you'll clone n8n's node starter repository, and build a node that integrates the SendGrid. You'll create a node that implements one piece of SendGrid functionality: create a contact. Existing node n8n has a built-in SendGrid node. To avoid clashing with the existing node, you'll give your version a different name. ### Step 1: Set up the project# n8n provides a starter repository for node development. Using the starter ensures you have all necessary dependencies. It also provides a linter. Clone the repository and navigate into the directory: 1. Generate a new repository from the template repository. 2. Clone your new repository: <table><tbody><tr><td><div><pre><span></span><span>1</span> <span>2</span></pre></div></td><td><div><pre><span></span><code>git<span> </span>clone<span> </span>https://github.com/<your-organization>/<your-repo-name>.git<span> </span>n8n-nodes-friendgrid <span>cd</span><span> </span>n8n-nodes-friendgrid </code></pre></div></td></tr></tbody></table> The starter contains example nodes and credentials. Delete the following directories and files: * `nodes/ExampleNode` * `nodes/HTTPBin` * `credentials/ExampleCredentials.credentials.ts` * `credentials/HttpBinApi.credentials.ts` Now create the following directories and files: `nodes/FriendGrid` `nodes/FriendGrid/FriendGrid.node.json` `nodes/FriendGrid/FriendGrid.node.ts` `credentials/FriendGridApi.credentials.ts` These are the key files required for any node. Refer to Node file structure for more information on required files and recommended organization. Now install the project dependencies: <table><tbody><tr><td><div><pre><span></span><span>1</span></pre></div></td><td><div><pre><span></span><code>npm<span> </span>i </code></pre></div></td></tr></tbody></table> ### Step 2: Add an icon# Save the SendGrid SVG logo from here as `friendGrid.svg` in `nodes/FriendGrid/`. n8n recommends using an SVG for your node icon, but you can also use PNG. If using PNG, the icon resolution should be 60x60px. Node icons should have a square or near-square aspect ratio. Don't reference Font Awesome If you want to use a Font Awesome icon in your node, download and embed the image. ### Step 3: Define the node in the base file# Every node must have a base file. Refer to Node base file for detailed information about base file parameters. In this example, the file is `FriendGrid.node.ts`. To keep this tutorial short, you'll place all the node functionality in this one file. When building more complex nodes, you should consider splitting out your functionality into modules. Refer to Node file structure for more information. #### Step 3.1: Imports# Start by adding the import statements: <table><tbody><tr><td><div><pre><span></span><span> 1</span> <span> 2</span> <span> 3</span> <span> 4</span> <span> 5</span> <span> 6</span> <span> 7</span> <span> 8</span> <span> 9</span> <span>10</span> <span>11</span> <span>12</span> <span>13</span> <span>14</span></pre></div></td><td><div><pre><span></span><code><span>import</span><span> </span><span>{</span> <span> </span><span>IExecuteFunctions</span><span>,</span> <span>}</span><span> </span><span>from</span><span> </span><span>'n8n-core'</span><span>;</span> <span>import</span><span> </span><span>{</span> <span> </span><span>IDataObject</span><span>,</span> <span> </span><span>INodeExecutionData</span><span>,</span> <span> </span><span>INodeType</span><span>,</span> <span> </span><span>INodeTypeDescription</span><span>,</span> <span>}</span><span> </span><span>from</span><span> </span><span>'n8n-workflow'</span><span>;</span> <span>import</span><span> </span><span>{</span> <span> </span><span>OptionsWithUri</span><span>,</span> <span>}</span><span> </span><span>from</span><span> </span><span>'request'</span><span>;</span> </code></pre></div></td></tr></tbody></table> #### Step 3.2: Create the main class# The node must export an interface that implements `INodeType`. This interface must include a `description` interface, which in turn contains the `properties` array. Class names and file names Make sure the class name and the file name match. For example, given a class `FriendGrid`, the filename must be `FriendGrid.node.ts`. <table><tbody><tr><td><div><pre><span></span><span> 1</span> <span> 2</span> <span> 3</span> <span> 4</span> <span> 5</span> <span> 6</span> <span> 7</span> <span> 8</span> <span> 9</span> <span>10</span> <span>11</span></pre></div></td><td><div><pre><span></span><code><span>export</span><span> </span><span>class</span><span> </span><span>FriendGrid</span><span> </span><span>implements</span><span> </span><span>INodeType</span><span> </span><span>{</span> <span> </span><span>description</span><span>:</span><span> </span><span>INodeTypeDescription</span><span> </span><span>=</span><span> </span><span>{</span> <span> </span><span>// Basic node details will go here</span> <span> </span><span>properties</span><span>:</span><span> </span><span>[</span> <span> </span><span>// Resources and operations will go here</span> <span> </span><span>],</span> <span> </span><span>};</span> <span> </span><span>// The execute method will go here</span> <span> </span><span>async</span><span> </span><span>execute</span><span>(</span><span>this</span><span>:</span><span> </span><span>IExecuteFunctions</span><span>)</span><span>:</span><span> </span><span>Promise</span><span><</span><span>INodeExecutionData</span><span>[][]</span><span>></span><span> </span><span>{</span> <span> </span><span>}</span> <span>}</span> </code></pre></div></td></tr></tbody></table> #### Step 3.3: Add node details# All programmatic nodes need some basic parameters, such as their display name and icon. Add the following to the `description`: <table><tbody><tr><td><div><pre><span></span><span> 1</span> <span> 2</span> <span> 3</span> <span> 4</span> <span> 5</span> <span> 6</span> <span> 7</span> <span> 8</span> <span> 9</span> <span>10</span> <span>11</span> <span>12</span> <span>13</span> <span>14</span> <span>15</span> <span>16</span> <span>17</span></pre></div></td><td><div><pre><span></span><code><span>displayName</span><span>:</span><span> </span><span>'FriendGrid'</span><span>,</span> <span>name</span><span>:</span><span> </span><span>'friendGrid'</span><span>,</span> <span>icon</span><span>:</span><span> </span><span>'file:friendGrid.svg'</span><span>,</span> <span>group</span><span>:</span><span> </span><span>[</span><span>'transform'</span><span>],</span> <span>version</span><span>:</span><span> </span><span>1</span><span>,</span> <span>description</span><span>:</span><span> </span><span>'Consume SendGrid API'</span><span>,</span> <span>defaults</span><span>:</span><span> </span><span>{</span> <span> </span><span>name</span><span>:</span><span> </span><span>'FriendGrid'</span><span>,</span> <span>},</span> <span>inputs</span><span>:</span><span> </span><span>[</span><span>'main'</span><span>],</span> <span>outputs</span><span>:</span><span> </span><span>[</span><span>'main'</span><span>],</span> <span>credentials</span><span>:</span><span> </span><span>[</span> <span> </span><span>{</span> <span> </span><span>name</span><span>:</span><span> </span><span>'friendGridApi'</span><span>,</span> <span> </span><span>required</span><span>:</span><span> </span><span>true</span><span>,</span> <span> </span><span>},</span> <span>],</span> </code></pre></div></td></tr></tbody></table> n8n uses some of the properties set in `description` to render the node in the Editor UI. These properties are `displayName`, `icon`, and `description`. #### Step 3.4: Add the resource# The resource object defines the API resource that the node uses. In this tutorial, you're creating a node to access one of SendGrid's API endpoints: `/v3/marketing/contacts`. This means you need to define a resource for this endpoint. Update the `properties` array with the resource object: <table><tbody><tr><td><div><pre><span></span><span> 1</span> <span> 2</span> <span> 3</span> <span> 4</span> <span> 5</span> <span> 6</span> <span> 7</span> <span> 8</span> <span> 9</span> <span>10</span> <span>11</span> <span>12</span> <span>13</span> <span>14</span> <span>15</span></pre></div></td><td><div><pre><span></span><code><span>{</span> <span> </span><span>displayName</span><span>:</span><span> </span><span>'Resource'</span><span>,</span> <span> </span><span>name</span><span>:</span><span> </span><span>'resource'</span><span>,</span> <span> </span><span>type</span><span>:</span><span> </span><span>'options'</span><span>,</span> <span> </span><span>options</span><span>:</span><span> </span><span>[</span> <span> </span><span>{</span> <span> </span><span>name</span><span>:</span><span> </span><span>'Contact'</span><span>,</span> <span> </span><span>value</span><span>:</span><span> </span><span>'contact'</span><span>,</span> <span> </span><span>},</span> <span> </span><span>],</span> <span> </span><span>default</span><span>:</span><span> </span><span>'contact'</span><span>,</span> <span> </span><span>noDataExpression</span><span>:</span><span> </span><span>true</span><span>,</span> <span> </span><span>required</span><span>:</span><span> </span><span>true</span><span>,</span> <span> </span><span>description</span><span>:</span><span> </span><span>'Create a new contact'</span><span>,</span> <span>},</span> </code></pre></div></td></tr></tbody></table> `type` controls which UI element n8n displays for the resource, and tells n8n what type of data to expect from the user. `options` results in n8n adding a dropdown that allows users to choose one option. Refer to Node UI elements for more information. #### Step 3.5: Add operations# The operations object defines what you can do with a resource. It usually relates to REST API verbs (GET, POST, and so on). In this tutorial, there's one operation: create a contact. It has one required field, the email address for the contact the user creates. Add the following to the `properties` array, after the `resource` object: <table><tbody><tr><td><div><pre><span></span><span> 1</span> <span> 2</span> <span> 3</span> <span> 4</span> <span> 5</span> <span> 6</span> <span> 7</span> <span> 8</span> <span> 9</span> <span>10</span> <span>11</span> <span>12</span> <span>13</span> <span>14</span> <span>15</span> <span>16</span> <span>17</span> <span>18</span> <span>19</span> <span>20</span> <span>21</span> <span>22</span> <span>23</span> <span>24</span> <span>25</span> <span>26</span> <span>27</span> <span>28</span> <span>29</span> <span>30</span> <span>31</span> <span>32</span> <span>33</span> <span>34</span> <span>35</span> <span>36</span> <span>37</span> <span>38</span> <span>39</span> <span>40</span> <span>41</span></pre></div></td><td><div><pre><span></span><code><span>{</span> <span> </span><span>displayName</span><span>:</span><span> </span><span>'Operation'</span><span>,</span> <span> </span><span>name</span><span>:</span><span> </span><span>'operation'</span><span>,</span> <span> </span><span>type</span><span>:</span><span> </span><span>'options'</span><span>,</span> <span> </span><span>displayOptions</span><span>:</span><span> </span><span>{</span> <span> </span><span>show</span><span>:</span><span> </span><span>{</span> <span> </span><span>resource</span><span>:</span><span> </span><span>[</span> <span> </span><span>'contact'</span><span>,</span> <span> </span><span>],</span> <span> </span><span>},</span> <span> </span><span>},</span> <span> </span><span>options</span><span>:</span><span> </span><span>[</span> <span> </span><span>{</span> <span> </span><span>name</span><span>:</span><span> </span><span>'Create'</span><span>,</span> <span> </span><span>value</span><span>:</span><span> </span><span>'create'</span><span>,</span> <span> </span><span>description</span><span>:</span><span> </span><span>'Create a contact'</span><span>,</span> <span> </span><span>action</span><span>:</span><span> </span><span>'Create a contact'</span><span>,</span> <span> </span><span>},</span> <span> </span><span>],</span> <span> </span><span>default</span><span>:</span><span> </span><span>'create'</span><span>,</span> <span> </span><span>noDataExpression</span><span>:</span><span> </span><span>true</span><span>,</span> <span>},</span> <span>{</span> <span> </span><span>displayName</span><span>:</span><span> </span><span>'Email'</span><span>,</span> <span> </span><span>name</span><span>:</span><span> </span><span>'email'</span><span>,</span> <span> </span><span>type</span><span>:</span><span> </span><span>'string'</span><span>,</span> <span> </span><span>required</span><span>:</span><span> </span><span>true</span><span>,</span> <span> </span><span>displayOptions</span><span>:</span><span> </span><span>{</span> <span> </span><span>show</span><span>:</span><span> </span><span>{</span> <span> </span><span>operation</span><span>:</span><span> </span><span>[</span> <span> </span><span>'create'</span><span>,</span> <span> </span><span>],</span> <span> </span><span>resource</span><span>:</span><span> </span><span>[</span> <span> </span><span>'contact'</span><span>,</span> <span> </span><span>],</span> <span> </span><span>},</span> <span> </span><span>},</span> <span> </span><span>default</span><span>:</span><span>''</span><span>,</span> <span> </span><span>placeholder</span><span>:</span><span> </span><span>'name@email.com'</span><span>,</span> <span> </span><span>description</span><span>:</span><span>'Primary email for the contact'</span><span>,</span> <span>},</span> </code></pre></div></td></tr></tbody></table> #### Step 3.6: Add optional fields# Most APIs, including the SendGrid API that you're using in this example, have optional fields you can use to refine your query. To avoid overwhelming users, n8n displays these under **Additional Fields** in the UI. For this tutorial, you'll add two additional fields, to allow users to enter the contact's first name and last name. Add the following to the properties array: <table><tbody><tr><td><div><pre><span></span><span> 1</span> <span> 2</span> <span> 3</span> <span> 4</span> <span> 5</span> <span> 6</span> <span> 7</span> <span> 8</span> <span> 9</span> <span>10</span> <span>11</span> <span>12</span> <span>13</span> <span>14</span> <span>15</span> <span>16</span> <span>17</span> <span>18</span> <span>19</span> <span>20</span> <span>21</span> <span>22</span> <span>23</span> <span>24</span> <span>25</span> <span>26</span> <span>27</span> <span>28</span> <span>29</span> <span>30</span> <span>31</span></pre></div></td><td><div><pre><span></span><code><span>{</span> <span> </span><span>displayName</span><span>:</span><span> </span><span>'Additional Fields'</span><span>,</span> <span> </span><span>name</span><span>:</span><span> </span><span>'additionalFields'</span><span>,</span> <span> </span><span>type</span><span>:</span><span> </span><span>'collection'</span><span>,</span> <span> </span><span>placeholder</span><span>:</span><span> </span><span>'Add Field'</span><span>,</span> <span> </span><span>default</span><span>:</span><span> </span><span>{},</span> <span> </span><span>displayOptions</span><span>:</span><span> </span><span>{</span> <span> </span><span>show</span><span>:</span><span> </span><span>{</span> <span> </span><span>resource</span><span>:</span><span> </span><span>[</span> <span> </span><span>'contact'</span><span>,</span> <span> </span><span>],</span> <span> </span><span>operation</span><span>:</span><span> </span><span>[</span> <span> </span><span>'create'</span><span>,</span> <span> </span><span>],</span> <span> </span><span>},</span> <span> </span><span>},</span> <span> </span><span>options</span><span>:</span><span> </span><span>[</span> <span> </span><span>{</span> <span> </span><span>displayName</span><span>:</span><span> </span><span>'First Name'</span><span>,</span> <span> </span><span>name</span><span>:</span><span> </span><span>'firstName'</span><span>,</span> <span> </span><span>type</span><span>:</span><span> </span><span>'string'</span><span>,</span> <span> </span><span>default</span><span>:</span><span> </span><span>''</span><span>,</span> <span> </span><span>},</span> <span> </span><span>{</span> <span> </span><span>displayName</span><span>:</span><span> </span><span>'Last Name'</span><span>,</span> <span> </span><span>name</span><span>:</span><span> </span><span>'lastName'</span><span>,</span> <span> </span><span>type</span><span>:</span><span> </span><span>'string'</span><span>,</span> <span> </span><span>default</span><span>:</span><span> </span><span>''</span><span>,</span> <span> </span><span>},</span> <span> </span><span>],</span> <span>},</span> </code></pre></div></td></tr></tbody></table> ### Step 4: Add the execute method# You've set up the node UI and basic information. It's time to map the node UI to API requests, and make the node actually do something. The `execute` method runs every time the node runs. In this method, you have access to the input items and to the parameters that the user set in the UI, including the credentials. Add the following the `execute` method in the `FriendGrid.node.ts`: <table><tbody><tr><td><div><pre><span></span><span> 1</span> <span> 2</span> <span> 3</span> <span> 4</span> <span> 5</span> <span> 6</span> <span> 7</span> <span> 8</span> <span> 9</span> <span>10</span> <span>11</span> <span>12</span> <span>13</span> <span>14</span> <span>15</span> <span>16</span> <span>17</span> <span>18</span> <span>19</span> <span>20</span> <span>21</span> <span>22</span> <span>23</span> <span>24</span> <span>25</span> <span>26</span> <span>27</span> <span>28</span> <span>29</span> <span>30</span> <span>31</span> <span>32</span> <span>33</span> <span>34</span> <span>35</span> <span>36</span> <span>37</span> <span>38</span> <span>39</span> <span>40</span> <span>41</span> <span>42</span></pre></div></td><td><div><pre><span></span><code><span>// Handle data coming from previous nodes</span> <span>const</span><span> </span><span>items</span><span> </span><span>=</span><span> </span><span>this</span><span>.</span><span>getInputData</span><span>();</span> <span>let</span><span> </span><span>responseData</span><span>;</span> <span>const</span><span> </span><span>returnData</span><span> </span><span>=</span><span> </span><span>[];</span> <span>const</span><span> </span><span>resource</span><span> </span><span>=</span><span> </span><span>this</span><span>.</span><span>getNodeParameter</span><span>(</span><span>'resource'</span><span>,</span><span> </span><span>0</span><span>)</span><span> </span><span>as</span><span> </span><span>string</span><span>;</span> <span>const</span><span> </span><span>operation</span><span> </span><span>=</span><span> </span><span>this</span><span>.</span><span>getNodeParameter</span><span>(</span><span>'operation'</span><span>,</span><span> </span><span>0</span><span>)</span><span> </span><span>as</span><span> </span><span>string</span><span>;</span> <span>// For each item, make an API call to create a contact</span> <span>for</span><span> </span><span>(</span><span>let</span><span> </span><span>i</span><span> </span><span>=</span><span> </span><span>0</span><span>;</span><span> </span><span>i</span><span> </span><span><</span><span> </span><span>items</span><span>.</span><span>length</span><span>;</span><span> </span><span>i</span><span>++</span><span>)</span><span> </span><span>{</span> <span> </span><span>if</span><span> </span><span>(</span><span>resource</span><span> </span><span>===</span><span> </span><span>'contact'</span><span>)</span><span> </span><span>{</span> <span> </span><span>if</span><span> </span><span>(</span><span>operation</span><span> </span><span>===</span><span> </span><span>'create'</span><span>)</span><span> </span><span>{</span> <span> </span><span>// Get email input</span> <span> </span><span>const</span><span> </span><span>email</span><span> </span><span>=</span><span> </span><span>this</span><span>.</span><span>getNodeParameter</span><span>(</span><span>'email'</span><span>,</span><span> </span><span>i</span><span>)</span><span> </span><span>as</span><span> </span><span>string</span><span>;</span> <span> </span><span>// Get additional fields input</span> <span> </span><span>const</span><span> </span><span>additionalFields</span><span> </span><span>=</span><span> </span><span>this</span><span>.</span><span>getNodeParameter</span><span>(</span><span>'additionalFields'</span><span>,</span><span> </span><span>i</span><span>)</span><span> </span><span>as</span><span> </span><span>IDataObject</span><span>;</span> <span> </span><span>const</span><span> </span><span>data</span><span>:</span><span> </span><span>IDataObject</span><span> </span><span>=</span><span> </span><span>{</span> <span> </span><span>email</span><span>,</span> <span> </span><span>};</span> <span> </span><span>Object</span><span>.</span><span>assign</span><span>(</span><span>data</span><span>,</span><span> </span><span>additionalFields</span><span>);</span> <span> </span><span>// Make HTTP request according to https://sendgrid.com/docs/api-reference/</span> <span> </span><span>const</span><span> </span><span>options</span><span>:</span><span> </span><span>OptionsWithUri</span><span> </span><span>=</span><span> </span><span>{</span> <span> </span><span>headers</span><span>:</span><span> </span><span>{</span> <span> </span><span>'Accept'</span><span>:</span><span> </span><span>'application/json'</span><span>,</span> <span> </span><span>},</span> <span> </span><span>method</span><span>:</span><span> </span><span>'PUT'</span><span>,</span> <span> </span><span>body</span><span>:</span><span> </span><span>{</span> <span> </span><span>contacts</span><span>:</span><span> </span><span>[</span> <span> </span><span>data</span><span>,</span> <span> </span><span>],</span> <span> </span><span>},</span> <span> </span><span>uri</span><span>:</span><span> </span><span>`https://api.sendgrid.com/v3/marketing/contacts`</span><span>,</span> <span> </span><span>json</span><span>:</span><span> </span><span>true</span><span>,</span> <span> </span><span>};</span> <span> </span><span>responseData</span><span> </span><span>=</span><span> </span><span>await</span><span> </span><span>this</span><span>.</span><span>helpers</span><span>.</span><span>requestWithAuthentication</span><span>.</span><span>call</span><span>(</span><span>this</span><span>,</span><span> </span><span>'friendGridApi'</span><span>,</span><span> </span><span>options</span><span>);</span> <span> </span><span>returnData</span><span>.</span><span>push</span><span>(</span><span>responseData</span><span>);</span> <span> </span><span>}</span> <span> </span><span>}</span> <span>}</span> <span>// Map data to n8n data structure</span> <span>return</span><span> </span><span>[</span><span>this</span><span>.</span><span>helpers</span><span>.</span><span>returnJsonArray</span><span>(</span><span>returnData</span><span>)];</span> </code></pre></div></td></tr></tbody></table> Note the following lines of this code: <table><tbody><tr><td><div><pre><span></span><span>1</span> <span>2</span> <span>3</span> <span>4</span> <span>5</span> <span>6</span> <span>7</span></pre></div></td><td><div><pre><span></span><code><span>const</span><span> </span><span>items</span><span> </span><span>=</span><span> </span><span>this</span><span>.</span><span>getInputData</span><span>();</span> <span>...</span><span> </span> <span>for</span><span> </span><span>(</span><span>let</span><span> </span><span>i</span><span> </span><span>=</span><span> </span><span>0</span><span>;</span><span> </span><span>i</span><span> </span><span><</span><span> </span><span>items</span><span>.</span><span>length</span><span>;</span><span> </span><span>i</span><span>++</span><span>)</span><span> </span><span>{</span> <span> </span><span>...</span> <span> </span><span>const</span><span> </span><span>email</span><span> </span><span>=</span><span> </span><span>this</span><span>.</span><span>getNodeParameter</span><span>(</span><span>'email'</span><span>,</span><span> </span><span>i</span><span>)</span><span> </span><span>as</span><span> </span><span>string</span><span>;</span> <span> </span><span>...</span> <span>}</span> </code></pre></div></td></tr></tbody></table> Users can provide data in two ways: * Entered directly in the node fields * By mapping data from earlier nodes in the workflow `getInputData()`, and the subsequent loop, allows the node to handle situations where data comes from a previous node. This includes supporting multiple inputs. This means that if, for example, the previous node outputs contact information for five people, your FriendGrid node can create five contacts. ### Step 5: Set up authentication# The SendGrid API requires users to authenticate with an API key. Add the following to `FriendGridApi.credentials.ts` <table><tbody><tr><td><div><pre><span></span><span> 1</span> <span> 2</span> <span> 3</span> <span> 4</span> <span> 5</span> <span> 6</span> <span> 7</span> <span> 8</span> <span> 9</span> <span>10</span> <span>11</span> <span>12</span> <span>13</span> <span>14</span> <span>15</span> <span>16</span> <span>17</span> <span>18</span> <span>19</span> <span>20</span> <span>21</span> <span>22</span> <span>23</span> <span>24</span> <span>25</span> <span>26</span> <span>27</span> <span>28</span> <span>29</span> <span>30</span> <span>31</span> <span>32</span> <span>33</span> <span>34</span> <span>35</span></pre></div></td><td><div><pre><span></span><code><span>import</span><span> </span><span>{</span> <span> </span><span>IAuthenticateGeneric</span><span>,</span> <span> </span><span>ICredentialTestRequest</span><span>,</span> <span> </span><span>ICredentialType</span><span>,</span> <span> </span><span>INodeProperties</span><span>,</span> <span>}</span><span> </span><span>from</span><span> </span><span>'n8n-workflow'</span><span>;</span> <span>export</span><span> </span><span>class</span><span> </span><span>FriendGridApi</span><span> </span><span>implements</span><span> </span><span>ICredentialType</span><span> </span><span>{</span> <span> </span><span>name</span><span> </span><span>=</span><span> </span><span>'friendGridApi'</span><span>;</span> <span> </span><span>displayName</span><span> </span><span>=</span><span> </span><span>'FriendGrid API'</span><span>;</span> <span> </span><span>properties</span><span>:</span><span> </span><span>INodeProperties</span><span>[]</span><span> </span><span>=</span><span> </span><span>[</span> <span> </span><span>{</span> <span> </span><span>displayName</span><span>:</span><span> </span><span>'API Key'</span><span>,</span> <span> </span><span>name</span><span>:</span><span> </span><span>'apiKey'</span><span>,</span> <span> </span><span>type</span><span>:</span><span> </span><span>'string'</span><span>,</span> <span> </span><span>default</span><span>:</span><span> </span><span>''</span><span>,</span> <span> </span><span>},</span> <span> </span><span>];</span> <span> </span><span>authenticate</span><span>:</span><span> </span><span>IAuthenticateGeneric</span><span> </span><span>=</span><span> </span><span>{</span> <span> </span><span>type</span><span>:</span><span> </span><span>'generic'</span><span>,</span> <span> </span><span>properties</span><span>:</span><span> </span><span>{</span> <span> </span><span>headers</span><span>:</span><span> </span><span>{</span> <span> </span><span>Authorization</span><span>:</span><span> </span><span>'=Bearer {{$credentials.apiKey}}'</span><span>,</span> <span> </span><span>},</span> <span> </span><span>},</span> <span> </span><span>};</span> <span> </span><span>test</span><span>:</span><span> </span><span>ICredentialTestRequest</span><span> </span><span>=</span><span> </span><span>{</span> <span> </span><span>request</span><span>:</span><span> </span><span>{</span> <span> </span><span>baseURL</span><span>:</span><span> </span><span>'https://api.sendgrid.com/v3'</span><span>,</span> <span> </span><span>url</span><span>:</span><span> </span><span>'/marketing/contacts'</span><span>,</span> <span> </span><span>},</span> <span> </span><span>};</span> <span>}</span> </code></pre></div></td></tr></tbody></table> For more information about credentials files and options, refer to Credentials file. ### Step 6: Add node metadata# Metadata about your node goes in the JSON file at the root of your node. n8n refers to this as the codex file. In this example, the file is `FriendGrid.node.json`. Add the following code to the JSON file: <table><tbody><tr><td><div><pre><span></span><span> 1</span> <span> 2</span> <span> 3</span> <span> 4</span> <span> 5</span> <span> 6</span> <span> 7</span> <span> 8</span> <span> 9</span> <span>10</span> <span>11</span> <span>12</span> <span>13</span> <span>14</span> <span>15</span> <span>16</span> <span>17</span> <span>18</span> <span>19</span> <span>20</span></pre></div></td><td><div><pre><span></span><code><span>{</span> <span> </span><span>"node"</span><span>:</span><span> </span><span>"n8n-nodes-base.FriendGrid"</span><span>,</span> <span> </span><span>"nodeVersion"</span><span>:</span><span> </span><span>"1.0"</span><span>,</span> <span> </span><span>"codexVersion"</span><span>:</span><span> </span><span>"1.0"</span><span>,</span> <span> </span><span>"categories"</span><span>:</span><span> </span><span>[</span> <span> </span><span>"Miscellaneous"</span> <span> </span><span>],</span> <span> </span><span>"resources"</span><span>:</span><span> </span><span>{</span> <span> </span><span>"credentialDocumentation"</span><span>:</span><span> </span><span>[</span> <span> </span><span>{</span> <span> </span><span>"url"</span><span>:</span><span> </span><span>""</span> <span> </span><span>}</span> <span> </span><span>],</span> <span> </span><span>"primaryDocumentation"</span><span>:</span><span> </span><span>[</span> <span> </span><span>{</span> <span> </span><span>"url"</span><span>:</span><span> </span><span>""</span> <span> </span><span>}</span> <span> </span><span>]</span> <span> </span><span>}</span> <span>}</span> </code></pre></div></td></tr></tbody></table> For more information on these parameters, refer to Node codex files. ### Step 7: Update the npm package details# Your npm package details are in the `package.json` at the root of the project. It's essential to include the `n8n` object with links to the credentials and base node file. Update this file to include the following information: <table><tbody><tr><td><div><pre><span></span><span> 1</span> <span> 2</span> <span> 3</span> <span> 4</span> <span> 5</span> <span> 6</span> <span> 7</span> <span> 8</span> <span> 9</span> <span>10</span> <span>11</span> <span>12</span> <span>13</span> <span>14</span> <span>15</span> <span>16</span> <span>17</span> <span>18</span> <span>19</span> <span>20</span> <span>21</span> <span>22</span> <span>23</span> <span>24</span> <span>25</span> <span>26</span> <span>27</span> <span>28</span> <span>29</span> <span>30</span> <span>31</span> <span>32</span> <span>33</span> <span>34</span> <span>35</span> <span>36</span> <span>37</span> <span>38</span> <span>39</span> <span>40</span> <span>41</span> <span>42</span> <span>43</span> <span>44</span> <span>45</span></pre></div></td><td><div><pre><span></span><code><span>{</span> <span> </span><span>// All node names must start with "n8n-nodes-"</span> <span> </span><span>"name"</span><span>:</span><span> </span><span>"n8n-nodes-friendgrid"</span><span>,</span> <span> </span><span>"version"</span><span>:</span><span> </span><span>"0.1.0"</span><span>,</span> <span> </span><span>"description"</span><span>:</span><span> </span><span>"n8n node to create contacts in SendGrid"</span><span>,</span> <span> </span><span>"keywords"</span><span>:</span><span> </span><span>[</span> <span> </span><span>// This keyword is required for community nodes</span> <span> </span><span>"n8n-community-node-package"</span> <span> </span><span>],</span> <span> </span><span>"license"</span><span>:</span><span> </span><span>"MIT"</span><span>,</span> <span> </span><span>"homepage"</span><span>:</span><span> </span><span>"https://n8n.io"</span><span>,</span> <span> </span><span>"author"</span><span>:</span><span> </span><span>{</span> <span> </span><span>"name"</span><span>:</span><span> </span><span>"Test"</span><span>,</span> <span> </span><span>"email"</span><span>:</span><span> </span><span>"test@example.com"</span> <span> </span><span>},</span> <span> </span><span>"repository"</span><span>:</span><span> </span><span>{</span> <span> </span><span>"type"</span><span>:</span><span> </span><span>"git"</span><span>,</span> <span> </span><span>// Change the git remote to your own repository</span> <span> </span><span>// Add the new URL here</span> <span> </span><span>"url"</span><span>:</span><span> </span><span>"git+<your-repo-url>"</span> <span> </span><span>},</span> <span> </span><span>"main"</span><span>:</span><span> </span><span>"index.js"</span><span>,</span> <span> </span><span>"scripts"</span><span>:</span><span> </span><span>{</span> <span> </span><span>// don't change</span> <span> </span><span>},</span> <span> </span><span>"files"</span><span>:</span><span> </span><span>[</span> <span> </span><span>"dist"</span> <span> </span><span>],</span> <span> </span><span>// Link the credentials and node</span> <span> </span><span>"n8n"</span><span>:</span><span> </span><span>{</span> <span> </span><span>"n8nNodesApiVersion"</span><span>:</span><span> </span><span>1</span><span>,</span> <span> </span><span>"credentials"</span><span>:</span><span> </span><span>[</span> <span> </span><span>"dist/credentials/FriendGridApi.credentials.js"</span> <span> </span><span>],</span> <span> </span><span>"nodes"</span><span>:</span><span> </span><span>[</span> <span> </span><span>"dist/nodes/FriendGrid/FriendGrid.node.js"</span> <span> </span><span>]</span> <span> </span><span>},</span> <span> </span><span>"devDependencies"</span><span>:</span><span> </span><span>{</span> <span> </span><span>// don't change</span> <span> </span><span>},</span> <span> </span><span>"peerDependencies"</span><span>:</span><span> </span><span>{</span> <span> </span><span>// don't change</span> <span> </span><span>}</span> <span>}</span> </code></pre></div></td></tr></tbody></table> You need to update the `package.json` to include your own information, such as your name and repository URL. For more information on npm `package.json` files, refer to npm's package.json documentation. ## Test your node# You can test your node as you build it by running it in a local n8n instance. 1. Install n8n using npm: <table><tbody><tr><td><div><pre><span></span><span>1</span></pre></div></td><td><div><pre><span></span><code>npm<span> </span>install<span> </span>n8n<span> </span>-g </code></pre></div></td></tr></tbody></table> 2. When you are ready to test your node, publish it locally: <table><tbody><tr><td><div><pre><span></span><span>1</span> <span>2</span> <span>3</span></pre></div></td><td><div><pre><span></span><code><span># In your node directory</span> npm<span> </span>run<span> </span>build npm<span> </span>link </code></pre></div></td></tr></tbody></table> 3. Install the node into your local n8n instance: <table><tbody><tr><td><div><pre><span></span><span>1</span> <span>2</span> <span>3</span></pre></div></td><td><div><pre><span></span><code><span># In the nodes directory within your n8n installation</span> <span># node-package-name is the name from the package.json</span> npm<span> </span>link<span> </span><node-package-name> </code></pre></div></td></tr></tbody></table> Check your directory Make sure you run `npm link <node-name>` in the nodes directory within your n8n installation. This can be: * `~/.n8n/custom/` * `~/.n8n/<your-custom-name>`: if your n8n installation set a different name using `N8N_CUSTOM_EXTENSIONS`. 4. Start n8n: <table><tbody><tr><td><div><pre><span></span><span>1</span></pre></div></td><td><div><pre><span></span><code>n8n start </code></pre></div></td></tr></tbody></table> 5. Open n8n in your browser. You should see your nodes when you search for them in the nodes panel. Node names Make sure you search using the node name, not the package name. For example, if your npm package name is `n8n-nodes-weather-nodes`, and the package contains nodes named `rain`, `sun`, `snow`, you should search for `rain`, not `weather-nodes`. ### Troubleshooting# * There's no `custom` directory in `~/.n8n` local installation. You have to create `custom` directory manually and run `npm init` <table><tbody><tr><td><div><pre><span></span><span>1</span> <span>2</span> <span>3</span> <span>4</span></pre></div></td><td><div><pre><span></span><code><span># In ~/.n8n directory run</span> mkdir<span> </span>custom<span> </span> <span>cd</span><span> </span>custom<span> </span> npm<span> </span>init </code></pre></div></td></tr></tbody></table> ## Next steps# * Deploy your node. * View an example of a programmatic node: n8n's Mattermost node. This is an example of a more complex programmatic node structure. * Learn about node versioning. * Make sure you understand key concepts: item linking and data structures. --- ## Page: https://docs.n8n.io/integrations/creating-nodes/build/reference/ This section contains reference information, including details about: * Node UI elements * Organizing your node files * Key parameters in your node's base file and credentials file. --- ## Page: https://docs.n8n.io/integrations/creating-nodes/build/reference/ui-elements/ ## Node user interface elements# n8n provides a set of predefined UI components (based on a JSON file) that allows users to input all sorts of data types. The following UI elements are available in n8n. ## String# Basic configuration: <table><tbody><tr><td><div><pre><span></span><span> 1</span> <span> 2</span> <span> 3</span> <span> 4</span> <span> 5</span> <span> 6</span> <span> 7</span> <span> 8</span> <span> 9</span> <span>10</span> <span>11</span> <span>12</span> <span>13</span> <span>14</span> <span>15</span> <span>16</span> <span>17</span> <span>18</span></pre></div></td><td><div><pre><span></span><code><span>{</span> <span> </span><span>displayName</span><span>:</span><span> </span><span>Name</span><span>,</span><span> </span><span>// The value the user sees in the UI</span> <span> </span><span>name</span><span>:</span><span> </span><span>name</span><span>,</span><span> </span><span>// The name used to reference the element UI within the code</span> <span> </span><span>type</span><span>:</span><span> </span><span>string</span><span>,</span> <span> </span><span>required</span><span>:</span><span> </span><span>true</span><span>,</span><span> </span><span>// Whether the field is required or not</span> <span> </span><span>default</span><span>:</span><span> </span><span>'n8n'</span><span>,</span> <span> </span><span>description</span><span>:</span><span> </span><span>'The name of the user'</span><span>,</span> <span> </span><span>displayOptions</span><span>:</span><span> </span><span>{</span><span> </span><span>// the resources and operations to display this element with</span> <span> </span><span>show</span><span>:</span><span> </span><span>{</span> <span> </span><span>resource</span><span>:</span><span> </span><span>[</span> <span> </span><span>// comma-separated list of resource names</span> <span> </span><span>],</span> <span> </span><span>operation</span><span>:</span><span> </span><span>[</span> <span> </span><span>// comma-separated list of operation names</span> <span> </span><span>]</span> <span> </span><span>}</span> <span> </span><span>},</span> <span>}</span> </code></pre></div></td></tr></tbody></table>  String field for inputting passwords: <table><tbody><tr><td><div><pre><span></span><span> 1</span> <span> 2</span> <span> 3</span> <span> 4</span> <span> 5</span> <span> 6</span> <span> 7</span> <span> 8</span> <span> 9</span> <span>10</span> <span>11</span> <span>12</span> <span>13</span> <span>14</span> <span>15</span> <span>16</span> <span>17</span> <span>18</span> <span>19</span> <span>20</span> <span>21</span></pre></div></td><td><div><pre><span></span><code><span>{</span> <span> </span><span>displayName</span><span>:</span><span> </span><span>'Password'</span><span>,</span> <span> </span><span>name</span><span>:</span><span> </span><span>'password'</span><span>,</span> <span> </span><span>type</span><span>:</span><span> </span><span>'string'</span><span>,</span> <span> </span><span>required</span><span>:</span><span> </span><span>true</span><span>,</span> <span> </span><span>typeOptions</span><span>:</span><span> </span><span>{</span> <span> </span><span>password</span><span>:</span><span> </span><span>true</span><span>,</span> <span> </span><span>},</span> <span> </span><span>default</span><span>:</span><span> </span><span>''</span><span>,</span> <span> </span><span>description</span><span>:</span><span> </span><span>`User's password`</span><span>,</span> <span> </span><span>displayOptions</span><span>:</span><span> </span><span>{</span><span> </span><span>// the resources and operations to display this element with</span> <span> </span><span>show</span><span>:</span><span> </span><span>{</span> <span> </span><span>resource</span><span>:</span><span> </span><span>[</span> <span> </span><span>// comma-separated list of resource names</span> <span> </span><span>],</span> <span> </span><span>operation</span><span>:</span><span> </span><span>[</span> <span> </span><span>// comma-separated list of operation names</span> <span> </span><span>]</span> <span> </span><span>}</span> <span> </span><span>},</span> <span>}</span> </code></pre></div></td></tr></tbody></table>  String field with more than one row: <table><tbody><tr><td><div><pre><span></span><span> 1</span> <span> 2</span> <span> 3</span> <span> 4</span> <span> 5</span> <span> 6</span> <span> 7</span> <span> 8</span> <span> 9</span> <span>10</span> <span>11</span> <span>12</span> <span>13</span> <span>14</span> <span>15</span> <span>16</span> <span>17</span> <span>18</span> <span>19</span> <span>20</span> <span>21</span></pre></div></td><td><div><pre><span></span><code><span>{</span> <span> </span><span>displayName</span><span>:</span><span> </span><span>'Description'</span><span>,</span> <span> </span><span>name</span><span>:</span><span> </span><span>'description'</span><span>,</span> <span> </span><span>type</span><span>:</span><span> </span><span>'string'</span><span>,</span> <span> </span><span>required</span><span>:</span><span> </span><span>true</span><span>,</span> <span> </span><span>typeOptions</span><span>:</span><span> </span><span>{</span> <span> </span><span>rows</span><span>:</span><span> </span><span>4</span><span>,</span> <span> </span><span>},</span> <span> </span><span>default</span><span>:</span><span> </span><span>''</span><span>,</span> <span> </span><span>description</span><span>:</span><span> </span><span>'Description'</span><span>,</span> <span> </span><span>displayOptions</span><span>:</span><span> </span><span>{</span><span> </span><span>// the resources and operations to display this element with</span> <span> </span><span>show</span><span>:</span><span> </span><span>{</span> <span> </span><span>resource</span><span>:</span><span> </span><span>[</span> <span> </span><span>// comma-separated list of resource names</span> <span> </span><span>],</span> <span> </span><span>operation</span><span>:</span><span> </span><span>[</span> <span> </span><span>// comma-separated list of operation names</span> <span> </span><span>]</span> <span> </span><span>}</span> <span> </span><span>},</span> <span>}</span> </code></pre></div></td></tr></tbody></table>  ### Support drag and drop for data keys# Users can drag and drop data values to map them to fields. Dragging and dropping creates an expression to load the data value. n8n supports this automatically. You need to add an extra configuration option to support dragging and dropping data keys: * `requiresDataPath: 'single'`: for fields that require a single string. * `requiresDataPath: 'multiple'`: for fields that can accept a comma-separated list of string. The Compare Datasets node code has examples. ## Number# Number field with decimal points: <table><tbody><tr><td><div><pre><span></span><span> 1</span> <span> 2</span> <span> 3</span> <span> 4</span> <span> 5</span> <span> 6</span> <span> 7</span> <span> 8</span> <span> 9</span> <span>10</span> <span>11</span> <span>12</span> <span>13</span> <span>14</span> <span>15</span> <span>16</span> <span>17</span> <span>18</span> <span>19</span> <span>20</span> <span>21</span> <span>22</span> <span>23</span></pre></div></td><td><div><pre><span></span><code><span>{</span> <span> </span><span>displayName</span><span>:</span><span> </span><span>'Amount'</span><span>,</span> <span> </span><span>name</span><span>:</span><span> </span><span>'amount'</span><span>,</span> <span> </span><span>type</span><span>:</span><span> </span><span>'number'</span><span>,</span> <span> </span><span>required</span><span>:</span><span> </span><span>true</span><span>,</span> <span> </span><span>typeOptions</span><span>:</span><span> </span><span>{</span> <span> </span><span>maxValue</span><span>:</span><span> </span><span>10</span><span>,</span> <span> </span><span>minValue</span><span>:</span><span> </span><span>0</span><span>,</span> <span> </span><span>numberPrecision</span><span>:</span><span> </span><span>2</span><span>,</span> <span> </span><span>},</span> <span> </span><span>default</span><span>:</span><span> </span><span>10.00</span><span>,</span> <span> </span><span>description</span><span>:</span><span> </span><span>'Your current amount'</span><span>,</span> <span> </span><span>displayOptions</span><span>:</span><span> </span><span>{</span><span> </span><span>// the resources and operations to display this element with</span> <span> </span><span>show</span><span>:</span><span> </span><span>{</span> <span> </span><span>resource</span><span>:</span><span> </span><span>[</span> <span> </span><span>// comma-separated list of resource names</span> <span> </span><span>],</span> <span> </span><span>operation</span><span>:</span><span> </span><span>[</span> <span> </span><span>// comma-separated list of operation names</span> <span> </span><span>]</span> <span> </span><span>}</span> <span> </span><span>},</span> <span>}</span> </code></pre></div></td></tr></tbody></table>  ## Collection# Use the `collection` type when you need to display optional fields. <table><tbody><tr><td><div><pre><span></span><span> 1</span> <span> 2</span> <span> 3</span> <span> 4</span> <span> 5</span> <span> 6</span> <span> 7</span> <span> 8</span> <span> 9</span> <span>10</span> <span>11</span> <span>12</span> <span>13</span> <span>14</span> <span>15</span> <span>16</span> <span>17</span> <span>18</span> <span>19</span> <span>20</span> <span>21</span> <span>22</span> <span>23</span> <span>24</span> <span>25</span> <span>26</span> <span>27</span> <span>28</span> <span>29</span> <span>30</span> <span>31</span> <span>32</span> <span>33</span> <span>34</span> <span>35</span> <span>36</span> <span>37</span> <span>38</span> <span>39</span></pre></div></td><td><div><pre><span></span><code><span>{</span> <span> </span><span>displayName</span><span>:</span><span> </span><span>'Filters'</span><span>,</span> <span> </span><span>name</span><span>:</span><span> </span><span>'filters'</span><span>,</span> <span> </span><span>type</span><span>:</span><span> </span><span>'collection'</span><span>,</span> <span> </span><span>placeholder</span><span>:</span><span> </span><span>'Add Field'</span><span>,</span> <span> </span><span>default</span><span>:</span><span> </span><span>{},</span> <span> </span><span>options</span><span>:</span><span> </span><span>[</span> <span> </span><span>{</span> <span> </span><span>displayName</span><span>:</span><span> </span><span>'Type'</span><span>,</span> <span> </span><span>name</span><span>:</span><span> </span><span>'type'</span><span>,</span> <span> </span><span>type</span><span>:</span><span> </span><span>'options'</span><span>,</span> <span> </span><span>options</span><span>:</span><span> </span><span>[</span> <span> </span><span>{</span> <span> </span><span>name</span><span>:</span><span> </span><span>'Automated'</span><span>,</span> <span> </span><span>value</span><span>:</span><span> </span><span>'automated'</span><span>,</span> <span> </span><span>},</span> <span> </span><span>{</span> <span> </span><span>name</span><span>:</span><span> </span><span>'Past'</span><span>,</span> <span> </span><span>value</span><span>:</span><span> </span><span>'past'</span><span>,</span> <span> </span><span>},</span> <span> </span><span>{</span> <span> </span><span>name</span><span>:</span><span> </span><span>'Upcoming'</span><span>,</span> <span> </span><span>value</span><span>:</span><span> </span><span>'upcoming'</span><span>,</span> <span> </span><span>},</span> <span> </span><span>],</span> <span> </span><span>default</span><span>:</span><span> </span><span>''</span><span>,</span> <span> </span><span>},</span> <span> </span><span>],</span> <span> </span><span>displayOptions</span><span>:</span><span> </span><span>{</span><span> </span><span>// the resources and operations to display this element with</span> <span> </span><span>show</span><span>:</span><span> </span><span>{</span> <span> </span><span>resource</span><span>:</span><span> </span><span>[</span> <span> </span><span>// comma-separated list of resource names</span> <span> </span><span>],</span> <span> </span><span>operation</span><span>:</span><span> </span><span>[</span> <span> </span><span>// comma-separated list of operation names</span> <span> </span><span>]</span> <span> </span><span>}</span> <span> </span><span>},</span> <span>}</span> </code></pre></div></td></tr></tbody></table>  ## DateTime# The `dateTime` type provides a date picker. <table><tbody><tr><td><div><pre><span></span><span> 1</span> <span> 2</span> <span> 3</span> <span> 4</span> <span> 5</span> <span> 6</span> <span> 7</span> <span> 8</span> <span> 9</span> <span>10</span> <span>11</span> <span>12</span> <span>13</span> <span>14</span> <span>15</span> <span>16</span> <span>17</span></pre></div></td><td><div><pre><span></span><code><span>{</span> <span> </span><span>displayName</span><span>:</span><span> </span><span>'Modified Since'</span><span>,</span> <span> </span><span>name</span><span>:</span><span> </span><span>'modified_since'</span><span>,</span> <span> </span><span>type</span><span>:</span><span> </span><span>'dateTime'</span><span>,</span> <span> </span><span>default</span><span>:</span><span> </span><span>''</span><span>,</span> <span> </span><span>description</span><span>:</span><span> </span><span>'The date and time when the file was last modified'</span><span>,</span> <span> </span><span>displayOptions</span><span>:</span><span> </span><span>{</span><span> </span><span>// the resources and operations to display this element with</span> <span> </span><span>show</span><span>:</span><span> </span><span>{</span> <span> </span><span>resource</span><span>:</span><span> </span><span>[</span> <span> </span><span>// comma-separated list of resource names</span> <span> </span><span>],</span> <span> </span><span>operation</span><span>:</span><span> </span><span>[</span> <span> </span><span>// comma-separated list of operation names</span> <span> </span><span>]</span> <span> </span><span>}</span> <span> </span><span>},</span> <span>}</span> </code></pre></div></td></tr></tbody></table>  ## Boolean# The `boolean` type adds a toggle for entering true or false. <table><tbody><tr><td><div><pre><span></span><span> 1</span> <span> 2</span> <span> 3</span> <span> 4</span> <span> 5</span> <span> 6</span> <span> 7</span> <span> 8</span> <span> 9</span> <span>10</span> <span>11</span> <span>12</span> <span>13</span> <span>14</span> <span>15</span> <span>16</span> <span>17</span></pre></div></td><td><div><pre><span></span><code><span>{</span> <span> </span><span>displayName</span><span>:</span><span> </span><span>'Wait for Image'</span><span>,</span> <span> </span><span>name</span><span>:</span><span> </span><span>'waitForImage'</span><span>,</span> <span> </span><span>type</span><span>:</span><span> </span><span>'boolean'</span><span>,</span> <span> </span><span>default</span><span>:</span><span> </span><span>true</span><span>,</span><span> </span><span>// Initial state of the toggle</span> <span> </span><span>description</span><span>:</span><span> </span><span>'Whether to wait for the image or not'</span><span>,</span> <span> </span><span>displayOptions</span><span>:</span><span> </span><span>{</span><span> </span><span>// the resources and operations to display this element with</span> <span> </span><span>show</span><span>:</span><span> </span><span>{</span> <span> </span><span>resource</span><span>:</span><span> </span><span>[</span> <span> </span><span>// comma-separated list of resource names</span> <span> </span><span>],</span> <span> </span><span>operation</span><span>:</span><span> </span><span>[</span> <span> </span><span>// comma-separated list of operation names</span> <span> </span><span>]</span> <span> </span><span>}</span> <span> </span><span>},</span> <span>}</span> </code></pre></div></td></tr></tbody></table>  ## Color# The `color` type provides a color selector. <table><tbody><tr><td><div><pre><span></span><span> 1</span> <span> 2</span> <span> 3</span> <span> 4</span> <span> 5</span> <span> 6</span> <span> 7</span> <span> 8</span> <span> 9</span> <span>10</span> <span>11</span> <span>12</span> <span>13</span> <span>14</span> <span>15</span> <span>16</span></pre></div></td><td><div><pre><span></span><code><span>{</span> <span> </span><span>displayName</span><span>:</span><span> </span><span>'Background Color'</span><span>,</span> <span> </span><span>name</span><span>:</span><span> </span><span>'backgroundColor'</span><span>,</span> <span> </span><span>type</span><span>:</span><span> </span><span>'color'</span><span>,</span> <span> </span><span>default</span><span>:</span><span> </span><span>''</span><span>,</span><span> </span><span>// Initially selected color</span> <span> </span><span>displayOptions</span><span>:</span><span> </span><span>{</span><span> </span><span>// the resources and operations to display this element with</span> <span> </span><span>show</span><span>:</span><span> </span><span>{</span> <span> </span><span>resource</span><span>:</span><span> </span><span>[</span> <span> </span><span>// comma-separated list of resource names</span> <span> </span><span>],</span> <span> </span><span>operation</span><span>:</span><span> </span><span>[</span> <span> </span><span>// comma-separated list of operation names</span> <span> </span><span>]</span> <span> </span><span>}</span> <span> </span><span>},</span> <span>}</span> </code></pre></div></td></tr></tbody></table>  ## Options# The `options` type adds an options list. Users can select a single value. <table><tbody><tr><td><div><pre><span></span><span> 1</span> <span> 2</span> <span> 3</span> <span> 4</span> <span> 5</span> <span> 6</span> <span> 7</span> <span> 8</span> <span> 9</span> <span>10</span> <span>11</span> <span>12</span> <span>13</span> <span>14</span> <span>15</span> <span>16</span> <span>17</span> <span>18</span> <span>19</span> <span>20</span> <span>21</span> <span>22</span> <span>23</span> <span>24</span> <span>25</span> <span>26</span> <span>27</span></pre></div></td><td><div><pre><span></span><code><span>{</span> <span> </span><span>displayName</span><span>:</span><span> </span><span>'Resource'</span><span>,</span> <span> </span><span>name</span><span>:</span><span> </span><span>'resource'</span><span>,</span> <span> </span><span>type</span><span>:</span><span> </span><span>'options'</span><span>,</span> <span> </span><span>options</span><span>:</span><span> </span><span>[</span> <span> </span><span>{</span> <span> </span><span>name</span><span>:</span><span> </span><span>'Image'</span><span>,</span> <span> </span><span>value</span><span>:</span><span> </span><span>'image'</span><span>,</span> <span> </span><span>},</span> <span> </span><span>{</span> <span> </span><span>name</span><span>:</span><span> </span><span>'Template'</span><span>,</span> <span> </span><span>value</span><span>:</span><span> </span><span>'template'</span><span>,</span> <span> </span><span>},</span> <span> </span><span>],</span> <span> </span><span>default</span><span>:</span><span> </span><span>'image'</span><span>,</span><span> </span><span>// The initially selected option</span> <span> </span><span>description</span><span>:</span><span> </span><span>'Resource to consume'</span><span>,</span> <span> </span><span>displayOptions</span><span>:</span><span> </span><span>{</span><span> </span><span>// the resources and operations to display this element with</span> <span> </span><span>show</span><span>:</span><span> </span><span>{</span> <span> </span><span>resource</span><span>:</span><span> </span><span>[</span> <span> </span><span>// comma-separated list of resource names</span> <span> </span><span>],</span> <span> </span><span>operation</span><span>:</span><span> </span><span>[</span> <span> </span><span>// comma-separated list of operation names</span> <span> </span><span>]</span> <span> </span><span>}</span> <span> </span><span>},</span> <span>}</span> </code></pre></div></td></tr></tbody></table>  ## Multi-options# The `multiOptions` type adds an options list. Users can select more than one value. <table><tbody><tr><td><div><pre><span></span><span> 1</span> <span> 2</span> <span> 3</span> <span> 4</span> <span> 5</span> <span> 6</span> <span> 7</span> <span> 8</span> <span> 9</span> <span>10</span> <span>11</span> <span>12</span> <span>13</span> <span>14</span> <span>15</span> <span>16</span> <span>17</span> <span>18</span> <span>19</span> <span>20</span> <span>21</span> <span>22</span> <span>23</span> <span>24</span> <span>25</span> <span>26</span> <span>27</span></pre></div></td><td><div><pre><span></span><code><span>{</span> <span> </span><span>displayName</span><span>:</span><span> </span><span>'Events'</span><span>,</span> <span> </span><span>name</span><span>:</span><span> </span><span>'events'</span><span>,</span> <span> </span><span>type</span><span>:</span><span> </span><span>'multiOptions'</span><span>,</span> <span> </span><span>options</span><span>:</span><span> </span><span>[</span> <span> </span><span>{</span> <span> </span><span>name</span><span>:</span><span> </span><span>'Plan Created'</span><span>,</span> <span> </span><span>value</span><span>:</span><span> </span><span>'planCreated'</span><span>,</span> <span> </span><span>},</span> <span> </span><span>{</span> <span> </span><span>name</span><span>:</span><span> </span><span>'Plan Deleted'</span><span>,</span> <span> </span><span>value</span><span>:</span><span> </span><span>'planDeleted'</span><span>,</span> <span> </span><span>},</span> <span> </span><span>],</span> <span> </span><span>default</span><span>:</span><span> </span><span>[],</span><span> </span><span>// Initially selected options</span> <span> </span><span>description</span><span>:</span><span> </span><span>'The events to be monitored'</span><span>,</span> <span> </span><span>displayOptions</span><span>:</span><span> </span><span>{</span><span> </span><span>// the resources and operations to display this element with</span> <span> </span><span>show</span><span>:</span><span> </span><span>{</span> <span> </span><span>resource</span><span>:</span><span> </span><span>[</span> <span> </span><span>// comma-separated list of resource names</span> <span> </span><span>],</span> <span> </span><span>operation</span><span>:</span><span> </span><span>[</span> <span> </span><span>// comma-separated list of operation names</span> <span> </span><span>]</span> <span> </span><span>}</span> <span> </span><span>},</span> <span>}</span> </code></pre></div></td></tr></tbody></table>  ## Filter# Use this component to evaluate, match, or filter incoming data. This is the code from n8n's own If node. It shows a filter component working with a collection component where users can configure the filter's behavior. <table><tbody><tr><td><div><pre><span></span><span> 1</span> <span> 2</span> <span> 3</span> <span> 4</span> <span> 5</span> <span> 6</span> <span> 7</span> <span> 8</span> <span> 9</span> <span>10</span> <span>11</span> <span>12</span> <span>13</span> <span>14</span> <span>15</span> <span>16</span> <span>17</span> <span>18</span> <span>19</span> <span>20</span> <span>21</span> <span>22</span> <span>23</span> <span>24</span> <span>25</span> <span>26</span> <span>27</span> <span>28</span> <span>29</span> <span>30</span> <span>31</span> <span>32</span> <span>33</span> <span>34</span> <span>35</span> <span>36</span> <span>37</span></pre></div></td><td><div><pre><span></span><code><span>{</span> <span> </span><span>displayName</span><span>:</span><span> </span><span>'Conditions'</span><span>,</span> <span> </span><span>name</span><span>:</span><span> </span><span>'conditions'</span><span>,</span> <span> </span><span>placeholder</span><span>:</span><span> </span><span>'Add Condition'</span><span>,</span> <span> </span><span>type</span><span>:</span><span> </span><span>'filter'</span><span>,</span> <span> </span><span>default</span><span>:</span><span> </span><span>{},</span> <span> </span><span>typeOptions</span><span>:</span><span> </span><span>{</span> <span> </span><span>filter</span><span>:</span><span> </span><span>{</span> <span> </span><span>// Use the user options (below) to determine filter behavior</span> <span> </span><span>caseSensitive</span><span>:</span><span> </span><span>'={{!$parameter.options.ignoreCase}}'</span><span>,</span> <span> </span><span>typeValidation</span><span>:</span><span> </span><span>'={{$parameter.options.looseTypeValidation ? "loose" : "strict"}}'</span><span>,</span> <span> </span><span>},</span> <span> </span><span>},</span> <span>},</span> <span>{</span> <span>displayName</span><span>:</span><span> </span><span>'Options'</span><span>,</span> <span>name</span><span>:</span><span> </span><span>'options'</span><span>,</span> <span>type</span><span>:</span><span> </span><span>'collection'</span><span>,</span> <span>placeholder</span><span>:</span><span> </span><span>'Add option'</span><span>,</span> <span>default</span><span>:</span><span> </span><span>{},</span> <span>options</span><span>:</span><span> </span><span>[</span> <span> </span><span>{</span> <span> </span><span>displayName</span><span>:</span><span> </span><span>'Ignore Case'</span><span>,</span> <span> </span><span>description</span><span>:</span><span> </span><span>'Whether to ignore letter case when evaluating conditions'</span><span>,</span> <span> </span><span>name</span><span>:</span><span> </span><span>'ignoreCase'</span><span>,</span> <span> </span><span>type</span><span>:</span><span> </span><span>'boolean'</span><span>,</span> <span> </span><span>default</span><span>:</span><span> </span><span>true</span><span>,</span> <span> </span><span>},</span> <span> </span><span>{</span> <span> </span><span>displayName</span><span>:</span><span> </span><span>'Less Strict Type Validation'</span><span>,</span> <span> </span><span>description</span><span>:</span><span> </span><span>'Whether to try casting value types based on the selected operator'</span><span>,</span> <span> </span><span>name</span><span>:</span><span> </span><span>'looseTypeValidation'</span><span>,</span> <span> </span><span>type</span><span>:</span><span> </span><span>'boolean'</span><span>,</span> <span> </span><span>default</span><span>:</span><span> </span><span>true</span><span>,</span> <span> </span><span>},</span> <span>],</span> <span>},</span> </code></pre></div></td></tr></tbody></table>  ## Assignment collection (drag and drop)# Use the drag and drop component when you want users to pre-fill name and value parameters with a single drag interaction. <table><tbody><tr><td><div><pre><span></span><span>1</span> <span>2</span> <span>3</span> <span>4</span> <span>5</span> <span>6</span></pre></div></td><td><div><pre><span></span><code><span>{</span> <span> </span><span>displayName</span><span>:</span><span> </span><span>'Fields to Set'</span><span>,</span> <span> </span><span>name</span><span>:</span><span> </span><span>'assignments'</span><span>,</span> <span> </span><span>type</span><span>:</span><span> </span><span>'assignmentCollection'</span><span>,</span> <span> </span><span>default</span><span>:</span><span> </span><span>{},</span> <span>},</span> </code></pre></div></td></tr></tbody></table> You can see an example in n8n's Edit Fields (Set) node:  ## Fixed collection# Use the `fixedCollection` type to group fields that are semantically related. <table><tbody><tr><td><div><pre><span></span><span> 1</span> <span> 2</span> <span> 3</span> <span> 4</span> <span> 5</span> <span> 6</span> <span> 7</span> <span> 8</span> <span> 9</span> <span>10</span> <span>11</span> <span>12</span> <span>13</span> <span>14</span> <span>15</span> <span>16</span> <span>17</span> <span>18</span> <span>19</span> <span>20</span> <span>21</span> <span>22</span> <span>23</span> <span>24</span> <span>25</span> <span>26</span> <span>27</span> <span>28</span> <span>29</span> <span>30</span> <span>31</span> <span>32</span> <span>33</span> <span>34</span> <span>35</span> <span>36</span> <span>37</span> <span>38</span> <span>39</span> <span>40</span> <span>41</span> <span>42</span></pre></div></td><td><div><pre><span></span><code><span>{</span> <span> </span><span>displayName</span><span>:</span><span> </span><span>'Metadata'</span><span>,</span> <span> </span><span>name</span><span>:</span><span> </span><span>'metadataUi'</span><span>,</span> <span> </span><span>placeholder</span><span>:</span><span> </span><span>'Add Metadata'</span><span>,</span> <span> </span><span>type</span><span>:</span><span> </span><span>'fixedCollection'</span><span>,</span> <span> </span><span>default</span><span>:</span><span> </span><span>''</span><span>,</span> <span> </span><span>typeOptions</span><span>:</span><span> </span><span>{</span> <span> </span><span>multipleValues</span><span>:</span><span> </span><span>true</span><span>,</span> <span> </span><span>},</span> <span> </span><span>description</span><span>:</span><span> </span><span>''</span><span>,</span> <span> </span><span>options</span><span>:</span><span> </span><span>[</span> <span> </span><span>{</span> <span> </span><span>name</span><span>:</span><span> </span><span>'metadataValues'</span><span>,</span> <span> </span><span>displayName</span><span>:</span><span> </span><span>'Metadata'</span><span>,</span> <span> </span><span>values</span><span>:</span><span> </span><span>[</span> <span> </span><span>{</span> <span> </span><span>displayName</span><span>:</span><span> </span><span>'Name'</span><span>,</span> <span> </span><span>name</span><span>:</span><span> </span><span>'name'</span><span>,</span> <span> </span><span>type</span><span>:</span><span> </span><span>'string'</span><span>,</span> <span> </span><span>default</span><span>:</span><span> </span><span>'Name of the metadata key to add.'</span><span>,</span> <span> </span><span>},</span> <span> </span><span>{</span> <span> </span><span>displayName</span><span>:</span><span> </span><span>'Value'</span><span>,</span> <span> </span><span>name</span><span>:</span><span> </span><span>'value'</span><span>,</span> <span> </span><span>type</span><span>:</span><span> </span><span>'string'</span><span>,</span> <span> </span><span>default</span><span>:</span><span> </span><span>''</span><span>,</span> <span> </span><span>description</span><span>:</span><span> </span><span>'Value to set for the metadata key.'</span><span>,</span> <span> </span><span>},</span> <span> </span><span>],</span> <span> </span><span>},</span> <span> </span><span>],</span> <span> </span><span>displayOptions</span><span>:</span><span> </span><span>{</span><span> </span><span>// the resources and operations to display this element with</span> <span> </span><span>show</span><span>:</span><span> </span><span>{</span> <span> </span><span>resource</span><span>:</span><span> </span><span>[</span> <span> </span><span>// comma-separated list of resource names</span> <span> </span><span>],</span> <span> </span><span>operation</span><span>:</span><span> </span><span>[</span> <span> </span><span>// comma-separated list of operation names</span> <span> </span><span>]</span> <span> </span><span>}</span> <span> </span><span>},</span> <span>}</span> </code></pre></div></td></tr></tbody></table>  ## Resource locator#  The resource locator element helps users find a specific resource in an external service, such as a card or label in Trello. The following options are available: * ID * URL * List: allows users to select or search from a prepopulated list. This option requires more coding, as you must populate the list, and handle searching if you choose to support it. You can choose which types to include. Example: <table><tbody><tr><td><div><pre><span></span><span> 1</span> <span> 2</span> <span> 3</span> <span> 4</span> <span> 5</span> <span> 6</span> <span> 7</span> <span> 8</span> <span> 9</span> <span>10</span> <span>11</span> <span>12</span> <span>13</span> <span>14</span> <span>15</span> <span>16</span> <span>17</span> <span>18</span> <span>19</span> <span>20</span> <span>21</span> <span>22</span> <span>23</span> <span>24</span> <span>25</span> <span>26</span> <span>27</span> <span>28</span> <span>29</span> <span>30</span> <span>31</span> <span>32</span> <span>33</span> <span>34</span> <span>35</span> <span>36</span> <span>37</span> <span>38</span> <span>39</span> <span>40</span> <span>41</span> <span>42</span> <span>43</span> <span>44</span> <span>45</span> <span>46</span> <span>47</span> <span>48</span> <span>49</span> <span>50</span> <span>51</span> <span>52</span> <span>53</span> <span>54</span> <span>55</span> <span>56</span> <span>57</span> <span>58</span> <span>59</span> <span>60</span> <span>61</span> <span>62</span> <span>63</span> <span>64</span> <span>65</span> <span>66</span> <span>67</span> <span>68</span> <span>69</span> <span>70</span> <span>71</span> <span>72</span> <span>73</span> <span>74</span> <span>75</span> <span>76</span></pre></div></td><td><div><pre><span></span><code><span>{</span> <span> </span><span>displayName</span><span>:</span><span> </span><span>'Card'</span><span>,</span> <span> </span><span>name</span><span>:</span><span> </span><span>'cardID'</span><span>,</span> <span> </span><span>type</span><span>:</span><span> </span><span>'resourceLocator'</span><span>,</span> <span> </span><span>default</span><span>:</span><span> </span><span>''</span><span>,</span> <span> </span><span>description</span><span>:</span><span> </span><span>'Get a card'</span><span>,</span> <span> </span><span>modes</span><span>:</span><span> </span><span>[</span> <span> </span><span>{</span> <span> </span><span>displayName</span><span>:</span><span> </span><span>'ID'</span><span>,</span> <span> </span><span>name</span><span>:</span><span> </span><span>'id'</span><span>,</span> <span> </span><span>type</span><span>:</span><span> </span><span>'string'</span><span>,</span> <span> </span><span>hint</span><span>:</span><span> </span><span>'Enter an ID'</span><span>,</span> <span> </span><span>validation</span><span>:</span><span> </span><span>[</span> <span> </span><span>{</span> <span> </span><span>type</span><span>:</span><span> </span><span>'regex'</span><span>,</span> <span> </span><span>properties</span><span>:</span><span> </span><span>{</span> <span> </span><span>regex</span><span>:</span><span> </span><span>'^[0-9]'</span><span>,</span> <span> </span><span>errorMessage</span><span>:</span><span> </span><span>'The ID must start with a number'</span><span>,</span> <span> </span><span>},</span> <span> </span><span>},</span> <span> </span><span>],</span> <span> </span><span>placeholder</span><span>:</span><span> </span><span>'12example'</span><span>,</span> <span> </span><span>// How to use the ID in API call</span> <span> </span><span>url</span><span>:</span><span> </span><span>'=http://api-base-url.com/?id={{$value}}'</span><span>,</span> <span> </span><span>},</span> <span> </span><span>{</span> <span> </span><span>displayName</span><span>:</span><span> </span><span>'URL'</span><span>,</span> <span> </span><span>name</span><span>:</span><span> </span><span>'url'</span><span>,</span> <span> </span><span>type</span><span>:</span><span> </span><span>'string'</span><span>,</span> <span> </span><span>hint</span><span>:</span><span> </span><span>'Enter a URL'</span><span>,</span> <span> </span><span>validation</span><span>:</span><span> </span><span>[</span> <span> </span><span>{</span> <span> </span><span>type</span><span>:</span><span> </span><span>'regex'</span><span>,</span> <span> </span><span>properties</span><span>:</span><span> </span><span>{</span> <span> </span><span>regex</span><span>:</span><span> </span><span>'^http'</span><span>,</span> <span> </span><span>errorMessage</span><span>:</span><span> </span><span>'Invalid URL'</span><span>,</span> <span> </span><span>},</span> <span> </span><span>},</span> <span> </span><span>],</span> <span> </span><span>placeholder</span><span>:</span><span> </span><span>'https://example.com/card/12example/'</span><span>,</span> <span> </span><span>// How to get the ID from the URL</span> <span> </span><span>extractValue</span><span>:</span><span> </span><span>{</span> <span> </span><span>type</span><span>:</span><span> </span><span>'regex'</span><span>,</span> <span> </span><span>regex</span><span>:</span><span> </span><span>'example.com/card/([0-9]*.*)/'</span><span>,</span> <span> </span><span>},</span> <span> </span><span>},</span> <span> </span><span>{</span> <span> </span><span>displayName</span><span>:</span><span> </span><span>'List'</span><span>,</span> <span> </span><span>name</span><span>:</span><span> </span><span>'list'</span><span>,</span> <span> </span><span>type</span><span>:</span><span> </span><span>'list'</span><span>,</span> <span> </span><span>typeOptions</span><span>:</span><span> </span><span>{</span> <span> </span><span>// You must always provide a search method</span> <span> </span><span>// Write this method within the methods object in your base file</span> <span> </span><span>// The method must populate the list, and handle searching if searchable: true</span> <span> </span><span>searchListMethod</span><span>:</span><span> </span><span>'searchMethod'</span><span>,</span> <span> </span><span>// If you want users to be able to search the list</span> <span> </span><span>searchable</span><span>:</span><span> </span><span>true</span><span>,</span> <span> </span><span>// Set to true if you want to force users to search</span> <span> </span><span>// When true, users can't browse the list</span> <span> </span><span>// Or false if users can browse a list</span> <span> </span><span>searchFilterRequired</span><span>:</span><span> </span><span>true</span><span>,</span> <span> </span><span>},</span> <span> </span><span>},</span> <span> </span><span>],</span> <span> </span><span>displayOptions</span><span>:</span><span> </span><span>{</span> <span> </span><span>// the resources and operations to display this element with</span> <span> </span><span>show</span><span>:</span><span> </span><span>{</span> <span> </span><span>resource</span><span>:</span><span> </span><span>[</span> <span> </span><span>// comma-separated list of resource names</span> <span> </span><span>],</span> <span> </span><span>operation</span><span>:</span><span> </span><span>[</span> <span> </span><span>// comma-separated list of operation names</span> <span> </span><span>],</span> <span> </span><span>},</span> <span> </span><span>},</span> <span>},</span> </code></pre></div></td></tr></tbody></table> Refer to the following for live examples: * Refer to `CardDescription.ts` and `Trello.node.ts` in n8n's Trello node for an example of a list with search that includes `searchFilterRequired: true`. * Refer to `GoogleDrive.node.ts` for an example where users can browse the list or search. ## Resource mapper# If your node performs insert, update, or upsert operations, you need to send data from the node in a format supported by the service you're integrating with. A common pattern is to use a Set node before the node that sends data, to convert the data to match the schema of the service you're connecting to. The resource mapper UI component provides a way to get data into the required format directly within the node, rather than using a Set node. The resource mapper component can also validate input data against the schema provided in the node, and cast input data into the expected type. Mapping and matching Mapping is the process of setting the input data to use as values when updating row(s). Matching is the process of using column names to identify the row(s) to update. <table><tbody><tr><td><div><pre><span></span><span> 1</span> <span> 2</span> <span> 3</span> <span> 4</span> <span> 5</span> <span> 6</span> <span> 7</span> <span> 8</span> <span> 9</span> <span>10</span> <span>11</span> <span>12</span> <span>13</span> <span>14</span> <span>15</span> <span>16</span> <span>17</span> <span>18</span> <span>19</span> <span>20</span> <span>21</span> <span>22</span> <span>23</span> <span>24</span> <span>25</span> <span>26</span> <span>27</span> <span>28</span> <span>29</span> <span>30</span> <span>31</span> <span>32</span></pre></div></td><td><div><pre><span></span><code><span>{</span> <span> </span><span>displayName</span><span>:</span><span> </span><span>'Columns'</span><span>,</span> <span> </span><span>name</span><span>:</span><span> </span><span>'columns'</span><span>,</span><span> </span><span>// The name used to reference the element UI within the code</span> <span> </span><span>type</span><span>:</span><span> </span><span>'resourceMapper'</span><span>,</span><span> </span><span>// The UI element type</span> <span> </span><span>default</span><span>:</span><span> </span><span>{</span> <span> </span><span>// mappingMode can be defined in the component (mappingMode: 'defineBelow')</span> <span> </span><span>// or you can attempt automatic mapping (mappingMode: 'autoMapInputData')</span> <span> </span><span>mappingMode</span><span>:</span><span> </span><span>'defineBelow'</span><span>,</span> <span> </span><span>// Important: always set default value to null</span> <span> </span><span>value</span><span>:</span><span> </span><span>null</span><span>,</span> <span> </span><span>},</span> <span> </span><span>required</span><span>:</span><span> </span><span>true</span><span>,</span> <span> </span><span>// See "Resource mapper type options interface" below for the full typeOptions specification</span> <span> </span><span>typeOptions</span><span>:</span><span> </span><span>{</span> <span> </span><span>resourceMapper</span><span>:</span><span> </span><span>{</span> <span> </span><span>resourceMapperMethod</span><span>:</span><span> </span><span>'getMappingColumns'</span><span>,</span> <span> </span><span>mode</span><span>:</span><span> </span><span>'update'</span><span>,</span> <span> </span><span>fieldWords</span><span>:</span><span> </span><span>{</span> <span> </span><span>singular</span><span>:</span><span> </span><span>'column'</span><span>,</span> <span> </span><span>plural</span><span>:</span><span> </span><span>'columns'</span><span>,</span> <span> </span><span>},</span> <span> </span><span>addAllFields</span><span>:</span><span> </span><span>true</span><span>,</span><span> </span> <span> </span><span>multiKeyMatch</span><span>:</span><span> </span><span>true</span><span>,</span> <span> </span><span>supportAutoMap</span><span>:</span><span> </span><span>true</span><span>,</span> <span> </span><span>matchingFieldsLabels</span><span>:</span><span> </span><span>{</span> <span> </span><span>title</span><span>:</span><span> </span><span>'Custom matching columns title'</span><span>,</span> <span> </span><span>description</span><span>:</span><span> </span><span>'Help text for custom matching columns'</span><span>,</span> <span> </span><span>hint</span><span>:</span><span> </span><span>'Below-field hint for custom matching columns'</span><span>,</span> <span> </span><span>},</span> <span> </span><span>},</span> <span> </span><span>},</span> <span>},</span> </code></pre></div></td></tr></tbody></table> Refer to the Postgres node (version 2) for a live example using a database schema. Refer to the Google Sheets node (version 2) for a live example using a schema-less service. ### Resource mapper type options interface# The `typeOptions` section must implement the following interface: <table><tbody><tr><td><div><pre><span></span><span> 1</span> <span> 2</span> <span> 3</span> <span> 4</span> <span> 5</span> <span> 6</span> <span> 7</span> <span> 8</span> <span> 9</span> <span>10</span> <span>11</span> <span>12</span> <span>13</span> <span>14</span> <span>15</span> <span>16</span> <span>17</span> <span>18</span> <span>19</span> <span>20</span> <span>21</span> <span>22</span> <span>23</span> <span>24</span> <span>25</span> <span>26</span> <span>27</span> <span>28</span> <span>29</span> <span>30</span></pre></div></td><td><div><pre><span></span><code><span>export</span><span> </span><span>interface</span><span> </span><span>ResourceMapperTypeOptions</span><span> </span><span>{</span> <span> </span><span>// The name of the method where you fetch the schema</span> <span> </span><span>// Refer to the Resource mapper method section for more detail</span> <span> </span><span>resourceMapperMethod</span><span>:</span><span> </span><span>string</span><span>;</span> <span> </span><span>// Choose the mode for your operation</span> <span> </span><span>// Supported modes: add, update, upsert</span> <span> </span><span>mode</span><span>:</span><span> </span><span>'add'</span><span> </span><span>|</span><span> </span><span>'update'</span><span> </span><span>|</span><span> </span><span>'upsert'</span><span>;</span> <span> </span><span>// Specify labels for fields in the UI</span> <span> </span><span>fieldWords</span><span>?:</span><span> </span><span>{</span><span> </span><span>singular</span><span>:</span><span> </span><span>string</span><span>;</span><span> </span><span>plural</span><span>:</span><span> </span><span>string</span><span> </span><span>};</span> <span> </span><span>// Whether n8n should display a UI input for every field when node first added to workflow</span> <span> </span><span>// Default is true</span> <span> </span><span>addAllFields</span><span>?:</span><span> </span><span>boolean</span><span>;</span> <span> </span><span>// Specify a message to show if no fields are fetched from the service </span> <span> </span><span>// (the call is successful but the response is empty)</span> <span> </span><span>noFieldsError</span><span>?:</span><span> </span><span>string</span><span>;</span> <span> </span><span>// Whether to support multi-key column matching</span> <span> </span><span>// multiKeyMatch is for update and upsert only</span> <span> </span><span>// Default is false</span> <span> </span><span>// If true, the node displays a multi-select dropdown for the matching column selector</span> <span> </span><span>multiKeyMatch</span><span>?:</span><span> </span><span>boolean</span><span>;</span> <span> </span><span>// Whether to support automatic mapping</span> <span> </span><span>// If false, n8n hides the mapping mode selector field and sets mappingMode to defineBelow</span> <span> </span><span>supportAutoMap</span><span>?:</span><span> </span><span>boolean</span><span>;</span> <span> </span><span>// Custom labels for the matching columns selector</span> <span> </span><span>matchingFieldsLabels</span><span>?:</span><span> </span><span>{</span> <span> </span><span>title</span><span>?:</span><span> </span><span>string</span><span>;</span> <span> </span><span>description</span><span>?:</span><span> </span><span>string</span><span>;</span> <span> </span><span>hint</span><span>?:</span><span> </span><span>string</span><span>;</span> <span> </span><span>};</span> <span>}</span> </code></pre></div></td></tr></tbody></table> ### Resource mapper method# This method contains your node-specific logic for fetching the data schema. Every node must implement its own logic for fetching the schema, and setting up each UI field according to the schema. It must return a value that implements the `ResourceMapperFields` interface: <table><tbody><tr><td><div><pre><span></span><span> 1</span> <span> 2</span> <span> 3</span> <span> 4</span> <span> 5</span> <span> 6</span> <span> 7</span> <span> 8</span> <span> 9</span> <span>10</span> <span>11</span> <span>12</span> <span>13</span> <span>14</span> <span>15</span> <span>16</span> <span>17</span> <span>18</span> <span>19</span> <span>20</span> <span>21</span> <span>22</span> <span>23</span> <span>24</span></pre></div></td><td><div><pre><span></span><code><span>interface</span><span> </span><span>ResourceMapperField</span><span> </span><span>{</span> <span> </span><span>// Field ID as in the service</span> <span> </span><span>id</span><span>:</span><span> </span><span>string</span><span>;</span> <span> </span><span>// Field label</span> <span> </span><span>displayName</span><span>:</span><span> </span><span>string</span><span>;</span> <span> </span><span>// Whether n8n should pre-select the field as a matching field</span> <span> </span><span>// A matching field is a column used to identify the rows to modify</span> <span> </span><span>defaultMatch</span><span>:</span><span> </span><span>boolean</span><span>;</span> <span> </span><span>// Whether the field can be used as a matching field</span> <span> </span><span>canBeUsedToMatch</span><span>?:</span><span> </span><span>boolean</span><span>;</span> <span> </span><span>// Whether the field is required by the schema</span> <span> </span><span>required</span><span>:</span><span> </span><span>boolean</span><span>;</span> <span> </span><span>// Whether to display the field in the UI</span> <span> </span><span>// If false, can't be used for matching or mapping</span> <span> </span><span>display</span><span>:</span><span> </span><span>boolean</span><span>;</span> <span> </span><span>// The data type for the field</span> <span> </span><span>// These correspond to UI element types</span> <span> </span><span>// Supported types: string, number, dateTime, boolean, time, array, object, options</span> <span> </span><span>type</span><span>?:</span><span> </span><span>FieldType</span><span>;</span> <span> </span><span>// Added at runtime if the field is removed from mapping by the user</span> <span> </span><span>removed</span><span>?:</span><span> </span><span>boolean</span><span>;</span> <span> </span><span>// Specify options for enumerated types</span> <span> </span><span>options</span><span>?:</span><span> </span><span>INodePropertyOptions</span><span>[];</span> <span>}</span> </code></pre></div></td></tr></tbody></table> Refer to the Postgres resource mapping method and Google Sheets resource mapping method for live examples. ## JSON# <table><tbody><tr><td><div><pre><span></span><span> 1</span> <span> 2</span> <span> 3</span> <span> 4</span> <span> 5</span> <span> 6</span> <span> 7</span> <span> 8</span> <span> 9</span> <span>10</span> <span>11</span> <span>12</span> <span>13</span> <span>14</span> <span>15</span> <span>16</span> <span>17</span></pre></div></td><td><div><pre><span></span><code><span>{</span> <span> </span><span>displayName</span><span>:</span><span> </span><span>'Content (JSON)'</span><span>,</span> <span> </span><span>name</span><span>:</span><span> </span><span>'content'</span><span>,</span> <span> </span><span>type</span><span>:</span><span> </span><span>'json'</span><span>,</span> <span> </span><span>default</span><span>:</span><span> </span><span>''</span><span>,</span> <span> </span><span>description</span><span>:</span><span> </span><span>''</span><span>,</span> <span> </span><span>displayOptions</span><span>:</span><span> </span><span>{</span><span> </span><span>// the resources and operations to display this element with</span> <span> </span><span>show</span><span>:</span><span> </span><span>{</span> <span> </span><span>resource</span><span>:</span><span> </span><span>[</span> <span> </span><span>// comma-separated list of resource names</span> <span> </span><span>],</span> <span> </span><span>operation</span><span>:</span><span> </span><span>[</span> <span> </span><span>// comma-separated list of operation names</span> <span> </span><span>]</span> <span> </span><span>}</span> <span> </span><span>},</span> <span>}</span> </code></pre></div></td></tr></tbody></table>  ## HTML# The HTML editor allows users to create HTML templates in their workflows. The editor supports standard HTML, CSS in `<style>` tags, and expressions wrapped in `{{}}`. Users can add `<script>` tags to pull in additional JavaScript. n8n doesn't run this JavaScript during workflow execution. <table><tbody><tr><td><div><pre><span></span><span> 1</span> <span> 2</span> <span> 3</span> <span> 4</span> <span> 5</span> <span> 6</span> <span> 7</span> <span> 8</span> <span> 9</span> <span>10</span> <span>11</span></pre></div></td><td><div><pre><span></span><code><span>{</span> <span> </span><span>displayName</span><span>:</span><span> </span><span>'HTML Template'</span><span>,</span><span> </span><span>// The value the user sees in the UI</span> <span> </span><span>name</span><span>:</span><span> </span><span>'html'</span><span>,</span><span> </span><span>// The name used to reference the element UI within the code</span> <span> </span><span>type</span><span>:</span><span> </span><span>'string'</span><span>,</span> <span> </span><span>typeOptions</span><span>:</span><span> </span><span>{</span> <span> </span><span>editor</span><span>:</span><span> </span><span>'htmlEditor'</span><span>,</span> <span> </span><span>},</span> <span> </span><span>default</span><span>:</span><span> </span><span>placeholder</span><span>,</span><span> </span><span>// Loads n8n's placeholder HTML template</span> <span> </span><span>noDataExpression</span><span>:</span><span> </span><span>true</span><span>,</span><span> </span><span>// Prevent using an expression for the field</span> <span> </span><span>description</span><span>:</span><span> </span><span>'HTML template to render'</span><span>,</span> <span>},</span> </code></pre></div></td></tr></tbody></table> Refer to `Html.node.ts` for a live example. ## Notice# Display a yellow box with a hint or extra info. Refer to Node UI design for guidance on writing good hints and info text. <table><tbody><tr><td><div><pre><span></span><span>1</span> <span>2</span> <span>3</span> <span>4</span> <span>5</span> <span>6</span></pre></div></td><td><div><pre><span></span><code><span>{</span> <span> </span><span>displayName</span><span>:</span><span> </span><span>'Your text here'</span><span>,</span> <span> </span><span>name</span><span>:</span><span> </span><span>'notice'</span><span>,</span> <span> </span><span>type</span><span>:</span><span> </span><span>'notice'</span><span>,</span> <span> </span><span>default</span><span>:</span><span> </span><span>''</span><span>,</span> <span>},</span> </code></pre></div></td></tr></tbody></table>  ## Hints# There are two types of hints: parameter hints and node hints: * Parameter hints are small lines of text below a user input field. * Node hints are a more powerful and flexible option than Notice. Use them to display longer hints, in the input panel, output panel, or node details view. ### Add a parameter hint# Add the `hint` parameter to a UI element: <table><tbody><tr><td><div><pre><span></span><span>1</span> <span>2</span> <span>3</span> <span>4</span> <span>5</span> <span>6</span> <span>7</span></pre></div></td><td><div><pre><span></span><code><span>{</span> <span> </span><span>displayName</span><span>:</span><span> </span><span>'URL'</span><span>,</span> <span> </span><span>name</span><span>:</span><span> </span><span>'url'</span><span>,</span> <span> </span><span>type</span><span>:</span><span> </span><span>'string'</span><span>,</span> <span> </span><span>hint</span><span>:</span><span> </span><span>'Enter a URL'</span><span>,</span> <span> </span><span>...</span> <span>}</span> </code></pre></div></td></tr></tbody></table> ### Add a node hint# Define the node's hints in the `hints` property within the node `description`: <table><tbody><tr><td><div><pre><span></span><span> 1</span> <span> 2</span> <span> 3</span> <span> 4</span> <span> 5</span> <span> 6</span> <span> 7</span> <span> 8</span> <span> 9</span> <span>10</span> <span>11</span> <span>12</span> <span>13</span> <span>14</span> <span>15</span> <span>16</span> <span>17</span> <span>18</span> <span>19</span></pre></div></td><td><div><pre><span></span><code><span>description</span><span>:</span><span> </span><span>INodeTypeDescription</span><span> </span><span>=</span><span> </span><span>{</span> <span> </span><span>...</span> <span> </span><span>hints</span><span>:</span><span> </span><span>[</span> <span> </span><span>{</span> <span> </span><span>// The hint message. You can use HTML.</span> <span> </span><span>message</span><span>:</span><span> </span><span>"This node has many input items. Consider enabling <b>Execute Once</b> in the node\'s settings."</span><span>,</span> <span> </span><span>// Choose from: info, warning, danger. The default is 'info'.</span> <span> </span><span>// Changes the color. info (grey), warning (yellow), danger (red)</span> <span> </span><span>type</span><span>:</span><span> </span><span>'info'</span><span>,</span> <span> </span><span>// Choose from: inputPane, outputPane, ndv. By default n8n displays the hint in both the input and output panels.</span> <span> </span><span>location</span><span>:</span><span> </span><span>'outputPane'</span><span>,</span> <span> </span><span>// Choose from: always, beforeExecution, afterExecution. The default is 'always'</span> <span> </span><span>whenToDisplay</span><span>:</span><span> </span><span>'beforeExecution'</span><span>,</span> <span> </span><span>// Optional. An expression. If it resolves to true, n8n displays the message. Defaults to true.</span> <span> </span><span>displayCondition</span><span>:</span><span> </span><span>'={{ $parameter["operation"] === "select" && $input.all().length > 1 }}'</span> <span> </span><span>}</span> <span> </span><span>]</span> <span> </span><span>...</span> <span>}</span> </code></pre></div></td></tr></tbody></table> ### Add a dynamic hint to a programmatic-style node# In programmatic-style nodes you can create a dynamic message that includes information from the node execution. As it relies on the node output data, you can't display this type of hint until after execution. <table><tbody><tr><td><div><pre><span></span><span> 1</span> <span> 2</span> <span> 3</span> <span> 4</span> <span> 5</span> <span> 6</span> <span> 7</span> <span> 8</span> <span> 9</span> <span>10</span> <span>11</span> <span>12</span> <span>13</span></pre></div></td><td><div><pre><span></span><code><span>if</span><span> </span><span>(</span><span>operation</span><span> </span><span>===</span><span> </span><span>'select'</span><span> </span><span>&&</span><span> </span><span>items</span><span>.</span><span>length</span><span> </span><span>></span><span> </span><span>1</span><span> </span><span>&&</span><span> </span><span>!</span><span>node</span><span>.</span><span>executeOnce</span><span>)</span><span> </span><span>{</span> <span> </span><span>// Expects two parameters: NodeExecutionData and an array of hints</span> <span> </span><span>return</span><span> </span><span>new</span><span> </span><span>NodeExecutionOutput</span><span>(</span> <span> </span><span>[</span><span>returnData</span><span>],</span> <span> </span><span>[</span> <span> </span><span>{</span> <span> </span><span>message</span><span>:</span><span> </span><span>`This node ran </span><span>${</span><span>items</span><span>.</span><span>length</span><span>}</span><span> times, once for each input item. To run for the first item only, enable <b>Execute once</b> in the node settings.`</span><span>,</span> <span> </span><span>location</span><span>:</span><span> </span><span>'outputPane'</span><span>,</span> <span> </span><span>},</span> <span> </span><span>],</span> <span> </span><span>);</span> <span>}</span> <span>return</span><span> </span><span>[</span><span>returnData</span><span>];</span> </code></pre></div></td></tr></tbody></table> For a live example of a dynamic hint in a programmatic-style node, view the Split Out node code. --- ## Page: https://docs.n8n.io/integrations/creating-nodes/build/reference/code-standards/ Following defined code standards when building your node makes your code more readable and maintainable, and helps avoid errors. This document provides guidance on good code practices for node building. It focuses on code details. For UI standards and UX guidance, refer to Node UI design. ## Use the linter# The n8n node linter provides automatic checking for many of the node-building standards. You should ensure your node passes the linter's checks before publishing it. Refer to the n8n node linter documentation for more information. ## Use the starter# The n8n node starter project includes a recommended setup, dependencies (including the linter), and examples to help you get started. Begin new projects with the starter. ## Write in TypeScript# All n8n code is TypeScript. Writing your nodes in TypeScript can speed up development and reduce bugs. ## Detailed guidelines for writing a node# These guidelines apply to any node you build. ### Resources and operations# If your node can perform several operations, call the parameter that sets the operation `Operation`. If your node can do these operations on more than one resource, create a `Resource` parameter. The following code sample shows a basic resource and operations setup: <table><tbody><tr><td><div><pre><span></span><span> 1</span> <span> 2</span> <span> 3</span> <span> 4</span> <span> 5</span> <span> 6</span> <span> 7</span> <span> 8</span> <span> 9</span> <span>10</span> <span>11</span> <span>12</span> <span>13</span> <span>14</span> <span>15</span> <span>16</span> <span>17</span> <span>18</span> <span>19</span> <span>20</span> <span>21</span> <span>22</span> <span>23</span> <span>24</span> <span>25</span> <span>26</span> <span>27</span> <span>28</span> <span>29</span> <span>30</span> <span>31</span> <span>32</span> <span>33</span> <span>34</span> <span>35</span> <span>36</span> <span>37</span> <span>38</span> <span>39</span> <span>40</span> <span>41</span> <span>42</span> <span>43</span> <span>44</span></pre></div></td><td><div><pre><span></span><code><span>export</span><span> </span><span>const</span><span> </span><span>ExampleNode</span><span> </span><span>implements</span><span> </span><span>INodeType</span><span> </span><span>{</span> <span> </span><span>description</span><span>:</span><span> </span><span>{</span> <span> </span><span>displayName</span><span>:</span><span> </span><span>'Example Node'</span><span>,</span> <span> </span><span>...</span> <span> </span><span>properties</span><span>:</span><span> </span><span>[</span> <span> </span><span>{</span> <span> </span><span>displayName</span><span>:</span><span> </span><span>'Resource'</span><span>,</span> <span> </span><span>name</span><span>:</span><span> </span><span>'resource'</span><span>,</span> <span> </span><span>type</span><span>:</span><span> </span><span>'options'</span><span>,</span> <span> </span><span>options</span><span>:</span><span> </span><span>[</span> <span> </span><span>{</span> <span> </span><span>name</span><span>:</span><span> </span><span>'Resource One'</span><span>,</span> <span> </span><span>value</span><span>:</span><span> </span><span>'resourceOne'</span> <span> </span><span>},</span> <span> </span><span>{</span> <span> </span><span>name</span><span>:</span><span> </span><span>'Resource Two'</span><span>,</span> <span> </span><span>value</span><span>:</span><span> </span><span>'resourceTwo'</span> <span> </span><span>}</span> <span> </span><span>],</span> <span> </span><span>default</span><span>:</span><span> </span><span>'resourceOne'</span> <span> </span><span>},</span> <span> </span><span>{</span> <span> </span><span>displayName</span><span>:</span><span> </span><span>'Operation'</span><span>,</span> <span> </span><span>name</span><span>:</span><span> </span><span>'operation'</span><span>,</span> <span> </span><span>type</span><span>:</span><span> </span><span>'options'</span><span>,</span> <span> </span><span>// Only show these operations for Resource One</span> <span> </span><span>displayOptions</span><span>:</span><span> </span><span>{</span> <span> </span><span>show</span><span>:</span><span> </span><span>{</span> <span> </span><span>resource</span><span>:</span><span> </span><span>[</span> <span> </span><span>'resourceOne'</span> <span> </span><span>]</span> <span> </span><span>}</span> <span> </span><span>},</span> <span> </span><span>options</span><span>:</span><span> </span><span>[</span> <span> </span><span>{</span> <span> </span><span>name</span><span>:</span><span> </span><span>'Create'</span><span>,</span> <span> </span><span>value</span><span>:</span><span> </span><span>'create'</span><span>,</span> <span> </span><span>description</span><span>:</span><span> </span><span>'Create an instance of Resource One'</span> <span> </span><span>}</span> <span> </span><span>]</span> <span> </span><span>}</span> <span> </span><span>]</span> <span> </span><span>}</span> <span>}</span> </code></pre></div></td></tr></tbody></table> ### Reuse internal parameter names# All resource and operation fields in an n8n node have two settings: a display name, set using the `name` parameter, and an internal name, set using the `value` parameter. Reusing the internal name for fields allows n8n to preserve user-entered data if a user switches operations. For example: you're building a node with a resource named 'Order'. This resource has several operations, including Get, Edit, and Delete. Each of these operations uses an order ID to perform the operation on the specified order. You need to display an ID field for the user. This field has a display label, and an internal name. By using the same internal name (set in `value`) for the operation ID field on each resource, a user can enter the ID with the Get operation selected, and not lose it if they switch to Edit. When reusing the internal name, you must ensure that only one field is visible to the user at a time. You can control this using `displayOptions`. ## Detailed guidelines for writing a programmatic-style node# These guidelines apply when building nodes using the programmatic node-building style. They aren't relevant when using the declarative style. For more information on different node-building styles, refer to Choose your node building approach. ### Don't change incoming data# Never change the incoming data a node receives (data accessible with `this.getInputData()`) as all nodes share it. If you need to add, change, or delete data, clone the incoming data and return the new data. If you don't do this, sibling nodes that execute after the current one will operate on the altered data and process incorrect data. It's not necessary to always clone all the data. For example, if a node changes the binary data but not the JSON data, you can create a new item that reuses the reference to the JSON item. ### Use the built in request library# Some third-party services have their own libraries on npm, which make it easier to create an integration. The problem with these packages is that you add another dependency (plus all the dependencies of the dependencies). This adds more and more code, which has to be loaded, can introduce security vulnerabilities, bugs, and so on. Instead, use the built-in module: <table><tbody><tr><td><div><pre><span></span><span>1</span> <span>2</span> <span>3</span> <span>4</span> <span>5</span> <span>6</span> <span>7</span> <span>8</span> <span>9</span></pre></div></td><td><div><pre><span></span><code><span>// If no auth needed</span> <span>const</span><span> </span><span>response</span><span> </span><span>=</span><span> </span><span>await</span><span> </span><span>this</span><span>.</span><span>helpers</span><span>.</span><span>httpRequest</span><span>(</span><span>options</span><span>);</span> <span>// If auth needed</span> <span>const</span><span> </span><span>response</span><span> </span><span>=</span><span> </span><span>await</span><span> </span><span>this</span><span>.</span><span>helpers</span><span>.</span><span>httpRequestWithAuthentication</span><span>.</span><span>call</span><span>(</span> <span> </span><span>this</span><span>,</span><span> </span> <span> </span><span>'credentialTypeName'</span><span>,</span><span> </span><span>// For example: pipedriveApi</span> <span> </span><span>options</span><span>,</span> <span>);</span> </code></pre></div></td></tr></tbody></table> This uses the npm package Axios. Refer to HTTP helpers for more information, and for migration instructions for the removed `this.helpers.request`. --- ## Page: https://docs.n8n.io/integrations/creating-nodes/build/reference/node-versioning/ ## Node versioning# n8n supports node versioning. You can make changes to existing nodes without breaking the existing behavior by introducing a new version. Be aware of how n8n decides which node version to load: * If a user builds and saves a workflow using version 1, n8n continues to use version 1 in that workflow, even if you create and publish a version 2 of the node. * When a user creates a new workflow and browses for nodes, n8n always loads the latest version of the node. Versioning type restricted by node style If you build a node using the declarative style, you can't use full versioning. ## Light versioning# This is available for all node types. One node can contain more than one version, allowing small version increments without code duplication. To use this feature: 1. Change the main `version` parameter to an array, and add your version numbers, including your existing version. 2. You can then access the version parameter with `@version` in your `displayOptions` in any object (to control which versions n8n displays the object with). You can also query the version from a function using `const nodeVersion = this.getNode().typeVersion;`. As an example, say you want to add versioning to the NasaPics node from the Declarative node tutorial, then configure a resource so that n8n only displays it in version 2 of the node. In your base `NasaPics.node.ts` file: <table><tbody><tr><td><div><pre><span></span><span> 1</span> <span> 2</span> <span> 3</span> <span> 4</span> <span> 5</span> <span> 6</span> <span> 7</span> <span> 8</span> <span> 9</span> <span>10</span> <span>11</span> <span>12</span> <span>13</span> <span>14</span> <span>15</span> <span>16</span> <span>17</span> <span>18</span> <span>19</span> <span>20</span></pre></div></td><td><div><pre><span></span><code><span>{</span> <span> </span><span>displayName</span><span>:</span><span> </span><span>'NASA Pics'</span><span>,</span> <span> </span><span>name</span><span>:</span><span> </span><span>'NasaPics'</span><span>,</span> <span> </span><span>icon</span><span>:</span><span> </span><span>'file:nasapics.svg'</span><span>,</span> <span> </span><span>// List the available versions</span> <span> </span><span>version</span><span>:</span><span> </span><span>[</span><span>1</span><span>,</span><span>2</span><span>,</span><span>3</span><span>],</span> <span> </span><span>// More basic parameters here</span> <span> </span><span>properties</span><span>:</span><span> </span><span>[</span> <span> </span><span>// Add a resource that's only displayed for version2</span> <span> </span><span>{</span> <span> </span><span>displayName</span><span>:</span><span> </span><span>'Resource name'</span><span>,</span> <span> </span><span>// More resource parameters</span> <span> </span><span>displayOptions</span><span>:</span><span> </span><span>{</span> <span> </span><span>show</span><span>:</span><span> </span><span>{</span> <span> </span><span>'@version'</span><span>:</span><span> </span><span>2</span><span>,</span> <span> </span><span>},</span> <span> </span><span>},</span> <span> </span><span>},</span> <span> </span><span>],</span> <span>}</span> </code></pre></div></td></tr></tbody></table> ## Full versioning# This isn't available for declarative-style nodes. As an example, refer to the Mattermost node. Full versioning summary: * The base node file should extend `NodeVersionedType` instead of `INodeType`. * The base node file should contain a description including the `defaultVersion` (usually the latest), other basic node metadata such as name, and a list of versions. It shouldn't contain any node functionality. * n8n recommends using `v1`, `v2`, and so on, for version folder names. --- ## Page: https://docs.n8n.io/integrations/creating-nodes/build/reference/node-base-files/ The node base file contains the core code of your node. All nodes must have a base file. The contents of this file are different depending on whether you're building a declarative-style or programmatic-style node. For guidance on which style to use, refer to Choose your node building approach. These documents give short code snippets to help understand the code structure and concepts. For full walk-throughs of building a node, including real-world code examples, refer to Build a declarative-style node or Build a programmatic-style node. You can also explore the n8n-nodes-starter and n8n's own nodes for a wider range of examples. The starter contains basic examples that you can build on. The n8n Mattermost node is a good example of a more complex programmatic-style node, including versioning. For all nodes, refer to the: * Structure of the node base file * Standard parameters For declarative-style nodes, refer to the: * Declarative-style parameters For programmatic-style nodes, refer to the: * Programmatic-style parameters * Programmatic-style execute() method --- ## Page: https://docs.n8n.io/integrations/creating-nodes/build/reference/node-base-files/structure/ The node base file follows this basic structure: 1. Add import statements. 2. Create a class for the node. 3. Within the node class, create a `description` object, which defines the node. A programmatic-style node also has an `execute()` method, which reads incoming data and parameters, then builds a request. The declarative style handles this using the `routing` key in the `properties` object, within `descriptions`. ## Outline structure for a declarative-style node# This code snippet gives an outline of the node structure. <table><tbody><tr><td><div><pre><span></span><span> 1</span> <span> 2</span> <span> 3</span> <span> 4</span> <span> 5</span> <span> 6</span> <span> 7</span> <span> 8</span> <span> 9</span> <span>10</span></pre></div></td><td><div><pre><span></span><code><span>import</span><span> </span><span>{</span><span> </span><span>INodeType</span><span>,</span><span> </span><span>INodeTypeDescription</span><span> </span><span>}</span><span> </span><span>from</span><span> </span><span>'n8n-workflow'</span><span>;</span> <span>export</span><span> </span><span>class</span><span> </span><span>ExampleNode</span><span> </span><span>implements</span><span> </span><span>INodeType</span><span> </span><span>{</span> <span> </span><span>description</span><span>:</span><span> </span><span>INodeTypeDescription</span><span> </span><span>=</span><span> </span><span>{</span> <span> </span><span>// Basic node details here</span> <span> </span><span>properties</span><span>:</span><span> </span><span>[</span> <span> </span><span>// Resources and operations here</span> <span> </span><span>]</span> <span> </span><span>};</span> <span>}</span> </code></pre></div></td></tr></tbody></table> Refer to Standard parameters for information on parameters available to all node types. Refer to Declarative-style parameters for the parameters available for declarative-style nodes. ## Outline structure for a programmatic-style node# This code snippet gives an outline of the node structure. <table><tbody><tr><td><div><pre><span></span><span> 1</span> <span> 2</span> <span> 3</span> <span> 4</span> <span> 5</span> <span> 6</span> <span> 7</span> <span> 8</span> <span> 9</span> <span>10</span> <span>11</span> <span>12</span> <span>13</span> <span>14</span> <span>15</span></pre></div></td><td><div><pre><span></span><code><span>import</span><span> </span><span>{</span><span> </span><span>IExecuteFunctions</span><span> </span><span>}</span><span> </span><span>from</span><span> </span><span>'n8n-core'</span><span>;</span> <span>import</span><span> </span><span>{</span><span> </span><span>INodeExecutionData</span><span>,</span><span> </span><span>INodeType</span><span>,</span><span> </span><span>INodeTypeDescription</span><span> </span><span>}</span><span> </span><span>from</span><span> </span><span>'n8n-workflow'</span><span>;</span> <span>export</span><span> </span><span>class</span><span> </span><span>ExampleNode</span><span> </span><span>implements</span><span> </span><span>INodeType</span><span> </span><span>{</span> <span> </span><span>description</span><span>:</span><span> </span><span>INodeTypeDescription</span><span> </span><span>=</span><span> </span><span>{</span> <span> </span><span>// Basic node details here</span> <span> </span><span>properties</span><span>:</span><span> </span><span>[</span> <span> </span><span>// Resources and operations here</span> <span> </span><span>]</span> <span> </span><span>};</span> <span> </span><span>async</span><span> </span><span>execute</span><span>(</span><span>this</span><span>:</span><span> </span><span>IExecuteFunctions</span><span>)</span><span>:</span><span> </span><span>Promise</span><span><</span><span>INodeExecutionData</span><span>[][]</span><span>></span><span> </span><span>{</span> <span> </span><span>// Process data and return</span> <span> </span><span>}</span> <span>};</span> </code></pre></div></td></tr></tbody></table> Refer to Standard parameters for information on parameters available to all node types. Refer to Programmatic-style parameters and Programmatic-style execute method for more information on working with programmatic-style nodes. --- ## Page: https://docs.n8n.io/integrations/creating-nodes/build/reference/node-base-files/standard-parameters/ These are the standard parameters for the node base file. They're the same for all node types. ## `displayName`# _String_ | _Required_ This is the name users see in the n8n GUI. ## `name`# _String_ | _Required_ The internal name of the object. Used to reference it from other places in the node. ## `icon`# _String_ or _Object_ | _Required_ Specifies an icon for a particular node. n8n recommends uploading your own image file. You can provide the icon file name as a string, or as an object to handle different icons for light and dark modes. If the icon works in both light and dark modes, use a string that starts with `file:`, indicating the path to the icon file. For example: <table><tbody><tr><td><div><pre><span></span><span>1</span></pre></div></td><td><div><pre><span></span><code>icon: 'file:exampleNodeIcon.svg' </code></pre></div></td></tr></tbody></table> To provide different icons for light and dark modes, use an object with `light` and `dark` properties. For example: <table><tbody><tr><td><div><pre><span></span><span>1</span> <span>2</span> <span>3</span> <span>4</span></pre></div></td><td><div><pre><span></span><code>icon: { light: 'file:exampleNodeIcon.svg', dark: 'file:exampleNodeIcon.dark.svg' } </code></pre></div></td></tr></tbody></table> n8n recommends using an SVG for your node icon, but you can also use PNG. If using PNG, the icon resolution should be 60x60px. Node icons should have a square or near-square aspect ratio. Don't reference Font Awesome If you want to use a Font Awesome icon in your node, download and embed the image. ## `group`# _Array of strings_ | _Required_ Tells n8n how the node behaves when the workflow runs. Options are: * `trigger`: node waits for a trigger. * `schedule`: node waits for a timer to expire. * `input`, `output`, `transform`: these currently have no effect. * An empty array, `[]`. Use this as the default option if you don't need `trigger` or `schedule`. ## `description`# _String_ | _Required_ A short description of the node. n8n uses this in the GUI. ## `defaults`# _Object_ | _Required_ Contains essential brand and name settings. The object can include: * `name`: String. Used as the node name on the canvas if the `displayName` is too long. * `color`: String. Hex color code. Provide the brand color of the integration for use in n8n. ## `forceInputNodeExecution`# _Boolean_ | _Optional_ When building a multi-input node, you can choose to force all preceding nodes on all branches to execute before the node runs. The default is `false` (requiring only one input branch to run). ## `inputs`# _Array of strings_ | _Required_ Names the input connectors. Controls the number of connectors the node has on the input side. If you need only one connector, use `input: ['main']`. ## `outputs`# _Array of strings_ | _Required_ Names the output connectors. Controls the number of connectors the node has on the output side. If you need only one connector, use `output: ['main']`. ## `requiredInputs`# _Integer_ or _Array_ | _Optional_ Used for multi-input nodes. Specify inputs by number that must have data (their branches must run) before the node can execute. ## `credentials`# _Array of objects_ | _Required_ This parameter tells n8n the credential options. Each object defines an authentication type. The object must include: * `name`: the credential name. Must match the `name` property in the credential file. For example, `name: 'asanaApi'` in `Asana.node.ts` links to `name = 'asanaApi'` in `AsanaApi.credential.ts`. * `required`: Boolean. Specify whether authentication is required to use this node. ## `requestDefaults`# _Object_ | _Required_ Set up the basic information for the API calls the node makes. This object must include: * `baseURL`: The API base URL. You can also add: * `headers`: an object describing the API call headers, such as content type. * `url`: string. Appended to the `baseURL`. You can usually leave this out. It's more common to provide this in the `operations`. ## `properties`# _Array of objects_ | _Required_ This contains the resource and operations objects that define node behaviors, as well as objects to set up mandatory and optional fields that can receive user input. ### Resource objects# A resource object includes the following parameters: * `displayName`: String. This should always be `Resource`. * `name`: String. This should always be `resource`. * `type`: String. Tells n8n which UI element to use, and what input type to expect. For example, `options` results in n8n adding a dropdown that allows users to choose one option. Refer to Node UI elements for more information. * `noDataExpression`: Boolean. Prevents using an expression for the parameter. Must always be `true` for `resource`. ### Operations objects# The operations object defines the available operations on a resource. * `displayName`: String. This should always be `Options`. * `name`: String. This should always be `option`. * `type`: String. Tells n8n which UI element to use, and what input type to expect. For example, `dateTime` results in n8n adding a date picker. Refer to Node UI elements for more information. * `noDataExpression`: Boolean. Prevents using an expression for the parameter. Must always be `true` for `operation`. * `options`: Array of objects. Each objects describes an operation's behavior, such as its routing, the REST verb it uses, and so on. An `options` object includes: * `name`. String. * `value`. String. * `action`: String. This parameter combines the resource and operation. You should always include it, as n8n will use it in future versions. For example, given a resource called `"Card"` and an operation `"Get all"`, your action is `"Get all cards"`. * `description`: String. * `routing`: Object containing request details. ### Additional fields objects# These objects define optional parameters. n8n displays them under **Additional Fields** in the GUI. Users can choose which parameters to set. The objects must include: <table><tbody><tr><td><div><pre><span></span><span> 1</span> <span> 2</span> <span> 3</span> <span> 4</span> <span> 5</span> <span> 6</span> <span> 7</span> <span> 8</span> <span> 9</span> <span>10</span> <span>11</span> <span>12</span> <span>13</span> <span>14</span> <span>15</span> <span>16</span> <span>17</span></pre></div></td><td><div><pre><span></span><code><span>displayName</span><span>:</span><span> </span><span>'Additional Fields'</span><span>,</span> <span>name</span><span>:</span><span> </span><span>'additionalFields'</span><span>,</span> <span>// The UI element type</span> <span>type</span><span>:</span><span> </span><span>''</span> <span>placeholder</span><span>:</span><span> </span><span>'Add Field'</span><span>,</span> <span>default</span><span>:</span><span> </span><span>{},</span> <span>displayOptions</span><span>:</span><span> </span><span>{</span> <span> </span><span>// Set which resources and operations this field is available for</span> <span> </span><span>show</span><span>:</span><span> </span><span>{</span> <span> </span><span>resource</span><span>:</span><span> </span><span>[</span> <span> </span><span>// Resource names</span> <span> </span><span>],</span> <span> </span><span>operation</span><span>:</span><span> </span><span>[</span> <span> </span><span>// Operation names</span> <span> </span><span>]</span> <span> </span><span>},</span> <span>}</span> </code></pre></div></td></tr></tbody></table> For more information about UI element types, refer to UI elements. --- ## Page: https://docs.n8n.io/integrations/creating-nodes/build/reference/node-base-files/declarative-style-parameters/ ## Declarative-style parameters# These are the parameters available for node base file of declarative-style nodes. This document gives short code snippets to help understand the code structure and concepts. For a full walk-through of building a node, including real-world code examples, refer to Build a declarative-style node. Refer to Standard parameters for parameters available to all nodes. ## `methods` and `loadOptions`# _Object_ | _Optional_ `methods` contains the `loadOptions` object. You can use `loadOptions` to query the service to get user-specific settings, then return them and render them in the GUI so the user can include them in subsequent queries. The object must include routing information for how to query the service, and output settings that define how to handle the returned options. For example: <table><tbody><tr><td><div><pre><span></span><span> 1</span> <span> 2</span> <span> 3</span> <span> 4</span> <span> 5</span> <span> 6</span> <span> 7</span> <span> 8</span> <span> 9</span> <span>10</span> <span>11</span> <span>12</span> <span>13</span> <span>14</span> <span>15</span> <span>16</span> <span>17</span> <span>18</span> <span>19</span> <span>20</span> <span>21</span> <span>22</span> <span>23</span> <span>24</span> <span>25</span> <span>26</span> <span>27</span> <span>28</span> <span>29</span> <span>30</span> <span>31</span> <span>32</span> <span>33</span> <span>34</span> <span>35</span> <span>36</span></pre></div></td><td><div><pre><span></span><code><span>methods</span><span> </span><span>:</span><span> </span><span>{</span> <span> </span><span>loadOptions</span><span>:</span><span> </span><span>{</span> <span> </span><span>routing</span><span>:</span><span> </span><span>{</span> <span> </span><span>request</span><span>:</span><span> </span><span>{</span> <span> </span><span>url</span><span>:</span><span> </span><span>'/webhook/example-option-parameters'</span><span>,</span> <span> </span><span>method</span><span>:</span><span> </span><span>'GET'</span><span>,</span> <span> </span><span>},</span> <span> </span><span>output</span><span>:</span><span> </span><span>{</span> <span> </span><span>postReceive</span><span>:</span><span> </span><span>[</span> <span> </span><span>{</span> <span> </span><span>// When the returned data is nested under another property</span> <span> </span><span>// Specify that property key</span> <span> </span><span>type</span><span>:</span><span> </span><span>'rootProperty'</span><span>,</span> <span> </span><span>properties</span><span>:</span><span> </span><span>{</span> <span> </span><span>property</span><span>:</span><span> </span><span>'responseData'</span><span>,</span> <span> </span><span>},</span> <span> </span><span>},</span> <span> </span><span>{</span> <span> </span><span>type</span><span>:</span><span> </span><span>'setKeyValue'</span><span>,</span> <span> </span><span>properties</span><span>:</span><span> </span><span>{</span> <span> </span><span>name</span><span>:</span><span> </span><span>'={{$responseItem.key}} ({{$responseItem.value}})'</span><span>,</span> <span> </span><span>value</span><span>:</span><span> </span><span>'={{$responseItem.value}}'</span><span>,</span> <span> </span><span>},</span> <span> </span><span>},</span> <span> </span><span>{</span> <span> </span><span>// If incoming data is an array of objects, sort alphabetically by key</span> <span> </span><span>type</span><span>:</span><span> </span><span>'sort'</span><span>,</span> <span> </span><span>properties</span><span>:</span><span> </span><span>{</span> <span> </span><span>key</span><span>:</span><span> </span><span>'name'</span><span>,</span> <span> </span><span>},</span> <span> </span><span>},</span> <span> </span><span>],</span> <span> </span><span>},</span> <span> </span><span>},</span> <span> </span><span>}</span> <span>},</span> </code></pre></div></td></tr></tbody></table> ## `routing`# _Object_ | _Required_ `routing` is an object used within an `options` array in operations and input field objects. It contains the details of an API call. The code example below comes from the Declarative-style tutorial. It sets up an integration with a NASA API. It shows how to use `requestDefaults` to set up the basic API call details, and `routing` to add information for each operation. <table><tbody><tr><td><div><pre><span></span><span> 1</span> <span> 2</span> <span> 3</span> <span> 4</span> <span> 5</span> <span> 6</span> <span> 7</span> <span> 8</span> <span> 9</span> <span>10</span> <span>11</span> <span>12</span> <span>13</span> <span>14</span> <span>15</span> <span>16</span> <span>17</span> <span>18</span> <span>19</span> <span>20</span> <span>21</span> <span>22</span> <span>23</span> <span>24</span> <span>25</span> <span>26</span> <span>27</span> <span>28</span> <span>29</span> <span>30</span> <span>31</span></pre></div></td><td><div><pre><span></span><code><span>description</span><span>:</span><span> </span><span>INodeTypeDescription</span><span> </span><span>=</span><span> </span><span>{</span> <span> </span><span>// Other node info here</span> <span> </span><span>requestDefaults</span><span>:</span><span> </span><span>{</span> <span> </span><span>baseURL</span><span>:</span><span> </span><span>'https://api.nasa.gov'</span><span>,</span> <span> </span><span>url</span><span>:</span><span> </span><span>''</span><span>,</span> <span> </span><span>headers</span><span>:</span><span> </span><span>{</span> <span> </span><span>Accept</span><span>:</span><span> </span><span>'application/json'</span><span>,</span> <span> </span><span>'Content-Type'</span><span>:</span><span> </span><span>'application/json'</span><span>,</span> <span> </span><span>},</span> <span> </span><span>},</span> <span> </span><span>properties</span><span>:</span><span> </span><span>[</span> <span> </span><span>// Resources here</span> <span> </span><span>{</span> <span> </span><span>displayName</span><span>:</span><span> </span><span>'Operation'</span> <span> </span><span>// Other operation details</span> <span> </span><span>options</span><span>:</span><span> </span><span>[</span> <span> </span><span>{</span> <span> </span><span>name</span><span>:</span><span> </span><span>'Get'</span> <span> </span><span>value</span><span>:</span><span> </span><span>'get'</span><span>,</span> <span> </span><span>description</span><span>:</span><span> </span><span>''</span><span>,</span> <span> </span><span>routing</span><span>:</span><span> </span><span>{</span> <span> </span><span>request</span><span>:</span><span> </span><span>{</span> <span> </span><span>method</span><span>:</span><span> </span><span>'GET'</span><span>,</span> <span> </span><span>url</span><span>:</span><span> </span><span>'/planetary/apod'</span> <span> </span><span>}</span> <span> </span><span>}</span> <span> </span><span>}</span> <span> </span><span>]</span> <span> </span><span>}</span> <span> </span><span>]</span> <span>}</span> </code></pre></div></td></tr></tbody></table> ## `version`# _Number_ or _Array_ | _Optional_ If you have one version of your node, this can be a number. If you want to support more than one version, turn this into an array, containing numbers for each node version. n8n supports two methods of node versioning, but declarative-style nodes must use the light versioning approach. Refer to Node versioning for more information. --- ## Page: https://docs.n8n.io/integrations/creating-nodes/build/reference/node-base-files/programmatic-style-parameters/ ## Programmatic-style parameters# These are the parameters available for node base file of programmatic-style nodes. This document gives short code snippets to help understand the code structure and concepts. For a full walk-through of building a node, including real-world code examples, refer to Build a programmatic-style node. Programmatic-style nodes also use the `execute()` method. Refer to Programmatic-style execute method for more information. Refer to Standard parameters for parameters available to all nodes. ## `defaultVersion`# _Number_ | _Optional_ Use `defaultVersion` when using the full versioning approach. n8n support two methods of node versioning. Refer to Node versioning for more information. ## `methods` and `loadOptions`# _Object_ | _Optional_ Contains the `loadOptions` method for programmatic-style nodes. You can use this method to query the service to get user-specific settings (such as getting a user's email labels from Gmail), then return them and render them in the GUI so the user can include them in subsequent queries. For example, n8n's Gmail node uses `loadOptions` to get all email labels: <table><tbody><tr><td><div><pre><span></span><span> 1</span> <span> 2</span> <span> 3</span> <span> 4</span> <span> 5</span> <span> 6</span> <span> 7</span> <span> 8</span> <span> 9</span> <span>10</span> <span>11</span> <span>12</span> <span>13</span> <span>14</span> <span>15</span> <span>16</span> <span>17</span> <span>18</span> <span>19</span> <span>20</span> <span>21</span> <span>22</span> <span>23</span> <span>24</span> <span>25</span></pre></div></td><td><div><pre><span></span><code><span> </span><span>methods</span><span> </span><span>=</span><span> </span><span>{</span> <span> </span><span>loadOptions</span><span>:</span><span> </span><span>{</span> <span> </span><span>// Get all the labels and display them</span> <span> </span><span>async</span><span> </span><span>getLabels</span><span>(</span> <span> </span><span>this</span><span>:</span><span> </span><span>ILoadOptionsFunctions</span><span>,</span> <span> </span><span>)</span><span>:</span><span> </span><span>Promise</span><span><</span><span>INodePropertyOptions</span><span>[]</span><span>></span><span> </span><span>{</span> <span> </span><span>const</span><span> </span><span>returnData</span><span>:</span><span> </span><span>INodePropertyOptions</span><span>[]</span><span> </span><span>=</span><span> </span><span>[];</span> <span> </span><span>const</span><span> </span><span>labels</span><span> </span><span>=</span><span> </span><span>await</span><span> </span><span>googleApiRequestAllItems</span><span>.</span><span>call</span><span>(</span> <span> </span><span>this</span><span>,</span> <span> </span><span>'labels'</span><span>,</span> <span> </span><span>'GET'</span><span>,</span> <span> </span><span>'/gmail/v1/users/me/labels'</span><span>,</span> <span> </span><span>);</span> <span> </span><span>for</span><span> </span><span>(</span><span>const</span><span> </span><span>label</span><span> </span><span>of</span><span> </span><span>labels</span><span>)</span><span> </span><span>{</span> <span> </span><span>const</span><span> </span><span>labelName</span><span> </span><span>=</span><span> </span><span>label</span><span>.</span><span>name</span><span>;</span> <span> </span><span>const</span><span> </span><span>labelId</span><span> </span><span>=</span><span> </span><span>label</span><span>.</span><span>id</span><span>;</span> <span> </span><span>returnData</span><span>.</span><span>push</span><span>({</span> <span> </span><span>name</span><span>:</span><span> </span><span>labelName</span><span>,</span> <span> </span><span>value</span><span>:</span><span> </span><span>labelId</span><span>,</span> <span> </span><span>});</span> <span> </span><span>}</span> <span> </span><span>return</span><span> </span><span>returnData</span><span>;</span> <span> </span><span>},</span> <span> </span><span>},</span> <span> </span><span>};</span> </code></pre></div></td></tr></tbody></table> ## `version`# _Number_ or _Array_ | _Optional_ Use `version` when using the light versioning approach. If you have one version of your node, this can be a number. If you want to support multiple versions, turn this into an array, containing numbers for each node version. n8n support two methods of node versioning. Programmatic-style nodes can use either. Refer to Node versioning for more information. --- ## Page: https://docs.n8n.io/integrations/creating-nodes/build/reference/node-base-files/programmatic-style-execute-method/ The main difference between the declarative and programmatic styles is how they handle incoming data and build API requests. The programmatic style requires an `execute()` method, which reads incoming data and parameters, then builds a request. The declarative style handles requests using the `routing` key in the `operations` object. The `execute()` method creates and returns an instance of `INodeExecutionData`. Paired items You must include input and output item pairing information in the data you return. For more information, refer to Paired items. --- ## Page: https://docs.n8n.io/integrations/creating-nodes/build/reference/node-codex-files/ ## Node codex files# The codex file contains metadata about your node. This file is the JSON file at the root of your node. For example, the `HttpBin.node.json` file in the n8n starter. The codex filename must match the node base filename. For example, given a node base file named `MyNode.node.ts`, the codex would be named `MyNode.node.json`. | Parameter | Description | | --- | --- | | `node` | Includes the node name. Must start with `n8n-nodes-base.`. For example, `n8n-nodes-base.openweatherapi`. | | `nodeVersion` | The node version. This should have the same value as the `version` parameter in your main node file. For example, `"1.0"`. | | `codexVersion` | The codex file version. The current version is `"1.0"`. | | `categories` | The settings in the `categories` array determine which category n8n adds your node to in the GUI. See Node categories for more information. | | `resources` | The `resources` object contains links to your node documentation. n8n automatically adds help links to credentials and nodes in the GUI. | ## Node categories# You can define one or more categories in your node configuration JSON. This helps n8n put the node in the correct category in the nodes panel. Choose from these categories: * Data & Storage * Finance & Accounting * Marketing & Content * Productivity * Miscellaneous * Sales * Development * Analytics * Communication * Utility You must match the syntax. For example, `Data & Storage` not `data and storage`. --- ## Page: https://docs.n8n.io/integrations/creating-nodes/build/reference/credentials-files/ ## Credentials file# The credentials file defines the authorization methods for the node. The settings in this file affect what n8n displays in the **Credentials** modal, and must reflect the authentication requirements of the service you're connecting to. In the credentials file, you can use all the n8n UI elements. n8n encrypts the data that's stored using credentials using an encryption key. ## Structure of the credentials file# The credentials file follows this basic structure: 1. Import statements 2. Create a class for the credentials 3. Within the class, define the properties that control authentication for the node. ### Outline structure# <table><tbody><tr><td><div><pre><span></span><span> 1</span> <span> 2</span> <span> 3</span> <span> 4</span> <span> 5</span> <span> 6</span> <span> 7</span> <span> 8</span> <span> 9</span> <span>10</span> <span>11</span> <span>12</span> <span>13</span> <span>14</span> <span>15</span> <span>16</span> <span>17</span> <span>18</span> <span>19</span> <span>20</span> <span>21</span> <span>22</span> <span>23</span> <span>24</span> <span>25</span> <span>26</span> <span>27</span> <span>28</span> <span>29</span> <span>30</span> <span>31</span> <span>32</span> <span>33</span> <span>34</span> <span>35</span> <span>36</span> <span>37</span></pre></div></td><td><div><pre><span></span><code><span>import</span><span> </span><span>{</span> <span> </span><span>IAuthenticateGeneric</span><span>,</span> <span> </span><span>ICredentialTestRequest</span><span>,</span> <span> </span><span>ICredentialType</span><span>,</span> <span> </span><span>INodeProperties</span><span>,</span> <span>}</span><span> </span><span>from</span><span> </span><span>'n8n-workflow'</span><span>;</span> <span>export</span><span> </span><span>class</span><span> </span><span>ExampleNode</span><span> </span><span>implements</span><span> </span><span>ICredentialType</span><span> </span><span>{</span> <span> </span><span>name</span><span> </span><span>=</span><span> </span><span>'exampleNodeApi'</span><span>;</span> <span> </span><span>displayName</span><span> </span><span>=</span><span> </span><span>'Example Node API'</span><span>;</span> <span> </span><span>documentationUrl</span><span> </span><span>=</span><span> </span><span>''</span><span>;</span> <span> </span><span>properties</span><span>:</span><span> </span><span>INodeProperties</span><span>[]</span><span> </span><span>=</span><span> </span><span>[</span> <span> </span><span>{</span> <span> </span><span>displayName</span><span>:</span><span> </span><span>'API Key'</span><span>,</span> <span> </span><span>name</span><span>:</span><span> </span><span>'apiKey'</span><span>,</span> <span> </span><span>type</span><span>:</span><span> </span><span>'string'</span><span>,</span> <span> </span><span>default</span><span>:</span><span> </span><span>''</span><span>,</span> <span> </span><span>},</span> <span> </span><span>];</span> <span> </span><span>authenticate</span><span>:</span><span> </span><span>IAuthenticateGeneric</span><span> </span><span>=</span><span> </span><span>{</span> <span> </span><span>type</span><span>:</span><span> </span><span>'generic'</span><span>,</span> <span> </span><span>properties</span><span>:</span><span> </span><span>{</span> <span> </span><span>// Can be body, header, qs or auth</span> <span> </span><span>qs</span><span>:</span><span> </span><span>{</span> <span> </span><span>// Use the value from `apiKey` above</span> <span> </span><span>'api_key'</span><span>:</span><span> </span><span>'={{$credentials.apiKey}}'</span> <span> </span><span>}</span> <span> </span><span>},</span> <span> </span><span>};</span> <span> </span><span>test</span><span>:</span><span> </span><span>ICredentialTestRequest</span><span> </span><span>=</span><span> </span><span>{</span> <span> </span><span>request</span><span>:</span><span> </span><span>{</span> <span> </span><span>baseURL</span><span>:</span><span> </span><span>'={{$credentials?.domain}}'</span><span>,</span> <span> </span><span>url</span><span>:</span><span> </span><span>'/bearer'</span><span>,</span> <span> </span><span>},</span> <span> </span><span>};</span> <span>}</span> </code></pre></div></td></tr></tbody></table> ## Parameters# ### `name`# String. The internal name of the object. Used to reference it from other places in the node. ### `displayName`# String. The name n8n uses in the GUI. ### `documentationUrl`# String. URL to your credentials documentation. ### `properties`# Each object contains: * `displayName`: the name n8n uses in the GUI. * `name`: the internal name of the object. Used to reference it from other places in the node. * `type`: the data type expected, such as `string`. * `default`: the URL that n8n should use to test credentials. ### `authenticate`# * `authenticate`: Object. Contains objects that tell n8n how to inject the authentication data as part of the API request. #### `type`# String. If you're using an authentication method that sends data in the header, body, or query string, set this to `'generic'`. #### `properties`# Object. Defines the authentication methods. Options are: * `body`: Object. Sends authentication data in the request body. Can contain nested objects. <table><tbody><tr><td><div><pre><span></span><span>1</span> <span>2</span> <span>3</span> <span>4</span> <span>5</span> <span>6</span> <span>7</span> <span>8</span> <span>9</span></pre></div></td><td><div><pre><span></span><code><span>authenticate</span><span>:</span><span> </span><span>IAuthenticateGeneric</span><span> </span><span>=</span><span> </span><span>{</span> <span> </span><span>type</span><span>:</span><span> </span><span>'generic'</span><span>,</span> <span> </span><span>properties</span><span>:</span><span> </span><span>{</span> <span> </span><span>body</span><span>:</span><span> </span><span>{</span> <span> </span><span>username</span><span>:</span><span> </span><span>'={{$credentials.username}}'</span><span>,</span> <span> </span><span>password</span><span>:</span><span> </span><span>'={{$credentials.password}}'</span><span>,</span> <span> </span><span>},</span> <span> </span><span>},</span> <span>};</span> </code></pre></div></td></tr></tbody></table> * `header`: Object. Send authentication data in the request header. <table><tbody><tr><td><div><pre><span></span><span>1</span> <span>2</span> <span>3</span> <span>4</span> <span>5</span> <span>6</span> <span>7</span> <span>8</span></pre></div></td><td><div><pre><span></span><code><span>authenticate</span><span>:</span><span> </span><span>IAuthenticateGeneric</span><span> </span><span>=</span><span> </span><span>{</span> <span> </span><span>type</span><span>:</span><span> </span><span>'generic'</span><span>,</span> <span> </span><span>properties</span><span>:</span><span> </span><span>{</span> <span> </span><span>header</span><span>:</span><span> </span><span>{</span> <span> </span><span>Authorization</span><span>:</span><span> </span><span>'=Bearer {{$credentials.authToken}}'</span><span>,</span> <span> </span><span>},</span> <span> </span><span>},</span> <span>};</span> </code></pre></div></td></tr></tbody></table> * `qs`: Object. Stands for "query string." Send authentication data in the request query string. <table><tbody><tr><td><div><pre><span></span><span>1</span> <span>2</span> <span>3</span> <span>4</span> <span>5</span> <span>6</span> <span>7</span> <span>8</span></pre></div></td><td><div><pre><span></span><code><span>authenticate</span><span>:</span><span> </span><span>IAuthenticateGeneric</span><span> </span><span>=</span><span> </span><span>{</span> <span> </span><span>type</span><span>:</span><span> </span><span>'generic'</span><span>,</span> <span> </span><span>properties</span><span>:</span><span> </span><span>{</span> <span> </span><span>qs</span><span>:</span><span> </span><span>{</span> <span> </span><span>token</span><span>:</span><span> </span><span>'={{$credentials.token}}'</span><span>,</span> <span> </span><span>},</span> <span> </span><span>},</span> <span>};</span> </code></pre></div></td></tr></tbody></table> * `auth`: Object. Used for Basic Auth. Requires `username` and `password` as the key names. <table><tbody><tr><td><div><pre><span></span><span>1</span> <span>2</span> <span>3</span> <span>4</span> <span>5</span> <span>6</span> <span>7</span> <span>8</span> <span>9</span></pre></div></td><td><div><pre><span></span><code><span>authenticate</span><span>:</span><span> </span><span>IAuthenticateGeneric</span><span> </span><span>=</span><span> </span><span>{</span> <span> </span><span>type</span><span>:</span><span> </span><span>'generic'</span><span>,</span> <span> </span><span>properties</span><span>:</span><span> </span><span>{</span> <span> </span><span>auth</span><span>:</span><span> </span><span>{</span> <span> </span><span>username</span><span>:</span><span> </span><span>'={{$credentials.username}}'</span><span>,</span> <span> </span><span>password</span><span>:</span><span> </span><span>'={{$credentials.password}}'</span><span>,</span> <span> </span><span>},</span> <span> </span><span>},</span> <span>};</span> </code></pre></div></td></tr></tbody></table> ### `test`# Provide a `request` object containing a URL and authentication type that n8n can use to test the credential. <table><tbody><tr><td><div><pre><span></span><span>1</span> <span>2</span> <span>3</span> <span>4</span> <span>5</span> <span>6</span></pre></div></td><td><div><pre><span></span><code><span>test</span><span>:</span><span> </span><span>ICredentialTestRequest</span><span> </span><span>=</span><span> </span><span>{</span> <span> </span><span>request</span><span>:</span><span> </span><span>{</span> <span> </span><span>baseURL</span><span>:</span><span> </span><span>'={{$credentials?.domain}}'</span><span>,</span> <span> </span><span>url</span><span>:</span><span> </span><span>'/bearer'</span><span>,</span> <span> </span><span>},</span> <span> </span><span>};</span> </code></pre></div></td></tr></tbody></table> --- ## Page: https://docs.n8n.io/integrations/creating-nodes/build/reference/http-helpers/ ## HTTP request helper for node builders# n8n provides a flexible helper for making HTTP requests, which abstracts away most of the complexity. Programmatic style only The information in this document is for node building using the programmatic style. It doesn't apply to declarative style nodes. ## Usage# Call the helper inside the `execute` function. <table><tbody><tr><td><div><pre><span></span><span>1</span> <span>2</span> <span>3</span> <span>4</span> <span>5</span> <span>6</span> <span>7</span> <span>8</span> <span>9</span></pre></div></td><td><div><pre><span></span><code><span>// If no auth needed</span> <span>const</span><span> </span><span>response</span><span> </span><span>=</span><span> </span><span>await</span><span> </span><span>this</span><span>.</span><span>helpers</span><span>.</span><span>httpRequest</span><span>(</span><span>options</span><span>);</span> <span>// If auth needed</span> <span>const</span><span> </span><span>response</span><span> </span><span>=</span><span> </span><span>await</span><span> </span><span>this</span><span>.</span><span>helpers</span><span>.</span><span>httpRequestWithAuthentication</span><span>.</span><span>call</span><span>(</span> <span> </span><span>this</span><span>,</span><span> </span> <span> </span><span>'credentialTypeName'</span><span>,</span><span> </span><span>// For example: pipedriveApi</span> <span> </span><span>options</span><span>,</span> <span>);</span> </code></pre></div></td></tr></tbody></table> `options` is an object: <table><tbody><tr><td><div><pre><span></span><span> 1</span> <span> 2</span> <span> 3</span> <span> 4</span> <span> 5</span> <span> 6</span> <span> 7</span> <span> 8</span> <span> 9</span> <span>10</span> <span>11</span> <span>12</span> <span>13</span> <span>14</span> <span>15</span> <span>16</span> <span>17</span> <span>18</span> <span>19</span> <span>20</span> <span>21</span> <span>22</span> <span>23</span> <span>24</span> <span>25</span> <span>26</span> <span>27</span></pre></div></td><td><div><pre><span></span><code><span>{</span> <span> </span><span>url</span><span>:</span><span> </span><span>string</span><span>;</span> <span> </span><span>headers?</span><span>:</span><span> </span><span>object</span><span>;</span> <span> </span><span>method</span><span>?:</span><span> </span><span>'GET'</span><span> </span><span>|</span><span> </span><span>'POST'</span><span> </span><span>|</span><span> </span><span>'PUT'</span><span> </span><span>|</span><span> </span><span>'DELETE'</span><span> </span><span>|</span><span> </span><span>'HEAD'</span><span>;</span> <span> </span><span>body?</span><span>:</span><span> </span><span>FormData</span><span> </span><span>|</span><span> </span><span>Array</span><span> </span><span>|</span><span> </span><span>string</span><span> </span><span>|</span><span> </span><span>number</span><span> </span><span>|</span><span> </span><span>object</span><span> </span><span>|</span><span> </span><span>Buffer</span><span> </span><span>|</span><span> </span><span>URLSearchParams</span><span>;</span> <span> </span><span>qs?</span><span>:</span><span> </span><span>object</span><span>;</span> <span> </span><span>arrayFormat</span><span>?:</span><span> </span><span>'indices'</span><span> </span><span>|</span><span> </span><span>'brackets'</span><span> </span><span>|</span><span> </span><span>'repeat'</span><span> </span><span>|</span><span> </span><span>'comma'</span><span>;</span> <span> </span><span>auth</span><span>?:</span><span> </span><span>{</span> <span> </span><span>username</span><span>:</span><span> </span><span>string</span><span>,</span> <span> </span><span>password</span><span>:</span><span> </span><span>string</span><span>,</span> <span> </span><span>};</span> <span> </span><span>disableFollowRedirect?</span><span>:</span><span> </span><span>boolean</span><span>;</span> <span> </span><span>encoding</span><span>?:</span><span> </span><span>'arraybuffer'</span><span> </span><span>|</span><span> </span><span>'blob'</span><span> </span><span>|</span><span> </span><span>'document'</span><span> </span><span>|</span><span> </span><span>'json'</span><span> </span><span>|</span><span> </span><span>'text'</span><span> </span><span>|</span><span> </span><span>'stream'</span><span>;</span> <span> </span><span>skipSslCertificateValidation?</span><span>:</span><span> </span><span>boolean</span><span>;</span> <span> </span><span>returnFullResponse?</span><span>:</span><span> </span><span>boolean</span><span>;</span> <span> </span><span>proxy</span><span>?:</span><span> </span><span>{</span> <span> </span><span>host</span><span>:</span><span> </span><span>string</span><span>;</span> <span> </span><span>port</span><span>:</span><span> </span><span>string</span><span> </span><span>|</span><span> </span><span>number</span><span>;</span> <span> </span><span>auth</span><span>?:</span><span> </span><span>{</span> <span> </span><span>username</span><span>:</span><span> </span><span>string</span><span>;</span> <span> </span><span>password</span><span>:</span><span> </span><span>string</span><span>;</span> <span> </span><span>},</span> <span> </span><span>protocol?</span><span>:</span><span> </span><span>string</span><span>;</span> <span> </span><span>};</span> <span> </span><span>timeout?</span><span>:</span><span> </span><span>number</span><span>;</span> <span> </span><span>json?</span><span>:</span><span> </span><span>boolean</span><span>;</span> <span>}</span><span> </span> </code></pre></div></td></tr></tbody></table> `url` is required. The other fields are optional. The default method is `GET`. Some notes about the possible fields: * `body`: you can use a regular JavaScript object for JSON payload, a buffer for file uploads, an instance of FormData for `multipart/form-data`, and `URLSearchParams` for `application/x-www-form-urlencoded`. * `headers`: a key-value pair. * If `body` is an instance of `FormData` then n8n adds `content-type: multipart/form-data` automatically. * If `body` is an instance of `URLSearchParams`, then n8n adds `content-type: application/x-www-form-urlencoded`. * To override this behavior, set a `content-type` header. * `arrayFormat`: if your query string contains an array of data, such as `const qs = {IDs: [15,17]}`, the value of `arrayFormat` defines how n8n formats it. * `indices` (default): `{ a: ['b', 'c'] }` as `a[0]=b&a[1]=c` * `brackets`: `{ a: ['b', 'c'] }` as `a[]=b&a[]=c` * `repeat`: `{ a: ['b', 'c'] }` as `a=b&a=c` * `comma`: `{ a: ['b', 'c'] }` as `a=b,c` * `auth`: Used for Basic auth. Provide `username` and `password`. n8n recommends omitting this, and using `helpers.httpRequestWithAuthentication(...)` instead. * `disableFollowRedirect`: By default, n8n follows redirects. You can set this to true to prevent this from happening. * `skipSslCertificateValidation`: Used for calling HTTPS services without proper certificate * `returnFullResponse`: Instead of returning just the body, returns an object with more data in the following format: `{body: body, headers: object, statusCode: 200, statusMessage: 'OK'}` * `encoding`: n8n can detect the content type, but you can specify `arrayBuffer` to receive a Buffer you can read from and interact with. ## Example# For an example, refer to the Mattermost node. ## Deprecation of the previous helper# The previous helper implementation using `this.helpers.request(options)` used and exposed the `request-promise` library. This was removed in version 1. To minimize incompatibility, n8n made a transparent conversion to another library called `Axios`. If you are having issues, please report them in the Community Forums or on GitHub. ## Migration guide to the new helper# The new helper is much more robust, library agnostic, and easier to use. New nodes should all use the new helper. You should strongly consider migrating existing custom nodes to the new helper. These are the main considerations when migrating: * Accepts `url`. Doesn't accept `uri`. * `encoding: null` now must be `encoding: arrayBuffer`. * `rejectUnauthorized: false` is now `skipSslCertificateValidation: true` * Use `body` according to `content-type` headers to clarify the payload. * `resolveWithFullResponse` is now `returnFullResponse` and has similar behavior --- ## Page: https://docs.n8n.io/integrations/creating-nodes/build/reference/paired-items/ Programmatic-style nodes only This guidance applies to programmatic-style nodes. If you're using declarative style, n8n handles paired items for you automatically. Use n8n's item linking to access data from items that precede the current item. n8n needs to know which input item a given output item comes from. If this information is missing, expressions in other nodes may break. As a node developer, you must ensure any items returned by your node support this. This applies to programmatic nodes (including trigger nodes). You don't need to consider item linking when building a declarative-style node. Refer to Choose your node building approach for more information on node styles. Start by reading Item linking concepts, which provides a conceptual overview of item linking, and details of the scenarios where n8n can handle the linking automatically. If you need to handle item linking manually, do this by setting `pairedItem` on each item your node returns: <table><tbody><tr><td><div><pre><span></span><span> 1</span> <span> 2</span> <span> 3</span> <span> 4</span> <span> 5</span> <span> 6</span> <span> 7</span> <span> 8</span> <span> 9</span> <span>10</span> <span>11</span> <span>12</span> <span>13</span> <span>14</span> <span>15</span> <span>16</span> <span>17</span> <span>18</span> <span>19</span> <span>20</span></pre></div></td><td><div><pre><span></span><code><span>// Use the pairedItem information of the incoming item</span> <span>newItem</span><span> </span><span>=</span><span> </span><span>{</span> <span> </span><span>"json"</span><span>:</span><span> </span><span>{</span><span> </span><span>.</span><span> </span><span>.</span><span> </span><span>.</span><span> </span><span>},</span> <span> </span><span>"pairedItem"</span><span>:</span><span> </span><span>{</span> <span> </span><span>"item"</span><span>:</span><span> </span><span>item</span><span>.</span><span>pairedItem</span><span>,</span> <span> </span><span>// Optional: choose the input to use</span> <span> </span><span>// Set this if your node combines multiple inputs</span> <span> </span><span>"input"</span><span>:</span><span> </span><span>0</span> <span>};</span> <span>// Or set the index manually</span> <span>newItem</span><span> </span><span>=</span><span> </span><span>{</span> <span> </span><span>"json"</span><span>:</span><span> </span><span>{</span><span> </span><span>.</span><span> </span><span>.</span><span> </span><span>.</span><span> </span><span>}</span> <span> </span><span>"pairedItem"</span><span>:</span><span> </span><span>{</span> <span> </span><span>"item"</span><span>:</span><span> </span><span>i</span><span>,</span> <span> </span><span>// Optional: choose the input to use</span> <span> </span><span>// Set this if your node combines multiple inputs</span> <span> </span><span>"input"</span><span>:</span><span> </span><span>0</span> <span> </span><span>},</span> <span>};</span> </code></pre></div></td></tr></tbody></table> --- ## Page: https://docs.n8n.io/integrations/creating-nodes/test/ 1. Integrations 2. Creating nodes 3. Test your node This section contains information about testing your node. There are two ways to test your node: * Manually, by running it on your own machine within a local n8n instance. * Automatically, using the linter. You should use both methods before publishing your node. --- ## Page: https://docs.n8n.io/integrations/creating-nodes/test/run-node-locally/ * Using n8n * Integrations * Hosting n8n * Code in n8n * Advanced AI * API * Embed * n8n home ↗ * Forum ↗ * Blog ↗ 1. Integrations 2. Creating nodes 3. Test your node You can test your node as you build it by running it in a local n8n instance. 1. Install n8n using npm: <table><tbody><tr><td><div><pre><span></span><span>1</span></pre></div></td><td><div><pre><span></span><code>npm<span> </span>install<span> </span>n8n<span> </span>-g </code></pre></div></td></tr></tbody></table> 2. When you are ready to test your node, publish it locally: <table><tbody><tr><td><div><pre><span></span><span>1</span> <span>2</span> <span>3</span></pre></div></td><td><div><pre><span></span><code><span># In your node directory</span> npm<span> </span>run<span> </span>build npm<span> </span>link </code></pre></div></td></tr></tbody></table> 3. Install the node into your local n8n instance: <table><tbody><tr><td><div><pre><span></span><span>1</span> <span>2</span> <span>3</span></pre></div></td><td><div><pre><span></span><code><span># In the nodes directory within your n8n installation</span> <span># node-package-name is the name from the package.json</span> npm<span> </span>link<span> </span><node-package-name> </code></pre></div></td></tr></tbody></table> Check your directory Make sure you run `npm link <node-name>` in the nodes directory within your n8n installation. This can be: * `~/.n8n/custom/` * `~/.n8n/<your-custom-name>`: if your n8n installation set a different name using `N8N_CUSTOM_EXTENSIONS`. 4. Start n8n: <table><tbody><tr><td><div><pre><span></span><span>1</span></pre></div></td><td><div><pre><span></span><code>n8n start </code></pre></div></td></tr></tbody></table> 5. Open n8n in your browser. You should see your nodes when you search for them in the nodes panel. Node names Make sure you search using the node name, not the package name. For example, if your npm package name is `n8n-nodes-weather-nodes`, and the package contains nodes named `rain`, `sun`, `snow`, you should search for `rain`, not `weather-nodes`. ### Troubleshooting# * There's no `custom` directory in `~/.n8n` local installation. You have to create `custom` directory manually and run `npm init` <table><tbody><tr><td><div><pre><span></span><span>1</span> <span>2</span> <span>3</span> <span>4</span></pre></div></td><td><div><pre><span></span><code><span># In ~/.n8n directory run</span> mkdir<span> </span>custom<span> </span> <span>cd</span><span> </span>custom<span> </span> npm<span> </span>init </code></pre></div></td></tr></tbody></table> --- ## Page: https://docs.n8n.io/integrations/creating-nodes/test/node-linter/ n8n's node linter, `eslint-plugin-n8n-nodes-base`, statically analyzes ("lints") the source code of n8n nodes and credentials in the official repository and in community packages. The linter detects issues and automatically fixes them to help you follow best practices. `eslint-plugin-n8n-nodes-base` contains a collection of rules for node files (`*.node.ts`), resource description files (`*Description.ts`), credential files (`*.credentials.ts`), and the `package.json` of a community package. ## Setup# If using the n8n node starter: Run `npm install` in the starter project to install all dependencies. Once the installation finishes, the linter is available to you. If using VS Code, install the ESLint VS Code extension. For other IDEs, refer to their ESLint integrations. Don't edit the configuration file `.eslintrc.js` contains the configuration for `eslint-plugin-n8n-nodes-base`. Don't edit this file. ## Usage# You can use the linter in a community package or in the main n8n repository. ### Linting# In a community package, the linter runs automatically after installing dependencies and before publishing the package to npm. In the main n8n repository, the linter runs automatically using GitHub Actions whenever you push to your pull request. In both cases, VS Code lints in the background as you work on your project. Hover over a detected issue to see a full description of the linting and a link to further information. You can also run the linter manually: * Run `npm run lint` to lint and view detected issues in your console. * Run `npm run lintfix` to lint and automatically fix issues. The linter fixes violations of rules marked as automatically fixable. Both commands can run in the root directory of your community package, or in `/packages/nodes-base/` in the main repository. ### Exceptions# Instead of fixing a rule violation, you can also make an exception for it, so the linter doesn't flag it. To make a lint exception from VS Code: hover over the issue and click on `Quick fix` (or `cmd+.` in macOS) and select **Disable {rule} for this line**. Only disable rules for a line where you have good reason to. If you think the linter is incorrectly reporting an issue, please report it in the linter repository. To add a lint exception to a single file, add a code comment. In particular, TSLint rules may not show up in VS Code and may need to be turned off using code comments. Refer to the TSLint documentation for more guidance. --- ## Page: https://docs.n8n.io/integrations/creating-nodes/test/troubleshooting-node-development/ ## Credentials# ### Error message: 'Credentials of type "\*" aren't known'# Check that the name in the credentials array matches the name used in the property name of the credentials' class. 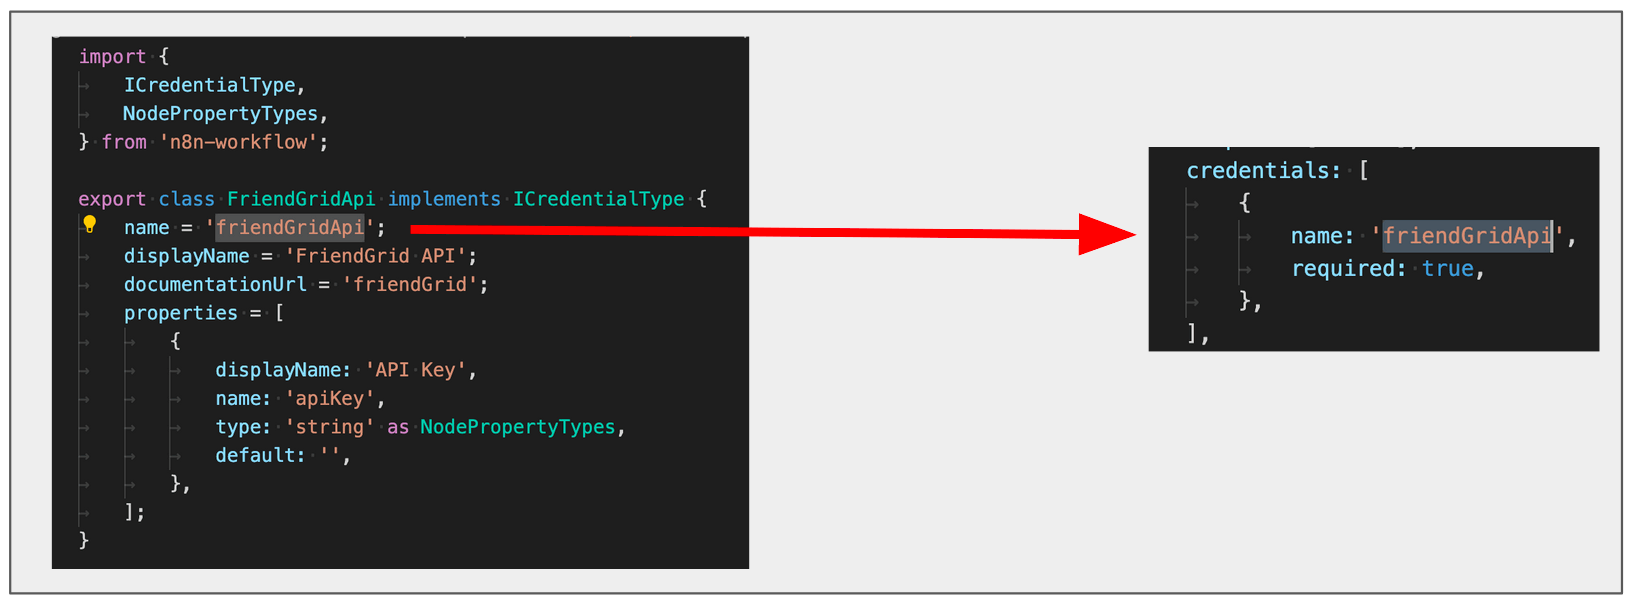 ## Editor UI# ### Error message: 'There was a problem loading init data: API-Server can not be reached. It's probably down'# * Check that the names of the node file, node folder, and class match the path added to `packages/nodes-base/package.json`. * Check that the names used in the `displayOptions` property are names used by UI elements in the node. ### Node icon doesn't show up in the Add Node menu and the Editor UI# * Check that the icon is in the same folder as the node. * Check that it's either in PNG or SVG format. * When the `icon` property references the icon file, check that it includes the logo extension (`.png` or `.svg`) and that it prefixes it with `file:`. For example, `file:friendGrid.png` or `file:friendGrid.svg`. ### Node icon doesn't fit# * If you use an SVG file, make sure the canvas size is square. You can find instructions to change the canvas size of an SVG file using GIMP here. * If you use a PNG file, make sure that it's 60x60 pixels. Check that you registered the node in the `package.json` file in your project. ### Changes to the description properties don't show in the UI on refreshing# Every time you change the description properties, you have to stop the current n8n process (`ctrl` + `c`) and run it again. You may also need to re-run `npm link`. ### Linter incorrectly warning about file name case# The node linter has rules for file names, including what case they should be. Windows users may encounter an issue when renaming files that causes the linter to continue giving warnings, even after you rename the files. This is due to a known Windows issue with changing case when renaming files. --- ## Page: https://docs.n8n.io/integrations/creating-nodes/deploy/ 1. Integrations 2. Creating nodes 3. Deploy your node This section contains details on how to deploy and share your node. You can choose to: * Submit your node to the community node repository. This makes it available for everyone to use, and allows you to install and use it like any other community node. This is the only way to use custom nodes on cloud. * Install the node into your n8n instance as a private node. --- ## Page: https://docs.n8n.io/integrations/creating-nodes/deploy/submit-community-nodes/ Subject to change The standards described in this document are for the first release of the community nodes repository. These may change in future releases. Community nodes are npm packages, hosted in the npm registry. When building a node to submit to the community node repository, use the following resources to make sure your node setup is correct: * View the starter node and n8n's own nodes for some examples. * Refer to the documentation on building your own nodes. * Make sure your node follows the standards for community nodes. ## Standards# To make your node available to the n8n community node repository, you must: * Make sure the package name starts with `n8n-nodes-` or `@<scope>/n8n-nodes-`. For example, `n8n-nodes-weather` or `@weatherPlugins/n8n-nodes-weather`. * Include `n8n-community-node-package` in your package keywords. * Make sure that you add your nodes and credentials to the `package.json` file inside the `n8n` attribute. Refer to the package.json in the starter node for an example. * Check your node using the linter and test it locally to ensure it works. * Submit the package to the npm registry. Refer to npm's documentation on Contributing packages to the registry for more information. --- ## Page: https://docs.n8n.io/integrations/creating-nodes/deploy/install-private-nodes/ You can build your own nodes and install them in your n8n instance without publishing them on npm. This is useful for nodes that you create for internal use only at your company. ## Install your node in a Docker n8n instance# If you're running n8n using Docker, you need to create a Docker image with the node installed in n8n. 1. Create a Dockerfile and paste the code from this Dockerfile. Your Dockerfile should look like this: <table><tbody><tr><td><div><pre><span></span><span> 1</span> <span> 2</span> <span> 3</span> <span> 4</span> <span> 5</span> <span> 6</span> <span> 7</span> <span> 8</span> <span> 9</span> <span>10</span> <span>11</span> <span>12</span> <span>13</span> <span>14</span> <span>15</span> <span>16</span> <span>17</span> <span>18</span> <span>19</span> <span>20</span> <span>21</span> <span>22</span> <span>23</span> <span>24</span> <span>25</span> <span>26</span> <span>27</span> <span>28</span> <span>29</span> <span>30</span> <span>31</span> <span>32</span> <span>33</span> <span>34</span> <span>35</span> <span>36</span></pre></div></td><td><div><pre><span></span><code><span>FROM</span><span> </span><span>node:16-alpine</span> <span>ARG</span><span> </span>N8N_VERSION <span>RUN</span><span> </span><span>if</span><span> </span><span>[</span><span> </span>-z<span> </span><span>"</span><span>$N8N_VERSION</span><span>"</span><span> </span><span>]</span><span> </span><span>;</span><span> </span><span>then</span><span> </span><span>echo</span><span> </span><span>"The N8N_VERSION argument is missing!"</span><span> </span><span>;</span><span> </span><span>exit</span><span> </span><span>1</span><span>;</span><span> </span><span>fi</span> <span># Update everything and install needed dependencies</span> <span>RUN</span><span> </span>apk<span> </span>add<span> </span>--update<span> </span>graphicsmagick<span> </span>tzdata<span> </span>git<span> </span>tini<span> </span>su-exec <span># Set a custom user to not have n8n run as root</span> <span>USER</span><span> </span><span>root</span> <span># Install n8n and the packages it needs to build it correctly.</span> <span>RUN</span><span> </span>apk<span> </span>--update<span> </span>add<span> </span>--virtual<span> </span>build-dependencies<span> </span>python3<span> </span>build-base<span> </span>ca-certificates<span> </span><span>&&</span><span> </span><span>\</span> <span> </span>npm<span> </span>config<span> </span><span>set</span><span> </span>python<span> </span><span>"</span><span>$(</span>which<span> </span>python3<span>)</span><span>"</span><span> </span><span>&&</span><span> </span><span>\</span> <span> </span><span>npm_config_user</span><span>=</span>root<span> </span>npm<span> </span>install<span> </span>-g<span> </span>full-icu<span> </span>n8n@<span>${</span><span>N8N_VERSION</span><span>}</span><span> </span><span>&&</span><span> </span><span>\</span> <span> </span>apk<span> </span>del<span> </span>build-dependencies<span> </span><span>\</span> <span> </span><span>&&</span><span> </span>rm<span> </span>-rf<span> </span>/root<span> </span>/tmp/*<span> </span>/var/cache/apk/*<span> </span><span>&&</span><span> </span>mkdir<span> </span>/root<span>;</span> <span># Install fonts</span> <span>RUN</span><span> </span>apk<span> </span>--no-cache<span> </span>add<span> </span>--virtual<span> </span>fonts<span> </span>msttcorefonts-installer<span> </span>fontconfig<span> </span><span>&&</span><span> </span><span>\</span> <span> </span>update-ms-fonts<span> </span><span>&&</span><span> </span><span>\</span> <span> </span>fc-cache<span> </span>-f<span> </span><span>&&</span><span> </span><span>\</span> <span> </span>apk<span> </span>del<span> </span>fonts<span> </span><span>&&</span><span> </span><span>\</span> <span> </span>find<span> </span>/usr/share/fonts/truetype/msttcorefonts/<span> </span>-type<span> </span>l<span> </span>-exec<span> </span>unlink<span> </span><span>{}</span><span> </span><span>\;</span><span> </span><span>\</span> <span> </span><span>&&</span><span> </span>rm<span> </span>-rf<span> </span>/root<span> </span>/tmp/*<span> </span>/var/cache/apk/*<span> </span><span>&&</span><span> </span>mkdir<span> </span>/root <span>ENV</span><span> </span>NODE_ICU_DATA<span> </span>/usr/local/lib/node_modules/full-icu <span>WORKDIR</span><span> </span><span>/data</span> <span>COPY</span><span> </span>docker-entrypoint.sh<span> </span>/docker-entrypoint.sh <span>ENTRYPOINT</span><span> </span><span>[</span><span>"tini"</span><span>,</span><span> </span><span>"--"</span><span>,</span><span> </span><span>"/docker-entrypoint.sh"</span><span>]</span> <span>EXPOSE</span><span> </span><span>5678/tcp</span> </code></pre></div></td></tr></tbody></table> 2. Compile your custom node code (`npm run build` if you are using nodes starter). Copy the **node** and **credential** folders from within the **dist** folder into your container's `~/.n8n/custom/` directory. This makes them available to Docker. 3. Download the docker-entrypoint.sh file, and place it in the same directory as your Dockerfile. 4. Build your Docker image: <table><tbody><tr><td><div><pre><span></span><span>1</span> <span>2</span> <span>3</span></pre></div></td><td><div><pre><span></span><code><span># Replace <n8n-version-number> with the n8n release version number. </span> <span># For example, N8N_VERSION=0.177.0</span> docker<span> </span>build<span> </span>--build-arg<span> </span><span>N8N_VERSION</span><span>=</span><n8n-version-number><span> </span>--tag<span>=</span>customizedn8n<span> </span>. </code></pre></div></td></tr></tbody></table> You can now use your node in Docker. ## Install your node in a global n8n instance# If you've installed n8n globally, make sure that you install your node inside n8n. n8n will find the module and load it automatically. --- ## Page: https://docs.n8n.io/hosting/community-edition-features/ The community edition includes almost the complete feature set of n8n, except for the features listed here. The community edition doesn't include these features: * Custom Variables * Environments * External secrets * External storage for binary data * Log streaming (Logging _is_ included) * Multi-main mode (Queue mode _is_ included) * Projects * SSO (SAML, LDAP) * Sharing (workflows, credentials) (Only the instance owner and the user who creates them can access workflows and credentials) * Version control using Git * Workflow history (You can get one day of workflow history with the community edition by registering) These features are available on the Enterprise Cloud plan, including the self-hosted Enterprise edition. Some of these features are available on the Starter and Pro Cloud plan. See pricing for reference. You can unlock extra features by registering your n8n community edition. You register with your email and receive a license key. Registering unlocks these features for the community edition: * Folders: Organize your workflows into tidy folders * Debug in editor: Copy and pin execution data when working on a workflow * One day of workflow history: 24 hours of workflow history so you can revert back to previous workflow versions * Custom execution data: Save, find, and annotate execution metadata To register a new community edition instance, select the option during your initial account creation. To register an existing community edition instance: 1. Select the **three dots icon**  in the lower-left corner. 2. Select **Settings** and then **Usage and plan**. 3. Select **Unlock** to enter your email and then select **Send me a free license key**. 4. Check your email for the account you entered. Once you have a license key, activate it by clicking the button in the license email or by visiting **Options > Settings > Usage and plan** and selecting **Enter activation key**. Once activated, your license will not expire. We may change the unlocked features in the future. This will not impact previously unlocked features. --- ## Page: https://docs.n8n.io/hosting/installation/npm/ npm is a quick way to get started with n8n on your local machine. You must have Node.js installed. n8n requires Node.js 18 or above. Latest and Next versions n8n releases a new minor version most weeks. The `latest` version is for production use. `next` is the most recent release. You should treat `next` as a beta: it may be unstable. To report issues, use the forum. Current `latest`: 1.86.1 Current `next`: 1.88.0 ## Try n8n with npx# You can try n8n without installing it using npx. From the terminal, run: <table><tbody><tr><td><div><pre><span></span><span>1</span></pre></div></td><td><div><pre><span></span><code>npx<span> </span>n8n </code></pre></div></td></tr></tbody></table> This command will download everything that's needed to start n8n. You can then access n8n and start building workflows by opening http://localhost:5678. ## Install globally with npm# To install n8n globally, use npm: <table><tbody><tr><td><div><pre><span></span><span>1</span></pre></div></td><td><div><pre><span></span><code>npm<span> </span>install<span> </span>n8n<span> </span>-g </code></pre></div></td></tr></tbody></table> To install or update to a specific version of n8n use the `@` syntax to specify the version. For example: <table><tbody><tr><td><div><pre><span></span><span>1</span></pre></div></td><td><div><pre><span></span><code>npm<span> </span>install<span> </span>-g<span> </span>n8n@0.126.1 </code></pre></div></td></tr></tbody></table> To install `next`: <table><tbody><tr><td><div><pre><span></span><span>1</span></pre></div></td><td><div><pre><span></span><code>npm<span> </span>install<span> </span>-g<span> </span>n8n@next </code></pre></div></td></tr></tbody></table> After the installation, start n8n by running: <table><tbody><tr><td><div><pre><span></span><span>1</span> <span>2</span> <span>3</span></pre></div></td><td><div><pre><span></span><code>n8n <span># or</span> n8n<span> </span>start </code></pre></div></td></tr></tbody></table> ### Next steps# Try out n8n using the Quickstarts. ## Updating# To update your n8n instance to the `latest` version, run: <table><tbody><tr><td><div><pre><span></span><span>1</span></pre></div></td><td><div><pre><span></span><code>npm<span> </span>update<span> </span>-g<span> </span>n8n </code></pre></div></td></tr></tbody></table> To install the `next` version: <table><tbody><tr><td><div><pre><span></span><span>1</span></pre></div></td><td><div><pre><span></span><code>npm<span> </span>install<span> </span>-g<span> </span>n8n@next </code></pre></div></td></tr></tbody></table> ## n8n with tunnel# Danger Use this for local development and testing. It isn't safe to use it in production. To use webhooks for trigger nodes of external services like GitHub, n8n has to be reachable from the web. n8n runs a tunnel service that can redirect requests from n8n's servers to your local n8n instance. Start n8n with `--tunnel` by running: <table><tbody><tr><td><div><pre><span></span><span>1</span></pre></div></td><td><div><pre><span></span><code>n8n<span> </span>start<span> </span>--tunnel </code></pre></div></td></tr></tbody></table> ## Reverting an upgrade# Install the older version that you want to go back to. If the upgrade involved a database migration: 1. Check the feature documentation and release notes to see if there are any manual changes you need to make. 2. Run `n8n db:revert` on your current version to roll back the database. If you want to revert more than one database migration, you need to repeat this process. ## Windows troubleshooting# If you are experiencing issues running n8n on Windows, make sure your Node.js environment is correctly set up. Follow Microsoft's guide to Install NodeJS on Windows. --- ## Page: https://docs.n8n.io/hosting/installation/docker/ ## Docker Installation# Docker offers the following advantages: * Installs n8n in a clean environment. * Easier setup for your preferred database. * Can avoid issues due to different operating systems, as Docker provides a consistent system. * Can avoid compatibility issues due to differences in operating systems and tools. * Makes migrating to new hosts or environments more straightforward. You can also use n8n in Docker with Docker Compose. You can find Docker Compose configurations for various architectures in the n8n-hosting repository. Self-hosting knowledge prerequisites Self-hosting n8n requires technical knowledge, including: * Setting up and configuring servers and containers * Managing application resources and scaling * Securing servers and applications * Configuring n8n n8n recommends self-hosting for expert users. Mistakes can lead to data loss, security issues, and downtime. If you aren't experienced at managing servers, n8n recommends n8n Cloud. ## Prerequisites# Before proceeding, install Docker Desktop. Linux Users Docker Desktop is available for Mac and Windows. Linux users must install Docker Engine and Docker Compose individually for your distribution. Latest and Next versions n8n releases a new minor version most weeks. The `latest` version is for production use. `next` is the most recent release. You should treat `next` as a beta: it may be unstable. To report issues, use the forum. Current `latest`: 1.86.1 Current `next`: 1.88.0 ## Starting n8n# From your terminal, run: <table><tbody><tr><td><div><pre><span></span><span>1</span> <span>2</span> <span>3</span></pre></div></td><td><div><pre><span></span><code>docker<span> </span>volume<span> </span>create<span> </span>n8n_data docker<span> </span>run<span> </span>-it<span> </span>--rm<span> </span>--name<span> </span>n8n<span> </span>-p<span> </span><span>5678</span>:5678<span> </span>-v<span> </span>n8n_data:/home/node/.n8n<span> </span>docker.n8n.io/n8nio/n8n </code></pre></div></td></tr></tbody></table> This command creates a volume to store persistent data, downloads the required n8n image, and starts your container, exposed on port `5678`. To save your work between container restarts, it also mounts a docker volume, `n8n_data`, to persist your data locally. Once running, you can access n8n by opening: http://localhost:5678 ## Using with PostgreSQL# By default, n8n uses SQLite to save credentials, past executions, and workflows. n8n also supports PostgreSQL, configurable using environment variables as detailed below. When using PostgreSQL, it's still important to persist the data stored in the `/home/node/.n8n` folder. This includes n8n user data and, even more importantly, the encryption key for credentials. It's also the name of the webhook when using the n8n tunnel. If n8n can't find the `/home/node/.n8n` directory on startup, it automatically creates one. In this case, all existing credentials that n8n saved with a different encryption key will no longer work. Keep in mind While persisting the `/home/node/.n8n` directory with PostgreSQL is the recommended best practice, it's not explicitly required. You can provide the encryption key by passing the `N8N_ENCRYPTION_KEY` environment variable when starting your Docker container. To use n8n with PostgreSQL, execute the following commands, replacing the placeholders (depicted within angled brackets, for example `<POSTGRES_USER>`) with your actual values: <table><tbody><tr><td><div><pre><span></span><span> 1</span> <span> 2</span> <span> 3</span> <span> 4</span> <span> 5</span> <span> 6</span> <span> 7</span> <span> 8</span> <span> 9</span> <span>10</span> <span>11</span> <span>12</span> <span>13</span> <span>14</span></pre></div></td><td><div><pre><span></span><code>docker<span> </span>volume<span> </span>create<span> </span>n8n_data docker<span> </span>run<span> </span>-it<span> </span>--rm<span> </span><span>\</span> <span> </span>--name<span> </span>n8n<span> </span><span>\</span> <span> </span>-p<span> </span><span>5678</span>:5678<span> </span><span>\</span> <span> </span>-e<span> </span><span>DB_TYPE</span><span>=</span>postgresdb<span> </span><span>\</span> <span> </span>-e<span> </span><span>DB_POSTGRESDB_DATABASE</span><span>=</span><POSTGRES_DATABASE><span> </span><span>\</span> <span> </span>-e<span> </span><span>DB_POSTGRESDB_HOST</span><span>=</span><POSTGRES_HOST><span> </span><span>\</span> <span> </span>-e<span> </span><span>DB_POSTGRESDB_PORT</span><span>=</span><POSTGRES_PORT><span> </span><span>\</span> <span> </span>-e<span> </span><span>DB_POSTGRESDB_USER</span><span>=</span><POSTGRES_USER><span> </span><span>\</span> <span> </span>-e<span> </span><span>DB_POSTGRESDB_SCHEMA</span><span>=</span><POSTGRES_SCHEMA><span> </span><span>\</span> <span> </span>-e<span> </span><span>DB_POSTGRESDB_PASSWORD</span><span>=</span><POSTGRES_PASSWORD><span> </span><span>\</span> <span> </span>-v<span> </span>n8n_data:/home/node/.n8n<span> </span><span>\</span> <span> </span>docker.n8n.io/n8nio/n8n </code></pre></div></td></tr></tbody></table> You can find a complete `docker-compose` file for PostgreSQL in the n8n hosting repository. ## Setting timezone# To define the timezone n8n should use, you can set the `GENERIC_TIMEZONE` environment variable. Schedule-oriented nodes, like the Schedule Trigger node use this to determine the correct timezone. You can set the system timezone, which controls what some scripts and commands like `date` return, using the `TZ` environment variable. This example sets the same timezone for both variables: <table><tbody><tr><td><div><pre><span></span><span>1</span> <span>2</span> <span>3</span> <span>4</span> <span>5</span> <span>6</span> <span>7</span> <span>8</span> <span>9</span></pre></div></td><td><div><pre><span></span><code>docker<span> </span>volume<span> </span>create<span> </span>n8n_data docker<span> </span>run<span> </span>-it<span> </span>--rm<span> </span><span>\</span> <span> </span>--name<span> </span>n8n<span> </span><span>\</span> <span> </span>-p<span> </span><span>5678</span>:5678<span> </span><span>\</span> <span> </span>-e<span> </span><span>GENERIC_TIMEZONE</span><span>=</span><span>"Europe/Berlin"</span><span> </span><span>\</span> <span> </span>-e<span> </span><span>TZ</span><span>=</span><span>"Europe/Berlin"</span><span> </span><span>\</span> <span> </span>-v<span> </span>n8n_data:/home/node/.n8n<span> </span><span>\</span> <span> </span>docker.n8n.io/n8nio/n8n </code></pre></div></td></tr></tbody></table> ## Updating# To update n8n, in Docker Desktop, navigate to the **Images** tab and select **Pull** from the context menu to download the latest n8n image:  You can also use the command line to pull the latest, or a specific version: <table><tbody><tr><td><div><pre><span></span><span>1</span> <span>2</span> <span>3</span> <span>4</span> <span>5</span> <span>6</span> <span>7</span> <span>8</span></pre></div></td><td><div><pre><span></span><code><span># Pull latest (stable) version</span> docker<span> </span>pull<span> </span>docker.n8n.io/n8nio/n8n <span># Pull specific version</span> docker<span> </span>pull<span> </span>docker.n8n.io/n8nio/n8n:1.81.0 <span># Pull next (unstable) version</span> docker<span> </span>pull<span> </span>docker.n8n.io/n8nio/n8n:next </code></pre></div></td></tr></tbody></table> After pulling the updated image, stop your n8n container and start it again. You can also use the command line. Replace `<container_id>` in the commands below with the container ID you find in the first command: <table><tbody><tr><td><div><pre><span></span><span> 1</span> <span> 2</span> <span> 3</span> <span> 4</span> <span> 5</span> <span> 6</span> <span> 7</span> <span> 8</span> <span> 9</span> <span>10</span> <span>11</span></pre></div></td><td><div><pre><span></span><code><span># Find your container ID</span> docker<span> </span>ps<span> </span>-a <span># Stop the container with the `<container_id>`</span> docker<span> </span>stop<span> </span><container_id> <span># Remove the container with the `<container_id>`</span> docker<span> </span>rm<span> </span><container_id> <span># Start the container</span> docker<span> </span>run<span> </span>--name<span>=</span><container_name><span> </span><span>[</span>options<span>]</span><span> </span>-d<span> </span>docker.n8n.io/n8nio/n8n </code></pre></div></td></tr></tbody></table> ### Updating Docker Compose# If you run n8n using a Docker Compose file, follow these steps to update n8n: <table><tbody><tr><td><div><pre><span></span><span>1</span> <span>2</span> <span>3</span> <span>4</span> <span>5</span> <span>6</span> <span>7</span> <span>8</span></pre></div></td><td><div><pre><span></span><code><span># Pull latest version</span> docker<span> </span>compose<span> </span>pull <span># Stop and remove older version</span> docker<span> </span>compose<span> </span>down <span># Start the container</span> docker<span> </span>compose<span> </span>up<span> </span>-d </code></pre></div></td></tr></tbody></table> ## Further reading# You can find more information about Docker setup in the README file for the Docker image. ## n8n with tunnel# Danger Use this for local development and testing. It isn't safe to use it in production. To use webhooks for trigger nodes of external services like GitHub, n8n has to be reachable from the web. n8n runs a tunnel service that can redirect requests from n8n's servers to your local n8n instance. Start n8n with `--tunnel` by running: <table><tbody><tr><td><div><pre><span></span><span>1</span> <span>2</span> <span>3</span> <span>4</span> <span>5</span> <span>6</span> <span>7</span> <span>8</span></pre></div></td><td><div><pre><span></span><code>docker<span> </span>volume<span> </span>create<span> </span>n8n_data docker<span> </span>run<span> </span>-it<span> </span>--rm<span> </span><span>\</span> <span> </span>--name<span> </span>n8n<span> </span><span>\</span> <span> </span>-p<span> </span><span>5678</span>:5678<span> </span><span>\</span> <span> </span>-v<span> </span>n8n_data:/home/node/.n8n<span> </span><span>\</span> <span> </span>docker.n8n.io/n8nio/n8n<span> </span><span>\</span> <span> </span>start<span> </span>--tunnel </code></pre></div></td></tr></tbody></table> ## Next steps# * Learn more about configuring and scaling n8n. * Or explore using n8n: try the Quickstarts. --- ## Page: https://docs.n8n.io/hosting/installation/server-setups/ 1. Hosting n8n 2. Installation 3. Server setups Self-host with Docker Compose: * Digital Ocean * Heroku * Hetzner Cloud Starting points for a Kubernetes setup: * AWS * Azure * Google Cloud Platform Configuration guides to help you get started on other platforms: * Docker Compose --- ## Page: https://docs.n8n.io/hosting/installation/server-setups/digital-ocean/ ## Hosting n8n on DigitalOcean# This hosting guide shows you how to self-host n8n on a DigitalOcean droplet. It uses: * Caddy (a reverse proxy) to allow access to the Droplet from the internet. Caddy will also automatically create and manage SSL / TLS certificates for your n8n instance. * Docker Compose to create and define the application components and how they work together. Self-hosting knowledge prerequisites Self-hosting n8n requires technical knowledge, including: * Setting up and configuring servers and containers * Managing application resources and scaling * Securing servers and applications * Configuring n8n n8n recommends self-hosting for expert users. Mistakes can lead to data loss, security issues, and downtime. If you aren't experienced at managing servers, n8n recommends n8n Cloud. Latest and Next versions n8n releases a new minor version most weeks. The `latest` version is for production use. `next` is the most recent release. You should treat `next` as a beta: it may be unstable. To report issues, use the forum. Current `latest`: 1.86.1 Current `next`: 1.88.0 ## Create a Droplet# 1. Log in to DigitalOcean. 2. Select the project to host the Droplet, or create a new project. 3. In your project, select **Droplets** from the **Manage** menu. 4. Create a new Droplet using the Docker image available on the **Marketplace** tab. Droplet resources When creating the Droplet, DigitalOcean asks you to choose a plan. For most usage levels, a basic shared CPU plan is enough. SSH key or Password DigitalOcean lets you choose between SSH key and password-based authentication. SSH keys are considered more secure. ## Log in to your Droplet and create new user# The rest of this guide requires you to log in to the Droplet using a terminal with SSH. Refer to How to Connect to Droplets with SSH for more information. You should create a new user, to avoid working as the root user: 1. Log in as root. 2. Create a new user: <table><tbody><tr><td><div><pre><span></span><span>1</span></pre></div></td><td><div><pre><span></span><code>adduser<span> </span><username> </code></pre></div></td></tr></tbody></table> 3. Follow the prompts in the CLI to finish creating the user. 4. Grant the new user administrative privileges: <table><tbody><tr><td><div><pre><span></span><span>1</span></pre></div></td><td><div><pre><span></span><code>usermod<span> </span>-aG<span> </span>sudo<span> </span><username> </code></pre></div></td></tr></tbody></table> You can now run commands with superuser privileges by using `sudo` before the command. 5. Follow the steps to set up SSH for the new user: Add Public Key Authentication. 6. Log out of the droplet. 7. Log in using SSH as the new user. ## Clone configuration repository# Docker Compose, n8n, and Caddy require a series of folders and configuration files. You can clone these from this repository into the home folder of the logged-in user on your Droplet. The following steps will tell you which file to change and what changes to make. Clone the repository with the following command: <table><tbody><tr><td><div><pre><span></span><span>1</span></pre></div></td><td><div><pre><span></span><code>git<span> </span>clone<span> </span>https://github.com/n8n-io/n8n-docker-caddy.git </code></pre></div></td></tr></tbody></table> And change directory to the root of the repository you cloned: <table><tbody><tr><td><div><pre><span></span><span>1</span></pre></div></td><td><div><pre><span></span><code><span>cd</span><span> </span>n8n-docker-caddy </code></pre></div></td></tr></tbody></table> ## Default folders and files# The host operating system (the DigitalOcean Droplet) copies the two folders you created to Docker containers to make them available to Docker. The two folders are: * `caddy_config`: Holds the Caddy configuration files. * `local_files`: A folder for files you upload or add using n8n. ### Create Docker volumes# To persist the Caddy cache between restarts and speed up start times, create a Docker volume that Docker reuses between restarts: <table><tbody><tr><td><div><pre><span></span><span>1</span></pre></div></td><td><div><pre><span></span><code>sudo<span> </span>docker<span> </span>volume<span> </span>create<span> </span>caddy_data </code></pre></div></td></tr></tbody></table> Create a Docker volume for the n8n data: <table><tbody><tr><td><div><pre><span></span><span>1</span></pre></div></td><td><div><pre><span></span><code>sudo<span> </span>docker<span> </span>volume<span> </span>create<span> </span>n8n_data </code></pre></div></td></tr></tbody></table> ## Set up DNS# n8n typically operates on a subdomain. Create a DNS record with your provider for the subdomain and point it to the IP address of the Droplet. The exact steps for this depend on your DNS provider, but typically you need to create a new "A" record for the n8n subdomain. DigitalOcean provide An Introduction to DNS Terminology, Components, and Concepts. ## Open ports# n8n runs as a web application, so the Droplet needs to allow incoming access to traffic on port 80 for non-secure traffic, and port 443 for secure traffic. Open the following ports in the Droplet's firewall by running the following two commands: <table><tbody><tr><td><div><pre><span></span><span>1</span> <span>2</span></pre></div></td><td><div><pre><span></span><code>sudo<span> </span>ufw<span> </span>allow<span> </span><span>80</span> sudo<span> </span>ufw<span> </span>allow<span> </span><span>443</span> </code></pre></div></td></tr></tbody></table> ## Configure n8n# n8n needs some environment variables set to pass to the application running in the Docker container. The example `.env` file contains placeholders you need to replace with values of your own. Open the file with the following command: <table><tbody><tr><td><div><pre><span></span><span>1</span></pre></div></td><td><div><pre><span></span><code>nano<span> </span>.env </code></pre></div></td></tr></tbody></table> The file contains inline comments to help you know what to change. Refer to Environment variables for n8n environment variables details. ## The Docker Compose file# The Docker Compose file (`docker-compose.yml`) defines the services the application needs, in this case Caddy and n8n. * The Caddy service definition defines the ports it uses and the local volumes to copy to the containers. * The n8n service definition defines the ports it uses, the environment variables n8n needs to run (some defined in the `.env` file), and the volumes it needs to copy to the containers. The Docker Compose file uses the environment variables set in the `.env` file, so you shouldn't need to change it's content, but to take a look, run the following command: <table><tbody><tr><td><div><pre><span></span><span>1</span></pre></div></td><td><div><pre><span></span><code>nano<span> </span>docker-compose.yml </code></pre></div></td></tr></tbody></table> ## Configure Caddy# Caddy needs to know which domains it should serve, and which port to expose to the outside world. Edit the `Caddyfile` file in the `caddy_config` folder. <table><tbody><tr><td><div><pre><span></span><span>1</span></pre></div></td><td><div><pre><span></span><code>nano<span> </span>caddy_config/Caddyfile </code></pre></div></td></tr></tbody></table> Change the placeholder domain to yours. If you followed the steps to name the subdomain n8n, your full domain is similar to `n8n.example.com`. The `n8n` in the `reverse_proxy` setting tells Caddy to use the service definition defined in the `docker-compose.yml` file: <table><tbody><tr><td><div><pre><span></span><span>1</span> <span>2</span> <span>3</span> <span>4</span> <span>5</span></pre></div></td><td><div><pre><span></span><code>n8n.<domain>.<suffix> { reverse_proxy n8n:5678 { flush_interval -1 } } </code></pre></div></td></tr></tbody></table> If you were to use `automate.example.com`, your `Caddyfile` may look something like: <table><tbody><tr><td><div><pre><span></span><span>1</span> <span>2</span> <span>3</span> <span>4</span> <span>5</span></pre></div></td><td><div><pre><span></span><code>automate.example.com { reverse_proxy n8n:5678 { flush_interval -1 } } </code></pre></div></td></tr></tbody></table> ## Start Docker Compose# Start n8n and Caddy with the following command: <table><tbody><tr><td><div><pre><span></span><span>1</span></pre></div></td><td><div><pre><span></span><code>sudo<span> </span>docker<span> </span>compose<span> </span>up<span> </span>-d </code></pre></div></td></tr></tbody></table> This may take a few minutes. ## Test your setup# In your browser, open the URL formed of the subdomain and domain name defined earlier. Enter the user name and password defined earlier, and you should be able to access n8n. ## Stop n8n and Caddy# You can stop n8n and Caddy with the following command: <table><tbody><tr><td><div><pre><span></span><span>1</span></pre></div></td><td><div><pre><span></span><code>sudo<span> </span>docker<span> </span>compose<span> </span>stop </code></pre></div></td></tr></tbody></table> ## Updating# If you run n8n using a Docker Compose file, follow these steps to update n8n: <table><tbody><tr><td><div><pre><span></span><span>1</span> <span>2</span> <span>3</span> <span>4</span> <span>5</span> <span>6</span> <span>7</span> <span>8</span></pre></div></td><td><div><pre><span></span><code><span># Pull latest version</span> docker<span> </span>compose<span> </span>pull <span># Stop and remove older version</span> docker<span> </span>compose<span> </span>down <span># Start the container</span> docker<span> </span>compose<span> </span>up<span> </span>-d </code></pre></div></td></tr></tbody></table> ## Next steps# * Learn more about configuring and scaling n8n. * Or explore using n8n: try the Quickstarts. --- ## Page: https://docs.n8n.io/hosting/installation/server-setups/heroku/ ## Hosting n8n on Heroku# This hosting guide shows you how to self-host n8n on Heroku. It uses: * Docker Compose to create and define the application components and how they work together. * Heroku's PostgreSQL service to host n8n's data storage. * A **Deploy to Heroku** button offering a one click, with minor configuration, deployment. Self-hosting knowledge prerequisites Self-hosting n8n requires technical knowledge, including: * Setting up and configuring servers and containers * Managing application resources and scaling * Securing servers and applications * Configuring n8n n8n recommends self-hosting for expert users. Mistakes can lead to data loss, security issues, and downtime. If you aren't experienced at managing servers, n8n recommends n8n Cloud. Latest and Next versions n8n releases a new minor version most weeks. The `latest` version is for production use. `next` is the most recent release. You should treat `next` as a beta: it may be unstable. To report issues, use the forum. Current `latest`: 1.86.1 Current `next`: 1.88.0 ## Use the deployment template to create a Heroku project# The quickest way to get started with deploying n8n to Heroku is using the **Deploy to Heroku** button:  This opens the **Create New App** page on Heroku. Set a name for the project, and choose the region to deploy the project to. ### Configure environment variables# Heroku pre-fills the configuration options defined in the `env` section of the `app.json` file, which also sets default values for the environment variables n8n uses. You can change any of these values to suit your needs. You must change the following values: * **N8N\_ENCRYPTION\_KEY**, which n8n uses to encrypt user account details before saving to the database. * **WEBHOOK\_URL** should match the application name you create to ensure that webhooks have the correct URL. ### Deploy n8n# Select **Deploy app**. After Heroku builds and deploys the app it provides links to **Manage App** or **View** the application. Heroku and DNS Refer to the Heroku documentation to find out how to connect your domain to a Heroku application. ## Changing the deployment template# You can make changes to the deployment template by forking the repository and deploying from you fork. ### The Dockerfile# By default the Dockerfile pulls the latest n8n image, if you want to use a different or fixed version, then update the image tag on the top line of the `Dockerfile`. ### Heroku and exposing ports# Heroku doesn't allow Docker-based applications to define an exposed port with the `EXPOSE` command. Instead, Heroku provides a `PORT` environment variable that it dynamically populates at application runtime. The `entrypoint.sh` file overrides the default Docker image command to instead set the port variable that Heroku provides. You can then access n8n on port 80 in a web browser. Docker limitations with Heroku Read this guide for more details on the limitations of using Docker with Heroku. ### Configuring Heroku# The `heroku.yml` file defines the application you want to create on Heroku. It consists of two sections: * `setup` > `addons` defines the Heroku addons to use. In this case, the PostgreSQL database addon. * The `build` section defines how Heroku builds the application. In this case it uses the Docker buildpack to build a `web` service based on the supplied `Dockerfile`. ## Next steps# * Learn more about configuring and scaling n8n. * Or explore using n8n: try the Quickstarts. --- ## Page: https://docs.n8n.io/hosting/installation/server-setups/hetzner/ ## Hosting n8n on Hetzner cloud# This hosting guide shows you how to self-host n8n on a Hetzner cloud server. It uses: * Caddy (a reverse proxy) to allow access to the Server from the internet. * Docker Compose to create and define the application components and how they work together. Self-hosting knowledge prerequisites Self-hosting n8n requires technical knowledge, including: * Setting up and configuring servers and containers * Managing application resources and scaling * Securing servers and applications * Configuring n8n n8n recommends self-hosting for expert users. Mistakes can lead to data loss, security issues, and downtime. If you aren't experienced at managing servers, n8n recommends n8n Cloud. Latest and Next versions n8n releases a new minor version most weeks. The `latest` version is for production use. `next` is the most recent release. You should treat `next` as a beta: it may be unstable. To report issues, use the forum. Current `latest`: 1.86.1 Current `next`: 1.88.0 ## Create a server# 1. Log in to the Hetzner Cloud Console. 2. Select the project to host the server, or create a new project by selecting **\+ NEW PROJECT**. 3. Select **\+ CREATE SERVER** on the project tile you want to add it to. You can change most of the settings to suit your needs, but as this guide uses Docker to run the application, under the **Image** section, select "Docker CE" from the **APPS** tab. Type When creating the server, Hetzner asks you to choose a plan. For most usage levels, the CPX11 type is enough. SSH keys Hetzner lets you choose between SSH and password-based authentication. SSH is more secure. The rest of this guide assumes you are using SSH. ## Log in to your server# The rest of this guide requires you to log in to the server using a terminal with SSH. Refer to Access with SSH/rsync/BorgBackup for more information. You can find the public IP in the listing of the servers in your project. ## Install Docker Compose# The Hetzner Docker app image doesn't have Docker compose installed. Install it with the following commands: <table><tbody><tr><td><div><pre><span></span><span>1</span> <span>2</span></pre></div></td><td><div><pre><span></span><code>apt<span> </span>update<span> </span><span>&&</span><span> </span>apt<span> </span>-y<span> </span>upgrade apt<span> </span>install<span> </span>docker-compose-plugin </code></pre></div></td></tr></tbody></table> ## Clone configuration repository# Docker Compose, n8n, and Caddy require a series of folders and configuration files. You can clone these from this repository into the root user folder of the server. The following steps will tell you which file to change and what changes to make. Clone the repository with the following command: <table><tbody><tr><td><div><pre><span></span><span>1</span></pre></div></td><td><div><pre><span></span><code>git<span> </span>clone<span> </span>https://github.com/n8n-io/n8n-docker-caddy.git </code></pre></div></td></tr></tbody></table> And change directory to the root of the repository you cloned: <table><tbody><tr><td><div><pre><span></span><span>1</span></pre></div></td><td><div><pre><span></span><code><span>cd</span><span> </span>n8n-docker-caddy </code></pre></div></td></tr></tbody></table> ## Default folders and files# The host operating system (the server) copies the two folders you created to Docker containers to make them available to Docker. The two folders are: * `caddy_config`: Holds the Caddy configuration files. * `local_files`: A folder for files you upload or add using n8n. ### Create Docker volume# To persist the Caddy cache between restarts and speed up start times, create a Docker volume that Docker reuses between restarts: <table><tbody><tr><td><div><pre><span></span><span>1</span></pre></div></td><td><div><pre><span></span><code>docker<span> </span>volume<span> </span>create<span> </span>caddy_data </code></pre></div></td></tr></tbody></table> Create a Docker volume for the n8n data: <table><tbody><tr><td><div><pre><span></span><span>1</span></pre></div></td><td><div><pre><span></span><code>sudo<span> </span>docker<span> </span>volume<span> </span>create<span> </span>n8n_data </code></pre></div></td></tr></tbody></table> ## Set up DNS# n8n typically operates on a subdomain. Create a DNS record with your provider for the subdomain and point it to the IP address of the server. The exact steps for this depend on your DNS provider, but typically you need to create a new "A" record for the n8n subdomain. DigitalOcean provide An Introduction to DNS Terminology, Components, and Concepts. ## Open ports# n8n runs as a web application, so the server needs to allow incoming access to traffic on port 80 for non-secure traffic, and port 443 for secure traffic. Open the following ports in the server's firewall by running the following two commands: <table><tbody><tr><td><div><pre><span></span><span>1</span> <span>2</span></pre></div></td><td><div><pre><span></span><code>sudo<span> </span>ufw<span> </span>allow<span> </span><span>80</span> sudo<span> </span>ufw<span> </span>allow<span> </span><span>443</span> </code></pre></div></td></tr></tbody></table> ## Configure n8n# n8n needs some environment variables set to pass to the application running in the Docker container. The example `.env` file contains placeholders you need to replace with values of your own. Open the file with the following command: <table><tbody><tr><td><div><pre><span></span><span>1</span></pre></div></td><td><div><pre><span></span><code>nano<span> </span>.env </code></pre></div></td></tr></tbody></table> The file contains inline comments to help you know what to change. Refer to Environment variables for n8n environment variables details. ## The Docker Compose file# The Docker Compose file (`docker-compose.yml`) defines the services the application needs, in this case Caddy and n8n. * The Caddy service definition defines the ports it uses and the local volumes to copy to the containers. * The n8n service definition defines the ports it uses, the environment variables n8n needs to run (some defined in the `.env` file), and the volumes it needs to copy to the containers. The Docker Compose file uses the environment variables set in the `.env` file, so you shouldn't need to change it's content, but to take a look, run the following command: <table><tbody><tr><td><div><pre><span></span><span>1</span></pre></div></td><td><div><pre><span></span><code>nano<span> </span>docker-compose.yml </code></pre></div></td></tr></tbody></table> ## Configure Caddy# Caddy needs to know which domains it should serve, and which port to expose to the outside world. Edit the `Caddyfile` file in the `caddy_config` folder. <table><tbody><tr><td><div><pre><span></span><span>1</span></pre></div></td><td><div><pre><span></span><code>nano<span> </span>caddy_config/Caddyfile </code></pre></div></td></tr></tbody></table> Change the placeholder subdomain to yours. If you followed the steps to name the subdomain n8n, your full domain is similar to `n8n.example.com`. The `n8n` in the `reverse_proxy` setting tells Caddy to use the service definition defined in the `docker-compose.yml` file: <table><tbody><tr><td><div><pre><span></span><span>1</span> <span>2</span> <span>3</span> <span>4</span> <span>5</span></pre></div></td><td><div><pre><span></span><code>n8n.<domain>.<suffix> { reverse_proxy n8n:5678 { flush_interval -1 } } </code></pre></div></td></tr></tbody></table> ## Start Docker Compose# Start n8n and Caddy with the following command: <table><tbody><tr><td><div><pre><span></span><span>1</span></pre></div></td><td><div><pre><span></span><code>docker<span> </span>compose<span> </span>up<span> </span>-d </code></pre></div></td></tr></tbody></table> This may take a few minutes. ## Test your setup# In your browser, open the URL formed of the subdomain and domain name defined earlier. Enter the user name and password defined earlier, and you should be able to access n8n. ## Stop n8n and Caddy# You can stop n8n and Caddy with the following command: <table><tbody><tr><td><div><pre><span></span><span>1</span></pre></div></td><td><div><pre><span></span><code>sudo<span> </span>docker<span> </span>compose<span> </span>stop </code></pre></div></td></tr></tbody></table> ## Updating# If you run n8n using a Docker Compose file, follow these steps to update n8n: <table><tbody><tr><td><div><pre><span></span><span>1</span> <span>2</span> <span>3</span> <span>4</span> <span>5</span> <span>6</span> <span>7</span> <span>8</span></pre></div></td><td><div><pre><span></span><code><span># Pull latest version</span> docker<span> </span>compose<span> </span>pull <span># Stop and remove older version</span> docker<span> </span>compose<span> </span>down <span># Start the container</span> docker<span> </span>compose<span> </span>up<span> </span>-d </code></pre></div></td></tr></tbody></table> ## Next steps# * Learn more about configuring and scaling n8n. * Or explore using n8n: try the Quickstarts. --- ## Page: https://docs.n8n.io/hosting/installation/server-setups/aws/ ## Hosting n8n on Amazon Web Services# This hosting guide shows you how to self-host n8n with Amazon Web Services (AWS). It uses n8n with Postgres as a database backend using Kubernetes to manage the necessary resources and reverse proxy. ## Hosting options# AWS offers several ways suitable for hosting n8n, including EC2 (virtual machines), and EKS (containers running with Kubernetes). This guide uses EKS as the hosting option. Using Kubernetes requires some additional complexity and configuration, but is the best method for scaling n8n as demand changes. ## Prerequisites# The steps in this guide use a mix of the AWS UI and the eksctl CLI tool for EKS. While not mentioned in the documentation for eksctl, you also need to install the AWS CLI tool, and configure authentication of the tool. Self-hosting knowledge prerequisites Self-hosting n8n requires technical knowledge, including: * Setting up and configuring servers and containers * Managing application resources and scaling * Securing servers and applications * Configuring n8n n8n recommends self-hosting for expert users. Mistakes can lead to data loss, security issues, and downtime. If you aren't experienced at managing servers, n8n recommends n8n Cloud. Latest and Next versions n8n releases a new minor version most weeks. The `latest` version is for production use. `next` is the most recent release. You should treat `next` as a beta: it may be unstable. To report issues, use the forum. Current `latest`: 1.86.1 Current `next`: 1.88.0 ## Create a cluster# Use the eksctl tool to create a cluster specifying a name and a region with the following command: <table><tbody><tr><td><div><pre><span></span><span>1</span></pre></div></td><td><div><pre><span></span><code>eksctl<span> </span>create<span> </span>cluster<span> </span>--name<span> </span>n8n<span> </span>--region<span> </span><your-aws-region> </code></pre></div></td></tr></tbody></table> This can take a while to create the cluster. Once the cluster is created, eksctl automatically sets the kubectl context to the cluster. ## Clone configuration repository# Kubernetes and n8n require a series of configuration files. You can clone these from this repository. The following steps tell you what each file does, and what settings you need to change. Clone the repository with the following command: <table><tbody><tr><td><div><pre><span></span><span>1</span></pre></div></td><td><div><pre><span></span><code>git<span> </span>clone<span> </span>https://github.com/n8n-io/n8n-kubernetes-hosting.git<span> </span>-b<span> </span>aws </code></pre></div></td></tr></tbody></table> And change directory to the root of the repository you cloned: <table><tbody><tr><td><div><pre><span></span><span>1</span></pre></div></td><td><div><pre><span></span><code><span>cd</span><span> </span>n8n-kubernetes-hosting </code></pre></div></td></tr></tbody></table> ## Configure Postgres# For larger scale n8n deployments, Postgres provides a more robust database backend than SQLite. ### Configure volume for persistent storage# To maintain data between pod restarts, the Postgres deployment needs a persistent volume. The default AWS storage class, gp2, is suitable for this purpose. This is defined in the `postgres-claaim0-persistentvolumeclaim.yaml` manifest. <table><tbody><tr><td><div><pre><span></span><span>1</span> <span>2</span> <span>3</span> <span>4</span> <span>5</span> <span>6</span></pre></div></td><td><div><pre><span></span><code><span>…</span> <span>spec</span><span>:</span> <span> </span><span>storageClassName</span><span>:</span><span> </span><span>gp2</span> <span> </span><span>accessModes</span><span>:</span> <span> </span><span>-</span><span> </span><span>ReadWriteOnce</span> <span>…</span> </code></pre></div></td></tr></tbody></table> ### Postgres environment variables# Postgres needs some environment variables set to pass to the application running in the containers. The example `postgres-secret.yaml` file contains placeholders you need to replace with values of your own for user details and the database to use. The `postgres-deployment.yaml` manifest then uses the values from this manifest file to send to the application pods. ## Configure n8n# ### Create a volume for file storage# While not essential for running n8n, using persistent volumes helps maintain files uploaded while using n8n and if you want to persist manual n8n encryption keys between restarts, which saves a file containing the key into file storage during startup. The `n8n-claim0-persistentvolumeclaim.yaml` manifest creates this, and the n8n Deployment mounts that claim in the `volumes` section of the `n8n-deployment.yaml` manifest. <table><tbody><tr><td><div><pre><span></span><span>1</span> <span>2</span> <span>3</span> <span>4</span> <span>5</span> <span>6</span></pre></div></td><td><div><pre><span></span><code><span>…</span> <span>volumes</span><span>:</span> <span> </span><span>-</span><span> </span><span>name</span><span>:</span><span> </span><span>n8n-claim0</span> <span> </span><span>persistentVolumeClaim</span><span>:</span> <span> </span><span>claimName</span><span>:</span><span> </span><span>n8n-claim0</span> <span>…</span> </code></pre></div></td></tr></tbody></table> ### Pod resources# Kubernetes lets you specify the minimum resources application containers need and the limits they can run to. The example YAML files cloned above contain the following in the `resources` section of the `n8n-deployment.yaml` file: <table><tbody><tr><td><div><pre><span></span><span>1</span> <span>2</span> <span>3</span> <span>4</span> <span>5</span> <span>6</span> <span>7</span></pre></div></td><td><div><pre><span></span><code><span>…</span> <span>resources</span><span>:</span> <span> </span><span>requests</span><span>:</span> <span> </span><span>memory</span><span>:</span><span> </span><span>"250Mi"</span> <span> </span><span>limits</span><span>:</span> <span> </span><span>memory</span><span>:</span><span> </span><span>"500Mi"</span> <span>…</span><span> </span> </code></pre></div></td></tr></tbody></table> This defines a minimum of 250mb per container, a maximum of 500mb, and lets Kubernetes handle CPU. You can change these values to match your own needs. As a guide, here are the resources values for the n8n cloud offerings: * **Start**: 320mb RAM, 10 millicore CPU burstable * **Pro (10k executions)**: 640mb RAM, 20 millicore CPU burstable * **Pro (50k executions)**: 1280mb RAM, 80 millicore CPU burstable ### Optional: Environment variables# You can configure n8n settings and behaviors using environment variables. Create an `n8n-secret.yaml` file. Refer to Environment variables for n8n environment variables details. ## Deployments# The two deployment manifests (`n8n-deployment.yaml` and `postgres-deployment.yaml`) define the n8n and Postgres applications to Kubernetes. The manifests define the following: * Send the environment variables defined to each application pod * Define the container image to use * Set resource consumption limits * The `volumes` defined earlier and `volumeMounts` to define the path in the container to mount volumes. * Scaling and restart policies. The example manifests define one instance of each pod. You should change this to meet your needs. The two service manifests (`postgres-service.yaml` and `n8n-service.yaml`) expose the services to the outside world using the Kubernetes load balancer using ports 5432 and 5678 respectively by default. ## Send to Kubernetes cluster# Send all the manifests to the cluster by running the following command in the `n8n-kubernetes-hosting` directory: <table><tbody><tr><td><div><pre><span></span><span>1</span></pre></div></td><td><div><pre><span></span><code>kubectl<span> </span>apply<span> </span>-f<span> </span>. </code></pre></div></td></tr></tbody></table> Namespace error You may see an error message about not finding an "n8n" namespace as that resources isn't ready yet. You can run the same command again, or apply the namespace manifest first with the following command: <table><tbody><tr><td><div><pre><span></span><span>1</span></pre></div></td><td><div><pre><span></span><code>kubectl<span> </span>apply<span> </span>-f<span> </span>namespace.yaml </code></pre></div></td></tr></tbody></table> ## Set up DNS# n8n typically operates on a subdomain. Create a DNS record with your provider for the subdomain and point it to a static address of the instance. To find the address of the n8n service running on the instance: 1. Open the **Clusters** section of the **Amazon Elastic Kubernetes Service** page in the AWS console. 2. Select the name of the cluster to open its configuration page. 3. Select the **Resources** tab, then **Service and networking** > **Services**. 4. Select the **n8n** service and copy the **Load balancer URLs** value. Use this value suffixed with the n8n service port (5678) for DNS. Use HTTP This guide uses HTTP connections for the services it defines, for example in `n8n-deployment.yaml`. However, if you click the **Load balancer URLs** value, EKS takes you to an "HTTPS" URL which results in an error. To solve this, when you open the n8n subdomain, make sure to use HTTP. ## Delete resources# If you need to delete the setup, you can remove the resources created by the manifests with the following command: <table><tbody><tr><td><div><pre><span></span><span>1</span></pre></div></td><td><div><pre><span></span><code>kubectl<span> </span>delete<span> </span>-f<span> </span>. </code></pre></div></td></tr></tbody></table> ## Next steps# * Learn more about configuring and scaling n8n. * Or explore using n8n: try the Quickstarts. --- ## Page: https://docs.n8n.io/hosting/installation/server-setups/azure/ ## Hosting n8n on Azure# This hosting guide shows you how to self-host n8n on Azure. It uses n8n with Postgres as a database backend using Kubernetes to manage the necessary resources and reverse proxy. ## Prerequisites# You need The Azure command line tool Self-hosting knowledge prerequisites Self-hosting n8n requires technical knowledge, including: * Setting up and configuring servers and containers * Managing application resources and scaling * Securing servers and applications * Configuring n8n n8n recommends self-hosting for expert users. Mistakes can lead to data loss, security issues, and downtime. If you aren't experienced at managing servers, n8n recommends n8n Cloud. Latest and Next versions n8n releases a new minor version most weeks. The `latest` version is for production use. `next` is the most recent release. You should treat `next` as a beta: it may be unstable. To report issues, use the forum. Current `latest`: 1.86.1 Current `next`: 1.88.0 ## Hosting options# Azure offers several ways suitable for hosting n8n, including Azure Container Instances (optimized for running containers), Linux Virtual Machines, and Azure Kubernetes Service (containers running with Kubernetes). This guide uses the Azure Kubernetes Service (AKS) as the hosting option. Using Kubernetes requires some additional complexity and configuration, but is the best method for scaling n8n as demand changes. The steps in this guide use a mix of the Azure UI and command line tool, but you can use either to accomplish most tasks. ## Open the Azure Kubernetes Service# From the Azure portal select **Kubernetes services**. ## Create a cluster# From the Kubernetes services page, select **Create** > **Create a Kubernetes cluster**. You can select any of the configuration options that suit your needs, then select **Create** when done. ## Set Kubectl context# The remainder of the steps in this guide require you to set the Azure instance as the Kubectl context. You can find the connection details for a cluster instance by opening its details page and then the **Connect** button. The resulting code snippets shows the steps to paste and run into a terminal to change your local Kubernetes settings to use the new cluster. ## Clone configuration repository# Kubernetes and n8n require a series of configuration files. You can clone these from this repository. The following steps tell you which file configures what and what you need to change. Clone the repository with the following command: <table><tbody><tr><td><div><pre><span></span><span>1</span></pre></div></td><td><div><pre><span></span><code>git<span> </span>clone<span> </span>https://github.com/n8n-io/n8n-kubernetes-hosting.git<span> </span>-b<span> </span>azure </code></pre></div></td></tr></tbody></table> And change directory to the root of the repository you cloned: <table><tbody><tr><td><div><pre><span></span><span>1</span></pre></div></td><td><div><pre><span></span><code><span>cd</span><span> </span>azure </code></pre></div></td></tr></tbody></table> ## Configure Postgres# For larger scale n8n deployments, Postgres provides a more robust database backend than SQLite. ### Configure volume for persistent storage# To maintain data between pod restarts, the Postgres deployment needs a persistent volume. The default storage class is suitable for this purpose and is defined in the `postgres-claim0-persistentvolumeclaim.yaml` manifest. ### Postgres environment variables# Postgres needs some environment variables set to pass to the application running in the containers. The example `postgres-secret.yaml` file contains placeholders you need to replace with your own values. Postgres will use these details when creating the database.. The `postgres-deployment.yaml` manifest then uses the values from this manifest file to send to the application pods. ## Configure n8n# ### Create a volume for file storage# While not essential for running n8n, using persistent volumes is required for: * Using nodes that interact with files, such as the binary data node. * If you want to persist manual n8n encryption keys between restarts. This saves a file containing the key into file storage during startup. The `n8n-claim0-persistentvolumeclaim.yaml` manifest creates this, and the n8n Deployment mounts that claim in the `volumes` section of the `n8n-deployment.yaml` manifest. <table><tbody><tr><td><div><pre><span></span><span>1</span> <span>2</span> <span>3</span> <span>4</span> <span>5</span> <span>6</span></pre></div></td><td><div><pre><span></span><code><span>…</span> <span>volumes</span><span>:</span> <span> </span><span>-</span><span> </span><span>name</span><span>:</span><span> </span><span>n8n-claim0</span> <span> </span><span>persistentVolumeClaim</span><span>:</span> <span> </span><span>claimName</span><span>:</span><span> </span><span>n8n-claim0</span> <span>…</span> </code></pre></div></td></tr></tbody></table> ### Pod resources# Kubernetes lets you optionally specify the minimum resources application containers need and the limits they can run to. The example YAML files cloned above contain the following in the `resources` section of the `n8n-deployment.yaml` file: <table><tbody><tr><td><div><pre><span></span><span>1</span> <span>2</span> <span>3</span> <span>4</span> <span>5</span> <span>6</span> <span>7</span></pre></div></td><td><div><pre><span></span><code><span>…</span> <span>resources</span><span>:</span> <span> </span><span>requests</span><span>:</span> <span> </span><span>memory</span><span>:</span><span> </span><span>"250Mi"</span> <span> </span><span>limits</span><span>:</span> <span> </span><span>memory</span><span>:</span><span> </span><span>"500Mi"</span> <span>…</span><span> </span> </code></pre></div></td></tr></tbody></table> This defines a minimum of 250mb per container, a maximum of 500mb, and lets Kubernetes handle CPU. You can change these values to match your own needs. As a guide, here are the resources values for the n8n cloud offerings: * **Start**: 320mb RAM, 10 millicore CPU burstable * **Pro (10k executions)**: 640mb RAM, 20 millicore CPU burstable * **Pro (50k executions)**: 1280mb RAM, 80 millicore CPU burstable ### Optional: Environment variables# You can configure n8n settings and behaviors using environment variables. Create an `n8n-secret.yaml` file. Refer to Environment variables for n8n environment variables details. ## Deployments# The two deployment manifests (`n8n-deployment.yaml` and `postgres-deployment.yaml`) define the n8n and Postgres applications to Kubernetes. The manifests define the following: * Send the environment variables defined to each application pod * Define the container image to use * Set resource consumption limits with the `resources` object * The `volumes` defined earlier and `volumeMounts` to define the path in the container to mount volumes. * Scaling and restart policies. The example manifests define one instance of each pod. You should change this to meet your needs. ## Services# The two service manifests (`postgres-service.yaml` and `n8n-service.yaml`) expose the services to the outside world using the Kubernetes load balancer using ports 5432 and 5678 respectively. ## Send to Kubernetes cluster# Send all the manifests to the cluster with the following command: <table><tbody><tr><td><div><pre><span></span><span>1</span></pre></div></td><td><div><pre><span></span><code>kubectl<span> </span>apply<span> </span>-f<span> </span>. </code></pre></div></td></tr></tbody></table> Namespace error You may see an error message about not finding an "n8n" namespace as that resources isn't ready yet. You can run the same command again, or apply the namespace manifest first with the following command: <table><tbody><tr><td><div><pre><span></span><span>1</span></pre></div></td><td><div><pre><span></span><code>kubectl<span> </span>apply<span> </span>-f<span> </span>namespace.yaml </code></pre></div></td></tr></tbody></table> ## Set up DNS# n8n typically operates on a subdomain. Create a DNS record with your provider for the subdomain and point it to the IP address of the n8n service. Find the IP address of the n8n service from the **Services & ingresses** menu item of the cluster you want to use under the **External IP** column. You need to add the n8n port, "5678" to the URL. Static IP addresses with AKS Read this tutorial for more details on how to use a static IP address with AKS. ## Delete resources# Remove the resources created by the manifests with the following command: <table><tbody><tr><td><div><pre><span></span><span>1</span></pre></div></td><td><div><pre><span></span><code>kubectl<span> </span>delete<span> </span>-f<span> </span>. </code></pre></div></td></tr></tbody></table> ## Next steps# * Learn more about configuring and scaling n8n. * Or explore using n8n: try the Quickstarts. --- ## Page: https://docs.n8n.io/hosting/installation/server-setups/google-cloud/ ## Hosting n8n on Google Cloud# This hosting guide shows you how to self-host n8n on Google Cloud (GCP). It uses n8n with Postgres as a database backend using Kubernetes to manage the necessary resources and reverse proxy. ## Prerequisites# * The gcloud command line tool * The gke-gcloud-auth-plugin (install the gcloud CLI first) Self-hosting knowledge prerequisites Self-hosting n8n requires technical knowledge, including: * Setting up and configuring servers and containers * Managing application resources and scaling * Securing servers and applications * Configuring n8n n8n recommends self-hosting for expert users. Mistakes can lead to data loss, security issues, and downtime. If you aren't experienced at managing servers, n8n recommends n8n Cloud. Latest and Next versions n8n releases a new minor version most weeks. The `latest` version is for production use. `next` is the most recent release. You should treat `next` as a beta: it may be unstable. To report issues, use the forum. Current `latest`: 1.86.1 Current `next`: 1.88.0 ## Hosting options# Google Cloud offers several options suitable for hosting n8n, including Cloud Run (optimized for running containers), Compute Engine (VMs), and Kubernetes Engine (containers running with Kubernetes). This guide uses the Google Kubernetes Engine (GKE) as the hosting option. Using Kubernetes requires some additional complexity and configuration, but is the best method for scaling n8n as demand changes. Most of the steps in this guide use the Google Cloud UI, but you can also use the gcloud command line tool instead to undertake all the steps. ## Create project# GCP encourages you to create projects to logically organize resources and configuration. Create a new project for your n8n deployment from your Google Cloud Console: select the project dropdown menu and then the **NEW PROJECT** button. Then select the newly created project. As you follow the other steps in this guide, make sure you have the correct project selected. ## Enable the Kubernetes Engine API# GKE isn't enabled by default. Search for "Kubernetes" in the top search bar and select "Kubernetes Engine" from the results. Select **ENABLE** to enable the Kubernetes Engine API for this project. ## Create a cluster# From the GKE service page, select **Clusters** > **CREATE**. Make sure you select the "Standard" cluster option, n8n doesn't work with an "Autopilot" cluster. You can leave the cluster configuration on defaults unless there's anything specifically you need to change, such as location. ## Set Kubectl context# The rest of the steps in this guide require you to set the GCP instance as the Kubectl context. You can find the connection details for a cluster instance by opening its details page and selecting **CONNECT**. The displayed code snippet shows a connection string for the gcloud CLI tool. Paste and run the code snippet in the gcloud CLI to change your local Kubernetes settings to use the new gcloud cluster. ## Clone configuration repository# Kubernetes and n8n require a series of configuration files. You can clone these from this repository locally. The following steps explain the file configuration and how to add your information. Clone the repository with the following command: <table><tbody><tr><td><div><pre><span></span><span>1</span></pre></div></td><td><div><pre><span></span><code>git<span> </span>clone<span> </span>https://github.com/n8n-io/n8n-kubernetes-hosting.git<span> </span>-b<span> </span>gcp </code></pre></div></td></tr></tbody></table> And change directory to the root of the repository you cloned: <table><tbody><tr><td><div><pre><span></span><span>1</span></pre></div></td><td><div><pre><span></span><code><span>cd</span><span> </span>n8n-kubernetes-hosting </code></pre></div></td></tr></tbody></table> ## Configure Postgres# For larger scale n8n deployments, Postgres provides a more robust database backend than SQLite. ### Create a volume for persistent storage# To maintain data between pod restarts, the Postgres deployment needs a persistent volume. Running Postgres on GCP requires a specific Kubernetes Storage Class. You can read this guide for specifics, but the `storage.yaml` manifest creates it for you. You may want to change the regions to create the storage in under the `allowedTopologies` > `matchedLabelExpressions` > `values` key. By default, they're set to `us-central`. <table><tbody><tr><td><div><pre><span></span><span>1</span> <span>2</span> <span>3</span> <span>4</span> <span>5</span> <span>6</span> <span>7</span></pre></div></td><td><div><pre><span></span><code><span>…</span> <span>allowedTopologies</span><span>:</span> <span> </span><span>-</span><span> </span><span>matchLabelExpressions</span><span>:</span> <span> </span><span>-</span><span> </span><span>key</span><span>:</span><span> </span><span>failure-domain.beta.kubernetes.io/zone</span> <span> </span><span>values</span><span>:</span> <span> </span><span>-</span><span> </span><span>us-central1-b</span> <span> </span><span>-</span><span> </span><span>us-central1-c</span> </code></pre></div></td></tr></tbody></table> ### Postgres environment variables# Postgres needs some environment variables set to pass to the application running in the containers. The example `postgres-secret.yaml` file contains placeholders you need to replace with your own values. Postgres will use these details when creating the database.. The `postgres-deployment.yaml` manifest then uses the values from this manifest file to send to the application pods. ## Configure n8n# ### Create a volume for file storage# While not essential for running n8n, using persistent volumes is required for: * Using nodes that interact with files, such as the binary data node. * If you want to persist manual n8n encryption keys between restarts. This saves a file containing the key into file storage during startup. The `n8n-claim0-persistentvolumeclaim.yaml` manifest creates this, and the n8n Deployment mounts that claim in the `volumes` section of the `n8n-deployment.yaml` manifest. <table><tbody><tr><td><div><pre><span></span><span>1</span> <span>2</span> <span>3</span> <span>4</span> <span>5</span> <span>6</span></pre></div></td><td><div><pre><span></span><code><span>…</span> <span>volumes</span><span>:</span> <span> </span><span>-</span><span> </span><span>name</span><span>:</span><span> </span><span>n8n-claim0</span> <span> </span><span>persistentVolumeClaim</span><span>:</span> <span> </span><span>claimName</span><span>:</span><span> </span><span>n8n-claim0</span> <span>…</span> </code></pre></div></td></tr></tbody></table> ### Pod resources# Kubernetes lets you optionally specify the minimum resources application containers need and the limits they can run to. The example YAML files cloned above contain the following in the `resources` section of the `n8n-deployment.yaml` and `postgres-deployment.yaml` files: <table><tbody><tr><td><div><pre><span></span><span>1</span> <span>2</span> <span>3</span> <span>4</span> <span>5</span> <span>6</span> <span>7</span></pre></div></td><td><div><pre><span></span><code><span>…</span> <span>resources</span><span>:</span> <span> </span><span>requests</span><span>:</span> <span> </span><span>memory</span><span>:</span><span> </span><span>"250Mi"</span> <span> </span><span>limits</span><span>:</span> <span> </span><span>memory</span><span>:</span><span> </span><span>"500Mi"</span> <span>…</span><span> </span> </code></pre></div></td></tr></tbody></table> This defines a minimum of 250mb per container, a maximum of 500mb, and lets Kubernetes handle CPU. You can change these values to match your own needs. As a guide, here are the resources values for the n8n cloud offerings: * **Start**: 320mb RAM, 10 millicore CPU burstable * **Pro (10k executions)**: 640mb RAM, 20 millicore CPU burstable * **Pro (50k executions)**: 1280mb RAM, 80 millicore CPU burstable ### Optional: Environment variables# You can configure n8n settings and behaviors using environment variables. Create an `n8n-secret.yaml` file. Refer to Environment variables for n8n environment variables details. ## Deployments# The two deployment manifests (`n8n-deployment.yaml` and `postgres-deployment.yaml`) define the n8n and Postgres applications to Kubernetes. The manifests define the following: * Send the environment variables defined to each application pod * Define the container image to use * Set resource consumption limits with the `resources` object * The `volumes` defined earlier and `volumeMounts` to define the path in the container to mount volumes. * Scaling and restart policies. The example manifests define one instance of each pod. You should change this to meet your needs. ## Services# The two service manifests (`postgres-service.yaml` and `n8n-service.yaml`) expose the services to the outside world using the Kubernetes load balancer using ports 5432 and 5678 respectively. ## Send to Kubernetes cluster# Send all the manifests to the cluster with the following command: <table><tbody><tr><td><div><pre><span></span><span>1</span></pre></div></td><td><div><pre><span></span><code>kubectl<span> </span>apply<span> </span>-f<span> </span>. </code></pre></div></td></tr></tbody></table> Namespace error You may see an error message about not finding an "n8n" namespace as that resources isn't ready yet. You can run the same command again, or apply the namespace manifest first with the following command: <table><tbody><tr><td><div><pre><span></span><span>1</span></pre></div></td><td><div><pre><span></span><code>kubectl<span> </span>apply<span> </span>-f<span> </span>namespace.yaml </code></pre></div></td></tr></tbody></table> ## Set up DNS# n8n typically operates on a subdomain. Create a DNS record with your provider for the subdomain and point it to the IP address of the n8n service. Find the IP address of the n8n service from the **Services & Ingress** menu item of the cluster you want to use under the **Endpoints** column. GKE and IP addresses Read this GKE tutorial for more details on how reserved IP addresses work with GKE and Kubernetes resources. ## Delete resources# Remove the resources created by the manifests with the following command: <table><tbody><tr><td><div><pre><span></span><span>1</span></pre></div></td><td><div><pre><span></span><code>kubectl<span> </span>delete<span> </span>-f<span> </span>. </code></pre></div></td></tr></tbody></table> ## Next steps# * Learn more about configuring and scaling n8n. * Or explore using n8n: try the Quickstarts. --- ## Page: https://docs.n8n.io/hosting/installation/server-setups/docker-compose/ If you have already installed Docker and Docker-Compose, then you can start with step 3. You can find Docker Compose configurations for various architectures in the n8n-hosting repository. Self-hosting knowledge prerequisites Self-hosting n8n requires technical knowledge, including: * Setting up and configuring servers and containers * Managing application resources and scaling * Securing servers and applications * Configuring n8n n8n recommends self-hosting for expert users. Mistakes can lead to data loss, security issues, and downtime. If you aren't experienced at managing servers, n8n recommends n8n Cloud. Latest and Next versions n8n releases a new minor version most weeks. The `latest` version is for production use. `next` is the most recent release. You should treat `next` as a beta: it may be unstable. To report issues, use the forum. Current `latest`: 1.86.1 Current `next`: 1.88.0 ## 1\. Install Docker and Docker Compose# How you install Docker and Docker Compose can vary depending on the Linux distribution you use. You can find detailed instructions in both the Docker and Docker Compose installation documentation. The following example is for Ubuntu: <table><tbody><tr><td><div><pre><span></span><span> 1</span> <span> 2</span> <span> 3</span> <span> 4</span> <span> 5</span> <span> 6</span> <span> 7</span> <span> 8</span> <span> 9</span> <span>10</span> <span>11</span> <span>12</span> <span>13</span> <span>14</span> <span>15</span></pre></div></td><td><div><pre><span></span><code><span># Remove incompatible or out of date Docker implementations if they exist</span> <span>for</span><span> </span>pkg<span> </span><span>in</span><span> </span>docker.io<span> </span>docker-doc<span> </span>docker-compose<span> </span>docker-compose-v2<span> </span>podman-docker<span> </span>containerd<span> </span>runc<span>;</span><span> </span><span>do</span><span> </span>sudo<span> </span>apt-get<span> </span>remove<span> </span><span>$pkg</span><span>;</span><span> </span><span>done</span> <span># Install prereq packages</span> sudo<span> </span>apt-get<span> </span>update sudo<span> </span>apt-get<span> </span>install<span> </span>ca-certificates<span> </span>curl <span># Download the repo signing key</span> sudo<span> </span>install<span> </span>-m<span> </span><span>0755</span><span> </span>-d<span> </span>/etc/apt/keyrings sudo<span> </span>curl<span> </span>-fsSL<span> </span>https://download.docker.com/linux/ubuntu/gpg<span> </span>-o<span> </span>/etc/apt/keyrings/docker.asc sudo<span> </span>chmod<span> </span>a+r<span> </span>/etc/apt/keyrings/docker.asc <span># Configure the repository</span> <span>echo</span><span> </span><span>"deb [arch=</span><span>$(</span>dpkg<span> </span>--print-architecture<span>)</span><span> signed-by=/etc/apt/keyrings/docker.asc] https://download.docker.com/linux/ubuntu </span><span>$(</span>.<span> </span>/etc/os-release<span> </span><span>&&</span><span> </span><span>echo</span><span> </span><span>"</span><span>${</span><span>UBUNTU_CODENAME</span><span>:-</span><span>$VERSION_CODENAME</span><span>}</span><span>"</span><span>)</span><span> stable"</span><span> </span><span>|</span><span> </span>sudo<span> </span>tee<span> </span>/etc/apt/sources.list.d/docker.list<span> </span>><span> </span>/dev/null <span># Update and install Docker and Docker Compose</span> sudo<span> </span>apt-get<span> </span>update sudo<span> </span>apt-get<span> </span>install<span> </span>docker-ce<span> </span>docker-ce-cli<span> </span>containerd.io<span> </span>docker-buildx-plugin<span> </span>docker-compose-plugin </code></pre></div></td></tr></tbody></table> Verify that Docker and Docker Compose are available by typing: <table><tbody><tr><td><div><pre><span></span><span>1</span> <span>2</span></pre></div></td><td><div><pre><span></span><code>docker<span> </span>--version docker<span> </span>compose<span> </span>version </code></pre></div></td></tr></tbody></table> ## 2\. Optional: Non-root user access# You can optionally grant access to run Docker without the `sudo` command. To grant access to the user that you're currently logged in with (assuming they have `sudo` access), run: <table><tbody><tr><td><div><pre><span></span><span>1</span> <span>2</span> <span>3</span></pre></div></td><td><div><pre><span></span><code>sudo<span> </span>usermod<span> </span>-aG<span> </span>docker<span> </span><span>${</span><span>USER</span><span>}</span> <span># Register the `docker` group memebership with current session without changing your primary group</span> <span>exec</span><span> </span>sg<span> </span>docker<span> </span>newgrp </code></pre></div></td></tr></tbody></table> To grant access to a different user, type the following, substituting `<USER_TO_RUN_DOCKER>` with the appropriate username: <table><tbody><tr><td><div><pre><span></span><span>1</span></pre></div></td><td><div><pre><span></span><code>sudo<span> </span>usermod<span> </span>-aG<span> </span>docker<span> </span><USER_TO_RUN_DOCKER> </code></pre></div></td></tr></tbody></table> You will need to run `exec sg docker newgrp` from any of that user's existing sessions for it to access the new group permissions. You can verify that your current session recognizes the `docker` group by typing: <table><tbody><tr><td><div><pre><span></span><span>1</span></pre></div></td><td><div><pre><span></span><code>groups </code></pre></div></td></tr></tbody></table> ## 3\. DNS setup# To host n8n online or on a network, create a dedicated subdomain pointed at your server. Add an A record to route the subdomain accordingly: * **Type**: A * **Name**: `n8n` (or the desired subdomain) * **IP address**: (your server's IP address) ## 4\. Create an `.env` file# Create a project directory to store your n8n environment configuration and Docker Compose files and navigate inside: <table><tbody><tr><td><div><pre><span></span><span>1</span> <span>2</span></pre></div></td><td><div><pre><span></span><code>mkdir<span> </span>n8n-compose <span>cd</span><span> </span>n8n-compose </code></pre></div></td></tr></tbody></table> Inside the `n8n-compose` directory, create an `.env` file to customize your n8n instance's details. Change it to match your own information: | .env file | | --- | | 1 2 3 4 5 6 7 8 9 10 11 12 13 14 15 | `# DOMAIN_NAME and SUBDOMAIN together determine where n8n will be reachable from # The top level domain to serve from DOMAIN_NAME=example.com # The subdomain to serve from SUBDOMAIN=n8n # The above example serve n8n at: https://n8n.example.com # Optional timezone to set which gets used by Cron and other scheduling nodes # New York is the default value if not set GENERIC_TIMEZONE=Europe/Berlin # The email address to use for the TLS/SSL certificate creation SSL_EMAIL=user@example.com` | ## 5\. Create local files directory# Inside your project directory, create a directory called `local-files` for sharing files between the n8n instance and the host system (for example, using the Read/Write Files from Disk node): <table><tbody><tr><td><div><pre><span></span><span>1</span></pre></div></td><td><div><pre><span></span><code>mkdir<span> </span>local-files </code></pre></div></td></tr></tbody></table> The Docker Compose file below can automatically create this directory, but doing it manually ensures that it's created with the right ownership and permissions. ## 6\. Create Docker Compose file# Create a `docker-compose.yml` file. Paste the following in the file: | docker-compose.yml file | | --- | | 1 2 3 4 5 6 7 8 9 10 11 12 13 14 15 16 17 18 19 20 21 22 23 24 25 26 27 28 29 30 31 32 33 34 35 36 37 38 39 40 41 42 43 44 45 46 47 48 49 50 51 52 53 54 55 56 57 | ``services: traefik: image: "traefik" restart: always command: - "--api=true" - "--api.insecure=true" - "--providers.docker=true" - "--providers.docker.exposedbydefault=false" - "--entrypoints.web.address=:80" - "--entrypoints.web.http.redirections.entryPoint.to=websecure" - "--entrypoints.web.http.redirections.entrypoint.scheme=https" - "--entrypoints.websecure.address=:443" - "--certificatesresolvers.mytlschallenge.acme.tlschallenge=true" - "--certificatesresolvers.mytlschallenge.acme.email=${SSL_EMAIL}" - "--certificatesresolvers.mytlschallenge.acme.storage=/letsencrypt/acme.json" ports: - "80:80" - "443:443" volumes: - traefik_data:/letsencrypt - /var/run/docker.sock:/var/run/docker.sock:ro n8n: image: docker.n8n.io/n8nio/n8n restart: always ports: - "127.0.0.1:5678:5678" labels: - traefik.enable=true - traefik.http.routers.n8n.rule=Host(`${SUBDOMAIN}.${DOMAIN_NAME}`) - traefik.http.routers.n8n.tls=true - traefik.http.routers.n8n.entrypoints=web,websecure - traefik.http.routers.n8n.tls.certresolver=mytlschallenge - traefik.http.middlewares.n8n.headers.SSLRedirect=true - traefik.http.middlewares.n8n.headers.STSSeconds=315360000 - traefik.http.middlewares.n8n.headers.browserXSSFilter=true - traefik.http.middlewares.n8n.headers.contentTypeNosniff=true - traefik.http.middlewares.n8n.headers.forceSTSHeader=true - traefik.http.middlewares.n8n.headers.SSLHost=${DOMAIN_NAME} - traefik.http.middlewares.n8n.headers.STSIncludeSubdomains=true - traefik.http.middlewares.n8n.headers.STSPreload=true - traefik.http.routers.n8n.middlewares=n8n@docker environment: - N8N_HOST=${SUBDOMAIN}.${DOMAIN_NAME} - N8N_PORT=5678 - N8N_PROTOCOL=https - NODE_ENV=production - WEBHOOK_URL=https://${SUBDOMAIN}.${DOMAIN_NAME}/ - GENERIC_TIMEZONE=${GENERIC_TIMEZONE} volumes: - n8n_data:/home/node/.n8n - ./local-files:/files volumes: n8n_data: traefik_data:`` | The above Docker Compose file configures two containers: one for n8n, and one to run traefik, an application proxy to manage TLS/SSL certificates and handle routing. It also creates and mounts two Docker Volumes and mounts the `local-files` directory you created earlier: | Name | Type | Container mount | Description | | --- | --- | --- | --- | | `n8n_data` | Volume | `/home/node/.n8n` | Where n8n saves its SQLite database file and encryption key. | | `traefik_data` | Volume | `/letsencrypt` | Where traefik saves the TLS/SSL certificate data. | | `./local-files` | Bind | `/files` | A local directory shared between the n8n instance and host. In n8n, use the `/files` path to read from and write to this directory. | ## 7\. Start Docker Compose# You can now start n8n by typing: <table><tbody><tr><td><div><pre><span></span><span>1</span></pre></div></td><td><div><pre><span></span><code>sudo<span> </span>docker<span> </span>compose<span> </span>up<span> </span>-d </code></pre></div></td></tr></tbody></table> To stop the container, type: <table><tbody><tr><td><div><pre><span></span><span>1</span></pre></div></td><td><div><pre><span></span><code>sudo<span> </span>docker<span> </span>compose<span> </span>stop </code></pre></div></td></tr></tbody></table> ## 8\. Done# You can now reach n8n using the subdomain + domain combination you defined in your `.env` file configuration. The above example would result in `https://n8n.example.com`. n8n is only accessible using secure HTTPS, not over plain HTTP. ## Next steps# * Learn more about configuring and scaling n8n. * Or explore using n8n: try the Quickstarts. --- ## Page: https://docs.n8n.io/hosting/installation/updating/ 1. Hosting n8n 2. Installation It's important to keep your n8n version up to date. This ensures you get the latest features and fixes. Some tips when updating: * Update frequently: this avoids having to jump multiple versions at once, reducing the risk of a disruptive update. Try to update at least once a month. * Check the Release notes for breaking changes. * Use Environments to create a test version of your instance. Test the update there first. For instructions on how to update, refer to the documentation for your installation method: * Installed with npm * Installed with Docker --- ## Page: https://docs.n8n.io/hosting/configuration/environment-variables/ 1. Hosting n8n 2. Configuration 3. Environment variables This section lists of environment variables that you can use to change n8n's configuration settings when self-hosting n8n. File-based configuration You can provide a configuration file for n8n. You can also append `_FILE` to certain variables to provide their configuration in a separate file. * Binary data * Credentials * Database * Deployment * Endpoints * Executions * External data storage * External hooks * External secrets * Logs * License * Nodes * Queue mode * Security * Source control * Task runners * Timezone and localization * User management and 2FA * Workflows --- ## Page: https://docs.n8n.io/hosting/configuration/environment-variables/binary-data/ By default, n8n uses memory to store binary data. Enterprise users can choose to use an external service instead. Refer to External storage for more information on using external storage for binary data. | Variable | Type | Default | Description | | --- | --- | --- | --- | | `N8N_AVAILABLE_BINARY_DATA_MODES` | String | `filesystem` | A comma separated list of available binary data modes. | | `N8N_BINARY_DATA_STORAGE_PATH` | String | `N8N_USER_FOLDER/binaryData` | The path where n8n stores binary data. | | `N8N_DEFAULT_BINARY_DATA_MODE` | String | `default` | The default binary data mode. `default` keeps binary data in memory. Set to `filesystem` to use the filesystem, or `s3` to AWS S3. Note that binary data pruning operates on the active binary data mode. For example, if your instance stored data in S3, and you later switched to filesystem mode, n8n only prunes binary data in the filesystem. This may change in future. | --- ## Page: https://docs.n8n.io/hosting/configuration/environment-variables/credentials/ * Using n8n * Integrations * Hosting n8n * Code in n8n * Advanced AI * API * Embed * n8n home ↗ * Forum ↗ * Blog ↗ 1. Hosting n8n 2. Configuration 3. Environment variables Enable credential overwrites using the following environment variables. Refer to Credential overwrites for details. | Variable | Type | Default | Description | | --- | --- | --- | --- | | `CREDENTIALS_OVERWRITE_DATA` /`_FILE` | \* | \- | Overwrites for credentials. | | `CREDENTIALS_OVERWRITE_ENDPOINT` | String | \- | The API endpoint to fetch credentials. | | `CREDENTIALS_DEFAULT_NAME` | String | `My credentials` | The default name for credentials. | --- ## Page: https://docs.n8n.io/hosting/configuration/environment-variables/database/ By default, n8n uses SQLite. n8n also supports PostgreSQL. n8n removed support for MySQL and MariaDB in v1.0. This page outlines environment variables to configure your chosen database for your self-hosted n8n instance. | Variable | Type | Default | Description | | --- | --- | --- | --- | | `DB_TYPE` /`_FILE` | Enum string: `sqlite`, `postgresdb` | `sqlite` | The database to use. | | `DB_TABLE_PREFIX` | \* | \- | Prefix to use for table names. | ## PostgreSQL# | Variable | Type | Default | Description | | --- | --- | --- | --- | | `DB_POSTGRESDB_DATABASE` /`_FILE` | String | `n8n` | The name of the PostgreSQL database. | | `DB_POSTGRESDB_HOST` /`_FILE` | String | `localhost` | The PostgreSQL host. | | `DB_POSTGRESDB_PORT` /`_FILE` | Number | `5432` | The PostgreSQL port. | | `DB_POSTGRESDB_USER` /`_FILE` | String | `postgres` | The PostgreSQL user. | | `DB_POSTGRESDB_PASSWORD` /`_FILE` | String | \- | The PostgreSQL password. | | `DB_POSTGRESDB_POOL_SIZE` /`_FILE` | Number | `2` | Control how many parallel open Postgres connections n8n should have. Increasing it may help with resource utilization, but too many connections may degrade performance. | | `DB_POSTGRESDB_CONNECTION_TIMEOUT` /`_FILE` | Number | `20000` | Postgres connection timeout (ms). | | `DB_POSTGRESDB_SCHEMA` /`_FILE` | String | `public` | The PostgreSQL schema. | | `DB_POSTGRESDB_SSL_ENABLED` /`_FILE` | Boolean | `false` | Whether to enable SSL. Automatically enabled if `DB_POSTGRESDB_SSL_CA`, `DB_POSTGRESDB_SSL_CERT` or `DB_POSTGRESDB_SSL_KEY` is defined. | | `DB_POSTGRESDB_SSL_CA` /`_FILE` | String | \- | The PostgreSQL SSL certificate authority. | | `DB_POSTGRESDB_SSL_CERT` /`_FILE` | String | \- | The PostgreSQL SSL certificate. | | `DB_POSTGRESDB_SSL_KEY` /`_FILE` | String | \- | The PostgreSQL SSL key. | | `DB_POSTGRESDB_SSL_REJECT_UNAUTHORIZED` /`_FILE` | Boolean | `true` | If n8n should reject unauthorized SSL connections (true) or not (false). | ## SQLite# | Variable | Type | Default | Description | | --- | --- | --- | --- | | `DB_SQLITE_POOL_SIZE` | Number | `0` | Controls whether to open the SQLite file in WAL mode or rollback journal mode. Uses rollback journal mode when set to zero. When greater than zero, uses WAL mode with the value determining the number of parallel SQL read connections to configure. WAL mode is much more performant and reliable than the rollback journal mode. | | `DB_SQLITE_VACUUM_ON_STARTUP` | Boolean | `false` | Runs VACUUM operation on startup to rebuild the database. Reduces file size and optimizes indexes. This is a long running blocking operation and increases start-up time. | --- ## Page: https://docs.n8n.io/hosting/configuration/environment-variables/deployment/ This page lists the deployment configuration options for your self-hosted n8n instance, including setting up access URLs, enabling templates, customizing encryption, and configuring server details. | Variable | Type | Default | Description | | --- | --- | --- | --- | | `N8N_EDITOR_BASE_URL` | String | \- | Public URL where users can access the editor. Also used for emails sent from n8n and the redirect URL for SAML based authentication. | | `N8N_CONFIG_FILES` | String | \- | Use to provide the path to any JSON configuration file. | | `N8N_DISABLE_UI` | Boolean | `false` | Set to `true` to disable the UI. | | `N8N_PREVIEW_MODE` | Boolean | `false` | Set to `true` to run in preview mode. | | `N8N_TEMPLATES_ENABLED` | Boolean | `false` | Enables workflow templates (true) or disable (false). | | `N8N_TEMPLATES_HOST` | String | `https://api.n8n.io` | Change this if creating your own workflow template library. Note that to use your own workflow templates library, your API must provide the same endpoints and response structure as n8n's. Refer to Workflow templates for more information. | | `N8N_ENCRYPTION_KEY` | String | Random key generated by n8n | Provide a custom key used to encrypt credentials in the n8n database. By default n8n generates a random key on first launch. | | `N8N_USER_FOLDER` | String | `user-folder` | Provide the path where n8n will create the `.n8n` folder. This directory stores user-specific data, such as database file and encryption key. | | `N8N_PATH` | String | `/` | The path n8n deploys to. | | `N8N_HOST` | String | `localhost` | Host name n8n runs on. | | `N8N_PORT` | Number | `5678` | The HTTP port n8n runs on. | | `N8N_LISTEN_ADDRESS` | String | `0.0.0.0` | The IP address n8n should listen on. | | `N8N_PROTOCOL` | Enum string: `http`, `https` | `http` | The protocol used to reach n8n. | | `N8N_SSL_KEY` | String | \- | The SSL key for HTTPS protocol. | | `N8N_SSL_CERT` | String | \- | The SSL certificate for HTTPS protocol. | | `N8N_PERSONALIZATION_ENABLED` | Boolean | `true` | Whether to ask users personalisation questions and then customise n8n accordingly. | | `N8N_VERSION_NOTIFICATIONS_ENABLED` | Boolean | `true` | When enabled, n8n sends notifications of new versions and security updates. | | `N8N_VERSION_NOTIFICATIONS_ENDPOINT` | String | `https://api.n8n.io/versions/` | The endpoint to retrieve where version information. | | `N8N_VERSION_NOTIFICATIONS_INFO_URL` | String | `https://docs.n8n.io/getting-started/installation/updating.html` | The URL displayed in the New Versions panel for more information. | | `N8N_DIAGNOSTICS_ENABLED` | Boolean | `true` | Whether to share selected, anonymous telemetry with n8n. Note that if you set this to `false`, you can't enable Ask AI in the Code node. | | `N8N_DIAGNOSTICS_CONFIG_FRONTEND` | String | `1zPn9bgWPzlQc0p8Gj1uiK6DOTn;https://telemetry.n8n.io` | Telemetry configuration for the frontend. | | `N8N_DIAGNOSTICS_CONFIG_BACKEND` | String | `1zPn7YoGC3ZXE9zLeTKLuQCB4F6;https://telemetry.n8n.io/v1/batch` | Telemetry configuration for the backend. | | `N8N_PUSH_BACKEND` | String | `websocket` | Choose whether the n8n backend uses server-sent events (`sse`) or WebSockets (`websocket`) to send changes to the UI. | | `VUE_APP_URL_BASE_API` | String | `http://localhost:5678/` | Used when building the `n8n-editor-ui` package manually to set how the frontend can reach the backend API. Refer to Configure the Base URL. | | `N8N_HIRING_BANNER_ENABLED` | Boolean | `true` | Whether to show the n8n hiring banner in the console (true) or not (false). | | `N8N_PUBLIC_API_SWAGGERUI_DISABLED` | Boolean | `false` | Whether the Swagger UI (API playground) is disabled (true) or not (false). | | `N8N_PUBLIC_API_DISABLED` | Boolean | `false` | Whether to disable the public API (true) or not (false). | | `N8N_PUBLIC_API_ENDPOINT` | String | `api` | Path for the public API endpoints. | | `N8N_GRACEFUL_SHUTDOWN_TIMEOUT` | Number | `30` | How long should the n8n process wait (in seconds) for components to shut down before exiting the process. | | `N8N_DEV_RELOAD` | Boolean | `false` | When working on the n8n source code, set this to `true` to automatically reload or restart the application when changes occur in the source code files. | | `N8N_REINSTALL_MISSING_PACKAGES` | Boolean | `false` | If set to `true`, n8n will automatically attempt to reinstall any missing packages. | | `N8N_TUNNEL_SUBDOMAIN` | String | \- | Specifies the subdomain for the n8n tunnel. If not set, n8n generates a random subdomain. | | `N8N_PROXY_HOPS` | Number | 0 | Number of reverse-proxies n8n is running behind. | --- ## Page: https://docs.n8n.io/hosting/configuration/environment-variables/endpoints/ This page lists environment variables for customizing endpoints in n8n. | Variable | Type | Default | Description | | --- | --- | --- | --- | | `N8N_PAYLOAD_SIZE_MAX` | Number | `16` | The maximum payload size in MiB. | | `N8N_FORMDATA_FILE_SIZE_MAX` | Number | `200` | Max payload size for files in form-data webhook payloads in MiB. | | `N8N_METRICS` | Boolean | `false` | Whether to enable the `/metrics` endpoint. | | `N8N_METRICS_PREFIX` | String | `n8n_` | Optional prefix for n8n specific metrics names. | | `N8N_METRICS_INCLUDE_DEFAULT_METRICS` | Boolean | `true` | Whether to expose default system and node.js metrics. | | `N8N_METRICS_INCLUDE_CACHE_METRICS` | Boolean | false | Whether to include metrics (true) for cache hits and misses, or not include them (false). | | `N8N_METRICS_INCLUDE_MESSAGE_EVENT_BUS_METRICS` | Boolean | `false` | Whether to include metrics (true) for events, or not include them (false). | | `N8N_METRICS_INCLUDE_WORKFLOW_ID_LABEL` | Boolean | `false` | Whether to include a label for the workflow ID on workflow metrics. | | `N8N_METRICS_INCLUDE_NODE_TYPE_LABEL` | Boolean | `false` | Whether to include a label for the node type on node metrics. | | `N8N_METRICS_INCLUDE_CREDENTIAL_TYPE_LABEL` | Boolean | `false` | Whether to include a label for the credential type on credential metrics. | | `N8N_METRICS_INCLUDE_API_ENDPOINTS` | Boolean | `false` | Whether to expose metrics for API endpoints. | | `N8N_METRICS_INCLUDE_API_PATH_LABEL` | Boolean | `false` | Whether to include a label for the path of API invocations. | | `N8N_METRICS_INCLUDE_API_METHOD_LABEL` | Boolean | `false` | Whether to include a label for the HTTP method (GET, POST, ...) of API invocations. | | `N8N_METRICS_INCLUDE_API_STATUS_CODE_LABEL` | Boolean | `false` | Whether to include a label for the HTTP status code (200, 404, ...) of API invocations. | | `N8N_METRICS_INCLUDE_QUEUE_METRICS` | Boolean | `false` | Whether to include metrics for jobs in scaling mode. Not supported in multi-main setup. | | `N8N_METRICS_QUEUE_METRICS_INTERVAL` | Integer | `20` | How often (in seconds) to update queue metrics. | | `N8N_ENDPOINT_REST` | String | `rest` | The path used for REST endpoint. | | `N8N_ENDPOINT_WEBHOOK` | String | `webhook` | The path used for webhook endpoint. | | `N8N_ENDPOINT_WEBHOOK_TEST` | String | `webhook-test` | The path used for test-webhook endpoint. | | `N8N_ENDPOINT_WEBHOOK_WAIT` | String | `webhook-waiting` | The path used for waiting-webhook endpoint. | | `WEBHOOK_URL` | String | \- | Used to manually provide the Webhook URL when running n8n behind a reverse proxy. See here for more details. | | `N8N_DISABLE_PRODUCTION_MAIN_PROCESS` | Boolean | `false` | Disable production webhooks from main process. This helps ensure no HTTP traffic load to main process when using webhook-specific processes. | --- ## Page: https://docs.n8n.io/hosting/configuration/environment-variables/executions/ 1. Hosting n8n 2. Configuration 3. Environment variables This page lists environment variables to configure workflow execution settings. | Variable | Type | Default | Description | | --- | --- | --- | --- | | `EXECUTIONS_MODE` | Enum string: `regular`, `queue` | `regular` | Whether executions should run directly or using queue. Refer to Queue mode for more details. | | `EXECUTIONS_TIMEOUT` | Number | `-1` | Sets a default timeout (in seconds) to all workflows after which n8n stops their execution. Users can override this for individual workflows up to the duration set in `EXECUTIONS_TIMEOUT_MAX`. Set `EXECUTIONS_TIMEOUT` to `-1` to disable. | | `EXECUTIONS_TIMEOUT_MAX` | Number | `3600` | The maximum execution time (in seconds) that users can set for an individual workflow. | | `EXECUTIONS_DATA_SAVE_ON_ERROR` | Enum string: `all`, `none` | `all` | Whether n8n saves execution data on error. | | `EXECUTIONS_DATA_SAVE_ON_SUCCESS` | Enum string: `all`, `none` | `all` | Whether n8n saves execution data on success. | | `EXECUTIONS_DATA_SAVE_ON_PROGRESS` | Boolean | `false` | Whether to save progress for each node executed (true) or not (false). | | `EXECUTIONS_DATA_SAVE_MANUAL_EXECUTIONS` | Boolean | `true` | Whether to save data of executions when started manually. | | `EXECUTIONS_DATA_PRUNE` | Boolean | `true` | Whether to delete data of past executions on a rolling basis. | | `EXECUTIONS_DATA_MAX_AGE` | Number | `336` | The execution age (in hours) before it's deleted. | | `EXECUTIONS_DATA_PRUNE_MAX_COUNT` | Number | `10000` | Maximum number of executions to keep in the database. 0 = no limit | | `EXECUTIONS_DATA_HARD_DELETE_BUFFER` | Number | `1` | How old (hours) the finished execution data has to be to get hard-deleted. By default, this buffer excludes recent executions as the user may need them while building a workflow. | | `EXECUTIONS_DATA_PRUNE_HARD_DELETE_INTERVAL` | Number | `15` | How often (minutes) execution data should be hard-deleted. | | `EXECUTIONS_DATA_PRUNE_SOFT_DELETE_INTERVAL` | Number | `60` | How often (minutes) execution data should be soft-deleted. | | `N8N_CONCURRENCY_PRODUCTION_LIMIT` | Number | `-1` | Max production executions allowed to run concurrently, in both regular and scaling modes. `-1` to disable in regular mode. | --- ## Page: https://docs.n8n.io/hosting/configuration/environment-variables/external-data-storage/ * Using n8n * Integrations * Hosting n8n * Code in n8n * Advanced AI * API * Embed * n8n home ↗ * Forum ↗ * Blog ↗ 1. Hosting n8n 2. Configuration 3. Environment variables Refer to External storage for more information on using external storage for binary data. | Variable | Type | Default | Description | | --- | --- | --- | --- | | `N8N_EXTERNAL_STORAGE_S3_HOST` | String | \- | Host of the n8n bucket in S3-compatible external storage. For example, `s3.us-east-1.amazonaws.com` | | `N8N_EXTERNAL_STORAGE_S3_BUCKET_NAME` | String | \- | Name of the n8n bucket in S3-compatible external storage. | | `N8N_EXTERNAL_STORAGE_S3_BUCKET_REGION` | String | \- | Region of the n8n bucket in S3-compatible external storage. For example, `us-east-1` | | `N8N_EXTERNAL_STORAGE_S3_ACCESS_KEY` | String | \- | Access key in S3-compatible external storage | | `N8N_EXTERNAL_STORAGE_S3_ACCESS_SECRET` | String | \- | Access secret in S3-compatible external storage. | --- ## Page: https://docs.n8n.io/hosting/configuration/environment-variables/external-hooks/ * Using n8n * Integrations * Hosting n8n * Code in n8n * Advanced AI * API * Embed * n8n home ↗ * Forum ↗ * Blog ↗ 1. Hosting n8n 2. Configuration 3. Environment variables You can define external hooks that n8n executes whenever a specific operation runs. Refer to Backend hooks for examples of available hooks and Hook files for information on file formatting. | Variable | Type | Description | | --- | --- | --- | | `EXTERNAL_HOOK_FILES` | String | Files containing backend external hooks. Provide multiple files as a colon-separated list ("`:`"). | | `EXTERNAL_FRONTEND_HOOKS_URLS` | String | URLs to files containing frontend external hooks. Provide multiple URLs as a colon-separated list ("`:`"). | --- ## Page: https://docs.n8n.io/hosting/configuration/environment-variables/external-secrets/ 1. Hosting n8n 2. Configuration 3. Environment variables File-based configuration You can add `_FILE` to individual variables to provide their configuration in a separate file. Refer to Keeping sensitive data in separate files for more details. You can use an external secrets store to manage credentials for n8n. Refer to External secrets for details. | Variable | Type | Default | Description | | --- | --- | --- | --- | | `N8N_EXTERNAL_SECRETS_UPDATE_INTERVAL` | Number | `300` (5 minutes) | How often (in seconds) to check for secret updates. | --- ## Page: https://docs.n8n.io/hosting/configuration/environment-variables/logs/ This page lists environment variables to set up logging for debugging. Refer to Logging in n8n for details. ## n8n logs# | Variable | Type | Default | Description | | --- | --- | --- | --- | | `N8N_LOG_LEVEL` | Enum string: `info`, `warn`, `error`, `debug` | `info` | Log output level. Refer to Log levels for details. | | `N8N_LOG_OUTPUT` | Enum string: `console`, `file` | `console` | Where to output logs. Provide multiple values as a comma-separated list. | | `N8N_LOG_FILE_COUNT_MAX` | Number | `100` | Max number of log files to keep. | | `N8N_LOG_FILE_SIZE_MAX` | Number | `16` | Max size of each log file in MB. | | `N8N_LOG_FILE_LOCATION` | String | `<n8n-directory-path>/logs/n8n.log` | Log file location. Requires N8N\_LOG\_OUTPUT set to `file`. | | `DB_LOGGING_ENABLED` | Boolean | `false` | Whether to enable database-specific logging. | | `DB_LOGGING_OPTIONS` | Enum string: `query`, `error`, `schema`, `warn`, `info`, `log` | `error` | Database log output level. To enable all logging, specify `all`. Refer to TypeORM logging options | | `DB_LOGGING_MAX_EXECUTION_TIME` | Number | `1000` | Maximum execution time (in milliseconds) before n8n logs a warning. Set to `0` to disable long running query warning. | | `CODE_ENABLE_STDOUT` | Boolean | `false` | Set to `true` to send Code node logs to process's stdout for debugging, monitoring, or logging purposes. | | `NO_COLOR` | any | `undefined` | Set to any value to output logs without ANSI colors. For more information, see the no-color.org website. | ## Log streaming# Refer to Log streaming for more information on this feature. | Variable | Type | Default | Description | | --- | --- | --- | --- | | `N8N_EVENTBUS_CHECKUNSENTINTERVAL` | Number | `0` | How often (in milliseconds) to check for unsent event messages. Can in rare cases send message twice. Set to `0` to disable it. | | `N8N_EVENTBUS_LOGWRITER_SYNCFILEACCESS` | Boolean | `false` | Whether all file access happens synchronously within the thread (true) or not (false). | | `N8N_EVENTBUS_LOGWRITER_KEEPLOGCOUNT` | Number | `3` | Number of event log files to keep. | | `N8N_EVENTBUS_LOGWRITER_MAXFILESIZEINKB` | Number | `10240` | Maximum size (in kilo-bytes) of an event log file before a new one starts. | | `N8N_EVENTBUS_LOGWRITER_LOGBASENAME` | String | `n8nEventLog` | Basename of the event log file. | --- ## Page: https://docs.n8n.io/hosting/configuration/environment-variables/licenses/ To enable certain licensed features, you must first activate your license. You can do this either through the UI or by setting environment variables. For more information, see license key. | Variable | Type | Default | Description | | --- | --- | --- | --- | | `N8N_HIDE_USAGE_PAGE` | boolean | `false` | Hide the usage and plans page in the app. | | `N8N_LICENSE_ACTIVATION_KEY` | String | `''` | Activation key to initialize license. Not applicable if the n8n instance was already activated. | | `N8N_LICENSE_AUTO_RENEW_ENABLED` | Boolean | `true` | Enables (true) or disables (false) autorenewal for licenses. If disabled, you need to manually renew the license every 10 days by navigating to **Settings** > **Usage and plan**, and pressing `F5`. Failure to renew the license will disable all licensed features. | | `N8N_LICENSE_DETACH_FLOATING_ON_SHUTDOWN` | Boolean | `true` | Controls whether the instance releases floating entitlements back to the pool upon shutdown. Set to `true` to allow other instances to reuse the entitlements, or `false` to retain them. For production instances that must always keep their licensed features, set this to `false`. | | `N8N_LICENSE_SERVER_URL` | String | `http://license.n8n.io/v1` | Server URL to retrieve license. | | `N8N_LICENSE_TENANT_ID` | Number | `1` | Tenant ID associated with the license. Only set this variable if explicitly instructed by n8n. | | `http_proxy_license_server` | String | `http://user:pass@proxy:port` | Proxy server URL for HTTP requests to retrieve license. This variable name needs to be lowercase. | | `https_proxy_license_server` | String | `https://user:pass@proxy:port` | Proxy server URL for HTTPS requests to retrieve license. This variable name needs to be lowercase. | --- ## Page: https://docs.n8n.io/hosting/configuration/environment-variables/nodes/ This page lists the environment variables configuration options for managing nodes in n8n, including specifying which nodes to load or exclude, importing built-in or external modules in the Code node, and enabling community nodes. | Variable | Type | Default | Description | | --- | --- | --- | --- | | `NODES_INCLUDE` | Array of strings | \- | Specify which nodes to load. | | `NODES_EXCLUDE` | Array of strings | \- | Specify which nodes not to load. For example, to block nodes that can be a security risk if users aren't trustworthy: `NODES_EXCLUDE: "[\"n8n-nodes-base.executeCommand\", \"n8n-nodes-base.readWriteFile\"]"` | | `NODE_FUNCTION_ALLOW_BUILTIN` | String | \- | Permit users to import specific built-in modules in the Code node. Use \* to allow all. n8n disables importing modules by default. | | `NODE_FUNCTION_ALLOW_EXTERNAL` | String | \- | Permit users to import specific external modules (from `n8n/node_modules`) in the Code node. n8n disables importing modules by default. | | `NODES_ERROR_TRIGGER_TYPE` | String | `n8n-nodes-base.errorTrigger` | Specify which node type to use as Error Trigger. | | `N8N_CUSTOM_EXTENSIONS` | String | \- | Specify the path to directories containing your custom nodes. | | `N8N_COMMUNITY_PACKAGES_ENABLED` | Boolean | `true` | Enables (true) or disables (false) community nodes. | | `N8N_COMMUNITY_PACKAGES_REGISTRY` | String | `https://registry.npmjs.org` | NPM registry URL to pull community packages from (license required). | --- ## Page: https://docs.n8n.io/hosting/configuration/environment-variables/queue-mode/ You can run n8n in different modes depending on your needs. Queue mode provides the best scalability. Refer to Queue mode for more information. | Variable | Type | Default | Description | | --- | --- | --- | --- | | `QUEUE_BULL_PREFIX` | String | \- | Prefix to use for all queue keys. | | `QUEUE_BULL_REDIS_DB` | Number | `0` | The Redis database used. | | `QUEUE_BULL_REDIS_HOST` | String | `localhost` | The Redis host. | | `QUEUE_BULL_REDIS_PORT` | Number | `6379` | The Redis port used. | | `QUEUE_BULL_REDIS_USERNAME` | String | \- | The Redis username (needs Redis version 6 or above). Don't define it for Redis < 6 compatibility | | `QUEUE_BULL_REDIS_PASSWORD` | String | \- | The Redis password. | | `QUEUE_BULL_REDIS_TIMEOUT_THRESHOLD` | Number | `10000` | The Redis timeout threshold (in ms). | | `QUEUE_BULL_REDIS_CLUSTER_NODES` | String | \- | Expects a comma-separated list of Redis Cluster nodes in the format `host:port`, for the Redis client to initially connect to. If running in queue mode (`EXECUTIONS_MODE = queue`), setting this variable will create a Redis Cluster client instead of a Redis client, and n8n will ignore `QUEUE_BULL_REDIS_HOST` and `QUEUE_BULL_REDIS_PORT`. | | `QUEUE_BULL_REDIS_TLS` | Boolean | `false` | Enable TLS on Redis connections. | | `QUEUE_BULL_REDIS_DUALSTACK` | Boolean | `false` | Enable dual-stack support (IPv4 and IPv6) on Redis connections. | | `QUEUE_WORKER_TIMEOUT` (**deprecated**) | Number | `30` | **Deprecated** Use `N8N_GRACEFUL_SHUTDOWN_TIMEOUT` instead. How long should n8n wait (seconds) for running executions before exiting worker process on shutdown. | | `QUEUE_HEALTH_CHECK_ACTIVE` | Boolean | `false` | Whether to enable health checks (true) or disable (false). | | `QUEUE_HEALTH_CHECK_PORT` | Number | \- | The port to serve health checks on. | | `QUEUE_WORKER_LOCK_DURATION` | Number | `30000` | How long (in ms) is the lease period for a worker to work on a message. | | `QUEUE_WORKER_LOCK_RENEW_TIME` | Number | `15000` | How frequently (in ms) should a worker renew the lease time. | | `QUEUE_WORKER_STALLED_INTERVAL` | Number | `30000` | How often should a worker check for stalled jobs (use 0 for never). | | `QUEUE_WORKER_MAX_STALLED_COUNT` | Number | `1` | Maximum amount of times a stalled job will be re-processed. | ## Multi-main setup# Refer to Configuring multi-main setup for details. | Variable | Type | Default | Description | | --- | --- | --- | --- | | `N8N_MULTI_MAIN_SETUP_ENABLED` | Boolean | `false` | Whether to enable multi-main setup for queue mode (license required). | | `N8N_MULTI_MAIN_SETUP_KEY_TTL` | Number | `10` | Time to live (in seconds) for leader key in multi-main setup. | | `N8N_MULTI_MAIN_SETUP_CHECK_INTERVAL` | Number | `3` | Interval (in seconds) for leader check in multi-main setup. | --- ## Page: https://docs.n8n.io/hosting/configuration/environment-variables/security/ * Using n8n * Integrations * Hosting n8n * Code in n8n * Advanced AI * API * Embed * n8n home ↗ * Forum ↗ * Blog ↗ 1. Hosting n8n 2. Configuration 3. Environment variables | Variable | Type | Default | Description | | --- | --- | --- | --- | | `N8N_BLOCK_ENV_ACCESS_IN_NODE` | Boolean | `false` | Whether to allow users to access environment variables in expressions and the Code node (false) or not (true). | | `N8N_RESTRICT_FILE_ACCESS_TO` | String | | Limits access to files in these directories. Provide multiple files as a colon-separated list ("`:`"). | | `N8N_BLOCK_FILE_ACCESS_TO_N8N_FILES` | Boolean | `true` | Set to `true` to block access to all files in the `.n8n` directory and user defined configuration files. | | `N8N_SECURITY_AUDIT_DAYS_ABANDONED_WORKFLOW` | Number | 90 | Number of days to consider a workflow abandoned if it's not executed. | | `N8N_SECURE_COOKIE` | Boolean | `true` | Ensures that cookies are only sent over HTTPS, enhancing security. | | `N8N_SAMESITE_COOKIE` | Enum string: `strict`, `lax`, `none` | `lax` | Controls cross-site cookie behavior (learn more): * `strict`: Sent only for first-party requests. * `lax` (default): Sent with top-level navigation requests. * `none`: Sent in all contexts (requires HTTPS). | --- ## Page: https://docs.n8n.io/hosting/configuration/environment-variables/source-control/ * Using n8n * Integrations * Hosting n8n * Code in n8n * Advanced AI * API * Embed * n8n home ↗ * Forum ↗ * Blog ↗ 1. Hosting n8n 2. Configuration 3. Environment variables n8n uses Git-based source control to support environments. Refer to Source control and environments for more information on how to link a Git repository to an n8n instance and configure your source control. | Variable | Type | Default | Description | | --- | --- | --- | --- | | `N8N_SOURCECONTROL_DEFAULT_SSH_KEY_TYPE` | String | `ed25519` | Set to `rsa` to make RSA the default SSH key type for Source control setup. | --- ## Page: https://docs.n8n.io/hosting/configuration/environment-variables/task-runners/ Task runners execute code defined by the Code node. ## n8n instance environment variables# | Variable | Type | Default | Description | | --- | --- | --- | --- | | `N8N_RUNNERS_ENABLED` | Boolean | `false` | Are task runners enabled. | | `N8N_RUNNERS_MODE` | Enum string: `internal`, `external` | `internal` | How to launch and run the task runner. `internal` means n8n will launch a task runner as child process. `external` means an external orchestrator will launch the task runner. | | `N8N_RUNNERS_AUTH_TOKEN` | String | Random string | Shared secret used by a task runner to authenticate to n8n. Required when using `external` mode. | | `N8N_RUNNERS_BROKER_PORT` | Number | `5679` | Port the task broker listens on for task runner connections. | | `N8N_RUNNERS_BROKER_LISTEN_ADDRESS` | String | `127.0.0.1` | Address the task broker listens on. | | `N8N_RUNNERS_MAX_PAYLOAD` | Number | `1 073 741 824` | Maximum payload size in bytes for communication between a task broker and a task runner. | | `N8N_RUNNERS_MAX_OLD_SPACE_SIZE` | String | | The `--max-old-space-size` option to use for a task runner (in MB). By default, Node.js will set this based on available memory. | | `N8N_RUNNERS_MAX_CONCURRENCY` | Number | `5` | The number of concurrent tasks a task runner can execute at a time. | | `N8N_RUNNERS_TASK_TIMEOUT` | Number | `60` | How long (in seconds) a task can take to complete before the task aborts and the runner restarts. Must be greater than 0. | | `N8N_RUNNERS_HEARTBEAT_INTERVAL` | Number | `30` | How often (in seconds) the runner must send a heartbeat to the broker, else the task aborts and the runner restarts. Must be greater than 0. | ## Task runner launcher environment variables# | Variable | Type | Default | Description | | --- | --- | --- | --- | | `N8N_RUNNERS_LAUNCHER_LOG_LEVEL` | Enum string: `debug`, `info`, `warn`, `error` | `info` | Which log messages to show. | | `N8N_RUNNERS_AUTH_TOKEN` | String | \- | Shared secret used to authenticate to n8n. | | `N8N_RUNNERS_AUTO_SHUTDOWN_TIMEOUT` | Number | `15` | The number of seconds to wait before shutting down an idle runner. | | `N8N_RUNNERS_TASK_BROKER_URI` | String | `http://127.0.0.1:5679` | The URI of the task broker server (n8n instance). | | `N8N_RUNNERS_LAUNCHER_HEALTH_CHECK_PORT` | Number | `5680` | Port for the launcher's health check server. | | `N8N_RUNNERS_MAX_PAYLOAD` | Number | `1 073 741 824` | Maximum payload size in bytes for communication between a task broker and a task runner. | | `N8N_RUNNERS_MAX_CONCURRENCY` | Number | `5` | The number of concurrent tasks a task runner can execute at a time. | | `NODE_OPTIONS` | String | \- | Options for Node.js. | ## Task runner environment variables# | Variable | Type | Default | Description | | --- | --- | --- | --- | | `N8N_RUNNERS_GRANT_TOKEN` | String | Random string | Token the runner uses to authenticate with the task broker. This is automatically provided by the launcher. | | `N8N_RUNNERS_AUTO_SHUTDOWN_TIMEOUT` | Number | `15` | The number of seconds to wait before shutting down an idle runner. | | `N8N_RUNNERS_TASK_BROKER_URI` | String | `http://127.0.0.1:5679` | The URI of the task broker server (n8n instance). | | `N8N_RUNNERS_LAUNCHER_HEALTH_CHECK_PORT` | Number | `5680` | Port for the launcher's health check server. | | `N8N_RUNNERS_MAX_PAYLOAD` | Number | `1 073 741 824` | Maximum payload size in bytes for communication between a task broker and a task runner. | | `N8N_RUNNERS_MAX_CONCURRENCY` | Number | `5` | The number of concurrent tasks a task runner can execute at a time. | | `NODE_FUNCTION_ALLOW_BUILTIN` | String | \- | Permit users to import specific built-in modules in the Code node. Use \* to allow all. n8n disables importing modules by default. | | `NODE_FUNCTION_ALLOW_EXTERNAL` | String | \- | Permit users to import specific external modules (from `n8n/node_modules`) in the Code node. n8n disables importing modules by default. | | `GENERIC_TIMEZONE` | \* | `America/New_York` | The same default timezone as configured for the n8n instance. | --- ## Page: https://docs.n8n.io/hosting/configuration/environment-variables/timezone-localization/ * Using n8n * Integrations * Hosting n8n * Code in n8n * Advanced AI * API * Embed * n8n home ↗ * Forum ↗ * Blog ↗ 1. Hosting n8n 2. Configuration 3. Environment variables | Variable | Type | Default | Description | | --- | --- | --- | --- | | `GENERIC_TIMEZONE` | \* | `America/New_York` | The n8n instance timezone. Important for schedule nodes (such as Cron). | | `N8N_DEFAULT_LOCALE` | String | `en` | A locale identifier, compatible with the Accept-Language header. n8n doesn't support regional identifiers, such as `de-AT`. When running in a locale other than the default, n8n displays UI strings in the selected locale, and falls back to `en` for any untranslated strings. | --- ## Page: https://docs.n8n.io/hosting/configuration/environment-variables/user-management-smtp-2fa/ 1. Hosting n8n 2. Configuration 3. Environment variables Refer to User management for more information on setting up user management and emails. | Variable | Type | Default | Description | | --- | --- | --- | --- | | `N8N_EMAIL_MODE` | String | `smtp` | Enable emails. | | `N8N_SMTP_HOST` | String | \- | _your\_SMTP\_server\_name_ | | `N8N_SMTP_PORT` | Number | \- | _your\_SMTP\_server\_port_ | | `N8N_SMTP_USER` | String | \- | _your\_SMTP\_username_ | | `N8N_SMTP_PASS` | String | \- | _your\_SMTP\_password_ | | `N8N_SMTP_OAUTH_SERVICE_CLIENT` | String | \- | If using 2LO with a service account this is your client ID | | `N8N_SMTP_OAUTH_PRIVATE_KEY` | String | \- | If using 2LO with a service account this is your private key | | `N8N_SMTP_SENDER` | String | \- | Sender email address. You can optionally include the sender name. Example with name: _N8N `<contact@n8n.com>`_ | | `N8N_SMTP_SSL` | Boolean | `true` | Whether to use SSL for SMTP (true) or not (false). | | `N8N_SMTP_STARTTLS` | Boolean | `true` | Whether to use STARTTLS for SMTP (true) or not (false). | | `N8N_UM_EMAIL_TEMPLATES_INVITE` | String | \- | Full path to your HTML email template. This overrides the default template for invite emails. | | `N8N_UM_EMAIL_TEMPLATES_PWRESET` | String | \- | Full path to your HTML email template. This overrides the default template for password reset emails. | | `N8N_UM_EMAIL_TEMPLATES_WORKFLOW_SHARED` | String | \- | Overrides the default HTML template for notifying users that a workflow was shared. Provide the full path to the template. | | `N8N_UM_EMAIL_TEMPLATES_CREDENTIALS_SHARED` | String | \- | Overrides the default HTML template for notifying users that a credential was shared. Provide the full path to the template. | | `N8N_USER_MANAGEMENT_JWT_SECRET` | String | \- | Set a specific JWT secret. By default, n8n generates one on start. | | `N8N_USER_MANAGEMENT_JWT_DURATION_HOURS` | Number | 168 | Set an expiration date for the JWTs in hours. | | `N8N_USER_MANAGEMENT_JWT_REFRESH_TIMEOUT_HOURS` | Number | 0 | How many hours before the JWT expires to automatically refresh it. 0 means 25% of `N8N_USER_MANAGEMENT_JWT_DURATION_HOURS`. -1 means it will never refresh, which forces users to log in again after the period defined in `N8N_USER_MANAGEMENT_JWT_DURATION_HOURS`. | | `N8N_MFA_ENABLED` | Boolean | `true` | Whether to enable two-factor authentication (true) or disable (false). n8n ignores this if existing users have 2FA enabled. | --- ## Page: https://docs.n8n.io/hosting/configuration/environment-variables/workflows/ * Using n8n * Integrations * Hosting n8n * Code in n8n * Advanced AI * API * Embed * n8n home ↗ * Forum ↗ * Blog ↗ 1. Hosting n8n 2. Configuration 3. Environment variables | Variable | Type | Default | Description | | --- | --- | --- | --- | | `N8N_ONBOARDING_FLOW_DISABLED` | Boolean | `false` | Whether to disable onboarding tips when creating a new workflow (true) or not (false). | | `N8N_WORKFLOW_ACTIVATION_BATCH_SIZE` | Number | `1` | How many workflows to activate simultaneously during startup. | | `N8N_WORKFLOW_CALLER_POLICY_DEFAULT_OPTION` | String | `workflowsFromSameOwner` | Which workflows can call a workflow. Options are: `any`, `none`, `workflowsFromAList`, `workflowsFromSameOwner`. This feature requires Workflow sharing. | | `N8N_WORKFLOW_TAGS_DISABLED` | Boolean | `false` | Whether to disable workflow tags (true) or enable tags (false). | | `WORKFLOWS_DEFAULT_NAME` | String | `My workflow` | The default name used for new workflows. | --- ## Page: https://docs.n8n.io/hosting/configuration/configuration-methods/ You can change n8n's settings using environment variables. For a full list of available configurations see Environment Variables. ## Set environment variables by command line# ### npm# For npm, set your desired environment variables in terminal using the `export` command as shown below: <table><tbody><tr><td><div><pre><span></span><span>1</span></pre></div></td><td><div><pre><span></span><code><span>export</span><span> </span><variable><span>=</span><value> </code></pre></div></td></tr></tbody></table> ### Docker# In Docker you can use the `-e` flag from the command line: <table><tbody><tr><td><div><pre><span></span><span>1</span> <span>2</span> <span>3</span> <span>4</span> <span>5</span></pre></div></td><td><div><pre><span></span><code>docker<span> </span>run<span> </span>-it<span> </span>--rm<span> </span><span>\</span> <span> </span>--name<span> </span>n8n<span> </span><span>\</span> <span> </span>-p<span> </span><span>5678</span>:5678<span> </span><span>\</span> <span> </span>-e<span> </span><span>N8N_TEMPLATES_ENABLED</span><span>=</span><span>"false"</span><span> </span><span>\</span> <span> </span>docker.n8n.io/n8nio/n8n </code></pre></div></td></tr></tbody></table> ## Set environment variables using a file# You can also configure n8n using a configuration file. Only define the values that need to be different from the default in your configuration file. You can use multiple files. For example, you can have a file with generic base settings, and files with specific values for different environments. ### npm# Set the path to the JSON configuration file using the environment variable `N8N_CONFIG_FILES`: <table><tbody><tr><td><div><pre><span></span><span>1</span> <span>2</span> <span>3</span> <span>4</span> <span>5</span> <span>6</span> <span>7</span> <span>8</span></pre></div></td><td><div><pre><span></span><code><span># Bash - Single file</span> <span>export</span><span> </span><span>N8N_CONFIG_FILES</span><span>=</span>/<path-to-config>/my-config.json <span># Bash - Multiple files are comma-separated</span> <span>export</span><span> </span><span>N8N_CONFIG_FILES</span><span>=</span>/<path-to-config>/my-config.json,/<path-to-config>/production.json <span># PowerShell - Single file, persist for current user</span> <span># Note that setting scope (Process, User, Machine) has no effect on Unix systems</span> <span>[</span>Environment<span>]</span>::SetEnvironmentVariable<span>(</span><span>'N8N_CONFIG_FILES'</span>,<span> </span><span>'<path-to-config>\config.json'</span>,<span> </span><span>'User'</span><span>)</span> </code></pre></div></td></tr></tbody></table> Example file: <table><tbody><tr><td><div><pre><span></span><span> 1</span> <span> 2</span> <span> 3</span> <span> 4</span> <span> 5</span> <span> 6</span> <span> 7</span> <span> 8</span> <span> 9</span> <span>10</span> <span>11</span></pre></div></td><td><div><pre><span></span><code><span>{</span> <span> </span><span>"executions"</span><span>:</span><span> </span><span>{</span> <span> </span><span>"saveDataOnSuccess"</span><span>:</span><span> </span><span>"none"</span> <span> </span><span>},</span> <span> </span><span>"generic"</span><span>:</span><span> </span><span>{</span> <span> </span><span>"timezone"</span><span>:</span><span> </span><span>"Europe/Berlin"</span> <span> </span><span>},</span> <span> </span><span>"nodes"</span><span>:</span><span> </span><span>{</span> <span> </span><span>"exclude"</span><span>:</span><span> </span><span>"[\"n8n-nodes-base.executeCommand\",\"n8n-nodes-base.writeBinaryFile\"]"</span> <span> </span><span>}</span> <span>}</span> </code></pre></div></td></tr></tbody></table> Formatting as JSON You can't always work out the correct JSON from the Environment variables reference. For example, to set `N8N_METRICS` to `true`, you need to do: <table><tbody><tr><td><div><pre><span></span><span>1</span> <span>2</span> <span>3</span> <span>4</span> <span>5</span> <span>6</span> <span>7</span></pre></div></td><td><div><pre><span></span><code><span>{</span> <span> </span><span>"endpoints"</span><span>:</span><span> </span><span>{</span> <span> </span><span>"metrics"</span><span>:</span><span> </span><span>{</span> <span> </span><span>"enable"</span><span>:</span><span> </span><span>true</span> <span> </span><span>}</span> <span> </span><span>}</span> <span>}</span> </code></pre></div></td></tr></tbody></table> Refer to the Schema file in the source code for full details of the expected settings. ### Docker# In Docker, you can set your environment variables in the `n8n: environment:` element of your `docker-compose.yaml` file. For example: <table><tbody><tr><td><div><pre><span></span><span>1</span> <span>2</span> <span>3</span></pre></div></td><td><div><pre><span></span><code><span>n8n</span><span>:</span> <span> </span><span>environment</span><span>:</span> <span> </span><span>-</span><span> </span><span>N8N_TEMPLATES_ENABLED=false</span> </code></pre></div></td></tr></tbody></table> ### Keeping sensitive data in separate files# You can append `_FILE` to individual environment variables to provide their configuration in a separate file, enabling you to avoid passing sensitive details using environment variables. n8n loads the data from the file with the given name, making it possible to load data from Docker-Secrets and Kubernetes-Secrets. Refer to Environment variables for details on each variable. While most environment variables can use the `_FILE` suffix, it's more beneficial for sensitive data such as credentials and database configuration. Here are some examples: <table><tbody><tr><td><div><pre><span></span><span> 1</span> <span> 2</span> <span> 3</span> <span> 4</span> <span> 5</span> <span> 6</span> <span> 7</span> <span> 8</span> <span> 9</span> <span>10</span> <span>11</span> <span>12</span></pre></div></td><td><div><pre><span></span><code><span>CREDENTIALS_OVERWRITE_DATA_FILE=/path/to/credentials_data</span> <span>DB_TYPE_FILE=/path/to/db_type</span> <span>DB_POSTGRESDB_DATABASE_FILE=/path/to/database_name</span> <span>DB_POSTGRESDB_HOST_FILE=/path/to/database_host</span> <span>DB_POSTGRESDB_PORT_FILE=/path/to/database_port</span> <span>DB_POSTGRESDB_USER_FILE=/path/to/database_user</span> <span>DB_POSTGRESDB_PASSWORD_FILE=/path/to/database_password</span> <span>DB_POSTGRESDB_SCHEMA_FILE=/path/to/database_schema</span> <span>DB_POSTGRESDB_SSL_CA_FILE=/path/to/ssl_ca</span> <span>DB_POSTGRESDB_SSL_CERT_FILE=/path/to/ssl_cert</span> <span>DB_POSTGRESDB_SSL_KEY_FILE=/path/to/ssl_key</span> <span>DB_POSTGRESDB_SSL_REJECT_UNAUTHORIZED_FILE=/path/to/ssl_reject_unauth</span> </code></pre></div></td></tr></tbody></table> --- ## Page: https://docs.n8n.io/hosting/configuration/configuration-examples/ * Using n8n * Integrations * Hosting n8n * Code in n8n * Advanced AI * API * Embed * n8n home ↗ * Forum ↗ * Blog ↗ --- ## Page: https://docs.n8n.io/hosting/configuration/configuration-examples/isolation/ By default, a self-hosted n8n instance sends data to n8n's servers. It notifies users about available updates, workflow templates, and diagnostics. To prevent your n8n instance from connecting to n8n's servers, set these environment variables to false: <table><tbody><tr><td><div><pre><span></span><span>1</span> <span>2</span> <span>3</span></pre></div></td><td><div><pre><span></span><code>N8N_DIAGNOSTICS_ENABLED=false N8N_VERSION_NOTIFICATIONS_ENABLED=false N8N_TEMPLATES_ENABLED=false </code></pre></div></td></tr></tbody></table> Unset n8n's diagnostics configuration: <table><tbody><tr><td><div><pre><span></span><span>1</span> <span>2</span> <span>3</span></pre></div></td><td><div><pre><span></span><code>EXTERNAL_FRONTEND_HOOKS_URLS= N8N_DIAGNOSTICS_CONFIG_FRONTEND= N8N_DIAGNOSTICS_CONFIG_BACKEND= </code></pre></div></td></tr></tbody></table> Refer to Environment variables reference for more information on these variables. --- ## Page: https://docs.n8n.io/hosting/configuration/configuration-examples/base-url/ Requires manual UI build This use case involves configuring the `VUE_APP_URL_BASE_API` environmental variable which requires a manual build of the `n8n-editor-ui` package. You can't use it with the default n8n Docker image where the default setting for this variable is `/`, meaning that it uses the root-domain. You can configure the Base URL that the front end uses to connect to the back end's REST API. This is relevant when you want to host n8n's front end and back end separately. <table><tbody><tr><td><div><pre><span></span><span>1</span></pre></div></td><td><div><pre><span></span><code><span>export</span><span> </span><span>VUE_APP_URL_BASE_API</span><span>=</span>https://n8n.example.com/ </code></pre></div></td></tr></tbody></table> Refer to Environment variables reference for more information on this variable. --- ## Page: https://docs.n8n.io/hosting/configuration/configuration-examples/custom-certificate-authority/ You can add your own certificate authority (CA) or self-signed certificate to n8n. This means you are able to trust a certain SSL certificate instead of trusting all invalid certificates, which is a potential security risk. Available in version 1.42.0 This feature is only available in version 1.42.0+. To use this feature you need to place your certificates in a folder and mount the folder to `/opt/custom-certificates` in the container. ## Docker# The examples below assume you have a folder called `pki` that contains your certificates in either the directory you run the command from or next to your docker compose file. ### Docker CLI# When using the CLI you can use the `-v` flag from the command line: <table><tbody><tr><td><div><pre><span></span><span>1</span> <span>2</span> <span>3</span> <span>4</span> <span>5</span></pre></div></td><td><div><pre><span></span><code>docker<span> </span>run<span> </span>-it<span> </span>--rm<span> </span><span>\</span> <span> </span>--name<span> </span>n8n<span> </span><span>\</span> <span> </span>-p<span> </span><span>5678</span>:5678<span> </span><span>\</span> <span> </span>-v<span> </span>./pki:/opt/custom-certificates<span> </span><span>\</span> <span> </span>docker.n8n.io/n8nio/n8n </code></pre></div></td></tr></tbody></table> ### Docker Compose# <table><tbody><tr><td><div><pre><span></span><span>1</span> <span>2</span> <span>3</span> <span>4</span> <span>5</span> <span>6</span> <span>7</span> <span>8</span> <span>9</span></pre></div></td><td><div><pre><span></span><code><span>name</span><span>:</span><span> </span><span>n8n</span> <span>services</span><span>:</span> <span> </span><span>n8n</span><span>:</span> <span> </span><span>volumes</span><span>:</span> <span> </span><span>-</span><span> </span><span>./pki:/opt/custom-certificates</span> <span> </span><span>container_name</span><span>:</span><span> </span><span>n8n</span> <span> </span><span>ports</span><span>:</span> <span> </span><span>-</span><span> </span><span>5678:5678</span> <span> </span><span>image</span><span>:</span><span> </span><span>docker.n8n.io/n8nio/n8n</span> </code></pre></div></td></tr></tbody></table> You should also give the right permissions to the imported certs. You can do this once the container is running (assuming n8n as the container name): <table><tbody><tr><td><div><pre><span></span><span>1</span></pre></div></td><td><div><pre><span></span><code>docker<span> </span><span>exec</span><span> </span>--user<span> </span><span>0</span><span> </span>n8n<span> </span>chown<span> </span>-R<span> </span><span>1000</span>:1000<span> </span>/opt/custom-certificates </code></pre></div></td></tr></tbody></table> --- ## Page: https://docs.n8n.io/hosting/configuration/configuration-examples/encryption-key/ n8n creates a random encryption key automatically on the first launch and saves it in the `~/.n8n` folder. n8n uses that key to encrypt the credentials before they get saved to the database. If the key isn't yet in the settings file, you can set it using an environment variable, so that n8n uses your custom key instead of generating a new one. In queue mode, you must specify the encryption key environment variable for all workers. <table><tbody><tr><td><div><pre><span></span><span>1</span></pre></div></td><td><div><pre><span></span><code><span>export</span><span> </span><span>N8N_ENCRYPTION_KEY</span><span>=</span><SOME<span> </span>RANDOM<span> </span>STRING> </code></pre></div></td></tr></tbody></table> Refer to Environment variables reference for more information on this variable. --- ## Page: https://docs.n8n.io/hosting/configuration/configuration-examples/execution-timeout/ A workflow times out and gets canceled after this time (in seconds). If the workflow runs in the main process, a soft timeout happens (takes effect after the current node finishes). If a workflow runs in its own process, n8n attempts a soft timeout first, then kills the process after waiting for a fifth of the given timeout duration. `EXECUTIONS_TIMEOUT` default is `-1`. For example, if you want to set the timeout to one hour: <table><tbody><tr><td><div><pre><span></span><span>1</span></pre></div></td><td><div><pre><span></span><code><span>export</span><span> </span><span>EXECUTIONS_TIMEOUT</span><span>=</span><span>3600</span> </code></pre></div></td></tr></tbody></table> You can also set maximum execution time (in seconds) for each workflow individually. For example, if you want to set maximum execution time to two hours: <table><tbody><tr><td><div><pre><span></span><span>1</span></pre></div></td><td><div><pre><span></span><code><span>export</span><span> </span><span>EXECUTIONS_TIMEOUT_MAX</span><span>=</span><span>7200</span> </code></pre></div></td></tr></tbody></table> Refer to Environment variables reference for more information on these variables. --- ## Page: https://docs.n8n.io/hosting/configuration/configuration-examples/custom-nodes-location/ * Using n8n * Integrations * Hosting n8n * Code in n8n * Advanced AI * API * Embed * n8n home ↗ * Forum ↗ * Blog ↗ n8n Docs * Using n8n * Getting started Getting started * Learning path * Choose your n8n * Quickstarts * A very quick quickstart * A longer introduction * Video courses * Text courses * Level one * Navigating the editor UI * Building a mini-workflow * Automating a (real-world) use case * Designing the workflow * Building the workflow Building the workflow * Getting data from the data warehouse * Inserting data into airtable * Filtering orders * Setting values for processing orders * Calculating booked orders * Notifying the team * Scheduling the workflow * Activating and examining the workflow * Exporting and importing workflows * Test your knowledge * Level two * Understanding the data structure * Processing different data types * Merging and splitting data * Dealing with errors in workflows * Automating a business workflow Automating a business workflow * Use case * Workflow 1 * Workflow 2 * Workflow 3 * Test your knowledge * Using the app Using the app * Understand workflows * Create and run * Components * Nodes * Connections * Sticky Notes * Executions * Manual, partial, and production executions * Workflow-level executions * All executions * Custom executions data * Debug executions * Tags * Export and import * Templates * Sharing * Settings * Workflow history * Workflow ID * Manage credentials * Create and edit * Credential sharing * Manage users and access * Cloud setup * Manage users * Account types * Role-based access control * Role types * Projects * Best practices * 2FA * LDAP * SAML * Set up SAML * Okta Workforce Identity SAML setup * Troubleshooting * Manage users with SAML * Keyboard shortcuts * Key concepts Key concepts * Flow logic * Splitting with conditionals * Merging data * Looping * Waiting * Sub-workflows * Error handling * Execution order in multi-branch workflows * Data * Data structure * Data flow within nodes * Transforming data * Process data using code * Data mapping * Data mapping in the UI * Data mapping in the expressions editor * Data item linking * Item linking concepts * Item linking in the Code node * Item linking errors * Item linking for node creators * Data pinning * Data editing * Data filtering * Data mocking * Binary data * Schema preview * Glossary * n8n Cloud n8n Cloud * Overview * Access the Cloud admin dashboard * Update your n8n Cloud version * Set the timezone * Cloud IP addresses * Cloud data management * Change ownership or username * Concurrency * AI Assistant * Enterprise features Enterprise features * Source control and environments * Understand * Environments * Git in n8n * Branch patterns * Set up * Using * Push and pull * Copy work between environments * Manage variables * Tutorial: Create environments with source control * External secrets * Log streaming * License key * Releases Releases * Release notes Release notes * 1.x * 0.x * v1.0 migration guide * Help and community Help and community * Where to get help * Contributing * Licenses and privacy Licenses and privacy * Privacy and security * Privacy * Security * Incident response * What you can do * Sustainable use license * Integrations * Built-in nodes Built-in nodes * Node types * Core nodes * Activation Trigger * Aggregate * AI Transform * Code * Keyboard shortcuts * Common issues * Compare Datasets * Compression * Chat Trigger * Common issues * Convert to File * Crypto * Date & Time * Debug Helper * Edit Fields (Set) * Edit Image * Email Trigger (IMAP) * Error Trigger * Execute Command * Common issues * Execute Sub-workflow * Execute Sub-workflow Trigger * Execution Data * Extract From File * Filter * FTP * Git * GraphQL * HTML * HTTP Request * Common issues * If * JWT * LDAP * Limit * Local File Trigger * Loop Over Items (Split in Batches) * Manual Trigger * Markdown * MCP Server Trigger * Merge * n8n * n8n Form * n8n Form Trigger * n8n Trigger * No Operation, do nothing * Read/Write Files from Disk * Remove Duplicates * Templates and examples * Rename Keys * Respond to Webhook * RSS Read * RSS Feed Trigger * Schedule Trigger * Common issues * Send Email * Sort * Split Out * SSE Trigger * SSH * Stop And Error * Summarize * Switch * TOTP * Wait * Webhook * Workflow development * Common issues * Workflow Trigger * XML * Actions * Action Network * ActiveCampaign * Adalo * Affinity * Agile CRM * Airtable * Common issues * Airtop * AMQP Sender * APITemplate.io * Asana * Automizy * Autopilot * AWS Certificate Manager * AWS Comprehend * AWS DynamoDB * AWS Elastic Load Balancing * AWS Lambda * AWS Rekognition * AWS S3 * AWS SES * AWS SNS * AWS SQS * AWS Textract * AWS Transcribe * Azure Storage * BambooHR * Bannerbear * Baserow * Beeminder * Bitly * Bitwarden * Box * Brandfetch * Brevo * Bubble * Chargebee * CircleCI * Webex by Cisco * Clearbit * ClickUp * Clockify * Cloudflare * Cockpit * Coda * CoinGecko * Contentful * ConvertKit * Copper * Cortex * CrateDB * crowd.dev * Customer.io * DeepL * Demio * DHL * Discord * Common issues * Discourse * Disqus * Drift * Dropbox * Dropcontact * E-goi * Elasticsearch * Elastic Security * Emelia * ERPNext * Facebook Graph API * FileMaker * Flow * Freshdesk * Freshservice * Freshworks CRM * GetResponse * Ghost * GitHub * GitLab * Gmail * Draft operations * Label operations * Message operations * Thread operations * Common issues * Gong * Google Ads * Google Analytics * Google BigQuery * Google Books * Google Business Profile * Google Calendar * Calendar operations * Event operations * Google Chat * Google Cloud Firestore * Google Cloud Natural Language * Google Cloud Realtime Database * Google Cloud Storage * Google Contacts * Google Docs * Google Drive * File operations * File and folder operations * Folder operations * Shared drive operations * Common issues * Google Perspective * Google Sheets * Document operations * Sheet within Document operations * Common issues * Google Slides * Google Tasks * Google Translate * Google Workspace Admin * Gotify * GoToWebinar * Grafana * Grist * Hacker News * HaloPSA * Harvest * Help Scout * HighLevel * Home Assistant * HubSpot * Humantic AI * Hunter * Intercom * Invoice Ninja * Iterable * Jenkins * Jira Software * Kafka * Keap * Kitemaker * KoboToolbox * Lemlist * Line * Linear * LingvaNex * LinkedIn * LoneScale * Magento 2 * Mailcheck * Mailchimp * MailerLite * Mailgun * Mailjet * Mandrill * marketstack * Matrix * Mattermost * Mautic * Medium * MessageBird * Metabase * Microsoft Dynamics CRM * Microsoft Entra ID * Microsoft Excel 365 * Microsoft Graph Security * Microsoft OneDrive * Microsoft Outlook * Microsoft SQL * Microsoft Teams * Microsoft To Do * Mindee * MISP * Mocean * monday.com * MongoDB * Monica CRM * MQTT * MSG91 * MySQL * Common issues * Customer Datastore (n8n Training) * Customer Messenger (n8n Training) * NASA * Netlify * Netscaler ADC * Nextcloud * NocoDB * Notion * Common issues * npm * Odoo * Okta * One Simple API * Onfleet * OpenAI * Assistant operations * Audio operations * File operations * Image operations * Text operations * Common issues * OpenThesaurus * OpenWeatherMap * Oura * Paddle * PagerDuty * PayPal * Peekalink * PhantomBuster * Philips Hue * Pipedrive * Plivo * PostBin * Postgres * Common issues * PostHog * ProfitWell * Pushbullet * Pushcut * Pushover * QuestDB * Quick Base * QuickBooks Online * QuickChart * RabbitMQ * Raindrop * Reddit * Redis * Rocket.Chat * Rundeck * S3 * Salesforce * Salesmate * SeaTable * SecurityScorecard * Segment * SendGrid * Sendy * Sentry.io * ServiceNow * seven * Shopify * SIGNL4 * Slack * Snowflake * Splunk * Spontit * Spotify * Stackby * Storyblok * Strapi * Strava * Stripe * Supabase * Common issues * SyncroMSP * Taiga * Tapfiliate * Telegram * Chat operations * Callback operations * File operations * Message operations * Common issues * TheHive * TheHive 5 * TimescaleDB * Todoist * Travis CI * Trello * Twake * Twilio * Twist * Unleashed Software * UpLead * uProc * UptimeRobot * urlscan.io * Venafi TLS Protect Cloud * Venafi TLS Protect Datacenter * Vero * Vonage * Webflow * Wekan * WhatsApp Business Cloud * Common issues * Wise * WooCommerce * WordPress * X (Formerly Twitter) * Xero * Yourls * YouTube * Zammad * Zendesk * Zoho CRM * Zoom * Zulip * Triggers * ActiveCampaign Trigger * Acuity Scheduling Trigger * Affinity Trigger * Airtable Trigger * AMQP Trigger * Asana Trigger * Autopilot Trigger * AWS SNS Trigger * Bitbucket Trigger * Box Trigger * Brevo Trigger * Calendly Trigger * Cal Trigger * Chargebee Trigger * ClickUp Trigger * Clockify Trigger * ConvertKit Trigger * Copper Trigger * crowd.dev Trigger * Customer.io Trigger * Emelia Trigger * Eventbrite Trigger * Facebook Lead Ads Trigger * Facebook Trigger * Ad Account * Application * Certificate Transparency * Group * Instagram * Link * Page * Permissions * User * WhatsApp Business Account * Workplace Security * Figma Trigger (Beta) * Flow Trigger * Form.io Trigger * Formstack Trigger * GetResponse Trigger * GitHub Trigger * GitLab Trigger * Gmail Trigger * Poll Mode options * Common issues * Google Calendar Trigger * Google Drive Trigger * Common issues * Google Business Profile Trigger * Google Sheets Trigger * Common issues * Gumroad Trigger * Help Scout Trigger * Hubspot Trigger * Invoice Ninja Trigger * Jira Trigger * JotForm Trigger * Kafka Trigger * Keap Trigger * KoboToolbox Trigger * Lemlist Trigger * Linear Trigger * LoneScale Trigger * Mailchimp Trigger * MailerLite Trigger * Mailjet Trigger * Mautic Trigger * Microsoft OneDrive Trigger * Microsoft Outlook Trigger * MQTT Trigger * Netlify Trigger * Notion Trigger * Onfleet Trigger * PayPal Trigger * Pipedrive Trigger * Postgres Trigger * Postmark Trigger * Pushcut Trigger * RabbitMQ Trigger * Redis Trigger * Salesforce Trigger * SeaTable Trigger * Shopify Trigger * Slack Trigger * Strava Trigger * Stripe Trigger * SurveyMonkey Trigger * Taiga Trigger * Telegram Trigger * Common issues * TheHive 5 Trigger * TheHive Trigger * Toggl Trigger * Trello Trigger * Twilio Trigger * Typeform Trigger * Venafi TLS Protect Cloud Trigger * Webex by Cisco Trigger * Webflow Trigger * WhatsApp Trigger * Wise Trigger * WooCommerce Trigger * Workable Trigger * Wufoo Trigger * Zendesk Trigger * Cluster nodes * Root nodes * AI Agent * Conversational Agent * OpenAI Functions Agent * Plan and Execute Agent * ReAct Agent * SQL Agent * Tools Agent * Common issues * Basic LLM Chain * Question and Answer Chain * Common issues * Summarization Chain * Information Extractor * Text Classifier * Sentiment Analysis * LangChain Code * Simple Vector Store * Milvus Vector Store * MongoDB Atlas Vector Store * PGVector Vector Store * Pinecone Vector Store * Qdrant Vector Store * Supabase Vector Store * Zep Vector Store * Sub-nodes * Default Data Loader * GitHub Document Loader * Embeddings AWS Bedrock * Embeddings Azure OpenAI * Embeddings Cohere * Embeddings Google Gemini * Embeddings Google PaLM * Embeddings Google Vertex * Embeddings HuggingFace Inference * Embeddings Mistral Cloud * Embeddings Ollama * Embeddings OpenAI * Anthropic Chat Model * AWS Bedrock Chat Model * Azure OpenAI Chat Model * DeepSeek Chat Model * Google Gemini Chat Model * Google Vertex Chat Model * Groq Chat Model * Mistral Cloud Chat Model * Ollama Chat Model * Common issues * OpenAI Chat Model * Common issues * OpenRouter Chat Model * Cohere Model * Ollama Model * Common issues * Hugging Face Inference Model * Chat Memory Manager * Simple Memory * Common issues * Motorhead * MongoDB Chat Memory * Redis Chat Memory * Postgres Chat Memory * Xata * Zep * Auto-fixing Output Parser * Item List Output Parser * Structured Output Parser * Common issues * Contextual Compression Retriever * MultiQuery Retriever * Vector Store Retriever * Workflow Retriever * Character Text Splitter * Recursive Character Text Splitter * Token Splitter * Calculator * Custom Code Tool * HTTP Request Tool * MCP Client Tool * SerpApi (Google Search) * Think Tool * Vector Store Question Answer Tool * Wikipedia * Wolfram|Alpha * Custom n8n Workflow Tool * Credentials * Action Network credentials * ActiveCampaign credentials * Acuity Scheduling credentials * Adalo credentials * Affinity credentials * Agile CRM credentials * Airtable credentials * Airtop credentials * AlienVault credentials * AMQP credentials * Anthropic credentials * APITemplate.io credentials * Asana credentials * Auth0 Management credentials * Automizy credentials * Autopilot credentials * AWS credentials * Azure OpenAI credentials * Azure Storage credentials * BambooHR credentials * Bannerbear credentials * Baserow credentials * Beeminder credentials * Bitbucket credentials * Bitly credentials * Bitwarden credentials * Box credentials * Brandfetch credentials * Brevo credentials * Bubble credentials * Cal.com credentials * Calendly credentials * Carbon Black credentials * Chargebee credentials * CircleCI credentials * Cisco Meraki credentials * Cisco Secure Endpoint credentials * Cisco Umbrella credentials * Clearbit credentials * ClickUp credentials * Clockify credentials * Cloudflare credentials * Cockpit credentials * Coda credentials * Cohere credentials * Contentful credentials * ConvertAPI credentials * ConvertKit credentials * Copper credentials * Cortex credentials * CrateDB credentials * crowd.dev credentials * CrowdStrike credentials * Customer.io credentials * Datadog credentials * DeepL credentials * DeepSeek credentials * Demio credentials * DFIR-IRIS credentials * DHL credentials * Discord credentials * Discourse credentials * Disqus credentials * Drift credentials * Dropbox credentials * Dropcontact credentials * Dynatrace credentials * E-goi credentials * Elasticsearch credentials * Elastic Security credentials * Emelia credentials * ERPNext credentials * Eventbrite credentials * F5 Big-IP credentials * Facebook App credentials * Facebook Graph API credentials * Facebook Lead Ads credentials * Figma credentials * FileMaker credentials * Filescan credentials * Flow credentials * Form.io Trigger credentials * Formstack Trigger credentials * Fortinet FortiGate credentials * Freshdesk credentials * Freshservice credentials * Freshworks CRM credentials * FTP credentials * GetResponse credentials * Ghost credentials * Git credentials * GitHub credentials * GitLab credentials * Gong credentials * Google * Google OAuth2 single service * Google OAuth2 generic * Google Service Account * Google Gemini(PaLM) credentials * Gotify credentials * GoToWebinar credentials * Grafana credentials * Grist credentials * Groq credentials * Gumroad credentials * HaloPSA credentials * Harvest credentials * Help Scout credentials * HighLevel credentials * Home Assistant credentials * HTTP Request credentials * HubSpot credentials * Hugging Face credentials * Humantic AI credentials * Hunter credentials * Hybrid Analysis credentials * IMAP * Gmail * Outlook.com * Yahoo * Imperva WAF credentials * Intercom credentials * Invoice Ninja credentials * Iterable credentials * Jenkins credentials * Jira credentials * JotForm credentials * JWT credentials * Kafka credentials * Keap credentials * Kibana credentials * Kitemaker credentials * KoboToolbox credentials * LDAP credentials * Lemlist credentials * Line credentials * Linear credentials * LingvaNex credentials * LinkedIn credentials * LoneScale credentials * Magento 2 credentials * Mailcheck credentials * Mailchimp credentials * MailerLite credentials * Mailgun credentials * Mailjet credentials * Malcore credentials * Mandrill credentials * Marketstack credentials * Matrix credentials * Mattermost credentials * Mautic credentials * Medium credentials * MessageBird credentials * Metabase credentials * Microsoft credentials * Microsoft Azure Monitor credentials * Microsoft Entra ID credentials * Microsoft SQL credentials * Milvus credentials * Mindee credentials * Miro credentials * MISP credentials * Mist credentials * Mistral Cloud credentials * Mocean credentials * monday.com credentials * MongoDB credentials * Monica CRM credentials * Motorhead credentials * MQTT credentials * MSG91 credentials * MySQL credentials * NASA credentials * Netlify credentials * Netscaler ADC credentials * Nextcloud credentials * NocoDB credentials * Notion credentials * npm credentials * Odoo credentials * Okta credentials * Ollama credentials * One Simple API credentials * Onfleet credentials * OpenAI credentials * OpenCTI credentials * OpenRouter credentials * OpenWeatherMap credentials * Oura credentials * Paddle credentials * PagerDuty credentials * PayPal credentials * Peekalink credentials * PhantomBuster credentials * Philips Hue credentials * Pinecone credentials * Pipedrive credentials * Plivo credentials * Postgres credentials * PostHog credentials * Postmark credentials * ProfitWell credentials * Pushbullet credentials * Pushcut credentials * Pushover credentials * QRadar credentials * Qdrant credentials * Qualys credentials * QuestDB credentials * Quick Base credentials * QuickBooks credentials * RabbitMQ credentials * Raindrop credentials * Rapid7 InsightVM credentials * Recorded Future credentials * Reddit credentials * Redis credentials * Rocket.Chat credentials * Rundeck credentials * S3 credentials * Salesforce credentials * Salesmate credentials * SeaTable credentials * SecurityScorecard credentials * Segment credentials * Sekoia credentials * Send Email * Gmail * Outlook.com * Yahoo * SendGrid credentials * Sendy credentials * Sentry.io credentials * Serp credentials * ServiceNow credentials * seven credentials * Shopify credentials * Shuffler credentials * SIGNL4 credentials * Slack credentials * Snowflake credentials * SolarWinds IPAM credentials * SolarWinds Observability SaaS credentials * Splunk credentials * Spontit credentials * Spotify credentials * SSH credentials * Stackby credentials * Storyblok credentials * Strapi credentials * Strava credentials * Stripe credentials * Supabase credentials * SurveyMonkey credentials * SyncroMSP credentials * Sysdig credentials * Taiga credentials * Tapfiliate credentials * Telegram credentials * TheHive credentials * TheHive 5 credentials * TimescaleDB credentials * Todoist credentials * Toggl credentials * TOTP credentials * Travis CI credentials * Trellix ePO credentials * Trello credentials * Twake credentials * Twilio credentials * Twist credentials * Typeform credentials * Unleashed Software credentials * UpLead credentials * uProc credentials * UptimeRobot credentials * urlscan.io credentials * Venafi TLS Protect Cloud credentials * Venafi TLS Protect Datacenter credentials * Vero credentials * VirusTotal credentials * Vonage credentials * Webex by Cisco credentials * Webflow credentials * Webhook credentials * Wekan credentials * WhatsApp Business Cloud credentials * Wise credentials * Wolfram|Alpha credentials * WooCommerce credentials * WordPress credentials * Workable credentials * Wufoo credentials * X (formerly Twitter) credentials * Xata credentials * Xero credentials * Yourls credentials * Zabbix credentials * Zammad credentials * Zendesk credentials * Zep credentials * Zoho credentials * Zoom credentials * Zscaler ZIA credentials * Zulip credentials * Custom API actions for existing nodes * Handle rate limits * Community nodes Community nodes * Installation and management * GUI installation * Manual installation * Risks * Blocklist * Using community nodes * Troubleshooting * Building community nodes * Creating nodes Creating nodes * Overview * Plan your node * Choose a node type * Choose a node building style * Node UI design * Choose node file structure * Build your node * Set up your development environment * Tutorial: Build a declarative-style node * Tutorial: Build a programmatic-style node * Reference * Node UI elements * Code standards * Versioning * Choose node file structure * Base files * Structure * Standard parameters * Declarative-style parameters * Programmatic-style parameters * Programmatic-style execute method * Codex files * Credentials files * HTTP request helpers * Item linking * Test your node * Run your node locally * Node linter * Troubleshooting * Deploy your node * Submit community nodes * Install private nodes * Hosting n8n * Community vs Enterprise * Installation Installation * npm * Docker * Server setups * Digital Ocean * Heroku * Hetzner * Amazon Web Services * Azure * Google Cloud * Docker Compose * Updating * Configuration Configuration * Environment variables * Binary data * Credentials * Database * Deployment * Endpoints * Executions * External data storage * External hooks * External secrets * Logs * License * Nodes * Queue mode * Security * Source control * Task runners * Timezone and localization * User management and 2FA * Workflows * Configuration methods * Configuration examples * Isolate n8n * Configure the Base URL * Configure custom SSL certificate authorities * Set a custom encryption key * Configure workflow timeouts * Specify custom nodes location * Enable modules in Code node * Set the timezone * Specify user folder path * Configure webhook URLs with reverse proxy * Enable Prometheus metrics * Supported databases and settings * Task runners * User management * Logging and monitoring Logging and monitoring * Logging * Monitoring * Security audit * Scaling and performance Scaling and performance * Overview * Performance and benchmarking * Configuring queue mode * Concurrency control * Execution data * Binary data * External storage for binary data * Memory-related errors * Securing n8n Securing n8n * Overview * Set up SSL * Set up SSO * Security audit * Disable the API * Opt out of data collection * Blocking nodes * Hardening task runners * Starter Kits Starter Kits * AI Starter Kit * Architecture Architecture * Overview * Database structure * Using the CLI Using the CLI * CLI commands * Code in n8n * Expressions * Using the Code node * AI coding * Built in methods and variables Built in methods and variables * Overview * Current node input * Output of other nodes * Date and time * JMESPath * HTTP node * LangChain Code node * n8n metadata * Convenience methods * Data transformation functions * Arrays * Booleans * Dates * Numbers * Objects * Strings * Custom variables Custom variables * Create custom variables * Cookbook Cookbook * Handling dates * Query JSON with JMESPath * Built-in methods and variables examples * execution * getWorkflowStaticData * Retrieve linked items from earlier in the workflow * (node-name).all * vars * Expressions * Check incoming data * Common issues * Code node * Get number of items returned by last node * Get the binary data buffer * Output to the browser console * HTTP Request node * Pagination * Advanced AI * Tutorial: Build an AI workflow in n8n * LangChain in n8n LangChain in n8n * Overview * Langchain concepts in n8n * LangChain learning resources * Use LangSmith with n8n * Examples and concepts Examples and concepts * Introduction * What is a chain? * What is an agent? * Agents vs chains example * What is memory? * What is a tool? * Use Google Sheets as a data source * Call an API to fetch data * Set a human fallback for AI workflows * Let AI specify tool parameters * What is a vector database? * Populate a Pinecone vector database from a website * API * Authentication * Pagination * Using the API playground * API reference * Embed * Prerequisites * Deployment * Configuration * Workflow management * Workflows templates * White labelling 1. Hosting n8n 2. Configuration 3. Configuration examples Every user can add custom nodes that get loaded by n8n on startup. The default location is in the subfolder `.n8n/custom` of the user who started n8n. You can define more folders with an environment variable: <table><tbody><tr><td><div><pre><span></span><span>1</span></pre></div></td><td><div><pre><span></span><code><span>export</span><span> </span><span>N8N_CUSTOM_EXTENSIONS</span><span>=</span><span>"/home/jim/n8n/custom-nodes;/data/n8n/nodes"</span> </code></pre></div></td></tr></tbody></table> Refer to Environment variables reference for more information on this variable. --- ## Page: https://docs.n8n.io/hosting/configuration/configuration-examples/modules-in-code-node/ * Using n8n * Integrations * Hosting n8n * Code in n8n * Advanced AI * API * Embed * n8n home ↗ * Forum ↗ * Blog ↗ 1. Hosting n8n 2. Configuration 3. Configuration examples For security reasons, the Code node restricts importing modules. It's possible to lift that restriction for built-in and external modules by setting the following environment variables: * `NODE_FUNCTION_ALLOW_BUILTIN`: For built-in modules * `NODE_FUNCTION_ALLOW_EXTERNAL`: For external modules sourced from n8n/node\_modules directory. External module support is disabled when an environment variable isn't set. <table><tbody><tr><td><div><pre><span></span><span> 1</span> <span> 2</span> <span> 3</span> <span> 4</span> <span> 5</span> <span> 6</span> <span> 7</span> <span> 8</span> <span> 9</span> <span>10</span> <span>11</span></pre></div></td><td><div><pre><span></span><code><span># Allows usage of all builtin modules</span> <span>export</span><span> </span><span>NODE_FUNCTION_ALLOW_BUILTIN</span><span>=</span>* <span># Allows usage of only crypto</span> <span>export</span><span> </span><span>NODE_FUNCTION_ALLOW_BUILTIN</span><span>=</span>crypto <span># Allows usage of only crypto and fs</span> <span>export</span><span> </span><span>NODE_FUNCTION_ALLOW_BUILTIN</span><span>=</span>crypto,fs <span># Allow usage of external npm modules.</span> <span>export</span><span> </span><span>NODE_FUNCTION_ALLOW_EXTERNAL</span><span>=</span>moment,lodash </code></pre></div></td></tr></tbody></table> Refer to Environment variables reference for more information on these variables. --- ## Page: https://docs.n8n.io/hosting/configuration/configuration-examples/time-zone/ The default timezone is America/New\_York. For instance, the Schedule node uses it to know at what time the workflow should start. To set a different default timezone, set `GENERIC_TIMEZONE` to the appropriate value. For example, if you want to set the timezone to Berlin (Germany): <table><tbody><tr><td><div><pre><span></span><span>1</span></pre></div></td><td><div><pre><span></span><code><span>export</span><span> </span><span>GENERIC_TIMEZONE</span><span>=</span>Europe/Berlin </code></pre></div></td></tr></tbody></table> You can find the name of your timezone here. Refer to Environment variables reference for more information on this variable. --- ## Page: https://docs.n8n.io/hosting/configuration/configuration-examples/user-folder/ * Using n8n * Integrations * Hosting n8n * Code in n8n * Advanced AI * API * Embed * n8n home ↗ * Forum ↗ * Blog ↗ n8n Docs * Using n8n * Getting started Getting started * Learning path * Choose your n8n * Quickstarts * A very quick quickstart * A longer introduction * Video courses * Text courses * Level one * Navigating the editor UI * Building a mini-workflow * Automating a (real-world) use case * Designing the workflow * Building the workflow Building the workflow * Getting data from the data warehouse * Inserting data into airtable * Filtering orders * Setting values for processing orders * Calculating booked orders * Notifying the team * Scheduling the workflow * Activating and examining the workflow * Exporting and importing workflows * Test your knowledge * Level two * Understanding the data structure * Processing different data types * Merging and splitting data * Dealing with errors in workflows * Automating a business workflow Automating a business workflow * Use case * Workflow 1 * Workflow 2 * Workflow 3 * Test your knowledge * Using the app Using the app * Understand workflows * Create and run * Components * Nodes * Connections * Sticky Notes * Executions * Manual, partial, and production executions * Workflow-level executions * All executions * Custom executions data * Debug executions * Tags * Export and import * Templates * Sharing * Settings * Workflow history * Workflow ID * Manage credentials * Create and edit * Credential sharing * Manage users and access * Cloud setup * Manage users * Account types * Role-based access control * Role types * Projects * Best practices * 2FA * LDAP * SAML * Set up SAML * Okta Workforce Identity SAML setup * Troubleshooting * Manage users with SAML * Keyboard shortcuts * Key concepts Key concepts * Flow logic * Splitting with conditionals * Merging data * Looping * Waiting * Sub-workflows * Error handling * Execution order in multi-branch workflows * Data * Data structure * Data flow within nodes * Transforming data * Process data using code * Data mapping * Data mapping in the UI * Data mapping in the expressions editor * Data item linking * Item linking concepts * Item linking in the Code node * Item linking errors * Item linking for node creators * Data pinning * Data editing * Data filtering * Data mocking * Binary data * Schema preview * Glossary * n8n Cloud n8n Cloud * Overview * Access the Cloud admin dashboard * Update your n8n Cloud version * Set the timezone * Cloud IP addresses * Cloud data management * Change ownership or username * Concurrency * AI Assistant * Enterprise features Enterprise features * Source control and environments * Understand * Environments * Git in n8n * Branch patterns * Set up * Using * Push and pull * Copy work between environments * Manage variables * Tutorial: Create environments with source control * External secrets * Log streaming * License key * Releases Releases * Release notes Release notes * 1.x * 0.x * v1.0 migration guide * Help and community Help and community * Where to get help * Contributing * Licenses and privacy Licenses and privacy * Privacy and security * Privacy * Security * Incident response * What you can do * Sustainable use license * Integrations * Built-in nodes Built-in nodes * Node types * Core nodes * Activation Trigger * Aggregate * AI Transform * Code * Keyboard shortcuts * Common issues * Compare Datasets * Compression * Chat Trigger * Common issues * Convert to File * Crypto * Date & Time * Debug Helper * Edit Fields (Set) * Edit Image * Email Trigger (IMAP) * Error Trigger * Execute Command * Common issues * Execute Sub-workflow * Execute Sub-workflow Trigger * Execution Data * Extract From File * Filter * FTP * Git * GraphQL * HTML * HTTP Request * Common issues * If * JWT * LDAP * Limit * Local File Trigger * Loop Over Items (Split in Batches) * Manual Trigger * Markdown * MCP Server Trigger * Merge * n8n * n8n Form * n8n Form Trigger * n8n Trigger * No Operation, do nothing * Read/Write Files from Disk * Remove Duplicates * Templates and examples * Rename Keys * Respond to Webhook * RSS Read * RSS Feed Trigger * Schedule Trigger * Common issues * Send Email * Sort * Split Out * SSE Trigger * SSH * Stop And Error * Summarize * Switch * TOTP * Wait * Webhook * Workflow development * Common issues * Workflow Trigger * XML * Actions * Action Network * ActiveCampaign * Adalo * Affinity * Agile CRM * Airtable * Common issues * Airtop * AMQP Sender * APITemplate.io * Asana * Automizy * Autopilot * AWS Certificate Manager * AWS Comprehend * AWS DynamoDB * AWS Elastic Load Balancing * AWS Lambda * AWS Rekognition * AWS S3 * AWS SES * AWS SNS * AWS SQS * AWS Textract * AWS Transcribe * Azure Storage * BambooHR * Bannerbear * Baserow * Beeminder * Bitly * Bitwarden * Box * Brandfetch * Brevo * Bubble * Chargebee * CircleCI * Webex by Cisco * Clearbit * ClickUp * Clockify * Cloudflare * Cockpit * Coda * CoinGecko * Contentful * ConvertKit * Copper * Cortex * CrateDB * crowd.dev * Customer.io * DeepL * Demio * DHL * Discord * Common issues * Discourse * Disqus * Drift * Dropbox * Dropcontact * E-goi * Elasticsearch * Elastic Security * Emelia * ERPNext * Facebook Graph API * FileMaker * Flow * Freshdesk * Freshservice * Freshworks CRM * GetResponse * Ghost * GitHub * GitLab * Gmail * Draft operations * Label operations * Message operations * Thread operations * Common issues * Gong * Google Ads * Google Analytics * Google BigQuery * Google Books * Google Business Profile * Google Calendar * Calendar operations * Event operations * Google Chat * Google Cloud Firestore * Google Cloud Natural Language * Google Cloud Realtime Database * Google Cloud Storage * Google Contacts * Google Docs * Google Drive * File operations * File and folder operations * Folder operations * Shared drive operations * Common issues * Google Perspective * Google Sheets * Document operations * Sheet within Document operations * Common issues * Google Slides * Google Tasks * Google Translate * Google Workspace Admin * Gotify * GoToWebinar * Grafana * Grist * Hacker News * HaloPSA * Harvest * Help Scout * HighLevel * Home Assistant * HubSpot * Humantic AI * Hunter * Intercom * Invoice Ninja * Iterable * Jenkins * Jira Software * Kafka * Keap * Kitemaker * KoboToolbox * Lemlist * Line * Linear * LingvaNex * LinkedIn * LoneScale * Magento 2 * Mailcheck * Mailchimp * MailerLite * Mailgun * Mailjet * Mandrill * marketstack * Matrix * Mattermost * Mautic * Medium * MessageBird * Metabase * Microsoft Dynamics CRM * Microsoft Entra ID * Microsoft Excel 365 * Microsoft Graph Security * Microsoft OneDrive * Microsoft Outlook * Microsoft SQL * Microsoft Teams * Microsoft To Do * Mindee * MISP * Mocean * monday.com * MongoDB * Monica CRM * MQTT * MSG91 * MySQL * Common issues * Customer Datastore (n8n Training) * Customer Messenger (n8n Training) * NASA * Netlify * Netscaler ADC * Nextcloud * NocoDB * Notion * Common issues * npm * Odoo * Okta * One Simple API * Onfleet * OpenAI * Assistant operations * Audio operations * File operations * Image operations * Text operations * Common issues * OpenThesaurus * OpenWeatherMap * Oura * Paddle * PagerDuty * PayPal * Peekalink * PhantomBuster * Philips Hue * Pipedrive * Plivo * PostBin * Postgres * Common issues * PostHog * ProfitWell * Pushbullet * Pushcut * Pushover * QuestDB * Quick Base * QuickBooks Online * QuickChart * RabbitMQ * Raindrop * Reddit * Redis * Rocket.Chat * Rundeck * S3 * Salesforce * Salesmate * SeaTable * SecurityScorecard * Segment * SendGrid * Sendy * Sentry.io * ServiceNow * seven * Shopify * SIGNL4 * Slack * Snowflake * Splunk * Spontit * Spotify * Stackby * Storyblok * Strapi * Strava * Stripe * Supabase * Common issues * SyncroMSP * Taiga * Tapfiliate * Telegram * Chat operations * Callback operations * File operations * Message operations * Common issues * TheHive * TheHive 5 * TimescaleDB * Todoist * Travis CI * Trello * Twake * Twilio * Twist * Unleashed Software * UpLead * uProc * UptimeRobot * urlscan.io * Venafi TLS Protect Cloud * Venafi TLS Protect Datacenter * Vero * Vonage * Webflow * Wekan * WhatsApp Business Cloud * Common issues * Wise * WooCommerce * WordPress * X (Formerly Twitter) * Xero * Yourls * YouTube * Zammad * Zendesk * Zoho CRM * Zoom * Zulip * Triggers * ActiveCampaign Trigger * Acuity Scheduling Trigger * Affinity Trigger * Airtable Trigger * AMQP Trigger * Asana Trigger * Autopilot Trigger * AWS SNS Trigger * Bitbucket Trigger * Box Trigger * Brevo Trigger * Calendly Trigger * Cal Trigger * Chargebee Trigger * ClickUp Trigger * Clockify Trigger * ConvertKit Trigger * Copper Trigger * crowd.dev Trigger * Customer.io Trigger * Emelia Trigger * Eventbrite Trigger * Facebook Lead Ads Trigger * Facebook Trigger * Ad Account * Application * Certificate Transparency * Group * Instagram * Link * Page * Permissions * User * WhatsApp Business Account * Workplace Security * Figma Trigger (Beta) * Flow Trigger * Form.io Trigger * Formstack Trigger * GetResponse Trigger * GitHub Trigger * GitLab Trigger * Gmail Trigger * Poll Mode options * Common issues * Google Calendar Trigger * Google Drive Trigger * Common issues * Google Business Profile Trigger * Google Sheets Trigger * Common issues * Gumroad Trigger * Help Scout Trigger * Hubspot Trigger * Invoice Ninja Trigger * Jira Trigger * JotForm Trigger * Kafka Trigger * Keap Trigger * KoboToolbox Trigger * Lemlist Trigger * Linear Trigger * LoneScale Trigger * Mailchimp Trigger * MailerLite Trigger * Mailjet Trigger * Mautic Trigger * Microsoft OneDrive Trigger * Microsoft Outlook Trigger * MQTT Trigger * Netlify Trigger * Notion Trigger * Onfleet Trigger * PayPal Trigger * Pipedrive Trigger * Postgres Trigger * Postmark Trigger * Pushcut Trigger * RabbitMQ Trigger * Redis Trigger * Salesforce Trigger * SeaTable Trigger * Shopify Trigger * Slack Trigger * Strava Trigger * Stripe Trigger * SurveyMonkey Trigger * Taiga Trigger * Telegram Trigger * Common issues * TheHive 5 Trigger * TheHive Trigger * Toggl Trigger * Trello Trigger * Twilio Trigger * Typeform Trigger * Venafi TLS Protect Cloud Trigger * Webex by Cisco Trigger * Webflow Trigger * WhatsApp Trigger * Wise Trigger * WooCommerce Trigger * Workable Trigger * Wufoo Trigger * Zendesk Trigger * Cluster nodes * Root nodes * AI Agent * Conversational Agent * OpenAI Functions Agent * Plan and Execute Agent * ReAct Agent * SQL Agent * Tools Agent * Common issues * Basic LLM Chain * Question and Answer Chain * Common issues * Summarization Chain * Information Extractor * Text Classifier * Sentiment Analysis * LangChain Code * Simple Vector Store * Milvus Vector Store * MongoDB Atlas Vector Store * PGVector Vector Store * Pinecone Vector Store * Qdrant Vector Store * Supabase Vector Store * Zep Vector Store * Sub-nodes * Default Data Loader * GitHub Document Loader * Embeddings AWS Bedrock * Embeddings Azure OpenAI * Embeddings Cohere * Embeddings Google Gemini * Embeddings Google PaLM * Embeddings Google Vertex * Embeddings HuggingFace Inference * Embeddings Mistral Cloud * Embeddings Ollama * Embeddings OpenAI * Anthropic Chat Model * AWS Bedrock Chat Model * Azure OpenAI Chat Model * DeepSeek Chat Model * Google Gemini Chat Model * Google Vertex Chat Model * Groq Chat Model * Mistral Cloud Chat Model * Ollama Chat Model * Common issues * OpenAI Chat Model * Common issues * OpenRouter Chat Model * Cohere Model * Ollama Model * Common issues * Hugging Face Inference Model * Chat Memory Manager * Simple Memory * Common issues * Motorhead * MongoDB Chat Memory * Redis Chat Memory * Postgres Chat Memory * Xata * Zep * Auto-fixing Output Parser * Item List Output Parser * Structured Output Parser * Common issues * Contextual Compression Retriever * MultiQuery Retriever * Vector Store Retriever * Workflow Retriever * Character Text Splitter * Recursive Character Text Splitter * Token Splitter * Calculator * Custom Code Tool * HTTP Request Tool * MCP Client Tool * SerpApi (Google Search) * Think Tool * Vector Store Question Answer Tool * Wikipedia * Wolfram|Alpha * Custom n8n Workflow Tool * Credentials * Action Network credentials * ActiveCampaign credentials * Acuity Scheduling credentials * Adalo credentials * Affinity credentials * Agile CRM credentials * Airtable credentials * Airtop credentials * AlienVault credentials * AMQP credentials * Anthropic credentials * APITemplate.io credentials * Asana credentials * Auth0 Management credentials * Automizy credentials * Autopilot credentials * AWS credentials * Azure OpenAI credentials * Azure Storage credentials * BambooHR credentials * Bannerbear credentials * Baserow credentials * Beeminder credentials * Bitbucket credentials * Bitly credentials * Bitwarden credentials * Box credentials * Brandfetch credentials * Brevo credentials * Bubble credentials * Cal.com credentials * Calendly credentials * Carbon Black credentials * Chargebee credentials * CircleCI credentials * Cisco Meraki credentials * Cisco Secure Endpoint credentials * Cisco Umbrella credentials * Clearbit credentials * ClickUp credentials * Clockify credentials * Cloudflare credentials * Cockpit credentials * Coda credentials * Cohere credentials * Contentful credentials * ConvertAPI credentials * ConvertKit credentials * Copper credentials * Cortex credentials * CrateDB credentials * crowd.dev credentials * CrowdStrike credentials * Customer.io credentials * Datadog credentials * DeepL credentials * DeepSeek credentials * Demio credentials * DFIR-IRIS credentials * DHL credentials * Discord credentials * Discourse credentials * Disqus credentials * Drift credentials * Dropbox credentials * Dropcontact credentials * Dynatrace credentials * E-goi credentials * Elasticsearch credentials * Elastic Security credentials * Emelia credentials * ERPNext credentials * Eventbrite credentials * F5 Big-IP credentials * Facebook App credentials * Facebook Graph API credentials * Facebook Lead Ads credentials * Figma credentials * FileMaker credentials * Filescan credentials * Flow credentials * Form.io Trigger credentials * Formstack Trigger credentials * Fortinet FortiGate credentials * Freshdesk credentials * Freshservice credentials * Freshworks CRM credentials * FTP credentials * GetResponse credentials * Ghost credentials * Git credentials * GitHub credentials * GitLab credentials * Gong credentials * Google * Google OAuth2 single service * Google OAuth2 generic * Google Service Account * Google Gemini(PaLM) credentials * Gotify credentials * GoToWebinar credentials * Grafana credentials * Grist credentials * Groq credentials * Gumroad credentials * HaloPSA credentials * Harvest credentials * Help Scout credentials * HighLevel credentials * Home Assistant credentials * HTTP Request credentials * HubSpot credentials * Hugging Face credentials * Humantic AI credentials * Hunter credentials * Hybrid Analysis credentials * IMAP * Gmail * Outlook.com * Yahoo * Imperva WAF credentials * Intercom credentials * Invoice Ninja credentials * Iterable credentials * Jenkins credentials * Jira credentials * JotForm credentials * JWT credentials * Kafka credentials * Keap credentials * Kibana credentials * Kitemaker credentials * KoboToolbox credentials * LDAP credentials * Lemlist credentials * Line credentials * Linear credentials * LingvaNex credentials * LinkedIn credentials * LoneScale credentials * Magento 2 credentials * Mailcheck credentials * Mailchimp credentials * MailerLite credentials * Mailgun credentials * Mailjet credentials * Malcore credentials * Mandrill credentials * Marketstack credentials * Matrix credentials * Mattermost credentials * Mautic credentials * Medium credentials * MessageBird credentials * Metabase credentials * Microsoft credentials * Microsoft Azure Monitor credentials * Microsoft Entra ID credentials * Microsoft SQL credentials * Milvus credentials * Mindee credentials * Miro credentials * MISP credentials * Mist credentials * Mistral Cloud credentials * Mocean credentials * monday.com credentials * MongoDB credentials * Monica CRM credentials * Motorhead credentials * MQTT credentials * MSG91 credentials * MySQL credentials * NASA credentials * Netlify credentials * Netscaler ADC credentials * Nextcloud credentials * NocoDB credentials * Notion credentials * npm credentials * Odoo credentials * Okta credentials * Ollama credentials * One Simple API credentials * Onfleet credentials * OpenAI credentials * OpenCTI credentials * OpenRouter credentials * OpenWeatherMap credentials * Oura credentials * Paddle credentials * PagerDuty credentials * PayPal credentials * Peekalink credentials * PhantomBuster credentials * Philips Hue credentials * Pinecone credentials * Pipedrive credentials * Plivo credentials * Postgres credentials * PostHog credentials * Postmark credentials * ProfitWell credentials * Pushbullet credentials * Pushcut credentials * Pushover credentials * QRadar credentials * Qdrant credentials * Qualys credentials * QuestDB credentials * Quick Base credentials * QuickBooks credentials * RabbitMQ credentials * Raindrop credentials * Rapid7 InsightVM credentials * Recorded Future credentials * Reddit credentials * Redis credentials * Rocket.Chat credentials * Rundeck credentials * S3 credentials * Salesforce credentials * Salesmate credentials * SeaTable credentials * SecurityScorecard credentials * Segment credentials * Sekoia credentials * Send Email * Gmail * Outlook.com * Yahoo * SendGrid credentials * Sendy credentials * Sentry.io credentials * Serp credentials * ServiceNow credentials * seven credentials * Shopify credentials * Shuffler credentials * SIGNL4 credentials * Slack credentials * Snowflake credentials * SolarWinds IPAM credentials * SolarWinds Observability SaaS credentials * Splunk credentials * Spontit credentials * Spotify credentials * SSH credentials * Stackby credentials * Storyblok credentials * Strapi credentials * Strava credentials * Stripe credentials * Supabase credentials * SurveyMonkey credentials * SyncroMSP credentials * Sysdig credentials * Taiga credentials * Tapfiliate credentials * Telegram credentials * TheHive credentials * TheHive 5 credentials * TimescaleDB credentials * Todoist credentials * Toggl credentials * TOTP credentials * Travis CI credentials * Trellix ePO credentials * Trello credentials * Twake credentials * Twilio credentials * Twist credentials * Typeform credentials * Unleashed Software credentials * UpLead credentials * uProc credentials * UptimeRobot credentials * urlscan.io credentials * Venafi TLS Protect Cloud credentials * Venafi TLS Protect Datacenter credentials * Vero credentials * VirusTotal credentials * Vonage credentials * Webex by Cisco credentials * Webflow credentials * Webhook credentials * Wekan credentials * WhatsApp Business Cloud credentials * Wise credentials * Wolfram|Alpha credentials * WooCommerce credentials * WordPress credentials * Workable credentials * Wufoo credentials * X (formerly Twitter) credentials * Xata credentials * Xero credentials * Yourls credentials * Zabbix credentials * Zammad credentials * Zendesk credentials * Zep credentials * Zoho credentials * Zoom credentials * Zscaler ZIA credentials * Zulip credentials * Custom API actions for existing nodes * Handle rate limits * Community nodes Community nodes * Installation and management * GUI installation * Manual installation * Risks * Blocklist * Using community nodes * Troubleshooting * Building community nodes * Creating nodes Creating nodes * Overview * Plan your node * Choose a node type * Choose a node building style * Node UI design * Choose node file structure * Build your node * Set up your development environment * Tutorial: Build a declarative-style node * Tutorial: Build a programmatic-style node * Reference * Node UI elements * Code standards * Versioning * Choose node file structure * Base files * Structure * Standard parameters * Declarative-style parameters * Programmatic-style parameters * Programmatic-style execute method * Codex files * Credentials files * HTTP request helpers * Item linking * Test your node * Run your node locally * Node linter * Troubleshooting * Deploy your node * Submit community nodes * Install private nodes * Hosting n8n * Community vs Enterprise * Installation Installation * npm * Docker * Server setups * Digital Ocean * Heroku * Hetzner * Amazon Web Services * Azure * Google Cloud * Docker Compose * Updating * Configuration Configuration * Environment variables * Binary data * Credentials * Database * Deployment * Endpoints * Executions * External data storage * External hooks * External secrets * Logs * License * Nodes * Queue mode * Security * Source control * Task runners * Timezone and localization * User management and 2FA * Workflows * Configuration methods * Configuration examples * Isolate n8n * Configure the Base URL * Configure custom SSL certificate authorities * Set a custom encryption key * Configure workflow timeouts * Specify custom nodes location * Enable modules in Code node * Set the timezone * Specify user folder path * Configure webhook URLs with reverse proxy * Enable Prometheus metrics * Supported databases and settings * Task runners * User management * Logging and monitoring Logging and monitoring * Logging * Monitoring * Security audit * Scaling and performance Scaling and performance * Overview * Performance and benchmarking * Configuring queue mode * Concurrency control * Execution data * Binary data * External storage for binary data * Memory-related errors * Securing n8n Securing n8n * Overview * Set up SSL * Set up SSO * Security audit * Disable the API * Opt out of data collection * Blocking nodes * Hardening task runners * Starter Kits Starter Kits * AI Starter Kit * Architecture Architecture * Overview * Database structure * Using the CLI Using the CLI * CLI commands * Code in n8n * Expressions * Using the Code node * AI coding * Built in methods and variables Built in methods and variables * Overview * Current node input * Output of other nodes * Date and time * JMESPath * HTTP node * LangChain Code node * n8n metadata * Convenience methods * Data transformation functions * Arrays * Booleans * Dates * Numbers * Objects * Strings * Custom variables Custom variables * Create custom variables * Cookbook Cookbook * Handling dates * Query JSON with JMESPath * Built-in methods and variables examples * execution * getWorkflowStaticData * Retrieve linked items from earlier in the workflow * (node-name).all * vars * Expressions * Check incoming data * Common issues * Code node * Get number of items returned by last node * Get the binary data buffer * Output to the browser console * HTTP Request node * Pagination * Advanced AI * Tutorial: Build an AI workflow in n8n * LangChain in n8n LangChain in n8n * Overview * Langchain concepts in n8n * LangChain learning resources * Use LangSmith with n8n * Examples and concepts Examples and concepts * Introduction * What is a chain? * What is an agent? * Agents vs chains example * What is memory? * What is a tool? * Use Google Sheets as a data source * Call an API to fetch data * Set a human fallback for AI workflows * Let AI specify tool parameters * What is a vector database? * Populate a Pinecone vector database from a website * API * Authentication * Pagination * Using the API playground * API reference * Embed * Prerequisites * Deployment * Configuration * Workflow management * Workflows templates * White labelling 1. Hosting n8n 2. Configuration 3. Configuration examples n8n saves user-specific data like the encryption key, SQLite database file, and the ID of the tunnel (if used) in the subfolder `.n8n` of the user who started n8n. It's possible to overwrite the user-folder using an environment variable. <table><tbody><tr><td><div><pre><span></span><span>1</span></pre></div></td><td><div><pre><span></span><code><span>export</span><span> </span><span>N8N_USER_FOLDER</span><span>=</span>/home/jim/n8n </code></pre></div></td></tr></tbody></table> Refer to Environment variables reference for more information on this variable. --- ## Page: https://docs.n8n.io/hosting/configuration/configuration-examples/webhook-url/ ## Configure n8n webhooks with reverse proxy# n8n creates the webhook URL by combining `N8N_PROTOCOL`, `N8N_HOST` and `N8N_PORT`. If n8n runs behind a reverse proxy, that won't work. That's because n8n runs internally on port 5678 but the reverse proxy exposes it to the web on port 443. In that case, it's important to set the webhook URL manually so that n8n can display it in the Editor UI and register the correct webhook URLs with external services. <table><tbody><tr><td><div><pre><span></span><span>1</span></pre></div></td><td><div><pre><span></span><code><span>export</span><span> </span><span>WEBHOOK_URL</span><span>=</span>https://n8n.example.com/ </code></pre></div></td></tr></tbody></table> Refer to Environment variables reference for more information on this variable. --- ## Page: https://docs.n8n.io/hosting/configuration/configuration-examples/prometheus/ To collect and expose metrics, n8n uses the prom-client library. The `/metrics` endpoint is disabled by default, but it's possible to enable it using the `N8N_METRICS` environment variable. <table><tbody><tr><td><div><pre><span></span><span>1</span></pre></div></td><td><div><pre><span></span><code><span>export</span><span> </span><span>N8N_METRICS</span><span>=</span><span>true</span> </code></pre></div></td></tr></tbody></table> Refer to the respective Environment Variables (`N8N_METRICS_INCLUDE_*`) for configuring which metrics and labels should get exposed. Both `main` and `worker` instances are able to expose metrics. ## Queue metrics# To enable queue metrics, set the `N8N_METRICS_INCLUDE_QUEUE_METRICS` env var to `true`. You can adjust the refresh rate with `N8N_METRICS_QUEUE_METRICS_INTERVAL`. Queue metrics are only available for the `main` instance in single-main mode. <table><tbody><tr><td><div><pre><span></span><span> 1</span> <span> 2</span> <span> 3</span> <span> 4</span> <span> 5</span> <span> 6</span> <span> 7</span> <span> 8</span> <span> 9</span> <span>10</span> <span>11</span> <span>12</span> <span>13</span> <span>14</span> <span>15</span></pre></div></td><td><div><pre><span></span><code># HELP n8n_scaling_mode_queue_jobs_active Current number of jobs being processed across all workers in scaling mode. # TYPE n8n_scaling_mode_queue_jobs_active gauge n8n_scaling_mode_queue_jobs_active 0 # HELP n8n_scaling_mode_queue_jobs_completed Total number of jobs completed across all workers in scaling mode since instance start. # TYPE n8n_scaling_mode_queue_jobs_completed counter n8n_scaling_mode_queue_jobs_completed 0 # HELP n8n_scaling_mode_queue_jobs_failed Total number of jobs failed across all workers in scaling mode since instance start. # TYPE n8n_scaling_mode_queue_jobs_failed counter n8n_scaling_mode_queue_jobs_failed 0 # HELP n8n_scaling_mode_queue_jobs_waiting Current number of enqueued jobs waiting for pickup in scaling mode. # TYPE n8n_scaling_mode_queue_jobs_waiting gauge n8n_scaling_mode_queue_jobs_waiting 0 </code></pre></div></td></tr></tbody></table> --- ## Page: https://docs.n8n.io/hosting/configuration/supported-databases-settings/ By default, n8n uses SQLite to save credentials, past executions, and workflows. n8n also supports PostgresDB. The following environment variables get used by all databases: * `DB_TABLE_PREFIX` (default: -) - Prefix for table names ## PostgresDB# To use PostgresDB as the database, you can provide the following environment variables: * `DB_TYPE=postgresdb` * `DB_POSTGRESDB_DATABASE` (default: 'n8n') * `DB_POSTGRESDB_HOST` (default: 'localhost') * `DB_POSTGRESDB_PORT` (default: 5432) * `DB_POSTGRESDB_USER` (default: 'postgres') * `DB_POSTGRESDB_PASSWORD` (default: empty) * `DB_POSTGRESDB_SCHEMA` (default: 'public') * `DB_POSTGRESDB_SSL_CA` (default: undefined): Path to the server's CA certificate used to validate the connection (opportunistic encryption isn't supported) * `DB_POSTGRESDB_SSL_CERT` (default: undefined): Path to the client's TLS certificate * `DB_POSTGRESDB_SSL_KEY` (default: undefined): Path to the client's private key corresponding to the certificate * `DB_POSTGRESDB_SSL_REJECT_UNAUTHORIZED` (default: true): If TLS connections that fail validation should be rejected <table><tbody><tr><td><div><pre><span></span><span> 1</span> <span> 2</span> <span> 3</span> <span> 4</span> <span> 5</span> <span> 6</span> <span> 7</span> <span> 8</span> <span> 9</span> <span>10</span> <span>11</span> <span>12</span> <span>13</span></pre></div></td><td><div><pre><span></span><code><span>export</span><span> </span><span>DB_TYPE</span><span>=</span>postgresdb <span>export</span><span> </span><span>DB_POSTGRESDB_DATABASE</span><span>=</span>n8n <span>export</span><span> </span><span>DB_POSTGRESDB_HOST</span><span>=</span>postgresdb <span>export</span><span> </span><span>DB_POSTGRESDB_PORT</span><span>=</span><span>5432</span> <span>export</span><span> </span><span>DB_POSTGRESDB_USER</span><span>=</span>n8n <span>export</span><span> </span><span>DB_POSTGRESDB_PASSWORD</span><span>=</span>n8n <span>export</span><span> </span><span>DB_POSTGRESDB_SCHEMA</span><span>=</span>n8n <span># optional:</span> <span>export</span><span> </span><span>DB_POSTGRESDB_SSL_CA</span><span>=</span><span>$(</span><span>pwd</span><span>)</span>/ca.crt <span>export</span><span> </span><span>DB_POSTGRESDB_SSL_REJECT_UNAUTHORIZED</span><span>=</span><span>false</span> n8n<span> </span>start </code></pre></div></td></tr></tbody></table> ### Required permissions# n8n needs to create and modify the schemas of the tables it uses. Recommended permissions: <table><tbody><tr><td><div><pre><span></span><span>1</span> <span>2</span> <span>3</span></pre></div></td><td><div><pre><span></span><code><span>CREATE</span><span> </span><span>DATABASE</span><span> </span><span>n8n</span><span>-</span><span>db</span><span>;</span> <span>CREATE</span><span> </span><span>USER</span><span> </span><span>n8n</span><span>-</span><span>user</span><span> </span><span>WITH</span><span> </span><span>PASSWORD</span><span> </span><span>'random-password'</span><span>;</span> <span>GRANT</span><span> </span><span>ALL</span><span> </span><span>PRIVILEGES</span><span> </span><span>ON</span><span> </span><span>DATABASE</span><span> </span><span>n8n</span><span>-</span><span>db</span><span> </span><span>TO</span><span> </span><span>n8n</span><span>-</span><span>user</span><span>;</span> </code></pre></div></td></tr></tbody></table> ### TLS# You can choose between these configurations: * Not declaring (default): Connect with `SSL=off` * Declaring only the CA and unauthorized flag: Connect with `SSL=on` and verify the server's signature * Declaring `_{CERT,KEY}` and the above: Use the certificate and key for client TLS authentication ## SQLite# This is the default database that gets used if nothing is defined. The database file is located at: `~/.n8n/database.sqlite` --- ## Page: https://docs.n8n.io/hosting/configuration/task-runners/ Task runners are a generic mechanism to execute tasks in a secure and performant way. They're used to execute user-provided JavaScript code in the Code node. This document describes how task runners work and how you can configure them. ## How it works# The task runner feature consists of three components: a task runner, a task broker, and a task requester.  Task runners connect to the task broker using a websocket connection. A task requester submits a task request to the broker where an available task runner can pick it up for execution. The runner executes the task and submits the results to the task requester. The task broker coordinates communication between the runner and the requester. The n8n instance (main and worker) acts as the broker. The Code node in this case is the task requester. ## Task runner modes# You can use task runners in two different modes: internal and external. ### Internal mode# In internal mode, the n8n instance launches the task runner as a child process. The n8n process monitors and manages the life cycle of the task runner. The task runner process shares the same `uid` and `gid` as n8n. ### External mode# In external mode, an external orchestrator (for example, Kubernetes) launches the task runner instead of n8n. Typically, this means you would configure the task runner to run as a side-car container next to n8n.  In this mode, the orchestrator monitors and manages the life cycle of the task runner container. The task runner is fully isolated from the n8n instance. When using the Queue mode, each n8n container (main and workers) needs to have its own task runner. ## Setting up external mode# Use the following details to configure task runners in external mode ### Configuring n8n instance in external mode# You can configure n8n to use external task runners by setting the following environment variables: | Environment variables | Description | | --- | --- | | `N8N_RUNNERS_ENABLED=true` | Enables task runners. | | `N8N_RUNNERS_MODE=external` | Use task runners in external mode. | | `N8N_RUNNERS_AUTH_TOKEN=<random secure shared secret>` | A shared secret task runners use to connect to the broker. | | `N8N_RUNNERS_BROKER_LISTEN_ADDRESS=0.0.0.0` | By default, the task broker only listens to localhost. When using multiple containers (for example, with Docker Compose), it needs to be able to accept external connections. | For full list of environment variables see task runner environment variables. ### Configuring task runners in external mode# The task runner comes bundled within the n8n Docker image. The Docker image also includes the task runner launcher. The launcher can start the runner on-demand, which means lower memory usage when there's no work needed, but a short delay (few hundred ms) in cold-start. The launcher also monitors the runner and restarts it in case of infinite loops or other issues. Run a task runner container from the n8n Docker image by setting the following properties: | Configuration | Description | | --- | --- | | `command` | `["/usr/local/bin/task-runner-launcher", "javascript"]` | | `livenessProbe` | `GET /healthz`, port `5680` | Set the following environment variables for the container, adjusted to fit your needs: | Environment variables | Description | | --- | --- | | `N8N_RUNNERS_AUTH_TOKEN=<random secure shared secret>` | The shared secret the task runner uses to connect to the broker. | | `N8N_RUNNERS_MAX_CONCURRENCY=5` | The number of concurrent tasks the runner can execute. | | `N8N_RUNNERS_TASK_BROKER_URI=localhost:5679` | The address of the task broker server within the n8n instance. | | `N8N_RUNNERS_AUTO_SHUTDOWN_TIMEOUT=15` | Number of seconds of inactivity to wait before shutting down the task runner process. The launcher will automatically start the runner again when there are new tasks to execute. Set to `0` to disable automatic shutdown. | | `NODE_OPTIONS=--max-old-space-size=<limit>` | The memory limit for the task runner Node.js process. This should be lower than the limit for container so that the runner runs out of memory before the container. That way, the launcher is able to monitor the runner. | | `GENERIC_TIMEZONE` | The same default timezone as configured for the n8n instance. | For full list of environment variables see task runner environment variables. --- ## Page: https://docs.n8n.io/hosting/configuration/user-management-self-hosted/ ## Configure self-hosted n8n for user management# User management in n8n allows you to invite people to work in your n8n instance. This document describes how to configure your n8n instance to support user management, and the steps to start inviting users. Refer to the main User management guide for more information about usage, including: * Managing users * Account types * Best practices For LDAP setup information, refer to LDAP. For SAML setup information, refer to SAML. Basic auth and JWT removed n8n removed support for basic auth and JWT in version 1.0. ## Setup# There are three stages to set up user management in n8n: 1. Configure your n8n instance to use your SMTP server. 2. Start n8n and follow the setup steps in the app. 3. Invite users. ### Step one: SMTP# n8n recommends setting up an SMTP server, for user invites and password resets. Optional from 0.210.1 From version 0.210.1 onward, this step is optional. You can choose to manually copy and send invite links instead of setting up SMTP. Note that if you skip this step, users can't reset passwords. Get the following information from your SMTP provider: * Server name * SMTP username * SMTP password * SMTP sender name To set up SMTP with n8n, configure the SMTP environment variables for your n8n instance. For information on how to set environment variables, refer to Configuration | Variable | Type | Description | Required? | | --- | --- | --- | --- | | `N8N_EMAIL_MODE` | string | `smtp` | Required | | `N8N_SMTP_HOST` | string | _your\_SMTP\_server\_name_ | Required | | `N8N_SMTP_PORT` | number | _your\_SMTP\_server\_port_ Default is `465`. | Optional | | `N8N_SMTP_USER` | string | _your\_SMTP\_username_ | Optional | | `N8N_SMTP_PASS` | string | _your\_SMTP\_password_ | Optional | | `N8N_SMTP_OAUTH_SERVICE_CLIENT` | string | _your\_OAuth\_service\_client_ | Optional | | `N8N_SMTP_OAUTH_PRIVATE_KEY` | string | _your\_OAuth\_private\_key_ | Optional | | `N8N_SMTP_SENDER` | string | Sender email address. You can optionally include the sender name. Example with name: _N8N `<contact@n8n.com>`_ | Required | | `N8N_SMTP_SSL` | boolean | Whether to use SSL for SMTP (true) or not (false). Defaults to `true`. | Optional | | `N8N_UM_EMAIL_TEMPLATES_INVITE` | string | Full path to your HTML email template. This overrides the default template for invite emails. | Optional | | `N8N_UM_EMAIL_TEMPLATES_PWRESET` | string | Full path to your HTML email template. This overrides the default template for password reset emails. | Optional | | `N8N_UM_EMAIL_TEMPLATES_WORKFLOW_SHARED` | String | Overrides the default HTML template for notifying users that a credential was shared. Provide the full path to the template. | Optional | | `N8N_UM_EMAIL_TEMPLATES_CREDENTIALS_SHARED` | String | Overrides the default HTML template for notifying users that a credential was shared. Provide the full path to the template. | Optional | If your n8n instance is already running, you need to restart it to enable the new SMTP settings. More configuration options There are more configuration options available as environment variables. Refer to Environment variables for a list. These include options to disable tags, workflow templates, and the personalization survey, if you don't want your users to see them. ### Step two: In-app setup# When you set up user management for the first time, you create an owner account. 1. Open n8n. The app displays a signup screen. 2. Enter your details. Your password must be at least eight characters, including at least one number and one capital letter. 3. Click **Next**. n8n logs you in with your new owner account. ### Step three: Invite users# You can now invite other people to your n8n instance. 1. Sign into your workspace with your owner account. (If you are in the Admin Panel open your **Workspace** from the Dashboard) 2. Click the three dots next to your user icon at the bottom left and click **Settings**. n8n opens your **Personal settings** page. 3. Click **Users** to go to the **Users** page. 4. Click **Invite**. 5. Enter the new user's email address. 6. Click **Invite user**. n8n sends an email with a link for the new user to join. --- ## Page: https://docs.n8n.io/hosting/logging-monitoring/logging/ Logging is an important feature for debugging. n8n uses the winston logging library. Log streaming n8n Self-hosted Enterprise tier includes Log streaming, in addition to the logging options described in this document. ## Setup# To set up logging in n8n, you need to set the following environment variables (you can also set the values in the configuration file) | Setting in the configuration file | Using environment variables | Description | | --- | --- | --- | | n8n.log.level | N8N\_LOG\_LEVEL | The log output level. The available options are (from lowest to highest level) are error, warn, info, and debug. The default value is `info`. You can learn more about these options here. | | n8n.log.output | N8N\_LOG\_OUTPUT | Where to output logs. The available options are `console` and `file`. Multiple values can be used separated by a comma (`,`). `console` is used by default. | | n8n.log.file.location | N8N\_LOG\_FILE\_LOCATION | The log file location, used only if log output is set to file. By default, `<n8nFolderPath>/logs/n8n.log` is used. | | n8n.log.file.maxsize | N8N\_LOG\_FILE\_SIZE\_MAX | The maximum size (in MB) for each log file. By default, n8n uses 16 MB. | | n8n.log.file.maxcount | N8N\_LOG\_FILE\_COUNT\_MAX | The maximum number of log files to keep. The default value is 100. This value should be set when using workers. | <table><tbody><tr><td><div><pre><span></span><span> 1</span> <span> 2</span> <span> 3</span> <span> 4</span> <span> 5</span> <span> 6</span> <span> 7</span> <span> 8</span> <span> 9</span> <span>10</span> <span>11</span> <span>12</span> <span>13</span> <span>14</span></pre></div></td><td><div><pre><span></span><code><span># Set the logging level to 'debug'</span> <span>export</span><span> </span><span>N8N_LOG_LEVEL</span><span>=</span>debug <span># Set log output to both console and a log file</span> <span>export</span><span> </span><span>N8N_LOG_OUTPUT</span><span>=</span>console,file <span># Set a save location for the log file</span> <span>export</span><span> </span><span>N8N_LOG_FILE_LOCATION</span><span>=</span>/home/jim/n8n/logs/n8n.log <span># Set a 50 MB maximum size for each log file</span> <span>export</span><span> </span><span>N8N_LOG_FILE_MAXSIZE</span><span>=</span><span>50</span> <span># Set 60 as the maximum number of log files to be kept</span> <span>export</span><span> </span><span>N8N_LOG_FILE_MAXCOUNT</span><span>=</span><span>60</span> </code></pre></div></td></tr></tbody></table> ### Log levels# n8n uses standard log levels to report: * `silent`: outputs nothing at all * `error`: outputs only errors and nothing else * `warn`: outputs errors and warning messages * `info`: contains useful information about progress * `debug`: the most verbose output. n8n outputs a lot of information to help you debug issues. ## Development# During development, adding log messages is a good practice. It assists in debugging errors. To configure logging for development, follow the guide below. ### Implementation details# n8n uses the `LoggerProxy` class, located in the `workflow` package. Calling the `LoggerProxy.init()` by passing in an instance of `Logger`, initializes the class before the usage. The initialization process happens only once. The `start.ts` file already does this process for you. If you are creating a new command from scratch, you need to initialize the `LoggerProxy` class. Once the `Logger` implementation gets created in the `cli` package, it can be obtained by calling the `getInstance` convenience method from the exported module. Check the start.ts file to learn more about how this process works. ### Adding logs# Once the `LoggerProxy` class gets initialized in the project, you can import it to any other file and add logs. Convenience methods are provided for all logging levels, so new logs can be added whenever needed using the format `Logger.<logLevel>('<message>', ...meta)`, where `meta` represents any additional properties desired beyond `message`. In the example above, we use the standard log levels described above. The `message` argument is a string, and `meta` is a data object. <table><tbody><tr><td><div><pre><span></span><span>1</span> <span>2</span> <span>3</span> <span>4</span> <span>5</span> <span>6</span> <span>7</span> <span>8</span> <span>9</span></pre></div></td><td><div><pre><span></span><code><span>// You have to import the LoggerProxy. We rename it to Logger to make it easier</span> <span>import</span><span> </span><span>{</span> <span> </span><span>LoggerProxy</span><span> </span><span>as</span><span> </span><span>Logger</span> <span>}</span><span> </span><span>from</span><span> </span><span>'n8n-workflow'</span><span>;</span> <span>// Info-level logging of a trigger function, with workflow name and workflow ID as additional metadata properties</span> <span>Logger</span><span>.</span><span>info</span><span>(</span><span>`Polling trigger initiated for workflow "</span><span>${</span><span>workflow</span><span>.</span><span>name</span><span>}</span><span>"`</span><span>,</span><span> </span><span>{</span><span>workflowName</span><span>:</span><span> </span><span>workflow</span><span>.</span><span>name</span><span>,</span><span> </span><span>workflowId</span><span>:</span><span> </span><span>workflow</span><span>.</span><span>id</span><span>});</span> </code></pre></div></td></tr></tbody></table> When creating new loggers, some useful standards to keep in mind are: * Craft log messages to be as human-readable as possible. For example, always wrap names in quotes. * Duplicating information in the log message and metadata, like workflow name in the above example, can be useful as messages are easier to search and metadata enables easier filtering. * Include multiple IDs (for example, `executionId`, `workflowId`, and `sessionId`) throughout all logs. * Use node types instead of node names (or both) as this is more consistent, and so easier to search. ## Front-end logs# As of now, front-end logs aren't available. Using `Logger` or `LoggerProxy` would yield errors in the `editor-ui` package. This functionality will get implemented in the future versions. --- ## Page: https://docs.n8n.io/hosting/logging-monitoring/monitoring/ There are three API endpoints you can call to check the status of your instance: `/healthz`, `healthz/readiness`, and `/metrics`. ## healthz and healthz/readiness# The `/healthz` endpoint returns a standard HTTP status code. 200 indicates the instance is reachable. It doesn't indicate DB status. It's available for both self-hosted and Cloud users. Access the endpoint: <table><tbody><tr><td><div><pre><span></span><span>1</span></pre></div></td><td><div><pre><span></span><code><your-instance-url>/healthz </code></pre></div></td></tr></tbody></table> The `/healthz/readiness` endpoint is similar to the `/healthz` endpoint, but it returns a HTTP status code of 200 if the DB is connected and migrated and therefore the instance is ready to accept traffic. Access the endpoint: <table><tbody><tr><td><div><pre><span></span><span>1</span></pre></div></td><td><div><pre><span></span><code><your-instance-url>/healthz/readiness </code></pre></div></td></tr></tbody></table> ## metrics# The `/metrics` endpoint provides more detailed information about the current status of the instance. Access the endpoint: <table><tbody><tr><td><div><pre><span></span><span>1</span></pre></div></td><td><div><pre><span></span><code><your-instance-url>/metrics </code></pre></div></td></tr></tbody></table> Feature availability The `/metrics` endpoint isn't available on n8n Cloud. ## Enable metrics and healthz for self-hosted n8n# The `/metrics` and `/healthz` endpoints are disabled by default. To enable them, configure your n8n instance: <table><tbody><tr><td><div><pre><span></span><span>1</span> <span>2</span> <span>3</span> <span>4</span></pre></div></td><td><div><pre><span></span><code><span># metrics</span> <span>N8N_METRICS</span><span>=</span><span>true</span> <span># healthz</span> <span>QUEUE_HEALTH_CHECK_ACTIVE</span><span>=</span><span>true</span> </code></pre></div></td></tr></tbody></table> Refer to Configuration methods for more information on how to configure your instance using environment variables. --- ## Page: https://docs.n8n.io/hosting/securing/security-audit/ You can run a security audit on your n8n instance, to detect common security issues. ## Run an audit# You can run an audit using the CLI, the public API, or the n8n node. ### CLI# Run `n8n audit`. ### API# Make a `POST` call to the `/audit` endpoint. You must authenticate as the instance owner. ### n8n node# Add the n8n node to your workflow. Select **Resource** > **Audit** and **Operation** > **Generate**. ## Report contents# The audit generates five risk reports: ### Credentials# This report shows: * Credentials not used in a workflow. * Credentials not used in an active workflow. * Credentials not use in a recently active workflow. ### Database# This report shows: * Expressions used in **Execute Query** fields in SQL nodes. * Expressions used in **Query Parameters** fields in SQL nodes. * Unused **Query Parameters** fields in SQL nodes. ### File system# This report lists nodes that interact with the file system. ### Nodes# This report shows: * Official risky nodes. These are n8n built in nodes. You can use them to fetch and run any code on the host system, which exposes the instance to exploits. You can view the list in n8n code | Audit constants, under `OFFICIAL_RISKY_NODE_TYPES`. * Community nodes. * Custom nodes. ### Instance# This report shows: * Unprotected webhooks in the instance. * Missing security settings * If your instance is outdated. --- ## Page: https://docs.n8n.io/hosting/scaling/overview/ ## Scaling n8n# When running n8n at scale, with a large number of users, workflows, or executions, you need to change your n8n configuration to ensure good performance. n8n can run in different modes depending on your needs. The `queue` mode provides the best scalability. Refer to Queue mode for configuration details. You can configure data saving and pruning to improve database performance. Refer to Execution data for details. --- ## Page: https://docs.n8n.io/hosting/scaling/performance-benchmarking/ n8n can handle up to 220 workflow executions per second on a single instance, with the ability to scale up further by adding more instances. This document outlines n8n's performance benchmarking. It describes the factors that affect performance, and includes two example benchmarks. ## Performance factors# The performance of n8n depends on factors including: * The workflow type * The resources available to n8n * How you configure n8n's scaling options ## Run your own benchmarking# To get an accurate estimate for your use case, run n8n's benchmarking framework. The repository contains more information about the benchmarking. ## Example: Single instance performance# This test measures how response time increases as requests per second increase. It looks at the response time when calling the Webhook Trigger node. Setup: * Hardware: ECS c5a.large instance (4GB RAM) * n8n setup: Single n8n instance (running in main mode, with Postgres database) * Workflow: Webhook Trigger node, Edit Fields node  This graph shows the percentage of requests to the Webhook Trigger node getting a response within 100 seconds, and how that varies with load. Under higher loads n8n usually still processes the data, but takes over 100s to respond. ## Example: Multi-instance performance# This test measures how response time increases as requests per second increase. It looks at the response time when calling the Webhook Trigger node. Setup: * Hardware: seven ECS c5a.4xlarge instances (8GB RAM each) * n8n setup: two webhook instances, four worker instances, one database instance (MySQL), one main instance running n8n and Redis * Workflow: Webhook Trigger node, Edit Fields node * Multi-instance setups use Queue mode  This graph shows the percentage of requests to the Webhook Trigger node getting a response within 100 seconds, and how that varies with load. Under higher loads n8n usually still processes the data, but takes over 100s to respond. --- ## Page: https://docs.n8n.io/hosting/scaling/queue-mode/ You can run n8n in different modes depending on your needs. The queue mode provides the best scalability. Binary data storage n8n doesn't support queue mode with binary data storage in filesystem. If your workflows need to persist binary data in queue mode, you can use S3 external storage. ## How it works# When running in queue mode, you have multiple n8n instances set up, with one main instance receiving workflow information (such as triggers) and the worker instances performing the executions. Each worker is its own Node.js instance, running in `main` mode, but able to handle multiple simultaneous workflow executions due to their high IOPS (input-output operations per second). By using worker instances and running in queue mode, you can scale n8n up (by adding workers) and down (by removing workers) as needed to handle the workload. This is the process flow: 1. The main n8n instance handles timers and webhook calls, generating (but not running) a workflow execution. 2. It passes the execution ID to a message broker, Redis, which maintains the queue of pending executions and allows the next available worker to pick them up. 3. A worker in the pool picks up message from Redis. 4. The worker uses the execution ID to get workflow information from the database. 5. After completing the workflow execution, the worker: * Writes the results to the database. * Posts to Redis, saying that the execution has finished. 6. Redis notifies the main instance.  ## Configuring workers# Workers are n8n instances that do the actual work. They receive information from the main n8n process about the workflows that have to get executed, execute the workflows, and update the status after each execution is complete. ### Set encryption key# n8n automatically generates an encryption key upon first startup. You can also provide your own custom key using environment variable if desired. The encryption key of the main n8n instance must be shared with all worker and webhooks processor nodes to ensure these worker nodes are able to access credentials stored in the database. Set the encryption key for each worker node in a configuration file or by setting the corresponding environment variable: <table><tbody><tr><td><div><pre><span></span><span>1</span></pre></div></td><td><div><pre><span></span><code><span>export</span><span> </span><span>N8N_ENCRYPTION_KEY</span><span>=</span><main_instance_encryption_key> </code></pre></div></td></tr></tbody></table> ### Set executions mode# Database considerations n8n recommends using Postgres 13+. Running n8n with execution mode set to `queue` with an SQLite database isn't recommended. Set the environment variable `EXECUTIONS_MODE` to `queue` on the main instance and any workers using the following command. <table><tbody><tr><td><div><pre><span></span><span>1</span></pre></div></td><td><div><pre><span></span><code><span>export</span><span> </span><span>EXECUTIONS_MODE</span><span>=</span>queue </code></pre></div></td></tr></tbody></table> Alternatively, you can set `executions.mode` to `queue` in the configuration file. ### Start Redis# Running Redis on a separate machine You can run Redis on a separate machine, just make sure that it's accessible by the n8n instance. To run Redis in a Docker container, follow the instructions below: Run the following command to start a Redis instance: <table><tbody><tr><td><div><pre><span></span><span>1</span></pre></div></td><td><div><pre><span></span><code>docker run --name some-redis -p 6379:6379 -d redis </code></pre></div></td></tr></tbody></table> By default, Redis runs on `localhost` on port `6379` with no password. Based on your Redis configuration, set the following configurations for the main n8n process. These will allow n8n to interact with Redis. | Using configuration file | Using environment variables | Description | | --- | --- | --- | | `queue.bull.redis.host:localhost` | `QUEUE_BULL_REDIS_HOST=localhost` | By default, Redis runs on `localhost`. | | `queue.bull.redis.port:6379` | `QUEUE_BULL_REDIS_PORT=6379` | The default port is `6379`. If Redis is running on a different port, configure the value. | You can also set the following optional configurations: | Using configuration file | Using environment variables | Description | | --- | --- | --- | | `queue.bull.redis.username:USERNAME` | `QUEUE_BULL_REDIS_USERNAME` | By default, Redis doesn't require a username. If you're using a specific user, configure it variable. | | `queue.bull.redis.password:PASSWORD` | `QUEUE_BULL_REDIS_PASSWORD` | By default, Redis doesn't require a password. If you're using a password, configure it variable. | | `queue.bull.redis.db:0` | `QUEUE_BULL_REDIS_DB` | The default value is `0`. If you change this value, update the configuration. | | `queue.bull.redis.timeoutThreshold:10000ms` | `QUEUE_BULL_REDIS_TIMEOUT_THRESHOLD` | Tells n8n how long it should wait if Redis is unavailable before exiting. The default value is `10000` (ms). | | `queue.bull.gracefulShutdownTimeout:30` | `N8N_GRACEFUL_SHUTDOWN_TIMEOUT` | A graceful shutdown timeout for workers to finish executing jobs before terminating the process. The default value is `30` seconds. | Now you can start your n8n instance and it will connect to your Redis instance. ### Start workers# You will need to start worker processes to allow n8n to execute workflows. If you want to host workers on a separate machine, install n8n on the machine and make sure that it's connected to your Redis instance and the n8n database. Start worker processes by running the following command from the root directory: <table><tbody><tr><td><div><pre><span></span><span>1</span></pre></div></td><td><div><pre><span></span><code>./packages/cli/bin/n8n worker </code></pre></div></td></tr></tbody></table> If you're using Docker, use the following command: <table><tbody><tr><td><div><pre><span></span><span>1</span></pre></div></td><td><div><pre><span></span><code>docker run --name n8n-queue -p 5679:5678 docker.n8n.io/n8nio/n8n worker </code></pre></div></td></tr></tbody></table> You can set up multiple worker processes. Make sure that all the worker processes have access to Redis and the n8n database. #### Worker server# Each worker process runs a server that exposes optional endpoints: * `/healthz`: returns whether the worker is up, if you enable the `QUEUE_HEALTH_CHECK_ACTIVE` environment variable * `/healthz/readiness`: returns whether worker's DB and Redis connections are ready, if you enable the `QUEUE_HEALTH_CHECK_ACTIVE` environment variable * credentials overwrite endpoint * `/metrics` #### View running workers# Feature availability * Available on Self-hosted Enterprise plans. * If you want access to this feature on Cloud Enterprise, contact n8n. You can view running workers and their performance metrics in n8n by selecting **Settings** > **Workers**. ## Running n8n with queues# When running n8n with queues, all the production workflow executions get processed by worker processes. This means that even the webhook calls get delegated to the worker processes, which might add some overhead and extra latency. Redis acts as the message broker, and the database persists data, so access to both is required. Running a distributed system with this setup over SQLite isn't supported. Migrate data If you want to migrate data from one database to another, you can use the Export and Import commands. Refer to the CLI commands for n8n documentation to learn how to use these commands. ## Webhook processors# Keep in mind Webhook processes rely on Redis and need the `EXECUTIONS_MODE` environment variable set too. Follow the configure the workers section above to setup webhook processor nodes. Webhook processors are another layer of scaling in n8n. Configuring the webhook processor is optional, and allows you to scale the incoming webhook requests. This method allows n8n to process a huge number of parallel requests. All you have to do is add more webhook processes and workers accordingly. The webhook process will listen to requests on the same port (default: `5678`). Run these processes in containers or separate machines, and have a load balancing system to route requests accordingly. n8n doesn't recommend adding the main process to the load balancer pool. If you add the main process to the pool, it will receive requests and possibly a heavy load. This will result in degraded performance for editing, viewing, and interacting with the n8n UI. You can start the webhook processor by executing the following command from the root directory: <table><tbody><tr><td><div><pre><span></span><span>1</span></pre></div></td><td><div><pre><span></span><code>./packages/cli/bin/n8n webhook </code></pre></div></td></tr></tbody></table> If you're using Docker, use the following command: <table><tbody><tr><td><div><pre><span></span><span>1</span></pre></div></td><td><div><pre><span></span><code>docker run --name n8n-queue -p 5679:5678 -e "EXECUTIONS_MODE=queue" docker.n8n.io/n8nio/n8n webhook </code></pre></div></td></tr></tbody></table> ### Configure webhook URL# To configure your webhook URL, execute the following command on the machine running the main n8n instance: <table><tbody><tr><td><div><pre><span></span><span>1</span></pre></div></td><td><div><pre><span></span><code><span>export</span><span> </span><span>WEBHOOK_URL</span><span>=</span>https://your-webhook-url.com </code></pre></div></td></tr></tbody></table> You can also set this value in the configuration file. ### Configure load balancer# When using multiple webhook processes you will need a load balancer to route requests. If you are using the same domain name for your n8n instance and the webhooks, you can set up your load balancer to route requests as follows: * Redirect any request that matches `/webhook/*` to the webhook servers pool * All other paths (the n8n internal API, the static files for the editor, etc.) should get routed to the main process **Note:** The default URL for manual workflow executions is `/webhook-test/*`. Make sure that these URLs route to your main process. You can change this path in the configuration file `endpoints.webhook` or using the `N8N_ENDPOINT_WEBHOOK` environment variable. If you change these, update your load balancer accordingly. ### Disable webhook processing in the main process (optional)# You have webhook processors to execute the workflows. You can disable the webhook processing in the main process. This will make sure to execute all webhook executions in the webhook processors. In the configuration file set `endpoints.disableProductionWebhooksOnMainProcess` to `true` so that n8n doesn't process webhook requests on the main process. Alternatively, you can use the following command: <table><tbody><tr><td><div><pre><span></span><span>1</span></pre></div></td><td><div><pre><span></span><code><span>export</span><span> </span><span>N8N_DISABLE_PRODUCTION_MAIN_PROCESS</span><span>=</span><span>true</span> </code></pre></div></td></tr></tbody></table> When disabling the webhook process in the main process, run the main process and don't add it to the load balancer's webhook pool. ## Configure worker concurrency# You can define the number of jobs a worker can run in parallel by using the `concurrency` flag. It defaults to `10`. To change it: <table><tbody><tr><td><div><pre><span></span><span>1</span></pre></div></td><td><div><pre><span></span><code>n8n<span> </span>worker<span> </span>--concurrency<span>=</span><span>5</span> </code></pre></div></td></tr></tbody></table> ## Concurrency and scaling recommendations# n8n recommends setting concurrency to 5 or higher for your worker instances. Setting low concurrency values with a large numbers of workers can exhaust your database's connection pool, leading to processing delays and failures. ## Multi-main setup# Feature availability * Available on Self-hosted Enterprise plans. * If you want access to this feature on Cloud Enterprise, contact n8n. In queue mode you can run more than one `main` process for high availability. In a single-mode setup, the `main` process does two sets of tasks: * **regular tasks**, such as running the API, serving the UI, and listening for webhooks, and * **at-most-once tasks**, such as running non-HTTP triggers (timers, pollers, and persistent connections like RabbitMQ and IMAP), and pruning executions and binary data. In a multi-main setup, there are two kinds of `main` processes: * **followers**, which run **regular tasks**, and * the **leader**, which runs **both regular and at-most-once tasks**. ### Leader designation# In a multi-main setup, all main instances handle the leadership process transparently to users. In case the current leader becomes unavailable, for example because it crashed or its event loop became too busy, other followers can take over. If the previous leader becomes responsive again, it becomes a follower. ### Configuring multi-main setup# To deploy n8n in multi-main setup, ensure: * All `main` processes are running in queue mode and are connected to Postgres and Redis. * All `main` and `worker` processes are running the same version of n8n. * All `main` processes have set the environment variable `N8N_MULTI_MAIN_SETUP_ENABLED` to `true`. * All `main` processes are running behind a load balancer with session persistence (sticky sessions) enabled. If needed, you can adjust the leader key options: | Using configuration file | Using environment variables | Description | | --- | --- | --- | | `multiMainSetup.ttl:10` | `N8N_MULTI_MAIN_SETUP_KEY_TTL=10` | Time to live (in seconds) for leader key in multi-main setup. | | `multiMainSetup.interval:3` | `N8N_MULTI_MAIN_SETUP_CHECK_INTERVAL=3` | Interval (in seconds) for leader check in multi-main setup. | --- ## Page: https://docs.n8n.io/hosting/scaling/concurrency-control/ ## Self-hosted concurrency control# Only for self-hosted n8n This document is for self-hosted concurrency control. Read Cloud concurrency to learn how concurrency works with n8n Cloud accounts. In regular mode, n8n doesn't limit how many production executions may run at the same time. This can lead to a scenario where too many concurrent executions thrash the event loop, causing performance degradation and unresponsiveness. To prevent this, you can set a concurrency limit for production executions in regular mode. Use this to control how many production executions run concurrently, and queue up any concurrent production executions over the limit. These executions remain in the queue until concurrency capacity frees up, and are then processed in FIFO order. Concurrency control is disabled by default. To enable it: <table><tbody><tr><td><div><pre><span></span><span>1</span></pre></div></td><td><div><pre><span></span><code><span>export</span><span> </span><span>N8N_CONCURRENCY_PRODUCTION_LIMIT</span><span>=</span><span>20</span> </code></pre></div></td></tr></tbody></table> Keep in mind: * Concurrency control applies only to production executions: those started from a webhook or trigger node. It doesn't apply to any other kinds, such as manual executions, sub-workflow executions, error executions, or started from CLI. * You can't retry queued executions. Cancelling or deleting a queued execution also removes it from the queue. * On instance startup, n8n resumes queued executions up to the concurrency limit and re-enqueues the rest. * To monitor concurrency control, watch logs for executions being added to the queue and released. In a future version, n8n will show concurrency control in the UI. When you enable concurrency control, you can view the number of active executions and the configured limit at the top of a project's or workflow's executions tab. ## Comparison to queue mode# In queue mode, you can control how many jobs a worker may run concurrently using the `--concurrency` flag. Concurrency control in queue mode is a separate mechanism from concurrency control in regular mode, but the environment variable `N8N_CONCURRENCY_PRODUCTION_LIMIT` controls both of them. In queue mode, n8n takes the limit from this variable if set to a value other than `-1`, falling back to the `--concurrency` flag or its default. --- ## Page: https://docs.n8n.io/hosting/scaling/execution-data/ Depending on your executions settings and volume, your n8n database can grow in size and run out of storage. To avoid this, n8n recommends that you don't save unnecessary data, and enable pruning of old executions data. To do this, configure the corresponding environment variables. ## Reduce saved data# Configuration at workflow level You can also configure these settings on an individual workflow basis using the workflow settings. You can select which executions data n8n saves. For example, you can save only executions that result in an `Error`. <table><tbody><tr><td><div><pre><span></span><span> 1</span> <span> 2</span> <span> 3</span> <span> 4</span> <span> 5</span> <span> 6</span> <span> 7</span> <span> 8</span> <span> 9</span> <span>10</span> <span>11</span> <span>12</span></pre></div></td><td><div><pre><span></span><code><span># npm</span> <span># Save executions ending in errors</span> <span>export</span><span> </span><span>EXECUTIONS_DATA_SAVE_ON_ERROR</span><span>=</span>all <span># Save successful executions</span> <span>export</span><span> </span><span>EXECUTIONS_DATA_SAVE_ON_SUCCESS</span><span>=</span>all <span># Don't save node progress for each execution</span> <span>export</span><span> </span><span>EXECUTIONS_DATA_SAVE_ON_PROGRESS</span><span>=</span><span>false</span> <span># Don't save manually launched executions</span> <span>export</span><span> </span><span>EXECUTIONS_DATA_SAVE_MANUAL_EXECUTIONS</span><span>=</span><span>false</span> </code></pre></div></td></tr></tbody></table> <table><tbody><tr><td><div><pre><span></span><span>1</span> <span>2</span> <span>3</span> <span>4</span> <span>5</span> <span>6</span> <span>7</span> <span>8</span> <span>9</span></pre></div></td><td><div><pre><span></span><code><span># Docker</span> docker<span> </span>run<span> </span>-it<span> </span>--rm<span> </span><span>\</span> <span> </span>--name<span> </span>n8n<span> </span><span>\</span> <span> </span>-p<span> </span><span>5678</span>:5678<span> </span><span>\</span> <span> </span>-e<span> </span><span>EXECUTIONS_DATA_SAVE_ON_ERROR</span><span>=</span>all<span> </span><span>\</span> <span> </span>-e<span> </span><span>EXECUTIONS_DATA_SAVE_ON_SUCCESS</span><span>=</span>none<span> </span><span>\</span> <span> </span>-e<span> </span><span>EXECUTIONS_DATA_SAVE_ON_PROGRESS</span><span>=</span><span>true</span><span> </span><span>\</span> <span> </span>-e<span> </span><span>EXECUTIONS_DATA_SAVE_MANUAL_EXECUTIONS</span><span>=</span><span>false</span><span> </span><span>\</span> <span> </span>docker.n8n.io/n8nio/n8n </code></pre></div></td></tr></tbody></table> <table><tbody><tr><td><div><pre><span></span><span>1</span> <span>2</span> <span>3</span> <span>4</span> <span>5</span> <span>6</span> <span>7</span></pre></div></td><td><div><pre><span></span><code><span># Docker Compose</span> <span>n8n</span><span>:</span> <span> </span><span>environment</span><span>:</span> <span> </span><span>-</span><span> </span><span>EXECUTIONS_DATA_SAVE_ON_ERROR=all</span> <span> </span><span>-</span><span> </span><span>EXECUTIONS_DATA_SAVE_ON_SUCCESS=none</span> <span> </span><span>-</span><span> </span><span>EXECUTIONS_DATA_SAVE_ON_PROGRESS=true</span> <span> </span><span>-</span><span> </span><span>EXECUTIONS_DATA_SAVE_MANUAL_EXECUTIONS=false</span> </code></pre></div></td></tr></tbody></table> ## Enable data pruning# You can enable data pruning to automatically delete finished executions after a given time. If you don't set `EXECUTIONS_DATA_MAX_AGE`, 336 hours (14 days) is the default. You can choose to prune finished executions data before the time set in `EXECUTIONS_DATA_MAX_AGE`, using `EXECUTIONS_DATA_PRUNE_MAX_COUNT`. This sets a maximum number of executions to store in the database. Once you reach the limit, n8n starts to delete the oldest execution records. This can help with database performance issues, especially if you use SQLite. The database size can still exceed the limit you set: old executions that haven't finished running don't get deleted, even if they would otherwise be subject to deletion. <table><tbody><tr><td><div><pre><span></span><span>1</span> <span>2</span> <span>3</span> <span>4</span> <span>5</span> <span>6</span> <span>7</span> <span>8</span> <span>9</span></pre></div></td><td><div><pre><span></span><code><span># npm</span> <span># Activate automatic data pruning</span> <span>export</span><span> </span><span>EXECUTIONS_DATA_PRUNE</span><span>=</span><span>true</span> <span># Number of hours after execution that n8n deletes data</span> <span>export</span><span> </span><span>EXECUTIONS_DATA_MAX_AGE</span><span>=</span><span>168</span> <span># Number of executions to store</span> <span>export</span><span> </span><span>EXECUTIONS_DATA_PRUNE_MAX_COUNT</span><span>=</span><span>50000</span> </code></pre></div></td></tr></tbody></table> <table><tbody><tr><td><div><pre><span></span><span>1</span> <span>2</span> <span>3</span> <span>4</span> <span>5</span> <span>6</span> <span>7</span></pre></div></td><td><div><pre><span></span><code><span># Docker</span> docker<span> </span>run<span> </span>-it<span> </span>--rm<span> </span><span>\</span> <span> </span>--name<span> </span>n8n<span> </span><span>\</span> <span> </span>-p<span> </span><span>5678</span>:5678<span> </span><span>\</span> <span> </span>-e<span> </span><span>EXECUTIONS_DATA_PRUNE</span><span>=</span><span>true</span><span> </span><span>\</span> <span> </span>-e<span> </span><span>EXECUTIONS_DATA_MAX_AGE</span><span>=</span><span>168</span><span> </span><span>\</span> <span> </span>docker.n8n.io/n8nio/n8n </code></pre></div></td></tr></tbody></table> <table><tbody><tr><td><div><pre><span></span><span>1</span> <span>2</span> <span>3</span> <span>4</span> <span>5</span> <span>6</span></pre></div></td><td><div><pre><span></span><code><span># Docker Compose</span> <span>n8n</span><span>:</span> <span> </span><span>environment</span><span>:</span> <span> </span><span>-</span><span> </span><span>EXECUTIONS_DATA_PRUNE=true</span> <span> </span><span>-</span><span> </span><span>EXECUTIONS_DATA_MAX_AGE=168</span> <span> </span><span>-</span><span> </span><span>EXECUTIONS_DATA_PRUNE_MAX_COUNT=50000</span> </code></pre></div></td></tr></tbody></table> SQLite If you run n8n using the default SQLite database, the disk space of any pruned data isn't automatically freed up but rather reused for future executions data. To free up this space configure the `DB_SQLITE_VACUUM_ON_STARTUP` environment variable or manually run the VACUUM operation. Binary data pruning Binary data pruning operates on the active binary data mode. For example, if your instance stored data in S3, and you later switched to filesystem mode, n8n only prunes binary data in the filesystem. This may change in future. --- ## Page: https://docs.n8n.io/hosting/scaling/binary-data/ Binary data is any file-type data, such as image files or documents generated or processed during the execution of a workflow. ## Enable filesystem mode# When handling binary data, n8n keeps the data in memory by default. This can cause crashes when working with large files. To avoid this, change the `N8N_DEFAULT_BINARY_DATA_MODE` environment variable to `filesystem`. This causes n8n to save data to disk, instead of using memory. If you're using queue mode, keep this to `default`. n8n doesn't support filesystem mode with queue mode. ## Binary data pruning# n8n executes binary data pruning as part of execution data pruning. Refer to Execution data | Enable data pruning for details. If you configure multiple binary data modes, binary data pruning operates on the active binary data mode. For example, if your instance stored data in S3, and you later switched to filesystem mode, n8n only prunes binary data in the filesystem. Refer to External storage for details. --- ## Page: https://docs.n8n.io/hosting/scaling/external-storage/ Feature availability * Available on Self-hosted Enterprise plans * If you want access to this feature on Cloud Enterprise, contact n8n. n8n can store binary data produced by workflow executions externally. This feature is useful to avoid relying on the filesystem for storing large amounts of binary data. n8n will introduce external storage for other data types in the future. ## Storing n8n's binary data in S3# n8n supports AWS S3 as an external store for binary data produced by workflow executions. You can use other S3-compatible services like Cloudflare R2 and Backblaze B2, but n8n doesn't officially support these. Enterprise-tier feature You will need an Enterprise license key for external storage. If your license key expires and you remain on S3 mode, the instance will be able to read from, but not write to, the S3 bucket. ### Setup# Create and configure a bucket following the AWS documentation. You can use the following policy, replacing `<bucket-name>` with the name of the bucket you created: <table><tbody><tr><td><div><pre><span></span><span> 1</span> <span> 2</span> <span> 3</span> <span> 4</span> <span> 5</span> <span> 6</span> <span> 7</span> <span> 8</span> <span> 9</span> <span>10</span> <span>11</span></pre></div></td><td><div><pre><span></span><code><span>{</span> <span> </span><span>"Version"</span><span>:</span><span> </span><span>"2012-10-17"</span><span>,</span> <span> </span><span>"Statement"</span><span>:</span><span> </span><span>[</span> <span> </span><span>{</span> <span> </span><span>"Sid"</span><span>:</span><span> </span><span>"VisualEditor0"</span><span>,</span> <span> </span><span>"Effect"</span><span>:</span><span> </span><span>"Allow"</span><span>,</span> <span> </span><span>"Action"</span><span>:</span><span> </span><span>[</span><span>"s3:*"</span><span>],</span> <span> </span><span>"Resource"</span><span>:</span><span> </span><span>[</span><span>"arn:aws:s3:::<bucket-name>"</span><span>,</span><span> </span><span>"arn:aws:s3:::<bucket-name>/*"</span><span>]</span> <span> </span><span>}</span> <span> </span><span>]</span> <span>}</span> </code></pre></div></td></tr></tbody></table> Set a bucket-level lifecycle configuration so that S3 automatically deletes old binary data. n8n delegates pruning of binary data to S3, so setting a lifecycle configuration is required unless you want to preserve binary data indefinitely. Once you finish creating the bucket, you will have a host, bucket name and region, and an access key ID and secret access key. You need to set them in n8n's environment: <table><tbody><tr><td><div><pre><span></span><span>1</span> <span>2</span> <span>3</span> <span>4</span> <span>5</span></pre></div></td><td><div><pre><span></span><code><span>export</span><span> </span><span>N8N_EXTERNAL_STORAGE_S3_HOST</span><span>=</span>...<span> </span><span># example: s3.us-east-1.amazonaws.com</span> <span>export</span><span> </span><span>N8N_EXTERNAL_STORAGE_S3_BUCKET_NAME</span><span>=</span>... <span>export</span><span> </span><span>N8N_EXTERNAL_STORAGE_S3_BUCKET_REGION</span><span>=</span>... <span>export</span><span> </span><span>N8N_EXTERNAL_STORAGE_S3_ACCESS_KEY</span><span>=</span>... <span>export</span><span> </span><span>N8N_EXTERNAL_STORAGE_S3_ACCESS_SECRET</span><span>=</span>... </code></pre></div></td></tr></tbody></table> No region If your provider doesn't require a region, you can set `N8N_EXTERNAL_STORAGE_S3_BUCKET_REGION` to `'auto'`. Tell n8n to store binary data in S3: <table><tbody><tr><td><div><pre><span></span><span>1</span> <span>2</span></pre></div></td><td><div><pre><span></span><code><span>export</span><span> </span><span>N8N_AVAILABLE_BINARY_DATA_MODES</span><span>=</span>filesystem,s3 <span>export</span><span> </span><span>N8N_DEFAULT_BINARY_DATA_MODE</span><span>=</span>s3 </code></pre></div></td></tr></tbody></table> Restart the server to load the new configuration. ### Usage# After you enable S3, n8n writes and reads any new binary data to and from the S3 bucket. n8n writes binary data to your S3 bucket in this format: <table><tbody><tr><td><div><pre><span></span><span>1</span></pre></div></td><td><div><pre><span></span><code>workflows/{workflowId}/executions/{executionId}/binary_data/{binaryFileId} </code></pre></div></td></tr></tbody></table> n8n continues to read older binary data stored in the filesystem from the filesystem, if `filesystem` remains listed as an option in `N8N_AVAILABLE_BINARY_DATA_MODES`. If you store binary data in S3 and later switch to filesystem mode, the instance continues to read any data stored in S3, as long as `s3` remains listed in `N8N_AVAILABLE_BINARY_DATA_MODES` and your S3 credentials remain valid. Binary data pruning Binary data pruning operates on the active binary data mode. For example, if your instance stored data in S3, and you later switched to filesystem mode, n8n only prunes binary data in the filesystem. This may change in future. --- ## Page: https://docs.n8n.io/hosting/scaling/memory-errors/ n8n doesn't restrict the amount of data each node can fetch and process. While this gives you freedom, it can lead to errors when workflow executions require more memory than available. This page explains how to identify and avoid these errors. ## Identifying out of memory situations# n8n provides error messages that warn you in some out of memory situations. For example, messages such as **Execution stopped at this node (n8n may have run out of memory while executing it)**. Error messages including **Problem running workflow**, **Connection Lost**, or **503 Service Temporarily Unavailable** suggest that an n8n instance has become unavailable. When self-hosting n8n, you may also see error messages such as **Allocation failed - JavaScript heap out of memory** in your server logs. On n8n Cloud, or when using n8n's Docker image, n8n restarts automatically when encountering such an issue. However, when running n8n with npm you might need to restart it manually. ## Typical causes# Such problems occur when a workflow execution requires more memory than available to an n8n instance. Factors increasing the memory usage for a workflow execution include: * Amount of JSON data. * Size of binary data. * Number of nodes in a workflow. * Some nodes are memory-heavy: the Code node and the older Function node can increase memory consumption significantly. * Manual or automatic workflow executions: manual executions increase memory consumption as n8n makes a copy of the data for the frontend. * Additional workflows running at the same time. ## Avoiding out of memory situations# When encountering an out of memory situation, there are two options: either increase the amount of memory available to n8n or reduce the memory consumption. ### Increase available memory# When self-hosting n8n, increasing the amount of memory available to n8n means provisioning your n8n instance with more memory. This may incur additional costs with your hosting provider. On n8n cloud you need to upgrade to a larger plan. ### Reduce memory consumption# This approach is more complex and means re-building the workflows causing the issue. This section provides some guidelines on how to reduce memory consumption. Not all suggestions are applicable to all workflows. * Split the data processed into smaller chunks. For example, instead of fetching 10,000 rows with each execution, process 200 rows with each execution. * Avoid using the Code node where possible. * Avoid manual executions when processing larger amounts of data. * Split the workflow up into sub-workflows and ensure each sub-workflow returns a limited amount of data to its parent workflow. Splitting the workflow might seem counter-intuitive at first as it usually requires adding at least two more nodes: the Loop Over Items node to split up the items into smaller batches and the Execute Workflow node to start the sub-workflow. However, as long as your sub-workflow does the heavy lifting for each batch and then returns only a small result set to the main workflow, this reduces memory consumption. This is because the sub-workflow only holds the data for the current batch in memory, after which the memory is free again. ### Increase old memory# This applies to self-hosting n8n. When encountering **JavaScript heap out of memory** errors, it's often useful to allocate additional memory to the old memory section of the V8 JavaScript engine. To do this, set the appropriate V8 option `--max-old-space-size=SIZE` either through the CLI or through the `NODE_OPTIONS` environment variable. --- ## Page: https://docs.n8n.io/hosting/securing/overview/ Securing your n8n instance can take several forms. At a high level, you can: * Conduct a security audit to identify security risks. * Set up SSL to enforce secure connections. * Set up Single Sign-On for user account management. * Use two-factor authentication (2FA) for your users. More granularly, consider blocking or opting out of features or data collection you don't want: * Disable the public API if you aren't using it. * Opt out of data collection of the anonymous data n8n collects automatically. * Block certain nodes from being available to your users. --- ## Page: https://docs.n8n.io/hosting/securing/set-up-ssl/ There are two methods to support TLS/SSL in n8n. ## Use a reverse proxy (recommended)# Use a reverse proxy like Traefik or a Network Load Balancer (NLB) in front of the n8n instance. This should also take care of certificate renewals. Refer to Security | Data encryption for more information. ## Pass certificates into n8n directly# You can also choose to pass certificates into n8n directly. To do so, set the `N8N_SSL_CERT` and `N8N_SSL_KEY` environment variables to point to your generated certificate and key file. You'll need to make sure the certificate stays renewed and up to date. Refer to Deployment environment variables for more information on these variables and Configuration for more information on setting environment variables. --- ## Page: https://docs.n8n.io/hosting/securing/set-up-sso/ 1. Hosting n8n 2. Securing n8n ## Set up SAML Single Sign-On (SSO)# Feature availability * Available on Enterprise plans. * You need access to the n8n instance owner account to enable and configure SAML Available from version 0.225.0. This section provides guidance on using SAML SSO (single sign-on) with n8n. It assumes you're familiar with SAML. If you're not, SAML Explained in Plain English can help you understand how SAML works, and its benefits. * Set up SAML: a general guide to setting up SAML in n8n, and links to resources for common IdPs. Start here. * Okta Workforce Identity SAML setup: step-by-step guidance to configuring Okta. * Troubleshooting: a list of things to check if you encounter issues. * Managing users with SAML: performing user management tasks with SAML enabled. --- ## Page: https://docs.n8n.io/hosting/securing/disable-public-api/ The n8n public REST API allows you to programmatically perform many of the same tasks as you can in the n8n GUI. If you don't plan on using this API, n8n recommends disabling it to improve the security of your n8n installation. To disable the public REST API, set the `N8N_PUBLIC_API_DISABLED` environment variable to `true`, for example: <table><tbody><tr><td><div><pre><span></span><span>1</span></pre></div></td><td><div><pre><span></span><code><span>export</span><span> </span><span>N8N_PUBLIC_API_DISABLED</span><span>=</span><span>true</span> </code></pre></div></td></tr></tbody></table> ## Disable the API playground# To disable the API playground, set the `N8N_PUBLIC_API_SWAGGERUI_DISABLED` environment variable to `true`, for example: <table><tbody><tr><td><div><pre><span></span><span>1</span></pre></div></td><td><div><pre><span></span><code><span>export</span><span> </span><span>N8N_PUBLIC_API_SWAGGERUI_DISABLED</span><span>=</span><span>true</span> </code></pre></div></td></tr></tbody></table> Refer to Deployment environment variables for more information on these environment variables. Refer to Configuration for more information on setting environment variables. --- ## Page: https://docs.n8n.io/hosting/securing/telemetry-opt-out/ n8n collects some anonymous data from self-hosted n8n installations. Use the instructions below to opt out of data telemetry collection. ## Collected data# Refer to Privacy | Data collection in self-hosted n8n for details on the data n8n collects. ## How collection works# Your n8n instance sends most data to n8n as the events that generate it occur. Workflow execution counts and an instance pulse are sent periodically (every 6 hours). These data types mostly fall into n8n telemetry collection. ## Opting out of data collection# n8n enables telemetry collection by default. To disable it, configure the following environment variables. ### Opt out of telemetry events# To opt out of telemetry events, set the `N8N_DIAGNOSTICS_ENABLED` environment variable to false, for example: <table><tbody><tr><td><div><pre><span></span><span>1</span></pre></div></td><td><div><pre><span></span><code><span>export</span><span> </span><span>N8N_DIAGNOSTICS_ENABLED</span><span>=</span><span>false</span> </code></pre></div></td></tr></tbody></table> ### Opt out of checking for new versions of n8n# To opt out of checking for new versions of n8n, set the `N8N_VERSION_NOTIFICATIONS_ENABLED` environment variable to false, for example: <table><tbody><tr><td><div><pre><span></span><span>1</span></pre></div></td><td><div><pre><span></span><code><span>export</span><span> </span><span>N8N_VERSION_NOTIFICATIONS_ENABLED</span><span>=</span><span>false</span> </code></pre></div></td></tr></tbody></table> ## Disable all connection to n8n servers# If you want to fully prevent all communication with n8n's servers, refer to Isolate n8n. Refer to Deployment environment variables for more information on these environment variables. Refer to Configuration for more information on setting environment variables. --- ## Page: https://docs.n8n.io/hosting/securing/blocking-nodes/ For security reasons, you may want to block your users from accessing or working with specific n8n nodes. This is helpful if your users might be untrustworthy. Use the `NODES_EXCLUDE` environment variable to prevent your users from accessing specific nodes. ## Exclude nodes# Update your `NODES_EXCLUDE` environment variable to include an array of strings containing any nodes you want to block your users from using. For example, setting the variable this way: <table><tbody><tr><td><div><pre><span></span><span>1</span></pre></div></td><td><div><pre><span></span><code>NODES_EXCLUDE: "[\"n8n-nodes-base.executeCommand\", \"n8n-nodes-base.readWriteFile\"]" </code></pre></div></td></tr></tbody></table> Blocks the Execute Command and Read/Write Files from Disk nodes. Your n8n users won't be able to search for or use these nodes. ## Suggested nodes to block# The nodes that can pose security risks vary based on your use case and user profile. Here are some nodes you might want to start with: * Execute Command * Read/Write Files from Disk Refer to Nodes environment variables for more information on this environment variable. Refer to Configuration for more information on setting environment variables. --- ## Page: https://docs.n8n.io/hosting/securing/hardening-task-runners/ Task runners are responsible for executing code from the Code node. While Code node executions are secure, you can follow these recommendations to further harden your task runners. ## Run task runners as sidecars in external mode# To increase the isolation between the core n8n process and code in the Code node, run task runners in external mode. External task runners launch as separate containers, providing a fully isolated environment to execute the JavaScript defined in the Code node. --- ## Page: https://docs.n8n.io/hosting/starter-kits/ai-starter-kit/ The Self-hosted AI Starter Kit is an open, docker compose template that bootstraps a fully featured Local AI and Low Code development environment. Curated by n8n, it combines the self-hosted n8n platform with a list of compatible AI products and components to get you started building self-hosted AI workflows. ## What’s included# ✅ **Self-hosted n8n**: Low-code platform with over 400 integrations and advanced AI components. ✅ **Ollama**: Cross-platform LLM platform to install and run the latest local LLMs. ✅ **Qdrant**: Open-source, high performance vector store with a comprehensive API. ✅ **PostgreSQL**: The workhorse of the Data Engineering world, handles large amounts of data safely. ## What you can build# ⭐️ AI Agents that can schedule appointments ⭐️ Summaries of company PDFs without leaking data ⭐️ Smarter Slackbots for company communications and IT-ops ⭐️ Private, low-cost analyses of financial documents ## Get the kit# Head to the GitHub repository to clone the repo and get started! For testing only n8n designed this kit to help you get started with self-hosted AI workflows. While it’s not fully optimized for production environments, it combines robust components that work well together for proof-of-concept projects. Customize it to meet your needs. Secure and harden it before using in production. --- ## Page: https://docs.n8n.io/hosting/architecture/overview/ 1. Hosting n8n 2. Architecture ## Architecture# Understanding n8n's underlying architecture is helpful if you need to: * Embed n8n * Customize n8n's default databases This section is a work in progress. If you have questions, please try the forum and let n8n know which architecture documents would be useful for you. --- ## Page: https://docs.n8n.io/hosting/architecture/database-structure/ This page describes the purpose of each table in the n8n database. ## Database and query technology# By default, n8n uses SQLite as the database. If you are using another database the structure will be similar, but the data-types may be different depending on the database. n8n uses TypeORM for queries and migrations. To inspect the n8n database, you can use DBeaver, which is an open-source universal database tool. ## Tables# These are the tables n8n creates during setup. ### auth\_identity# Stores details of external authentication providers when using SAML. ### auth\_provider\_sync\_history# Stores the history of a SAML connection. ### credentials\_entity# Stores the credentials used to authenticate with integrations. ### event\_destinations# Contains the destination configurations for Log streaming. ### execution\_data# Contains the workflow at time of running, and the execution data. ### execution\_entity# Stores all saved workflow executions. Workflow settings can affect which executions n8n saves. ### execution\_metadata# Stores Custom executions data. ### installed\_nodes# Lists the community nodes installed in your n8n instance. ### installed\_packages# Details of npm community nodes packages installed in your n8n instance. installed\_nodes lists each individual node. `installed_packages` lists npm packages, which may contain more than one node. ### migrations# A log of all database migrations. Read more about Migrations in TypeORM's documentation. ### project# Lists the projects in your instance. ### project\_relation# Describes the relationship between a user and a project, including the user's role type. ### role# Not currently used. Foruse in future work on custom roles. ### settings# Records custom instance settings. These are settings that you can't control using environment variables. They include: * Whether the instance owner is set up * Whether the user chose to skip owner and user management setup * License key ### shared\_credentials# Maps credentials to users. ### shared\_workflow# Maps workflows to users. ### tag\_entity# All workflow tags created in the n8n instance. This table lists the tags. workflows\_tags records which workflows have which tags. ### user# Contains user data. ### variables# Store variables. ### webhook\_entity# Records the active webhooks in your n8n instance's workflows. This isn't just webhooks uses in the Webhook node. It includes all active webhooks used by any trigger node. ### workflow\_entity# Your n8n instance's saved workflows. ### workflow\_history# Store previous versions of workflows. ### workflow\_statistics# Counts workflow IDs and their status. ### workflows\_tags# Maps tags to workflows. tag\_entity contains tag details. ## Entity Relationship Diagram (ERD)#  --- ## Page: https://docs.n8n.io/hosting/cli-commands/ n8n includes a CLI (command line interface), allowing you to perform actions using the CLI rather than the n8n editor. These include starting workflows, and exporting and importing workflows and credentials. ## Running CLI commands# You can use CLI commands with self-hosted n8n. Depending on how you choose to install n8n, there are differences in how to run the commands: * npm: the `n8n` command is directly available. The documentation uses this in the examples below. * Docker: the `n8n` command is available within your Docker container: <table><tbody><tr><td><div><pre><span></span><span>1</span></pre></div></td><td><div><pre><span></span><code>docker<span> </span><span>exec</span><span> </span>-u<span> </span>node<span> </span>-it<span> </span><n8n-container-name><span> </span><n8n-cli-command> </code></pre></div></td></tr></tbody></table> ## Start a workflow# You can start workflows directly using the CLI. Execute a saved workflow by its ID: <table><tbody><tr><td><div><pre><span></span><span>1</span></pre></div></td><td><div><pre><span></span><code>n8n<span> </span>execute<span> </span>--id<span> </span><ID> </code></pre></div></td></tr></tbody></table> ## Change the active status of a workflow# You can change the active status of a workflow using the CLI. Restart required These commands operate on your n8n database. If you execute them while n8n is running, the changes don't take effect until you restart n8n. Set the active status of a workflow by its ID to false: <table><tbody><tr><td><div><pre><span></span><span>1</span></pre></div></td><td><div><pre><span></span><code>n8n<span> </span>update:workflow<span> </span>--id<span>=</span><ID><span> </span>--active<span>=</span><span>false</span> </code></pre></div></td></tr></tbody></table> Set the active status of a workflow by its ID to true: <table><tbody><tr><td><div><pre><span></span><span>1</span></pre></div></td><td><div><pre><span></span><code>n8n<span> </span>update:workflow<span> </span>--id<span>=</span><ID><span> </span>--active<span>=</span><span>true</span> </code></pre></div></td></tr></tbody></table> Set the active status to false for all the workflows: <table><tbody><tr><td><div><pre><span></span><span>1</span></pre></div></td><td><div><pre><span></span><code>n8n<span> </span>update:workflow<span> </span>--all<span> </span>--active<span>=</span><span>false</span> </code></pre></div></td></tr></tbody></table> Set the active status to true for all the workflows: <table><tbody><tr><td><div><pre><span></span><span>1</span></pre></div></td><td><div><pre><span></span><code>n8n<span> </span>update:workflow<span> </span>--all<span> </span>--active<span>=</span><span>true</span> </code></pre></div></td></tr></tbody></table> ## Export workflows and credentials# You can export your workflows and credentials from n8n using the CLI. Command flags: | Flag | Description | | --- | --- | | \--help | Help prompt. | | \--all | Exports all workflows/credentials. | | \--backup | Sets --all --pretty --separate for backups. You can optionally set --output. | | \--id | The ID of the workflow to export. | | \--output | Outputs file name or directory if using separate files. | | \--pretty | Formats the output in an easier to read fashion. | | \--separate | Exports one file per workflow (useful for versioning). Must set a directory using --output. | | \--decrypted | Exports the credentials in a plain text format. | ### Workflows# Export all your workflows to the standard output (terminal): <table><tbody><tr><td><div><pre><span></span><span>1</span></pre></div></td><td><div><pre><span></span><code>n8n<span> </span>export:workflow<span> </span>--all </code></pre></div></td></tr></tbody></table> Export a workflow by its ID and specify the output file name: <table><tbody><tr><td><div><pre><span></span><span>1</span></pre></div></td><td><div><pre><span></span><code>n8n<span> </span>export:workflow<span> </span>--id<span>=</span><ID><span> </span>--output<span>=</span>file.json </code></pre></div></td></tr></tbody></table> Export all workflows to a specific directory in a single file: <table><tbody><tr><td><div><pre><span></span><span>1</span></pre></div></td><td><div><pre><span></span><code>n8n<span> </span>export:workflow<span> </span>--all<span> </span>--output<span>=</span>backups/latest/file.json </code></pre></div></td></tr></tbody></table> Export all the workflows to a specific directory using the `--backup` flag (details above): <table><tbody><tr><td><div><pre><span></span><span>1</span></pre></div></td><td><div><pre><span></span><code>n8n<span> </span>export:workflow<span> </span>--backup<span> </span>--output<span>=</span>backups/latest/ </code></pre></div></td></tr></tbody></table> ### Credentials# Export all your credentials to the standard output (terminal): <table><tbody><tr><td><div><pre><span></span><span>1</span></pre></div></td><td><div><pre><span></span><code>n8n<span> </span>export:credentials<span> </span>--all </code></pre></div></td></tr></tbody></table> Export credentials by their ID and specify the output file name: <table><tbody><tr><td><div><pre><span></span><span>1</span></pre></div></td><td><div><pre><span></span><code>n8n<span> </span>export:credentials<span> </span>--id<span>=</span><ID><span> </span>--output<span>=</span>file.json </code></pre></div></td></tr></tbody></table> Export all credentials to a specific directory in a single file: <table><tbody><tr><td><div><pre><span></span><span>1</span></pre></div></td><td><div><pre><span></span><code>n8n<span> </span>export:credentials<span> </span>--all<span> </span>--output<span>=</span>backups/latest/file.json </code></pre></div></td></tr></tbody></table> Export all the credentials to a specific directory using the `--backup` flag (details above): <table><tbody><tr><td><div><pre><span></span><span>1</span></pre></div></td><td><div><pre><span></span><code>n8n<span> </span>export:credentials<span> </span>--backup<span> </span>--output<span>=</span>backups/latest/ </code></pre></div></td></tr></tbody></table> Export all the credentials in plain text format. You can use this to migrate from one installation to another that has a different secret key in the configuration file. Sensitive information All sensitive information is visible in the files. <table><tbody><tr><td><div><pre><span></span><span>1</span></pre></div></td><td><div><pre><span></span><code>n8n<span> </span>export:credentials<span> </span>--all<span> </span>--decrypted<span> </span>--output<span>=</span>backups/decrypted.json </code></pre></div></td></tr></tbody></table> ## Import workflows and credentials# You can import your workflows and credentials from n8n using the CLI. Update the IDs When exporting workflows and credentials, n8n also exports their IDs. If you have workflows and credentials with the same IDs in your existing database, they will be overwritten. To avoid this, delete or change the IDs before importing. Available flags: | Flag | Description | | --- | --- | | \--help | Help prompt. | | \--input | Input file name or directory if you use --separate. | | \--projectId | Import the workflow or credential to the specified project. Can't be used with `--userId`. | | \--separate | Imports `*.json` files from directory provided by --input. | | \--userId | Import the workflow or credential to the specified user. Can't be used with `--projectId`. | Migrating to SQLite n8n limits workflow and credential names to 128 characters, but SQLite doesn't enforce size limits. This might result in errors like **Data too long for column name** during the import process. In this case, you can edit the names from the n8n interface and export again, or edit the JSON file directly before importing. ### Workflows# Import workflows from a specific file: <table><tbody><tr><td><div><pre><span></span><span>1</span></pre></div></td><td><div><pre><span></span><code>n8n<span> </span>import:workflow<span> </span>--input<span>=</span>file.json </code></pre></div></td></tr></tbody></table> Import all the workflow files as JSON from the specified directory: <table><tbody><tr><td><div><pre><span></span><span>1</span></pre></div></td><td><div><pre><span></span><code>n8n<span> </span>import:workflow<span> </span>--separate<span> </span>--input<span>=</span>backups/latest/ </code></pre></div></td></tr></tbody></table> ### Credentials# Import credentials from a specific file: <table><tbody><tr><td><div><pre><span></span><span>1</span></pre></div></td><td><div><pre><span></span><code>n8n<span> </span>import:credentials<span> </span>--input<span>=</span>file.json </code></pre></div></td></tr></tbody></table> Import all the credentials files as JSON from the specified directory: <table><tbody><tr><td><div><pre><span></span><span>1</span></pre></div></td><td><div><pre><span></span><code>n8n<span> </span>import:credentials<span> </span>--separate<span> </span>--input<span>=</span>backups/latest/ </code></pre></div></td></tr></tbody></table> ## License# ### Clear# Clear your existing license from n8n's database and reset n8n to default features: <table><tbody><tr><td><div><pre><span></span><span>1</span></pre></div></td><td><div><pre><span></span><code>n8n<span> </span>license:clear </code></pre></div></td></tr></tbody></table> If your license includes floating entitlements, running this command will also attempt to release them back to the pool, making them available for other instances. ### Info# Display information about the existing license: <table><tbody><tr><td><div><pre><span></span><span>1</span></pre></div></td><td><div><pre><span></span><code>n8n<span> </span>license:info </code></pre></div></td></tr></tbody></table> ## User management# You can reset user management using the n8n CLI. This returns user management to its pre-setup state. It removes all user accounts. Use this if you forget your password, and don't have SMTP set up to do password resets by email. <table><tbody><tr><td><div><pre><span></span><span>1</span></pre></div></td><td><div><pre><span></span><code>n8n<span> </span>user-management:reset </code></pre></div></td></tr></tbody></table> ### Disable MFA for a user# If a user loses their recovery codes you can disable MFA for a user with this command. The user will then be able to log back in to set up MFA again. <table><tbody><tr><td><div><pre><span></span><span>1</span></pre></div></td><td><div><pre><span></span><code>n8n<span> </span>mfa:disable<span> </span>--email<span>=</span>johndoe@example.com </code></pre></div></td></tr></tbody></table> ### Disable LDAP# You can reset the LDAP settings using the command below. <table><tbody><tr><td><div><pre><span></span><span>1</span></pre></div></td><td><div><pre><span></span><code>n8n<span> </span>ldap:reset </code></pre></div></td></tr></tbody></table> ## Security audit# You can run a security audit on your n8n instance, to detect common security issues. <table><tbody><tr><td><div><pre><span></span><span>1</span></pre></div></td><td><div><pre><span></span><code>n8n<span> </span>audit </code></pre></div></td></tr></tbody></table> --- ## Page: https://docs.n8n.io/code/expressions/ Expressions are a powerful feature implemented in all n8n nodes. They allow node parameters to be set dynamically based on data from: * Previous node executions * The workflow * Your n8n environment You can also execute JavaScript within an expression, making this a convenient and easy way to manipulate data into useful parameter values without writing extensive extra code. n8n created and uses a templating language called Tournament, and extends it with custom methods and variables and data transformation functions. These features make it easier to perform common tasks like getting data from other nodes or accessing workflow metadata. n8n additionally supports two libraries: * Luxon, for working with dates and time. * JMESPath, for querying JSON. Data in n8n When writing expressions, it's helpful to understand data structure and behavior in n8n. Refer to Data for more information on working with data in your workflows. ## Writing expressions# To use an expression to set a parameter value: 1. Hover over the parameter where you want to use an expression. 2. Select **Expressions** in the **Fixed/Expression** toggle. 3. Write your expression in the parameter, or select **Open expression editor**  to open the expressions editor. If you use the expressions editor, you can browse the available data in the **Variable selector**. All expressions have the format `{{ your expression here }}`. ### Example: Get data from webhook body# Consider the following scenario: you have a webhook trigger that receives data through the webhook body. You want to extract some of that data for use in the workflow. Your webhook data looks similar to this: <table><tbody><tr><td><div><pre><span></span><span> 1</span> <span> 2</span> <span> 3</span> <span> 4</span> <span> 5</span> <span> 6</span> <span> 7</span> <span> 8</span> <span> 9</span> <span>10</span> <span>11</span> <span>12</span> <span>13</span> <span>14</span> <span>15</span></pre></div></td><td><div><pre><span></span><code><span>[</span> <span> </span><span>{</span> <span> </span><span>"headers"</span><span>:</span><span> </span><span>{</span> <span> </span><span>"host"</span><span>:</span><span> </span><span>"n8n.instance.address"</span><span>,</span> <span> </span><span>...</span> <span> </span><span>},</span> <span> </span><span>"params"</span><span>:</span><span> </span><span>{},</span> <span> </span><span>"query"</span><span>:</span><span> </span><span>{},</span> <span> </span><span>"body"</span><span>:</span><span> </span><span>{</span> <span> </span><span>"name"</span><span>:</span><span> </span><span>"Jim"</span><span>,</span> <span> </span><span>"age"</span><span>:</span><span> </span><span>30</span><span>,</span> <span> </span><span>"city"</span><span>:</span><span> </span><span>"New York"</span> <span> </span><span>}</span> <span> </span><span>}</span> <span>]</span> </code></pre></div></td></tr></tbody></table> In the next node in the workflow, you want to get just the value of `city`. You can use the following expression: <table><tbody><tr><td><div><pre><span></span><span>1</span></pre></div></td><td><div><pre><span></span><code><span>{{</span><span>$json</span><span>.</span><span>body</span><span>.</span><span>city</span><span>}}</span> </code></pre></div></td></tr></tbody></table> This expression: 1. Accesses the incoming JSON-formatted data using n8n's custom `$json` variable. 2. Finds the value of `city` (in this example, "New York"). Note that this example uses JMESPath syntax to query the JSON data. You can also write this expression as `{{$json['body']['city']}}`. ### Example: Writing longer JavaScript# An expression contains one line of JavaScript. This means you cannot do things like variable assignments or multiple standalone operations. To understand the limitations of JavaScript in expressions, and start thinking about workarounds, look at the following two pieces of code. Both code examples use the Luxon date and time library to find the time between two dates in months, and encloses the code in handlebar brackets, like an expression. However, the first example isn't a valid n8n expression: <table><tbody><tr><td><div><pre><span></span><span> 1</span> <span> 2</span> <span> 3</span> <span> 4</span> <span> 5</span> <span> 6</span> <span> 7</span> <span> 8</span> <span> 9</span> <span>10</span> <span>11</span></pre></div></td><td><div><pre><span></span><code><span>// This example is split over multiple lines for readability</span> <span>// It's still invalid when formatted as a single line</span> <span>{{</span> <span> </span><span>function</span><span> </span><span>example</span><span>()</span><span> </span><span>{</span> <span> </span><span>let</span><span> </span><span>end</span><span> </span><span>=</span><span> </span><span>DateTime</span><span>.</span><span>fromISO</span><span>(</span><span>'2017-03-13'</span><span>);</span> <span> </span><span>let</span><span> </span><span>start</span><span> </span><span>=</span><span> </span><span>DateTime</span><span>.</span><span>fromISO</span><span>(</span><span>'2017-02-13'</span><span>);</span> <span> </span><span>let</span><span> </span><span>diffInMonths</span><span> </span><span>=</span><span> </span><span>end</span><span>.</span><span>diff</span><span>(</span><span>start</span><span>,</span><span> </span><span>'months'</span><span>);</span> <span> </span><span>return</span><span> </span><span>diffInMonths</span><span>.</span><span>toObject</span><span>();</span> <span> </span><span>}</span> <span> </span><span>example</span><span>();</span> <span>}}</span> </code></pre></div></td></tr></tbody></table> While the second example is valid: <table><tbody><tr><td><div><pre><span></span><span>1</span></pre></div></td><td><div><pre><span></span><code><span>{{</span><span>DateTime</span><span>.</span><span>fromISO</span><span>(</span><span>'2017-03-13'</span><span>).</span><span>diff</span><span>(</span><span>DateTime</span><span>.</span><span>fromISO</span><span>(</span><span>'2017-02-13'</span><span>),</span><span> </span><span>'months'</span><span>).</span><span>toObject</span><span>()}}</span> </code></pre></div></td></tr></tbody></table> ## Common issues# For common errors or issues with expressions and suggested resolution steps, refer to Common Issues. --- ## Page: https://docs.n8n.io/code/code-node/ Use the Code node to write custom JavaScript or Python and run it as a step in your workflow. Examples and templates For usage examples and templates to help you get started, refer to n8n's Code integrations page. ## Usage# How to use the Code node. ### Choose a mode# There are two modes: * **Run Once for All Items**: this is the default. When your workflow runs, the code in the code node executes once, regardless of how many input items there are. * **Run Once for Each Item**: choose this if you want your code to run for every input item. ## JavaScript# The Code node supports Node.js. ### Supported JavaScript features# The Code node supports: * Promises. Instead of returning the items directly, you can return a promise which resolves accordingly. * Writing to your browser console using `console.log`. This is useful for debugging and troubleshooting your workflows. ### External libraries# If you self-host n8n, you can import and use built-in and external npm modules in the Code node. To learn how to enable external modules, refer to the Enable modules in Code node guide. If you use n8n Cloud, you can't import external npm modules. n8n makes two modules available for you: * crypto Node.js module * moment npm package ### Built-in methods and variables# n8n provides built-in methods and variables for working with data and accessing n8n data. Refer to Built-in methods and variables for more information. The syntax to use the built-in methods and variables is `$variableName` or `$methodName()`. Type `$` in the Code node or expressions editor to see a list of suggested methods and variables. ### Keyboard shortcuts# The Code node editing environment supports time-saving and useful keyboard shortcuts for a range of operations from autocompletion to code-folding and using multiple-cursors. A full list can be found in the list of keyboard shortcuts. ## Python# n8n added Python support in version 1.0. It doesn't include a Python executable. Instead, n8n provides Python support using Pyodide, which is a port of CPython to WebAssembly. This limits the available Python packages to the Packages included with Pyodide. n8n downloads the package automatically the first time you use it. Slower than JavaScript The Code node takes longer to process Python than JavaScript. This is due to the extra compilation steps. ### Built-in methods and variables# n8n provides built-in methods and variables for working with data and accessing n8n data. Refer to Built-in methods and variables for more information. The syntax to use the built-in methods and variables is `_variableName` or `_methodName()`. Type `_` in the Code node to see a list of suggested methods and variables. ### Keyboard shortcuts# The Code node editing environment supports time-saving and useful keyboard shortcuts for a range of operations from autocompletion to code-folding and using multiple-cursors. A full list can be found in the list of keyboard shortcuts. ## File system and HTTP requests# You can't access the file system or make HTTP requests. Use the following nodes instead: * Read/Write File From Disk * HTTP Request ## Coding in n8n# There are two places where you can use code in n8n: the Code node and the expressions editor. When using either area, there are some key concepts you need to know, as well as some built-in methods and variables to help with common tasks. ### Key concepts# When working with the Code node, you need to understand the following concepts: * Data structure: understand the data you receive in the Code node, and requirements for outputting data from the node. * Item linking: learn how data items work, and how to link to items from previous nodes. You need to handle item linking in your code when the number of input and output items doesn't match. ### Built-in methods and variables# n8n includes built-in methods and variables. These provide support for: * Accessing specific item data * Accessing data about workflows, executions, and your n8n environment * Convenience variables to help with data and time Refer to Built-in methods and variables for more information. ## Use AI in the Code node# Feature availability AI assistance in the Code node is available to Cloud users. It isn't available in self-hosted n8n. AI generated code overwrites your code If you've already written some code on the **Code** tab, the AI generated code will replace it. n8n recommends using AI as a starting point to create your initial code, then editing it as needed. To use ChatGPT to generate code in the Code node: 1. In the Code node, set **Language** to **JavaScript**. 2. Select the **Ask AI** tab. 3. Write your query. 4. Select **Generate Code**. n8n sends your query to ChatGPT, then displays the result in the **Code** tab. --- ## Page: https://docs.n8n.io/code/ai-code/ ## AI coding with GPT# Not available on self-hosted. Python isn't supported. /// ## Use AI in the Code node# Feature availability AI assistance in the Code node is available to Cloud users. It isn't available in self-hosted n8n. AI generated code overwrites your code If you've already written some code on the **Code** tab, the AI generated code will replace it. n8n recommends using AI as a starting point to create your initial code, then editing it as needed. To use ChatGPT to generate code in the Code node: 1. In the Code node, set **Language** to **JavaScript**. 2. Select the **Ask AI** tab. 3. Write your query. 4. Select **Generate Code**. n8n sends your query to ChatGPT, then displays the result in the **Code** tab. ## Usage limits# During the trial phase there are no usage limits. If n8n makes the feature permanent, there may be usage limits as part of your pricing tier. ## Feature limits# The ChatGPT implementation in n8n has the following limitations: * The AI writes code that manipulates data from the n8n workflow. You can't ask it to pull in data from other sources. * The AI doesn't know your data, just the schema, so you need to tell it things like how to find the data you want to extract, or how to check for null. * Nodes before the Code node must execute and deliver data to the Code node before you run your AI query. * Doesn't work with large incoming data schemas. * May have issues if there are a lot of nodes before the code node. ## Writing good prompts# Writing good prompts increases the chance of getting useful code back. Some general tips: * Provide examples: if possible, give a sample expected output. This helps the AI to better understand the transformation or logic you’re aiming for. * Describe the processing steps: if there are specific processing steps or logic that should apply to the data, list them in sequence. For example: "First, filter out all users under 18. Then, sort the remaining users by their last name." * Avoid ambiguities: while the AI understands various instructions, being clear and direct ensures you get the most accurate code. Instead of saying "Get the older users," you might say "Filter users who are 60 years and above." * Be clear about what you expect as the output. Do you want the data transformed, filtered, aggregated, or sorted? Provide as much detail as possible. And some n8n-specific guidance: * Think about the input data: make sure ChatGPT knows which pieces of the data you want to access, and what the incoming data represents. You may need to tell ChatGPT about the availability of n8n's built-in methods and variables. * Declare interactions between nodes: if your logic involves data from multiple nodes, specify how they should interact. "Merge the output of 'Node A' with 'Node B' based on the 'userID' property". if you prefer data to come from certain nodes or to ignore others, be clear: "Only consider data from the 'Purchases' node and ignore the 'Refunds' node." * Ensure the output is compatible with n8n. Refer to Data structure for more information on the data structure n8n requires. ### Example prompts# These examples show a range of possible prompts and tasks. #### Example 1: Find a piece of data inside a second dataset# To try the example yourself, download the example workflow and import it into n8n. In the third Code node, enter this prompt: > The slack data contains only one item. The input data represents all Notion users. Sometimes the person property that holds the email can be null. I want to find the notionId of the Slack user and return it. Take a look at the code the AI generates. This is the JavaScript you need: <table><tbody><tr><td><div><pre><span></span><span>1</span> <span>2</span> <span>3</span> <span>4</span> <span>5</span> <span>6</span> <span>7</span> <span>8</span> <span>9</span></pre></div></td><td><div><pre><span></span><code><span>const</span><span> </span><span>slackUser</span><span> </span><span>=</span><span> </span><span>$</span><span>(</span><span>"Mock Slack"</span><span>).</span><span>all</span><span>()[</span><span>0</span><span>];</span> <span>const</span><span> </span><span>notionUsers</span><span> </span><span>=</span><span> </span><span>$input</span><span>.</span><span>all</span><span>();</span> <span>const</span><span> </span><span>slackUserEmail</span><span> </span><span>=</span><span> </span><span>slackUser</span><span>.</span><span>json</span><span>.</span><span>email</span><span>;</span> <span>const</span><span> </span><span>notionUser</span><span> </span><span>=</span><span> </span><span>notionUsers</span><span>.</span><span>find</span><span>(</span> <span> </span><span>(</span><span>user</span><span>)</span><span> </span><span>=></span><span> </span><span>user</span><span>.</span><span>json</span><span>.</span><span>person</span><span> </span><span>&&</span><span> </span><span>user</span><span>.</span><span>json</span><span>.</span><span>person</span><span>.</span><span>email</span><span> </span><span>===</span><span> </span><span>slackUserEmail</span> <span>);</span> <span>return</span><span> </span><span>notionUser</span><span> </span><span>?</span><span> </span><span>[{</span><span> </span><span>json</span><span>:</span><span> </span><span>{</span><span> </span><span>notionId</span><span>:</span><span> </span><span>notionUser</span><span>.</span><span>json</span><span>.</span><span>id</span><span> </span><span>}</span><span> </span><span>}]</span><span> </span><span>:</span><span> </span><span>[];</span> </code></pre></div></td></tr></tbody></table> #### Example 2: Data transformation# To try the example yourself, download the example workflow and import it into n8n. In the **Join items** Code node, enter this prompt: > Return a single line of text that has all usernames listed with a comma. Each username should be enquoted with a double quotation mark. Take a look at the code the AI generates. This is the JavaScript you need: <table><tbody><tr><td><div><pre><span></span><span>1</span> <span>2</span> <span>3</span> <span>4</span></pre></div></td><td><div><pre><span></span><code><span>const</span><span> </span><span>items</span><span> </span><span>=</span><span> </span><span>$input</span><span>.</span><span>all</span><span>();</span> <span>const</span><span> </span><span>usernames</span><span> </span><span>=</span><span> </span><span>items</span><span>.</span><span>map</span><span>((</span><span>item</span><span>)</span><span> </span><span>=></span><span> </span><span>`"</span><span>${</span><span>item</span><span>.</span><span>json</span><span>.</span><span>username</span><span>}</span><span>"`</span><span>);</span> <span>const</span><span> </span><span>result</span><span> </span><span>=</span><span> </span><span>usernames</span><span>.</span><span>join</span><span>(</span><span>", "</span><span>);</span> <span>return</span><span> </span><span>[{</span><span> </span><span>json</span><span>:</span><span> </span><span>{</span><span> </span><span>usernames</span><span>:</span><span> </span><span>result</span><span> </span><span>}</span><span> </span><span>}];</span> </code></pre></div></td></tr></tbody></table> #### Example 3: Summarize data and create a Slack message# To try the example yourself, download the example workflow and import it into n8n. In the **Summarize** Code node, enter this prompt: > Create a markdown text for Slack that counts how many ideas, features and bugs have been submitted. The type of submission is saved in the property\_type field. A feature has the property "Feature", a bug has the property "Bug" and an idea has the property "Bug". Also, list the five top submissions by vote in that message. Use "" as markdown for links. Take a look at the code the AI generates. This is the JavaScript you need: <table><tbody><tr><td><div><pre><span></span><span> 1</span> <span> 2</span> <span> 3</span> <span> 4</span> <span> 5</span> <span> 6</span> <span> 7</span> <span> 8</span> <span> 9</span> <span>10</span> <span>11</span> <span>12</span> <span>13</span> <span>14</span> <span>15</span> <span>16</span> <span>17</span> <span>18</span> <span>19</span> <span>20</span> <span>21</span> <span>22</span> <span>23</span> <span>24</span> <span>25</span> <span>26</span> <span>27</span> <span>28</span> <span>29</span> <span>30</span> <span>31</span> <span>32</span> <span>33</span> <span>34</span> <span>35</span> <span>36</span> <span>37</span> <span>38</span> <span>39</span> <span>40</span></pre></div></td><td><div><pre><span></span><code><span>const</span><span> </span><span>submissions</span><span> </span><span>=</span><span> </span><span>$input</span><span>.</span><span>all</span><span>();</span> <span>// Count the number of ideas, features, and bugs</span> <span>let</span><span> </span><span>ideaCount</span><span> </span><span>=</span><span> </span><span>0</span><span>;</span> <span>let</span><span> </span><span>featureCount</span><span> </span><span>=</span><span> </span><span>0</span><span>;</span> <span>let</span><span> </span><span>bugCount</span><span> </span><span>=</span><span> </span><span>0</span><span>;</span> <span>submissions</span><span>.</span><span>forEach</span><span>((</span><span>submission</span><span>)</span><span> </span><span>=></span><span> </span><span>{</span> <span> </span><span>switch</span><span> </span><span>(</span><span>submission</span><span>.</span><span>json</span><span>.</span><span>property_type</span><span>[</span><span>0</span><span>])</span><span> </span><span>{</span> <span> </span><span>case</span><span> </span><span>"Idea"</span><span>:</span> <span> </span><span>ideaCount</span><span>++</span><span>;</span> <span> </span><span>break</span><span>;</span> <span> </span><span>case</span><span> </span><span>"Feature"</span><span>:</span> <span> </span><span>featureCount</span><span>++</span><span>;</span> <span> </span><span>break</span><span>;</span> <span> </span><span>case</span><span> </span><span>"Bug"</span><span>:</span> <span> </span><span>bugCount</span><span>++</span><span>;</span> <span> </span><span>break</span><span>;</span> <span> </span><span>}</span> <span>});</span> <span>// Sort submissions by votes and take the top 5</span> <span>const</span><span> </span><span>topSubmissions</span><span> </span><span>=</span><span> </span><span>submissions</span> <span> </span><span>.</span><span>sort</span><span>((</span><span>a</span><span>,</span><span> </span><span>b</span><span>)</span><span> </span><span>=></span><span> </span><span>b</span><span>.</span><span>json</span><span>.</span><span>property_votes</span><span> </span><span>-</span><span> </span><span>a</span><span>.</span><span>json</span><span>.</span><span>property_votes</span><span>)</span> <span> </span><span>.</span><span>slice</span><span>(</span><span>0</span><span>,</span><span> </span><span>5</span><span>);</span> <span>let</span><span> </span><span>topSubmissionText</span><span> </span><span>=</span><span> </span><span>""</span><span>;</span> <span>topSubmissions</span><span>.</span><span>forEach</span><span>((</span><span>submission</span><span>)</span><span> </span><span>=></span><span> </span><span>{</span> <span> </span><span>topSubmissionText</span><span> </span><span>+=</span><span> </span><span>`<</span><span>${</span><span>submission</span><span>.</span><span>json</span><span>.</span><span>url</span><span>}</span><span>|</span><span>${</span><span>submission</span><span>.</span><span>json</span><span>.</span><span>name</span><span>}</span><span>> with </span><span>${</span><span>submission</span><span>.</span><span>json</span><span>.</span><span>property_votes</span><span>}</span><span> votes\n`</span><span>;</span> <span>});</span> <span>// Construct the Slack message</span> <span>const</span><span> </span><span>slackMessage</span><span> </span><span>=</span><span> </span><span>`*Summary of Submissions*\n</span> <span>Ideas: </span><span>${</span><span>ideaCount</span><span>}</span><span>\n</span> <span>Features: </span><span>${</span><span>featureCount</span><span>}</span><span>\n</span> <span>Bugs: </span><span>${</span><span>bugCount</span><span>}</span><span>\n</span> <span>Top 5 Submissions:\n</span> <span>${</span><span>topSubmissionText</span><span>}</span><span>`</span><span>;</span> <span>return</span><span> </span><span>[{</span><span> </span><span>json</span><span>:</span><span> </span><span>{</span><span> </span><span>slackMessage</span><span> </span><span>}</span><span> </span><span>}];</span> </code></pre></div></td></tr></tbody></table> ### Reference incoming node data explicitly# If your incoming data contains nested fields, using dot notation to reference them can help the AI understand what data you want.  To try the example yourself, download the example workflow and import it into n8n. In the second Code node, enter this prompt: > The data in "Mock data" represents a list of people. For each person, return a new item containing personal\_info.first\_name and work\_info.job\_title. This is the JavaScript you need: <table><tbody><tr><td><div><pre><span></span><span> 1</span> <span> 2</span> <span> 3</span> <span> 4</span> <span> 5</span> <span> 6</span> <span> 7</span> <span> 8</span> <span> 9</span> <span>10</span> <span>11</span> <span>12</span></pre></div></td><td><div><pre><span></span><code><span>const</span><span> </span><span>items</span><span> </span><span>=</span><span> </span><span>$input</span><span>.</span><span>all</span><span>();</span> <span>const</span><span> </span><span>newItems</span><span> </span><span>=</span><span> </span><span>items</span><span>.</span><span>map</span><span>((</span><span>item</span><span>)</span><span> </span><span>=></span><span> </span><span>{</span> <span> </span><span>const</span><span> </span><span>firstName</span><span> </span><span>=</span><span> </span><span>item</span><span>.</span><span>json</span><span>.</span><span>personal_info</span><span>.</span><span>first_name</span><span>;</span> <span> </span><span>const</span><span> </span><span>jobTitle</span><span> </span><span>=</span><span> </span><span>item</span><span>.</span><span>json</span><span>.</span><span>work_info</span><span>.</span><span>job_title</span><span>;</span> <span> </span><span>return</span><span> </span><span>{</span> <span> </span><span>json</span><span>:</span><span> </span><span>{</span> <span> </span><span>firstName</span><span>,</span> <span> </span><span>jobTitle</span><span>,</span> <span> </span><span>},</span> <span> </span><span>};</span> <span>});</span> <span>return</span><span> </span><span>newItems</span><span>;</span> </code></pre></div></td></tr></tbody></table> Pluralsight offer a short guide on How to use ChatGPT to write code, which includes example prompts. ## Fixing the code# The AI-generated code may work without any changes, but you may have to edit it. You need to be aware of n8n's Data structure. You may also find n8n's built-in methods and variables useful. --- ## Page: https://docs.n8n.io/code/builtin/overview/ ## Built-in methods and variables# n8n provides built-in methods and variables for working with data and accessing n8n data. This section provides a reference of available methods and variables for use in expressions, with a short description. Availability in the expressions editor and the Code node Some methods and variables aren't available in the Code node. These aren't in the documentation. All data transformation functions are only available in the expressions editor. The Cookbook contains examples for some common tasks, including some Code node only functions. * Current node input * Output of other nodes * Date and time * JMESPath * HTTP node * LangChain Code node * n8n metadata * Convenience methods * Data transformation functions --- ## Page: https://docs.n8n.io/code/builtin/current-node-input/ 1. Code in n8n 2. Built in methods and variables Methods for working with the input of the current node. Some methods and variables aren't available in the Code node. Python support You can use Python in the Code node. It isn't available in expressions. JavaScriptPython | Method | Description | Available in Code node? | | --- | --- | --- | | `$binary` | Shorthand for `$input.item.binary`. Incoming binary data from a node |  | | `$input.item` | The input item of the current node that's being processed. Refer to Item linking for more information on paired items and item linking. |  | | `$input.all()` | All input items in current node. |  | | `$input.first()` | First input item in current node. |  | | `$input.last()` | Last input item in current node. |  | | `$input.params` | Object containing the query settings of the previous node. This includes data such as the operation it ran, result limits, and so on. |  | | `$json` | Shorthand for `$input.item.json`. Incoming JSON data from a node. Refer to Data structure for information on item structure. |  (when running once for each item) | | `$input.context.noItemsLeft` | Boolean. Only available when working with the Loop Over Items node. Provides information about what's happening in the node. Use this to determine whether the node is still processing items. |  | | Method | Description | | --- | --- | | `_input.item` | The input item of the current node that's being processed. Refer to Item linking for more information on paired items and item linking. | | `_input.all()` | All input items in current node. | | `_input.first()` | First input item in current node. | | `_input.last()` | Last input item in current node. | | `_input.params` | Object containing the query settings of the previous node. This includes data such as the operation it ran, result limits, and so on. | | `_json` | Shorthand for `_input.item.json`. Incoming JSON data from a node. Refer to Data structure for information on item structure. Available when you set **Mode** to **Run Once for Each Item**. | | `_input.context.noItemsLeft` | Boolean. Only available when working with the Loop Over Items node. Provides information about what's happening in the node. Use this to determine whether the node is still processing items. | --- ## Page: https://docs.n8n.io/code/builtin/output-other-nodes/ 1. Code in n8n 2. Built in methods and variables Methods for working with the output of other nodes. Some methods and variables aren't available in the Code node. Python support You can use Python in the Code node. It isn't available in expressions. JavaScriptPython | Method | Description | Available in Code node? | | --- | --- | --- | | `$("<node-name>").all(branchIndex?, runIndex?)` | Returns all items from a given node. If `branchIndex` isn't given it will default to the output that connects `node-name` with the node where you use the expression or code. |  | | `$("<node-name>").first(branchIndex?, runIndex?)` | The first item output by the given node. If `branchIndex` isn't given it will default to the output that connects `node-name` with the node where you use the expression or code. |  | | `$("<node-name>").last(branchIndex?, runIndex?)` | The last item output by the given node. If `branchIndex` isn't given it will default to the output that connects `node-name` with the node where you use the expression or code. |  | | `$("<node-name>").item` | The linked item. This is the item in the specified node used to produce the current item. Refer to Item linking for more information on item linking. |  | | `$("<node-name>").params` | Object containing the query settings of the given node. This includes data such as the operation it ran, result limits, and so on. |  | | `$("<node-name>").context` | Boolean. Only available when working with the Loop Over Items node. Provides information about what's happening in the node. Use this to determine whether the node is still processing items. |  | | `$("<node-name>").itemMatching(currentNodeInputIndex)` | Use instead of `$("<node-name>").item` in the Code node if you need to trace back from an input item. |  | | Method | Description | Available in Code node? | | --- | --- | --- | | `_("<node-name>").all(branchIndex?, runIndex?)` | Returns all items from a given node. If `branchIndex` isn't given it will default to the output that connects`node-name` with the node where you use the expression or code. |  | | `_("<node-name>").first(branchIndex?, runIndex?)` | The first item output by the given node. If `branchIndex` isn't given it will default to the output that connects`node-name` with the node where you use the expression or code. |  | | `_("<node-name>").last(branchIndex?, runIndex?)` | The last item output by the given node. If `branchIndex` isn't given it will default to the output that connects`node-name` with the node where you use the expression or code. |  | | `_("<node-name>").item` | The linked item. This is the item in the specified node used to produce the current item. Refer to Item linking for more information on item linking. |  | | `_("<node-name>").params` | Object containing the query settings of the given node. This includes data such as the operation it ran, result limits, and so on. |  | | `_("<node-name>").context` | Boolean. Only available when working with the Loop Over Items node. Provides information about what's happening in the node. Use this to determine whether the node is still processing items. |  | | `_("<node-name>").itemMatching(currentNodeInputIndex)` | Use instead of `_("<node-name>").item` in the Code node if you need to trace back from an input item. Refer to Retrieve linked items from earlier in the workflow for an example. |  | --- ## Page: https://docs.n8n.io/code/builtin/date-time/ 1. Code in n8n 2. Built in methods and variables ## Built-in date and time methods# Methods for working with date and time. Python support You can use Python in the Code node. It isn't available in expressions. JavaScriptPython | Method | Description | Available in Code node? | | --- | --- | --- | | `$now` | A Luxon object containing the current timestamp. Equivalent to `DateTime.now()`. |  | | `$today` | A Luxon object containing the current timestamp, rounded down to the day. Equivalent to `DateTime.now().set({ hour: 0, minute: 0, second: 0, millisecond: 0 })`. |  | | Method | Description | | --- | --- | | `_now` | A Luxon object containing the current timestamp. Equivalent to `DateTime.now()`. | | `_today` | A Luxon object containing the current timestamp, rounded down to the day. Equivalent to `DateTime.now().set({ hour: 0, minute: 0, second: 0, millisecond: 0 })`. | n8n passes dates between nodes as strings, so you need to parse them. Luxon helps you do this. Refer to Date and time with Luxon for more information. n8n provides built-in convenience functions to support data transformation in expressions for dates. Refer to Data transformation functions | Dates for more information. --- ## Page: https://docs.n8n.io/code/builtin/jmespath/ 1. Code in n8n 2. Built in methods and variables ## JMESPath method# This is an n8n-provided method for working with the JMESPath library. Python support You can use Python in the Code node. It isn't available in expressions. JavaScriptPython | Method | Description | Available in Code node? | | --- | --- | --- | | `$jmespath()` | Perform a search on a JSON object using JMESPath. |  | | Method | Description | | --- | --- | | `_jmespath()` | Perform a search on a JSON object using JMESPath. | --- ## Page: https://docs.n8n.io/code/builtin/http-node-variables/ ## HTTP node variables# Variables for working with HTTP node requests and responses when using pagination. Refer to HTTP Request for guidance on using the HTTP node, including configuring pagination. Refer to HTTP Request node cookbook | Pagination for example pagination configurations. HTTP node only These variables are for use in expressions in the HTTP node. You can't use them in other nodes. | Variable | Description | | --- | --- | | `$pageCount` | The pagination count. Tracks how many pages the node has fetched. | | `$request` | The request object sent by the HTTP node. | | `$response` | The response object from the HTTP call. Includes `$response.body`, `$response.headers`, and `$response.statusCode`. The contents of `body` and `headers` depend on the data sent by the API. | --- ## Page: https://docs.n8n.io/code/builtin/langchain-methods/ 1. Code in n8n 2. Built in methods and variables ## LangChain Code node methods# n8n provides these methods to make it easier to perform common tasks in the LangChain Code node. LangChain Code node only These variables are for use in expressions in the LangChain Code node. You can't use them in other nodes. | Method | Description | | --- | --- | | `this.addInputData(inputName, data)` | Populate the data of a specified non-main input. Useful for mocking data. * `inputName` is the input connection type, and must be one of: `ai_agent`, `ai_chain`, `ai_document`, `ai_embedding`, `ai_languageModel`, `ai_memory`, `ai_outputParser`, `ai_retriever`, `ai_textSplitter`, `ai_tool`, `ai_vectorRetriever`, `ai_vectorStore` * `data` contains the data you want to add. Refer to Data structure for information on the data structure expected by n8n. | | `this.addOutputData(outputName, data)` | Populate the data of a specified non-main output. Useful for mocking data. * `outputName` is the input connection type, and must be one of: `ai_agent`, `ai_chain`, `ai_document`, `ai_embedding`, `ai_languageModel`, `ai_memory`, `ai_outputParser`, `ai_retriever`, `ai_textSplitter`, `ai_tool`, `ai_vectorRetriever`, `ai_vectorStore` * `data` contains the data you want to add. Refer to Data structure for information on the data structure expected by n8n. | | `this.getInputConnectionData(inputName, itemIndex, inputIndex?)` | Get data from a specified non-main input. * `inputName` is the input connection type, and must be one of: `ai_agent`, `ai_chain`, `ai_document`, `ai_embedding`, `ai_languageModel`, `ai_memory`, `ai_outputParser`, `ai_retriever`, `ai_textSplitter`, `ai_tool`, `ai_vectorRetriever`, `ai_vectorStore` * `itemIndex` should always be `0` (this parameter will be used in upcoming functionality) * Use `inputIndex` if there is more than one node connected to the specified input. | | `this.getInputData(inputIndex?, inputName?)` | Get data from the main input. | | `this.getNode()` | Get the current node. | | `this.getNodeOutputs()` | Get the outputs of the current node. | | `this.getExecutionCancelSignal()` | Use this to stop the execution of a function when the workflow stops. In most cases n8n handles this, but you may need to use it if building your own chains or agents. It replaces the Cancelling a running LLMChain code that you'd use if building a LangChain application normally. | --- ## Page: https://docs.n8n.io/code/builtin/n8n-metadata/ 1. Code in n8n 2. Built in methods and variables Methods for working with n8n metadata. This includes: * Access to n8n environment variables for self-hosted n8n. * Metadata about workflows, executions, and nodes. * Information about instance Variables and External secrets. Python support You can use Python in the Code node. It isn't available in expressions. JavaScriptPython | Method | Description | Available in Code node? | | --- | --- | --- | | `$env` | Contains n8n instance configuration environment variables. |  | | `$execution.customData` | Set and get custom execution data. Refer to Custom executions data for more information. |  | | `$execution.id` | The unique ID of the current workflow execution. |  | | `$execution.mode` | Whether the execution was triggered automatically, or by manually running the workflow. Possible values are `test` and `production`. |  | | `$execution.resumeUrl` | The webhook URL to call to resume a workflow waiting at a Wait node. |  | | `$getWorkflowStaticData(type)` | View an example. Static data doesn't persist when testing workflows. The workflow must be active and called by a trigger or webhook to save static data. This gives access to the static workflow data. |  | | `$("<node-name>").isExecuted` | Check whether a node has already executed. |  | | `$itemIndex` | The index of an item in a list of items. |  | | `$nodeVersion` | Get the version of the current node. |  | | `$prevNode.name` | The name of the node that the current input came from. When using the Merge node, note that `$prevNode` always uses the first input connector. |  | | `$prevNode.outputIndex` | The index of the output connector that the current input came from. Use this when the previous node had multiple outputs (such as an If or Switch node). When using the Merge node, note that `$prevNode` always uses the first input connector. |  | | `$prevNode.runIndex` | The run of the previous node that generated the current input. When using the Merge node, note that `$prevNode` always uses the first input connector. |  | | `$runIndex` | How many times n8n has executed the current node. Zero-based (the first run is 0, the second is 1, and so on). |  | | `$secrets` | Contains information about your External secrets setup. |  | | `$vars` | Contains the Variables available in the active environment. |  | | `$version` | The node version. |  | | `$workflow.active` | Whether the workflow is active (true) or not (false). |  | | `$workflow.id` | The workflow ID. |  | | `$workflow.name` | The workflow name. |  | | Method | Description | | --- | --- | | `_env` | Contains n8n instance configuration environment variables. | | `_execution.customData` | Set and get custom execution data. Refer to Custom executions data for more information. | | `_execution.id` | The unique ID of the current workflow execution. | | `_execution.mode` | Whether the execution was triggered automatically, or by manually running the workflow. Possible values are `test` and `production`. | | `_execution.resumeUrl` | The webhook URL to call to resume a workflow waiting at a Wait node. | | `_getWorkflowStaticData(type)` | View an example. Static data doesn't persist when testing workflows. The workflow must be active and called by a trigger or webhook to save static data. This gives access to the static workflow data. | | `_("<node-name>").isExecuted` | Check whether a node has already executed. | | `_nodeVersion` | Get the version of the current node. | | `_prevNode.name` | The name of the node that the current input came from. When using the Merge node, note that `_prevNode` always uses the first input connector. | | `_prevNode.outputIndex` | The index of the output connector that the current input came from. Use this when the previous node had multiple outputs (such as an If or Switch node). When using the Merge node, note that `_prevNode` always uses the first input connector. | | `_prevNode.runIndex` | The run of the previous node that generated the current input. When using the Merge node, note that `_prevNode` always uses the first input connector. | | `_runIndex` | How many times n8n has executed the current node. Zero-based (the first run is 0, the second is 1, and so on). | | `_secrets` | Contains information about your External secrets setup. | | `_vars` | Contains the Variables available in the active environment. | | `_workflow.active` | Whether the workflow is active (true) or not (false). | | `_workflow.id` | The workflow ID. | | `_workflow.name` | The workflow name. | --- ## Page: https://docs.n8n.io/code/builtin/convenience/ 1. Code in n8n 2. Built in methods and variables n8n provides these methods to make it easier to perform common tasks in expressions. Python support You can use Python in the Code node. It isn't available in expressions. JavaScriptPython | Method | Description | Available in Code node? | | --- | --- | --- | | `$evaluateExpression(expression: string, itemIndex?: number)` | Evaluates a string as an expression. If you don't provide `itemIndex`, n8n uses the data from item 0 in the Code node. |  | | `$ifEmpty(value, defaultValue)` | The `$ifEmpty()` function takes two parameters, tests the first to check if it's empty, then returns either the parameter (if not empty) or the second parameter (if the first is empty). The first parameter is empty if it's: * `undefined` * `null` * An empty string `''` * An array where `value.length` returns `false` * An object where `Object.keys(value).length` returns `false` |  | | `$if()` | The `$if()` function takes three parameters: a condition, the value to return if true, and the value to return if false. |  | | `$max()` | Returns the highest of the provided numbers. |  | | `$min()` | Returns the lowest of the provided numbers. |  | | Method | Description | | --- | --- | | `_evaluateExpression(expression: string, itemIndex?: number)` | Evaluates a string as an expression. If you don't provide `itemIndex`, n8n uses the data from item 0 in the Code node. | | `_ifEmpty(value, defaultValue)` | The `_ifEmpty()` function takes two parameters, tests the first to check if it's empty, then returns either the parameter (if not empty) or the second parameter (if the first is empty). The first parameter is empty if it's: * `undefined` * `null` * An empty string `''` * An array where `value.length` returns `false` * An object where `Object.keys(value).length` returns `false` | --- ## Page: https://docs.n8n.io/code/builtin/data-transformation-functions/ Data transformation functions are helper functions to make data transformation easier in expressions. JavaScript in expressions You can use any JavaScript in expressions. Refer to Expressions for more information. For a list of available functions, refer to the page for your data type: * Arrays * Dates * Numbers * Objects * Strings ## Usage# Data transformation functions are available in the expressions editor. The syntax is: <table><tbody><tr><td><div><pre><span></span><span>1</span></pre></div></td><td><div><pre><span></span><code><span>{{</span><span> </span><span>dataItem</span><span>.</span><span>function</span><span>()</span><span> </span><span>}}</span> </code></pre></div></td></tr></tbody></table> For example, to check if a string is an email: <table><tbody><tr><td><div><pre><span></span><span>1</span> <span>2</span> <span>3</span></pre></div></td><td><div><pre><span></span><code><span>{{</span><span> </span><span>"example@example.com"</span><span>.</span><span>isEmail</span><span>()</span><span> </span><span>}}</span> <span>// Returns true</span> </code></pre></div></td></tr></tbody></table> --- ## Page: https://docs.n8n.io/code/builtin/data-transformation-functions/arrays/ A reference document listing built-in convenience functions to support data transformation in expressions for arrays. JavaScript in expressions You can use any JavaScript in expressions. Refer to Expressions for more information. ### average(): Number # Returns the value of elements in an array * * * ### chunk(size: Number): Array # Splits arrays into chunks with a length of size #### Function parameters# sizeRequiredNumber The size of each chunk. * * * ### compact(): Array # Removes empty values from the array. * * * ### difference(arr: Array): Array # Compares two arrays. Returns all elements in the base array that aren't present in arr. #### Function parameters# arrRequiredArray The array to compare to the base array. * * * ### intersection(arr: Array): Array # Compares two arrays. Returns all elements in the base array that are present in arr. #### Function parameters# arrRequiredArray The array to compare to the base array. * * * ### first(): Array item # Returns the first element of the array. * * * ### isEmpty(): Boolean # Checks if the array doesn't have any elements. * * * ### isNotEmpty(): Boolean # Checks if the array has elements. * * * ### last(): Array item # Returns the last element of the array. * * * ### max(): Number # Returns the highest value in an array. * * * ### merge(arr: Array): Array # Merges two Object-arrays into one array by merging the key-value pairs of each element. #### Function parameters# arrRequiredArray The array to merge into the base array. * * * ### min(): Number # Gets the minimum value from a number-only array. * * * ### pluck(fieldName?: String): Array # Returns an array of Objects where keys equal the given field names. #### Function parameters# fieldNameOptionalString The key(s) you want to retrieve. You can enter as many keys as you want, as comma-separated strings. * * * ### randomItem(): Array item # Returns a random element from an array. * * * ### removeDuplicates(key?: String): Array # Removes duplicates from an array. #### Function parameters# keyOptionalString A key, or comma-separated list of keys, to check for duplicates. * * * ### renameKeys(from: String, to: String): Array # Renames all matching keys in the array. You can rename more than one key by entering a series of comma separated strings, in the pattern oldKeyName, newKeyName. #### Function parameters# fromRequiredString The key you want to rename. toRequiredString The new name. * * * ### smartJoin(keyField: String, nameField: String): Array # Operates on an array of objects where each object contains key-value pairs. Creates a new object containing key-value pairs, where the key is the value of the first pair, and the value is the value of the second pair. Removes non-matching and empty values and trims any whitespace before joining. #### Function parameters# keyFieldRequiredString The key to join. nameFieldRequiredString The value to join. #### Example ##### Basic usage <table><tbody><tr><td><div><pre><span></span><span>1</span> <span>2</span> <span>3</span> <span>4</span></pre></div></td><td><div><pre><span></span><code><span>// Input</span> <span>{{</span><span> </span><span>[{</span><span>"type"</span><span>:</span><span>"fruit"</span><span>,</span><span> </span><span>"name"</span><span>:</span><span>"apple"</span><span>},{</span><span>"type"</span><span>:</span><span>"vegetable"</span><span>,</span><span> </span><span>"name"</span><span>:</span><span>"carrot"</span><span>}</span><span> </span><span>].</span><span>smartJoin</span><span>(</span><span>"type"</span><span>,</span><span>"name"</span><span>)</span><span> </span><span>}}</span> <span>// Output</span> <span>[</span><span>Object</span><span>:</span><span> </span><span>{</span><span>"fruit"</span><span>:</span><span>"apple"</span><span>,</span><span>"vegetable"</span><span>:</span><span>"carrot"</span><span>}]</span> </code></pre></div></td></tr></tbody></table> * * * ### sum(): Number # Returns the total sum all the values in an array of parsable numbers. * * * ### toJsonString(): String # Convert an array to a JSON string. Equivalent of `JSON.stringify`. * * * ### union(arr: Array): Array # Concatenates two arrays and then removes duplicate. #### Function parameters# arrRequiredArray The array to compare to the base array. * * * ### unique(key?: String): Array # Remove duplicates from an array. #### Function parameters# keyOptionalString A key, or comma-separated list of keys, to check for duplicates. * * * --- ## Page: https://docs.n8n.io/code/builtin/data-transformation-functions/booleans/ A reference document listing built-in convenience functions to support data transformation in expressions for arrays. JavaScript in expressions You can use any JavaScript in expressions. Refer to Expressions for more information. ### toInt(): Number # Convert a boolean to a number. `false` converts to `0`, `true` converts to `1`. * * * --- ## Page: https://docs.n8n.io/code/builtin/data-transformation-functions/dates/ A reference document listing built-in convenience functions to support data transformation in expressions for dates. JavaScript in expressions You can use any JavaScript in expressions. Refer to Expressions for more information. ### beginningOf(unit?: DurationUnit): Date # Transforms a Date to the start of the given time period. Returns either a JavaScript Date or Luxon Date, depending on input. #### Function parameters# unitOptionalString enum A valid string specifying the time unit. Default: `week` One of: `second`, `minute`, `hour`, `day`, `week`, `month`, `year` * * * ### endOfMonth(): Date # Transforms a Date to the end of the month. * * * Extracts the part defined in datePart from a Date. Returns either a JavaScript Date or Luxon Date, depending on input. #### Function parameters# OptionalString enum A valid string specifying the time unit. Default: `week` One of: `second`, `minute`, `hour`, `day`, `week`, `month`, `year` * * * ### format(fmt: TimeFormat): String # Formats a Date in the given structure #### Function parameters# * * * ### isBetween(date1: Date | DateTime, date2: Date | DateTime): Boolean # Checks if a Date is between two given dates. #### Function parameters# date1RequiredDate or DateTime The first date in the range. date2RequiredDate or DateTime The last date in the range. * * * ### isDst(): Boolean # Checks if a Date is within Daylight Savings Time. * * * ### isInLast(n?: Number, unit?: DurationUnit): Boolean # Checks if a Date is within a given time period. #### Function parameters# nOptionalNumber The number of units. For example, to check if the date is in the last nine weeks, enter 9. Default: `0` unitOptionalString enum A valid string specifying the time unit. Default: `minutes` One of: `second`, `minute`, `hour`, `day`, `week`, `month`, `year` * * * ### isWeekend(): Boolean # Checks if the Date falls on a Saturday or Sunday. * * * ### minus(n: Number, unit?: DurationUnit): Date # Subtracts a given time period from a Date. Returns either a JavaScript Date or Luxon Date, depending on input. #### Function parameters# nRequiredNumber The number of units. For example, to subtract nine seconds, enter 9 here. unitOptionalString enum A valid string specifying the time unit. Default: `milliseconds` One of: `second`, `minute`, `hour`, `day`, `week`, `month`, `year` * * * ### plus(n: Number, unit?: DurationUnit): Date # Adds a given time period to a Date. Returns either a JavaScript Date or Luxon Date, depending on input. #### Function parameters# nRequiredNumber The number of units. For example, to add nine seconds, enter 9 here. unitOptionalString enum A valid string specifying the time unit. Default: `milliseconds` One of: `second`, `minute`, `hour`, `day`, `week`, `month`, `year` * * * * * * --- ## Page: https://docs.n8n.io/code/builtin/data-transformation-functions/numbers/ A reference document listing built-in convenience functions to support data transformation in expressions for numbers. JavaScript in expressions You can use any JavaScript in expressions. Refer to Expressions for more information. ### ceil(): Number # Rounds up a number to a whole number. * * * ### floor(): Number # Rounds down a number to a whole number. * * * ### format(locales?: LanguageCode, options?: FormatOptions): String # This is a wrapper around Intl.NumberFormat(). Returns a formatted string of a number based on the given LanguageCode and FormatOptions. When no arguments are given, transforms the number in a like format 1.234. #### Function parameters# localesOptionalString An IETF BCP 47 language tag. Default: `en-US` * * * ### isEven(): Boolean # Returns true if the number is even. Only works on whole numbers. * * * ### isOdd(): Boolean # Returns true if the number is odd. Only works on whole numbers. * * * ### round(decimalPlaces?: Number): Number # Returns the value of a number rounded to the nearest whole number, unless a decimal place is specified. #### Function parameters# decimalPlacesOptionalNumber How many decimal places to round to. Default: `0` * * * ### toBoolean(): Boolean # Converts a number to a boolean. `0` converts to `false`. All other values convert to `true`. * * * ### toDateTime(format?: String): Date # #### Function parameters# formatOptionalString enum Can be `ms` (milliseconds), `s` (seconds), or `excel` (Excel 1900). Defaults to milliseconds. * * * --- ## Page: https://docs.n8n.io/code/builtin/data-transformation-functions/objects/ A reference document listing built-in convenience functions to support data transformation in expressions for objects. JavaScript in expressions You can use any JavaScript in expressions. Refer to Expressions for more information. ### isEmpty(): Boolean # Checks if the Object has no key-value pairs. * * * ### merge(object: Object): Object # Merges two Objects into a single Object using the first as the base Object. If a key exists in both Objects, the key in the base Object takes precedence. #### Function parameters# objectRequiredObject The Object to merge with the base Object. * * * ### hasField(fieldName: String): Boolean # Checks if the Object has a given field. Only top-level keys are supported. #### Function parameters# fieldNameRequiredString The field to search for. * * * ### removeField(key: String): Object # Removes a given field from the Object #### Function parameters# keyRequiredString The field key of the field to remove. * * * ### removeFieldsContaining(value: String): Object # Removes fields with a given value from the Object. #### Function parameters# valueRequiredString The field value of the field to remove. * * * ### keepFieldsContaining(value: String): Object # Removes fields that do not match the given value from the Object. #### Function parameters# valueRequiredString The field value of the field to keep. * * * ### compact(): Object # Removes empty values from an Object. * * * ### toJsonString(): String # Convert an object to a JSON string. Equivalent of `JSON.stringify`. * * * ### urlEncode(): String # Transforms an Object into a URL parameter list. Only top-level keys are supported. * * * --- ## Page: https://docs.n8n.io/code/builtin/data-transformation-functions/strings/ A reference document listing built-in convenience functions to support data transformation in expressions for strings. JavaScript in expressions You can use any JavaScript in expressions. Refer to Expressions for more information. ### base64Encode(): A base64 encoded string. # Encode a string as base64. * * * ### base64Decode(): A plain string. # Convert a base64 encoded string to a normal string. * * * ### extractDomain(): String # Extracts a domain from a string containing a valid URL. Returns undefined if none is found. * * * Extracts an email from a string. Returns undefined if none is found. * * * Extracts a URL from a string. Returns undefined if none is found. * * * Extract the path but not the root domain from a URL. For example, `"https://example.com/orders/1/details".extractUrlPath()` returns `"/orders/1/details/"`. * * * ### hash(algo?: Algorithm): String # Returns a string hashed with the given algorithm. #### Function parameters# algoOptionalString enum Which hashing algorithm to use. Default: `md5` One of: `md5`, `base64`, `sha1`, `sha224`, `sha256`, `sha384`, `sha512`, `sha3`, `ripemd160` * * * ### isDomain(): Boolean # Checks if a string is a domain. * * * ### isEmail(): Boolean # Checks if a string is an email. * * * ### isEmpty(): Boolean # Checks if a string is empty. * * * ### isNotEmpty(): Boolean # Checks if a string has content. * * * ### isNumeric(): Boolean # Checks if a string only contains digits. * * * ### isUrl(): Boolean # Checks if a string is a valid URL. * * * ### parseJson(): Object # Equivalent of `JSON.parse()`. Parses a string as a JSON object. * * * ### quote(mark?: String): String # Returns a string wrapped in the quotation marks. Default quotation is `"`. #### Function parameters# markOptionalString Which quote mark style to use. Default: `"` * * * ### removeMarkdown(): String # Removes Markdown formatting from a string. * * * ### replaceSpecialChars(): String # Replaces non-ASCII characters in a string with an ASCII representation. * * * ### removeTags(): String # Remove tags, such as HTML or XML, from a string. * * * ### toBoolean(): Boolean # Convert a string to a boolean. `"false"`, `"0"`, `""`, and `"no"` convert to `false`. * * * * * * ### toDecimalNumber(): Number # See toFloat * * * ### toFloat(): Number # Converts a string to a decimal number. * * * ### toInt(): Number # Converts a string to an integer. * * * ### toSentenceCase(): String # Formats a string to sentence case. * * * ### toSnakeCase(): String # Formats a string to snake case. * * * ### toTitleCase(): String # Formats a string to title case. Will not change already uppercase letters to prevent losing information from acronyms and trademarks such as iPhone or FAANG. * * * ### toWholeNumber(): Number # Converts a string to a whole number. * * * ### urlDecode(entireString?: Boolean): String # Decodes a URL-encoded string. It decodes any percent-encoded characters in the input string, and replaces them with their original characters. #### Function parameters# entireStringOptionalBoolean Whether to decode characters that are part of the URI syntax (true) or not (false). * * * ### urlEncode(entireString?: Boolean): String # Encodes a string to be used/included in a URL. #### Function parameters# entireStringOptionalBoolean Whether to encode characters that are part of the URI syntax (true) or not (false). * * * --- ## Page: https://docs.n8n.io/code/variables/ Feature availability * Available on Self-hosted Enterprise and Pro Cloud plans. * You need access to the n8n instance owner account to create and edit variables. All users can use existing variables. Available in version 0.225.0 and above. Custom variables are read-only variables that you can use to store and reuse values in n8n workflows. Variables are shared When you create a variable, it's available to everyone on your n8n instance. ## Create variables# To create a new variable: 1. On the **Variables** page, select **Add Variable**. 2. Enter a **Key** and **Value**. The maximum key length is 50 characters, and the maximum value length is 220 characters. n8n limits the characters you can use in the key and value to lowercase and uppercase letters, numbers, and underscores (`A-Z`, `a-z`, `0-9`, `_`). 3. Select **Save**. The variable is now available for use in all workflows in the n8n instance. ## Edit and delete variables# To edit or delete a variable: 1. On the **Variables** page, hover over the variable you want to change. 2. Select **Edit** or **Delete**. ## Use variables in workflows# You can access variables in the Code node and in expressions: <table><tbody><tr><td><div><pre><span></span><span>1</span> <span>2</span></pre></div></td><td><div><pre><span></span><code><span>// Access a variable</span> <span>$vars</span><span>.</span><span><</span><span>variable</span><span>-</span><span>name</span><span>></span> </code></pre></div></td></tr></tbody></table> All variables are strings. During workflow execution, n8n replaces the variables with the variable value. If the variable has no value, n8n treats its value as `undefined`. Workflows don't automatically fail in this case. Variables are read-only. You must use the UI to change the values. If you need to set and access custom data within your workflow, use Workflow static data. --- ## Page: https://docs.n8n.io/code/cookbook/luxon/ Luxon is a JavaScript library that makes it easier to work with date and time. For full details of how to use Luxon, refer to Luxon's documentation. n8n passes dates between nodes as strings, so you need to parse them. Luxon makes this easier. Python support Luxon is a JavaScript library. The two convenience variables created by n8n are available when using Python in the Code node, but their functionality is limited: * You can't perform Luxon operations on these variables. For example, there is no Python equivalent for `$today.minus(...)`. * The generic Luxon functionality, such as Convert date string to Luxon, isn't available for Python users. ## Variables# n8n uses Luxon to provide two custom variables: * `now`: a Luxon object containing the current timestamp. Equivalent to `DateTime.now()`. * `today`: a Luxon object containing the current timestamp, rounded down to the day. Equivalent to `DateTime.now().set({ hour: 0, minute: 0, second: 0, millisecond: 0 })`. Note that these variables can return different time formats when cast as a string. This is the same behavior as Luxon's `DateTime.now()`. Expressions (JavaScript)Code node (JavaScript)Code node (Python) <table><tbody><tr><td><div><pre><span></span><span>1</span> <span>2</span> <span>3</span> <span>4</span> <span>5</span> <span>6</span></pre></div></td><td><div><pre><span></span><code><span>{{</span><span>$now</span><span>}}</span> <span>// n8n displays the ISO formatted timestamp</span> <span>// For example 2022-03-09T14:02:37.065+00:00</span> <span>{{</span><span>"Today's date is "</span><span> </span><span>+</span><span> </span><span>$now</span><span>}}</span> <span>// n8n displays "Today's date is <unix timestamp>"</span> <span>// For example "Today's date is 1646834498755"</span> </code></pre></div></td></tr></tbody></table> <table><tbody><tr><td><div><pre><span></span><span>1</span> <span>2</span> <span>3</span> <span>4</span> <span>5</span> <span>6</span></pre></div></td><td><div><pre><span></span><code><span>$now</span> <span>// n8n displays <ISO formatted timestamp></span> <span>// For example 2022-03-09T14:00:25.058+00:00</span> <span>let</span><span> </span><span>rightNow</span><span> </span><span>=</span><span> </span><span>"Today's date is "</span><span> </span><span>+</span><span> </span><span>$now</span> <span>// n8n displays "Today's date is <unix timestamp>"</span> <span>// For example "Today's date is 1646834498755"</span> </code></pre></div></td></tr></tbody></table> <table><tbody><tr><td><div><pre><span></span><span>1</span> <span>2</span> <span>3</span> <span>4</span> <span>5</span> <span>6</span></pre></div></td><td><div><pre><span></span><code><span>_now</span> <span># n8n displays <ISO formatted timestamp></span> <span># For example 2022-03-09T14:00:25.058+00:00</span> <span>rightNow</span> <span>=</span> <span>"Today's date is "</span> <span>+</span> <span>str</span><span>(</span><span>_now</span><span>)</span> <span># n8n displays "Today's date is <unix timestamp>"</span> <span># For example "Today's date is 1646834498755"</span> </code></pre></div></td></tr></tbody></table> n8n provides built-in convenience functions to support data transformation in expressions for dates. Refer to Data transformation functions | Dates for more information. ## Date and time behavior in n8n# Be aware of the following: * In a workflow, n8n converts dates and times to strings between nodes. Keep this in mind when doing arithmetic on dates and times from other nodes. * With vanilla JavaScript, you can convert a string to a date with `new Date('2019-06-23')`. In Luxon, you must use a function explicitly stating the format, such as `DateTime.fromISO('2019-06-23')` or `DateTime.fromFormat("23-06-2019", "dd-MM-yyyy")`. ## Setting the timezone in n8n# Luxon uses the n8n timezone. This value is either: * Default: `America/New York` * A custom timezone for your n8n instance, set using the `GENERIC_TIMEZONE` environment variable. * A custom timezone for an individual workflow, configured in workflow settings. ## Common tasks# This section provides examples for some common operations. More examples, and detailed guidance, are available in Luxon's own documentation. ### Convert date string to Luxon# You can convert date strings and other date formats to a Luxon DateTime object. You can convert from standard formats and from arbitrary strings. A difference between Luxon DateTime and JavaScript Date With vanilla JavaScript, you can convert a string to a date with `new Date('2019-06-23')`. In Luxon, you must use a function explicitly stating the format, such as `DateTime.fromISO('2019-06-23')` or `DateTime.fromFormat("23-06-2019", "dd-MM-yyyy")`. #### If you have a date in a supported standard technical format:# Most dates use `fromISO()`. This creates a Luxon DateTime from an ISO 8601 string. For example: Expressions (JavaScript)Code node (JavaScript) <table><tbody><tr><td><div><pre><span></span><span>1</span></pre></div></td><td><div><pre><span></span><code><span>{{</span><span>DateTime</span><span>.</span><span>fromISO</span><span>(</span><span>'2019-06-23T00:00:00.00'</span><span>)}}</span> </code></pre></div></td></tr></tbody></table> <table><tbody><tr><td><div><pre><span></span><span>1</span></pre></div></td><td><div><pre><span></span><code><span>let</span><span> </span><span>luxonDateTime</span><span> </span><span>=</span><span> </span><span>DateTime</span><span>.</span><span>fromISO</span><span>(</span><span>'2019-06-23T00:00:00.00'</span><span>)</span> </code></pre></div></td></tr></tbody></table> Luxon's API documentation has more information on fromISO. Luxon provides functions to handle conversions for a range of formats. Refer to Luxon's guide to Parsing technical formats for details. #### If you have a date as a string that doesn't use a standard format:# Use Luxon's Ad-hoc parsing. To do this, use the `fromFormat()` function, providing the string and a set of tokens that describe the format. For example, you have n8n's founding date, 23rd June 2019, formatted as `23-06-2019`. You want to turn this into a Luxon object: Expressions (JavaScript)Code node (JavaScript) <table><tbody><tr><td><div><pre><span></span><span>1</span></pre></div></td><td><div><pre><span></span><code><span>{{</span><span>DateTime</span><span>.</span><span>fromFormat</span><span>(</span><span>"23-06-2019"</span><span>,</span><span> </span><span>"dd-MM-yyyy"</span><span>)}}</span> </code></pre></div></td></tr></tbody></table> <table><tbody><tr><td><div><pre><span></span><span>1</span></pre></div></td><td><div><pre><span></span><code><span>let</span><span> </span><span>newFormat</span><span> </span><span>=</span><span> </span><span>DateTime</span><span>.</span><span>fromFormat</span><span>(</span><span>"23-06-2019"</span><span>,</span><span> </span><span>"dd-MM-yyyy"</span><span>)</span> </code></pre></div></td></tr></tbody></table> When using ad-hoc parsing, note Luxon's warning about Limitations. If you see unexpected results, try their Debugging guide. ### Get n days from today# Get a number of days before or after today. Expressions (JavaScript)Code node (JavaScript) For example, you want to set a field to always show the date seven days before the current date. In the expressions editor, enter: <table><tbody><tr><td><div><pre><span></span><span>1</span></pre></div></td><td><div><pre><span></span><code><span>{{</span><span>$today</span><span>.</span><span>minus</span><span>({</span><span>days</span><span>:</span><span> </span><span>7</span><span>})}}</span> </code></pre></div></td></tr></tbody></table> On the 23rd June 2019, this returns `[Object: "2019-06-16T00:00:00.000+00:00"]`. This example uses n8n's custom variable `$today` for convenience. It's the equivalent of `DateTime.now().set({ hour: 0, minute: 0, second: 0, millisecond: 0 }).minus({days: 7})`. For example, you want a variable containing the date seven days before the current date. In the code editor, enter: <table><tbody><tr><td><div><pre><span></span><span>1</span></pre></div></td><td><div><pre><span></span><code><span>let</span><span> </span><span>sevenDaysAgo</span><span> </span><span>=</span><span> </span><span>$today</span><span>.</span><span>minus</span><span>({</span><span>days</span><span>:</span><span> </span><span>7</span><span>})</span> </code></pre></div></td></tr></tbody></table> On the 23rd June 2019, this returns `[Object: "2019-06-16T00:00:00.000+00:00"]`. This example uses n8n's custom variable `$today` for convenience. It's the equivalent of `DateTime.now().set({ hour: 0, minute: 0, second: 0, millisecond: 0 }).minus({days: 7})`. For more detailed information and examples, refer to: * Luxon's guide to math * Their API documentation on DateTime plus and DateTime minus ### Create human-readable dates# In Get n days from today, the example gets the date seven days before the current date, and returns it as `[Object: "yyyy-mm-dd-T00:00:00.000+00:00"]` (for expressions) or `yyyy-mm-dd-T00:00:00.000+00:00` (in the Code node). To make this more readable, you can use Luxon's formatting functions. For example, you want the field containing the date to be formatted as DD/MM/YYYY, so that on the 23rd June 2019, it returns `23/06/2019`. This expression gets the date seven days before today, and converts it to the DD/MM/YYYY format. Expressions (JavaScript)Code node (JavaScript) <table><tbody><tr><td><div><pre><span></span><span>1</span></pre></div></td><td><div><pre><span></span><code><span>{{</span><span>$today</span><span>.</span><span>minus</span><span>({</span><span>days</span><span>:</span><span> </span><span>7</span><span>}).</span><span>toLocaleString</span><span>()}}</span> </code></pre></div></td></tr></tbody></table> <table><tbody><tr><td><div><pre><span></span><span>1</span></pre></div></td><td><div><pre><span></span><code><span>let</span><span> </span><span>readableSevenDaysAgo</span><span> </span><span>=</span><span> </span><span>$today</span><span>.</span><span>minus</span><span>({</span><span>days</span><span>:</span><span> </span><span>7</span><span>}).</span><span>toLocaleString</span><span>()</span> </code></pre></div></td></tr></tbody></table> You can alter the format. For example: Expressions (JavaScript)Code node (JavaScript) <table><tbody><tr><td><div><pre><span></span><span>1</span></pre></div></td><td><div><pre><span></span><code><span>{{</span><span>$today</span><span>.</span><span>minus</span><span>({</span><span>days</span><span>:</span><span> </span><span>7</span><span>}).</span><span>toLocaleString</span><span>({</span><span>month</span><span>:</span><span> </span><span>'long'</span><span>,</span><span> </span><span>day</span><span>:</span><span> </span><span>'numeric'</span><span>,</span><span> </span><span>year</span><span>:</span><span> </span><span>'numeric'</span><span>})}}</span> </code></pre></div></td></tr></tbody></table> On 23rd June 2019, this returns "16 June 2019". <table><tbody><tr><td><div><pre><span></span><span>1</span></pre></div></td><td><div><pre><span></span><code><span>let</span><span> </span><span>readableSevenDaysAgo</span><span> </span><span>=</span><span> </span><span>$today</span><span>.</span><span>minus</span><span>({</span><span>days</span><span>:</span><span> </span><span>7</span><span>}).</span><span>toLocaleString</span><span>({</span><span>month</span><span>:</span><span> </span><span>'long'</span><span>,</span><span> </span><span>day</span><span>:</span><span> </span><span>'numeric'</span><span>,</span><span> </span><span>year</span><span>:</span><span> </span><span>'numeric'</span><span>})</span> </code></pre></div></td></tr></tbody></table> On 23rd June 2019, this returns "16 June 2019". Refer to Luxon's guide on toLocaleString (strings for humans) for more information. ### Get the time between two dates# To get the time between two dates, use Luxon's diffs feature. This subtracts one date from another and returns a duration. For example, get the number of months between two dates: Expressions (JavaScript)Code node (JavaScript) <table><tbody><tr><td><div><pre><span></span><span>1</span></pre></div></td><td><div><pre><span></span><code><span>{{</span><span>DateTime</span><span>.</span><span>fromISO</span><span>(</span><span>'2019-06-23'</span><span>).</span><span>diff</span><span>(</span><span>DateTime</span><span>.</span><span>fromISO</span><span>(</span><span>'2019-05-23'</span><span>),</span><span> </span><span>'months'</span><span>).</span><span>toObject</span><span>()}}</span> </code></pre></div></td></tr></tbody></table> This returns `[Object: {"months":1}]`. <table><tbody><tr><td><div><pre><span></span><span>1</span></pre></div></td><td><div><pre><span></span><code><span>let</span><span> </span><span>monthsBetweenDates</span><span> </span><span>=</span><span> </span><span>DateTime</span><span>.</span><span>fromISO</span><span>(</span><span>'2019-06-23'</span><span>).</span><span>diff</span><span>(</span><span>DateTime</span><span>.</span><span>fromISO</span><span>(</span><span>'2019-05-23'</span><span>),</span><span> </span><span>'months'</span><span>).</span><span>toObject</span><span>()</span> </code></pre></div></td></tr></tbody></table> This returns `{"months":1}`. Refer to Luxon's Diffs for more information. ### A longer example: How many days to Christmas?# This example brings together several Luxon features, uses JMESPath, and does some basic string manipulation. The scenario: you want a countdown to 25th December. Every day, it should tell you the number of days remaining to Christmas. You don't want to update it for next year - it needs to seamlessly work for every year. Expressions (JavaScript)Code node (JavaScript) <table><tbody><tr><td><div><pre><span></span><span>1</span></pre></div></td><td><div><pre><span></span><code><span>{{</span><span>"There are "</span><span> </span><span>+</span><span> </span><span>$today</span><span>.</span><span>diff</span><span>(</span><span>DateTime</span><span>.</span><span>fromISO</span><span>(</span><span>$today</span><span>.</span><span>year</span><span> </span><span>+</span><span> </span><span>'-12-25'</span><span>),</span><span> </span><span>'days'</span><span>).</span><span>toObject</span><span>().</span><span>days</span><span>.</span><span>toString</span><span>().</span><span>substring</span><span>(</span><span>1</span><span>)</span><span> </span><span>+</span><span> </span><span>" days to Christmas!"</span><span>}}</span> </code></pre></div></td></tr></tbody></table> This outputs `"There are <number of days> days to Christmas!"`. For example, on 9th March, it outputs "There are 291 days to Christmas!". A detailed explanation of what the expression does: * `{{`: indicates the start of the expression. * `"There are "`: a string. * `+`: used to join two strings. * `$today.diff()`: This is similar to the example in Get the time between two dates, but it uses n8n's custom `$today` variable. * `DateTime.fromISO($today.year + '-12-25'), 'days'`: this part gets the current year using `$today.year`, turns it into an ISO string along with the month and date, and then takes the whole ISO string and converts it to a Luxon DateTime data structure. It also tells Luxon that you want the duration in days. * `toObject()` turns the result of diff() into a more usable object. At this point, the expression returns `[Object: {"days":-<number-of-days>}]`. For example, on 9th March, `[Object: {"days":-291}]`. * `.days` uses JMESPath syntax to retrieve just the number of days from the object. For more information on using JMESPath with n8n, refer to our JMESpath documentation. This gives you the number of days to Christmas, as a negative number. * `.toString().substring(1)` turns the number into a string and removes the `-`. * `+ " days to Christmas!"`: another string, with a `+` to join it to the previous string. * `}}`: indicates the end of the expression. <table><tbody><tr><td><div><pre><span></span><span>1</span></pre></div></td><td><div><pre><span></span><code><span>let</span><span> </span><span>daysToChristmas</span><span> </span><span>=</span><span> </span><span>"There are "</span><span> </span><span>+</span><span> </span><span>$today</span><span>.</span><span>diff</span><span>(</span><span>DateTime</span><span>.</span><span>fromISO</span><span>(</span><span>$today</span><span>.</span><span>year</span><span> </span><span>+</span><span> </span><span>'-12-25'</span><span>),</span><span> </span><span>'days'</span><span>).</span><span>toObject</span><span>().</span><span>days</span><span>.</span><span>toString</span><span>().</span><span>substring</span><span>(</span><span>1</span><span>)</span><span> </span><span>+</span><span> </span><span>" days to Christmas!"</span><span>;</span> </code></pre></div></td></tr></tbody></table> This outputs `"There are <number of days> days to Christmas!"`. For example, on 9th March, it outputs "There are 291 days to Christmas!". A detailed explanation of what the code does: * `"There are "`: a string. * `+`: used to join two strings. * `$today.diff()`: This is similar to the example in Get the time between two dates, but it uses n8n's custom `$today` variable. * `DateTime.fromISO($today.year + '-12-25'), 'days'`: this part gets the current year using `$today.year`, turns it into an ISO string along with the month and date, and then takes the whole ISO string and converts it to a Luxon DateTime data structure. It also tells Luxon that you want the duration in days. * `toObject()` turns the result of diff() into a more usable object. At this point, the expression returns `[Object: {"days":-<number-of-days>}]`. For example, on 9th March, `[Object: {"days":-291}]`. * `.days` uses JMESPath syntax to retrieve just the number of days from the object. For more information on using JMESPath with n8n, refer to our JMESpath documentation. This gives you the number of days to Christmas, as a negative number. * `.toString().substring(1)` turns the number into a string and removes the `-`. * `+ " days to Christmas!"`: another string, with a `+` to join it to the previous string. --- ## Page: https://docs.n8n.io/code/cookbook/jmespath/ JMESPath is a query language for JSON that you can use to extract and transform elements from a JSON document. For full details of how to use JMESPath, refer to the JMESPath documentation. ## The `jmespath()` method# n8n provides a custom method, `jmespath()`. Use this method to perform a search on a JSON object using the JMESPath query language. The basic syntax is: JavaScriptPython <table><tbody><tr><td><div><pre><span></span><span>1</span></pre></div></td><td><div><pre><span></span><code><span>$jmespath</span><span>(</span><span>object</span><span>,</span><span> </span><span>searchString</span><span>)</span> </code></pre></div></td></tr></tbody></table> <table><tbody><tr><td><div><pre><span></span><span>1</span></pre></div></td><td><div><pre><span></span><code><span>_jmespath</span><span>(</span><span>object</span><span>,</span> <span>searchString</span><span>)</span> </code></pre></div></td></tr></tbody></table> To help understand what the method does, here is the equivalent longer JavaScript: <table><tbody><tr><td><div><pre><span></span><span>1</span> <span>2</span></pre></div></td><td><div><pre><span></span><code><span>var</span><span> </span><span>jmespath</span><span> </span><span>=</span><span> </span><span>require</span><span>(</span><span>'jmespath'</span><span>);</span> <span>jmespath</span><span>.</span><span>search</span><span>(</span><span>object</span><span>,</span><span> </span><span>searchString</span><span>);</span> </code></pre></div></td></tr></tbody></table> Expressions must be single-line The longer code example doesn't work in Expressions, as they must be single-line. `object` is a JSON object, such as the output of a previous node. `searchString` is an expression written in the JMESPath query language. The JMESPath Specification provides a list of supported expressions, while their Tutorial and Examples provide interactive examples. Search parameter order The examples in the JMESPath Specification follow the pattern `search(searchString, object)`. The JMESPath JavaScript library, which n8n uses, supports `search(object, searchString)` instead. This means that when using examples from the JMESPath documentation, you may need to change the order of the search function parameters. ## Common tasks# This section provides examples for some common operations. More examples, and detailed guidance, are available in JMESPath's own documentation. When trying out these examples, you need to set the Code node **Mode** to **Run Once for Each Item**. ### Apply a JMESPath expression to a collection of elements with projections# From the JMESPath projections documentation: > Projections are one of the key features of JMESPath. Use it to apply an expression to a collection of elements. JMESPath supports five kinds of projections: > > * List Projections > * Slice Projections > * Object Projections > * Flatten Projections > * Filter Projections The following example shows basic usage of list, slice, and object projections. Refer to the JMESPath projections documentation for detailed explanations of each projection type, and more examples. Given this JSON from a webhook node: <table><tbody><tr><td><div><pre><span></span><span> 1</span> <span> 2</span> <span> 3</span> <span> 4</span> <span> 5</span> <span> 6</span> <span> 7</span> <span> 8</span> <span> 9</span> <span>10</span> <span>11</span> <span>12</span> <span>13</span> <span>14</span> <span>15</span> <span>16</span> <span>17</span> <span>18</span> <span>19</span> <span>20</span> <span>21</span> <span>22</span> <span>23</span> <span>24</span> <span>25</span> <span>26</span> <span>27</span> <span>28</span> <span>29</span> <span>30</span> <span>31</span> <span>32</span> <span>33</span> <span>34</span> <span>35</span> <span>36</span></pre></div></td><td><div><pre><span></span><code><span>[</span> <span> </span><span>{</span> <span> </span><span>"headers"</span><span>:</span><span> </span><span>{</span> <span> </span><span>"host"</span><span>:</span><span> </span><span>"n8n.instance.address"</span><span>,</span> <span> </span><span>...</span> <span> </span><span>},</span> <span> </span><span>"params"</span><span>:</span><span> </span><span>{},</span> <span> </span><span>"query"</span><span>:</span><span> </span><span>{},</span> <span> </span><span>"body"</span><span>:</span><span> </span><span>{</span> <span> </span><span>"people"</span><span>:</span><span> </span><span>[</span> <span> </span><span>{</span> <span> </span><span>"first"</span><span>:</span><span> </span><span>"James"</span><span>,</span> <span> </span><span>"last"</span><span>:</span><span> </span><span>"Green"</span> <span> </span><span>},</span> <span> </span><span>{</span> <span> </span><span>"first"</span><span>:</span><span> </span><span>"Jacob"</span><span>,</span> <span> </span><span>"last"</span><span>:</span><span> </span><span>"Jones"</span> <span> </span><span>},</span> <span> </span><span>{</span> <span> </span><span>"first"</span><span>:</span><span> </span><span>"Jayden"</span><span>,</span> <span> </span><span>"last"</span><span>:</span><span> </span><span>"Smith"</span> <span> </span><span>}</span> <span> </span><span>],</span> <span> </span><span>"dogs"</span><span>:</span><span> </span><span>{</span> <span> </span><span>"Fido"</span><span>:</span><span> </span><span>{</span> <span> </span><span>"color"</span><span>:</span><span> </span><span>"brown"</span><span>,</span> <span> </span><span>"age"</span><span>:</span><span> </span><span>7</span> <span> </span><span>},</span> <span> </span><span>"Spot"</span><span>:</span><span> </span><span>{</span> <span> </span><span>"color"</span><span>:</span><span> </span><span>"black and white"</span><span>,</span> <span> </span><span>"age"</span><span>:</span><span> </span><span>5</span> <span> </span><span>}</span> <span> </span><span>}</span> <span> </span><span>}</span> <span> </span><span>}</span> <span>]</span> </code></pre></div></td></tr></tbody></table> Retrieve a list of all the people's first names: Expressions (JavaScript)Code node (JavaScript)Code node (Python) <table><tbody><tr><td><div><pre><span></span><span>1</span> <span>2</span></pre></div></td><td><div><pre><span></span><code><span>{{</span><span>$jmespath</span><span>(</span><span>$json</span><span>.</span><span>body</span><span>.</span><span>people</span><span>,</span><span> </span><span>"[*].first"</span><span> </span><span>)}}</span> <span>// Returns ["James", "Jacob", "Jayden"]</span> </code></pre></div></td></tr></tbody></table> <table><tbody><tr><td><div><pre><span></span><span> 1</span> <span> 2</span> <span> 3</span> <span> 4</span> <span> 5</span> <span> 6</span> <span> 7</span> <span> 8</span> <span> 9</span> <span>10</span> <span>11</span> <span>12</span> <span>13</span></pre></div></td><td><div><pre><span></span><code><span>let</span><span> </span><span>firstNames</span><span> </span><span>=</span><span> </span><span>$jmespath</span><span>(</span><span>$json</span><span>.</span><span>body</span><span>.</span><span>people</span><span>,</span><span> </span><span>"[*].first"</span><span> </span><span>)</span> <span>return</span><span> </span><span>{</span><span>firstNames</span><span>};</span> <span>/* Returns:</span> <span>[</span> <span> {</span> <span> "firstNames": [</span> <span> "James",</span> <span> "Jacob",</span> <span> "Jayden"</span> <span> ]</span> <span> }</span> <span>]</span> <span>*/</span> </code></pre></div></td></tr></tbody></table> <table><tbody><tr><td><div><pre><span></span><span> 1</span> <span> 2</span> <span> 3</span> <span> 4</span> <span> 5</span> <span> 6</span> <span> 7</span> <span> 8</span> <span> 9</span> <span>10</span> <span>11</span> <span>12</span> <span>13</span> <span>14</span></pre></div></td><td><div><pre><span></span><code><span>firstNames</span> <span>=</span> <span>_jmespath</span><span>(</span><span>_json</span><span>.</span><span>body</span><span>.</span><span>people</span><span>,</span> <span>"[*].first"</span> <span>)</span> <span>return</span> <span>{</span><span>"firstNames"</span><span>:</span><span>firstNames</span><span>}</span> <span>"""</span> <span>Returns:</span> <span>[</span> <span> {</span> <span> "firstNames": [</span> <span> "James",</span> <span> "Jacob",</span> <span> "Jayden"</span> <span> ]</span> <span> }</span> <span>]</span> <span>"""</span> </code></pre></div></td></tr></tbody></table> Get a slice of the first names: Expressions (JavaScript)Code node (JavaScript)Code node (Python) <table><tbody><tr><td><div><pre><span></span><span>1</span> <span>2</span></pre></div></td><td><div><pre><span></span><code><span>{{</span><span>$jmespath</span><span>(</span><span>$json</span><span>.</span><span>body</span><span>.</span><span>people</span><span>,</span><span> </span><span>"[:2].first"</span><span>)}}</span> <span>// Returns ["James", "Jacob"]</span> </code></pre></div></td></tr></tbody></table> <table><tbody><tr><td><div><pre><span></span><span> 1</span> <span> 2</span> <span> 3</span> <span> 4</span> <span> 5</span> <span> 6</span> <span> 7</span> <span> 8</span> <span> 9</span> <span>10</span> <span>11</span> <span>12</span> <span>13</span></pre></div></td><td><div><pre><span></span><code><span>let</span><span> </span><span>firstTwoNames</span><span> </span><span>=</span><span> </span><span>$jmespath</span><span>(</span><span>$json</span><span>.</span><span>body</span><span>.</span><span>people</span><span>,</span><span> </span><span>"[:2].first"</span><span>);</span> <span>return</span><span> </span><span>{</span><span>firstTwoNames</span><span>};</span> <span>/* Returns:</span> <span>[</span> <span> {</span> <span> "firstNames": [</span> <span> "James",</span> <span> "Jacob",</span> <span> "Jayden"</span> <span> ]</span> <span> }</span> <span>]</span> <span>*/</span> </code></pre></div></td></tr></tbody></table> <table><tbody><tr><td><div><pre><span></span><span> 1</span> <span> 2</span> <span> 3</span> <span> 4</span> <span> 5</span> <span> 6</span> <span> 7</span> <span> 8</span> <span> 9</span> <span>10</span> <span>11</span> <span>12</span> <span>13</span></pre></div></td><td><div><pre><span></span><code><span>firstTwoNames</span> <span>=</span> <span>_jmespath</span><span>(</span><span>_json</span><span>.</span><span>body</span><span>.</span><span>people</span><span>,</span> <span>"[:2].first"</span> <span>)</span> <span>return</span> <span>{</span><span>"firstTwoNames"</span><span>:</span><span>firstTwoNames</span><span>}</span> <span>"""</span> <span>Returns:</span> <span>[</span> <span> {</span> <span> "firstTwoNames": [</span> <span> "James",</span> <span> "Jacob"</span> <span> ]</span> <span> }</span> <span>]</span> <span>"""</span> </code></pre></div></td></tr></tbody></table> Get a list of the dogs' ages using object projections: Expressions (JavaScript)Code node (JavaScript)Code node (Python) <table><tbody><tr><td><div><pre><span></span><span>1</span> <span>2</span></pre></div></td><td><div><pre><span></span><code><span>{{</span><span>$jmespath</span><span>(</span><span>$json</span><span>.</span><span>body</span><span>.</span><span>dogs</span><span>,</span><span> </span><span>"*.age"</span><span>)}}</span> <span>// Returns [7,5]</span> </code></pre></div></td></tr></tbody></table> <table><tbody><tr><td><div><pre><span></span><span> 1</span> <span> 2</span> <span> 3</span> <span> 4</span> <span> 5</span> <span> 6</span> <span> 7</span> <span> 8</span> <span> 9</span> <span>10</span> <span>11</span> <span>12</span></pre></div></td><td><div><pre><span></span><code><span>let</span><span> </span><span>dogsAges</span><span> </span><span>=</span><span> </span><span>$jmespath</span><span>(</span><span>$json</span><span>.</span><span>body</span><span>.</span><span>dogs</span><span>,</span><span> </span><span>"*.age"</span><span>);</span> <span>return</span><span> </span><span>{</span><span>dogsAges</span><span>};</span> <span>/* Returns:</span> <span>[</span> <span> {</span> <span> "dogsAges": [</span> <span> 7,</span> <span> 5</span> <span> ]</span> <span> }</span> <span>]</span> <span>*/</span> </code></pre></div></td></tr></tbody></table> <table><tbody><tr><td><div><pre><span></span><span> 1</span> <span> 2</span> <span> 3</span> <span> 4</span> <span> 5</span> <span> 6</span> <span> 7</span> <span> 8</span> <span> 9</span> <span>10</span> <span>11</span> <span>12</span> <span>13</span></pre></div></td><td><div><pre><span></span><code><span>dogsAges</span> <span>=</span> <span>_jmespath</span><span>(</span><span>_json</span><span>.</span><span>body</span><span>.</span><span>dogs</span><span>,</span> <span>"*.age"</span><span>)</span> <span>return</span> <span>{</span><span>"dogsAges"</span><span>:</span> <span>dogsAges</span><span>}</span> <span>"""</span> <span>Returns:</span> <span>[</span> <span> {</span> <span> "dogsAges": [</span> <span> 7,</span> <span> 5</span> <span> ]</span> <span> }</span> <span>]</span> <span>"""</span> </code></pre></div></td></tr></tbody></table> ### Select multiple elements and create a new list or object# Use Multiselect to select elements from a JSON object and combine them into a new list or object. Given this JSON from a webhook node: <table><tbody><tr><td><div><pre><span></span><span> 1</span> <span> 2</span> <span> 3</span> <span> 4</span> <span> 5</span> <span> 6</span> <span> 7</span> <span> 8</span> <span> 9</span> <span>10</span> <span>11</span> <span>12</span> <span>13</span> <span>14</span> <span>15</span> <span>16</span> <span>17</span> <span>18</span> <span>19</span> <span>20</span> <span>21</span> <span>22</span> <span>23</span> <span>24</span> <span>25</span> <span>26</span> <span>27</span> <span>28</span> <span>29</span> <span>30</span> <span>31</span> <span>32</span> <span>33</span> <span>34</span> <span>35</span> <span>36</span></pre></div></td><td><div><pre><span></span><code><span>[</span> <span> </span><span>{</span> <span> </span><span>"headers"</span><span>:</span><span> </span><span>{</span> <span> </span><span>"host"</span><span>:</span><span> </span><span>"n8n.instance.address"</span><span>,</span> <span> </span><span>...</span> <span> </span><span>},</span> <span> </span><span>"params"</span><span>:</span><span> </span><span>{},</span> <span> </span><span>"query"</span><span>:</span><span> </span><span>{},</span> <span> </span><span>"body"</span><span>:</span><span> </span><span>{</span> <span> </span><span>"people"</span><span>:</span><span> </span><span>[</span> <span> </span><span>{</span> <span> </span><span>"first"</span><span>:</span><span> </span><span>"James"</span><span>,</span> <span> </span><span>"last"</span><span>:</span><span> </span><span>"Green"</span> <span> </span><span>},</span> <span> </span><span>{</span> <span> </span><span>"first"</span><span>:</span><span> </span><span>"Jacob"</span><span>,</span> <span> </span><span>"last"</span><span>:</span><span> </span><span>"Jones"</span> <span> </span><span>},</span> <span> </span><span>{</span> <span> </span><span>"first"</span><span>:</span><span> </span><span>"Jayden"</span><span>,</span> <span> </span><span>"last"</span><span>:</span><span> </span><span>"Smith"</span> <span> </span><span>}</span> <span> </span><span>],</span> <span> </span><span>"dogs"</span><span>:</span><span> </span><span>{</span> <span> </span><span>"Fido"</span><span>:</span><span> </span><span>{</span> <span> </span><span>"color"</span><span>:</span><span> </span><span>"brown"</span><span>,</span> <span> </span><span>"age"</span><span>:</span><span> </span><span>7</span> <span> </span><span>},</span> <span> </span><span>"Spot"</span><span>:</span><span> </span><span>{</span> <span> </span><span>"color"</span><span>:</span><span> </span><span>"black and white"</span><span>,</span> <span> </span><span>"age"</span><span>:</span><span> </span><span>5</span> <span> </span><span>}</span> <span> </span><span>}</span> <span> </span><span>}</span> <span> </span><span>}</span> <span>]</span> </code></pre></div></td></tr></tbody></table> Use multiselect list to get the first and last names and create new lists containing both names: Expressions (JavaScript)Code node (JavaScript)Code node (Python) <table><tbody><tr><td><div><pre><span></span><span>1</span> <span>2</span></pre></div></td><td><div><pre><span></span><code><span>{{</span><span>$jmespath</span><span>(</span><span>$json</span><span>.</span><span>body</span><span>.</span><span>people</span><span>,</span><span> </span><span>"[].[first, last]"</span><span>)}}</span> <span>// Returns [["James","Green"],["Jacob","Jones"],["Jayden","Smith"]]</span> </code></pre></div></td></tr></tbody></table> <table><tbody><tr><td><div><pre><span></span><span> 1</span> <span> 2</span> <span> 3</span> <span> 4</span> <span> 5</span> <span> 6</span> <span> 7</span> <span> 8</span> <span> 9</span> <span>10</span> <span>11</span> <span>12</span> <span>13</span> <span>14</span> <span>15</span> <span>16</span> <span>17</span> <span>18</span> <span>19</span> <span>20</span> <span>21</span> <span>22</span></pre></div></td><td><div><pre><span></span><code><span>let</span><span> </span><span>newList</span><span> </span><span>=</span><span> </span><span>$jmespath</span><span>(</span><span>$json</span><span>.</span><span>body</span><span>.</span><span>people</span><span>,</span><span> </span><span>"[].[first, last]"</span><span>);</span> <span>return</span><span> </span><span>{</span><span>newList</span><span>};</span> <span>/* Returns:</span> <span>[</span> <span> {</span> <span> "newList": [</span> <span> [</span> <span> "James",</span> <span> "Green"</span> <span> ],</span> <span> [</span> <span> "Jacob",</span> <span> "Jones"</span> <span> ],</span> <span> [</span> <span> "Jayden",</span> <span> "Smith"</span> <span> ]</span> <span> ]</span> <span> }</span> <span>]</span> <span>*/</span> </code></pre></div></td></tr></tbody></table> <table><tbody><tr><td><div><pre><span></span><span> 1</span> <span> 2</span> <span> 3</span> <span> 4</span> <span> 5</span> <span> 6</span> <span> 7</span> <span> 8</span> <span> 9</span> <span>10</span> <span>11</span> <span>12</span> <span>13</span> <span>14</span> <span>15</span> <span>16</span> <span>17</span> <span>18</span> <span>19</span> <span>20</span> <span>21</span> <span>22</span> <span>23</span></pre></div></td><td><div><pre><span></span><code><span>newList</span> <span>=</span> <span>_jmespath</span><span>(</span><span>_json</span><span>.</span><span>body</span><span>.</span><span>people</span><span>,</span> <span>"[].[first, last]"</span><span>)</span> <span>return</span> <span>{</span><span>"newList"</span><span>:</span><span>newList</span><span>}</span> <span>"""</span> <span>Returns:</span> <span>[</span> <span> {</span> <span> "newList": [</span> <span> [</span> <span> "James",</span> <span> "Green"</span> <span> ],</span> <span> [</span> <span> "Jacob",</span> <span> "Jones"</span> <span> ],</span> <span> [</span> <span> "Jayden",</span> <span> "Smith"</span> <span> ]</span> <span> ]</span> <span> }</span> <span>]</span> <span>"""</span> </code></pre></div></td></tr></tbody></table> ### An alternative to arrow functions in expressions# For example, generate some input data by returning the below code from the Code node: <table><tbody><tr><td><div><pre><span></span><span> 1</span> <span> 2</span> <span> 3</span> <span> 4</span> <span> 5</span> <span> 6</span> <span> 7</span> <span> 8</span> <span> 9</span> <span>10</span> <span>11</span> <span>12</span> <span>13</span> <span>14</span> <span>15</span> <span>16</span> <span>17</span> <span>18</span> <span>19</span> <span>20</span> <span>21</span> <span>22</span> <span>23</span> <span>24</span> <span>25</span> <span>26</span> <span>27</span> <span>28</span></pre></div></td><td><div><pre><span></span><code><span>return</span><span>[</span> <span> </span><span>{</span> <span> </span><span>"json"</span><span>:</span><span> </span><span>{</span><span> </span> <span> </span><span>"num_categories"</span><span>:</span><span> </span><span>"0"</span><span>,</span> <span> </span><span>"num_products"</span><span>:</span><span> </span><span>"45"</span><span>,</span> <span> </span><span>"category_id"</span><span>:</span><span> </span><span>5529735</span><span>,</span> <span> </span><span>"parent_id"</span><span>:</span><span> </span><span>1407340</span><span>,</span> <span> </span><span>"pos_enabled"</span><span>:</span><span> </span><span>1</span><span>,</span> <span> </span><span>"pos_favorite"</span><span>:</span><span> </span><span>0</span><span>,</span> <span> </span><span>"name"</span><span>:</span><span> </span><span>"HP"</span><span>,</span> <span> </span><span>"description"</span><span>:</span><span> </span><span>""</span><span>,</span> <span> </span><span>"image"</span><span>:</span><span> </span><span>""</span> <span> </span><span>}</span> <span> </span><span>},</span> <span> </span><span>{</span> <span> </span><span>"json"</span><span>:</span><span> </span><span>{</span> <span> </span><span>"num_categories"</span><span>:</span><span> </span><span>"0"</span><span>,</span> <span> </span><span>"num_products"</span><span>:</span><span> </span><span>"86"</span><span>,</span> <span> </span><span>"category_id"</span><span>:</span><span> </span><span>5529740</span><span>,</span> <span> </span><span>"parent_id"</span><span>:</span><span> </span><span>1407340</span><span>,</span> <span> </span><span>"pos_enabled"</span><span>:</span><span> </span><span>1</span><span>,</span> <span> </span><span>"pos_favorite"</span><span>:</span><span> </span><span>0</span><span>,</span> <span> </span><span>"name"</span><span>:</span><span> </span><span>"Lenovo"</span><span>,</span> <span> </span><span>"description"</span><span>:</span><span> </span><span>""</span><span>,</span> <span> </span><span>"image"</span><span>:</span><span> </span><span>""</span> <span> </span><span>}</span> <span> </span><span>}</span><span> </span> <span>]</span> </code></pre></div></td></tr></tbody></table> You could do a search like "find the item with the name Lenovo and tell me their category ID." <table><tbody><tr><td><div><pre><span></span><span>1</span></pre></div></td><td><div><pre><span></span><code><span>{{</span><span> </span><span>$jmespath</span><span>(</span><span>$</span><span>(</span><span>"Code"</span><span>).</span><span>all</span><span>(),</span><span> </span><span>"[?json.name=='Lenovo'].json.category_id"</span><span>)</span><span> </span><span>}}</span> </code></pre></div></td></tr></tbody></table> --- ## Page: https://docs.n8n.io/code/cookbook/builtin/ n8n provides built-in methods and variables for working with data and accessing n8n data. This section provides usage examples. * execution * getWorkflowStaticData * Retrieve linked items from earlier in the workflow * (node-name).all * vars * Built-in methods and variables reference * Expressions * Code node --- ## Page: https://docs.n8n.io/code/cookbook/builtin/execution/ ## `execution.id`# Contains the unique ID of the current workflow execution. JavaScriptPython <table><tbody><tr><td><div><pre><span></span><span>1</span></pre></div></td><td><div><pre><span></span><code><span>let</span><span> </span><span>executionId</span><span> </span><span>=</span><span> </span><span>$execution</span><span>.</span><span>id</span><span>;</span> </code></pre></div></td></tr></tbody></table> <table><tbody><tr><td><div><pre><span></span><span>1</span></pre></div></td><td><div><pre><span></span><code><span>executionId</span> <span>=</span> <span>_execution</span><span>.</span><span>id</span> </code></pre></div></td></tr></tbody></table> ## `execution.resumeUrl`# The webhook URL to call to resume a waiting workflow. See the Wait > On webhook call documentation to learn more. ## `execution.customData`# This is only available in the Code node. JavaScriptPython <table><tbody><tr><td><div><pre><span></span><span> 1</span> <span> 2</span> <span> 3</span> <span> 4</span> <span> 5</span> <span> 6</span> <span> 7</span> <span> 8</span> <span> 9</span> <span>10</span> <span>11</span></pre></div></td><td><div><pre><span></span><code><span>// Set a single piece of custom execution data</span> <span>$execution</span><span>.</span><span>customData</span><span>.</span><span>set</span><span>(</span><span>"key"</span><span>,</span><span> </span><span>"value"</span><span>);</span> <span>// Set the custom execution data object</span> <span>$execution</span><span>.</span><span>customData</span><span>.</span><span>setAll</span><span>({</span><span>"key1"</span><span>:</span><span> </span><span>"value1"</span><span>,</span><span> </span><span>"key2"</span><span>:</span><span> </span><span>"value2"</span><span>})</span> <span>// Access the current state of the object during the execution</span> <span>var</span><span> </span><span>customData</span><span> </span><span>=</span><span> </span><span>$execution</span><span>.</span><span>customData</span><span>.</span><span>getAll</span><span>()</span> <span>// Access a specific value set during this execution</span> <span>var</span><span> </span><span>customData</span><span> </span><span>=</span><span> </span><span>$execution</span><span>.</span><span>customData</span><span>.</span><span>get</span><span>(</span><span>"key"</span><span>)</span> </code></pre></div></td></tr></tbody></table> <table><tbody><tr><td><div><pre><span></span><span> 1</span> <span> 2</span> <span> 3</span> <span> 4</span> <span> 5</span> <span> 6</span> <span> 7</span> <span> 8</span> <span> 9</span> <span>10</span> <span>11</span></pre></div></td><td><div><pre><span></span><code><span># Set a single piece of custom execution data</span> <span>_execution</span><span>.</span><span>customData</span><span>.</span><span>set</span><span>(</span><span>"key"</span><span>,</span> <span>"value"</span><span>);</span> <span># Set the custom execution data object</span> <span>_execution</span><span>.</span><span>customData</span><span>.</span><span>setAll</span><span>({</span><span>"key1"</span><span>:</span> <span>"value1"</span><span>,</span> <span>"key2"</span><span>:</span> <span>"value2"</span><span>})</span> <span># Access the current state of the object during the execution</span> <span>customData</span> <span>=</span> <span>_execution</span><span>.</span><span>customData</span><span>.</span><span>getAll</span><span>()</span> <span># Access a specific value set during this execution</span> <span>customData</span> <span>=</span> <span>_execution</span><span>.</span><span>customData</span><span>.</span><span>get</span><span>(</span><span>"key"</span><span>)</span> </code></pre></div></td></tr></tbody></table> Refer to Custom executions data for more information. --- ## Page: https://docs.n8n.io/code/cookbook/builtin/get-workflow-static-data/ This gives access to the static workflow data. Experimental feature * Static data isn't available when testing workflows. The workflow must be active and called by a trigger or webhook to save static data. * This feature may behave unreliably under high-frequency workflow executions. You can save data directly in the workflow. This data should be small. As an example: you can save a timestamp of the last item processed from an RSS feed or database. It will always return an object. Properties can then read, delete or set on that object. When the workflow execution succeeds, n8n checks automatically if the data has changed and saves it, if necessary. There are two types of static data, global and node. Global static data is the same in the whole workflow. Every node in the workflow can access it. The node static data is unique to the node. Only the node that set it can retrieve it again. Example with global data: JavaScriptPython <table><tbody><tr><td><div><pre><span></span><span> 1</span> <span> 2</span> <span> 3</span> <span> 4</span> <span> 5</span> <span> 6</span> <span> 7</span> <span> 8</span> <span> 9</span> <span>10</span> <span>11</span></pre></div></td><td><div><pre><span></span><code><span>// Get the global workflow static data</span> <span>const</span><span> </span><span>workflowStaticData</span><span> </span><span>=</span><span> </span><span>$getWorkflowStaticData</span><span>(</span><span>'global'</span><span>);</span> <span>// Access its data</span> <span>const</span><span> </span><span>lastExecution</span><span> </span><span>=</span><span> </span><span>workflowStaticData</span><span>.</span><span>lastExecution</span><span>;</span> <span>// Update its data</span> <span>workflowStaticData</span><span>.</span><span>lastExecution</span><span> </span><span>=</span><span> </span><span>new</span><span> </span><span>Date</span><span>().</span><span>getTime</span><span>();</span> <span>// Delete data</span> <span>delete</span><span> </span><span>workflowStaticData</span><span>.</span><span>lastExecution</span><span>;</span> </code></pre></div></td></tr></tbody></table> <table><tbody><tr><td><div><pre><span></span><span> 1</span> <span> 2</span> <span> 3</span> <span> 4</span> <span> 5</span> <span> 6</span> <span> 7</span> <span> 8</span> <span> 9</span> <span>10</span> <span>11</span></pre></div></td><td><div><pre><span></span><code><span># Get the global workflow static data</span> <span>workflowStaticData</span> <span>=</span> <span>_getWorkflowStaticData</span><span>(</span><span>'global'</span><span>)</span> <span># Access its data</span> <span>lastExecution</span> <span>=</span> <span>workflowStaticData</span><span>.</span><span>lastExecution</span> <span># Update its data</span> <span>workflowStaticData</span><span>.</span><span>lastExecution</span> <span>=</span> <span>new</span> <span>Date</span><span>()</span><span>.</span><span>getTime</span><span>()</span> <span># Delete data</span> <span>delete</span> <span>workflowStaticData</span><span>.</span><span>lastExecution</span> </code></pre></div></td></tr></tbody></table> Example with node data: JavaScriptPython <table><tbody><tr><td><div><pre><span></span><span> 1</span> <span> 2</span> <span> 3</span> <span> 4</span> <span> 5</span> <span> 6</span> <span> 7</span> <span> 8</span> <span> 9</span> <span>10</span> <span>11</span></pre></div></td><td><div><pre><span></span><code><span>// Get the static data of the node</span> <span>const</span><span> </span><span>nodeStaticData</span><span> </span><span>=</span><span> </span><span>$getWorkflowStaticData</span><span>(</span><span>'node'</span><span>);</span> <span>// Access its data</span> <span>const</span><span> </span><span>lastExecution</span><span> </span><span>=</span><span> </span><span>nodeStaticData</span><span>.</span><span>lastExecution</span><span>;</span> <span>// Update its data</span> <span>nodeStaticData</span><span>.</span><span>lastExecution</span><span> </span><span>=</span><span> </span><span>new</span><span> </span><span>Date</span><span>().</span><span>getTime</span><span>();</span> <span>// Delete data</span> <span>delete</span><span> </span><span>nodeStaticData</span><span>.</span><span>lastExecution</span><span>;</span> </code></pre></div></td></tr></tbody></table> <table><tbody><tr><td><div><pre><span></span><span> 1</span> <span> 2</span> <span> 3</span> <span> 4</span> <span> 5</span> <span> 6</span> <span> 7</span> <span> 8</span> <span> 9</span> <span>10</span> <span>11</span></pre></div></td><td><div><pre><span></span><code><span># Get the static data of the node</span> <span>nodeStaticData</span> <span>=</span> <span>_getWorkflowStaticData</span><span>(</span><span>'node'</span><span>)</span> <span># Access its data</span> <span>lastExecution</span> <span>=</span> <span>nodeStaticData</span><span>.</span><span>lastExecution</span> <span># Update its data</span> <span>nodeStaticData</span><span>.</span><span>lastExecution</span> <span>=</span> <span>new</span> <span>Date</span><span>()</span><span>.</span><span>getTime</span><span>()</span> <span># Delete data</span> <span>delete</span> <span>nodeStaticData</span><span>.</span><span>lastExecution</span> </code></pre></div></td></tr></tbody></table> ## Templates and examples# --- ## Page: https://docs.n8n.io/code/cookbook/builtin/itemmatching/ Every item in a node's input data links back to the items used in previous nodes to generate it. This is useful if you need to retrieve linked items from further back than the immediate previous node. To access the linked items from earlier in the workflow, use `("<node-name>").itemMatching(currentNodeinputIndex)`. For example, consider a workflow that does the following: 1. The Customer Datastore node generates example data: <table><tbody><tr><td><div><pre><span></span><span> 1</span> <span> 2</span> <span> 3</span> <span> 4</span> <span> 5</span> <span> 6</span> <span> 7</span> <span> 8</span> <span> 9</span> <span>10</span> <span>11</span> <span>12</span> <span>13</span> <span>14</span> <span>15</span> <span>16</span> <span>17</span> <span>18</span> <span>19</span></pre></div></td><td><div><pre><span></span><code><span>[</span> <span> </span><span>{</span> <span> </span><span>"id"</span><span>:</span><span> </span><span>"23423532"</span><span>,</span> <span> </span><span>"name"</span><span>:</span><span> </span><span>"Jay Gatsby"</span><span>,</span> <span> </span><span>"email"</span><span>:</span><span> </span><span>"gatsby@west-egg.com"</span><span>,</span> <span> </span><span>"notes"</span><span>:</span><span> </span><span>"Keeps asking about a green light??"</span><span>,</span> <span> </span><span>"country"</span><span>:</span><span> </span><span>"US"</span><span>,</span> <span> </span><span>"created"</span><span>:</span><span> </span><span>"1925-04-10"</span> <span> </span><span>},</span> <span> </span><span>{</span> <span> </span><span>"id"</span><span>:</span><span> </span><span>"23423533"</span><span>,</span> <span> </span><span>"name"</span><span>:</span><span> </span><span>"José Arcadio Buendía"</span><span>,</span> <span> </span><span>"email"</span><span>:</span><span> </span><span>"jab@macondo.co"</span><span>,</span> <span> </span><span>"notes"</span><span>:</span><span> </span><span>"Lots of people named after him. Very confusing"</span><span>,</span> <span> </span><span>"country"</span><span>:</span><span> </span><span>"CO"</span><span>,</span> <span> </span><span>"created"</span><span>:</span><span> </span><span>"1967-05-05"</span> <span> </span><span>},</span> <span> </span><span>...</span> <span>]</span> </code></pre></div></td></tr></tbody></table> 2. The Edit Fields node simplifies this data: <table><tbody><tr><td><div><pre><span></span><span>1</span> <span>2</span> <span>3</span> <span>4</span> <span>5</span> <span>6</span> <span>7</span> <span>8</span> <span>9</span></pre></div></td><td><div><pre><span></span><code><span>[</span> <span> </span><span>{</span> <span> </span><span>"name"</span><span>:</span><span> </span><span>"Jay Gatsby"</span> <span> </span><span>},</span> <span> </span><span>{</span> <span> </span><span>"name"</span><span>:</span><span> </span><span>"José Arcadio Buendía"</span> <span> </span><span>},</span> <span> </span><span>...</span> <span>]</span> </code></pre></div></td></tr></tbody></table> 3. The Code node restore the email address to the correct person: <table><tbody><tr><td><div><pre><span></span><span> 1</span> <span> 2</span> <span> 3</span> <span> 4</span> <span> 5</span> <span> 6</span> <span> 7</span> <span> 8</span> <span> 9</span> <span>10</span> <span>11</span></pre></div></td><td><div><pre><span></span><code><span>[</span> <span> </span><span>{</span> <span> </span><span>"name"</span><span>:</span><span> </span><span>"Jay Gatsby"</span><span>,</span> <span> </span><span>"restoreEmail"</span><span>:</span><span> </span><span>"gatsby@west-egg.com"</span> <span> </span><span>},</span> <span> </span><span>{</span> <span> </span><span>"name"</span><span>:</span><span> </span><span>"José Arcadio Buendía"</span><span>,</span> <span> </span><span>"restoreEmail"</span><span>:</span><span> </span><span>"jab@macondo.co"</span> <span> </span><span>},</span> <span> </span><span>...</span> <span>]</span> </code></pre></div></td></tr></tbody></table> The Code node does this using the following code: JavaScriptPython <table><tbody><tr><td><div><pre><span></span><span>1</span> <span>2</span> <span>3</span> <span>4</span></pre></div></td><td><div><pre><span></span><code><span>for</span><span>(</span><span>let</span><span> </span><span>i</span><span>=</span><span>0</span><span>;</span><span> </span><span>i</span><span><</span><span>$input</span><span>.</span><span>all</span><span>().</span><span>length</span><span>;</span><span> </span><span>i</span><span>++</span><span>)</span><span> </span><span>{</span> <span> </span><span>$input</span><span>.</span><span>all</span><span>()[</span><span>i</span><span>].</span><span>json</span><span>.</span><span>restoreEmail</span><span> </span><span>=</span><span> </span><span>$</span><span>(</span><span>'Customer Datastore (n8n training)'</span><span>).</span><span>itemMatching</span><span>(</span><span>i</span><span>).</span><span>json</span><span>.</span><span>email</span><span>;</span> <span>}</span> <span>return</span><span> </span><span>$input</span><span>.</span><span>all</span><span>();</span> </code></pre></div></td></tr></tbody></table> <table><tbody><tr><td><div><pre><span></span><span>1</span> <span>2</span> <span>3</span> <span>4</span></pre></div></td><td><div><pre><span></span><code><span>for</span> <span>i</span><span>,</span><span>item</span> <span>in</span> <span>enumerate</span><span>(</span><span>_input</span><span>.</span><span>all</span><span>()):</span> <span>_input</span><span>.</span><span>all</span><span>()[</span><span>i</span><span>]</span><span>.</span><span>json</span><span>.</span><span>restoreEmail</span> <span>=</span> <span>_</span><span>(</span><span>'Customer Datastore (n8n training)'</span><span>)</span><span>.</span><span>itemMatching</span><span>(</span><span>i</span><span>)</span><span>.</span><span>json</span><span>.</span><span>email</span> <span>return</span> <span>_input</span><span>.</span><span>all</span><span>();</span> </code></pre></div></td></tr></tbody></table> You can view and download the example workflow from n8n website | itemMatchin usage example . --- ## Page: https://docs.n8n.io/code/cookbook/builtin/all/ * Using n8n * Integrations * Hosting n8n * Code in n8n * Advanced AI * API * Embed * n8n home ↗ * Forum ↗ * Blog ↗ 1. Code in n8n 2. Cookbook 3. Built-in methods and variables examples ## `("<node-name>").all(branchIndex?: number, runIndex?: number)`# This gives access to all the items of the current or parent nodes. If you don't supply any parameters, it returns all the items of the current node. ## Getting items# JavaScriptPython <table><tbody><tr><td><div><pre><span></span><span> 1</span> <span> 2</span> <span> 3</span> <span> 4</span> <span> 5</span> <span> 6</span> <span> 7</span> <span> 8</span> <span> 9</span> <span>10</span> <span>11</span></pre></div></td><td><div><pre><span></span><code><span>// Returns all the items of the given node and current run</span> <span>let</span><span> </span><span>allItems</span><span> </span><span>=</span><span> </span><span>$</span><span>(</span><span>"<node-name>"</span><span>).</span><span>all</span><span>();</span> <span>// Returns all items the node "IF" outputs (index: 0 which is Output "true" of its most recent run)</span> <span>let</span><span> </span><span>allItems</span><span> </span><span>=</span><span> </span><span>$</span><span>(</span><span>"IF"</span><span>).</span><span>all</span><span>();</span> <span>// Returns all items the node "IF" outputs (index: 0 which is Output "true" of the same run as current node)</span> <span>let</span><span> </span><span>allItems</span><span> </span><span>=</span><span> </span><span>$</span><span>(</span><span>"IF"</span><span>).</span><span>all</span><span>(</span><span>0</span><span>,</span><span> </span><span>$runIndex</span><span>);</span> <span>// Returns all items the node "IF" outputs (index: 1 which is Output "false" of run 0 which is the first run)</span> <span>let</span><span> </span><span>allItems</span><span> </span><span>=</span><span> </span><span>$</span><span>(</span><span>"IF"</span><span>).</span><span>all</span><span>(</span><span>1</span><span>,</span><span> </span><span>0</span><span>);</span> </code></pre></div></td></tr></tbody></table> <table><tbody><tr><td><div><pre><span></span><span> 1</span> <span> 2</span> <span> 3</span> <span> 4</span> <span> 5</span> <span> 6</span> <span> 7</span> <span> 8</span> <span> 9</span> <span>10</span> <span>11</span></pre></div></td><td><div><pre><span></span><code><span># Returns all the items of the given node and current run</span> <span>allItems</span> <span>=</span> <span>_</span><span>(</span><span>"<node-name>"</span><span>)</span><span>.</span><span>all</span><span>();</span> <span># Returns all items the node "IF" outputs (index: 0 which is Output "true" of its most recent run)</span> <span>allItems</span> <span>=</span> <span>_</span><span>(</span><span>"IF"</span><span>)</span><span>.</span><span>all</span><span>();</span> <span># Returns all items the node "IF" outputs (index: 0 which is Output "true" of the same run as current node)</span> <span>allItems</span> <span>=</span> <span>_</span><span>(</span><span>"IF"</span><span>)</span><span>.</span><span>all</span><span>(</span><span>0</span><span>,</span> <span>_runIndex</span><span>);</span> <span># Returns all items the node "IF" outputs (index: 1 which is Output "false" of run 0 which is the first run)</span> <span>allItems</span> <span>=</span> <span>_</span><span>(</span><span>"IF"</span><span>)</span><span>.</span><span>all</span><span>(</span><span>1</span><span>,</span> <span>0</span><span>);</span> </code></pre></div></td></tr></tbody></table> ## Accessing item data# Get all items output by a previous node, and log out the data they contain: JavaScriptPython <table><tbody><tr><td><div><pre><span></span><span>1</span> <span>2</span> <span>3</span> <span>4</span></pre></div></td><td><div><pre><span></span><code><span>previousNodeData</span><span> </span><span>=</span><span> </span><span>$</span><span>(</span><span>"<node-name>"</span><span>).</span><span>all</span><span>();</span> <span>for</span><span>(</span><span>let</span><span> </span><span>i</span><span>=</span><span>0</span><span>;</span><span> </span><span>i</span><span><</span><span>previousNodeData</span><span>.</span><span>length</span><span>;</span><span> </span><span>i</span><span>++</span><span>)</span><span> </span><span>{</span> <span> </span><span>console</span><span>.</span><span>log</span><span>(</span><span>previousNodeData</span><span>[</span><span>i</span><span>].</span><span>json</span><span>);</span> <span>}</span> </code></pre></div></td></tr></tbody></table> <table><tbody><tr><td><div><pre><span></span><span>1</span> <span>2</span> <span>3</span> <span>4</span> <span>5</span> <span>6</span></pre></div></td><td><div><pre><span></span><code><span>previousNodeData</span> <span>=</span> <span>_</span><span>(</span><span>"<node-name>"</span><span>)</span><span>.</span><span>all</span><span>();</span> <span>for</span> <span>item</span> <span>in</span> <span>previousNodeData</span><span>:</span> <span># item is of type <class 'pyodide.ffi.JsProxy'></span> <span># You need to convert it to a Dict</span> <span>itemDict</span> <span>=</span> <span>item</span><span>.</span><span>json</span><span>.</span><span>to_py</span><span>()</span> <span>print</span><span>(</span><span>itemDict</span><span>)</span> </code></pre></div></td></tr></tbody></table> --- ## Page: https://docs.n8n.io/code/cookbook/builtin/vars/ n8n Docs * Using n8n * Getting started Getting started * Learning path * Choose your n8n * Quickstarts * A very quick quickstart * A longer introduction * Video courses * Text courses * Level one * Navigating the editor UI * Building a mini-workflow * Automating a (real-world) use case * Designing the workflow * Building the workflow Building the workflow * Getting data from the data warehouse * Inserting data into airtable * Filtering orders * Setting values for processing orders * Calculating booked orders * Notifying the team * Scheduling the workflow * Activating and examining the workflow * Exporting and importing workflows * Test your knowledge * Level two * Understanding the data structure * Processing different data types * Merging and splitting data * Dealing with errors in workflows * Automating a business workflow Automating a business workflow * Use case * Workflow 1 * Workflow 2 * Workflow 3 * Test your knowledge * Using the app Using the app * Understand workflows * Create and run * Components * Nodes * Connections * Sticky Notes * Executions * Manual, partial, and production executions * Workflow-level executions * All executions * Custom executions data * Debug executions * Tags * Export and import * Templates * Sharing * Settings * Workflow history * Workflow ID * Manage credentials * Create and edit * Credential sharing * Manage users and access * Cloud setup * Manage users * Account types * Role-based access control * Role types * Projects * Best practices * 2FA * LDAP * SAML * Set up SAML * Okta Workforce Identity SAML setup * Troubleshooting * Manage users with SAML * Keyboard shortcuts * Key concepts Key concepts * Flow logic * Splitting with conditionals * Merging data * Looping * Waiting * Sub-workflows * Error handling * Execution order in multi-branch workflows * Data * Data structure * Data flow within nodes * Transforming data * Process data using code * Data mapping * Data mapping in the UI * Data mapping in the expressions editor * Data item linking * Item linking concepts * Item linking in the Code node * Item linking errors * Item linking for node creators * Data pinning * Data editing * Data filtering * Data mocking * Binary data * Schema preview * Glossary * n8n Cloud n8n Cloud * Overview * Access the Cloud admin dashboard * Update your n8n Cloud version * Set the timezone * Cloud IP addresses * Cloud data management * Change ownership or username * Concurrency * AI Assistant * Enterprise features Enterprise features * Source control and environments * Understand * Environments * Git in n8n * Branch patterns * Set up * Using * Push and pull * Copy work between environments * Manage variables * Tutorial: Create environments with source control * External secrets * Log streaming * License key * Releases Releases * Release notes Release notes * 1.x * 0.x * v1.0 migration guide * Help and community Help and community * Where to get help * Contributing * Licenses and privacy Licenses and privacy * Privacy and security * Privacy * Security * Incident response * What you can do * Sustainable use license * Integrations * Built-in nodes Built-in nodes * Node types * Core nodes * Activation Trigger * Aggregate * AI Transform * Code * Keyboard shortcuts * Common issues * Compare Datasets * Compression * Chat Trigger * Common issues * Convert to File * Crypto * Date & Time * Debug Helper * Edit Fields (Set) * Edit Image * Email Trigger (IMAP) * Error Trigger * Execute Command * Common issues * Execute Sub-workflow * Execute Sub-workflow Trigger * Execution Data * Extract From File * Filter * FTP * Git * GraphQL * HTML * HTTP Request * Common issues * If * JWT * LDAP * Limit * Local File Trigger * Loop Over Items (Split in Batches) * Manual Trigger * Markdown * MCP Server Trigger * Merge * n8n * n8n Form * n8n Form Trigger * n8n Trigger * No Operation, do nothing * Read/Write Files from Disk * Remove Duplicates * Templates and examples * Rename Keys * Respond to Webhook * RSS Read * RSS Feed Trigger * Schedule Trigger * Common issues * Send Email * Sort * Split Out * SSE Trigger * SSH * Stop And Error * Summarize * Switch * TOTP * Wait * Webhook * Workflow development * Common issues * Workflow Trigger * XML * Actions * Action Network * ActiveCampaign * Adalo * Affinity * Agile CRM * Airtable * Common issues * Airtop * AMQP Sender * APITemplate.io * Asana * Automizy * Autopilot * AWS Certificate Manager * AWS Comprehend * AWS DynamoDB * AWS Elastic Load Balancing * AWS Lambda * AWS Rekognition * AWS S3 * AWS SES * AWS SNS * AWS SQS * AWS Textract * AWS Transcribe * Azure Storage * BambooHR * Bannerbear * Baserow * Beeminder * Bitly * Bitwarden * Box * Brandfetch * Brevo * Bubble * Chargebee * CircleCI * Webex by Cisco * Clearbit * ClickUp * Clockify * Cloudflare * Cockpit * Coda * CoinGecko * Contentful * ConvertKit * Copper * Cortex * CrateDB * crowd.dev * Customer.io * DeepL * Demio * DHL * Discord * Common issues * Discourse * Disqus * Drift * Dropbox * Dropcontact * E-goi * Elasticsearch * Elastic Security * Emelia * ERPNext * Facebook Graph API * FileMaker * Flow * Freshdesk * Freshservice * Freshworks CRM * GetResponse * Ghost * GitHub * GitLab * Gmail * Draft operations * Label operations * Message operations * Thread operations * Common issues * Gong * Google Ads * Google Analytics * Google BigQuery * Google Books * Google Business Profile * Google Calendar * Calendar operations * Event operations * Google Chat * Google Cloud Firestore * Google Cloud Natural Language * Google Cloud Realtime Database * Google Cloud Storage * Google Contacts * Google Docs * Google Drive * File operations * File and folder operations * Folder operations * Shared drive operations * Common issues * Google Perspective * Google Sheets * Document operations * Sheet within Document operations * Common issues * Google Slides * Google Tasks * Google Translate * Google Workspace Admin * Gotify * GoToWebinar * Grafana * Grist * Hacker News * HaloPSA * Harvest * Help Scout * HighLevel * Home Assistant * HubSpot * Humantic AI * Hunter * Intercom * Invoice Ninja * Iterable * Jenkins * Jira Software * Kafka * Keap * Kitemaker * KoboToolbox * Lemlist * Line * Linear * LingvaNex * LinkedIn * LoneScale * Magento 2 * Mailcheck * Mailchimp * MailerLite * Mailgun * Mailjet * Mandrill * marketstack * Matrix * Mattermost * Mautic * Medium * MessageBird * Metabase * Microsoft Dynamics CRM * Microsoft Entra ID * Microsoft Excel 365 * Microsoft Graph Security * Microsoft OneDrive * Microsoft Outlook * Microsoft SQL * Microsoft Teams * Microsoft To Do * Mindee * MISP * Mocean * monday.com * MongoDB * Monica CRM * MQTT * MSG91 * MySQL * Common issues * Customer Datastore (n8n Training) * Customer Messenger (n8n Training) * NASA * Netlify * Netscaler ADC * Nextcloud * NocoDB * Notion * Common issues * npm * Odoo * Okta * One Simple API * Onfleet * OpenAI * Assistant operations * Audio operations * File operations * Image operations * Text operations * Common issues * OpenThesaurus * OpenWeatherMap * Oura * Paddle * PagerDuty * PayPal * Peekalink * PhantomBuster * Philips Hue * Pipedrive * Plivo * PostBin * Postgres * Common issues * PostHog * ProfitWell * Pushbullet * Pushcut * Pushover * QuestDB * Quick Base * QuickBooks Online * QuickChart * RabbitMQ * Raindrop * Reddit * Redis * Rocket.Chat * Rundeck * S3 * Salesforce * Salesmate * SeaTable * SecurityScorecard * Segment * SendGrid * Sendy * Sentry.io * ServiceNow * seven * Shopify * SIGNL4 * Slack * Snowflake * Splunk * Spontit * Spotify * Stackby * Storyblok * Strapi * Strava * Stripe * Supabase * Common issues * SyncroMSP * Taiga * Tapfiliate * Telegram * Chat operations * Callback operations * File operations * Message operations * Common issues * TheHive * TheHive 5 * TimescaleDB * Todoist * Travis CI * Trello * Twake * Twilio * Twist * Unleashed Software * UpLead * uProc * UptimeRobot * urlscan.io * Venafi TLS Protect Cloud * Venafi TLS Protect Datacenter * Vero * Vonage * Webflow * Wekan * WhatsApp Business Cloud * Common issues * Wise * WooCommerce * WordPress * X (Formerly Twitter) * Xero * Yourls * YouTube * Zammad * Zendesk * Zoho CRM * Zoom * Zulip * Triggers * ActiveCampaign Trigger * Acuity Scheduling Trigger * Affinity Trigger * Airtable Trigger * AMQP Trigger * Asana Trigger * Autopilot Trigger * AWS SNS Trigger * Bitbucket Trigger * Box Trigger * Brevo Trigger * Calendly Trigger * Cal Trigger * Chargebee Trigger * ClickUp Trigger * Clockify Trigger * ConvertKit Trigger * Copper Trigger * crowd.dev Trigger * Customer.io Trigger * Emelia Trigger * Eventbrite Trigger * Facebook Lead Ads Trigger * Facebook Trigger * Ad Account * Application * Certificate Transparency * Group * Instagram * Link * Page * Permissions * User * WhatsApp Business Account * Workplace Security * Figma Trigger (Beta) * Flow Trigger * Form.io Trigger * Formstack Trigger * GetResponse Trigger * GitHub Trigger * GitLab Trigger * Gmail Trigger * Poll Mode options * Common issues * Google Calendar Trigger * Google Drive Trigger * Common issues * Google Business Profile Trigger * Google Sheets Trigger * Common issues * Gumroad Trigger * Help Scout Trigger * Hubspot Trigger * Invoice Ninja Trigger * Jira Trigger * JotForm Trigger * Kafka Trigger * Keap Trigger * KoboToolbox Trigger * Lemlist Trigger * Linear Trigger * LoneScale Trigger * Mailchimp Trigger * MailerLite Trigger * Mailjet Trigger * Mautic Trigger * Microsoft OneDrive Trigger * Microsoft Outlook Trigger * MQTT Trigger * Netlify Trigger * Notion Trigger * Onfleet Trigger * PayPal Trigger * Pipedrive Trigger * Postgres Trigger * Postmark Trigger * Pushcut Trigger * RabbitMQ Trigger * Redis Trigger * Salesforce Trigger * SeaTable Trigger * Shopify Trigger * Slack Trigger * Strava Trigger * Stripe Trigger * SurveyMonkey Trigger * Taiga Trigger * Telegram Trigger * Common issues * TheHive 5 Trigger * TheHive Trigger * Toggl Trigger * Trello Trigger * Twilio Trigger * Typeform Trigger * Venafi TLS Protect Cloud Trigger * Webex by Cisco Trigger * Webflow Trigger * WhatsApp Trigger * Wise Trigger * WooCommerce Trigger * Workable Trigger * Wufoo Trigger * Zendesk Trigger * Cluster nodes * Root nodes * AI Agent * Conversational Agent * OpenAI Functions Agent * Plan and Execute Agent * ReAct Agent * SQL Agent * Tools Agent * Common issues * Basic LLM Chain * Question and Answer Chain * Common issues * Summarization Chain * Information Extractor * Text Classifier * Sentiment Analysis * LangChain Code * Simple Vector Store * Milvus Vector Store * MongoDB Atlas Vector Store * PGVector Vector Store * Pinecone Vector Store * Qdrant Vector Store * Supabase Vector Store * Zep Vector Store * Sub-nodes * Default Data Loader * GitHub Document Loader * Embeddings AWS Bedrock * Embeddings Azure OpenAI * Embeddings Cohere * Embeddings Google Gemini * Embeddings Google PaLM * Embeddings Google Vertex * Embeddings HuggingFace Inference * Embeddings Mistral Cloud * Embeddings Ollama * Embeddings OpenAI * Anthropic Chat Model * AWS Bedrock Chat Model * Azure OpenAI Chat Model * DeepSeek Chat Model * Google Gemini Chat Model * Google Vertex Chat Model * Groq Chat Model * Mistral Cloud Chat Model * Ollama Chat Model * Common issues * OpenAI Chat Model * Common issues * OpenRouter Chat Model * Cohere Model * Ollama Model * Common issues * Hugging Face Inference Model * Chat Memory Manager * Simple Memory * Common issues * Motorhead * MongoDB Chat Memory * Redis Chat Memory * Postgres Chat Memory * Xata * Zep * Auto-fixing Output Parser * Item List Output Parser * Structured Output Parser * Common issues * Contextual Compression Retriever * MultiQuery Retriever * Vector Store Retriever * Workflow Retriever * Character Text Splitter * Recursive Character Text Splitter * Token Splitter * Calculator * Custom Code Tool * HTTP Request Tool * MCP Client Tool * SerpApi (Google Search) * Think Tool * Vector Store Question Answer Tool * Wikipedia * Wolfram|Alpha * Custom n8n Workflow Tool * Credentials * Action Network credentials * ActiveCampaign credentials * Acuity Scheduling credentials * Adalo credentials * Affinity credentials * Agile CRM credentials * Airtable credentials * Airtop credentials * AlienVault credentials * AMQP credentials * Anthropic credentials * APITemplate.io credentials * Asana credentials * Auth0 Management credentials * Automizy credentials * Autopilot credentials * AWS credentials * Azure OpenAI credentials * Azure Storage credentials * BambooHR credentials * Bannerbear credentials * Baserow credentials * Beeminder credentials * Bitbucket credentials * Bitly credentials * Bitwarden credentials * Box credentials * Brandfetch credentials * Brevo credentials * Bubble credentials * Cal.com credentials * Calendly credentials * Carbon Black credentials * Chargebee credentials * CircleCI credentials * Cisco Meraki credentials * Cisco Secure Endpoint credentials * Cisco Umbrella credentials * Clearbit credentials * ClickUp credentials * Clockify credentials * Cloudflare credentials * Cockpit credentials * Coda credentials * Cohere credentials * Contentful credentials * ConvertAPI credentials * ConvertKit credentials * Copper credentials * Cortex credentials * CrateDB credentials * crowd.dev credentials * CrowdStrike credentials * Customer.io credentials * Datadog credentials * DeepL credentials * DeepSeek credentials * Demio credentials * DFIR-IRIS credentials * DHL credentials * Discord credentials * Discourse credentials * Disqus credentials * Drift credentials * Dropbox credentials * Dropcontact credentials * Dynatrace credentials * E-goi credentials * Elasticsearch credentials * Elastic Security credentials * Emelia credentials * ERPNext credentials * Eventbrite credentials * F5 Big-IP credentials * Facebook App credentials * Facebook Graph API credentials * Facebook Lead Ads credentials * Figma credentials * FileMaker credentials * Filescan credentials * Flow credentials * Form.io Trigger credentials * Formstack Trigger credentials * Fortinet FortiGate credentials * Freshdesk credentials * Freshservice credentials * Freshworks CRM credentials * FTP credentials * GetResponse credentials * Ghost credentials * Git credentials * GitHub credentials * GitLab credentials * Gong credentials * Google * Google OAuth2 single service * Google OAuth2 generic * Google Service Account * Google Gemini(PaLM) credentials * Gotify credentials * GoToWebinar credentials * Grafana credentials * Grist credentials * Groq credentials * Gumroad credentials * HaloPSA credentials * Harvest credentials * Help Scout credentials * HighLevel credentials * Home Assistant credentials * HTTP Request credentials * HubSpot credentials * Hugging Face credentials * Humantic AI credentials * Hunter credentials * Hybrid Analysis credentials * IMAP * Gmail * Outlook.com * Yahoo * Imperva WAF credentials * Intercom credentials * Invoice Ninja credentials * Iterable credentials * Jenkins credentials * Jira credentials * JotForm credentials * JWT credentials * Kafka credentials * Keap credentials * Kibana credentials * Kitemaker credentials * KoboToolbox credentials * LDAP credentials * Lemlist credentials * Line credentials * Linear credentials * LingvaNex credentials * LinkedIn credentials * LoneScale credentials * Magento 2 credentials * Mailcheck credentials * Mailchimp credentials * MailerLite credentials * Mailgun credentials * Mailjet credentials * Malcore credentials * Mandrill credentials * Marketstack credentials * Matrix credentials * Mattermost credentials * Mautic credentials * Medium credentials * MessageBird credentials * Metabase credentials * Microsoft credentials * Microsoft Azure Monitor credentials * Microsoft Entra ID credentials * Microsoft SQL credentials * Milvus credentials * Mindee credentials * Miro credentials * MISP credentials * Mist credentials * Mistral Cloud credentials * Mocean credentials * monday.com credentials * MongoDB credentials * Monica CRM credentials * Motorhead credentials * MQTT credentials * MSG91 credentials * MySQL credentials * NASA credentials * Netlify credentials * Netscaler ADC credentials * Nextcloud credentials * NocoDB credentials * Notion credentials * npm credentials * Odoo credentials * Okta credentials * Ollama credentials * One Simple API credentials * Onfleet credentials * OpenAI credentials * OpenCTI credentials * OpenRouter credentials * OpenWeatherMap credentials * Oura credentials * Paddle credentials * PagerDuty credentials * PayPal credentials * Peekalink credentials * PhantomBuster credentials * Philips Hue credentials * Pinecone credentials * Pipedrive credentials * Plivo credentials * Postgres credentials * PostHog credentials * Postmark credentials * ProfitWell credentials * Pushbullet credentials * Pushcut credentials * Pushover credentials * QRadar credentials * Qdrant credentials * Qualys credentials * QuestDB credentials * Quick Base credentials * QuickBooks credentials * RabbitMQ credentials * Raindrop credentials * Rapid7 InsightVM credentials * Recorded Future credentials * Reddit credentials * Redis credentials * Rocket.Chat credentials * Rundeck credentials * S3 credentials * Salesforce credentials * Salesmate credentials * SeaTable credentials * SecurityScorecard credentials * Segment credentials * Sekoia credentials * Send Email * Gmail * Outlook.com * Yahoo * SendGrid credentials * Sendy credentials * Sentry.io credentials * Serp credentials * ServiceNow credentials * seven credentials * Shopify credentials * Shuffler credentials * SIGNL4 credentials * Slack credentials * Snowflake credentials * SolarWinds IPAM credentials * SolarWinds Observability SaaS credentials * Splunk credentials * Spontit credentials * Spotify credentials * SSH credentials * Stackby credentials * Storyblok credentials * Strapi credentials * Strava credentials * Stripe credentials * Supabase credentials * SurveyMonkey credentials * SyncroMSP credentials * Sysdig credentials * Taiga credentials * Tapfiliate credentials * Telegram credentials * TheHive credentials * TheHive 5 credentials * TimescaleDB credentials * Todoist credentials * Toggl credentials * TOTP credentials * Travis CI credentials * Trellix ePO credentials * Trello credentials * Twake credentials * Twilio credentials * Twist credentials * Typeform credentials * Unleashed Software credentials * UpLead credentials * uProc credentials * UptimeRobot credentials * urlscan.io credentials * Venafi TLS Protect Cloud credentials * Venafi TLS Protect Datacenter credentials * Vero credentials * VirusTotal credentials * Vonage credentials * Webex by Cisco credentials * Webflow credentials * Webhook credentials * Wekan credentials * WhatsApp Business Cloud credentials * Wise credentials * Wolfram|Alpha credentials * WooCommerce credentials * WordPress credentials * Workable credentials * Wufoo credentials * X (formerly Twitter) credentials * Xata credentials * Xero credentials * Yourls credentials * Zabbix credentials * Zammad credentials * Zendesk credentials * Zep credentials * Zoho credentials * Zoom credentials * Zscaler ZIA credentials * Zulip credentials * Custom API actions for existing nodes * Handle rate limits * Community nodes Community nodes * Installation and management * GUI installation * Manual installation * Risks * Blocklist * Using community nodes * Troubleshooting * Building community nodes * Creating nodes Creating nodes * Overview * Plan your node * Choose a node type * Choose a node building style * Node UI design * Choose node file structure * Build your node * Set up your development environment * Tutorial: Build a declarative-style node * Tutorial: Build a programmatic-style node * Reference * Node UI elements * Code standards * Versioning * Choose node file structure * Base files * Structure * Standard parameters * Declarative-style parameters * Programmatic-style parameters * Programmatic-style execute method * Codex files * Credentials files * HTTP request helpers * Item linking * Test your node * Run your node locally * Node linter * Troubleshooting * Deploy your node * Submit community nodes * Install private nodes * Hosting n8n * Community vs Enterprise * Installation Installation * npm * Docker * Server setups * Digital Ocean * Heroku * Hetzner * Amazon Web Services * Azure * Google Cloud * Docker Compose * Updating * Configuration Configuration * Environment variables * Binary data * Credentials * Database * Deployment * Endpoints * Executions * External data storage * External hooks * External secrets * Logs * License * Nodes * Queue mode * Security * Source control * Task runners * Timezone and localization * User management and 2FA * Workflows * Configuration methods * Configuration examples * Isolate n8n * Configure the Base URL * Configure custom SSL certificate authorities * Set a custom encryption key * Configure workflow timeouts * Specify custom nodes location * Enable modules in Code node * Set the timezone * Specify user folder path * Configure webhook URLs with reverse proxy * Enable Prometheus metrics * Supported databases and settings * Task runners * User management * Logging and monitoring Logging and monitoring * Logging * Monitoring * Security audit * Scaling and performance Scaling and performance * Overview * Performance and benchmarking * Configuring queue mode * Concurrency control * Execution data * Binary data * External storage for binary data * Memory-related errors * Securing n8n Securing n8n * Overview * Set up SSL * Set up SSO * Security audit * Disable the API * Opt out of data collection * Blocking nodes * Hardening task runners * Starter Kits Starter Kits * AI Starter Kit * Architecture Architecture * Overview * Database structure * Using the CLI Using the CLI * CLI commands * Code in n8n * Expressions * Using the Code node * AI coding * Built in methods and variables Built in methods and variables * Overview * Current node input * Output of other nodes * Date and time * JMESPath * HTTP node * LangChain Code node * n8n metadata * Convenience methods * Data transformation functions * Arrays * Booleans * Dates * Numbers * Objects * Strings * Custom variables Custom variables * Create custom variables * Cookbook Cookbook * Handling dates * Query JSON with JMESPath * Built-in methods and variables examples * execution * getWorkflowStaticData * Retrieve linked items from earlier in the workflow * (node-name).all * vars * Expressions * Check incoming data * Common issues * Code node * Get number of items returned by last node * Get the binary data buffer * Output to the browser console * HTTP Request node * Pagination * Advanced AI * Tutorial: Build an AI workflow in n8n * LangChain in n8n LangChain in n8n * Overview * Langchain concepts in n8n * LangChain learning resources * Use LangSmith with n8n * Examples and concepts Examples and concepts * Introduction * What is a chain? * What is an agent? * Agents vs chains example * What is memory? * What is a tool? * Use Google Sheets as a data source * Call an API to fetch data * Set a human fallback for AI workflows * Let AI specify tool parameters * What is a vector database? * Populate a Pinecone vector database from a website * API * Authentication * Pagination * Using the API playground * API reference * Embed * Prerequisites * Deployment * Configuration * Workflow management * Workflows templates * White labelling 1. Code in n8n 2. Cookbook 3. Built-in methods and variables examples Feature availability * Available on Self-hosted Enterprise and Pro and Enterprise Cloud plans. * You need access to the n8n instance owner account to create variables. `vars` contains all Variables for the active environment. It's read-only: you can access variables using `vars`, but must set them using the UI. JavaScriptPython <table><tbody><tr><td><div><pre><span></span><span>1</span> <span>2</span></pre></div></td><td><div><pre><span></span><code><span>// Access a variable</span> <span>$vars</span><span>.</span><span><</span><span>variable</span><span>-</span><span>name</span><span>></span> </code></pre></div></td></tr></tbody></table> <table><tbody><tr><td><div><pre><span></span><span>1</span> <span>2</span></pre></div></td><td><div><pre><span></span><code><span># Access a variable</span> <span>_vars</span><span>.<</span><span>variable</span><span>-</span><span>name</span><span>></span> </code></pre></div></td></tr></tbody></table> --- ## Page: https://docs.n8n.io/code/cookbook/expressions/ 1. Code in n8n 2. Cookbook 3. Expressions This section contains examples and recipes for tasks you can do with expressions. Python support You can use Python in the Code node. It isn't available in expressions. * Check incoming data * Common issues * Built-in methods and variables reference * Expressions --- ## Page: https://docs.n8n.io/code/cookbook/expressions/check-incoming-data/ At times, you may want to check the incoming data. If the incoming data doesn't match a condition, you may want to return a different value. For example, you want to check if a variable from the previous node is empty and return a string if it's empty. Use the following code snippet to return `not found` if the variable is empty. <table><tbody><tr><td><div><pre><span></span><span>1</span></pre></div></td><td><div><pre><span></span><code><span>{{</span><span>$json</span><span>[</span><span>"variable_name"</span><span>]</span><span>?</span><span> </span><span>$json</span><span>[</span><span>"variable_name"</span><span>]</span><span> </span><span>:</span><span>"not found"</span><span>}}</span> </code></pre></div></td></tr></tbody></table> The above expression uses the ternary operator. You can learn more about the ternary operator here. As an alternative, you can use the nullish coalescing operator (??) or the logical or operator (||): <table><tbody><tr><td><div><pre><span></span><span>1</span> <span>2</span></pre></div></td><td><div><pre><span></span><code><span>{{</span><span> </span><span>$x</span><span> </span><span>??</span><span> </span><span>"default value"</span><span> </span><span>}}</span> <span>{{</span><span> </span><span>$x</span><span> </span><span>||</span><span> </span><span>"default value"</span><span> </span><span>}}</span> </code></pre></div></td></tr></tbody></table> In either of the above two cases, the value of `$x` will be used if it's set to a non-null, non-false value. The string `default value` is the fallback value. --- ## Page: https://docs.n8n.io/code/cookbook/expressions/common-issues/ Here are some common errors and issues related to expressions and steps to resolve or troubleshoot them. ## The 'JSON Output' in item 0 contains invalid JSON# This error occurs when you use JSON mode but don't provide a valid JSON object. Depending on the problem with the JSON object, the error sometimes display as `The 'JSON Output' in item 0 does not contain a valid JSON object`. To resolve this, make sure that the code you provide is valid JSON: * Check the JSON with a JSON validator. * Check that your JSON object doesn't reference undefined input data. This may occur if the incoming data doesn't always include the same fields. ## Can't get data for expression# This error occurs when n8n can't retrieve the data referenced by an expression. Often, this happens when the preceding node hasn't been run yet. Another variation of this may appear as `Referenced node is unexecuted`. In that case, the full text of this error will tell you the exact node that isn't executing in this format: > An expression references the node '<node-name>', but it hasn’t been executed yet. Either change the expression, or re-wire your workflow to make sure that node executes first. To begin troubleshooting, test the workflow up to the named node. For nodes that use JavaScript or other custom code, you can check if a previous node has executed before trying to use its value by checking the following: <table><tbody><tr><td><div><pre><span></span><span>1</span></pre></div></td><td><div><pre><span></span><code><span>$</span><span>(</span><span>"<node-name>"</span><span>).</span><span>isExecuted</span> </code></pre></div></td></tr></tbody></table> As an example, this JSON references the parameters of the input data. This error will display if you test this step without connecting it to another node: <table><tbody><tr><td><div><pre><span></span><span>1</span> <span>2</span> <span>3</span></pre></div></td><td><div><pre><span></span><code><span>{</span> <span> </span><span>"my_field_1"</span><span>:</span><span> </span><span>{{</span><span> </span><span>$input</span><span>.</span><span>params</span><span> </span><span>}}</span> <span>}</span> </code></pre></div></td></tr></tbody></table> ## Invalid syntax# This error occurs when you use an expression that has a syntax error. For example, the expression in this JSON includes a trailing period, which results in an invalid syntax error: <table><tbody><tr><td><div><pre><span></span><span>1</span> <span>2</span> <span>3</span> <span>4</span></pre></div></td><td><div><pre><span></span><code><span>{</span> <span> </span><span>"my_field_1"</span><span>:</span><span> </span><span>"value"</span><span>,</span> <span> </span><span>"my_field_2"</span><span>:</span><span> </span><span>{{</span><span> </span><span>$</span><span>(</span><span>'If'</span><span>).</span><span>item</span><span>.</span><span>json</span><span>.</span><span> </span><span>}}</span> <span>}</span> </code></pre></div></td></tr></tbody></table> To resolve this error, check your expression syntax to make sure they follow the expected format. --- ## Page: https://docs.n8n.io/code/cookbook/code-node/ * Using n8n * Integrations * Hosting n8n * Code in n8n * Advanced AI * API * Embed * n8n home ↗ * Forum ↗ * Blog ↗ --- ## Page: https://docs.n8n.io/code/cookbook/code-node/number-items-last-node/ 1. Code in n8n 2. Cookbook 3. Code node To get the number of items returned by the previous node: JavaScriptPython <table><tbody><tr><td><div><pre><span></span><span> 1</span> <span> 2</span> <span> 3</span> <span> 4</span> <span> 5</span> <span> 6</span> <span> 7</span> <span> 8</span> <span> 9</span> <span>10</span> <span>11</span> <span>12</span> <span>13</span> <span>14</span> <span>15</span> <span>16</span></pre></div></td><td><div><pre><span></span><code><span>if</span><span> </span><span>(</span><span>Object</span><span>.</span><span>keys</span><span>(</span><span>items</span><span>[</span><span>0</span><span>].</span><span>json</span><span>).</span><span>length</span><span> </span><span>===</span><span> </span><span>0</span><span>)</span><span> </span><span>{</span> <span>return</span><span> </span><span>[</span> <span> </span><span>{</span> <span> </span><span>json</span><span>:</span><span> </span><span>{</span> <span> </span><span>results</span><span>:</span><span> </span><span>0</span><span>,</span> <span> </span><span>}</span> <span> </span><span>}</span> <span>]</span> <span>}</span> <span>return</span><span> </span><span>[</span> <span> </span><span>{</span> <span> </span><span>json</span><span>:</span><span> </span><span>{</span> <span> </span><span>results</span><span>:</span><span> </span><span>items</span><span>.</span><span>length</span><span>,</span> <span> </span><span>}</span> <span> </span><span>}</span> <span>];</span> </code></pre></div></td></tr></tbody></table> The output will be similar to the following. <table><tbody><tr><td><div><pre><span></span><span>1</span> <span>2</span> <span>3</span> <span>4</span> <span>5</span></pre></div></td><td><div><pre><span></span><code><span>[</span> <span> </span><span>{</span> <span> </span><span>"results"</span><span>:</span><span> </span><span>8</span> <span> </span><span>}</span> <span>]</span> </code></pre></div></td></tr></tbody></table> <table><tbody><tr><td><div><pre><span></span><span> 1</span> <span> 2</span> <span> 3</span> <span> 4</span> <span> 5</span> <span> 6</span> <span> 7</span> <span> 8</span> <span> 9</span> <span>10</span> <span>11</span> <span>12</span> <span>13</span> <span>14</span> <span>15</span> <span>16</span></pre></div></td><td><div><pre><span></span><code><span>if</span> <span>len</span><span>(</span><span>items</span><span>[</span><span>0</span><span>]</span><span>.</span><span>json</span><span>)</span> <span>==</span> <span>0</span><span>:</span> <span>return</span> <span>[</span> <span>{</span> <span>"json"</span><span>:</span> <span>{</span> <span>"results"</span><span>:</span> <span>0</span><span>,</span> <span>}</span> <span>}</span> <span>]</span> <span>else</span><span>:</span> <span>return</span> <span>[</span> <span>{</span> <span>"json"</span><span>:</span> <span>{</span> <span>"results"</span><span>:</span> <span>items</span><span>.</span><span>length</span><span>,</span> <span>}</span> <span>}</span> <span>]</span> </code></pre></div></td></tr></tbody></table> The output will be similar to the following. <table><tbody><tr><td><div><pre><span></span><span>1</span> <span>2</span> <span>3</span> <span>4</span> <span>5</span></pre></div></td><td><div><pre><span></span><code><span>[</span> <span> </span><span>{</span> <span> </span><span>"results"</span><span>:</span><span> </span><span>8</span> <span> </span><span>}</span> <span>]</span> </code></pre></div></td></tr></tbody></table> --- ## Page: https://docs.n8n.io/code/cookbook/code-node/get-binary-data-buffer/ The binary data buffer contains all the binary file data processed by a workflow. You need to access it if you want to perform operations on the binary data, such as: * Manipulating the data: for example, adding column headers to a CSV file. * Using the data in calculations: for example, calculating a hash value based on it. * Complex HTTP requests: for example, combining file upload with sending other data formats. Not available in Python `getBinaryDataBuffer()` isn't supported when using Python. You can access the buffer using n8n's `getBinaryDataBuffer()` function: <table><tbody><tr><td><div><pre><span></span><span>1</span> <span>2</span> <span>3</span> <span>4</span> <span>5</span> <span>6</span></pre></div></td><td><div><pre><span></span><code><span>/* </span> <span>* itemIndex: number. The index of the item in the input data.</span> <span>* binaryPropertyName: string. The name of the binary property. </span> <span>* The default in the Read/Write File From Disk node is 'data'. </span> <span>*/</span> <span>let</span><span> </span><span>binaryDataBufferItem</span><span> </span><span>=</span><span> </span><span>await</span><span> </span><span>this</span><span>.</span><span>helpers</span><span>.</span><span>getBinaryDataBuffer</span><span>(</span><span>itemIndex</span><span>,</span><span> </span><span>binaryPropertyName</span><span>);</span> </code></pre></div></td></tr></tbody></table> For example: <table><tbody><tr><td><div><pre><span></span><span>1</span> <span>2</span></pre></div></td><td><div><pre><span></span><code><span>let</span><span> </span><span>binaryDataBufferItem</span><span> </span><span>=</span><span> </span><span>await</span><span> </span><span>this</span><span>.</span><span>helpers</span><span>.</span><span>getBinaryDataBuffer</span><span>(</span><span>0</span><span>,</span><span> </span><span>'data'</span><span>);</span> <span>// Returns the data in the binary buffer for the first input item</span> </code></pre></div></td></tr></tbody></table> You should always use the `getBinaryDataBuffer()` function, and avoid using older methods of directly accessing the buffer, such as targeting it with expressions like `items[0].binary.data.data`. --- ## Page: https://docs.n8n.io/code/cookbook/code-node/console-log/ ## Output to the browser console with `console.log()` or `print()` in the Code node# You can use `console.log()` or `print()` in the Code node to help when writing and debugging your code. For help opening your browser console, refer to this guide by Balsamiq. ## console.log (JavaScript)# For technical information on `console.log()`, refer to the MDN developer docs. For example, copy the following code into a Code node, then open your console and run the node: <table><tbody><tr><td><div><pre><span></span><span>1</span> <span>2</span></pre></div></td><td><div><pre><span></span><code><span>let</span><span> </span><span>a</span><span> </span><span>=</span><span> </span><span>"apple"</span><span>;</span> <span>console</span><span>.</span><span>log</span><span>(</span><span>a</span><span>);</span> </code></pre></div></td></tr></tbody></table> ## print (Python)# For technical information on `print()`, refer to the Real Python's guide. For example, set your Code node **Language** to **Python**, copy the following code into the node, then open your console and run the node: <table><tbody><tr><td><div><pre><span></span><span>1</span> <span>2</span></pre></div></td><td><div><pre><span></span><code><span>a</span> <span>=</span> <span>"apple"</span> <span>print</span><span>(</span><span>a</span><span>)</span> </code></pre></div></td></tr></tbody></table> ### Handling an output of `[object Object]`# If the console displays `[object Object]` when you print, check the data type, then convert it as needed. To check the data type: <table><tbody><tr><td><div><pre><span></span><span>1</span></pre></div></td><td><div><pre><span></span><code><span>print</span><span>(</span><span>type</span><span>(</span><span>myData</span><span>))</span> </code></pre></div></td></tr></tbody></table> #### JsProxy# If `type()` outputs `<class 'pyodide.ffi.JsProxy'>`, you need to convert the JsProxy to a native Python object using `to_py()`. This occurs when working with data in the n8n node data structure, such as node inputs and outputs. For example, if you want to print the data from a previous node in the workflow: <table><tbody><tr><td><div><pre><span></span><span>1</span> <span>2</span> <span>3</span> <span>4</span> <span>5</span> <span>6</span></pre></div></td><td><div><pre><span></span><code><span>previousNodeData</span> <span>=</span> <span>_</span><span>(</span><span>"<node-name>"</span><span>)</span><span>.</span><span>all</span><span>();</span> <span>for</span> <span>item</span> <span>in</span> <span>previousNodeData</span><span>:</span> <span># item is of type <class 'pyodide.ffi.JsProxy'></span> <span># You need to convert it to a Dict</span> <span>itemDict</span> <span>=</span> <span>item</span><span>.</span><span>json</span><span>.</span><span>to_py</span><span>()</span> <span>print</span><span>(</span><span>itemDict</span><span>)</span> </code></pre></div></td></tr></tbody></table> Refer to the Pyodide documentation on JsProxy for more information on this class. --- ## Page: https://docs.n8n.io/code/cookbook/http-node/ The HTTP Request node is one of the most versatile nodes in n8n. Use this node to make HTTP requests to query data from any app or service with a REST API. Refer to HTTP Request for information on node settings. * Pagination * HTTP Request * Built-in methods and variables reference * Expressions --- ## Page: https://docs.n8n.io/code/cookbook/http-node/pagination/ The HTTP Request node supports pagination. This page provides some example configurations, including using the HTTP node variables. Refer to HTTP Request for more information on the node. API differences Different APIs implement pagination in different ways. Check the API documentation for the API you're using for details. You need to find out things like: * Does the API provide the URL for the next page? * Are there API-specific limits on page size or page number? * The structure of the data that the API returns. In the HTTP Request node, select **Add Option** > **Pagination**. ## Use a URL from the response to get the next page using `$response`# If the API returns the URL of the next page in its response: 1. Set **Pagination Mode** to **Response Contains Next URL**. n8n displays the parameters for this option. 2. In **Next URL**, use an expression to set the URL. The exact expression depends on the data returned by your API. For example, if the API includes a parameter called `next-page` in the response body: <table><tbody><tr><td><div><pre><span></span><span>1</span></pre></div></td><td><div><pre><span></span><code><span>{{</span><span> </span><span>$response</span><span>.</span><span>body</span><span>[</span><span>"next-page"</span><span>]</span><span> </span><span>}}</span> </code></pre></div></td></tr></tbody></table> ## Get the next page by number using `$pageCount`# If the API you're using supports targeting a specific page by number: 1. Set **Pagination Mode** to **Update a Parameter in Each Request**. 2. Set **Type** to **Query**. 3. Enter the **Name** of the query parameter. This depends on your API and is usually described in its documentation. For example, some APIs use a query parameter named `page` to set the page. So **Name** would be `page`. 4. Hover over **Value** and toggle **Expression** on. 5. Enter `{{ $pageCount + 1 }}` `$pageCount` is the number of pages the HTTP Request node has fetched. It starts at zero. Most API pagination counts from one (the first page is page one). This means that adding `+1` to `$pageCount` means the node fetches page one on its first loop, page two on its second, and so on. ## Navigate pagination through body parameters# If the API you're using allows you to paginate through the body parameters: 1. Set the HTTP Request Method to **POST** 2. Set **Pagination Mode** to **Update a Parameter in Each Request**. 3. Select **Body** in the **Type** parameter. 4. Enter the **Name** of the body parameter. This depends on the API you're using. `page` is a common key name. 5. Hover over **Value** and toggle **Expression** on. 6. Enter `{{ $pageCount + 1 }}` ## Set the page size in the query# If the API you're using supports choosing the page size in the query: 1. Select **Send Query Parameters** in main node parameters (this is the parameters you see when you first open the node, not the settings within options). 2. Enter the **Name** of the query parameter. This depends on your API. For example, a lot of APIs use a query parameter named `limit` to set page size. So **Name** would be `limit`. 3. In **Value**, enter your page size. --- ## Page: https://docs.n8n.io/advanced-ai/intro-tutorial/ ## Build an AI chat agent with n8n# Welcome to the introductory tutorial for building AI workflows with n8n. Whether you have used n8n before, or this is your first time, we will show you how the building blocks of AI workflows fit together and construct a working AI-powered chat agent which you can easily customize for your own purposes. 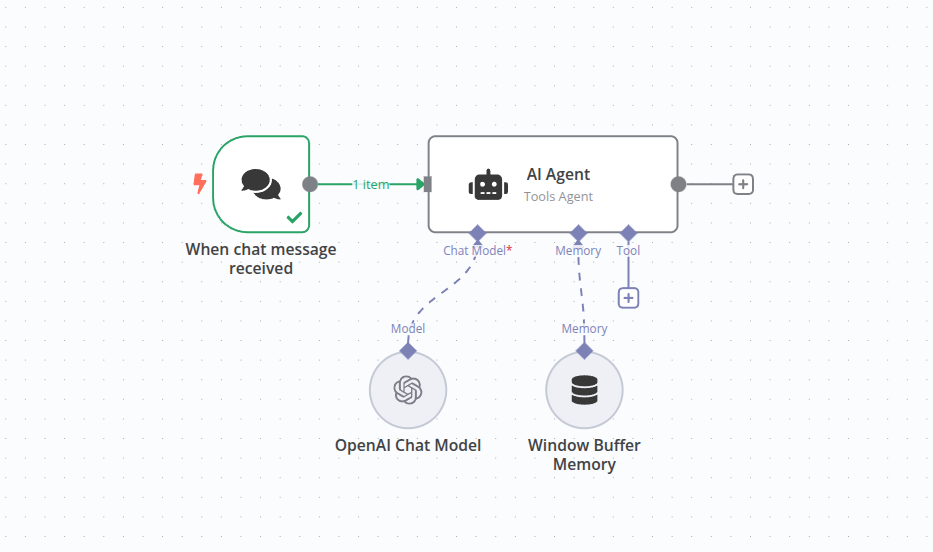 Many people find it easier to take in new information in video format. This tutorial is based on one of n8n's popular videos, linked below. Watch the video or read the steps here, or both! ### What you will need# * **n8n**: For this tutorial we recommend using the n8n cloud service - there is a free trial for new users! For a self hosted service, refer to the installation pages. * **Credentials for a chat model**: This tutorial uses OpenAI, but you can easily use DeepSeek, Google Gemini, Groq, Azure, and others (see the sub-nodes documentation for more). ### What you will learn# * AI concepts in n8n * How to use the AI Agent node * Working with Chat input * Connecting with AI models * Customising input * Observing the conversation * Adding persistence ## AI concepts in n8n# If you're already familiar with AI, feel free to skip this section. This is a basic introduction to AI concepts and how they can be used in n8n workflows. An AI agent builds on Large Language Models (LLMs), which generate text based on input by predicting the next word. While LLMs only process input to produce output, AI agents add goal-oriented functionality. They can use tools, process their outputs, and make decisions to complete tasks and solve problems. In n8n, the AI agent is represented as a node with some extra connections. | Feature | LLM | AI Agent | | --- | --- | --- | | Core Capability | Text generation | Goal-oriented task completion | | Decision-Making | None | Yes | | Uses Tools/APIs | No | Yes | | Workflow Complexity | Single-step | Multi-step | | Scope | Generates language | Performs complex, real-world tasks | | Example | LLM generating a paragraph | An agent scheduling an appointment | By incorporating the AI agent as a node, n8n can combine AI-driven steps with traditional programming for efficient, real-world workflows. For instance, simpler tasks, like validating an email address, do not require AI, whereas a complex tasks, like processing the _content_ of an email or dealing with multimodal inputs (e.g., images, audio), are excellent uses of an AI agent. ## 1\. Create a new workflow# When you open n8n, you'll see either: * An empty workflow: if you have no workflows and you're logging in for the first time. Use this workflow. * The **Workflows** list on the **Overview** page. Select the  **button** to create a new workflow. ## 2\. Add a trigger node# Every workflow needs somewhere to start. In n8n these are called 'trigger nodes'. For this workflow, we want to start with a chat node. 1. Select **Add first step** or press Tab to open the node menu. 2. Search for **Chat Trigger**. n8n shows a list of nodes that match the search. 3. Select **Chat Trigger** to add the node to the canvas. n8n opens the node. 4. Close the node details view (Select **Back to canvas**) to return to the canvas. More about the Chat Trigger node... The trigger node generates output when there is an event causing it to trigger. In this case we want to be able to type in text to cause the workflow to run. In production, this trigger can be hooked up to a public chat interface as provided by n8n or embedded into another website. To start this simple workflow we will just use the built-in local chat interface to communicate, so no further setup is required. ## 3\. Add an AI Agent Node# The AI Agent node is the core of adding AI to your workflows. 1. Select the **Add node**  connector on the trigger node to bring up the node search. 2. Start typing "AI" and choose the **AI agent** node to add it. 3. The editing view of the **AI agent** will now be displayed. 4. There are some fields which can be changed. As we're using the **Chat Trigger** node, the default setting for the source and specification of the prompt don't need to be changed. ## 4\. Configure the node# AI agents require a chat model to be attached to process the incoming prompts. 1. Add a chat model by clicking the plus  button underneath the **Chat Model** connection on the **AI Agent** node (it's the first connection along the bottom of the node). 2. The search dialog will appear, filtered on 'Language Models'. These are the models with built-in support in n8n. For this tutorial we will use **OpenAI Chat Model**. 3. Selecting the **OpenAI Chat model** from the list will attach it to the **AI Agent** node and open the node editor. One of the parameters which can be changed is the 'Model'. Note that for the basic OpenAI accounts, only the 'gpt-4o-mini' model is allowed. Which chat model? As mentioned earlier, the LLM is the component which generates the text according to a prompt it is given. LLMs have to be created and trained, usually an intensive process. Different LLMS may have different capabilities or specialties, depending on the data they were trained with. ## 5\. Add credentials (if needed)# In order for n8n to communicate with the chat model, it will need some credentials (login data giving it access to an account on a different online service). If you already have credentials set up for OpenAI, these should appear by default in the credentials selector. Otherwise you can use the Credentials selector to help you add a new credential. 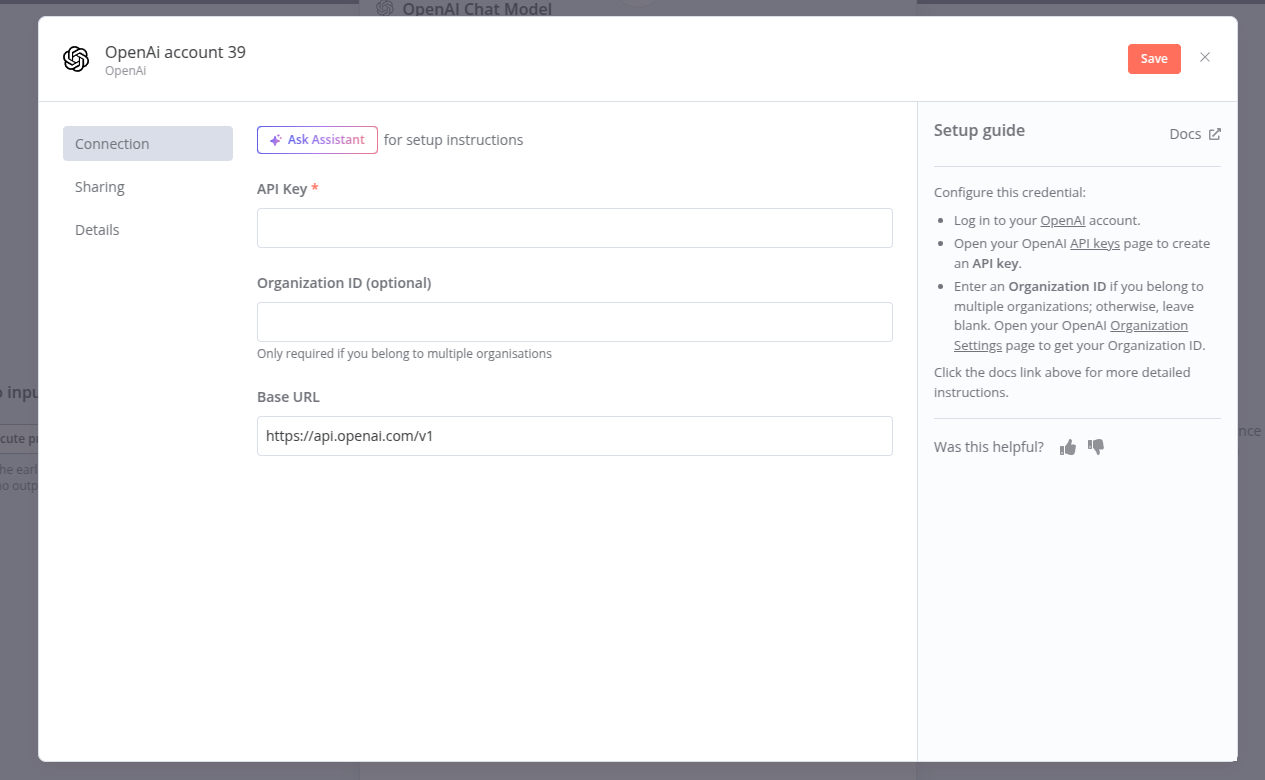 1. To add a new credential, click on the text which says 'Select credential'. An option to add a new credential will appear 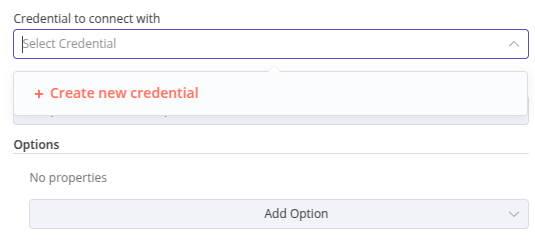 2. This credential just needs an API key. When adding credentials of any type, check the text to the right-hand side. In this case it has a handy link to take you straight to your OpenAI account to retrieve the API key. 3. The API key is just one long string. That's all you need for this particular credential. Copy it from the OpenAI website and paste it into the **API key** section. Keeping your credentials safe Credentials are private pieces of information issued by apps and services to authenticate you as a user and allow you to connect and share information between the app or service and the n8n node. The type of information required varies depending on the app/service concerned. You should be careful about sharing or revealing the credentials outside of n8n. ## 6\. Test the node# Now that the node is connected to the **Chat Trigger** and a chat model, we can test this part of the workflow. 1. Click on the 'Chat' button near the bottom of the canvas. This opens up a local chat window on the left and the AI agent logs on the right. 2. Type in a message and press Enter. You will now see the response from the chat model appear below your message. 3. The log window displays the inputs to and outputs from the AI Agent. 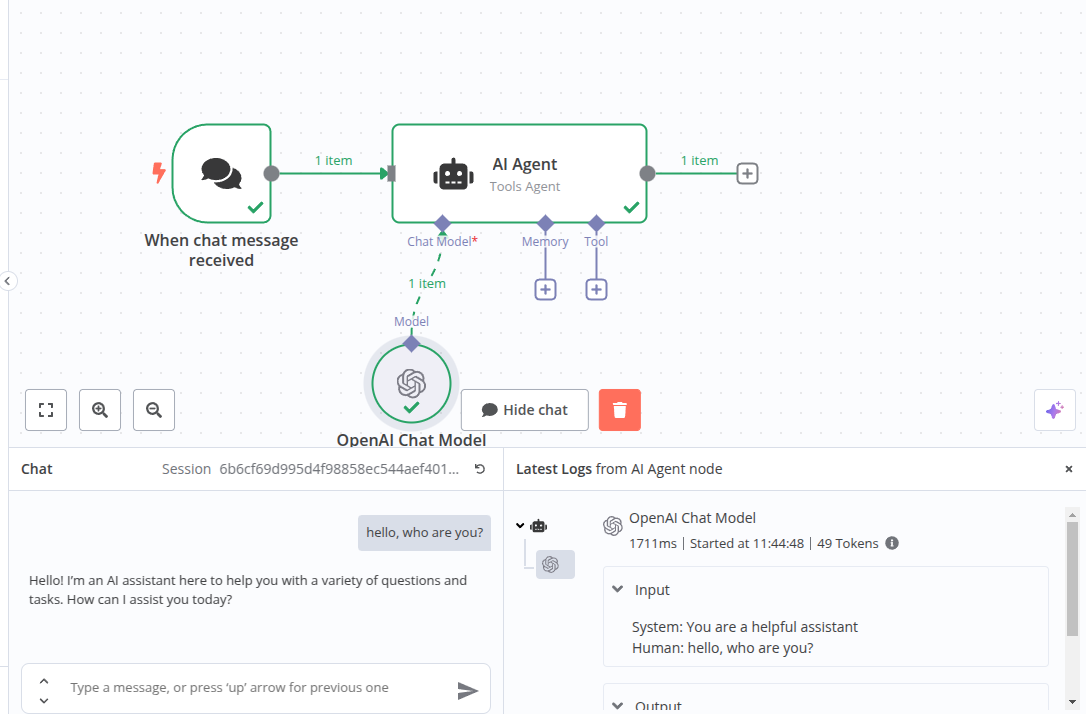 Accessing the logs... You can access the logs for the AI node even when you aren't using the chat interface. Open up the **AI Agent** node and click on the **Logs** tab in the right hand panel. 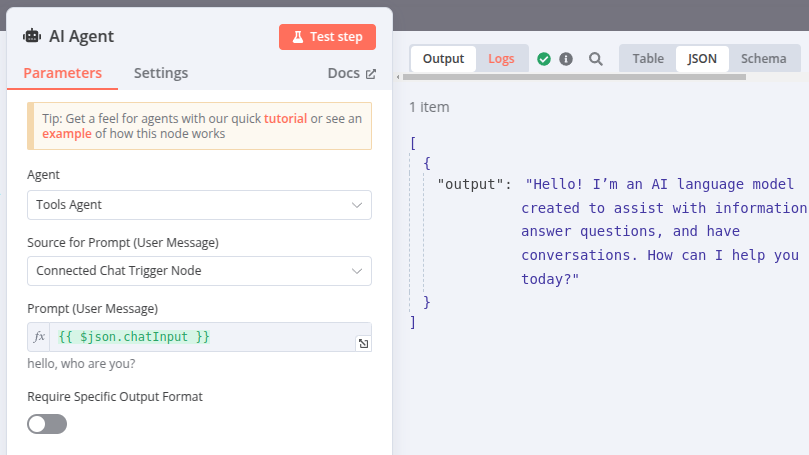 ## 7\. Changing the prompt# The logs in the previous step reveal some extra data - the system prompt. This is the default message that the **AI Agent** primes the chat model with. From the log you can see this is set to "You are a helpful assistant". We can however change this prompt to alter the behavior of the chat model. 1. Open the **AI Agent** node. In the bottom of the panel is a section labeled 'Options' and a selector labeled 'Add Option'. Use this to select 'System message' 2. The system message is now displayed. This is the same priming prompt we noticed before in the logs. Change the prompt to something else to prime the chat model in a different way. You could try something like "You are a brilliant poet who always replies in rhyming couplets" for example. 3. Close the node and return to the chat window. Repeat your message and notice how the output has changed. 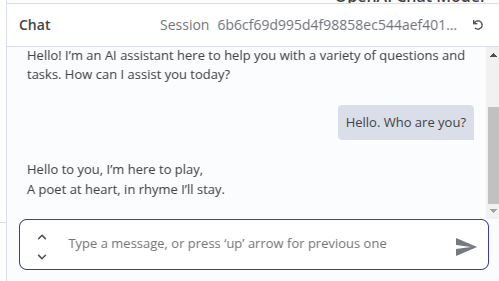 ## 8\. Adding persistence# The chat model is now giving us useful output, but there is something wrong with it which will become apparent when you try to have a conversation. 1. Use the chat and tell the chat model your name, for example "Hi there, my name is Nick". 2. Wait for the response, then type the message "What's my name?". The AI will not be able to tell you, however apologetic it may seem. The reason for this is we are not saving the context. The AI Agent has no memory.  3. In order to remember what has happened in the conversation, the AI Agent needs to preserve context. We can do this by adding memory to the **AI Agent** node. On the canvas click on the  on the bottom of the **AI Agent** node labeled "Memory". 4. From the panel which appears, select "Simple Memory". This will use the memory from the instance running n8n, and is usually sufficient for simple usage. The default value of 5 interactions should be sufficient here, but remember where this option is if you may want to change it later. 5. Repeat the exercise of having a conversation above, and see that the AI Agent now remembers your name. ## 9\. Saving the workflow# Before we leave the workflow editor, remember to save the workflow or all your changes will be lost. 1. Click on the "Save" button in the top right of the editor window. Your workflow will now be saved and you can return to it later to chat again or add new features. ## Congratulations!# You have taken your first steps in building useful and effective workflows with AI. In this tutorial we have investigated the basic building blocks of an AI workflow, added an **AI Agent** and a chat model, and adjusted the prompt to get the kind of output we wanted. We also added memory so the chat could retain context between messages. ## Next steps# Now you have seen how to create a basic AI workflow, there are plenty of resources to build on that knowledge and plenty of examples to give you ideas of where to go next: * Learn more about AI concepts and view examples in Examples and concepts. * Browse AI Workflow templates. * Find out how to enhance the AI agent with tools. --- ## Page: https://docs.n8n.io/advanced-ai/langchain/overview/ n8n provides a collection of nodes that implement LangChain's functionality. The LangChain nodes are configurable, meaning you can choose your preferred agent, LLM, memory, and so on. Alongside the LangChain nodes, you can connect any n8n node as normal: this means you can integrate your LangChain logic with other data sources and services. * Learning resources: n8n's documentation for LangChain assumes you're familiar with AI and LangChain concepts. This page provides links to learning resources. * LangChain concepts and features in n8n: how n8n represents LangChain concepts and features. --- ## Page: https://docs.n8n.io/advanced-ai/langchain/langchain-n8n/ This page explains how LangChain concepts and features map to n8n nodes. This page includes lists of the LangChain-focused nodes in n8n. You can use any n8n node in a workflow where you interact with LangChain, to link LangChain to other services. The LangChain features uses n8n's Cluster nodes. ## Trigger nodes# Chat Trigger ## Cluster nodes# Cluster nodes are node groups that work together to provide functionality in an n8n workflow. Instead of using a single node, you use a root node and one or more sub-nodes that extend the functionality of the node.  ### Root nodes# Each cluster starts with one root node. #### Chains# A chain is a series of LLMs, and related tools, linked together to support functionality that can't be provided by a single LLM alone. Available nodes: * Basic LLM Chain * Retrieval Q&A Chain * Summarization Chain * Sentiment Analysis * Text Classifier Learn more about chaining in LangChain. #### Agents# > An agent has access to a suite of tools, and determines which ones to use depending on the user input. Agents can use multiple tools, and use the output of one tool as the input to the next. Source Available nodes: * Agent Learn more about Agents in LangChain. #### Vector stores# Vector stores store embedded data, and perform vector searches on it. * Simple Vector Store * PGVector Vector Store * Pinecone Vector Store * Qdrant Vector Store * Supabase Vector Store * Zep Vector Store Learn more about Vector stores in LangChain. #### Miscellaneous# Utility nodes. LangChain Code: import LangChain. This means if there is functionality you need that n8n hasn't created a node for, you can still use it. ### Sub-nodes# Each root node can have one or more sub-nodes attached to it. #### Document loaders# Document loaders add data to your chain as documents. The data source can be a file or web service. Available nodes: * Default Document Loader * GitHub Document Loader Learn more about Document loaders in LangChain. #### Language models# LLMs (large language models) are programs that analyze datasets. They're the key element of working with AI. Available nodes: * Anthropic Chat Model * AWS Bedrock Chat Model * Cohere Model * Hugging Face Inference Model * Mistral Cloud Chat Model * Ollama Chat Model * Ollama Model * OpenAI Chat Model Learn more about Language models in LangChain. #### Memory# Memory retains information about previous queries in a series of queries. For example, when a user interacts with a chat model, it's useful if your application can remember and call on the full conversation, not just the most recent query entered by the user. Available nodes: * Motorhead * Redis Chat Memory * Postgres Chat Memory * Simple Memory * Xata * Zep Learn more about Memory in LangChain. #### Output parsers# Output parsers take the text generated by an LLM and format it to match the structure you require. Available nodes: * Auto-fixing Output Parser * Item List Output Parser * Structured Output Parser Learn more about Output parsers in LangChain. #### Retrievers# * Contextual Compression Retriever * MultiQuery Retriever * Vector Store Retriever * Workflow Retriever #### Text splitters# Text splitters break down data (documents), making it easier for the LLM to process the information and return accurate results. Available nodes: * Character Text Splitter * Recursive Character Text Splitter * Token Splitter n8n's text splitter nodes implements parts of LangChain's text\_splitter API. #### Tools# Utility tools. * Calculator * Code Tool * SerpAPI * Think Tool * Vector Store Tool * Wikipedia * Wolfram|Alpha * Workflow Tool #### Embeddings# > Embeddings capture the "relatedness" of text, images, video, or other types of information. (source) Available nodes: * Embeddings AWS Bedrock * Embeddings Cohere * Embeddings Google PaLM * Embeddings Hugging Face Inference * Embeddings Mistral Cloud * Embeddings Ollama * Embeddings OpenAI Learn more about Text embeddings in LangChain. #### Miscellaneous# * Chat Memory Manager --- ## Page: https://docs.n8n.io/advanced-ai/langchain/langchain-learning-resources/ You don't need to know details about LangChain to use n8n, but it can be helpful to learn a few concepts. This pages lists some learning resources that people at n8n have found helpful. The LangChain documentation includes introductions to key concepts and possible use cases. Choose the LangChain | Python or LangChain | JavaScript documentation for quickstarts, code examples, and API documentation. LangChain also provide code templates (Python only), offering ideas for potential use cases and common patterns. What Product People Need To Know About LangChain provides a list of terminology and concepts, explained with helpful metaphors. Aimed at a wide audience. If you prefer video, this YouTube series by Greg Kamradt works through the LangChain documentation, providing code examples as it goes. n8n offers space to discuss LangChain on the Discord. Join to share your projects and discuss ideas with the community. --- ## Page: https://docs.n8n.io/advanced-ai/langchain/langsmith/ LangSmith is a developer platform created by the LangChain team. You can connect your n8n instance to LangSmith to record and monitor runs in n8n, just as you can in a LangChain application. Feature availability Self-hosted n8n only. ## Connect your n8n instance to LangSmith# 1. Log in to LangSmith and get your API key. 2. Set the LangSmith environment variables: | Variable | Value | | --- | --- | | LANGCHAIN\_ENDPOINT | `"https://api.smith.langchain.com"` | | LANGCHAIN\_TRACING\_V2 | `true` | | LANGCHAIN\_API\_KEY | Set this to your API key | Set the variables so that they're available globally in the environment where you host your n8n instance. You can do this in the same way as the rest of your general configuration. These aren't n8n environment variables, so don't try to set them using the n8n configuration file. 3. Restart n8n. For information on using LangSmith, refer to LangSmith's documentation. --- ## Page: https://docs.n8n.io/advanced-ai/examples/introduction/ 1. Advanced AI 2. Examples and concepts This section provides explanations of important AI concepts, and workflow templates that highlight those concepts, with explanations and configuration guides. The examples cover common use cases and highlight different features of advanced AI in n8n. * **Agents and chains** Learn about agents and chains in AI, including exploring key differences using the example workflow. What's a chain in AI? What's an agent in AI? Demonstration of key differences between agents and chains * **Custom n8n Workflow Tool** Learn about tools in AI, then explore examples that use n8n workflows as custom tools to give your AI workflow access to more data. What's a tool in AI? Chat with Google Sheets Call an API to fetch data Set up a human fallback Let AI specify tool parameters with `$fromAI()` * **Vector databases** Learn about vector databases in AI, along with related concepts including embeddings and retrievers. What's a vector database? Populate a Pinecone vector database from a website * **Memory** Learn about memory in AI. What's memory in AI? * **AI workflow templates** You can browse AI templates, included community contributions, on the n8n website. Browse all AI templates --- ## Page: https://docs.n8n.io/advanced-ai/examples/understand-chains/ Chains bring together different components of AI to create a cohesive system. They set up a sequence of calls between the components. These components can include models and memory (though note that in n8n chains can't use memory). ## Chains in n8n# n8n provides three chain nodes: * Basic LLM Chain: use to interact with an LLM, without any additional components. * Question and Answer Chain: can connect to a vector store using a retriever, or to an n8n workflow using the Workflow Retriever node. Use this if you want to create a workflow that supports asking questions about specific documents. * Summarization Chain: takes an input and returns a summary. There's an important difference between chains in n8n and in other tools such as LangChain: none of the chain nodes support memory. This means they can't remember previous user queries. If you use LangChain to code an AI application, you can give your application memory. In n8n, if you need your workflow to support memory, use an agent. This is essential if you want users to be able to have a natural ongoing conversation with your app. --- ## Page: https://docs.n8n.io/advanced-ai/examples/understand-agents/ One way to think of an agent is as a chain that knows how to make decisions. Where a chain follows a predetermined sequence of calls to different AI components, an agent uses a language model to determine which actions to take. Agents are the part of AI that act as decision-makers. They can interact with other agents and tools. When you send a query to an agent, it tries to choose the best tools to use to answer. Agents adapt to your specific queries, as well as the prompts that configure their behavior. ## Agents in n8n# n8n provides one Agent node, which can act as different types of agent depending on the settings you choose. Refer to the Agent node documentation for details on the available agent types. When execute a workflow containing an agent, the agent runs multiple times. For example, it may do an initial setup, followed by a run to call a tool, then another run to evaluate the tool response and respond to the user. --- ## Page: https://docs.n8n.io/advanced-ai/examples/agent-chain-comparison/ * Using n8n * Integrations * Hosting n8n * Code in n8n * Advanced AI * API * Embed * n8n home ↗ * Forum ↗ * Blog ↗ 1. Advanced AI 2. Examples and concepts ## Demonstration of key differences between agents and chains# In this workflow you can choose whether your chat query goes to an agent or chain. It shows some of the ways that agents are more powerful than chains. ## Key features# This workflow uses: * Chat Trigger: start your workflow and respond to user chat interactions. The node provides a customizable chat interface. * Switch node: directs your query to either the agent or chain, depending on which you specify in your query. If you say "agent" it sends it to the agent. If you say "chain" it sends it to the chain. * Agent: the Agent node interacts with other components of the workflow and makes decisions about what tools to use. * Basic LLM Chain: the Basic LLM Chain node supports chatting with a connected LLM, but doesn't support memory or tools. ## Using the example# To load the template into your n8n instance: 1. Download the workflow JSON file. 2. Open a new workflow in your n8n instance. 3. Copy in the JSON, or select **Workflow menu**  > **Import from file...**. The example workflows use Sticky Notes to guide you: * Yellow: notes and information. * Green: instructions to run the workflow. * Orange: you need to change something to make the workflow work. * Blue: draws attention to a key feature of the example. --- ## Page: https://docs.n8n.io/advanced-ai/examples/understand-memory/ Memory is a key part of AI chat services. The memory keeps a history of previous messages, allowing for an ongoing conversation with the AI, rather than every interaction starting fresh. ## AI memory in n8n# To add memory to your AI workflow you can use either: * Simple Memory: stores a customizable length of chat history for the current session. This is the easiest to get started with. * One of the memory services that n8n provides nodes for. These include: * Motorhead * Redis Chat Memory * Postgres Chat Memory * Xata * Zep If you need to do advanced AI memory management in your workflows, use the Chat Memory Manager node. This node is useful when you: * Can't add a memory node directly. * Need to do more complex memory management, beyond what the memory nodes offer. For example, you can add this node to check the memory size of the Agent node's response, and reduce it if needed. * Want to inject messages to the AI that look like user messages, to give the AI more context. --- ## Page: https://docs.n8n.io/advanced-ai/examples/understand-tools/ In AI, 'tools' has a specific meaning. Tools act like addons that your AI can use to access extra context or resources. Here are a couple of other ways of expressing it: > Tools are interfaces that an agent can use to interact with the world (source) > We can think of these tools as being almost like functions that your AI model can call (source) ## AI tools in n8n# n8n provides tool sub-nodes that you can connect to your AI agent. As well as providing some popular tools, such as Wikipedia and SerpAPI, n8n provides three especially powerful tools: * Custom n8n Workflow Tool: use this to load any n8n workflow as a tool. * Custom Code Tool: write code that your agent can run. * HTTP Request Tool: make calls to fetch a website or data from an API. The next three examples highlight the Custom n8n Workflow Tool: * Chat with Google Sheets * Call an API to fetch data * Set up a human fallback You can also learn how to let AI dynamically specify parameters for tools with the `$fromAI()` function. --- ## Page: https://docs.n8n.io/advanced-ai/examples/data-google-sheets/ * Using n8n * Integrations * Hosting n8n * Code in n8n * Advanced AI * API * Embed * n8n home ↗ * Forum ↗ * Blog ↗ 1. Advanced AI 2. Examples and concepts Use n8n to bring your own data to AI. This workflow uses the Chat Trigger to provide the chat interface, and the Custom n8n Workflow Tool to call a second workflow that queries Google Sheets. ## Key features# This workflow uses: * Chat Trigger: start your workflow and respond to user chat interactions. The node provides a customizable chat interface. * Agent: the key piece of the AI workflow. The Agent interacts with other components of the workflow and makes decisions about what tools to use. * Custom n8n Workflow Tool: plug in n8n workflows as custom tools. In AI, a tool is an interface the AI can use to interact with the world (in this case, the data provided by your workflow). The AI model uses the tool to access information beyond its built-in dataset. ## Using the example# To load the template into your n8n instance: 1. Download the workflow JSON file. 2. Open a new workflow in your n8n instance. 3. Copy in the JSON, or select **Workflow menu**  > **Import from file...**. The example workflows use Sticky Notes to guide you: * Yellow: notes and information. * Green: instructions to run the workflow. * Orange: you need to change something to make the workflow work. * Blue: draws attention to a key feature of the example. --- ## Page: https://docs.n8n.io/advanced-ai/examples/api-workflow-tool/ Use n8n to bring data from any API to your AI. This workflow uses the Chat Trigger to provide the chat interface, and the Custom n8n Workflow Tool to call a second workflow that calls the API. The second workflow uses AI functionality to refine the API request based on the user's query. ## Key features# This workflow uses: * Chat Trigger: start your workflow and respond to user chat interactions. The node provides a customizable chat interface. * Agent: the key piece of the AI workflow. The Agent interacts with other components of the workflow and makes decisions about what tools to use. * Custom n8n Workflow Tool: plug in n8n workflows as custom tools. In AI, a tool is an interface the AI can use to interact with the world (in this case, the data provided by your workflow). The AI model uses the tool to access information beyond its built-in dataset. * A Basic LLM Chain with an Auto-fixing Output Parser and Structured Output Parser to read the user's query and set parameters for the API call based on the user input. ## Using the example# To load the template into your n8n instance: 1. Download the workflow JSON file. 2. Open a new workflow in your n8n instance. 3. Copy in the JSON, or select **Workflow menu**  > **Import from file...**. The example workflows use Sticky Notes to guide you: * Yellow: notes and information. * Green: instructions to run the workflow. * Orange: you need to change something to make the workflow work. * Blue: draws attention to a key feature of the example. --- ## Page: https://docs.n8n.io/advanced-ai/examples/human-fallback/ This is a workflow that tries to answer user queries using the standard GPT-4 model. If it can't answer, it sends a message to Slack to ask for human help. It prompts the user to supply an email address. This workflow uses the Chat Trigger to provide the chat interface, and the Custom n8n Workflow Tool to call a second workflow that handles checking for email addresses and sending the Slack message. ## Key features# This workflow uses: * Chat Trigger: start your workflow and respond to user chat interactions. The node provides a customizable chat interface. * Agent: the key piece of the AI workflow. The Agent interacts with other components of the workflow and makes decisions about what tools to use. * Custom n8n Workflow Tool: plug in n8n workflows as custom tools. In AI, a tool is an interface the AI can use to interact with the world (in this case, the data provided by your workflow). It allows the AI model to access information beyond its built-in dataset. ## Using the example# To load the template into your n8n instance: 1. Download the workflow JSON file. 2. Open a new workflow in your n8n instance. 3. Copy in the JSON, or select **Workflow menu**  > **Import from file...**. The example workflows use Sticky Notes to guide you: * Yellow: notes and information. * Green: instructions to run the workflow. * Orange: you need to change something to make the workflow work. * Blue: draws attention to a key feature of the example. --- ## Page: https://docs.n8n.io/advanced-ai/examples/using-the-fromai-function/ When configuring app node tools connected to the Tools Agent, many parameters can be filled in by the AI model itself. The AI model will use the context from the task and information from other connected tools to fill in the appropriate details. There are two ways to do this, and you can switch between them. ## Let the model fill in the parameter# Each appropriate parameter field in the tool's editing dialog has an extra button at the end: 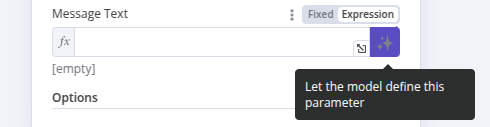 On activating this button, the AI Agent will fill in the expression for you, with no need for any further user input. The field itself is filled in with a message indicating that the parameter has been defined automatically by the model. If you want to define the parameter yourself, click on the 'X' in this box to revert to user-defined values. Note that the 'expression' field will now contain the expression generated by this feature, though you can now edit it further to add extra details as described in the following section. Warning Activating this feature will overwrite any manual definition you may have already added. ## Use the `$fromAI()` function# The `$fromAI()` function uses AI to dynamically fill in parameters for tools connected to the Tools AI agent. You can use the `$fromAI()` function in expressions within app nodes (like Gmail, Notion, or Slack) which are connected to the **AI Agent** as tools. To use the `$fromAI()` function, call it with the required `key` parameter: <table><tbody><tr><td><div><pre><span></span><span>1</span></pre></div></td><td><div><pre><span></span><code><span>{{</span><span> </span><span>$fromAI</span><span>(</span><span>'email'</span><span>)</span><span> </span><span>}}</span> </code></pre></div></td></tr></tbody></table> The `key` parameter and other arguments to the `$fromAI()` function aren't references to existing values. Instead, think of these arguments as hints that the AI model will use to populate the right data. For instance, if you choose a key called `email`, the AI Model will look for an email address in its context, other tools, and input data. In chat workflows, it may ask the user for an email address if it can't find one elsewhere. You can optionally pass other parameters like `description` to give extra context to the AI model. ### Parameters# The `$fromAI()` function accepts the following parameters: | Parameter | Type | Required? | Description | | --- | --- | --- | --- | | `key` | string |  | A string representing the key or name of the argument. This must be between 1 and 64 characters in length and can only contain lowercase letters, uppercase letters, numbers, underscores, and hyphens. | | `description` | string |  | A string describing the argument. | | `type` | string |  | A string specifying the data type. Can be string, number, boolean, or json (defaults to string). | | `defaultValue` | any |  | The default value to use for the argument. | ### Examples# As an example, you could use the following `$fromAI()` expression to dynamically populate a field with a name: <table><tbody><tr><td><div><pre><span></span><span>1</span></pre></div></td><td><div><pre><span></span><code><span>$fromAI</span><span>(</span><span>"name"</span><span>,</span><span> </span><span>"The commenter's name"</span><span>,</span><span> </span><span>"string"</span><span>,</span><span> </span><span>"Jane Doe"</span><span>)</span> </code></pre></div></td></tr></tbody></table> If you don't need the optional parameters, you could simplify this as: <table><tbody><tr><td><div><pre><span></span><span>1</span></pre></div></td><td><div><pre><span></span><code><span>$fromAI</span><span>(</span><span>"name"</span><span>)</span> </code></pre></div></td></tr></tbody></table> To dynamically populate the number of items you have in stock, you could use a `$fromAI()` expression like this: <table><tbody><tr><td><div><pre><span></span><span>1</span></pre></div></td><td><div><pre><span></span><code><span>$fromAI</span><span>(</span><span>"numItemsInStock"</span><span>,</span><span> </span><span>"Number of items in stock"</span><span>,</span><span> </span><span>"number"</span><span>,</span><span> </span><span>5</span><span>)</span> </code></pre></div></td></tr></tbody></table> If you only want to fill in parts of a field with a dynamic value from the model, you can use it in a normal expression as well. For example, if you want the model to fill out the `subject` parameter for an e-mail, but always pre-fix the generated value with the string 'Generated by AI:', you could use the following expression: <table><tbody><tr><td><div><pre><span></span><span>1</span></pre></div></td><td><div><pre><span></span><code><span>Generated</span><span> </span><span>by</span><span> </span><span>AI</span><span>:</span><span> </span><span>{{</span><span> </span><span>$fromAI</span><span>(</span><span>"subject"</span><span>)</span><span> </span><span>}}</span> </code></pre></div></td></tr></tbody></table> ### Templates# You can see the `$fromAI()` function in action in the following templates: * Angie, Personal AI Assistant with Telegram Voice and Text * Automate Customer Support Issue Resolution using AI Text Classifier * Scale Deal Flow with a Pitch Deck AI Vision, Chatbot and QDrant Vector Store --- ## Page: https://docs.n8n.io/advanced-ai/examples/understand-vector-databases/ Vector databases store information as numbers: > A vector database is a type of database that stores data as high-dimensional vectors, which are mathematical representations of features or attributes. (source) This enables fast and accurate similarity searches. With a vector database, instead of using conventional database queries, you can search for relevant data based on semantic and contextual meaning. ## A simplified example# A vector database could store the sentence "n8n is a source-available automation tool that you can self-host", but instead of storing it as text, the vector database stores an array of dimensions (numbers between 0 and 1) that represent its features. This doesn't mean turning each letter in the sentence into a number. Instead, the vectors in the vector database describe the sentence. Suppose that in a vector store `0.1` represents `automation tool`, `0.2` represents `source available`, and `0.3` represents `can be self-hosted`. You could end up with the following vectors: | Sentence | Vector (array of dimensions) | | --- | --- | | n8n is a source-available automation tool that you can self-host | \[0.1, 0.2, 0.3\] | | Zapier is an automation tool | \[0.1\] | | Make is an automation tool | \[0.1\] | | Confluence is a wiki tool that you can self-host | \[0.3\] | This example is very simplified In practice, vectors are far more complex. A vector can range in size from tens to thousands of dimensions. The dimensions don't have a one-to-one relationship to a single feature, so you can't translate individual dimensions directly into single concepts. This example gives an approximate mental model, not a true technical understanding. ## Demonstrating the power of similarity search# Qdrant provides vector search demos to help users understand the power of vector databases. The food discovery demo shows how a vector store can help match pictures based on visual similarities. > This demo uses data from Delivery Service. Users may like or dislike the photo of a dish, and the app will recommend more similar meals based on how they look. It's also possible to choose to view results from the restaurants within the delivery radius. (source) For full technical details, refer to the Qdrant demo-food-discovery GitHub repository. ## Embeddings, retrievers, text splitters, and document loaders# Vector databases require other tools to function: * Document loaders and text splitters: document loaders pull in documents and data, and prepare them for embedding. Document loaders can use text splitters to break documents into chunks. * Embeddings: these are the tools that turn the data (text, images, and so on) into vectors, and back into raw data. Note that n8n only supports text embeddings. * Retrievers: retrievers fetch documents from vector databases. You need to pair them with an embedding to translate the vectors back into data. --- ## Page: https://docs.n8n.io/advanced-ai/examples/vector-store-website/ Use n8n to scrape a website, load the data into Pinecone, then query it using a chat workflow. This workflow uses the HTTP node to get website data, extracts the relevant content using the HTML node, then uses the Pinecone Vector Store node to send it to Pinecone. ## Key features# This workflow uses: * HTTP node: fetches website data. * HTML node: simplifies the data by extracting the main content from the page. * Pinecone Vector Store node and Embeddings OpenAI: transform the data into vectors and store it in Pinecone. * Chat Trigger and Question and Answer Chain to query the vector database. ## Using the example# To load the template into your n8n instance: 1. Download the workflow JSON file. 2. Open a new workflow in your n8n instance. 3. Copy in the JSON, or select **Workflow menu**  > **Import from file...**. The example workflows use Sticky Notes to guide you: * Yellow: notes and information. * Green: instructions to run the workflow. * Orange: you need to change something to make the workflow work. * Blue: draws attention to a key feature of the example. --- ## Page: https://docs.n8n.io/api/authentication/ n8n uses API keys to authenticate API calls. Feature availability The n8n API isn't available during the free trial. Please upgrade to access this feature. ## Create an API key# 1. Log in to n8n. 2. Go to **Settings** > **n8n API**. 3. Select **Create an API key**. 4. Copy **My API Key** and use this key to authenticate your calls. ## Call the API using your key# Send the API key in your API call as a header named `X-N8N-API-KEY`. For example, say you want to get all active workflows. Your curl request will look like this: <table><tbody><tr><td><div><pre><span></span><span> 1</span> <span> 2</span> <span> 3</span> <span> 4</span> <span> 5</span> <span> 6</span> <span> 7</span> <span> 8</span> <span> 9</span> <span>10</span> <span>11</span></pre></div></td><td><div><pre><span></span><code><span># For a self-hosted n8n instance</span> curl<span> </span>-X<span> </span><span>'GET'</span><span> </span><span>\</span> <span> </span><span>'<N8N_HOST>:<N8N_PORT>/<N8N_PATH>/api/v<version-number>/workflows?active=true'</span><span> </span><span>\</span> <span> </span>-H<span> </span><span>'accept: application/json'</span><span> </span><span>\</span> <span> </span>-H<span> </span><span>'X-N8N-API-KEY: <your-api-key>'</span> <span># For n8n Cloud</span> curl<span> </span>-X<span> </span><span>'GET'</span><span> </span><span>\</span> <span> </span><span>'<your-cloud-instance>/api/v<version-number>/workflows?active=true'</span><span> </span><span>\</span> <span> </span>-H<span> </span><span>'accept: application/json'</span><span> </span><span>\</span> <span> </span>-H<span> </span><span>'X-N8N-API-KEY: <your-api-key>'</span> </code></pre></div></td></tr></tbody></table> ## Delete an API key# 1. Log in to n8n. 2. Go to **Settings** > **n8n API**. 3. Select **Delete** next to the key you want to delete. 4. Confirm the delete by selecting **Delete Forever**. --- ## Page: https://docs.n8n.io/api/pagination/ The default page size is 100 results. You can change the page size limit. The maximum permitted size is 250. When a response contains more than one page, it includes a cursor, which you can use to request the next pages. For example, say you want to get all active workflows, 150 at a time. Get the first page: <table><tbody><tr><td><div><pre><span></span><span> 1</span> <span> 2</span> <span> 3</span> <span> 4</span> <span> 5</span> <span> 6</span> <span> 7</span> <span> 8</span> <span> 9</span> <span>10</span> <span>11</span></pre></div></td><td><div><pre><span></span><code><span># For a self-hosted n8n instance</span> curl<span> </span>-X<span> </span><span>'GET'</span><span> </span><span>\</span> <span> </span><span>'<N8N_HOST>:<N8N_PORT>/<N8N_PATH>/api/v<version-number>/workflows?active=true&limit=150'</span><span> </span><span>\</span> <span> </span>-H<span> </span><span>'accept: application/json'</span><span> </span><span>\</span> <span> </span>-H<span> </span><span>'X-N8N-API-KEY: <your-api-key>'</span> <span># For n8n Cloud</span> curl<span> </span>-X<span> </span><span>'GET'</span><span> </span><span>\</span> <span> </span><span>'<your-cloud-instance>/api/v<version-number>/workflows?active=true&limit=150'</span><span> </span><span>\</span> <span> </span>-H<span> </span><span>'accept: application/json'</span><span> </span><span>\</span> <span> </span>-H<span> </span><span>'X-N8N-API-KEY: <your-api-key>'</span> </code></pre></div></td></tr></tbody></table> The response is in JSON format, and includes a `nextCursor` value. This is an example response. <table><tbody><tr><td><div><pre><span></span><span>1</span> <span>2</span> <span>3</span> <span>4</span> <span>5</span> <span>6</span> <span>7</span> <span>8</span> <span>9</span></pre></div></td><td><div><pre><span></span><code><span>{</span> <span> </span><span>"data"</span><span>:</span><span> </span><span>[</span> <span> </span><span>// The response contains an object for each workflow</span> <span> </span><span>{</span> <span> </span><span>// Workflow data</span> <span> </span><span>}</span> <span> </span><span>],</span> <span> </span><span>"nextCursor"</span><span>:</span><span> </span><span>"MTIzZTQ1NjctZTg5Yi0xMmQzLWE0NTYtNDI2NjE0MTc0MDA"</span> <span>}</span> </code></pre></div></td></tr></tbody></table> Then to request the next page: <table><tbody><tr><td><div><pre><span></span><span>1</span> <span>2</span> <span>3</span> <span>4</span> <span>5</span> <span>6</span> <span>7</span> <span>8</span> <span>9</span></pre></div></td><td><div><pre><span></span><code><span># For a self-hosted n8n instance</span> curl<span> </span>-X<span> </span><span>'GET'</span><span> </span><span>\</span> <span> </span><span>'<N8N_HOST>:<N8N_PORT>/<N8N_PATH>/api/v<version-number>/workflows?active=true&limit=150&cursor=MTIzZTQ1NjctZTg5Yi0xMmQzLWE0NTYtNDI2NjE0MTc0MDA'</span><span> </span><span>\</span> <span> </span>-H<span> </span><span>'accept: application/json'</span> <span># For n8n Cloud</span> curl<span> </span>-X<span> </span><span>'GET'</span><span> </span><span>\</span> <span> </span><span>'<your-cloud-instance>/api/v<version-number>/workflows?active=true&limit=150&cursor=MTIzZTQ1NjctZTg5Yi0xMmQzLWE0NTYtNDI2NjE0MTc0MDA'</span><span> </span><span>\</span> <span> </span>-H<span> </span><span>'accept: application/json'</span> </code></pre></div></td></tr></tbody></table> --- ## Page: https://docs.n8n.io/api/using-api-playground/ Feature availability The API playground isn't available on Cloud. It's available for all self-hosted pricing tiers. The n8n API comes with a built-in Swagger UI playground in self-hosted versions. This provides interactive documentation, where you can try out requests. The path to access the playground depends on your hosting. n8n constructs the path from values set in your environment variables: <table><tbody><tr><td><div><pre><span></span><span>1</span></pre></div></td><td><div><pre><span></span><code>N8N_HOST:N8N_PORT/N8N_PATH/api/v<api-version-number>/docs </code></pre></div></td></tr></tbody></table> The API version number is `1`. There may be multiple versions available in the future. Real data If you select **Authorize** and enter your API key in the API playground, you have access to your live data. This is useful for trying out requests. Be aware you can change or delete real data. The API includes built-in documentation about credential formats. This is available using the `credentials` endpoint: <table><tbody><tr><td><div><pre><span></span><span>1</span></pre></div></td><td><div><pre><span></span><code>N8N_HOST:N8N_PORT/N8N_PATH/api/v<api-version-number>/credentials/schema/<span>{</span>credentialTypeName<span>}</span> </code></pre></div></td></tr></tbody></table> How to find `credentialTypeName` To find the type, download your workflow as JSON and examine it. For example, for a Google Drive node the `{credentialTypeName}` is `googleDriveOAuth2Api`: <table><tbody><tr><td><div><pre><span></span><span>1</span> <span>2</span> <span>3</span> <span>4</span> <span>5</span> <span>6</span> <span>7</span> <span>8</span> <span>9</span></pre></div></td><td><div><pre><span></span><code><span>{</span> <span> </span><span>...</span><span>,</span> <span> </span><span>"credentials"</span><span>:</span><span> </span><span>{</span> <span> </span><span>"googleDriveOAuth2Api"</span><span>:</span><span> </span><span>{</span> <span> </span><span>"id"</span><span>:</span><span> </span><span>"9"</span><span>,</span> <span> </span><span>"name"</span><span>:</span><span> </span><span>"Google Drive"</span> <span> </span><span>}</span> <span> </span><span>}</span> <span>}</span> </code></pre></div></td></tr></tbody></table> --- ## Page: https://docs.n8n.io/api/api-reference/ * Using n8n * Integrations * Hosting n8n * Code in n8n * Advanced AI * API * Embed * n8n home ↗ * Forum ↗ * Blog ↗ --- ## Page: https://docs.n8n.io/embed/prerequisites/ Feature availability Embed requires an embed license. For more information about when to use Embed, as well as costs and licensing processes, refer to Embed on the n8n website. The requirements provided here are an example based on n8n Cloud and are for illustrative purposes only. Your requirements may vary depending on the number of users, workflows, and executions. Contact n8n for more information. | Component | Sizing | Supported | | --- | --- | --- | | CPU/vCPU | Minimum 10 CPU cycles, scaling as needed | Any public or private cloud | | Database | 512 MB - 4 GB SSD | SQLite or PostgreSQL | | Memory | 320 MB - 2 GB | | ## CPU considerations# n8n isn't CPU intensive so even small instances (of providers such as AWS and GCP) should be enough for most use cases. Usually, memory requirements supersede CPU requirements, so focus resources there when planning your infrastructure. ## Database considerations# n8n uses its database to store credentials, past executions, and workflows. A core feature of n8n is the flexibility to choose a database. All the supported databases have different advantages and disadvantages, which you have to consider individually and pick the one that best suits your needs. By default n8n creates an SQLite database if no database exists at the given location. n8n recommends that every n8n instance have a dedicated database. This helps to prevent dependencies and potential performance degradation. If it isn't possible to provide a dedicated database for every n8n instance, n8n recommends making use of Postgres's schema feature. For Postgres, the database must already exist on the DB-instance. The database user for the n8n process needs to have full permissions on all tables that they're using or creating. n8n creates and maintains the database schema. ### Best practices# * SSD storage. * In containerized cloud environments, ensure that the volume is persisted and mounted when stopping/starting a container. If not, all data is lost. * If using Postgres, don't use the `tablePrefix` configuration option. It will be deprecated in the near future. * Pay attention to the changelog of new versions and consider reverting migrations before downgrading. * Set up at least the basic database security and stability mechanisms such as IP allow lists and backups. ## Memory considerations# An n8n instance doesn't typically require large amounts of available memory. For example an n8n Cloud instance at idle requires ~100MB. It's the nature of your workflows and the data being processed that determines your memory requirements. For example, while most nodes just pass data to the next node in the workflow, the Code node creates a pre-processing and post-processing copy of the data. When dealing will large binary files, this can consume all available resources. --- ## Page: https://docs.n8n.io/embed/deployment/ Feature availability Embed requires an embed license. For more information about when to use Embed, as well as costs and licensing processes, refer to Embed on the n8n website. See the hosting documentation for detailed setup options. ## User data# n8n recommends that you follow the same or similar practices used internally for n8n Cloud: Save user data using Rook and, if an n8n server goes down, a new instance starts on another machine using the same data. Due to this, you don't need to use backups except in case of a catastrophic failure, or when a user wants to reactivate their account within your prescribed retention period (two weeks for n8n Cloud). ## Backups# n8n recommends creating nightly backups by attaching another container, and copying all data to this second container. In this manner, RAM usage is negligible, and so doesn't impact the amount of users you can place on the server. ## Restarting# If your instance is down or restarting, missed executions (for example, Cron or Webhook nodes) during this time aren't recoverable. If it's important for you to maintain 100% uptime, you need to build another proxy in front of it which caches the data. --- ## Page: https://docs.n8n.io/embed/configuration/ Feature availability Embed requires an embed license. For more information about when to use Embed, as well as costs and licensing processes, refer to Embed on the n8n website. ## Authentication# You can secure n8n by setting up User management, n8n's built-in authentication feature. n8n supports LDAP and SAML. ### Credential overwrites# To offer OAuth login to users, it's possible to overwrite credentials on a global basis. This credential data isn't visible to users but the backend uses it automatically. In the Editor UI, n8n hides all overwritten fields by default. This means that users are able to authenticate using OAuth by pressing the "connect" button on the credentials. n8n offers two ways to apply credential overwrites: using Environment Variable and using the REST API. #### Using environment variables# You can set credential overwrites using environment variable by setting the `CREDENTIALS_OVERWRITE_DATA` to `{ CREDENTIAL_NAME: { PARAMETER: VALUE }}`. Warning Even though this is possible, it isn't recommended. Environment variables aren't protected in n8n, so the data can leak to users. #### Using REST APIs# The recommended way is to load the data using a custom REST endpoint. Set the `CREDENTIALS_OVERWRITE_ENDPOINT` to a path under which this endpoint should be made available. Note The endpoints can be called just one at a time for security reasons. For example: 1. Activate the endpoint by setting the environment variable in the environment n8n runs under: <table><tbody><tr><td><div><pre><span></span><span>1</span></pre></div></td><td><div><pre><span></span><code><span>export</span><span> </span><span>CREDENTIALS_OVERWRITE_ENDPOINT</span><span>=</span>send-credentials </code></pre></div></td></tr></tbody></table> 2. A JSON file with the credentials to overwrite is then needed. For example, a `oauth-credentials.json` file to overwrite credentials for Asana and GitHub could look like this: <table><tbody><tr><td><div><pre><span></span><span> 1</span> <span> 2</span> <span> 3</span> <span> 4</span> <span> 5</span> <span> 6</span> <span> 7</span> <span> 8</span> <span> 9</span> <span>10</span></pre></div></td><td><div><pre><span></span><code><span>{</span> <span> </span><span>"asanaOAuth2Api"</span><span>:</span><span> </span><span>{</span> <span> </span><span>"clientId"</span><span>:</span><span> </span><span>"<id>"</span><span>,</span> <span> </span><span>"clientSecret"</span><span>:</span><span> </span><span>"<secret>"</span> <span> </span><span>},</span> <span> </span><span>"githubOAuth2Api"</span><span>:</span><span> </span><span>{</span> <span> </span><span>"clientId"</span><span>:</span><span> </span><span>"<id>"</span><span>,</span> <span> </span><span>"clientSecret"</span><span>:</span><span> </span><span>"<secret>"</span> <span> </span><span>}</span> <span>}</span> </code></pre></div></td></tr></tbody></table> 3. Then apply it to the instance by sending it using curl: <table><tbody><tr><td><div><pre><span></span><span>1</span></pre></div></td><td><div><pre><span></span><code>curl<span> </span>-H<span> </span><span>"Content-Type: application/json"</span><span> </span>--data<span> </span>@oauth-credentials.json<span> </span>http://localhost:5678/send-credentials </code></pre></div></td></tr></tbody></table> Note There are cases when credentials are based on others. For example, the `googleSheetsOAuth2Api` extends the `googleOAuth2Api`. In this case, you can set parameters on the parent credentials (`googleOAuth2Api`) for all child-credentials (`googleSheetsOAuth2Api`) to use. ## Environment variables# n8n has many environment variables you can configure. Here are the most relevant environment variables for your hosted solution: | Variable | Type | Default | Description | | --- | --- | --- | --- | | `EXECUTIONS_TIMEOUT` | Number | `-1` | Sets a default timeout (in seconds) to all workflows after which n8n stops their execution. Users can override this for individual workflows up to the duration set in `EXECUTIONS_TIMEOUT_MAX`. Set `EXECUTIONS_TIMEOUT` to `-1` to disable. | | `EXECUTIONS_DATA_PRUNE` | Boolean | `true` | Whether to delete data of past executions on a rolling basis. | | `EXECUTIONS_DATA_MAX_AGE` | Number | `336` | The execution age (in hours) before it's deleted. | | `EXECUTIONS_DATA_PRUNE_MAX_COUNT` | Number | `10000` | Maximum number of executions to keep in the database. 0 = no limit | | `NODES_EXCLUDE` | Array of strings | \- | Specify which nodes not to load. For example, to block nodes that can be a security risk if users aren't trustworthy: `NODES_EXCLUDE: "[\"n8n-nodes-base.executeCommand\", \"n8n-nodes-base.readWriteFile\"]"` | | `NODES_INCLUDE` | Array of strings | \- | Specify which nodes to load. | | `N8N_TEMPLATES_ENABLED` | Boolean | `true` | Enable workflow templates (true) or disable (false). | | `N8N_TEMPLATES_HOST` | String | `https://api.n8n.io` | Change this if creating your own workflow template library. Note that to use your own workflow templates library, your API must provide the same endpoints and response structure as n8n's. Refer to Workflow templates for more information. | ## Backend hooks# It's possible to define external hooks that n8n executes whenever a specific operation runs. You can use these, for example, to log data, change data, or forbid an action by throwing an error. ### Available hooks# | Hook | Arguments | Description | | --- | --- | --- | | `credentials.create` | `[credentialData: ICredentialsDb]` | Called before new credentials get created. Use to restrict the number of credentials. | | `credentials.delete` | `[id: credentialId]` | Called before credentials get deleted. | | `credentials.update` | `[credentialData: ICredentialsDb]` | Called before existing credentials are saved. | | `frontend.settings` | `[frontendSettings: IN8nUISettings]` | Gets called on n8n startup. Allows you to, for example, overwrite frontend data like the displayed OAuth URL. | | `n8n.ready` | `[app: App]` | Called once n8n is ready. Use to, for example, register custom API endpoints. | | `n8n.stop` | | Called when an n8n process gets stopped. Allows you to save some process data. | | `oauth1.authenticate` | `[oAuthOptions: clientOAuth1.Options, oauthRequestData: {oauth_callback: string}]` | Called before an OAuth1 authentication. Use to overwrite an OAuth callback URL. | | `oauth2.callback` | `[oAuth2Parameters: {clientId: string, clientSecret: string \| undefined, accessTokenUri: string, authorizationUri: string, redirectUri: string, scopes: string[]}]` | Called in an OAuth2 callback. Use to overwrite an OAuth callback URL. | | `workflow.activate` | `[workflowData: IWorkflowDb]` | Called before a workflow gets activated. Use to restrict the number of active workflows. | | `workflow.afterDelete` | `[workflowId: string]` | Called after a workflow gets deleted. | | `workflow.afterUpdate` | `[workflowData: IWorkflowBase]` | Called after an existing workflow gets saved. | | `workflow.create` | `[workflowData: IWorkflowBase]` | Called before a workflow gets created. Use to restrict the number of saved workflows. | | `workflow.delete` | `[workflowId: string]` | Called before a workflow gets delete. | | `workflow.postExecute` | `[run: IRun, workflowData: IWorkflowBase]` | Called after a workflow gets executed. | | `workflow.preExecute` | `[workflow: Workflow: mode: WorkflowExecuteMode]` | Called before a workflow gets executed. Allows you to count or limit the number of workflow executions. | | `workflow.update` | `[workflowData: IWorkflowBase]` | Called before an existing workflow gets saved. | ### Registering hooks# Set hooks by registering a hook file that contains the hook functions. To register a hook, set the environment variable `EXTERNAL_HOOK_FILES`. You can set the variable to a single file: `EXTERNAL_HOOK_FILES=/data/hook.js` Or to contain multiple files separated by a semicolon: `EXTERNAL_HOOK_FILES=/data/hook1.js;/data/hook2.js` ### Backend hook files# Hook files are regular JavaScript files that have the following format: <table><tbody><tr><td><div><pre><span></span><span> 1</span> <span> 2</span> <span> 3</span> <span> 4</span> <span> 5</span> <span> 6</span> <span> 7</span> <span> 8</span> <span> 9</span> <span>10</span> <span>11</span> <span>12</span> <span>13</span> <span>14</span> <span>15</span> <span>16</span> <span>17</span> <span>18</span> <span>19</span> <span>20</span> <span>21</span> <span>22</span> <span>23</span></pre></div></td><td><div><pre><span></span><code><span>module</span><span>.</span><span>exports</span><span> </span><span>=</span><span> </span><span>{</span> <span> </span><span>"frontend"</span><span>:</span><span> </span><span>{</span> <span> </span><span>"settings"</span><span>:</span><span> </span><span>[</span> <span> </span><span>async</span><span> </span><span>function</span><span> </span><span>(</span><span>settings</span><span>)</span><span> </span><span>{</span> <span> </span><span>settings</span><span>.</span><span>oauthCallbackUrls</span><span>.</span><span>oauth1</span><span> </span><span>=</span><span> </span><span>'https://n8n.example.com/oauth1/callback'</span><span>;</span> <span> </span><span>settings</span><span>.</span><span>oauthCallbackUrls</span><span>.</span><span>oauth2</span><span> </span><span>=</span><span> </span><span>'https://n8n.example.com/oauth2/callback'</span><span>;</span> <span> </span><span>}</span> <span> </span><span>]</span> <span> </span><span>},</span> <span> </span><span>"workflow"</span><span>:</span><span> </span><span>{</span> <span> </span><span>"activate"</span><span>:</span><span> </span><span>[</span> <span> </span><span>async</span><span> </span><span>function</span><span> </span><span>(</span><span>workflowData</span><span>)</span><span> </span><span>{</span> <span> </span><span>const</span><span> </span><span>activeWorkflows</span><span> </span><span>=</span><span> </span><span>await</span><span> </span><span>this</span><span>.</span><span>dbCollections</span><span>.</span><span>Workflow</span><span>.</span><span>count</span><span>({</span><span> </span><span>active</span><span>:</span><span> </span><span>true</span><span> </span><span>});</span> <span> </span><span>if</span><span> </span><span>(</span><span>activeWorkflows</span><span> </span><span>></span><span> </span><span>1</span><span>)</span><span> </span><span>{</span> <span> </span><span>throw</span><span> </span><span>new</span><span> </span><span>Error</span><span>(</span> <span> </span><span>'Active workflow limit reached.'</span> <span> </span><span>);</span> <span> </span><span>}</span> <span> </span><span>}</span> <span> </span><span>]</span> <span> </span><span>}</span> <span>}</span> </code></pre></div></td></tr></tbody></table> ### Backend hook functions# A hook or a hook file can contain multiple hook functions, with all functions executed one after another. If the parameters of the hook function are objects, it's possible to change the data of that parameter to change the behavior of n8n. You can also access the database in any hook function using `this.dbCollections` (refer to the code sample in Backend hook files. ## Frontend external hooks# Like backend external hooks, it's possible to define external hooks in the frontend code that get executed by n8n whenever a user performs a specific operation. You can use them, for example, to log data and change data. ### Available hooks# | Hook | Description | | --- | --- | | `credentialsEdit.credentialTypeChanged` | Called when an existing credential's type changes. | | `credentials.create` | Called when someone creates a new credential. | | `credentialsList.dialogVisibleChanged` | | | `dataDisplay.nodeTypeChanged` | | | `dataDisplay.onDocumentationUrlClick` | Called when someone selects the help documentation link. | | `execution.open` | Called when an existing execution opens. | | `executionsList.openDialog` | Called when someone selects an execution from existing Workflow Executions. | | `expressionEdit.itemSelected` | | | `expressionEdit.dialogVisibleChanged` | | | `nodeCreateList.filteredNodeTypesComputed` | | | `nodeCreateList.nodeFilterChanged` | Called when someone makes any changes to the node panel filter. | | `nodeCreateList.selectedTypeChanged` | | | `nodeCreateList.mounted` | | | `nodeCreateList.destroyed` | | | `nodeSettings.credentialSelected` | | | `nodeSettings.valueChanged` | | | `nodeView.createNodeActiveChanged` | | | `nodeView.addNodeButton` | | | `nodeView.createNodeActiveChanged` | | | `nodeView.mount` | | | `pushConnection.executionFinished` | | | `showMessage.showError` | | | `runData.displayModeChanged` | | | `workflow.activeChange` | | | `workflow.activeChangeCurrent` | | | `workflow.afterUpdate` | Called when someone updates an existing workflow. | | `workflow.open` | | | `workflowRun.runError` | | | `workflowRun.runWorkflow` | Called when a workflow executes. | | `workflowSettings.dialogVisibleChanged` | | | `workflowSettings.saveSettings` | Called when someone saves the settings of a workflow. | ### Registering hooks# You can set hooks by loading the hooks script on the page. One way to do this is by creating a hooks file in the project and adding a script tag in your `editor-ui/public/index.html` file: <table><tbody><tr><td><div><pre><span></span><span>1</span></pre></div></td><td><div><pre><span></span><code><span><</span><span>script</span> <span>src</span><span>=</span><span>"frontend-hooks.js"</span><span>></</span><span>script</span><span>></span> </code></pre></div></td></tr></tbody></table> ### Frontend hook files# Frontend external hook files are regular JavaScript files which have the following format: <table><tbody><tr><td><div><pre><span></span><span> 1</span> <span> 2</span> <span> 3</span> <span> 4</span> <span> 5</span> <span> 6</span> <span> 7</span> <span> 8</span> <span> 9</span> <span>10</span> <span>11</span> <span>12</span> <span>13</span> <span>14</span> <span>15</span> <span>16</span> <span>17</span> <span>18</span> <span>19</span> <span>20</span> <span>21</span> <span>22</span></pre></div></td><td><div><pre><span></span><code><span>window</span><span>.</span><span>n8nExternalHooks</span><span> </span><span>=</span><span> </span><span>{</span> <span> </span><span>nodeView</span><span>:</span><span> </span><span>{</span> <span> </span><span>mount</span><span>:</span><span> </span><span>[</span> <span> </span><span>function</span><span> </span><span>(</span><span>store</span><span>,</span><span> </span><span>meta</span><span>)</span><span> </span><span>{</span> <span> </span><span>// do something</span> <span> </span><span>},</span> <span> </span><span>],</span> <span> </span><span>createNodeActiveChanged</span><span>:</span><span> </span><span>[</span> <span> </span><span>function</span><span> </span><span>(</span><span>store</span><span>,</span><span> </span><span>meta</span><span>)</span><span> </span><span>{</span> <span> </span><span>// do something</span> <span> </span><span>},</span> <span> </span><span>function</span><span> </span><span>(</span><span>store</span><span>,</span><span> </span><span>meta</span><span>)</span><span> </span><span>{</span> <span> </span><span>// do something else</span> <span> </span><span>},</span> <span> </span><span>],</span> <span> </span><span>addNodeButton</span><span>:</span><span> </span><span>[</span> <span> </span><span>function</span><span> </span><span>(</span><span>store</span><span>,</span><span> </span><span>meta</span><span>)</span><span> </span><span>{</span> <span> </span><span>// do something</span> <span> </span><span>},</span> <span> </span><span>],</span> <span> </span><span>},</span> <span>};</span> </code></pre></div></td></tr></tbody></table> ### Frontend hook functions# You can define multiple hook functions per hook. Each hook function is invoked with the following arguments arguments: * `store`: The Vuex store object. You can use this to change or get data from the store. * `metadata`: The object that contains any data provided by the hook. To see what's passed, search for the hook in the `editor-ui` package. --- ## Page: https://docs.n8n.io/embed/managing-workflows/ When managing an embedded n8n deployment, spanning across teams or organizations, you will likely need to run the same (or similar) workflows for multiple users. There are two available options for doing so: Here you need to capture all credentials for any node/service this user must authenticate with, along with any additional parameters required for the particular workflow. The credentials and any parameters needed will depend on your workflow and what you are trying to do. After all relevant credential details have been obtained, you can proceed to create the relevant service credentials in n8n. This can be done using the Editor UI or API call. The frontend API used by the Editor UI can also be called to achieve the same result. The API endpoint is in the format: `https://<n8n-domain>/rest/credentials`. For example, to create the credentials in the Editor UI example above, the request would be: The response will contain the ID of the new credentials, which you will use when creating the workflow for this user: Best practice is to have a “base” workflow that you then duplicate and customize for each new user with their credentials (and any other details). You can duplicate and customize your template workflow using either the Editor UI or API call. <table><tbody><tr><td><div><pre><span></span><span> 1</span> <span> 2</span> <span> 3</span> <span> 4</span> <span> 5</span> <span> 6</span> <span> 7</span> <span> 8</span> <span> 9</span> <span> 10</span> <span> 11</span> <span> 12</span> <span> 13</span> <span> 14</span> <span> 15</span> <span> 16</span> <span> 17</span> <span> 18</span> <span> 19</span> <span> 20</span> <span> 21</span> <span> 22</span> <span> 23</span> <span> 24</span> <span> 25</span> <span> 26</span> <span> 27</span> <span> 28</span> <span> 29</span> <span> 30</span> <span> 31</span> <span> 32</span> <span> 33</span> <span> 34</span> <span> 35</span> <span> 36</span> <span> 37</span> <span> 38</span> <span> 39</span> <span> 40</span> <span> 41</span> <span> 42</span> <span> 43</span> <span> 44</span> <span> 45</span> <span> 46</span> <span> 47</span> <span> 48</span> <span> 49</span> <span> 50</span> <span> 51</span> <span> 52</span> <span> 53</span> <span> 54</span> <span> 55</span> <span> 56</span> <span> 57</span> <span> 58</span> <span> 59</span> <span> 60</span> <span> 61</span> <span> 62</span> <span> 63</span> <span> 64</span> <span> 65</span> <span> 66</span> <span> 67</span> <span> 68</span> <span> 69</span> <span> 70</span> <span> 71</span> <span> 72</span> <span> 73</span> <span> 74</span> <span> 75</span> <span> 76</span> <span> 77</span> <span> 78</span> <span> 79</span> <span> 80</span> <span> 81</span> <span> 82</span> <span> 83</span> <span> 84</span> <span> 85</span> <span> 86</span> <span> 87</span> <span> 88</span> <span> 89</span> <span> 90</span> <span> 91</span> <span> 92</span> <span> 93</span> <span> 94</span> <span> 95</span> <span> 96</span> <span> 97</span> <span> 98</span> <span> 99</span> <span>100</span> <span>101</span> <span>102</span> <span>103</span> <span>104</span> <span>105</span> <span>106</span> <span>107</span> <span>108</span> <span>109</span> <span>110</span> <span>111</span> <span>112</span> <span>113</span> <span>114</span> <span>115</span> <span>116</span> <span>117</span> <span>118</span> <span>119</span> <span>120</span> <span>121</span> <span>122</span> <span>123</span> <span>124</span> <span>125</span> <span>126</span> <span>127</span> <span>128</span> <span>129</span> <span>130</span> <span>131</span> <span>132</span> <span>133</span> <span>134</span> <span>135</span> <span>136</span> <span>137</span> <span>138</span> <span>139</span> <span>140</span> <span>141</span> <span>142</span> <span>143</span> <span>144</span> <span>145</span> <span>146</span> <span>147</span> <span>148</span> <span>149</span> <span>150</span> <span>151</span> <span>152</span> <span>153</span> <span>154</span> <span>155</span> <span>156</span> <span>157</span> <span>158</span> <span>159</span> <span>160</span> <span>161</span> <span>162</span> <span>163</span> <span>164</span> <span>165</span> <span>166</span> <span>167</span> <span>168</span> <span>169</span> <span>170</span> <span>171</span> <span>172</span> <span>173</span> <span>174</span> <span>175</span> <span>176</span> <span>177</span> <span>178</span> <span>179</span> <span>180</span> <span>181</span> <span>182</span> <span>183</span> <span>184</span> <span>185</span> <span>186</span> <span>187</span> <span>188</span> <span>189</span> <span>190</span> <span>191</span> <span>192</span> <span>193</span> <span>194</span> <span>195</span> <span>196</span> <span>197</span> <span>198</span> <span>199</span> <span>200</span> <span>201</span> <span>202</span> <span>203</span> <span>204</span> <span>205</span> <span>206</span> <span>207</span> <span>208</span> <span>209</span> <span>210</span> <span>211</span> <span>212</span> <span>213</span> <span>214</span> <span>215</span> <span>216</span> <span>217</span> <span>218</span> <span>219</span> <span>220</span> <span>221</span> <span>222</span> <span>223</span> <span>224</span> <span>225</span> <span>226</span> <span>227</span> <span>228</span></pre></div></td><td><div><pre><span></span><code><span>{</span> <span> </span><span>"data"</span><span>:</span><span> </span><span>{</span> <span> </span><span>"id"</span><span>:</span><span> </span><span>"1012"</span><span>,</span> <span> </span><span>"name"</span><span>:</span><span> </span><span>"Nathan's Workflow"</span><span>,</span> <span> </span><span>"active"</span><span>:</span><span> </span><span>false</span><span>,</span> <span> </span><span>"nodes"</span><span>:</span><span> </span><span>[</span> <span> </span><span>{</span> <span> </span><span>"parameters"</span><span>:</span><span> </span><span>{},</span> <span> </span><span>"name"</span><span>:</span><span> </span><span>"Start"</span><span>,</span> <span> </span><span>"type"</span><span>:</span><span> </span><span>"n8n-nodes-base.start"</span><span>,</span> <span> </span><span>"typeVersion"</span><span>:</span><span> </span><span>1</span><span>,</span> <span> </span><span>"position"</span><span>:</span><span> </span><span>[</span> <span> </span><span>130</span><span>,</span> <span> </span><span>640</span> <span> </span><span>]</span> <span> </span><span>},</span> <span> </span><span>{</span> <span> </span><span>"parameters"</span><span>:</span><span> </span><span>{</span> <span> </span><span>"authentication"</span><span>:</span><span> </span><span>"headerAuth"</span><span>,</span> <span> </span><span>"url"</span><span>:</span><span> </span><span>"https://internal.users.n8n.cloud/webhook/custom-erp"</span><span>,</span> <span> </span><span>"options"</span><span>:</span><span> </span><span>{</span> <span> </span><span>"splitIntoItems"</span><span>:</span><span> </span><span>true</span> <span> </span><span>},</span> <span> </span><span>"headerParametersUi"</span><span>:</span><span> </span><span>{</span> <span> </span><span>"parameter"</span><span>:</span><span> </span><span>[</span> <span> </span><span>{</span> <span> </span><span>"name"</span><span>:</span><span> </span><span>"unique_id"</span><span>,</span> <span> </span><span>"value"</span><span>:</span><span> </span><span>"recLhLYQbzNSFtHNq"</span> <span> </span><span>}</span> <span> </span><span>]</span> <span> </span><span>}</span> <span> </span><span>},</span> <span> </span><span>"name"</span><span>:</span><span> </span><span>"HTTP Request"</span><span>,</span> <span> </span><span>"type"</span><span>:</span><span> </span><span>"n8n-nodes-base.httpRequest"</span><span>,</span> <span> </span><span>"typeVersion"</span><span>:</span><span> </span><span>1</span><span>,</span> <span> </span><span>"position"</span><span>:</span><span> </span><span>[</span> <span> </span><span>430</span><span>,</span> <span> </span><span>300</span> <span> </span><span>],</span> <span> </span><span>"credentials"</span><span>:</span><span> </span><span>{</span> <span> </span><span>"httpHeaderAuth"</span><span>:</span><span> </span><span>"beginner_course"</span> <span> </span><span>}</span> <span> </span><span>},</span> <span> </span><span>{</span> <span> </span><span>"parameters"</span><span>:</span><span> </span><span>{</span> <span> </span><span>"operation"</span><span>:</span><span> </span><span>"append"</span><span>,</span> <span> </span><span>"application"</span><span>:</span><span> </span><span>"appKBGQfbm6NfW6bv"</span><span>,</span> <span> </span><span>"table"</span><span>:</span><span> </span><span>"processingOrders"</span><span>,</span> <span> </span><span>"options"</span><span>:</span><span> </span><span>{}</span> <span> </span><span>},</span> <span> </span><span>"name"</span><span>:</span><span> </span><span>"Airtable"</span><span>,</span> <span> </span><span>"type"</span><span>:</span><span> </span><span>"n8n-nodes-base.airtable"</span><span>,</span> <span> </span><span>"typeVersion"</span><span>:</span><span> </span><span>1</span><span>,</span> <span> </span><span>"position"</span><span>:</span><span> </span><span>[</span> <span> </span><span>990</span><span>,</span> <span> </span><span>210</span> <span> </span><span>],</span> <span> </span><span>"credentials"</span><span>:</span><span> </span><span>{</span> <span> </span><span>"airtableApi"</span><span>:</span><span> </span><span>"Airtable"</span> <span> </span><span>}</span> <span> </span><span>},</span> <span> </span><span>{</span> <span> </span><span>"parameters"</span><span>:</span><span> </span><span>{</span> <span> </span><span>"conditions"</span><span>:</span><span> </span><span>{</span> <span> </span><span>"string"</span><span>:</span><span> </span><span>[</span> <span> </span><span>{</span> <span> </span><span>"value1"</span><span>:</span><span> </span><span>"={{$json[\"orderStatus\"]}}"</span><span>,</span> <span> </span><span>"value2"</span><span>:</span><span> </span><span>"processing"</span> <span> </span><span>}</span> <span> </span><span>]</span> <span> </span><span>}</span> <span> </span><span>},</span> <span> </span><span>"name"</span><span>:</span><span> </span><span>"IF"</span><span>,</span> <span> </span><span>"type"</span><span>:</span><span> </span><span>"n8n-nodes-base.if"</span><span>,</span> <span> </span><span>"typeVersion"</span><span>:</span><span> </span><span>1</span><span>,</span> <span> </span><span>"position"</span><span>:</span><span> </span><span>[</span> <span> </span><span>630</span><span>,</span> <span> </span><span>300</span> <span> </span><span>]</span> <span> </span><span>},</span> <span> </span><span>{</span> <span> </span><span>"parameters"</span><span>:</span><span> </span><span>{</span> <span> </span><span>"keepOnlySet"</span><span>:</span><span> </span><span>true</span><span>,</span> <span> </span><span>"values"</span><span>:</span><span> </span><span>{</span> <span> </span><span>"number"</span><span>:</span><span> </span><span>[</span> <span> </span><span>{</span> <span> </span><span>"name"</span><span>:</span><span> </span><span>"=orderId"</span><span>,</span> <span> </span><span>"value"</span><span>:</span><span> </span><span>"={{$json[\"orderID\"]}}"</span> <span> </span><span>}</span> <span> </span><span>],</span> <span> </span><span>"string"</span><span>:</span><span> </span><span>[</span> <span> </span><span>{</span> <span> </span><span>"name"</span><span>:</span><span> </span><span>"employeeName"</span><span>,</span> <span> </span><span>"value"</span><span>:</span><span> </span><span>"={{$json[\"employeeName\"]}}"</span> <span> </span><span>}</span> <span> </span><span>]</span> <span> </span><span>},</span> <span> </span><span>"options"</span><span>:</span><span> </span><span>{}</span> <span> </span><span>},</span> <span> </span><span>"name"</span><span>:</span><span> </span><span>"Set"</span><span>,</span> <span> </span><span>"type"</span><span>:</span><span> </span><span>"n8n-nodes-base.set"</span><span>,</span> <span> </span><span>"typeVersion"</span><span>:</span><span> </span><span>1</span><span>,</span> <span> </span><span>"position"</span><span>:</span><span> </span><span>[</span> <span> </span><span>800</span><span>,</span> <span> </span><span>210</span> <span> </span><span>]</span> <span> </span><span>},</span> <span> </span><span>{</span> <span> </span><span>"parameters"</span><span>:</span><span> </span><span>{</span> <span> </span><span>"functionCode"</span><span>:</span><span> </span><span>"let totalBooked = items.length;\nlet bookedSum = 0;\n\nfor(let i=0; i < items.length; i++) {\n bookedSum = bookedSum + items[i].json.orderPrice;\n}\nreturn [{json:{totalBooked, bookedSum}}]\n"</span> <span> </span><span>},</span> <span> </span><span>"name"</span><span>:</span><span> </span><span>"Function"</span><span>,</span> <span> </span><span>"type"</span><span>:</span><span> </span><span>"n8n-nodes-base.function"</span><span>,</span> <span> </span><span>"typeVersion"</span><span>:</span><span> </span><span>1</span><span>,</span> <span> </span><span>"position"</span><span>:</span><span> </span><span>[</span> <span> </span><span>800</span><span>,</span> <span> </span><span>400</span> <span> </span><span>]</span> <span> </span><span>},</span> <span> </span><span>{</span> <span> </span><span>"parameters"</span><span>:</span><span> </span><span>{</span> <span> </span><span>"webhookUri"</span><span>:</span><span> </span><span>"https://discord.com/api/webhooks/865213348202151968/oD5_WPDQwtr22Vjd_82QP3-_4b_lGhAeM7RynQ8Js5DzyXrQEnj0zeAQIA6fki1JLtXE"</span><span>,</span> <span> </span><span>"text"</span><span>:</span><span> </span><span>"=This week we have {{$json[\"totalBooked\"]}} booked orders with a total value of {{$json[\"bookedSum\"]}}. My Unique ID: {{$node[\"HTTP Request\"].parameter[\"headerParametersUi\"][\"parameter\"][0][\"value\"]}}"</span> <span> </span><span>},</span> <span> </span><span>"name"</span><span>:</span><span> </span><span>"Discord"</span><span>,</span> <span> </span><span>"type"</span><span>:</span><span> </span><span>"n8n-nodes-base.discord"</span><span>,</span> <span> </span><span>"typeVersion"</span><span>:</span><span> </span><span>1</span><span>,</span> <span> </span><span>"position"</span><span>:</span><span> </span><span>[</span> <span> </span><span>1000</span><span>,</span> <span> </span><span>400</span> <span> </span><span>]</span> <span> </span><span>},</span> <span> </span><span>{</span> <span> </span><span>"parameters"</span><span>:</span><span> </span><span>{</span> <span> </span><span>"triggerTimes"</span><span>:</span><span> </span><span>{</span> <span> </span><span>"item"</span><span>:</span><span> </span><span>[</span> <span> </span><span>{</span> <span> </span><span>"mode"</span><span>:</span><span> </span><span>"everyWeek"</span><span>,</span> <span> </span><span>"hour"</span><span>:</span><span> </span><span>9</span> <span> </span><span>}</span> <span> </span><span>]</span> <span> </span><span>}</span> <span> </span><span>},</span> <span> </span><span>"name"</span><span>:</span><span> </span><span>"Cron"</span><span>,</span> <span> </span><span>"type"</span><span>:</span><span> </span><span>"n8n-nodes-base.cron"</span><span>,</span> <span> </span><span>"typeVersion"</span><span>:</span><span> </span><span>1</span><span>,</span> <span> </span><span>"position"</span><span>:</span><span> </span><span>[</span> <span> </span><span>220</span><span>,</span> <span> </span><span>300</span> <span> </span><span>]</span> <span> </span><span>}</span> <span> </span><span>],</span> <span> </span><span>"connections"</span><span>:</span><span> </span><span>{</span> <span> </span><span>"HTTP Request"</span><span>:</span><span> </span><span>{</span> <span> </span><span>"main"</span><span>:</span><span> </span><span>[</span> <span> </span><span>[</span> <span> </span><span>{</span> <span> </span><span>"node"</span><span>:</span><span> </span><span>"IF"</span><span>,</span> <span> </span><span>"type"</span><span>:</span><span> </span><span>"main"</span><span>,</span> <span> </span><span>"index"</span><span>:</span><span> </span><span>0</span> <span> </span><span>}</span> <span> </span><span>]</span> <span> </span><span>]</span> <span> </span><span>},</span> <span> </span><span>"Start"</span><span>:</span><span> </span><span>{</span> <span> </span><span>"main"</span><span>:</span><span> </span><span>[</span> <span> </span><span>[]</span> <span> </span><span>]</span> <span> </span><span>},</span> <span> </span><span>"IF"</span><span>:</span><span> </span><span>{</span> <span> </span><span>"main"</span><span>:</span><span> </span><span>[</span> <span> </span><span>[</span> <span> </span><span>{</span> <span> </span><span>"node"</span><span>:</span><span> </span><span>"Set"</span><span>,</span> <span> </span><span>"type"</span><span>:</span><span> </span><span>"main"</span><span>,</span> <span> </span><span>"index"</span><span>:</span><span> </span><span>0</span> <span> </span><span>}</span> <span> </span><span>],</span> <span> </span><span>[</span> <span> </span><span>{</span> <span> </span><span>"node"</span><span>:</span><span> </span><span>"Function"</span><span>,</span> <span> </span><span>"type"</span><span>:</span><span> </span><span>"main"</span><span>,</span> <span> </span><span>"index"</span><span>:</span><span> </span><span>0</span> <span> </span><span>}</span> <span> </span><span>]</span> <span> </span><span>]</span> <span> </span><span>},</span> <span> </span><span>"Set"</span><span>:</span><span> </span><span>{</span> <span> </span><span>"main"</span><span>:</span><span> </span><span>[</span> <span> </span><span>[</span> <span> </span><span>{</span> <span> </span><span>"node"</span><span>:</span><span> </span><span>"Airtable"</span><span>,</span> <span> </span><span>"type"</span><span>:</span><span> </span><span>"main"</span><span>,</span> <span> </span><span>"index"</span><span>:</span><span> </span><span>0</span> <span> </span><span>}</span> <span> </span><span>]</span> <span> </span><span>]</span> <span> </span><span>},</span> <span> </span><span>"Function"</span><span>:</span><span> </span><span>{</span> <span> </span><span>"main"</span><span>:</span><span> </span><span>[</span> <span> </span><span>[</span> <span> </span><span>{</span> <span> </span><span>"node"</span><span>:</span><span> </span><span>"Discord"</span><span>,</span> <span> </span><span>"type"</span><span>:</span><span> </span><span>"main"</span><span>,</span> <span> </span><span>"index"</span><span>:</span><span> </span><span>0</span> <span> </span><span>}</span> <span> </span><span>]</span> <span> </span><span>]</span> <span> </span><span>},</span> <span> </span><span>"Cron"</span><span>:</span><span> </span><span>{</span> <span> </span><span>"main"</span><span>:</span><span> </span><span>[</span> <span> </span><span>[</span> <span> </span><span>{</span> <span> </span><span>"node"</span><span>:</span><span> </span><span>"HTTP Request"</span><span>,</span> <span> </span><span>"type"</span><span>:</span><span> </span><span>"main"</span><span>,</span> <span> </span><span>"index"</span><span>:</span><span> </span><span>0</span> <span> </span><span>}</span> <span> </span><span>]</span> <span> </span><span>]</span> <span> </span><span>}</span> <span> </span><span>},</span> <span> </span><span>"createdAt"</span><span>:</span><span> </span><span>"2021-07-16T11:15:46.066Z"</span><span>,</span> <span> </span><span>"updatedAt"</span><span>:</span><span> </span><span>"2021-07-16T12:05:44.045Z"</span><span>,</span> <span> </span><span>"settings"</span><span>:</span><span> </span><span>{},</span> <span> </span><span>"staticData"</span><span>:</span><span> </span><span>null</span><span>,</span> <span> </span><span>"tags"</span><span>:</span><span> </span><span>[]</span> <span> </span><span>}</span> <span>}</span> </code></pre></div></td></tr></tbody></table> The response will contain the ID of the new workflow, which you will use in the next step. The details and scope of this workflow will vary greatly according to the individual use case, however there are a few design implementations to keep in mind: For each new user, or for any existing user as may be needed, call the webhook defined as the workflow trigger and provide the necessary credentials (and any other workflow parameters). --- ## Page: https://docs.n8n.io/embed/workflow-templates/ 1 2 3 4 5 6 7 8 9 10 11 12 13 14 15 16 17 18 19 20 21 22 23 24 25 26 27 28 29 30 31 32 33 34 35 36 37 38 39 40 41 42 43 44 45 46 47 48 49 50 51 52 53 54 55 56 57 58 59 60 61 62 63 64 65 66 67 68 69 70 71 72 73 74 75 76 77 78 79 80 81 82 83 84 85 86 87 88 89 90 91 92 93 94 95 96 97 98 99 100 101 102 103 104 105 106 107 108 109 110 111 112 113 114 115 116 117 118 119 120 121 122 123 124 125 126 127 128 129 130 131 132 133 134 135 136 137 138 139 140 141 142 143 144 145 146 147 148 149 150 151 152 153 154 155 156 157 158 159 160 161 162 163 164 165 166 167 168 169 170 171 172 173 174 175 176 177 178 179 180 181 182 183 184 185 186 187 188 189 190 191 192 193 194 195 196 197 198 199 200 201 202 203 204 205 206 207 `{ "$schema": "http://json-schema.org/draft-07/schema#", "title": "Generated schema for Root", "type": "object", "properties": { "id": { "type": "number" }, "name": { "type": "string" }, "totalViews": { "type": "number" }, "price": {}, "purchaseUrl": {}, "recentViews": { "type": "number" }, "createdAt": { "type": "string" }, "user": { "type": "object", "properties": { "username": { "type": "string" }, "verified": { "type": "boolean" } }, "required": [ "username", "verified" ] }, "nodes": { "type": "array", "items": { "type": "object", "properties": { "id": { "type": "number" }, "icon": { "type": "string" }, "name": { "type": "string" }, "codex": { "type": "object", "properties": { "data": { "type": "object", "properties": { "details": { "type": "string" }, "resources": { "type": "object", "properties": { "generic": { "type": "array", "items": { "type": "object", "properties": { "url": { "type": "string" }, "icon": { "type": "string" }, "label": { "type": "string" } }, "required": [ "url", "label" ] } }, "primaryDocumentation": { "type": "array", "items": { "type": "object", "properties": { "url": { "type": "string" } }, "required": [ "url" ] } } }, "required": [ "primaryDocumentation" ] }, "categories": { "type": "array", "items": { "type": "string" } }, "nodeVersion": { "type": "string" }, "codexVersion": { "type": "string" } }, "required": [ "categories" ] } } }, "group": { "type": "string" }, "defaults": { "type": "object", "properties": { "name": { "type": "string" }, "color": { "type": "string" } }, "required": [ "name" ] }, "iconData": { "type": "object", "properties": { "icon": { "type": "string" }, "type": { "type": "string" }, "fileBuffer": { "type": "string" } }, "required": [ "type" ] }, "displayName": { "type": "string" }, "typeVersion": { "type": "number" }, "nodeCategories": { "type": "array", "items": { "type": "object", "properties": { "id": { "type": "number" }, "name": { "type": "string" } }, "required": [ "id", "name" ] } } }, "required": [ "id", "icon", "name", "codex", "group", "defaults", "iconData", "displayName", "typeVersion" ] } } }, "required": [ "id", "name", "totalViews", "price", "purchaseUrl", "recentViews", "createdAt", "user", "nodes" ] }` --- ## Page: https://docs.n8n.io/embed/white-labelling/ Feature availability Embed requires an embed license. For more information about when to use Embed, as well as costs and licensing processes, refer to Embed on the n8n website. White labelling n8n means customizing the frontend styling and assets to match your brand identity. The process involves changing two packages in n8n's source code github.com/n8n-io/n8n: * packages/design-system: n8n's storybook design system with CSS styles and Vue.js components * packages/editor-ui: n8n's Vue.js frontend build with Vite.js ## Prerequisites# You need the following installed on your development machine: * git * Node.js and npm. Minimum version Node 18.17.0. You can find instructions on how to install both using nvm (Node Version Manager) for Linux, Mac, and WSL here. For Windows users, refer to Microsoft's guide to Install NodeJS on Windows. Create a fork of n8n's repository and clone your new repository. <table><tbody><tr><td><div><pre><span></span><span>1</span> <span>2</span></pre></div></td><td><div><pre><span></span><code>git<span> </span>clone<span> </span>https://github.com/<your-organization>/n8n.git<span> </span>n8n <span>cd</span><span> </span>n8n </code></pre></div></td></tr></tbody></table> Install all dependencies, build and start n8n. <table><tbody><tr><td><div><pre><span></span><span>1</span> <span>2</span> <span>3</span></pre></div></td><td><div><pre><span></span><code>npm<span> </span>install npm<span> </span>run<span> </span>build npm<span> </span>run<span> </span>start </code></pre></div></td></tr></tbody></table> Whenever you make changes you need to rebuild and restart n8n. While developing you can use `npm run dev` to automatically rebuild and restart n8n anytime you make code changes. ## Theme colors# To customize theme colors open packages/design-system and start with: * packages/design-system/src/css/\_tokens.scss * packages/design-system/src/css/\_tokens.dark.scss At the top of `_tokens.scss` you will find `--color-primary` variables as HSL colors: <table><tbody><tr><td><div><pre><span></span><span>1</span> <span>2</span> <span>3</span> <span>4</span></pre></div></td><td><div><pre><span></span><code><span>@mixin</span><span> theme</span><span> </span><span>{</span> <span> </span><span>--color-primary-h</span><span>:</span><span> </span><span>6</span><span>.9</span><span>;</span> <span> </span><span>--color-primary-s</span><span>:</span><span> </span><span>100</span><span>%</span><span>;</span> <span> </span><span>--color-primary-l</span><span>:</span><span> </span><span>67</span><span>.6</span><span>%</span><span>;</span> </code></pre></div></td></tr></tbody></table> In the following example the primary color changes to #0099ff. To convert to HSL you can use a color converter tool. <table><tbody><tr><td><div><pre><span></span><span>1</span> <span>2</span> <span>3</span> <span>4</span></pre></div></td><td><div><pre><span></span><code><span>@mixin</span><span> theme</span><span> </span><span>{</span> <span> </span><span>--color-primary-h</span><span>:</span><span> </span><span>204</span><span>;</span> <span> </span><span>--color-primary-s</span><span>:</span><span> </span><span>100</span><span>%</span><span>;</span> <span> </span><span>--color-primary-l</span><span>:</span><span> </span><span>50</span><span>%</span><span>;</span> </code></pre></div></td></tr></tbody></table>  ## Theme logos# To change the editor’s logo assets look into packages/editor-ui/public and replace: * favicon-16x16.png * favicon-32x32.png * favicon.ico * n8n-logo.svg * n8n-logo-collapsed.svg * n8n-logo-expanded.svg Replace these logo assets. n8n uses them in Vue.js components, including: * MainSidebar.vue: top/left logo in the main sidebar. * Logo.vue: reused in other components. In the following example replace `n8n-logo-collapsed.svg` and `n8n-logo-expanded.svg` to update the main sidebar's logo assets.  If your logo assets require different sizing or placement you can customize SCSS styles at the bottom of MainSidebar.vue. <table><tbody><tr><td><div><pre><span></span><span> 1</span> <span> 2</span> <span> 3</span> <span> 4</span> <span> 5</span> <span> 6</span> <span> 7</span> <span> 8</span> <span> 9</span> <span>10</span> <span>11</span> <span>12</span> <span>13</span> <span>14</span> <span>15</span> <span>16</span> <span>17</span> <span>18</span> <span>19</span> <span>20</span> <span>21</span> <span>22</span></pre></div></td><td><div><pre><span></span><code><span>.logoItem</span><span> </span><span>{</span> <span> </span><span>display</span><span>:</span><span> </span><span>flex</span><span>;</span> <span> </span><span>justify-content</span><span>:</span><span> </span><span>space-between</span><span>;</span> <span> </span><span>height</span><span>:</span><span> </span><span>$</span><span>header-height</span><span>;</span> <span> </span><span>line-height</span><span>:</span><span> </span><span>$</span><span>header-height</span><span>;</span> <span> </span><span>margin</span><span>:</span><span> </span><span>0</span><span> </span><span>!</span><span>important</span><span>;</span> <span> </span><span>border-radius</span><span>:</span><span> </span><span>0</span><span> </span><span>!</span><span>important</span><span>;</span> <span> </span><span>border-bottom</span><span>:</span><span> </span><span>var</span><span>(</span><span>--border-width-base</span><span>)</span><span> </span><span>var</span><span>(</span><span>--border-style-base</span><span>)</span><span> </span><span>var</span><span>(</span><span>--color-background-xlight</span><span>);</span> <span> </span><span>cursor</span><span>:</span><span> </span><span>default</span><span>;</span> <span> </span><span>&</span><span>:hover</span><span>,</span><span> </span><span>&</span><span>:global</span><span>(</span><span>.is-active</span><span>)</span><span>:hover</span><span> </span><span>{</span> <span> </span><span>background-color</span><span>:</span><span> </span><span>initial</span><span> </span><span>!</span><span>important</span><span>;</span> <span> </span><span>}</span> <span> </span><span>*</span><span> </span><span>{</span><span> </span><span>vertical-align</span><span>:</span><span> </span><span>middle</span><span>;</span><span> </span><span>}</span> <span> </span><span>.icon</span><span> </span><span>{</span> <span> </span><span>height</span><span>:</span><span> </span><span>18px</span><span>;</span> <span> </span><span>position</span><span>:</span><span> </span><span>relative</span><span>;</span> <span> </span><span>left</span><span>:</span><span> </span><span>6px</span><span>;</span> <span> </span><span>}</span> <span>}</span> </code></pre></div></td></tr></tbody></table> ## Text localization# To change all text occurrences like `n8n` or `n8n.io` to your brand identity you can customize n8n's English internationalization file: packages/editor-ui/src/plugins/i18n/locales/en.json. n8n uses the Vue I18n internationalization plugin for Vue.js to translate the majority of UI texts. To search and replace text occurrences inside `en.json` you can use Linked locale messages. In the following example add the `_brand.name` translation key to white label n8n's AboutModal.vue. <table><tbody><tr><td><div><pre><span></span><span>1</span> <span>2</span> <span>3</span> <span>4</span> <span>5</span> <span>6</span></pre></div></td><td><div><pre><span></span><code><span>{</span> <span> </span><span>"_brand.name"</span><span>:</span><span> </span><span>"My Brand"</span><span>,</span> <span> </span><span>//replace n8n with link to _brand.name</span> <span> </span><span>"about.aboutN8n"</span><span>:</span><span> </span><span>"About @:_brand.name"</span><span>,</span> <span> </span><span>"about.n8nVersion"</span><span>:</span><span> </span><span>"@:_brand.name Version"</span><span>,</span> <span>}</span> </code></pre></div></td></tr></tbody></table>  ### Window title# To change n8n's window title to your brand name, edit the following: * packages/editor-ui/index.html * packages/editor-ui/src/components/mixins/titleChange.ts The following example replaces all occurrences of `n8n` and `n8n.io` with `My Brand` in `index.html` and `titleChange.ts`. <table><tbody><tr><td><div><pre><span></span><span>1</span> <span>2</span> <span>3</span> <span>4</span> <span>5</span> <span>6</span></pre></div></td><td><div><pre><span></span><code><span><!DOCTYPE html></span> <span><</span><span>html</span> <span>lang</span><span>=</span><span>"en"</span><span>></span> <span><</span><span>head</span><span>></span> <span><!-- Replace html title attribute --></span> <span><</span><span>title</span><span>></span>My Brand - Workflow Automation<span></</span><span>title</span><span>></span> <span></</span><span>head</span><span>></span> </code></pre></div></td></tr></tbody></table> <table><tbody><tr><td><div><pre><span></span><span>1</span> <span>2</span> <span>3</span> <span>4</span> <span>5</span> <span>6</span> <span>7</span> <span>8</span> <span>9</span></pre></div></td><td><div><pre><span></span><code><span>$titleSet</span><span>(</span><span>workflow</span><span>:</span><span> </span><span>string</span><span>,</span><span> </span><span>status</span><span>:</span><span> </span><span>WorkflowTitleStatus</span><span>)</span><span> </span><span>{</span> <span> </span><span>// replace n8n prefix</span> <span> </span><span>window</span><span>.</span><span>document</span><span>.</span><span>title</span><span> </span><span>=</span><span> </span><span>`My Brand - </span><span>${</span><span>icon</span><span>}</span><span> </span><span>${</span><span>workflow</span><span>}</span><span>`</span><span>;</span> <span>},</span> <span>$titleReset</span><span>()</span><span> </span><span>{</span> <span> </span><span>// replace n8n prefix</span> <span> </span><span>document</span><span>.</span><span>title</span><span> </span><span>=</span><span> </span><span>`My Brand - Workflow Automation`</span><span>;</span> <span>},</span> </code></pre></div></td></tr></tbody></table>  --- ## Page: https://docs.n8n.io/_workflows/try-it-out/quickstart/very-quick-quickstart-workflow.json \[object Object\] --- ## Page: https://docs.n8n.io/_workflows/try-it-out/quickstart/tutorial.json \[object Object\] --- ## Page: https://docs.n8n.io/_workflows//courses/level-one/chapter-2.json \[object Object\] --- ## Page: https://docs.n8n.io/_workflows//courses/level-one/finished.json \[object Object\] --- ## Page: https://docs.n8n.io/_workflows//courses/level-one/chapter-5/chapter-5.1.json \[object Object\] --- ## Page: https://docs.n8n.io/_workflows//courses/level-one/chapter-5/chapter-5.2.json \[object Object\] --- ## Page: https://docs.n8n.io/_workflows//courses/level-one/chapter-5/chapter-5.3.json \[object Object\] --- ## Page: https://docs.n8n.io/_workflows//courses/level-one/chapter-5/chapter-5.4.json \[object Object\] --- ## Page: https://docs.n8n.io/_workflows//courses/level-one/chapter-5/chapter-5.5.json \[object Object\] --- ## Page: https://docs.n8n.io/_workflows//courses/level-one/chapter-5/chapter-5.6.json \[object Object\] --- ## Page: https://docs.n8n.io/_workflows/credentials/dynamic_credentials_using_expressions.json \[object Object\] --- ## Page: https://docs.n8n.io/hosting/configuration/environment-variables/nodes This page lists the environment variables configuration options for managing nodes in n8n, including specifying which nodes to load or exclude, importing built-in or external modules in the Code node, and enabling community nodes. | Variable | Type | Default | Description | | --- | --- | --- | --- | | `NODES_INCLUDE` | Array of strings | \- | Specify which nodes to load. | | `NODES_EXCLUDE` | Array of strings | \- | Specify which nodes not to load. For example, to block nodes that can be a security risk if users aren't trustworthy: `NODES_EXCLUDE: "[\"n8n-nodes-base.executeCommand\", \"n8n-nodes-base.readWriteFile\"]"` | | `NODE_FUNCTION_ALLOW_BUILTIN` | String | \- | Permit users to import specific built-in modules in the Code node. Use \* to allow all. n8n disables importing modules by default. | | `NODE_FUNCTION_ALLOW_EXTERNAL` | String | \- | Permit users to import specific external modules (from `n8n/node_modules`) in the Code node. n8n disables importing modules by default. | | `NODES_ERROR_TRIGGER_TYPE` | String | `n8n-nodes-base.errorTrigger` | Specify which node type to use as Error Trigger. | | `N8N_CUSTOM_EXTENSIONS` | String | \- | Specify the path to directories containing your custom nodes. | | `N8N_COMMUNITY_PACKAGES_ENABLED` | Boolean | `true` | Enables (true) or disables (false) community nodes. | | `N8N_COMMUNITY_PACKAGES_REGISTRY` | String | `https://registry.npmjs.org` | NPM registry URL to pull community packages from (license required). | --- ## Page: https://docs.n8n.io/reference/contributing.html ## How can you contribute?# There are a several ways in which you can contribute to n8n, depending on your skills and interests. Each form of contribution is valuable to us! * Star n8n on GitHub and Docker Hub. * Follow us on Twitter, LinkedIn, and Facebook. * Upvote n8n on AlternativeTo and Alternative.me. * Add n8n to your stack on Stackshare. * Write a review about n8n on G2, Slant, and Capterra. You can participate in the forum and help the community members out with their questions. When sharing workflows in the community forum for debugging, use code blocks. Use triple backticks ` ``` ` to wrap the workflow JSON in a code block. The following video demonstrates the steps of sharing workflows on the community forum: ## Contribute a workflow template# You can submit your workflows to n8n's template library. n8n is working on a creator program, and developing a marketplace of templates. This is an ongoing project, and details are likely to change. Refer to n8n Creator hub for information on how to submit templates and become a creator. ## Build a node# Create an integration for a third party service. Check out the node creation docs for guidance on how to create and publish a community node. ## Contribute to the code# There are different ways in which you can contribute to the n8n code base: * Fix issues reported on GitHub. The CONTRIBUTING guide will help you get your development environment ready in minutes. * Add additional functionality to an existing third party integration. * Add a new feature to n8n. ## Contribute to the docs# You can contribute to the n8n documentation, for example by documenting nodes or fixing issues. The repository for the docs is here and the guidelines for contributing to the docs are here. ## Contribute to the blog# You can write an article for the n8n blog. Your article can be, for example, a workflow tutorial, an opinion piece on automation, or some domain-specific automation guides. ### How to submit a post# n8n appreciates all contributions. Publishing a tutorial on your own site that supports the community is a great contribution. If you want n8n to highlight your post on the blog, follow these steps: 1. Email your idea to marketing@n8n.io with the subject "Blog contribution: \[Your Topic\]." 2. Submit your draft: * Write your post in a Google Doc following the style guide. * If your blog post includes example workflows, include the workflow JSON in a separate section at the end. * For author credit, provide a second Google Doc with your full name, a short byline, and your image. n8n will use this to create your author page and credit you as the author of the post. 3. Wait for feedback. We will respond if your draft fits with the blog's strategy and requirements. If you don't hear back within 30 days, it means we won't be moving forward with your blog post. ## Refer a candidate# Do you know someone who would be a great fit for one of our open positions? Refer them to us! In return, we'll pay you €1,000 when the referral successfully passes their probationary period. Here's how this works: 1. **Search**: Have a look at the description and requirements of each role, and consider if someone you know would be a great fit. 2. **Referral**: Once you've identified a potential candidate, send an email to Jobs at n8n with the subject line _Employee referral - \[job title\]_ and a short description of the person you're referring (and the reason why). Also, tell your referral to apply for the job through our careers page. 3. **Evaluation**: We'll screen the application and inform you about the next steps of the hiring process. 4. **Reward**: As soon as your referral has successfully finished the probationary period, we'll reward you for your efforts by transferring the €1,000 to your bank account. --- ## Page: https://docs.n8n.io/_workflows/integrations/builtin/core-nodes/n8n-nodes-base.extractfromfile/webhook-example.json \[object Object\] --- ## Page: https://docs.n8n.io/_workflows/integrations/builtin/core-nodes/n8n-nodes-base.splitinbatches/rss-feed-example.json \[object Object\] --- ## Page: https://docs.n8n.io/_workflows/integrations/builtin/core-nodes/n8n-nodes-base.form/mutually-exclusive-branching.json \[object Object\] --- ## Page: https://docs.n8n.io/_workflows/integrations/builtin/core-nodes/n8n-nodes-base.form/multiple-branch-execution.json \[object Object\] --- ## Page: https://docs.n8n.io/_workflows/integrations/builtin/app-nodes/n8n-nodes-base.googledrive/get-most-recent-file.json \[object Object\] --- ## Page: https://docs.n8n.io/_workflows/ai-code/find-a-piece-of-data.json \[object Object\] --- ## Page: https://docs.n8n.io/_workflows/ai-code/data-transformation.json \[object Object\] --- ## Page: https://docs.n8n.io/_workflows/ai-code/summarize-data.json \[object Object\] --- ## Page: https://docs.n8n.io/_workflows/ai-code/reference-incoming-data-explicitly.json \[object Object\] --- ## Page: https://docs.n8n.io/_workflows//advanced-ai/tutorials/chat_01.json \[object Object\] --- ## Page: https://docs.n8n.io/_workflows//advanced-ai/tutorials/chat_02.json \[object Object\] --- ## Page: https://docs.n8n.io/_workflows//advanced-ai/tutorials/chat_complete.json \[object Object\] --- ## Page: https://docs.n8n.io/_workflows/advanced-ai/examples/agents_vs_chains.json \[object Object\] --- ## Page: https://docs.n8n.io/_workflows/advanced-ai/examples/chat_with_google_sheets_docs_version.json \[object Object\] --- ## Page: https://docs.n8n.io/_workflows/advanced-ai/examples/let_your_ai_call_an_api.json \[object Object\] --- ## Page: https://docs.n8n.io/_workflows/advanced-ai/examples/ask_a_human.json \[object Object\] --- ## Page: https://docs.n8n.io/_workflows/advanced-ai/examples/populate_a_pinecone_vector_database_from_a_website.json \[object Object\] --- ## Page: https://docs.n8n.io/reference/server-setup.html 1. Hosting n8n 2. Installation 3. Server setups Self-host with Docker Compose: * Digital Ocean * Heroku * Hetzner Cloud Starting points for a Kubernetes setup: * AWS * Azure * Google Cloud Platform Configuration guides to help you get started on other platforms: * Docker Compose --- ## Page: https://docs.n8n.io/hosting/configuration/ 1. Hosting n8n 2. Configuration 3. Environment variables This section lists of environment variables that you can use to change n8n's configuration settings when self-hosting n8n. File-based configuration You can provide a configuration file for n8n. You can also append `_FILE` to certain variables to provide their configuration in a separate file. * Binary data * Credentials * Database * Deployment * Endpoints * Executions * External data storage * External hooks * External secrets * Logs * License * Nodes * Queue mode * Security * Source control * Task runners * Timezone and localization * User management and 2FA * Workflows --- ## Page: https://docs.n8n.io/hosting/supported-databases-settings/ By default, n8n uses SQLite to save credentials, past executions, and workflows. n8n also supports PostgresDB. The following environment variables get used by all databases: * `DB_TABLE_PREFIX` (default: -) - Prefix for table names ## PostgresDB# To use PostgresDB as the database, you can provide the following environment variables: * `DB_TYPE=postgresdb` * `DB_POSTGRESDB_DATABASE` (default: 'n8n') * `DB_POSTGRESDB_HOST` (default: 'localhost') * `DB_POSTGRESDB_PORT` (default: 5432) * `DB_POSTGRESDB_USER` (default: 'postgres') * `DB_POSTGRESDB_PASSWORD` (default: empty) * `DB_POSTGRESDB_SCHEMA` (default: 'public') * `DB_POSTGRESDB_SSL_CA` (default: undefined): Path to the server's CA certificate used to validate the connection (opportunistic encryption isn't supported) * `DB_POSTGRESDB_SSL_CERT` (default: undefined): Path to the client's TLS certificate * `DB_POSTGRESDB_SSL_KEY` (default: undefined): Path to the client's private key corresponding to the certificate * `DB_POSTGRESDB_SSL_REJECT_UNAUTHORIZED` (default: true): If TLS connections that fail validation should be rejected <table><tbody><tr><td><div><pre><span></span><span> 1</span> <span> 2</span> <span> 3</span> <span> 4</span> <span> 5</span> <span> 6</span> <span> 7</span> <span> 8</span> <span> 9</span> <span>10</span> <span>11</span> <span>12</span> <span>13</span></pre></div></td><td><div><pre><span></span><code><span>export</span><span> </span><span>DB_TYPE</span><span>=</span>postgresdb <span>export</span><span> </span><span>DB_POSTGRESDB_DATABASE</span><span>=</span>n8n <span>export</span><span> </span><span>DB_POSTGRESDB_HOST</span><span>=</span>postgresdb <span>export</span><span> </span><span>DB_POSTGRESDB_PORT</span><span>=</span><span>5432</span> <span>export</span><span> </span><span>DB_POSTGRESDB_USER</span><span>=</span>n8n <span>export</span><span> </span><span>DB_POSTGRESDB_PASSWORD</span><span>=</span>n8n <span>export</span><span> </span><span>DB_POSTGRESDB_SCHEMA</span><span>=</span>n8n <span># optional:</span> <span>export</span><span> </span><span>DB_POSTGRESDB_SSL_CA</span><span>=</span><span>$(</span><span>pwd</span><span>)</span>/ca.crt <span>export</span><span> </span><span>DB_POSTGRESDB_SSL_REJECT_UNAUTHORIZED</span><span>=</span><span>false</span> n8n<span> </span>start </code></pre></div></td></tr></tbody></table> ### Required permissions# n8n needs to create and modify the schemas of the tables it uses. Recommended permissions: <table><tbody><tr><td><div><pre><span></span><span>1</span> <span>2</span> <span>3</span></pre></div></td><td><div><pre><span></span><code><span>CREATE</span><span> </span><span>DATABASE</span><span> </span><span>n8n</span><span>-</span><span>db</span><span>;</span> <span>CREATE</span><span> </span><span>USER</span><span> </span><span>n8n</span><span>-</span><span>user</span><span> </span><span>WITH</span><span> </span><span>PASSWORD</span><span> </span><span>'random-password'</span><span>;</span> <span>GRANT</span><span> </span><span>ALL</span><span> </span><span>PRIVILEGES</span><span> </span><span>ON</span><span> </span><span>DATABASE</span><span> </span><span>n8n</span><span>-</span><span>db</span><span> </span><span>TO</span><span> </span><span>n8n</span><span>-</span><span>user</span><span>;</span> </code></pre></div></td></tr></tbody></table> ### TLS# You can choose between these configurations: * Not declaring (default): Connect with `SSL=off` * Declaring only the CA and unauthorized flag: Connect with `SSL=on` and verify the server's signature * Declaring `_{CERT,KEY}` and the above: Use the certificate and key for client TLS authentication ## SQLite# This is the default database that gets used if nothing is defined. The database file is located at: `~/.n8n/database.sqlite` --- ## Page: https://docs.n8n.io/hosting/user-management-self-hosted/ ## Configure self-hosted n8n for user management# User management in n8n allows you to invite people to work in your n8n instance. This document describes how to configure your n8n instance to support user management, and the steps to start inviting users. Refer to the main User management guide for more information about usage, including: * Managing users * Account types * Best practices For LDAP setup information, refer to LDAP. For SAML setup information, refer to SAML. Basic auth and JWT removed n8n removed support for basic auth and JWT in version 1.0. ## Setup# There are three stages to set up user management in n8n: 1. Configure your n8n instance to use your SMTP server. 2. Start n8n and follow the setup steps in the app. 3. Invite users. ### Step one: SMTP# n8n recommends setting up an SMTP server, for user invites and password resets. Optional from 0.210.1 From version 0.210.1 onward, this step is optional. You can choose to manually copy and send invite links instead of setting up SMTP. Note that if you skip this step, users can't reset passwords. Get the following information from your SMTP provider: * Server name * SMTP username * SMTP password * SMTP sender name To set up SMTP with n8n, configure the SMTP environment variables for your n8n instance. For information on how to set environment variables, refer to Configuration | Variable | Type | Description | Required? | | --- | --- | --- | --- | | `N8N_EMAIL_MODE` | string | `smtp` | Required | | `N8N_SMTP_HOST` | string | _your\_SMTP\_server\_name_ | Required | | `N8N_SMTP_PORT` | number | _your\_SMTP\_server\_port_ Default is `465`. | Optional | | `N8N_SMTP_USER` | string | _your\_SMTP\_username_ | Optional | | `N8N_SMTP_PASS` | string | _your\_SMTP\_password_ | Optional | | `N8N_SMTP_OAUTH_SERVICE_CLIENT` | string | _your\_OAuth\_service\_client_ | Optional | | `N8N_SMTP_OAUTH_PRIVATE_KEY` | string | _your\_OAuth\_private\_key_ | Optional | | `N8N_SMTP_SENDER` | string | Sender email address. You can optionally include the sender name. Example with name: _N8N `<contact@n8n.com>`_ | Required | | `N8N_SMTP_SSL` | boolean | Whether to use SSL for SMTP (true) or not (false). Defaults to `true`. | Optional | | `N8N_UM_EMAIL_TEMPLATES_INVITE` | string | Full path to your HTML email template. This overrides the default template for invite emails. | Optional | | `N8N_UM_EMAIL_TEMPLATES_PWRESET` | string | Full path to your HTML email template. This overrides the default template for password reset emails. | Optional | | `N8N_UM_EMAIL_TEMPLATES_WORKFLOW_SHARED` | String | Overrides the default HTML template for notifying users that a credential was shared. Provide the full path to the template. | Optional | | `N8N_UM_EMAIL_TEMPLATES_CREDENTIALS_SHARED` | String | Overrides the default HTML template for notifying users that a credential was shared. Provide the full path to the template. | Optional | If your n8n instance is already running, you need to restart it to enable the new SMTP settings. More configuration options There are more configuration options available as environment variables. Refer to Environment variables for a list. These include options to disable tags, workflow templates, and the personalization survey, if you don't want your users to see them. ### Step two: In-app setup# When you set up user management for the first time, you create an owner account. 1. Open n8n. The app displays a signup screen. 2. Enter your details. Your password must be at least eight characters, including at least one number and one capital letter. 3. Click **Next**. n8n logs you in with your new owner account. ### Step three: Invite users# You can now invite other people to your n8n instance. 1. Sign into your workspace with your owner account. (If you are in the Admin Panel open your **Workspace** from the Dashboard) 2. Click the three dots next to your user icon at the bottom left and click **Settings**. n8n opens your **Personal settings** page. 3. Click **Users** to go to the **Users** page. 4. Click **Invite**. 5. Enter the new user's email address. 6. Click **Invite user**. n8n sends an email with a link for the new user to join. --- ## Page: https://docs.n8n.io/reference/ ## Welcome to n8n Docs# This is the documentation for n8n, a fair-code licensed workflow automation tool that combines AI capabilities with business process automation. It covers everything from setup to usage and development. It's a work in progress and all contributions are welcome. ## Where to start# * **Quickstarts** Jump in with n8n's quickstart guides. Try it out * **Choose the right n8n for you** Cloud, npm, self-host . . . Options * **Explore integrations** Browse n8n's integrations library. Find your apps * **Build AI functionality** n8n supports building AI functionality and tools. Advanced AI ## About n8n# n8n (pronounced n-eight-n) helps you to connect any app with an API with any other, and manipulate its data with little or no code. * Customizable: highly flexible workflows and the option to build custom nodes. * Convenient: use the npm or Docker to try out n8n, or the Cloud hosting option if you want us to handle the infrastructure. * Privacy-focused: self-host n8n for privacy and security. --- ## Page: https://docs.n8n.io/hosting/environment-variables/ 1. Hosting n8n 2. Configuration 3. Environment variables This section lists of environment variables that you can use to change n8n's configuration settings when self-hosting n8n. File-based configuration You can provide a configuration file for n8n. You can also append `_FILE` to certain variables to provide their configuration in a separate file. * Binary data * Credentials * Database * Deployment * Endpoints * Executions * External data storage * External hooks * External secrets * Logs * License * Nodes * Queue mode * Security * Source control * Task runners * Timezone and localization * User management and 2FA * Workflows --- ## Page: https://docs.n8n.io/hosting/environment-variables/task-runners/ Task runners are a generic mechanism to execute tasks in a secure and performant way. They're used to execute user-provided JavaScript code in the Code node. This document describes how task runners work and how you can configure them. ## How it works# The task runner feature consists of three components: a task runner, a task broker, and a task requester.  Task runners connect to the task broker using a websocket connection. A task requester submits a task request to the broker where an available task runner can pick it up for execution. The runner executes the task and submits the results to the task requester. The task broker coordinates communication between the runner and the requester. The n8n instance (main and worker) acts as the broker. The Code node in this case is the task requester. ## Task runner modes# You can use task runners in two different modes: internal and external. ### Internal mode# In internal mode, the n8n instance launches the task runner as a child process. The n8n process monitors and manages the life cycle of the task runner. The task runner process shares the same `uid` and `gid` as n8n. ### External mode# In external mode, an external orchestrator (for example, Kubernetes) launches the task runner instead of n8n. Typically, this means you would configure the task runner to run as a side-car container next to n8n.  In this mode, the orchestrator monitors and manages the life cycle of the task runner container. The task runner is fully isolated from the n8n instance. When using the Queue mode, each n8n container (main and workers) needs to have its own task runner. ## Setting up external mode# Use the following details to configure task runners in external mode ### Configuring n8n instance in external mode# You can configure n8n to use external task runners by setting the following environment variables: | Environment variables | Description | | --- | --- | | `N8N_RUNNERS_ENABLED=true` | Enables task runners. | | `N8N_RUNNERS_MODE=external` | Use task runners in external mode. | | `N8N_RUNNERS_AUTH_TOKEN=<random secure shared secret>` | A shared secret task runners use to connect to the broker. | | `N8N_RUNNERS_BROKER_LISTEN_ADDRESS=0.0.0.0` | By default, the task broker only listens to localhost. When using multiple containers (for example, with Docker Compose), it needs to be able to accept external connections. | For full list of environment variables see task runner environment variables. ### Configuring task runners in external mode# The task runner comes bundled within the n8n Docker image. The Docker image also includes the task runner launcher. The launcher can start the runner on-demand, which means lower memory usage when there's no work needed, but a short delay (few hundred ms) in cold-start. The launcher also monitors the runner and restarts it in case of infinite loops or other issues. Run a task runner container from the n8n Docker image by setting the following properties: | Configuration | Description | | --- | --- | | `command` | `["/usr/local/bin/task-runner-launcher", "javascript"]` | | `livenessProbe` | `GET /healthz`, port `5680` | Set the following environment variables for the container, adjusted to fit your needs: | Environment variables | Description | | --- | --- | | `N8N_RUNNERS_AUTH_TOKEN=<random secure shared secret>` | The shared secret the task runner uses to connect to the broker. | | `N8N_RUNNERS_MAX_CONCURRENCY=5` | The number of concurrent tasks the runner can execute. | | `N8N_RUNNERS_TASK_BROKER_URI=localhost:5679` | The address of the task broker server within the n8n instance. | | `N8N_RUNNERS_AUTO_SHUTDOWN_TIMEOUT=15` | Number of seconds of inactivity to wait before shutting down the task runner process. The launcher will automatically start the runner again when there are new tasks to execute. Set to `0` to disable automatic shutdown. | | `NODE_OPTIONS=--max-old-space-size=<limit>` | The memory limit for the task runner Node.js process. This should be lower than the limit for container so that the runner runs out of memory before the container. That way, the launcher is able to monitor the runner. | | `GENERIC_TIMEZONE` | The same default timezone as configured for the n8n instance. | For full list of environment variables see task runner environment variables. --- ## Page: https://docs.n8n.io/reference/keyboard-shortcuts/ * Using n8n * Integrations * Hosting n8n * Code in n8n * Advanced AI * API * Embed * n8n home ↗ * Forum ↗ * Blog ↗ 1. Using n8n 2. Using the app ## Keyboard shortcuts and controls# n8n provides keyboard shortcuts for some actions. ## Workflow controls# * **Ctrl** + **Alt** + **n**: create new workflow * **Ctrl** + **o**: open workflow * **Ctrl** + **s**: save the current workflow * **Ctrl** + **z**: undo * **Ctrl** + **shift** + **z**: redo * **Ctrl** + **Enter**: execute workflow ## Canvas# ### Move the canvas# * **Ctrl** + **Left Mouse Button** + drag: move node view * **Ctrl** + **Middle mouse button** + drag: move node view * **Space** + drag: move node view * **Middle mouse button** + drag: move node view * Two fingers on a touch screen: move node view ### Canvas zoom# * **+** or **\=**: zoom in * **\-** or **\_**: zoom out * **0**: reset zoom level * **1**: zoom to fit workflow * **Ctrl** + **Mouse wheel**: zoom in/out ### Nodes on the canvas# * **Ctrl** + **a**: select all nodes * **Ctrl** + **v**: paste nodes * **Shift** + **s**: add sticky note ### With one or more nodes selected in canvas# * **ArrowDown**: select sibling node below the current one * **ArrowLeft**: select node left of the current one * **ArrowRight**: select node right of the current one * **ArrowUp**: select sibling node above the current one * **Ctrl** + **c**: copy * **Ctrl** + **x**: cut * **D**: deactivate * **Delete**: delete * **Enter**: open * **F2**: rename * **P**: pin data in node. Refer to Data pinning for more information. * **Shift** + **ArrowLeft**: select all nodes left of the current one * **Shift** + **ArrowRight**: select all nodes right of the current one ## Node panel# * **Tab**: open the Node Panel * **Enter**: insert selected node into workflow * **Escape**: close Node panel ### Node panel categories# * **Enter**: insert node into workflow, collapse/expand category, open subcategory * **ArrowRight**: expand category, open subcategory * **ArrowLeft**: collapse category, close subcategory view ## Within nodes# * **\=**: in an empty parameter input, this switches to expressions mode. --- ## Page: https://docs.n8n.io/reference/release-notes/ New features and bug fixes for n8n. You can also view the Releases in the GitHub repository. Latest and Next versions n8n releases a new minor version most weeks. The `latest` version is for production use. `next` is the most recent release. You should treat `next` as a beta: it may be unstable. To report issues, use the forum. Current `latest`: 1.86.1 Current `next`: 1.88.0 ## How to update n8n# The steps to update your n8n depend on which n8n platform you use. Refer to the documentation for your n8n: * Cloud * Self-hosted options: * npm * Docker ## Semantic versioning in n8n# n8n uses semantic versioning. All version numbers are in the format `MAJOR.MINOR.PATCH`. Version numbers increment as follows: * MAJOR version when making incompatible changes which can require user action. * MINOR version when adding functionality in a backward-compatible manner. * PATCH version when making backward-compatible bug fixes. Older versions You can find the release notes for older versions of n8n here ## n8n@1.88.0# View the commits for this version. **Release date:** 2025-04-10 Next version This is the `next` version. n8n recommends using the `latest` version. The `next` version may be unstable. To report issues, use the forum. This release contains new features, new nodes, performance improvements, and bug fixes. ### Model Context Protocol (MCP) nodes# MCP aims to standardise how LLMs like Claude, ChatGPT, or Cursor can interact with tools or integrate data for their agents. Many providers - both established or new - are adopting MCP as a standard way to build agentic systems. It is an easy way to either expose your own app as a server, making capabilities available to a model as tools, or as a client that can call on tools outside of your own system. While it’s still early in the development process, we want to give you access to our new MCP nodes. This will help us understand your requirements better and will also let us converge on a great general solution quicker. We are adding two new nodes: * a MCP Server Trigger for any workflow * a MCP Client Tool for the AI Agent The MCP Server Trigger turns n8n into an MCP server, providing n8n tools to models running outside of n8n. You can run multiple MCP servers from your n8n instance. The MCP Client Tool connects LLMs - and other intelligent agents - to any MCP-enabled service through a single interface. Max from our DevRel team created an official walkthrough for you to get started:  Studio Update #04 ### MCP Server Trigger# The MCP Server Trigger turns n8n into an MCP server, providing n8n tools to models running outside of n8n. The node acts as an entry point into n8n for MCP clients. It operates by exposing a URL that MCP clients can interact with to access n8n tools. This means your n8n workflows and integrations are now available to models run elsewhere. Pretty neat.  MCP Server Trigger Explore the MCP Server Trigger docs ### MCP Client Tool# The MCP Client Tool node is a MCP client, allowing you to use the tools exposed by an external MCP server. You can connect the MCP Client Tool node to your models to call external tools with n8n agents. In this regard it is similar to using a n8n tool with your AI agent. One advantage is that the MCP Client Tool can access multiple tools on the MCP server at once, keeping your canvas cleaner and easier to understand.  MCP Client Tools Explore the MCP Client Tool docs ### Node updates# * Added a node for Azure Cosmos DB * Added a node for Milvus Vector Store * Updated the Email Trigger (IMAP) node ### Contributors# adina-hub umanamente For full release details, refer to Releases on GitHub. ## n8n@1.87.2# View the commits for this version. **Release date:** 2025-04-09 This release contains bug fixes. For full release details, refer to Releases on GitHub. ## n8n@1.86.1# View the commits for this version. **Release date:** 2025-04-09 Latest version This is the `latest` version. n8n recommends using the `latest` version. The `next` version may be unstable. To report issues, use the forum. This release contains a bug fix. For full release details, refer to Releases on GitHub. ## n8n@1.87.1# View the commits for this version. **Release date:** 2025-04-08 This release contains bug fixes. For full release details, refer to Releases on GitHub. ## n8n@1.87.0# View the commits for this version. **Release date:** 2025-04-07 This release contains new nodes, node updates, API updates, core updates, editor updates, and bug fixes. ### Contributors# cesars-gh Stamsy Pash10g For full release details, refer to Releases on GitHub. ## n8n@1.86.0# View the commits for this version. **Release date:** 2025-03-31 This release contains API updates, core updates, editor improvements, node updates, and bug fixes. ### Contributors# Aijeyomah ownerer ulevitsky For full release details, refer to Releases on GitHub. ## n8n@1.85.4# View the commits for this version. **Release date:** 2025-03-27 This release contains a bug fix. For full release details, refer to Releases on GitHub. ## n8n@1.84.3# View the commits for this version. **Release date:** 2025-03-27 This release contains a bug fix. For full release details, refer to Releases on GitHub. ## n8n@1.84.2# View the commits for this version. **Release date:** 2025-03-26 This release contains a bug fix. For full release details, refer to Releases on GitHub. ## n8n@1.85.3# View the commits for this version. **Release date:** 2025-03-26 This release contains a bug fix. For full release details, refer to Releases on GitHub. ## n8n@1.85.2# View the commits for this version. **Release date:** 2025-03-25 This release contains a bug fix. For full release details, refer to Releases on GitHub. ## n8n@1.85.1# View the commits for this version. **Release date:** 2025-03-25 This release contains bug fixes. For full release details, refer to Releases on GitHub. ## n8n@1.85.0# View the commits for this version. **Release date:** 2025-03-24 This release contains a new node, a new credential, core updates, editor updates, node updates, and bug fixes. ### Folders# What can we say about folders? Well, they’re super handy for categorizing just about everything and they’re finally available for your n8n workflows. Tidy up your workspace with unlimited folders and nested folders. Search for workflows within folders. It’s one of the ways we’re making it easier to organize your n8n instances more effectively. **How to use it:** Create and manage folders within your personal space or within projects. You can also create workflows from within a folder. You may need to restart your instance in order to activate folders.  It's a folder alright Folders are available for all registered users so get started with decluttering your workspace now and look for more features (like drag and drop) to organize your instances soon. ### Enhancements to Form Trigger Node# Recent updates to the Form Trigger node have made it a more powerful tool for building business solutions. These enhancements provide more flexibility and customization, enabling teams to create visually engaging and highly functional workflows with forms. * **HTML customization:** Add custom HTML to forms, including embedded images and videos, for richer user experiences. * **Custom CSS support**: Apply custom styles to user-facing components to align forms with your brand’s look and feel. Adjust fonts, colors, and spacing for a seamless visual identity. * **Form previews:** Your form’s description and title will pull into previews of your form when sharing on social media or messaging apps, providing a more polished look. * **Hidden fields:** Use query parameters to add hidden fields, allowing you to pass data—such as a referral source—without exposing it to the user. * **New responses options:** Respond to user submissions in multiple ways including text, HTML, or a downloadable file (binary format). This enables forms to display rich webpages or deliver digital assets such as dynamically generated invoices or personalized certificates.  Form with custom CSS applied These improvements elevate the Form Trigger node beyond a simple workflow trigger, transforming it into a powerful tool for addressing use cases from data collection and order processing to custom content creation. ### Contributors# Fank For full release details, refer to Releases on GitHub. ## n8n@1.84.1# View the commits for this version. **Release date:** 2025-03-18 This release contains bug fixes. For full release details, refer to Releases on GitHub. ## n8n@1.84.0# View the commits for this version. **Release date:** 2025-03-17 This release contains a new node, node updates, editor updates, and bug fixes. ### Contributors# Pash10g For full release details, refer to Releases on GitHub. ## n8n@1.83.2# View the commits for this version. **Release date:** 2025-03-14 This release contains bug fixes. For full release details, refer to Releases on GitHub. ## n8n@1.82.4# View the commits for this version. **Release date:** 2025-03-14 This release contains a bug fix. For full release details, refer to Releases on GitHub. ## n8n@1.82.3# View the commits for this version. **Release date:** 2025-03-13 This release contains a bug fix. For full release details, refer to Releases on GitHub. ## n8n@1.83.1# View the commits for this version. **Release date:** 2025-03-12 This release contains bug fixes. For full release details, refer to Releases on GitHub. ## n8n@1.83.0# View the commits for this version. **Release date:** 2025-03-12 This release contains bug fixes and an editor update. ### Schema Preview# Schema Preview lets you view and work with a node’s expected output without executing it or adding credentials, keeping you in flow while building. * **See expected node outputs instantly.** View schemas for over 100+ nodes to help you design workflows efficiently without extra steps. * **Define workflow logic first, take care of credentials later.** Build your end-to-end workflow without getting sidetracked by credential setup. * **Avoid unwanted executions when building.** Prevent unnecessary API calls, unwanted data changes, or potential third-party service costs by viewing outputs without executing nodes. **How to use it:** * Add a node with Schema Preview support to your workflow. * Open the next node in the sequence - Schema Preview data appears in the Node Editor where you would typically find it in the Schema View. * Use Schema Preview fields just like other schema data - drag and drop them into parameters and settings as needed. Don’t forget to add the required credentials before putting your workflow into production. ### Contributors# pemontto Haru922 For full release details, refer to Releases on GitHub. ## n8n@1.82.2# View the commits for this version. **Release date:** 2025-03-12 This release contains bug fixes. For full release details, refer to Releases on GitHub. ## n8n@1.82.1# View the commits for this version. **Release date:** 2025-03-04 This release contains bug fixes. For full release details, refer to Releases on GitHub. ## n8n@1.82.0# View the commits for this version. **Release date:** 2025-03-03 This release contains core updates, editor updates, new nodes, node updates, new credentials, credential updates, and bug fixes. ### Tidy up# Tidy up instantly aligns nodes, centers stickies, untangles connections, and brings structure to your workflows. Whether you're preparing to share a workflow or just want to improve readability, this feature saves you time and makes your logic easier to follow. Clean, well-organized workflows aren't just nicer to look at—they’re also quicker to understand. **How to:** Open the workflow you want to tidy, then choose one of these options: * Click the **Tidy up** button in the bottom-left corner of the canvas (it looks like a broom 🧹) * Press **Shift + Alt + T** on your keyboard * Right-click anywhere on the canvas and select **Tidy up workflow** Want to tidy up just part of your workflow? Select the specific nodes you want to clean up first - Tidy up will only adjust those, along with any stickies behind them. ### Multiple API keys# n8n now supports multiple API keys, allowing users to generate and manage separate keys for different workflows or integrations. This improves security by enabling easier key rotation and isolation of credentials. Future updates will introduce more granular controls.  Multiple API keys ### Contributors# Rostammahabadi Lanhild matthiez feelgood-interface adina-hub For full release details, refer to Releases on GitHub. ## n8n@1.81.4# View the commits for this version. **Release date:** 2025-03-03 This release contains a bug fix. For full release details, refer to Releases on GitHub. ## n8n@1.81.3# View the commits for this version. **Release date:** 2025-03-03 This release contains bug fixes. For full release details, refer to Releases on GitHub. ## n8n@1.81.2# View the commits for this version. **Release date:** 2025-02-28 This release contains bug fixes. For full release details, refer to Releases on GitHub. ## n8n@1.80.5# View the commits for this version. **Release date:** 2025-02-28 This release contains a bug fix. For full release details, refer to Releases on GitHub. ## n8n@1.80.4# View the commits for this version. **Release date:** 2025-02-27 This release contains a bug fix. For full release details, refer to Releases on GitHub. ## n8n@1.81.1# View the commits for this version. **Release date:** 2025-02-27 This release contains bug fixes. For full release details, refer to Releases on GitHub. ## n8n@1.81.0# View the commits for this version. **Release date:** 2025-02-24 This release contains bug fixes, a core update, editor improvements, and a node update. ### Improved partial executions# The new execution engine for partial executions ensures that testing parts of a workflow in the builder closely mirrors production behaviour. This makes iterating with updated run-data faster and more reliable, particularly for complex workflows. Before, user would test parts of a workflow in the builder that didn't consistently reflect production behaviour, leading to unexpected results during development. This update aligns workflow execution in the builder with production behavior. Here is an example for loops: Before After For full release details, refer to Releases on GitHub. ## n8n@1.80.3# View the commits for this version. **Release date:** 2025-02-21 This release contains a bug fix. For full release details, refer to Releases on GitHub. ## n8n@1.79.4# View the commits for this version. **Release date:** 2025-02-21 This release contains a bug fix. For full release details, refer to Releases on GitHub. ## n8n@1.80.2# View the commits for this version. **Release date:** 2025-02-21 This release contains a bug fix. For full release details, refer to Releases on GitHub. ## n8n@1.79.3# View the commits for this version. **Release date:** 2025-02-21 This release contains a bug fix. For full release details, refer to Releases on GitHub. ## n8n@1.80.1# View the commits for this version. **Release date:** 2025-02-20 This release contains bug fixes. For full release details, refer to Releases on GitHub. ## n8n@1.79.2# View the commits for this version. **Release date:** 2025-02-20 This release contains bug fixes. For full release details, refer to Releases on GitHub. ## n8n@1.80.0# View the commits for this version. **Release date:** 2025-02-17 This release contains bug fixes and an editor improvement. For full release details, refer to Releases on GitHub. ## n8n@1.75.3# View the commits for this version. **Release date:** 2025-02-17 This release contains a bug fix. For full release details, refer to Releases on GitHub. ## n8n@1.74.4# View the commits for this version. **Release date:** 2025-02-17 This release contains a bug fix. For full release details, refer to Releases on GitHub. ## n8n@1.79.1# View the commits for this version. **Release date:** 2025-02-15 This release contains a bug fix. For full release details, refer to Releases on GitHub. ## n8n@1.78.1# View the commits for this version. **Release date:** 2025-02-15 This release contains a bug fix. For full release details, refer to Releases on GitHub. ## n8n@1.77.4# View the commits for this version. **Release date:** 2025-02-15 This release contains a bug fix. For full release details, refer to Releases on GitHub. ## n8n@1.76.4# View the commits for this version. **Release date:** 2025-02-15 This release contains a bug fix. For full release details, refer to Releases on GitHub. ## n8n@1.79.0# View the commits for this version. **Release date:** 2025-02-12 This release contains new features, node updates, and bug fixes. For full release details, refer to Releases on GitHub. ## n8n@1.77.3# View the commits for this version. **Release date:** 2025-02-06 This release contains a bug fix. For full release details, refer to Releases on GitHub. ## n8n@1.78.0# View the commits for this version. **Release date:** 2025-02-05 This release contains new features, node updates, and bug fixes. ### Contributors# mocanew Timtendo12 For full release details, refer to Releases on GitHub. ## n8n@1.77.2# View the commits for this version. **Release date:** 2025-02-04 This release contains bug fixes. For full release details, refer to Releases on GitHub. ## n8n@1.76.3# View the commits for this version. **Release date:** 2025-02-04 This release contains bug fixes. For full release details, refer to Releases on GitHub. ## n8n@1.77.1# View the commits for this version. **Release date:** 2025-02-03 This release contains bug fixes. For full release details, refer to Releases on GitHub. ## n8n@1.76.2# View the commits for this version. **Release date:** 2025-02-03 This release contains bug fixes. For full release details, refer to Releases on GitHub. ## n8n@1.77.0# View the commits for this version. **Release date:** 2025-01-29 This release contains new features, editor updates, new nodes, new credentials, node updates, and bug fixes. For full release details, refer to Releases on GitHub. ## n8n@1.76.1# View the commits for this version. **Release date:** 2025-01-23 This release contains a bug fix. For full release details, refer to Releases on GitHub. ## n8n@1.76.0# View the commits for this version. **Release date:** 2025-01-22 This release contains new features, editor updates, new credentials, node improvements, and bug fixes. ### Contributors# Stamsy GKdeVries For full release details, refer to Releases on GitHub. ## n8n@1.75.2# View the commits for this version. **Release date:** 2025-01-17 This release contains a bug fix. For full release details, refer to Releases on GitHub. ## n8n@1.74.3# View the commits for this version. **Release date:** 2025-01-17 This release contains a bug fix. For full release details, refer to Releases on GitHub. ## n8n@1.75.1# View the commits for this version. **Release date:** 2025-01-17 This release contains bug fixes. For full release details, refer to Releases on GitHub. ## n8n@1.74.2# View the commits for this version. **Release date:** 2025-01-17 This release contains bug fixes. For full release details, refer to Releases on GitHub. ## n8n@1.75.0# View the commits for this version. **Release date:** 2025-01-15 This release contains bug fixes and editor updates. ### Improved consistency across environments# We added new UX and automatic changes improvements resulting in a better consistency between your staging and production instances. Previously, users faced issues like: * Lack of visibility into required credential updates when pulling changes * Incomplete synchronization, where changes — such as deletions — weren’t always applied across environments * Confusing commit process, making it unclear what was being pushed or pulled We addressed these by: * Clearly indicating required credential updates when pulling changes * Ensuring deletions and other modifications sync correctly across environments * Improving commit selection to provide better visibility into what’s being pushed  Commit modal  Pull notification For full release details, refer to Releases on GitHub. ## n8n@1.74.1# View the commits for this version. **Release date:** 2025-01-09 This release contains a bug fix. For full release details, refer to Releases on GitHub. ## n8n@1.74.0# View the commits for this version. **Release date:** 2025-01-08 This release contains new features, a new node, node updates, performance improvements and bug fixes. ### Overhauled Code node editing experience# We added a ton of new helpers to the Code node, making edits of your code much faster and more comfortable. You get: * TypeScript autocomplete * TypeScript linting * TypeScript hover tips * Search and replace * New keyboard shortcuts based on the VSCode keymap * Auto-formatting using prettier (Alt+Shift+F) * Remember folded regions and history after refresh * Multi cursor * Type function in the Code node using JSDoc types * Drag and drop for all Code node modes * Indentation markers We build this on a web worker architecture so you won't have to suffer from performance degradation while typing. To get the full picture, check out our Studio update with Max and Elias, where they discuss and demo the new editing experience. 👇  Studio Update #04 ### New node: Microsoft Entra ID# Microsoft Entra ID (formerly known as Microsoft Azure Active Directory or Azure AD) is used for cloud-based identity and access management. The new node supports a wide range of Microsoft Entra ID features, which includes creating, getting, updating, and deleting users and groups, as well as adding users to and removing them from groups. ### Node updates# * AI Agent: Vector stores can now be directly used as tools for the agent * Code: Tons of new speed and convenience features, see above for details * Google Vertex Chat: Added option to specify the GCP region for the Google API credentials * HighLevel: Added support for calendar items We also added a custom projects icon selector on top of the available emojis. Pretty! ### Contributors# igatanasov Stamsy feelgood-interface For full release details, refer to Releases on GitHub. ## n8n@1.73.1# View the commits for this version. **Release date:** 2024-12-19 This release contains a bug fix. For full release details, refer to Releases on GitHub. ## n8n@1.73.0# View the commits for this version. **Release date:** 2024-12-19 This release contains node updates, performance improvements, and bug fixes. ### Node updates# * AI Agent: Updated descriptions for Chat Trigger options * Facebook Graph API: Updated for API v21.0 * Gmail: Added two new options for the `Send and wait` operation, free text and custom form * Linear Trigger: Added support for admin scope * MailerLite: Now supports the new API * Slack: Added two new options for the `Send and wait` operation, free text and custom form We also added credential support for SolarWinds IPAM and SolarWinds Observability. Last, but not least, we improved the schema view performance in the node details view by 90% and added drag and drop re-ordering to parameters. This comes in very handy in the If or Edit Fields nodes. ### Contributors# CodeShakingSheep mickaelandrieu Stamsy pbdco For full release details, refer to Releases on GitHub. ## n8n@1.72.1# View the commits for this version. **Release date:** 2024-12-12 This release contains bug fixes. For full release details, refer to Releases on GitHub. ## n8n@1.71.3# View the commits for this version. **Release date:** 2024-12-12 This release contains bug fixes. For full release details, refer to Releases on GitHub. ## n8n@1.72.0# View the commits for this version. **Release date:** 2024-12-11 This release contains node updates, usability improvements, and bug fixes. ### Node updates# * AI Transform: The `maximum context length` error now retries with reduced payload size * Redis: Added support for `continue on fail` ### Improved commit modal# We added filters and text search to the commit modal when working with Environments. This will make committing easier as we provide more information and better visibility. Environments are available on the Enterprise plan. For full release details, refer to Releases on GitHub. ## n8n@1.71.2# View the commits for this version. **Release date:** 2024-12-10 This release contains bug fixes. For full release details, refer to Releases on GitHub. ## n8n@1.70.4# View the commits for this version. **Release date:** 2024-12-10 This release contains bug fixes. For full release details, refer to Releases on GitHub. ## n8n@1.71.1# View the commits for this version. **Release date:** 2024-12-06 This release contains bug fixes. For full release details, refer to Releases on GitHub. ## n8n@1.70.3# View the commits for this version. **Release date:** 2024-12-05 This release contains bug fixes. For full release details, refer to Releases on GitHub. ## n8n@1.71.0# View the commits for this version. **Release date:** 2024-12-04 This release contains node updates, performance improvements, and bug fixes. ### Task runners for the Code node in public beta# We're introducing a significant performance upgrade to the Code node with our new Task runner system. This enhancement moves JavaScript code execution to a separate process, improving your workflow execution speed while adding better isolation.  Task runners overview Our benchmarks show up to 6x improvement in workflow executions using Code nodes - from approximately 6 to 35 executions per second. All these improvements happen under the hood, keeping your Code node experience exactly the same. The Task runner comes in two modes: * Internal mode (default): Perfect for getting started, automatically managing task runners as child processes * External mode: For advanced hosting scenarios requiring maximum isolation and security Currently, this feature is opt-in and can be enabled using environment variables. Once stable, it will become the default execution method for Code nodes. To start using Task runners today, check out the docs. ### Node updates# * AI Transform node: We improved the prompt for code generation to transform data * Code node: We added a warning if `pairedItem` is absent or could not be auto mapped For full release details, refer to Releases on GitHub. ## n8n@1.70.2# View the commits for this version. **Release date:** 2024-12-04 This release contains bug fixes. For full release details, refer to Releases on GitHub. ## n8n@1.70.1# View the commits for this version. **Release date:** 2024-11-29 This release contains bug fixes. For full release details, refer to Releases on GitHub. ## n8n@1.70.0# View the commits for this version. **Release date:** 2024-11-27 This release contains node updates, performance improvements and bug fixes. ### New canvas in beta# The new canvas is now the default setting for all users. It should bring significant performance improvements and adds a handy minimap. As it is still a beta version you can still revert to the previous version with the three dot menu. We're looking forward to your feedback. Should you encounter a bug, you will find a handy button to create an issue at the bottom of the new canvas as well. ### Node updates# * We added credential support for Zabbix to the HTTP request node * We added new OAuth2 credentials for Microsoft SharePoint * The Slack node now uses markdown for the approval message when using the `Send and Wait for Approval` operation ### Contributors# feelgood-interface adina-hub For full release details, refer to Releases on GitHub. ## n8n@1.68.1# View the commits for this version. **Release date:** 2024-11-26 This release contains bug fixes. For full release details, refer to Releases on GitHub. ## n8n@1.69.2# View the commits for this version. **Release date:** 2024-11-26 This release contains a bug fix. For full release details, refer to Releases on GitHub. ## n8n@1.69.1# View the commits for this version. **Release date:** 2024-11-25 This release contains bug fixes. For full release details, refer to Releases on GitHub. ## n8n@1.69.0# View the commits for this version. **Release date:** 2024-11-20 This release contains a new feature, node improvements and bug fixes. ### Sub-workflow debugging# We made it much easier to debug sub-workflows by improving their accessibility from the parent workflow. For full release details, refer to Releases on GitHub. ## n8n@1.68.0# View the commits for this version. **Release date:** 2024-11-13 This release contains node updates, performance improvements and many bug fixes. #### New AI agent canvas chat# We revamped the chat experience for AI agents on the canvas. A neatly organized view instead of a modal hiding the nodes. You can now see the canvas, chat and logs at the same time when testing your workflow. For full release details, refer to Releases on GitHub. ## n8n@1.67.1# View the commits for this version. **Release date:** 2024-11-07 This release contains a bug fix. For full release details, refer to Releases on GitHub. ## n8n@1.67.0# View the commits for this version. **Release date:** 2024-11-06 This release contains node updates and bug fixes. ### Node updates# * AI Transform: Improved usability * Anthropic Chat Model Node: Added Haiku 3.5 support * Convert to File: Added delimiter option for writing to CSV * Gmail Trigger: Added option to filter for draft messages * Intercom: Credential can now be used in the HTTP Request node * Rapid7 InsightVM: Added credential support For full release details, refer to Releases on GitHub. ## n8n@1.66.0# View the commits for this version. **Release date:** 2024-10-31 This release contains performance improvements, a node update and bug fixes. ### Node update# * Anthropic Chat Model: Added support for claude-3-5-sonnet-20241022 We made updates to how projects and workflow ownership are displayed making them easier to understand and navigate. We further improved the performance logic of partial executions, leading to a smoother and more enjoyable building experience. ### New n8n canvas alpha# We have enabled the alpha version of our new canvas. The canvas is the ‘drawing board’ of the n8n editor, and we’re working on a full rewrite. Your feedback and testing will help us improve it. Read all about it on our community forum. For full release details, refer to Releases on GitHub. ## n8n@1.65.2# View the commits for this version. **Release date:** 2024-10-28 This release contains bug fixes. For full release details, refer to Releases on GitHub. ## n8n@1.64.3# View the commits for this version. **Release date:** 2024-10-25 This release contains bug fixes. For full release details, refer to Releases on GitHub. ## n8n@1.65.1# View the commits for this version. **Release date:** 2024-10-25 This release contains bug fixes. For full release details, refer to Releases on GitHub. ## n8n@1.65.0# View the commits for this version. **Release date:** 2024-10-24 Breaking change What changed? Queue polling via the environment variable `QUEUE_RECOVERY_INTERVAL` has been removed. When is action necessary? If you have set `QUEUE_RECOVERY_INTERVAL`, you can remove it as it no longer has any effect. This release contains a new features, new nodes, node enhancements, and bug fixes. ### New node: n8n Form# Use the n8n Form node to create user-facing forms with multiple pages. You can add other nodes with custom logic between to process user input. Start the workflow with a n8n Form Trigger.  A multi-page form with branching Additionally you can: * Set default selections with query parameters * Define the form with a JSON array of objects * Show a completion screen and redirect to another URL ### Node updates# New nodes: * Google Business Profile and Google Business Profile Trigger: Use these to integrate Google Business Profile reviews and posts with your workflows Enhanced nodes: * AI Agent: Removed the requirement to add at least one tool * GitHub: Added workflows as a resource operation * Structured Output Parser: Added more user-friendly error messages For additional security, we improved how we handle multi-factor authentication, hardened config file permissions and introduced JWT for the public API. For better performance, we improved how partial executions are handled in loops. For full release details, refer to Releases on GitHub. ### Contributors# * Idan Fishman ## n8n@1.64.2# View the commits for this version. **Release date:** 2024-10-24 This release contains a bug fix. For full release details, refer to Releases on GitHub. ## n8n@1.64.1# View the commits for this version. **Release date:** 2024-10-21 This release contains a bug fix. For full release details, refer to Releases on GitHub. ## n8n@1.64.0# View the commits for this version. **Release date:** 2024-10-16 This release contains a new node, node enhancements, performance improvements and bug fixes. ### Enhanced node: Remove Duplicates# The Remove Duplicates node got a major makeover with the addition of two new operations: * Remove Items Processed in Previous Executions: Compare items in the current input to items from previous executions and remove duplicates * Clear Deduplication History: Wipe the memory of items from previous executions. This makes it easier to only process new items from any data source. For example, you can now more easily poll a Google sheet for new entries by `id` or remove duplicate orders from the same customer by comparing their `order date`. The great thing is, you can now do this within **and across** workflow runs. ### New node: Gong# The new node for Gong allows you to get users and calls to process them further in n8n. Very useful for sales related workflows. For full release details, refer to Releases on GitHub. ### Contributors# * Sören Uhrbach ## n8n@1.63.4# View the commits for this version. **Release date:** 2024-10-15 This release contains a bug fix. For full release details, refer to Releases on GitHub. ## n8n@1.62.6# View the commits for this version. **Release date:** 2024-10-15 This release contains a bug fix. For full release details, refer to Releases on GitHub. ## n8n@1.63.3# View the commits for this version. **Release date:** 2024-10-15 This release contains a bug fix. For full release details, refer to Releases on GitHub. ## n8n@1.63.2# View the commits for this version. **Release date:** 2024-10-11 This release contains a bug fix. For full release details, refer to Releases on GitHub. ## n8n@1.62.5# View the commits for this version. **Release date:** 2024-10-11 This release contains a bug fix. For full release details, refer to Releases on GitHub. ## n8n@1.63.1# View the commits for this version. **Release date:** 2024-10-11 This release contains a bug fix. For full release details, refer to Releases on GitHub. ## n8n@1.62.4# View the commits for this version. **Release date:** 2024-10-11 This release contains a bug fix. For full release details, refer to Releases on GitHub. ## n8n@1.63.0# View the commits for this version. **Release date:** 2024-10-09 Breaking change What changed? * The worker server used to bind to IPv6 by default. It now binds to IPv4 by default. * The worker server's `/healthz` used to report healthy status based on database and Redis checks. It now reports healthy status regardless of database and Redis status, and the database and Redis checks are part of `/healthz/readiness`. When is action necessary? * If you experience a port conflict error when starting a worker server using its default port, set a different port for the worker server with `QUEUE_HEALTH_CHECK_PORT`. * If you are relying on database and Redis checks for worker health status, switch to checking `/healthz/readiness` instead of `/healthz`. This release contains new features, node enhancements and bug fixes. ### Node updates# * OpenAI: Added the option to choose between the default memory connector to provide memory to the assistant or to specify a thread ID * Gmail and Slack: Added custom approval operations to have a human in the loop of a workflow We have also optimized the worker health checks (see breaking change above). Each credential now has a seperate url you can link to. This makes sharing much easier. For full release details, refer to Releases on GitHub. ### Contributors# Pemontto ## n8n@1.62.3# View the commits for this version. **Release date:** 2024-10-08 This release contains bug fixes. For full release details, refer to Releases on GitHub. ## n8n@1.62.2# View the commits for this version. **Release date:** 2024-10-07 This release contains bug fixes. For full release details, refer to Releases on GitHub. ## n8n@1.62.1# View the commits for this version. **Release date:** 2024-10-02 This release contains new features, node enhancements and bug fixes. Skipped 1.62.0 We skipped 1.62.0 and went straight to 1.62.1 with an additional fix. #### Additional nodes as tools# Additionally, we have added a `$fromAI()` placeholder function to use with tools, allowing you to dynamically pass information from the models to the connected tools. This function works similarly to placeholders used elsewhere in n8n. Both of these new features enable you to build even more powerful AI agents by drawing directly from the apps your business uses. This makes integrating LLMs into your business processes even easier than before. ### Node updates# * Google BigQuery: Added option to return numeric values as integers and not strings * HTTP Request: Added credential support for Sysdig * Invoice Ninja: Additional query params for getAll requests * Question and Answer Chain: Added the option to use a custom prompt Drag and drop insertion on cursor position from schema view is now also enabled for code, SQL and Html fields in nodes. Customers with an enterprise license can now rate, tag and highlight execution data in the executions view. To use highlighting, add an Execution Data Node (or Code node) to the workflow to set custom executions data. For full release details, refer to Releases on GitHub. ### Contributors# Benjamin Roedell CodeShakingSheep manuelbcd Miguel Prytoluk ## n8n@1.61.0# View the commits for this version. **Release date:** 2024-09-25 This release contains new features, node enhancements and bug fixes. ### Node updates# * Brandfetch: Updated to use the new API * Slack: Made adding or removing the workflow link to a message easier Big datasets now render faster thanks to virtual scrolling and execution annotations are harder to delete. For full release details, refer to Releases on GitHub. ## n8n@1.59.4# View the commits for this version. **Release date:** 2024-09-20 This release contains bug fixes. For full release details, refer to Releases on GitHub. ## n8n@1.60.1# View the commits for this version. **Release date:** 2024-09-20 This release contains bug fixes. For full release details, refer to Releases on GitHub. ## n8n@1.60.0# View the commits for this version. **Release date:** 2024-09-18 This release contains new features, node enhancements and bug fixes. You can now customize the maximum file size when uploading files within forms to webhooks. The environment variable to set for this is `N8N_FORMDATA_FILE_SIZE_MAX`. The default setting is 200MiB. ### Node updates# Enhanced nodes: * Invoice Ninja: Added actions for bank transactions * OpenAI: Added O1 models to the model select For full release details, refer to Releases on GitHub. ### Contributors# CodeShakingSheep ## n8n@1.59.3# View the commits for this version. **Release date:** 2024-09-18 This release contains a bug fix. For full release details, refer to Releases on GitHub. ## n8n@1.59.2# View the commits for this version. **Release date:** 2024-09-17 This release contains a bug fix. For full release details, refer to Releases on GitHub. ## n8n@1.59.1# View the commits for this version. **Release date:** 2024-09-16 This release contains bug fixes. For full release details, refer to Releases on GitHub. ## n8n@1.58.2# View the commits for this version. **Release date:** 2024-09-12 This release contains bug fixes. For full release details, refer to Releases on GitHub. ## n8n@1.59.0# View the commits for this version. **Release date:** 2024-09-11 Chat Trigger If you are using the Chat Trigger in "Embedded Chat" mode, with authentication turned on, you could see errors connecting to n8n if the authentication on the sending/embedded side is mis-configured. This release contains bug fixes and feature enhancements. For full release details, refer to Releases on GitHub. ### Contributors# oscarpedrero ## n8n@1.58.1# View the commits for this version. **Release date:** 2024-09-06 This release contains bug fixes. For full release details, refer to Releases on GitHub. ## n8n@1.58.0# View the commits for this version. **Release date:** 2024-09-05 This release contains new features, bug fixes and feature enhancements. #### New node: PGVector Vector Store# This release adds the PGVector Vector Store node. Use this node to interact with the PGVector tables in your PostgreSQL database. You can insert, get, and retrieve documents from a vector table to provide them to a retriever connected to a chain. #### See active collaborators on workflows# We added collaborator avatars back to the workflow canvas. You will see other users who are active on the workflow, preventing you from overriding each other's work.  Collaboration avatars For full release details, refer to Releases on GitHub. ## n8n@1.57.0# View the commits for this version. **Release date:** 2024-08-28 This release contains new features and bug fixes. #### Improved execution queue handling# We are exposing new execution queue metrics to give users more visibility of the queue length. This helps to inform decisions on horizontal scaling, based on queue status. We have also made querying executions faster. #### New credentials for the HTTP Request node# We added credential support for Datadog, Dynatrace, Elastic Security, Filescan, Iris, and Malcore to the HTTP Request node making it easier to use existing credentials. We also made it easier to select workflows as tools when working with AI agents by implementing a new `workflow selector` parameter type. For full release details, refer to Releases on GitHub. ### Contributors# Bram Kn ## n8n@1.56.2# View the commits for this version. **Release date:** 2024-08-26 This release contains a bug fix. For full release details, refer to Releases on GitHub. ## n8n@1.56.1# View the commits for this version. **Release date:** 2024-08-23 This release contains bug fixes. For full release details, refer to Releases on GitHub. ## n8n@1.56.0# View the commits for this version. **Release date:** 2024-08-21 This release contains node updates, security and bug fixes. For full release details, refer to Releases on GitHub. ### Contributors# CodeShakingSheep Oz Weiss For full release details, refer to Releases on GitHub. ## n8n@1.55.3# View the commits for this version. **Release date:** 2024-08-16 This release contains bug fixes. For full release details, refer to Releases on GitHub. ## n8n@1.55.2# View the commits for this version. **Release date:** 2024-08-16 This release contains bug fixes. For full release details, refer to Releases on GitHub. ## n8n@1.55.1# View the commits for this version. **Release date:** 2024-08-15 This release contains bug fixes. For full release details, refer to Releases on GitHub. ## n8n@1.54.4# View the commits for this version. **Release date:** 2024-08-15 This release contains bug fixes. For full release details, refer to Releases on GitHub. ## n8n@1.54.3# View the commits for this version. **Release date:** 2024-08-15 This release contains bug fixes. For full release details, refer to Releases on GitHub. ## n8n@1.54.2# View the commits for this version. **Release date:** 2024-08-14 This release contains bug fixes. For full release details, refer to Releases on GitHub. ## n8n@1.55.0# View the commits for this version. **Release date:** 2024-08-14 Breaking change The N8N\_BLOCK\_FILE\_ACCESS\_TO\_N8N\_FILES environment variable now also blocks access to n8n's static cache directory at ~/.cache/n8n/public. If you are writing to or reading from a file at n8n's static cache directory via a node, e.g. Read/Write Files from Disk, please update your node to use a different path. This release contains a new feature, a new node, a node update and bug fixes. #### Override the npm registry# This release adds the option to override the npm registry for installing community packages. This is a paid feature. We now also prevent npm downloading community packages from a compromised npm registry by explicitly using --registry in all npm install commands. #### New node: AI Transform# This release adds the AI Transform node. Use the AI Transform node to generate code snippets based on your prompt. The AI is context-aware, understanding the workflow’s nodes and their data types. The node is only available on Cloud plans. #### New node: Okta# This release adds the Okta node. Use the Okta node to automate work in Okta and integrate Okta with other applications. n8n has built-in support for a wide range of Okta features, which includes creating, updating, and deleting users. ### Node updates# Enhanced node: * MySQL This release also adds the new schema view for the expression editor modal. For full release details, refer to Releases on GitHub. ## n8n@1.54.1# View the commits for this version. **Release date:** 2024-08-13 This release contains a bug fix. For full release details, refer to Releases on GitHub. ## n8n@1.53.2# View the commits for this version. **Release date:** 2024-08-08 This release contains a bug fix. For full release details, refer to Releases on GitHub. ## n8n@1.54.0# View the commits for this version. **Release date:** 2024-08-07 This release contains new features, node enhancements, bug fixes and updates to our API. ### API update# Our public REST API now supports additional operations: * Create, delete, and edit roles for users * Create, read, update and delete projects Find the details in the API reference. ### Contributors# CodeShakingSheep Javier Ferrer González Mickaël Andrieu Oz Weiss Pemontto For full release details, refer to Releases on GitHub. ## n8n@1.45.2# View the commits for this version. **Release date:** 2024-08-06 This release contains a bug fix. For full release details, refer to Releases on GitHub. ## n8n@1.53.1# View the commits for this version. **Release date:** 2024-08-02 This release contains bug fixes. For full release details, refer to Releases on GitHub. ## n8n@1.53.0# View the commits for this version. **Release date:** 2024-07-31 This release contains new features, new nodes, node enhancements, bug fixes and updates to our API. #### Added Google Cloud Platform Secrets Manager support# This release adds Google Cloud Platform Secrets Manager to the list of external secret stores. We already support AWS secrets, Azure Key Vault, Infisical and HashiCorp Vault. External secret stores are available under an enterprise license. This release adds the Information Extractor node. The node is specifically tailored for information extraction tasks. It uses Structured Output Parser under the hood, but provides a simpler way to extract information from text in a structured JSON form. #### New node: Sentiment Analysis# This release adds the Sentiment Analysis node. The node leverages LLMs to analyze and categorize the sentiment of input text. Users can easily integrate this node into their workflows to perform sentiment analysis on text data. The node is flexible enough to handle various use cases, from basic positive/negative classification to more nuanced sentiment categories. ### Node updates# Enhanced nodes: * Calendly Trigger * HTTP Request * n8n Form Trigger * Shopify ### API update# Our public REST API now supports additional operations: * Create, read, and delete for variables * Filtering workflows by project * Transferring workflows Find the details in the API reference. ### Contributors# feelgood-interface Oz Weiss For full release details, refer to Releases on GitHub. ## n8n@1.52.2# View the commits for this version. **Release date:** 2024-07-31 This release contains bug fixes. For full release details, refer to Releases on GitHub. ## n8n@1.52.1# View the commits for this version. **Release date:** 2024-07-26 This release contains bug fixes. For full release details, refer to Releases on GitHub. ## n8n@1.51.2# View the commits for this version. **Release date:** 2024-07-26 This release contains bug fixes. For full release details, refer to Releases on GitHub. ## n8n@1.52.0# View the commits for this version. **Release date:** 2024-07-25 Breaking change Prometheus metrics enabled via N8N\_METRICS\_INCLUDE\_DEFAULT\_METRICS and N8N\_METRICS\_INCLUDE\_API\_ENDPOINTS were fixed to include the default n8n\_ prefix. If you are using Prometheus metrics from these categories and are using a non-empty prefix, please update those metrics to match their new prefixed names. This release contains new features, node enhancements and bug fixes. #### Added Azure Key Vault support# This release adds Azure Key Vault to the list of external secret stores. We already support AWS secrets, Infisical and HashiCorp Vault and are working on Google Secrets Manager. External secret stores are available under an enterprise license. ### Node updates# Enhanced nodes: * Pinecone Vector Store * Supabase Vector Store * Send Email Deprecated nodes: * OpenAI Model: You can use the OpenAI Chat Model instead * Google Palm Chat Model: You can use Google Vertex or Gemini instead * Google Palm Model: You can use Google Vertex or Gemini instead ## n8n@1.51.1# View the commits for this version. **Release date:** 2024-07-23 This release contains bug fixes. For full release details, refer to Releases on GitHub. ## n8n@1.50.2# View the commits for this version. **Release date:** 2024-07-23 This release contains bug fixes. For full release details, refer to Releases on GitHub. ## n8n@1.51.0# View the commits for this version. **Release date:** 2024-07-18 This release contains new nodes, node enhancements and bug fixes. For full release details, refer to Releases on GitHub. ### Node updates# * Enhanced nodes: Asana ## n8n@1.50.1# View the commits for this version. **Release date:** 2024-07-16 This release contains bug fixes. For full release details, refer to Releases on GitHub. ## n8n@1.50.0# View the commits for this version. **Release date:** 2024-07-10 This release contains node enhancements and bug fixes. ### Node updates# * Enhanced nodes: Chat Trigger, Google Cloud Firestore, Qdrant Vector Store, Splunk, Telegram * Deprecated node: Orbit (product shut down) ### Beta Feature Removal# The Ask AI beta feature for the HTTP Request node has been removed from this version ### Contributors# Stanley Yoshinori Takamatsu CodeShakingSheep jeanpaul adrian-martinez-onestic Malki Davis ## n8n@1.49.0# View the commits for this version. **Release date:** 2024-07-03 This release contains a new node, node enhancements, and bug fixes. ### Node updates# * New node added: Vector Store Tool for the AI Agent * Enhanced nodes: Zep Cloud Memory, Copper, Embeddings Cohere, GitHub, Merge, Zammad For full release details, refer to Releases on GitHub. ### Contributors# Jochem KhDu Nico Weichbrodt Pavlo Paliychuk ## n8n@1.48.3# View the commits for this version. **Release date:** 2024-07-03 This release contains bug fixes. For full release details, refer to Releases on GitHub. ## n8n@1.47.3# View the commits for this version. **Release date:** 2024-07-03 This release contains bug fixes. For full release details, refer to Releases on GitHub. ## n8n@1.48.2# View the commits for this version. **Release date:** 2024-07-01 This release contains bug fixes. For full release details, refer to Releases on GitHub. ## n8n@1.47.2# View the commits for this version. **Release date:** 2024-07-01 This release contains bug fixes. For full release details, refer to Releases on GitHub. ## n8n@1.48.1# View the commits for this version. **Release date:** 2024-06-27 This release contains bug fixes. For full release details, refer to Releases on GitHub. ## n8n@1.48.0# View the commits for this version. **Release date:** 2024-06-27 This release contains bug fixes and feature enhancements. For full release details, refer to Releases on GitHub. ### Contributors# KubeAl ## n8n@1.47.1# View the commits for this version. **Release date:** 2024-06-26 This is a bug fix release. For full release details, refer to Releases on GitHub. ## n8n@1.47.0# View the commits for this version. **Release date:** 2024-06-20 Breaking change Calling `$(...).last()` (or `(...).first()` or `$(...).all()`) without arguments now returns the last item (or first or all items) of the output that connects two nodes. Previously, it returned the item/items of the first output of that node. Refer to the breaking changes log for details. This release contains bug fixes, feature enhancements, a new node, node enhancements and performance improvements. For full release details, refer to Releases on GitHub. #### New node: HTTP request tool# This release adds the HTTP request tool. You can use it with an AI agent as a tool to collect information from a website or API. Refer to the HTTP request tool for details. ### Contributors# Daniel ekadin-mtc Eric Francis Josh Sorenson Mohammad Alsmadi Nikolai T. Jensen n8n-ninja pebosi Taylor Hoffmann ## n8n@1.45.1# View the commits for this version. **Release date:** 2024-06-12 This is a bug fix release. For full release details, refer to Releases on GitHub. ## n8n@1.46.0# View the commits for this version. **Release date:** 2024-06-12 This release contains feature enhancements, node enhancements, and bug fixes. For full release details, refer to Releases on GitHub. ### Contributors# Jean Khawand pemontto Valentin Coppin ## n8n@1.44.2# View the commits for this version. **Release date:** 2024-06-12 This is a bug fix release. For full release details, refer to Releases on GitHub. ## n8n@1.42.2# View the commits for this version. **Release date:** 2024-06-10 This is a bug fix release. For full release details, refer to Releases on GitHub. ## n8n@1.45.0# View the commits for this version. **Release date:** 2024-06-06 This release contains new features, node enhancements, and bug fixes. For full release details, refer to Releases on GitHub. ## n8n@1.44.1# View the commits for this version. **Release date:** 2024-06-03 This is a bug fix release. For full release details, refer to Releases on GitHub. ## n8n@1.44.0# View the commits for this version. **Release date:** 2024-05-30 This release contains new features, node enhancements, and bug fixes. For full release details, refer to Releases on GitHub. ## n8n@1.43.1# View the commits for this version. **Release date:** 2024-05-28 This is a bug fix release. For full release details, refer to Releases on GitHub. ## n8n@1.43.0# View the commits for this version. **Release date:** 2024-05-22 This release contains new features, node enhancements, and bug fixes. Backup recommended Although this release doesn't include a breaking change, it is a significant update including database migrations. n8n recommends backing up your data before updating to this version. Credential sharing required for manual executions Instance owners and admins: you will see changes if you try to manually execute a workflow where the credentials aren't shared with you. Manual workflow executions now use the same permissions checks as production executions, meaning you can't do a manual execution of a workflow if you don't have access to the credentials. Previously, owners and admins could do manual executions without credentials being shared with them. To resolve this, the credential creator needs to share the credential with you. #### New feature: Projects# With projects and roles, you can give your team access to collections of workflows and credentials, rather than having to share each workflow and credential individually. Simultaneously, you tighten security by limiting access to people on the relevant team. Refer to the RBAC documentation for information on creating projects and using roles. The number of projects and role types vary depending on your plan. Refer to Pricing for details. ### Other highlights# * Improved memory support for OpenAI assistants. ### Rolling back to a previous version# If you update to this version, then decide you need to role back: Self-hosted n8n: 1. Delete any RBAC projects you created. 2. Revert the database migrations using `n8n db:revert`. Cloud: contact help@n8n.io. ### Contributors# Ayato Hayashi Daniil Zobov Guilherme Barile Romain MARTINEAU ## n8n@1.42.1# View the commits for this version. **Release date:** 2024-05-20 This is a bug fix release. For full release details, refer to Releases on GitHub. ## n8n@1.41.1# View the commits for this version. **Release date:** 2024-05-16 This is a bug fix release. For full release details, refer to Releases on GitHub. ## n8n@1.42.0# View the commits for this version. **Release date:** 2024-05-15 This release contains new features, node enhancements, and bug fixes. Note that this release removes the AI error debugger. We're working on a new and improved version. #### New feature: Tools Agent# This release adds a new option to the Agent node: the Tools Agent. This agent has an enhanced ability to work with tools, and can ensure a standard output format. This is now the recommended default agent. For full release details, refer to Releases on GitHub. ### Contributors# Mike Quinlan guangwu ## n8n@1.41.0# View the commits for this version. **Release date:** 2024-05-08 This release contains new features, node enhancements, and bug fixes. Note that this release temporarily disables the AI error helper. For full release details, refer to Releases on GitHub. ### Contributors# Florin Lungu ## n8n@1.40.0# View the commits for this version. **Release date:** 2024-05-02 Breaking change Please note that this version contains a breaking change for instances using a Postgres database. The default value for the DB\_POSTGRESDB\_USER environment variable was switched from `root` to `postgres`. Refer to the breaking changes log for details. This release contains new features, new nodes, node enhancements, and bug fixes. #### New feature: Ask AI in the HTTP node# You can now ask AI to help create API requests in the HTTP Request node: 1. In the HTTP Request node, select **Ask AI**. 2. Enter the **Service** and **Request** you want to use. For example, to use the NASA API to get their picture of the day, enter `NASA` in **Service** and `get picture of the day` in **Request**. 3. Check the parameters: the AI tries to fill them out, but you may still need to adjust or correct the configuration. Self-hosted users need to enable AI features and provide their own API keys For full release details, refer to Releases on GitHub. ### Contributors# Alberto Pasqualetto Bram Kn CodeShakingSheep Nicolas-nwb pemontto pengqiseven webk Yoshino-s ## n8n@1.39.1# View the commits for this version. **Release date:** 2024-04-25 This release contains bug fixes. For full release details, refer to Releases on GitHub. ## n8n@1.38.2# View the commits for this version. **Release date:** 2024-04-25 This release contains bug fixes. For full release details, refer to Releases on GitHub. ## n8n@1.37.4# View the commits for this version. **Release date:** 2024-04-25 This release contains bug fixes. For full release details, refer to Releases on GitHub. ## n8n@1.39.0# View the commits for this version. **Release date:** 2024-04-24 This release contains new nodes, node enhancements, and bug fixes. #### Node enhancement: Multiple methods, one Webhook node# The Webhook Trigger node can now handle calls to multiple HTTP methods. Refer to the Webhook node documentation for information on enabling this. For full release details, refer to Releases on GitHub. ### Contributors# Bram Kn ## n8n@1.38.1# View the commits for this version. **Release date:** 2024-04-18 This release contains bug fixes. For full release details, refer to Releases on GitHub. ## n8n@1.37.3# View the commits for this version. **Release date:** 2024-04-18 This release contains bug fixes. For full release details, refer to Releases on GitHub. ## n8n@1.38.0# View the commits for this version. **Release date:** 2024-04-17 This release contains new nodes, bug fixes, and node enhancements. For full release details, refer to Releases on GitHub. ### Contributors# Chengyou Liu Francesco Mannino ## n8n@1.37.2# View the commits for this version. **Release date:** 2024-04-17 This release contains bug fixes. For full release details, refer to Releases on GitHub. ## n8n@1.36.4# View the commits for this version. **Release date:** 2024-04-15 This release contains bug fixes. For full release details, refer to Releases on GitHub. ## n8n@1.36.3# View the commits for this version. **Release date:** 2024-04-12 This release contains bug fixes. For full release details, refer to Releases on GitHub. ## n8n@1.37.1# View the commits for this version. **Release date:** 2024-04-11 Breaking change Please note that this version contains a breaking change for self-hosted n8n. It removes the `--file` flag for the `execute` CLI command. If you have scripts relying on the `--file` flag, update them to first import the workflow and then execute it using the `--id` flag. Refer to CLI commands for more information on CLI options. This release contains bug fixes. For full release details, refer to Releases on GitHub. ## n8n@1.36.2# View the commits for this version. **Release date:** 2024-04-11 This release contains bug fixes. For full release details, refer to Releases on GitHub. ## n8n@1.37.0# View the commits for this version. **Release date:** 2024-04-10 Breaking change Please note that this version contains a breaking change for self-hosted n8n. It removes the `--file` flag for the `execute` CLI command. If you have scripts relying on the `--file` flag, update them to first import the workflow and then execute it using the `--id` flag. Refer to CLI commands for more information on CLI options. This release contains a new node, improvements to error handling and messaging, node enhancements, and bug fixes. For full release details, refer to Releases on GitHub. ### Contributors# Miguel Prytoluk ## n8n@1.36.1# View the commits for this version. **Release date:** 2024-04-04 This release contains bug fixes. For full release details, refer to Releases on GitHub. ## n8n@1.36.0# View the commits for this version. **Release date:** 2024-04-03 This release contains new nodes, enhancements and bug fixes. For full release details, refer to Releases on GitHub. ## n8n@1.35.0# View the commits for this version. **Release date:** 2024-03-28 This release contains enhancements and bug fixes. For full release details, refer to Releases on GitHub. ## n8n@1.34.2# View the commits for this version. **Release date:** 2024-03-26 This release contains bug fixes. For full release details, refer to Releases on GitHub. ## n8n@1.34.1# View the commits for this version. **Release date:** 2024-03-25 This release contains bug fixes. For full release details, refer to Releases on GitHub. ## n8n@1.34.0# View the commits for this version. **Release date:** 2024-03-20 This release contains new features, new nodes, and bug fixes. #### New node: Microsoft OneDrive Trigger node# This release adds the Microsoft OneDrive Trigger node. You can now trigger workflows on file and folder creation and update events. #### New data transformation functions# This release introduces new data transformation functions: **String** <table><tbody><tr><td><div><pre><span></span><span>1</span> <span>2</span> <span>3</span> <span>4</span> <span>5</span> <span>6</span></pre></div></td><td><div><pre><span></span><code><span>toDateTime</span><span>()</span><span> </span><span>//replaces toDate(). toDate() is retained for backwards compatability.</span> <span>parseJson</span><span>()</span> <span>extractUrlPath</span><span>()</span> <span>toBoolean</span><span>()</span> <span>base64Encode</span><span>()</span> <span>base64Decode</span><span>()</span> </code></pre></div></td></tr></tbody></table> **Number** <table><tbody><tr><td><div><pre><span></span><span>1</span> <span>2</span></pre></div></td><td><div><pre><span></span><code><span>toDateTime</span><span>()</span> <span>toBoolean</span><span>()</span> </code></pre></div></td></tr></tbody></table> **Object** <table><tbody><tr><td><div><pre><span></span><span>1</span></pre></div></td><td><div><pre><span></span><code><span>toJsonString</span><span>()</span> </code></pre></div></td></tr></tbody></table> **Array** <table><tbody><tr><td><div><pre><span></span><span>1</span></pre></div></td><td><div><pre><span></span><code><span>toJsonString</span><span>()</span> </code></pre></div></td></tr></tbody></table> **Date & DateTime** <table><tbody><tr><td><div><pre><span></span><span>1</span> <span>2</span></pre></div></td><td><div><pre><span></span><code><span>toDateTime</span><span>()</span> <span>toInt</span><span>()</span> </code></pre></div></td></tr></tbody></table> **Boolean** <table><tbody><tr><td><div><pre><span></span><span>1</span></pre></div></td><td><div><pre><span></span><code><span>toInt</span><span>()</span> </code></pre></div></td></tr></tbody></table> ### Contributors# Bram Kn pemontto ## n8n@1.33.1# View the commits for this version. **Release date:** 2024-03-15 This release contains bug fixes. For full release details, refer to Releases on GitHub. ## n8n@1.32.2# View the commits for this version. **Release date:** 2024-03-15 This release contains bug fixes. For full release details, refer to Releases on GitHub. ## n8n@1.33.0# View the commits for this version. **Release date:** 2024-03-13 This release contains new features, node enhancements, and bug fixes. For full release details, refer to Releases on GitHub. ### Contributors# gumida Ayato Hayashi Jordan MC Naveen ## n8n@1.32.1# View the commits for this version. **Release date:** 2024-03-07 This is a bug fix release. For full release details, refer to Releases on GitHub. ## n8n@1.31.2# View the commits for this version. **Release date:** 2024-03-07 This is a bug fix release. For full release details, refer to Releases on GitHub. ## n8n@1.32.0# View the commits for this version. **Release date:** 2024-03-06 This release contains new features, node enhancements, performance improvements, and bug fixes. For full release details, refer to Releases on GitHub. ## n8n@1.31.1# View the commits for this version. **Release date:** 2024-03-06 Breaking changes Please note that this version contains a breaking change. HTTP connections to the editor will fail on domains other than localhost. You can read more about it here. This is a bug fix release and it contains a breaking change. For full release details, refer to Releases on GitHub. ## n8n@1.31.0# View the commits for this version. **Release date:** 2024-02-28 This release contains new features, new nodes, node enhancements and bug fixes. For full release details, refer to Releases on GitHub. ## n8n@1.30.1# View the commits for this version. **Release date:** 2024-02-23 This release contains bug fixes. For full release details, refer to Releases on GitHub. ## n8n@1.30.0# View the commits for this version. **Release date:** 2024-02-21 This release contains new features, node enhancements, and bug fixes. For full release details, refer to Releases on GitHub. ## n8n@1.29.1# View the commits for this version. **Release date:** 2024-02-16 This release contains bug fixes. For full release details, refer to Releases on GitHub. ## n8n@1.29.0# View the commits for this version. **Release date:** 2024-02-15 This release contains new features, node enhancements, and bug fixes. For full release details, refer to Releases on GitHub. ### New features# #### OpenAI node overhaul# This release includes a new version of the OpenAI node, adding more operations, including support for working with assistants. Other highlights: * Support for AI events in log streaming. * Added support for workflow tags in the public API. ### Contributors# Bruno Inec Jesús Burgers ## n8n@1.27.3# View the commits for this version. **Release date:** 2024-02-15 This release contains bug fixes. For full release details, refer to Releases on GitHub. ## n8n@1.28.0# View the commits for this version. **Release date:** 2024-02-07 This release contains new features, new nodes, node enhancements and bug fixes. For full release details, refer to Releases on GitHub. ### Contributors# Andrea Ascari ## n8n@1.27.2# View the commits for this version. **Release date:** 2024-02-02 This release contains bug fixes. For full release details, refer to Releases on GitHub. ## n8n@1.27.1# View the commits for this version. **Release date:** 2024-01-31 This release contains new features, node enhancements, and bug fixes. For full release details, refer to Releases on GitHub. ## n8n@1.27.0# View the commits for this version. **Release date:** 2024-01-31 Breaking change This release removes `own` mode for self-hosted n8n. You must now use `EXECUTIONS_MODE` and set to either `regular` or `queue`. Refer to Queue mode for information on configuring queue mode. Skip this release Please upgrade directly to 1.27.1. This release contains node enhancements and bug fixes. For full release details, refer to Releases on GitHub. ## n8n@1.26.0# View the commits for this version. **Release date:** 2024-01-24 This release contains new features, node enhancements, and bug fixes. For full release details, refer to Releases on GitHub. ### Contributors# Daniel Schröder Nihaal Sangha ## n8n@1.25.1# View the commits for this version. **Release date:** 2024-01-22 This is a bug fix release. For full release details, refer to Releases on GitHub. ### Contributors# Nihaal Sangha ## n8n@1.25.0# View the commits for this version. **Release date:** 2024-01-17 This release contains a new node, feature improvements, and bug fixes. #### New node: Chat Memory Manager# The Chat Memory Manager node replaces the Chat Messages Retriever node. It manages chat message memories within your AI workflows. For full release details, refer to Releases on GitHub. ## n8n@1.24.1# View the commits for this version. **Release date:** 2024-01-16 This is a bug fix release. For full release details, refer to Releases on GitHub. ## n8n@1.22.6# View the commits for this version. **Release date:** 2024-01-10 This is a bug fix release. It includes important fixes for the HTTP Request and monday.com nodes. For full release details, refer to Releases on GitHub. ## n8n@1.24.0# View the commits for this version. **Release date:** 2024-01-10 This release contains new nodes for advanced AI, node enhancements, new features, performance enhancements, and bug fixes. #### Chat trigger# n8n has created a new Chat Trigger node. The new node provides a chat interface that you can make publicly available, with customization and authentication options. ### Contributors# Anush Eric Koleda Mason Geloso vacitbaydarman ## n8n@1.22.5# View the commits for this version. **Release date:** 2024-01-09 This is a bug fix release. For full release details, refer to Releases on GitHub. ## n8n@1.23.0# View the commits for this version. **Release date:** 2024-01-03 This release contains new nodes, node enhancements, new features, and bug fixes. #### New nodes and improved experience for working with files# This release includes a major overhaul of nodes relating to files (binary data). There are now three key nodes dedicated to handling binary data files: * Read/Write Files from Disk to read and write files from/to the machine where n8n is running. * Convert to File to take input data and output it as a file. * Extract From File to get data from a binary format and convert it to JSON. n8n has moved support for iCalendar, PDF, and spreadsheet formats into these nodes, and removed the iCalendar, Read PDF, and Spreadsheet File nodes. There are still standalone nodes for HTML and XML. ### Contributors# Aaron Gutierrez Advaith Gundu Anush Bin Nihaal Sangha ## n8n@1.22.4# View the commits for this version. **Release date:** 2024-01-03 This is a bug fix release. For full release details, refer to Releases on GitHub. ## n8n@1.22.3# View the commits for this version. **Release date:** 2023-12-27 Upgrade directly to 1.22.4 Due to issues with this release, upgrade directly to 1.22.4. This is a bug fix release. For full release details, refer to Releases on GitHub. ## n8n@1.22.2# View the commits for this version. **Release date:** 2023-12-27 Upgrade directly to 1.22.4 Due to issues with this release, upgrade directly to 1.22.4. This is a bug fix release. For full release details, refer to Releases on GitHub. ## n8n@1.22.1# View the commits for this version. **Release date:** 2023-12-21 This is a bug fix release. For full release details, refer to Releases on GitHub. ## n8n@1.22.0# View the commits for this version. **Release date:** 2023-12-21 This release contains node enhancements, new features, performance improvements, and bug fixes. For full release details, refer to Releases on GitHub. ## n8n@1.18.4# View the commits for this version. **Release date:** 2023-12-19 This is a bug fix release. For full release details, refer to Releases on GitHub. ## n8n@1.21.1# View the commits for this version. **Release date:** 2023-12-15 This is a bug fix release. For full release details, refer to Releases on GitHub. ## n8n@1.18.3# View the commits for this version. **Release date:** 2023-12-15 This is a bug fix release. For full release details, refer to Releases on GitHub. ## n8n@1.21.0# View the commits for this version. **Release date:** 2023-12-13 This release contains new features and nodes, node enhancements, and bug fixes. #### New user role: Admin# This release introduces a third account type: admin. This role is available on pro and enterprise plans. Admins have similar permissions to instance owners. Read more about user roles #### New data transformation nodes# This release replaces the Item Lists node with a collection of nodes for data transformation tasks: * Aggregate: take separate items, or portions of them, and group them together into individual items. * Limit: remove items beyond a defined maximum number. * Remove Duplicates: identify and delete items that are identical across all fields or a subset of fields. * Sort: organize lists of in a desired ordering, or generate a random selection. * Split Out: separate a single data item containing a list into multiple items. * Summarize: aggregate items together, in a manner similar to Excel pivot tables. #### Increased sharing permissions for owners and admins# Instance owners and users with the admin role can now see and share all workflows and credentials. They can't view sensitive credential information. For full release details, refer to Releases on GitHub. ## n8n@1.20.0# View the commits for this version. **Release date:** 2023-12-06 This release contains bug fixes, node enhancements, and ongoing new feature work. For full release details, refer to Releases on GitHub. ### Contributors# Andrey Starostin ## n8n@1.19.5# View the commits for this version. **Release date:** 2023-12-05 This is a bug fix release. Breaking change This release removes the TensorFlow Embeddings node. For full release details, refer to Releases on GitHub. ## n8n@1.18.2# View the commits for this version. **Release date:** 2023-12-05 This is a bug fix release. For full release details, refer to Releases on GitHub. ## n8n@1.19.4# View the commits for this version. **Release date:** 2023-12-01 Missing ARM v7 support This version doesn't support ARM v7. n8n is working on fixing this in future releases. For full release details, refer to Releases on GitHub. ## n8n@1.19.0# View the commits for this version. **Release date:** 2023-11-29 Upgrade directly to 1.19.4 Due to issues with this release, upgrade directly to 1.19.4. This release contains new features, node enhancements, and bug fixes. #### LangChain general availability# This release adds LangChain support to the main n8n version. Refer to LangChain for more information on how to build AI tools in n8n, the new nodes n8n has introduced, and related learning resources. #### Show avatars of users working on the same workflow# This release improves the experience of users collaborating on workflows. You can now see who else is editing at the same time as you. ## n8n@1.18.1# View the commits for this version. **Release date:** 2023-11-30 This is a bug fix release. For full release details, refer to Releases on GitHub. ## n8n@1.18.0# View the commits for this version. **Release date:** 2023-11-22 This release contains new features and bug fixes. #### Template creator hub# Built a template you want to share? This release introduces the n8n Creator hub. Refer to the creator hub Notion doc for more information on this project. #### Node input and output search filter# Cloud Pro and Enterprise users can now search and filter the input and output data in nodes. Refer to Data filtering for more information. For full release details, refer to Releases on GitHub. ## n8n@1.17.1# View the commits for this version. **Release date:** 2023-11-17 This release contains bug fixes. For full release details, refer to Releases on GitHub. ## n8n@1.17.0# View the commits for this version. **Release date:** 2023-11-15 This release contains node enhancements and bug fixes. #### Sticky Note Colors# You can now select background colors for sticky notes. #### Discord Node Overhaul# An overhaul of the Discord node, improving the UI making it easier to configure, improving error handling, and fixing issues. For full release details, refer to Releases on GitHub. ### Contributors# antondollmaier teomane ## n8n@1.16.0# View the commits for this version. **Release date:** 2023-11-08 This release contains node enhancements and bug fixes. For full release details, refer to Releases on GitHub. ## n8n@1.15.2# View the commits for this version. **Release date:** 2023-11-07 This release contains bug fixes. For full release details, refer to Releases on GitHub. ## n8n@1.15.1# View the commits for this version. **Release date:** 2023-11-02 This release contains new features, node enhancements, and bug fixes. #### Workflow history# This release introduces workflow history: view and load previous versions of your workflows. Workflow history is available in Enterprise n8n, and with limited history for Cloud Pro. Learn more in the Workflow history documentation. #### Dark mode# _Almost_ in time for Halloween: this release introduces dark mode. To enable dark mode: 1. Select **Settings** > **Personal**. 2. Under **Personalisation**, change **Theme** to **Dark theme**. #### Optional error output for nodes# All nodes apart from sub-nodes and trigger nodes have a new optional output: **Error**. Use this to add steps to handle node errors. The HTTP Request node now supports an pagination. Read the node docs for information and examples. For full release details, refer to Releases on GitHub. ### Contributors# Yoshino-s ## n8n@1.14.2# View the commits for this version. **Release date:** 2023-10-26 This release contains bug fixes. For full release details, refer to Releases on GitHub. ## n8n@1.14.1# View the commits for this version. **Release date:** 2023-10-26 This release contains bug fixes. For full release details, refer to Releases on GitHub. ## n8n@1.14.0# View the commits for this version. **Release date:** 2023-10-25 This release contains node enhancements and bug fixes. #### Switch node supports more outputs# The Switch node now supports an unlimited number of outputs. For full release details, refer to Releases on GitHub. ## n8n@1.13.0# View the commits for this version. **Release date:** 2023-10-25 This release contains new features, feature enhancements, and bug fixes. Upgrade directly to 1.14.0 This release failed to publish to npm. Upgrade directly to 1.14.0. This releases introduces a new node, the RSS Feed Trigger. Use this node to start a workflow when a new RSS feed item is published. #### Facebook Lead Ads Trigger node# This releases add another new node, the Facebook Lead Ads Trigger. Use this node to trigger a workflow when you get a new lead. For full release details, refer to Releases on GitHub. ## n8n@1.12.2# View the commits for this version. **Release date:** 2023-10-24 This release contains bug fixes. For full release details, refer to Releases on GitHub. ### Contributors# Burak Akgün ## n8n@1.12.1# View the commits for this version. **Release date:** 2023-10-23 This release contains bug fixes. For full release details, refer to Releases on GitHub. ### Contributors# Léo Martinez ## n8n@1.11.2# View the commits for this version. **Release date:** 2023-10-23 This release contains bug fixes. For full release details, refer to Releases on GitHub. ### Contributors# Inga pemontto ## n8n@1.12.0# View the commits for this version. **Release date:** 2023-10-18 This release contains new features, node enhancements, and bug fixes. #### Form Trigger node# This releases introduces a new node, the n8n Form Trigger. Use this node to start a workflow based on a user submitting a form. It provides a configurable form interface. For full release details, refer to Releases on GitHub. ### Contributors# Damian Karzon Inga pemontto ## n8n@1.11.1# View the commits for this version. **Release date:** 2023-10-13 This release contains bug fixes. For full release details, refer to Releases on GitHub. ## n8n@1.11.0# View the commits for this version. **Release date:** 2023-10-11 This release contains new features and bug fixes. #### External storage for binary files# Self-hosted users can now use an external service to store binary data. Learn more in External storage. If you're using n8n Cloud and are interested in this feature, please contact n8n. #### Item Lists node supports binary data# The Item Lists node now supports splitting and concatenating binary data inputs. This means you no longer need to use code to split a collection of files into multiple items. For full release details, refer to Releases on GitHub. ## n8n@1.10.1# View the commits for this version. **Release date:** 2023-10-11 This release contains bug fixes. For full release details, refer to Releases on GitHub. ## n8n@1.9.3# View the commits for this version. **Release date:** 2023-10-10 This release contains bug fixes. For full release details, refer to Releases on GitHub. ## n8n@1.9.2# View the commits for this version. **Release date:** 2023-10-09 This release contains bug fixes. For full release details, refer to Releases on GitHub. ## n8n@1.10.0# View the commits for this version. **Release date:** 2023-10-05 This release contains bug fixes and preparatory work for new features. For full release details, refer to Releases on GitHub. ## n8n@1.9.1# View the commits for this version. **Release date:** 2023-10-04 This release contains bug fixes. For full release details, refer to Releases on GitHub. ## LangChain in n8n (beta)# **Release date:** 2023-10-04 This release introduces support for building with LangChain in n8n. With n8n's LangChain nodes you can build AI-powered functionality within your workflows. The LangChain nodes are configurable, meaning you can choose your preferred agent, LLM, memory, and other components. Alongside the LangChain nodes, you can connect any n8n node as normal: this means you can integrate your LangChain logic with other data sources and services. Read more: * This is a beta release, and not yet available in the main product. Follow the instructions in Access LangChain in n8n to try it out. Self-hosted and Cloud options are available. * Learn how LangChain concepts map to n8n nodes in LangChain concepts in n8n. * Browse n8n's new Cluster nodes. This is a new set of node types that allows for multiple nodes to work together to configure each other. ## n8n@1.9.0# View the commits for this version. **Release date:** 2023-09-28 This release contains new features, performance improvements, and bug fixes. #### Tournament# This releases replaces RiotTmpl, the templating language used in expressions, with n8n's own templating language, Tournament. You can now use arrow functions in expressions. #### `N8N_BINARY_DATA_TTL` and `EXECUTIONS_DATA_PRUNE_TIMEOUT` removed# The environment variables `N8N_BINARY_DATA_TTL` and `EXECUTIONS_DATA_PRUNE_TIMEOUT` no longer have any effect and can be removed. Instead of relying on a TTL system for binary data, n8n cleans up binary data together with executions during pruning. For full release details, refer to Releases on GitHub. ## n8n@1.8.2# View the commits for this version. **Release date:** 2023-09-25 This release contains bug fixes. For full release details, refer to Releases on GitHub. ## n8n@1.8.1# View the commits for this version. **Release date:** 2023-09-21 This release contains bug fixes. For full release details, refer to Releases on GitHub. ## n8n@1.8.0# View the commits for this version. **Release date:** 2023-09-20 This release contains node enhancements and bug fixes. For full release details, refer to Releases on GitHub. ## n8n@1.7.1# View the commits for this version. **Release date:** 2023-09-14 This release contains bug fixes. For full release details, refer to Releases on GitHub. ## n8n@1.7.0# View the commits for this version. **Release date:** 2023-09-13 This release contains node enhancements and bug fixes. For full release details, refer to Releases on GitHub. ### Contributors# Quang-Linh LE MC Naveen ## n8n@1.6.1# View the commits for this version. **Release date:** 2023-09-06 This is a bug fix release. For full release details, refer to Releases on GitHub. ## n8n@1.6.0# View the commits for this version. **Release date:** 2023-09-06 This release contains bug fixes, new features, and node enhancements. Upgrade directly to 1.6.1 Skip this version and upgrade directly to 1.6.1, which contains essential bug fixes. #### TheHive 5# This release introduces support for TheHive API version 5. This uses a new node and credentials: * TheHive 5 node * TheHive 5 Trigger node * TheHive 5 credentials #### `N8N_PERSISTED_BINARY_DATA_TTL` removed# The environment variables `N8N_PERSISTED_BINARY_DATA_TTL` no longer has any effect and can be removed. This legacy flag was originally introduced to support ephemeral executions (see details), which are no longer supported. For full release details, refer to Releases on GitHub. ## n8n@1.5.1# View the commits for this version. **Release date:** 2023-08-31 This is a bug fix release. For full release details, refer to Releases on GitHub. ## n8n@1.5.0# View the commits for this version. **Release date:** 2023-08-31 This release contains new features, node enhancements, and bug fixes. Upgrade directly to 1.5.1 Skip this version and upgrade directly to 1.5.1, which contains essential bug fixes. ### Highlights# #### External secrets storage for credentials# Enterprise-tier accounts can now use external secrets vaults to manage credentials in n8n. This allows you to store credential information securely outside your n8n instance. n8n supports Infisical and HashiCorp Vault. Refer to External secrets for guidance on enabling and using this feature. #### Two-factor authentication# n8n now supports two-factor authentication (2FA) for self-hosted instances. n8n is working on bringing support to Cloud. Refer to Two-factor authentication for guidance on enabling and using it. #### Debug executions# Users on a paid n8n plan can now load data from previous executions into their current workflow. This is useful when debugging a failed execution. Refer to Debug executions for guidance on using this feature. For full release details, refer to Releases on GitHub. ## n8n@1.4.1# View the commits for this version. **Release date:** 2023-08-29 This is a bug fix release. For full release details, refer to Releases on GitHub. ## n8n@1.4.0# View the commits for this version. **Release date:** 2023-08-23 This release contains new features, node enhancements, and bug fixes. For full release details, refer to Releases on GitHub. ### Contributors# pemontto ## n8n@1.3.1# View the commits for this version. **Release date:** 2023-08-18 This is a bug fix release. For full release details, refer to Releases on GitHub. ## n8n@1.3.0# View the commits for this version. **Release date:** 2023-08-16 This release contains new features and bug fixes. ### Highlights# #### Trial feature: AI support in the Code node# This release introduces limited support for using AI to generate code in the Code node. Initially this feature is only available on Cloud, and will gradually be rolled out, starting with about 20% of users. Learn how to use the feature, including guidance on writing prompts, in Generate code with ChatGPT. For full release details, refer to Releases on GitHub. ### Contributors# Ian Gallagher Xavier Calland ## n8n@1.2.2# View the commits for this version. **Release date:** 2023-08-14 This is a bug fix release. For full release details, refer to Releases on GitHub. ## n8n@1.2.1# View the commits for this version. **Release date:** 2023-08-09 This is a bug fix release. For full release details, refer to Releases on GitHub. ## n8n@1.2.0# View the commits for this version. **Release date:** 2023-08-09 This release contains new features, node enhancements, bug fixes, and performance improvements. Upgrade directly to 1.2.1 When upgrading, skip this release and go directly to 1.2.1. ### Highlights# For full release details, refer to Releases on GitHub. ## n8n@1.1.1# View the commits for this version. **Release date:** 2023-07-27 This is a bug fix release. Breaking changes Please note that this version contains breaking changes if upgrading from a `0.x.x` version. For full details, refer to the n8n v1.0 migration guide. For full release details, refer to Releases on GitHub. ## n8n@1.1.0# View the commits for this version. **Release date:** 2023-07-26 This release contains new features, bug fixes, and node enhancements. Breaking changes Please note that this version contains breaking changes if upgrading from a `0.x.x` version. For full details, refer to the n8n v1.0 migration guide. ### Highlights# #### Source control and environments# This release introduces source control and environments for enterprise users. n8n uses Git-based source control to support environments. Linking your n8n instances to a Git repository lets you create multiple n8n environments, backed by Git branches. Refer to Source control and environments to learn more about the features and set up your environments. For full release details, refer to Releases on GitHub. ### Contributors# Adrián Martínez Alberto Pasqualetto Marten Steketee perseus-algol Sandra Ashipala ZergRael ## n8n@1.0.5# View the commits for this version. **Release date:** 2023-07-24 This is a bug fix release. Breaking changes Please note that this version contains breaking changes if upgrading from a `0.x.x` version. For full details, refer to the n8n v1.0 migration guide. For full release details, refer to Releases on GitHub. ## n8n@1.0.4# View the commits for this version. **Release date:** 2023-07-19 This is a bug fix release. Breaking changes Please note that this version contains breaking changes if upgrading from a `0.x.x` version. For full details, refer to the n8n v1.0 migration guide. For full release details, refer to Releases on GitHub. ### Contributors# Romain Dunand noctarius aka Christoph Engelbert ## n8n@1.0.3# View the commits for this version. **Release date:** 2023-07-13 This release contains API enhancements and adds support for sending messages to forum threads in the Telegram node. Breaking changes Please note that this version contains breaking changes if upgrading from a `0.x.x` version. For full details, refer to the n8n v1.0 migration guide. For full release details, refer to Releases on GitHub. ### Contributors# Kirill ## n8n@1.0.2# View the commits for this version. **Release date:** 2023-07-05 This is a bug fix release. Breaking changes Please note that this version contains breaking changes if upgrading from a `0.x.x` version. For full details, refer to the n8n v1.0 migration guide. ### Contributors# Romain Dunand ## n8n@1.0.1# View the commits for this version. **Release date:** 2023-07-05 Breaking changes Please note that this version contains breaking changes. For full details, refer to the n8n v1.0 migration guide. This is n8n's version one release. For full details, refer to the n8n v1.0 migration guide. ### Highlights# #### Python support# Although JavaScript remains the default language, you can now also select Python as an option in the Code node and even make use of many Python modules. Note that Python is unavailable in Code nodes added to a workflow before v1.0. ### Contributors# Marten Steketee