W↓
All docs
🔑
Sign Up/Sign In
react.dev/reference/react
Public Link
Apr 6, 2025, 10:04:01 AM - complete - 745.9 kB
Created by:
****ad@vlad.studio
Starting URLs:
https://react.dev/reference/react
Max Pages:
1000
## Page: https://react.dev/reference/react This section provides detailed reference documentation for working with React. For an introduction to React, please visit the Learn section. The React reference documentation is broken down into functional subsections: ## React Programmatic React features: * Hooks - Use different React features from your components. * Components - Built-in components that you can use in your JSX. * APIs - APIs that are useful for defining components. * Directives - Provide instructions to bundlers compatible with React Server Components. ## React DOM React-dom contains features that are only supported for web applications (which run in the browser DOM environment). This section is broken into the following: * Hooks - Hooks for web applications which run in the browser DOM environment. * Components - React supports all of the browser built-in HTML and SVG components. * APIs - The `react-dom` package contains methods supported only in web applications. * Client APIs - The `react-dom/client` APIs let you render React components on the client (in the browser). * Server APIs - The `react-dom/server` APIs let you render React components to HTML on the server. ## Rules of React React has idioms — or rules — for how to express patterns in a way that is easy to understand and yields high-quality applications: * Components and Hooks must be pure – Purity makes your code easier to understand, debug, and allows React to automatically optimize your components and hooks correctly. * React calls Components and Hooks – React is responsible for rendering components and hooks when necessary to optimize the user experience. * Rules of Hooks – Hooks are defined using JavaScript functions, but they represent a special type of reusable UI logic with restrictions on where they can be called. ## Legacy APIs * Legacy APIs - Exported from the `react` package, but not recommended for use in newly written code. --- ## Page: https://react.dev/reference/react/hooks _Hooks_ let you use different React features from your components. You can either use the built-in Hooks or combine them to build your own. This page lists all built-in Hooks in React. * * * ## State Hooks _State_ lets a component “remember” information like user input. For example, a form component can use state to store the input value, while an image gallery component can use state to store the selected image index. To add state to a component, use one of these Hooks: * `useState` declares a state variable that you can update directly. * `useReducer` declares a state variable with the update logic inside a reducer function. function ImageGallery() {const [index, setIndex] = useState(0);// ... * * * ## Context Hooks _Context_ lets a component receive information from distant parents without passing it as props. For example, your app’s top-level component can pass the current UI theme to all components below, no matter how deep. * `useContext` reads and subscribes to a context. function Button() {const theme = useContext(ThemeContext);// ... * * * ## Ref Hooks _Refs_ let a component hold some information that isn’t used for rendering, like a DOM node or a timeout ID. Unlike with state, updating a ref does not re-render your component. Refs are an “escape hatch” from the React paradigm. They are useful when you need to work with non-React systems, such as the built-in browser APIs. * `useRef` declares a ref. You can hold any value in it, but most often it’s used to hold a DOM node. * `useImperativeHandle` lets you customize the ref exposed by your component. This is rarely used. function Form() {const inputRef = useRef(null);// ... * * * ## Effect Hooks _Effects_ let a component connect to and synchronize with external systems. This includes dealing with network, browser DOM, animations, widgets written using a different UI library, and other non-React code. * `useEffect` connects a component to an external system. function ChatRoom({ roomId }) {useEffect(() => {const connection = createConnection(roomId);connection.connect();return () => connection.disconnect();}, [roomId]);// ... Effects are an “escape hatch” from the React paradigm. Don’t use Effects to orchestrate the data flow of your application. If you’re not interacting with an external system, you might not need an Effect. There are two rarely used variations of `useEffect` with differences in timing: * `useLayoutEffect` fires before the browser repaints the screen. You can measure layout here. * `useInsertionEffect` fires before React makes changes to the DOM. Libraries can insert dynamic CSS here. * * * ## Performance Hooks A common way to optimize re-rendering performance is to skip unnecessary work. For example, you can tell React to reuse a cached calculation or to skip a re-render if the data has not changed since the previous render. To skip calculations and unnecessary re-rendering, use one of these Hooks: * `useMemo` lets you cache the result of an expensive calculation. * `useCallback` lets you cache a function definition before passing it down to an optimized component. function TodoList({ todos, tab, theme }) {const visibleTodos = useMemo(() => filterTodos(todos, tab), [todos, tab]);// ...} Sometimes, you can’t skip re-rendering because the screen actually needs to update. In that case, you can improve performance by separating blocking updates that must be synchronous (like typing into an input) from non-blocking updates which don’t need to block the user interface (like updating a chart). To prioritize rendering, use one of these Hooks: * `useTransition` lets you mark a state transition as non-blocking and allow other updates to interrupt it. * `useDeferredValue` lets you defer updating a non-critical part of the UI and let other parts update first. * * * ## Other Hooks These Hooks are mostly useful to library authors and aren’t commonly used in the application code. * `useDebugValue` lets you customize the label React DevTools displays for your custom Hook. * `useId` lets a component associate a unique ID with itself. Typically used with accessibility APIs. * `useSyncExternalStore` lets a component subscribe to an external store. * `useActionState` allows you to manage state of actions. * * * ## Your own Hooks You can also define your own custom Hooks as JavaScript functions. --- ## Page: https://react.dev/reference/react/useActionState `useActionState` is a Hook that allows you to update state based on the result of a form action. const [state, formAction, isPending] = useActionState(fn, initialState, permalink?); ### Note In earlier React Canary versions, this API was part of React DOM and called `useFormState`. * Reference * `useActionState(action, initialState, permalink?)` * Usage * Using information returned by a form action * Troubleshooting * My action can no longer read the submitted form data * * * ## Reference ### `useActionState(action, initialState, permalink?)` Call `useActionState` at the top level of your component to create component state that is updated when a form action is invoked. You pass `useActionState` an existing form action function as well as an initial state, and it returns a new action that you use in your form, along with the latest form state and whether the Action is still pending. The latest form state is also passed to the function that you provided. import { useActionState } from "react";async function increment(previousState, formData) {return previousState + 1;}function StatefulForm({}) {const [state, formAction] = useActionState(increment, 0);return (<form>{state}<button formAction={formAction}>Increment</button></form>)} The form state is the value returned by the action when the form was last submitted. If the form has not yet been submitted, it is the initial state that you pass. If used with a Server Function, `useActionState` allows the server’s response from submitting the form to be shown even before hydration has completed. See more examples below. #### Parameters * `fn`: The function to be called when the form is submitted or button pressed. When the function is called, it will receive the previous state of the form (initially the `initialState` that you pass, subsequently its previous return value) as its initial argument, followed by the arguments that a form action normally receives. * `initialState`: The value you want the state to be initially. It can be any serializable value. This argument is ignored after the action is first invoked. * **optional** `permalink`: A string containing the unique page URL that this form modifies. For use on pages with dynamic content (eg: feeds) in conjunction with progressive enhancement: if `fn` is a server function and the form is submitted before the JavaScript bundle loads, the browser will navigate to the specified permalink URL, rather than the current page’s URL. Ensure that the same form component is rendered on the destination page (including the same action `fn` and `permalink`) so that React knows how to pass the state through. Once the form has been hydrated, this parameter has no effect. #### Returns `useActionState` returns an array with the following values: 1. The current state. During the first render, it will match the `initialState` you have passed. After the action is invoked, it will match the value returned by the action. 2. A new action that you can pass as the `action` prop to your `form` component or `formAction` prop to any `button` component within the form. The action can also be called manually within `startTransition`. 3. The `isPending` flag that tells you whether there is a pending Transition. #### Caveats * When used with a framework that supports React Server Components, `useActionState` lets you make forms interactive before JavaScript has executed on the client. When used without Server Components, it is equivalent to component local state. * The function passed to `useActionState` receives an extra argument, the previous or initial state, as its first argument. This makes its signature different than if it were used directly as a form action without using `useActionState`. * * * ## Usage ### Using information returned by a form action Call `useActionState` at the top level of your component to access the return value of an action from the last time a form was submitted. import { useActionState } from 'react';import { action } from './actions.js';function MyComponent() {const [state, formAction] = useActionState(action, null);// ...return (<form action={formAction}>{/* ... */}</form>);} `useActionState` returns an array with the following items: 1. The current state of the form, which is initially set to the initial state you provided, and after the form is submitted is set to the return value of the action you provided. 2. A new action that you pass to `<form>` as its `action` prop or call manually within `startTransition`. 3. A pending state that you can utilise while your action is processing. When the form is submitted, the action function that you provided will be called. Its return value will become the new current state of the form. The action that you provide will also receive a new first argument, namely the current state of the form. The first time the form is submitted, this will be the initial state you provided, while with subsequent submissions, it will be the return value from the last time the action was called. The rest of the arguments are the same as if `useActionState` had not been used. function action(currentState, formData) {// ...return 'next state';} ## Troubleshooting ### My action can no longer read the submitted form data When you wrap an action with `useActionState`, it gets an extra argument _as its first argument_. The submitted form data is therefore its _second_ argument instead of its first as it would usually be. The new first argument that gets added is the current state of the form. function action(currentState, formData) {// ...} --- ## Page: https://react.dev/reference/react/useCallback `useCallback` is a React Hook that lets you cache a function definition between re-renders. const cachedFn = useCallback(fn, dependencies) * Reference * `useCallback(fn, dependencies)` * Usage * Skipping re-rendering of components * Updating state from a memoized callback * Preventing an Effect from firing too often * Optimizing a custom Hook * Troubleshooting * Every time my component renders, `useCallback` returns a different function * I need to call `useCallback` for each list item in a loop, but it’s not allowed * * * ## Reference ### `useCallback(fn, dependencies)` Call `useCallback` at the top level of your component to cache a function definition between re-renders: import { useCallback } from 'react';export default function ProductPage({ productId, referrer, theme }) {const handleSubmit = useCallback((orderDetails) => {post('/product/' + productId + '/buy', {referrer,orderDetails,});}, [productId, referrer]); See more examples below. #### Parameters * `fn`: The function value that you want to cache. It can take any arguments and return any values. React will return (not call!) your function back to you during the initial render. On next renders, React will give you the same function again if the `dependencies` have not changed since the last render. Otherwise, it will give you the function that you have passed during the current render, and store it in case it can be reused later. React will not call your function. The function is returned to you so you can decide when and whether to call it. * `dependencies`: The list of all reactive values referenced inside of the `fn` code. Reactive values include props, state, and all the variables and functions declared directly inside your component body. If your linter is configured for React, it will verify that every reactive value is correctly specified as a dependency. The list of dependencies must have a constant number of items and be written inline like `[dep1, dep2, dep3]`. React will compare each dependency with its previous value using the `Object.is` comparison algorithm. #### Returns On the initial render, `useCallback` returns the `fn` function you have passed. During subsequent renders, it will either return an already stored `fn` function from the last render (if the dependencies haven’t changed), or return the `fn` function you have passed during this render. #### Caveats * `useCallback` is a Hook, so you can only call it **at the top level of your component** or your own Hooks. You can’t call it inside loops or conditions. If you need that, extract a new component and move the state into it. * React **will not throw away the cached function unless there is a specific reason to do that.** For example, in development, React throws away the cache when you edit the file of your component. Both in development and in production, React will throw away the cache if your component suspends during the initial mount. In the future, React may add more features that take advantage of throwing away the cache—for example, if React adds built-in support for virtualized lists in the future, it would make sense to throw away the cache for items that scroll out of the virtualized table viewport. This should match your expectations if you rely on `useCallback` as a performance optimization. Otherwise, a state variable or a ref may be more appropriate. * * * ## Usage ### Skipping re-rendering of components When you optimize rendering performance, you will sometimes need to cache the functions that you pass to child components. Let’s first look at the syntax for how to do this, and then see in which cases it’s useful. To cache a function between re-renders of your component, wrap its definition into the `useCallback` Hook: import { useCallback } from 'react';function ProductPage({ productId, referrer, theme }) {const handleSubmit = useCallback((orderDetails) => {post('/product/' + productId + '/buy', {referrer,orderDetails,});}, [productId, referrer]);// ... You need to pass two things to `useCallback`: 1. A function definition that you want to cache between re-renders. 2. A list of dependencies including every value within your component that’s used inside your function. On the initial render, the returned function you’ll get from `useCallback` will be the function you passed. On the following renders, React will compare the dependencies with the dependencies you passed during the previous render. If none of the dependencies have changed (compared with `Object.is`), `useCallback` will return the same function as before. Otherwise, `useCallback` will return the function you passed on _this_ render. In other words, `useCallback` caches a function between re-renders until its dependencies change. **Let’s walk through an example to see when this is useful.** Say you’re passing a `handleSubmit` function down from the `ProductPage` to the `ShippingForm` component: function ProductPage({ productId, referrer, theme }) {// ...return (<div className={theme}><ShippingForm onSubmit={handleSubmit} /></div>); You’ve noticed that toggling the `theme` prop freezes the app for a moment, but if you remove `<ShippingForm />` from your JSX, it feels fast. This tells you that it’s worth trying to optimize the `ShippingForm` component. **By default, when a component re-renders, React re-renders all of its children recursively.** This is why, when `ProductPage` re-renders with a different `theme`, the `ShippingForm` component _also_ re-renders. This is fine for components that don’t require much calculation to re-render. But if you verified a re-render is slow, you can tell `ShippingForm` to skip re-rendering when its props are the same as on last render by wrapping it in `memo`: import { memo } from 'react';const ShippingForm = memo(function ShippingForm({ onSubmit }) {// ...}); **With this change, `ShippingForm` will skip re-rendering if all of its props are the _same_ as on the last render.** This is when caching a function becomes important! Let’s say you defined `handleSubmit` without `useCallback`: function ProductPage({ productId, referrer, theme }) {// Every time the theme changes, this will be a different function...function handleSubmit(orderDetails) {post('/product/' + productId + '/buy', {referrer,orderDetails,});}return (<div className={theme}>{/* ... so ShippingForm's props will never be the same, and it will re-render every time */}<ShippingForm onSubmit={handleSubmit} /></div>);} **In JavaScript, a `function () {}` or `() => {}` always creates a _different_ function,** similar to how the `{}` object literal always creates a new object. Normally, this wouldn’t be a problem, but it means that `ShippingForm` props will never be the same, and your `memo` optimization won’t work. This is where `useCallback` comes in handy: function ProductPage({ productId, referrer, theme }) {// Tell React to cache your function between re-renders...const handleSubmit = useCallback((orderDetails) => {post('/product/' + productId + '/buy', {referrer,orderDetails,});}, [productId, referrer]); // ...so as long as these dependencies don't change...return (<div className={theme}>{/* ...ShippingForm will receive the same props and can skip re-rendering */}<ShippingForm onSubmit={handleSubmit} /></div>);} **By wrapping `handleSubmit` in `useCallback`, you ensure that it’s the _same_ function between the re-renders** (until dependencies change). You don’t _have to_ wrap a function in `useCallback` unless you do it for some specific reason. In this example, the reason is that you pass it to a component wrapped in `memo`, and this lets it skip re-rendering. There are other reasons you might need `useCallback` which are described further on this page. ### Note **You should only rely on `useCallback` as a performance optimization.** If your code doesn’t work without it, find the underlying problem and fix it first. Then you may add `useCallback` back. ##### Deep Dive You will often see `useMemo` alongside `useCallback`. They are both useful when you’re trying to optimize a child component. They let you memoize (or, in other words, cache) something you’re passing down: import { useMemo, useCallback } from 'react';function ProductPage({ productId, referrer }) {const product = useData('/product/' + productId);const requirements = useMemo(() => { // Calls your function and caches its resultreturn computeRequirements(product);}, [product]);const handleSubmit = useCallback((orderDetails) => { // Caches your function itselfpost('/product/' + productId + '/buy', {referrer,orderDetails,});}, [productId, referrer]);return (<div className={theme}><ShippingForm requirements={requirements} onSubmit={handleSubmit} /></div>);} The difference is in _what_ they’re letting you cache: * **`useMemo` caches the _result_ of calling your function.** In this example, it caches the result of calling `computeRequirements(product)` so that it doesn’t change unless `product` has changed. This lets you pass the `requirements` object down without unnecessarily re-rendering `ShippingForm`. When necessary, React will call the function you’ve passed during rendering to calculate the result. * **`useCallback` caches _the function itself._** Unlike `useMemo`, it does not call the function you provide. Instead, it caches the function you provided so that `handleSubmit` _itself_ doesn’t change unless `productId` or `referrer` has changed. This lets you pass the `handleSubmit` function down without unnecessarily re-rendering `ShippingForm`. Your code won’t run until the user submits the form. If you’re already familiar with `useMemo`, you might find it helpful to think of `useCallback` as this: // Simplified implementation (inside React)function useCallback(fn, dependencies) {return useMemo(() => fn, dependencies);} Read more about the difference between `useMemo` and `useCallback`. ##### Deep Dive #### Should you add useCallback everywhere? If your app is like this site, and most interactions are coarse (like replacing a page or an entire section), memoization is usually unnecessary. On the other hand, if your app is more like a drawing editor, and most interactions are granular (like moving shapes), then you might find memoization very helpful. Caching a function with `useCallback` is only valuable in a few cases: * You pass it as a prop to a component wrapped in `memo`. You want to skip re-rendering if the value hasn’t changed. Memoization lets your component re-render only if dependencies changed. * The function you’re passing is later used as a dependency of some Hook. For example, another function wrapped in `useCallback` depends on it, or you depend on this function from `useEffect.` There is no benefit to wrapping a function in `useCallback` in other cases. There is no significant harm to doing that either, so some teams choose to not think about individual cases, and memoize as much as possible. The downside is that code becomes less readable. Also, not all memoization is effective: a single value that’s “always new” is enough to break memoization for an entire component. Note that `useCallback` does not prevent _creating_ the function. You’re always creating a function (and that’s fine!), but React ignores it and gives you back a cached function if nothing changed. **In practice, you can make a lot of memoization unnecessary by following a few principles:** 1. When a component visually wraps other components, let it accept JSX as children. Then, if the wrapper component updates its own state, React knows that its children don’t need to re-render. 2. Prefer local state and don’t lift state up any further than necessary. Don’t keep transient state like forms and whether an item is hovered at the top of your tree or in a global state library. 3. Keep your rendering logic pure. If re-rendering a component causes a problem or produces some noticeable visual artifact, it’s a bug in your component! Fix the bug instead of adding memoization. 4. Avoid unnecessary Effects that update state. Most performance problems in React apps are caused by chains of updates originating from Effects that cause your components to render over and over. 5. Try to remove unnecessary dependencies from your Effects. For example, instead of memoization, it’s often simpler to move some object or a function inside an Effect or outside the component. If a specific interaction still feels laggy, use the React Developer Tools profiler to see which components benefit the most from memoization, and add memoization where needed. These principles make your components easier to debug and understand, so it’s good to follow them in any case. In long term, we’re researching doing memoization automatically to solve this once and for all. * * * ### Updating state from a memoized callback Sometimes, you might need to update state based on previous state from a memoized callback. This `handleAddTodo` function specifies `todos` as a dependency because it computes the next todos from it: function TodoList() {const [todos, setTodos] = useState([]);const handleAddTodo = useCallback((text) => {const newTodo = { id: nextId++, text };setTodos([...todos, newTodo]);}, [todos]);// ... You’ll usually want memoized functions to have as few dependencies as possible. When you read some state only to calculate the next state, you can remove that dependency by passing an updater function instead: function TodoList() {const [todos, setTodos] = useState([]);const handleAddTodo = useCallback((text) => {const newTodo = { id: nextId++, text };setTodos(todos => [...todos, newTodo]);}, []); // ✅ No need for the todos dependency// ... Here, instead of making `todos` a dependency and reading it inside, you pass an instruction about _how_ to update the state (`todos => [...todos, newTodo]`) to React. Read more about updater functions. * * * ### Preventing an Effect from firing too often Sometimes, you might want to call a function from inside an Effect: function ChatRoom({ roomId }) {const [message, setMessage] = useState('');function createOptions() {return {serverUrl: 'https://localhost:1234',roomId: roomId};}useEffect(() => {const options = createOptions();const connection = createConnection(options);connection.connect();// ... This creates a problem. Every reactive value must be declared as a dependency of your Effect. However, if you declare `createOptions` as a dependency, it will cause your Effect to constantly reconnect to the chat room: useEffect(() => {const options = createOptions();const connection = createConnection(options);connection.connect();return () => connection.disconnect();}, [createOptions]); // 🔴 Problem: This dependency changes on every render// ... To solve this, you can wrap the function you need to call from an Effect into `useCallback`: function ChatRoom({ roomId }) {const [message, setMessage] = useState('');const createOptions = useCallback(() => {return {serverUrl: 'https://localhost:1234',roomId: roomId};}, [roomId]); // ✅ Only changes when roomId changesuseEffect(() => {const options = createOptions();const connection = createConnection(options);connection.connect();return () => connection.disconnect();}, [createOptions]); // ✅ Only changes when createOptions changes// ... This ensures that the `createOptions` function is the same between re-renders if the `roomId` is the same. **However, it’s even better to remove the need for a function dependency.** Move your function _inside_ the Effect: function ChatRoom({ roomId }) {const [message, setMessage] = useState('');useEffect(() => {function createOptions() { // ✅ No need for useCallback or function dependencies!return {serverUrl: 'https://localhost:1234',roomId: roomId};}const options = createOptions();const connection = createConnection(options);connection.connect();return () => connection.disconnect();}, [roomId]); // ✅ Only changes when roomId changes// ... Now your code is simpler and doesn’t need `useCallback`. Learn more about removing Effect dependencies. * * * ### Optimizing a custom Hook If you’re writing a custom Hook, it’s recommended to wrap any functions that it returns into `useCallback`: function useRouter() {const { dispatch } = useContext(RouterStateContext);const navigate = useCallback((url) => {dispatch({ type: 'navigate', url });}, [dispatch]);const goBack = useCallback(() => {dispatch({ type: 'back' });}, [dispatch]);return {navigate,goBack,};} This ensures that the consumers of your Hook can optimize their own code when needed. * * * ## Troubleshooting ### Every time my component renders, `useCallback` returns a different function Make sure you’ve specified the dependency array as a second argument! If you forget the dependency array, `useCallback` will return a new function every time: function ProductPage({ productId, referrer }) {const handleSubmit = useCallback((orderDetails) => {post('/product/' + productId + '/buy', {referrer,orderDetails,});}); // 🔴 Returns a new function every time: no dependency array// ... This is the corrected version passing the dependency array as a second argument: function ProductPage({ productId, referrer }) {const handleSubmit = useCallback((orderDetails) => {post('/product/' + productId + '/buy', {referrer,orderDetails,});}, [productId, referrer]); // ✅ Does not return a new function unnecessarily// ... If this doesn’t help, then the problem is that at least one of your dependencies is different from the previous render. You can debug this problem by manually logging your dependencies to the console: const handleSubmit = useCallback((orderDetails) => {// ..}, [productId, referrer]);console.log([productId, referrer]); You can then right-click on the arrays from different re-renders in the console and select “Store as a global variable” for both of them. Assuming the first one got saved as `temp1` and the second one got saved as `temp2`, you can then use the browser console to check whether each dependency in both arrays is the same: Object.is(temp1[0], temp2[0]); // Is the first dependency the same between the arrays?Object.is(temp1[1], temp2[1]); // Is the second dependency the same between the arrays?Object.is(temp1[2], temp2[2]); // ... and so on for every dependency ... When you find which dependency is breaking memoization, either find a way to remove it, or memoize it as well. * * * ### I need to call `useCallback` for each list item in a loop, but it’s not allowed Suppose the `Chart` component is wrapped in `memo`. You want to skip re-rendering every `Chart` in the list when the `ReportList` component re-renders. However, you can’t call `useCallback` in a loop: function ReportList({ items }) {return (<article>{items.map(item => {// 🔴 You can't call useCallback in a loop like this:const handleClick = useCallback(() => {sendReport(item)}, [item]);return (<figure key={item.id}><Chart onClick={handleClick} /></figure>);})}</article>);} Instead, extract a component for an individual item, and put `useCallback` there: function ReportList({ items }) {return (<article>{items.map(item =><Report key={item.id} item={item} />)}</article>);}function Report({ item }) {// ✅ Call useCallback at the top level:const handleClick = useCallback(() => {sendReport(item)}, [item]);return (<figure><Chart onClick={handleClick} /></figure>);} Alternatively, you could remove `useCallback` in the last snippet and instead wrap `Report` itself in `memo`. If the `item` prop does not change, `Report` will skip re-rendering, so `Chart` will skip re-rendering too: function ReportList({ items }) {// ...}const Report = memo(function Report({ item }) {function handleClick() {sendReport(item);}return (<figure><Chart onClick={handleClick} /></figure>);}); --- ## Page: https://react.dev/reference/react/useContext `useContext` is a React Hook that lets you read and subscribe to context from your component. const value = useContext(SomeContext) * Reference * `useContext(SomeContext)` * Usage * Passing data deeply into the tree * Updating data passed via context * Specifying a fallback default value * Overriding context for a part of the tree * Optimizing re-renders when passing objects and functions * Troubleshooting * My component doesn’t see the value from my provider * I am always getting `undefined` from my context although the default value is different * * * ## Reference ### `useContext(SomeContext)` Call `useContext` at the top level of your component to read and subscribe to context. import { useContext } from 'react';function MyComponent() {const theme = useContext(ThemeContext);// ... See more examples below. #### Parameters * `SomeContext`: The context that you’ve previously created with `createContext`. The context itself does not hold the information, it only represents the kind of information you can provide or read from components. #### Returns `useContext` returns the context value for the calling component. It is determined as the `value` passed to the closest `SomeContext.Provider` above the calling component in the tree. If there is no such provider, then the returned value will be the `defaultValue` you have passed to `createContext` for that context. The returned value is always up-to-date. React automatically re-renders components that read some context if it changes. #### Caveats * `useContext()` call in a component is not affected by providers returned from the _same_ component. The corresponding `<Context.Provider>` **needs to be _above_** the component doing the `useContext()` call. * React **automatically re-renders** all the children that use a particular context starting from the provider that receives a different `value`. The previous and the next values are compared with the `Object.is` comparison. Skipping re-renders with `memo` does not prevent the children receiving fresh context values. * If your build system produces duplicates modules in the output (which can happen with symlinks), this can break context. Passing something via context only works if `SomeContext` that you use to provide context and `SomeContext` that you use to read it are **_exactly_ the same object**, as determined by a `===` comparison. * * * ## Usage ### Passing data deeply into the tree Call `useContext` at the top level of your component to read and subscribe to context. import { useContext } from 'react';function Button() {const theme = useContext(ThemeContext);// ... `useContext` returns the context value for the context you passed. To determine the context value, React searches the component tree and finds **the closest context provider above** for that particular context. To pass context to a `Button`, wrap it or one of its parent components into the corresponding context provider: function MyPage() {return (<ThemeContext.Provider value="dark"><Form /></ThemeContext.Provider>);}function Form() {// ... renders buttons inside ...} It doesn’t matter how many layers of components there are between the provider and the `Button`. When a `Button` _anywhere_ inside of `Form` calls `useContext(ThemeContext)`, it will receive `"dark"` as the value. ### Pitfall `useContext()` always looks for the closest provider _above_ the component that calls it. It searches upwards and **does not** consider providers in the component from which you’re calling `useContext()`. import { createContext, useContext } from 'react'; const ThemeContext = createContext(null); export default function MyApp() { return ( <ThemeContext.Provider value\="dark"\> <Form /> </ThemeContext.Provider\> ) } function Form() { return ( <Panel title\="Welcome"\> <Button\>Sign up</Button\> <Button\>Log in</Button\> </Panel\> ); } function Panel({ title, children }) { const theme = useContext(ThemeContext); const className = 'panel-' + theme; return ( <section className\={className}\> <h1\>{title}</h1\> {children} </section\> ) } function Button({ children }) { const theme = useContext(ThemeContext); const className = 'button-' + theme; return ( <button className\={className}\> {children} </button\> ); } * * * ### Updating data passed via context Often, you’ll want the context to change over time. To update context, combine it with state. Declare a state variable in the parent component, and pass the current state down as the context value to the provider. function MyPage() {const [theme, setTheme] = useState('dark');return (<ThemeContext.Provider value={theme}><Form /><Button onClick={() => {setTheme('light');}}> Switch to light theme</Button></ThemeContext.Provider>);} Now any `Button` inside of the provider will receive the current `theme` value. If you call `setTheme` to update the `theme` value that you pass to the provider, all `Button` components will re-render with the new `'light'` value. #### Example 1 of 5: Updating a value via context In this example, the `MyApp` component holds a state variable which is then passed to the `ThemeContext` provider. Checking the “Dark mode” checkbox updates the state. Changing the provided value re-renders all the components using that context. import { createContext, useContext, useState } from 'react'; const ThemeContext = createContext(null); export default function MyApp() { const \[theme, setTheme\] = useState('light'); return ( <ThemeContext.Provider value\={theme}\> <Form /> <label\> <input type\="checkbox" checked\={theme === 'dark'} onChange\={(e) \=> { setTheme(e.target.checked ? 'dark' : 'light') }} /> Use dark mode </label\> </ThemeContext.Provider\> ) } function Form({ children }) { return ( <Panel title\="Welcome"\> <Button\>Sign up</Button\> <Button\>Log in</Button\> </Panel\> ); } function Panel({ title, children }) { const theme = useContext(ThemeContext); const className = 'panel-' + theme; return ( <section className\={className}\> <h1\>{title}</h1\> {children} </section\> ) } function Button({ children }) { const theme = useContext(ThemeContext); const className = 'button-' + theme; return ( <button className\={className}\> {children} </button\> ); } Note that `value="dark"` passes the `"dark"` string, but `value={theme}` passes the value of the JavaScript `theme` variable with JSX curly braces. Curly braces also let you pass context values that aren’t strings. * * * ### Specifying a fallback default value If React can’t find any providers of that particular context in the parent tree, the context value returned by `useContext()` will be equal to the default value that you specified when you created that context: const ThemeContext = createContext(null); The default value **never changes**. If you want to update context, use it with state as described above. Often, instead of `null`, there is some more meaningful value you can use as a default, for example: const ThemeContext = createContext('light'); This way, if you accidentally render some component without a corresponding provider, it won’t break. This also helps your components work well in a test environment without setting up a lot of providers in the tests. In the example below, the “Toggle theme” button is always light because it’s **outside any theme context provider** and the default context theme value is `'light'`. Try editing the default theme to be `'dark'`. import { createContext, useContext, useState } from 'react'; const ThemeContext = createContext('light'); export default function MyApp() { const \[theme, setTheme\] = useState('light'); return ( <\> <ThemeContext.Provider value\={theme}\> <Form /> </ThemeContext.Provider\> <Button onClick\={() \=> { setTheme(theme === 'dark' ? 'light' : 'dark'); }}\> Toggle theme </Button\> </\> ) } function Form({ children }) { return ( <Panel title\="Welcome"\> <Button\>Sign up</Button\> <Button\>Log in</Button\> </Panel\> ); } function Panel({ title, children }) { const theme = useContext(ThemeContext); const className = 'panel-' + theme; return ( <section className\={className}\> <h1\>{title}</h1\> {children} </section\> ) } function Button({ children, onClick }) { const theme = useContext(ThemeContext); const className = 'button-' + theme; return ( <button className\={className} onClick\={onClick}\> {children} </button\> ); } * * * ### Overriding context for a part of the tree You can override the context for a part of the tree by wrapping that part in a provider with a different value. <ThemeContext.Provider value="dark"> ...<ThemeContext.Provider value="light"><Footer /></ThemeContext.Provider> ...</ThemeContext.Provider> You can nest and override providers as many times as you need. #### Example 1 of 2: Overriding a theme Here, the button _inside_ the `Footer` receives a different context value (`"light"`) than the buttons outside (`"dark"`). import { createContext, useContext } from 'react'; const ThemeContext = createContext(null); export default function MyApp() { return ( <ThemeContext.Provider value\="dark"\> <Form /> </ThemeContext.Provider\> ) } function Form() { return ( <Panel title\="Welcome"\> <Button\>Sign up</Button\> <Button\>Log in</Button\> <ThemeContext.Provider value\="light"\> <Footer /> </ThemeContext.Provider\> </Panel\> ); } function Footer() { return ( <footer\> <Button\>Settings</Button\> </footer\> ); } function Panel({ title, children }) { const theme = useContext(ThemeContext); const className = 'panel-' + theme; return ( <section className\={className}\> {title && <h1\>{title}</h1\>} {children} </section\> ) } function Button({ children }) { const theme = useContext(ThemeContext); const className = 'button-' + theme; return ( <button className\={className}\> {children} </button\> ); } * * * ### Optimizing re-renders when passing objects and functions You can pass any values via context, including objects and functions. function MyApp() {const [currentUser, setCurrentUser] = useState(null);function login(response) {storeCredentials(response.credentials);setCurrentUser(response.user);}return (<AuthContext.Provider value={{ currentUser, login }}><Page /></AuthContext.Provider>);} Here, the context value is a JavaScript object with two properties, one of which is a function. Whenever `MyApp` re-renders (for example, on a route update), this will be a _different_ object pointing at a _different_ function, so React will also have to re-render all components deep in the tree that call `useContext(AuthContext)`. In smaller apps, this is not a problem. However, there is no need to re-render them if the underlying data, like `currentUser`, has not changed. To help React take advantage of that fact, you may wrap the `login` function with `useCallback` and wrap the object creation into `useMemo`. This is a performance optimization: import { useCallback, useMemo } from 'react';function MyApp() {const [currentUser, setCurrentUser] = useState(null);const login = useCallback((response) => {storeCredentials(response.credentials);setCurrentUser(response.user);}, []);const contextValue = useMemo(() => ({currentUser,login}), [currentUser, login]);return (<AuthContext.Provider value={contextValue}><Page /></AuthContext.Provider>);} As a result of this change, even if `MyApp` needs to re-render, the components calling `useContext(AuthContext)` won’t need to re-render unless `currentUser` has changed. Read more about `useMemo` and `useCallback`. * * * ## Troubleshooting ### My component doesn’t see the value from my provider There are a few common ways that this can happen: 1. You’re rendering `<SomeContext.Provider>` in the same component (or below) as where you’re calling `useContext()`. Move `<SomeContext.Provider>` _above and outside_ the component calling `useContext()`. 2. You may have forgotten to wrap your component with `<SomeContext.Provider>`, or you might have put it in a different part of the tree than you thought. Check whether the hierarchy is right using React DevTools. 3. You might be running into some build issue with your tooling that causes `SomeContext` as seen from the providing component and `SomeContext` as seen by the reading component to be two different objects. This can happen if you use symlinks, for example. You can verify this by assigning them to globals like `window.SomeContext1` and `window.SomeContext2` and then checking whether `window.SomeContext1 === window.SomeContext2` in the console. If they’re not the same, fix that issue on the build tool level. ### I am always getting `undefined` from my context although the default value is different You might have a provider without a `value` in the tree: // 🚩 Doesn't work: no value prop<ThemeContext.Provider><Button /></ThemeContext.Provider> If you forget to specify `value`, it’s like passing `value={undefined}`. You may have also mistakingly used a different prop name by mistake: // 🚩 Doesn't work: prop should be called "value"<ThemeContext.Provider theme={theme}><Button /></ThemeContext.Provider> In both of these cases you should see a warning from React in the console. To fix them, call the prop `value`: // ✅ Passing the value prop<ThemeContext.Provider value={theme}><Button /></ThemeContext.Provider> Note that the default value from your `createContext(defaultValue)` call is only used **if there is no matching provider above at all.** If there is a `<SomeContext.Provider value={undefined}>` component somewhere in the parent tree, the component calling `useContext(SomeContext)` _will_ receive `undefined` as the context value. --- ## Page: https://react.dev/reference/react/useDebugValue `useDebugValue` is a React Hook that lets you add a label to a custom Hook in React DevTools. useDebugValue(value, format?) * Reference * `useDebugValue(value, format?)` * Usage * Adding a label to a custom Hook * Deferring formatting of a debug value * * * ## Reference ### `useDebugValue(value, format?)` Call `useDebugValue` at the top level of your custom Hook to display a readable debug value: import { useDebugValue } from 'react';function useOnlineStatus() {// ...useDebugValue(isOnline ? 'Online' : 'Offline');// ...} See more examples below. #### Parameters * `value`: The value you want to display in React DevTools. It can have any type. * **optional** `format`: A formatting function. When the component is inspected, React DevTools will call the formatting function with the `value` as the argument, and then display the returned formatted value (which may have any type). If you don’t specify the formatting function, the original `value` itself will be displayed. #### Returns `useDebugValue` does not return anything. ## Usage ### Adding a label to a custom Hook Call `useDebugValue` at the top level of your custom Hook to display a readable debug value for React DevTools. import { useDebugValue } from 'react';function useOnlineStatus() {// ...useDebugValue(isOnline ? 'Online' : 'Offline');// ...} This gives components calling `useOnlineStatus` a label like `OnlineStatus: "Online"` when you inspect them: 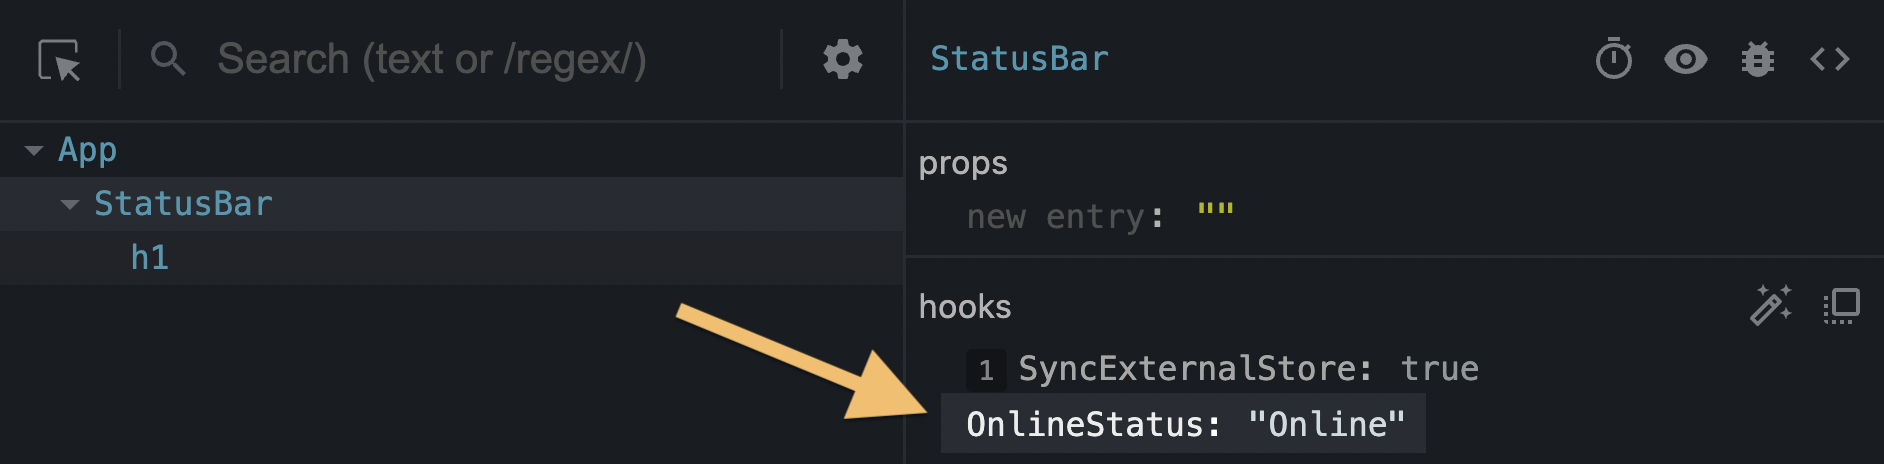 Without the `useDebugValue` call, only the underlying data (in this example, `true`) would be displayed. import { useSyncExternalStore, useDebugValue } from 'react'; export function useOnlineStatus() { const isOnline = useSyncExternalStore(subscribe, () \=> navigator.onLine, () \=> true); useDebugValue(isOnline ? 'Online' : 'Offline'); return isOnline; } function subscribe(callback) { window.addEventListener('online', callback); window.addEventListener('offline', callback); return () \=> { window.removeEventListener('online', callback); window.removeEventListener('offline', callback); }; } ### Note Don’t add debug values to every custom Hook. It’s most valuable for custom Hooks that are part of shared libraries and that have a complex internal data structure that’s difficult to inspect. * * * ### Deferring formatting of a debug value You can also pass a formatting function as the second argument to `useDebugValue`: useDebugValue(date, date => date.toDateString()); Your formatting function will receive the debug value as a parameter and should return a formatted display value. When your component is inspected, React DevTools will call this function and display its result. This lets you avoid running potentially expensive formatting logic unless the component is actually inspected. For example, if `date` is a Date value, this avoids calling `toDateString()` on it for every render. --- ## Page: https://react.dev/reference/react/useDeferredValue `useDeferredValue` is a React Hook that lets you defer updating a part of the UI. const deferredValue = useDeferredValue(value) * Reference * `useDeferredValue(value, initialValue?)` * Usage * Showing stale content while fresh content is loading * Indicating that the content is stale * Deferring re-rendering for a part of the UI * * * ## Reference ### `useDeferredValue(value, initialValue?)` Call `useDeferredValue` at the top level of your component to get a deferred version of that value. import { useState, useDeferredValue } from 'react';function SearchPage() {const [query, setQuery] = useState('');const deferredQuery = useDeferredValue(query);// ...} See more examples below. #### Parameters * `value`: The value you want to defer. It can have any type. * **optional** `initialValue`: A value to use during the initial render of a component. If this option is omitted, `useDeferredValue` will not defer during the initial render, because there’s no previous version of `value` that it can render instead. #### Returns * `currentValue`: During the initial render, the returned deferred value will be the `initialValue`, or the same as the value you provided. During updates, React will first attempt a re-render with the old value (so it will return the old value), and then try another re-render in the background with the new value (so it will return the updated value). #### Caveats * When an update is inside a Transition, `useDeferredValue` always returns the new `value` and does not spawn a deferred render, since the update is already deferred. * The values you pass to `useDeferredValue` should either be primitive values (like strings and numbers) or objects created outside of rendering. If you create a new object during rendering and immediately pass it to `useDeferredValue`, it will be different on every render, causing unnecessary background re-renders. * When `useDeferredValue` receives a different value (compared with `Object.is`), in addition to the current render (when it still uses the previous value), it schedules a re-render in the background with the new value. The background re-render is interruptible: if there’s another update to the `value`, React will restart the background re-render from scratch. For example, if the user is typing into an input faster than a chart receiving its deferred value can re-render, the chart will only re-render after the user stops typing. * `useDeferredValue` is integrated with `<Suspense>`. If the background update caused by a new value suspends the UI, the user will not see the fallback. They will see the old deferred value until the data loads. * `useDeferredValue` does not by itself prevent extra network requests. * There is no fixed delay caused by `useDeferredValue` itself. As soon as React finishes the original re-render, React will immediately start working on the background re-render with the new deferred value. Any updates caused by events (like typing) will interrupt the background re-render and get prioritized over it. * The background re-render caused by `useDeferredValue` does not fire Effects until it’s committed to the screen. If the background re-render suspends, its Effects will run after the data loads and the UI updates. * * * ## Usage ### Showing stale content while fresh content is loading Call `useDeferredValue` at the top level of your component to defer updating some part of your UI. import { useState, useDeferredValue } from 'react';function SearchPage() {const [query, setQuery] = useState('');const deferredQuery = useDeferredValue(query);// ...} During the initial render, the deferred value will be the same as the value you provided. During updates, the deferred value will “lag behind” the latest value. In particular, React will first re-render _without_ updating the deferred value, and then try to re-render with the newly received value in the background. **Let’s walk through an example to see when this is useful.** In this example, the `SearchResults` component suspends while fetching the search results. Try typing `"a"`, waiting for the results, and then editing it to `"ab"`. The results for `"a"` get replaced by the loading fallback. import { Suspense, useState } from 'react'; import SearchResults from './SearchResults.js'; export default function App() { const \[query, setQuery\] = useState(''); return ( <\> <label\> Search albums: <input value\={query} onChange\={e \=> setQuery(e.target.value)} /> </label\> <Suspense fallback\={<h2\>Loading...</h2\>}\> <SearchResults query\={query} /> </Suspense\> </\> ); } A common alternative UI pattern is to _defer_ updating the list of results and to keep showing the previous results until the new results are ready. Call `useDeferredValue` to pass a deferred version of the query down: export default function App() {const [query, setQuery] = useState('');const deferredQuery = useDeferredValue(query);return (<><label> Search albums:<input value={query} onChange={e => setQuery(e.target.value)} /></label><Suspense fallback={<h2>Loading...</h2>}><SearchResults query={deferredQuery} /></Suspense></>);} The `query` will update immediately, so the input will display the new value. However, the `deferredQuery` will keep its previous value until the data has loaded, so `SearchResults` will show the stale results for a bit. Enter `"a"` in the example below, wait for the results to load, and then edit the input to `"ab"`. Notice how instead of the Suspense fallback, you now see the stale result list until the new results have loaded: import { Suspense, useState, useDeferredValue } from 'react'; import SearchResults from './SearchResults.js'; export default function App() { const \[query, setQuery\] = useState(''); const deferredQuery = useDeferredValue(query); return ( <\> <label\> Search albums: <input value\={query} onChange\={e \=> setQuery(e.target.value)} /> </label\> <Suspense fallback\={<h2\>Loading...</h2\>}\> <SearchResults query\={deferredQuery} /> </Suspense\> </\> ); } ##### Deep Dive #### How does deferring a value work under the hood? You can think of it as happening in two steps: 1. **First, React re-renders with the new `query` (`"ab"`) but with the old `deferredQuery` (still `"a")`.** The `deferredQuery` value, which you pass to the result list, is _deferred:_ it “lags behind” the `query` value. 2. **In the background, React tries to re-render with _both_ `query` and `deferredQuery` updated to `"ab"`.** If this re-render completes, React will show it on the screen. However, if it suspends (the results for `"ab"` have not loaded yet), React will abandon this rendering attempt, and retry this re-render again after the data has loaded. The user will keep seeing the stale deferred value until the data is ready. The deferred “background” rendering is interruptible. For example, if you type into the input again, React will abandon it and restart with the new value. React will always use the latest provided value. Note that there is still a network request per each keystroke. What’s being deferred here is displaying results (until they’re ready), not the network requests themselves. Even if the user continues typing, responses for each keystroke get cached, so pressing Backspace is instant and doesn’t fetch again. * * * ### Indicating that the content is stale In the example above, there is no indication that the result list for the latest query is still loading. This can be confusing to the user if the new results take a while to load. To make it more obvious to the user that the result list does not match the latest query, you can add a visual indication when the stale result list is displayed: <div style={{opacity: query !== deferredQuery ? 0.5 : 1,}}><SearchResults query={deferredQuery} /></div> With this change, as soon as you start typing, the stale result list gets slightly dimmed until the new result list loads. You can also add a CSS transition to delay dimming so that it feels gradual, like in the example below: import { Suspense, useState, useDeferredValue } from 'react'; import SearchResults from './SearchResults.js'; export default function App() { const \[query, setQuery\] = useState(''); const deferredQuery = useDeferredValue(query); const isStale = query !== deferredQuery; return ( <\> <label\> Search albums: <input value\={query} onChange\={e \=> setQuery(e.target.value)} /> </label\> <Suspense fallback\={<h2\>Loading...</h2\>}\> <div style\={{ opacity: isStale ? 0.5 : 1, transition: isStale ? 'opacity 0.2s 0.2s linear' : 'opacity 0s 0s linear' }}\> <SearchResults query\={deferredQuery} /> </div\> </Suspense\> </\> ); } * * * ### Deferring re-rendering for a part of the UI You can also apply `useDeferredValue` as a performance optimization. It is useful when a part of your UI is slow to re-render, there’s no easy way to optimize it, and you want to prevent it from blocking the rest of the UI. Imagine you have a text field and a component (like a chart or a long list) that re-renders on every keystroke: function App() {const [text, setText] = useState('');return (<><input value={text} onChange={e => setText(e.target.value)} /><SlowList text={text} /></>);} First, optimize `SlowList` to skip re-rendering when its props are the same. To do this, wrap it in `memo`: const SlowList = memo(function SlowList({ text }) {// ...}); However, this only helps if the `SlowList` props are _the same_ as during the previous render. The problem you’re facing now is that it’s slow when they’re _different,_ and when you actually need to show different visual output. Concretely, the main performance problem is that whenever you type into the input, the `SlowList` receives new props, and re-rendering its entire tree makes the typing feel janky. In this case, `useDeferredValue` lets you prioritize updating the input (which must be fast) over updating the result list (which is allowed to be slower): function App() {const [text, setText] = useState('');const deferredText = useDeferredValue(text);return (<><input value={text} onChange={e => setText(e.target.value)} /><SlowList text={deferredText} /></>);} This does not make re-rendering of the `SlowList` faster. However, it tells React that re-rendering the list can be deprioritized so that it doesn’t block the keystrokes. The list will “lag behind” the input and then “catch up”. Like before, React will attempt to update the list as soon as possible, but will not block the user from typing. #### Example 1 of 2: Deferred re-rendering of the list In this example, each item in the `SlowList` component is **artificially slowed down** so that you can see how `useDeferredValue` lets you keep the input responsive. Type into the input and notice that typing feels snappy while the list “lags behind” it. ### Pitfall This optimization requires `SlowList` to be wrapped in `memo`. This is because whenever the `text` changes, React needs to be able to re-render the parent component quickly. During that re-render, `deferredText` still has its previous value, so `SlowList` is able to skip re-rendering (its props have not changed). Without `memo`, it would have to re-render anyway, defeating the point of the optimization. ##### Deep Dive #### How is deferring a value different from debouncing and throttling? There are two common optimization techniques you might have used before in this scenario: * _Debouncing_ means you’d wait for the user to stop typing (e.g. for a second) before updating the list. * _Throttling_ means you’d update the list every once in a while (e.g. at most once a second). While these techniques are helpful in some cases, `useDeferredValue` is better suited to optimizing rendering because it is deeply integrated with React itself and adapts to the user’s device. Unlike debouncing or throttling, it doesn’t require choosing any fixed delay. If the user’s device is fast (e.g. powerful laptop), the deferred re-render would happen almost immediately and wouldn’t be noticeable. If the user’s device is slow, the list would “lag behind” the input proportionally to how slow the device is. Also, unlike with debouncing or throttling, deferred re-renders done by `useDeferredValue` are interruptible by default. This means that if React is in the middle of re-rendering a large list, but the user makes another keystroke, React will abandon that re-render, handle the keystroke, and then start rendering in the background again. By contrast, debouncing and throttling still produce a janky experience because they’re _blocking:_ they merely postpone the moment when rendering blocks the keystroke. If the work you’re optimizing doesn’t happen during rendering, debouncing and throttling are still useful. For example, they can let you fire fewer network requests. You can also use these techniques together. --- ## Page: https://react.dev/reference/react/useEffect `useEffect` is a React Hook that lets you synchronize a component with an external system. useEffect(setup, dependencies?) * Reference * `useEffect(setup, dependencies?)` * Usage * Connecting to an external system * Wrapping Effects in custom Hooks * Controlling a non-React widget * Fetching data with Effects * Specifying reactive dependencies * Updating state based on previous state from an Effect * Removing unnecessary object dependencies * Removing unnecessary function dependencies * Reading the latest props and state from an Effect * Displaying different content on the server and the client * Troubleshooting * My Effect runs twice when the component mounts * My Effect runs after every re-render * My Effect keeps re-running in an infinite cycle * My cleanup logic runs even though my component didn’t unmount * My Effect does something visual, and I see a flicker before it runs * * * ## Reference ### `useEffect(setup, dependencies?)` Call `useEffect` at the top level of your component to declare an Effect: import { useState, useEffect } from 'react';import { createConnection } from './chat.js';function ChatRoom({ roomId }) {const [serverUrl, setServerUrl] = useState('https://localhost:1234');useEffect(() => {const connection = createConnection(serverUrl, roomId);connection.connect();return () => {connection.disconnect();};}, [serverUrl, roomId]);// ...} See more examples below. #### Parameters * `setup`: The function with your Effect’s logic. Your setup function may also optionally return a _cleanup_ function. When your component is added to the DOM, React will run your setup function. After every re-render with changed dependencies, React will first run the cleanup function (if you provided it) with the old values, and then run your setup function with the new values. After your component is removed from the DOM, React will run your cleanup function. * **optional** `dependencies`: The list of all reactive values referenced inside of the `setup` code. Reactive values include props, state, and all the variables and functions declared directly inside your component body. If your linter is configured for React, it will verify that every reactive value is correctly specified as a dependency. The list of dependencies must have a constant number of items and be written inline like `[dep1, dep2, dep3]`. React will compare each dependency with its previous value using the `Object.is` comparison. If you omit this argument, your Effect will re-run after every re-render of the component. See the difference between passing an array of dependencies, an empty array, and no dependencies at all. #### Returns `useEffect` returns `undefined`. #### Caveats * `useEffect` is a Hook, so you can only call it **at the top level of your component** or your own Hooks. You can’t call it inside loops or conditions. If you need that, extract a new component and move the state into it. * If you’re **not trying to synchronize with some external system,** you probably don’t need an Effect. * When Strict Mode is on, React will **run one extra development-only setup+cleanup cycle** before the first real setup. This is a stress-test that ensures that your cleanup logic “mirrors” your setup logic and that it stops or undoes whatever the setup is doing. If this causes a problem, implement the cleanup function. * If some of your dependencies are objects or functions defined inside the component, there is a risk that they will **cause the Effect to re-run more often than needed.** To fix this, remove unnecessary object and function dependencies. You can also extract state updates and non-reactive logic outside of your Effect. * If your Effect wasn’t caused by an interaction (like a click), React will generally let the browser **paint the updated screen first before running your Effect.** If your Effect is doing something visual (for example, positioning a tooltip), and the delay is noticeable (for example, it flickers), replace `useEffect` with `useLayoutEffect`. * If your Effect is caused by an interaction (like a click), **React may run your Effect before the browser paints the updated screen**. This ensures that the result of the Effect can be observed by the event system. Usually, this works as expected. However, if you must defer the work until after paint, such as an `alert()`, you can use `setTimeout`. See reactwg/react-18/128 for more information. * Even if your Effect was caused by an interaction (like a click), **React may allow the browser to repaint the screen before processing the state updates inside your Effect.** Usually, this works as expected. However, if you must block the browser from repainting the screen, you need to replace `useEffect` with `useLayoutEffect`. * Effects **only run on the client.** They don’t run during server rendering. * * * ## Usage ### Connecting to an external system Some components need to stay connected to the network, some browser API, or a third-party library, while they are displayed on the page. These systems aren’t controlled by React, so they are called _external._ To connect your component to some external system, call `useEffect` at the top level of your component: import { useState, useEffect } from 'react';import { createConnection } from './chat.js';function ChatRoom({ roomId }) {const [serverUrl, setServerUrl] = useState('https://localhost:1234');useEffect(() => {const connection = createConnection(serverUrl, roomId);connection.connect();return () => {connection.disconnect();};}, [serverUrl, roomId]);// ...} You need to pass two arguments to `useEffect`: 1. A _setup function_ with setup code that connects to that system. * It should return a _cleanup function_ with cleanup code that disconnects from that system. 2. A list of dependencies including every value from your component used inside of those functions. **React calls your setup and cleanup functions whenever it’s necessary, which may happen multiple times:** 1. Your setup code runs when your component is added to the page _(mounts)_. 2. After every re-render of your component where the dependencies have changed: * First, your cleanup code runs with the old props and state. * Then, your setup code runs with the new props and state. 3. Your cleanup code runs one final time after your component is removed from the page _(unmounts)._ **Let’s illustrate this sequence for the example above.** When the `ChatRoom` component above gets added to the page, it will connect to the chat room with the initial `serverUrl` and `roomId`. If either `serverUrl` or `roomId` change as a result of a re-render (say, if the user picks a different chat room in a dropdown), your Effect will _disconnect from the previous room, and connect to the next one._ When the `ChatRoom` component is removed from the page, your Effect will disconnect one last time. **To help you find bugs, in development React runs setup and cleanup one extra time before the setup.** This is a stress-test that verifies your Effect’s logic is implemented correctly. If this causes visible issues, your cleanup function is missing some logic. The cleanup function should stop or undo whatever the setup function was doing. The rule of thumb is that the user shouldn’t be able to distinguish between the setup being called once (as in production) and a _setup_ → _cleanup_ → _setup_ sequence (as in development). See common solutions. **Try to write every Effect as an independent process and think about a single setup/cleanup cycle at a time.** It shouldn’t matter whether your component is mounting, updating, or unmounting. When your cleanup logic correctly “mirrors” the setup logic, your Effect is resilient to running setup and cleanup as often as needed. #### Example 1 of 5: Connecting to a chat server In this example, the `ChatRoom` component uses an Effect to stay connected to an external system defined in `chat.js`. Press “Open chat” to make the `ChatRoom` component appear. This sandbox runs in development mode, so there is an extra connect-and-disconnect cycle, as explained here. Try changing the `roomId` and `serverUrl` using the dropdown and the input, and see how the Effect re-connects to the chat. Press “Close chat” to see the Effect disconnect one last time. import { useState, useEffect } from 'react'; import { createConnection } from './chat.js'; function ChatRoom({ roomId }) { const \[serverUrl, setServerUrl\] = useState('https://localhost:1234'); useEffect(() \=> { const connection = createConnection(serverUrl, roomId); connection.connect(); return () \=> { connection.disconnect(); }; }, \[roomId, serverUrl\]); return ( <\> <label\> Server URL:{' '} <input value\={serverUrl} onChange\={e \=> setServerUrl(e.target.value)} /> </label\> <h1\>Welcome to the {roomId} room!</h1\> </\> ); } export default function App() { const \[roomId, setRoomId\] = useState('general'); const \[show, setShow\] = useState(false); return ( <\> <label\> Choose the chat room:{' '} <select value\={roomId} onChange\={e \=> setRoomId(e.target.value)} \> <option value\="general"\>general</option\> <option value\="travel"\>travel</option\> <option value\="music"\>music</option\> </select\> </label\> <button onClick\={() \=> setShow(!show)}\> {show ? 'Close chat' : 'Open chat'} </button\> {show && <hr />} {show && <ChatRoom roomId\={roomId} />} </\> ); } * * * ### Wrapping Effects in custom Hooks Effects are an “escape hatch”: you use them when you need to “step outside React” and when there is no better built-in solution for your use case. If you find yourself often needing to manually write Effects, it’s usually a sign that you need to extract some custom Hooks for common behaviors your components rely on. For example, this `useChatRoom` custom Hook “hides” the logic of your Effect behind a more declarative API: function useChatRoom({ serverUrl, roomId }) {useEffect(() => {const options = {serverUrl: serverUrl,roomId: roomId};const connection = createConnection(options);connection.connect();return () => connection.disconnect();}, [roomId, serverUrl]);} Then you can use it from any component like this: function ChatRoom({ roomId }) {const [serverUrl, setServerUrl] = useState('https://localhost:1234');useChatRoom({roomId: roomId,serverUrl: serverUrl});// ... There are also many excellent custom Hooks for every purpose available in the React ecosystem. Learn more about wrapping Effects in custom Hooks. #### Example 1 of 3: Custom `useChatRoom` Hook This example is identical to one of the earlier examples, but the logic is extracted to a custom Hook. import { useState } from 'react'; import { useChatRoom } from './useChatRoom.js'; function ChatRoom({ roomId }) { const \[serverUrl, setServerUrl\] = useState('https://localhost:1234'); useChatRoom({ roomId: roomId, serverUrl: serverUrl }); return ( <\> <label\> Server URL:{' '} <input value\={serverUrl} onChange\={e \=> setServerUrl(e.target.value)} /> </label\> <h1\>Welcome to the {roomId} room!</h1\> </\> ); } export default function App() { const \[roomId, setRoomId\] = useState('general'); const \[show, setShow\] = useState(false); return ( <\> <label\> Choose the chat room:{' '} <select value\={roomId} onChange\={e \=> setRoomId(e.target.value)} \> <option value\="general"\>general</option\> <option value\="travel"\>travel</option\> <option value\="music"\>music</option\> </select\> </label\> <button onClick\={() \=> setShow(!show)}\> {show ? 'Close chat' : 'Open chat'} </button\> {show && <hr />} {show && <ChatRoom roomId\={roomId} />} </\> ); } * * * ### Controlling a non-React widget Sometimes, you want to keep an external system synchronized to some prop or state of your component. For example, if you have a third-party map widget or a video player component written without React, you can use an Effect to call methods on it that make its state match the current state of your React component. This Effect creates an instance of a `MapWidget` class defined in `map-widget.js`. When you change the `zoomLevel` prop of the `Map` component, the Effect calls the `setZoom()` on the class instance to keep it synchronized: import { useRef, useEffect } from 'react'; import { MapWidget } from './map-widget.js'; export default function Map({ zoomLevel }) { const containerRef = useRef(null); const mapRef = useRef(null); useEffect(() \=> { if (mapRef.current === null) { mapRef.current = new MapWidget(containerRef.current); } const map = mapRef.current; map.setZoom(zoomLevel); }, \[zoomLevel\]); return ( <div style\={{ width: 200, height: 200 }} ref\={containerRef} /> ); } In this example, a cleanup function is not needed because the `MapWidget` class manages only the DOM node that was passed to it. After the `Map` React component is removed from the tree, both the DOM node and the `MapWidget` class instance will be automatically garbage-collected by the browser JavaScript engine. * * * ### Fetching data with Effects You can use an Effect to fetch data for your component. Note that if you use a framework, using your framework’s data fetching mechanism will be a lot more efficient than writing Effects manually. If you want to fetch data from an Effect manually, your code might look like this: import { useState, useEffect } from 'react';import { fetchBio } from './api.js';export default function Page() {const [person, setPerson] = useState('Alice');const [bio, setBio] = useState(null);useEffect(() => {let ignore = false;setBio(null);fetchBio(person).then(result => {if (!ignore) {setBio(result);}});return () => {ignore = true;};}, [person]);// ... Note the `ignore` variable which is initialized to `false`, and is set to `true` during cleanup. This ensures your code doesn’t suffer from “race conditions”: network responses may arrive in a different order than you sent them. import { useState, useEffect } from 'react'; import { fetchBio } from './api.js'; export default function Page() { const \[person, setPerson\] = useState('Alice'); const \[bio, setBio\] = useState(null); useEffect(() \=> { let ignore = false; setBio(null); fetchBio(person).then(result \=> { if (!ignore) { setBio(result); } }); return () \=> { ignore = true; } }, \[person\]); return ( <\> <select value\={person} onChange\={e \=> { setPerson(e.target.value); }}\> <option value\="Alice"\>Alice</option\> <option value\="Bob"\>Bob</option\> <option value\="Taylor"\>Taylor</option\> </select\> <hr /> <p\><i\>{bio ?? 'Loading...'}</i\></p\> </\> ); } You can also rewrite using the `async` / `await` syntax, but you still need to provide a cleanup function: import { useState, useEffect } from 'react'; import { fetchBio } from './api.js'; export default function Page() { const \[person, setPerson\] = useState('Alice'); const \[bio, setBio\] = useState(null); useEffect(() \=> { async function startFetching() { setBio(null); const result = await fetchBio(person); if (!ignore) { setBio(result); } } let ignore = false; startFetching(); return () \=> { ignore = true; } }, \[person\]); return ( <\> <select value\={person} onChange\={e \=> { setPerson(e.target.value); }}\> <option value\="Alice"\>Alice</option\> <option value\="Bob"\>Bob</option\> <option value\="Taylor"\>Taylor</option\> </select\> <hr /> <p\><i\>{bio ?? 'Loading...'}</i\></p\> </\> ); } Writing data fetching directly in Effects gets repetitive and makes it difficult to add optimizations like caching and server rendering later. It’s easier to use a custom Hook—either your own or maintained by the community. ##### Deep Dive #### What are good alternatives to data fetching in Effects? Writing `fetch` calls inside Effects is a popular way to fetch data, especially in fully client-side apps. This is, however, a very manual approach and it has significant downsides: * **Effects don’t run on the server.** This means that the initial server-rendered HTML will only include a loading state with no data. The client computer will have to download all JavaScript and render your app only to discover that now it needs to load the data. This is not very efficient. * **Fetching directly in Effects makes it easy to create “network waterfalls”.** You render the parent component, it fetches some data, renders the child components, and then they start fetching their data. If the network is not very fast, this is significantly slower than fetching all data in parallel. * **Fetching directly in Effects usually means you don’t preload or cache data.** For example, if the component unmounts and then mounts again, it would have to fetch the data again. * **It’s not very ergonomic.** There’s quite a bit of boilerplate code involved when writing `fetch` calls in a way that doesn’t suffer from bugs like race conditions. This list of downsides is not specific to React. It applies to fetching data on mount with any library. Like with routing, data fetching is not trivial to do well, so we recommend the following approaches: * **If you use a framework, use its built-in data fetching mechanism.** Modern React frameworks have integrated data fetching mechanisms that are efficient and don’t suffer from the above pitfalls. * **Otherwise, consider using or building a client-side cache.** Popular open source solutions include React Query, useSWR, and React Router 6.4+. You can build your own solution too, in which case you would use Effects under the hood but also add logic for deduplicating requests, caching responses, and avoiding network waterfalls (by preloading data or hoisting data requirements to routes). You can continue fetching data directly in Effects if neither of these approaches suit you. * * * ### Specifying reactive dependencies **Notice that you can’t “choose” the dependencies of your Effect.** Every reactive value used by your Effect’s code must be declared as a dependency. Your Effect’s dependency list is determined by the surrounding code: function ChatRoom({ roomId }) { // This is a reactive valueconst [serverUrl, setServerUrl] = useState('https://localhost:1234'); // This is a reactive value toouseEffect(() => {const connection = createConnection(serverUrl, roomId); // This Effect reads these reactive valuesconnection.connect();return () => connection.disconnect();}, [serverUrl, roomId]); // ✅ So you must specify them as dependencies of your Effect// ...} If either `serverUrl` or `roomId` change, your Effect will reconnect to the chat using the new values. **Reactive values include props and all variables and functions declared directly inside of your component.** Since `roomId` and `serverUrl` are reactive values, you can’t remove them from the dependencies. If you try to omit them and your linter is correctly configured for React, the linter will flag this as a mistake you need to fix: function ChatRoom({ roomId }) {const [serverUrl, setServerUrl] = useState('https://localhost:1234');useEffect(() => {const connection = createConnection(serverUrl, roomId);connection.connect();return () => connection.disconnect();}, []); // 🔴 React Hook useEffect has missing dependencies: 'roomId' and 'serverUrl'// ...} **To remove a dependency, you need to “prove” to the linter that it _doesn’t need_ to be a dependency.** For example, you can move `serverUrl` out of your component to prove that it’s not reactive and won’t change on re-renders: const serverUrl = 'https://localhost:1234'; // Not a reactive value anymorefunction ChatRoom({ roomId }) {useEffect(() => {const connection = createConnection(serverUrl, roomId);connection.connect();return () => connection.disconnect();}, [roomId]); // ✅ All dependencies declared// ...} Now that `serverUrl` is not a reactive value (and can’t change on a re-render), it doesn’t need to be a dependency. **If your Effect’s code doesn’t use any reactive values, its dependency list should be empty (`[]`):** const serverUrl = 'https://localhost:1234'; // Not a reactive value anymoreconst roomId = 'music'; // Not a reactive value anymorefunction ChatRoom() {useEffect(() => {const connection = createConnection(serverUrl, roomId);connection.connect();return () => connection.disconnect();}, []); // ✅ All dependencies declared// ...} An Effect with empty dependencies doesn’t re-run when any of your component’s props or state change. ### Pitfall If you have an existing codebase, you might have some Effects that suppress the linter like this: useEffect(() => {// ...// 🔴 Avoid suppressing the linter like this:// eslint-ignore-next-line react-hooks/exhaustive-deps}, []); **When dependencies don’t match the code, there is a high risk of introducing bugs.** By suppressing the linter, you “lie” to React about the values your Effect depends on. Instead, prove they’re unnecessary. #### Example 1 of 3: Passing a dependency array If you specify the dependencies, your Effect runs **after the initial render _and_ after re-renders with changed dependencies.** useEffect(() => {// ...}, [a, b]); // Runs again if a or b are different In the below example, `serverUrl` and `roomId` are reactive values, so they both must be specified as dependencies. As a result, selecting a different room in the dropdown or editing the server URL input causes the chat to re-connect. However, since `message` isn’t used in the Effect (and so it isn’t a dependency), editing the message doesn’t re-connect to the chat. import { useState, useEffect } from 'react'; import { createConnection } from './chat.js'; function ChatRoom({ roomId }) { const \[serverUrl, setServerUrl\] = useState('https://localhost:1234'); const \[message, setMessage\] = useState(''); useEffect(() \=> { const connection = createConnection(serverUrl, roomId); connection.connect(); return () \=> { connection.disconnect(); }; }, \[serverUrl, roomId\]); return ( <\> <label\> Server URL:{' '} <input value\={serverUrl} onChange\={e \=> setServerUrl(e.target.value)} /> </label\> <h1\>Welcome to the {roomId} room!</h1\> <label\> Your message:{' '} <input value\={message} onChange\={e \=> setMessage(e.target.value)} /> </label\> </\> ); } export default function App() { const \[show, setShow\] = useState(false); const \[roomId, setRoomId\] = useState('general'); return ( <\> <label\> Choose the chat room:{' '} <select value\={roomId} onChange\={e \=> setRoomId(e.target.value)} \> <option value\="general"\>general</option\> <option value\="travel"\>travel</option\> <option value\="music"\>music</option\> </select\> <button onClick\={() \=> setShow(!show)}\> {show ? 'Close chat' : 'Open chat'} </button\> </label\> {show && <hr />} {show && <ChatRoom roomId\={roomId}/>} </\> ); } * * * ### Updating state based on previous state from an Effect When you want to update state based on previous state from an Effect, you might run into a problem: function Counter() {const [count, setCount] = useState(0);useEffect(() => {const intervalId = setInterval(() => {setCount(count + 1); // You want to increment the counter every second...}, 1000)return () => clearInterval(intervalId);}, [count]); // 🚩 ... but specifying `count` as a dependency always resets the interval.// ...} Since `count` is a reactive value, it must be specified in the list of dependencies. However, that causes the Effect to cleanup and setup again every time the `count` changes. This is not ideal. To fix this, pass the `c => c + 1` state updater to `setCount`: Now that you’re passing `c => c + 1` instead of `count + 1`, your Effect no longer needs to depend on `count`. As a result of this fix, it won’t need to cleanup and setup the interval again every time the `count` changes. * * * ### Removing unnecessary object dependencies If your Effect depends on an object or a function created during rendering, it might run too often. For example, this Effect re-connects after every render because the `options` object is different for every render: const serverUrl = 'https://localhost:1234';function ChatRoom({ roomId }) {const [message, setMessage] = useState('');const options = { // 🚩 This object is created from scratch on every re-renderserverUrl: serverUrl,roomId: roomId};useEffect(() => {const connection = createConnection(options); // It's used inside the Effectconnection.connect();return () => connection.disconnect();}, [options]); // 🚩 As a result, these dependencies are always different on a re-render// ... Avoid using an object created during rendering as a dependency. Instead, create the object inside the Effect: import { useState, useEffect } from 'react'; import { createConnection } from './chat.js'; const serverUrl = 'https://localhost:1234'; function ChatRoom({ roomId }) { const \[message, setMessage\] = useState(''); useEffect(() \=> { const options = { serverUrl: serverUrl, roomId: roomId }; const connection = createConnection(options); connection.connect(); return () \=> connection.disconnect(); }, \[roomId\]); return ( <\> <h1\>Welcome to the {roomId} room!</h1\> <input value\={message} onChange\={e \=> setMessage(e.target.value)} /> </\> ); } export default function App() { const \[roomId, setRoomId\] = useState('general'); return ( <\> <label\> Choose the chat room:{' '} <select value\={roomId} onChange\={e \=> setRoomId(e.target.value)} \> <option value\="general"\>general</option\> <option value\="travel"\>travel</option\> <option value\="music"\>music</option\> </select\> </label\> <hr /> <ChatRoom roomId\={roomId} /> </\> ); } Now that you create the `options` object inside the Effect, the Effect itself only depends on the `roomId` string. With this fix, typing into the input doesn’t reconnect the chat. Unlike an object which gets re-created, a string like `roomId` doesn’t change unless you set it to another value. Read more about removing dependencies. * * * ### Removing unnecessary function dependencies If your Effect depends on an object or a function created during rendering, it might run too often. For example, this Effect re-connects after every render because the `createOptions` function is different for every render: function ChatRoom({ roomId }) {const [message, setMessage] = useState('');function createOptions() { // 🚩 This function is created from scratch on every re-renderreturn {serverUrl: serverUrl,roomId: roomId};}useEffect(() => {const options = createOptions(); // It's used inside the Effectconst connection = createConnection();connection.connect();return () => connection.disconnect();}, [createOptions]); // 🚩 As a result, these dependencies are always different on a re-render// ... By itself, creating a function from scratch on every re-render is not a problem. You don’t need to optimize that. However, if you use it as a dependency of your Effect, it will cause your Effect to re-run after every re-render. Avoid using a function created during rendering as a dependency. Instead, declare it inside the Effect: import { useState, useEffect } from 'react'; import { createConnection } from './chat.js'; const serverUrl = 'https://localhost:1234'; function ChatRoom({ roomId }) { const \[message, setMessage\] = useState(''); useEffect(() \=> { function createOptions() { return { serverUrl: serverUrl, roomId: roomId }; } const options = createOptions(); const connection = createConnection(options); connection.connect(); return () \=> connection.disconnect(); }, \[roomId\]); return ( <\> <h1\>Welcome to the {roomId} room!</h1\> <input value\={message} onChange\={e \=> setMessage(e.target.value)} /> </\> ); } export default function App() { const \[roomId, setRoomId\] = useState('general'); return ( <\> <label\> Choose the chat room:{' '} <select value\={roomId} onChange\={e \=> setRoomId(e.target.value)} \> <option value\="general"\>general</option\> <option value\="travel"\>travel</option\> <option value\="music"\>music</option\> </select\> </label\> <hr /> <ChatRoom roomId\={roomId} /> </\> ); } Now that you define the `createOptions` function inside the Effect, the Effect itself only depends on the `roomId` string. With this fix, typing into the input doesn’t reconnect the chat. Unlike a function which gets re-created, a string like `roomId` doesn’t change unless you set it to another value. Read more about removing dependencies. * * * ### Reading the latest props and state from an Effect ### Under Construction This section describes an **experimental API that has not yet been released** in a stable version of React. By default, when you read a reactive value from an Effect, you have to add it as a dependency. This ensures that your Effect “reacts” to every change of that value. For most dependencies, that’s the behavior you want. **However, sometimes you’ll want to read the _latest_ props and state from an Effect without “reacting” to them.** For example, imagine you want to log the number of the items in the shopping cart for every page visit: function Page({ url, shoppingCart }) {useEffect(() => {logVisit(url, shoppingCart.length);}, [url, shoppingCart]); // ✅ All dependencies declared// ...} **What if you want to log a new page visit after every `url` change, but _not_ if only the `shoppingCart` changes?** You can’t exclude `shoppingCart` from dependencies without breaking the reactivity rules. However, you can express that you _don’t want_ a piece of code to “react” to changes even though it is called from inside an Effect. Declare an _Effect Event_ with the `useEffectEvent` Hook, and move the code reading `shoppingCart` inside of it: function Page({ url, shoppingCart }) {const onVisit = useEffectEvent(visitedUrl => {logVisit(visitedUrl, shoppingCart.length)});useEffect(() => {onVisit(url);}, [url]); // ✅ All dependencies declared// ...} **Effect Events are not reactive and must always be omitted from dependencies of your Effect.** This is what lets you put non-reactive code (where you can read the latest value of some props and state) inside of them. By reading `shoppingCart` inside of `onVisit`, you ensure that `shoppingCart` won’t re-run your Effect. Read more about how Effect Events let you separate reactive and non-reactive code. * * * ### Displaying different content on the server and the client If your app uses server rendering (either directly or via a framework), your component will render in two different environments. On the server, it will render to produce the initial HTML. On the client, React will run the rendering code again so that it can attach your event handlers to that HTML. This is why, for hydration to work, your initial render output must be identical on the client and the server. In rare cases, you might need to display different content on the client. For example, if your app reads some data from `localStorage`, it can’t possibly do that on the server. Here is how you could implement this: function MyComponent() {const [didMount, setDidMount] = useState(false);useEffect(() => {setDidMount(true);}, []);if (didMount) {// ... return client-only JSX ...} else {// ... return initial JSX ...}} While the app is loading, the user will see the initial render output. Then, when it’s loaded and hydrated, your Effect will run and set `didMount` to `true`, triggering a re-render. This will switch to the client-only render output. Effects don’t run on the server, so this is why `didMount` was `false` during the initial server render. Use this pattern sparingly. Keep in mind that users with a slow connection will see the initial content for quite a bit of time—potentially, many seconds—so you don’t want to make jarring changes to your component’s appearance. In many cases, you can avoid the need for this by conditionally showing different things with CSS. * * * ## Troubleshooting ### My Effect runs twice when the component mounts When Strict Mode is on, in development, React runs setup and cleanup one extra time before the actual setup. This is a stress-test that verifies your Effect’s logic is implemented correctly. If this causes visible issues, your cleanup function is missing some logic. The cleanup function should stop or undo whatever the setup function was doing. The rule of thumb is that the user shouldn’t be able to distinguish between the setup being called once (as in production) and a setup → cleanup → setup sequence (as in development). Read more about how this helps find bugs and how to fix your logic. * * * ### My Effect runs after every re-render First, check that you haven’t forgotten to specify the dependency array: useEffect(() => {// ...}); // 🚩 No dependency array: re-runs after every render! If you’ve specified the dependency array but your Effect still re-runs in a loop, it’s because one of your dependencies is different on every re-render. You can debug this problem by manually logging your dependencies to the console: useEffect(() => {// ..}, [serverUrl, roomId]);console.log([serverUrl, roomId]); You can then right-click on the arrays from different re-renders in the console and select “Store as a global variable” for both of them. Assuming the first one got saved as `temp1` and the second one got saved as `temp2`, you can then use the browser console to check whether each dependency in both arrays is the same: Object.is(temp1[0], temp2[0]); // Is the first dependency the same between the arrays?Object.is(temp1[1], temp2[1]); // Is the second dependency the same between the arrays?Object.is(temp1[2], temp2[2]); // ... and so on for every dependency ... When you find the dependency that is different on every re-render, you can usually fix it in one of these ways: * Updating state based on previous state from an Effect * Removing unnecessary object dependencies * Removing unnecessary function dependencies * Reading the latest props and state from an Effect As a last resort (if these methods didn’t help), wrap its creation with `useMemo` or `useCallback` (for functions). * * * ### My Effect keeps re-running in an infinite cycle If your Effect runs in an infinite cycle, these two things must be true: * Your Effect is updating some state. * That state leads to a re-render, which causes the Effect’s dependencies to change. Before you start fixing the problem, ask yourself whether your Effect is connecting to some external system (like DOM, network, a third-party widget, and so on). Why does your Effect need to set state? Does it synchronize with that external system? Or are you trying to manage your application’s data flow with it? If there is no external system, consider whether removing the Effect altogether would simplify your logic. If you’re genuinely synchronizing with some external system, think about why and under what conditions your Effect should update the state. Has something changed that affects your component’s visual output? If you need to keep track of some data that isn’t used by rendering, a ref (which doesn’t trigger re-renders) might be more appropriate. Verify your Effect doesn’t update the state (and trigger re-renders) more than needed. Finally, if your Effect is updating the state at the right time, but there is still a loop, it’s because that state update leads to one of the Effect’s dependencies changing. Read how to debug dependency changes. * * * ### My cleanup logic runs even though my component didn’t unmount The cleanup function runs not only during unmount, but before every re-render with changed dependencies. Additionally, in development, React runs setup+cleanup one extra time immediately after component mounts. If you have cleanup code without corresponding setup code, it’s usually a code smell: useEffect(() => {// 🔴 Avoid: Cleanup logic without corresponding setup logicreturn () => {doSomething();};}, []); Your cleanup logic should be “symmetrical” to the setup logic, and should stop or undo whatever setup did: useEffect(() => {const connection = createConnection(serverUrl, roomId);connection.connect();return () => {connection.disconnect();};}, [serverUrl, roomId]); Learn how the Effect lifecycle is different from the component’s lifecycle. * * * ### My Effect does something visual, and I see a flicker before it runs If your Effect must block the browser from painting the screen, replace `useEffect` with `useLayoutEffect`. Note that **this shouldn’t be needed for the vast majority of Effects.** You’ll only need this if it’s crucial to run your Effect before the browser paint: for example, to measure and position a tooltip before the user sees it. --- ## Page: https://react.dev/reference/react/useId `useId` is a React Hook for generating unique IDs that can be passed to accessibility attributes. const id = useId() * Reference * `useId()` * Usage * Generating unique IDs for accessibility attributes * Generating IDs for several related elements * Specifying a shared prefix for all generated IDs * Using the same ID prefix on the client and the server * * * ## Reference ### `useId()` Call `useId` at the top level of your component to generate a unique ID: import { useId } from 'react';function PasswordField() {const passwordHintId = useId();// ... See more examples below. #### Parameters `useId` does not take any parameters. #### Returns `useId` returns a unique ID string associated with this particular `useId` call in this particular component. #### Caveats * `useId` is a Hook, so you can only call it **at the top level of your component** or your own Hooks. You can’t call it inside loops or conditions. If you need that, extract a new component and move the state into it. * `useId` **should not be used to generate keys** in a list. Keys should be generated from your data. * * * ## Usage ### Generating unique IDs for accessibility attributes Call `useId` at the top level of your component to generate a unique ID: import { useId } from 'react';function PasswordField() {const passwordHintId = useId();// ... You can then pass the generated ID to different attributes: <><input type="password" aria-describedby={passwordHintId} /><p id={passwordHintId}></> **Let’s walk through an example to see when this is useful.** HTML accessibility attributes like `aria-describedby` let you specify that two tags are related to each other. For example, you can specify that an element (like an input) is described by another element (like a paragraph). In regular HTML, you would write it like this: <label> Password:<inputtype="password"aria-describedby="password-hint"/></label><p id="password-hint"> The password should contain at least 18 characters</p> However, hardcoding IDs like this is not a good practice in React. A component may be rendered more than once on the page—but IDs have to be unique! Instead of hardcoding an ID, generate a unique ID with `useId`: import { useId } from 'react';function PasswordField() {const passwordHintId = useId();return (<><label> Password:<inputtype="password"aria-describedby={passwordHintId}/></label><p id={passwordHintId}> The password should contain at least 18 characters</p></>);} Now, even if `PasswordField` appears multiple times on the screen, the generated IDs won’t clash. import { useId } from 'react'; function PasswordField() { const passwordHintId = useId(); return ( <\> <label\> Password: <input type\="password" aria-describedby\={passwordHintId} /> </label\> <p id\={passwordHintId}\> The password should contain at least 18 characters </p\> </\> ); } export default function App() { return ( <\> <h2\>Choose password</h2\> <PasswordField /> <h2\>Confirm password</h2\> <PasswordField /> </\> ); } Watch this video to see the difference in the user experience with assistive technologies. ### Pitfall With server rendering, **`useId` requires an identical component tree on the server and the client**. If the trees you render on the server and the client don’t match exactly, the generated IDs won’t match. ##### Deep Dive #### Why is useId better than an incrementing counter? You might be wondering why `useId` is better than incrementing a global variable like `nextId++`. The primary benefit of `useId` is that React ensures that it works with server rendering. During server rendering, your components generate HTML output. Later, on the client, hydration attaches your event handlers to the generated HTML. For hydration to work, the client output must match the server HTML. This is very difficult to guarantee with an incrementing counter because the order in which the Client Components are hydrated may not match the order in which the server HTML was emitted. By calling `useId`, you ensure that hydration will work, and the output will match between the server and the client. Inside React, `useId` is generated from the “parent path” of the calling component. This is why, if the client and the server tree are the same, the “parent path” will match up regardless of rendering order. * * * If you need to give IDs to multiple related elements, you can call `useId` to generate a shared prefix for them: This lets you avoid calling `useId` for every single element that needs a unique ID. * * * ### Specifying a shared prefix for all generated IDs If you render multiple independent React applications on a single page, pass `identifierPrefix` as an option to your `createRoot` or `hydrateRoot` calls. This ensures that the IDs generated by the two different apps never clash because every identifier generated with `useId` will start with the distinct prefix you’ve specified. * * * ### Using the same ID prefix on the client and the server If you render multiple independent React apps on the same page, and some of these apps are server-rendered, make sure that the `identifierPrefix` you pass to the `hydrateRoot` call on the client side is the same as the `identifierPrefix` you pass to the server APIs such as `renderToPipeableStream`. // Serverimport { renderToPipeableStream } from 'react-dom/server';const { pipe } = renderToPipeableStream(<App />,{ identifierPrefix: 'react-app1' }); // Clientimport { hydrateRoot } from 'react-dom/client';const domNode = document.getElementById('root');const root = hydrateRoot(domNode,reactNode,{ identifierPrefix: 'react-app1' }); You do not need to pass `identifierPrefix` if you only have one React app on the page. --- ## Page: https://react.dev/reference/react/useImperativeHandle `useImperativeHandle` is a React Hook that lets you customize the handle exposed as a ref. useImperativeHandle(ref, createHandle, dependencies?) * Reference * `useImperativeHandle(ref, createHandle, dependencies?)` * Usage * Exposing a custom ref handle to the parent component * Exposing your own imperative methods * * * ## Reference ### `useImperativeHandle(ref, createHandle, dependencies?)` Call `useImperativeHandle` at the top level of your component to customize the ref handle it exposes: import { useImperativeHandle } from 'react';function MyInput({ ref }) {useImperativeHandle(ref, () => {return {// ... your methods ...};}, []);// ... See more examples below. #### Parameters * `ref`: The `ref` you received as a prop to the `MyInput` component. * `createHandle`: A function that takes no arguments and returns the ref handle you want to expose. That ref handle can have any type. Usually, you will return an object with the methods you want to expose. * **optional** `dependencies`: The list of all reactive values referenced inside of the `createHandle` code. Reactive values include props, state, and all the variables and functions declared directly inside your component body. If your linter is configured for React, it will verify that every reactive value is correctly specified as a dependency. The list of dependencies must have a constant number of items and be written inline like `[dep1, dep2, dep3]`. React will compare each dependency with its previous value using the `Object.is` comparison. If a re-render resulted in a change to some dependency, or if you omitted this argument, your `createHandle` function will re-execute, and the newly created handle will be assigned to the ref. #### Returns `useImperativeHandle` returns `undefined`. * * * ## Usage ### Exposing a custom ref handle to the parent component To expose a DOM node to the parent element, pass in the `ref` prop to the node. function MyInput({ ref }) {return <input ref={ref} />;}; With the code above, a ref to `MyInput` will receive the `<input>` DOM node. However, you can expose a custom value instead. To customize the exposed handle, call `useImperativeHandle` at the top level of your component: import { useImperativeHandle } from 'react';function MyInput({ ref }) {useImperativeHandle(ref, () => {return {// ... your methods ...};}, []);return <input />;}; Note that in the code above, the `ref` is no longer passed to the `<input>`. For example, suppose you don’t want to expose the entire `<input>` DOM node, but you want to expose two of its methods: `focus` and `scrollIntoView`. To do this, keep the real browser DOM in a separate ref. Then use `useImperativeHandle` to expose a handle with only the methods that you want the parent component to call: import { useRef, useImperativeHandle } from 'react';function MyInput({ ref }) {const inputRef = useRef(null);useImperativeHandle(ref, () => {return {focus() {inputRef.current.focus();},scrollIntoView() {inputRef.current.scrollIntoView();},};}, []);return <input ref={inputRef} />;}; Now, if the parent component gets a ref to `MyInput`, it will be able to call the `focus` and `scrollIntoView` methods on it. However, it will not have full access to the underlying `<input>` DOM node. * * * ### Exposing your own imperative methods The methods you expose via an imperative handle don’t have to match the DOM methods exactly. For example, this `Post` component exposes a `scrollAndFocusAddComment` method via an imperative handle. This lets the parent `Page` scroll the list of comments _and_ focus the input field when you click the button: ### Pitfall **Do not overuse refs.** You should only use refs for _imperative_ behaviors that you can’t express as props: for example, scrolling to a node, focusing a node, triggering an animation, selecting text, and so on. **If you can express something as a prop, you should not use a ref.** For example, instead of exposing an imperative handle like `{ open, close }` from a `Modal` component, it is better to take `isOpen` as a prop like `<Modal isOpen={isOpen} />`. Effects can help you expose imperative behaviors via props. --- ## Page: https://react.dev/reference/react/useInsertionEffect ### Pitfall `useInsertionEffect` is for CSS-in-JS library authors. Unless you are working on a CSS-in-JS library and need a place to inject the styles, you probably want `useEffect` or `useLayoutEffect` instead. `useInsertionEffect` allows inserting elements into the DOM before any layout Effects fire. useInsertionEffect(setup, dependencies?) * Reference * `useInsertionEffect(setup, dependencies?)` * Usage * Injecting dynamic styles from CSS-in-JS libraries * * * ## Reference ### `useInsertionEffect(setup, dependencies?)` Call `useInsertionEffect` to insert styles before any Effects fire that may need to read layout: import { useInsertionEffect } from 'react';// Inside your CSS-in-JS libraryfunction useCSS(rule) {useInsertionEffect(() => {// ... inject <style> tags here ...});return rule;} See more examples below. #### Parameters * `setup`: The function with your Effect’s logic. Your setup function may also optionally return a _cleanup_ function. When your component is added to the DOM, but before any layout Effects fire, React will run your setup function. After every re-render with changed dependencies, React will first run the cleanup function (if you provided it) with the old values, and then run your setup function with the new values. When your component is removed from the DOM, React will run your cleanup function. * **optional** `dependencies`: The list of all reactive values referenced inside of the `setup` code. Reactive values include props, state, and all the variables and functions declared directly inside your component body. If your linter is configured for React, it will verify that every reactive value is correctly specified as a dependency. The list of dependencies must have a constant number of items and be written inline like `[dep1, dep2, dep3]`. React will compare each dependency with its previous value using the `Object.is` comparison algorithm. If you don’t specify the dependencies at all, your Effect will re-run after every re-render of the component. #### Returns `useInsertionEffect` returns `undefined`. #### Caveats * Effects only run on the client. They don’t run during server rendering. * You can’t update state from inside `useInsertionEffect`. * By the time `useInsertionEffect` runs, refs are not attached yet. * `useInsertionEffect` may run either before or after the DOM has been updated. You shouldn’t rely on the DOM being updated at any particular time. * Unlike other types of Effects, which fire cleanup for every Effect and then setup for every Effect, `useInsertionEffect` will fire both cleanup and setup one component at a time. This results in an “interleaving” of the cleanup and setup functions. * * * ## Usage ### Injecting dynamic styles from CSS-in-JS libraries Traditionally, you would style React components using plain CSS. // In your JS file:<button className="success" />// In your CSS file:.success { color: green; } Some teams prefer to author styles directly in JavaScript code instead of writing CSS files. This usually requires using a CSS-in-JS library or a tool. There are three common approaches to CSS-in-JS: 1. Static extraction to CSS files with a compiler 2. Inline styles, e.g. `<div style={{ opacity: 1 }}>` 3. Runtime injection of `<style>` tags If you use CSS-in-JS, we recommend a combination of the first two approaches (CSS files for static styles, inline styles for dynamic styles). **We don’t recommend runtime `<style>` tag injection for two reasons:** 1. Runtime injection forces the browser to recalculate the styles a lot more often. 2. Runtime injection can be very slow if it happens at the wrong time in the React lifecycle. The first problem is not solvable, but `useInsertionEffect` helps you solve the second problem. Call `useInsertionEffect` to insert the styles before any layout Effects fire: // Inside your CSS-in-JS librarylet isInserted = new Set();function useCSS(rule) {useInsertionEffect(() => {// As explained earlier, we don't recommend runtime injection of <style> tags.// But if you have to do it, then it's important to do in useInsertionEffect.if (!isInserted.has(rule)) {isInserted.add(rule);document.head.appendChild(getStyleForRule(rule));}});return rule;}function Button() {const className = useCSS('...');return <div className={className} />;} Similarly to `useEffect`, `useInsertionEffect` does not run on the server. If you need to collect which CSS rules have been used on the server, you can do it during rendering: let collectedRulesSet = new Set();function useCSS(rule) {if (typeof window === 'undefined') {collectedRulesSet.add(rule);}useInsertionEffect(() => {// ...});return rule;} Read more about upgrading CSS-in-JS libraries with runtime injection to `useInsertionEffect`. ##### Deep Dive #### How is this better than injecting styles during rendering or useLayoutEffect? If you insert styles during rendering and React is processing a non-blocking update, the browser will recalculate the styles every single frame while rendering a component tree, which can be **extremely slow.** `useInsertionEffect` is better than inserting styles during `useLayoutEffect` or `useEffect` because it ensures that by the time other Effects run in your components, the `<style>` tags have already been inserted. Otherwise, layout calculations in regular Effects would be wrong due to outdated styles. --- ## Page: https://react.dev/reference/react/useLayoutEffect ### Pitfall `useLayoutEffect` can hurt performance. Prefer `useEffect` when possible. `useLayoutEffect` is a version of `useEffect` that fires before the browser repaints the screen. useLayoutEffect(setup, dependencies?) * Reference * `useLayoutEffect(setup, dependencies?)` * Usage * Measuring layout before the browser repaints the screen * Troubleshooting * I’m getting an error: “`useLayoutEffect` does nothing on the server” * * * ## Reference ### `useLayoutEffect(setup, dependencies?)` Call `useLayoutEffect` to perform the layout measurements before the browser repaints the screen: import { useState, useRef, useLayoutEffect } from 'react';function Tooltip() {const ref = useRef(null);const [tooltipHeight, setTooltipHeight] = useState(0);useLayoutEffect(() => {const { height } = ref.current.getBoundingClientRect();setTooltipHeight(height);}, []);// ... See more examples below. #### Parameters * `setup`: The function with your Effect’s logic. Your setup function may also optionally return a _cleanup_ function. Before your component is added to the DOM, React will run your setup function. After every re-render with changed dependencies, React will first run the cleanup function (if you provided it) with the old values, and then run your setup function with the new values. Before your component is removed from the DOM, React will run your cleanup function. * **optional** `dependencies`: The list of all reactive values referenced inside of the `setup` code. Reactive values include props, state, and all the variables and functions declared directly inside your component body. If your linter is configured for React, it will verify that every reactive value is correctly specified as a dependency. The list of dependencies must have a constant number of items and be written inline like `[dep1, dep2, dep3]`. React will compare each dependency with its previous value using the `Object.is` comparison. If you omit this argument, your Effect will re-run after every re-render of the component. #### Returns `useLayoutEffect` returns `undefined`. #### Caveats * `useLayoutEffect` is a Hook, so you can only call it **at the top level of your component** or your own Hooks. You can’t call it inside loops or conditions. If you need that, extract a component and move the Effect there. * When Strict Mode is on, React will **run one extra development-only setup+cleanup cycle** before the first real setup. This is a stress-test that ensures that your cleanup logic “mirrors” your setup logic and that it stops or undoes whatever the setup is doing. If this causes a problem, implement the cleanup function. * If some of your dependencies are objects or functions defined inside the component, there is a risk that they will **cause the Effect to re-run more often than needed.** To fix this, remove unnecessary object and function dependencies. You can also extract state updates and non-reactive logic outside of your Effect. * Effects **only run on the client.** They don’t run during server rendering. * The code inside `useLayoutEffect` and all state updates scheduled from it **block the browser from repainting the screen.** When used excessively, this makes your app slow. When possible, prefer `useEffect`. * If you trigger a state update inside `useLayoutEffect`, React will execute all remaining Effects immediately including `useEffect`. * * * ## Usage ### Measuring layout before the browser repaints the screen Most components don’t need to know their position and size on the screen to decide what to render. They only return some JSX. Then the browser calculates their _layout_ (position and size) and repaints the screen. Sometimes, that’s not enough. Imagine a tooltip that appears next to some element on hover. If there’s enough space, the tooltip should appear above the element, but if it doesn’t fit, it should appear below. In order to render the tooltip at the right final position, you need to know its height (i.e. whether it fits at the top). To do this, you need to render in two passes: 1. Render the tooltip anywhere (even with a wrong position). 2. Measure its height and decide where to place the tooltip. 3. Render the tooltip _again_ in the correct place. **All of this needs to happen before the browser repaints the screen.** You don’t want the user to see the tooltip moving. Call `useLayoutEffect` to perform the layout measurements before the browser repaints the screen: function Tooltip() {const ref = useRef(null);const [tooltipHeight, setTooltipHeight] = useState(0); // You don't know real height yetuseLayoutEffect(() => {const { height } = ref.current.getBoundingClientRect();setTooltipHeight(height); // Re-render now that you know the real height}, []);// ...use tooltipHeight in the rendering logic below...} Here’s how this works step by step: 1. `Tooltip` renders with the initial `tooltipHeight = 0` (so the tooltip may be wrongly positioned). 2. React places it in the DOM and runs the code in `useLayoutEffect`. 3. Your `useLayoutEffect` measures the height of the tooltip content and triggers an immediate re-render. 4. `Tooltip` renders again with the real `tooltipHeight` (so the tooltip is correctly positioned). 5. React updates it in the DOM, and the browser finally displays the tooltip. Hover over the buttons below and see how the tooltip adjusts its position depending on whether it fits: import { useRef, useLayoutEffect, useState } from 'react'; import { createPortal } from 'react-dom'; import TooltipContainer from './TooltipContainer.js'; export default function Tooltip({ children, targetRect }) { const ref = useRef(null); const \[tooltipHeight, setTooltipHeight\] = useState(0); useLayoutEffect(() \=> { const { height } = ref.current.getBoundingClientRect(); setTooltipHeight(height); console.log('Measured tooltip height: ' + height); }, \[\]); let tooltipX = 0; let tooltipY = 0; if (targetRect !== null) { tooltipX = targetRect.left; tooltipY = targetRect.top - tooltipHeight; if (tooltipY < 0) { tooltipY = targetRect.bottom; } } return createPortal( <TooltipContainer x\={tooltipX} y\={tooltipY} contentRef\={ref}\> {children} </TooltipContainer\>, document.body ); } Notice that even though the `Tooltip` component has to render in two passes (first, with `tooltipHeight` initialized to `0` and then with the real measured height), you only see the final result. This is why you need `useLayoutEffect` instead of `useEffect` for this example. Let’s look at the difference in detail below. #### Example 1 of 2: `useLayoutEffect` blocks the browser from repainting React guarantees that the code inside `useLayoutEffect` and any state updates scheduled inside it will be processed **before the browser repaints the screen.** This lets you render the tooltip, measure it, and re-render the tooltip again without the user noticing the first extra render. In other words, `useLayoutEffect` blocks the browser from painting. import { useRef, useLayoutEffect, useState } from 'react'; import { createPortal } from 'react-dom'; import TooltipContainer from './TooltipContainer.js'; export default function Tooltip({ children, targetRect }) { const ref = useRef(null); const \[tooltipHeight, setTooltipHeight\] = useState(0); useLayoutEffect(() \=> { const { height } = ref.current.getBoundingClientRect(); setTooltipHeight(height); }, \[\]); let tooltipX = 0; let tooltipY = 0; if (targetRect !== null) { tooltipX = targetRect.left; tooltipY = targetRect.top - tooltipHeight; if (tooltipY < 0) { tooltipY = targetRect.bottom; } } return createPortal( <TooltipContainer x\={tooltipX} y\={tooltipY} contentRef\={ref}\> {children} </TooltipContainer\>, document.body ); } ### Note Rendering in two passes and blocking the browser hurts performance. Try to avoid this when you can. * * * ## Troubleshooting ### I’m getting an error: “`useLayoutEffect` does nothing on the server” The purpose of `useLayoutEffect` is to let your component use layout information for rendering: 1. Render the initial content. 2. Measure the layout _before the browser repaints the screen._ 3. Render the final content using the layout information you’ve read. When you or your framework uses server rendering, your React app renders to HTML on the server for the initial render. This lets you show the initial HTML before the JavaScript code loads. The problem is that on the server, there is no layout information. In the earlier example, the `useLayoutEffect` call in the `Tooltip` component lets it position itself correctly (either above or below content) depending on the content height. If you tried to render `Tooltip` as a part of the initial server HTML, this would be impossible to determine. On the server, there is no layout yet! So, even if you rendered it on the server, its position would “jump” on the client after the JavaScript loads and runs. Usually, components that rely on layout information don’t need to render on the server anyway. For example, it probably doesn’t make sense to show a `Tooltip` during the initial render. It is triggered by a client interaction. However, if you’re running into this problem, you have a few different options: * Replace `useLayoutEffect` with `useEffect`. This tells React that it’s okay to display the initial render result without blocking the paint (because the original HTML will become visible before your Effect runs). * Alternatively, mark your component as client-only. This tells React to replace its content up to the closest `<Suspense>` boundary with a loading fallback (for example, a spinner or a glimmer) during server rendering. * Alternatively, you can render a component with `useLayoutEffect` only after hydration. Keep a boolean `isMounted` state that’s initialized to `false`, and set it to `true` inside a `useEffect` call. Your rendering logic can then be like `return isMounted ? <RealContent /> : <FallbackContent />`. On the server and during the hydration, the user will see `FallbackContent` which should not call `useLayoutEffect`. Then React will replace it with `RealContent` which runs on the client only and can include `useLayoutEffect` calls. * If you synchronize your component with an external data store and rely on `useLayoutEffect` for different reasons than measuring layout, consider `useSyncExternalStore` instead which supports server rendering. --- ## Page: https://react.dev/reference/react/useMemo `useMemo` is a React Hook that lets you cache the result of a calculation between re-renders. const cachedValue = useMemo(calculateValue, dependencies) * Reference * `useMemo(calculateValue, dependencies)` * Usage * Skipping expensive recalculations * Skipping re-rendering of components * Preventing an Effect from firing too often * Memoizing a dependency of another Hook * Memoizing a function * Troubleshooting * My calculation runs twice on every re-render * My `useMemo` call is supposed to return an object, but returns undefined * Every time my component renders, the calculation in `useMemo` re-runs * I need to call `useMemo` for each list item in a loop, but it’s not allowed * * * ## Reference ### `useMemo(calculateValue, dependencies)` Call `useMemo` at the top level of your component to cache a calculation between re-renders: import { useMemo } from 'react';function TodoList({ todos, tab }) {const visibleTodos = useMemo(() => filterTodos(todos, tab),[todos, tab]);// ...} See more examples below. #### Parameters * `calculateValue`: The function calculating the value that you want to cache. It should be pure, should take no arguments, and should return a value of any type. React will call your function during the initial render. On next renders, React will return the same value again if the `dependencies` have not changed since the last render. Otherwise, it will call `calculateValue`, return its result, and store it so it can be reused later. * `dependencies`: The list of all reactive values referenced inside of the `calculateValue` code. Reactive values include props, state, and all the variables and functions declared directly inside your component body. If your linter is configured for React, it will verify that every reactive value is correctly specified as a dependency. The list of dependencies must have a constant number of items and be written inline like `[dep1, dep2, dep3]`. React will compare each dependency with its previous value using the `Object.is` comparison. #### Returns On the initial render, `useMemo` returns the result of calling `calculateValue` with no arguments. During next renders, it will either return an already stored value from the last render (if the dependencies haven’t changed), or call `calculateValue` again, and return the result that `calculateValue` has returned. #### Caveats * `useMemo` is a Hook, so you can only call it **at the top level of your component** or your own Hooks. You can’t call it inside loops or conditions. If you need that, extract a new component and move the state into it. * In Strict Mode, React will **call your calculation function twice** in order to help you find accidental impurities. This is development-only behavior and does not affect production. If your calculation function is pure (as it should be), this should not affect your logic. The result from one of the calls will be ignored. * React **will not throw away the cached value unless there is a specific reason to do that.** For example, in development, React throws away the cache when you edit the file of your component. Both in development and in production, React will throw away the cache if your component suspends during the initial mount. In the future, React may add more features that take advantage of throwing away the cache—for example, if React adds built-in support for virtualized lists in the future, it would make sense to throw away the cache for items that scroll out of the virtualized table viewport. This should be fine if you rely on `useMemo` solely as a performance optimization. Otherwise, a state variable or a ref may be more appropriate. ### Note Caching return values like this is also known as _memoization_, which is why this Hook is called `useMemo`. * * * ## Usage ### Skipping expensive recalculations To cache a calculation between re-renders, wrap it in a `useMemo` call at the top level of your component: import { useMemo } from 'react';function TodoList({ todos, tab, theme }) {const visibleTodos = useMemo(() => filterTodos(todos, tab), [todos, tab]);// ...} You need to pass two things to `useMemo`: 1. A calculation function that takes no arguments, like `() =>`, and returns what you wanted to calculate. 2. A list of dependencies including every value within your component that’s used inside your calculation. On the initial render, the value you’ll get from `useMemo` will be the result of calling your calculation. On every subsequent render, React will compare the dependencies with the dependencies you passed during the last render. If none of the dependencies have changed (compared with `Object.is`), `useMemo` will return the value you already calculated before. Otherwise, React will re-run your calculation and return the new value. In other words, `useMemo` caches a calculation result between re-renders until its dependencies change. **Let’s walk through an example to see when this is useful.** By default, React will re-run the entire body of your component every time that it re-renders. For example, if this `TodoList` updates its state or receives new props from its parent, the `filterTodos` function will re-run: function TodoList({ todos, tab, theme }) {const visibleTodos = filterTodos(todos, tab);// ...} Usually, this isn’t a problem because most calculations are very fast. However, if you’re filtering or transforming a large array, or doing some expensive computation, you might want to skip doing it again if data hasn’t changed. If both `todos` and `tab` are the same as they were during the last render, wrapping the calculation in `useMemo` like earlier lets you reuse `visibleTodos` you’ve already calculated before. This type of caching is called _memoization._ ### Note **You should only rely on `useMemo` as a performance optimization.** If your code doesn’t work without it, find the underlying problem and fix it first. Then you may add `useMemo` to improve performance. ##### Deep Dive #### How to tell if a calculation is expensive? In general, unless you’re creating or looping over thousands of objects, it’s probably not expensive. If you want to get more confidence, you can add a console log to measure the time spent in a piece of code: console.time('filter array');const visibleTodos = filterTodos(todos, tab);console.timeEnd('filter array'); Perform the interaction you’re measuring (for example, typing into the input). You will then see logs like `filter array: 0.15ms` in your console. If the overall logged time adds up to a significant amount (say, `1ms` or more), it might make sense to memoize that calculation. As an experiment, you can then wrap the calculation in `useMemo` to verify whether the total logged time has decreased for that interaction or not: console.time('filter array');const visibleTodos = useMemo(() => {return filterTodos(todos, tab); // Skipped if todos and tab haven't changed}, [todos, tab]);console.timeEnd('filter array'); `useMemo` won’t make the _first_ render faster. It only helps you skip unnecessary work on updates. Keep in mind that your machine is probably faster than your users’ so it’s a good idea to test the performance with an artificial slowdown. For example, Chrome offers a CPU Throttling option for this. Also note that measuring performance in development will not give you the most accurate results. (For example, when Strict Mode is on, you will see each component render twice rather than once.) To get the most accurate timings, build your app for production and test it on a device like your users have. ##### Deep Dive #### Should you add useMemo everywhere? If your app is like this site, and most interactions are coarse (like replacing a page or an entire section), memoization is usually unnecessary. On the other hand, if your app is more like a drawing editor, and most interactions are granular (like moving shapes), then you might find memoization very helpful. Optimizing with `useMemo` is only valuable in a few cases: * The calculation you’re putting in `useMemo` is noticeably slow, and its dependencies rarely change. * You pass it as a prop to a component wrapped in `memo`. You want to skip re-rendering if the value hasn’t changed. Memoization lets your component re-render only when dependencies aren’t the same. * The value you’re passing is later used as a dependency of some Hook. For example, maybe another `useMemo` calculation value depends on it. Or maybe you are depending on this value from `useEffect.` There is no benefit to wrapping a calculation in `useMemo` in other cases. There is no significant harm to doing that either, so some teams choose to not think about individual cases, and memoize as much as possible. The downside of this approach is that code becomes less readable. Also, not all memoization is effective: a single value that’s “always new” is enough to break memoization for an entire component. **In practice, you can make a lot of memoization unnecessary by following a few principles:** 1. When a component visually wraps other components, let it accept JSX as children. This way, when the wrapper component updates its own state, React knows that its children don’t need to re-render. 2. Prefer local state and don’t lift state up any further than necessary. For example, don’t keep transient state like forms and whether an item is hovered at the top of your tree or in a global state library. 3. Keep your rendering logic pure. If re-rendering a component causes a problem or produces some noticeable visual artifact, it’s a bug in your component! Fix the bug instead of adding memoization. 4. Avoid unnecessary Effects that update state. Most performance problems in React apps are caused by chains of updates originating from Effects that cause your components to render over and over. 5. Try to remove unnecessary dependencies from your Effects. For example, instead of memoization, it’s often simpler to move some object or a function inside an Effect or outside the component. If a specific interaction still feels laggy, use the React Developer Tools profiler to see which components would benefit the most from memoization, and add memoization where needed. These principles make your components easier to debug and understand, so it’s good to follow them in any case. In the long term, we’re researching doing granular memoization automatically to solve this once and for all. * * * ### Skipping re-rendering of components In some cases, `useMemo` can also help you optimize performance of re-rendering child components. To illustrate this, let’s say this `TodoList` component passes the `visibleTodos` as a prop to the child `List` component: export default function TodoList({ todos, tab, theme }) {// ...return (<div className={theme}><List items={visibleTodos} /></div>);} You’ve noticed that toggling the `theme` prop freezes the app for a moment, but if you remove `<List />` from your JSX, it feels fast. This tells you that it’s worth trying to optimize the `List` component. **By default, when a component re-renders, React re-renders all of its children recursively.** This is why, when `TodoList` re-renders with a different `theme`, the `List` component _also_ re-renders. This is fine for components that don’t require much calculation to re-render. But if you’ve verified that a re-render is slow, you can tell `List` to skip re-rendering when its props are the same as on last render by wrapping it in `memo`: import { memo } from 'react';const List = memo(function List({ items }) {// ...}); **With this change, `List` will skip re-rendering if all of its props are the _same_ as on the last render.** This is where caching the calculation becomes important! Imagine that you calculated `visibleTodos` without `useMemo`: export default function TodoList({ todos, tab, theme }) {// Every time the theme changes, this will be a different array...const visibleTodos = filterTodos(todos, tab);return (<div className={theme}>{/* ... so List's props will never be the same, and it will re-render every time */}<List items={visibleTodos} /></div>);} **In the above example, the `filterTodos` function always creates a _different_ array,** similar to how the `{}` object literal always creates a new object. Normally, this wouldn’t be a problem, but it means that `List` props will never be the same, and your `memo` optimization won’t work. This is where `useMemo` comes in handy: export default function TodoList({ todos, tab, theme }) {// Tell React to cache your calculation between re-renders...const visibleTodos = useMemo(() => filterTodos(todos, tab),[todos, tab] // ...so as long as these dependencies don't change...);return (<div className={theme}>{/* ...List will receive the same props and can skip re-rendering */}<List items={visibleTodos} /></div>);} **By wrapping the `visibleTodos` calculation in `useMemo`, you ensure that it has the _same_ value between the re-renders** (until dependencies change). You don’t _have to_ wrap a calculation in `useMemo` unless you do it for some specific reason. In this example, the reason is that you pass it to a component wrapped in `memo`, and this lets it skip re-rendering. There are a few other reasons to add `useMemo` which are described further on this page. ##### Deep Dive #### Memoizing individual JSX nodes Instead of wrapping `List` in `memo`, you could wrap the `<List />` JSX node itself in `useMemo`: export default function TodoList({ todos, tab, theme }) {const visibleTodos = useMemo(() => filterTodos(todos, tab), [todos, tab]);const children = useMemo(() => <List items={visibleTodos} />, [visibleTodos]);return (<div className={theme}>{children}</div>);} The behavior would be the same. If the `visibleTodos` haven’t changed, `List` won’t be re-rendered. A JSX node like `<List items={visibleTodos} />` is an object like `{ type: List, props: { items: visibleTodos } }`. Creating this object is very cheap, but React doesn’t know whether its contents is the same as last time or not. This is why by default, React will re-render the `List` component. However, if React sees the same exact JSX as during the previous render, it won’t try to re-render your component. This is because JSX nodes are immutable. A JSX node object could not have changed over time, so React knows it’s safe to skip a re-render. However, for this to work, the node has to _actually be the same object_, not merely look the same in code. This is what `useMemo` does in this example. Manually wrapping JSX nodes into `useMemo` is not convenient. For example, you can’t do this conditionally. This is usually why you would wrap components with `memo` instead of wrapping JSX nodes. * * * ### Preventing an Effect from firing too often Sometimes, you might want to use a value inside an Effect: function ChatRoom({ roomId }) {const [message, setMessage] = useState('');const options = {serverUrl: 'https://localhost:1234',roomId: roomId}useEffect(() => {const connection = createConnection(options);connection.connect();// ... This creates a problem. Every reactive value must be declared as a dependency of your Effect. However, if you declare `options` as a dependency, it will cause your Effect to constantly reconnect to the chat room: useEffect(() => {const connection = createConnection(options);connection.connect();return () => connection.disconnect();}, [options]); // 🔴 Problem: This dependency changes on every render// ... To solve this, you can wrap the object you need to call from an Effect in `useMemo`: function ChatRoom({ roomId }) {const [message, setMessage] = useState('');const options = useMemo(() => {return {serverUrl: 'https://localhost:1234',roomId: roomId};}, [roomId]); // ✅ Only changes when roomId changesuseEffect(() => {const connection = createConnection(options);connection.connect();return () => connection.disconnect();}, [options]); // ✅ Only changes when options changes// ... This ensures that the `options` object is the same between re-renders if `useMemo` returns the cached object. However, since `useMemo` is performance optimization, not a semantic guarantee, React may throw away the cached value if there is a specific reason to do that. This will also cause the effect to re-fire, **so it’s even better to remove the need for a function dependency** by moving your object _inside_ the Effect: function ChatRoom({ roomId }) {const [message, setMessage] = useState('');useEffect(() => {const options = { // ✅ No need for useMemo or object dependencies!serverUrl: 'https://localhost:1234',roomId: roomId}const connection = createConnection(options);connection.connect();return () => connection.disconnect();}, [roomId]); // ✅ Only changes when roomId changes// ... Now your code is simpler and doesn’t need `useMemo`. Learn more about removing Effect dependencies. ### Memoizing a dependency of another Hook Suppose you have a calculation that depends on an object created directly in the component body: function Dropdown({ allItems, text }) {const searchOptions = { matchMode: 'whole-word', text };const visibleItems = useMemo(() => {return searchItems(allItems, searchOptions);}, [allItems, searchOptions]); // 🚩 Caution: Dependency on an object created in the component body// ... Depending on an object like this defeats the point of memoization. When a component re-renders, all of the code directly inside the component body runs again. **The lines of code creating the `searchOptions` object will also run on every re-render.** Since `searchOptions` is a dependency of your `useMemo` call, and it’s different every time, React knows the dependencies are different, and recalculate `searchItems` every time. To fix this, you could memoize the `searchOptions` object _itself_ before passing it as a dependency: function Dropdown({ allItems, text }) {const searchOptions = useMemo(() => {return { matchMode: 'whole-word', text };}, [text]); // ✅ Only changes when text changesconst visibleItems = useMemo(() => {return searchItems(allItems, searchOptions);}, [allItems, searchOptions]); // ✅ Only changes when allItems or searchOptions changes// ... In the example above, if the `text` did not change, the `searchOptions` object also won’t change. However, an even better fix is to move the `searchOptions` object declaration _inside_ of the `useMemo` calculation function: function Dropdown({ allItems, text }) {const visibleItems = useMemo(() => {const searchOptions = { matchMode: 'whole-word', text };return searchItems(allItems, searchOptions);}, [allItems, text]); // ✅ Only changes when allItems or text changes// ... Now your calculation depends on `text` directly (which is a string and can’t “accidentally” become different). * * * ### Memoizing a function Suppose the `Form` component is wrapped in `memo`. You want to pass a function to it as a prop: export default function ProductPage({ productId, referrer }) {function handleSubmit(orderDetails) {post('/product/' + productId + '/buy', {referrer,orderDetails});}return <Form onSubmit={handleSubmit} />;} Just as `{}` creates a different object, function declarations like `function() {}` and expressions like `() => {}` produce a _different_ function on every re-render. By itself, creating a new function is not a problem. This is not something to avoid! However, if the `Form` component is memoized, presumably you want to skip re-rendering it when no props have changed. A prop that is _always_ different would defeat the point of memoization. To memoize a function with `useMemo`, your calculation function would have to return another function: export default function Page({ productId, referrer }) {const handleSubmit = useMemo(() => {return (orderDetails) => {post('/product/' + productId + '/buy', {referrer,orderDetails});};}, [productId, referrer]);return <Form onSubmit={handleSubmit} />;} This looks clunky! **Memoizing functions is common enough that React has a built-in Hook specifically for that. Wrap your functions into `useCallback` instead of `useMemo`** to avoid having to write an extra nested function: export default function Page({ productId, referrer }) {const handleSubmit = useCallback((orderDetails) => {post('/product/' + productId + '/buy', {referrer,orderDetails});}, [productId, referrer]);return <Form onSubmit={handleSubmit} />;} The two examples above are completely equivalent. The only benefit to `useCallback` is that it lets you avoid writing an extra nested function inside. It doesn’t do anything else. Read more about `useCallback`. * * * ## Troubleshooting ### My calculation runs twice on every re-render In Strict Mode, React will call some of your functions twice instead of once: function TodoList({ todos, tab }) {// This component function will run twice for every render.const visibleTodos = useMemo(() => {// This calculation will run twice if any of the dependencies change.return filterTodos(todos, tab);}, [todos, tab]);// ... This is expected and shouldn’t break your code. This **development-only** behavior helps you keep components pure. React uses the result of one of the calls, and ignores the result of the other call. As long as your component and calculation functions are pure, this shouldn’t affect your logic. However, if they are accidentally impure, this helps you notice and fix the mistake. For example, this impure calculation function mutates an array you received as a prop: const visibleTodos = useMemo(() => {// 🚩 Mistake: mutating a proptodos.push({ id: 'last', text: 'Go for a walk!' });const filtered = filterTodos(todos, tab);return filtered;}, [todos, tab]); React calls your function twice, so you’d notice the todo is added twice. Your calculation shouldn’t change any existing objects, but it’s okay to change any _new_ objects you created during the calculation. For example, if the `filterTodos` function always returns a _different_ array, you can mutate _that_ array instead: const visibleTodos = useMemo(() => {const filtered = filterTodos(todos, tab);// ✅ Correct: mutating an object you created during the calculationfiltered.push({ id: 'last', text: 'Go for a walk!' });return filtered;}, [todos, tab]); Read keeping components pure to learn more about purity. Also, check out the guides on updating objects and updating arrays without mutation. * * * ### My `useMemo` call is supposed to return an object, but returns undefined This code doesn’t work: // 🔴 You can't return an object from an arrow function with () => {const searchOptions = useMemo(() => { matchMode: 'whole-word',text: text}, [text]); In JavaScript, `() => {` starts the arrow function body, so the `{` brace is not a part of your object. This is why it doesn’t return an object, and leads to mistakes. You could fix it by adding parentheses like `({` and `})`: // This works, but is easy for someone to break againconst searchOptions = useMemo(() => ({matchMode: 'whole-word',text: text}), [text]); However, this is still confusing and too easy for someone to break by removing the parentheses. To avoid this mistake, write a `return` statement explicitly: // ✅ This works and is explicitconst searchOptions = useMemo(() => {return {matchMode: 'whole-word',text: text};}, [text]); * * * ### Every time my component renders, the calculation in `useMemo` re-runs Make sure you’ve specified the dependency array as a second argument! If you forget the dependency array, `useMemo` will re-run the calculation every time: function TodoList({ todos, tab }) {// 🔴 Recalculates every time: no dependency arrayconst visibleTodos = useMemo(() => filterTodos(todos, tab));// ... This is the corrected version passing the dependency array as a second argument: function TodoList({ todos, tab }) {// ✅ Does not recalculate unnecessarilyconst visibleTodos = useMemo(() => filterTodos(todos, tab), [todos, tab]);// ... If this doesn’t help, then the problem is that at least one of your dependencies is different from the previous render. You can debug this problem by manually logging your dependencies to the console: const visibleTodos = useMemo(() => filterTodos(todos, tab), [todos, tab]);console.log([todos, tab]); You can then right-click on the arrays from different re-renders in the console and select “Store as a global variable” for both of them. Assuming the first one got saved as `temp1` and the second one got saved as `temp2`, you can then use the browser console to check whether each dependency in both arrays is the same: Object.is(temp1[0], temp2[0]); // Is the first dependency the same between the arrays?Object.is(temp1[1], temp2[1]); // Is the second dependency the same between the arrays?Object.is(temp1[2], temp2[2]); // ... and so on for every dependency ... When you find which dependency breaks memoization, either find a way to remove it, or memoize it as well. * * * ### I need to call `useMemo` for each list item in a loop, but it’s not allowed Suppose the `Chart` component is wrapped in `memo`. You want to skip re-rendering every `Chart` in the list when the `ReportList` component re-renders. However, you can’t call `useMemo` in a loop: function ReportList({ items }) {return (<article>{items.map(item => {// 🔴 You can't call useMemo in a loop like this:const data = useMemo(() => calculateReport(item), [item]);return (<figure key={item.id}><Chart data={data} /></figure>);})}</article>);} Instead, extract a component for each item and memoize data for individual items: function ReportList({ items }) {return (<article>{items.map(item =><Report key={item.id} item={item} />)}</article>);}function Report({ item }) {// ✅ Call useMemo at the top level:const data = useMemo(() => calculateReport(item), [item]);return (<figure><Chart data={data} /></figure>);} Alternatively, you could remove `useMemo` and instead wrap `Report` itself in `memo`. If the `item` prop does not change, `Report` will skip re-rendering, so `Chart` will skip re-rendering too: function ReportList({ items }) {// ...}const Report = memo(function Report({ item }) {const data = calculateReport(item);return (<figure><Chart data={data} /></figure>);}); --- ## Page: https://react.dev/reference/react/useOptimistic `useOptimistic` is a React Hook that lets you optimistically update the UI. const [optimisticState, addOptimistic] = useOptimistic(state, updateFn); * Reference * `useOptimistic(state, updateFn)` * Usage * Optimistically updating forms * * * ## Reference ### `useOptimistic(state, updateFn)` `useOptimistic` is a React Hook that lets you show a different state while an async action is underway. It accepts some state as an argument and returns a copy of that state that can be different during the duration of an async action such as a network request. You provide a function that takes the current state and the input to the action, and returns the optimistic state to be used while the action is pending. This state is called the “optimistic” state because it is usually used to immediately present the user with the result of performing an action, even though the action actually takes time to complete. import { useOptimistic } from 'react';function AppContainer() {const [optimisticState, addOptimistic] = useOptimistic(state,// updateFn(currentState, optimisticValue) => {// merge and return new state// with optimistic value});} See more examples below. #### Parameters * `state`: the value to be returned initially and whenever no action is pending. * `updateFn(currentState, optimisticValue)`: a function that takes the current state and the optimistic value passed to `addOptimistic` and returns the resulting optimistic state. It must be a pure function. `updateFn` takes in two parameters. The `currentState` and the `optimisticValue`. The return value will be the merged value of the `currentState` and `optimisticValue`. #### Returns * `optimisticState`: The resulting optimistic state. It is equal to `state` unless an action is pending, in which case it is equal to the value returned by `updateFn`. * `addOptimistic`: `addOptimistic` is the dispatching function to call when you have an optimistic update. It takes one argument, `optimisticValue`, of any type and will call the `updateFn` with `state` and `optimisticValue`. * * * ## Usage ### Optimistically updating forms The `useOptimistic` Hook provides a way to optimistically update the user interface before a background operation, like a network request, completes. In the context of forms, this technique helps to make apps feel more responsive. When a user submits a form, instead of waiting for the server’s response to reflect the changes, the interface is immediately updated with the expected outcome. For example, when a user types a message into the form and hits the “Send” button, the `useOptimistic` Hook allows the message to immediately appear in the list with a “Sending…” label, even before the message is actually sent to a server. This “optimistic” approach gives the impression of speed and responsiveness. The form then attempts to truly send the message in the background. Once the server confirms the message has been received, the “Sending…” label is removed. --- ## Page: https://react.dev/reference/react/useReducer `useReducer` is a React Hook that lets you add a reducer to your component. const [state, dispatch] = useReducer(reducer, initialArg, init?) * Reference * `useReducer(reducer, initialArg, init?)` * `dispatch` function * Usage * Adding a reducer to a component * Writing the reducer function * Avoiding recreating the initial state * Troubleshooting * I’ve dispatched an action, but logging gives me the old state value * I’ve dispatched an action, but the screen doesn’t update * A part of my reducer state becomes undefined after dispatching * My entire reducer state becomes undefined after dispatching * I’m getting an error: “Too many re-renders” * My reducer or initializer function runs twice * * * ## Reference ### `useReducer(reducer, initialArg, init?)` Call `useReducer` at the top level of your component to manage its state with a reducer. import { useReducer } from 'react';function reducer(state, action) {// ...}function MyComponent() {const [state, dispatch] = useReducer(reducer, { age: 42 });// ... See more examples below. #### Parameters * `reducer`: The reducer function that specifies how the state gets updated. It must be pure, should take the state and action as arguments, and should return the next state. State and action can be of any types. * `initialArg`: The value from which the initial state is calculated. It can be a value of any type. How the initial state is calculated from it depends on the next `init` argument. * **optional** `init`: The initializer function that should return the initial state. If it’s not specified, the initial state is set to `initialArg`. Otherwise, the initial state is set to the result of calling `init(initialArg)`. #### Returns `useReducer` returns an array with exactly two values: 1. The current state. During the first render, it’s set to `init(initialArg)` or `initialArg` (if there’s no `init`). 2. The `dispatch` function that lets you update the state to a different value and trigger a re-render. #### Caveats * `useReducer` is a Hook, so you can only call it **at the top level of your component** or your own Hooks. You can’t call it inside loops or conditions. If you need that, extract a new component and move the state into it. * The `dispatch` function has a stable identity, so you will often see it omitted from Effect dependencies, but including it will not cause the Effect to fire. If the linter lets you omit a dependency without errors, it is safe to do. Learn more about removing Effect dependencies. * In Strict Mode, React will **call your reducer and initializer twice** in order to help you find accidental impurities. This is development-only behavior and does not affect production. If your reducer and initializer are pure (as they should be), this should not affect your logic. The result from one of the calls is ignored. * * * ### `dispatch` function The `dispatch` function returned by `useReducer` lets you update the state to a different value and trigger a re-render. You need to pass the action as the only argument to the `dispatch` function: const [state, dispatch] = useReducer(reducer, { age: 42 });function handleClick() {dispatch({ type: 'incremented_age' });// ... React will set the next state to the result of calling the `reducer` function you’ve provided with the current `state` and the action you’ve passed to `dispatch`. #### Parameters * `action`: The action performed by the user. It can be a value of any type. By convention, an action is usually an object with a `type` property identifying it and, optionally, other properties with additional information. #### Returns `dispatch` functions do not have a return value. #### Caveats * The `dispatch` function **only updates the state variable for the _next_ render**. If you read the state variable after calling the `dispatch` function, you will still get the old value that was on the screen before your call. * If the new value you provide is identical to the current `state`, as determined by an `Object.is` comparison, React will **skip re-rendering the component and its children.** This is an optimization. React may still need to call your component before ignoring the result, but it shouldn’t affect your code. * React batches state updates. It updates the screen **after all the event handlers have run** and have called their `set` functions. This prevents multiple re-renders during a single event. In the rare case that you need to force React to update the screen earlier, for example to access the DOM, you can use `flushSync`. * * * ## Usage ### Adding a reducer to a component Call `useReducer` at the top level of your component to manage state with a reducer. import { useReducer } from 'react';function reducer(state, action) {// ...}function MyComponent() {const [state, dispatch] = useReducer(reducer, { age: 42 });// ... `useReducer` returns an array with exactly two items: 1. The current state of this state variable, initially set to the initial state you provided. 2. The `dispatch` function that lets you change it in response to interaction. To update what’s on the screen, call `dispatch` with an object representing what the user did, called an _action_: function handleClick() {dispatch({ type: 'incremented_age' });} React will pass the current state and the action to your reducer function. Your reducer will calculate and return the next state. React will store that next state, render your component with it, and update the UI. `useReducer` is very similar to `useState`, but it lets you move the state update logic from event handlers into a single function outside of your component. Read more about choosing between `useState` and `useReducer`. * * * ### Writing the reducer function A reducer function is declared like this: function reducer(state, action) {// ...} Then you need to fill in the code that will calculate and return the next state. By convention, it is common to write it as a `switch` statement. For each `case` in the `switch`, calculate and return some next state. function reducer(state, action) {switch (action.type) {case 'incremented_age': {return {name: state.name,age: state.age + 1};}case 'changed_name': {return {name: action.nextName,age: state.age};}}throw Error('Unknown action: ' + action.type);} Actions can have any shape. By convention, it’s common to pass objects with a `type` property identifying the action. It should include the minimal necessary information that the reducer needs to compute the next state. function Form() {const [state, dispatch] = useReducer(reducer, { name: 'Taylor', age: 42 });function handleButtonClick() {dispatch({ type: 'incremented_age' });}function handleInputChange(e) {dispatch({type: 'changed_name',nextName: e.target.value});}// ... The action type names are local to your component. Each action describes a single interaction, even if that leads to multiple changes in data. The shape of the state is arbitrary, but usually it’ll be an object or an array. Read extracting state logic into a reducer to learn more. ### Pitfall State is read-only. Don’t modify any objects or arrays in state: function reducer(state, action) {switch (action.type) {case 'incremented_age': {// 🚩 Don't mutate an object in state like this:state.age = state.age + 1;return state;} Instead, always return new objects from your reducer: function reducer(state, action) {switch (action.type) {case 'incremented_age': {// ✅ Instead, return a new objectreturn {...state,age: state.age + 1};} Read updating objects in state and updating arrays in state to learn more. * * * ### Avoiding recreating the initial state React saves the initial state once and ignores it on the next renders. function createInitialState(username) {// ...}function TodoList({ username }) {const [state, dispatch] = useReducer(reducer, createInitialState(username));// ... Although the result of `createInitialState(username)` is only used for the initial render, you’re still calling this function on every render. This can be wasteful if it’s creating large arrays or performing expensive calculations. To solve this, you may **pass it as an _initializer_ function** to `useReducer` as the third argument instead: function createInitialState(username) {// ...}function TodoList({ username }) {const [state, dispatch] = useReducer(reducer, username, createInitialState);// ... Notice that you’re passing `createInitialState`, which is the _function itself_, and not `createInitialState()`, which is the result of calling it. This way, the initial state does not get re-created after initialization. In the above example, `createInitialState` takes a `username` argument. If your initializer doesn’t need any information to compute the initial state, you may pass `null` as the second argument to `useReducer`. * * * ## Troubleshooting ### I’ve dispatched an action, but logging gives me the old state value Calling the `dispatch` function **does not change state in the running code**: function handleClick() {console.log(state.age); // 42dispatch({ type: 'incremented_age' }); // Request a re-render with 43console.log(state.age); // Still 42!setTimeout(() => {console.log(state.age); // Also 42!}, 5000);} This is because states behaves like a snapshot. Updating state requests another render with the new state value, but does not affect the `state` JavaScript variable in your already-running event handler. If you need to guess the next state value, you can calculate it manually by calling the reducer yourself: const action = { type: 'incremented_age' };dispatch(action);const nextState = reducer(state, action);console.log(state); // { age: 42 }console.log(nextState); // { age: 43 } * * * ### I’ve dispatched an action, but the screen doesn’t update React will **ignore your update if the next state is equal to the previous state,** as determined by an `Object.is` comparison. This usually happens when you change an object or an array in state directly: function reducer(state, action) {switch (action.type) {case 'incremented_age': {// 🚩 Wrong: mutating existing objectstate.age++;return state;}case 'changed_name': {// 🚩 Wrong: mutating existing objectstate.name = action.nextName;return state;}// ...}} You mutated an existing `state` object and returned it, so React ignored the update. To fix this, you need to ensure that you’re always updating objects in state and updating arrays in state instead of mutating them: function reducer(state, action) {switch (action.type) {case 'incremented_age': {// ✅ Correct: creating a new objectreturn {...state,age: state.age + 1};}case 'changed_name': {// ✅ Correct: creating a new objectreturn {...state,name: action.nextName};}// ...}} * * * ### A part of my reducer state becomes undefined after dispatching Make sure that every `case` branch **copies all of the existing fields** when returning the new state: function reducer(state, action) {switch (action.type) {case 'incremented_age': {return {...state, // Don't forget this!age: state.age + 1};}// ... Without `...state` above, the returned next state would only contain the `age` field and nothing else. * * * ### My entire reducer state becomes undefined after dispatching If your state unexpectedly becomes `undefined`, you’re likely forgetting to `return` state in one of the cases, or your action type doesn’t match any of the `case` statements. To find why, throw an error outside the `switch`: function reducer(state, action) {switch (action.type) {case 'incremented_age': {// ...}case 'edited_name': {// ...}}throw Error('Unknown action: ' + action.type);} You can also use a static type checker like TypeScript to catch such mistakes. * * * ### I’m getting an error: “Too many re-renders” You might get an error that says: `Too many re-renders. React limits the number of renders to prevent an infinite loop.` Typically, this means that you’re unconditionally dispatching an action _during render_, so your component enters a loop: render, dispatch (which causes a render), render, dispatch (which causes a render), and so on. Very often, this is caused by a mistake in specifying an event handler: // 🚩 Wrong: calls the handler during renderreturn <button onClick={handleClick()}>Click me</button>// ✅ Correct: passes down the event handlerreturn <button onClick={handleClick}>Click me</button>// ✅ Correct: passes down an inline functionreturn <button onClick={(e) => handleClick(e)}>Click me</button> If you can’t find the cause of this error, click on the arrow next to the error in the console and look through the JavaScript stack to find the specific `dispatch` function call responsible for the error. * * * ### My reducer or initializer function runs twice In Strict Mode, React will call your reducer and initializer functions twice. This shouldn’t break your code. This **development-only** behavior helps you keep components pure. React uses the result of one of the calls, and ignores the result of the other call. As long as your component, initializer, and reducer functions are pure, this shouldn’t affect your logic. However, if they are accidentally impure, this helps you notice the mistakes. For example, this impure reducer function mutates an array in state: function reducer(state, action) {switch (action.type) {case 'added_todo': {// 🚩 Mistake: mutating statestate.todos.push({ id: nextId++, text: action.text });return state;}// ...}} Because React calls your reducer function twice, you’ll see the todo was added twice, so you’ll know that there is a mistake. In this example, you can fix the mistake by replacing the array instead of mutating it: function reducer(state, action) {switch (action.type) {case 'added_todo': {// ✅ Correct: replacing with new statereturn {...state,todos: [...state.todos,{ id: nextId++, text: action.text }]};}// ...}} Now that this reducer function is pure, calling it an extra time doesn’t make a difference in behavior. This is why React calling it twice helps you find mistakes. **Only component, initializer, and reducer functions need to be pure.** Event handlers don’t need to be pure, so React will never call your event handlers twice. Read keeping components pure to learn more. --- ## Page: https://react.dev/reference/react/useRef `useRef` is a React Hook that lets you reference a value that’s not needed for rendering. const ref = useRef(initialValue) * Reference * `useRef(initialValue)` * Usage * Referencing a value with a ref * Manipulating the DOM with a ref * Avoiding recreating the ref contents * Troubleshooting * I can’t get a ref to a custom component * * * ## Reference ### `useRef(initialValue)` Call `useRef` at the top level of your component to declare a ref. import { useRef } from 'react';function MyComponent() {const intervalRef = useRef(0);const inputRef = useRef(null);// ... See more examples below. #### Parameters * `initialValue`: The value you want the ref object’s `current` property to be initially. It can be a value of any type. This argument is ignored after the initial render. #### Returns `useRef` returns an object with a single property: * `current`: Initially, it’s set to the `initialValue` you have passed. You can later set it to something else. If you pass the ref object to React as a `ref` attribute to a JSX node, React will set its `current` property. On the next renders, `useRef` will return the same object. #### Caveats * You can mutate the `ref.current` property. Unlike state, it is mutable. However, if it holds an object that is used for rendering (for example, a piece of your state), then you shouldn’t mutate that object. * When you change the `ref.current` property, React does not re-render your component. React is not aware of when you change it because a ref is a plain JavaScript object. * Do not write _or read_ `ref.current` during rendering, except for initialization. This makes your component’s behavior unpredictable. * In Strict Mode, React will **call your component function twice** in order to help you find accidental impurities. This is development-only behavior and does not affect production. Each ref object will be created twice, but one of the versions will be discarded. If your component function is pure (as it should be), this should not affect the behavior. * * * ## Usage ### Referencing a value with a ref Call `useRef` at the top level of your component to declare one or more refs. import { useRef } from 'react';function Stopwatch() {const intervalRef = useRef(0);// ... `useRef` returns a ref object with a single `current` property initially set to the initial value you provided. On the next renders, `useRef` will return the same object. You can change its `current` property to store information and read it later. This might remind you of state, but there is an important difference. **Changing a ref does not trigger a re-render.** This means refs are perfect for storing information that doesn’t affect the visual output of your component. For example, if you need to store an interval ID and retrieve it later, you can put it in a ref. To update the value inside the ref, you need to manually change its `current` property: function handleStartClick() {const intervalId = setInterval(() => {// ...}, 1000);intervalRef.current = intervalId;} Later, you can read that interval ID from the ref so that you can call clear that interval: function handleStopClick() {const intervalId = intervalRef.current;clearInterval(intervalId);} By using a ref, you ensure that: * You can **store information** between re-renders (unlike regular variables, which reset on every render). * Changing it **does not trigger a re-render** (unlike state variables, which trigger a re-render). * The **information is local** to each copy of your component (unlike the variables outside, which are shared). Changing a ref does not trigger a re-render, so refs are not appropriate for storing information you want to display on the screen. Use state for that instead. Read more about choosing between `useRef` and `useState`. #### Example 1 of 2: Click counter This component uses a ref to keep track of how many times the button was clicked. Note that it’s okay to use a ref instead of state here because the click count is only read and written in an event handler. import { useRef } from 'react'; export default function Counter() { let ref = useRef(0); function handleClick() { ref.current = ref.current + 1; alert('You clicked ' + ref.current + ' times!'); } return ( <button onClick\={handleClick}\> Click me! </button\> ); } If you show `{ref.current}` in the JSX, the number won’t update on click. This is because setting `ref.current` does not trigger a re-render. Information that’s used for rendering should be state instead. ### Pitfall **Do not write _or read_ `ref.current` during rendering.** React expects that the body of your component behaves like a pure function: * If the inputs (props, state, and context) are the same, it should return exactly the same JSX. * Calling it in a different order or with different arguments should not affect the results of other calls. Reading or writing a ref **during rendering** breaks these expectations. function MyComponent() {// ...// 🚩 Don't write a ref during renderingmyRef.current = 123;// ...// 🚩 Don't read a ref during renderingreturn <h1>{myOtherRef.current}</h1>;} You can read or write refs **from event handlers or effects instead**. function MyComponent() {// ...useEffect(() => {// ✅ You can read or write refs in effectsmyRef.current = 123;});// ...function handleClick() {// ✅ You can read or write refs in event handlersdoSomething(myOtherRef.current);}// ...} If you _have to_ read or write something during rendering, use state instead. When you break these rules, your component might still work, but most of the newer features we’re adding to React will rely on these expectations. Read more about keeping your components pure. * * * ### Manipulating the DOM with a ref It’s particularly common to use a ref to manipulate the DOM. React has built-in support for this. First, declare a ref object with an initial value of `null`: import { useRef } from 'react';function MyComponent() {const inputRef = useRef(null);// ... Then pass your ref object as the `ref` attribute to the JSX of the DOM node you want to manipulate: // ...return <input ref={inputRef} />; After React creates the DOM node and puts it on the screen, React will set the `current` property of your ref object to that DOM node. Now you can access the `<input>`’s DOM node and call methods like `focus()`: function handleClick() {inputRef.current.focus();} React will set the `current` property back to `null` when the node is removed from the screen. Read more about manipulating the DOM with refs. #### Example 1 of 4: Focusing a text input In this example, clicking the button will focus the input: import { useRef } from 'react'; export default function Form() { const inputRef = useRef(null); function handleClick() { inputRef.current.focus(); } return ( <\> <input ref\={inputRef} /> <button onClick\={handleClick}\> Focus the input </button\> </\> ); } * * * ### Avoiding recreating the ref contents React saves the initial ref value once and ignores it on the next renders. function Video() {const playerRef = useRef(new VideoPlayer());// ... Although the result of `new VideoPlayer()` is only used for the initial render, you’re still calling this function on every render. This can be wasteful if it’s creating expensive objects. To solve it, you may initialize the ref like this instead: function Video() {const playerRef = useRef(null);if (playerRef.current === null) {playerRef.current = new VideoPlayer();}// ... Normally, writing or reading `ref.current` during render is not allowed. However, it’s fine in this case because the result is always the same, and the condition only executes during initialization so it’s fully predictable. ##### Deep Dive #### How to avoid null checks when initializing useRef later If you use a type checker and don’t want to always check for `null`, you can try a pattern like this instead: function Video() {const playerRef = useRef(null);function getPlayer() {if (playerRef.current !== null) {return playerRef.current;}const player = new VideoPlayer();playerRef.current = player;return player;}// ... Here, the `playerRef` itself is nullable. However, you should be able to convince your type checker that there is no case in which `getPlayer()` returns `null`. Then use `getPlayer()` in your event handlers. * * * ## Troubleshooting ### I can’t get a ref to a custom component If you try to pass a `ref` to your own component like this: const inputRef = useRef(null);return <MyInput ref={inputRef} />; You might get an error in the console: Console TypeError: Cannot read properties of null By default, your own components don’t expose refs to the DOM nodes inside them. To fix this, find the component that you want to get a ref to: export default function MyInput({ value, onChange }) {return (<inputvalue={value}onChange={onChange}/>);} And then add `ref` to the list of props your component accepts and pass `ref` as a prop to the relevent child built-in component like this: function MyInput({ value, onChange, ref }) {return (<inputvalue={value}onChange={onChange}ref={ref}/>);};export default MyInput; Then the parent component can get a ref to it. Read more about accessing another component’s DOM nodes. --- ## Page: https://react.dev/reference/react/useState `useState` is a React Hook that lets you add a state variable to your component. const [state, setState] = useState(initialState) * Reference * `useState(initialState)` * `set` functions, like `setSomething(nextState)` * Usage * Adding state to a component * Updating state based on the previous state * Updating objects and arrays in state * Avoiding recreating the initial state * Resetting state with a key * Storing information from previous renders * Troubleshooting * I’ve updated the state, but logging gives me the old value * I’ve updated the state, but the screen doesn’t update * I’m getting an error: “Too many re-renders” * My initializer or updater function runs twice * I’m trying to set state to a function, but it gets called instead * * * ## Reference ### `useState(initialState)` Call `useState` at the top level of your component to declare a state variable. import { useState } from 'react';function MyComponent() {const [age, setAge] = useState(28);const [name, setName] = useState('Taylor');const [todos, setTodos] = useState(() => createTodos());// ... The convention is to name state variables like `[something, setSomething]` using array destructuring. See more examples below. #### Parameters * `initialState`: The value you want the state to be initially. It can be a value of any type, but there is a special behavior for functions. This argument is ignored after the initial render. * If you pass a function as `initialState`, it will be treated as an _initializer function_. It should be pure, should take no arguments, and should return a value of any type. React will call your initializer function when initializing the component, and store its return value as the initial state. See an example below. #### Returns `useState` returns an array with exactly two values: 1. The current state. During the first render, it will match the `initialState` you have passed. 2. The `set` function that lets you update the state to a different value and trigger a re-render. #### Caveats * `useState` is a Hook, so you can only call it **at the top level of your component** or your own Hooks. You can’t call it inside loops or conditions. If you need that, extract a new component and move the state into it. * In Strict Mode, React will **call your initializer function twice** in order to help you find accidental impurities. This is development-only behavior and does not affect production. If your initializer function is pure (as it should be), this should not affect the behavior. The result from one of the calls will be ignored. * * * ### `set` functions, like `setSomething(nextState)` The `set` function returned by `useState` lets you update the state to a different value and trigger a re-render. You can pass the next state directly, or a function that calculates it from the previous state: const [name, setName] = useState('Edward');function handleClick() {setName('Taylor');setAge(a => a + 1);// ... #### Parameters * `nextState`: The value that you want the state to be. It can be a value of any type, but there is a special behavior for functions. * If you pass a function as `nextState`, it will be treated as an _updater function_. It must be pure, should take the pending state as its only argument, and should return the next state. React will put your updater function in a queue and re-render your component. During the next render, React will calculate the next state by applying all of the queued updaters to the previous state. See an example below. #### Returns `set` functions do not have a return value. #### Caveats * The `set` function **only updates the state variable for the _next_ render**. If you read the state variable after calling the `set` function, you will still get the old value that was on the screen before your call. * If the new value you provide is identical to the current `state`, as determined by an `Object.is` comparison, React will **skip re-rendering the component and its children.** This is an optimization. Although in some cases React may still need to call your component before skipping the children, it shouldn’t affect your code. * React batches state updates. It updates the screen **after all the event handlers have run** and have called their `set` functions. This prevents multiple re-renders during a single event. In the rare case that you need to force React to update the screen earlier, for example to access the DOM, you can use `flushSync`. * The `set` function has a stable identity, so you will often see it omitted from Effect dependencies, but including it will not cause the Effect to fire. If the linter lets you omit a dependency without errors, it is safe to do. Learn more about removing Effect dependencies. * Calling the `set` function _during rendering_ is only allowed from within the currently rendering component. React will discard its output and immediately attempt to render it again with the new state. This pattern is rarely needed, but you can use it to **store information from the previous renders**. See an example below. * In Strict Mode, React will **call your updater function twice** in order to help you find accidental impurities. This is development-only behavior and does not affect production. If your updater function is pure (as it should be), this should not affect the behavior. The result from one of the calls will be ignored. * * * ## Usage ### Adding state to a component Call `useState` at the top level of your component to declare one or more state variables. import { useState } from 'react';function MyComponent() {const [age, setAge] = useState(42);const [name, setName] = useState('Taylor');// ... The convention is to name state variables like `[something, setSomething]` using array destructuring. `useState` returns an array with exactly two items: 1. The current state of this state variable, initially set to the initial state you provided. 2. The `set` function that lets you change it to any other value in response to interaction. To update what’s on the screen, call the `set` function with some next state: function handleClick() {setName('Robin');} React will store the next state, render your component again with the new values, and update the UI. ### Pitfall Calling the `set` function **does not** change the current state in the already executing code: function handleClick() {setName('Robin');console.log(name); // Still "Taylor"!} It only affects what `useState` will return starting from the _next_ render. #### Example 1 of 4: Counter (number) In this example, the `count` state variable holds a number. Clicking the button increments it. * * * ### Updating state based on the previous state Suppose the `age` is `42`. This handler calls `setAge(age + 1)` three times: function handleClick() {setAge(age + 1); // setAge(42 + 1)setAge(age + 1); // setAge(42 + 1)setAge(age + 1); // setAge(42 + 1)} However, after one click, `age` will only be `43` rather than `45`! This is because calling the `set` function does not update the `age` state variable in the already running code. So each `setAge(age + 1)` call becomes `setAge(43)`. To solve this problem, **you may pass an _updater function_** to `setAge` instead of the next state: function handleClick() {setAge(a => a + 1); // setAge(42 => 43)setAge(a => a + 1); // setAge(43 => 44)setAge(a => a + 1); // setAge(44 => 45)} Here, `a => a + 1` is your updater function. It takes the pending state and calculates the next state from it. React puts your updater functions in a queue. Then, during the next render, it will call them in the same order: 1. `a => a + 1` will receive `42` as the pending state and return `43` as the next state. 2. `a => a + 1` will receive `43` as the pending state and return `44` as the next state. 3. `a => a + 1` will receive `44` as the pending state and return `45` as the next state. There are no other queued updates, so React will store `45` as the current state in the end. By convention, it’s common to name the pending state argument for the first letter of the state variable name, like `a` for `age`. However, you may also call it like `prevAge` or something else that you find clearer. React may call your updaters twice in development to verify that they are pure. ##### Deep Dive #### Is using an updater always preferred? You might hear a recommendation to always write code like `setAge(a => a + 1)` if the state you’re setting is calculated from the previous state. There is no harm in it, but it is also not always necessary. In most cases, there is no difference between these two approaches. React always makes sure that for intentional user actions, like clicks, the `age` state variable would be updated before the next click. This means there is no risk of a click handler seeing a “stale” `age` at the beginning of the event handler. However, if you do multiple updates within the same event, updaters can be helpful. They’re also helpful if accessing the state variable itself is inconvenient (you might run into this when optimizing re-renders). If you prefer consistency over slightly more verbose syntax, it’s reasonable to always write an updater if the state you’re setting is calculated from the previous state. If it’s calculated from the previous state of some _other_ state variable, you might want to combine them into one object and use a reducer. #### Example 1 of 2: Passing the updater function This example passes the updater function, so the “+3” button works. import { useState } from 'react'; export default function Counter() { const \[age, setAge\] = useState(42); function increment() { setAge(a \=> a + 1); } return ( <\> <h1\>Your age: {age}</h1\> <button onClick\={() \=> { increment(); increment(); increment(); }}\>+3</button\> <button onClick\={() \=> { increment(); }}\>+1</button\> </\> ); } * * * ### Updating objects and arrays in state You can put objects and arrays into state. In React, state is considered read-only, so **you should _replace_ it rather than _mutate_ your existing objects**. For example, if you have a `form` object in state, don’t mutate it: // 🚩 Don't mutate an object in state like this:form.firstName = 'Taylor'; Instead, replace the whole object by creating a new one: // ✅ Replace state with a new objectsetForm({...form,firstName: 'Taylor'}); Read updating objects in state and updating arrays in state to learn more. #### Example 1 of 4: Form (object) In this example, the `form` state variable holds an object. Each input has a change handler that calls `setForm` with the next state of the entire form. The `{ ...form }` spread syntax ensures that the state object is replaced rather than mutated. import { useState } from 'react'; export default function Form() { const \[form, setForm\] = useState({ firstName: 'Barbara', lastName: 'Hepworth', email: 'bhepworth@sculpture.com', }); return ( <\> <label\> First name: <input value\={form.firstName} onChange\={e \=> { setForm({ ...form, firstName: e.target.value }); }} /> </label\> <label\> Last name: <input value\={form.lastName} onChange\={e \=> { setForm({ ...form, lastName: e.target.value }); }} /> </label\> <label\> Email: <input value\={form.email} onChange\={e \=> { setForm({ ...form, email: e.target.value }); }} /> </label\> <p\> {form.firstName}{' '} {form.lastName}{' '} ({form.email}) </p\> </\> ); } * * * ### Avoiding recreating the initial state React saves the initial state once and ignores it on the next renders. function TodoList() {const [todos, setTodos] = useState(createInitialTodos());// ... Although the result of `createInitialTodos()` is only used for the initial render, you’re still calling this function on every render. This can be wasteful if it’s creating large arrays or performing expensive calculations. To solve this, you may **pass it as an _initializer_ function** to `useState` instead: function TodoList() {const [todos, setTodos] = useState(createInitialTodos);// ... Notice that you’re passing `createInitialTodos`, which is the _function itself_, and not `createInitialTodos()`, which is the result of calling it. If you pass a function to `useState`, React will only call it during initialization. React may call your initializers twice in development to verify that they are pure. #### Example 1 of 2: Passing the initializer function This example passes the initializer function, so the `createInitialTodos` function only runs during initialization. It does not run when component re-renders, such as when you type into the input. import { useState } from 'react'; function createInitialTodos() { const initialTodos = \[\]; for (let i = 0; i < 50; i++) { initialTodos.push({ id: i, text: 'Item ' + (i + 1) }); } return initialTodos; } export default function TodoList() { const \[todos, setTodos\] = useState(createInitialTodos); const \[text, setText\] = useState(''); return ( <\> <input value\={text} onChange\={e \=> setText(e.target.value)} /> <button onClick\={() \=> { setText(''); setTodos(\[{ id: todos.length, text: text }, ...todos\]); }}\>Add</button\> <ul\> {todos.map(item \=> ( <li key\={item.id}\> {item.text} </li\> ))} </ul\> </\> ); } * * * ### Resetting state with a key You’ll often encounter the `key` attribute when rendering lists. However, it also serves another purpose. You can **reset a component’s state by passing a different `key` to a component.** In this example, the Reset button changes the `version` state variable, which we pass as a `key` to the `Form`. When the `key` changes, React re-creates the `Form` component (and all of its children) from scratch, so its state gets reset. Read preserving and resetting state to learn more. import { useState } from 'react'; export default function App() { const \[version, setVersion\] = useState(0); function handleReset() { setVersion(version + 1); } return ( <\> <button onClick\={handleReset}\>Reset</button\> <Form key\={version} /> </\> ); } function Form() { const \[name, setName\] = useState('Taylor'); return ( <\> <input value\={name} onChange\={e \=> setName(e.target.value)} /> <p\>Hello, {name}.</p\> </\> ); } * * * ### Storing information from previous renders Usually, you will update state in event handlers. However, in rare cases you might want to adjust state in response to rendering — for example, you might want to change a state variable when a prop changes. In most cases, you don’t need this: * **If the value you need can be computed entirely from the current props or other state, remove that redundant state altogether.** If you’re worried about recomputing too often, the `useMemo` Hook can help. * If you want to reset the entire component tree’s state, pass a different `key` to your component. * If you can, update all the relevant state in the event handlers. In the rare case that none of these apply, there is a pattern you can use to update state based on the values that have been rendered so far, by calling a `set` function while your component is rendering. Here’s an example. This `CountLabel` component displays the `count` prop passed to it: export default function CountLabel({ count }) {return <h1>{count}</h1>} Say you want to show whether the counter has _increased or decreased_ since the last change. The `count` prop doesn’t tell you this — you need to keep track of its previous value. Add the `prevCount` state variable to track it. Add another state variable called `trend` to hold whether the count has increased or decreased. Compare `prevCount` with `count`, and if they’re not equal, update both `prevCount` and `trend`. Now you can show both the current count prop and _how it has changed since the last render_. import { useState } from 'react'; export default function CountLabel({ count }) { const \[prevCount, setPrevCount\] = useState(count); const \[trend, setTrend\] = useState(null); if (prevCount !== count) { setPrevCount(count); setTrend(count > prevCount ? 'increasing' : 'decreasing'); } return ( <\> <h1\>{count}</h1\> {trend && <p\>The count is {trend}</p\>} </\> ); } Note that if you call a `set` function while rendering, it must be inside a condition like `prevCount !== count`, and there must be a call like `setPrevCount(count)` inside of the condition. Otherwise, your component would re-render in a loop until it crashes. Also, you can only update the state of the _currently rendering_ component like this. Calling the `set` function of _another_ component during rendering is an error. Finally, your `set` call should still update state without mutation — this doesn’t mean you can break other rules of pure functions. This pattern can be hard to understand and is usually best avoided. However, it’s better than updating state in an effect. When you call the `set` function during render, React will re-render that component immediately after your component exits with a `return` statement, and before rendering the children. This way, children don’t need to render twice. The rest of your component function will still execute (and the result will be thrown away). If your condition is below all the Hook calls, you may add an early `return;` to restart rendering earlier. * * * ## Troubleshooting ### I’ve updated the state, but logging gives me the old value Calling the `set` function **does not change state in the running code**: function handleClick() {console.log(count); // 0setCount(count + 1); // Request a re-render with 1console.log(count); // Still 0!setTimeout(() => {console.log(count); // Also 0!}, 5000);} This is because states behaves like a snapshot. Updating state requests another render with the new state value, but does not affect the `count` JavaScript variable in your already-running event handler. If you need to use the next state, you can save it in a variable before passing it to the `set` function: const nextCount = count + 1;setCount(nextCount);console.log(count); // 0console.log(nextCount); // 1 * * * ### I’ve updated the state, but the screen doesn’t update React will **ignore your update if the next state is equal to the previous state,** as determined by an `Object.is` comparison. This usually happens when you change an object or an array in state directly: obj.x = 10; // 🚩 Wrong: mutating existing objectsetObj(obj); // 🚩 Doesn't do anything You mutated an existing `obj` object and passed it back to `setObj`, so React ignored the update. To fix this, you need to ensure that you’re always _replacing_ objects and arrays in state instead of _mutating_ them: // ✅ Correct: creating a new objectsetObj({...obj,x: 10}); * * * ### I’m getting an error: “Too many re-renders” You might get an error that says: `Too many re-renders. React limits the number of renders to prevent an infinite loop.` Typically, this means that you’re unconditionally setting state _during render_, so your component enters a loop: render, set state (which causes a render), render, set state (which causes a render), and so on. Very often, this is caused by a mistake in specifying an event handler: // 🚩 Wrong: calls the handler during renderreturn <button onClick={handleClick()}>Click me</button>// ✅ Correct: passes down the event handlerreturn <button onClick={handleClick}>Click me</button>// ✅ Correct: passes down an inline functionreturn <button onClick={(e) => handleClick(e)}>Click me</button> If you can’t find the cause of this error, click on the arrow next to the error in the console and look through the JavaScript stack to find the specific `set` function call responsible for the error. * * * ### My initializer or updater function runs twice In Strict Mode, React will call some of your functions twice instead of once: function TodoList() {// This component function will run twice for every render.const [todos, setTodos] = useState(() => {// This initializer function will run twice during initialization.return createTodos();});function handleClick() {setTodos(prevTodos => {// This updater function will run twice for every click.return [...prevTodos, createTodo()];});}// ... This is expected and shouldn’t break your code. This **development-only** behavior helps you keep components pure. React uses the result of one of the calls, and ignores the result of the other call. As long as your component, initializer, and updater functions are pure, this shouldn’t affect your logic. However, if they are accidentally impure, this helps you notice the mistakes. For example, this impure updater function mutates an array in state: setTodos(prevTodos => {// 🚩 Mistake: mutating stateprevTodos.push(createTodo());}); Because React calls your updater function twice, you’ll see the todo was added twice, so you’ll know that there is a mistake. In this example, you can fix the mistake by replacing the array instead of mutating it: setTodos(prevTodos => {// ✅ Correct: replacing with new statereturn [...prevTodos, createTodo()];}); Now that this updater function is pure, calling it an extra time doesn’t make a difference in behavior. This is why React calling it twice helps you find mistakes. **Only component, initializer, and updater functions need to be pure.** Event handlers don’t need to be pure, so React will never call your event handlers twice. Read keeping components pure to learn more. * * * ### I’m trying to set state to a function, but it gets called instead You can’t put a function into state like this: const [fn, setFn] = useState(someFunction);function handleClick() {setFn(someOtherFunction);} Because you’re passing a function, React assumes that `someFunction` is an initializer function, and that `someOtherFunction` is an updater function, so it tries to call them and store the result. To actually _store_ a function, you have to put `() =>` before them in both cases. Then React will store the functions you pass. const [fn, setFn] = useState(() => someFunction);function handleClick() {setFn(() => someOtherFunction);} --- ## Page: https://react.dev/reference/react/useSyncExternalStore `useSyncExternalStore` is a React Hook that lets you subscribe to an external store. const snapshot = useSyncExternalStore(subscribe, getSnapshot, getServerSnapshot?) * Reference * `useSyncExternalStore(subscribe, getSnapshot, getServerSnapshot?)` * Usage * Subscribing to an external store * Subscribing to a browser API * Extracting the logic to a custom Hook * Adding support for server rendering * Troubleshooting * I’m getting an error: “The result of `getSnapshot` should be cached” * My `subscribe` function gets called after every re-render * * * ## Reference ### `useSyncExternalStore(subscribe, getSnapshot, getServerSnapshot?)` Call `useSyncExternalStore` at the top level of your component to read a value from an external data store. import { useSyncExternalStore } from 'react';import { todosStore } from './todoStore.js';function TodosApp() {const todos = useSyncExternalStore(todosStore.subscribe, todosStore.getSnapshot);// ...} It returns the snapshot of the data in the store. You need to pass two functions as arguments: 1. The `subscribe` function should subscribe to the store and return a function that unsubscribes. 2. The `getSnapshot` function should read a snapshot of the data from the store. See more examples below. #### Parameters * `subscribe`: A function that takes a single `callback` argument and subscribes it to the store. When the store changes, it should invoke the provided `callback`, which will cause React to re-call `getSnapshot` and (if needed) re-render the component. The `subscribe` function should return a function that cleans up the subscription. * `getSnapshot`: A function that returns a snapshot of the data in the store that’s needed by the component. While the store has not changed, repeated calls to `getSnapshot` must return the same value. If the store changes and the returned value is different (as compared by `Object.is`), React re-renders the component. * **optional** `getServerSnapshot`: A function that returns the initial snapshot of the data in the store. It will be used only during server rendering and during hydration of server-rendered content on the client. The server snapshot must be the same between the client and the server, and is usually serialized and passed from the server to the client. If you omit this argument, rendering the component on the server will throw an error. #### Returns The current snapshot of the store which you can use in your rendering logic. #### Caveats * The store snapshot returned by `getSnapshot` must be immutable. If the underlying store has mutable data, return a new immutable snapshot if the data has changed. Otherwise, return a cached last snapshot. * If a different `subscribe` function is passed during a re-render, React will re-subscribe to the store using the newly passed `subscribe` function. You can prevent this by declaring `subscribe` outside the component. * If the store is mutated during a non-blocking Transition update, React will fall back to performing that update as blocking. Specifically, for every Transition update, React will call `getSnapshot` a second time just before applying changes to the DOM. If it returns a different value than when it was called originally, React will restart the update from scratch, this time applying it as a blocking update, to ensure that every component on screen is reflecting the same version of the store. * It’s not recommended to _suspend_ a render based on a store value returned by `useSyncExternalStore`. The reason is that mutations to the external store cannot be marked as non-blocking Transition updates, so they will trigger the nearest `Suspense` fallback, replacing already-rendered content on screen with a loading spinner, which typically makes a poor UX. For example, the following are discouraged: const LazyProductDetailPage = lazy(() => import('./ProductDetailPage.js'));function ShoppingApp() {const selectedProductId = useSyncExternalStore(...);// ❌ Calling `use` with a Promise dependent on `selectedProductId`const data = use(fetchItem(selectedProductId))// ❌ Conditionally rendering a lazy component based on `selectedProductId`return selectedProductId != null ? <LazyProductDetailPage /> : <FeaturedProducts />;} * * * ## Usage ### Subscribing to an external store Most of your React components will only read data from their props, state, and context. However, sometimes a component needs to read some data from some store outside of React that changes over time. This includes: * Third-party state management libraries that hold state outside of React. * Browser APIs that expose a mutable value and events to subscribe to its changes. Call `useSyncExternalStore` at the top level of your component to read a value from an external data store. import { useSyncExternalStore } from 'react';import { todosStore } from './todoStore.js';function TodosApp() {const todos = useSyncExternalStore(todosStore.subscribe, todosStore.getSnapshot);// ...} It returns the snapshot of the data in the store. You need to pass two functions as arguments: 1. The `subscribe` function should subscribe to the store and return a function that unsubscribes. 2. The `getSnapshot` function should read a snapshot of the data from the store. React will use these functions to keep your component subscribed to the store and re-render it on changes. For example, in the sandbox below, `todosStore` is implemented as an external store that stores data outside of React. The `TodosApp` component connects to that external store with the `useSyncExternalStore` Hook. import { useSyncExternalStore } from 'react'; import { todosStore } from './todoStore.js'; export default function TodosApp() { const todos = useSyncExternalStore(todosStore.subscribe, todosStore.getSnapshot); return ( <\> <button onClick\={() \=> todosStore.addTodo()}\>Add todo</button\> <hr /> <ul\> {todos.map(todo \=> ( <li key\={todo.id}\>{todo.text}</li\> ))} </ul\> </\> ); } ### Note When possible, we recommend using built-in React state with `useState` and `useReducer` instead. The `useSyncExternalStore` API is mostly useful if you need to integrate with existing non-React code. * * * ### Subscribing to a browser API Another reason to add `useSyncExternalStore` is when you want to subscribe to some value exposed by the browser that changes over time. For example, suppose that you want your component to display whether the network connection is active. The browser exposes this information via a property called `navigator.onLine`. This value can change without React’s knowledge, so you should read it with `useSyncExternalStore`. import { useSyncExternalStore } from 'react';function ChatIndicator() {const isOnline = useSyncExternalStore(subscribe, getSnapshot);// ...} To implement the `getSnapshot` function, read the current value from the browser API: function getSnapshot() {return navigator.onLine;} Next, you need to implement the `subscribe` function. For example, when `navigator.onLine` changes, the browser fires the `online` and `offline` events on the `window` object. You need to subscribe the `callback` argument to the corresponding events, and then return a function that cleans up the subscriptions: function subscribe(callback) {window.addEventListener('online', callback);window.addEventListener('offline', callback);return () => {window.removeEventListener('online', callback);window.removeEventListener('offline', callback);};} Now React knows how to read the value from the external `navigator.onLine` API and how to subscribe to its changes. Disconnect your device from the network and notice that the component re-renders in response: import { useSyncExternalStore } from 'react'; export default function ChatIndicator() { const isOnline = useSyncExternalStore(subscribe, getSnapshot); return <h1\>{isOnline ? '✅ Online' : '❌ Disconnected'}</h1\>; } function getSnapshot() { return navigator.onLine; } function subscribe(callback) { window.addEventListener('online', callback); window.addEventListener('offline', callback); return () \=> { window.removeEventListener('online', callback); window.removeEventListener('offline', callback); }; } * * * Usually you won’t write `useSyncExternalStore` directly in your components. Instead, you’ll typically call it from your own custom Hook. This lets you use the same external store from different components. For example, this custom `useOnlineStatus` Hook tracks whether the network is online: import { useSyncExternalStore } from 'react';export function useOnlineStatus() {const isOnline = useSyncExternalStore(subscribe, getSnapshot);return isOnline;}function getSnapshot() {// ...}function subscribe(callback) {// ...} Now different components can call `useOnlineStatus` without repeating the underlying implementation: import { useOnlineStatus } from './useOnlineStatus.js'; function StatusBar() { const isOnline = useOnlineStatus(); return <h1\>{isOnline ? '✅ Online' : '❌ Disconnected'}</h1\>; } function SaveButton() { const isOnline = useOnlineStatus(); function handleSaveClick() { console.log('✅ Progress saved'); } return ( <button disabled\={!isOnline} onClick\={handleSaveClick}\> {isOnline ? 'Save progress' : 'Reconnecting...'} </button\> ); } export default function App() { return ( <\> <SaveButton /> <StatusBar /> </\> ); } * * * ### Adding support for server rendering If your React app uses server rendering, your React components will also run outside the browser environment to generate the initial HTML. This creates a few challenges when connecting to an external store: * If you’re connecting to a browser-only API, it won’t work because it does not exist on the server. * If you’re connecting to a third-party data store, you’ll need its data to match between the server and client. To solve these issues, pass a `getServerSnapshot` function as the third argument to `useSyncExternalStore`: import { useSyncExternalStore } from 'react';export function useOnlineStatus() {const isOnline = useSyncExternalStore(subscribe, getSnapshot, getServerSnapshot);return isOnline;}function getSnapshot() {return navigator.onLine;}function getServerSnapshot() {return true; // Always show "Online" for server-generated HTML}function subscribe(callback) {// ...} The `getServerSnapshot` function is similar to `getSnapshot`, but it runs only in two situations: * It runs on the server when generating the HTML. * It runs on the client during hydration, i.e. when React takes the server HTML and makes it interactive. This lets you provide the initial snapshot value which will be used before the app becomes interactive. If there is no meaningful initial value for the server rendering, omit this argument to force rendering on the client. ### Note Make sure that `getServerSnapshot` returns the same exact data on the initial client render as it returned on the server. For example, if `getServerSnapshot` returned some prepopulated store content on the server, you need to transfer this content to the client. One way to do this is to emit a `<script>` tag during server rendering that sets a global like `window.MY_STORE_DATA`, and read from that global on the client in `getServerSnapshot`. Your external store should provide instructions on how to do that. * * * ## Troubleshooting ### I’m getting an error: “The result of `getSnapshot` should be cached” This error means your `getSnapshot` function returns a new object every time it’s called, for example: function getSnapshot() {// 🔴 Do not return always different objects from getSnapshotreturn {todos: myStore.todos};} React will re-render the component if `getSnapshot` return value is different from the last time. This is why, if you always return a different value, you will enter an infinite loop and get this error. Your `getSnapshot` object should only return a different object if something has actually changed. If your store contains immutable data, you can return that data directly: function getSnapshot() {// ✅ You can return immutable datareturn myStore.todos;} If your store data is mutable, your `getSnapshot` function should return an immutable snapshot of it. This means it _does_ need to create new objects, but it shouldn’t do this for every single call. Instead, it should store the last calculated snapshot, and return the same snapshot as the last time if the data in the store has not changed. How you determine whether mutable data has changed depends on your mutable store. * * * ### My `subscribe` function gets called after every re-render This `subscribe` function is defined _inside_ a component so it is different on every re-render: function ChatIndicator() {// 🚩 Always a different function, so React will resubscribe on every re-renderfunction subscribe() {// ...}const isOnline = useSyncExternalStore(subscribe, getSnapshot);// ...} React will resubscribe to your store if you pass a different `subscribe` function between re-renders. If this causes performance issues and you’d like to avoid resubscribing, move the `subscribe` function outside: // ✅ Always the same function, so React won't need to resubscribefunction subscribe() {// ...}function ChatIndicator() {const isOnline = useSyncExternalStore(subscribe, getSnapshot);// ...} Alternatively, wrap `subscribe` into `useCallback` to only resubscribe when some argument changes: function ChatIndicator({ userId }) {// ✅ Same function as long as userId doesn't changeconst subscribe = useCallback(() => {// ...}, [userId]);const isOnline = useSyncExternalStore(subscribe, getSnapshot);// ...} --- ## Page: https://react.dev/reference/react/useTransition `useTransition` is a React Hook that lets you render a part of the UI in the background. const [isPending, startTransition] = useTransition() * Reference * `useTransition()` * `startTransition(action)` * Usage * Perform non-blocking updates with Actions * Exposing `action` prop from components * Displaying a pending visual state * Preventing unwanted loading indicators * Building a Suspense-enabled router * Displaying an error to users with an error boundary * Troubleshooting * Updating an input in a Transition doesn’t work * React doesn’t treat my state update as a Transition * React doesn’t treat my state update after `await` as a Transition * I want to call `useTransition` from outside a component * The function I pass to `startTransition` executes immediately * My state updates in Transitions are out of order * * * ## Reference ### `useTransition()` Call `useTransition` at the top level of your component to mark some state updates as Transitions. import { useTransition } from 'react';function TabContainer() {const [isPending, startTransition] = useTransition();// ...} See more examples below. #### Parameters `useTransition` does not take any parameters. #### Returns `useTransition` returns an array with exactly two items: 1. The `isPending` flag that tells you whether there is a pending Transition. 2. The `startTransition` function that lets you mark updates as a Transition. * * * ### `startTransition(action)` The `startTransition` function returned by `useTransition` lets you mark an update as a Transition. function TabContainer() {const [isPending, startTransition] = useTransition();const [tab, setTab] = useState('about');function selectTab(nextTab) {startTransition(() => {setTab(nextTab);});}// ...} ### Note #### Functions called in `startTransition` are called “Actions”. The function passed to `startTransition` is called an “Action”. By convention, any callback called inside `startTransition` (such as a callback prop) should be named `action` or include the “Action” suffix: function SubmitButton({ submitAction }) {const [isPending, startTransition] = useTransition();return (<buttondisabled={isPending}onClick={() => {startTransition(() => {submitAction();});}}> Submit</button>);} #### Parameters * `action`: A function that updates some state by calling one or more `set` functions. React calls `action` immediately with no parameters and marks all state updates scheduled synchronously during the `action` function call as Transitions. Any async calls that are awaited in the `action` will be included in the Transition, but currently require wrapping any `set` functions after the `await` in an additional `startTransition` (see Troubleshooting). State updates marked as Transitions will be non-blocking and will not display unwanted loading indicators. #### Returns `startTransition` does not return anything. #### Caveats * `useTransition` is a Hook, so it can only be called inside components or custom Hooks. If you need to start a Transition somewhere else (for example, from a data library), call the standalone `startTransition` instead. * You can wrap an update into a Transition only if you have access to the `set` function of that state. If you want to start a Transition in response to some prop or a custom Hook value, try `useDeferredValue` instead. * The function you pass to `startTransition` is called immediately, marking all state updates that happen while it executes as Transitions. If you try to perform state updates in a `setTimeout`, for example, they won’t be marked as Transitions. * You must wrap any state updates after any async requests in another `startTransition` to mark them as Transitions. This is a known limitation that we will fix in the future (see Troubleshooting). * The `startTransition` function has a stable identity, so you will often see it omitted from Effect dependencies, but including it will not cause the Effect to fire. If the linter lets you omit a dependency without errors, it is safe to do. Learn more about removing Effect dependencies. * A state update marked as a Transition will be interrupted by other state updates. For example, if you update a chart component inside a Transition, but then start typing into an input while the chart is in the middle of a re-render, React will restart the rendering work on the chart component after handling the input update. * Transition updates can’t be used to control text inputs. * If there are multiple ongoing Transitions, React currently batches them together. This is a limitation that may be removed in a future release. ## Usage ### Perform non-blocking updates with Actions Call `useTransition` at the top of your component to create Actions, and access the pending state: import {useState, useTransition} from 'react';function CheckoutForm() {const [isPending, startTransition] = useTransition();// ...} `useTransition` returns an array with exactly two items: 1. The `isPending` flag that tells you whether there is a pending Transition. 2. The `startTransition` function that lets you create an Action. To start a Transition, pass a function to `startTransition` like this: import {useState, useTransition} from 'react';import {updateQuantity} from './api';function CheckoutForm() {const [isPending, startTransition] = useTransition();const [quantity, setQuantity] = useState(1);function onSubmit(newQuantity) {startTransition(async function () {const savedQuantity = await updateQuantity(newQuantity);startTransition(() => {setQuantity(savedQuantity);});});}// ...} The function passed to `startTransition` is called the “Action”. You can update state and (optionally) perform side effects within an Action, and the work will be done in the background without blocking user interactions on the page. A Transition can include multiple Actions, and while a Transition is in progress, your UI stays responsive. For example, if the user clicks a tab but then changes their mind and clicks another tab, the second click will be immediately handled without waiting for the first update to finish. To give the user feedback about in-progress Transitions, to `isPending` state switches to `true` at the first call to `startTransition`, and stays `true` until all Actions complete and the final state is shown to the user. Transitions ensure side effects in Actions to complete in order to prevent unwanted loading indicators, and you can provide immediate feedback while the Transition is in progress with `useOptimistic`. #### Example 1 of 2: Updating the quantity in an Action In this example, the `updateQuantity` function simulates a request to the server to update the item’s quantity in the cart. This function is _artificially slowed down_ so that it takes at least a second to complete the request. Update the quantity multiple times quickly. Notice that the pending “Total” state is shown while any requests are in progress, and the “Total” updates only after the final request is complete. Because the update is in an Action, the “quantity” can continue to be updated while the request is in progress. import { useState, useTransition } from "react"; import { updateQuantity } from "./api"; import Item from "./Item"; import Total from "./Total"; export default function App({}) { const \[quantity, setQuantity\] = useState(1); const \[isPending, startTransition\] = useTransition(); const updateQuantityAction = async newQuantity \=> { startTransition(async () \=> { const savedQuantity = await updateQuantity(newQuantity); startTransition(() \=> { setQuantity(savedQuantity); }); }); }; return ( <div\> <h1\>Checkout</h1\> <Item action\={updateQuantityAction}/> <hr /> <Total quantity\={quantity} isPending\={isPending} /> </div\> ); } This is a basic example to demonstrate how Actions work, but this example does not handle requests completing out of order. When updating the quantity multiple times, it’s possible for the previous requests to finish after later requests causing the quantity to update out of order. This is a known limitation that we will fix in the future (see Troubleshooting below). For common use cases, React provides built-in abstractions such as: * `useActionState` * `<form>` actions * Server Functions These solutions handle request ordering for you. When using Transitions to build your own custom hooks or libraries that manage async state transitions, you have greater control over the request ordering, but you must handle it yourself. * * * ### Exposing `action` prop from components You can expose an `action` prop from a component to allow a parent to call an Action. For example, this `TabButton` component wraps its `onClick` logic in an `action` prop: export default function TabButton({ action, children, isActive }) {const [isPending, startTransition] = useTransition();if (isActive) {return <b>{children}</b>}return (<button onClick={() => {startTransition(() => {action();});}}>{children}</button>);} Because the parent component updates its state inside the `action`, that state update gets marked as a Transition. This means you can click on “Posts” and then immediately click “Contact” and it does not block user interactions: import { useTransition } from 'react'; export default function TabButton({ action, children, isActive }) { const \[isPending, startTransition\] = useTransition(); if (isActive) { return <b\>{children}</b\> } return ( <button onClick\={() \=> { startTransition(() \=> { action(); }); }}\> {children} </button\> ); } * * * ### Displaying a pending visual state You can use the `isPending` boolean value returned by `useTransition` to indicate to the user that a Transition is in progress. For example, the tab button can have a special “pending” visual state: function TabButton({ action, children, isActive }) {const [isPending, startTransition] = useTransition();// ...if (isPending) {return <b className="pending">{children}</b>;}// ... Notice how clicking “Posts” now feels more responsive because the tab button itself updates right away: import { useTransition } from 'react'; export default function TabButton({ action, children, isActive }) { const \[isPending, startTransition\] = useTransition(); if (isActive) { return <b\>{children}</b\> } if (isPending) { return <b className\="pending"\>{children}</b\>; } return ( <button onClick\={() \=> { startTransition(() \=> { action(); }); }}\> {children} </button\> ); } * * * ### Preventing unwanted loading indicators In this example, the `PostsTab` component fetches some data using use. When you click the “Posts” tab, the `PostsTab` component _suspends_, causing the closest loading fallback to appear: import { Suspense, useState } from 'react'; import TabButton from './TabButton.js'; import AboutTab from './AboutTab.js'; import PostsTab from './PostsTab.js'; import ContactTab from './ContactTab.js'; export default function TabContainer() { const \[tab, setTab\] = useState('about'); return ( <Suspense fallback\={<h1\>🌀 Loading...</h1\>}\> <TabButton isActive\={tab === 'about'} action\={() \=> setTab('about')} \> About </TabButton\> <TabButton isActive\={tab === 'posts'} action\={() \=> setTab('posts')} \> Posts </TabButton\> <TabButton isActive\={tab === 'contact'} action\={() \=> setTab('contact')} \> Contact </TabButton\> <hr /> {tab === 'about' && <AboutTab />} {tab === 'posts' && <PostsTab />} {tab === 'contact' && <ContactTab />} </Suspense\> ); } Hiding the entire tab container to show a loading indicator leads to a jarring user experience. If you add `useTransition` to `TabButton`, you can instead display the pending state in the tab button instead. Notice that clicking “Posts” no longer replaces the entire tab container with a spinner: import { useTransition } from 'react'; export default function TabButton({ action, children, isActive }) { const \[isPending, startTransition\] = useTransition(); if (isActive) { return <b\>{children}</b\> } if (isPending) { return <b className\="pending"\>{children}</b\>; } return ( <button onClick\={() \=> { startTransition(() \=> { action(); }); }}\> {children} </button\> ); } Read more about using Transitions with Suspense. ### Note Transitions only “wait” long enough to avoid hiding _already revealed_ content (like the tab container). If the Posts tab had a nested `<Suspense>` boundary, the Transition would not “wait” for it. * * * ### Building a Suspense-enabled router If you’re building a React framework or a router, we recommend marking page navigations as Transitions. function Router() {const [page, setPage] = useState('/');const [isPending, startTransition] = useTransition();function navigate(url) {startTransition(() => {setPage(url);});}// ... This is recommended for three reasons: * Transitions are interruptible, which lets the user click away without waiting for the re-render to complete. * Transitions prevent unwanted loading indicators, which lets the user avoid jarring jumps on navigation. * Transitions wait for all pending actions which lets the user wait for side effects to complete before the new page is shown. Here is a simplified router example using Transitions for navigations. import { Suspense, useState, useTransition } from 'react'; import IndexPage from './IndexPage.js'; import ArtistPage from './ArtistPage.js'; import Layout from './Layout.js'; export default function App() { return ( <Suspense fallback\={<BigSpinner />}\> <Router /> </Suspense\> ); } function Router() { const \[page, setPage\] = useState('/'); const \[isPending, startTransition\] = useTransition(); function navigate(url) { startTransition(() \=> { setPage(url); }); } let content; if (page === '/') { content = ( <IndexPage navigate\={navigate} /> ); } else if (page === '/the-beatles') { content = ( <ArtistPage artist\={{ id: 'the-beatles', name: 'The Beatles', }} /> ); } return ( <Layout isPending\={isPending}\> {content} </Layout\> ); } function BigSpinner() { return <h2\>🌀 Loading...</h2\>; } ### Note Suspense-enabled routers are expected to wrap the navigation updates into Transitions by default. * * * ### Displaying an error to users with an error boundary If a function passed to `startTransition` throws an error, you can display an error to your user with an error boundary. To use an error boundary, wrap the component where you are calling the `useTransition` in an error boundary. Once the function passed to `startTransition` errors, the fallback for the error boundary will be displayed. import { useTransition } from "react"; import { ErrorBoundary } from "react-error-boundary"; export function AddCommentContainer() { return ( <ErrorBoundary fallback\={<p\>⚠️Something went wrong</p\>}\> <AddCommentButton /> </ErrorBoundary\> ); } function addComment(comment) { if (comment == null) { throw new Error("Example Error: An error thrown to trigger error boundary"); } } function AddCommentButton() { const \[pending, startTransition\] = useTransition(); return ( <button disabled\={pending} onClick\={() \=> { startTransition(() \=> { addComment(); }); }} \> Add comment </button\> ); } * * * ## Troubleshooting ### Updating an input in a Transition doesn’t work You can’t use a Transition for a state variable that controls an input: const [text, setText] = useState('');// ...function handleChange(e) {// ❌ Can't use Transitions for controlled input statestartTransition(() => {setText(e.target.value);});}// ...return <input value={text} onChange={handleChange} />; This is because Transitions are non-blocking, but updating an input in response to the change event should happen synchronously. If you want to run a Transition in response to typing, you have two options: 1. You can declare two separate state variables: one for the input state (which always updates synchronously), and one that you will update in a Transition. This lets you control the input using the synchronous state, and pass the Transition state variable (which will “lag behind” the input) to the rest of your rendering logic. 2. Alternatively, you can have one state variable, and add `useDeferredValue` which will “lag behind” the real value. It will trigger non-blocking re-renders to “catch up” with the new value automatically. * * * ### React doesn’t treat my state update as a Transition When you wrap a state update in a Transition, make sure that it happens _during_ the `startTransition` call: startTransition(() => {// ✅ Setting state *during* startTransition callsetPage('/about');}); The function you pass to `startTransition` must be synchronous. You can’t mark an update as a Transition like this: startTransition(() => {// ❌ Setting state *after* startTransition callsetTimeout(() => {setPage('/about');}, 1000);}); Instead, you could do this: setTimeout(() => {startTransition(() => {// ✅ Setting state *during* startTransition callsetPage('/about');});}, 1000); * * * ### React doesn’t treat my state update after `await` as a Transition When you use `await` inside a `startTransition` function, the state updates that happen after the `await` are not marked as Transitions. You must wrap state updates after each `await` in a `startTransition` call: startTransition(async () => {await someAsyncFunction();// ❌ Not using startTransition after awaitsetPage('/about');}); However, this works instead: startTransition(async () => {await someAsyncFunction();// ✅ Using startTransition *after* awaitstartTransition(() => {setPage('/about');});}); This is a JavaScript limitation due to React losing the scope of the async context. In the future, when AsyncContext is available, this limitation will be removed. * * * ### I want to call `useTransition` from outside a component You can’t call `useTransition` outside a component because it’s a Hook. In this case, use the standalone `startTransition` method instead. It works the same way, but it doesn’t provide the `isPending` indicator. * * * ### The function I pass to `startTransition` executes immediately If you run this code, it will print 1, 2, 3: console.log(1);startTransition(() => {console.log(2);setPage('/about');});console.log(3); **It is expected to print 1, 2, 3.** The function you pass to `startTransition` does not get delayed. Unlike with the browser `setTimeout`, it does not run the callback later. React executes your function immediately, but any state updates scheduled _while it is running_ are marked as Transitions. You can imagine that it works like this: // A simplified version of how React workslet isInsideTransition = false;function startTransition(scope) {isInsideTransition = true;scope();isInsideTransition = false;}function setState() {if (isInsideTransition) {// ... schedule a Transition state update ...} else {// ... schedule an urgent state update ...}} ### My state updates in Transitions are out of order If you `await` inside `startTransition`, you might see the updates happen out of order. In this example, the `updateQuantity` function simulates a request to the server to update the item’s quantity in the cart. This function _artificially returns the every other request after the previous_ to simulate race conditions for network requests. Try updating the quantity once, then update it quickly multiple times. You might see the incorrect total: import { useState, useTransition } from "react"; import { updateQuantity } from "./api"; import Item from "./Item"; import Total from "./Total"; export default function App({}) { const \[quantity, setQuantity\] = useState(1); const \[isPending, startTransition\] = useTransition(); const \[clientQuantity, setClientQuantity\] = useState(1); const updateQuantityAction = newQuantity \=> { setClientQuantity(newQuantity); startTransition(async () \=> { const savedQuantity = await updateQuantity(newQuantity); startTransition(() \=> { setQuantity(savedQuantity); }); }); }; return ( <div\> <h1\>Checkout</h1\> <Item action\={updateQuantityAction}/> <hr /> <Total clientQuantity\={clientQuantity} savedQuantity\={quantity} isPending\={isPending} /> </div\> ); } When clicking multiple times, it’s possible for previous requests to finish after later requests. When this happens, React currently has no way to know the intended order. This is because the updates are scheduled asynchronously, and React loses context of the order across the async boundary. This is expected, because Actions within a Transition do not guarantee execution order. For common use cases, React provides higher-level abstractions like `useActionState` and `<form>` actions that handle ordering for you. For advanced use cases, you’ll need to implement your own queuing and abort logic to handle this. --- ## Page: https://react.dev/reference/react/components React exposes a few built-in components that you can use in your JSX. * * * ## Built-in components * `<Fragment>`, alternatively written as `<>...</>`, lets you group multiple JSX nodes together. * `<Profiler>` lets you measure rendering performance of a React tree programmatically. * `<Suspense>` lets you display a fallback while the child components are loading. * `<StrictMode>` enables extra development-only checks that help you find bugs early. * * * ## Your own components You can also define your own components as JavaScript functions. --- ## Page: https://react.dev/reference/react/Fragment `<Fragment>`, often used via `<>...</>` syntax, lets you group elements without a wrapper node. <><OneChild /><AnotherChild /></> * Reference * `<Fragment>` * Usage * Returning multiple elements * Assigning multiple elements to a variable * Grouping elements with text * Rendering a list of Fragments * * * ## Reference ### `<Fragment>` Wrap elements in `<Fragment>` to group them together in situations where you need a single element. Grouping elements in `Fragment` has no effect on the resulting DOM; it is the same as if the elements were not grouped. The empty JSX tag `<></>` is shorthand for `<Fragment></Fragment>` in most cases. #### Props * **optional** `key`: Fragments declared with the explicit `<Fragment>` syntax may have keys. #### Caveats * If you want to pass `key` to a Fragment, you can’t use the `<>...</>` syntax. You have to explicitly import `Fragment` from `'react'` and render `<Fragment key={yourKey}>...</Fragment>`. * React does not reset state when you go from rendering `<><Child /></>` to `[<Child />]` or back, or when you go from rendering `<><Child /></>` to `<Child />` and back. This only works a single level deep: for example, going from `<><><Child /></></>` to `<Child />` resets the state. See the precise semantics here. * * * ## Usage ### Returning multiple elements Use `Fragment`, or the equivalent `<>...</>` syntax, to group multiple elements together. You can use it to put multiple elements in any place where a single element can go. For example, a component can only return one element, but by using a Fragment you can group multiple elements together and then return them as a group: function Post() {return (<><PostTitle /><PostBody /></>);} Fragments are useful because grouping elements with a Fragment has no effect on layout or styles, unlike if you wrapped the elements in another container like a DOM element. If you inspect this example with the browser tools, you’ll see that all `<h1>` and `<article>` DOM nodes appear as siblings without wrappers around them: export default function Blog() { return ( <\> <Post title\="An update" body\="It's been a while since I posted..." /> <Post title\="My new blog" body\="I am starting a new blog!" /> </\> ) } function Post({ title, body }) { return ( <\> <PostTitle title\={title} /> <PostBody body\={body} /> </\> ); } function PostTitle({ title }) { return <h1\>{title}</h1\> } function PostBody({ body }) { return ( <article\> <p\>{body}</p\> </article\> ); } ##### Deep Dive #### How to write a Fragment without the special syntax? The example above is equivalent to importing `Fragment` from React: import { Fragment } from 'react';function Post() {return (<Fragment><PostTitle /><PostBody /></Fragment>);} Usually you won’t need this unless you need to pass a `key` to your `Fragment`. * * * ### Assigning multiple elements to a variable Like any other element, you can assign Fragment elements to variables, pass them as props, and so on: function CloseDialog() {const buttons = (<><OKButton /><CancelButton /></>);return (<AlertDialog buttons={buttons}> Are you sure you want to leave this page?</AlertDialog>);} * * * ### Grouping elements with text You can use `Fragment` to group text together with components: function DateRangePicker({ start, end }) {return (<> From<DatePicker date={start} /> to<DatePicker date={end} /></>);} * * * ### Rendering a list of Fragments Here’s a situation where you need to write `Fragment` explicitly instead of using the `<></>` syntax. When you render multiple elements in a loop, you need to assign a `key` to each element. If the elements within the loop are Fragments, you need to use the normal JSX element syntax in order to provide the `key` attribute: function Blog() {return posts.map(post =><Fragment key={post.id}><PostTitle title={post.title} /><PostBody body={post.body} /></Fragment>);} You can inspect the DOM to verify that there are no wrapper elements around the Fragment children: import { Fragment } from 'react'; const posts = \[ { id: 1, title: 'An update', body: "It's been a while since I posted..." }, { id: 2, title: 'My new blog', body: 'I am starting a new blog!' } \]; export default function Blog() { return posts.map(post \=> <Fragment key\={post.id}\> <PostTitle title\={post.title} /> <PostBody body\={post.body} /> </Fragment\> ); } function PostTitle({ title }) { return <h1\>{title}</h1\> } function PostBody({ body }) { return ( <article\> <p\>{body}</p\> </article\> ); } --- ## Page: https://react.dev/reference/react/Profiler `<Profiler>` lets you measure rendering performance of a React tree programmatically. <Profiler id="App" onRender={onRender}><App /></Profiler> * Reference * `<Profiler>` * `onRender` callback * Usage * Measuring rendering performance programmatically * Measuring different parts of the application * * * ## Reference ### `<Profiler>` Wrap a component tree in a `<Profiler>` to measure its rendering performance. <Profiler id="App" onRender={onRender}><App /></Profiler> #### Props * `id`: A string identifying the part of the UI you are measuring. * `onRender`: An `onRender` callback that React calls every time components within the profiled tree update. It receives information about what was rendered and how much time it took. #### Caveats * Profiling adds some additional overhead, so **it is disabled in the production build by default.** To opt into production profiling, you need to enable a special production build with profiling enabled. * * * ### `onRender` callback React will call your `onRender` callback with information about what was rendered. function onRender(id, phase, actualDuration, baseDuration, startTime, commitTime) {// Aggregate or log render timings...} #### Parameters * `id`: The string `id` prop of the `<Profiler>` tree that has just committed. This lets you identify which part of the tree was committed if you are using multiple profilers. * `phase`: `"mount"`, `"update"` or `"nested-update"`. This lets you know whether the tree has just been mounted for the first time or re-rendered due to a change in props, state, or Hooks. * `actualDuration`: The number of milliseconds spent rendering the `<Profiler>` and its descendants for the current update. This indicates how well the subtree makes use of memoization (e.g. `memo` and `useMemo`). Ideally this value should decrease significantly after the initial mount as many of the descendants will only need to re-render if their specific props change. * `baseDuration`: The number of milliseconds estimating how much time it would take to re-render the entire `<Profiler>` subtree without any optimizations. It is calculated by summing up the most recent render durations of each component in the tree. This value estimates a worst-case cost of rendering (e.g. the initial mount or a tree with no memoization). Compare `actualDuration` against it to see if memoization is working. * `startTime`: A numeric timestamp for when React began rendering the current update. * `commitTime`: A numeric timestamp for when React committed the current update. This value is shared between all profilers in a commit, enabling them to be grouped if desirable. * * * ## Usage ### Measuring rendering performance programmatically Wrap the `<Profiler>` component around a React tree to measure its rendering performance. <App><Profiler id="Sidebar" onRender={onRender}><Sidebar /></Profiler><PageContent /></App> It requires two props: an `id` (string) and an `onRender` callback (function) which React calls any time a component within the tree “commits” an update. ### Note `<Profiler>` lets you gather measurements programmatically. If you’re looking for an interactive profiler, try the Profiler tab in React Developer Tools. It exposes similar functionality as a browser extension. * * * ### Measuring different parts of the application You can use multiple `<Profiler>` components to measure different parts of your application: <App><Profiler id="Sidebar" onRender={onRender}><Sidebar /></Profiler><Profiler id="Content" onRender={onRender}><Content /></Profiler></App> You can also nest `<Profiler>` components: <App><Profiler id="Sidebar" onRender={onRender}><Sidebar /></Profiler><Profiler id="Content" onRender={onRender}><Content><Profiler id="Editor" onRender={onRender}><Editor /></Profiler><Preview /></Content></Profiler></App> Although `<Profiler>` is a lightweight component, it should be used only when necessary. Each use adds some CPU and memory overhead to an application. * * * --- ## Page: https://react.dev/reference/react/StrictMode `<StrictMode>` lets you find common bugs in your components early during development. <StrictMode><App /></StrictMode> * Reference * `<StrictMode>` * Usage * Enabling Strict Mode for entire app * Enabling Strict Mode for a part of the app * Fixing bugs found by double rendering in development * Fixing bugs found by re-running Effects in development * Fixing bugs found by re-running ref callbacks in development * Fixing deprecation warnings enabled by Strict Mode * * * ## Reference ### `<StrictMode>` Use `StrictMode` to enable additional development behaviors and warnings for the component tree inside: import { StrictMode } from 'react';import { createRoot } from 'react-dom/client';const root = createRoot(document.getElementById('root'));root.render(<StrictMode><App /></StrictMode>); See more examples below. Strict Mode enables the following development-only behaviors: * Your components will re-render an extra time to find bugs caused by impure rendering. * Your components will re-run Effects an extra time to find bugs caused by missing Effect cleanup. * Your components will re-run refs callbacks an extra time to find bugs caused by missing ref cleanup. * Your components will be checked for usage of deprecated APIs. #### Props `StrictMode` accepts no props. #### Caveats * There is no way to opt out of Strict Mode inside a tree wrapped in `<StrictMode>`. This gives you confidence that all components inside `<StrictMode>` are checked. If two teams working on a product disagree whether they find the checks valuable, they need to either reach consensus or move `<StrictMode>` down in the tree. * * * ## Usage ### Enabling Strict Mode for entire app Strict Mode enables extra development-only checks for the entire component tree inside the `<StrictMode>` component. These checks help you find common bugs in your components early in the development process. To enable Strict Mode for your entire app, wrap your root component with `<StrictMode>` when you render it: import { StrictMode } from 'react';import { createRoot } from 'react-dom/client';const root = createRoot(document.getElementById('root'));root.render(<StrictMode><App /></StrictMode>); We recommend wrapping your entire app in Strict Mode, especially for newly created apps. If you use a framework that calls `createRoot` for you, check its documentation for how to enable Strict Mode. Although the Strict Mode checks **only run in development,** they help you find bugs that already exist in your code but can be tricky to reliably reproduce in production. Strict Mode lets you fix bugs before your users report them. ### Note Strict Mode enables the following checks in development: * Your components will re-render an extra time to find bugs caused by impure rendering. * Your components will re-run Effects an extra time to find bugs caused by missing Effect cleanup. * Your components will re-run ref callbacks an extra time to find bugs caused by missing ref cleanup. * Your components will be checked for usage of deprecated APIs. **All of these checks are development-only and do not impact the production build.** * * * ### Enabling Strict Mode for a part of the app You can also enable Strict Mode for any part of your application: import { StrictMode } from 'react';function App() {return (<><Header /><StrictMode><main><Sidebar /><Content /></main></StrictMode><Footer /></>);} In this example, Strict Mode checks will not run against the `Header` and `Footer` components. However, they will run on `Sidebar` and `Content`, as well as all of the components inside them, no matter how deep. ### Note When `StrictMode` is enabled for a part of the app, React will only enable behaviors that are possible in production. For example, if `<StrictMode>` is not enabled at the root of the app, it will not re-run Effects an extra time on initial mount, since this would cause child effects to double fire without the parent effects, which cannot happen in production. * * * ### Fixing bugs found by double rendering in development React assumes that every component you write is a pure function. This means that React components you write must always return the same JSX given the same inputs (props, state, and context). Components breaking this rule behave unpredictably and cause bugs. To help you find accidentally impure code, Strict Mode calls some of your functions (only the ones that should be pure) **twice in development.** This includes: * Your component function body (only top-level logic, so this doesn’t include code inside event handlers) * Functions that you pass to `useState`, `set` functions, `useMemo`, or `useReducer` * Some class component methods like `constructor`, `render`, `shouldComponentUpdate` (see the whole list) If a function is pure, running it twice does not change its behavior because a pure function produces the same result every time. However, if a function is impure (for example, it mutates the data it receives), running it twice tends to be noticeable (that’s what makes it impure!) This helps you spot and fix the bug early. **Here is an example to illustrate how double rendering in Strict Mode helps you find bugs early.** This `StoryTray` component takes an array of `stories` and adds one last “Create Story” item at the end: There is a mistake in the code above. However, it is easy to miss because the initial output appears correct. This mistake will become more noticeable if the `StoryTray` component re-renders multiple times. For example, let’s make the `StoryTray` re-render with a different background color whenever you hover over it: import { useState } from 'react'; export default function StoryTray({ stories }) { const \[isHover, setIsHover\] = useState(false); const items = stories; items.push({ id: 'create', label: 'Create Story' }); return ( <ul onPointerEnter\={() \=> setIsHover(true)} onPointerLeave\={() \=> setIsHover(false)} style\={{ backgroundColor: isHover ? '#ddd' : '#fff' }} \> {items.map(story \=> ( <li key\={story.id}\> {story.label} </li\> ))} </ul\> ); } Notice how every time you hover over the `StoryTray` component, “Create Story” gets added to the list again. The intention of the code was to add it once at the end. But `StoryTray` directly modifies the `stories` array from the props. Every time `StoryTray` renders, it adds “Create Story” again at the end of the same array. In other words, `StoryTray` is not a pure function—running it multiple times produces different results. To fix this problem, you can make a copy of the array, and modify that copy instead of the original one: export default function StoryTray({ stories }) {const items = stories.slice(); // Clone the array// ✅ Good: Pushing into a new arrayitems.push({ id: 'create', label: 'Create Story' }); This would make the `StoryTray` function pure. Each time it is called, it would only modify a new copy of the array, and would not affect any external objects or variables. This solves the bug, but you had to make the component re-render more often before it became obvious that something is wrong with its behavior. **In the original example, the bug wasn’t obvious. Now let’s wrap the original (buggy) code in `<StrictMode>`:** **Strict Mode _always_ calls your rendering function twice, so you can see the mistake right away** (“Create Story” appears twice). This lets you notice such mistakes early in the process. When you fix your component to render in Strict Mode, you _also_ fix many possible future production bugs like the hover functionality from before: import { useState } from 'react'; export default function StoryTray({ stories }) { const \[isHover, setIsHover\] = useState(false); const items = stories.slice(); items.push({ id: 'create', label: 'Create Story' }); return ( <ul onPointerEnter\={() \=> setIsHover(true)} onPointerLeave\={() \=> setIsHover(false)} style\={{ backgroundColor: isHover ? '#ddd' : '#fff' }} \> {items.map(story \=> ( <li key\={story.id}\> {story.label} </li\> ))} </ul\> ); } Without Strict Mode, it was easy to miss the bug until you added more re-renders. Strict Mode made the same bug appear right away. Strict Mode helps you find bugs before you push them to your team and to your users. Read more about keeping components pure. ### Note If you have React DevTools installed, any `console.log` calls during the second render call will appear slightly dimmed. React DevTools also offers a setting (off by default) to suppress them completely. * * * ### Fixing bugs found by re-running Effects in development Strict Mode can also help find bugs in Effects. Every Effect has some setup code and may have some cleanup code. Normally, React calls setup when the component _mounts_ (is added to the screen) and calls cleanup when the component _unmounts_ (is removed from the screen). React then calls cleanup and setup again if its dependencies changed since the last render. When Strict Mode is on, React will also run **one extra setup+cleanup cycle in development for every Effect.** This may feel surprising, but it helps reveal subtle bugs that are hard to catch manually. **Here is an example to illustrate how re-running Effects in Strict Mode helps you find bugs early.** Consider this example that connects a component to a chat: There is an issue with this code, but it might not be immediately clear. To make the issue more obvious, let’s implement a feature. In the example below, `roomId` is not hardcoded. Instead, the user can select the `roomId` that they want to connect to from a dropdown. Click “Open chat” and then select different chat rooms one by one. Keep track of the number of active connections in the console: You’ll notice that the number of open connections always keeps growing. In a real app, this would cause performance and network problems. The issue is that your Effect is missing a cleanup function: useEffect(() => {const connection = createConnection(serverUrl, roomId);connection.connect();return () => connection.disconnect();}, [roomId]); Now that your Effect “cleans up” after itself and destroys the outdated connections, the leak is solved. However, notice that the problem did not become visible until you’ve added more features (the select box). **In the original example, the bug wasn’t obvious. Now let’s wrap the original (buggy) code in `<StrictMode>`:** **With Strict Mode, you immediately see that there is a problem** (the number of active connections jumps to 2). Strict Mode runs an extra setup+cleanup cycle for every Effect. This Effect has no cleanup logic, so it creates an extra connection but doesn’t destroy it. This is a hint that you’re missing a cleanup function. Strict Mode lets you notice such mistakes early in the process. When you fix your Effect by adding a cleanup function in Strict Mode, you _also_ fix many possible future production bugs like the select box from before: Notice how the active connection count in the console doesn’t keep growing anymore. Without Strict Mode, it was easy to miss that your Effect needed cleanup. By running _setup → cleanup → setup_ instead of _setup_ for your Effect in development, Strict Mode made the missing cleanup logic more noticeable. Read more about implementing Effect cleanup. * * * ### Fixing bugs found by re-running ref callbacks in development Strict Mode can also help find bugs in callbacks refs. Every callback `ref` has some setup code and may have some cleanup code. Normally, React calls setup when the element is _created_ (is added to the DOM) and calls cleanup when the element is _removed_ (is removed from the DOM). When Strict Mode is on, React will also run **one extra setup+cleanup cycle in development for every callback `ref`.** This may feel surprising, but it helps reveal subtle bugs that are hard to catch manually. Consider this example, which allows you to select an animal and then scroll to one of them. Notice when you switch from “Cats” to “Dogs”, the console logs show that the number of animals in the list keeps growing, and the “Scroll to” buttons stop working: import { useRef, useState } from "react"; export default function AnimalFriends() { const itemsRef = useRef(\[\]); const \[animalList, setAnimalList\] = useState(setupAnimalList); const \[animal, setAnimal\] = useState('cat'); function scrollToAnimal(index) { const list = itemsRef.current; const {node} = list\[index\]; node.scrollIntoView({ behavior: "smooth", block: "nearest", inline: "center", }); } const animals = animalList.filter(a \=> a.type === animal) return ( <\> <nav\> <button onClick\={() \=> setAnimal('cat')}\>Cats</button\> <button onClick\={() \=> setAnimal('dog')}\>Dogs</button\> </nav\> <hr /> <nav\> <span\>Scroll to:</span\>{animals.map((animal, index) \=> ( <button key\={animal.src} onClick\={() \=> scrollToAnimal(index)}\> {index} </button\> ))} </nav\> <div\> <ul\> {animals.map((animal) \=> ( <li key\={animal.src} ref\={(node) \=> { const list = itemsRef.current; const item = {animal: animal, node}; list.push(item); console.log(\`✅ Adding animal to the map. Total animals: ${list.length}\`); if (list.length > 10) { console.log('❌ Too many animals in the list!'); } return () \=> { } }} \> <img src\={animal.src} /> </li\> ))} </ul\> </div\> </\> ); } function setupAnimalList() { const animalList = \[\]; for (let i = 0; i < 10; i++) { animalList.push({type: 'cat', src: "https://loremflickr.com/320/240/cat?lock=" + i}); } for (let i = 0; i < 10; i++) { animalList.push({type: 'dog', src: "https://loremflickr.com/320/240/dog?lock=" + i}); } return animalList; } **This is a production bug!** Since the ref callback doesn’t remove animals from the list in the cleanup, the list of animals keeps growing. This is a memory leak that can cause performance problems in a real app, and breaks the behavior of the app. The issue is the ref callback doesn’t cleanup after itself: <liref={node => {const list = itemsRef.current;const item = {animal, node};list.push(item);return () => {// 🚩 No cleanup, this is a bug!}}}</li> Now let’s wrap the original (buggy) code in `<StrictMode>`: import { useRef, useState } from "react"; export default function AnimalFriends() { const itemsRef = useRef(\[\]); const \[animalList, setAnimalList\] = useState(setupAnimalList); const \[animal, setAnimal\] = useState('cat'); function scrollToAnimal(index) { const list = itemsRef.current; const {node} = list\[index\]; node.scrollIntoView({ behavior: "smooth", block: "nearest", inline: "center", }); } const animals = animalList.filter(a \=> a.type === animal) return ( <\> <nav\> <button onClick\={() \=> setAnimal('cat')}\>Cats</button\> <button onClick\={() \=> setAnimal('dog')}\>Dogs</button\> </nav\> <hr /> <nav\> <span\>Scroll to:</span\>{animals.map((animal, index) \=> ( <button key\={animal.src} onClick\={() \=> scrollToAnimal(index)}\> {index} </button\> ))} </nav\> <div\> <ul\> {animals.map((animal) \=> ( <li key\={animal.src} ref\={(node) \=> { const list = itemsRef.current; const item = {animal: animal, node} list.push(item); console.log(\`✅ Adding animal to the map. Total animals: ${list.length}\`); if (list.length > 10) { console.log('❌ Too many animals in the list!'); } return () \=> { } }} \> <img src\={animal.src} /> </li\> ))} </ul\> </div\> </\> ); } function setupAnimalList() { const animalList = \[\]; for (let i = 0; i < 10; i++) { animalList.push({type: 'cat', src: "https://loremflickr.com/320/240/cat?lock=" + i}); } for (let i = 0; i < 10; i++) { animalList.push({type: 'dog', src: "https://loremflickr.com/320/240/dog?lock=" + i}); } return animalList; } **With Strict Mode, you immediately see that there is a problem**. Strict Mode runs an extra setup+cleanup cycle for every callback ref. This callback ref has no cleanup logic, so it adds refs but doesn’t remove them. This is a hint that you’re missing a cleanup function. Strict Mode lets you eagerly find mistakes in callback refs. When you fix your callback by adding a cleanup function in Strict Mode, you _also_ fix many possible future production bugs like the “Scroll to” bug from before: import { useRef, useState } from "react"; export default function AnimalFriends() { const itemsRef = useRef(\[\]); const \[animalList, setAnimalList\] = useState(setupAnimalList); const \[animal, setAnimal\] = useState('cat'); function scrollToAnimal(index) { const list = itemsRef.current; const {node} = list\[index\]; node.scrollIntoView({ behavior: "smooth", block: "nearest", inline: "center", }); } const animals = animalList.filter(a \=> a.type === animal) return ( <\> <nav\> <button onClick\={() \=> setAnimal('cat')}\>Cats</button\> <button onClick\={() \=> setAnimal('dog')}\>Dogs</button\> </nav\> <hr /> <nav\> <span\>Scroll to:</span\>{animals.map((animal, index) \=> ( <button key\={animal.src} onClick\={() \=> scrollToAnimal(index)}\> {index} </button\> ))} </nav\> <div\> <ul\> {animals.map((animal) \=> ( <li key\={animal.src} ref\={(node) \=> { const list = itemsRef.current; const item = {animal, node}; list.push({animal: animal, node}); console.log(\`✅ Adding animal to the map. Total animals: ${list.length}\`); if (list.length > 10) { console.log('❌ Too many animals in the list!'); } return () \=> { list.splice(list.indexOf(item)); console.log(\`❌ Removing animal from the map. Total animals: ${itemsRef.current.length}\`); } }} \> <img src\={animal.src} /> </li\> ))} </ul\> </div\> </\> ); } function setupAnimalList() { const animalList = \[\]; for (let i = 0; i < 10; i++) { animalList.push({type: 'cat', src: "https://loremflickr.com/320/240/cat?lock=" + i}); } for (let i = 0; i < 10; i++) { animalList.push({type: 'dog', src: "https://loremflickr.com/320/240/dog?lock=" + i}); } return animalList; } Now on inital mount in StrictMode, the ref callbacks are all setup, cleaned up, and setup again: ...✅ Adding animal to the map. Total animals: 10...❌ Removing animal from the map. Total animals: 0...✅ Adding animal to the map. Total animals: 10 **This is expected.** Strict Mode confirms that the ref callbacks are cleaned up correctly, so the size never grows above the expected amount. After the fix, there are no memory leaks, and all the features work as expected. Without Strict Mode, it was easy to miss the bug until you clicked around to app to notice broken features. Strict Mode made the bugs appear right away, before you push them to production. * * * ### Fixing deprecation warnings enabled by Strict Mode React warns if some component anywhere inside a `<StrictMode>` tree uses one of these deprecated APIs: * `UNSAFE_` class lifecycle methods like `UNSAFE_componentWillMount`. See alternatives. These APIs are primarily used in older class components so they rarely appear in modern apps. --- ## Page: https://react.dev/reference/react/Suspense `<Suspense>` lets you display a fallback until its children have finished loading. <Suspense fallback={<Loading />}><SomeComponent /></Suspense> * Reference * `<Suspense>` * Usage * Displaying a fallback while content is loading * Revealing content together at once * Revealing nested content as it loads * Showing stale content while fresh content is loading * Preventing already revealed content from hiding * Indicating that a Transition is happening * Resetting Suspense boundaries on navigation * Providing a fallback for server errors and client-only content * Troubleshooting * How do I prevent the UI from being replaced by a fallback during an update? * * * ## Reference ### `<Suspense>` #### Props * `children`: The actual UI you intend to render. If `children` suspends while rendering, the Suspense boundary will switch to rendering `fallback`. * `fallback`: An alternate UI to render in place of the actual UI if it has not finished loading. Any valid React node is accepted, though in practice, a fallback is a lightweight placeholder view, such as a loading spinner or skeleton. Suspense will automatically switch to `fallback` when `children` suspends, and back to `children` when the data is ready. If `fallback` suspends while rendering, it will activate the closest parent Suspense boundary. #### Caveats * React does not preserve any state for renders that got suspended before they were able to mount for the first time. When the component has loaded, React will retry rendering the suspended tree from scratch. * If Suspense was displaying content for the tree, but then it suspended again, the `fallback` will be shown again unless the update causing it was caused by `startTransition` or `useDeferredValue`. * If React needs to hide the already visible content because it suspended again, it will clean up layout Effects in the content tree. When the content is ready to be shown again, React will fire the layout Effects again. This ensures that Effects measuring the DOM layout don’t try to do this while the content is hidden. * React includes under-the-hood optimizations like _Streaming Server Rendering_ and _Selective Hydration_ that are integrated with Suspense. Read an architectural overview and watch a technical talk to learn more. * * * ## Usage ### Displaying a fallback while content is loading You can wrap any part of your application with a Suspense boundary: <Suspense fallback={<Loading />}><Albums /></Suspense> React will display your loading fallback until all the code and data needed by the children has been loaded. In the example below, the `Albums` component _suspends_ while fetching the list of albums. Until it’s ready to render, React switches the closest Suspense boundary above to show the fallback—your `Loading` component. Then, when the data loads, React hides the `Loading` fallback and renders the `Albums` component with data. import { Suspense } from 'react'; import Albums from './Albums.js'; export default function ArtistPage({ artist }) { return ( <\> <h1\>{artist.name}</h1\> <Suspense fallback\={<Loading />}\> <Albums artistId\={artist.id} /> </Suspense\> </\> ); } function Loading() { return <h2\>🌀 Loading...</h2\>; } ### Note **Only Suspense-enabled data sources will activate the Suspense component.** They include: * Data fetching with Suspense-enabled frameworks like Relay and Next.js * Lazy-loading component code with `lazy` * Reading the value of a cached Promise with `use` Suspense **does not** detect when data is fetched inside an Effect or event handler. The exact way you would load data in the `Albums` component above depends on your framework. If you use a Suspense-enabled framework, you’ll find the details in its data fetching documentation. Suspense-enabled data fetching without the use of an opinionated framework is not yet supported. The requirements for implementing a Suspense-enabled data source are unstable and undocumented. An official API for integrating data sources with Suspense will be released in a future version of React. * * * ### Revealing content together at once By default, the whole tree inside Suspense is treated as a single unit. For example, even if _only one_ of these components suspends waiting for some data, _all_ of them together will be replaced by the loading indicator: <Suspense fallback={<Loading />}><Biography /><Panel><Albums /></Panel></Suspense> Then, after all of them are ready to be displayed, they will all appear together at once. In the example below, both `Biography` and `Albums` fetch some data. However, because they are grouped under a single Suspense boundary, these components always “pop in” together at the same time. import { Suspense } from 'react'; import Albums from './Albums.js'; import Biography from './Biography.js'; import Panel from './Panel.js'; export default function ArtistPage({ artist }) { return ( <\> <h1\>{artist.name}</h1\> <Suspense fallback\={<Loading />}\> <Biography artistId\={artist.id} /> <Panel\> <Albums artistId\={artist.id} /> </Panel\> </Suspense\> </\> ); } function Loading() { return <h2\>🌀 Loading...</h2\>; } Components that load data don’t have to be direct children of the Suspense boundary. For example, you can move `Biography` and `Albums` into a new `Details` component. This doesn’t change the behavior. `Biography` and `Albums` share the same closest parent Suspense boundary, so their reveal is coordinated together. <Suspense fallback={<Loading />}><Details artistId={artist.id} /></Suspense>function Details({ artistId }) {return (<><Biography artistId={artistId} /><Panel><Albums artistId={artistId} /></Panel></>);} * * * ### Revealing nested content as it loads When a component suspends, the closest parent Suspense component shows the fallback. This lets you nest multiple Suspense components to create a loading sequence. Each Suspense boundary’s fallback will be filled in as the next level of content becomes available. For example, you can give the album list its own fallback: <Suspense fallback={<BigSpinner />}><Biography /><Suspense fallback={<AlbumsGlimmer />}><Panel><Albums /></Panel></Suspense></Suspense> With this change, displaying the `Biography` doesn’t need to “wait” for the `Albums` to load. The sequence will be: 1. If `Biography` hasn’t loaded yet, `BigSpinner` is shown in place of the entire content area. 2. Once `Biography` finishes loading, `BigSpinner` is replaced by the content. 3. If `Albums` hasn’t loaded yet, `AlbumsGlimmer` is shown in place of `Albums` and its parent `Panel`. 4. Finally, once `Albums` finishes loading, it replaces `AlbumsGlimmer`. import { Suspense } from 'react'; import Albums from './Albums.js'; import Biography from './Biography.js'; import Panel from './Panel.js'; export default function ArtistPage({ artist }) { return ( <\> <h1\>{artist.name}</h1\> <Suspense fallback\={<BigSpinner />}\> <Biography artistId\={artist.id} /> <Suspense fallback\={<AlbumsGlimmer />}\> <Panel\> <Albums artistId\={artist.id} /> </Panel\> </Suspense\> </Suspense\> </\> ); } function BigSpinner() { return <h2\>🌀 Loading...</h2\>; } function AlbumsGlimmer() { return ( <div className\="glimmer-panel"\> <div className\="glimmer-line" /> <div className\="glimmer-line" /> <div className\="glimmer-line" /> </div\> ); } Suspense boundaries let you coordinate which parts of your UI should always “pop in” together at the same time, and which parts should progressively reveal more content in a sequence of loading states. You can add, move, or delete Suspense boundaries in any place in the tree without affecting the rest of your app’s behavior. Don’t put a Suspense boundary around every component. Suspense boundaries should not be more granular than the loading sequence that you want the user to experience. If you work with a designer, ask them where the loading states should be placed—it’s likely that they’ve already included them in their design wireframes. * * * ### Showing stale content while fresh content is loading In this example, the `SearchResults` component suspends while fetching the search results. Type `"a"`, wait for the results, and then edit it to `"ab"`. The results for `"a"` will get replaced by the loading fallback. import { Suspense, useState } from 'react'; import SearchResults from './SearchResults.js'; export default function App() { const \[query, setQuery\] = useState(''); return ( <\> <label\> Search albums: <input value\={query} onChange\={e \=> setQuery(e.target.value)} /> </label\> <Suspense fallback\={<h2\>Loading...</h2\>}\> <SearchResults query\={query} /> </Suspense\> </\> ); } A common alternative UI pattern is to _defer_ updating the list and to keep showing the previous results until the new results are ready. The `useDeferredValue` Hook lets you pass a deferred version of the query down: export default function App() {const [query, setQuery] = useState('');const deferredQuery = useDeferredValue(query);return (<><label> Search albums:<input value={query} onChange={e => setQuery(e.target.value)} /></label><Suspense fallback={<h2>Loading...</h2>}><SearchResults query={deferredQuery} /></Suspense></>);} The `query` will update immediately, so the input will display the new value. However, the `deferredQuery` will keep its previous value until the data has loaded, so `SearchResults` will show the stale results for a bit. To make it more obvious to the user, you can add a visual indication when the stale result list is displayed: <div style={{opacity: query !== deferredQuery ? 0.5 : 1 }}><SearchResults query={deferredQuery} /></div> Enter `"a"` in the example below, wait for the results to load, and then edit the input to `"ab"`. Notice how instead of the Suspense fallback, you now see the dimmed stale result list until the new results have loaded: import { Suspense, useState, useDeferredValue } from 'react'; import SearchResults from './SearchResults.js'; export default function App() { const \[query, setQuery\] = useState(''); const deferredQuery = useDeferredValue(query); const isStale = query !== deferredQuery; return ( <\> <label\> Search albums: <input value\={query} onChange\={e \=> setQuery(e.target.value)} /> </label\> <Suspense fallback\={<h2\>Loading...</h2\>}\> <div style\={{ opacity: isStale ? 0.5 : 1 }}\> <SearchResults query\={deferredQuery} /> </div\> </Suspense\> </\> ); } ### Note Both deferred values and Transitions let you avoid showing Suspense fallback in favor of inline indicators. Transitions mark the whole update as non-urgent so they are typically used by frameworks and router libraries for navigation. Deferred values, on the other hand, are mostly useful in application code where you want to mark a part of UI as non-urgent and let it “lag behind” the rest of the UI. * * * ### Preventing already revealed content from hiding When a component suspends, the closest parent Suspense boundary switches to showing the fallback. This can lead to a jarring user experience if it was already displaying some content. Try pressing this button: import { Suspense, useState } from 'react'; import IndexPage from './IndexPage.js'; import ArtistPage from './ArtistPage.js'; import Layout from './Layout.js'; export default function App() { return ( <Suspense fallback\={<BigSpinner />}\> <Router /> </Suspense\> ); } function Router() { const \[page, setPage\] = useState('/'); function navigate(url) { setPage(url); } let content; if (page === '/') { content = ( <IndexPage navigate\={navigate} /> ); } else if (page === '/the-beatles') { content = ( <ArtistPage artist\={{ id: 'the-beatles', name: 'The Beatles', }} /> ); } return ( <Layout\> {content} </Layout\> ); } function BigSpinner() { return <h2\>🌀 Loading...</h2\>; } When you pressed the button, the `Router` component rendered `ArtistPage` instead of `IndexPage`. A component inside `ArtistPage` suspended, so the closest Suspense boundary started showing the fallback. The closest Suspense boundary was near the root, so the whole site layout got replaced by `BigSpinner`. To prevent this, you can mark the navigation state update as a _Transition_ with `startTransition`: function Router() {const [page, setPage] = useState('/');function navigate(url) {startTransition(() => {setPage(url); });}// ... This tells React that the state transition is not urgent, and it’s better to keep showing the previous page instead of hiding any already revealed content. Now clicking the button “waits” for the `Biography` to load: import { Suspense, startTransition, useState } from 'react'; import IndexPage from './IndexPage.js'; import ArtistPage from './ArtistPage.js'; import Layout from './Layout.js'; export default function App() { return ( <Suspense fallback\={<BigSpinner />}\> <Router /> </Suspense\> ); } function Router() { const \[page, setPage\] = useState('/'); function navigate(url) { startTransition(() \=> { setPage(url); }); } let content; if (page === '/') { content = ( <IndexPage navigate\={navigate} /> ); } else if (page === '/the-beatles') { content = ( <ArtistPage artist\={{ id: 'the-beatles', name: 'The Beatles', }} /> ); } return ( <Layout\> {content} </Layout\> ); } function BigSpinner() { return <h2\>🌀 Loading...</h2\>; } A Transition doesn’t wait for _all_ content to load. It only waits long enough to avoid hiding already revealed content. For example, the website `Layout` was already revealed, so it would be bad to hide it behind a loading spinner. However, the nested `Suspense` boundary around `Albums` is new, so the Transition doesn’t wait for it. ### Note Suspense-enabled routers are expected to wrap the navigation updates into Transitions by default. * * * ### Indicating that a Transition is happening In the above example, once you click the button, there is no visual indication that a navigation is in progress. To add an indicator, you can replace `startTransition` with `useTransition` which gives you a boolean `isPending` value. In the example below, it’s used to change the website header styling while a Transition is happening: import { Suspense, useState, useTransition } from 'react'; import IndexPage from './IndexPage.js'; import ArtistPage from './ArtistPage.js'; import Layout from './Layout.js'; export default function App() { return ( <Suspense fallback\={<BigSpinner />}\> <Router /> </Suspense\> ); } function Router() { const \[page, setPage\] = useState('/'); const \[isPending, startTransition\] = useTransition(); function navigate(url) { startTransition(() \=> { setPage(url); }); } let content; if (page === '/') { content = ( <IndexPage navigate\={navigate} /> ); } else if (page === '/the-beatles') { content = ( <ArtistPage artist\={{ id: 'the-beatles', name: 'The Beatles', }} /> ); } return ( <Layout isPending\={isPending}\> {content} </Layout\> ); } function BigSpinner() { return <h2\>🌀 Loading...</h2\>; } * * * ### Resetting Suspense boundaries on navigation During a Transition, React will avoid hiding already revealed content. However, if you navigate to a route with different parameters, you might want to tell React it is _different_ content. You can express this with a `key`: <ProfilePage key={queryParams.id} /> Imagine you’re navigating within a user’s profile page, and something suspends. If that update is wrapped in a Transition, it will not trigger the fallback for already visible content. That’s the expected behavior. However, now imagine you’re navigating between two different user profiles. In that case, it makes sense to show the fallback. For example, one user’s timeline is _different content_ from another user’s timeline. By specifying a `key`, you ensure that React treats different users’ profiles as different components, and resets the Suspense boundaries during navigation. Suspense-integrated routers should do this automatically. * * * ### Providing a fallback for server errors and client-only content If you use one of the streaming server rendering APIs (or a framework that relies on them), React will also use your `<Suspense>` boundaries to handle errors on the server. If a component throws an error on the server, React will not abort the server render. Instead, it will find the closest `<Suspense>` component above it and include its fallback (such as a spinner) into the generated server HTML. The user will see a spinner at first. On the client, React will attempt to render the same component again. If it errors on the client too, React will throw the error and display the closest error boundary. However, if it does not error on the client, React will not display the error to the user since the content was eventually displayed successfully. You can use this to opt out some components from rendering on the server. To do this, throw an error in the server environment and then wrap them in a `<Suspense>` boundary to replace their HTML with fallbacks: <Suspense fallback={<Loading />}><Chat /></Suspense>function Chat() {if (typeof window === 'undefined') {throw Error('Chat should only render on the client.');}// ...} The server HTML will include the loading indicator. It will be replaced by the `Chat` component on the client. * * * ## Troubleshooting ### How do I prevent the UI from being replaced by a fallback during an update? Replacing visible UI with a fallback creates a jarring user experience. This can happen when an update causes a component to suspend, and the nearest Suspense boundary is already showing content to the user. To prevent this from happening, mark the update as non-urgent using `startTransition`. During a Transition, React will wait until enough data has loaded to prevent an unwanted fallback from appearing: function handleNextPageClick() {// If this update suspends, don't hide the already displayed contentstartTransition(() => {setCurrentPage(currentPage + 1);});} This will avoid hiding existing content. However, any newly rendered `Suspense` boundaries will still immediately display fallbacks to avoid blocking the UI and let the user see the content as it becomes available. **React will only prevent unwanted fallbacks during non-urgent updates**. It will not delay a render if it’s the result of an urgent update. You must opt in with an API like `startTransition` or `useDeferredValue`. If your router is integrated with Suspense, it should wrap its updates into `startTransition` automatically. --- ## Page: https://react.dev/reference/react/apis In addition to Hooks and Components, the `react` package exports a few other APIs that are useful for defining components. This page lists all the remaining modern React APIs. * * * * `createContext` lets you define and provide context to the child components. Used with `useContext`. * `forwardRef` lets your component expose a DOM node as a ref to the parent. Used with `useRef`. * `lazy` lets you defer loading a component’s code until it’s rendered for the first time. * `memo` lets your component skip re-renders with same props. Used with `useMemo` and `useCallback`. * `startTransition` lets you mark a state update as non-urgent. Similar to `useTransition`. * `act` lets you wrap renders and interactions in tests to ensure updates have processed before making assertions. * * * ## Resource APIs _Resources_ can be accessed by a component without having them as part of their state. For example, a component can read a message from a Promise or read styling information from a context. To read a value from a resource, use this API: * `use` lets you read the value of a resource like a Promise or context. function MessageComponent({ messagePromise }) {const message = use(messagePromise);const theme = use(ThemeContext);// ...} --- ## Page: https://react.dev/reference/react/act `act` is a test helper to apply pending React updates before making assertions. await act(async actFn) To prepare a component for assertions, wrap the code rendering it and performing updates inside an `await act()` call. This makes your test run closer to how React works in the browser. ### Note You might find using `act()` directly a bit too verbose. To avoid some of the boilerplate, you could use a library like React Testing Library, whose helpers are wrapped with `act()`. * Reference * `await act(async actFn)` * Usage * Rendering components in tests * Dispatching events in tests * Troubleshooting * I’m getting an error: “The current testing environment is not configured to support act”(…)” * * * ## Reference ### `await act(async actFn)` When writing UI tests, tasks like rendering, user events, or data fetching can be considered as “units” of interaction with a user interface. React provides a helper called `act()` that makes sure all updates related to these “units” have been processed and applied to the DOM before you make any assertions. The name `act` comes from the Arrange-Act-Assert pattern. it ('renders with button disabled', async () => {await act(async () => {root.render(<TestComponent />)});expect(container.querySelector('button')).toBeDisabled();}); ### Note We recommend using `act` with `await` and an `async` function. Although the sync version works in many cases, it doesn’t work in all cases and due to the way React schedules updates internally, it’s difficult to predict when you can use the sync version. We will deprecate and remove the sync version in the future. #### Parameters * `async actFn`: An async function wrapping renders or interactions for components being tested. Any updates triggered within the `actFn`, are added to an internal act queue, which are then flushed together to process and apply any changes to the DOM. Since it is async, React will also run any code that crosses an async boundary, and flush any updates scheduled. #### Returns `act` does not return anything. ## Usage When testing a component, you can use `act` to make assertions about its output. For example, let’s say we have this `Counter` component, the usage examples below show how to test it: function Counter() {const [count, setCount] = useState(0);const handleClick = () => {setCount(prev => prev + 1);}useEffect(() => {document.title = `You clicked ${count} times`;}, [count]);return (<div><p>You clicked {count} times</p><button onClick={handleClick}> Click me</button></div>)} ### Rendering components in tests To test the render output of a component, wrap the render inside `act()`: import {act} from 'react';import ReactDOMClient from 'react-dom/client';import Counter from './Counter';it('can render and update a counter', async () => {container = document.createElement('div');document.body.appendChild(container);// ✅ Render the component inside act().await act(() => {ReactDOMClient.createRoot(container).render(<Counter />);});const button = container.querySelector('button');const label = container.querySelector('p');expect(label.textContent).toBe('You clicked 0 times');expect(document.title).toBe('You clicked 0 times');}); Here, we create a container, append it to the document, and render the `Counter` component inside `act()`. This ensures that the component is rendered and its effects are applied before making assertions. Using `act` ensures that all updates have been applied before we make assertions. ### Dispatching events in tests To test events, wrap the event dispatch inside `act()`: import {act} from 'react';import ReactDOMClient from 'react-dom/client';import Counter from './Counter';it.only('can render and update a counter', async () => {const container = document.createElement('div');document.body.appendChild(container);await act( async () => {ReactDOMClient.createRoot(container).render(<Counter />);});// ✅ Dispatch the event inside act().await act(async () => {button.dispatchEvent(new MouseEvent('click', { bubbles: true }));});const button = container.querySelector('button');const label = container.querySelector('p');expect(label.textContent).toBe('You clicked 1 times');expect(document.title).toBe('You clicked 1 times');}); Here, we render the component with `act`, and then dispatch the event inside another `act()`. This ensures that all updates from the event are applied before making assertions. ### Pitfall Don’t forget that dispatching DOM events only works when the DOM container is added to the document. You can use a library like React Testing Library to reduce the boilerplate code. ## Troubleshooting ### I’m getting an error: “The current testing environment is not configured to support act”(…)” Using `act` requires setting `global.IS_REACT_ACT_ENVIRONMENT=true` in your test environment. This is to ensure that `act` is only used in the correct environment. If you don’t set the global, you will see an error like this: Console Warning: The current testing environment is not configured to support act(…) To fix, add this to your global setup file for React tests: global.IS_REACT_ACT_ENVIRONMENT=true --- ## Page: https://react.dev/reference/react/cache `cache` lets you cache the result of a data fetch or computation. const cachedFn = cache(fn); * Reference * `cache(fn)` * Usage * Cache an expensive computation * Share a snapshot of data * Preload data * Troubleshooting * My memoized function still runs even though I’ve called it with the same arguments * * * ## Reference ### `cache(fn)` Call `cache` outside of any components to create a version of the function with caching. import {cache} from 'react';import calculateMetrics from 'lib/metrics';const getMetrics = cache(calculateMetrics);function Chart({data}) {const report = getMetrics(data);// ...} When `getMetrics` is first called with `data`, `getMetrics` will call `calculateMetrics(data)` and store the result in cache. If `getMetrics` is called again with the same `data`, it will return the cached result instead of calling `calculateMetrics(data)` again. See more examples below. #### Parameters * `fn`: The function you want to cache results for. `fn` can take any arguments and return any value. #### Returns `cache` returns a cached version of `fn` with the same type signature. It does not call `fn` in the process. When calling `cachedFn` with given arguments, it first checks if a cached result exists in the cache. If a cached result exists, it returns the result. If not, it calls `fn` with the arguments, stores the result in the cache, and returns the result. The only time `fn` is called is when there is a cache miss. ### Note The optimization of caching return values based on inputs is known as _memoization_. We refer to the function returned from `cache` as a memoized function. #### Caveats * React will invalidate the cache for all memoized functions for each server request. * Each call to `cache` creates a new function. This means that calling `cache` with the same function multiple times will return different memoized functions that do not share the same cache. * `cachedFn` will also cache errors. If `fn` throws an error for certain arguments, it will be cached, and the same error is re-thrown when `cachedFn` is called with those same arguments. * `cache` is for use in Server Components only. * * * ## Usage ### Cache an expensive computation Use `cache` to skip duplicate work. import {cache} from 'react';import calculateUserMetrics from 'lib/user';const getUserMetrics = cache(calculateUserMetrics);function Profile({user}) {const metrics = getUserMetrics(user);// ...}function TeamReport({users}) {for (let user in users) {const metrics = getUserMetrics(user);// ...}// ...} If the same `user` object is rendered in both `Profile` and `TeamReport`, the two components can share work and only call `calculateUserMetrics` once for that `user`. Assume `Profile` is rendered first. It will call `getUserMetrics`, and check if there is a cached result. Since it is the first time `getUserMetrics` is called with that `user`, there will be a cache miss. `getUserMetrics` will then call `calculateUserMetrics` with that `user` and write the result to cache. When `TeamReport` renders its list of `users` and reaches the same `user` object, it will call `getUserMetrics` and read the result from cache. ### Pitfall ##### Calling different memoized functions will read from different caches. To access the same cache, components must call the same memoized function. // Temperature.jsimport {cache} from 'react';import {calculateWeekReport} from './report';export function Temperature({cityData}) {// 🚩 Wrong: Calling `cache` in component creates new `getWeekReport` for each renderconst getWeekReport = cache(calculateWeekReport);const report = getWeekReport(cityData);// ...} // Precipitation.jsimport {cache} from 'react';import {calculateWeekReport} from './report';// 🚩 Wrong: `getWeekReport` is only accessible for `Precipitation` component.const getWeekReport = cache(calculateWeekReport);export function Precipitation({cityData}) {const report = getWeekReport(cityData);// ...} In the above example, `Precipitation` and `Temperature` each call `cache` to create a new memoized function with their own cache look-up. If both components render for the same `cityData`, they will do duplicate work to call `calculateWeekReport`. In addition, `Temperature` creates a new memoized function each time the component is rendered which doesn’t allow for any cache sharing. To maximize cache hits and reduce work, the two components should call the same memoized function to access the same cache. Instead, define the memoized function in a dedicated module that can be `import`\-ed across components. // getWeekReport.jsimport {cache} from 'react';import {calculateWeekReport} from './report';export default cache(calculateWeekReport); // Temperature.jsimport getWeekReport from './getWeekReport';export default function Temperature({cityData}) {const report = getWeekReport(cityData);// ...} // Precipitation.jsimport getWeekReport from './getWeekReport';export default function Precipitation({cityData}) {const report = getWeekReport(cityData);// ...} Here, both components call the same memoized function exported from `./getWeekReport.js` to read and write to the same cache. To share a snapshot of data between components, call `cache` with a data-fetching function like `fetch`. When multiple components make the same data fetch, only one request is made and the data returned is cached and shared across components. All components refer to the same snapshot of data across the server render. import {cache} from 'react';import {fetchTemperature} from './api.js';const getTemperature = cache(async (city) => {return await fetchTemperature(city);});async function AnimatedWeatherCard({city}) {const temperature = await getTemperature(city);// ...}async function MinimalWeatherCard({city}) {const temperature = await getTemperature(city);// ...} If `AnimatedWeatherCard` and `MinimalWeatherCard` both render for the same city, they will receive the same snapshot of data from the memoized function. If `AnimatedWeatherCard` and `MinimalWeatherCard` supply different city arguments to `getTemperature`, then `fetchTemperature` will be called twice and each call site will receive different data. The city acts as a cache key. ### Note Asynchronous rendering is only supported for Server Components. async function AnimatedWeatherCard({city}) {const temperature = await getTemperature(city);// ...} ### Preload data By caching a long-running data fetch, you can kick off asynchronous work prior to rendering the component. const getUser = cache(async (id) => {return await db.user.query(id);});async function Profile({id}) {const user = await getUser(id);return (<section><img src={user.profilePic} /><h2>{user.name}</h2></section>);}function Page({id}) {// ✅ Good: start fetching the user datagetUser(id);// ... some computational workreturn (<><Profile id={id} /></>);} When rendering `Page`, the component calls `getUser` but note that it doesn’t use the returned data. This early `getUser` call kicks off the asynchronous database query that occurs while `Page` is doing other computational work and rendering children. When rendering `Profile`, we call `getUser` again. If the initial `getUser` call has already returned and cached the user data, when `Profile` asks and waits for this data, it can simply read from the cache without requiring another remote procedure call. If the initial data request hasn’t been completed, preloading data in this pattern reduces delay in data-fetching. ##### Deep Dive #### Caching asynchronous work When evaluating an asynchronous function, you will receive a Promise for that work. The promise holds the state of that work (_pending_, _fulfilled_, _failed_) and its eventual settled result. In this example, the asynchronous function `fetchData` returns a promise that is awaiting the `fetch`. async function fetchData() {return await fetch(`https://...`);}const getData = cache(fetchData);async function MyComponent() {getData();// ... some computational work await getData();// ...} In calling `getData` the first time, the promise returned from `fetchData` is cached. Subsequent look-ups will then return the same promise. Notice that the first `getData` call does not `await` whereas the second does. `await` is a JavaScript operator that will wait and return the settled result of the promise. The first `getData` call simply initiates the `fetch` to cache the promise for the second `getData` to look-up. If by the second call the promise is still _pending_, then `await` will pause for the result. The optimization is that while we wait on the `fetch`, React can continue with computational work, thus reducing the wait time for the second call. If the promise is already settled, either to an error or the _fulfilled_ result, `await` will return that value immediately. In both outcomes, there is a performance benefit. ### Pitfall ##### Calling a memoized function outside of a component will not use the cache. import {cache} from 'react';const getUser = cache(async (userId) => {return await db.user.query(userId);});// 🚩 Wrong: Calling memoized function outside of component will not memoize.getUser('demo-id');async function DemoProfile() {// ✅ Good: `getUser` will memoize.const user = await getUser('demo-id');return <Profile user={user} />;} React only provides cache access to the memoized function in a component. When calling `getUser` outside of a component, it will still evaluate the function but not read or update the cache. This is because cache access is provided through a context which is only accessible from a component. ##### Deep Dive #### When should I use `cache`, `memo`, or `useMemo`? All mentioned APIs offer memoization but the difference is what they’re intended to memoize, who can access the cache, and when their cache is invalidated. #### `useMemo` In general, you should use `useMemo` for caching a expensive computation in a Client Component across renders. As an example, to memoize a transformation of data within a component. 'use client';function WeatherReport({record}) {const avgTemp = useMemo(() => calculateAvg(record), record);// ...}function App() {const record = getRecord();return (<><WeatherReport record={record} /><WeatherReport record={record} /></>);} In this example, `App` renders two `WeatherReport`s with the same record. Even though both components do the same work, they cannot share work. `useMemo`’s cache is only local to the component. However, `useMemo` does ensure that if `App` re-renders and the `record` object doesn’t change, each component instance would skip work and use the memoized value of `avgTemp`. `useMemo` will only cache the last computation of `avgTemp` with the given dependencies. #### `cache` In general, you should use `cache` in Server Components to memoize work that can be shared across components. const cachedFetchReport = cache(fetchReport);function WeatherReport({city}) {const report = cachedFetchReport(city);// ...}function App() {const city = "Los Angeles";return (<><WeatherReport city={city} /><WeatherReport city={city} /></>);} Re-writing the previous example to use `cache`, in this case the second instance of `WeatherReport` will be able to skip duplicate work and read from the same cache as the first `WeatherReport`. Another difference from the previous example is that `cache` is also recommended for memoizing data fetches, unlike `useMemo` which should only be used for computations. At this time, `cache` should only be used in Server Components and the cache will be invalidated across server requests. #### `memo` You should use `memo` to prevent a component re-rendering if its props are unchanged. 'use client';function WeatherReport({record}) {const avgTemp = calculateAvg(record); // ...}const MemoWeatherReport = memo(WeatherReport);function App() {const record = getRecord();return (<><MemoWeatherReport record={record} /><MemoWeatherReport record={record} /></>);} In this example, both `MemoWeatherReport` components will call `calculateAvg` when first rendered. However, if `App` re-renders, with no changes to `record`, none of the props have changed and `MemoWeatherReport` will not re-render. Compared to `useMemo`, `memo` memoizes the component render based on props vs. specific computations. Similar to `useMemo`, the memoized component only caches the last render with the last prop values. Once the props change, the cache invalidates and the component re-renders. * * * ## Troubleshooting ### My memoized function still runs even though I’ve called it with the same arguments See prior mentioned pitfalls * Calling different memoized functions will read from different caches. * Calling a memoized function outside of a component will not use the cache. If none of the above apply, it may be a problem with how React checks if something exists in cache. If your arguments are not primitives (ex. objects, functions, arrays), ensure you’re passing the same object reference. When calling a memoized function, React will look up the input arguments to see if a result is already cached. React will use shallow equality of the arguments to determine if there is a cache hit. import {cache} from 'react';const calculateNorm = cache((vector) => {// ...});function MapMarker(props) {// 🚩 Wrong: props is an object that changes every render.const length = calculateNorm(props);// ...}function App() {return (<><MapMarker x={10} y={10} z={10} /><MapMarker x={10} y={10} z={10} /></>);} In this case the two `MapMarker`s look like they’re doing the same work and calling `calculateNorm` with the same value of `{x: 10, y: 10, z:10}`. Even though the objects contain the same values, they are not the same object reference as each component creates its own `props` object. React will call `Object.is` on the input to verify if there is a cache hit. import {cache} from 'react';const calculateNorm = cache((x, y, z) => {// ...});function MapMarker(props) {// ✅ Good: Pass primitives to memoized functionconst length = calculateNorm(props.x, props.y, props.z);// ...}function App() {return (<><MapMarker x={10} y={10} z={10} /><MapMarker x={10} y={10} z={10} /></>);} One way to address this could be to pass the vector dimensions to `calculateNorm`. This works because the dimensions themselves are primitives. Another solution may be to pass the vector object itself as a prop to the component. We’ll need to pass the same object to both component instances. import {cache} from 'react';const calculateNorm = cache((vector) => {// ...});function MapMarker(props) {// ✅ Good: Pass the same `vector` objectconst length = calculateNorm(props.vector);// ...}function App() {const vector = [10, 10, 10];return (<><MapMarker vector={vector} /><MapMarker vector={vector} /></>);} --- ## Page: https://react.dev/reference/react/captureOwnerStack `captureOwnerStack` reads the current Owner Stack in development and returns it as a string if available. const stack = captureOwnerStack(); * Reference * `captureOwnerStack()` * Usage * Enhance a custom error overlay * Troubleshooting * The Owner Stack is `null` * `captureOwnerStack` is not available * * * ## Reference ### `captureOwnerStack()` Call `captureOwnerStack` to get the current Owner Stack. import * as React from 'react';function Component() {if (process.env.NODE_ENV !== 'production') {const ownerStack = React.captureOwnerStack();console.log(ownerStack);}} #### Parameters `captureOwnerStack` does not take any parameters. #### Returns `captureOwnerStack` returns `string | null`. Owner Stacks are available in * Component render * Effects (e.g. `useEffect`) * React’s event handlers (e.g. `<button onClick={...} />`) * React error handlers (React Root options `onCaughtError`, `onRecoverableError`, and `onUncaughtError`) If no Owner Stack is available, `null` is returned (see Troubleshooting: The Owner Stack is `null`). #### Caveats * Owner Stacks are only available in development. `captureOwnerStack` will always return `null` outside of development. ##### Deep Dive #### Owner Stack vs Component Stack The Owner Stack is different from the Component Stack available in React error handlers like `errorInfo.componentStack` in `onUncaughtError`. For example, consider the following code: import {captureOwnerStack} from 'react'; import {createRoot} from 'react-dom/client'; import App, {Component} from './App.js'; import './styles.css'; createRoot(document.createElement('div'), { onUncaughtError: (error, errorInfo) \=> { console.log(errorInfo.componentStack); console.log(captureOwnerStack()); }, }).render( <App\> <Component label\="disabled" /> </App\> ); `SubComponent` would throw an error. The Component Stack of that error would be at SubComponentat fieldsetat Componentat mainat React.Suspenseat App However, the Owner Stack would only read at Component Neither `App` nor the DOM components (e.g. `fieldset`) are considered Owners in this Stack since they didn’t contribute to “creating” the node containing `SubComponent`. `App` and DOM components only forwarded the node. `App` just rendered the `children` node as opposed to `Component` which created a node containing `SubComponent` via `<SubComponent />`. Neither `Navigation` nor `legend` are in the stack at all since it’s only a sibling to a node containing `<SubComponent />`. `SubComponent` is omitted because it’s already part of the callstack. ## Usage ### Enhance a custom error overlay import { captureOwnerStack } from "react";import { instrumentedConsoleError } from "./errorOverlay";const originalConsoleError = console.error;console.error = function patchedConsoleError(...args) {originalConsoleError.apply(console, args);const ownerStack = captureOwnerStack();onConsoleError({// Keep in mind that in a real application, console.error can be// called with multiple arguments which you should account for.consoleMessage: args[0],ownerStack,});}; If you intercept `console.error` calls to highlight them in an error overlay, you can call `captureOwnerStack` to include the Owner Stack. import { captureOwnerStack } from "react"; import { createRoot } from "react-dom/client"; import App from './App'; import { onConsoleError } from "./errorOverlay"; import './styles.css'; const originalConsoleError = console.error; console.error = function patchedConsoleError(...args) { originalConsoleError.apply(console, args); const ownerStack = captureOwnerStack(); onConsoleError({ consoleMessage: args\[0\], ownerStack, }); }; const container = document.getElementById("root"); createRoot(container).render(<App />); ## Troubleshooting ### The Owner Stack is `null` The call of `captureOwnerStack` happened outside of a React controlled function e.g. in a `setTimeout` callback, after a `fetch` call or in a custom DOM event handler. During render, Effects, React event handlers, and React error handlers (e.g. `hydrateRoot#options.onCaughtError`) Owner Stacks should be available. In the example below, clicking the button will log an empty Owner Stack because `captureOwnerStack` was called during a custom DOM event handler. The Owner Stack must be captured earlier e.g. by moving the call of `captureOwnerStack` into the Effect body. import {captureOwnerStack, useEffect} from 'react'; export default function App() { useEffect(() \=> { function handleEvent() { console.log('Owner Stack: ', captureOwnerStack()); } document.addEventListener('click', handleEvent); return () \=> { document.removeEventListener('click', handleEvent); } }) return <button\>Click me to see that Owner Stacks are not available in custom DOM event handlers</button\>; } ### `captureOwnerStack` is not available `captureOwnerStack` is only exported in development builds. It will be `undefined` in production builds. If `captureOwnerStack` is used in files that are bundled for production and development, you should conditionally access it from a namespace import. // Don't use named imports of `captureOwnerStack` in files that are bundled for development and production.import {captureOwnerStack} from 'react';// Use a namespace import instead and access `captureOwnerStack` conditionally.import * as React from 'react';if (process.env.NODE_ENV !== 'production') {const ownerStack = React.captureOwnerStack();console.log('Owner Stack', ownerStack);} --- ## Page: https://react.dev/reference/react/createContext `createContext` lets you create a context that components can provide or read. const SomeContext = createContext(defaultValue) * Reference * `createContext(defaultValue)` * `SomeContext.Provider` * `SomeContext.Consumer` * Usage * Creating context * Importing and exporting context from a file * Troubleshooting * I can’t find a way to change the context value * * * ## Reference ### `createContext(defaultValue)` Call `createContext` outside of any components to create a context. import { createContext } from 'react';const ThemeContext = createContext('light'); See more examples below. #### Parameters * `defaultValue`: The value that you want the context to have when there is no matching context provider in the tree above the component that reads context. If you don’t have any meaningful default value, specify `null`. The default value is meant as a “last resort” fallback. It is static and never changes over time. #### Returns `createContext` returns a context object. **The context object itself does not hold any information.** It represents _which_ context other components read or provide. Typically, you will use `SomeContext.Provider` in components above to specify the context value, and call `useContext(SomeContext)` in components below to read it. The context object has a few properties: * `SomeContext.Provider` lets you provide the context value to components. * `SomeContext.Consumer` is an alternative and rarely used way to read the context value. * * * ### `SomeContext.Provider` Wrap your components into a context provider to specify the value of this context for all components inside: function App() {const [theme, setTheme] = useState('light');// ...return (<ThemeContext.Provider value={theme}><Page /></ThemeContext.Provider>);} #### Props * `value`: The value that you want to pass to all the components reading this context inside this provider, no matter how deep. The context value can be of any type. A component calling `useContext(SomeContext)` inside of the provider receives the `value` of the innermost corresponding context provider above it. * * * ### `SomeContext.Consumer` Before `useContext` existed, there was an older way to read context: function Button() {// 🟡 Legacy way (not recommended)return (<ThemeContext.Consumer>{theme => (<button className={theme} />)}</ThemeContext.Consumer>);} Although this older way still works, **newly written code should read context with `useContext()` instead:** function Button() {// ✅ Recommended wayconst theme = useContext(ThemeContext);return <button className={theme} />;} #### Props * `children`: A function. React will call the function you pass with the current context value determined by the same algorithm as `useContext()` does, and render the result you return from this function. React will also re-run this function and update the UI whenever the context from the parent components changes. * * * ## Usage ### Creating context Context lets components pass information deep down without explicitly passing props. Call `createContext` outside any components to create one or more contexts. import { createContext } from 'react';const ThemeContext = createContext('light');const AuthContext = createContext(null); `createContext` returns a context object. Components can read context by passing it to `useContext()`: function Button() {const theme = useContext(ThemeContext);// ...}function Profile() {const currentUser = useContext(AuthContext);// ...} By default, the values they receive will be the default values you have specified when creating the contexts. However, by itself this isn’t useful because the default values never change. Context is useful because you can **provide other, dynamic values from your components:** function App() {const [theme, setTheme] = useState('dark');const [currentUser, setCurrentUser] = useState({ name: 'Taylor' });// ...return (<ThemeContext.Provider value={theme}><AuthContext.Provider value={currentUser}><Page /></AuthContext.Provider></ThemeContext.Provider>);} Now the `Page` component and any components inside it, no matter how deep, will “see” the passed context values. If the passed context values change, React will re-render the components reading the context as well. Read more about reading and providing context and see examples. * * * ### Importing and exporting context from a file Often, components in different files will need access to the same context. This is why it’s common to declare contexts in a separate file. Then you can use the `export` statement to make context available for other files: // Contexts.jsimport { createContext } from 'react';export const ThemeContext = createContext('light');export const AuthContext = createContext(null); Components declared in other files can then use the `import` statement to read or provide this context: // Button.jsimport { ThemeContext } from './Contexts.js';function Button() {const theme = useContext(ThemeContext);// ...} // App.jsimport { ThemeContext, AuthContext } from './Contexts.js';function App() {// ...return (<ThemeContext.Provider value={theme}><AuthContext.Provider value={currentUser}><Page /></AuthContext.Provider></ThemeContext.Provider>);} This works similar to importing and exporting components. * * * ## Troubleshooting ### I can’t find a way to change the context value Code like this specifies the _default_ context value: const ThemeContext = createContext('light'); This value never changes. React only uses this value as a fallback if it can’t find a matching provider above. To make context change over time, add state and wrap components in a context provider. --- ## Page: https://react.dev/reference/react/lazy `lazy` lets you defer loading component’s code until it is rendered for the first time. const SomeComponent = lazy(load) * Reference * `lazy(load)` * `load` function * Usage * Lazy-loading components with Suspense * Troubleshooting * My `lazy` component’s state gets reset unexpectedly * * * ## Reference ### `lazy(load)` Call `lazy` outside your components to declare a lazy-loaded React component: import { lazy } from 'react';const MarkdownPreview = lazy(() => import('./MarkdownPreview.js')); See more examples below. #### Parameters * `load`: A function that returns a Promise or another _thenable_ (a Promise-like object with a `then` method). React will not call `load` until the first time you attempt to render the returned component. After React first calls `load`, it will wait for it to resolve, and then render the resolved value’s `.default` as a React component. Both the returned Promise and the Promise’s resolved value will be cached, so React will not call `load` more than once. If the Promise rejects, React will `throw` the rejection reason for the nearest Error Boundary to handle. #### Returns `lazy` returns a React component you can render in your tree. While the code for the lazy component is still loading, attempting to render it will _suspend._ Use `<Suspense>` to display a loading indicator while it’s loading. * * * ### `load` function #### Parameters `load` receives no parameters. #### Returns You need to return a Promise or some other _thenable_ (a Promise-like object with a `then` method). It needs to eventually resolve to an object whose `.default` property is a valid React component type, such as a function, `memo`, or a `forwardRef` component. * * * ## Usage ### Lazy-loading components with Suspense Usually, you import components with the static `import` declaration: import MarkdownPreview from './MarkdownPreview.js'; To defer loading this component’s code until it’s rendered for the first time, replace this import with: import { lazy } from 'react';const MarkdownPreview = lazy(() => import('./MarkdownPreview.js')); This code relies on dynamic `import()`, which might require support from your bundler or framework. Using this pattern requires that the lazy component you’re importing was exported as the `default` export. Now that your component’s code loads on demand, you also need to specify what should be displayed while it is loading. You can do this by wrapping the lazy component or any of its parents into a `<Suspense>` boundary: <Suspense fallback={<Loading />}><h2>Preview</h2><MarkdownPreview /></Suspense> In this example, the code for `MarkdownPreview` won’t be loaded until you attempt to render it. If `MarkdownPreview` hasn’t loaded yet, `Loading` will be shown in its place. Try ticking the checkbox: This demo loads with an artificial delay. The next time you untick and tick the checkbox, `Preview` will be cached, so there will be no loading state. To see the loading state again, click “Reset” on the sandbox. Learn more about managing loading states with Suspense. * * * ## Troubleshooting ### My `lazy` component’s state gets reset unexpectedly Do not declare `lazy` components _inside_ other components: import { lazy } from 'react';function Editor() {// 🔴 Bad: This will cause all state to be reset on re-rendersconst MarkdownPreview = lazy(() => import('./MarkdownPreview.js'));// ...} Instead, always declare them at the top level of your module: import { lazy } from 'react';// ✅ Good: Declare lazy components outside of your componentsconst MarkdownPreview = lazy(() => import('./MarkdownPreview.js'));function Editor() {// ...} --- ## Page: https://react.dev/reference/react/memo `memo` lets you skip re-rendering a component when its props are unchanged. const MemoizedComponent = memo(SomeComponent, arePropsEqual?) * Reference * `memo(Component, arePropsEqual?)` * Usage * Skipping re-rendering when props are unchanged * Updating a memoized component using state * Updating a memoized component using a context * Minimizing props changes * Specifying a custom comparison function * Troubleshooting * My component re-renders when a prop is an object, array, or function * * * ## Reference ### `memo(Component, arePropsEqual?)` Wrap a component in `memo` to get a _memoized_ version of that component. This memoized version of your component will usually not be re-rendered when its parent component is re-rendered as long as its props have not changed. But React may still re-render it: memoization is a performance optimization, not a guarantee. import { memo } from 'react';const SomeComponent = memo(function SomeComponent(props) {// ...}); See more examples below. #### Parameters * `Component`: The component that you want to memoize. The `memo` does not modify this component, but returns a new, memoized component instead. Any valid React component, including functions and `forwardRef` components, is accepted. * **optional** `arePropsEqual`: A function that accepts two arguments: the component’s previous props, and its new props. It should return `true` if the old and new props are equal: that is, if the component will render the same output and behave in the same way with the new props as with the old. Otherwise it should return `false`. Usually, you will not specify this function. By default, React will compare each prop with `Object.is`. #### Returns `memo` returns a new React component. It behaves the same as the component provided to `memo` except that React will not always re-render it when its parent is being re-rendered unless its props have changed. * * * ## Usage ### Skipping re-rendering when props are unchanged React normally re-renders a component whenever its parent re-renders. With `memo`, you can create a component that React will not re-render when its parent re-renders so long as its new props are the same as the old props. Such a component is said to be _memoized_. To memoize a component, wrap it in `memo` and use the value that it returns in place of your original component: const Greeting = memo(function Greeting({ name }) {return <h1>Hello, {name}!</h1>;});export default Greeting; A React component should always have pure rendering logic. This means that it must return the same output if its props, state, and context haven’t changed. By using `memo`, you are telling React that your component complies with this requirement, so React doesn’t need to re-render as long as its props haven’t changed. Even with `memo`, your component will re-render if its own state changes or if a context that it’s using changes. In this example, notice that the `Greeting` component re-renders whenever `name` is changed (because that’s one of its props), but not when `address` is changed (because it’s not passed to `Greeting` as a prop): import { memo, useState } from 'react'; export default function MyApp() { const \[name, setName\] = useState(''); const \[address, setAddress\] = useState(''); return ( <\> <label\> Name{': '} <input value\={name} onChange\={e \=> setName(e.target.value)} /> </label\> <label\> Address{': '} <input value\={address} onChange\={e \=> setAddress(e.target.value)} /> </label\> <Greeting name\={name} /> </\> ); } const Greeting = memo(function Greeting({ name }) { console.log("Greeting was rendered at", new Date().toLocaleTimeString()); return <h3\>Hello{name && ', '}{name}!</h3\>; }); ### Note **You should only rely on `memo` as a performance optimization.** If your code doesn’t work without it, find the underlying problem and fix it first. Then you may add `memo` to improve performance. ##### Deep Dive #### Should you add memo everywhere? If your app is like this site, and most interactions are coarse (like replacing a page or an entire section), memoization is usually unnecessary. On the other hand, if your app is more like a drawing editor, and most interactions are granular (like moving shapes), then you might find memoization very helpful. Optimizing with `memo` is only valuable when your component re-renders often with the same exact props, and its re-rendering logic is expensive. If there is no perceptible lag when your component re-renders, `memo` is unnecessary. Keep in mind that `memo` is completely useless if the props passed to your component are _always different,_ such as if you pass an object or a plain function defined during rendering. This is why you will often need `useMemo` and `useCallback` together with `memo`. There is no benefit to wrapping a component in `memo` in other cases. There is no significant harm to doing that either, so some teams choose to not think about individual cases, and memoize as much as possible. The downside of this approach is that code becomes less readable. Also, not all memoization is effective: a single value that’s “always new” is enough to break memoization for an entire component. **In practice, you can make a lot of memoization unnecessary by following a few principles:** 1. When a component visually wraps other components, let it accept JSX as children. This way, when the wrapper component updates its own state, React knows that its children don’t need to re-render. 2. Prefer local state and don’t lift state up any further than necessary. For example, don’t keep transient state like forms and whether an item is hovered at the top of your tree or in a global state library. 3. Keep your rendering logic pure. If re-rendering a component causes a problem or produces some noticeable visual artifact, it’s a bug in your component! Fix the bug instead of adding memoization. 4. Avoid unnecessary Effects that update state. Most performance problems in React apps are caused by chains of updates originating from Effects that cause your components to render over and over. 5. Try to remove unnecessary dependencies from your Effects. For example, instead of memoization, it’s often simpler to move some object or a function inside an Effect or outside the component. If a specific interaction still feels laggy, use the React Developer Tools profiler to see which components would benefit the most from memoization, and add memoization where needed. These principles make your components easier to debug and understand, so it’s good to follow them in any case. In the long term, we’re researching doing granular memoization automatically to solve this once and for all. * * * ### Updating a memoized component using state Even when a component is memoized, it will still re-render when its own state changes. Memoization only has to do with props that are passed to the component from its parent. import { memo, useState } from 'react'; export default function MyApp() { const \[name, setName\] = useState(''); const \[address, setAddress\] = useState(''); return ( <\> <label\> Name{': '} <input value\={name} onChange\={e \=> setName(e.target.value)} /> </label\> <label\> Address{': '} <input value\={address} onChange\={e \=> setAddress(e.target.value)} /> </label\> <Greeting name\={name} /> </\> ); } const Greeting = memo(function Greeting({ name }) { console.log('Greeting was rendered at', new Date().toLocaleTimeString()); const \[greeting, setGreeting\] = useState('Hello'); return ( <\> <h3\>{greeting}{name && ', '}{name}!</h3\> <GreetingSelector value\={greeting} onChange\={setGreeting} /> </\> ); }); function GreetingSelector({ value, onChange }) { return ( <\> <label\> <input type\="radio" checked\={value === 'Hello'} onChange\={e \=> onChange('Hello')} /> Regular greeting </label\> <label\> <input type\="radio" checked\={value === 'Hello and welcome'} onChange\={e \=> onChange('Hello and welcome')} /> Enthusiastic greeting </label\> </\> ); } If you set a state variable to its current value, React will skip re-rendering your component even without `memo`. You may still see your component function being called an extra time, but the result will be discarded. * * * ### Updating a memoized component using a context Even when a component is memoized, it will still re-render when a context that it’s using changes. Memoization only has to do with props that are passed to the component from its parent. import { createContext, memo, useContext, useState } from 'react'; const ThemeContext = createContext(null); export default function MyApp() { const \[theme, setTheme\] = useState('dark'); function handleClick() { setTheme(theme === 'dark' ? 'light' : 'dark'); } return ( <ThemeContext.Provider value\={theme}\> <button onClick\={handleClick}\> Switch theme </button\> <Greeting name\="Taylor" /> </ThemeContext.Provider\> ); } const Greeting = memo(function Greeting({ name }) { console.log("Greeting was rendered at", new Date().toLocaleTimeString()); const theme = useContext(ThemeContext); return ( <h3 className\={theme}\>Hello, {name}!</h3\> ); }); To make your component re-render only when a _part_ of some context changes, split your component in two. Read what you need from the context in the outer component, and pass it down to a memoized child as a prop. * * * ### Minimizing props changes When you use `memo`, your component re-renders whenever any prop is not _shallowly equal_ to what it was previously. This means that React compares every prop in your component with its previous value using the `Object.is` comparison. Note that `Object.is(3, 3)` is `true`, but `Object.is({}, {})` is `false`. To get the most out of `memo`, minimize the times that the props change. For example, if the prop is an object, prevent the parent component from re-creating that object every time by using `useMemo`: function Page() {const [name, setName] = useState('Taylor');const [age, setAge] = useState(42);const person = useMemo(() => ({ name, age }),[name, age]);return <Profile person={person} />;}const Profile = memo(function Profile({ person }) {// ...}); A better way to minimize props changes is to make sure the component accepts the minimum necessary information in its props. For example, it could accept individual values instead of a whole object: function Page() {const [name, setName] = useState('Taylor');const [age, setAge] = useState(42);return <Profile name={name} age={age} />;}const Profile = memo(function Profile({ name, age }) {// ...}); Even individual values can sometimes be projected to ones that change less frequently. For example, here a component accepts a boolean indicating the presence of a value rather than the value itself: function GroupsLanding({ person }) {const hasGroups = person.groups !== null;return <CallToAction hasGroups={hasGroups} />;}const CallToAction = memo(function CallToAction({ hasGroups }) {// ...}); When you need to pass a function to memoized component, either declare it outside your component so that it never changes, or `useCallback` to cache its definition between re-renders. * * * ### Specifying a custom comparison function In rare cases it may be infeasible to minimize the props changes of a memoized component. In that case, you can provide a custom comparison function, which React will use to compare the old and new props instead of using shallow equality. This function is passed as a second argument to `memo`. It should return `true` only if the new props would result in the same output as the old props; otherwise it should return `false`. const Chart = memo(function Chart({ dataPoints }) {// ...}, arePropsEqual);function arePropsEqual(oldProps, newProps) {return (oldProps.dataPoints.length === newProps.dataPoints.length &&oldProps.dataPoints.every((oldPoint, index) => {const newPoint = newProps.dataPoints[index];return oldPoint.x === newPoint.x && oldPoint.y === newPoint.y;}));} If you do this, use the Performance panel in your browser developer tools to make sure that your comparison function is actually faster than re-rendering the component. You might be surprised. When you do performance measurements, make sure that React is running in the production mode. ### Pitfall If you provide a custom `arePropsEqual` implementation, **you must compare every prop, including functions.** Functions often close over the props and state of parent components. If you return `true` when `oldProps.onClick !== newProps.onClick`, your component will keep “seeing” the props and state from a previous render inside its `onClick` handler, leading to very confusing bugs. Avoid doing deep equality checks inside `arePropsEqual` unless you are 100% sure that the data structure you’re working with has a known limited depth. **Deep equality checks can become incredibly slow** and can freeze your app for many seconds if someone changes the data structure later. * * * ## Troubleshooting ### My component re-renders when a prop is an object, array, or function React compares old and new props by shallow equality: that is, it considers whether each new prop is reference-equal to the old prop. If you create a new object or array each time the parent is re-rendered, even if the individual elements are each the same, React will still consider it to be changed. Similarly, if you create a new function when rendering the parent component, React will consider it to have changed even if the function has the same definition. To avoid this, simplify props or memoize props in the parent component. --- ## Page: https://react.dev/reference/react/startTransition `startTransition` lets you render a part of the UI in the background. startTransition(action) * Reference * `startTransition(action)` * Usage * Marking a state update as a non-blocking Transition * * * ## Reference ### `startTransition(action)` The `startTransition` function lets you mark a state update as a Transition. import { startTransition } from 'react';function TabContainer() {const [tab, setTab] = useState('about');function selectTab(nextTab) {startTransition(() => {setTab(nextTab);});}// ...} See more examples below. #### Parameters * `action`: A function that updates some state by calling one or more `set` functions. React calls `action` immediately with no parameters and marks all state updates scheduled synchronously during the `action` function call as Transitions. Any async calls awaited in the `action` will be included in the transition, but currently require wrapping any `set` functions after the `await` in an additional `startTransition` (see Troubleshooting). State updates marked as Transitions will be non-blocking and will not display unwanted loading indicators.. #### Returns `startTransition` does not return anything. #### Caveats * `startTransition` does not provide a way to track whether a Transition is pending. To show a pending indicator while the Transition is ongoing, you need `useTransition` instead. * You can wrap an update into a Transition only if you have access to the `set` function of that state. If you want to start a Transition in response to some prop or a custom Hook return value, try `useDeferredValue` instead. * The function you pass to `startTransition` is called immediately, marking all state updates that happen while it executes as Transitions. If you try to perform state updates in a `setTimeout`, for example, they won’t be marked as Transitions. * You must wrap any state updates after any async requests in another `startTransition` to mark them as Transitions. This is a known limitation that we will fix in the future (see Troubleshooting). * A state update marked as a Transition will be interrupted by other state updates. For example, if you update a chart component inside a Transition, but then start typing into an input while the chart is in the middle of a re-render, React will restart the rendering work on the chart component after handling the input state update. * Transition updates can’t be used to control text inputs. * If there are multiple ongoing Transitions, React currently batches them together. This is a limitation that may be removed in a future release. * * * ## Usage ### Marking a state update as a non-blocking Transition You can mark a state update as a _Transition_ by wrapping it in a `startTransition` call: import { startTransition } from 'react';function TabContainer() {const [tab, setTab] = useState('about');function selectTab(nextTab) {startTransition(() => {setTab(nextTab);});}// ...} Transitions let you keep the user interface updates responsive even on slow devices. With a Transition, your UI stays responsive in the middle of a re-render. For example, if the user clicks a tab but then change their mind and click another tab, they can do that without waiting for the first re-render to finish. --- ## Page: https://react.dev/reference/react/use `use` is a React API that lets you read the value of a resource like a Promise or context. const value = use(resource); * Reference * `use(resource)` * Usage * Reading context with `use` * Streaming data from the server to the client * Dealing with rejected Promises * Troubleshooting * “Suspense Exception: This is not a real error!” * * * ## Reference ### `use(resource)` Call `use` in your component to read the value of a resource like a Promise or context. import { use } from 'react';function MessageComponent({ messagePromise }) {const message = use(messagePromise);const theme = use(ThemeContext);// ... Unlike React Hooks, `use` can be called within loops and conditional statements like `if`. Like React Hooks, the function that calls `use` must be a Component or Hook. When called with a Promise, the `use` API integrates with `Suspense` and error boundaries. The component calling `use` _suspends_ while the Promise passed to `use` is pending. If the component that calls `use` is wrapped in a Suspense boundary, the fallback will be displayed. Once the Promise is resolved, the Suspense fallback is replaced by the rendered components using the data returned by the `use` API. If the Promise passed to `use` is rejected, the fallback of the nearest Error Boundary will be displayed. See more examples below. #### Parameters * `resource`: this is the source of the data you want to read a value from. A resource can be a Promise or a context. #### Returns The `use` API returns the value that was read from the resource like the resolved value of a Promise or context. #### Caveats * The `use` API must be called inside a Component or a Hook. * When fetching data in a Server Component, prefer `async` and `await` over `use`. `async` and `await` pick up rendering from the point where `await` was invoked, whereas `use` re-renders the component after the data is resolved. * Prefer creating Promises in Server Components and passing them to Client Components over creating Promises in Client Components. Promises created in Client Components are recreated on every render. Promises passed from a Server Component to a Client Component are stable across re-renders. See this example. * * * ## Usage ### Reading context with `use` When a context is passed to `use`, it works similarly to `useContext`. While `useContext` must be called at the top level of your component, `use` can be called inside conditionals like `if` and loops like `for`. `use` is preferred over `useContext` because it is more flexible. import { use } from 'react';function Button() {const theme = use(ThemeContext);// ... `use` returns the context value for the context you passed. To determine the context value, React searches the component tree and finds **the closest context provider above** for that particular context. To pass context to a `Button`, wrap it or one of its parent components into the corresponding context provider. function MyPage() {return (<ThemeContext.Provider value="dark"><Form /></ThemeContext.Provider>);}function Form() {// ... renders buttons inside ...} It doesn’t matter how many layers of components there are between the provider and the `Button`. When a `Button` _anywhere_ inside of `Form` calls `use(ThemeContext)`, it will receive `"dark"` as the value. Unlike `useContext`, `use` can be called in conditionals and loops like `if`. function HorizontalRule({ show }) {if (show) {const theme = use(ThemeContext);return <hr className={theme} />;}return false;} `use` is called from inside a `if` statement, allowing you to conditionally read values from a Context. ### Pitfall Like `useContext`, `use(context)` always looks for the closest context provider _above_ the component that calls it. It searches upwards and **does not** consider context providers in the component from which you’re calling `use(context)`. import { createContext, use } from 'react'; const ThemeContext = createContext(null); export default function MyApp() { return ( <ThemeContext.Provider value\="dark"\> <Form /> </ThemeContext.Provider\> ) } function Form() { return ( <Panel title\="Welcome"\> <Button show\={true}\>Sign up</Button\> <Button show\={false}\>Log in</Button\> </Panel\> ); } function Panel({ title, children }) { const theme = use(ThemeContext); const className = 'panel-' + theme; return ( <section className\={className}\> <h1\>{title}</h1\> {children} </section\> ) } function Button({ show, children }) { if (show) { const theme = use(ThemeContext); const className = 'button-' + theme; return ( <button className\={className}\> {children} </button\> ); } return false } ### Streaming data from the server to the client Data can be streamed from the server to the client by passing a Promise as a prop from a Server Component to a Client Component. import { fetchMessage } from './lib.js';import { Message } from './message.js';export default function App() {const messagePromise = fetchMessage();return (<Suspense fallback={<p>waiting for message...</p>}><Message messagePromise={messagePromise} /></Suspense>);} The Client Component then takes the Promise it received as a prop and passes it to the `use` API. This allows the Client Component to read the value from the Promise that was initially created by the Server Component. // message.js'use client';import { use } from 'react';export function Message({ messagePromise }) {const messageContent = use(messagePromise);return <p>Here is the message: {messageContent}</p>;} Because `Message` is wrapped in `Suspense`, the fallback will be displayed until the Promise is resolved. When the Promise is resolved, the value will be read by the `use` API and the `Message` component will replace the Suspense fallback. "use client"; import { use, Suspense } from "react"; function Message({ messagePromise }) { const messageContent = use(messagePromise); return <p\>Here is the message: {messageContent}</p\>; } export function MessageContainer({ messagePromise }) { return ( <Suspense fallback\={<p\>⌛Downloading message...</p\>}\> <Message messagePromise\={messagePromise} /> </Suspense\> ); } ### Note When passing a Promise from a Server Component to a Client Component, its resolved value must be serializable to pass between server and client. Data types like functions aren’t serializable and cannot be the resolved value of such a Promise. ##### Deep Dive #### Should I resolve a Promise in a Server or Client Component? A Promise can be passed from a Server Component to a Client Component and resolved in the Client Component with the `use` API. You can also resolve the Promise in a Server Component with `await` and pass the required data to the Client Component as a prop. export default async function App() {const messageContent = await fetchMessage();return <Message messageContent={messageContent} />} But using `await` in a Server Component will block its rendering until the `await` statement is finished. Passing a Promise from a Server Component to a Client Component prevents the Promise from blocking the rendering of the Server Component. ### Dealing with rejected Promises In some cases a Promise passed to `use` could be rejected. You can handle rejected Promises by either: 1. Displaying an error to users with an error boundary. 2. Providing an alternative value with `Promise.catch` ### Pitfall `use` cannot be called in a try-catch block. Instead of a try-catch block wrap your component in an Error Boundary, or provide an alternative value to use with the Promise’s `.catch` method. #### Displaying an error to users with an error boundary If you’d like to display an error to your users when a Promise is rejected, you can use an error boundary. To use an error boundary, wrap the component where you are calling the `use` API in an error boundary. If the Promise passed to `use` is rejected the fallback for the error boundary will be displayed. "use client"; import { use, Suspense } from "react"; import { ErrorBoundary } from "react-error-boundary"; export function MessageContainer({ messagePromise }) { return ( <ErrorBoundary fallback\={<p\>⚠️Something went wrong</p\>}\> <Suspense fallback\={<p\>⌛Downloading message...</p\>}\> <Message messagePromise\={messagePromise} /> </Suspense\> </ErrorBoundary\> ); } function Message({ messagePromise }) { const content = use(messagePromise); return <p\>Here is the message: {content}</p\>; } #### Providing an alternative value with `Promise.catch` If you’d like to provide an alternative value when the Promise passed to `use` is rejected you can use the Promise’s `catch` method. import { Message } from './message.js';export default function App() {const messagePromise = new Promise((resolve, reject) => {reject();}).catch(() => {return "no new message found.";});return (<Suspense fallback={<p>waiting for message...</p>}><Message messagePromise={messagePromise} /></Suspense>);} To use the Promise’s `catch` method, call `catch` on the Promise object. `catch` takes a single argument: a function that takes an error message as an argument. Whatever is returned by the function passed to `catch` will be used as the resolved value of the Promise. * * * ## Troubleshooting ### “Suspense Exception: This is not a real error!” You are either calling `use` outside of a React Component or Hook function, or calling `use` in a try–catch block. If you are calling `use` inside a try–catch block, wrap your component in an error boundary, or call the Promise’s `catch` to catch the error and resolve the Promise with another value. See these examples. If you are calling `use` outside a React Component or Hook function, move the `use` call to a React Component or Hook function. function MessageComponent({messagePromise}) {function download() {// ❌ the function calling `use` is not a Component or Hookconst message = use(messagePromise);// ... Instead, call `use` outside any component closures, where the function that calls `use` is a Component or Hook. function MessageComponent({messagePromise}) {// ✅ `use` is being called from a component. const message = use(messagePromise);// ... --- ## Page: https://react.dev/reference/react/experimental_taintObjectReference ### Under Construction **This API is experimental and is not available in a stable version of React yet.** You can try it by upgrading React packages to the most recent experimental version: * `react@experimental` * `react-dom@experimental` * `eslint-plugin-react-hooks@experimental` Experimental versions of React may contain bugs. Don’t use them in production. This API is only available inside React Server Components. `taintObjectReference` lets you prevent a specific object instance from being passed to a Client Component like a `user` object. experimental_taintObjectReference(message, object); To prevent passing a key, hash or token, see `taintUniqueValue`. * Reference * `taintObjectReference(message, object)` * Usage * Prevent user data from unintentionally reaching the client * * * ## Reference ### `taintObjectReference(message, object)` Call `taintObjectReference` with an object to register it with React as something that should not be allowed to be passed to the Client as is: import {experimental_taintObjectReference} from 'react';experimental_taintObjectReference('Do not pass ALL environment variables to the client.',process.env); See more examples below. #### Parameters * `message`: The message you want to display if the object gets passed to a Client Component. This message will be displayed as a part of the Error that will be thrown if the object gets passed to a Client Component. * `object`: The object to be tainted. Functions and class instances can be passed to `taintObjectReference` as `object`. Functions and classes are already blocked from being passed to Client Components but the React’s default error message will be replaced by what you defined in `message`. When a specific instance of a Typed Array is passed to `taintObjectReference` as `object`, any other copies of the Typed Array will not be tainted. #### Returns `experimental_taintObjectReference` returns `undefined`. #### Caveats * Recreating or cloning a tainted object creates a new untainted object which may contain sensitive data. For example, if you have a tainted `user` object, `const userInfo = {name: user.name, ssn: user.ssn}` or `{...user}` will create new objects which are not tainted. `taintObjectReference` only protects against simple mistakes when the object is passed through to a Client Component unchanged. ### Pitfall **Do not rely on just tainting for security.** Tainting an object doesn’t prevent leaking of every possible derived value. For example, the clone of a tainted object will create a new untainted object. Using data from a tainted object (e.g. `{secret: taintedObj.secret}`) will create a new value or object that is not tainted. Tainting is a layer of protection; a secure app will have multiple layers of protection, well designed APIs, and isolation patterns. * * * ## Usage ### Prevent user data from unintentionally reaching the client A Client Component should never accept objects that carry sensitive data. Ideally, the data fetching functions should not expose data that the current user should not have access to. Sometimes mistakes happen during refactoring. To protect against these mistakes happening down the line we can “taint” the user object in our data API. import {experimental_taintObjectReference} from 'react';export async function getUser(id) {const user = await db`SELECT * FROM users WHERE id = ${id}`;experimental_taintObjectReference('Do not pass the entire user object to the client. ' +'Instead, pick off the specific properties you need for this use case.',user,);return user;} Now whenever anyone tries to pass this object to a Client Component, an error will be thrown with the passed in error message instead. ##### Deep Dive #### Protecting against leaks in data fetching If you’re running a Server Components environment that has access to sensitive data, you have to be careful not to pass objects straight through: // api.jsexport async function getUser(id) {const user = await db`SELECT * FROM users WHERE id = ${id}`;return user;} import { getUser } from 'api.js';import { InfoCard } from 'components.js';export async function Profile(props) {const user = await getUser(props.userId);// DO NOT DO THISreturn <InfoCard user={user} />;} // components.js"use client";export async function InfoCard({ user }) {return <div>{user.name}</div>;} Ideally, the `getUser` should not expose data that the current user should not have access to. To prevent passing the `user` object to a Client Component down the line we can “taint” the user object: // api.jsimport {experimental_taintObjectReference} from 'react';export async function getUser(id) {const user = await db`SELECT * FROM users WHERE id = ${id}`;experimental_taintObjectReference('Do not pass the entire user object to the client. ' +'Instead, pick off the specific properties you need for this use case.',user,);return user;} Now if anyone tries to pass the `user` object to a Client Component, an error will be thrown with the passed in error message. --- ## Page: https://react.dev/reference/react/experimental_taintUniqueValue ### Under Construction **This API is experimental and is not available in a stable version of React yet.** You can try it by upgrading React packages to the most recent experimental version: * `react@experimental` * `react-dom@experimental` * `eslint-plugin-react-hooks@experimental` Experimental versions of React may contain bugs. Don’t use them in production. This API is only available inside React Server Components. `taintUniqueValue` lets you prevent unique values from being passed to Client Components like passwords, keys, or tokens. taintUniqueValue(errMessage, lifetime, value) To prevent passing an object containing sensitive data, see `taintObjectReference`. * Reference * `taintUniqueValue(message, lifetime, value)` * Usage * Prevent a token from being passed to Client Components * * * ## Reference ### `taintUniqueValue(message, lifetime, value)` Call `taintUniqueValue` with a password, token, key or hash to register it with React as something that should not be allowed to be passed to the Client as is: import {experimental_taintUniqueValue} from 'react';experimental_taintUniqueValue('Do not pass secret keys to the client.',process,process.env.SECRET_KEY); See more examples below. #### Parameters * `message`: The message you want to display if `value` is passed to a Client Component. This message will be displayed as a part of the Error that will be thrown if `value` is passed to a Client Component. * `lifetime`: Any object that indicates how long `value` should be tainted. `value` will be blocked from being sent to any Client Component while this object still exists. For example, passing `globalThis` blocks the value for the lifetime of an app. `lifetime` is typically an object whose properties contains `value`. * `value`: A string, bigint or TypedArray. `value` must be a unique sequence of characters or bytes with high entropy such as a cryptographic token, private key, hash, or a long password. `value` will be blocked from being sent to any Client Component. #### Returns `experimental_taintUniqueValue` returns `undefined`. #### Caveats * Deriving new values from tainted values can compromise tainting protection. New values created by uppercasing tainted values, concatenating tainted string values into a larger string, converting tainted values to base64, substringing tainted values, and other similar transformations are not tainted unless you explicitly call `taintUniqueValue` on these newly created values. * Do not use `taintUniqueValue` to protect low-entropy values such as PIN codes or phone numbers. If any value in a request is controlled by an attacker, they could infer which value is tainted by enumerating all possible values of the secret. * * * ## Usage ### Prevent a token from being passed to Client Components To ensure that sensitive information such as passwords, session tokens, or other unique values do not inadvertently get passed to Client Components, the `taintUniqueValue` function provides a layer of protection. When a value is tainted, any attempt to pass it to a Client Component will result in an error. The `lifetime` argument defines the duration for which the value remains tainted. For values that should remain tainted indefinitely, objects like `globalThis` or `process` can serve as the `lifetime` argument. These objects have a lifespan that spans the entire duration of your app’s execution. import {experimental_taintUniqueValue} from 'react';experimental_taintUniqueValue('Do not pass a user password to the client.',globalThis,process.env.SECRET_KEY); If the tainted value’s lifespan is tied to a object, the `lifetime` should be the object that encapsulates the value. This ensures the tainted value remains protected for the lifetime of the encapsulating object. import {experimental_taintUniqueValue} from 'react';export async function getUser(id) {const user = await db`SELECT * FROM users WHERE id = ${id}`;experimental_taintUniqueValue('Do not pass a user session token to the client.',user,user.session.token);return user;} In this example, the `user` object serves as the `lifetime` argument. If this object gets stored in a global cache or is accessible by another request, the session token remains tainted. ### Pitfall **Do not rely solely on tainting for security.** Tainting a value doesn’t block every possible derived value. For example, creating a new value by upper casing a tainted string will not taint the new value. import {experimental_taintUniqueValue} from 'react';const password = 'correct horse battery staple';experimental_taintUniqueValue('Do not pass the password to the client.',globalThis,password);const uppercasePassword = password.toUpperCase() // `uppercasePassword` is not tainted In this example, the constant `password` is tainted. Then `password` is used to create a new value `uppercasePassword` by calling the `toUpperCase` method on `password`. The newly created `uppercasePassword` is not tainted. Other similar ways of deriving new values from tainted values like concatenating it into a larger string, converting it to base64, or returning a substring create untained values. Tainting only protects against simple mistakes like explicitly passing secret values to the client. Mistakes in calling the `taintUniqueValue` like using a global store outside of React, without the corresponding lifetime object, can cause the tainted value to become untainted. Tainting is a layer of protection; a secure app will have multiple layers of protection, well designed APIs, and isolation patterns. ##### Deep Dive #### Using `server-only` and `taintUniqueValue` to prevent leaking secrets If you’re running a Server Components environment that has access to private keys or passwords such as database passwords, you have to be careful not to pass that to a Client Component. export async function Dashboard(props) {// DO NOT DO THISreturn <Overview password={process.env.API_PASSWORD} />;} "use client";import {useEffect} from '...'export async function Overview({ password }) {useEffect(() => {const headers = { Authorization: password };fetch(url, { headers }).then(...);}, [password]);...} This example would leak the secret API token to the client. If this API token can be used to access data this particular user shouldn’t have access to, it could lead to a data breach. Ideally, secrets like this are abstracted into a single helper file that can only be imported by trusted data utilities on the server. The helper can even be tagged with `server-only` to ensure that this file isn’t imported on the client. import "server-only";export function fetchAPI(url) {const headers = { Authorization: process.env.API_PASSWORD };return fetch(url, { headers });} Sometimes mistakes happen during refactoring and not all of your colleagues might know about this. To protect against this mistakes happening down the line we can “taint” the actual password: import "server-only";import {experimental_taintUniqueValue} from 'react';experimental_taintUniqueValue('Do not pass the API token password to the client. ' +'Instead do all fetches on the server.'process,process.env.API_PASSWORD); Now whenever anyone tries to pass this password to a Client Component, or send the password to a Client Component with a Server Function, an error will be thrown with message you defined when you called `taintUniqueValue`. * * * --- ## Page: https://react.dev/reference/react-dom/hooks The `react-dom` package contains Hooks that are only supported for web applications (which run in the browser DOM environment). These Hooks are not supported in non-browser environments like iOS, Android, or Windows applications. If you are looking for Hooks that are supported in web browsers _and other environments_ see the React Hooks page. This page lists all the Hooks in the `react-dom` package. * * * ## Form Hooks _Forms_ let you create interactive controls for submitting information. To manage forms in your components, use one of these Hooks: * `useFormStatus` allows you to make updates to the UI based on the status of a form. function Form({ action }) {async function increment(n) {return n + 1;}const [count, incrementFormAction] = useActionState(increment, 0);return (<form action={action}><button formAction={incrementFormAction}>Count: {count}</button><Button /></form>);}function Button() {const { pending } = useFormStatus();return (<button disabled={pending} type="submit"> Submit</button>);} --- ## Page: https://react.dev/reference/react-dom/hooks/useFormStatus `useFormStatus` is a Hook that gives you status information of the last form submission. const { pending, data, method, action } = useFormStatus(); * Reference * `useFormStatus()` * Usage * Display a pending state during form submission * Read the form data being submitted * Troubleshooting * `status.pending` is never `true` * * * ## Reference ### `useFormStatus()` The `useFormStatus` Hook provides status information of the last form submission. import { useFormStatus } from "react-dom";import action from './actions';function Submit() {const status = useFormStatus();return <button disabled={status.pending}>Submit</button>}export default function App() {return (<form action={action}><Submit /></form>);} To get status information, the `Submit` component must be rendered within a `<form>`. The Hook returns information like the `pending` property which tells you if the form is actively submitting. In the above example, `Submit` uses this information to disable `<button>` presses while the form is submitting. See more examples below. #### Parameters `useFormStatus` does not take any parameters. #### Returns A `status` object with the following properties: * `pending`: A boolean. If `true`, this means the parent `<form>` is pending submission. Otherwise, `false`. * `data`: An object implementing the `FormData interface` that contains the data the parent `<form>` is submitting. If there is no active submission or no parent `<form>`, it will be `null`. * `method`: A string value of either `'get'` or `'post'`. This represents whether the parent `<form>` is submitting with either a `GET` or `POST` HTTP method. By default, a `<form>` will use the `GET` method and can be specified by the `method` property. * `action`: A reference to the function passed to the `action` prop on the parent `<form>`. If there is no parent `<form>`, the property is `null`. If there is a URI value provided to the `action` prop, or no `action` prop specified, `status.action` will be `null`. #### Caveats * The `useFormStatus` Hook must be called from a component that is rendered inside a `<form>`. * `useFormStatus` will only return status information for a parent `<form>`. It will not return status information for any `<form>` rendered in that same component or children components. * * * ## Usage ### Display a pending state during form submission To display a pending state while a form is submitting, you can call the `useFormStatus` Hook in a component rendered in a `<form>` and read the `pending` property returned. Here, we use the `pending` property to indicate the form is submitting. import { useFormStatus } from "react-dom"; import { submitForm } from "./actions.js"; function Submit() { const { pending } = useFormStatus(); return ( <button type\="submit" disabled\={pending}\> {pending ? "Submitting..." : "Submit"} </button\> ); } function Form({ action }) { return ( <form action\={action}\> <Submit /> </form\> ); } export default function App() { return <Form action\={submitForm} />; } ### Pitfall ##### `useFormStatus` will not return status information for a `<form>` rendered in the same component. The `useFormStatus` Hook only returns status information for a parent `<form>` and not for any `<form>` rendered in the same component calling the Hook, or child components. function Form() {// 🚩 `pending` will never be true// useFormStatus does not track the form rendered in this componentconst { pending } = useFormStatus();return <form action={submit}></form>;} Instead call `useFormStatus` from inside a component that is located inside `<form>`. function Submit() {// ✅ `pending` will be derived from the form that wraps the Submit componentconst { pending } = useFormStatus(); return <button disabled={pending}>...</button>;}function Form() {// This is the <form> `useFormStatus` tracksreturn (<form action={submit}><Submit /></form>);} ### Read the form data being submitted You can use the `data` property of the status information returned from `useFormStatus` to display what data is being submitted by the user. Here, we have a form where users can request a username. We can use `useFormStatus` to display a temporary status message confirming what username they have requested. import {useState, useMemo, useRef} from 'react'; import {useFormStatus} from 'react-dom'; export default function UsernameForm() { const {pending, data} = useFormStatus(); return ( <div\> <h3\>Request a Username: </h3\> <input type\="text" name\="username" disabled\={pending}/> <button type\="submit" disabled\={pending}\> Submit </button\> <br /> <p\>{data ? \`Requesting ${data?.get("username")}...\`: ''}</p\> </div\> ); } * * * ## Troubleshooting ### `status.pending` is never `true` `useFormStatus` will only return status information for a parent `<form>`. If the component that calls `useFormStatus` is not nested in a `<form>`, `status.pending` will always return `false`. Verify `useFormStatus` is called in a component that is a child of a `<form>` element. `useFormStatus` will not track the status of a `<form>` rendered in the same component. See Pitfall for more details. --- ## Page: https://react.dev/reference/react-dom/components All of the built-in browser components support some props and events. This includes React-specific props like `ref` and `dangerouslySetInnerHTML`. They are special in React because passing the `value` prop to them makes them _controlled._ These built-in browser components let you load external resources or annotate the document with metadata: They are special in React because React can render them into the document head, suspend while resources are loading, and enact other behaviors that are described on the reference page for each specific component. React supports all built-in browser HTML components. This includes: ### Note Similar to the DOM standard, React uses a `camelCase` convention for prop names. For example, you’ll write `tabIndex` instead of `tabindex`. You can convert existing HTML to JSX with an online converter. If you render a tag with a dash, like `<my-element>`, React will assume you want to render a custom HTML element. In React, rendering custom elements works differently from rendering built-in browser tags: If you render a built-in browser HTML element with an `is` attribute, it will also be treated as a custom element. React supports all built-in browser SVG components. This includes: ### Note Similar to the DOM standard, React uses a `camelCase` convention for prop names. For example, you’ll write `tabIndex` instead of `tabindex`. You can convert existing SVG to JSX with an online converter. Namespaced attributes also have to be written without the colon: * `xlink:actuate` becomes `xlinkActuate`. * `xlink:arcrole` becomes `xlinkArcrole`. * `xlink:href` becomes `xlinkHref`. * `xlink:role` becomes `xlinkRole`. * `xlink:show` becomes `xlinkShow`. * `xlink:title` becomes `xlinkTitle`. * `xlink:type` becomes `xlinkType`. * `xml:base` becomes `xmlBase`. * `xml:lang` becomes `xmlLang`. * `xml:space` becomes `xmlSpace`. * `xmlns:xlink` becomes `xmlnsXlink`. --- ## Page: https://react.dev/reference/react-dom/components/common All built-in browser components, such as `<div>`, support some common props and events. * Reference * Common components (e.g. `<div>`) * `ref` callback function * React event object * `AnimationEvent` handler function * `ClipboardEvent` handler function * `CompositionEvent` handler function * `DragEvent` handler function * `FocusEvent` handler function * `Event` handler function * `InputEvent` handler function * `KeyboardEvent` handler function * `MouseEvent` handler function * `PointerEvent` handler function * `TouchEvent` handler function * `TransitionEvent` handler function * `UIEvent` handler function * `WheelEvent` handler function * Usage * Applying CSS styles * Manipulating a DOM node with a ref * Dangerously setting the inner HTML * Handling mouse events * Handling pointer events * Handling focus events * Handling keyboard events * * * ## Reference ### Common components (e.g. `<div>`) <div className="wrapper">Some content</div> See more examples below. #### Props These special React props are supported for all built-in components: * `children`: A React node (an element, a string, a number, a portal, an empty node like `null`, `undefined` and booleans, or an array of other React nodes). Specifies the content inside the component. When you use JSX, you will usually specify the `children` prop implicitly by nesting tags like `<div><span /></div>`. * `dangerouslySetInnerHTML`: An object of the form `{ __html: '<p>some html</p>' }` with a raw HTML string inside. Overrides the `innerHTML` property of the DOM node and displays the passed HTML inside. This should be used with extreme caution! If the HTML inside isn’t trusted (for example, if it’s based on user data), you risk introducing an XSS vulnerability. Read more about using `dangerouslySetInnerHTML`. * `ref`: A ref object from `useRef` or `createRef`, or a `ref` callback function, or a string for legacy refs. Your ref will be filled with the DOM element for this node. Read more about manipulating the DOM with refs. * `suppressContentEditableWarning`: A boolean. If `true`, suppresses the warning that React shows for elements that both have `children` and `contentEditable={true}` (which normally do not work together). Use this if you’re building a text input library that manages the `contentEditable` content manually. * `suppressHydrationWarning`: A boolean. If you use server rendering, normally there is a warning when the server and the client render different content. In some rare cases (like timestamps), it is very hard or impossible to guarantee an exact match. If you set `suppressHydrationWarning` to `true`, React will not warn you about mismatches in the attributes and the content of that element. It only works one level deep, and is intended to be used as an escape hatch. Don’t overuse it. Read about suppressing hydration errors. * `style`: An object with CSS styles, for example `{ fontWeight: 'bold', margin: 20 }`. Similarly to the DOM `style` property, the CSS property names need to be written as `camelCase`, for example `fontWeight` instead of `font-weight`. You can pass strings or numbers as values. If you pass a number, like `width: 100`, React will automatically append `px` (“pixels”) to the value unless it’s a unitless property. We recommend using `style` only for dynamic styles where you don’t know the style values ahead of time. In other cases, applying plain CSS classes with `className` is more efficient. Read more about `className` and `style`. These standard DOM props are also supported for all built-in components: * `accessKey`: A string. Specifies a keyboard shortcut for the element. Not generally recommended. * `aria-*`: ARIA attributes let you specify the accessibility tree information for this element. See ARIA attributes for a complete reference. In React, all ARIA attribute names are exactly the same as in HTML. * `autoCapitalize`: A string. Specifies whether and how the user input should be capitalized. * `className`: A string. Specifies the element’s CSS class name. Read more about applying CSS styles. * `contentEditable`: A boolean. If `true`, the browser lets the user edit the rendered element directly. This is used to implement rich text input libraries like Lexical. React warns if you try to pass React children to an element with `contentEditable={true}` because React will not be able to update its content after user edits. * `data-*`: Data attributes let you attach some string data to the element, for example `data-fruit="banana"`. In React, they are not commonly used because you would usually read data from props or state instead. * `dir`: Either `'ltr'` or `'rtl'`. Specifies the text direction of the element. * `draggable`: A boolean. Specifies whether the element is draggable. Part of HTML Drag and Drop API. * `enterKeyHint`: A string. Specifies which action to present for the enter key on virtual keyboards. * `htmlFor`: A string. For `<label>` and `<output>`, lets you associate the label with some control. Same as `for` HTML attribute. React uses the standard DOM property names (`htmlFor`) instead of HTML attribute names. * `hidden`: A boolean or a string. Specifies whether the element should be hidden. * `id`: A string. Specifies a unique identifier for this element, which can be used to find it later or connect it with other elements. Generate it with `useId` to avoid clashes between multiple instances of the same component. * `is`: A string. If specified, the component will behave like a custom element. * `inputMode`: A string. Specifies what kind of keyboard to display (for example, text, number or telephone). * `itemProp`: A string. Specifies which property the element represents for structured data crawlers. * `lang`: A string. Specifies the language of the element. * `onAnimationEnd`: An `AnimationEvent` handler function. Fires when a CSS animation completes. * `onAnimationEndCapture`: A version of `onAnimationEnd` that fires in the capture phase. * `onAnimationIteration`: An `AnimationEvent` handler function. Fires when an iteration of a CSS animation ends, and another one begins. * `onAnimationIterationCapture`: A version of `onAnimationIteration` that fires in the capture phase. * `onAnimationStart`: An `AnimationEvent` handler function. Fires when a CSS animation starts. * `onAnimationStartCapture`: `onAnimationStart`, but fires in the capture phase. * `onAuxClick`: A `MouseEvent` handler function. Fires when a non-primary pointer button was clicked. * `onAuxClickCapture`: A version of `onAuxClick` that fires in the capture phase. * `onBeforeInput`: An `InputEvent` handler function. Fires before the value of an editable element is modified. React does _not_ yet use the native `beforeinput` event, and instead attempts to polyfill it using other events. * `onBeforeInputCapture`: A version of `onBeforeInput` that fires in the capture phase. * `onBlur`: A `FocusEvent` handler function. Fires when an element lost focus. Unlike the built-in browser `blur` event, in React the `onBlur` event bubbles. * `onBlurCapture`: A version of `onBlur` that fires in the capture phase. * `onClick`: A `MouseEvent` handler function. Fires when the primary button was clicked on the pointing device. * `onClickCapture`: A version of `onClick` that fires in the capture phase. * `onCompositionStart`: A `CompositionEvent` handler function. Fires when an input method editor starts a new composition session. * `onCompositionStartCapture`: A version of `onCompositionStart` that fires in the capture phase. * `onCompositionEnd`: A `CompositionEvent` handler function. Fires when an input method editor completes or cancels a composition session. * `onCompositionEndCapture`: A version of `onCompositionEnd` that fires in the capture phase. * `onCompositionUpdate`: A `CompositionEvent` handler function. Fires when an input method editor receives a new character. * `onCompositionUpdateCapture`: A version of `onCompositionUpdate` that fires in the capture phase. * `onContextMenu`: A `MouseEvent` handler function. Fires when the user tries to open a context menu. * `onContextMenuCapture`: A version of `onContextMenu` that fires in the capture phase. * `onCopy`: A `ClipboardEvent` handler function. Fires when the user tries to copy something into the clipboard. * `onCopyCapture`: A version of `onCopy` that fires in the capture phase. * `onCut`: A `ClipboardEvent` handler function. Fires when the user tries to cut something into the clipboard. * `onCutCapture`: A version of `onCut` that fires in the capture phase. * `onDoubleClick`: A `MouseEvent` handler function. Fires when the user clicks twice. Corresponds to the browser `dblclick` event. * `onDoubleClickCapture`: A version of `onDoubleClick` that fires in the capture phase. * `onDrag`: A `DragEvent` handler function. Fires while the user is dragging something. * `onDragCapture`: A version of `onDrag` that fires in the capture phase. * `onDragEnd`: A `DragEvent` handler function. Fires when the user stops dragging something. * `onDragEndCapture`: A version of `onDragEnd` that fires in the capture phase. * `onDragEnter`: A `DragEvent` handler function. Fires when the dragged content enters a valid drop target. * `onDragEnterCapture`: A version of `onDragEnter` that fires in the capture phase. * `onDragOver`: A `DragEvent` handler function. Fires on a valid drop target while the dragged content is dragged over it. You must call `e.preventDefault()` here to allow dropping. * `onDragOverCapture`: A version of `onDragOver` that fires in the capture phase. * `onDragStart`: A `DragEvent` handler function. Fires when the user starts dragging an element. * `onDragStartCapture`: A version of `onDragStart` that fires in the capture phase. * `onDrop`: A `DragEvent` handler function. Fires when something is dropped on a valid drop target. * `onDropCapture`: A version of `onDrop` that fires in the capture phase. * `onFocus`: A `FocusEvent` handler function. Fires when an element receives focus. Unlike the built-in browser `focus` event, in React the `onFocus` event bubbles. * `onFocusCapture`: A version of `onFocus` that fires in the capture phase. * `onGotPointerCapture`: A `PointerEvent` handler function. Fires when an element programmatically captures a pointer. * `onGotPointerCaptureCapture`: A version of `onGotPointerCapture` that fires in the capture phase. * `onKeyDown`: A `KeyboardEvent` handler function. Fires when a key is pressed. * `onKeyDownCapture`: A version of `onKeyDown` that fires in the capture phase. * `onKeyPress`: A `KeyboardEvent` handler function. Deprecated. Use `onKeyDown` or `onBeforeInput` instead. * `onKeyPressCapture`: A version of `onKeyPress` that fires in the capture phase. * `onKeyUp`: A `KeyboardEvent` handler function. Fires when a key is released. * `onKeyUpCapture`: A version of `onKeyUp` that fires in the capture phase. * `onLostPointerCapture`: A `PointerEvent` handler function. Fires when an element stops capturing a pointer. * `onLostPointerCaptureCapture`: A version of `onLostPointerCapture` that fires in the capture phase. * `onMouseDown`: A `MouseEvent` handler function. Fires when the pointer is pressed down. * `onMouseDownCapture`: A version of `onMouseDown` that fires in the capture phase. * `onMouseEnter`: A `MouseEvent` handler function. Fires when the pointer moves inside an element. Does not have a capture phase. Instead, `onMouseLeave` and `onMouseEnter` propagate from the element being left to the one being entered. * `onMouseLeave`: A `MouseEvent` handler function. Fires when the pointer moves outside an element. Does not have a capture phase. Instead, `onMouseLeave` and `onMouseEnter` propagate from the element being left to the one being entered. * `onMouseMove`: A `MouseEvent` handler function. Fires when the pointer changes coordinates. * `onMouseMoveCapture`: A version of `onMouseMove` that fires in the capture phase. * `onMouseOut`: A `MouseEvent` handler function. Fires when the pointer moves outside an element, or if it moves into a child element. * `onMouseOutCapture`: A version of `onMouseOut` that fires in the capture phase. * `onMouseUp`: A `MouseEvent` handler function. Fires when the pointer is released. * `onMouseUpCapture`: A version of `onMouseUp` that fires in the capture phase. * `onPointerCancel`: A `PointerEvent` handler function. Fires when the browser cancels a pointer interaction. * `onPointerCancelCapture`: A version of `onPointerCancel` that fires in the capture phase. * `onPointerDown`: A `PointerEvent` handler function. Fires when a pointer becomes active. * `onPointerDownCapture`: A version of `onPointerDown` that fires in the capture phase. * `onPointerEnter`: A `PointerEvent` handler function. Fires when a pointer moves inside an element. Does not have a capture phase. Instead, `onPointerLeave` and `onPointerEnter` propagate from the element being left to the one being entered. * `onPointerLeave`: A `PointerEvent` handler function. Fires when a pointer moves outside an element. Does not have a capture phase. Instead, `onPointerLeave` and `onPointerEnter` propagate from the element being left to the one being entered. * `onPointerMove`: A `PointerEvent` handler function. Fires when a pointer changes coordinates. * `onPointerMoveCapture`: A version of `onPointerMove` that fires in the capture phase. * `onPointerOut`: A `PointerEvent` handler function. Fires when a pointer moves outside an element, if the pointer interaction is cancelled, and a few other reasons. * `onPointerOutCapture`: A version of `onPointerOut` that fires in the capture phase. * `onPointerUp`: A `PointerEvent` handler function. Fires when a pointer is no longer active. * `onPointerUpCapture`: A version of `onPointerUp` that fires in the capture phase. * `onPaste`: A `ClipboardEvent` handler function. Fires when the user tries to paste something from the clipboard. * `onPasteCapture`: A version of `onPaste` that fires in the capture phase. * `onScroll`: An `Event` handler function. Fires when an element has been scrolled. This event does not bubble. * `onScrollCapture`: A version of `onScroll` that fires in the capture phase. * `onSelect`: An `Event` handler function. Fires after the selection inside an editable element like an input changes. React extends the `onSelect` event to work for `contentEditable={true}` elements as well. In addition, React extends it to fire for empty selection and on edits (which may affect the selection). * `onSelectCapture`: A version of `onSelect` that fires in the capture phase. * `onTouchCancel`: A `TouchEvent` handler function. Fires when the browser cancels a touch interaction. * `onTouchCancelCapture`: A version of `onTouchCancel` that fires in the capture phase. * `onTouchEnd`: A `TouchEvent` handler function. Fires when one or more touch points are removed. * `onTouchEndCapture`: A version of `onTouchEnd` that fires in the capture phase. * `onTouchMove`: A `TouchEvent` handler function. Fires one or more touch points are moved. * `onTouchMoveCapture`: A version of `onTouchMove` that fires in the capture phase. * `onTouchStart`: A `TouchEvent` handler function. Fires when one or more touch points are placed. * `onTouchStartCapture`: A version of `onTouchStart` that fires in the capture phase. * `onTransitionEnd`: A `TransitionEvent` handler function. Fires when a CSS transition completes. * `onTransitionEndCapture`: A version of `onTransitionEnd` that fires in the capture phase. * `onWheel`: A `WheelEvent` handler function. Fires when the user rotates a wheel button. * `onWheelCapture`: A version of `onWheel` that fires in the capture phase. * `role`: A string. Specifies the element role explicitly for assistive technologies. * `slot`: A string. Specifies the slot name when using shadow DOM. In React, an equivalent pattern is typically achieved by passing JSX as props, for example `<Layout left={<Sidebar />} right={<Content />} />`. * `spellCheck`: A boolean or null. If explicitly set to `true` or `false`, enables or disables spellchecking. * `tabIndex`: A number. Overrides the default Tab button behavior. Avoid using values other than `-1` and `0`. * `title`: A string. Specifies the tooltip text for the element. * `translate`: Either `'yes'` or `'no'`. Passing `'no'` excludes the element content from being translated. You can also pass custom attributes as props, for example `mycustomprop="someValue"`. This can be useful when integrating with third-party libraries. The custom attribute name must be lowercase and must not start with `on`. The value will be converted to a string. If you pass `null` or `undefined`, the custom attribute will be removed. These events fire only for the `<form>` elements: * `onReset`: An `Event` handler function. Fires when a form gets reset. * `onResetCapture`: A version of `onReset` that fires in the capture phase. * `onSubmit`: An `Event` handler function. Fires when a form gets submitted. * `onSubmitCapture`: A version of `onSubmit` that fires in the capture phase. These events fire only for the `<dialog>` elements. Unlike browser events, they bubble in React: * `onCancel`: An `Event` handler function. Fires when the user tries to dismiss the dialog. * `onCancelCapture`: A version of `onCancel` that fires in the capture phase. * `onClose`: An `Event` handler function. Fires when a dialog has been closed. * `onCloseCapture`: A version of `onClose` that fires in the capture phase. These events fire only for the `<details>` elements. Unlike browser events, they bubble in React: * `onToggle`: An `Event` handler function. Fires when the user toggles the details. * `onToggleCapture`: A version of `onToggle` that fires in the capture phase. These events fire for `<img>`, `<iframe>`, `<object>`, `<embed>`, `<link>`, and SVG `<image>` elements. Unlike browser events, they bubble in React: * `onLoad`: An `Event` handler function. Fires when the resource has loaded. * `onLoadCapture`: A version of `onLoad` that fires in the capture phase. * `onError`: An `Event` handler function. Fires when the resource could not be loaded. * `onErrorCapture`: A version of `onError` that fires in the capture phase. These events fire for resources like `<audio>` and `<video>`. Unlike browser events, they bubble in React: * `onAbort`: An `Event` handler function. Fires when the resource has not fully loaded, but not due to an error. * `onAbortCapture`: A version of `onAbort` that fires in the capture phase. * `onCanPlay`: An `Event` handler function. Fires when there’s enough data to start playing, but not enough to play to the end without buffering. * `onCanPlayCapture`: A version of `onCanPlay` that fires in the capture phase. * `onCanPlayThrough`: An `Event` handler function. Fires when there’s enough data that it’s likely possible to start playing without buffering until the end. * `onCanPlayThroughCapture`: A version of `onCanPlayThrough` that fires in the capture phase. * `onDurationChange`: An `Event` handler function. Fires when the media duration has updated. * `onDurationChangeCapture`: A version of `onDurationChange` that fires in the capture phase. * `onEmptied`: An `Event` handler function. Fires when the media has become empty. * `onEmptiedCapture`: A version of `onEmptied` that fires in the capture phase. * `onEncrypted`: An `Event` handler function. Fires when the browser encounters encrypted media. * `onEncryptedCapture`: A version of `onEncrypted` that fires in the capture phase. * `onEnded`: An `Event` handler function. Fires when the playback stops because there’s nothing left to play. * `onEndedCapture`: A version of `onEnded` that fires in the capture phase. * `onError`: An `Event` handler function. Fires when the resource could not be loaded. * `onErrorCapture`: A version of `onError` that fires in the capture phase. * `onLoadedData`: An `Event` handler function. Fires when the current playback frame has loaded. * `onLoadedDataCapture`: A version of `onLoadedData` that fires in the capture phase. * `onLoadedMetadata`: An `Event` handler function. Fires when metadata has loaded. * `onLoadedMetadataCapture`: A version of `onLoadedMetadata` that fires in the capture phase. * `onLoadStart`: An `Event` handler function. Fires when the browser started loading the resource. * `onLoadStartCapture`: A version of `onLoadStart` that fires in the capture phase. * `onPause`: An `Event` handler function. Fires when the media was paused. * `onPauseCapture`: A version of `onPause` that fires in the capture phase. * `onPlay`: An `Event` handler function. Fires when the media is no longer paused. * `onPlayCapture`: A version of `onPlay` that fires in the capture phase. * `onPlaying`: An `Event` handler function. Fires when the media starts or restarts playing. * `onPlayingCapture`: A version of `onPlaying` that fires in the capture phase. * `onProgress`: An `Event` handler function. Fires periodically while the resource is loading. * `onProgressCapture`: A version of `onProgress` that fires in the capture phase. * `onRateChange`: An `Event` handler function. Fires when playback rate changes. * `onRateChangeCapture`: A version of `onRateChange` that fires in the capture phase. * `onResize`: An `Event` handler function. Fires when video changes size. * `onResizeCapture`: A version of `onResize` that fires in the capture phase. * `onSeeked`: An `Event` handler function. Fires when a seek operation completes. * `onSeekedCapture`: A version of `onSeeked` that fires in the capture phase. * `onSeeking`: An `Event` handler function. Fires when a seek operation starts. * `onSeekingCapture`: A version of `onSeeking` that fires in the capture phase. * `onStalled`: An `Event` handler function. Fires when the browser is waiting for data but it keeps not loading. * `onStalledCapture`: A version of `onStalled` that fires in the capture phase. * `onSuspend`: An `Event` handler function. Fires when loading the resource was suspended. * `onSuspendCapture`: A version of `onSuspend` that fires in the capture phase. * `onTimeUpdate`: An `Event` handler function. Fires when the current playback time updates. * `onTimeUpdateCapture`: A version of `onTimeUpdate` that fires in the capture phase. * `onVolumeChange`: An `Event` handler function. Fires when the volume has changed. * `onVolumeChangeCapture`: A version of `onVolumeChange` that fires in the capture phase. * `onWaiting`: An `Event` handler function. Fires when the playback stopped due to temporary lack of data. * `onWaitingCapture`: A version of `onWaiting` that fires in the capture phase. #### Caveats * You cannot pass both `children` and `dangerouslySetInnerHTML` at the same time. * Some events (like `onAbort` and `onLoad`) don’t bubble in the browser, but bubble in React. * * * ### `ref` callback function Instead of a ref object (like the one returned by `useRef`), you may pass a function to the `ref` attribute. <div ref={(node) => {console.log('Attached', node);return () => {console.log('Clean up', node)}}}> See an example of using the `ref` callback. When the `<div>` DOM node is added to the screen, React will call your `ref` callback with the DOM `node` as the argument. When that `<div>` DOM node is removed, React will call your the cleanup function returned from the callback. React will also call your `ref` callback whenever you pass a _different_ `ref` callback. In the above example, `(node) => { ... }` is a different function on every render. When your component re-renders, the _previous_ function will be called with `null` as the argument, and the _next_ function will be called with the DOM node. #### Parameters * `node`: A DOM node. React will pass you the DOM node when the ref gets attached. Unless you pass the same function reference for the `ref` callback on every render, the callback will get temporarily cleanup and re-create during every re-render of the component. ### Note #### React 19 added cleanup functions for `ref` callbacks. To support backwards compatibility, if a cleanup function is not returned from the `ref` callback, `node` will be called with `null` when the `ref` is detached. This behavior will be removed in a future version. #### Returns * **optional** `cleanup function`: When the `ref` is detached, React will call the cleanup function. If a function is not returned by the `ref` callback, React will call the callback again with `null` as the argument when the `ref` gets detached. This behavior will be removed in a future version. #### Caveats * When Strict Mode is on, React will **run one extra development-only setup+cleanup cycle** before the first real setup. This is a stress-test that ensures that your cleanup logic “mirrors” your setup logic and that it stops or undoes whatever the setup is doing. If this causes a problem, implement the cleanup function. * When you pass a _different_ `ref` callback, React will call the _previous_ callback’s cleanup function if provided. If no cleanup function is defined, the `ref` callback will be called with `null` as the argument. The _next_ function will be called with the DOM node. * * * ### React event object Your event handlers will receive a _React event object._ It is also sometimes known as a “synthetic event”. <button onClick={e => {console.log(e); // React event object}} /> It conforms to the same standard as the underlying DOM events, but fixes some browser inconsistencies. Some React events do not map directly to the browser’s native events. For example in `onMouseLeave`, `e.nativeEvent` will point to a `mouseout` event. The specific mapping is not part of the public API and may change in the future. If you need the underlying browser event for some reason, read it from `e.nativeEvent`. #### Properties React event objects implement some of the standard `Event` properties: * `bubbles`: A boolean. Returns whether the event bubbles through the DOM. * `cancelable`: A boolean. Returns whether the event can be canceled. * `currentTarget`: A DOM node. Returns the node to which the current handler is attached in the React tree. * `defaultPrevented`: A boolean. Returns whether `preventDefault` was called. * `eventPhase`: A number. Returns which phase the event is currently in. * `isTrusted`: A boolean. Returns whether the event was initiated by user. * `target`: A DOM node. Returns the node on which the event has occurred (which could be a distant child). * `timeStamp`: A number. Returns the time when the event occurred. Additionally, React event objects provide these properties: * `nativeEvent`: A DOM `Event`. The original browser event object. #### Methods React event objects implement some of the standard `Event` methods: * `preventDefault()`: Prevents the default browser action for the event. * `stopPropagation()`: Stops the event propagation through the React tree. Additionally, React event objects provide these methods: * `isDefaultPrevented()`: Returns a boolean value indicating whether `preventDefault` was called. * `isPropagationStopped()`: Returns a boolean value indicating whether `stopPropagation` was called. * `persist()`: Not used with React DOM. With React Native, call this to read event’s properties after the event. * `isPersistent()`: Not used with React DOM. With React Native, returns whether `persist` has been called. #### Caveats * The values of `currentTarget`, `eventPhase`, `target`, and `type` reflect the values your React code expects. Under the hood, React attaches event handlers at the root, but this is not reflected in React event objects. For example, `e.currentTarget` may not be the same as the underlying `e.nativeEvent.currentTarget`. For polyfilled events, `e.type` (React event type) may differ from `e.nativeEvent.type` (underlying type). * * * ### `AnimationEvent` handler function An event handler type for the CSS animation events. <divonAnimationStart={e => console.log('onAnimationStart')}onAnimationIteration={e => console.log('onAnimationIteration')}onAnimationEnd={e => console.log('onAnimationEnd')}/> #### Parameters * `e`: A React event object with these extra `AnimationEvent` properties: * `animationName` * `elapsedTime` * `pseudoElement` * * * ### `ClipboardEvent` handler function An event handler type for the Clipboard API events. <inputonCopy={e => console.log('onCopy')}onCut={e => console.log('onCut')}onPaste={e => console.log('onPaste')}/> #### Parameters * `e`: A React event object with these extra `ClipboardEvent` properties: * `clipboardData` * * * ### `CompositionEvent` handler function An event handler type for the input method editor (IME) events. <inputonCompositionStart={e => console.log('onCompositionStart')}onCompositionUpdate={e => console.log('onCompositionUpdate')}onCompositionEnd={e => console.log('onCompositionEnd')}/> #### Parameters * `e`: A React event object with these extra `CompositionEvent` properties: * `data` * * * ### `DragEvent` handler function An event handler type for the HTML Drag and Drop API events. <><divdraggable={true}onDragStart={e => console.log('onDragStart')}onDragEnd={e => console.log('onDragEnd')}> Drag source</div><divonDragEnter={e => console.log('onDragEnter')}onDragLeave={e => console.log('onDragLeave')}onDragOver={e => { e.preventDefault(); console.log('onDragOver'); }}onDrop={e => console.log('onDrop')}> Drop target</div></> #### Parameters * `e`: A React event object with these extra `DragEvent` properties: * `dataTransfer` It also includes the inherited `MouseEvent` properties: * `altKey` * `button` * `buttons` * `ctrlKey` * `clientX` * `clientY` * `getModifierState(key)` * `metaKey` * `movementX` * `movementY` * `pageX` * `pageY` * `relatedTarget` * `screenX` * `screenY` * `shiftKey` It also includes the inherited `UIEvent` properties: * `detail` * `view` * * * ### `FocusEvent` handler function An event handler type for the focus events. <inputonFocus={e => console.log('onFocus')}onBlur={e => console.log('onBlur')}/> See an example. #### Parameters * `e`: A React event object with these extra `FocusEvent` properties: * `relatedTarget` It also includes the inherited `UIEvent` properties: * `detail` * `view` * * * ### `Event` handler function An event handler type for generic events. #### Parameters * `e`: A React event object with no additional properties. * * * ### `InputEvent` handler function An event handler type for the `onBeforeInput` event. <input onBeforeInput={e => console.log('onBeforeInput')} /> #### Parameters * `e`: A React event object with these extra `InputEvent` properties: * `data` * * * ### `KeyboardEvent` handler function An event handler type for keyboard events. <inputonKeyDown={e => console.log('onKeyDown')}onKeyUp={e => console.log('onKeyUp')}/> See an example. #### Parameters * `e`: A React event object with these extra `KeyboardEvent` properties: * `altKey` * `charCode` * `code` * `ctrlKey` * `getModifierState(key)` * `key` * `keyCode` * `locale` * `metaKey` * `location` * `repeat` * `shiftKey` * `which` It also includes the inherited `UIEvent` properties: * `detail` * `view` * * * ### `MouseEvent` handler function An event handler type for mouse events. <divonClick={e => console.log('onClick')}onMouseEnter={e => console.log('onMouseEnter')}onMouseOver={e => console.log('onMouseOver')}onMouseDown={e => console.log('onMouseDown')}onMouseUp={e => console.log('onMouseUp')}onMouseLeave={e => console.log('onMouseLeave')}/> See an example. #### Parameters * `e`: A React event object with these extra `MouseEvent` properties: * `altKey` * `button` * `buttons` * `ctrlKey` * `clientX` * `clientY` * `getModifierState(key)` * `metaKey` * `movementX` * `movementY` * `pageX` * `pageY` * `relatedTarget` * `screenX` * `screenY` * `shiftKey` It also includes the inherited `UIEvent` properties: * `detail` * `view` * * * ### `PointerEvent` handler function An event handler type for pointer events. <divonPointerEnter={e => console.log('onPointerEnter')}onPointerMove={e => console.log('onPointerMove')}onPointerDown={e => console.log('onPointerDown')}onPointerUp={e => console.log('onPointerUp')}onPointerLeave={e => console.log('onPointerLeave')}/> See an example. #### Parameters * `e`: A React event object with these extra `PointerEvent` properties: * `height` * `isPrimary` * `pointerId` * `pointerType` * `pressure` * `tangentialPressure` * `tiltX` * `tiltY` * `twist` * `width` It also includes the inherited `MouseEvent` properties: * `altKey` * `button` * `buttons` * `ctrlKey` * `clientX` * `clientY` * `getModifierState(key)` * `metaKey` * `movementX` * `movementY` * `pageX` * `pageY` * `relatedTarget` * `screenX` * `screenY` * `shiftKey` It also includes the inherited `UIEvent` properties: * `detail` * `view` * * * ### `TouchEvent` handler function An event handler type for touch events. <divonTouchStart={e => console.log('onTouchStart')}onTouchMove={e => console.log('onTouchMove')}onTouchEnd={e => console.log('onTouchEnd')}onTouchCancel={e => console.log('onTouchCancel')}/> #### Parameters * `e`: A React event object with these extra `TouchEvent` properties: * `altKey` * `ctrlKey` * `changedTouches` * `getModifierState(key)` * `metaKey` * `shiftKey` * `touches` * `targetTouches` It also includes the inherited `UIEvent` properties: * `detail` * `view` * * * ### `TransitionEvent` handler function An event handler type for the CSS transition events. <divonTransitionEnd={e => console.log('onTransitionEnd')}/> #### Parameters * `e`: A React event object with these extra `TransitionEvent` properties: * `elapsedTime` * `propertyName` * `pseudoElement` * * * ### `UIEvent` handler function An event handler type for generic UI events. <divonScroll={e => console.log('onScroll')}/> #### Parameters * `e`: A React event object with these extra `UIEvent` properties: * `detail` * `view` * * * ### `WheelEvent` handler function An event handler type for the `onWheel` event. <divonWheel={e => console.log('onWheel')}/> #### Parameters * `e`: A React event object with these extra `WheelEvent` properties: * `deltaMode` * `deltaX` * `deltaY` * `deltaZ` It also includes the inherited `MouseEvent` properties: * `altKey` * `button` * `buttons` * `ctrlKey` * `clientX` * `clientY` * `getModifierState(key)` * `metaKey` * `movementX` * `movementY` * `pageX` * `pageY` * `relatedTarget` * `screenX` * `screenY` * `shiftKey` It also includes the inherited `UIEvent` properties: * `detail` * `view` * * * ## Usage ### Applying CSS styles In React, you specify a CSS class with `className`. It works like the `class` attribute in HTML: <img className="avatar" /> Then you write the CSS rules for it in a separate CSS file: /* In your CSS */.avatar {border-radius: 50%;} React does not prescribe how you add CSS files. In the simplest case, you’ll add a `<link>` tag to your HTML. If you use a build tool or a framework, consult its documentation to learn how to add a CSS file to your project. Sometimes, the style values depend on data. Use the `style` attribute to pass some styles dynamically: <imgclassName="avatar"style={{width: user.imageSize,height: user.imageSize}}/> In the above example, `style={{}}` is not a special syntax, but a regular `{}` object inside the `style={ }` JSX curly braces. We recommend only using the `style` attribute when your styles depend on JavaScript variables. ##### Deep Dive #### How to apply multiple CSS classes conditionally? To apply CSS classes conditionally, you need to produce the `className` string yourself using JavaScript. For example, `className={'row ' + (isSelected ? 'selected': '')}` will produce either `className="row"` or `className="row selected"` depending on whether `isSelected` is `true`. To make this more readable, you can use a tiny helper library like `classnames`: import cn from 'classnames';function Row({ isSelected }) {return (<div className={cn('row', isSelected && 'selected')}> ...</div>);} It is especially convenient if you have multiple conditional classes: import cn from 'classnames';function Row({ isSelected, size }) {return (<div className={cn('row', {selected: isSelected,large: size === 'large',small: size === 'small',})}> ...</div>);} * * * ### Manipulating a DOM node with a ref Sometimes, you’ll need to get the browser DOM node associated with a tag in JSX. For example, if you want to focus an `<input>` when a button is clicked, you need to call `focus()` on the browser `<input>` DOM node. To obtain the browser DOM node for a tag, declare a ref and pass it as the `ref` attribute to that tag: import { useRef } from 'react';export default function Form() {const inputRef = useRef(null);// ...return (<input ref={inputRef} />// ... React will put the DOM node into `inputRef.current` after it’s been rendered to the screen. Read more about manipulating DOM with refs and check out more examples. For more advanced use cases, the `ref` attribute also accepts a callback function. * * * ### Dangerously setting the inner HTML You can pass a raw HTML string to an element like so: const markup = { __html: '<p>some raw html</p>' };return <div dangerouslySetInnerHTML={markup} />; **This is dangerous. As with the underlying DOM `innerHTML` property, you must exercise extreme caution! Unless the markup is coming from a completely trusted source, it is trivial to introduce an XSS vulnerability this way.** For example, if you use a Markdown library that converts Markdown to HTML, you trust that its parser doesn’t contain bugs, and the user only sees their own input, you can display the resulting HTML like this: The `{__html}` object should be created as close to where the HTML is generated as possible, like the above example does in the `renderMarkdownToHTML` function. This ensures that all raw HTML being used in your code is explicitly marked as such, and that only variables that you expect to contain HTML are passed to `dangerouslySetInnerHTML`. It is not recommended to create the object inline like `<div dangerouslySetInnerHTML={{__html: markup}} />`. To see why rendering arbitrary HTML is dangerous, replace the code above with this: const post = {// Imagine this content is stored in the database.content: `<img src="" onerror='alert("you were hacked")'>`};export default function MarkdownPreview() {// 🔴 SECURITY HOLE: passing untrusted input to dangerouslySetInnerHTMLconst markup = { __html: post.content };return <div dangerouslySetInnerHTML={markup} />;} The code embedded in the HTML will run. A hacker could use this security hole to steal user information or to perform actions on their behalf. **Only use `dangerouslySetInnerHTML` with trusted and sanitized data.** * * * ### Handling mouse events This example shows some common mouse events and when they fire. * * * ### Handling pointer events This example shows some common pointer events and when they fire. * * * ### Handling focus events In React, focus events bubble. You can use the `currentTarget` and `relatedTarget` to differentiate if the focusing or blurring events originated from outside of the parent element. The example shows how to detect focusing a child, focusing the parent element, and how to detect focus entering or leaving the whole subtree. * * * ### Handling keyboard events This example shows some common keyboard events and when they fire. --- ## Page: https://react.dev/reference/react-dom/components/form The built-in browser `<form>` component lets you create interactive controls for submitting information. <form action={search}><input name="query" /><button type="submit">Search</button></form> * Reference * `<form>` * Usage * Handle form submission on the client * Handle form submission with a Server Function * Display a pending state during form submission * Optimistically updating form data * Handling form submission errors * Display a form submission error without JavaScript * Handling multiple submission types * * * ## Reference ### `<form>` To create interactive controls for submitting information, render the built-in browser `<form>` component. <form action={search}><input name="query" /><button type="submit">Search</button></form> See more examples below. #### Props `<form>` supports all common element props. `action`: a URL or function. When a URL is passed to `action` the form will behave like the HTML form component. When a function is passed to `action` the function will handle the form submission. The function passed to `action` may be async and will be called with a single argument containing the form data of the submitted form. The `action` prop can be overridden by a `formAction` attribute on a `<button>`, `<input type="submit">`, or `<input type="image">` component. #### Caveats * When a function is passed to `action` or `formAction` the HTTP method will be POST regardless of value of the `method` prop. * * * ## Usage ### Handle form submission on the client Pass a function to the `action` prop of form to run the function when the form is submitted. `formData` will be passed to the function as an argument so you can access the data submitted by the form. This differs from the conventional HTML action, which only accepts URLs. After the `action` function succeeds, all uncontrolled field elements in the form are reset. ### Handle form submission with a Server Function Render a `<form>` with an input and submit button. Pass a Server Function (a function marked with `'use server'`) to the `action` prop of form to run the function when the form is submitted. Passing a Server Function to `<form action>` allow users to submit forms without JavaScript enabled or before the code has loaded. This is beneficial to users who have a slow connection, device, or have JavaScript disabled and is similar to the way forms work when a URL is passed to the `action` prop. You can use hidden form fields to provide data to the `<form>`’s action. The Server Function will be called with the hidden form field data as an instance of `FormData`. import { updateCart } from './lib.js';function AddToCart({productId}) {async function addToCart(formData) {'use server'const productId = formData.get('productId')await updateCart(productId)}return (<form action={addToCart}><input type="hidden" name="productId" value={productId} /><button type="submit">Add to Cart</button></form>);} In lieu of using hidden form fields to provide data to the `<form>`’s action, you can call the `bind` method to supply it with extra arguments. This will bind a new argument (`productId`) to the function in addition to the `formData` that is passed as an argument to the function. import { updateCart } from './lib.js';function AddToCart({productId}) {async function addToCart(productId, formData) {"use server";await updateCart(productId)}const addProductToCart = addToCart.bind(null, productId);return (<form action={addProductToCart}><button type="submit">Add to Cart</button></form>);} When `<form>` is rendered by a Server Component, and a Server Function is passed to the `<form>`’s `action` prop, the form is progressively enhanced. ### Display a pending state during form submission To display a pending state when a form is being submitted, you can call the `useFormStatus` Hook in a component rendered in a `<form>` and read the `pending` property returned. Here, we use the `pending` property to indicate the form is submitting. import { useFormStatus } from "react-dom"; import { submitForm } from "./actions.js"; function Submit() { const { pending } = useFormStatus(); return ( <button type\="submit" disabled\={pending}\> {pending ? "Submitting..." : "Submit"} </button\> ); } function Form({ action }) { return ( <form action\={action}\> <Submit /> </form\> ); } export default function App() { return <Form action\={submitForm} />; } To learn more about the `useFormStatus` Hook see the reference documentation. ### Optimistically updating form data The `useOptimistic` Hook provides a way to optimistically update the user interface before a background operation, like a network request, completes. In the context of forms, this technique helps to make apps feel more responsive. When a user submits a form, instead of waiting for the server’s response to reflect the changes, the interface is immediately updated with the expected outcome. For example, when a user types a message into the form and hits the “Send” button, the `useOptimistic` Hook allows the message to immediately appear in the list with a “Sending…” label, even before the message is actually sent to a server. This “optimistic” approach gives the impression of speed and responsiveness. The form then attempts to truly send the message in the background. Once the server confirms the message has been received, the “Sending…” label is removed. import { useOptimistic, useState, useRef } from "react"; import { deliverMessage } from "./actions.js"; function Thread({ messages, sendMessage }) { const formRef = useRef(); async function formAction(formData) { addOptimisticMessage(formData.get("message")); formRef.current.reset(); await sendMessage(formData); } const \[optimisticMessages, addOptimisticMessage\] = useOptimistic( messages, (state, newMessage) \=> \[ ...state, { text: newMessage, sending: true } \] ); return ( <\> {optimisticMessages.map((message, index) \=> ( <div key\={index}\> {message.text} {!!message.sending && <small\> (Sending...)</small\>} </div\> ))} <form action\={formAction} ref\={formRef}\> <input type\="text" name\="message" placeholder\="Hello!" /> <button type\="submit"\>Send</button\> </form\> </\> ); } export default function App() { const \[messages, setMessages\] = useState(\[ { text: "Hello there!", sending: false, key: 1 } \]); async function sendMessage(formData) { const sentMessage = await deliverMessage(formData.get("message")); setMessages((messages) \=> \[...messages, { text: sentMessage }\]); } return <Thread messages\={messages} sendMessage\={sendMessage} />; } ### Handling form submission errors In some cases the function called by a `<form>`’s `action` prop throws an error. You can handle these errors by wrapping `<form>` in an Error Boundary. If the function called by a `<form>`’s `action` prop throws an error, the fallback for the error boundary will be displayed. import { ErrorBoundary } from "react-error-boundary"; export default function Search() { function search() { throw new Error("search error"); } return ( <ErrorBoundary fallback\={<p\>There was an error while submitting the form</p\>} \> <form action\={search}\> <input name\="query" /> <button type\="submit"\>Search</button\> </form\> </ErrorBoundary\> ); } ### Display a form submission error without JavaScript Displaying a form submission error message before the JavaScript bundle loads for progressive enhancement requires that: 1. `<form>` be rendered by a Server Component 2. the function passed to the `<form>`’s `action` prop be a Server Function 3. the `useActionState` Hook be used to display the error message `useActionState` takes two parameters: a Server Function and an initial state. `useActionState` returns two values, a state variable and an action. The action returned by `useActionState` should be passed to the `action` prop of the form. The state variable returned by `useActionState` can be used to display an error message. The value returned by the Server Function passed to `useActionState` will be used to update the state variable. import { useActionState } from "react"; import { signUpNewUser } from "./api"; export default function Page() { async function signup(prevState, formData) { "use server"; const email = formData.get("email"); try { await signUpNewUser(email); alert(\`Added "${email}"\`); } catch (err) { return err.toString(); } } const \[message, signupAction\] = useActionState(signup, null); return ( <\> <h1\>Signup for my newsletter</h1\> <p\>Signup with the same email twice to see an error</p\> <form action\={signupAction} id\="signup-form"\> <label htmlFor\="email"\>Email: </label\> <input name\="email" id\="email" placeholder\="react@example.com" /> <button\>Sign up</button\> {!!message && <p\>{message}</p\>} </form\> </\> ); } Learn more about updating state from a form action with the `useActionState` docs ### Handling multiple submission types Forms can be designed to handle multiple submission actions based on the button pressed by the user. Each button inside a form can be associated with a distinct action or behavior by setting the `formAction` prop. When a user taps a specific button, the form is submitted, and a corresponding action, defined by that button’s attributes and action, is executed. For instance, a form might submit an article for review by default but have a separate button with `formAction` set to save the article as a draft. export default function Search() { function publish(formData) { const content = formData.get("content"); const button = formData.get("button"); alert(\`'${content}' was published with the '${button}' button\`); } function save(formData) { const content = formData.get("content"); alert(\`Your draft of '${content}' has been saved!\`); } return ( <form action\={publish}\> <textarea name\="content" rows\={4} cols\={40} /> <br /> <button type\="submit" name\="button" value\="submit"\>Publish</button\> <button formAction\={save}\>Save draft</button\> </form\> ); } --- ## Page: https://react.dev/reference/react-dom/components/input The built-in browser `<input>` component lets you render different kinds of form inputs. <input /> * Reference * `<input>` * Usage * Displaying inputs of different types * Providing a label for an input * Providing an initial value for an input * Reading the input values when submitting a form * Controlling an input with a state variable * Optimizing re-rendering on every keystroke * Troubleshooting * My text input doesn’t update when I type into it * My checkbox doesn’t update when I click on it * My input caret jumps to the beginning on every keystroke * I’m getting an error: “A component is changing an uncontrolled input to be controlled” * * * ## Reference ### `<input>` To display an input, render the built-in browser `<input>` component. <input name="myInput" /> See more examples below. #### Props `<input>` supports all common element props. * `formAction`: A string or function. Overrides the parent `<form action>` for `type="submit"` and `type="image"`. When a URL is passed to `action` the form will behave like a standard HTML form. When a function is passed to `formAction` the function will handle the form submission. See `<form action>`. You can make an input controlled by passing one of these props: * `checked`: A boolean. For a checkbox input or a radio button, controls whether it is selected. * `value`: A string. For a text input, controls its text. (For a radio button, specifies its form data.) When you pass either of them, you must also pass an `onChange` handler that updates the passed value. These `<input>` props are only relevant for uncontrolled inputs: * `defaultChecked`: A boolean. Specifies the initial value for `type="checkbox"` and `type="radio"` inputs. * `defaultValue`: A string. Specifies the initial value for a text input. These `<input>` props are relevant both for uncontrolled and controlled inputs: * `accept`: A string. Specifies which filetypes are accepted by a `type="file"` input. * `alt`: A string. Specifies the alternative image text for a `type="image"` input. * `capture`: A string. Specifies the media (microphone, video, or camera) captured by a `type="file"` input. * `autoComplete`: A string. Specifies one of the possible autocomplete behaviors. * `autoFocus`: A boolean. If `true`, React will focus the element on mount. * `dirname`: A string. Specifies the form field name for the element’s directionality. * `disabled`: A boolean. If `true`, the input will not be interactive and will appear dimmed. * `children`: `<input>` does not accept children. * `form`: A string. Specifies the `id` of the `<form>` this input belongs to. If omitted, it’s the closest parent form. * `formAction`: A string. Overrides the parent `<form action>` for `type="submit"` and `type="image"`. * `formEnctype`: A string. Overrides the parent `<form enctype>` for `type="submit"` and `type="image"`. * `formMethod`: A string. Overrides the parent `<form method>` for `type="submit"` and `type="image"`. * `formNoValidate`: A string. Overrides the parent `<form noValidate>` for `type="submit"` and `type="image"`. * `formTarget`: A string. Overrides the parent `<form target>` for `type="submit"` and `type="image"`. * `height`: A string. Specifies the image height for `type="image"`. * `list`: A string. Specifies the `id` of the `<datalist>` with the autocomplete options. * `max`: A number. Specifies the maximum value of numerical and datetime inputs. * `maxLength`: A number. Specifies the maximum length of text and other inputs. * `min`: A number. Specifies the minimum value of numerical and datetime inputs. * `minLength`: A number. Specifies the minimum length of text and other inputs. * `multiple`: A boolean. Specifies whether multiple values are allowed for `<type="file"` and `type="email"`. * `name`: A string. Specifies the name for this input that’s submitted with the form. * `onChange`: An `Event` handler function. Required for controlled inputs. Fires immediately when the input’s value is changed by the user (for example, it fires on every keystroke). Behaves like the browser `input` event. * `onChangeCapture`: A version of `onChange` that fires in the capture phase. * `onInput`: An `Event` handler function. Fires immediately when the value is changed by the user. For historical reasons, in React it is idiomatic to use `onChange` instead which works similarly. * `onInputCapture`: A version of `onInput` that fires in the capture phase. * `onInvalid`: An `Event` handler function. Fires if an input fails validation on form submit. Unlike the built-in `invalid` event, the React `onInvalid` event bubbles. * `onInvalidCapture`: A version of `onInvalid` that fires in the capture phase. * `onSelect`: An `Event` handler function. Fires after the selection inside the `<input>` changes. React extends the `onSelect` event to also fire for empty selection and on edits (which may affect the selection). * `onSelectCapture`: A version of `onSelect` that fires in the capture phase. * `pattern`: A string. Specifies the pattern that the `value` must match. * `placeholder`: A string. Displayed in a dimmed color when the input value is empty. * `readOnly`: A boolean. If `true`, the input is not editable by the user. * `required`: A boolean. If `true`, the value must be provided for the form to submit. * `size`: A number. Similar to setting width, but the unit depends on the control. * `src`: A string. Specifies the image source for a `type="image"` input. * `step`: A positive number or an `'any'` string. Specifies the distance between valid values. * `type`: A string. One of the input types. * `width`: A string. Specifies the image width for a `type="image"` input. #### Caveats * Checkboxes need `checked` (or `defaultChecked`), not `value` (or `defaultValue`). * If a text input receives a string `value` prop, it will be treated as controlled. * If a checkbox or a radio button receives a boolean `checked` prop, it will be treated as controlled. * An input can’t be both controlled and uncontrolled at the same time. * An input cannot switch between being controlled or uncontrolled over its lifetime. * Every controlled input needs an `onChange` event handler that synchronously updates its backing value. * * * ## Usage ### Displaying inputs of different types To display an input, render an `<input>` component. By default, it will be a text input. You can pass `type="checkbox"` for a checkbox, `type="radio"` for a radio button, or one of the other input types. * * * ### Providing a label for an input Typically, you will place every `<input>` inside a `<label>` tag. This tells the browser that this label is associated with that input. When the user clicks the label, the browser will automatically focus the input. It’s also essential for accessibility: a screen reader will announce the label caption when the user focuses the associated input. If you can’t nest `<input>` into a `<label>`, associate them by passing the same ID to `<input id>` and `<label htmlFor>`. To avoid conflicts between multiple instances of one component, generate such an ID with `useId`. * * * ### Providing an initial value for an input You can optionally specify the initial value for any input. Pass it as the `defaultValue` string for text inputs. Checkboxes and radio buttons should specify the initial value with the `defaultChecked` boolean instead. * * * ### Reading the input values when submitting a form Add a `<form>` around your inputs with a `<button type="submit">` inside. It will call your `<form onSubmit>` event handler. By default, the browser will send the form data to the current URL and refresh the page. You can override that behavior by calling `e.preventDefault()`. Read the form data with `new FormData(e.target)`. ### Note Give a `name` to every `<input>`, for example `<input name="firstName" defaultValue="Taylor" />`. The `name` you specified will be used as a key in the form data, for example `{ firstName: "Taylor" }`. ### Pitfall By default, a `<button>` inside a `<form>` without a `type` attribute will submit it. This can be surprising! If you have your own custom `Button` React component, consider using `<button type="button">` instead of `<button>` (with no type). Then, to be explicit, use `<button type="submit">` for buttons that _are_ supposed to submit the form. * * * ### Controlling an input with a state variable An input like `<input />` is _uncontrolled._ Even if you pass an initial value like `<input defaultValue="Initial text" />`, your JSX only specifies the initial value. It does not control what the value should be right now. **To render a _controlled_ input, pass the `value` prop to it (or `checked` for checkboxes and radios).** React will force the input to always have the `value` you passed. Usually, you would do this by declaring a state variable: function Form() {const [firstName, setFirstName] = useState(''); // Declare a state variable...// ...return (<inputvalue={firstName} // ...force the input's value to match the state variable...onChange={e => setFirstName(e.target.value)} // ... and update the state variable on any edits!/>);} A controlled input makes sense if you needed state anyway—for example, to re-render your UI on every edit: function Form() {const [firstName, setFirstName] = useState('');return (<><label> First name:<input value={firstName} onChange={e => setFirstName(e.target.value)} /></label>{firstName !== '' && <p>Your name is {firstName}.</p>} ... It’s also useful if you want to offer multiple ways to adjust the input state (for example, by clicking a button): function Form() {// ...const [age, setAge] = useState('');const ageAsNumber = Number(age);return (<><label> Age:<inputvalue={age}onChange={e => setAge(e.target.value)}type="number"/><button onClick={() => setAge(ageAsNumber + 10)}> Add 10 years</button> The `value` you pass to controlled components should not be `undefined` or `null`. If you need the initial value to be empty (such as with the `firstName` field below), initialize your state variable to an empty string (`''`). ### Pitfall **If you pass `value` without `onChange`, it will be impossible to type into the input.** When you control an input by passing some `value` to it, you _force_ it to always have the value you passed. So if you pass a state variable as a `value` but forget to update that state variable synchronously during the `onChange` event handler, React will revert the input after every keystroke back to the `value` that you specified. * * * ### Optimizing re-rendering on every keystroke When you use a controlled input, you set the state on every keystroke. If the component containing your state re-renders a large tree, this can get slow. There’s a few ways you can optimize re-rendering performance. For example, suppose you start with a form that re-renders all page content on every keystroke: function App() {const [firstName, setFirstName] = useState('');return (<><form><input value={firstName} onChange={e => setFirstName(e.target.value)} /></form><PageContent /></>);} Since `<PageContent />` doesn’t rely on the input state, you can move the input state into its own component: function App() {return (<><SignupForm /><PageContent /></>);}function SignupForm() {const [firstName, setFirstName] = useState('');return (<form><input value={firstName} onChange={e => setFirstName(e.target.value)} /></form>);} This significantly improves performance because now only `SignupForm` re-renders on every keystroke. If there is no way to avoid re-rendering (for example, if `PageContent` depends on the search input’s value), `useDeferredValue` lets you keep the controlled input responsive even in the middle of a large re-render. * * * ## Troubleshooting ### My text input doesn’t update when I type into it If you render an input with `value` but no `onChange`, you will see an error in the console: // 🔴 Bug: controlled text input with no onChange handler<input value={something} /> Console You provided a `value` prop to a form field without an `onChange` handler. This will render a read-only field. If the field should be mutable use `defaultValue`. Otherwise, set either `onChange` or `readOnly`. As the error message suggests, if you only wanted to specify the _initial_ value, pass `defaultValue` instead: // ✅ Good: uncontrolled input with an initial value<input defaultValue={something} /> If you want to control this input with a state variable, specify an `onChange` handler: // ✅ Good: controlled input with onChange<input value={something} onChange={e => setSomething(e.target.value)} /> If the value is intentionally read-only, add a `readOnly` prop to suppress the error: // ✅ Good: readonly controlled input without on change<input value={something} readOnly={true} /> * * * ### My checkbox doesn’t update when I click on it If you render a checkbox with `checked` but no `onChange`, you will see an error in the console: // 🔴 Bug: controlled checkbox with no onChange handler<input type="checkbox" checked={something} /> Console You provided a `checked` prop to a form field without an `onChange` handler. This will render a read-only field. If the field should be mutable use `defaultChecked`. Otherwise, set either `onChange` or `readOnly`. As the error message suggests, if you only wanted to specify the _initial_ value, pass `defaultChecked` instead: // ✅ Good: uncontrolled checkbox with an initial value<input type="checkbox" defaultChecked={something} /> If you want to control this checkbox with a state variable, specify an `onChange` handler: // ✅ Good: controlled checkbox with onChange<input type="checkbox" checked={something} onChange={e => setSomething(e.target.checked)} /> ### Pitfall You need to read `e.target.checked` rather than `e.target.value` for checkboxes. If the checkbox is intentionally read-only, add a `readOnly` prop to suppress the error: // ✅ Good: readonly controlled input without on change<input type="checkbox" checked={something} readOnly={true} /> * * * ### My input caret jumps to the beginning on every keystroke If you control an input, you must update its state variable to the input’s value from the DOM during `onChange`. You can’t update it to something other than `e.target.value` (or `e.target.checked` for checkboxes): function handleChange(e) {// 🔴 Bug: updating an input to something other than e.target.valuesetFirstName(e.target.value.toUpperCase());} You also can’t update it asynchronously: function handleChange(e) {// 🔴 Bug: updating an input asynchronouslysetTimeout(() => {setFirstName(e.target.value);}, 100);} To fix your code, update it synchronously to `e.target.value`: function handleChange(e) {// ✅ Updating a controlled input to e.target.value synchronouslysetFirstName(e.target.value);} If this doesn’t fix the problem, it’s possible that the input gets removed and re-added from the DOM on every keystroke. This can happen if you’re accidentally resetting state on every re-render, for example if the input or one of its parents always receives a different `key` attribute, or if you nest component function definitions (which is not supported and causes the “inner” component to always be considered a different tree). * * * ### I’m getting an error: “A component is changing an uncontrolled input to be controlled” If you provide a `value` to the component, it must remain a string throughout its lifetime. You cannot pass `value={undefined}` first and later pass `value="some string"` because React won’t know whether you want the component to be uncontrolled or controlled. A controlled component should always receive a string `value`, not `null` or `undefined`. If your `value` is coming from an API or a state variable, it might be initialized to `null` or `undefined`. In that case, either set it to an empty string (`''`) initially, or pass `value={someValue ?? ''}` to ensure `value` is a string. Similarly, if you pass `checked` to a checkbox, ensure it’s always a boolean. --- ## Page: https://react.dev/reference/react-dom/components/option The built-in browser `<option>` component lets you render an option inside a `<select>` box. <select><option value="someOption">Some option</option><option value="otherOption">Other option</option></select> * Reference * `<option>` * Usage * Displaying a select box with options * * * ## Reference ### `<option>` The built-in browser `<option>` component lets you render an option inside a `<select>` box. <select><option value="someOption">Some option</option><option value="otherOption">Other option</option></select> See more examples below. #### Props `<option>` supports all common element props. Additionally, `<option>` supports these props: * `disabled`: A boolean. If `true`, the option will not be selectable and will appear dimmed. * `label`: A string. Specifies the meaning of the option. If not specified, the text inside the option is used. * `value`: The value to be used when submitting the parent `<select>` in a form if this option is selected. #### Caveats * React does not support the `selected` attribute on `<option>`. Instead, pass this option’s `value` to the parent `<select defaultValue>` for an uncontrolled select box, or `<select value>` for a controlled select. * * * ## Usage ### Displaying a select box with options Render a `<select>` with a list of `<option>` components inside to display a select box. Give each `<option>` a `value` representing the data to be submitted with the form. Read more about displaying a `<select>` with a list of `<option>` components. --- ## Page: https://react.dev/reference/react-dom/components/progress The built-in browser `<progress>` component lets you render a progress indicator. <progress value={0.5} /> * Reference * `<progress>` * Usage * Controlling a progress indicator * * * ## Reference ### `<progress>` To display a progress indicator, render the built-in browser `<progress>` component. <progress value={0.5} /> See more examples below. #### Props `<progress>` supports all common element props. Additionally, `<progress>` supports these props: * `max`: A number. Specifies the maximum `value`. Defaults to `1`. * `value`: A number between `0` and `max`, or `null` for indeterminate progress. Specifies how much was done. * * * ## Usage ### Controlling a progress indicator To display a progress indicator, render a `<progress>` component. You can pass a number `value` between `0` and the `max` value you specify. If you don’t pass a `max` value, it will assumed to be `1` by default. If the operation is not ongoing, pass `value={null}` to put the progress indicator into an indeterminate state. --- ## Page: https://react.dev/reference/react-dom/components/select The built-in browser `<select>` component lets you render a select box with options. <select><option value="someOption">Some option</option><option value="otherOption">Other option</option></select> * Reference * `<select>` * Usage * Displaying a select box with options * Providing a label for a select box * Providing an initially selected option * Enabling multiple selection * Reading the select box value when submitting a form * Controlling a select box with a state variable * * * ## Reference ### `<select>` To display a select box, render the built-in browser `<select>` component. <select><option value="someOption">Some option</option><option value="otherOption">Other option</option></select> See more examples below. #### Props `<select>` supports all common element props. You can make a select box controlled by passing a `value` prop: * `value`: A string (or an array of strings for `multiple={true}`). Controls which option is selected. Every value string match the `value` of some `<option>` nested inside the `<select>`. When you pass `value`, you must also pass an `onChange` handler that updates the passed value. If your `<select>` is uncontrolled, you may pass the `defaultValue` prop instead: * `defaultValue`: A string (or an array of strings for `multiple={true}`). Specifies the initially selected option. These `<select>` props are relevant both for uncontrolled and controlled select boxes: * `autoComplete`: A string. Specifies one of the possible autocomplete behaviors. * `autoFocus`: A boolean. If `true`, React will focus the element on mount. * `children`: `<select>` accepts `<option>`, `<optgroup>`, and `<datalist>` components as children. You can also pass your own components as long as they eventually render one of the allowed components. If you pass your own components that eventually render `<option>` tags, each `<option>` you render must have a `value`. * `disabled`: A boolean. If `true`, the select box will not be interactive and will appear dimmed. * `form`: A string. Specifies the `id` of the `<form>` this select box belongs to. If omitted, it’s the closest parent form. * `multiple`: A boolean. If `true`, the browser allows multiple selection. * `name`: A string. Specifies the name for this select box that’s submitted with the form. * `onChange`: An `Event` handler function. Required for controlled select boxes. Fires immediately when the user picks a different option. Behaves like the browser `input` event. * `onChangeCapture`: A version of `onChange` that fires in the capture phase. * `onInput`: An `Event` handler function. Fires immediately when the value is changed by the user. For historical reasons, in React it is idiomatic to use `onChange` instead which works similarly. * `onInputCapture`: A version of `onInput` that fires in the capture phase. * `onInvalid`: An `Event` handler function. Fires if an input fails validation on form submit. Unlike the built-in `invalid` event, the React `onInvalid` event bubbles. * `onInvalidCapture`: A version of `onInvalid` that fires in the capture phase. * `required`: A boolean. If `true`, the value must be provided for the form to submit. * `size`: A number. For `multiple={true}` selects, specifies the preferred number of initially visible items. #### Caveats * Unlike in HTML, passing a `selected` attribute to `<option>` is not supported. Instead, use `<select defaultValue>` for uncontrolled select boxes and `<select value>` for controlled select boxes. * If a select box receives a `value` prop, it will be treated as controlled. * A select box can’t be both controlled and uncontrolled at the same time. * A select box cannot switch between being controlled or uncontrolled over its lifetime. * Every controlled select box needs an `onChange` event handler that synchronously updates its backing value. * * * ## Usage ### Displaying a select box with options Render a `<select>` with a list of `<option>` components inside to display a select box. Give each `<option>` a `value` representing the data to be submitted with the form. * * * ### Providing a label for a select box Typically, you will place every `<select>` inside a `<label>` tag. This tells the browser that this label is associated with that select box. When the user clicks the label, the browser will automatically focus the select box. It’s also essential for accessibility: a screen reader will announce the label caption when the user focuses the select box. If you can’t nest `<select>` into a `<label>`, associate them by passing the same ID to `<select id>` and `<label htmlFor>`. To avoid conflicts between multiple instances of one component, generate such an ID with `useId`. import { useId } from 'react'; export default function Form() { const vegetableSelectId = useId(); return ( <\> <label\> Pick a fruit: <select name\="selectedFruit"\> <option value\="apple"\>Apple</option\> <option value\="banana"\>Banana</option\> <option value\="orange"\>Orange</option\> </select\> </label\> <hr /> <label htmlFor\={vegetableSelectId}\> Pick a vegetable: </label\> <select id\={vegetableSelectId} name\="selectedVegetable"\> <option value\="cucumber"\>Cucumber</option\> <option value\="corn"\>Corn</option\> <option value\="tomato"\>Tomato</option\> </select\> </\> ); } * * * ### Providing an initially selected option By default, the browser will select the first `<option>` in the list. To select a different option by default, pass that `<option>`’s `value` as the `defaultValue` to the `<select>` element. ### Pitfall Unlike in HTML, passing a `selected` attribute to an individual `<option>` is not supported. * * * ### Enabling multiple selection Pass `multiple={true}` to the `<select>` to let the user select multiple options. In that case, if you also specify `defaultValue` to choose the initially selected options, it must be an array. export default function FruitPicker() { return ( <label\> Pick some fruits: <select name\="selectedFruit" defaultValue\={\['orange', 'banana'\]} multiple\={true} \> <option value\="apple"\>Apple</option\> <option value\="banana"\>Banana</option\> <option value\="orange"\>Orange</option\> </select\> </label\> ); } * * * ### Reading the select box value when submitting a form Add a `<form>` around your select box with a `<button type="submit">` inside. It will call your `<form onSubmit>` event handler. By default, the browser will send the form data to the current URL and refresh the page. You can override that behavior by calling `e.preventDefault()`. Read the form data with `new FormData(e.target)`. export default function EditPost() { function handleSubmit(e) { e.preventDefault(); const form = e.target; const formData = new FormData(form); fetch('/some-api', { method: form.method, body: formData }); console.log(new URLSearchParams(formData).toString()); const formJson = Object.fromEntries(formData.entries()); console.log(formJson); console.log(\[...formData.entries()\]); } return ( <form method\="post" onSubmit\={handleSubmit}\> <label\> Pick your favorite fruit: <select name\="selectedFruit" defaultValue\="orange"\> <option value\="apple"\>Apple</option\> <option value\="banana"\>Banana</option\> <option value\="orange"\>Orange</option\> </select\> </label\> <label\> Pick all your favorite vegetables: <select name\="selectedVegetables" multiple\={true} defaultValue\={\['corn', 'tomato'\]} \> <option value\="cucumber"\>Cucumber</option\> <option value\="corn"\>Corn</option\> <option value\="tomato"\>Tomato</option\> </select\> </label\> <hr /> <button type\="reset"\>Reset</button\> <button type\="submit"\>Submit</button\> </form\> ); } ### Note Give a `name` to your `<select>`, for example `<select name="selectedFruit" />`. The `name` you specified will be used as a key in the form data, for example `{ selectedFruit: "orange" }`. If you use `<select multiple={true}>`, the `FormData` you’ll read from the form will include each selected value as a separate name-value pair. Look closely at the console logs in the example above. ### Pitfall By default, _any_ `<button>` inside a `<form>` will submit it. This can be surprising! If you have your own custom `Button` React component, consider returning `<button type="button">` instead of `<button>`. Then, to be explicit, use `<button type="submit">` for buttons that _are_ supposed to submit the form. * * * ### Controlling a select box with a state variable A select box like `<select />` is _uncontrolled._ Even if you pass an initially selected value like `<select defaultValue="orange" />`, your JSX only specifies the initial value, not the value right now. **To render a _controlled_ select box, pass the `value` prop to it.** React will force the select box to always have the `value` you passed. Typically, you will control a select box by declaring a state variable: function FruitPicker() {const [selectedFruit, setSelectedFruit] = useState('orange'); // Declare a state variable...// ...return (<selectvalue={selectedFruit} // ...force the select's value to match the state variable...onChange={e => setSelectedFruit(e.target.value)} // ... and update the state variable on any change!><option value="apple">Apple</option><option value="banana">Banana</option><option value="orange">Orange</option></select>);} This is useful if you want to re-render some part of the UI in response to every selection. import { useState } from 'react'; export default function FruitPicker() { const \[selectedFruit, setSelectedFruit\] = useState('orange'); const \[selectedVegs, setSelectedVegs\] = useState(\['corn', 'tomato'\]); return ( <\> <label\> Pick a fruit: <select value\={selectedFruit} onChange\={e \=> setSelectedFruit(e.target.value)} \> <option value\="apple"\>Apple</option\> <option value\="banana"\>Banana</option\> <option value\="orange"\>Orange</option\> </select\> </label\> <hr /> <label\> Pick all your favorite vegetables: <select multiple\={true} value\={selectedVegs} onChange\={e \=> { const options = \[...e.target.selectedOptions\]; const values = options.map(option \=> option.value); setSelectedVegs(values); }} \> <option value\="cucumber"\>Cucumber</option\> <option value\="corn"\>Corn</option\> <option value\="tomato"\>Tomato</option\> </select\> </label\> <hr /> <p\>Your favorite fruit: {selectedFruit}</p\> <p\>Your favorite vegetables: {selectedVegs.join(', ')}</p\> </\> ); } ### Pitfall **If you pass `value` without `onChange`, it will be impossible to select an option.** When you control a select box by passing some `value` to it, you _force_ it to always have the value you passed. So if you pass a state variable as a `value` but forget to update that state variable synchronously during the `onChange` event handler, React will revert the select box after every keystroke back to the `value` that you specified. Unlike in HTML, passing a `selected` attribute to an individual `<option>` is not supported. --- ## Page: https://react.dev/reference/react-dom/components/textarea The built-in browser `<textarea>` component lets you render a multiline text input. <textarea /> * Reference * `<textarea>` * Usage * Displaying a text area * Providing a label for a text area * Providing an initial value for a text area * Reading the text area value when submitting a form * Controlling a text area with a state variable * Troubleshooting * My text area doesn’t update when I type into it * My text area caret jumps to the beginning on every keystroke * I’m getting an error: “A component is changing an uncontrolled input to be controlled” * * * ## Reference ### `<textarea>` To display a text area, render the built-in browser `<textarea>` component. <textarea name="postContent" /> See more examples below. #### Props `<textarea>` supports all common element props. You can make a text area controlled by passing a `value` prop: * `value`: A string. Controls the text inside the text area. When you pass `value`, you must also pass an `onChange` handler that updates the passed value. If your `<textarea>` is uncontrolled, you may pass the `defaultValue` prop instead: * `defaultValue`: A string. Specifies the initial value for a text area. These `<textarea>` props are relevant both for uncontrolled and controlled text areas: * `autoComplete`: Either `'on'` or `'off'`. Specifies the autocomplete behavior. * `autoFocus`: A boolean. If `true`, React will focus the element on mount. * `children`: `<textarea>` does not accept children. To set the initial value, use `defaultValue`. * `cols`: A number. Specifies the default width in average character widths. Defaults to `20`. * `disabled`: A boolean. If `true`, the input will not be interactive and will appear dimmed. * `form`: A string. Specifies the `id` of the `<form>` this input belongs to. If omitted, it’s the closest parent form. * `maxLength`: A number. Specifies the maximum length of text. * `minLength`: A number. Specifies the minimum length of text. * `name`: A string. Specifies the name for this input that’s submitted with the form. * `onChange`: An `Event` handler function. Required for controlled text areas. Fires immediately when the input’s value is changed by the user (for example, it fires on every keystroke). Behaves like the browser `input` event. * `onChangeCapture`: A version of `onChange` that fires in the capture phase. * `onInput`: An `Event` handler function. Fires immediately when the value is changed by the user. For historical reasons, in React it is idiomatic to use `onChange` instead which works similarly. * `onInputCapture`: A version of `onInput` that fires in the capture phase. * `onInvalid`: An `Event` handler function. Fires if an input fails validation on form submit. Unlike the built-in `invalid` event, the React `onInvalid` event bubbles. * `onInvalidCapture`: A version of `onInvalid` that fires in the capture phase. * `onSelect`: An `Event` handler function. Fires after the selection inside the `<textarea>` changes. React extends the `onSelect` event to also fire for empty selection and on edits (which may affect the selection). * `onSelectCapture`: A version of `onSelect` that fires in the capture phase. * `placeholder`: A string. Displayed in a dimmed color when the text area value is empty. * `readOnly`: A boolean. If `true`, the text area is not editable by the user. * `required`: A boolean. If `true`, the value must be provided for the form to submit. * `rows`: A number. Specifies the default height in average character heights. Defaults to `2`. * `wrap`: Either `'hard'`, `'soft'`, or `'off'`. Specifies how the text should be wrapped when submitting a form. #### Caveats * Passing children like `<textarea>something</textarea>` is not allowed. Use `defaultValue` for initial content. * If a text area receives a string `value` prop, it will be treated as controlled. * A text area can’t be both controlled and uncontrolled at the same time. * A text area cannot switch between being controlled or uncontrolled over its lifetime. * Every controlled text area needs an `onChange` event handler that synchronously updates its backing value. * * * ## Usage ### Displaying a text area Render `<textarea>` to display a text area. You can specify its default size with the `rows` and `cols` attributes, but by default the user will be able to resize it. To disable resizing, you can specify `resize: none` in the CSS. * * * ### Providing a label for a text area Typically, you will place every `<textarea>` inside a `<label>` tag. This tells the browser that this label is associated with that text area. When the user clicks the label, the browser will focus the text area. It’s also essential for accessibility: a screen reader will announce the label caption when the user focuses the text area. If you can’t nest `<textarea>` into a `<label>`, associate them by passing the same ID to `<textarea id>` and `<label htmlFor>`. To avoid conflicts between instances of one component, generate such an ID with `useId`. import { useId } from 'react'; export default function Form() { const postTextAreaId = useId(); return ( <\> <label htmlFor\={postTextAreaId}\> Write your post: </label\> <textarea id\={postTextAreaId} name\="postContent" rows\={4} cols\={40} /> </\> ); } * * * ### Providing an initial value for a text area You can optionally specify the initial value for the text area. Pass it as the `defaultValue` string. ### Pitfall Unlike in HTML, passing initial text like `<textarea>Some content</textarea>` is not supported. * * * ### Reading the text area value when submitting a form Add a `<form>` around your textarea with a `<button type="submit">` inside. It will call your `<form onSubmit>` event handler. By default, the browser will send the form data to the current URL and refresh the page. You can override that behavior by calling `e.preventDefault()`. Read the form data with `new FormData(e.target)`. export default function EditPost() { function handleSubmit(e) { e.preventDefault(); const form = e.target; const formData = new FormData(form); fetch('/some-api', { method: form.method, body: formData }); const formJson = Object.fromEntries(formData.entries()); console.log(formJson); } return ( <form method\="post" onSubmit\={handleSubmit}\> <label\> Post title: <input name\="postTitle" defaultValue\="Biking" /> </label\> <label\> Edit your post: <textarea name\="postContent" defaultValue\="I really enjoyed biking yesterday!" rows\={4} cols\={40} /> </label\> <hr /> <button type\="reset"\>Reset edits</button\> <button type\="submit"\>Save post</button\> </form\> ); } ### Note Give a `name` to your `<textarea>`, for example `<textarea name="postContent" />`. The `name` you specified will be used as a key in the form data, for example `{ postContent: "Your post" }`. ### Pitfall By default, _any_ `<button>` inside a `<form>` will submit it. This can be surprising! If you have your own custom `Button` React component, consider returning `<button type="button">` instead of `<button>`. Then, to be explicit, use `<button type="submit">` for buttons that _are_ supposed to submit the form. * * * ### Controlling a text area with a state variable A text area like `<textarea />` is _uncontrolled._ Even if you pass an initial value like `<textarea defaultValue="Initial text" />`, your JSX only specifies the initial value, not the value right now. **To render a _controlled_ text area, pass the `value` prop to it.** React will force the text area to always have the `value` you passed. Typically, you will control a text area by declaring a state variable: function NewPost() {const [postContent, setPostContent] = useState(''); // Declare a state variable...// ...return (<textareavalue={postContent} // ...force the input's value to match the state variable...onChange={e => setPostContent(e.target.value)} // ... and update the state variable on any edits!/>);} This is useful if you want to re-render some part of the UI in response to every keystroke. ### Pitfall **If you pass `value` without `onChange`, it will be impossible to type into the text area.** When you control a text area by passing some `value` to it, you _force_ it to always have the value you passed. So if you pass a state variable as a `value` but forget to update that state variable synchronously during the `onChange` event handler, React will revert the text area after every keystroke back to the `value` that you specified. * * * ## Troubleshooting ### My text area doesn’t update when I type into it If you render a text area with `value` but no `onChange`, you will see an error in the console: // 🔴 Bug: controlled text area with no onChange handler<textarea value={something} /> Console You provided a `value` prop to a form field without an `onChange` handler. This will render a read-only field. If the field should be mutable use `defaultValue`. Otherwise, set either `onChange` or `readOnly`. As the error message suggests, if you only wanted to specify the _initial_ value, pass `defaultValue` instead: // ✅ Good: uncontrolled text area with an initial value<textarea defaultValue={something} /> If you want to control this text area with a state variable, specify an `onChange` handler: // ✅ Good: controlled text area with onChange<textarea value={something} onChange={e => setSomething(e.target.value)} /> If the value is intentionally read-only, add a `readOnly` prop to suppress the error: // ✅ Good: readonly controlled text area without on change<textarea value={something} readOnly={true} /> * * * ### My text area caret jumps to the beginning on every keystroke If you control a text area, you must update its state variable to the text area’s value from the DOM during `onChange`. You can’t update it to something other than `e.target.value`: function handleChange(e) {// 🔴 Bug: updating an input to something other than e.target.valuesetFirstName(e.target.value.toUpperCase());} You also can’t update it asynchronously: function handleChange(e) {// 🔴 Bug: updating an input asynchronouslysetTimeout(() => {setFirstName(e.target.value);}, 100);} To fix your code, update it synchronously to `e.target.value`: function handleChange(e) {// ✅ Updating a controlled input to e.target.value synchronouslysetFirstName(e.target.value);} If this doesn’t fix the problem, it’s possible that the text area gets removed and re-added from the DOM on every keystroke. This can happen if you’re accidentally resetting state on every re-render. For example, this can happen if the text area or one of its parents always receives a different `key` attribute, or if you nest component definitions (which is not allowed in React and causes the “inner” component to remount on every render). * * * ### I’m getting an error: “A component is changing an uncontrolled input to be controlled” If you provide a `value` to the component, it must remain a string throughout its lifetime. You cannot pass `value={undefined}` first and later pass `value="some string"` because React won’t know whether you want the component to be uncontrolled or controlled. A controlled component should always receive a string `value`, not `null` or `undefined`. If your `value` is coming from an API or a state variable, it might be initialized to `null` or `undefined`. In that case, either set it to an empty string (`''`) initially, or pass `value={someValue ?? ''}` to ensure `value` is a string. --- ## Page: https://react.dev/reference/react-dom/components/link The built-in browser `<link>` component lets you use external resources such as stylesheets or annotate the document with link metadata. <link rel="icon" href="favicon.ico" /> * Reference * `<link>` * Usage * Linking to related resources * Linking to a stylesheet * Controlling stylesheet precedence * Deduplicated stylesheet rendering * Annotating specific items within the document with links * * * ## Reference ### `<link>` To link to external resources such as stylesheets, fonts, and icons, or to annotate the document with link metadata, render the built-in browser `<link>` component. You can render `<link>` from any component and React will in most cases place the corresponding DOM element in the document head. <link rel="icon" href="favicon.ico" /> See more examples below. #### Props `<link>` supports all common element props. * `rel`: a string, required. Specifies the relationship to the resource. React treats links with `rel="stylesheet"` differently from other links. These props apply when `rel="stylesheet"`: * `precedence`: a string. Tells React where to rank the `<link>` DOM node relative to others in the document `<head>`, which determines which stylesheet can override the other. React will infer that precedence values it discovers first are “lower” and precedence values it discovers later are “higher”. Many style systems can work fine using a single precedence value because style rules are atomic. Stylesheets with the same precedence go together whether they are `<link>` or inline `<style>` tags or loaded using `preinit` functions. * `media`: a string. Restricts the stylesheet to a certain media query. * `title`: a string. Specifies the name of an alternative stylesheet. These props apply when `rel="stylesheet"` but disable React’s special treatment of stylesheets: * `disabled`: a boolean. Disables the stylesheet. * `onError`: a function. Called when the stylesheet fails to load. * `onLoad`: a function. Called when the stylesheet finishes being loaded. These props apply when `rel="preload"` or `rel="modulepreload"`: * `as`: a string. The type of resource. Its possible values are `audio`, `document`, `embed`, `fetch`, `font`, `image`, `object`, `script`, `style`, `track`, `video`, `worker`. * `imageSrcSet`: a string. Applicable only when `as="image"`. Specifies the source set of the image. * `imageSizes`: a string. Applicable only when `as="image"`. Specifies the sizes of the image. These props apply when `rel="icon"` or `rel="apple-touch-icon"`: * `sizes`: a string. The sizes of the icon. These props apply in all cases: * `href`: a string. The URL of the linked resource. * `crossOrigin`: a string. The CORS policy to use. Its possible values are `anonymous` and `use-credentials`. It is required when `as` is set to `"fetch"`. * `referrerPolicy`: a string. The Referrer header to send when fetching. Its possible values are `no-referrer-when-downgrade` (the default), `no-referrer`, `origin`, `origin-when-cross-origin`, and `unsafe-url`. * `fetchPriority`: a string. Suggests a relative priority for fetching the resource. The possible values are `auto` (the default), `high`, and `low`. * `hrefLang`: a string. The language of the linked resource. * `integrity`: a string. A cryptographic hash of the resource, to verify its authenticity. * `type`: a string. The MIME type of the linked resource. Props that are **not recommended** for use with React: * `blocking`: a string. If set to `"render"`, instructs the browser not to render the page until the stylesheet is loaded. React provides more fine-grained control using Suspense. #### Special rendering behavior React will always place the DOM element corresponding to the `<link>` component within the document’s `<head>`, regardless of where in the React tree it is rendered. The `<head>` is the only valid place for `<link>` to exist within the DOM, yet it’s convenient and keeps things composable if a component representing a specific page can render `<link>` components itself. There are a few exceptions to this: * If the `<link>` has a `rel="stylesheet"` prop, then it has to also have a `precedence` prop to get this special behavior. This is because the order of stylesheets within the document is significant, so React needs to know how to order this stylesheet relative to others, which you specify using the `precedence` prop. If the `precedence` prop is omitted, there is no special behavior. * If the `<link>` has an `itemProp` prop, there is no special behavior, because in this case it doesn’t apply to the document but instead represents metadata about a specific part of the page. * If the `<link>` has an `onLoad` or `onError` prop, because in that case you are managing the loading of the linked resource manually within your React component. #### Special behavior for stylesheets In addition, if the `<link>` is to a stylesheet (namely, it has `rel="stylesheet"` in its props), React treats it specially in the following ways: * The component that renders `<link>` will suspend while the stylesheet is loading. * If multiple components render links to the same stylesheet, React will de-duplicate them and only put a single link into the DOM. Two links are considered the same if they have the same `href` prop. There are two exception to this special behavior: * If the link doesn’t have a `precedence` prop, there is no special behavior, because the order of stylesheets within the document is significant, so React needs to know how to order this stylesheet relative to others, which you specify using the `precedence` prop. * If you supply any of the `onLoad`, `onError`, or `disabled` props, there is no special behavior, because these props indicate that you are managing the loading of the stylesheet manually within your component. This special treatment comes with two caveats: * React will ignore changes to props after the link has been rendered. (React will issue a warning in development if this happens.) * React may leave the link in the DOM even after the component that rendered it has been unmounted. * * * ## Usage You can annotate the document with links to related resources such as an icon, canonical URL, or pingback. React will place this metadata within the document `<head>` regardless of where in the React tree it is rendered. ### Linking to a stylesheet If a component depends on a certain stylesheet in order to be displayed correctly, you can render a link to that stylesheet within the component. Your component will suspend while the stylesheet is loading. You must supply the `precedence` prop, which tells React where to place this stylesheet relative to others — stylesheets with higher precedence can override those with lower precedence. ### Note When you want to use a stylesheet, it can be beneficial to call the preinit function. Calling this function may allow the browser to start fetching the stylesheet earlier than if you just render a `<link>` component, for example by sending an HTTP Early Hints response. ### Controlling stylesheet precedence Stylesheets can conflict with each other, and when they do, the browser goes with the one that comes later in the document. React lets you control the order of stylesheets with the `precedence` prop. In this example, three components render stylesheets, and the ones with the same precedence are grouped together in the `<head>`. import ShowRenderedHTML from './ShowRenderedHTML.js'; export default function HomePage() { return ( <ShowRenderedHTML\> <FirstComponent /> <SecondComponent /> <ThirdComponent/> ... </ShowRenderedHTML\> ); } function FirstComponent() { return <link rel\="stylesheet" href\="first.css" precedence\="first" />; } function SecondComponent() { return <link rel\="stylesheet" href\="second.css" precedence\="second" />; } function ThirdComponent() { return <link rel\="stylesheet" href\="third.css" precedence\="first" />; } Note the `precedence` values themselves are arbitrary and their naming is up to you. React will infer that precedence values it discovers first are “lower” and precedence values it discovers later are “higher”. ### Deduplicated stylesheet rendering If you render the same stylesheet from multiple components, React will place only a single `<link>` in the document head. ### Annotating specific items within the document with links You can use the `<link>` component with the `itemProp` prop to annotate specific items within the document with links to related resources. In this case, React will _not_ place these annotations within the document `<head>` but will place them like any other React component. <section itemScope><h3>Annotating specific items</h3><link itemProp="author" href="http://example.com/" /><p>...</p></section> --- ## Page: https://react.dev/reference/react-dom/components/meta The built-in browser `<meta>` component lets you add metadata to the document. <meta name="keywords" content="React, JavaScript, semantic markup, html" /> * Reference * `<meta>` * Usage * Annotating the document with metadata * Annotating specific items within the document with metadata * * * ## Reference ### `<meta>` To add document metadata, render the built-in browser `<meta>` component. You can render `<meta>` from any component and React will always place the corresponding DOM element in the document head. <meta name="keywords" content="React, JavaScript, semantic markup, html" /> See more examples below. #### Props `<meta>` supports all common element props. It should have _exactly one_ of the following props: `name`, `httpEquiv`, `charset`, `itemProp`. The `<meta>` component does something different depending on which of these props is specified. * `name`: a string. Specifies the kind of metadata to be attached to the document. * `charset`: a string. Specifies the character set used by the document. The only valid value is `"utf-8"`. * `httpEquiv`: a string. Specifies a directive for processing the document. * `itemProp`: a string. Specifies metadata about a particular item within the document rather than the document as a whole. * `content`: a string. Specifies the metadata to be attached when used with the `name` or `itemProp` props or the behavior of the directive when used with the `httpEquiv` prop. #### Special rendering behavior React will always place the DOM element corresponding to the `<meta>` component within the document’s `<head>`, regardless of where in the React tree it is rendered. The `<head>` is the only valid place for `<meta>` to exist within the DOM, yet it’s convenient and keeps things composable if a component representing a specific page can render `<meta>` components itself. There is one exception to this: if `<meta>` has an `itemProp` prop, there is no special behavior, because in this case it doesn’t represent metadata about the document but rather metadata about a specific part of the page. * * * ## Usage ### Annotating the document with metadata You can annotate the document with metadata such as keywords, a summary, or the author’s name. React will place this metadata within the document `<head>` regardless of where in the React tree it is rendered. <meta name="author" content="John Smith" /><meta name="keywords" content="React, JavaScript, semantic markup, html" /><meta name="description" content="API reference for the <meta> component in React DOM" /> You can render the `<meta>` component from any component. React will put a `<meta>` DOM node in the document `<head>`. ### Annotating specific items within the document with metadata You can use the `<meta>` component with the `itemProp` prop to annotate specific items within the document with metadata. In this case, React will _not_ place these annotations within the document `<head>` but will place them like any other React component. <section itemScope><h3>Annotating specific items</h3><meta itemProp="description" content="API reference for using <meta> with itemProp" /><p>...</p></section> --- ## Page: https://react.dev/reference/react-dom/components/script The built-in browser `<script>` component lets you add a script to your document. <script> alert("hi!") </script> * Reference * `<script>` * Usage * Rendering an external script * Rendering an inline script * * * ## Reference ### `<script>` To add inline or external scripts to your document, render the built-in browser `<script>` component. You can render `<script>` from any component and React will in certain cases place the corresponding DOM element in the document head and de-duplicate identical scripts. <script> alert("hi!") </script><script src="script.js" /> See more examples below. #### Props `<script>` supports all common element props. It should have _either_ `children` or a `src` prop. * `children`: a string. The source code of an inline script. * `src`: a string. The URL of an external script. Other supported props: * `async`: a boolean. Allows the browser to defer execution of the script until the rest of the document has been processed — the preferred behavior for performance. * `crossOrigin`: a string. The CORS policy to use. Its possible values are `anonymous` and `use-credentials`. * `fetchPriority`: a string. Lets the browser rank scripts in priority when fetching multiple scripts at the same time. Can be `"high"`, `"low"`, or `"auto"` (the default). * `integrity`: a string. A cryptographic hash of the script, to verify its authenticity. * `noModule`: a boolean. Disables the script in browsers that support ES modules — allowing for a fallback script for browsers that do not. * `nonce`: a string. A cryptographic nonce to allow the resource when using a strict Content Security Policy. * `referrer`: a string. Says what Referer header to send when fetching the script and any resources that the script fetches in turn. * `type`: a string. Says whether the script is a classic script, ES module, or import map. Props that disable React’s special treatment of scripts: * `onError`: a function. Called when the script fails to load. * `onLoad`: a function. Called when the script finishes being loaded. Props that are **not recommended** for use with React: * `blocking`: a string. If set to `"render"`, instructs the browser not to render the page until the scriptsheet is loaded. React provides more fine-grained control using Suspense. * `defer`: a string. Prevents the browser from executing the script until the document is done loading. Not compatible with streaming server-rendered components. Use the `async` prop instead. #### Special rendering behavior React can move `<script>` components to the document’s `<head>` and de-duplicate identical scripts. To opt into this behavior, provide the `src` and `async={true}` props. React will de-duplicate scripts if they have the same `src`. The `async` prop must be true to allow scripts to be safely moved. This special treatment comes with two caveats: * React will ignore changes to props after the script has been rendered. (React will issue a warning in development if this happens.) * React may leave the script in the DOM even after the component that rendered it has been unmounted. (This has no effect as scripts just execute once when they are inserted into the DOM.) * * * ## Usage ### Rendering an external script If a component depends on certain scripts in order to be displayed correctly, you can render a `<script>` within the component. However, the component might be committed before the script has finished loading. You can start depending on the script content once the `load` event is fired e.g. by using the `onLoad` prop. React will de-duplicate scripts that have the same `src`, inserting only one of them into the DOM even if multiple components render it. import ShowRenderedHTML from './ShowRenderedHTML.js'; function Map({lat, long}) { return ( <\> <script async src\="map-api.js" onLoad\={() \=> console.log('script loaded')} /> <div id\="map" data-lat\={lat} data-long\={long} /> </\> ); } export default function Page() { return ( <ShowRenderedHTML\> <Map /> </ShowRenderedHTML\> ); } ### Note When you want to use a script, it can be beneficial to call the preinit function. Calling this function may allow the browser to start fetching the script earlier than if you just render a `<script>` component, for example by sending an HTTP Early Hints response. ### Rendering an inline script To include an inline script, render the `<script>` component with the script source code as its children. Inline scripts are not de-duplicated or moved to the document `<head>`. import ShowRenderedHTML from './ShowRenderedHTML.js'; function Tracking() { return ( <script\> ga('send', 'pageview'); </script\> ); } export default function Page() { return ( <ShowRenderedHTML\> <h1\>My Website</h1\> <Tracking /> <p\>Welcome</p\> </ShowRenderedHTML\> ); } --- ## Page: https://react.dev/reference/react-dom/components/style The built-in browser `<style>` component lets you add inline CSS stylesheets to your document. <style>{` p { color: red; } `}</style> * Reference * `<style>` * Usage * Rendering an inline CSS stylesheet * * * ## Reference ### `<style>` To add inline styles to your document, render the built-in browser `<style>` component. You can render `<style>` from any component and React will in certain cases place the corresponding DOM element in the document head and de-duplicate identical styles. <style>{` p { color: red; } `}</style> See more examples below. #### Props `<style>` supports all common element props. * `children`: a string, required. The contents of the stylesheet. * `precedence`: a string. Tells React where to rank the `<style>` DOM node relative to others in the document `<head>`, which determines which stylesheet can override the other. React will infer that precedence values it discovers first are “lower” and precedence values it discovers later are “higher”. Many style systems can work fine using a single precedence value because style rules are atomic. Stylesheets with the same precedence go together whether they are `<link>` or inline `<style>` tags or loaded using `preinit` functions. * `href`: a string. Allows React to de-duplicate styles that have the same `href`. * `media`: a string. Restricts the stylesheet to a certain media query. * `nonce`: a string. A cryptographic nonce to allow the resource when using a strict Content Security Policy. * `title`: a string. Specifies the name of an alternative stylesheet. Props that are **not recommended** for use with React: * `blocking`: a string. If set to `"render"`, instructs the browser not to render the page until the stylesheet is loaded. React provides more fine-grained control using Suspense. #### Special rendering behavior React can move `<style>` components to the document’s `<head>`, de-duplicate identical stylesheets, and suspend while the stylesheet is loading. To opt into this behavior, provide the `href` and `precedence` props. React will de-duplicate styles if they have the same `href`. The precedence prop tells React where to rank the `<style>` DOM node relative to others in the document `<head>`, which determines which stylesheet can override the other. This special treatment comes with two caveats: * React will ignore changes to props after the style has been rendered. (React will issue a warning in development if this happens.) * React will drop all extraneous props when using the `precedence` prop (beyond `href` and `precedence`). * React may leave the style in the DOM even after the component that rendered it has been unmounted. * * * ## Usage ### Rendering an inline CSS stylesheet If a component depends on certain CSS styles in order to be displayed correctly, you can render an inline stylesheet within the component. The `href` prop should uniquely identify the stylesheet, because React will de-duplicate stylesheets that have the same `href`. If you supply a `precedence` prop, React will reorder inline stylesheets based on the order these values appear in the component tree. Inline stylesheets will not trigger Suspense boundaries while they’re loading. Even if they load async resources like fonts or images. import ShowRenderedHTML from './ShowRenderedHTML.js'; import { useId } from 'react'; function PieChart({data, colors}) { const id = useId(); const stylesheet = colors.map((color, index) \=> \`#${id} .color-${index}: \\{ color: "${color}"; \\}\` ).join(); return ( <\> <style href\={"PieChart-" + JSON.stringify(colors)} precedence\="medium"\> {stylesheet} </style\> <svg id\={id}\> … </svg\> </\> ); } export default function App() { return ( <ShowRenderedHTML\> <PieChart data\="..." colors\={\['red', 'green', 'blue'\]} /> </ShowRenderedHTML\> ); } --- ## Page: https://react.dev/reference/react-dom/components/title The built-in browser `<title>` component lets you specify the title of the document. <title>My Blog</title> * Reference * `<title>` * Usage * Set the document title * Use variables in the title * * * ## Reference ### `<title>` To specify the title of the document, render the built-in browser `<title>` component. You can render `<title>` from any component and React will always place the corresponding DOM element in the document head. <title>My Blog</title> See more examples below. #### Props `<title>` supports all common element props. * `children`: `<title>` accepts only text as a child. This text will become the title of the document. You can also pass your own components as long as they only render text. #### Special rendering behavior React will always place the DOM element corresponding to the `<title>` component within the document’s `<head>`, regardless of where in the React tree it is rendered. The `<head>` is the only valid place for `<title>` to exist within the DOM, yet it’s convenient and keeps things composable if a component representing a specific page can render its `<title>` itself. There are two exception to this: * If `<title>` is within an `<svg>` component, then there is no special behavior, because in this context it doesn’t represent the document’s title but rather is an accessibility annotation for that SVG graphic. * If the `<title>` has an `itemProp` prop, there is no special behavior, because in this case it doesn’t represent the document’s title but rather metadata about a specific part of the page. ### Pitfall Only render a single `<title>` at a time. If more than one component renders a `<title>` tag at the same time, React will place all of those titles in the document head. When this happens, the behavior of browsers and search engines is undefined. * * * ## Usage ### Set the document title Render the `<title>` component from any component with text as its children. React will put a `<title>` DOM node in the document `<head>`. ### Use variables in the title The children of the `<title>` component must be a single string of text. (Or a single number or a single object with a `toString` method.) It might not be obvious, but using JSX curly braces like this: <title>Results page {pageNumber}</title> // 🔴 Problem: This is not a single string … actually causes the `<title>` component to get a two-element array as its children (the string `"Results page"` and the value of `pageNumber`). This will cause an error. Instead, use string interpolation to pass `<title>` a single string: <title>{`Results page ${pageNumber}`}</title> --- ## Page: https://react.dev/reference/react-dom The `react-dom` package contains methods that are only supported for the web applications (which run in the browser DOM environment). They are not supported for React Native. * * * ## APIs These APIs can be imported from your components. They are rarely used: * `createPortal` lets you render child components in a different part of the DOM tree. * `flushSync` lets you force React to flush a state update and update the DOM synchronously. ## Resource Preloading APIs These APIs can be used to make apps faster by pre-loading resources such as scripts, stylesheets, and fonts as soon as you know you need them, for example before navigating to another page where the resources will be used. React-based frameworks frequently handle resource loading for you, so you might not have to call these APIs yourself. Consult your framework’s documentation for details. * `prefetchDNS` lets you prefetch the IP address of a DNS domain name that you expect to connect to. * `preconnect` lets you connect to a server you expect to request resources from, even if you don’t know what resources you’ll need yet. * `preload` lets you fetch a stylesheet, font, image, or external script that you expect to use. * `preloadModule` lets you fetch an ESM module that you expect to use. * `preinit` lets you fetch and evaluate an external script or fetch and insert a stylesheet. * `preinitModule` lets you fetch and evaluate an ESM module. * * * ## Entry points The `react-dom` package provides two additional entry points: * `react-dom/client` contains APIs to render React components on the client (in the browser). * `react-dom/server` contains APIs to render React components on the server. * * * ## Removed APIs These APIs were removed in React 19: * `findDOMNode`: see alternatives. * `hydrate`: use `hydrateRoot` instead. * `render`: use `createRoot` instead. * `unmountComponentAtNode`: use `root.unmount()` instead. * `renderToNodeStream`: use `react-dom/server` APIs instead. * `renderToStaticNodeStream`: use `react-dom/server` APIs instead. --- ## Page: https://react.dev/reference/react-dom/createPortal `createPortal` lets you render some children into a different part of the DOM. <div><SomeComponent />{createPortal(children, domNode, key?)}</div> * Reference * `createPortal(children, domNode, key?)` * Usage * Rendering to a different part of the DOM * Rendering a modal dialog with a portal * Rendering React components into non-React server markup * Rendering React components into non-React DOM nodes * * * ## Reference ### `createPortal(children, domNode, key?)` To create a portal, call `createPortal`, passing some JSX, and the DOM node where it should be rendered: import { createPortal } from 'react-dom';// ...<div><p>This child is placed in the parent div.</p>{createPortal(<p>This child is placed in the document body.</p>,document.body)}</div> See more examples below. A portal only changes the physical placement of the DOM node. In every other way, the JSX you render into a portal acts as a child node of the React component that renders it. For example, the child can access the context provided by the parent tree, and events bubble up from children to parents according to the React tree. #### Parameters * `children`: Anything that can be rendered with React, such as a piece of JSX (e.g. `<div />` or `<SomeComponent />`), a Fragment (`<>...</>`), a string or a number, or an array of these. * `domNode`: Some DOM node, such as those returned by `document.getElementById()`. The node must already exist. Passing a different DOM node during an update will cause the portal content to be recreated. * **optional** `key`: A unique string or number to be used as the portal’s key. #### Returns `createPortal` returns a React node that can be included into JSX or returned from a React component. If React encounters it in the render output, it will place the provided `children` inside the provided `domNode`. #### Caveats * Events from portals propagate according to the React tree rather than the DOM tree. For example, if you click inside a portal, and the portal is wrapped in `<div onClick>`, that `onClick` handler will fire. If this causes issues, either stop the event propagation from inside the portal, or move the portal itself up in the React tree. * * * ## Usage ### Rendering to a different part of the DOM _Portals_ let your components render some of their children into a different place in the DOM. This lets a part of your component “escape” from whatever containers it may be in. For example, a component can display a modal dialog or a tooltip that appears above and outside of the rest of the page. To create a portal, render the result of `createPortal` with some JSX and the DOM node where it should go: import { createPortal } from 'react-dom';function MyComponent() {return (<div style={{ border: '2px solid black' }}><p>This child is placed in the parent div.</p>{createPortal(<p>This child is placed in the document body.</p>,document.body)}</div>);} React will put the DOM nodes for the JSX you passed inside of the DOM node you provided. Without a portal, the second `<p>` would be placed inside the parent `<div>`, but the portal “teleported” it into the `document.body`: Notice how the second paragraph visually appears outside the parent `<div>` with the border. If you inspect the DOM structure with developer tools, you’ll see that the second `<p>` got placed directly into the `<body>`: <body><div id="root"> ...<div style="border: 2px solid black"><p>This child is placed inside the parent div.</p></div> ...</div><p>This child is placed in the document body.</p></body> A portal only changes the physical placement of the DOM node. In every other way, the JSX you render into a portal acts as a child node of the React component that renders it. For example, the child can access the context provided by the parent tree, and events still bubble up from children to parents according to the React tree. * * * ### Rendering a modal dialog with a portal You can use a portal to create a modal dialog that floats above the rest of the page, even if the component that summons the dialog is inside a container with `overflow: hidden` or other styles that interfere with the dialog. In this example, the two containers have styles that disrupt the modal dialog, but the one rendered into a portal is unaffected because, in the DOM, the modal is not contained within the parent JSX elements. ### Pitfall It’s important to make sure that your app is accessible when using portals. For instance, you may need to manage keyboard focus so that the user can move the focus in and out of the portal in a natural way. Follow the WAI-ARIA Modal Authoring Practices when creating modals. If you use a community package, ensure that it is accessible and follows these guidelines. * * * ### Rendering React components into non-React server markup Portals can be useful if your React root is only part of a static or server-rendered page that isn’t built with React. For example, if your page is built with a server framework like Rails, you can create areas of interactivity within static areas such as sidebars. Compared with having multiple separate React roots, portals let you treat the app as a single React tree with shared state even though its parts render to different parts of the DOM. import { createPortal } from 'react-dom'; const sidebarContentEl = document.getElementById('sidebar-content'); export default function App() { return ( <\> <MainContent /> {createPortal( <SidebarContent />, sidebarContentEl )} </\> ); } function MainContent() { return <p\>This part is rendered by React</p\>; } function SidebarContent() { return <p\>This part is also rendered by React!</p\>; } * * * ### Rendering React components into non-React DOM nodes You can also use a portal to manage the content of a DOM node that’s managed outside of React. For example, suppose you’re integrating with a non-React map widget and you want to render React content inside a popup. To do this, declare a `popupContainer` state variable to store the DOM node you’re going to render into: const [popupContainer, setPopupContainer] = useState(null); When you create the third-party widget, store the DOM node returned by the widget so you can render into it: useEffect(() => {if (mapRef.current === null) {const map = createMapWidget(containerRef.current);mapRef.current = map;const popupDiv = addPopupToMapWidget(map);setPopupContainer(popupDiv);}}, []); This lets you use `createPortal` to render React content into `popupContainer` once it becomes available: return (<div style={{ width: 250, height: 250 }} ref={containerRef}>{popupContainer !== null && createPortal(<p>Hello from React!</p>,popupContainer)}</div>); Here is a complete example you can play with: import { useRef, useEffect, useState } from 'react'; import { createPortal } from 'react-dom'; import { createMapWidget, addPopupToMapWidget } from './map-widget.js'; export default function Map() { const containerRef = useRef(null); const mapRef = useRef(null); const \[popupContainer, setPopupContainer\] = useState(null); useEffect(() \=> { if (mapRef.current === null) { const map = createMapWidget(containerRef.current); mapRef.current = map; const popupDiv = addPopupToMapWidget(map); setPopupContainer(popupDiv); } }, \[\]); return ( <div style\={{ width: 250, height: 250 }} ref\={containerRef}\> {popupContainer !== null && createPortal( <p\>Hello from React!</p\>, popupContainer )} </div\> ); } --- ## Page: https://react.dev/reference/react-dom/flushSync ### Pitfall Using `flushSync` is uncommon and can hurt the performance of your app. `flushSync` lets you force React to flush any updates inside the provided callback synchronously. This ensures that the DOM is updated immediately. flushSync(callback) * Reference * `flushSync(callback)` * Usage * Flushing updates for third-party integrations * * * ## Reference ### `flushSync(callback)` Call `flushSync` to force React to flush any pending work and update the DOM synchronously. import { flushSync } from 'react-dom';flushSync(() => {setSomething(123);}); Most of the time, `flushSync` can be avoided. Use `flushSync` as last resort. See more examples below. #### Parameters * `callback`: A function. React will immediately call this callback and flush any updates it contains synchronously. It may also flush any pending updates, or Effects, or updates inside of Effects. If an update suspends as a result of this `flushSync` call, the fallbacks may be re-shown. #### Returns `flushSync` returns `undefined`. #### Caveats * `flushSync` can significantly hurt performance. Use sparingly. * `flushSync` may force pending Suspense boundaries to show their `fallback` state. * `flushSync` may run pending Effects and synchronously apply any updates they contain before returning. * `flushSync` may flush updates outside the callback when necessary to flush the updates inside the callback. For example, if there are pending updates from a click, React may flush those before flushing the updates inside the callback. * * * ## Usage ### Flushing updates for third-party integrations When integrating with third-party code such as browser APIs or UI libraries, it may be necessary to force React to flush updates. Use `flushSync` to force React to flush any state updates inside the callback synchronously: flushSync(() => {setSomething(123);});// By this line, the DOM is updated. This ensures that, by the time the next line of code runs, React has already updated the DOM. **Using `flushSync` is uncommon, and using it often can significantly hurt the performance of your app.** If your app only uses React APIs, and does not integrate with third-party libraries, `flushSync` should be unnecessary. However, it can be helpful for integrating with third-party code like browser APIs. Some browser APIs expect results inside of callbacks to be written to the DOM synchronously, by the end of the callback, so the browser can do something with the rendered DOM. In most cases, React handles this for you automatically. But in some cases it may be necessary to force a synchronous update. For example, the browser `onbeforeprint` API allows you to change the page immediately before the print dialog opens. This is useful for applying custom print styles that allow the document to display better for printing. In the example below, you use `flushSync` inside of the `onbeforeprint` callback to immediately “flush” the React state to the DOM. Then, by the time the print dialog opens, `isPrinting` displays “yes”: Without `flushSync`, the print dialog will display `isPrinting` as “no”. This is because React batches the updates asynchronously and the print dialog is displayed before the state is updated. ### Pitfall `flushSync` can significantly hurt performance, and may unexpectedly force pending Suspense boundaries to show their fallback state. Most of the time, `flushSync` can be avoided, so use `flushSync` as a last resort. --- ## Page: https://react.dev/reference/react-dom/preconnect `preconnect` lets you eagerly connect to a server that you expect to load resources from. preconnect("https://example.com"); To preconnect to a host, call the `preconnect` function from `react-dom`. The `preconnect` function provides the browser with a hint that it should open a connection to the given server. If the browser chooses to do so, this can speed up the loading of resources from that server. `preconnect` returns nothing. Call `preconnect` when rendering a component if you know that its children will load external resources from that host. Call `preconnect` in an event handler before transitioning to a page or state where external resources will be needed. This gets the process started earlier than if you call it during the rendering of the new page or state. --- ## Page: https://react.dev/reference/react-dom/prefetchDNS `prefetchDNS` lets you eagerly look up the IP of a server that you expect to load resources from. prefetchDNS("https://example.com"); To look up a host, call the `prefetchDNS` function from `react-dom`. The prefetchDNS function provides the browser with a hint that it should look up the IP address of a given server. If the browser chooses to do so, this can speed up the loading of resources from that server. `prefetchDNS` returns nothing. Call `prefetchDNS` when rendering a component if you know that its children will load external resources from that host. Call `prefetchDNS` in an event handler before transitioning to a page or state where external resources will be needed. This gets the process started earlier than if you call it during the rendering of the new page or state. --- ## Page: https://react.dev/reference/react-dom/preinit ### Note React-based frameworks frequently handle resource loading for you, so you might not have to call this API yourself. Consult your framework’s documentation for details. `preinit` lets you eagerly fetch and evaluate a stylesheet or external script. preinit("https://example.com/script.js", {as: "script"}); To preinit a script or stylesheet, call the `preinit` function from `react-dom`. The `preinit` function provides the browser with a hint that it should start downloading and executing the given resource, which can save time. Scripts that you `preinit` are executed when they finish downloading. Stylesheets that you preinit are inserted into the document, which causes them to go into effect right away. `preinit` returns nothing. Call `preinit` when rendering a component if you know that it or its children will use a specific resource, and you’re OK with the resource being evaluated and thereby taking effect immediately upon being downloaded. --- ## Page: https://react.dev/reference/react-dom/preinitModule ### Note React-based frameworks frequently handle resource loading for you, so you might not have to call this API yourself. Consult your framework’s documentation for details. `preinitModule` lets you eagerly fetch and evaluate an ESM module. preinitModule("https://example.com/module.js", {as: "script"}); * Reference * `preinitModule(href, options)` * Usage * Preloading when rendering * Preloading in an event handler * * * ## Reference ### `preinitModule(href, options)` To preinit an ESM module, call the `preinitModule` function from `react-dom`. import { preinitModule } from 'react-dom';function AppRoot() {preinitModule("https://example.com/module.js", {as: "script"});// ...} See more examples below. The `preinitModule` function provides the browser with a hint that it should start downloading and executing the given module, which can save time. Modules that you `preinit` are executed when they finish downloading. #### Parameters * `href`: a string. The URL of the module you want to download and execute. * `options`: an object. It contains the following properties: * `as`: a required string. It must be `'script'`. * `crossOrigin`: a string. The CORS policy to use. Its possible values are `anonymous` and `use-credentials`. * `integrity`: a string. A cryptographic hash of the module, to verify its authenticity. * `nonce`: a string. A cryptographic nonce to allow the module when using a strict Content Security Policy. #### Returns `preinitModule` returns nothing. #### Caveats * Multiple calls to `preinitModule` with the same `href` have the same effect as a single call. * In the browser, you can call `preinitModule` in any situation: while rendering a component, in an Effect, in an event handler, and so on. * In server-side rendering or when rendering Server Components, `preinitModule` only has an effect if you call it while rendering a component or in an async context originating from rendering a component. Any other calls will be ignored. * * * ## Usage ### Preloading when rendering Call `preinitModule` when rendering a component if you know that it or its children will use a specific module and you’re OK with the module being evaluated and thereby taking effect immediately upon being downloaded. import { preinitModule } from 'react-dom';function AppRoot() {preinitModule("https://example.com/module.js", {as: "script"});return ...;} If you want the browser to download the module but not to execute it right away, use `preloadModule` instead. If you want to preinit a script that isn’t an ESM module, use `preinit`. ### Preloading in an event handler Call `preinitModule` in an event handler before transitioning to a page or state where the module will be needed. This gets the process started earlier than if you call it during the rendering of the new page or state. import { preinitModule } from 'react-dom';function CallToAction() {const onClick = () => {preinitModule("https://example.com/module.js", {as: "script"});startWizard();}return (<button onClick={onClick}>Start Wizard</button>);} --- ## Page: https://react.dev/reference/react-dom/preload ### Note React-based frameworks frequently handle resource loading for you, so you might not have to call this API yourself. Consult your framework’s documentation for details. `preload` lets you eagerly fetch a resource such as a stylesheet, font, or external script that you expect to use. preload("https://example.com/font.woff2", {as: "font"}); To preload a resource, call the `preload` function from `react-dom`. The `preload` function provides the browser with a hint that it should start downloading the given resource, which can save time. `preload` returns nothing. Call `preload` when rendering a component if you know that it or its children will use a specific resource. --- ## Page: https://react.dev/reference/react-dom/preloadModule ### Note React-based frameworks frequently handle resource loading for you, so you might not have to call this API yourself. Consult your framework’s documentation for details. `preloadModule` lets you eagerly fetch an ESM module that you expect to use. preloadModule("https://example.com/module.js", {as: "script"}); * Reference * `preloadModule(href, options)` * Usage * Preloading when rendering * Preloading in an event handler * * * ## Reference ### `preloadModule(href, options)` To preload an ESM module, call the `preloadModule` function from `react-dom`. import { preloadModule } from 'react-dom';function AppRoot() {preloadModule("https://example.com/module.js", {as: "script"});// ...} See more examples below. The `preloadModule` function provides the browser with a hint that it should start downloading the given module, which can save time. #### Parameters * `href`: a string. The URL of the module you want to download. * `options`: an object. It contains the following properties: * `as`: a required string. It must be `'script'`. * `crossOrigin`: a string. The CORS policy to use. Its possible values are `anonymous` and `use-credentials`. * `integrity`: a string. A cryptographic hash of the module, to verify its authenticity. * `nonce`: a string. A cryptographic nonce to allow the module when using a strict Content Security Policy. #### Returns `preloadModule` returns nothing. #### Caveats * Multiple calls to `preloadModule` with the same `href` have the same effect as a single call. * In the browser, you can call `preloadModule` in any situation: while rendering a component, in an Effect, in an event handler, and so on. * In server-side rendering or when rendering Server Components, `preloadModule` only has an effect if you call it while rendering a component or in an async context originating from rendering a component. Any other calls will be ignored. * * * ## Usage ### Preloading when rendering Call `preloadModule` when rendering a component if you know that it or its children will use a specific module. import { preloadModule } from 'react-dom';function AppRoot() {preloadModule("https://example.com/module.js", {as: "script"});return ...;} If you want the browser to start executing the module immediately (rather than just downloading it), use `preinitModule` instead. If you want to load a script that isn’t an ESM module, use `preload`. ### Preloading in an event handler Call `preloadModule` in an event handler before transitioning to a page or state where the module will be needed. This gets the process started earlier than if you call it during the rendering of the new page or state. import { preloadModule } from 'react-dom';function CallToAction() {const onClick = () => {preloadModule("https://example.com/module.js", {as: "script"});startWizard();}return (<button onClick={onClick}>Start Wizard</button>);} --- ## Page: https://react.dev/reference/react-dom/client The `react-dom/client` APIs let you render React components on the client (in the browser). These APIs are typically used at the top level of your app to initialize your React tree. A framework may call them for you. Most of your components don’t need to import or use them. * * * ## Client APIs * `createRoot` lets you create a root to display React components inside a browser DOM node. * `hydrateRoot` lets you display React components inside a browser DOM node whose HTML content was previously generated by `react-dom/server`. * * * ## Browser support React supports all popular browsers, including Internet Explorer 9 and above. Some polyfills are required for older browsers such as IE 9 and IE 10. --- ## Page: https://react.dev/reference/react-dom/client/createRoot `createRoot` lets you create a root to display React components inside a browser DOM node. const root = createRoot(domNode, options?) * Reference * `createRoot(domNode, options?)` * `root.render(reactNode)` * `root.unmount()` * Usage * Rendering an app fully built with React * Rendering a page partially built with React * Updating a root component * Error logging in production * Troubleshooting * I’ve created a root, but nothing is displayed * I’m getting an error: “You passed a second argument to root.render” * I’m getting an error: “Target container is not a DOM element” * I’m getting an error: “Functions are not valid as a React child.” * My server-rendered HTML gets re-created from scratch * * * ## Reference ### `createRoot(domNode, options?)` Call `createRoot` to create a React root for displaying content inside a browser DOM element. import { createRoot } from 'react-dom/client';const domNode = document.getElementById('root');const root = createRoot(domNode); React will create a root for the `domNode`, and take over managing the DOM inside it. After you’ve created a root, you need to call `root.render` to display a React component inside of it: root.render(<App />); An app fully built with React will usually only have one `createRoot` call for its root component. A page that uses “sprinkles” of React for parts of the page may have as many separate roots as needed. See more examples below. #### Parameters * `domNode`: A DOM element. React will create a root for this DOM element and allow you to call functions on the root, such as `render` to display rendered React content. * **optional** `options`: An object with options for this React root. * **optional** `onCaughtError`: Callback called when React catches an error in an Error Boundary. Called with the `error` caught by the Error Boundary, and an `errorInfo` object containing the `componentStack`. * **optional** `onUncaughtError`: Callback called when an error is thrown and not caught by an Error Boundary. Called with the `error` that was thrown, and an `errorInfo` object containing the `componentStack`. * **optional** `onRecoverableError`: Callback called when React automatically recovers from errors. Called with an `error` React throws, and an `errorInfo` object containing the `componentStack`. Some recoverable errors may include the original error cause as `error.cause`. * **optional** `identifierPrefix`: A string prefix React uses for IDs generated by `useId`. Useful to avoid conflicts when using multiple roots on the same page. #### Returns `createRoot` returns an object with two methods: `render` and `unmount`. #### Caveats * If your app is server-rendered, using `createRoot()` is not supported. Use `hydrateRoot()` instead. * You’ll likely have only one `createRoot` call in your app. If you use a framework, it might do this call for you. * When you want to render a piece of JSX in a different part of the DOM tree that isn’t a child of your component (for example, a modal or a tooltip), use `createPortal` instead of `createRoot`. * * * ### `root.render(reactNode)` Call `root.render` to display a piece of JSX (“React node”) into the React root’s browser DOM node. root.render(<App />); React will display `<App />` in the `root`, and take over managing the DOM inside it. See more examples below. #### Parameters * `reactNode`: A _React node_ that you want to display. This will usually be a piece of JSX like `<App />`, but you can also pass a React element constructed with `createElement()`, a string, a number, `null`, or `undefined`. #### Returns `root.render` returns `undefined`. #### Caveats * The first time you call `root.render`, React will clear all the existing HTML content inside the React root before rendering the React component into it. * If your root’s DOM node contains HTML generated by React on the server or during the build, use `hydrateRoot()` instead, which attaches the event handlers to the existing HTML. * If you call `render` on the same root more than once, React will update the DOM as necessary to reflect the latest JSX you passed. React will decide which parts of the DOM can be reused and which need to be recreated by “matching it up” with the previously rendered tree. Calling `render` on the same root again is similar to calling the `set` function on the root component: React avoids unnecessary DOM updates. * * * ### `root.unmount()` Call `root.unmount` to destroy a rendered tree inside a React root. root.unmount(); An app fully built with React will usually not have any calls to `root.unmount`. This is mostly useful if your React root’s DOM node (or any of its ancestors) may get removed from the DOM by some other code. For example, imagine a jQuery tab panel that removes inactive tabs from the DOM. If a tab gets removed, everything inside it (including the React roots inside) would get removed from the DOM as well. In that case, you need to tell React to “stop” managing the removed root’s content by calling `root.unmount`. Otherwise, the components inside the removed root won’t know to clean up and free up global resources like subscriptions. Calling `root.unmount` will unmount all the components in the root and “detach” React from the root DOM node, including removing any event handlers or state in the tree. #### Parameters `root.unmount` does not accept any parameters. #### Returns `root.unmount` returns `undefined`. #### Caveats * Calling `root.unmount` will unmount all the components in the tree and “detach” React from the root DOM node. * Once you call `root.unmount` you cannot call `root.render` again on the same root. Attempting to call `root.render` on an unmounted root will throw a “Cannot update an unmounted root” error. However, you can create a new root for the same DOM node after the previous root for that node has been unmounted. * * * ## Usage ### Rendering an app fully built with React If your app is fully built with React, create a single root for your entire app. import { createRoot } from 'react-dom/client';const root = createRoot(document.getElementById('root'));root.render(<App />); Usually, you only need to run this code once at startup. It will: 1. Find the browser DOM node defined in your HTML. 2. Display the React component for your app inside. **If your app is fully built with React, you shouldn’t need to create any more roots, or to call `root.render` again.** From this point on, React will manage the DOM of your entire app. To add more components, nest them inside the `App` component. When you need to update the UI, each of your components can do this by using state. When you need to display extra content like a modal or a tooltip outside the DOM node, render it with a portal. ### Note When your HTML is empty, the user sees a blank page until the app’s JavaScript code loads and runs: <div id="root"></div> This can feel very slow! To solve this, you can generate the initial HTML from your components on the server or during the build. Then your visitors can read text, see images, and click links before any of the JavaScript code loads. We recommend using a framework that does this optimization out of the box. Depending on when it runs, this is called _server-side rendering (SSR)_ or _static site generation (SSG)._ ### Pitfall **Apps using server rendering or static generation must call `hydrateRoot` instead of `createRoot`.** React will then _hydrate_ (reuse) the DOM nodes from your HTML instead of destroying and re-creating them. * * * ### Rendering a page partially built with React If your page isn’t fully built with React, you can call `createRoot` multiple times to create a root for each top-level piece of UI managed by React. You can display different content in each root by calling `root.render`. Here, two different React components are rendered into two DOM nodes defined in the `index.html` file: You could also create a new DOM node with `document.createElement()` and add it to the document manually. const domNode = document.createElement('div');const root = createRoot(domNode); root.render(<Comment />);document.body.appendChild(domNode); // You can add it anywhere in the document To remove the React tree from the DOM node and clean up all the resources used by it, call `root.unmount`. root.unmount(); This is mostly useful if your React components are inside an app written in a different framework. * * * ### Updating a root component You can call `render` more than once on the same root. As long as the component tree structure matches up with what was previously rendered, React will preserve the state. Notice how you can type in the input, which means that the updates from repeated `render` calls every second in this example are not destructive: It is uncommon to call `render` multiple times. Usually, your components will update state instead. ### Error logging in production By default, React will log all errors to the console. To implement your own error reporting, you can provide the optional error handler root options `onUncaughtError`, `onCaughtError` and `onRecoverableError`: import { createRoot } from "react-dom/client";import { reportCaughtError } from "./reportError";const container = document.getElementById("root");const root = createRoot(container, {onCaughtError: (error, errorInfo) => {if (error.message !== "Known error") {reportCaughtError({error,componentStack: errorInfo.componentStack,});}},}); The onCaughtError option is a function called with two arguments: 1. The error that was thrown. 2. An errorInfo object that contains the componentStack of the error. Together with `onUncaughtError` and `onRecoverableError`, you can can implement your own error reporting system: import { createRoot } from "react-dom/client"; import App from "./App.js"; import { onCaughtErrorProd, onRecoverableErrorProd, onUncaughtErrorProd, } from "./reportError"; const container = document.getElementById("root"); const root = createRoot(container, { onCaughtError: onCaughtErrorProd, onRecoverableError: onRecoverableErrorProd, onUncaughtError: onUncaughtErrorProd, }); root.render(<App />); ## Troubleshooting ### I’ve created a root, but nothing is displayed Make sure you haven’t forgotten to actually _render_ your app into the root: import { createRoot } from 'react-dom/client';import App from './App.js';const root = createRoot(document.getElementById('root'));root.render(<App />); Until you do that, nothing is displayed. * * * ### I’m getting an error: “You passed a second argument to root.render” A common mistake is to pass the options for `createRoot` to `root.render(...)`: Console Warning: You passed a second argument to root.render(…) but it only accepts one argument. To fix, pass the root options to `createRoot(...)`, not `root.render(...)`: // 🚩 Wrong: root.render only takes one argument.root.render(App, {onUncaughtError});// ✅ Correct: pass options to createRoot.const root = createRoot(container, {onUncaughtError}); root.render(<App />); * * * ### I’m getting an error: “Target container is not a DOM element” This error means that whatever you’re passing to `createRoot` is not a DOM node. If you’re not sure what’s happening, try logging it: const domNode = document.getElementById('root');console.log(domNode); // ???const root = createRoot(domNode);root.render(<App />); For example, if `domNode` is `null`, it means that `getElementById` returned `null`. This will happen if there is no node in the document with the given ID at the time of your call. There may be a few reasons for it: 1. The ID you’re looking for might differ from the ID you used in the HTML file. Check for typos! 2. Your bundle’s `<script>` tag cannot “see” any DOM nodes that appear _after_ it in the HTML. Another common way to get this error is to write `createRoot(<App />)` instead of `createRoot(domNode)`. * * * ### I’m getting an error: “Functions are not valid as a React child.” This error means that whatever you’re passing to `root.render` is not a React component. This may happen if you call `root.render` with `Component` instead of `<Component />`: // 🚩 Wrong: App is a function, not a Component.root.render(App);// ✅ Correct: <App /> is a component.root.render(<App />); Or if you pass a function to `root.render`, instead of the result of calling it: // 🚩 Wrong: createApp is a function, not a component.root.render(createApp);// ✅ Correct: call createApp to return a component.root.render(createApp()); * * * ### My server-rendered HTML gets re-created from scratch If your app is server-rendered and includes the initial HTML generated by React, you might notice that creating a root and calling `root.render` deletes all that HTML, and then re-creates all the DOM nodes from scratch. This can be slower, resets focus and scroll positions, and may lose other user input. Server-rendered apps must use `hydrateRoot` instead of `createRoot`: import { hydrateRoot } from 'react-dom/client';import App from './App.js';hydrateRoot(document.getElementById('root'),<App />); Note that its API is different. In particular, usually there will be no further `root.render` call. --- ## Page: https://react.dev/reference/react-dom/client/hydrateRoot `hydrateRoot` lets you display React components inside a browser DOM node whose HTML content was previously generated by `react-dom/server`. const root = hydrateRoot(domNode, reactNode, options?) * Reference * `hydrateRoot(domNode, reactNode, options?)` * `root.render(reactNode)` * `root.unmount()` * Usage * Hydrating server-rendered HTML * Hydrating an entire document * Suppressing unavoidable hydration mismatch errors * Handling different client and server content * Updating a hydrated root component * Error logging in production * Troubleshooting * I’m getting an error: “You passed a second argument to root.render” * * * ## Reference ### `hydrateRoot(domNode, reactNode, options?)` Call `hydrateRoot` to “attach” React to existing HTML that was already rendered by React in a server environment. import { hydrateRoot } from 'react-dom/client';const domNode = document.getElementById('root');const root = hydrateRoot(domNode, reactNode); React will attach to the HTML that exists inside the `domNode`, and take over managing the DOM inside it. An app fully built with React will usually only have one `hydrateRoot` call with its root component. See more examples below. #### Parameters * `domNode`: A DOM element that was rendered as the root element on the server. * `reactNode`: The “React node” used to render the existing HTML. This will usually be a piece of JSX like `<App />` which was rendered with a `ReactDOM Server` method such as `renderToPipeableStream(<App />)`. * **optional** `options`: An object with options for this React root. * **optional** `onCaughtError`: Callback called when React catches an error in an Error Boundary. Called with the `error` caught by the Error Boundary, and an `errorInfo` object containing the `componentStack`. * **optional** `onUncaughtError`: Callback called when an error is thrown and not caught by an Error Boundary. Called with the `error` that was thrown and an `errorInfo` object containing the `componentStack`. * **optional** `onRecoverableError`: Callback called when React automatically recovers from errors. Called with the `error` React throws, and an `errorInfo` object containing the `componentStack`. Some recoverable errors may include the original error cause as `error.cause`. * **optional** `identifierPrefix`: A string prefix React uses for IDs generated by `useId`. Useful to avoid conflicts when using multiple roots on the same page. Must be the same prefix as used on the server. #### Returns `hydrateRoot` returns an object with two methods: `render` and `unmount`. #### Caveats * `hydrateRoot()` expects the rendered content to be identical with the server-rendered content. You should treat mismatches as bugs and fix them. * In development mode, React warns about mismatches during hydration. There are no guarantees that attribute differences will be patched up in case of mismatches. This is important for performance reasons because in most apps, mismatches are rare, and so validating all markup would be prohibitively expensive. * You’ll likely have only one `hydrateRoot` call in your app. If you use a framework, it might do this call for you. * If your app is client-rendered with no HTML rendered already, using `hydrateRoot()` is not supported. Use `createRoot()` instead. * * * ### `root.render(reactNode)` Call `root.render` to update a React component inside a hydrated React root for a browser DOM element. root.render(<App />); React will update `<App />` in the hydrated `root`. See more examples below. #### Parameters * `reactNode`: A “React node” that you want to update. This will usually be a piece of JSX like `<App />`, but you can also pass a React element constructed with `createElement()`, a string, a number, `null`, or `undefined`. #### Returns `root.render` returns `undefined`. #### Caveats * If you call `root.render` before the root has finished hydrating, React will clear the existing server-rendered HTML content and switch the entire root to client rendering. * * * ### `root.unmount()` Call `root.unmount` to destroy a rendered tree inside a React root. root.unmount(); An app fully built with React will usually not have any calls to `root.unmount`. This is mostly useful if your React root’s DOM node (or any of its ancestors) may get removed from the DOM by some other code. For example, imagine a jQuery tab panel that removes inactive tabs from the DOM. If a tab gets removed, everything inside it (including the React roots inside) would get removed from the DOM as well. You need to tell React to “stop” managing the removed root’s content by calling `root.unmount`. Otherwise, the components inside the removed root won’t clean up and free up resources like subscriptions. Calling `root.unmount` will unmount all the components in the root and “detach” React from the root DOM node, including removing any event handlers or state in the tree. #### Parameters `root.unmount` does not accept any parameters. #### Returns `root.unmount` returns `undefined`. #### Caveats * Calling `root.unmount` will unmount all the components in the tree and “detach” React from the root DOM node. * Once you call `root.unmount` you cannot call `root.render` again on the root. Attempting to call `root.render` on an unmounted root will throw a “Cannot update an unmounted root” error. * * * ## Usage ### Hydrating server-rendered HTML If your app’s HTML was generated by `react-dom/server`, you need to _hydrate_ it on the client. import { hydrateRoot } from 'react-dom/client';hydrateRoot(document.getElementById('root'), <App />); This will hydrate the server HTML inside the browser DOM node with the React component for your app. Usually, you will do it once at startup. If you use a framework, it might do this behind the scenes for you. To hydrate your app, React will “attach” your components’ logic to the initial generated HTML from the server. Hydration turns the initial HTML snapshot from the server into a fully interactive app that runs in the browser. You shouldn’t need to call `hydrateRoot` again or to call it in more places. From this point on, React will be managing the DOM of your application. To update the UI, your components will use state instead. ### Pitfall The React tree you pass to `hydrateRoot` needs to produce **the same output** as it did on the server. This is important for the user experience. The user will spend some time looking at the server-generated HTML before your JavaScript code loads. Server rendering creates an illusion that the app loads faster by showing the HTML snapshot of its output. Suddenly showing different content breaks that illusion. This is why the server render output must match the initial render output on the client. The most common causes leading to hydration errors include: * Extra whitespace (like newlines) around the React-generated HTML inside the root node. * Using checks like `typeof window !== 'undefined'` in your rendering logic. * Using browser-only APIs like `window.matchMedia` in your rendering logic. * Rendering different data on the server and the client. React recovers from some hydration errors, but **you must fix them like other bugs.** In the best case, they’ll lead to a slowdown; in the worst case, event handlers can get attached to the wrong elements. * * * ### Hydrating an entire document Apps fully built with React can render the entire document as JSX, including the `<html>` tag: function App() {return (<html><head><meta charSet="utf-8" /><meta name="viewport" content="width=device-width, initial-scale=1" /><link rel="stylesheet" href="/styles.css"></link><title>My app</title></head><body><Router /></body></html>);} To hydrate the entire document, pass the `document` global as the first argument to `hydrateRoot`: import { hydrateRoot } from 'react-dom/client';import App from './App.js';hydrateRoot(document, <App />); * * * ### Suppressing unavoidable hydration mismatch errors If a single element’s attribute or text content is unavoidably different between the server and the client (for example, a timestamp), you may silence the hydration mismatch warning. To silence hydration warnings on an element, add `suppressHydrationWarning={true}`: This only works one level deep, and is intended to be an escape hatch. Don’t overuse it. React will **not** attempt to patch mismatched text content. * * * ### Handling different client and server content If you intentionally need to render something different on the server and the client, you can do a two-pass rendering. Components that render something different on the client can read a state variable like `isClient`, which you can set to `true` in an Effect: This way the initial render pass will render the same content as the server, avoiding mismatches, but an additional pass will happen synchronously right after hydration. ### Pitfall This approach makes hydration slower because your components have to render twice. Be mindful of the user experience on slow connections. The JavaScript code may load significantly later than the initial HTML render, so rendering a different UI immediately after hydration may also feel jarring to the user. * * * ### Updating a hydrated root component After the root has finished hydrating, you can call `root.render` to update the root React component. **Unlike with `createRoot`, you don’t usually need to do this because the initial content was already rendered as HTML.** If you call `root.render` at some point after hydration, and the component tree structure matches up with what was previously rendered, React will preserve the state. Notice how you can type in the input, which means that the updates from repeated `render` calls every second in this example are not destructive: It is uncommon to call `root.render` on a hydrated root. Usually, you’ll update state inside one of the components instead. ### Error logging in production By default, React will log all errors to the console. To implement your own error reporting, you can provide the optional error handler root options `onUncaughtError`, `onCaughtError` and `onRecoverableError`: import { hydrateRoot } from "react-dom/client";import { reportCaughtError } from "./reportError";const container = document.getElementById("root");const root = hydrateRoot(container, {onCaughtError: (error, errorInfo) => {if (error.message !== "Known error") {reportCaughtError({error,componentStack: errorInfo.componentStack,});}},}); The onCaughtError option is a function called with two arguments: 1. The error that was thrown. 2. An errorInfo object that contains the componentStack of the error. Together with `onUncaughtError` and `onRecoverableError`, you can implement your own error reporting system: import { hydrateRoot } from "react-dom/client"; import App from "./App.js"; import { onCaughtErrorProd, onRecoverableErrorProd, onUncaughtErrorProd, } from "./reportError"; const container = document.getElementById("root"); hydrateRoot(container, <App />, { onCaughtError: onCaughtErrorProd, onRecoverableError: onRecoverableErrorProd, onUncaughtError: onUncaughtErrorProd, }); ## Troubleshooting ### I’m getting an error: “You passed a second argument to root.render” A common mistake is to pass the options for `hydrateRoot` to `root.render(...)`: Console Warning: You passed a second argument to root.render(…) but it only accepts one argument. To fix, pass the root options to `hydrateRoot(...)`, not `root.render(...)`: // 🚩 Wrong: root.render only takes one argument.root.render(App, {onUncaughtError});// ✅ Correct: pass options to createRoot.const root = hydrateRoot(container, <App />, {onUncaughtError}); --- ## Page: https://react.dev/reference/react-dom/server The `react-dom/server` APIs let you server-side render React components to HTML. These APIs are only used on the server at the top level of your app to generate the initial HTML. A framework may call them for you. Most of your components don’t need to import or use them. * * * ## Server APIs for Node.js Streams These methods are only available in the environments with Node.js Streams: * `renderToPipeableStream` renders a React tree to a pipeable Node.js Stream. * * * ## Server APIs for Web Streams These methods are only available in the environments with Web Streams, which includes browsers, Deno, and some modern edge runtimes: * `renderToReadableStream` renders a React tree to a Readable Web Stream. * * * ## Legacy Server APIs for non-streaming environments These methods can be used in the environments that don’t support streams: * `renderToString` renders a React tree to a string. * `renderToStaticMarkup` renders a non-interactive React tree to a string. They have limited functionality compared to the streaming APIs. --- ## Page: https://react.dev/reference/react-dom/server/renderToPipeableStream `renderToPipeableStream` renders a React tree to a pipeable Node.js Stream. const { pipe, abort } = renderToPipeableStream(reactNode, options?) * Reference * `renderToPipeableStream(reactNode, options?)` * Usage * Rendering a React tree as HTML to a Node.js Stream * Streaming more content as it loads * Specifying what goes into the shell * Logging crashes on the server * Recovering from errors inside the shell * Recovering from errors outside the shell * Setting the status code * Handling different errors in different ways * Waiting for all content to load for crawlers and static generation * Aborting server rendering * * * ## Reference ### `renderToPipeableStream(reactNode, options?)` Call `renderToPipeableStream` to render your React tree as HTML into a Node.js Stream. import { renderToPipeableStream } from 'react-dom/server';const { pipe } = renderToPipeableStream(<App />, {bootstrapScripts: ['/main.js'],onShellReady() {response.setHeader('content-type', 'text/html');pipe(response);}}); On the client, call `hydrateRoot` to make the server-generated HTML interactive. See more examples below. #### Parameters * `reactNode`: A React node you want to render to HTML. For example, a JSX element like `<App />`. It is expected to represent the entire document, so the `App` component should render the `<html>` tag. * **optional** `options`: An object with streaming options. * **optional** `bootstrapScriptContent`: If specified, this string will be placed in an inline `<script>` tag. * **optional** `bootstrapScripts`: An array of string URLs for the `<script>` tags to emit on the page. Use this to include the `<script>` that calls `hydrateRoot`. Omit it if you don’t want to run React on the client at all. * **optional** `bootstrapModules`: Like `bootstrapScripts`, but emits `<script type="module">` instead. * **optional** `identifierPrefix`: A string prefix React uses for IDs generated by `useId`. Useful to avoid conflicts when using multiple roots on the same page. Must be the same prefix as passed to `hydrateRoot`. * **optional** `namespaceURI`: A string with the root namespace URI for the stream. Defaults to regular HTML. Pass `'http://www.w3.org/2000/svg'` for SVG or `'http://www.w3.org/1998/Math/MathML'` for MathML. * **optional** `nonce`: A `nonce` string to allow scripts for `script-src` Content-Security-Policy. * **optional** `onAllReady`: A callback that fires when all rendering is complete, including both the shell and all additional content. You can use this instead of `onShellReady` for crawlers and static generation. If you start streaming here, you won’t get any progressive loading. The stream will contain the final HTML. * **optional** `onError`: A callback that fires whenever there is a server error, whether recoverable or not. By default, this only calls `console.error`. If you override it to log crash reports, make sure that you still call `console.error`. You can also use it to adjust the status code before the shell is emitted. * **optional** `onShellReady`: A callback that fires right after the initial shell has been rendered. You can set the status code and call `pipe` here to start streaming. React will stream the additional content after the shell along with the inline `<script>` tags that replace the HTML loading fallbacks with the content. * **optional** `onShellError`: A callback that fires if there was an error rendering the initial shell. It receives the error as an argument. No bytes were emitted from the stream yet, and neither `onShellReady` nor `onAllReady` will get called, so you can output a fallback HTML shell. * **optional** `progressiveChunkSize`: The number of bytes in a chunk. Read more about the default heuristic. #### Returns `renderToPipeableStream` returns an object with two methods: * `pipe` outputs the HTML into the provided Writable Node.js Stream. Call `pipe` in `onShellReady` if you want to enable streaming, or in `onAllReady` for crawlers and static generation. * `abort` lets you abort server rendering and render the rest on the client. * * * ## Usage ### Rendering a React tree as HTML to a Node.js Stream Call `renderToPipeableStream` to render your React tree as HTML into a Node.js Stream: import { renderToPipeableStream } from 'react-dom/server';// The route handler syntax depends on your backend frameworkapp.use('/', (request, response) => {const { pipe } = renderToPipeableStream(<App />, {bootstrapScripts: ['/main.js'],onShellReady() {response.setHeader('content-type', 'text/html');pipe(response);}});}); Along with the root component, you need to provide a list of bootstrap `<script>` paths. Your root component should return **the entire document including the root `<html>` tag.** For example, it might look like this: export default function App() {return (<html><head><meta charSet="utf-8" /><meta name="viewport" content="width=device-width, initial-scale=1" /><link rel="stylesheet" href="/styles.css"></link><title>My app</title></head><body><Router /></body></html>);} React will inject the doctype and your bootstrap `<script>` tags into the resulting HTML stream: <!DOCTYPE html><html><!-- ... HTML from your components ... --></html><script src="/main.js" async=""></script> On the client, your bootstrap script should hydrate the entire `document` with a call to `hydrateRoot`: import { hydrateRoot } from 'react-dom/client';import App from './App.js';hydrateRoot(document, <App />); This will attach event listeners to the server-generated HTML and make it interactive. ##### Deep Dive #### Reading CSS and JS asset paths from the build output The final asset URLs (like JavaScript and CSS files) are often hashed after the build. For example, instead of `styles.css` you might end up with `styles.123456.css`. Hashing static asset filenames guarantees that every distinct build of the same asset will have a different filename. This is useful because it lets you safely enable long-term caching for static assets: a file with a certain name would never change content. However, if you don’t know the asset URLs until after the build, there’s no way for you to put them in the source code. For example, hardcoding `"/styles.css"` into JSX like earlier wouldn’t work. To keep them out of your source code, your root component can read the real filenames from a map passed as a prop: export default function App({ assetMap }) {return (<html><head> ...<link rel="stylesheet" href={assetMap['styles.css']}></link> ...</head> ...</html>);} On the server, render `<App assetMap={assetMap} />` and pass your `assetMap` with the asset URLs: // You'd need to get this JSON from your build tooling, e.g. read it from the build output.const assetMap = {'styles.css': '/styles.123456.css','main.js': '/main.123456.js'};app.use('/', (request, response) => {const { pipe } = renderToPipeableStream(<App assetMap={assetMap} />, {bootstrapScripts: [assetMap['main.js']],onShellReady() {response.setHeader('content-type', 'text/html');pipe(response);}});}); Since your server is now rendering `<App assetMap={assetMap} />`, you need to render it with `assetMap` on the client too to avoid hydration errors. You can serialize and pass `assetMap` to the client like this: // You'd need to get this JSON from your build tooling.const assetMap = {'styles.css': '/styles.123456.css','main.js': '/main.123456.js'};app.use('/', (request, response) => {const { pipe } = renderToPipeableStream(<App assetMap={assetMap} />, {// Careful: It's safe to stringify() this because this data isn't user-generated.bootstrapScriptContent: `window.assetMap = ${JSON.stringify(assetMap)};`,bootstrapScripts: [assetMap['main.js']],onShellReady() {response.setHeader('content-type', 'text/html');pipe(response);}});}); In the example above, the `bootstrapScriptContent` option adds an extra inline `<script>` tag that sets the global `window.assetMap` variable on the client. This lets the client code read the same `assetMap`: import { hydrateRoot } from 'react-dom/client';import App from './App.js';hydrateRoot(document, <App assetMap={window.assetMap} />); Both client and server render `App` with the same `assetMap` prop, so there are no hydration errors. * * * ### Streaming more content as it loads Streaming allows the user to start seeing the content even before all the data has loaded on the server. For example, consider a profile page that shows a cover, a sidebar with friends and photos, and a list of posts: function ProfilePage() {return (<ProfileLayout><ProfileCover /><Sidebar><Friends /><Photos /></Sidebar><Posts /></ProfileLayout>);} Imagine that loading data for `<Posts />` takes some time. Ideally, you’d want to show the rest of the profile page content to the user without waiting for the posts. To do this, wrap `Posts` in a `<Suspense>` boundary: function ProfilePage() {return (<ProfileLayout><ProfileCover /><Sidebar><Friends /><Photos /></Sidebar><Suspense fallback={<PostsGlimmer />}><Posts /></Suspense></ProfileLayout>);} This tells React to start streaming the HTML before `Posts` loads its data. React will send the HTML for the loading fallback (`PostsGlimmer`) first, and then, when `Posts` finishes loading its data, React will send the remaining HTML along with an inline `<script>` tag that replaces the loading fallback with that HTML. From the user’s perspective, the page will first appear with the `PostsGlimmer`, later replaced by the `Posts`. You can further nest `<Suspense>` boundaries to create a more granular loading sequence: function ProfilePage() {return (<ProfileLayout><ProfileCover /><Suspense fallback={<BigSpinner />}><Sidebar><Friends /><Photos /></Sidebar><Suspense fallback={<PostsGlimmer />}><Posts /></Suspense></Suspense></ProfileLayout>);} In this example, React can start streaming the page even earlier. Only `ProfileLayout` and `ProfileCover` must finish rendering first because they are not wrapped in any `<Suspense>` boundary. However, if `Sidebar`, `Friends`, or `Photos` need to load some data, React will send the HTML for the `BigSpinner` fallback instead. Then, as more data becomes available, more content will continue to be revealed until all of it becomes visible. Streaming does not need to wait for React itself to load in the browser, or for your app to become interactive. The HTML content from the server will get progressively revealed before any of the `<script>` tags load. Read more about how streaming HTML works. ### Note **Only Suspense-enabled data sources will activate the Suspense component.** They include: * Data fetching with Suspense-enabled frameworks like Relay and Next.js * Lazy-loading component code with `lazy` * Reading the value of a Promise with `use` Suspense **does not** detect when data is fetched inside an Effect or event handler. The exact way you would load data in the `Posts` component above depends on your framework. If you use a Suspense-enabled framework, you’ll find the details in its data fetching documentation. Suspense-enabled data fetching without the use of an opinionated framework is not yet supported. The requirements for implementing a Suspense-enabled data source are unstable and undocumented. An official API for integrating data sources with Suspense will be released in a future version of React. * * * ### Specifying what goes into the shell The part of your app outside of any `<Suspense>` boundaries is called _the shell:_ function ProfilePage() {return (<ProfileLayout><ProfileCover /><Suspense fallback={<BigSpinner />}><Sidebar><Friends /><Photos /></Sidebar><Suspense fallback={<PostsGlimmer />}><Posts /></Suspense></Suspense></ProfileLayout>);} It determines the earliest loading state that the user may see: <ProfileLayout><ProfileCover /><BigSpinner /></ProfileLayout> If you wrap the whole app into a `<Suspense>` boundary at the root, the shell will only contain that spinner. However, that’s not a pleasant user experience because seeing a big spinner on the screen can feel slower and more annoying than waiting a bit more and seeing the real layout. This is why usually you’ll want to place the `<Suspense>` boundaries so that the shell feels _minimal but complete_—like a skeleton of the entire page layout. The `onShellReady` callback fires when the entire shell has been rendered. Usually, you’ll start streaming then: const { pipe } = renderToPipeableStream(<App />, {bootstrapScripts: ['/main.js'],onShellReady() {response.setHeader('content-type', 'text/html');pipe(response);}}); By the time `onShellReady` fires, components in nested `<Suspense>` boundaries might still be loading data. * * * ### Logging crashes on the server By default, all errors on the server are logged to console. You can override this behavior to log crash reports: const { pipe } = renderToPipeableStream(<App />, {bootstrapScripts: ['/main.js'],onShellReady() {response.setHeader('content-type', 'text/html');pipe(response);},onError(error) {console.error(error);logServerCrashReport(error);}}); If you provide a custom `onError` implementation, don’t forget to also log errors to the console like above. * * * ### Recovering from errors inside the shell In this example, the shell contains `ProfileLayout`, `ProfileCover`, and `PostsGlimmer`: function ProfilePage() {return (<ProfileLayout><ProfileCover /><Suspense fallback={<PostsGlimmer />}><Posts /></Suspense></ProfileLayout>);} If an error occurs while rendering those components, React won’t have any meaningful HTML to send to the client. Override `onShellError` to send a fallback HTML that doesn’t rely on server rendering as the last resort: const { pipe } = renderToPipeableStream(<App />, {bootstrapScripts: ['/main.js'],onShellReady() {response.setHeader('content-type', 'text/html');pipe(response);},onShellError(error) {response.statusCode = 500;response.setHeader('content-type', 'text/html');response.send('<h1>Something went wrong</h1>'); },onError(error) {console.error(error);logServerCrashReport(error);}}); If there is an error while generating the shell, both `onError` and `onShellError` will fire. Use `onError` for error reporting and use `onShellError` to send the fallback HTML document. Your fallback HTML does not have to be an error page. Instead, you may include an alternative shell that renders your app on the client only. * * * ### Recovering from errors outside the shell In this example, the `<Posts />` component is wrapped in `<Suspense>` so it is _not_ a part of the shell: function ProfilePage() {return (<ProfileLayout><ProfileCover /><Suspense fallback={<PostsGlimmer />}><Posts /></Suspense></ProfileLayout>);} If an error happens in the `Posts` component or somewhere inside it, React will try to recover from it: 1. It will emit the loading fallback for the closest `<Suspense>` boundary (`PostsGlimmer`) into the HTML. 2. It will “give up” on trying to render the `Posts` content on the server anymore. 3. When the JavaScript code loads on the client, React will _retry_ rendering `Posts` on the client. If retrying rendering `Posts` on the client _also_ fails, React will throw the error on the client. As with all the errors thrown during rendering, the closest parent error boundary determines how to present the error to the user. In practice, this means that the user will see a loading indicator until it is certain that the error is not recoverable. If retrying rendering `Posts` on the client succeeds, the loading fallback from the server will be replaced with the client rendering output. The user will not know that there was a server error. However, the server `onError` callback and the client `onRecoverableError` callbacks will fire so that you can get notified about the error. * * * ### Setting the status code Streaming introduces a tradeoff. You want to start streaming the page as early as possible so that the user can see the content sooner. However, once you start streaming, you can no longer set the response status code. By dividing your app into the shell (above all `<Suspense>` boundaries) and the rest of the content, you’ve already solved a part of this problem. If the shell errors, you’ll get the `onShellError` callback which lets you set the error status code. Otherwise, you know that the app may recover on the client, so you can send “OK”. const { pipe } = renderToPipeableStream(<App />, {bootstrapScripts: ['/main.js'],onShellReady() {response.statusCode = 200;response.setHeader('content-type', 'text/html');pipe(response);},onShellError(error) {response.statusCode = 500;response.setHeader('content-type', 'text/html');response.send('<h1>Something went wrong</h1>'); },onError(error) {console.error(error);logServerCrashReport(error);}}); If a component _outside_ the shell (i.e. inside a `<Suspense>` boundary) throws an error, React will not stop rendering. This means that the `onError` callback will fire, but you will still get `onShellReady` instead of `onShellError`. This is because React will try to recover from that error on the client, as described above. However, if you’d like, you can use the fact that something has errored to set the status code: let didError = false;const { pipe } = renderToPipeableStream(<App />, {bootstrapScripts: ['/main.js'],onShellReady() {response.statusCode = didError ? 500 : 200;response.setHeader('content-type', 'text/html');pipe(response);},onShellError(error) {response.statusCode = 500;response.setHeader('content-type', 'text/html');response.send('<h1>Something went wrong</h1>'); },onError(error) {didError = true;console.error(error);logServerCrashReport(error);}}); This will only catch errors outside the shell that happened while generating the initial shell content, so it’s not exhaustive. If knowing whether an error occurred for some content is critical, you can move it up into the shell. * * * ### Handling different errors in different ways You can create your own `Error` subclasses and use the `instanceof` operator to check which error is thrown. For example, you can define a custom `NotFoundError` and throw it from your component. Then your `onError`, `onShellReady`, and `onShellError` callbacks can do something different depending on the error type: let didError = false;let caughtError = null;function getStatusCode() {if (didError) {if (caughtError instanceof NotFoundError) {return 404;} else {return 500;}} else {return 200;}}const { pipe } = renderToPipeableStream(<App />, {bootstrapScripts: ['/main.js'],onShellReady() {response.statusCode = getStatusCode();response.setHeader('content-type', 'text/html');pipe(response);},onShellError(error) {response.statusCode = getStatusCode();response.setHeader('content-type', 'text/html');response.send('<h1>Something went wrong</h1>'); },onError(error) {didError = true;caughtError = error;console.error(error);logServerCrashReport(error);}}); Keep in mind that once you emit the shell and start streaming, you can’t change the status code. * * * ### Waiting for all content to load for crawlers and static generation Streaming offers a better user experience because the user can see the content as it becomes available. However, when a crawler visits your page, or if you’re generating the pages at the build time, you might want to let all of the content load first and then produce the final HTML output instead of revealing it progressively. You can wait for all the content to load using the `onAllReady` callback: let didError = false;let isCrawler = // ... depends on your bot detection strategy ...const { pipe } = renderToPipeableStream(<App />, {bootstrapScripts: ['/main.js'],onShellReady() {if (!isCrawler) {response.statusCode = didError ? 500 : 200;response.setHeader('content-type', 'text/html');pipe(response);}},onShellError(error) {response.statusCode = 500;response.setHeader('content-type', 'text/html');response.send('<h1>Something went wrong</h1>'); },onAllReady() {if (isCrawler) {response.statusCode = didError ? 500 : 200;response.setHeader('content-type', 'text/html');pipe(response); }},onError(error) {didError = true;console.error(error);logServerCrashReport(error);}}); A regular visitor will get a stream of progressively loaded content. A crawler will receive the final HTML output after all the data loads. However, this also means that the crawler will have to wait for _all_ data, some of which might be slow to load or error. Depending on your app, you could choose to send the shell to the crawlers too. * * * ### Aborting server rendering You can force the server rendering to “give up” after a timeout: const { pipe, abort } = renderToPipeableStream(<App />, {// ...});setTimeout(() => {abort();}, 10000); React will flush the remaining loading fallbacks as HTML, and will attempt to render the rest on the client. --- ## Page: https://react.dev/reference/react-dom/server/renderToReadableStream `renderToReadableStream` renders a React tree to a Readable Web Stream. const stream = await renderToReadableStream(reactNode, options?) * Reference * `renderToReadableStream(reactNode, options?)` * Usage * Rendering a React tree as HTML to a Readable Web Stream * Streaming more content as it loads * Specifying what goes into the shell * Logging crashes on the server * Recovering from errors inside the shell * Recovering from errors outside the shell * Setting the status code * Handling different errors in different ways * Waiting for all content to load for crawlers and static generation * Aborting server rendering * * * ## Reference ### `renderToReadableStream(reactNode, options?)` Call `renderToReadableStream` to render your React tree as HTML into a Readable Web Stream. import { renderToReadableStream } from 'react-dom/server';async function handler(request) {const stream = await renderToReadableStream(<App />, {bootstrapScripts: ['/main.js']});return new Response(stream, {headers: { 'content-type': 'text/html' },});} On the client, call `hydrateRoot` to make the server-generated HTML interactive. See more examples below. #### Parameters * `reactNode`: A React node you want to render to HTML. For example, a JSX element like `<App />`. It is expected to represent the entire document, so the `App` component should render the `<html>` tag. * **optional** `options`: An object with streaming options. * **optional** `bootstrapScriptContent`: If specified, this string will be placed in an inline `<script>` tag. * **optional** `bootstrapScripts`: An array of string URLs for the `<script>` tags to emit on the page. Use this to include the `<script>` that calls `hydrateRoot`. Omit it if you don’t want to run React on the client at all. * **optional** `bootstrapModules`: Like `bootstrapScripts`, but emits `<script type="module">` instead. * **optional** `identifierPrefix`: A string prefix React uses for IDs generated by `useId`. Useful to avoid conflicts when using multiple roots on the same page. Must be the same prefix as passed to `hydrateRoot`. * **optional** `namespaceURI`: A string with the root namespace URI for the stream. Defaults to regular HTML. Pass `'http://www.w3.org/2000/svg'` for SVG or `'http://www.w3.org/1998/Math/MathML'` for MathML. * **optional** `nonce`: A `nonce` string to allow scripts for `script-src` Content-Security-Policy. * **optional** `onError`: A callback that fires whenever there is a server error, whether recoverable or not. By default, this only calls `console.error`. If you override it to log crash reports, make sure that you still call `console.error`. You can also use it to adjust the status code before the shell is emitted. * **optional** `progressiveChunkSize`: The number of bytes in a chunk. Read more about the default heuristic. * **optional** `signal`: An abort signal that lets you abort server rendering and render the rest on the client. #### Returns `renderToReadableStream` returns a Promise: * If rendering the shell is successful, that Promise will resolve to a Readable Web Stream. * If rendering the shell fails, the Promise will be rejected. Use this to output a fallback shell. The returned stream has an additional property: * `allReady`: A Promise that resolves when all rendering is complete, including both the shell and all additional content. You can `await stream.allReady` before returning a response for crawlers and static generation. If you do that, you won’t get any progressive loading. The stream will contain the final HTML. * * * ## Usage ### Rendering a React tree as HTML to a Readable Web Stream Call `renderToReadableStream` to render your React tree as HTML into a Readable Web Stream: import { renderToReadableStream } from 'react-dom/server';async function handler(request) {const stream = await renderToReadableStream(<App />, {bootstrapScripts: ['/main.js']});return new Response(stream, {headers: { 'content-type': 'text/html' },});} Along with the root component, you need to provide a list of bootstrap `<script>` paths. Your root component should return **the entire document including the root `<html>` tag.** For example, it might look like this: export default function App() {return (<html><head><meta charSet="utf-8" /><meta name="viewport" content="width=device-width, initial-scale=1" /><link rel="stylesheet" href="/styles.css"></link><title>My app</title></head><body><Router /></body></html>);} React will inject the doctype and your bootstrap `<script>` tags into the resulting HTML stream: <!DOCTYPE html><html><!-- ... HTML from your components ... --></html><script src="/main.js" async=""></script> On the client, your bootstrap script should hydrate the entire `document` with a call to `hydrateRoot`: import { hydrateRoot } from 'react-dom/client';import App from './App.js';hydrateRoot(document, <App />); This will attach event listeners to the server-generated HTML and make it interactive. ##### Deep Dive #### Reading CSS and JS asset paths from the build output The final asset URLs (like JavaScript and CSS files) are often hashed after the build. For example, instead of `styles.css` you might end up with `styles.123456.css`. Hashing static asset filenames guarantees that every distinct build of the same asset will have a different filename. This is useful because it lets you safely enable long-term caching for static assets: a file with a certain name would never change content. However, if you don’t know the asset URLs until after the build, there’s no way for you to put them in the source code. For example, hardcoding `"/styles.css"` into JSX like earlier wouldn’t work. To keep them out of your source code, your root component can read the real filenames from a map passed as a prop: export default function App({ assetMap }) {return (<html><head><title>My app</title><link rel="stylesheet" href={assetMap['styles.css']}></link></head> ...</html>);} On the server, render `<App assetMap={assetMap} />` and pass your `assetMap` with the asset URLs: // You'd need to get this JSON from your build tooling, e.g. read it from the build output.const assetMap = {'styles.css': '/styles.123456.css','main.js': '/main.123456.js'};async function handler(request) {const stream = await renderToReadableStream(<App assetMap={assetMap} />, {bootstrapScripts: [assetMap['/main.js']]});return new Response(stream, {headers: { 'content-type': 'text/html' },});} Since your server is now rendering `<App assetMap={assetMap} />`, you need to render it with `assetMap` on the client too to avoid hydration errors. You can serialize and pass `assetMap` to the client like this: // You'd need to get this JSON from your build tooling.const assetMap = {'styles.css': '/styles.123456.css','main.js': '/main.123456.js'};async function handler(request) {const stream = await renderToReadableStream(<App assetMap={assetMap} />, {// Careful: It's safe to stringify() this because this data isn't user-generated.bootstrapScriptContent: `window.assetMap = ${JSON.stringify(assetMap)};`,bootstrapScripts: [assetMap['/main.js']],});return new Response(stream, {headers: { 'content-type': 'text/html' },});} In the example above, the `bootstrapScriptContent` option adds an extra inline `<script>` tag that sets the global `window.assetMap` variable on the client. This lets the client code read the same `assetMap`: import { hydrateRoot } from 'react-dom/client';import App from './App.js';hydrateRoot(document, <App assetMap={window.assetMap} />); Both client and server render `App` with the same `assetMap` prop, so there are no hydration errors. * * * ### Streaming more content as it loads Streaming allows the user to start seeing the content even before all the data has loaded on the server. For example, consider a profile page that shows a cover, a sidebar with friends and photos, and a list of posts: function ProfilePage() {return (<ProfileLayout><ProfileCover /><Sidebar><Friends /><Photos /></Sidebar><Posts /></ProfileLayout>);} Imagine that loading data for `<Posts />` takes some time. Ideally, you’d want to show the rest of the profile page content to the user without waiting for the posts. To do this, wrap `Posts` in a `<Suspense>` boundary: function ProfilePage() {return (<ProfileLayout><ProfileCover /><Sidebar><Friends /><Photos /></Sidebar><Suspense fallback={<PostsGlimmer />}><Posts /></Suspense></ProfileLayout>);} This tells React to start streaming the HTML before `Posts` loads its data. React will send the HTML for the loading fallback (`PostsGlimmer`) first, and then, when `Posts` finishes loading its data, React will send the remaining HTML along with an inline `<script>` tag that replaces the loading fallback with that HTML. From the user’s perspective, the page will first appear with the `PostsGlimmer`, later replaced by the `Posts`. You can further nest `<Suspense>` boundaries to create a more granular loading sequence: function ProfilePage() {return (<ProfileLayout><ProfileCover /><Suspense fallback={<BigSpinner />}><Sidebar><Friends /><Photos /></Sidebar><Suspense fallback={<PostsGlimmer />}><Posts /></Suspense></Suspense></ProfileLayout>);} In this example, React can start streaming the page even earlier. Only `ProfileLayout` and `ProfileCover` must finish rendering first because they are not wrapped in any `<Suspense>` boundary. However, if `Sidebar`, `Friends`, or `Photos` need to load some data, React will send the HTML for the `BigSpinner` fallback instead. Then, as more data becomes available, more content will continue to be revealed until all of it becomes visible. Streaming does not need to wait for React itself to load in the browser, or for your app to become interactive. The HTML content from the server will get progressively revealed before any of the `<script>` tags load. Read more about how streaming HTML works. ### Note **Only Suspense-enabled data sources will activate the Suspense component.** They include: * Data fetching with Suspense-enabled frameworks like Relay and Next.js * Lazy-loading component code with `lazy` * Reading the value of a Promise with `use` Suspense **does not** detect when data is fetched inside an Effect or event handler. The exact way you would load data in the `Posts` component above depends on your framework. If you use a Suspense-enabled framework, you’ll find the details in its data fetching documentation. Suspense-enabled data fetching without the use of an opinionated framework is not yet supported. The requirements for implementing a Suspense-enabled data source are unstable and undocumented. An official API for integrating data sources with Suspense will be released in a future version of React. * * * ### Specifying what goes into the shell The part of your app outside of any `<Suspense>` boundaries is called _the shell:_ function ProfilePage() {return (<ProfileLayout><ProfileCover /><Suspense fallback={<BigSpinner />}><Sidebar><Friends /><Photos /></Sidebar><Suspense fallback={<PostsGlimmer />}><Posts /></Suspense></Suspense></ProfileLayout>);} It determines the earliest loading state that the user may see: <ProfileLayout><ProfileCover /><BigSpinner /></ProfileLayout> If you wrap the whole app into a `<Suspense>` boundary at the root, the shell will only contain that spinner. However, that’s not a pleasant user experience because seeing a big spinner on the screen can feel slower and more annoying than waiting a bit more and seeing the real layout. This is why usually you’ll want to place the `<Suspense>` boundaries so that the shell feels _minimal but complete_—like a skeleton of the entire page layout. The async call to `renderToReadableStream` will resolve to a `stream` as soon as the entire shell has been rendered. Usually, you’ll start streaming then by creating and returning a response with that `stream`: async function handler(request) {const stream = await renderToReadableStream(<App />, {bootstrapScripts: ['/main.js']});return new Response(stream, {headers: { 'content-type': 'text/html' },});} By the time the `stream` is returned, components in nested `<Suspense>` boundaries might still be loading data. * * * ### Logging crashes on the server By default, all errors on the server are logged to console. You can override this behavior to log crash reports: async function handler(request) {const stream = await renderToReadableStream(<App />, {bootstrapScripts: ['/main.js'],onError(error) {console.error(error);logServerCrashReport(error);}});return new Response(stream, {headers: { 'content-type': 'text/html' },});} If you provide a custom `onError` implementation, don’t forget to also log errors to the console like above. * * * ### Recovering from errors inside the shell In this example, the shell contains `ProfileLayout`, `ProfileCover`, and `PostsGlimmer`: function ProfilePage() {return (<ProfileLayout><ProfileCover /><Suspense fallback={<PostsGlimmer />}><Posts /></Suspense></ProfileLayout>);} If an error occurs while rendering those components, React won’t have any meaningful HTML to send to the client. Wrap your `renderToReadableStream` call in a `try...catch` to send a fallback HTML that doesn’t rely on server rendering as the last resort: async function handler(request) {try {const stream = await renderToReadableStream(<App />, {bootstrapScripts: ['/main.js'],onError(error) {console.error(error);logServerCrashReport(error);}});return new Response(stream, {headers: { 'content-type': 'text/html' },});} catch (error) {return new Response('<h1>Something went wrong</h1>', {status: 500,headers: { 'content-type': 'text/html' },});}} If there is an error while generating the shell, both `onError` and your `catch` block will fire. Use `onError` for error reporting and use the `catch` block to send the fallback HTML document. Your fallback HTML does not have to be an error page. Instead, you may include an alternative shell that renders your app on the client only. * * * ### Recovering from errors outside the shell In this example, the `<Posts />` component is wrapped in `<Suspense>` so it is _not_ a part of the shell: function ProfilePage() {return (<ProfileLayout><ProfileCover /><Suspense fallback={<PostsGlimmer />}><Posts /></Suspense></ProfileLayout>);} If an error happens in the `Posts` component or somewhere inside it, React will try to recover from it: 1. It will emit the loading fallback for the closest `<Suspense>` boundary (`PostsGlimmer`) into the HTML. 2. It will “give up” on trying to render the `Posts` content on the server anymore. 3. When the JavaScript code loads on the client, React will _retry_ rendering `Posts` on the client. If retrying rendering `Posts` on the client _also_ fails, React will throw the error on the client. As with all the errors thrown during rendering, the closest parent error boundary determines how to present the error to the user. In practice, this means that the user will see a loading indicator until it is certain that the error is not recoverable. If retrying rendering `Posts` on the client succeeds, the loading fallback from the server will be replaced with the client rendering output. The user will not know that there was a server error. However, the server `onError` callback and the client `onRecoverableError` callbacks will fire so that you can get notified about the error. * * * ### Setting the status code Streaming introduces a tradeoff. You want to start streaming the page as early as possible so that the user can see the content sooner. However, once you start streaming, you can no longer set the response status code. By dividing your app into the shell (above all `<Suspense>` boundaries) and the rest of the content, you’ve already solved a part of this problem. If the shell errors, your `catch` block will run which lets you set the error status code. Otherwise, you know that the app may recover on the client, so you can send “OK”. async function handler(request) {try {const stream = await renderToReadableStream(<App />, {bootstrapScripts: ['/main.js'],onError(error) {console.error(error);logServerCrashReport(error);}});return new Response(stream, {status: 200,headers: { 'content-type': 'text/html' },});} catch (error) {return new Response('<h1>Something went wrong</h1>', {status: 500,headers: { 'content-type': 'text/html' },});}} If a component _outside_ the shell (i.e. inside a `<Suspense>` boundary) throws an error, React will not stop rendering. This means that the `onError` callback will fire, but your code will continue running without getting into the `catch` block. This is because React will try to recover from that error on the client, as described above. However, if you’d like, you can use the fact that something has errored to set the status code: async function handler(request) {try {let didError = false;const stream = await renderToReadableStream(<App />, {bootstrapScripts: ['/main.js'],onError(error) {didError = true;console.error(error);logServerCrashReport(error);}});return new Response(stream, {status: didError ? 500 : 200,headers: { 'content-type': 'text/html' },});} catch (error) {return new Response('<h1>Something went wrong</h1>', {status: 500,headers: { 'content-type': 'text/html' },});}} This will only catch errors outside the shell that happened while generating the initial shell content, so it’s not exhaustive. If knowing whether an error occurred for some content is critical, you can move it up into the shell. * * * ### Handling different errors in different ways You can create your own `Error` subclasses and use the `instanceof` operator to check which error is thrown. For example, you can define a custom `NotFoundError` and throw it from your component. Then you can save the error in `onError` and do something different before returning the response depending on the error type: async function handler(request) {let didError = false;let caughtError = null;function getStatusCode() {if (didError) {if (caughtError instanceof NotFoundError) {return 404;} else {return 500;}} else {return 200;}}try {const stream = await renderToReadableStream(<App />, {bootstrapScripts: ['/main.js'],onError(error) {didError = true;caughtError = error;console.error(error);logServerCrashReport(error);}});return new Response(stream, {status: getStatusCode(),headers: { 'content-type': 'text/html' },});} catch (error) {return new Response('<h1>Something went wrong</h1>', {status: getStatusCode(),headers: { 'content-type': 'text/html' },});}} Keep in mind that once you emit the shell and start streaming, you can’t change the status code. * * * ### Waiting for all content to load for crawlers and static generation Streaming offers a better user experience because the user can see the content as it becomes available. However, when a crawler visits your page, or if you’re generating the pages at the build time, you might want to let all of the content load first and then produce the final HTML output instead of revealing it progressively. You can wait for all the content to load by awaiting the `stream.allReady` Promise: async function handler(request) {try {let didError = false;const stream = await renderToReadableStream(<App />, {bootstrapScripts: ['/main.js'],onError(error) {didError = true;console.error(error);logServerCrashReport(error);}});let isCrawler = // ... depends on your bot detection strategy ...if (isCrawler) {await stream.allReady;}return new Response(stream, {status: didError ? 500 : 200,headers: { 'content-type': 'text/html' },});} catch (error) {return new Response('<h1>Something went wrong</h1>', {status: 500,headers: { 'content-type': 'text/html' },});}} A regular visitor will get a stream of progressively loaded content. A crawler will receive the final HTML output after all the data loads. However, this also means that the crawler will have to wait for _all_ data, some of which might be slow to load or error. Depending on your app, you could choose to send the shell to the crawlers too. * * * ### Aborting server rendering You can force the server rendering to “give up” after a timeout: async function handler(request) {try {const controller = new AbortController();setTimeout(() => {controller.abort();}, 10000);const stream = await renderToReadableStream(<App />, {signal: controller.signal,bootstrapScripts: ['/main.js'],onError(error) {didError = true;console.error(error);logServerCrashReport(error);}});// ... React will flush the remaining loading fallbacks as HTML, and will attempt to render the rest on the client. --- ## Page: https://react.dev/reference/react-dom/server/renderToStaticMarkup `renderToStaticMarkup` renders a non-interactive React tree to an HTML string. const html = renderToStaticMarkup(reactNode, options?) * Reference * `renderToStaticMarkup(reactNode, options?)` * Usage * Rendering a non-interactive React tree as HTML to a string * * * ## Reference ### `renderToStaticMarkup(reactNode, options?)` On the server, call `renderToStaticMarkup` to render your app to HTML. import { renderToStaticMarkup } from 'react-dom/server';const html = renderToStaticMarkup(<Page />); It will produce non-interactive HTML output of your React components. See more examples below. #### Parameters * `reactNode`: A React node you want to render to HTML. For example, a JSX node like `<Page />`. * **optional** `options`: An object for server render. * **optional** `identifierPrefix`: A string prefix React uses for IDs generated by `useId`. Useful to avoid conflicts when using multiple roots on the same page. #### Returns An HTML string. #### Caveats * `renderToStaticMarkup` output cannot be hydrated. * `renderToStaticMarkup` has limited Suspense support. If a component suspends, `renderToStaticMarkup` immediately sends its fallback as HTML. * `renderToStaticMarkup` works in the browser, but using it in the client code is not recommended. If you need to render a component to HTML in the browser, get the HTML by rendering it into a DOM node. * * * ## Usage ### Rendering a non-interactive React tree as HTML to a string Call `renderToStaticMarkup` to render your app to an HTML string which you can send with your server response: import { renderToStaticMarkup } from 'react-dom/server';// The route handler syntax depends on your backend frameworkapp.use('/', (request, response) => {const html = renderToStaticMarkup(<Page />);response.send(html);}); This will produce the initial non-interactive HTML output of your React components. ### Pitfall This method renders **non-interactive HTML that cannot be hydrated.** This is useful if you want to use React as a simple static page generator, or if you’re rendering completely static content like emails. Interactive apps should use `renderToString` on the server and `hydrateRoot` on the client. --- ## Page: https://react.dev/reference/react-dom/server/renderToString ### Pitfall `renderToString` does not support streaming or waiting for data. See the alternatives. `renderToString` renders a React tree to an HTML string. const html = renderToString(reactNode, options?) * Reference * `renderToString(reactNode, options?)` * Usage * Rendering a React tree as HTML to a string * Alternatives * Migrating from `renderToString` to a streaming render on the server * Migrating from `renderToString` to a static prerender on the server * Removing `renderToString` from the client code * Troubleshooting * When a component suspends, the HTML always contains a fallback * * * ## Reference ### `renderToString(reactNode, options?)` On the server, call `renderToString` to render your app to HTML. import { renderToString } from 'react-dom/server';const html = renderToString(<App />); On the client, call `hydrateRoot` to make the server-generated HTML interactive. See more examples below. #### Parameters * `reactNode`: A React node you want to render to HTML. For example, a JSX node like `<App />`. * **optional** `options`: An object for server render. * **optional** `identifierPrefix`: A string prefix React uses for IDs generated by `useId`. Useful to avoid conflicts when using multiple roots on the same page. Must be the same prefix as passed to `hydrateRoot`. #### Returns An HTML string. #### Caveats * `renderToString` has limited Suspense support. If a component suspends, `renderToString` immediately sends its fallback as HTML. * `renderToString` works in the browser, but using it in the client code is not recommended. * * * ## Usage ### Rendering a React tree as HTML to a string Call `renderToString` to render your app to an HTML string which you can send with your server response: import { renderToString } from 'react-dom/server';// The route handler syntax depends on your backend frameworkapp.use('/', (request, response) => {const html = renderToString(<App />);response.send(html);}); This will produce the initial non-interactive HTML output of your React components. On the client, you will need to call `hydrateRoot` to _hydrate_ that server-generated HTML and make it interactive. ### Pitfall `renderToString` does not support streaming or waiting for data. See the alternatives. * * * ## Alternatives ### Migrating from `renderToString` to a streaming render on the server `renderToString` returns a string immediately, so it does not support streaming content as it loads. When possible, we recommend using these fully-featured alternatives: * If you use Node.js, use `renderToPipeableStream`. * If you use Deno or a modern edge runtime with Web Streams, use `renderToReadableStream`. You can continue using `renderToString` if your server environment does not support streams. * * * ### Migrating from `renderToString` to a static prerender on the server `renderToString` returns a string immediately, so it does not support waiting for data to load for static HTML generation. We recommend using these fully-featured alternatives: * If you use Node.js, use `prerenderToNodeStream`. * If you use Deno or a modern edge runtime with Web Streams, use `prerender`. You can continue using `renderToString` if your static site generation environment does not support streams. * * * ### Removing `renderToString` from the client code Sometimes, `renderToString` is used on the client to convert some component to HTML. // 🚩 Unnecessary: using renderToString on the clientimport { renderToString } from 'react-dom/server';const html = renderToString(<MyIcon />);console.log(html); // For example, "<svg>...</svg>" Importing `react-dom/server` **on the client** unnecessarily increases your bundle size and should be avoided. If you need to render some component to HTML in the browser, use `createRoot` and read HTML from the DOM: import { createRoot } from 'react-dom/client';import { flushSync } from 'react-dom';const div = document.createElement('div');const root = createRoot(div);flushSync(() => {root.render(<MyIcon />);});console.log(div.innerHTML); // For example, "<svg>...</svg>" The `flushSync` call is necessary so that the DOM is updated before reading its `innerHTML` property. * * * ## Troubleshooting ### When a component suspends, the HTML always contains a fallback `renderToString` does not fully support Suspense. If some component suspends (for example, because it’s defined with `lazy` or fetches data), `renderToString` will not wait for its content to resolve. Instead, `renderToString` will find the closest `<Suspense>` boundary above it and render its `fallback` prop in the HTML. The content will not appear until the client code loads. To solve this, use one of the recommended streaming solutions. For server side rendering, they can stream content in chunks as it resolves on the server so that the user sees the page being progressively filled in before the client code loads. For static site generation, they can wait for all the content to resolve before generating the static HTML. --- ## Page: https://react.dev/reference/react-dom/static The `react-dom/static` APIs let you generate static HTML for React components. They have limited functionality compared to the streaming APIs. A framework may call them for you. Most of your components don’t need to import or use them. * * * ## Static APIs for Web Streams These methods are only available in the environments with Web Streams, which includes browsers, Deno, and some modern edge runtimes: * `prerender` renders a React tree to static HTML with a Readable Web Stream. * * * ## Static APIs for Node.js Streams These methods are only available in the environments with Node.js Streams: * `prerenderToNodeStream` renders a React tree to static HTML with a Node.js Stream. --- ## Page: https://react.dev/reference/react-dom/static/prerender `prerender` renders a React tree to a static HTML string using a Web Stream. const {prelude} = await prerender(reactNode, options?) * Reference * `prerender(reactNode, options?)` * Usage * Rendering a React tree to a stream of static HTML * Rendering a React tree to a string of static HTML * Waiting for all data to load * Troubleshooting * My stream doesn’t start until the entire app is rendered * * * ## Reference ### `prerender(reactNode, options?)` Call `prerender` to render your app to static HTML. import { prerender } from 'react-dom/static';async function handler(request) {const {prelude} = await prerender(<App />, {bootstrapScripts: ['/main.js']});return new Response(prelude, {headers: { 'content-type': 'text/html' },});} On the client, call `hydrateRoot` to make the server-generated HTML interactive. See more examples below. #### Parameters * `reactNode`: A React node you want to render to HTML. For example, a JSX node like `<App />`. It is expected to represent the entire document, so the App component should render the `<html>` tag. * **optional** `options`: An object with static generation options. * **optional** `bootstrapScriptContent`: If specified, this string will be placed in an inline `<script>` tag. * **optional** `bootstrapScripts`: An array of string URLs for the `<script>` tags to emit on the page. Use this to include the `<script>` that calls `hydrateRoot`. Omit it if you don’t want to run React on the client at all. * **optional** `bootstrapModules`: Like `bootstrapScripts`, but emits `<script type="module">` instead. * **optional** `identifierPrefix`: A string prefix React uses for IDs generated by `useId`. Useful to avoid conflicts when using multiple roots on the same page. Must be the same prefix as passed to `hydrateRoot`. * **optional** `namespaceURI`: A string with the root namespace URI for the stream. Defaults to regular HTML. Pass `'http://www.w3.org/2000/svg'` for SVG or `'http://www.w3.org/1998/Math/MathML'` for MathML. * **optional** `onError`: A callback that fires whenever there is a server error, whether recoverable or not. By default, this only calls `console.error`. If you override it to log crash reports, make sure that you still call `console.error`. You can also use it to adjust the status code before the shell is emitted. * **optional** `progressiveChunkSize`: The number of bytes in a chunk. Read more about the default heuristic. * **optional** `signal`: An abort signal that lets you abort server rendering and render the rest on the client. #### Returns `prerender` returns a Promise: * If rendering the is successful, the Promise will resolve to an object containing: * `prelude`: a Web Stream of HTML. You can use this stream to send a response in chunks, or you can read the entire stream into a string. * If rendering fails, the Promise will be rejected. Use this to output a fallback shell. ### Note ### When should I use `prerender`? The static `prerender` API is used for static server-side generation (SSG). Unlike `renderToString`, `prerender` waits for all data to load before resolving. This makes it suitable for generating static HTML for a full page, including data that needs to be fetched using Suspense. To stream content as it loads, use a streaming server-side render (SSR) API like renderToReadableStream. * * * ## Usage ### Rendering a React tree to a stream of static HTML Call `prerender` to render your React tree to static HTML into a Readable Web Stream:: import { prerender } from 'react-dom/static';async function handler(request) {const {prelude} = await prerender(<App />, {bootstrapScripts: ['/main.js']});return new Response(prelude, {headers: { 'content-type': 'text/html' },});} Along with the root component, you need to provide a list of bootstrap `<script>` paths. Your root component should return **the entire document including the root `<html>` tag.** For example, it might look like this: export default function App() {return (<html><head><meta charSet="utf-8" /><meta name="viewport" content="width=device-width, initial-scale=1" /><link rel="stylesheet" href="/styles.css"></link><title>My app</title></head><body><Router /></body></html>);} React will inject the doctype and your bootstrap `<script>` tags into the resulting HTML stream: <!DOCTYPE html><html><!-- ... HTML from your components ... --></html><script src="/main.js" async=""></script> On the client, your bootstrap script should hydrate the entire `document` with a call to `hydrateRoot`: import { hydrateRoot } from 'react-dom/client';import App from './App.js';hydrateRoot(document, <App />); This will attach event listeners to the static server-generated HTML and make it interactive. ##### Deep Dive #### Reading CSS and JS asset paths from the build output The final asset URLs (like JavaScript and CSS files) are often hashed after the build. For example, instead of `styles.css` you might end up with `styles.123456.css`. Hashing static asset filenames guarantees that every distinct build of the same asset will have a different filename. This is useful because it lets you safely enable long-term caching for static assets: a file with a certain name would never change content. However, if you don’t know the asset URLs until after the build, there’s no way for you to put them in the source code. For example, hardcoding `"/styles.css"` into JSX like earlier wouldn’t work. To keep them out of your source code, your root component can read the real filenames from a map passed as a prop: export default function App({ assetMap }) {return (<html><head><title>My app</title><link rel="stylesheet" href={assetMap['styles.css']}></link></head> ...</html>);} On the server, render `<App assetMap={assetMap} />` and pass your `assetMap` with the asset URLs: // You'd need to get this JSON from your build tooling, e.g. read it from the build output.const assetMap = {'styles.css': '/styles.123456.css','main.js': '/main.123456.js'};async function handler(request) {const {prelude} = await prerender(<App assetMap={assetMap} />, {bootstrapScripts: [assetMap['/main.js']]});return new Response(prelude, {headers: { 'content-type': 'text/html' },});} Since your server is now rendering `<App assetMap={assetMap} />`, you need to render it with `assetMap` on the client too to avoid hydration errors. You can serialize and pass `assetMap` to the client like this: // You'd need to get this JSON from your build tooling.const assetMap = {'styles.css': '/styles.123456.css','main.js': '/main.123456.js'};async function handler(request) {const {prelude} = await prerender(<App assetMap={assetMap} />, {// Careful: It's safe to stringify() this because this data isn't user-generated.bootstrapScriptContent: `window.assetMap = ${JSON.stringify(assetMap)};`,bootstrapScripts: [assetMap['/main.js']],});return new Response(prelude, {headers: { 'content-type': 'text/html' },});} In the example above, the `bootstrapScriptContent` option adds an extra inline `<script>` tag that sets the global `window.assetMap` variable on the client. This lets the client code read the same `assetMap`: import { hydrateRoot } from 'react-dom/client';import App from './App.js';hydrateRoot(document, <App assetMap={window.assetMap} />); Both client and server render `App` with the same `assetMap` prop, so there are no hydration errors. * * * ### Rendering a React tree to a string of static HTML Call `prerender` to render your app to a static HTML string: import { prerender } from 'react-dom/static';async function renderToString() {const {prelude} = await prerender(<App />, {bootstrapScripts: ['/main.js']});const reader = prelude.getReader();let content = '';while (true) {const {done, value} = await reader.read();if (done) {return content;}content += Buffer.from(value).toString('utf8');}} This will produce the initial non-interactive HTML output of your React components. On the client, you will need to call `hydrateRoot` to _hydrate_ that server-generated HTML and make it interactive. * * * ### Waiting for all data to load `prerender` waits for all data to load before finishing the static HTML generation and resolving. For example, consider a profile page that shows a cover, a sidebar with friends and photos, and a list of posts: function ProfilePage() {return (<ProfileLayout><ProfileCover /><Sidebar><Friends /><Photos /></Sidebar><Suspense fallback={<PostsGlimmer />}><Posts /></Suspense></ProfileLayout>);} Imagine that `<Posts />` needs to load some data, which takes some time. Ideally, you’d want wait for the posts to finish so it’s included in the HTML. To do this, you can use Suspense to suspend on the data, and `prerender` will wait for the suspended content to finish before resolving to the static HTML. ### Note **Only Suspense-enabled data sources will activate the Suspense component.** They include: * Data fetching with Suspense-enabled frameworks like Relay and Next.js * Lazy-loading component code with `lazy` * Reading the value of a Promise with `use` Suspense **does not** detect when data is fetched inside an Effect or event handler. The exact way you would load data in the `Posts` component above depends on your framework. If you use a Suspense-enabled framework, you’ll find the details in its data fetching documentation. Suspense-enabled data fetching without the use of an opinionated framework is not yet supported. The requirements for implementing a Suspense-enabled data source are unstable and undocumented. An official API for integrating data sources with Suspense will be released in a future version of React. * * * ## Troubleshooting ### My stream doesn’t start until the entire app is rendered The `prerender` response waits for the entire app to finish rendering, including waiting for all Suspense boundaries to resolve, before resolving. It is designed for static site generation (SSG) ahead of time and does not support streaming more content as it loads. To stream content as it loads, use a streaming server render API like renderToReadableStream. --- ## Page: https://react.dev/reference/react-dom/static/prerenderToNodeStream `prerenderToNodeStream` renders a React tree to a static HTML string using a Node.js Stream.. const {prelude} = await prerenderToNodeStream(reactNode, options?) * Reference * `prerenderToNodeStream(reactNode, options?)` * Usage * Rendering a React tree to a stream of static HTML * Rendering a React tree to a string of static HTML * Waiting for all data to load * Troubleshooting * My stream doesn’t start until the entire app is rendered ### Note This API is specific to Node.js. Environments with Web Streams, like Deno and modern edge runtimes, should use `prerender` instead. * * * ## Reference ### `prerenderToNodeStream(reactNode, options?)` Call `prerenderToNodeStream` to render your app to static HTML. import { prerenderToNodeStream } from 'react-dom/static';// The route handler syntax depends on your backend frameworkapp.use('/', async (request, response) => {const { prelude } = await prerenderToNodeStream(<App />, {bootstrapScripts: ['/main.js'],});response.setHeader('Content-Type', 'text/plain');prelude.pipe(response);}); On the client, call `hydrateRoot` to make the server-generated HTML interactive. See more examples below. #### Parameters * `reactNode`: A React node you want to render to HTML. For example, a JSX node like `<App />`. It is expected to represent the entire document, so the App component should render the `<html>` tag. * **optional** `options`: An object with static generation options. * **optional** `bootstrapScriptContent`: If specified, this string will be placed in an inline `<script>` tag. * **optional** `bootstrapScripts`: An array of string URLs for the `<script>` tags to emit on the page. Use this to include the `<script>` that calls `hydrateRoot`. Omit it if you don’t want to run React on the client at all. * **optional** `bootstrapModules`: Like `bootstrapScripts`, but emits `<script type="module">` instead. * **optional** `identifierPrefix`: A string prefix React uses for IDs generated by `useId`. Useful to avoid conflicts when using multiple roots on the same page. Must be the same prefix as passed to `hydrateRoot`. * **optional** `namespaceURI`: A string with the root namespace URI for the stream. Defaults to regular HTML. Pass `'http://www.w3.org/2000/svg'` for SVG or `'http://www.w3.org/1998/Math/MathML'` for MathML. * **optional** `onError`: A callback that fires whenever there is a server error, whether recoverable or not. By default, this only calls `console.error`. If you override it to log crash reports, make sure that you still call `console.error`. You can also use it to adjust the status code before the shell is emitted. * **optional** `progressiveChunkSize`: The number of bytes in a chunk. Read more about the default heuristic. * **optional** `signal`: An abort signal that lets you abort server rendering and render the rest on the client. #### Returns `prerenderToNodeStream` returns a Promise: * If rendering the is successful, the Promise will resolve to an object containing: * `prelude`: a Node.js Stream. of HTML. You can use this stream to send a response in chunks, or you can read the entire stream into a string. * If rendering fails, the Promise will be rejected. Use this to output a fallback shell. ### Note ### When should I use `prerenderToNodeStream`? The static `prerenderToNodeStream` API is used for static server-side generation (SSG). Unlike `renderToString`, `prerenderToNodeStream` waits for all data to load before resolving. This makes it suitable for generating static HTML for a full page, including data that needs to be fetched using Suspense. To stream content as it loads, use a streaming server-side render (SSR) API like renderToReadableStream. * * * ## Usage ### Rendering a React tree to a stream of static HTML Call `prerenderToNodeStream` to render your React tree to static HTML into a Node.js Stream.: import { prerenderToNodeStream } from 'react-dom/static';// The route handler syntax depends on your backend frameworkapp.use('/', async (request, response) => {const { prelude } = await prerenderToNodeStream(<App />, {bootstrapScripts: ['/main.js'],});response.setHeader('Content-Type', 'text/plain');prelude.pipe(response);}); Along with the root component, you need to provide a list of bootstrap `<script>` paths. Your root component should return **the entire document including the root `<html>` tag.** For example, it might look like this: export default function App() {return (<html><head><meta charSet="utf-8" /><meta name="viewport" content="width=device-width, initial-scale=1" /><link rel="stylesheet" href="/styles.css"></link><title>My app</title></head><body><Router /></body></html>);} React will inject the doctype and your bootstrap `<script>` tags into the resulting HTML stream: <!DOCTYPE html><html><!-- ... HTML from your components ... --></html><script src="/main.js" async=""></script> On the client, your bootstrap script should hydrate the entire `document` with a call to `hydrateRoot`: import { hydrateRoot } from 'react-dom/client';import App from './App.js';hydrateRoot(document, <App />); This will attach event listeners to the static server-generated HTML and make it interactive. ##### Deep Dive #### Reading CSS and JS asset paths from the build output The final asset URLs (like JavaScript and CSS files) are often hashed after the build. For example, instead of `styles.css` you might end up with `styles.123456.css`. Hashing static asset filenames guarantees that every distinct build of the same asset will have a different filename. This is useful because it lets you safely enable long-term caching for static assets: a file with a certain name would never change content. However, if you don’t know the asset URLs until after the build, there’s no way for you to put them in the source code. For example, hardcoding `"/styles.css"` into JSX like earlier wouldn’t work. To keep them out of your source code, your root component can read the real filenames from a map passed as a prop: export default function App({ assetMap }) {return (<html><head><title>My app</title><link rel="stylesheet" href={assetMap['styles.css']}></link></head> ...</html>);} On the server, render `<App assetMap={assetMap} />` and pass your `assetMap` with the asset URLs: // You'd need to get this JSON from your build tooling, e.g. read it from the build output.const assetMap = {'styles.css': '/styles.123456.css','main.js': '/main.123456.js'};app.use('/', async (request, response) => {const { prelude } = await prerenderToNodeStream(<App />, {bootstrapScripts: [assetMap['/main.js']]});response.setHeader('Content-Type', 'text/html');prelude.pipe(response);}); Since your server is now rendering `<App assetMap={assetMap} />`, you need to render it with `assetMap` on the client too to avoid hydration errors. You can serialize and pass `assetMap` to the client like this: // You'd need to get this JSON from your build tooling.const assetMap = {'styles.css': '/styles.123456.css','main.js': '/main.123456.js'};app.use('/', async (request, response) => {const { prelude } = await prerenderToNodeStream(<App />, {// Careful: It's safe to stringify() this because this data isn't user-generated.bootstrapScriptContent: `window.assetMap = ${JSON.stringify(assetMap)};`,bootstrapScripts: [assetMap['/main.js']],});response.setHeader('Content-Type', 'text/html');prelude.pipe(response);}); In the example above, the `bootstrapScriptContent` option adds an extra inline `<script>` tag that sets the global `window.assetMap` variable on the client. This lets the client code read the same `assetMap`: import { hydrateRoot } from 'react-dom/client';import App from './App.js';hydrateRoot(document, <App assetMap={window.assetMap} />); Both client and server render `App` with the same `assetMap` prop, so there are no hydration errors. * * * ### Rendering a React tree to a string of static HTML Call `prerenderToNodeStream` to render your app to a static HTML string: import { prerenderToNodeStream } from 'react-dom/static';async function renderToString() {const {prelude} = await prerenderToNodeStream(<App />, {bootstrapScripts: ['/main.js']});return new Promise((resolve, reject) => {let data = '';prelude.on('data', chunk => {data += chunk;});prelude.on('end', () => resolve(data));prelude.on('error', reject);});} This will produce the initial non-interactive HTML output of your React components. On the client, you will need to call `hydrateRoot` to _hydrate_ that server-generated HTML and make it interactive. * * * ### Waiting for all data to load `prerenderToNodeStream` waits for all data to load before finishing the static HTML generation and resolving. For example, consider a profile page that shows a cover, a sidebar with friends and photos, and a list of posts: function ProfilePage() {return (<ProfileLayout><ProfileCover /><Sidebar><Friends /><Photos /></Sidebar><Suspense fallback={<PostsGlimmer />}><Posts /></Suspense></ProfileLayout>);} Imagine that `<Posts />` needs to load some data, which takes some time. Ideally, you’d want wait for the posts to finish so it’s included in the HTML. To do this, you can use Suspense to suspend on the data, and `prerenderToNodeStream` will wait for the suspended content to finish before resolving to the static HTML. ### Note **Only Suspense-enabled data sources will activate the Suspense component.** They include: * Data fetching with Suspense-enabled frameworks like Relay and Next.js * Lazy-loading component code with `lazy` * Reading the value of a Promise with `use` Suspense **does not** detect when data is fetched inside an Effect or event handler. The exact way you would load data in the `Posts` component above depends on your framework. If you use a Suspense-enabled framework, you’ll find the details in its data fetching documentation. Suspense-enabled data fetching without the use of an opinionated framework is not yet supported. The requirements for implementing a Suspense-enabled data source are unstable and undocumented. An official API for integrating data sources with Suspense will be released in a future version of React. * * * ## Troubleshooting ### My stream doesn’t start until the entire app is rendered The `prerenderToNodeStream` response waits for the entire app to finish rendering, including waiting for all Suspense boundaries to resolve, before resolving. It is designed for static site generation (SSG) ahead of time and does not support streaming more content as it loads. To stream content as it loads, use a streaming server render API like renderToPipeableStream. --- ## Page: https://react.dev/reference/react/legacy These APIs are exported from the `react` package, but they are not recommended for use in newly written code. See the linked individual API pages for the suggested alternatives. * * * ## Legacy APIs * `Children` lets you manipulate and transform the JSX received as the `children` prop. See alternatives. * `cloneElement` lets you create a React element using another element as a starting point. See alternatives. * `Component` lets you define a React component as a JavaScript class. See alternatives. * `createElement` lets you create a React element. Typically, you’ll use JSX instead. * `createRef` creates a ref object which can contain arbitrary value. See alternatives. * `forwardRef` lets your component expose a DOM node to parent component with a ref. * `isValidElement` checks whether a value is a React element. Typically used with `cloneElement`. * `PureComponent` is similar to `Component`, but it skip re-renders with same props. See alternatives. * * * ## Removed APIs These APIs were removed in React 19: * `createFactory`: use JSX instead. * Class Components: `static contextTypes`: use `static contextType` instead. * Class Components: `static childContextTypes`: use `static contextType` instead. * Class Components: `static getChildContext`: use `Context.Provider` instead. * Class Components: `static propTypes`: use a type system like TypeScript instead. * Class Components: `this.refs`: use `createRef` instead. --- ## Page: https://react.dev/reference/react/Children ### Pitfall Using `Children` is uncommon and can lead to fragile code. See common alternatives. `Children` lets you manipulate and transform the JSX you received as the `children` prop. const mappedChildren = Children.map(children, child =><div className="Row">{child}</div>); * Reference * `Children.count(children)` * `Children.forEach(children, fn, thisArg?)` * `Children.map(children, fn, thisArg?)` * `Children.only(children)` * `Children.toArray(children)` * Usage * Transforming children * Running some code for each child * Counting children * Converting children to an array * Alternatives * Exposing multiple components * Accepting an array of objects as a prop * Calling a render prop to customize rendering * Troubleshooting * I pass a custom component, but the `Children` methods don’t show its render result * * * ## Reference ### `Children.count(children)` Call `Children.count(children)` to count the number of children in the `children` data structure. import { Children } from 'react';function RowList({ children }) {return (<><h1>Total rows: {Children.count(children)}</h1> ...</>);} See more examples below. #### Parameters * `children`: The value of the `children` prop received by your component. #### Returns The number of nodes inside these `children`. #### Caveats * Empty nodes (`null`, `undefined`, and Booleans), strings, numbers, and React elements count as individual nodes. Arrays don’t count as individual nodes, but their children do. **The traversal does not go deeper than React elements:** they don’t get rendered, and their children aren’t traversed. Fragments don’t get traversed. * * * ### `Children.forEach(children, fn, thisArg?)` Call `Children.forEach(children, fn, thisArg?)` to run some code for each child in the `children` data structure. import { Children } from 'react';function SeparatorList({ children }) {const result = [];Children.forEach(children, (child, index) => {result.push(child);result.push(<hr key={index} />);});// ... See more examples below. #### Parameters * `children`: The value of the `children` prop received by your component. * `fn`: The function you want to run for each child, similar to the array `forEach` method callback. It will be called with the child as the first argument and its index as the second argument. The index starts at `0` and increments on each call. * **optional** `thisArg`: The `this` value with which the `fn` function should be called. If omitted, it’s `undefined`. #### Returns `Children.forEach` returns `undefined`. #### Caveats * Empty nodes (`null`, `undefined`, and Booleans), strings, numbers, and React elements count as individual nodes. Arrays don’t count as individual nodes, but their children do. **The traversal does not go deeper than React elements:** they don’t get rendered, and their children aren’t traversed. Fragments don’t get traversed. * * * ### `Children.map(children, fn, thisArg?)` Call `Children.map(children, fn, thisArg?)` to map or transform each child in the `children` data structure. import { Children } from 'react';function RowList({ children }) {return (<div className="RowList">{Children.map(children, child =><div className="Row">{child}</div>)}</div>);} See more examples below. #### Parameters * `children`: The value of the `children` prop received by your component. * `fn`: The mapping function, similar to the array `map` method callback. It will be called with the child as the first argument and its index as the second argument. The index starts at `0` and increments on each call. You need to return a React node from this function. This may be an empty node (`null`, `undefined`, or a Boolean), a string, a number, a React element, or an array of other React nodes. * **optional** `thisArg`: The `this` value with which the `fn` function should be called. If omitted, it’s `undefined`. #### Returns If `children` is `null` or `undefined`, returns the same value. Otherwise, returns a flat array consisting of the nodes you’ve returned from the `fn` function. The returned array will contain all nodes you returned except for `null` and `undefined`. #### Caveats * Empty nodes (`null`, `undefined`, and Booleans), strings, numbers, and React elements count as individual nodes. Arrays don’t count as individual nodes, but their children do. **The traversal does not go deeper than React elements:** they don’t get rendered, and their children aren’t traversed. Fragments don’t get traversed. * If you return an element or an array of elements with keys from `fn`, **the returned elements’ keys will be automatically combined with the key of the corresponding original item from `children`.** When you return multiple elements from `fn` in an array, their keys only need to be unique locally amongst each other. * * * ### `Children.only(children)` Call `Children.only(children)` to assert that `children` represent a single React element. function Box({ children }) {const element = Children.only(children);// ... #### Parameters * `children`: The value of the `children` prop received by your component. #### Returns If `children` is a valid element, returns that element. Otherwise, throws an error. #### Caveats * This method always **throws if you pass an array (such as the return value of `Children.map`) as `children`.** In other words, it enforces that `children` is a single React element, not that it’s an array with a single element. * * * ### `Children.toArray(children)` Call `Children.toArray(children)` to create an array out of the `children` data structure. import { Children } from 'react';export default function ReversedList({ children }) {const result = Children.toArray(children);result.reverse();// ... #### Parameters * `children`: The value of the `children` prop received by your component. #### Returns Returns a flat array of elements in `children`. #### Caveats * Empty nodes (`null`, `undefined`, and Booleans) will be omitted in the returned array. **The returned elements’ keys will be calculated from the original elements’ keys and their level of nesting and position.** This ensures that flattening the array does not introduce changes in behavior. * * * ## Usage ### Transforming children To transform the children JSX that your component receives as the `children` prop, call `Children.map`: import { Children } from 'react';function RowList({ children }) {return (<div className="RowList">{Children.map(children, child =><div className="Row">{child}</div>)}</div>);} In the example above, the `RowList` wraps every child it receives into a `<div className="Row">` container. For example, let’s say the parent component passes three `<p>` tags as the `children` prop to `RowList`: <RowList><p>This is the first item.</p><p>This is the second item.</p><p>This is the third item.</p></RowList> Then, with the `RowList` implementation above, the final rendered result will look like this: <div className="RowList"><div className="Row"><p>This is the first item.</p></div><div className="Row"><p>This is the second item.</p></div><div className="Row"><p>This is the third item.</p></div></div> `Children.map` is similar to to transforming arrays with `map()`. The difference is that the `children` data structure is considered _opaque._ This means that even if it’s sometimes an array, you should not assume it’s an array or any other particular data type. This is why you should use `Children.map` if you need to transform it. ##### Deep Dive #### Why is the children prop not always an array? In React, the `children` prop is considered an _opaque_ data structure. This means that you shouldn’t rely on how it is structured. To transform, filter, or count children, you should use the `Children` methods. In practice, the `children` data structure is often represented as an array internally. However, if there is only a single child, then React won’t create an extra array since this would lead to unnecessary memory overhead. As long as you use the `Children` methods instead of directly introspecting the `children` prop, your code will not break even if React changes how the data structure is actually implemented. Even when `children` is an array, `Children.map` has useful special behavior. For example, `Children.map` combines the keys on the returned elements with the keys on the `children` you’ve passed to it. This ensures the original JSX children don’t “lose” keys even if they get wrapped like in the example above. ### Pitfall The `children` data structure **does not include rendered output** of the components you pass as JSX. In the example below, the `children` received by the `RowList` only contains two items rather than three: 1. `<p>This is the first item.</p>` 2. `<MoreRows />` This is why only two row wrappers are generated in this example: import RowList from './RowList.js'; export default function App() { return ( <RowList\> <p\>This is the first item.</p\> <MoreRows /> </RowList\> ); } function MoreRows() { return ( <\> <p\>This is the second item.</p\> <p\>This is the third item.</p\> </\> ); } **There is no way to get the rendered output of an inner component** like `<MoreRows />` when manipulating `children`. This is why it’s usually better to use one of the alternative solutions. * * * ### Running some code for each child Call `Children.forEach` to iterate over each child in the `children` data structure. It does not return any value and is similar to the array `forEach` method. You can use it to run custom logic like constructing your own array. ### Pitfall As mentioned earlier, there is no way to get the rendered output of an inner component when manipulating `children`. This is why it’s usually better to use one of the alternative solutions. * * * ### Counting children Call `Children.count(children)` to calculate the number of children. import { Children } from 'react'; export default function RowList({ children }) { return ( <div className\="RowList"\> <h1 className\="RowListHeader"\> Total rows: {Children.count(children)} </h1\> {Children.map(children, child \=> <div className\="Row"\> {child} </div\> )} </div\> ); } ### Pitfall As mentioned earlier, there is no way to get the rendered output of an inner component when manipulating `children`. This is why it’s usually better to use one of the alternative solutions. * * * ### Converting children to an array Call `Children.toArray(children)` to turn the `children` data structure into a regular JavaScript array. This lets you manipulate the array with built-in array methods like `filter`, `sort`, or `reverse`. ### Pitfall As mentioned earlier, there is no way to get the rendered output of an inner component when manipulating `children`. This is why it’s usually better to use one of the alternative solutions. * * * ## Alternatives ### Note This section describes alternatives to the `Children` API (with capital `C`) that’s imported like this: import { Children } from 'react'; Don’t confuse it with using the `children` prop (lowercase `c`), which is good and encouraged. ### Exposing multiple components Manipulating children with the `Children` methods often leads to fragile code. When you pass children to a component in JSX, you don’t usually expect the component to manipulate or transform the individual children. When you can, try to avoid using the `Children` methods. For example, if you want every child of `RowList` to be wrapped in `<div className="Row">`, export a `Row` component, and manually wrap every row into it like this: import { RowList, Row } from './RowList.js'; export default function App() { return ( <RowList\> <Row\> <p\>This is the first item.</p\> </Row\> <Row\> <p\>This is the second item.</p\> </Row\> <Row\> <p\>This is the third item.</p\> </Row\> </RowList\> ); } Unlike using `Children.map`, this approach does not wrap every child automatically. **However, this approach has a significant benefit compared to the earlier example with `Children.map` because it works even if you keep extracting more components.** For example, it still works if you extract your own `MoreRows` component: import { RowList, Row } from './RowList.js'; export default function App() { return ( <RowList\> <Row\> <p\>This is the first item.</p\> </Row\> <MoreRows /> </RowList\> ); } function MoreRows() { return ( <\> <Row\> <p\>This is the second item.</p\> </Row\> <Row\> <p\>This is the third item.</p\> </Row\> </\> ); } This wouldn’t work with `Children.map` because it would “see” `<MoreRows />` as a single child (and a single row). * * * ### Accepting an array of objects as a prop You can also explicitly pass an array as a prop. For example, this `RowList` accepts a `rows` array as a prop: Since `rows` is a regular JavaScript array, the `RowList` component can use built-in array methods like `map` on it. This pattern is especially useful when you want to be able to pass more information as structured data together with children. In the below example, the `TabSwitcher` component receives an array of objects as the `tabs` prop: import TabSwitcher from './TabSwitcher.js'; export default function App() { return ( <TabSwitcher tabs\={\[ { id: 'first', header: 'First', content: <p\>This is the first item.</p\> }, { id: 'second', header: 'Second', content: <p\>This is the second item.</p\> }, { id: 'third', header: 'Third', content: <p\>This is the third item.</p\> } \]} /> ); } Unlike passing the children as JSX, this approach lets you associate some extra data like `header` with each item. Because you are working with the `tabs` directly, and it is an array, you do not need the `Children` methods. * * * ### Calling a render prop to customize rendering Instead of producing JSX for every single item, you can also pass a function that returns JSX, and call that function when necessary. In this example, the `App` component passes a `renderContent` function to the `TabSwitcher` component. The `TabSwitcher` component calls `renderContent` only for the selected tab: A prop like `renderContent` is called a _render prop_ because it is a prop that specifies how to render a piece of the user interface. However, there is nothing special about it: it is a regular prop which happens to be a function. Render props are functions, so you can pass information to them. For example, this `RowList` component passes the `id` and the `index` of each row to the `renderRow` render prop, which uses `index` to highlight even rows: import { RowList, Row } from './RowList.js'; export default function App() { return ( <RowList rowIds\={\['first', 'second', 'third'\]} renderRow\={(id, index) \=> { return ( <Row isHighlighted\={index % 2 === 0}\> <p\>This is the {id} item.</p\> </Row\> ); }} /> ); } This is another example of how parent and child components can cooperate without manipulating the children. * * * ## Troubleshooting ### I pass a custom component, but the `Children` methods don’t show its render result Suppose you pass two children to `RowList` like this: <RowList><p>First item</p><MoreRows /></RowList> If you do `Children.count(children)` inside `RowList`, you will get `2`. Even if `MoreRows` renders 10 different items, or if it returns `null`, `Children.count(children)` will still be `2`. From the `RowList`’s perspective, it only “sees” the JSX it has received. It does not “see” the internals of the `MoreRows` component. The limitation makes it hard to extract a component. This is why alternatives are preferred to using `Children`. --- ## Page: https://react.dev/reference/react/cloneElement ### Pitfall Using `cloneElement` is uncommon and can lead to fragile code. See common alternatives. `cloneElement` lets you create a new React element using another element as a starting point. const clonedElement = cloneElement(element, props, ...children) * Reference * `cloneElement(element, props, ...children)` * Usage * Overriding props of an element * Alternatives * Passing data with a render prop * Passing data through context * Extracting logic into a custom Hook * * * ## Reference ### `cloneElement(element, props, ...children)` Call `cloneElement` to create a React element based on the `element`, but with different `props` and `children`: import { cloneElement } from 'react';// ...const clonedElement = cloneElement(<Row title="Cabbage"> Hello</Row>,{ isHighlighted: true },'Goodbye');console.log(clonedElement); // <Row title="Cabbage" isHighlighted={true}>Goodbye</Row> See more examples below. #### Parameters * `element`: The `element` argument must be a valid React element. For example, it could be a JSX node like `<Something />`, the result of calling `createElement`, or the result of another `cloneElement` call. * `props`: The `props` argument must either be an object or `null`. If you pass `null`, the cloned element will retain all of the original `element.props`. Otherwise, for every prop in the `props` object, the returned element will “prefer” the value from `props` over the value from `element.props`. The rest of the props will be filled from the original `element.props`. If you pass `props.key` or `props.ref`, they will replace the original ones. * **optional** `...children`: Zero or more child nodes. They can be any React nodes, including React elements, strings, numbers, portals, empty nodes (`null`, `undefined`, `true`, and `false`), and arrays of React nodes. If you don’t pass any `...children` arguments, the original `element.props.children` will be preserved. #### Returns `cloneElement` returns a React element object with a few properties: * `type`: Same as `element.type`. * `props`: The result of shallowly merging `element.props` with the overriding `props` you have passed. * `ref`: The original `element.ref`, unless it was overridden by `props.ref`. * `key`: The original `element.key`, unless it was overridden by `props.key`. Usually, you’ll return the element from your component or make it a child of another element. Although you may read the element’s properties, it’s best to treat every element as opaque after it’s created, and only render it. #### Caveats * Cloning an element **does not modify the original element.** * You should only **pass children as multiple arguments to `cloneElement` if they are all statically known,** like `cloneElement(element, null, child1, child2, child3)`. If your children are dynamic, pass the entire array as the third argument: `cloneElement(element, null, listItems)`. This ensures that React will warn you about missing `key`s for any dynamic lists. For static lists this is not necessary because they never reorder. * `cloneElement` makes it harder to trace the data flow, so **try the alternatives instead.** * * * ## Usage ### Overriding props of an element To override the props of some React element, pass it to `cloneElement` with the props you want to override: import { cloneElement } from 'react';// ...const clonedElement = cloneElement(<Row title="Cabbage" />,{ isHighlighted: true }); Here, the resulting cloned element will be `<Row title="Cabbage" isHighlighted={true} />`. **Let’s walk through an example to see when it’s useful.** Imagine a `List` component that renders its `children` as a list of selectable rows with a “Next” button that changes which row is selected. The `List` component needs to render the selected `Row` differently, so it clones every `<Row>` child that it has received, and adds an extra `isHighlighted: true` or `isHighlighted: false` prop: export default function List({ children }) {const [selectedIndex, setSelectedIndex] = useState(0);return (<div className="List">{Children.map(children, (child, index) =>cloneElement(child, {isHighlighted: index === selectedIndex }))} Let’s say the original JSX received by `List` looks like this: <List><Row title="Cabbage" /><Row title="Garlic" /><Row title="Apple" /></List> By cloning its children, the `List` can pass extra information to every `Row` inside. The result looks like this: <List><Rowtitle="Cabbage"isHighlighted={true} /><Rowtitle="Garlic"isHighlighted={false} /><Rowtitle="Apple"isHighlighted={false} /></List> Notice how pressing “Next” updates the state of the `List`, and highlights a different row: import { Children, cloneElement, useState } from 'react'; export default function List({ children }) { const \[selectedIndex, setSelectedIndex\] = useState(0); return ( <div className\="List"\> {Children.map(children, (child, index) \=> cloneElement(child, { isHighlighted: index === selectedIndex }) )} <hr /> <button onClick\={() \=> { setSelectedIndex(i \=> (i + 1) % Children.count(children) ); }}\> Next </button\> </div\> ); } To summarize, the `List` cloned the `<Row />` elements it received and added an extra prop to them. ### Pitfall Cloning children makes it hard to tell how the data flows through your app. Try one of the alternatives. * * * ## Alternatives ### Passing data with a render prop Instead of using `cloneElement`, consider accepting a _render prop_ like `renderItem`. Here, `List` receives `renderItem` as a prop. `List` calls `renderItem` for every item and passes `isHighlighted` as an argument: export default function List({ items, renderItem }) {const [selectedIndex, setSelectedIndex] = useState(0);return (<div className="List">{items.map((item, index) => {const isHighlighted = index === selectedIndex;return renderItem(item, isHighlighted);})} The `renderItem` prop is called a “render prop” because it’s a prop that specifies how to render something. For example, you can pass a `renderItem` implementation that renders a `<Row>` with the given `isHighlighted` value: <Listitems={products}renderItem={(product, isHighlighted) =><Rowkey={product.id}title={product.title}isHighlighted={isHighlighted}/>}/> The end result is the same as with `cloneElement`: <List><Rowtitle="Cabbage"isHighlighted={true} /><Rowtitle="Garlic"isHighlighted={false} /><Rowtitle="Apple"isHighlighted={false} /></List> However, you can clearly trace where the `isHighlighted` value is coming from. import { useState } from 'react'; export default function List({ items, renderItem }) { const \[selectedIndex, setSelectedIndex\] = useState(0); return ( <div className\="List"\> {items.map((item, index) \=> { const isHighlighted = index === selectedIndex; return renderItem(item, isHighlighted); })} <hr /> <button onClick\={() \=> { setSelectedIndex(i \=> (i + 1) % items.length ); }}\> Next </button\> </div\> ); } This pattern is preferred to `cloneElement` because it is more explicit. * * * ### Passing data through context Another alternative to `cloneElement` is to pass data through context. For example, you can call `createContext` to define a `HighlightContext`: export const HighlightContext = createContext(false); Your `List` component can wrap every item it renders into a `HighlightContext` provider: export default function List({ items, renderItem }) {const [selectedIndex, setSelectedIndex] = useState(0);return (<div className="List">{items.map((item, index) => {const isHighlighted = index === selectedIndex;return (<HighlightContext.Provider key={item.id} value={isHighlighted}>{renderItem(item)}</HighlightContext.Provider>);})} With this approach, `Row` does not need to receive an `isHighlighted` prop at all. Instead, it reads the context: export default function Row({ title }) {const isHighlighted = useContext(HighlightContext);// ... This allows the calling component to not know or worry about passing `isHighlighted` to `<Row>`: <Listitems={products}renderItem={product =><Row title={product.title} />}/> Instead, `List` and `Row` coordinate the highlighting logic through context. import { useState } from 'react'; import { HighlightContext } from './HighlightContext.js'; export default function List({ items, renderItem }) { const \[selectedIndex, setSelectedIndex\] = useState(0); return ( <div className\="List"\> {items.map((item, index) \=> { const isHighlighted = index === selectedIndex; return ( <HighlightContext.Provider key\={item.id} value\={isHighlighted} \> {renderItem(item)} </HighlightContext.Provider\> ); })} <hr /> <button onClick\={() \=> { setSelectedIndex(i \=> (i + 1) % items.length ); }}\> Next </button\> </div\> ); } Learn more about passing data through context. * * * Another approach you can try is to extract the “non-visual” logic into your own Hook, and use the information returned by your Hook to decide what to render. For example, you could write a `useList` custom Hook like this: import { useState } from 'react';export default function useList(items) {const [selectedIndex, setSelectedIndex] = useState(0);function onNext() {setSelectedIndex(i =>(i + 1) % items.length);}const selected = items[selectedIndex];return [selected, onNext];} Then you could use it like this: export default function App() {const [selected, onNext] = useList(products);return (<div className="List">{products.map(product =><Rowkey={product.id}title={product.title}isHighlighted={selected === product}/>)}<hr /><button onClick={onNext}> Next</button></div>);} The data flow is explicit, but the state is inside the `useList` custom Hook that you can use from any component: import Row from './Row.js'; import useList from './useList.js'; import { products } from './data.js'; export default function App() { const \[selected, onNext\] = useList(products); return ( <div className\="List"\> {products.map(product \=> <Row key\={product.id} title\={product.title} isHighlighted\={selected === product} /> )} <hr /> <button onClick\={onNext}\> Next </button\> </div\> ); } This approach is particularly useful if you want to reuse this logic between different components. --- ## Page: https://react.dev/reference/react/Component ### Pitfall We recommend defining components as functions instead of classes. See how to migrate. `Component` is the base class for the React components defined as JavaScript classes. Class components are still supported by React, but we don’t recommend using them in new code. class Greeting extends Component {render() {return <h1>Hello, {this.props.name}!</h1>;}} * Reference * `Component` * `context` * `props` * `state` * `constructor(props)` * `componentDidCatch(error, info)` * `componentDidMount()` * `componentDidUpdate(prevProps, prevState, snapshot?)` * `componentWillMount()` * `componentWillReceiveProps(nextProps)` * `componentWillUpdate(nextProps, nextState)` * `componentWillUnmount()` * `forceUpdate(callback?)` * `getSnapshotBeforeUpdate(prevProps, prevState)` * `render()` * `setState(nextState, callback?)` * `shouldComponentUpdate(nextProps, nextState, nextContext)` * `UNSAFE_componentWillMount()` * `UNSAFE_componentWillReceiveProps(nextProps, nextContext)` * `UNSAFE_componentWillUpdate(nextProps, nextState)` * `static contextType` * `static defaultProps` * `static getDerivedStateFromError(error)` * `static getDerivedStateFromProps(props, state)` * Usage * Defining a class component * Adding state to a class component * Adding lifecycle methods to a class component * Catching rendering errors with an error boundary * Alternatives * Migrating a simple component from a class to a function * Migrating a component with state from a class to a function * Migrating a component with lifecycle methods from a class to a function * Migrating a component with context from a class to a function * * * ## Reference ### `Component` To define a React component as a class, extend the built-in `Component` class and define a `render` method: import { Component } from 'react';class Greeting extends Component {render() {return <h1>Hello, {this.props.name}!</h1>;}} Only the `render` method is required, other methods are optional. See more examples below. * * * ### `context` The context of a class component is available as `this.context`. It is only available if you specify _which_ context you want to receive using `static contextType`. A class component can only read one context at a time. class Button extends Component {static contextType = ThemeContext;render() {const theme = this.context;const className = 'button-' + theme;return (<button className={className}>{this.props.children}</button>);}} ### Note Reading `this.context` in class components is equivalent to `useContext` in function components. See how to migrate. * * * ### `props` The props passed to a class component are available as `this.props`. class Greeting extends Component {render() {return <h1>Hello, {this.props.name}!</h1>;}}<Greeting name="Taylor" /> ### Note Reading `this.props` in class components is equivalent to declaring props in function components. See how to migrate. * * * ### `state` The state of a class component is available as `this.state`. The `state` field must be an object. Do not mutate the state directly. If you wish to change the state, call `setState` with the new state. class Counter extends Component {state = {age: 42,};handleAgeChange = () => {this.setState({age: this.state.age + 1 });};render() {return (<><button onClick={this.handleAgeChange}> Increment age</button><p>You are {this.state.age}.</p></>);}} ### Note Defining `state` in class components is equivalent to calling `useState` in function components. See how to migrate. * * * ### `constructor(props)` The constructor runs before your class component _mounts_ (gets added to the screen). Typically, a constructor is only used for two purposes in React. It lets you declare state and bind your class methods to the class instance: class Counter extends Component {constructor(props) {super(props);this.state = { counter: 0 };this.handleClick = this.handleClick.bind(this);}handleClick() {// ...} If you use modern JavaScript syntax, constructors are rarely needed. Instead, you can rewrite this code above using the public class field syntax which is supported both by modern browsers and tools like Babel: class Counter extends Component {state = { counter: 0 };handleClick = () => {// ...} A constructor should not contain any side effects or subscriptions. #### Parameters * `props`: The component’s initial props. #### Returns `constructor` should not return anything. #### Caveats * Do not run any side effects or subscriptions in the constructor. Instead, use `componentDidMount` for that. * Inside a constructor, you need to call `super(props)` before any other statement. If you don’t do that, `this.props` will be `undefined` while the constructor runs, which can be confusing and cause bugs. * Constructor is the only place where you can assign `this.state` directly. In all other methods, you need to use `this.setState()` instead. Do not call `setState` in the constructor. * When you use server rendering, the constructor will run on the server too, followed by the `render` method. However, lifecycle methods like `componentDidMount` or `componentWillUnmount` will not run on the server. * When Strict Mode is on, React will call `constructor` twice in development and then throw away one of the instances. This helps you notice the accidental side effects that need to be moved out of the `constructor`. ### Note There is no exact equivalent for `constructor` in function components. To declare state in a function component, call `useState`. To avoid recalculating the initial state, pass a function to `useState`. * * * ### `componentDidCatch(error, info)` If you define `componentDidCatch`, React will call it when some child component (including distant children) throws an error during rendering. This lets you log that error to an error reporting service in production. Typically, it is used together with `static getDerivedStateFromError` which lets you update state in response to an error and display an error message to the user. A component with these methods is called an _error boundary._ See an example. #### Parameters * `error`: The error that was thrown. In practice, it will usually be an instance of `Error` but this is not guaranteed because JavaScript allows to `throw` any value, including strings or even `null`. * `info`: An object containing additional information about the error. Its `componentStack` field contains a stack trace with the component that threw, as well as the names and source locations of all its parent components. In production, the component names will be minified. If you set up production error reporting, you can decode the component stack using sourcemaps the same way as you would do for regular JavaScript error stacks. #### Returns `componentDidCatch` should not return anything. #### Caveats * In the past, it was common to call `setState` inside `componentDidCatch` in order to update the UI and display the fallback error message. This is deprecated in favor of defining `static getDerivedStateFromError`. * Production and development builds of React slightly differ in the way `componentDidCatch` handles errors. In development, the errors will bubble up to `window`, which means that any `window.onerror` or `window.addEventListener('error', callback)` will intercept the errors that have been caught by `componentDidCatch`. In production, instead, the errors will not bubble up, which means any ancestor error handler will only receive errors not explicitly caught by `componentDidCatch`. ### Note There is no direct equivalent for `componentDidCatch` in function components yet. If you’d like to avoid creating class components, write a single `ErrorBoundary` component like above and use it throughout your app. Alternatively, you can use the `react-error-boundary` package which does that for you. * * * ### `componentDidMount()` If you define the `componentDidMount` method, React will call it when your component is added _(mounted)_ to the screen. This is a common place to start data fetching, set up subscriptions, or manipulate the DOM nodes. If you implement `componentDidMount`, you usually need to implement other lifecycle methods to avoid bugs. For example, if `componentDidMount` reads some state or props, you also have to implement `componentDidUpdate` to handle their changes, and `componentWillUnmount` to clean up whatever `componentDidMount` was doing. class ChatRoom extends Component {state = {serverUrl: 'https://localhost:1234'};componentDidMount() {this.setupConnection();}componentDidUpdate(prevProps, prevState) {if (this.props.roomId !== prevProps.roomId ||this.state.serverUrl !== prevState.serverUrl) {this.destroyConnection();this.setupConnection();}}componentWillUnmount() {this.destroyConnection();}// ...} See more examples. #### Parameters `componentDidMount` does not take any parameters. #### Returns `componentDidMount` should not return anything. #### Caveats * When Strict Mode is on, in development React will call `componentDidMount`, then immediately call `componentWillUnmount`, and then call `componentDidMount` again. This helps you notice if you forgot to implement `componentWillUnmount` or if its logic doesn’t fully “mirror” what `componentDidMount` does. * Although you may call `setState` immediately in `componentDidMount`, it’s best to avoid that when you can. It will trigger an extra rendering, but it will happen before the browser updates the screen. This guarantees that even though the `render` will be called twice in this case, the user won’t see the intermediate state. Use this pattern with caution because it often causes performance issues. In most cases, you should be able to assign the initial state in the `constructor` instead. It can, however, be necessary for cases like modals and tooltips when you need to measure a DOM node before rendering something that depends on its size or position. ### Note For many use cases, defining `componentDidMount`, `componentDidUpdate`, and `componentWillUnmount` together in class components is equivalent to calling `useEffect` in function components. In the rare cases where it’s important for the code to run before browser paint, `useLayoutEffect` is a closer match. See how to migrate. * * * ### `componentDidUpdate(prevProps, prevState, snapshot?)` If you define the `componentDidUpdate` method, React will call it immediately after your component has been re-rendered with updated props or state. This method is not called for the initial render. You can use it to manipulate the DOM after an update. This is also a common place to do network requests as long as you compare the current props to previous props (e.g. a network request may not be necessary if the props have not changed). Typically, you’d use it together with `componentDidMount` and `componentWillUnmount`: class ChatRoom extends Component {state = {serverUrl: 'https://localhost:1234'};componentDidMount() {this.setupConnection();}componentDidUpdate(prevProps, prevState) {if (this.props.roomId !== prevProps.roomId ||this.state.serverUrl !== prevState.serverUrl) {this.destroyConnection();this.setupConnection();}}componentWillUnmount() {this.destroyConnection();}// ...} See more examples. #### Parameters * `prevProps`: Props before the update. Compare `prevProps` to `this.props` to determine what changed. * `prevState`: State before the update. Compare `prevState` to `this.state` to determine what changed. * `snapshot`: If you implemented `getSnapshotBeforeUpdate`, `snapshot` will contain the value you returned from that method. Otherwise, it will be `undefined`. #### Returns `componentDidUpdate` should not return anything. #### Caveats * `componentDidUpdate` will not get called if `shouldComponentUpdate` is defined and returns `false`. * The logic inside `componentDidUpdate` should usually be wrapped in conditions comparing `this.props` with `prevProps`, and `this.state` with `prevState`. Otherwise, there’s a risk of creating infinite loops. * Although you may call `setState` immediately in `componentDidUpdate`, it’s best to avoid that when you can. It will trigger an extra rendering, but it will happen before the browser updates the screen. This guarantees that even though the `render` will be called twice in this case, the user won’t see the intermediate state. This pattern often causes performance issues, but it may be necessary for rare cases like modals and tooltips when you need to measure a DOM node before rendering something that depends on its size or position. ### Note For many use cases, defining `componentDidMount`, `componentDidUpdate`, and `componentWillUnmount` together in class components is equivalent to calling `useEffect` in function components. In the rare cases where it’s important for the code to run before browser paint, `useLayoutEffect` is a closer match. See how to migrate. * * * ### `componentWillMount()` ### Deprecated This API has been renamed from `componentWillMount` to `UNSAFE_componentWillMount`. The old name has been deprecated. In a future major version of React, only the new name will work. Run the `rename-unsafe-lifecycles` codemod to automatically update your components. * * * ### `componentWillReceiveProps(nextProps)` ### Deprecated This API has been renamed from `componentWillReceiveProps` to `UNSAFE_componentWillReceiveProps`. The old name has been deprecated. In a future major version of React, only the new name will work. Run the `rename-unsafe-lifecycles` codemod to automatically update your components. * * * ### `componentWillUpdate(nextProps, nextState)` ### Deprecated This API has been renamed from `componentWillUpdate` to `UNSAFE_componentWillUpdate`. The old name has been deprecated. In a future major version of React, only the new name will work. Run the `rename-unsafe-lifecycles` codemod to automatically update your components. * * * ### `componentWillUnmount()` If you define the `componentWillUnmount` method, React will call it before your component is removed _(unmounted)_ from the screen. This is a common place to cancel data fetching or remove subscriptions. The logic inside `componentWillUnmount` should “mirror” the logic inside `componentDidMount`. For example, if `componentDidMount` sets up a subscription, `componentWillUnmount` should clean up that subscription. If the cleanup logic in your `componentWillUnmount` reads some props or state, you will usually also need to implement `componentDidUpdate` to clean up resources (such as subscriptions) corresponding to the old props and state. class ChatRoom extends Component {state = {serverUrl: 'https://localhost:1234'};componentDidMount() {this.setupConnection();}componentDidUpdate(prevProps, prevState) {if (this.props.roomId !== prevProps.roomId ||this.state.serverUrl !== prevState.serverUrl) {this.destroyConnection();this.setupConnection();}}componentWillUnmount() {this.destroyConnection();}// ...} See more examples. #### Parameters `componentWillUnmount` does not take any parameters. #### Returns `componentWillUnmount` should not return anything. #### Caveats * When Strict Mode is on, in development React will call `componentDidMount`, then immediately call `componentWillUnmount`, and then call `componentDidMount` again. This helps you notice if you forgot to implement `componentWillUnmount` or if its logic doesn’t fully “mirror” what `componentDidMount` does. ### Note For many use cases, defining `componentDidMount`, `componentDidUpdate`, and `componentWillUnmount` together in class components is equivalent to calling `useEffect` in function components. In the rare cases where it’s important for the code to run before browser paint, `useLayoutEffect` is a closer match. See how to migrate. * * * ### `forceUpdate(callback?)` Forces a component to re-render. Usually, this is not necessary. If your component’s `render` method only reads from `this.props`, `this.state`, or `this.context`, it will re-render automatically when you call `setState` inside your component or one of its parents. However, if your component’s `render` method reads directly from an external data source, you have to tell React to update the user interface when that data source changes. That’s what `forceUpdate` lets you do. Try to avoid all uses of `forceUpdate` and only read from `this.props` and `this.state` in `render`. #### Parameters * **optional** `callback` If specified, React will call the `callback` you’ve provided after the update is committed. #### Returns `forceUpdate` does not return anything. #### Caveats * If you call `forceUpdate`, React will re-render without calling `shouldComponentUpdate`. ### Note Reading an external data source and forcing class components to re-render in response to its changes with `forceUpdate` has been superseded by `useSyncExternalStore` in function components. * * * ### `getSnapshotBeforeUpdate(prevProps, prevState)` If you implement `getSnapshotBeforeUpdate`, React will call it immediately before React updates the DOM. It enables your component to capture some information from the DOM (e.g. scroll position) before it is potentially changed. Any value returned by this lifecycle method will be passed as a parameter to `componentDidUpdate`. For example, you can use it in a UI like a chat thread that needs to preserve its scroll position during updates: class ScrollingList extends React.Component {constructor(props) {super(props);this.listRef = React.createRef();}getSnapshotBeforeUpdate(prevProps, prevState) {// Are we adding new items to the list?// Capture the scroll position so we can adjust scroll later.if (prevProps.list.length < this.props.list.length) {const list = this.listRef.current;return list.scrollHeight - list.scrollTop;}return null;}componentDidUpdate(prevProps, prevState, snapshot) {// If we have a snapshot value, we've just added new items.// Adjust scroll so these new items don't push the old ones out of view.// (snapshot here is the value returned from getSnapshotBeforeUpdate)if (snapshot !== null) {const list = this.listRef.current;list.scrollTop = list.scrollHeight - snapshot;}}render() {return (<div ref={this.listRef}>{/* ...contents... */}</div>);}} In the above example, it is important to read the `scrollHeight` property directly in `getSnapshotBeforeUpdate`. It is not safe to read it in `render`, `UNSAFE_componentWillReceiveProps`, or `UNSAFE_componentWillUpdate` because there is a potential time gap between these methods getting called and React updating the DOM. #### Parameters * `prevProps`: Props before the update. Compare `prevProps` to `this.props` to determine what changed. * `prevState`: State before the update. Compare `prevState` to `this.state` to determine what changed. #### Returns You should return a snapshot value of any type that you’d like, or `null`. The value you returned will be passed as the third argument to `componentDidUpdate`. #### Caveats * `getSnapshotBeforeUpdate` will not get called if `shouldComponentUpdate` is defined and returns `false`. ### Note At the moment, there is no equivalent to `getSnapshotBeforeUpdate` for function components. This use case is very uncommon, but if you have the need for it, for now you’ll have to write a class component. * * * ### `render()` The `render` method is the only required method in a class component. The `render` method should specify what you want to appear on the screen, for example: import { Component } from 'react';class Greeting extends Component {render() {return <h1>Hello, {this.props.name}!</h1>;}} React may call `render` at any moment, so you shouldn’t assume that it runs at a particular time. Usually, the `render` method should return a piece of JSX, but a few other return types (like strings) are supported. To calculate the returned JSX, the `render` method can read `this.props`, `this.state`, and `this.context`. You should write the `render` method as a pure function, meaning that it should return the same result if props, state, and context are the same. It also shouldn’t contain side effects (like setting up subscriptions) or interact with the browser APIs. Side effects should happen either in event handlers or methods like `componentDidMount`. #### Parameters `render` does not take any parameters. #### Returns `render` can return any valid React node. This includes React elements such as `<div />`, strings, numbers, portals, empty nodes (`null`, `undefined`, `true`, and `false`), and arrays of React nodes. #### Caveats * `render` should be written as a pure function of props, state, and context. It should not have side effects. * `render` will not get called if `shouldComponentUpdate` is defined and returns `false`. * When Strict Mode is on, React will call `render` twice in development and then throw away one of the results. This helps you notice the accidental side effects that need to be moved out of the `render` method. * There is no one-to-one correspondence between the `render` call and the subsequent `componentDidMount` or `componentDidUpdate` call. Some of the `render` call results may be discarded by React when it’s beneficial. * * * ### `setState(nextState, callback?)` Call `setState` to update the state of your React component. class Form extends Component {state = {name: 'Taylor',};handleNameChange = (e) => {const newName = e.target.value;this.setState({name: newName});}render() {return (<><input value={this.state.name} onChange={this.handleNameChange} /><p>Hello, {this.state.name}.</p></>);}} `setState` enqueues changes to the component state. It tells React that this component and its children need to re-render with the new state. This is the main way you’ll update the user interface in response to interactions. ### Pitfall Calling `setState` **does not** change the current state in the already executing code: function handleClick() {console.log(this.state.name); // "Taylor"this.setState({name: 'Robin'});console.log(this.state.name); // Still "Taylor"!} It only affects what `this.state` will return starting from the _next_ render. You can also pass a function to `setState`. It lets you update state based on the previous state: handleIncreaseAge = () => {this.setState(prevState => {return {age: prevState.age + 1};});} You don’t have to do this, but it’s handy if you want to update state multiple times during the same event. #### Parameters * `nextState`: Either an object or a function. * If you pass an object as `nextState`, it will be shallowly merged into `this.state`. * If you pass a function as `nextState`, it will be treated as an _updater function_. It must be pure, should take the pending state and props as arguments, and should return the object to be shallowly merged into `this.state`. React will put your updater function in a queue and re-render your component. During the next render, React will calculate the next state by applying all of the queued updaters to the previous state. * **optional** `callback`: If specified, React will call the `callback` you’ve provided after the update is committed. #### Returns `setState` does not return anything. #### Caveats * Think of `setState` as a _request_ rather than an immediate command to update the component. When multiple components update their state in response to an event, React will batch their updates and re-render them together in a single pass at the end of the event. In the rare case that you need to force a particular state update to be applied synchronously, you may wrap it in `flushSync`, but this may hurt performance. * `setState` does not update `this.state` immediately. This makes reading `this.state` right after calling `setState` a potential pitfall. Instead, use `componentDidUpdate` or the setState `callback` argument, either of which are guaranteed to fire after the update has been applied. If you need to set the state based on the previous state, you can pass a function to `nextState` as described above. ### Note Calling `setState` in class components is similar to calling a `set` function in function components. See how to migrate. * * * ### `shouldComponentUpdate(nextProps, nextState, nextContext)` If you define `shouldComponentUpdate`, React will call it to determine whether a re-render can be skipped. If you are confident you want to write it by hand, you may compare `this.props` with `nextProps` and `this.state` with `nextState` and return `false` to tell React the update can be skipped. class Rectangle extends Component {state = {isHovered: false};shouldComponentUpdate(nextProps, nextState) {if (nextProps.position.x === this.props.position.x &&nextProps.position.y === this.props.position.y &&nextProps.size.width === this.props.size.width &&nextProps.size.height === this.props.size.height &&nextState.isHovered === this.state.isHovered) {// Nothing has changed, so a re-render is unnecessaryreturn false;}return true;}// ...} React calls `shouldComponentUpdate` before rendering when new props or state are being received. Defaults to `true`. This method is not called for the initial render or when `forceUpdate` is used. #### Parameters * `nextProps`: The next props that the component is about to render with. Compare `nextProps` to `this.props` to determine what changed. * `nextState`: The next state that the component is about to render with. Compare `nextState` to `this.state` to determine what changed. * `nextContext`: The next context that the component is about to render with. Compare `nextContext` to `this.context` to determine what changed. Only available if you specify `static contextType`. #### Returns Return `true` if you want the component to re-render. That’s the default behavior. Return `false` to tell React that re-rendering can be skipped. #### Caveats * This method _only_ exists as a performance optimization. If your component breaks without it, fix that first. * Consider using `PureComponent` instead of writing `shouldComponentUpdate` by hand. `PureComponent` shallowly compares props and state, and reduces the chance that you’ll skip a necessary update. * We do not recommend doing deep equality checks or using `JSON.stringify` in `shouldComponentUpdate`. It makes performance unpredictable and dependent on the data structure of every prop and state. In the best case, you risk introducing multi-second stalls to your application, and in the worst case you risk crashing it. * Returning `false` does not prevent child components from re-rendering when _their_ state changes. * Returning `false` does not _guarantee_ that the component will not re-render. React will use the return value as a hint but it may still choose to re-render your component if it makes sense to do for other reasons. ### Note Optimizing class components with `shouldComponentUpdate` is similar to optimizing function components with `memo`. Function components also offer more granular optimization with `useMemo`. * * * ### `UNSAFE_componentWillMount()` If you define `UNSAFE_componentWillMount`, React will call it immediately after the `constructor`. It only exists for historical reasons and should not be used in any new code. Instead, use one of the alternatives: * To initialize state, declare `state` as a class field or set `this.state` inside the `constructor`. * If you need to run a side effect or set up a subscription, move that logic to `componentDidMount` instead. See examples of migrating away from unsafe lifecycles. #### Parameters `UNSAFE_componentWillMount` does not take any parameters. #### Returns `UNSAFE_componentWillMount` should not return anything. #### Caveats * `UNSAFE_componentWillMount` will not get called if the component implements `static getDerivedStateFromProps` or `getSnapshotBeforeUpdate`. * Despite its naming, `UNSAFE_componentWillMount` does not guarantee that the component _will_ get mounted if your app uses modern React features like `Suspense`. If a render attempt is suspended (for example, because the code for some child component has not loaded yet), React will throw the in-progress tree away and attempt to construct the component from scratch during the next attempt. This is why this method is “unsafe”. Code that relies on mounting (like adding a subscription) should go into `componentDidMount`. * `UNSAFE_componentWillMount` is the only lifecycle method that runs during server rendering. For all practical purposes, it is identical to `constructor`, so you should use the `constructor` for this type of logic instead. ### Note Calling `setState` inside `UNSAFE_componentWillMount` in a class component to initialize state is equivalent to passing that state as the initial state to `useState` in a function component. * * * ### `UNSAFE_componentWillReceiveProps(nextProps, nextContext)` If you define `UNSAFE_componentWillReceiveProps`, React will call it when the component receives new props. It only exists for historical reasons and should not be used in any new code. Instead, use one of the alternatives: * If you need to **run a side effect** (for example, fetch data, run an animation, or reinitialize a subscription) in response to prop changes, move that logic to `componentDidUpdate` instead. * If you need to **avoid re-computing some data only when a prop changes,** use a memoization helper instead. * If you need to **“reset” some state when a prop changes,** consider either making a component fully controlled or fully uncontrolled with a key instead. * If you need to **“adjust” some state when a prop changes,** check whether you can compute all the necessary information from props alone during rendering. If you can’t, use `static getDerivedStateFromProps` instead. See examples of migrating away from unsafe lifecycles. #### Parameters * `nextProps`: The next props that the component is about to receive from its parent component. Compare `nextProps` to `this.props` to determine what changed. * `nextContext`: The next context that the component is about to receive from the closest provider. Compare `nextContext` to `this.context` to determine what changed. Only available if you specify `static contextType`. #### Returns `UNSAFE_componentWillReceiveProps` should not return anything. #### Caveats * `UNSAFE_componentWillReceiveProps` will not get called if the component implements `static getDerivedStateFromProps` or `getSnapshotBeforeUpdate`. * Despite its naming, `UNSAFE_componentWillReceiveProps` does not guarantee that the component _will_ receive those props if your app uses modern React features like `Suspense`. If a render attempt is suspended (for example, because the code for some child component has not loaded yet), React will throw the in-progress tree away and attempt to construct the component from scratch during the next attempt. By the time of the next render attempt, the props might be different. This is why this method is “unsafe”. Code that should run only for committed updates (like resetting a subscription) should go into `componentDidUpdate`. * `UNSAFE_componentWillReceiveProps` does not mean that the component has received _different_ props than the last time. You need to compare `nextProps` and `this.props` yourself to check if something changed. * React doesn’t call `UNSAFE_componentWillReceiveProps` with initial props during mounting. It only calls this method if some of component’s props are going to be updated. For example, calling `setState` doesn’t generally trigger `UNSAFE_componentWillReceiveProps` inside the same component. * * * ### `UNSAFE_componentWillUpdate(nextProps, nextState)` If you define `UNSAFE_componentWillUpdate`, React will call it before rendering with the new props or state. It only exists for historical reasons and should not be used in any new code. Instead, use one of the alternatives: * If you need to run a side effect (for example, fetch data, run an animation, or reinitialize a subscription) in response to prop or state changes, move that logic to `componentDidUpdate` instead. * If you need to read some information from the DOM (for example, to save the current scroll position) so that you can use it in `componentDidUpdate` later, read it inside `getSnapshotBeforeUpdate` instead. See examples of migrating away from unsafe lifecycles. #### Parameters * `nextProps`: The next props that the component is about to render with. Compare `nextProps` to `this.props` to determine what changed. * `nextState`: The next state that the component is about to render with. Compare `nextState` to `this.state` to determine what changed. #### Returns `UNSAFE_componentWillUpdate` should not return anything. #### Caveats * `UNSAFE_componentWillUpdate` will not get called if `shouldComponentUpdate` is defined and returns `false`. * `UNSAFE_componentWillUpdate` will not get called if the component implements `static getDerivedStateFromProps` or `getSnapshotBeforeUpdate`. * It’s not supported to call `setState` (or any method that leads to `setState` being called, like dispatching a Redux action) during `componentWillUpdate`. * Despite its naming, `UNSAFE_componentWillUpdate` does not guarantee that the component _will_ update if your app uses modern React features like `Suspense`. If a render attempt is suspended (for example, because the code for some child component has not loaded yet), React will throw the in-progress tree away and attempt to construct the component from scratch during the next attempt. By the time of the next render attempt, the props and state might be different. This is why this method is “unsafe”. Code that should run only for committed updates (like resetting a subscription) should go into `componentDidUpdate`. * `UNSAFE_componentWillUpdate` does not mean that the component has received _different_ props or state than the last time. You need to compare `nextProps` with `this.props` and `nextState` with `this.state` yourself to check if something changed. * React doesn’t call `UNSAFE_componentWillUpdate` with initial props and state during mounting. ### Note There is no direct equivalent to `UNSAFE_componentWillUpdate` in function components. * * * ### `static contextType` If you want to read `this.context` from your class component, you must specify which context it needs to read. The context you specify as the `static contextType` must be a value previously created by `createContext`. class Button extends Component {static contextType = ThemeContext;render() {const theme = this.context;const className = 'button-' + theme;return (<button className={className}>{this.props.children}</button>);}} ### Note Reading `this.context` in class components is equivalent to `useContext` in function components. See how to migrate. * * * ### `static defaultProps` You can define `static defaultProps` to set the default props for the class. They will be used for `undefined` and missing props, but not for `null` props. For example, here is how you define that the `color` prop should default to `'blue'`: class Button extends Component {static defaultProps = {color: 'blue'};render() {return <button className={this.props.color}>click me</button>;}} If the `color` prop is not provided or is `undefined`, it will be set by default to `'blue'`: <>{/* this.props.color is "blue" */}<Button />{/* this.props.color is "blue" */}<Button color={undefined} />{/* this.props.color is null */}<Button color={null} />{/* this.props.color is "red" */}<Button color="red" /></> ### Note Defining `defaultProps` in class components is similar to using default values in function components. * * * ### `static getDerivedStateFromError(error)` If you define `static getDerivedStateFromError`, React will call it when a child component (including distant children) throws an error during rendering. This lets you display an error message instead of clearing the UI. Typically, it is used together with `componentDidCatch` which lets you send the error report to some analytics service. A component with these methods is called an _error boundary._ See an example. #### Parameters * `error`: The error that was thrown. In practice, it will usually be an instance of `Error` but this is not guaranteed because JavaScript allows to `throw` any value, including strings or even `null`. #### Returns `static getDerivedStateFromError` should return the state telling the component to display the error message. #### Caveats * `static getDerivedStateFromError` should be a pure function. If you want to perform a side effect (for example, to call an analytics service), you need to also implement `componentDidCatch`. ### Note There is no direct equivalent for `static getDerivedStateFromError` in function components yet. If you’d like to avoid creating class components, write a single `ErrorBoundary` component like above and use it throughout your app. Alternatively, use the `react-error-boundary` package which does that. * * * ### `static getDerivedStateFromProps(props, state)` If you define `static getDerivedStateFromProps`, React will call it right before calling `render`, both on the initial mount and on subsequent updates. It should return an object to update the state, or `null` to update nothing. This method exists for rare use cases where the state depends on changes in props over time. For example, this `Form` component resets the `email` state when the `userID` prop changes: class Form extends Component {state = {email: this.props.defaultEmail,prevUserID: this.props.userID};static getDerivedStateFromProps(props, state) {// Any time the current user changes,// Reset any parts of state that are tied to that user.// In this simple example, that's just the email.if (props.userID !== state.prevUserID) {return {prevUserID: props.userID,email: props.defaultEmail};}return null;}// ...} Note that this pattern requires you to keep a previous value of the prop (like `userID`) in state (like `prevUserID`). #### Parameters * `props`: The next props that the component is about to render with. * `state`: The next state that the component is about to render with. #### Returns `static getDerivedStateFromProps` return an object to update the state, or `null` to update nothing. #### Caveats * This method is fired on _every_ render, regardless of the cause. This is different from `UNSAFE_componentWillReceiveProps`, which only fires when the parent causes a re-render and not as a result of a local `setState`. * This method doesn’t have access to the component instance. If you’d like, you can reuse some code between `static getDerivedStateFromProps` and the other class methods by extracting pure functions of the component props and state outside the class definition. * * * ## Usage ### Defining a class component To define a React component as a class, extend the built-in `Component` class and define a `render` method: import { Component } from 'react';class Greeting extends Component {render() {return <h1>Hello, {this.props.name}!</h1>;}} React will call your `render` method whenever it needs to figure out what to display on the screen. Usually, you will return some JSX from it. Your `render` method should be a pure function: it should only calculate the JSX. Similarly to function components, a class component can receive information by props from its parent component. However, the syntax for reading props is different. For example, if the parent component renders `<Greeting name="Taylor" />`, then you can read the `name` prop from `this.props`, like `this.props.name`: Note that Hooks (functions starting with `use`, like `useState`) are not supported inside class components. ### Pitfall We recommend defining components as functions instead of classes. See how to migrate. * * * ### Adding state to a class component To add state to a class, assign an object to a property called `state`. To update state, call `this.setState`. ### Pitfall We recommend defining components as functions instead of classes. See how to migrate. * * * ### Adding lifecycle methods to a class component There are a few special methods you can define on your class. If you define the `componentDidMount` method, React will call it when your component is added _(mounted)_ to the screen. React will call `componentDidUpdate` after your component re-renders due to changed props or state. React will call `componentWillUnmount` after your component has been removed _(unmounted)_ from the screen. If you implement `componentDidMount`, you usually need to implement all three lifecycles to avoid bugs. For example, if `componentDidMount` reads some state or props, you also have to implement `componentDidUpdate` to handle their changes, and `componentWillUnmount` to clean up whatever `componentDidMount` was doing. For example, this `ChatRoom` component keeps a chat connection synchronized with props and state: Note that in development when Strict Mode is on, React will call `componentDidMount`, immediately call `componentWillUnmount`, and then call `componentDidMount` again. This helps you notice if you forgot to implement `componentWillUnmount` or if its logic doesn’t fully “mirror” what `componentDidMount` does. ### Pitfall We recommend defining components as functions instead of classes. See how to migrate. * * * ### Catching rendering errors with an error boundary By default, if your application throws an error during rendering, React will remove its UI from the screen. To prevent this, you can wrap a part of your UI into an _error boundary_. An error boundary is a special component that lets you display some fallback UI instead of the part that crashed—for example, an error message. To implement an error boundary component, you need to provide `static getDerivedStateFromError` which lets you update state in response to an error and display an error message to the user. You can also optionally implement `componentDidCatch` to add some extra logic, for example, to log the error to an analytics service. With `captureOwnerStack` you can include the Owner Stack during development. import * as React from 'react';class ErrorBoundary extends React.Component {constructor(props) {super(props);this.state = { hasError: false };}static getDerivedStateFromError(error) {// Update state so the next render will show the fallback UI.return { hasError: true };}componentDidCatch(error, info) {logErrorToMyService(error,// Example "componentStack":// in ComponentThatThrows (created by App)// in ErrorBoundary (created by App)// in div (created by App)// in Appinfo.componentStack,// Warning: `captureOwnerStack` is not available in production.React.captureOwnerStack(),);}render() {if (this.state.hasError) {// You can render any custom fallback UIreturn this.props.fallback;}return this.props.children;}} Then you can wrap a part of your component tree with it: <ErrorBoundary fallback={<p>Something went wrong</p>}><Profile /></ErrorBoundary> If `Profile` or its child component throws an error, `ErrorBoundary` will “catch” that error, display a fallback UI with the error message you’ve provided, and send a production error report to your error reporting service. You don’t need to wrap every component into a separate error boundary. When you think about the granularity of error boundaries, consider where it makes sense to display an error message. For example, in a messaging app, it makes sense to place an error boundary around the list of conversations. It also makes sense to place one around every individual message. However, it wouldn’t make sense to place a boundary around every avatar. ### Note There is currently no way to write an error boundary as a function component. However, you don’t have to write the error boundary class yourself. For example, you can use `react-error-boundary` instead. * * * ## Alternatives ### Migrating a simple component from a class to a function Typically, you will define components as functions instead. For example, suppose you’re converting this `Greeting` class component to a function: Define a function called `Greeting`. This is where you will move the body of your `render` function. function Greeting() {// ... move the code from the render method here ...} Instead of `this.props.name`, define the `name` prop using the destructuring syntax and read it directly: function Greeting({ name }) {return <h1>Hello, {name}!</h1>;} Here is a complete example: * * * ### Migrating a component with state from a class to a function Suppose you’re converting this `Counter` class component to a function: Start by declaring a function with the necessary state variables: import { useState } from 'react';function Counter() {const [name, setName] = useState('Taylor');const [age, setAge] = useState(42);// ... Next, convert the event handlers: function Counter() {const [name, setName] = useState('Taylor');const [age, setAge] = useState(42);function handleNameChange(e) {setName(e.target.value);}function handleAgeChange() {setAge(age + 1);}// ... Finally, replace all references starting with `this` with the variables and functions you defined in your component. For example, replace `this.state.age` with `age`, and replace `this.handleNameChange` with `handleNameChange`. Here is a fully converted component: * * * ### Migrating a component with lifecycle methods from a class to a function Suppose you’re converting this `ChatRoom` class component with lifecycle methods to a function: First, verify that your `componentWillUnmount` does the opposite of `componentDidMount`. In the above example, that’s true: it disconnects the connection that `componentDidMount` sets up. If such logic is missing, add it first. Next, verify that your `componentDidUpdate` method handles changes to any props and state you’re using in `componentDidMount`. In the above example, `componentDidMount` calls `setupConnection` which reads `this.state.serverUrl` and `this.props.roomId`. This is why `componentDidUpdate` checks whether `this.state.serverUrl` and `this.props.roomId` have changed, and resets the connection if they did. If your `componentDidUpdate` logic is missing or doesn’t handle changes to all relevant props and state, fix that first. In the above example, the logic inside the lifecycle methods connects the component to a system outside of React (a chat server). To connect a component to an external system, describe this logic as a single Effect: import { useState, useEffect } from 'react';function ChatRoom({ roomId }) {const [serverUrl, setServerUrl] = useState('https://localhost:1234');useEffect(() => {const connection = createConnection(serverUrl, roomId);connection.connect();return () => {connection.disconnect();};}, [serverUrl, roomId]);// ...} This `useEffect` call is equivalent to the logic in the lifecycle methods above. If your lifecycle methods do multiple unrelated things, split them into multiple independent Effects. Here is a complete example you can play with: * * * ### Migrating a component with context from a class to a function In this example, the `Panel` and `Button` class components read context from `this.context`: When you convert them to function components, replace `this.context` with `useContext` calls: --- ## Page: https://react.dev/reference/react/createElement `createElement` lets you create a React element. It serves as an alternative to writing JSX. const element = createElement(type, props, ...children) * Reference * `createElement(type, props, ...children)` * Usage * Creating an element without JSX * * * ## Reference ### `createElement(type, props, ...children)` Call `createElement` to create a React element with the given `type`, `props`, and `children`. import { createElement } from 'react';function Greeting({ name }) {return createElement('h1',{ className: 'greeting' },'Hello');} See more examples below. #### Parameters * `type`: The `type` argument must be a valid React component type. For example, it could be a tag name string (such as `'div'` or `'span'`), or a React component (a function, a class, or a special component like `Fragment`). * `props`: The `props` argument must either be an object or `null`. If you pass `null`, it will be treated the same as an empty object. React will create an element with props matching the `props` you have passed. Note that `ref` and `key` from your `props` object are special and will _not_ be available as `element.props.ref` and `element.props.key` on the returned `element`. They will be available as `element.ref` and `element.key`. * **optional** `...children`: Zero or more child nodes. They can be any React nodes, including React elements, strings, numbers, portals, empty nodes (`null`, `undefined`, `true`, and `false`), and arrays of React nodes. #### Returns `createElement` returns a React element object with a few properties: * `type`: The `type` you have passed. * `props`: The `props` you have passed except for `ref` and `key`. * `ref`: The `ref` you have passed. If missing, `null`. * `key`: The `key` you have passed, coerced to a string. If missing, `null`. Usually, you’ll return the element from your component or make it a child of another element. Although you may read the element’s properties, it’s best to treat every element as opaque after it’s created, and only render it. #### Caveats * You must **treat React elements and their props as immutable** and never change their contents after creation. In development, React will freeze the returned element and its `props` property shallowly to enforce this. * When you use JSX, **you must start a tag with a capital letter to render your own custom component.** In other words, `<Something />` is equivalent to `createElement(Something)`, but `<something />` (lowercase) is equivalent to `createElement('something')` (note it’s a string, so it will be treated as a built-in HTML tag). * You should only **pass children as multiple arguments to `createElement` if they are all statically known,** like `createElement('h1', {}, child1, child2, child3)`. If your children are dynamic, pass the entire array as the third argument: `createElement('ul', {}, listItems)`. This ensures that React will warn you about missing `key`s for any dynamic lists. For static lists this is not necessary because they never reorder. * * * ## Usage ### Creating an element without JSX If you don’t like JSX or can’t use it in your project, you can use `createElement` as an alternative. To create an element without JSX, call `createElement` with some type, props, and children: import { createElement } from 'react';function Greeting({ name }) {return createElement('h1',{ className: 'greeting' },'Hello ',createElement('i', null, name),'. Welcome!');} The children are optional, and you can pass as many as you need (the example above has three children). This code will display a `<h1>` header with a greeting. For comparison, here is the same example rewritten with JSX: function Greeting({ name }) {return (<h1 className="greeting">Hello <i>{name}</i>. Welcome!</h1>);} To render your own React component, pass a function like `Greeting` as the type instead of a string like `'h1'`: export default function App() {return createElement(Greeting, { name: 'Taylor' });} With JSX, it would look like this: export default function App() {return <Greeting name="Taylor" />;} Here is a complete example written with `createElement`: Both coding styles are fine, so you can use whichever one you prefer for your project. The main benefit of using JSX compared to `createElement` is that it’s easy to see which closing tag corresponds to which opening tag. ##### Deep Dive #### What is a React element, exactly? An element is a lightweight description of a piece of the user interface. For example, both `<Greeting name="Taylor" />` and `createElement(Greeting, { name: 'Taylor' })` produce an object like this: // Slightly simplified{ type: Greeting,props: { name: 'Taylor'}, key: null,ref: null,} **Note that creating this object does not render the `Greeting` component or create any DOM elements.** A React element is more like a description—an instruction for React to later render the `Greeting` component. By returning this object from your `App` component, you tell React what to do next. Creating elements is extremely cheap so you don’t need to try to optimize or avoid it. --- ## Page: https://react.dev/reference/react/createRef `createRef` creates a ref object which can contain arbitrary value. class MyInput extends Component {inputRef = createRef();// ...} * Reference * `createRef()` * Usage * Declaring a ref in a class component * Alternatives * Migrating from a class with `createRef` to a function with `useRef` * * * ## Reference ### `createRef()` Call `createRef` to declare a ref inside a class component. import { createRef, Component } from 'react';class MyComponent extends Component {intervalRef = createRef();inputRef = createRef();// ... See more examples below. #### Parameters `createRef` takes no parameters. #### Returns `createRef` returns an object with a single property: * `current`: Initially, it’s set to the `null`. You can later set it to something else. If you pass the ref object to React as a `ref` attribute to a JSX node, React will set its `current` property. #### Caveats * `createRef` always returns a _different_ object. It’s equivalent to writing `{ current: null }` yourself. * In a function component, you probably want `useRef` instead which always returns the same object. * `const ref = useRef()` is equivalent to `const [ref, _] = useState(() => createRef(null))`. * * * ## Usage ### Declaring a ref in a class component To declare a ref inside a class component, call `createRef` and assign its result to a class field: import { Component, createRef } from 'react';class Form extends Component {inputRef = createRef();// ...} If you now pass `ref={this.inputRef}` to an `<input>` in your JSX, React will populate `this.inputRef.current` with the input DOM node. For example, here is how you make a button that focuses the input: * * * ## Alternatives ### Migrating from a class with `createRef` to a function with `useRef` We recommend using function components instead of class components in new code. If you have some existing class components using `createRef`, here is how you can convert them. This is the original code: --- ## Page: https://react.dev/reference/react/forwardRef ### Deprecated In React 19, `forwardRef` is no longer necessary. Pass `ref` as a prop instead. `forwardRef` will deprecated in a future release. Learn more here. `forwardRef` lets your component expose a DOM node to parent component with a ref. const SomeComponent = forwardRef(render) * Reference * `forwardRef(render)` * `render` function * Usage * Exposing a DOM node to the parent component * Forwarding a ref through multiple components * Exposing an imperative handle instead of a DOM node * Troubleshooting * My component is wrapped in `forwardRef`, but the `ref` to it is always `null` * * * ## Reference ### `forwardRef(render)` Call `forwardRef()` to let your component receive a ref and forward it to a child component: import { forwardRef } from 'react';const MyInput = forwardRef(function MyInput(props, ref) {// ...}); See more examples below. #### Parameters * `render`: The render function for your component. React calls this function with the props and `ref` that your component received from its parent. The JSX you return will be the output of your component. #### Returns `forwardRef` returns a React component that you can render in JSX. Unlike React components defined as plain functions, a component returned by `forwardRef` is also able to receive a `ref` prop. #### Caveats * In Strict Mode, React will **call your render function twice** in order to help you find accidental impurities. This is development-only behavior and does not affect production. If your render function is pure (as it should be), this should not affect the logic of your component. The result from one of the calls will be ignored. * * * ### `render` function `forwardRef` accepts a render function as an argument. React calls this function with `props` and `ref`: const MyInput = forwardRef(function MyInput(props, ref) {return (<label>{props.label}<input ref={ref} /></label>);}); #### Parameters * `props`: The props passed by the parent component. * `ref`: The `ref` attribute passed by the parent component. The `ref` can be an object or a function. If the parent component has not passed a ref, it will be `null`. You should either pass the `ref` you receive to another component, or pass it to `useImperativeHandle`. #### Returns `forwardRef` returns a React component that you can render in JSX. Unlike React components defined as plain functions, the component returned by `forwardRef` is able to take a `ref` prop. * * * ## Usage ### Exposing a DOM node to the parent component By default, each component’s DOM nodes are private. However, sometimes it’s useful to expose a DOM node to the parent—for example, to allow focusing it. To opt in, wrap your component definition into `forwardRef()`: import { forwardRef } from 'react';const MyInput = forwardRef(function MyInput(props, ref) {const { label, ...otherProps } = props;return (<label>{label}<input {...otherProps} /></label>);}); You will receive a ref as the second argument after props. Pass it to the DOM node that you want to expose: import { forwardRef } from 'react';const MyInput = forwardRef(function MyInput(props, ref) {const { label, ...otherProps } = props;return (<label>{label}<input {...otherProps} ref={ref} /></label>);}); This lets the parent `Form` component access the `<input>` DOM node exposed by `MyInput`: function Form() {const ref = useRef(null);function handleClick() {ref.current.focus();}return (<form><MyInput label="Enter your name:" ref={ref} /><button type="button" onClick={handleClick}> Edit</button></form>);} This `Form` component passes a ref to `MyInput`. The `MyInput` component _forwards_ that ref to the `<input>` browser tag. As a result, the `Form` component can access that `<input>` DOM node and call `focus()` on it. Keep in mind that exposing a ref to the DOM node inside your component makes it harder to change your component’s internals later. You will typically expose DOM nodes from reusable low-level components like buttons or text inputs, but you won’t do it for application-level components like an avatar or a comment. #### Example 1 of 2: Focusing a text input Clicking the button will focus the input. The `Form` component defines a ref and passes it to the `MyInput` component. The `MyInput` component forwards that ref to the browser `<input>`. This lets the `Form` component focus the `<input>`. import { useRef } from 'react'; import MyInput from './MyInput.js'; export default function Form() { const ref = useRef(null); function handleClick() { ref.current.focus(); } return ( <form\> <MyInput label\="Enter your name:" ref\={ref} /> <button type\="button" onClick\={handleClick}\> Edit </button\> </form\> ); } * * * ### Forwarding a ref through multiple components Instead of forwarding a `ref` to a DOM node, you can forward it to your own component like `MyInput`: const FormField = forwardRef(function FormField(props, ref) {// ...return (<><MyInput ref={ref} /> ...</>);}); If that `MyInput` component forwards a ref to its `<input>`, a ref to `FormField` will give you that `<input>`: function Form() {const ref = useRef(null);function handleClick() {ref.current.focus();}return (<form><FormField label="Enter your name:" ref={ref} isRequired={true} /><button type="button" onClick={handleClick}> Edit</button></form>);} The `Form` component defines a ref and passes it to `FormField`. The `FormField` component forwards that ref to `MyInput`, which forwards it to a browser `<input>` DOM node. This is how `Form` accesses that DOM node. import { useRef } from 'react'; import FormField from './FormField.js'; export default function Form() { const ref = useRef(null); function handleClick() { ref.current.focus(); } return ( <form\> <FormField label\="Enter your name:" ref\={ref} isRequired\={true} /> <button type\="button" onClick\={handleClick}\> Edit </button\> </form\> ); } * * * ### Exposing an imperative handle instead of a DOM node Instead of exposing an entire DOM node, you can expose a custom object, called an _imperative handle,_ with a more constrained set of methods. To do this, you’d need to define a separate ref to hold the DOM node: const MyInput = forwardRef(function MyInput(props, ref) {const inputRef = useRef(null);// ...return <input {...props} ref={inputRef} />;}); Pass the `ref` you received to `useImperativeHandle` and specify the value you want to expose to the `ref`: import { forwardRef, useRef, useImperativeHandle } from 'react';const MyInput = forwardRef(function MyInput(props, ref) {const inputRef = useRef(null);useImperativeHandle(ref, () => {return {focus() {inputRef.current.focus();},scrollIntoView() {inputRef.current.scrollIntoView();},};}, []);return <input {...props} ref={inputRef} />;}); If some component gets a ref to `MyInput`, it will only receive your `{ focus, scrollIntoView }` object instead of the DOM node. This lets you limit the information you expose about your DOM node to the minimum. import { useRef } from 'react'; import MyInput from './MyInput.js'; export default function Form() { const ref = useRef(null); function handleClick() { ref.current.focus(); } return ( <form\> <MyInput placeholder\="Enter your name" ref\={ref} /> <button type\="button" onClick\={handleClick}\> Edit </button\> </form\> ); } Read more about using imperative handles. ### Pitfall **Do not overuse refs.** You should only use refs for _imperative_ behaviors that you can’t express as props: for example, scrolling to a node, focusing a node, triggering an animation, selecting text, and so on. **If you can express something as a prop, you should not use a ref.** For example, instead of exposing an imperative handle like `{ open, close }` from a `Modal` component, it is better to take `isOpen` as a prop like `<Modal isOpen={isOpen} />`. Effects can help you expose imperative behaviors via props. * * * ## Troubleshooting ### My component is wrapped in `forwardRef`, but the `ref` to it is always `null` This usually means that you forgot to actually use the `ref` that you received. For example, this component doesn’t do anything with its `ref`: const MyInput = forwardRef(function MyInput({ label }, ref) {return (<label>{label}<input /></label>);}); To fix it, pass the `ref` down to a DOM node or another component that can accept a ref: const MyInput = forwardRef(function MyInput({ label }, ref) {return (<label>{label}<input ref={ref} /></label>);}); The `ref` to `MyInput` could also be `null` if some of the logic is conditional: const MyInput = forwardRef(function MyInput({ label, showInput }, ref) {return (<label>{label}{showInput && <input ref={ref} />}</label>);}); If `showInput` is `false`, then the ref won’t be forwarded to any node, and a ref to `MyInput` will remain empty. This is particularly easy to miss if the condition is hidden inside another component, like `Panel` in this example: const MyInput = forwardRef(function MyInput({ label, showInput }, ref) {return (<label>{label}<Panel isExpanded={showInput}><input ref={ref} /></Panel></label>);}); --- ## Page: https://react.dev/reference/react/isValidElement `isValidElement` checks whether a value is a React element. const isElement = isValidElement(value) * Reference * `isValidElement(value)` * Usage * Checking if something is a React element * * * ## Reference ### `isValidElement(value)` Call `isValidElement(value)` to check whether `value` is a React element. import { isValidElement, createElement } from 'react';// ✅ React elementsconsole.log(isValidElement(<p />)); // trueconsole.log(isValidElement(createElement('p'))); // true// ❌ Not React elementsconsole.log(isValidElement(25)); // falseconsole.log(isValidElement('Hello')); // falseconsole.log(isValidElement({ age: 42 })); // false See more examples below. #### Parameters * `value`: The `value` you want to check. It can be any a value of any type. #### Returns `isValidElement` returns `true` if the `value` is a React element. Otherwise, it returns `false`. #### Caveats * **Only JSX tags and objects returned by `createElement` are considered to be React elements.** For example, even though a number like `42` is a valid React _node_ (and can be returned from a component), it is not a valid React element. Arrays and portals created with `createPortal` are also _not_ considered to be React elements. * * * ## Usage ### Checking if something is a React element Call `isValidElement` to check if some value is a _React element._ React elements are: * Values produced by writing a JSX tag * Values produced by calling `createElement` For React elements, `isValidElement` returns `true`: import { isValidElement, createElement } from 'react';// ✅ JSX tags are React elementsconsole.log(isValidElement(<p />)); // trueconsole.log(isValidElement(<MyComponent />)); // true// ✅ Values returned by createElement are React elementsconsole.log(isValidElement(createElement('p'))); // trueconsole.log(isValidElement(createElement(MyComponent))); // true Any other values, such as strings, numbers, or arbitrary objects and arrays, are not React elements. For them, `isValidElement` returns `false`: // ❌ These are *not* React elementsconsole.log(isValidElement(null)); // falseconsole.log(isValidElement(25)); // falseconsole.log(isValidElement('Hello')); // falseconsole.log(isValidElement({ age: 42 })); // falseconsole.log(isValidElement([<div />, <div />])); // falseconsole.log(isValidElement(MyComponent)); // false It is very uncommon to need `isValidElement`. It’s mostly useful if you’re calling another API that _only_ accepts elements (like `cloneElement` does) and you want to avoid an error when your argument is not a React element. Unless you have some very specific reason to add an `isValidElement` check, you probably don’t need it. ##### Deep Dive #### React elements vs React nodes When you write a component, you can return any kind of _React node_ from it: function MyComponent() {// ... you can return any React node ...} A React node can be: * A React element created like `<div />` or `createElement('div')` * A portal created with `createPortal` * A string * A number * `true`, `false`, `null`, or `undefined` (which are not displayed) * An array of other React nodes **Note `isValidElement` checks whether the argument is a _React element,_ not whether it’s a React node.** For example, `42` is not a valid React element. However, it is a perfectly valid React node: function MyComponent() {return 42; // It's ok to return a number from component} This is why you shouldn’t use `isValidElement` as a way to check whether something can be rendered. --- ## Page: https://react.dev/reference/react/PureComponent ### Pitfall We recommend defining components as functions instead of classes. See how to migrate. `PureComponent` is similar to `Component` but it skips re-renders for same props and state. Class components are still supported by React, but we don’t recommend using them in new code. class Greeting extends PureComponent {render() {return <h1>Hello, {this.props.name}!</h1>;}} * Reference * `PureComponent` * Usage * Skipping unnecessary re-renders for class components * Alternatives * Migrating from a `PureComponent` class component to a function * * * ## Reference ### `PureComponent` To skip re-rendering a class component for same props and state, extend `PureComponent` instead of `Component`: import { PureComponent } from 'react';class Greeting extends PureComponent {render() {return <h1>Hello, {this.props.name}!</h1>;}} `PureComponent` is a subclass of `Component` and supports all the `Component` APIs. Extending `PureComponent` is equivalent to defining a custom `shouldComponentUpdate` method that shallowly compares props and state. See more examples below. * * * ## Usage ### Skipping unnecessary re-renders for class components React normally re-renders a component whenever its parent re-renders. As an optimization, you can create a component that React will not re-render when its parent re-renders so long as its new props and state are the same as the old props and state. Class components can opt into this behavior by extending `PureComponent`: class Greeting extends PureComponent {render() {return <h1>Hello, {this.props.name}!</h1>;}} A React component should always have pure rendering logic. This means that it must return the same output if its props, state, and context haven’t changed. By using `PureComponent`, you are telling React that your component complies with this requirement, so React doesn’t need to re-render as long as its props and state haven’t changed. However, your component will still re-render if a context that it’s using changes. In this example, notice that the `Greeting` component re-renders whenever `name` is changed (because that’s one of its props), but not when `address` is changed (because it’s not passed to `Greeting` as a prop): ### Pitfall We recommend defining components as functions instead of classes. See how to migrate. * * * ## Alternatives ### Migrating from a `PureComponent` class component to a function We recommend using function components instead of class components in new code. If you have some existing class components using `PureComponent`, here is how you can convert them. This is the original code: --- ## Page: https://react.dev/reference/react/experimental_useEffectEvent ### Under Construction **This API is experimental and is not available in a stable version of React yet.** You can try it by upgrading React packages to the most recent experimental version: * `react@experimental` * `react-dom@experimental` * `eslint-plugin-react-hooks@experimental` Experimental versions of React may contain bugs. Don’t use them in production. `useEffectEvent` is a React Hook that lets you extract non-reactive logic into an Effect Event. const onSomething = useEffectEvent(callback) --- ## Page: https://react.dev/reference/react-dom/unmountComponentAtNode ### Deprecated This API will be removed in a future major version of React. In React 18, `unmountComponentAtNode` was replaced by `root.unmount()`. `unmountComponentAtNode` removes a mounted React component from the DOM. unmountComponentAtNode(domNode) * Reference * `unmountComponentAtNode(domNode)` * Usage * Removing a React app from a DOM element * * * ## Reference ### `unmountComponentAtNode(domNode)` Call `unmountComponentAtNode` to remove a mounted React component from the DOM and clean up its event handlers and state. import { unmountComponentAtNode } from 'react-dom';const domNode = document.getElementById('root');render(<App />, domNode);unmountComponentAtNode(domNode); See more examples below. #### Parameters * `domNode`: A DOM element. React will remove a mounted React component from this element. #### Returns `unmountComponentAtNode` returns `true` if a component was unmounted and `false` otherwise. * * * ## Usage Call `unmountComponentAtNode` to remove a mounted React component from a browser DOM node and clean up its event handlers and state. import { render, unmountComponentAtNode } from 'react-dom';import App from './App.js';const rootNode = document.getElementById('root');render(<App />, rootNode);// ...unmountComponentAtNode(rootNode); ### Removing a React app from a DOM element Occasionally, you may want to “sprinkle” React on an existing page, or a page that is not fully written in React. In those cases, you may need to “stop” the React app, by removing all of the UI, state, and listeners from the DOM node it was rendered to. In this example, clicking “Render React App” will render a React app. Click “Unmount React App” to destroy it: --- ## Page: https://react.dev/reference/react-dom/findDOMNode ### Deprecated This API will be removed in a future major version of React. See the alternatives. `findDOMNode` finds the browser DOM node for a React class component instance. const domNode = findDOMNode(componentInstance) * Reference * `findDOMNode(componentInstance)` * Usage * Finding the root DOM node of a class component * Alternatives * Reading component’s own DOM node from a ref * Reading a child component’s DOM node from a forwarded ref * Adding a wrapper `<div>` element * * * ## Reference ### `findDOMNode(componentInstance)` Call `findDOMNode` to find the browser DOM node for a given React class component instance. import { findDOMNode } from 'react-dom';const domNode = findDOMNode(componentInstance); See more examples below. #### Parameters * `componentInstance`: An instance of the `Component` subclass. For example, `this` inside a class component. #### Returns `findDOMNode` returns the first closest browser DOM node within the given `componentInstance`. When a component renders to `null`, or renders `false`, `findDOMNode` returns `null`. When a component renders to a string, `findDOMNode` returns a text DOM node containing that value. #### Caveats * A component may return an array or a Fragment with multiple children. In that case `findDOMNode`, will return the DOM node corresponding to the first non-empty child. * `findDOMNode` only works on mounted components (that is, components that have been placed in the DOM). If you try to call this on a component that has not been mounted yet (like calling `findDOMNode()` in `render()` on a component that has yet to be created), an exception will be thrown. * `findDOMNode` only returns the result at the time of your call. If a child component renders a different node later, there is no way for you to be notified of this change. * `findDOMNode` accepts a class component instance, so it can’t be used with function components. * * * ## Usage ### Finding the root DOM node of a class component Call `findDOMNode` with a class component instance (usually, `this`) to find the DOM node it has rendered. class AutoselectingInput extends Component {componentDidMount() {const input = findDOMNode(this);input.select()}render() {return <input defaultValue="Hello" />}} Here, the `input` variable will be set to the `<input>` DOM element. This lets you do something with it. For example, when clicking “Show example” below mounts the input, `input.select()` selects all text in the input: * * * ## Alternatives ### Reading component’s own DOM node from a ref Code using `findDOMNode` is fragile because the connection between the JSX node and the code manipulating the corresponding DOM node is not explicit. For example, try wrapping this `<input />` into a `<div>`: This will break the code because now, `findDOMNode(this)` finds the `<div>` DOM node, but the code expects an `<input>` DOM node. To avoid these kinds of problems, use `createRef` to manage a specific DOM node. In this example, `findDOMNode` is no longer used. Instead, `inputRef = createRef(null)` is defined as an instance field on the class. To read the DOM node from it, you can use `this.inputRef.current`. To attach it to the JSX, you render `<input ref={this.inputRef} />`. This connects the code using the DOM node to its JSX: import { createRef, Component } from 'react'; class AutoselectingInput extends Component { inputRef = createRef(null); componentDidMount() { const input = this.inputRef.current; input.select() } render() { return ( <input ref\={this.inputRef} defaultValue\="Hello" /> ); } } export default AutoselectingInput; In modern React without class components, the equivalent code would call `useRef` instead: Read more about manipulating the DOM with refs. * * * ### Reading a child component’s DOM node from a forwarded ref In this example, `findDOMNode(this)` finds a DOM node that belongs to another component. The `AutoselectingInput` renders `MyInput`, which is your own component that renders a browser `<input>`. Notice that calling `findDOMNode(this)` inside `AutoselectingInput` still gives you the DOM `<input>`—even though the JSX for this `<input>` is hidden inside the `MyInput` component. This seems convenient for the above example, but it leads to fragile code. Imagine that you wanted to edit `MyInput` later and add a wrapper `<div>` around it. This would break the code of `AutoselectingInput` (which expects to find an `<input>`). To replace `findDOMNode` in this example, the two components need to coordinate: 1. `AutoSelectingInput` should declare a ref, like in the earlier example, and pass it to `<MyInput>`. 2. `MyInput` should be declared with `forwardRef` to take that ref and forward it down to the `<input>` node. This version does that, so it no longer needs `findDOMNode`: import { createRef, Component } from 'react'; import MyInput from './MyInput.js'; class AutoselectingInput extends Component { inputRef = createRef(null); componentDidMount() { const input = this.inputRef.current; input.select() } render() { return ( <MyInput ref\={this.inputRef} /> ); } } export default AutoselectingInput; Here is how this code would look like with function components instead of classes: * * * ### Adding a wrapper `<div>` element Sometimes a component needs to know the position and size of its children. This makes it tempting to find the children with `findDOMNode(this)`, and then use DOM methods like `getBoundingClientRect` for measurements. There is currently no direct equivalent for this use case, which is why `findDOMNode` is deprecated but is not yet removed completely from React. In the meantime, you can try rendering a wrapper `<div>` node around the content as a workaround, and getting a ref to that node. However, extra wrappers can break styling. <div ref={someRef}>{children}</div> This also applies to focusing and scrolling to arbitrary children. --- ## Page: https://react.dev/reference/react-dom/hydrate ### Deprecated This API will be removed in a future major version of React. In React 18, `hydrate` was replaced by `hydrateRoot`. Using `hydrate` in React 18 will warn that your app will behave as if it’s running React 17. Learn more here. `hydrate` lets you display React components inside a browser DOM node whose HTML content was previously generated by `react-dom/server` in React 17 and below. hydrate(reactNode, domNode, callback?) * Reference * `hydrate(reactNode, domNode, callback?)` * Usage * Hydrating server-rendered HTML * Suppressing unavoidable hydration mismatch errors * Handling different client and server content * * * ## Reference ### `hydrate(reactNode, domNode, callback?)` Call `hydrate` in React 17 and below to “attach” React to existing HTML that was already rendered by React in a server environment. import { hydrate } from 'react-dom';hydrate(reactNode, domNode); React will attach to the HTML that exists inside the `domNode`, and take over managing the DOM inside it. An app fully built with React will usually only have one `hydrate` call with its root component. See more examples below. #### Parameters * `reactNode`: The “React node” used to render the existing HTML. This will usually be a piece of JSX like `<App />` which was rendered with a `ReactDOM Server` method such as `renderToString(<App />)` in React 17. * `domNode`: A DOM element that was rendered as the root element on the server. * **optional**: `callback`: A function. If passed, React will call it after your component is hydrated. #### Returns `hydrate` returns null. #### Caveats * `hydrate` expects the rendered content to be identical with the server-rendered content. React can patch up differences in text content, but you should treat mismatches as bugs and fix them. * In development mode, React warns about mismatches during hydration. There are no guarantees that attribute differences will be patched up in case of mismatches. This is important for performance reasons because in most apps, mismatches are rare, and so validating all markup would be prohibitively expensive. * You’ll likely have only one `hydrate` call in your app. If you use a framework, it might do this call for you. * If your app is client-rendered with no HTML rendered already, using `hydrate()` is not supported. Use render() (for React 17 and below) or createRoot() (for React 18+) instead. * * * ## Usage Call `hydrate` to attach a React component into a server-rendered browser DOM node. import { hydrate } from 'react-dom';hydrate(<App />, document.getElementById('root')); Using `hydrate()` to render a client-only app (an app without server-rendered HTML) is not supported. Use `render()` (in React 17 and below) or `createRoot()` (in React 18+) instead. ### Hydrating server-rendered HTML In React, “hydration” is how React “attaches” to existing HTML that was already rendered by React in a server environment. During hydration, React will attempt to attach event listeners to the existing markup and take over rendering the app on the client. In apps fully built with React, **you will usually only hydrate one “root”, once at startup for your entire app**. Usually you shouldn’t need to call `hydrate` again or to call it in more places. From this point on, React will be managing the DOM of your application. To update the UI, your components will use state. For more information on hydration, see the docs for `hydrateRoot`. * * * ### Suppressing unavoidable hydration mismatch errors If a single element’s attribute or text content is unavoidably different between the server and the client (for example, a timestamp), you may silence the hydration mismatch warning. To silence hydration warnings on an element, add `suppressHydrationWarning={true}`: This only works one level deep, and is intended to be an escape hatch. Don’t overuse it. Unless it’s text content, React still won’t attempt to patch it up, so it may remain inconsistent until future updates. * * * ### Handling different client and server content If you intentionally need to render something different on the server and the client, you can do a two-pass rendering. Components that render something different on the client can read a state variable like `isClient`, which you can set to `true` in an Effect: This way the initial render pass will render the same content as the server, avoiding mismatches, but an additional pass will happen synchronously right after hydration. ### Pitfall This approach makes hydration slower because your components have to render twice. Be mindful of the user experience on slow connections. The JavaScript code may load significantly later than the initial HTML render, so rendering a different UI immediately after hydration may feel jarring to the user. --- ## Page: https://react.dev/reference/react-dom/render ### Deprecated This API will be removed in a future major version of React. In React 18, `render` was replaced by `createRoot`. Using `render` in React 18 will warn that your app will behave as if it’s running React 17. Learn more here. `render` renders a piece of JSX (“React node”) into a browser DOM node. render(reactNode, domNode, callback?) * Reference * `render(reactNode, domNode, callback?)` * Usage * Rendering the root component * Rendering multiple roots * Updating the rendered tree * * * ## Reference ### `render(reactNode, domNode, callback?)` Call `render` to display a React component inside a browser DOM element. import { render } from 'react-dom';const domNode = document.getElementById('root');render(<App />, domNode); React will display `<App />` in the `domNode`, and take over managing the DOM inside it. An app fully built with React will usually only have one `render` call with its root component. A page that uses “sprinkles” of React for parts of the page may have as many `render` calls as needed. See more examples below. #### Parameters * `reactNode`: A _React node_ that you want to display. This will usually be a piece of JSX like `<App />`, but you can also pass a React element constructed with `createElement()`, a string, a number, `null`, or `undefined`. * `domNode`: A DOM element. React will display the `reactNode` you pass inside this DOM element. From this moment, React will manage the DOM inside the `domNode` and update it when your React tree changes. * **optional** `callback`: A function. If passed, React will call it after your component is placed into the DOM. #### Returns `render` usually returns `null`. However, if the `reactNode` you pass is a _class component_, then it will return an instance of that component. #### Caveats * In React 18, `render` was replaced by `createRoot`. Please use `createRoot` for React 18 and beyond. * The first time you call `render`, React will clear all the existing HTML content inside the `domNode` before rendering the React component into it. If your `domNode` contains HTML generated by React on the server or during the build, use `hydrate()` instead, which attaches the event handlers to the existing HTML. * If you call `render` on the same `domNode` more than once, React will update the DOM as necessary to reflect the latest JSX you passed. React will decide which parts of the DOM can be reused and which need to be recreated by “matching it up” with the previously rendered tree. Calling `render` on the same `domNode` again is similar to calling the `set` function on the root component: React avoids unnecessary DOM updates. * If your app is fully built with React, you’ll likely have only one `render` call in your app. (If you use a framework, it might do this call for you.) When you want to render a piece of JSX in a different part of the DOM tree that isn’t a child of your component (for example, a modal or a tooltip), use `createPortal` instead of `render`. * * * ## Usage Call `render` to display a React component inside a browser DOM node. import { render } from 'react-dom';import App from './App.js';render(<App />, document.getElementById('root')); ### Rendering the root component In apps fully built with React, **you will usually only do this once at startup**—to render the “root” component. Usually you shouldn’t need to call `render` again or to call it in more places. From this point on, React will be managing the DOM of your application. To update the UI, your components will use state. * * * ### Rendering multiple roots If your page isn’t fully built with React, call `render` for each top-level piece of UI managed by React. You can destroy the rendered trees with `unmountComponentAtNode()`. * * * ### Updating the rendered tree You can call `render` more than once on the same DOM node. As long as the component tree structure matches up with what was previously rendered, React will preserve the state. Notice how you can type in the input, which means that the updates from repeated `render` calls every second are not destructive: It is uncommon to call `render` multiple times. Usually, you’ll update state inside your components instead. --- ## Page: https://react.dev/reference/react-dom/server/renderToNodeStream `renderToNodeStream` renders a React tree to a Node.js Readable Stream. const stream = renderToNodeStream(reactNode, options?) * Reference * `renderToNodeStream(reactNode, options?)` * Usage * Rendering a React tree as HTML to a Node.js Readable Stream * * * ## Reference ### `renderToNodeStream(reactNode, options?)` On the server, call `renderToNodeStream` to get a Node.js Readable Stream which you can pipe into the response. import { renderToNodeStream } from 'react-dom/server';const stream = renderToNodeStream(<App />);stream.pipe(response); On the client, call `hydrateRoot` to make the server-generated HTML interactive. See more examples below. #### Parameters * `reactNode`: A React node you want to render to HTML. For example, a JSX element like `<App />`. * **optional** `options`: An object for server render. * **optional** `identifierPrefix`: A string prefix React uses for IDs generated by `useId`. Useful to avoid conflicts when using multiple roots on the same page. Must be the same prefix as passed to `hydrateRoot`. #### Returns A Node.js Readable Stream that outputs an HTML string. #### Caveats * This method will wait for all Suspense boundaries to complete before returning any output. * As of React 18, this method buffers all of its output, so it doesn’t actually provide any streaming benefits. This is why it’s recommended that you migrate to `renderToPipeableStream` instead. * The returned stream is a byte stream encoded in utf-8. If you need a stream in another encoding, take a look at a project like iconv-lite, which provides transform streams for transcoding text. * * * ## Usage ### Rendering a React tree as HTML to a Node.js Readable Stream Call `renderToNodeStream` to get a Node.js Readable Stream which you can pipe to your server response: import { renderToNodeStream } from 'react-dom/server';// The route handler syntax depends on your backend frameworkapp.use('/', (request, response) => {const stream = renderToNodeStream(<App />);stream.pipe(response);}); The stream will produce the initial non-interactive HTML output of your React components. On the client, you will need to call `hydrateRoot` to _hydrate_ that server-generated HTML and make it interactive. --- ## Page: https://react.dev/reference/react-dom/server/renderToStaticNodeStream `renderToStaticNodeStream` renders a non-interactive React tree to a Node.js Readable Stream. const stream = renderToStaticNodeStream(reactNode, options?) * Reference * `renderToStaticNodeStream(reactNode, options?)` * Usage * Rendering a React tree as static HTML to a Node.js Readable Stream * * * ## Reference ### `renderToStaticNodeStream(reactNode, options?)` On the server, call `renderToStaticNodeStream` to get a Node.js Readable Stream. import { renderToStaticNodeStream } from 'react-dom/server';const stream = renderToStaticNodeStream(<Page />);stream.pipe(response); See more examples below. The stream will produce non-interactive HTML output of your React components. #### Parameters * `reactNode`: A React node you want to render to HTML. For example, a JSX element like `<Page />`. * **optional** `options`: An object for server render. * **optional** `identifierPrefix`: A string prefix React uses for IDs generated by `useId`. Useful to avoid conflicts when using multiple roots on the same page. #### Returns A Node.js Readable Stream that outputs an HTML string. The resulting HTML can’t be hydrated on the client. #### Caveats * `renderToStaticNodeStream` output cannot be hydrated. * This method will wait for all Suspense boundaries to complete before returning any output. * As of React 18, this method buffers all of its output, so it doesn’t actually provide any streaming benefits. * The returned stream is a byte stream encoded in utf-8. If you need a stream in another encoding, take a look at a project like iconv-lite, which provides transform streams for transcoding text. * * * ## Usage ### Rendering a React tree as static HTML to a Node.js Readable Stream Call `renderToStaticNodeStream` to get a Node.js Readable Stream which you can pipe to your server response: import { renderToStaticNodeStream } from 'react-dom/server';// The route handler syntax depends on your backend frameworkapp.use('/', (request, response) => {const stream = renderToStaticNodeStream(<Page />);stream.pipe(response);}); The stream will produce the initial non-interactive HTML output of your React components. ### Pitfall This method renders **non-interactive HTML that cannot be hydrated.** This is useful if you want to use React as a simple static page generator, or if you’re rendering completely static content like emails. Interactive apps should use `renderToPipeableStream` on the server and `hydrateRoot` on the client. --- ## Page: https://react.dev/reference/react/createFactory ### Deprecated This API will be removed in a future major version of React. See the alternatives. `createFactory` lets you create a function that produces React elements of a given type. const factory = createFactory(type) * Reference * `createFactory(type)` * Usage * Creating React elements with a factory * Alternatives * Copying `createFactory` into your project * Replacing `createFactory` with `createElement` * Replacing `createFactory` with JSX * * * ## Reference ### `createFactory(type)` Call `createFactory(type)` to create a factory function which produces React elements of a given `type`. import { createFactory } from 'react';const button = createFactory('button'); Then you can use it to create React elements without JSX: export default function App() {return button({onClick: () => {alert('Clicked!')}}, 'Click me');} See more examples below. #### Parameters * `type`: The `type` argument must be a valid React component type. For example, it could be a tag name string (such as `'div'` or `'span'`), or a React component (a function, a class, or a special component like `Fragment`). #### Returns Returns a factory function. That factory function receives a `props` object as the first argument, followed by a list of `...children` arguments, and returns a React element with the given `type`, `props` and `children`. * * * ## Usage ### Creating React elements with a factory Although most React projects use JSX to describe the user interface, JSX is not required. In the past, `createFactory` used to be one of the ways you could describe the user interface without JSX. Call `createFactory` to create a _factory function_ for a specific element type like `'button'`: import { createFactory } from 'react';const button = createFactory('button'); Calling that factory function will produce React elements with the props and children you have provided: This is how `createFactory` was used as an alternative to JSX. However, `createFactory` is deprecated, and you should not call `createFactory` in any new code. See how to migrate away from `createFactory` below. * * * ## Alternatives ### Copying `createFactory` into your project If your project has many `createFactory` calls, copy this `createFactory.js` implementation into your project: This lets you keep all of your code unchanged except the imports. * * * ### Replacing `createFactory` with `createElement` If you have a few `createFactory` calls that you don’t mind porting manually, and you don’t want to use JSX, you can replace every call a factory function with a `createElement` call. For example, you can replace this code: import { createFactory } from 'react';const button = createFactory('button');export default function App() {return button({onClick: () => {alert('Clicked!')}}, 'Click me');} with this code: import { createElement } from 'react';export default function App() {return createElement('button', {onClick: () => {alert('Clicked!')}}, 'Click me');} Here is a complete example of using React without JSX: * * * ### Replacing `createFactory` with JSX Finally, you can use JSX instead of `createFactory`. This is the most common way to use React: ### Pitfall Sometimes, your existing code might pass some variable as a `type` instead of a constant like `'button'`: function Heading({ isSubheading, ...props }) {const type = isSubheading ? 'h2' : 'h1';const factory = createFactory(type);return factory(props);} To do the same in JSX, you need to rename your variable to start with an uppercase letter like `Type`: function Heading({ isSubheading, ...props }) {const Type = isSubheading ? 'h2' : 'h1';return <Type {...props} />;} Otherwise React will interpret `<type>` as a built-in HTML tag because it is lowercase.